Velen / Novigrad - Map Markers Summary
Places of Power x8, Witcher Gear x34, Quest Givers x54, Notice Boards x19, Quest-related x77, Hidden Treasure Quests x26, Hidden Treasures x21, Armorers x3, Armorers x2, Blacksmiths x5, Blacksmiths x3, Merchants x35, Merchants x2, Entrances x15, Entrances x15, Taverns x9, Treasures x71, Special Monsters x23, Monster Nests x27, Guarded Treasures x32, Bandit Camps x30, Abandoned Sites x16, Persons in Distress x6, Herbalists x10, Alchemists x3, Smugglers' Caches x4, Spoils of War x3, Signposts x111, Grindstones x13, Armorer's Tables x7, Barbers x3, Harbors x11
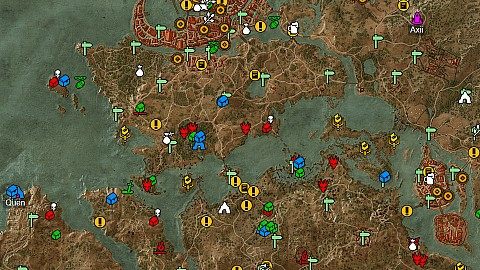
The following legend of Velen / Novigrad interactive game map defines the points of interest / markers displayed on the map. Each marker corresponds to a specific element to facilitate efficient navigation and interaction with the map.
On your first visit to the place of power you will gain an additional ability point.
 Aard
Aard
Axii
Igni
Igni
Quen
Quen
Yrden
Yrden
It is best to visit this place while doing the Magic Lamp quest.
It is always some kind of box, chest or a corpse containing witcher gear diagrams required for scavenger hunt quests.
 Cat School Gear (Silver Sword)
Jump down and use the aard sign to destroy one of the walls. On the other side you will find a skeleton - Diagram: Feline silver sword and Professor Sigismund Gloger's notes.
Related quests: Scavenger Hunt: Cat School Gear (17).
Cat School Gear (Silver Sword)
Jump down and use the aard sign to destroy one of the walls. On the other side you will find a skeleton - Diagram: Feline silver sword and Professor Sigismund Gloger's notes.
Related quests: Scavenger Hunt: Cat School Gear (17).
Cat School Gear (Steel Sword)
Diagram: Feline steel sword and Prince Adrien's journal. The chest is in the basement.
Related quests: Scavenger Hunt: Cat School Gear (17).
Cat School Gear (Whole Armor)
Kill Mad Kiyan (17) in the labolatory located in the Passages under Temple Isle. He drops: Diagram: Feline trousers, Diagram: Feline gauntlets, Diagram: Feline boots, Diagram: Feline armor, Laboratory notebook, and Moonblade (Silver Sword).
Related quests: Scavenger Hunt: Cat School Gear (17).
Enhanced Cat School Gear (Boots)
Diagram: Enhanced Feline boots.
Griffin School Gear (Whole Armor)
Diagram: Griffin armor, Diagram: Griffin trousers, Diagram: Griffin boots, Diagram: Griffin gauntlets, and Witcher George's journal. The chest is located in the largest cavern of the Dragonslayer's Grotto.
Related quests: Scavenger Hunt: Griffin School Gear (11).
Superior Cat School Gear (Whole Armor)
Diagram: Superior Feline armor, Diagram: Superior Feline gauntlets, Diagram: Superior Feline trousers, and Diagram: Superior Feline boots. Area is guarded by an earth elemental (27).
Related quests: Scavenger Hunt: Cat School Gear Upgrade Diagrams - Part 3 (29).
Places where you can get new quests to play.
 Event: Alghouls
Help the peasants kill the alghouls (6).
Event: Alghouls
Help the peasants kill the alghouls (6).
Event: Bridge Blockade
Three bandits (3) are blocking the bridge. Pay them (50 crowns), use Delusion (1) or kill them. Using Delusion will give you the most XP.
Event: Caravan Attack
Two merchants, Anselm and Griswold, were attacked by their own bodyguards, who turned out to be ordinary bandits. Help the merchants to kill the robbers and you will receive XP and 20 coins. Once you save them, they'll go to Crow's Perch where you will be able to trade with them.
Event: Child
When you talk to him, he will start running to a nearby alley where you will be attacked by four bandits (14).
Event: Croupier
Available during "A Matter of Life and Death" quest. Play gwent with three opponents and win cards: Milva, Vampire: Bruxa, and Dandelion.
Event: Drunkards
Two drunken butchers asking for a donation. You'll meet them while doing the "Destination: Skellige" quest. Give them 25 crowns (low XP), use Delusion (1) (high XP) or refuse them and beat one of them in a fistfight (medium XP).
Event: Elf
You can chase away two men harassing an elf. Don't expect any gratitude.
Event: Fake Basilisk
Talk to the Beast Tamer then kill the wyvern (10).
Event: Help the Elves
Three townsmen (7) beating two elves. If you want to help the elves, you have to kill people.
Event: Hungry Kids
Kill the wild dog (4) and then talk to the children hiding in the house. Give them something to eat or some money (25 coins) and you'll get a doll and In Beast's Clothing book (Torn-out page: Werewolf decoction, and bestiary entries for Werewolves and Ulfhedinn) from them.
Event: John Verdun #1
Kill two drowners (4) and untie the Temerian deserter. If you do that, you'll meet him again - Event: John Verdun #2.
Event: John Verdun #2
You'll meet him here if you saved him from the drowners before - Event: John Verdun #1. You can either take his money (50 crowns + some XP) or kill him and his comrades.
Event: Looters
For 525 coins you can buy a relic steel sword - Mourner from them, and get some experience points. Or you can kill them and loot this sword from a corpse of one of them (No XP in this case).
Event: Looters
Kill them (4,5) to get some XP.
Event: Nekker Soup
Help troll Boris get gid of the nekkers (2). He will give you the Elf head. 25 XP.
Event: Preacher
Talk to him and you'll get some XP.
Event: Ronvid of the Small Marsh #1
This is where you'll meet Ronvid for the first time. Beat him in a duel.
Event: Ronvid of the Small Marsh #2
This is where you'll meet Ronvid for the second time. Beat him in a duel. This time he'll have a shield.
Event: Ronvid of the Small Marsh #3
This is where you'll meet Ronvid for the third time. You can fight him and kill him and his two mates, or use Delusion (2) and convince him that he should go home. 50 XP (+40 XP if you used delusion).
Event: Strumpet
You can use Delusion (1) - 40 XP, threaten the man - no XP, tell the woman you can make the man leave - 10 XP or leave as requested - no XP. In the first three cases, it will turn out that these two were just playing.
Friendly Dog
Kill some wolves (9) that attack the dog.
Related quests: A Dog's Life (5).
Nilfgaardian Deserter
Related quests: Lynch Mob (7).
Nilfgaardian Woman
Related quests: Blood Ties (12).
Ofieri Merchant
He sells: Francesca Findabair - Hope of the Aen Seidhe, Eredin Bréacc Glas - The Treacherous, and Gaunter O'Dimm: Darkness cards, Ofieri blinders (55 Horse's Fear Level), Ofieri saddlebags (100 Maximum inventory weight).
Related quests: From Ofier's Distant Shores (33), Races: Swift as the Western Winds (32).
Offers of work for the witchers are posted here. Return from time to time to notice boards you've already seen becouse new contracts might have been posted since your last visit.
 Alness Notice Board
Places, NPCs and other elements related in some way to the quests available in the game.
 Caesar Bilzen's House
Nilfgaardian Soldier
You'll meet him here if you've done the "On Death's Bed" quest. He's the soldier that Lena was dating.
Old Woman's Husband's Grave
Related quests: Last Rites (9).
Place of Haunting
Use Keira's magic lamp here to conjure up a vision tied to this location's past.Related quests: A Towerful of Mice (6).
Place of Haunting
Use Keira's magic lamp here to conjure up a vision tied to this location's past.Related quests: A Towerful of Mice (6).
Place of Haunting
Use Keira's magic lamp here to conjure up a vision tied to this location's past.Related quests: A Towerful of Mice (6).
Vilmerius Hospital
Whoreson Junior's House
Related quests: Get Junior (12).
Whoreson's Hideout
Related quests: Get Junior (12).
Here you can find clues about the location of the hidden treasures.
 A Costly Mistake (Quest)
Kill the drowners foraging nearby and take the Smuggler's notes from the corpse lying next to the crashed boat.
Related quests: A Costly Mistake (18).
A Costly Mistake (Quest)
Kill the drowners foraging nearby and take the Smuggler's notes from the corpse lying next to the crashed boat.
Related quests: A Costly Mistake (18).
A Plea Ignored (Quest)
It's guarded by a grave hag (28). Loot the crumpled letter and the key to burned down house from the corpse.
Related quests: A Plea Ignored (28).
An Unfortunate Turn of Events (Quest)
Battlefield Loot (Quest)
It is guarded by a bilge hag (18).
Related quests: Battlefield Loot (20).
Blood Gold (Quest)
Related quests: Blood Gold (18).
Coast of Wrecks (Quest)
Corpse Next to a Big Fossil
Kill the foglets (4), loot the Scratched key from the corpse then follow the footprints and find a small locked box.
Dowry (Quest)
A basilisk (32) flies nearby.
Related quests: Dowry (32).
Hidden from the World (Quest)
Locked Depot
It's guarded by a Fiend (22). Take the Bandit's key from the corpse and use it to open the wooden door. Two wooden chests that you will find inside are the treasure. Relic.
Lost Goods (Quest)
Out of the Frying Pan, into the Fire (Quest)
Queen Zuleyka's Treasure (Quest)
Kill the pirates (7) and pick up Pirate's notes.
Related quests: Queen Zuleyka's Treasure (4).
Sunken Treasure (Quest)
Loot the Water-damaged letter from a corpse lying on the shore.
Related quests: Sunken Treasure (4).
The Royal Air Force (Quest)
Erynia (34) and a few harpies (34) flying nearby.
Related quests: The Royal Air Force (36).
The Things Men Do For Coin… (Quest)
Tough Luck (Quest)
Related quests: Tough Luck (18).
Here you can find the hidden treasures.
 A Costly Mistake (Treasure)
The chest is at the bottom next to the shipwreck.
Related quests: A Costly Mistake (18).
A Costly Mistake (Treasure)
The chest is at the bottom next to the shipwreck.
Related quests: A Costly Mistake (18).
Blood Gold (Treasure)
Related quests: Blood Gold (18).
Chest
Chest is inside the Elf's Hideout. It's the easiest to access during the "Magic Lamp" quest. It's guarded by a golem (6).
Dowry (Treasure)
Related quests: Dowry (32).
Hidden Treasure
Queen Zuleyka's Treasure (Treasure)
The chest is located inside the sunken shipwreck.
Related quests: Queen Zuleyka's Treasure (4).
Scratched Key Box
You need the Scratched key to unlock it.
Sunken Treasure (Treasure)
The treasure is in the chest lying at the bottom next to the shipwreck.
Related quests: Sunken Treasure (4).
Tough Luck (Treasure)
Related quests: Tough Luck (18).
Armorers craft armor. Armorers and blacksmiths can salvage crafting components from any unneeded items you've gathered.
 Fergus Graem / Yoana
Armorer (Journeyman) / (Master)
Yoana is a master armorer but first you have to do the "Master Armorers "quest.Related quests: Master Armorers (24).
Fergus Graem / Yoana
Armorer (Journeyman) / (Master)
Yoana is a master armorer but first you have to do the "Master Armorers "quest.Related quests: Master Armorers (24).
Mulbrydale Armorer
Armorer (Amateur) a.k.a. Swordmith. He'll be here when you set him free.
Oxenfurt Armorer
Armorer (Journeyman)
Blacksmiths forge weapons. Armorers and blacksmiths can salvage crafting components from any unneeded items you've gathered.
 Bald Mountain Blacksmith
Blacksmith (Amateur)
Bald Mountain Blacksmith
Blacksmith (Amateur)
Blacksmith
Blacksmith (Amateur)
Blacksmith
Blacksmith (Journeyman)
Blacksmith
Blacksmith (Amateur)
Oxenfurt Blacksmith
Blacksmith (Journeyman)
Here you can buy or sell various items.
 Claywich Merchant
You must first release him - Persons in Distress. Gwent cards: Etolian Auxiliary Archers, Black Infantry Archer, Crinfrid Reavers Dragon Hunter, Puttkammer, Sweers.
Claywich Merchant
You must first release him - Persons in Distress. Gwent cards: Etolian Auxiliary Archers, Black Infantry Archer, Crinfrid Reavers Dragon Hunter, Puttkammer, Sweers.
Crow's Perch Trader
Gwent cards: Zerrikanian Fire Scorpion, Impera Brigade Guard, Nausicaa Cavalry Rider, Albrich.Related quests: Free Spirit (13).
Elven Merchant
He'll be here when you free him from the bandits. Visit him and you will receive 50 crowns and 150 XP. He sells Addan Deith (Relic Silver Sword).
Lindenvale Merchant
Gwent cards: Poor F*cking Infantry, Etolian Auxiliary Archers, Black Infantry Archer, Heavy Zerrikanian Fire Scorpion, Rainfarn.Related quests: Free Spirit (13).
Merchant
Merchant
Merchant
Merchant
Merchant
Alchemy ingredients, food and drink.
Merchant
Merchant
Merchant
Merchant
Merchant
Merchant
Merchant
Merchant
Merchant
Merchant
Merchant
Merchant B
Merchant C
Midcopse Merchant
Gwent cards: Poor F*cking Infantry, Crinfrid Reavers Dragon Hunter, Blue Stripes Commando, Morteisen.
Oreton Trader
Rugged saddlebags (+70 Maximum inventory weight)
Shopkeeper
 Elf's Hideout (Exit)
Foglet Cave
An entrance masked by illusion. You need the Eye of Nehaleni to reveal it.Related quests: Contract: Swamp Thing (12).
Foglet Cave
An entrance masked by illusion. You need the Eye of Nehaleni to reveal it.Related quests: Contract: Swamp Thing (12).
 Cave Entrance
Entrance
Entrance
Grotto
Monster Den
There is golem (19) here.
Monster Den
Many Nekkers (18) + Rabid rock troll (16).
Secret Passage to Junior's Hideout
Related quests: Get Junior (12).
Trolls' Cave
Nekker Warriors (6) and Nekkers (6).Related quests: A Deadly Plot (14).
Well
 Cunny of the Goose Inn
Gwent cards: Havekar Healer, Scorch, Impera Brigade Guard, Young Emissary, Francesca Findabair - Daisy of the Valley.
Cunny of the Goose Inn
Gwent cards: Havekar Healer, Scorch, Impera Brigade Guard, Young Emissary, Francesca Findabair - Daisy of the Valley.
Lindenvale Inn
Gwent cards: Commander's Horn, Siege Engineer, Impera Brigade Guard, Nausicaa Cavalry Rider.Related quests: Fists of Fury: Velen (11).
Seven Cats Inn
Gwent cards: Havekar Smuggler, Mahakaman Defender, Decoy, Impera Brigade Guard, Young Emissary.
The Nowhere Inn
Places where there are usually chests containing some nice loot.
 Chest
Chest
Chest
Chest
Destroy one of the walls in the hidden cave with the Aard sign.
Chest
Chest
Chest
Chest
Chest
Chest
Chest
Chest
Chest
Chest
Chest
Chest
Chest
Chest
Chest
Chest
Chest
Chest
Mastercrafted racing saddle (55 Stamina).
Chest
Chest
Chest
Chest
Chest
Chest
Chest
Chest
This chests is inside the Grotto.
Chest
The chest is located in a cave which can be accessed through a well.
Chest
The chest is located in a cave which can be accessed through a well.
Chest
Chest
Chest
Mastercrafted Racing Saddle (55 Stamina).
Chest
Chest
Chest
Chest
Chest
Chest
Chest
Chest
Chest
Chest
Chest
Chest
Chest
Chest
Chest
Chest
Chest
Chest
Chest
Dive into the small lake and swim in the cave.
Chest
Chest
Chest
Chest
Chest
Relic.
Chest & Box
Inside the monster den.
Chest & Corpse
Gwyhyr (relic steel sword).
Chest & Skeleton
The chest is located in a hidden cave, the entrance to which is in the Monster Den and is masked by an illusion, so you need the Eye of Nehaleni.
Chests
Chests
7 x Chest
Chests
Two Chests
Two Chests
Two Chests
Two Chests
Two Chests
The special monsters you encounter on your way. These are mostly monsters that you have to kill to finish the witcher's contracts.
 Basilisk
 (32).
Basilisk
Basilisk (32).
Botchling
You will have to deal with him here if you decide to kill him while doing the Family Matters quest.Related quests: Family Matters (6).
Fiend
Fiend (16).
Werewolf
You will meet the werewolf in the cave, the entrance to which is located under the nearby isolated shack, while doing the Wild at Heart quest.Related quests: Wild at Heart (7).
Every nest is guarded by the monsters of a specific type. Use bombs to destroy it. Do not forget to loot it after you destroy it.
 Arachnomorphs
 (34)
Arachnomorphs
Arachnomorphs (34)
Draconids
Wyvern (34).
Draconids
Forktail (30).
Drowners
Drowners (9).
Drowners
Drowners (4).
Endregas
Endrega Warrior (9) + Endrega Workers (9).
Endregas
Endrega Warrior (9) + Endrega Workers (9).
Ghouls
Ghouls (9).
Ghouls
Ghouls (9).
Ghouls
Ghouls (9).
Ghouls
Ghouls (9).
Ghouls
Ghouls (9).
Ghouls
Ghouls (9).
Harpies
Harpies (7).
Nekkers
Nekkers (34).
Nekkers
Nekkers (34).
Nekkers
Nekkers (34).
Nekkers
Nekkers (6)
Nekkers
Nekker Warrior (9) + Nekkers (8).
Nekkers
Nekker Warrior (9) + Nekkers (8).
Nekkers
Nekker Warrior (9) + Nekkers (8).
Nekkers
Nekkers (6,8).
Rotfiends
Devourer (5) + Rotfiends (6).
Rotfiends
Rotfiends (6).
Rotfiends
Devourer (5) + Rotfiends (6).
It is always some kind of box, chest or a dead body containing some goods and guarded by one or more monsters.
 Guarded Treasure
Guarded by a bear (34).
Guarded Treasure
Guarded by a bear (34).
Guarded Treasure
Guarded by a golem (37).
Guarded Treasure
Guarded by the four boars (34).
Guarded Treasure
Guarded by an armored arachas (23).
Guarded Treasure
Relic. Guarded by Bilge Hag (15).
Guarded Treasure
Guarded by Water Hag (8).
Guarded Treasure
Guarded by a Basilisk (14). Relic.
Guarded Treasure
Guarded by an alghoul (34) and a few ghouls (34).
Guarded Treasure
Relic item. Guarded by a Wyvern (18).
Guarded Treasure
Guarded by a leshen (20).
Guarded Treasure
Relic. Guarded by Basilisk (14).
Guarded Treasure
Relic. Guarded by Bilge Hag (15).
Guarded Treasure
Guarded by the cyclops (19).
Guarded Treasure
Guarded by a few drowners (9). Relic.
Guarded Treasure
Guarded by an alghoul (13).
Guarded Treasure
Guarded by 7 x Drowner (4).
Guarded Treasure
Guarded by Noonwraith (15).
Guarded Treasure
Guarded by 6 x Endrega Worker (9) + Endrega Warrior (9).
Guarded Treasure
Guarded by Forktail (14)
Guarded Treasure
Guarded by 4 x Drowner (4).
Guarded Treasure
Guarded by a Bear (12).
Guarded Treasure
Guarded by the Water Hag (8).
Guarded Treasure
Guarded by Water Hag (8)
Guarded Treasure
Guarded by Earth Elemental (24).
Guarded Treasure
Guarded by Earth Elemental (20)
Guarded Treasure
Guarded by Bilge Hag (20)
Guarded Treasure
Guarded by 4 x Wraith (7)
Guarded Treasure
Relic steel sword. Guarded by the Alghoul (13).
Guarded Treasure
Guarded by a Wyvern (14). Two chests. Cavalry saddle (60 Stamina).
Guarded Treasure
Guarded by the Cyclops (19).
Guarded Treasure
Guarded by 3 x Wraith (16) + Noonwraith (18). Mastercrafted saddle (+35 stamina), Relic. Use the aard sign to break the rocks blocking the entrance to the cave.
Guarded Treasure
Guarded by Gargoyle (19).
Kill all the enemies in the area. There is always a treasure chest somewhere in the camp.
 Bandits
A few bandits (7).
Bandits
A few bandits (7).
Bandits
A few bandits (7).
Bandits & Deserters
A few bandits (7) and deserters (9).
Bandits & Deserters
A few bandits (7) and deserters (9).
Cannibals
A cannibal chief (5) and some cannibals (3).
Cannibals
The cannibals (3). Relic.
Cannibals
A cannibal chief (5) and the cannibals (3).
Cannibals
The cannibals (3).
Deserters
A deserter leader (9) and a few deserters (9).
Deserters
A deserter leader (9) and the deserters (9). Two chests.
Deserters
The deserters (9).
Deserters
The deserters (9).
Deserters
A few deserters (7).
Deserters
A deserter leader (9) and the deserters (9).
Deserters
A few deserters (7).
Deserters
A few deserters (9).
Deserters
A few deserters (9).
Deserters
A deserter leader (9) and a few deserters (9).
Deserters
A deserter leader (9), the deserters (9), and the guard dogs (1). Two chests.
Deserters
The deserters (9).
Deserters
A few deserters (9). Two chests.
Fallen Knights
Fallen Knights (33).
Fallen Knights
Fallen Knights (33).
Fallen Knights
Fallen Knights (33).
Fallen Knights
Fallen Knights (33).
Fallen Knights
Fallen Knights (33).
Pirates
A pirate leader (7) and the pirates (7).
A place abandoned due to monster or bandit attacks. Once the danger is eliminated, it will fill with life once more.
 Abandoned Site
Drowned Dead (34) + Bilge Hag (34)
Abandoned Site
Drowned Dead (34) + Bilge Hag (34)
Abandoned Site
To liberate the village, destroy the nearby monster nests.
Abandoned Village
To liberate the village, destroy the nearby monster nest.
Arachnomorphs
Arachnomorphs (34).
Deserters
This place is occupied by several deserters (9).
Drowners
This place is occupied by a few drowners (9).
Drowners
This place is occupied by a few drowners (4).
Endregas
This place is occupied by the endrega workers (9) and an endrega warrior (11).
Fallen Knights
Fallen Knights (33).
Ghouls
Ghouls (34).
Ghouls
This place is occupied by an alghoul (9) and the ghouls (9).
Pirates
This place is occupied by the pirates (7).
Pirates
This place is occupied by several pirates (7).
Renegades
This place is occupied by several renegades (5) and a renegade leader (6).
Renegades
This place is occupied by several renegades (5) and a renegade leader (6).
Wraiths
Wraiths (29).
 Merchant
Border Post Merchant. Loot the Cage key from the body of the leader and use it to unlock the cage.
Deserters (9) + Deserter Leader (9).
Merchant
Border Post Merchant. Loot the Cage key from the body of the leader and use it to unlock the cage.
Deserters (9) + Deserter Leader (9).
Person in Distress
Herbalist. Fallen Knights (33).
Person in Distress
Elven merchant. Deserter Leader (9) + Deserters (9). Loot Simple cage key and open the cage.
Person in Distress
Mulbrydale Armorer. Loot slavers' key from one of the corpses and use it to open the door.
Nilfgaardian Deserters (14,16) + Slave Drivers (7).
Person in Distress
Claywich barber. Guarded by 7 x Renegade (5) + Renegade Leader (6). Loot the Cage key from the body of the leader and use it to unlock the cage.
Person in Distress
A merchant who, when released, will open a stand in Claywich.
Guarded by 7 x Renegade (5) + Renegade Leader (6). Loot the Bandits' key from the body of the leader and use it to unlock the cage.
 Herbalist
Herbalist
Herbalist
Herbalist
Herbalist
Herbalist
Herbalist
Master Topical
 Alchemist
Pellar
He will be available as long as you helped him in the "Forefathers' Eve" quest.
Priest of Eternal Fire
Related quests: Free Spirit (13).
 Smugglers' Cache
Relic.
Smugglers' Cache
Relic.
Smugglers' Cache
Smugglers' Cache
Smugglers' Cache
Relic.
 Spoils of War
Spoils of War
Loot the Aged key from the skeleton and use it to open the chest. Moonblade - relic silver sword.
Spoils of War
Three chests. One is in the deckhouse of the sunken ship and two more in its hold. Relic.
Once discovered, signposts allow you to fast travel directly from one signpost to another. Walk up to the signpost and use it to open the world map and select the destination point.
 Abandoned Tower
Legend has it a beleaguered traveler once stood at this tower's gates. He begged shelter for the night, claiming he'd been injured, but the baron living inside was afraid the traveler was a spy and sent him away. Little did he know the traveler was a powerful mage, who cast a curse on the tower, its inhospitable owner and all who dwelled with him. Soon thereafter the baron and all his retinue died in mysterious circumstances, and the tower fell into ruin.
Abandoned Tower
Legend has it a beleaguered traveler once stood at this tower's gates. He begged shelter for the night, claiming he'd been injured, but the baron living inside was afraid the traveler was a spy and sent him away. Little did he know the traveler was a powerful mage, who cast a curse on the tower, its inhospitable owner and all who dwelled with him. Soon thereafter the baron and all his retinue died in mysterious circumstances, and the tower fell into ruin.
Aeramas' Abandoned Manor
Peasants living nearby often complain about the overwhelming cheese stench wafting out of this residence...Related quests: Of Dairy and Darkness (9).
Alness
Until recently, this was a thoroughly unremarkable village. Then the Vegelbuds began organizing their famous horse races here, granting Alness the enviable honor of hosting the region's most prestigious equestrian contests.
Ancient Oak
Centuries ago bloody rituals in honor of the old gods were conducted here. Locals believe dark forces still haunt this place.Related quests: Ladies of the Wood (6), The Whispering Hillock (5).
Arette
Novigrad has always attracted those in search of a better life. Some of them found no welcome within the city walls, and so built huts outside the city.
Arnskrone Castle Ruins
In its glory days, this castle buzzed with life as the hub of the Romilly family's activities. Today it is merely a dangerous ruin in the heart of a cursed wood.Related quests: A Dark Legacy.
Bandits' Camp
A place some particularly nasty characters have decided to call home.
Benek
This small village owes its name to its founding elder, who erected the largest windmill the land had ever seen on this spot - thereby providing work for all the village's inhabitants.
Blackbough
This village takes its name from the unwanted limbs loggers used to bring here to burn, leaving stacks of charred logs behind. The locals, however, prefer the old legend which holds that their village was founded by a prominent member of an ancient race of tree people.Related quests: Fists of Fury: Velen (11).
Boatmakers' Hut
Though nothing about this small domicile is particularly eye-catching, a family of the best shipwrights in Velen has lived here for generations, crafting the finest skiffs and dinghies north of the Yaruga.
Border Post
A small isle stuck in the river's central current - an ideal place for bleaching cloth.Related quests: A Deadly Plot (14).
Bowdon
Bowdon was founded by writ of King Heribert the Quarrelsome. Unfortunately, the king was roaring drunk when they asked him to indicate on the map where to build the new settlement and slammed his finger down in the middle of a swamp. Those forced to settle there soon abandoned the unpleasant bog. Their empty dwellings became shelter for vagabonds and bandits.Related quests: Rose on a Red Field (32).
Brunwich
This picturesque little village's beauty makes it a frequent subject of works by bards and poets. The best-known piece whose action is set in Brunwich is "The Betrothing," a farce penned by Stanislas Islas. The reputation thus gained has made it a popular destination for bohemians from Oxenfurt, who escape here during the hottest months to pass the time with contests for the most beautiful feathered cap and hunts for a golden horn held at night in the nearby woods.Related quests: Dead Man's Party (33).
Burned Ruins
One of the many structures in the area which did not survive the onslaught of war.
Carsten
A village named after a baker whose exquisite goods gained him fame, as well as the privilege of supplying bread to the table of the hierarch of the Church of the Eternal Fire in Novigrad. Following his death, none proved capable of recreating his recipes for his delicious and deeply aromatic breads, so these days Carsten is known chiefly for its trade in grain and flour.
Cavern
One of those places wise men avoid at all costs, so as not to tempt fate.
Claywich
Every year at Belleteyn, a great feast is held in Claywich accompanied by games, song and dance. On that night villagers from far and wide come to celebrate, with passing travelers welcome as well. Shortly before midnight the youth in attendance race deep into the forest in search of a fern flower, and though no one has as yet found one, many have found their other halves, or at least a night of moonlight passion.
Coast of Wrecks
Once the local youth would come here to revel amidst the wrecks. Now inhabitants of nearby villages have started combing the place day and night in search of anything that can be exchanged for food.
Codgers' Quarry
This now-inactive quarry once only employed stonebreakers over thirty years of age who would work hard all day, then spend the evenings racing down the sides of the quarry pit on hand-crafted wagons.
Condyle
This village has been completely and utterly destroyed. Rumors claim its inhabitants perished in a gruesome massacre.
Crane Cape
The lighthouse on Crane Cape has for centuries lit the way for vessels seeking safe passage from Kovir and Poviss to the Novigrad Port.
Crossroads
A small crossroads in the woods.
Crossroads
A small crossroads, well trodden by the inhabitants of the surrounding villages.
Crow's Perch
After Vserad, its previous owner, panicked at the news that armies were approaching and fled to Fyke Isle, this castle became home to Phillip Strenger, alias the Bloody Baron, along with his family and entourage.Related quests: Bloody Baron (6).
Cunny of the Goose
This inn owes its name to its former owner, a swaggering, blustering fellow who wanted to attract those of a similar temperament. Luckily he died of liver poisoning after a few years and ownership passed to a distant relative, who turned the Cunny of the Goose into the best spot for stuffed goose liver in all the region.
Dancing Windmill
When the current owner's grandfather, the famous dancer Pablo "Sugar" Sasko, ended his career, he settled here and organized nights of dancing for the nearby peasantry. Supposedly these revelries became so fashionable that dung-booted peasants were dancing rounds with members of Novigrad's most elite families and adventure-seeking urban dandies.
Destroyed Bastion
Bastion built during the reign of King Gardic and destroyed during the First Nilfgaardian War.
Devil's Pit
The inhabitants of Velen believe the expanse of caverns underneath the Devil's Pit are home to demons.
Dragonslayer's Grotto
Underneath this fortress lies a musty, rank cave in which a lost traveler will find nothing but a few fattened leeches - if he's lucky. Nevertheless, village elders insist on repeating the legend that gave the grotto its name: that of a legendary dragonslayer said to be buried somewhere deep inside.
Drahim Castle
In its glory years, this castle was home to the Redanian Moskovitz of the Sea Cats dynasty, patrons of the arts and admirers of elven culture. After the death by suicide of the dynasty's last member, Prince Adrien, the castle fell into the hands of the Redanian crown - and then into ruin.Related quests: Contract: The White Lady (16), Scavenger Hunt: Cat School Gear (17).
Draken Hollow Outpost
Defensive structure built during the reign of Vizimir the Just, in the 13th century, a time of intense Redanian-Temerian border conflicts. In the relative calm that followed, it fell into disuse, then disrepair.
Drudge
This once-peaceful fishermen's settlement now stands almost completely empty. Road-weary travelers sometimes find shelter in its abandoned huts - besides that, not a soul is to be seen.Related quests: A Dog's Life (5).
Electors' Square
Square named after a group of Novigrad reformers who enacted bold transformations that led to the city's rapid growth, enriching its residents considerably and ushering in the city's golden age.
Erde
This woodland settlement is almost entirely depopulated, and its proximity to Deadwight Wood scares off any potential new settlers.
Est Tayiar
Long before men first peopled these lands, a beautiful, prospering elven city stood here, centered around the palace of King Maeglor. One day, however, the city's inhabitants began mysteriously dying off in large numbers. According to legend, King Maeglor sensed he, too, would soon perish and cast a powerful spell that caused the earth to swallow the city whole so that no outsider could ever desecrate it. Centuries later, scholars from the Oxenfurt Academy began painstaking excavations of King Maeglor's palace in a search for the causes of the catastrophe. Yet work came to a sudden halt when three subsequent expeditions ventured into the ruins' depths - and were never heard from again...Related quests: Redania's Most Wanted (12), Scavenger Hunt: Cat School Gear (17).
Eternal Fire Chapel
This shrine greets travelers on their way to Oxenfurt. Merchants sometimes stop here to sell goods to pilgrims and visiting scholars.
Ferry Station
The ferry's former owners were famed for treating travelers who were forced to wait for better conditions to raucous and unforgettable evenings.
Forest Hut
Though his friends advised against building a house in the middle of the woods, Hans refused to listen and did things his way. When the war broke out and laid waste to this region, Hans and his family lived in peace, untouched by the troubles of the wider world - until one fateful night...
Frischlow
Like many other settlements in the area, this one has suffered greatly on account of the war. Its inhabitants have abandoned their property and evacuated lands in which they once dwelled in relative peace.
Fyke Isle
Ruined tower which is said to be afflicted by a terrible curse.
Garin Estate
Some two hundred and forty years ago, a certain Josen Garin arrived in these lands. A Haaki traveler, writer, brawler and souse, Garin looked around and saw the local meadows in bloom, cool shadows beneath charming glades, and glorious sun-bathed fields. All this inspired him to settle down here for good. His new neighbors treated the arrival with suspicion, yet they changed their minds and warmed to him once he turned a gracious host who would fill their cups once and again with the exquisite wines he had brought with him from his homeland.Related quests: Dead Man's Party (33), Evil's Soft First Touches (32), Rose on a Red Field (32).
Gate of the Hierarch
This gate is named in honor of Novigrad's own son, the Hierarch of the Eternal Fire. Supposedly this name was given to it upon popular request, though no one can be found who remembers requesting any such thing.
Glory Gate
Toughs and hooligans often end a night of drunken escapades under this gate after being thrown out of the nearby taverns.
Grotto
A dark and hostile place which creaks from time to time with unsettling, throaty noises...
Gustfields Farm
Farmstead founded years ago by an eccentric flaxen-haired painter named Cunigund de Cabbrae, who came here seeking peace, quiet and fresh country air.
Hangman's Alley
The road is lined with the hanged bodies of peasants who opposed their new rulers or had the bad luck of happening across bandits who had nothing against adding another dangling installation to the boulevard's scenery.
Harpy Feeding Ground
One of those places entered by only the very brave, or the very foolish.
Heatherton
The inhabitants of this village were relieved when they learned the path of the marching armies had shifted slightly and passed their village bye. Then, one night... they changed their mind.Related quests: Bloody Baron (6), Hunting a Witch (5), The Nilfgaardian Connection (5).
Heddel
The village of Heddel was once known first and foremost for the fine lace undergarments produced there. Heddel lingerie aroused such controversy, however, that the Novigrad hierarch personally forbade its production.
Herbalist's Hut
Home to a halfling herbalist who is a passionate devotee of innovative gardening methods and experimental herbal medicine.
Hierarch Square
Until quite recently a great many mages lived near Novigrad's main square. They fled when the witch hunters began their reign of terror, leaving many of the city's most beautiful townhouses abandoned and uncared for.
Hindhold
This watchtower used to protect barges traveling between Oxenfurt and Novigrad. It once even boasted a bridge connecting the two sides of the river, but now it stands abandoned and neglected, its bridge a collapsed ruin.
Honeyfill Meadworks
The renowned Honeyfill Meadworks has for generations belonged to a respected family of halflings.
House of Respite
The House of Respite's motto: "A soldier does not live on war alone." This is slightly misleading, however, for the club is not open to all soldiers, only Nilfgaardian officers (or those capable of passing themselves off as such).
Hunter's Cottage
The Buckholt Hills have long been famed for the wealth of wild animals dwelling there, which is why the owner of the nearby Sarrasin Grange once had a hunter's cottage built there, to ensure the daily provision of fresh game.
Inn at the Crossroads
A sizeable establishment able to accommodate a crowd of travelers and revelers.
Isolated Hut
Rumors claim a famous painter lives in this house, though no one has ever seen him or knows his name.Related quests: A Poet Under Pressure (13), Cabaret (14).
Isolated Shack
Small hut constructed by a famous sculptor who, having garnered every laurel possible for one of his trade, abandoned his Koviri residence and moved here in order to find inspiration in solitude and reflect on what to make of the rest of his life.Related quests: Wild at Heart (7).
Kilkerinn Ruins
It is difficult to believe this abandoned pile of debris in the middle of a forest is the famed Kilkerinn Palace, which, according to legend, once housed the renowned artist Giann'Lorenzo's workshop. His sculptures now command exorbitant prices at auction, making Kilkerinn a frequent target for plunderers seeking treasure.
Kimbolt Way
Road built on orders of Baron Kimbolt, meant to act as a safe escape route in case his plans to take power after King Foltest's death went awry.
Lighthouse
Many years ago a horrible accident took place here: a ship carrying the cousin of King Radovid IV the Bald wrecked against the rocks during a storm. The king ordered a lighthouse erected on that spot in order to warn other seafarers of its deadly danger.
Lindenvale
One of Velen's many impoverished villages, its poverty deepened by war levies and the epidemic that spread after the Nilfgaardians' arrival.
Loggers' Hut
A lone cabin deep in the Novigrad Forest - an ideal base for woodcutters.Related quests: Contract: Lord of the Wood (25).
Lornruk
Years ago smugglers would come here to load and unload illicit cargo.
Lucian's Windmill
Lucian le Foix, the famous Oxenfurt sculptor and architect, bought this windmill several years ago and made it into his country retreat. Sadly the enormous popularity of the great Lucian's designs means he spends little time in his fortress of solitude and has entrusted its care to a steward.
Lurtch
Once the Evves family estate was located here and the area bore the name of Lord Evves' wife, Mortilanca. When the couple died, their will stipulated their land be turned over to their serfs. The grateful peasants then founded a village of freeholders and named it after their first ealdorman, Lurtch, who had previously served as the Evves family's butler.
Marauders' Bridge
After the Battle of Velen, marauders swarmed over this bridge in their rush to scavenge the battlefield.
Martin Feuille's Farmstead
Founded by Lord Martin Feuille, this vast plantation was until not so long ago the largest producer of alfalfa in the region. Sadly, when war broke out the lord fled to his winter residence in Kovir, leaving his land to be administered by an ill-suited steward who squandered his liege's fertile fields.
Midcopse
Typical farming settlement which the worst of the fighting has left untouched - but which famine now grips all the same. One of the larger villages in this region.Related quests: Hunting a Witch (5).
Moldavie Residence
Despite its ideal location and beautiful surroundings, this residence has been tossed from owner to owner like a hot potato, and for some unknown reason suffers from a bad reputation.Related quests: Contract: Doors Slamming Shut (24).
Mulbrydale
One of the oldest villages in the region. Owes its name to a certain undereducated botanist who could not discern one kind of tree from another and so called them all mulberries.Related quests: An Eye for an Eye (12).
Nilfgaardian Army Group 'Center' Camp
Pitched in a mere two weeks, the Army Group 'Center' camp constitutes the quintessence of Nilfgaardian martial architecture.
Novigrad Docks
A den of dirt and depravity and the shadiest part of Novigrad. After dark all one finds here are women of loose morals, hoodlums and drunk sailors.
Novigrad Gate
During Oxenfurt Academy's exam sessions, this gate would be closed, to spare the students from Novigrad's temptations.
Olena's Grove
Legends claim that a beautiful nymph named Olena once lived in this grove. She fell in love with a young hunter and the man swore to be true to the nymph, but later betrayed her. She decided to punish him by casting a spell on his spirit, which wanders the grove to this day.
Oreton
Village founded by Count Primislavus don Stessa, distant cousin to King Foltest of Temeria. The count was known for his passion for racing chariots down winding forest paths and narrow country roads. This spectacle delighted onlookers, won the hearts of highborn ladies and aroused hatred in his rivals.
Oxenfurt Gate
In the times when Novigrad and Oxenfurt were embroiled in fierce neighborly disputes, this gate went through several completely different names, the Gate of Harlots and the Gate of Bloodsuckers being two of the longer lived examples. Its current name was chosen when this conflict was finally put to rest.
Oxenfurt Harbor
Oxenfurt's picturesque port has featured as the subject of numerous odes and ballads, the setting for at least three lurid crime novels, and a favorite spot for romantic outings for generations of students.
Portside Gate
Though not the most stately of gates, this one's location near the bustling port has made it the calling card of the city.
Refugees' Camp
The members of this small community have erected a large, winged statue - evidence of people turning to old gods and ancient cults in this time of war and famine.
Road to Bald Mountain
The peasants of Velen believe the summit of Bald Mountain is home to witches, werebbubbs and wights.Related quests: Bald Mountain (26).
Ruined Tower
Five centuries ago King Geddes sent his most loyal knight, Martin of Oakdale, to watch over the inhabitants of this troubled land. He also sent his least-loyal knight, to scrub Martin's latrines.
Sarrasin Grange
Lord Antares Sarrasin moved his wife and smattering of comely daughters here from far-off Nazair on his medic's recommendations. The leech proclaimed with absolute certainty that "if you wish to sire a son, it must be in the Gustfields." While waiting to produce a male heir, the Sarrasins took to wine cultivation and soon their grange became renowned from Nazair to Skellige.
Seven Cats Inn
This dank establishment is host to a shady clientele.
Southern Gate
In truth demarcating the eastern and not southern edge of the city, the Southern Gate was given its inappropriate name by a one-time city planner who knew nothing about architecture and could not read a map, but had in his favor the fact that he was the mayor's cousin and threw lavish parties. Though confusingly incorrect, the name stuck and now the city's residents never think twice about its illogical appellation.
St. Gregory's Bridge
Bridge named after the hero of Novigrad who saved the city from a horrible famine three hundred years ago by sacrificing half his fortune to import food from Nazair. After this, he was declared a saint, something even the jurors of the Church of the Eternal Fire were unable to change.
Stonecutters' Settlement
Over twenty years ago a certain Bartolomeo, known as "Badger" on account of certain characteristic aspects of his coiffure, discovered a rich deposit of high-quality stone on this spot. He bought the land for a song, then leased it back to local peasants before heading off to Kovir, where he lives the life of a rich and powerful townsman to this day.
Temerian Partisan Hideout
Though the Nilfgaardians thought Temeria died along with King Foltest, Temerian guerillas still hide in the woods, prepared to give their lives at a moment's notice in their fight for independence.Related quests: An Eye for an Eye (12).
The Orphans of Crookback Bog
Orphaned and unwanted children from nearby villages find a roof over their head and a bowl of warm food here.Related quests: Ladies of the Wood (6), Return to Crookback Bog (9).
Toderas
Village founded by King Griffin of Temeria, the husband of Clarissa of Toussaint. The king had planned to turn Toderas into a large, bustling university city, a sort of Temerian alternative to Oxenfurt, but, as any visitor can quickly attest, his efforts failed utterly.
Tretogor Gate
Gate erected with funds from the Redanian royal family, who, wanting to earn favor with Novigrad merchants and the hierarch, dedicated a significant amount of coin to its construction, as well as some no-less-valuable (wo)manpower in the form of the master architect Countess Anna Yaye-Pinkovitz and her skilled crew.
Troll Bridge
Local legend has it this bridge was erected by trolls who were later killed by an anonymous witcher.
Upper Mill
The local community held a raising bee to construct the new brick Upper Mill to replace the old wooden Lower Mill. Once finished, however, they decided closing a fully-functional mill just because there is a newer one would be a sinful waste, thus both mills remain in operation.
Ursten
War has caused countless refugees to flee Temeria. With the Pontar blockaded, they have tended to flood villages which, like Ursten, are located close to river crossings.
Vikk Watchtower
Legends claim ages ago the famed mage Alzur had his laboratory in the Vikk Watchtower.
Von Everec Estate
The history of the von Everec estate is as tangled as that of the family itself. The once wealthy Redanian family's manor and lands were auctioned off after they fell deeply in debt, but were returned to von Everec hands by Olgierd, the infamous leader of an informal band of armed men calling themselves the Redanian Free Company. Despite the effort he went through to regain it, Olgierd abandoned the residence some time later, and dark legends concerning it now circulate among its neighbors.Related quests: Dead Man's Party (33), Scenes From a Marriage (35).
Wastrel Manor
The once-beautiful manor house located near here was known for its extravagant balls, which were attended by the cream of the local youth. Its owners abandoned it over a century ago, but soon afterwards it became a place of worship for the local community, which believes a deity dwells in the ruins.
Western Gate
Before war broke out, several hundred people a day would pass through here. Now the Redanian blockade has slowed traffic to a mere trickle.
Wheat Fields
The fertile soils of the Pontar delta guarantee the inhabitants of Novigrad full granaries and full stomachs all year long.
White Eagle Fort
The grand name might seem in ill-fitting with this place, but the troll that lives here - a Redanian patriot and military aficionado - goes to great lengths to make his beloved King Radovid proud.
Widows' Grotto
According to legend, many years ago a young woman would wait here and watch for her husband's return from an overseas raid. Years passed and woman grew old, still waiting for her husband. Yet he never came, and finally, she died. Three days after her funeral, her husband returned, having at last escaped from the pirates who had held him captive all this time. When he learned about his beloved's loyal vigil, he wept bitter tears, then leapt to his death.
Winespring Grange
Years ago, an eccentric count named Jacobus Ruth of the Rieslings settled here. The count could not stand the pomposity of court life but loved good wine. He thus planted a vineyard here which produces a fabulous beaujolais prized on both sides of the Pontar.
Wolven Glade
A long, long time ago, when this land was ruled by forest spirits and ancient gods, the living would come here to pay their respects to the dead in the way their holy tome commanded: "Walk thee in darkness, on a path of blood, standing under bare sky, naked before the gods and their messengers."Related quests: Family Matters (6).
Yantra
The inhabitants of this village are known for their talkativeness and tendency to exaggerate, which makes them good companions for a round of drink, but impossible to tolerate for long stretches of time.Related quests: Little Red (15), Novigrad Hospitality (8).
Zuetzer Castle
It is hard to say anything about Zuetzer Castle without mentioning the tragic death of Anastasia von Bourmann. Once one of the most powerful magnates in Redania, Count von Bourmann retreated from public life after the loss of his only child and never left his family manor to the very end of his days. Currently Zuetzer Castle is but a decaying ruin haunted by a sad past.
 Novigrad Barber
Novigrad Barber
Oxenfurt Barber