The Vatican - Map Markers Summary
Maps x10, Signposts x6, Disguises x2, Adventure Quest x1, Chapter Notes x23, Chapter Photos x19, Fieldwork x5, Fieldwork Notes x24, Fieldwork Photos x14, Discoveries x5, Field Notes x17, Field Photos x41, Adventure Books x30, Medicine Bottles x15, Ancient Relics x10, Lost Artifacts x5, Mystery Quests x8, Mystery Notes x22, Mystery Photos x5, Puzzles x4, Key Items & Objects x15, Switches x11, Locked Containers x4, Keys x14, Locked Passages x61, Shops x3, NPCs x7, Ammunition Boxes x10, Repair Kits x19, Bandages x48, Currency / Egyptian Pounds x61, Bread x44, Fruit x20, Map Transitions x23, Transitions x76
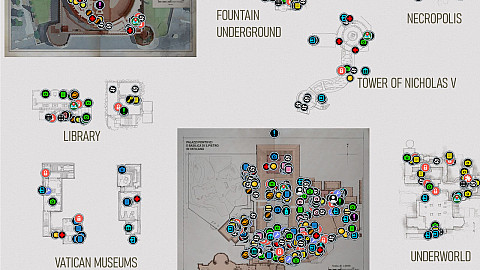
The following legend of The Vatican interactive game map defines the points of interest / markers displayed on the map. Each marker corresponds to a specific element to facilitate efficient navigation and interaction with the map.
Maps of the locations we visit. Some of them you have to find, and some, for the dungeons, etc. you get automatically when you reach a certain place.
 Castel Sant'Angelo
On a kneeler standing against the wall, near the door.
A map of the Castello and the secret passage to the Vatican.
Castel Sant'Angelo
On a kneeler standing against the wall, near the door.
A map of the Castello and the secret passage to the Vatican.
Castel Sant'Angelo
An alternative place where you can find a map of the castle if you don't already have one.
Castel Sant'Angelo
An alternative place where you can find a map of the castle if you don't already have one.
Fountain Underground Map
Library Map
You will unlock this map automatically after leaving Antonio's office.
Necropolis Lower Map
You will unlock this map automatically after the cutscene in which you enter Necropolis.
Tower of Nicholas V
You will unlock this map automatically once you enter the tower through the main entrance.
Underworld Map
You will unlock this map automatically once you go down the spiral staircase.
Vatican City Map
On top of a wooden cabinet located near the library door.
A detailed map covering parts of the Vatican City.
Vatican City Map
An alternative place where you can find the Vatican City map if you don't already have one.
Signposts allow you to fast travel between them. In order to be able to select a specific signpost as a destination, you must first unlock it by reaching it on foot.
 Apostolic Palace
Belvedere Courtyard
Belvedere Courtyard
Castel Sant'Angelo
Sistine Chapel
Tower of Nicholas V
Disguises allow you to hide from enemies and enter restricted areas without being noticed.
 Blackshirt Uniform
Clerical Suit
You will receive it from Antonio shortly after arriving at the Vatican.
Adventures are the main story quests where your objective is to solve the mystery of the Great Circle.
 The Stolen Cat Mummy
Previous adventure: The Adventure Begins.
The clue left behind by the giant cat mummy thief lead Indy to the Vatican. With political turmoil brewing in the Holy City and Fascist Blackshirts are patrolling the streets, Father Antonio Morello, an old friend of Indy's, was willing to help him get in and solve the mystery.
Objectives:
Enter Castel Sant'Angelo - Antonio, an old friend, is waiting by the Passetto di Borgo, "the village steps", which is on the far side of Castel Sant'Angelo. There is no entrance from this side, but where there's a whip, there's a way.
-= continued in full description =-
Next adventure: The Race is On.
The Stolen Cat Mummy
Previous adventure: The Adventure Begins.
The clue left behind by the giant cat mummy thief lead Indy to the Vatican. With political turmoil brewing in the Holy City and Fascist Blackshirts are patrolling the streets, Father Antonio Morello, an old friend of Indy's, was willing to help him get in and solve the mystery.
Objectives:
Enter Castel Sant'Angelo - Antonio, an old friend, is waiting by the Passetto di Borgo, "the village steps", which is on the far side of Castel Sant'Angelo. There is no entrance from this side, but where there's a whip, there's a way.
-= continued in full description =-
Next adventure: The Race is On.
Chapter Notes, Gizeh. Chapter notes are documents or photos related to the adventure you must complete to uncover the mystery of the Great Circle. They contain all sorts of related interesting info. Collecting each of them is not mandatory but is worthwhile as it provides additional adventure points.
 Caruso's Letter
Letter. On a small table standing against the wall. Related adventure: The Stolen Cat Mummy.
Caruso's Letter
Letter. On a small table standing against the wall. Related adventure: The Stolen Cat Mummy.
De Vito's Letter
Letter. On a desk in a room on the first floor. Related adventure: The Stolen Cat Mummy.
Mario's Note
Note. On the wall, to the left of the locked gate. Related adventure: The Stolen Cat Mummy.
Chapter Notes, Gizeh. Chapter notes are documents or photos related to the adventure you must complete to uncover the mystery of the Great Circle. They contain all sorts of related interesting info. Collecting each of them is not mandatory but is worthwhile as it provides additional adventure points.
Fieldwork, The Vatican. Fieldwork are local activities / side quests that are of greater importance and may or may not be related to the main adventure.
 A Mystery Begins
How to start: This is the first quest that begins your adventure in The Order of the Giants DLC. You will receive it automatically after meeting Gina for the first time.
Reward:
Objectives:
Talk to the Priest - There is a priest in the Vatican gardens, near the Fountain of Confession. - Talk to Father Ricci.
-= continued in full description =-
A Mystery Begins
How to start: This is the first quest that begins your adventure in The Order of the Giants DLC. You will receive it automatically after meeting Gina for the first time.
Reward:
Objectives:
Talk to the Priest - There is a priest in the Vatican gardens, near the Fountain of Confession. - Talk to Father Ricci.
-= continued in full description =-
A Nun in Trouble
How to start: Bring the parchment to Antonio and then exit the library during the "The Stolen Cat Mummy" adventure.
Reward: 350 Adventure Points
Objectives:
Talk to Gina - After the encounter on the balcony, Gina, the journalist posing as a nun, agreed to trade information if it could help her find her missing sister. Talking to her might help shed some more light on the mystery of the stolen cat mummy.
-= continued in full description =-
A Savage Discovery
How to start: Read the "Theft Report" note. It can be found in a number of places.
Reward: 300 Adventure Points
Objectives:
Find the Professor - There's supposed to be a big excavation ongoing in the Vatican at the moment, lead by a British professor. Perhaps he's discovered something connected to this mystery.
-= continued in full description =-
The Mad Priest
How to start: Read the Catherine's Letter you can find at the post office.
Reward: 225 Adventure Points
Objectives:
Find Sister Catherine - There's a Sister Catherine in the Sistine Chapel waiting for a delivery boy from Antonio. It concerns Father Crescenzo, the mad priest who made the map of the secret inscriptions.
-= continued in full description =-
The Secret of Giants
How to start: Take a photo of the fifth strange inscription.
Reward: Ancient Relic (Library #2).
Objectives:
Photograph Inscriptions - Crescenzo's map had a total of ten inscriptions marked on it. Antonio would probably be interested in seeing the photos of all of them.
Return to Antonio - I've gotten photos of all the Nephilim inscriptions on Crescenzo's map. I should return to Antonio and show him what I've found.
Fieldwork Notes. Notes and photographs that are related to fieldwork tasks.
 Castello Photograph
Photograph. It will be found by Gina when you check the other clues. Related fieldwork: A Nun in Trouble.
Castello Photograph
Photograph. It will be found by Gina when you check the other clues. Related fieldwork: A Nun in Trouble.
Catherine's Letter
Letter. On a desk in the main hallway of the post office building. Related fieldwork: The Mad Priest.
Ipeo Card
Card. : On a sofa located against a wall on the second floor of Apostolic Palace. Related fieldwork: The Mad Priest.
Fieldwork Notes. Notes and photographs that are related to fieldwork tasks.
 Casina Pio IV
You can take the photo while standing on the scaffolding.
Related fieldwork: A Mystery Begins.
Casina Pio IV
You can take the photo while standing on the scaffolding.
Related fieldwork: A Mystery Begins.
Discoveries, Gizeh. Discoveries are activities that span over greater sections, some of them throughout the entire game. To complete one of these you will have to explore the world to find something that relates to the discovery.
 A Remedy for All
How to start: Talk to Valeria or find one of the Medicine Bottles in the Vatican.
Objectives:
Find Medicine Bottles in the Vatican x 15 - The local medical worker is in dire need of medicine and all recovered bottles should be brought there.
Summary: All the medicine bottles have been returned to the local medical workers.
A Remedy for All
How to start: Talk to Valeria or find one of the Medicine Bottles in the Vatican.
Objectives:
Find Medicine Bottles in the Vatican x 15 - The local medical worker is in dire need of medicine and all recovered bottles should be brought there.
Summary: All the medicine bottles have been returned to the local medical workers.
A World of Knowledge (The Vatican)
How to start: Buy the "Vatican Books" adventure book.
Objectives:
Find Adventure Books in the Vatican x 23 - Learn new abilities by collecting Adventure Books and taking a moment to study them.
Summary: All the Adventure Books and Map Guides have been discovered.
Riddles of the Ancients (The Vatican)
How to start: Find the first of the Ancient Relics.
Objectives:
Find Ancient Relics in the Vatican x 10 - A collection of curious hand-carved prehistoric stone relics.
Underground Boxing Ring
Hot to start: Attempt to enter the Underground Boxing Ring.
Reward: Money earned after each fight. 150 Adventure Points.
Objectives:
Find Disguise - This place is not welcoming to people not in uniform. Blackshirts only.
-= continued in full description =-
Field Notes, Gizeh. Interesting notes and photographs gathered while out on the field. 58 such notes and photographs can be found in The Vatican.
 Angry Note
Briscola Flyer
On a corner of the table.
Cacio e Pepe Recipe
Recipe.
Gizeh Postcard
Postcard. On the bed in the sleeping room on the second floor.
Lockbox Note
Pope Article
News Article. It is on top of a wooden crate in the attic area of the chapel.
Propaganda Flyer
Paper.
Risotto ai Funghi Recipe
Recipe. On a small table in a hallway inside the post office.
Saltimbocca alla Romana Recipe
Recipe. On a bench.
Shanghai Article
News Article. On the workbench. It can be collected while following the nun during the "The Stolen Cat Mummy" quest.
St. Peter Postcard
Postcard.
Swiss Guard Postcard
Postcard.
Tales of Dread #1
Comic Book. On the table, next to which there is a motorcycle.
Tales of Dread #2
Comic Book.
Tales of Dread #3
Comic Book.
Ticket Stub
Valeria's Letter
Document. It is on the table at the back of the radio operator's room located on the first floor.
Field Notes, Gizeh. Interesting notes and photographs gathered while out on the field. 58 such notes and photographs can be found in The Vatican.
 Adjusting Painting
Anchored Airship
Antonio
Belvedere Courtyard
Take a photo of the courtyard from the balcony above the stage.
Bird Feeding
Boxing Ring
Chapel Altar
Cobblestone Workers
Take a picture of workers repairing the pavement.
Coffee Break
Dragon Statue
In one of the rooms on the second floor of the Apostolic Palace.
Ernesto
You can take this picture right after you buy a camera from Ernesto.
Facade Painting
You can take a picture from a small canopy that you can get to using the Zipline.
Fixture Work
Great Tower Hall
Jerusalem Cross
Lovers' Tomb
Marble Statue
Metatron Statue
Nike Statue
Oceanus
Ornamented Gate
Ornate Door
Pendulum Trap
Roman Murals
Secret Room
Sewer Bridge
Sister Catherine
Sistine Chapel Ceiling
Stage Construction
Stolen Artifacts
In the storage room of the Apostolic Palace.
Study Group
Teacher and Apprentice
You will be able to take this photo after completing the "A Savage Discovery" fieldwork.
Tomb Fresco
Tomb of the Warrior Giant
Treasure Chamber
Valeria
Take a photo of Valeria after you talk to her.
Vatican Apostolic Library
Vatican Excavation
Vatican Seal
Washing Tent
Window Cleaning
You can take a picture when you climb the scaffolding.
Adventure Books allow you to learn new Abilities to tackle harder challenges. Adventure Books are divided into a few categories depending on which kind of Ability you can learn from it: Survival, Fitness, Packing, Brawling, and Combat. You can also collect Map Guides which are listed under the Exploration category. These will unlock important information about the locations that you visit and place markers on maps.
 Brawler I
On top of a small crate in the room after going down the spiral staircase.
Category: Brawling
Description: Deal increased damage in armed and hand-to-hand melee combat.
Adventure Points To Unlock: 200
Brawler I
On top of a small crate in the room after going down the spiral staircase.
Category: Brawling
Description: Deal increased damage in armed and hand-to-hand melee combat.
Adventure Points To Unlock: 200
Brawler II
Category: Brawling
Description: Deal increased damage in armed and hand-to-hand melee combat.
Adventure Points To Unlock: 400
Climbing Ace I
On a barrel standing in the corner of the rooftop balcony.
Category: Fitness
Description: Drains less stamina and enables faster movement by using [L Shift] while ledge climbing.
Adventure Points To Unlock: 100
Cutman I
It's inside the Secret of Secrets Safe.
Category: Fitness
Description: Improved health bar regeneration efficiency.
Adventure Points To Unlock: 250
Fruit Bag
Category: Packing
Description: Carry twice the amount of fruit.
Adventure Points to Unlock: 250
Hardboiled I
You can buy it for 720 Lire from Shady Vendor (The Vatican).
Category: Survival
Description: Harden protection by merging two health bars into one.
Adventure Points To Unlock: 350
Iron Grip I
Category: Fitness
Description: Indy can clinch enemies for longer.
Adventure Points To Unlock: 225
Lucky Hat I
On the second floor of the building, in the captain's office, on the table.
Category: Survival
Description: After being knocked out, Indy can pick up his fedora using [E], giving him a second chance at the fight. Lucky Hat is disabled while Indy's Outfit's Fortitude is on cooldown.
Adventure Points To Unlock: 125
Lucky Hat I
An alternative place where you can find this book if you didn't pick it up when passing through Castel Sant'Angelo (Lucky Hat I).
Category: Survival
Description: After being knocked out, Indy can pick up his fedora using [E], giving him a second chance at the fight. Lucky Hat is disabled while Indy's Outfit's Fortitude is on cooldown.
Adventure Points To Unlock: 125
Marshall College Guide
It will spawn on the table and you will be able to collect it after completing the "A Savage Discovery" fieldwork.
Category: Exploration
Description: A guidebook concerning things of interest one can discover in Marshall College.
Moxie I
You can buy it for 5 Medicine Bottles from Valeria.
Category: Fitness
Description: Extend stamina bar to improve overall cardio fitness.
Adventure Points To Unlock: 250
Moxie II
You can buy it for 10 Medicine Bottles from Valeria.
Category: Fitness
Description: Extend stamina bar to improve overall cardio fitness.
Adventure Points To Unlock: 500
Moxie III
You can buy it for 15 Medicine Bottles from Valeria.
Category: Fitness
Description: Extend stamina bar to improve overall cardio fitness.
Adventure Points to Unlock: 950
Open Season
Category: Combat
Description: Whip-cracking an enemy temporarily causes them to take more damage from subsequent attacks.
Adventure Points To Unlock: 600
Pep I
Category: Fitness
Description: Add a boost to stamina recovery speed.
Adventure Points To Unlock: 275
Punch Out I
It is on the wooden crate in the radio operator's room located on the ground floor.
Category: Brawling
Description: Restore stamina when an enemy is knocked out.
Adventure Points To Unlock: 25
Sawbones I
You can buy it for 400 Lire from Shady Vendor (The Vatican).
Category: Packing
Description: Bandage inventory capacity is increased by one.
Adventure Points to Unlock: 250
Shaping Up I
You can buy it for 5 Medicine Bottles from Valeria.
Category: Survival
Description: Increase health reserve by adding one bar.
Shaping Up II
You can buy it for 10 Medicine Bottles from Valeria.
Category: Survival
Description: Increase health reserve by adding one bar.
Shaping Up III
You can buy it for 15 Medicine Bottles from Valeria.
Category: Survival
Description: Increase health reserve by adding one bar.
Adventure Points To Unlock: 1200
Sleight of Hand
On the crate standing on the scaffolding.
Category: Combat
Description: Disarming an enemy with a whip-crack causes their weapon to fly Indy's way.
Adventure Points To Unlock: 800
Splinter Smash
It's in a locked container. Examine the Ticket Stub to learn the code needed to open the safe: 5238.
Category: Combat
Description: The last hit before an improvised weapon breaks deals additional damage.
Adventure Points To Unlock: 300
Street Scrapper I
Code: 1136.
Category: Combat
Description: Deal increased damage with one and two handed melee weapons.
Adventure Points To Unlock: 250
Throttle
Category: Combat
Description: Knock out unaware light-weight and medium-weight enemies with a whip pull.
Adventure Points To Unlock: 200
Vatican Artifacts
You can buy it for 300 Lire from Ernesto.
Category: Exploration
Description: A guidebook to finding all the lost artifacts in the Vatican.
Vatican Books
You can buy it for 300 Lire from Ernesto.
Category: Exploration
Description: A compendium of adventure books found the Vatican.
Vatican Medicine
Category: Exploration
Description: A handy guide to the locations of the medicine bottles in Vatican.
Vatican Mysteries
You can buy it for 300 Lire from Ernesto.
Category: Exploration
Description: An informative guide to discovering the mysteries of the Vatican.
Vatican Notes
You can buy it for 600 Lire from Ernesto.
Category: Exploration
Description: A guidebook concerning various notes to be gathered in the Vatican.
Vatican Relics
Category: Exploration
Description: An esoteric research journal concerning ancient relics rumored to be in the Vatican.
Medicine Bottles can be exchanged for Adventure Books that either raise your HP or stamina bar permanently.
 Medicine Bottle
On a table on the upper floor of a two-level tent building.
Medicine Bottle
On a table on the upper floor of a two-level tent building.
Medicine Bottle
On the crates located in the locked military tent. To get here you need the Blackshirt Key.
Medicine Bottle
On a small wooden bench standing next to the crates, against the wall at the end of the alley.
Medicine Bottle
On a table standing in the tent of the Blackshirts.
Medicine Bottle
On the table inside a military tent.
Medicine Bottle
On a table standing against a wall in the side alley.
Medicine Bottle
On a desk in one of the rooms on the second floor of the Apostolic Palace.
Medicine Bottle
You will be able to get here after completing the "A Nun in Trouble" fieldwork.
Medicine Bottle
You will reach this place after crossing the Tower of Nicholas V and the sewers.
Medicine Bottle
On the crates at the end of the staircase.
Medicine Bottle
On top of the table standing in the alcove at the bottom of the staircase.
Medicine Bottle
On a wooden table standing in a small courtyard.
Medicine Bottle
On a wooden box located at the top of the wall. You can get here, for example, by climbing up using the Grappling Point & Drainpipe.
Medicine Bottle
On a wooden bench inside the excavation site foreman's office.
Medicine Bottle
On a wooden bench standing at the side of the courtyard.
Finding all the ancient relics is the objective of the "Riddles of the Ancients (The Vatican)" discovery.
 Ancient Relic (Fountain Underground #1)
On top of a broken pillar in the pit under the pendulum trap.
Ancient Relic (Fountain Underground #1)
On top of a broken pillar in the pit under the pendulum trap.
Ancient Relic (Fountain Underground #2)
On the stone ledge in a small, locked room, accessible by activating a nearby pedestal.
Ancient Relic (Fountain Underground #3)
On a wooden shelf, next to the books.
Ancient Relic (Library #1)
On the table in the basement of the library.
Ancient Relic (Library #2)
It spawns on Antonio's desk after completing the "The Secret of Giants" quest.
Ancient Relic (Necropolis #1)
Ancient Relic (Necropolis #2)
On the stone ledge, in the room after passing through the burnt door.
Ancient Relic (Necropolis #3)
On the ground in a small, locked room, accessible by activating a nearby pedestal.
Ancient Relic (Necropolis #4)
On the edge of one of the tombs, accessible after climbing to the uppermost level.
Ancient Relic (Necropolis #5)
In a small locked room you will get to after activating the nearby pedestals.
Finding all the lost artifacts is the objective of the "Lost Artifacts of Europe" discovery.
 Drinking Horn
Inside a locked safe. To open the safe, use the code 7171. The code is written on the crate located near the door with a small lamp standing on it. It will become visible when the lamp is turned off.
Related discovery: Lost Artifacts of Europe.
Drinking Horn
Inside a locked safe. To open the safe, use the code 7171. The code is written on the crate located near the door with a small lamp standing on it. It will become visible when the lamp is turned off.
Related discovery: Lost Artifacts of Europe.
Golden Xiphos
In a secret compartment behind a painting in a small museum at the back of the Sistine Chapel. To open it turn the painting which is upside down.
Mysteries, Gizeh. Mysteries are shorter and sometimes quite challenging activities, and will give you adventure points when they have been completed, in addition to a variety of different smaller rewards.
 A Date to Remember
Open the Shipment Container - There is a locked shipment container in one of the Blackshirt tents. Maybe it's possible to relieve the container of its contents?
Reward: 100 Adventure points.
A Date to Remember
Open the Shipment Container - There is a locked shipment container in one of the Blackshirt tents. Maybe it's possible to relieve the container of its contents?
Reward: 100 Adventure points.
A Free Spirit
How to start: Read the Missing Cat Flyer.
Snap Photograph of Cat - Father Bianchi has lost his cat. Better keep an eye out for this spectacular black satin-haired wonder of nature.
Pin Photograph to Missing Cat Flyer - Father Bianchi's lost cat was kicking back on a rooftop. Better let the father know that his precious friend is safe.
Reward: 100 Adventure Points
Summary: Father Bianchi will be happy to know that his lost cat is just exploring the rooftops. The little fella will find his way home when he wants to.
A Snake in the Garden
How to start: Read the Bookcase Note.
Solve Ventura's Bookcase - There seems to be something special about Ventura's bookcase. Should be worth investigating.
Reward: 100 Adventure Points.
Solution:
Read the Bookcase Note and investigate its back to see four symbols:
Francorum - Crown Symbol
Logicae - Triangle Symbol
QDV - Sun Symbol
Philosophiae - Wheel Symbol
Approach the bookcase and pull out books with symbols in the following (alphabetical) order:
Crown
Triangle
Wheel
Sun
Pick up the Mussolini's Letter.
Father and Son
Find the Locked Door - Giuliana handed over a key that unlocks a door somewhere in the Borgia Tower. She said it might lead to further clues about the cat mummy mystery.
Search the Agency Room - Giuliana's key lead to a locked room used by the Vatican Secret Agency. Could be some interesting leads in there.
Collect Evidence - This place looks like a center for some kind of secret operation. Perhaps there's useful information to be found regarding the cat mummy.
Reward: 100 Adventure Points.
House of God
How to start: Read the Cleaning Note.
The Basilica replica has a handle on the front and some other strange features. Deserves a closer look.
Solution:
Move the handle located on the front of the replica as far to the right as possible.
Proceed to the left side of the replica and take the Relief Medallion from the compartment that opened.
Move the lever located on the front of the replica as far to the left as possible.
Place the Relief Medalion in the slot on the right side of the replica.
Proceed to the left side of the replica and pick up the Golden Chalice from the compartment that opened there.
Place the Golden Chalice on the top of the replica.
Reward: 100 Adventure Points
Summary: The Basilica replica turned out to be a puzzle box with a secret compartment containing a very interesting book.
Secret of Secrets
How to start: Read the Nicoletti's Letter.
Open the Locked Safe - A priest found an old manuscript and locked it away. The code to the safe has something to do with two saints.
Reward: 100 Adventure Points.
Solution:
The Nicoletti's Letter contains a clue that Peter is first and then Paul.
Find the Planetary Chart. The symbols correspond to the numbers from 1 to 8.
Find the Saint Peter Statue and turn it around to see two symbols. There is no such symbol on the Planetary Chart so it must be an erased "4". So the beginning of the safe combination is 44.
Find the Saint Paul Statue and turn it around to see two symbols which correspond to the numbers 7 and 1, so the second part of the combination is 71.
Use the code 4471 to unlock the safe.
Take the Hidden Note lying under the forged book.
Signs of Trouble
Find the Information - Gina left a note with instructions to retrieve information from one of her informants that has been locked away in a safe in the dig site.
Return Information to Gina - The information was sparsed, but intriguing - an airship ticket to Peru issued in Laura's name.
Gina needed help retrieving information about her sister from a contact. It turned out to be an airship ticket in her name to Peru beginning of March.
Notes that are related to the mysteries.
 Cesare Borgia's Letter
Mystery Note. It is on the crate in the hidden room. Related mystery: The Bulls of Blood.
Cesare Borgia's Letter
Mystery Note. It is on the crate in the hidden room. Related mystery: The Bulls of Blood.
Nicoletti's Letter
On a table with a typewriter in the corner of a room on the second floor of the Sistine Chapel. Related mystery: Secret of Secrets.
Photographs that are related to the mysteries.
 Black Cat / Signor Smushki
This cat is on the roof, which can be reached by climbing up the Scaffolding.
Related mystery: A Free Spirit.
Black Cat / Signor Smushki
This cat is on the roof, which can be reached by climbing up the Scaffolding.
Related mystery: A Free Spirit.
Brown Cat
This cat is sitting on the scaffolding.
Related mystery: A Free Spirit.
Orange Cat
The cat is on the roof, which can be reached by climbing up the Drainpipe.
Related mystery: A Free Spirit.
White Cat
This cat sits on a chimney on the roof. You can get here by climbing up the Drainpipe.
Related mystery: A Free Spirit.
Puzzles and riddles that need to be solved to push the game storyline forward, gain access to new places, etc.
 Fountain of Confession
Solution:
Get the Fountain Gate Key, enter storage room, climb up to the scaffolding and get the Dragon Claw.
Climb to the top of the left tower and place the Dragon Claw on the white dragon and rotate it.
Use the lever that comes out to rotate the white dragon statue so that it faces the black dragon located on the right tower.
Get to the right tower and turn the black dragon's claw so that the lever comes out and then use it to turn that dragon so that it faces the white dragon. This will cause the little dragon in the fountain to rotate.
-= continued in full description =-
Fountain of Confession
Solution:
Get the Fountain Gate Key, enter storage room, climb up to the scaffolding and get the Dragon Claw.
Climb to the top of the left tower and place the Dragon Claw on the white dragon and rotate it.
Use the lever that comes out to rotate the white dragon statue so that it faces the black dragon located on the right tower.
Get to the right tower and turn the black dragon's claw so that the lever comes out and then use it to turn that dragon so that it faces the white dragon. This will cause the little dragon in the fountain to rotate.
-= continued in full description =-
Gold Trial
Solution:
Go to the west side, and pull two chains to position two tubes over the hearths.
Use the grappling point on the left side, climb up and jump onto the tube that has a grip. Gina will move it to the east side.
From the tube, use the grappling point on the other side, go through the hole under the ceiling and jump down. There you will find two more chains you can use to move the other two tubes. Position them above the hearths.
Return to the main room and pull the lever located next to the door.
Sacred Wounds
Solution: Pour some wine into the bowl in front of the Sacred Wounds Mural. Five levers will be revealed around different parts of Jesus' body. Then pour some wine into the bowls in front of other five murals to reveal numbers.
Right Foot (Walking on Water) - III
Left Foot (Anointment of Jesus) - IV
Left Hand (Holy Chalice) - II
Right Hand (Body of Christ) - II
Chest (Spear of Longinus) - III
Silver Trial
Solution:
Get the Stone Tablet and place it on the altar in the middle of the room.
Use the eastern grappling point to get to the second Stone Tablet. Take it and give it to Gina through the bars.
Return to the central platform by climbing over the edges of the wall.
Use the western grappling point to get to the other side get the stone tablet from Gina.
Place the stone tablet in the western altar.
Return to the central platform using the grappling point and exit the room.
Various other items that are useful during the adventure.
 Antique Bust
Antique Bust (Necropolis #1)
Antique Bust (Necropolis #2)
Camera
It will allow you to take photos that are both needed for the main storyline of the game as well as many side activities.
Cat Mummy
Dragon Claw
Missing Cat Flyer
Stone Tablet
Stone Tablet
The Stone Fragment
Unknown Language Book
Various types of switches, levers, pressure plates and other items that can be switched, shifted, etc.
 Crusader Shield / Hidden Lever
Golden Dragon Path Lever
Hidden Lever
Pedestal (Fountain)
Pedestal (Necropolis #1)
Pedestal (Necropolis #2)
Pedestal (Necropolis #3)
Pedestal (Necropolis #3)
Silver Dragon Path Lever
Ventura's Bookcase
 Safe
Lock combination: 5873.
Safe
Lock combination: 5873.
Safe
Lock combination: 1891.
Shipment Container
Lock combination: 6380.
Keys you can use to open some locked doors, gates, etc.
 Ancient Vatican Key
To get here and collect this key you need to revisit the Vatican after you reach the Sukhothai and buy the Rebreather. You can get here through the Underwater Passage. Related discovery: The Serpent's Chest.
Description: One of three ancient keys scattered across the globe.
Ancient Vatican Key
To get here and collect this key you need to revisit the Vatican after you reach the Sukhothai and buy the Rebreather. You can get here through the Underwater Passage. Related discovery: The Serpent's Chest.
Description: One of three ancient keys scattered across the globe.
Barracks Key
A key to a backdoor of the Barracks.
Blackshirt Key
Burial Chamber Key
Description: An ancient burial chamber key found in the catacombs underneath the Vatican.
Unlocks: Burial Chamber Gate.
Captain's Key
On the second floor of the building, in the captain's office, on the wall, on a small board with key hooks.
Description: Opens the northern gate of the Angel Courtyard at Castel Sant'Angelo.
Unlocks: Angel Courtyard Gate.
Cellar Key
Description: An old iron key marked with the address "3 v.d. Pellegrino".
Unlocks: Post Office Cellar.
Clerical Key
You will receive it from Antonio when you collect the Crescenzo's Map.
Description: This key allows access to areas only available to Vatican clergy members.
Fountain Gate Key
Description: A key to the storage room next to the Fountain of Confession.
Unlocks: Storage Room.
Jail Cell Key
Description: A key to the jail cell in the Blackshirt barracks.
Unlocks: Jail Cell Locked Door.
Rampart Key
On a small board with key hooks hanging on the wall.
Description: Opens the rampart gate on the southwest bastion of Castel Sant'Angelo.
Unlocks: Rampart Gate.
Various locked or blocked passages. Some of them can be opened with the right key. Some can only be unlocked from a certain side. Others can be unblocked by, for example, using a large hammer or setting them on fire.
 Agency Room Locked Door
Apostolic Palace Door
This door can be opened from the inside during the quest "The Mad Priest".
Borgia Tower Locked Door
Borgia Tower Locked Door
This door can be opened from the inside during the "A Nun in Trouble" fieldwork.
Burnable Door
You can burn them and thus create a passage when you approach them with a torch. You can throw the torch into the room through a hole in the wall and then enter the room through a gap with pouring water.
Burnable Door
Burnable Wall
Clerical Door
Clerical Door
Clerical Door x 2
Doors are located on both floors of the library.
Key required to open it: Clerical Key.
Gold Trial Door
Golden Dragon Path
Guarded Gate
The gate will open as you progress through the storyline, when you reach the post office by an alternative route and talk to Ernesto. Then also the area around the post office will no longer be restricted.
Jail Cell Locked Door
Locked Door
It is in the attic of the chapel. This door can be unlocked from the west side. You will be able to do this once you use the Zipline.
Locked Door
Locked Door
Gina will unlock it for you.
Locked Door
Gina will unlock it after investigating all five clues.
Locked Door
Gina will open this door for you during the "A Nun in Trouble" fieldwork.
Locked Door
Locked Gate
Locked Gate
This gate can be unlocked from the western side. You will be able to do this when you use the Zipline.
Locked Gate
Locked Gate
Locked Gate
This gate can be unlocked from the east side by pulling the lever on the wall.
Locked Gate
Locked Gate
Locked Gate
Locked Gate
Locked Gate
To open the gate, jump into the water at the Diving Spot and swim to the other side of the tunnel and then use the whip to pull the chain.
Locked Gate
Locked Gate
It can be unlocked from the inside after going through the Tower of Nicholas V and the sewers.
Locked Gate
Monastery Gate
Museum Entrance
Unlocks automatically while following Gina during the "A Nun in Trouble" fieldwork.
Post Office Cellar
Key required to open it: Cellar Key.
Scriptorium Door
Secret Entrance
Use the Giant's Symbol to unlock it.
Silver Dragon Path
Silver Trial Door
Sliding Wall
It can be opened from the tunnel on the south side by pulling the lever.
The Bulls of Blood Hidden Door
To open this door turn both paintings upside down so that the brown bulls are on top. Related mystery: The Bulls of Blood.
Underground Boxing Ring
Ventura's Office
On the second floor of the Apostolic Palace. This door can be opened from inside the office.
Places where you can buy various items, such as adventure books or tools.
Other NPC's. Meeting their needs can be a source of additional adventure points.
 Giuseppe
Mailman
Return a missing letter to him. You can find the letter at the post office at the end of the corridor.
Reward: 10 Adventure Points.
Additional ammunition for Indy's revolver. One box contains two bullets.
With a repair kit you can repair broken weapons in your satchel.
Using bandages restores your health.
Places where you can find local currency.
Eating bread, such as cornetti, donuts, crackers and others boosts your total health temporarily.
Eating fruit such as apples, oranges, lemons, figs and others gives you an additional stamina boost.
Transitions between different sections of the map.
 Fountain Underground Entrance
Lower Necropolis Starting Point
This is where you will end up after destroying the Tomb of a Giant Warrior.
Museum Entrance
To Airship (Gizeh)
To Castel Sant'Angelo
To Necropolis
To Necropolis
To the Tower of Nicholas V
To the Tower of Nicholas V (Scaffolding)
To the Underworld
To the Vatican
Antonio is waiting for you here.
To the Vatican (Apostolic Palace)
To the Vatican (Main Entrance)
To the Vatican (Museum Exit)
To the Vatican (Scaffolding)
To the Vatican City
Exit from the library to the city area. The door is located at the bottom of the staircase.
To Underworld
Tower of Nicholas V Main Entrance
Underworld Entrance
The door can be unlocked during the "The Stolen Cat Mummy" quest. Pour the wine that Antonio gave you into the bowl at the front of the altar and turn the large disk on the door until the angel is on top.
Window
The window through which you get inside the museum during the "A Nun in Trouble" fieldwork. You cannot exit this way.