Welcome to guides4gamers.com

Rome, Indiana Jones and the Great Circle Map

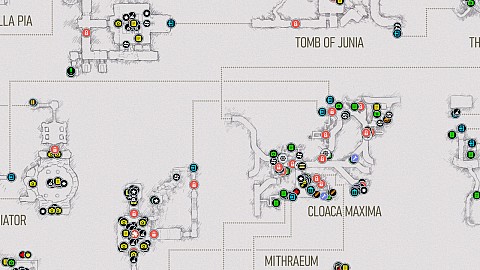
An interactive map presenting all locations available in the DLC The Order of Giants for Indiana Jones and the Great Circle. These areas become accessible after you receive the quest "A Mystery Begins", which is unlocked once the zeppelin arrives at the Vatican and you meet Gina Lombardi.

Rome

Rome - Map Markers Summary

Signposts x4, Adventure Quest x1, Chapter Notes x32, Chapter Photos x23, Discoveries x2, Field Notes x28, Field Photos x17, Adventure Books x3, Lost Artifacts x7, Mystery Quests x3, Mystery Notes x6, Puzzles x5, Key Items & Objects x36, Switches x37, Locked Containers x4, Keys x3, Locked Passages x37, Ammunition Boxes x8, Repair Kits x6, Bandages x20, Bread x27, Fruit x16, Map Transitions x26, Transitions x41, Boat Docks x5

Legend / Points of interest

The following legend of Rome interactive game map defines the points of interest / markers displayed on the map. Each marker corresponds to a specific element to facilitate efficient navigation and interaction with the map.

Signposts

Signposts allow you to fast travel between them. In order to be able to select a specific signpost as a destination, you must first unlock it by reaching it on foot.

Icon of Signpost Cloaca Maxima You will only be able to use it after reaching the Mithraeum signpost. Allows you to fast travel to: Mithraeum The Tiber River Via Giulia
Icon of Signpost Mithraeum Once you get here, you will be able to fast travels between signposts in Rome. Allows you to fast travel to: The Tiber River Via Giulia Cloaca Maxima
Icon of Signpost The Tiber River You will only be able to use it after reaching the Mithraeum signpost. Allows you to fast travel to: Mithraeum Via Giulia Cloaca Maxima
Icon of Signpost Via Giulia You will only be able to use it after reaching the Mithraeum signpost. Allows you to fast travel to: Mithraeum The Tiber River Cloaca Maxima

Adventure Quests

Adventures are the main story quests where your objective is to solve the mystery of the Great Circle.

Icon of Adventure The Order of Giants Objectives: Find the Secret Chamber - According to Father Ricci, Pope Paul IV built a secret chamber beneath the Casina, or Villa Pia. He thinks the helmet of the giant "Nameless Crusader" is in that chamber.

Chapter Notes

Chapter Notes, Gizeh. Chapter notes are documents or photos related to the adventure you must complete to uncover the mystery of the Great Circle. They contain all sorts of related interesting info. Collecting each of them is not mandatory but is worthwhile as it provides additional adventure points.

Icon of Chapter Note Battle of La Forbie Note.
Icon of Chapter Note Blackshirt Note Note. In the room on the third floor.
Icon of Chapter Note Blackshirt Orders Note.
Icon of Chapter Note Blackshirt Search Order Note.
Icon of Chapter Note Boat Request
Icon of Chapter Note Building Instructions
Icon of Chapter Note Burned Paper Note.
Icon of Chapter Note Code to Safe
Icon of Chapter Note Costume Shop Receipt Note.
Icon of Chapter Note Crusader's Diary
Icon of Chapter Note Dead Blackshirt's Letter Note.
Icon of Chapter Note DiMaggio's Note
Icon of Chapter Note Dr. Barbieri's Research Note.
Icon of Chapter Note Giants Arriving in Rome Note.
Icon of Chapter Note Gladiator Shrine Solution
Icon of Chapter Note Magician Card
Icon of Chapter Note Mithras Born from a Rock
Icon of Chapter Note Nephilim Orders In the Crusader Helmet.
Icon of Chapter Note Nero's Favorite Note.
Icon of Chapter Note Note about Relief
Icon of Chapter Note Notes on Mural
Icon of Chapter Note On the Tauroctony
Icon of Chapter Note Protection Instructions
Icon of Chapter Note Pump Room Request Note.
Icon of Chapter Note Safe Invoice In Ricci's basement after coming back with all cylinder pieces.
Icon of Chapter Note Skeleton's Note Note.
Icon of Chapter Note The Monster's Gate Solution
Icon of Chapter Note The Tomb of Gibborim Solution
Icon of Chapter Note The Water Serpent Solution
Icon of Chapter Note Theodorus' Confession
Icon of Chapter Note Ventura's Letter
Icon of Chapter Note Water Serpent Blueprints Note.

Chapter Photos

Chapter Notes, Gizeh. Chapter notes are documents or photos related to the adventure you must complete to uncover the mystery of the Great Circle. They contain all sorts of related interesting info. Collecting each of them is not mandatory but is worthwhile as it provides additional adventure points.

Icon of Chapter Note Bear Gladiator
Icon of Chapter Note Boar Gladiator
Icon of Chapter Note City of Antioch
Icon of Chapter Note Crusader Armor
Icon of Chapter Note Crusader Cross Mural
Icon of Chapter Note Emperor Nero
Icon of Chapter Note Fountain Statue You can take a photo while standing on the bridge.
Icon of Chapter Note Hands of Faith
Icon of Chapter Note Headless Gladiator
Icon of Chapter Note Junia Statue
Icon of Chapter Note Lion Gladiator
Icon of Chapter Note Mediterranean Map Mural
Icon of Chapter Note Nero Bust
Icon of Chapter Note Peculiar Wall
Icon of Chapter Note Ring of Sigils
Icon of Chapter Note Shield Mural
Icon of Chapter Note Sword Mural
Icon of Chapter Note The Holy Expeditions
Icon of Chapter Note The Monster's Gate
Icon of Chapter Note The Nameless Crusader
Icon of Chapter Note Tiger Gladiator
Icon of Chapter Note Trinity Mural
Icon of Chapter Note Water Serpent Fountain

Discoveries

Discoveries, Gizeh. Discoveries are activities that span over greater sections, some of them throughout the entire game. To complete one of these you will have to explore the world to find something that relates to the discovery.

Icon of Discovery A World of Knowledge How to start: Find any of the adventure books located in the Rome area. Objective: Learn new abilities by collecting Adventure Books and taking a moment to study them. Hard Crust Vitamins Rome Guide
Icon of Discovery Mithraic Artifacts How to start: Find any of the Mithraic artifacts. Objective: Search secret places and collect all the Mithraic artifacts (x7). Heliodromus Artifact Leo Artifact Perses Artifact Miles Artifact Pater Artifact Nymphus Artifact Corax Artifact

Field Notes

Field Notes, Gizeh. Interesting notes and photographs gathered while out on the field. 58 such notes and photographs can be found in The Vatican.

Icon of Field Note Book Presentation Leaflet On a table with books standing on the street.
Icon of Field Note Claudius' Diary It lies on the ground in the corner of the side room.
Icon of Field Note Colosseum Tours On a stone bench standing in the square by a round flower bed.
Icon of Field Note Cult of the Eternal Serpent Comic Book. On the floor, between the corpses of two soldiers.
Icon of Field Note Death Card On a church pew in a side room of the villa.
Icon of Field Note Digger's Letter On the barrel standing in the corner against the wall.
Icon of Field Note Disappearances Article On the crates, in the side tunnel.
Icon of Field Note Fascist Propaganda On a wooden crate located on the pier.
Icon of Field Note Food for Beasts In one of the cells, on the ground.
Icon of Field Note Garum Recipe A note lying on a rack with wooden crates.
Icon of Field Note Gladiator Earnings It lies on the floor, next to the signpost.
Icon of Field Note Gladiator Medical Status On the ground, in a room on the upper level.
Icon of Field Note Gladiator Puls Recipe On a stone slab, in a room on the upper level.
Icon of Field Note Herbal Cure On the floor, behind the statue.
Icon of Field Note Leonardo's Letter On the table inside the hut.
Icon of Field Note Love Letter Draft You can get here through the Uderwater Passage. You need a Rebreather to get here.
Icon of Field Note Message in a Bottle To get it, smash the bottle you can find here.
Icon of Field Note Miles' Letter In a hidden, dark corridor behind the Burnable Wall.
Icon of Field Note Mithraic Degrees A note lying on the table.
Icon of Field Note Mithras Guard Rotation It sits on a stone tomb in a side room.
Icon of Field Note Nero's Letter In Ricci's Safe. You will be able to look inside once you bring him the three fragments of the cylinder.
Icon of Field Note October Feast In a crate of bottles standing against the wall.
Icon of Field Note Ode to Nero On the ground, next to the skeleton.
Icon of Field Note Oenogarum Recipe Note. In the room on the second floor you can get to by jumping from the scaffolding onto its balcony.
Icon of Field Note Sewer Tours On top of the barrel. You can get here via a passageway, the entrance to which is located on the upper level, on the west side.
Icon of Field Note Titans of the Arena Comic Book. On a bench, on a wooden platform under the bridge.
Icon of Field Note Trattoria Ad A note pinned to the wall of the building.
Icon of Field Note Vadstena Postcard On one of the round tables standing in the square.

Field Photos

Field Notes, Gizeh. Interesting notes and photographs gathered while out on the field. 58 such notes and photographs can be found in The Vatican.

Icon of Field Note A Tree
Icon of Field Note Ancient Flame Graffiti
Icon of Field Note Bull Graffiti
Icon of Field Note Bull Painting
Icon of Field Note Castel Sant'Angelo
Icon of Field Note Dangerous Hole
Icon of Field Note Father Ricci's Library
Icon of Field Note Intriguing Architecture
Icon of Field Note Mithras Born from a Rock
Icon of Field Note Mithras Slaying the Bull
Icon of Field Note Mystery Graffiti
Icon of Field Note Palazzo Ricci
Icon of Field Note Palazzo Ricci Back Door You can take a photo from one of the balconies of the building.
Icon of Field Note Palazzo Ricci Courtyard
Icon of Field Note Pio the Parrot
Icon of Field Note Sewer Cat Use the Grappling Point to get to te alcove where the cat is.
Icon of Field Note Sewer Entrance

Adventure Books

Adventure Books allow you to learn new Abilities to tackle harder challenges. Adventure Books are divided into a few categories depending on which kind of Ability you can learn from it: Survival, Fitness, Packing, Brawling, and Combat. You can also collect Map Guides which are listed under the Exploration category. These will unlock important information about the locations that you visit and place markers on maps.

Icon of Adventure Book Hard Crust In the Collegial Hall Safe you need to open to complete the mystery "A Collegial Mystery". Category: Combat Description: Temporarily inflict more damage while charged by hearty, whole-grain bread. Adventure Points To Unlock: 1000
Icon of Adventure Book Rome Guide It lies on metal rails, next to a hole in the wall in Cloaca Maxima that you will have to pass through. Category: Exploration Description: An informative guidebook to things of interest that can be discovered in Rome.
Icon of Adventure Book Vitamins Category: Combat Description: Boosted by fruity vitamins incoming damage is temporarily reduced. Adventure Points To Unlock: 1000

Lost Artifacts

Finding all the lost artifacts is the objective of the "Lost Artifacts of Europe" discovery.

Icon of Lost Artifact Corax Artifact Related discovery: Mithraic Artifacts. Description: A statuette of a raven, which is the symbol of Corax, the first Mithraic grade of initiation.
Icon of Lost Artifact Heliodromus Artifact Related discovery: Mithraic Artifacts. Description: A radiating crown, the symbol of Heliodromus, the sixth Mithraic grade of initiation.
Icon of Lost Artifact Leo Artifact Related discovery: Mithraic Artifacts. Description: A Batillum, an ancient Roman fire shovel. This symbolizes Leo, the fourth Mithraic grade of initiation.
Icon of Lost Artifact Miles Artifact Related discovery: Mithraic Artifacts. Description: A Coolus bronze helmet, the symbol of Miles, the third Mithraic grade of initiation.
Icon of Lost Artifact Nymphus Artifact Related discovery: Mithraic Artifacts.It's a reward form completing the mystery "A Bull in the Sky". Description: A small lamp. It's the symbol of Nymphus, the second Mithraic grade of initiation.
Icon of Lost Artifact Pater Artifact Related discovery: Mithraic Artifacts. Take the torch from the nearby jug, light it, and then place it in the statue's hand. Description: A ruby ring, the symbol of Pater, the seventh Mithraic grade of initiation.
Icon of Lost Artifact Perses Artifact Related discovery: Mithraic Artifacts. It's a reward form completing the mystery "A Tale of Wine Making". Description: A sickle, the symbol of Perses, the fifth Mithraic grade of initiation.

Mystery Quests

Mysteries, Gizeh. Mysteries are shorter and sometimes quite challenging activities, and will give you adventure points when they have been completed, in addition to a variety of different smaller rewards.

Icon of Mystery A Bull in the Sky How to start: Put your hand in the lion's mouth and turn the handle inside. Objective: A room hidden behind the relief with the gaping mouth. There is a series of pillars with stars on them, and weights on the floor. Solution: Place 5 weights on the pedestals. The weights have different weights, which can be determined by the number of dots on them. The numbers in the screenshot below indicate which weight should go on which pedestal. Reward: 100 Adventure Points + Nymphus Artifact.
Icon of Mystery A Collegial Mystery How to start: Read the Federico's Letter or Alessandro's Letter Objective: Find the Secret Document - A priest is coercing a colleague to steal a confidential document. Might be worth looking into. Solution: According to the notes, clues to the safe combination can be found on the paintings on the villa's upper floor. The combination is: 1-2-2-2, as there are 12 apostles, 2 cherubs, and 2 beasts in the paintings. Use it to open the Collegial Hall Safe and collect two notes: Alessandro's Note and Discretionary Assessment. Summary: The safe in the collegial hall contained the confidential document that the priest Federico asked Alessandro to get for him. Reward: 100 Adventure Points + Hard Crust adventure book.
Icon of Mystery A Tale of Wine Making How to start: Collect one of the tablets: Grow, Ferment, Process, Harvest, or Plant. Objective: A curious mural with several missing pieces. Maybe try to find all the pieces and put them in the right spot? Solution: Place the tablets on the mural as shown in the screenshot below. Summary: The mural told the story of how to make wine. Solving it revealed a peculiar artifact. Reward: 100 Adventure Points + Perses Artifact.

Mystery Notes

Notes that are related to the mysteries.

Icon of Mystery Note Alessandro's Letter Related mystery: A Collegial Mystery.
Icon of Mystery Note Alessandro's Note Related mystery: A Collegial Mystery.
Icon of Mystery Note Discretionary Assessment Related mystery: A Collegial Mystery.
Icon of Mystery Note Federico's Letter Related mystery: A Collegial Mystery.
Icon of Mystery Note Mural Note Related mystery: A Tale of Wine Making.
Icon of Mystery Note On Astrological Symbolism Related mystery: A Bull in the Sky.

Puzzles

Puzzles and riddles that need to be solved to push the game storyline forward, gain access to new places, etc.

Icon of Puzzle Gladiator Shrine Pick up the Giant Blade and insert it into the Statue's Hand. Whip‑yank the Raised Sword to release the rolling flaming ball. Your goal is to guide the ball through four gladiator statues in a specific order. Murals around show the correct order: Lion - Boar - Tiger - Bear. You have three track pieces (two curved, one straight). You must place them on intersections so the ball rolls along a path visiting each statue in the correct order without falling. Since there are only three pieces and you will pass through some intersections multiple times, you have to rearrange them while the ball is rolling. Once the ball hits all four statues in order, a statue of Emperor Nero will lower its arm and you can pick up the Cylinder Piece (Shrine of the Gladiator) from its hand.
Icon of Puzzle Monster's Gate There are five tiles around on the ground need the gate. Pick them up and place them back into their correct slots. Fitting them in completes the mural and reveals a hidden Wooden Cog. Pick up this cog and install it on the podium in front of the mural. Look at the Roman numeral next to each animal on the mural: Snake = II, Horse = III, Raven = V, Scorpion = VI. For each animal repeat steps below: Place the Cylinder Roll into the Cylinder Roll Slot (Console) and rotate it so that the number of one of the animals is at the top. Circles on mural will also rotate. Note the symbol that appears on the mural on the inner circle next to animal symbol. Around the room are four stone pillars, each with one of the four animals carved near the top. At the base of each pillar is a rotatable section with several symbols on its faces. For each animal pillar, rotate the cube until the symbol you found on the mural for that animal is directly underneath the carving. Once all four pillars have the correct symbol beneath their animal, go back to the mural and insert the Cylinder Roll into the Cylinder Roll Slot (Mural) and turn it.
Icon of Puzzle Ricci's Library Bookshelf Pull the books in the following order: Circle - Crown - Triangle. A tip regarding the order can be found on the Burned Paper.
Icon of Puzzle The Water Serpent You must use the Serpent Wrench to redirect the water between the containers in order to lift all four platforms and then fill all the containers with water. To lift a platform, redirect the water to the snake's mouth on the platform. In the case of one of the platforms, you also need to remove the blockage from the mechanism. How to redirect the water in all five cases is shown in the image and video below.
Icon of Puzzle Tomb of Gibborim This puzzle is a complex challenge requiring you to use four scepters (Cross Scepter, Shield Scepter, Sword Scepter, and Trinity Scepter) to rotate floor discs based on clues from murals. Below you will find complete step-by-step instructions on how to complete this puzzle.

Key Items & Objects

Various other items that are useful during the adventure.

Icon of Key Item Cross Scepter Related puzzle: Tomb of Gibborim.
Icon of Key Item Crusader Figurine In a secret compartment that opens when you press the Holy Expeditions badge on the mural. Related adventure: The Order of Giants.
Icon of Key Item Crusader Helmet Related adventure: The Order of Giants. Inside you will find the Nephilim Orders and the Crusader Helmet Key.
Icon of Key Item Cylinder Piece (Shrine of the Gladiator) Another of the three cylinder pieces you need to collect. It's a reward for completing the Gladiator Shrine puzzle.
Icon of Key Item Cylinder Piece (Tomb of Gibborim) Another of the three cylinder pieces you need to collect. It's a reward for completing Tomb of Gibborim puzzle.
Icon of Key Item Cylinder Piece (Tomb of Junia) The first of the cylinder pieces you need to collect.
Icon of Key Item Cylinder Roll Related puzzle: Monster's Gate.
Icon of Other Dropped Letter Pick up the letter lying on the floor and put it in the mailbox so that it doesn't fall out, and you will receive 10 adventure points.
Icon of Other Dynamite x2
Icon of Other Dynamite x3 In the Storage Shed Safe.
Icon of Key Item Ferment Related mystery: A Tale of Wine Making.
Icon of Key Item Giant Blade Related puzzle: Gladiator Shrine. Place it in the Statue's Hand.
Icon of Other Golden Apple
Icon of Key Item Grow Related mystery: A Tale of Wine Making.
Icon of Key Item Harvest Related mystery: A Tale of Wine Making.
Icon of Key Item Large Hammer You can use it to break down the Weak Wall.
Icon of Key Item Large Mace You can use it to break down the Weak Wall blocking an access to the Corax Artifact.
Icon of Other Pet the Cat Achievement. In the room on the third floor.
Icon of Key Item Pickaxe You can use it to break down the Weak Wall blocking an access to the Miles Artifact.
Icon of Key Item Plant Related mystery: A Tale of Wine Making.
Icon of Key Item Pope Figurine In a secret compartment that opens when you press the Holy Expeditions badge on the mural. Related adventure: The Order of Giants.
Icon of Key Item Process Related mystery: A Tale of Wine Making.
Icon of Key Item Safe Combination Correct combination (5-7-4-2) for opening the Cloaca Maxima Safe.
Icon of Key Item Serpent Wrench Related puzzle: The Water Serpent.
Icon of Key Item Serpent Wrench This wrench got stuck in the mechanism that lifts one of the platforms. At some point in solving The Water Serpent puzzle, you will have to remove it with your whip.
Icon of Key Item Shield Scepter Related puzzle: Tomb of Gibborim.
Icon of Key Item Sword Scepter Related puzzle: Tomb of Gibborim.
Icon of Key Item The Sword of Gibborim Related puzzle: Tomb of Gibborim.
Icon of Key Item Torches A jug with torches. Use one of them to get the Pater Artifact.
Icon of Key Item Trinity Scepter Related puzzle: Tomb of Gibborim.
Icon of Key Item Weight (1)
Icon of Key Item Weight (3)
Icon of Key Item Weight x3 (2) (2) (1)
Icon of Key Item Wooden Cog Related puzzle: Monster's Gate. To open the cache containing this cog, you must collect the panels lying on the ground and place them in the appropriate slots on the mural. You must match the fragments to complete the images of the animals.

Switches

Various types of switches, levers, pressure plates and other items that can be switched, shifted, etc.

Icon of Key Item Aethopolis Slot Use the Cross Scepter and turn it twice (180 degrees) in any direction. Related puzzle: Tomb of Gibborim.
Icon of Key Item Al-Mansur Castra Slot Use the Sword Scepter and turn it once to the right. Related puzzle: Tomb of Gibborim.
Icon of Key Item Antioch Slot Place the Crusader Figurine here. Related adventure: The Order of Giants.
Icon of Key Item Apple Symbol Handle (3) Related puzzle: Tomb of Gibborim.
Icon of Key Item Chain Pull this chain several times to bring the crane with the Grappling Point toward you.
Icon of Key Item Chain Pull it several times to move the crane arm with the Grappling Point on it. When you release the chain, the crane arm will slowly begin to return to its previous position, so hurry and use the grappling point before it moves too far away.
Icon of Key Item Chain Use it several times to bring the Grappling Point closer to you.
Icon of Key Item Cross Slot Related puzzle: Tomb of Gibborim.
Icon of Key Item Custodis Fastigium Slot Use the Trinity Scepter and turn it once to the right. Related puzzle: Tomb of Gibborim.
Icon of Key Item Cylinder Roll Slot (Console) Related puzzle: Monster's Gate. To use it, you must first install the Wooden Cog. Then use the Cylinder Roll to rotate it, allowing you to get clues about the correct symbols.
Icon of Key Item Cylinder Roll Slot (Mural) Once you have properly aligned the symbols on the columns, use the Cylinder Roll here and turn it to complete the puzzle and open the passage.
Icon of Key Item Halygast Slot Use the Cross Scepter and turn it twice (180 degrees) in any direction. Related puzzle: Tomb of Gibborim.
Icon of Key Item Hori Castrum Slot Use the Shield Scepter and turn it twice (180 degrees) in any direction. Related puzzle: Tomb of Gibborim.
Icon of Key Item Horse Pillar Related puzzle: Monster's Gate. You need to set it up as shown in the screenshot below.
Icon of Key Item Keys Symbol Handle (1) Related puzzle: Tomb of Gibborim.
Icon of Key Item Lever Use it to lower the cage so you can continue along its roof.
Icon of Key Item Lever (Shield Scepter Trial) Related puzzle: Tomb of Gibborim.
Icon of Key Item Lever (Trinity Scepter Trial) Related puzzle: Tomb of Gibborim.
Icon of Key Item Malum Slot Use the Trinity Scepter and turn it once to the left. Related puzzle: Tomb of Gibborim.
Icon of Key Item Nakhala Pagus Slot Use the Shield Scepter and turn it twice (180 degrees) in any direction. Related puzzle: Tomb of Gibborim.
Icon of Key Item Pugna Slot Use the Sword Scepter and turn it twice (180 degrees) in any direction. Related puzzle: Tomb of Gibborim.
Icon of Key Item Raised Sword Related puzzle: Gladiator Shrine. You will be able to use it when you place the Giant Blade in the Statue's Hand. Pull it using the whip to release the rolling ball.
Icon of Key Item Raven Pillar Related puzzle: Monster's Gate. You need to set it up as shown in the screenshot below.
Icon of Key Item Rome Slot Place the Pope Figurine here. Related adventure: The Order of Giants.
Icon of Key Item Rudera Slot Use the Sword Scepter and turn it once to the right. Related puzzle: Tomb of Gibborim.
Icon of Key Item Sancti Luciani Ecclesia Slot Use the Trinity Scepter and turn it twice (180 degrees) in any direction. Related puzzle: Tomb of Gibborim.
Icon of Key Item Scorpion Pillar Related puzzle: Monster's Gate. You need to set it up as shown in the screenshot below.
Icon of Key Item Shield Handle #1 Related puzzle: Tomb of Gibborim.
Icon of Key Item Shield Handle #2 Related puzzle: Tomb of Gibborim.
Icon of Key Item Shield Handle #3 Related puzzle: Tomb of Gibborim.
Icon of Key Item Shield Slot Related puzzle: Tomb of Gibborim.
Icon of Key Item Shield Symbol Handle (2) Related puzzle: Tomb of Gibborim.
Icon of Key Item Snake Pillar Related puzzle: Monster's Gate. You need to set it up as shown in the screenshot below.
Icon of Key Item Snake Symbol Handle (4) Related puzzle: Tomb of Gibborim.
Icon of Key Item Statue's Hand Related puzzle: Gladiator Shrine. Place the Giant Blade here.
Icon of Key Item Sword Slot Related puzzle: Tomb of Gibborim.
Icon of Key Item Trinity Slot Related puzzle: Tomb of Gibborim.

Locked Containers

Icon of Key Item Cloaca Maxima Safe Safe combination: 5-7-4-2. The correct combination is on one of the boxes in the side tunnel. Inside you will find the Leo Artifact.
Icon of Key Item Collegial Hall Safe Safe combination: 1-2-2-2. Related mystery: A Collegial Mystery.
Icon of Key Item Ricci's Safe Safe combination: 4-7-6-8. A hint about the combination can be found in note "Code to Safe". Related adventure: The Order of Giants.
Icon of Key Item Storage Shed Safe Safe combination: 1-2-3-4. You can find this combination in DiMaggio's Note.

Keys

Keys you can use to open some locked doors, gates, etc.

Icon of Key Crusader Helmet Key
Icon of Key Mithraeum Key
Icon of Key Ricci's Basement Key

Locked Passages

Various locked or blocked passages. Some of them can be opened with the right key. Some can only be unlocked from a certain side. Others can be unblocked by, for example, using a large hammer or setting them on fire.

Icon of Locked Passage Burnable Wall You can come back here once you have obtained the Lighter and set fire to the barrier.
Icon of Locked Passage Clerical Door Required key: Clerical Key.
Icon of Locked Passage Grating Use the whip to yank the gating open and make a passage.
Icon of Locked Passage Hidden Passage It can be unlocked from the east side.
Icon of Locked Passage Locked Door The gate will be open when you are leaving the tomb.
Icon of Locked Passage Locked Door It can be unlocked from the south side.
Icon of Locked Passage Locked Door It can be unlocked from the east side.
Icon of Locked Passage Locked Door It can be unlocked from the north side.
Icon of Locked Passage Locked Gate Required key: Blackshirt Key.
Icon of Locked Passage Locked Gate You will unlock this gate on your way to get the Cylinder Piece (Tomb of Junia).
Icon of Locked Passage Locked Gate It can be unlocked from the east side.
Icon of Locked Passage Locked Gate It can be unlocked from the south side.
Icon of Locked Passage Locked Gate It can be unlocked from the west side.
Icon of Locked Passage Locked Gate The gate will unlock when you are leaving the undergrounds of the shrine.
Icon of Locked Passage Locked Gate It can be unlocked from the north side.
Icon of Locked Passage Locked Gate You can open this gate by pulling out the pin located on its north side.
Icon of Locked Passage Locked Gate It can be unlocked from the north side.
Icon of Locked Passage Locked Gate This gate will open once you collect the Cylinder Piece (Shrine of the Gladiator).
Icon of Locked Passage Locked Gate You can open this gate by pulling out the pin located on its north side.
Icon of Locked Passage Locked Gate You can open this gate by pulling out the pin located on its east side.
Icon of Locked Passage Locked Gate It can be unlocked from the south side. You can get here via a passageway, the entrance to which is located on the upper level, on the west side.
Icon of Locked Passage Locked Gate It can be unlocked from the east side.
Icon of Locked Passage Locked Gate The gate will unlock when you are leaving the shrine.
Icon of Locked Passage Locked Gate Required key: Mithraeum Key.
Icon of Locked Passage Locked Gate (Shield Scepter Trial) Related puzzle: Tomb of Gibborim.
Icon of Locked Passage Locked Gate (Tomb of Gibborim Exit) It will open when you solve the Tomb of Gibborim puzzle.
Icon of Locked Passage Locked Gate (Trinity Scepter Trial)
Icon of Locked Passage Ricci's Basement Door The doors will be closed at a later stage of the game. Required key: Ricci's Basement Key.
Icon of Locked Passage Secret Passage There is a small keyhole in the wall. You need to use the Crusader Helmet Key here.
Icon of Locked Passage Uderwater Passage To unlock this passage and swim further, you will need the Rebreather.
Icon of Locked Passage Weak Wall Use the Pickaxe to destroy it.
Icon of Locked Passage Weak Wall To destroy it, you can use the Large Hammer lying nearby.
Icon of Locked Passage Weak Wall To destroy it, you can use the Large Hammer.
Icon of Locked Passage Weak Wall To destroy it, you can use the Large Mace.

Ammunition Boxes

Additional ammunition for Indy's revolver. One box contains two bullets.

Repair Kits

With a repair kit you can repair broken weapons in your satchel.

Bandages

Using bandages restores your health.

Bread

Eating bread, such as cornetti, donuts, crackers and others boosts your total health temporarily.

Fruit

Eating fruit such as apples, oranges, lemons, figs and others gives you an additional stamina boost.

Map Transitions

Transitions between different sections of the map.

Icon of Transition Cloaca Maxima
Icon of Transition Cloaca Maxima The passage is behind the bookshelf. It will take you down to the Ricci's basement in Cloaca Maxima. Required key: Clerical Key.
Icon of Transition Colosseum Behind this door, the final battle of The Order of Giant DLC awaits you.
Icon of Transition Hypogeum
Icon of Transition Hypogeum (Lower Level)
Icon of Transition Hypogeum (Upper Level)
Icon of Transition Lower Mithraeum
Icon of Transition Lower Mithraeum You cannot go back this way, you can only move down.
Icon of Transition Mithraeum The gate will be opened by one of the cultists at a certain stage of the game.
Icon of Transition Secret Chamber Entrance To open this passage, you must take two figurines: Crusader Figurine and Pope Figurine, and place them in slots Antioch Slot and Rome Slot, respectively.
Icon of Transition Shrine of the Gladiator
Icon of Transition Shrine of the Gladiator (Lower Level) You can only go down using the rope, it's not possible to get back up this way.
Icon of Transition The River Tiber
Icon of Transition The Vatican You start here, it's also a way back to the Vatican.
Icon of Transition The Water Serpent Gate The gate will open once The Water Serpent has been solved.
Icon of Transition Tomb of Gibborim
Icon of Transition Tomb of Junia
Icon of Transition Via Giulia
Icon of Transition Via Giulia Sewer manhole. You can only get through here once, during the main storyline of the game.