All sorts of other items that will be helpful or even necessary to us while playing.
Key Items
Locations on Marshall College
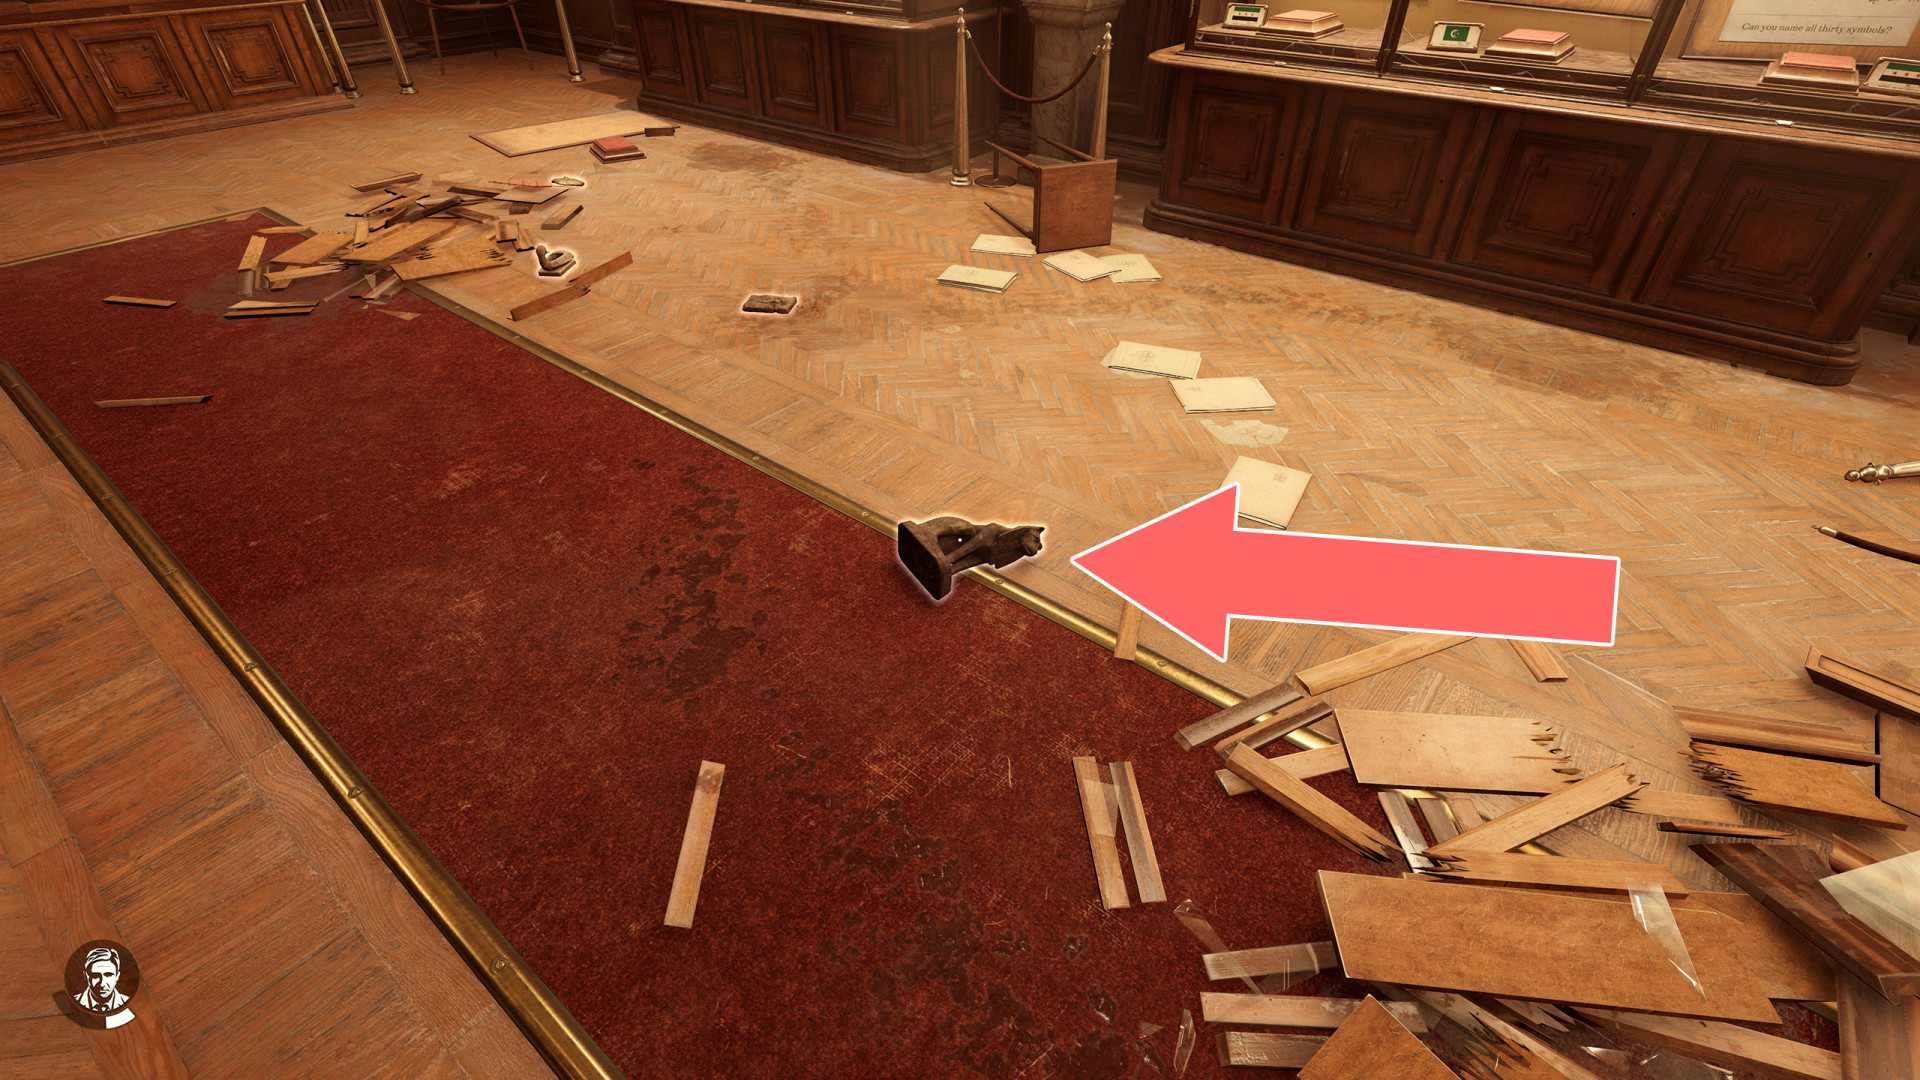
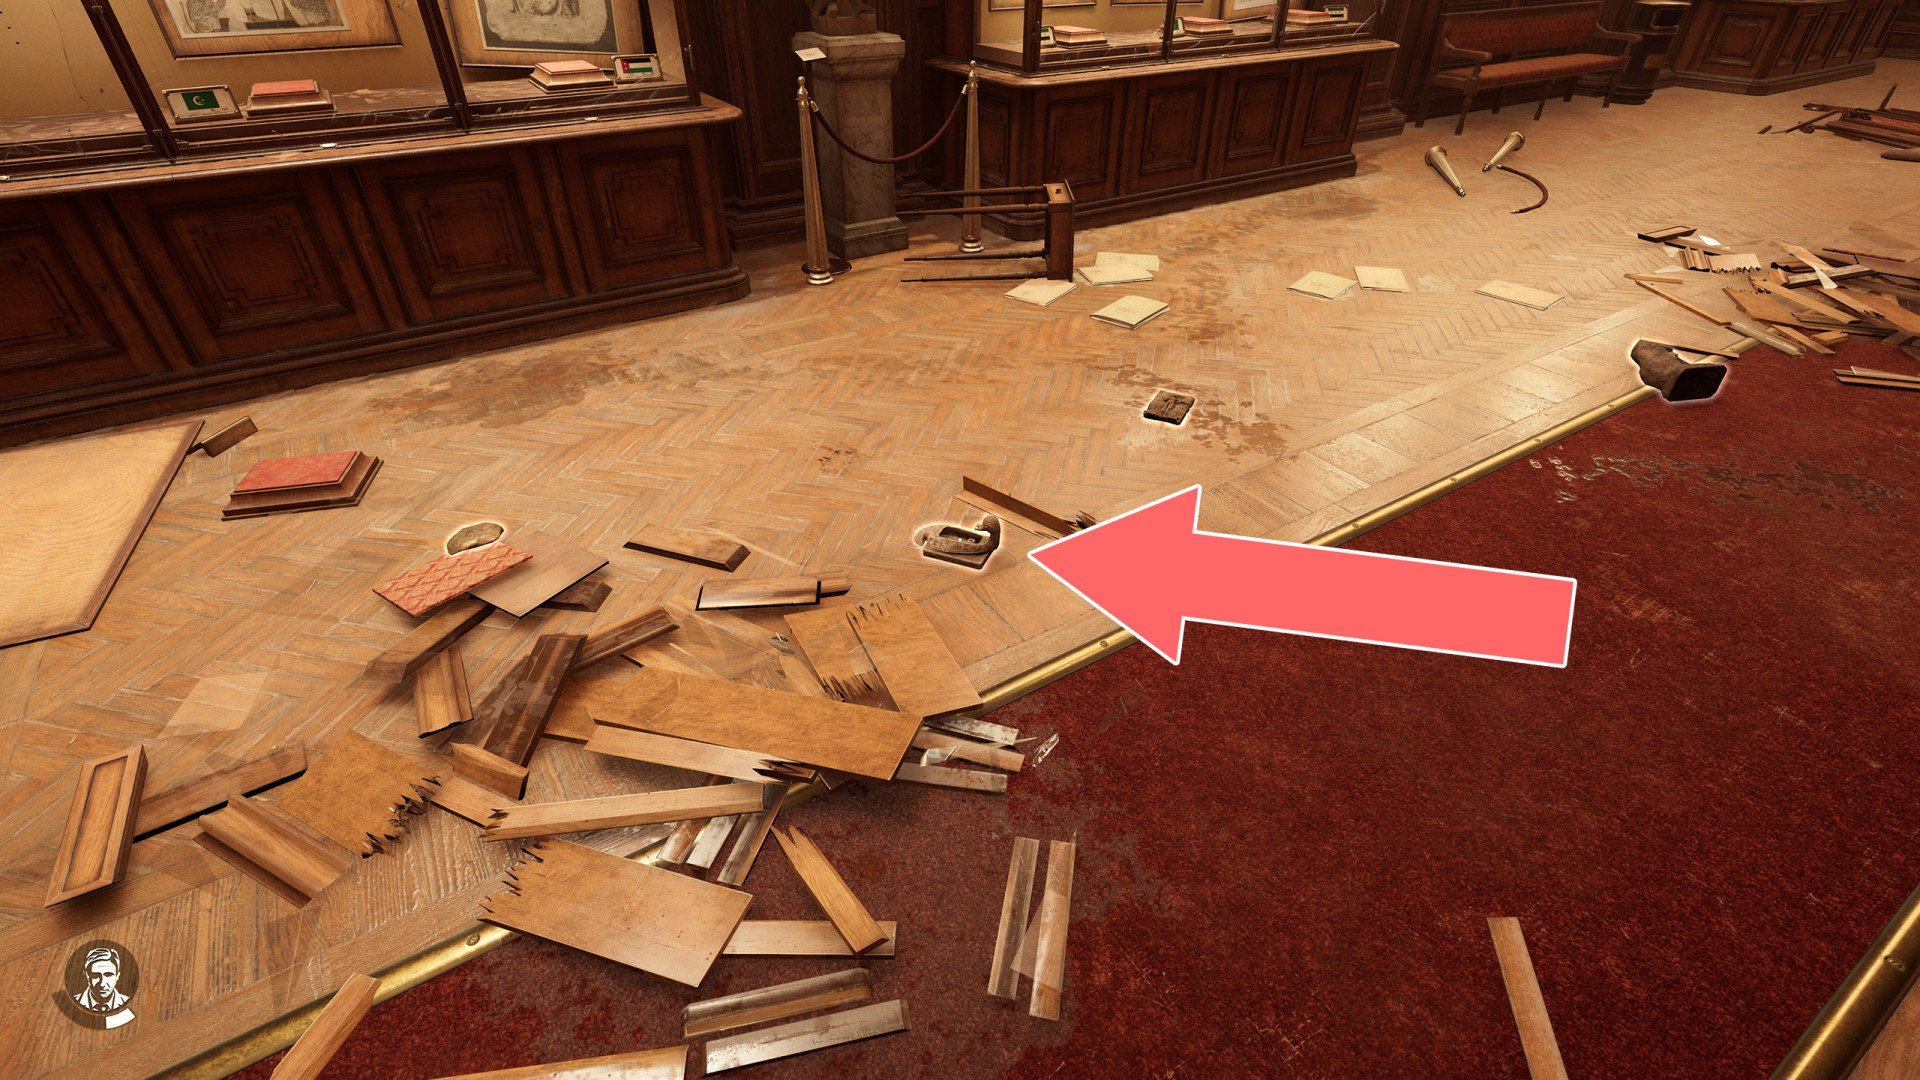
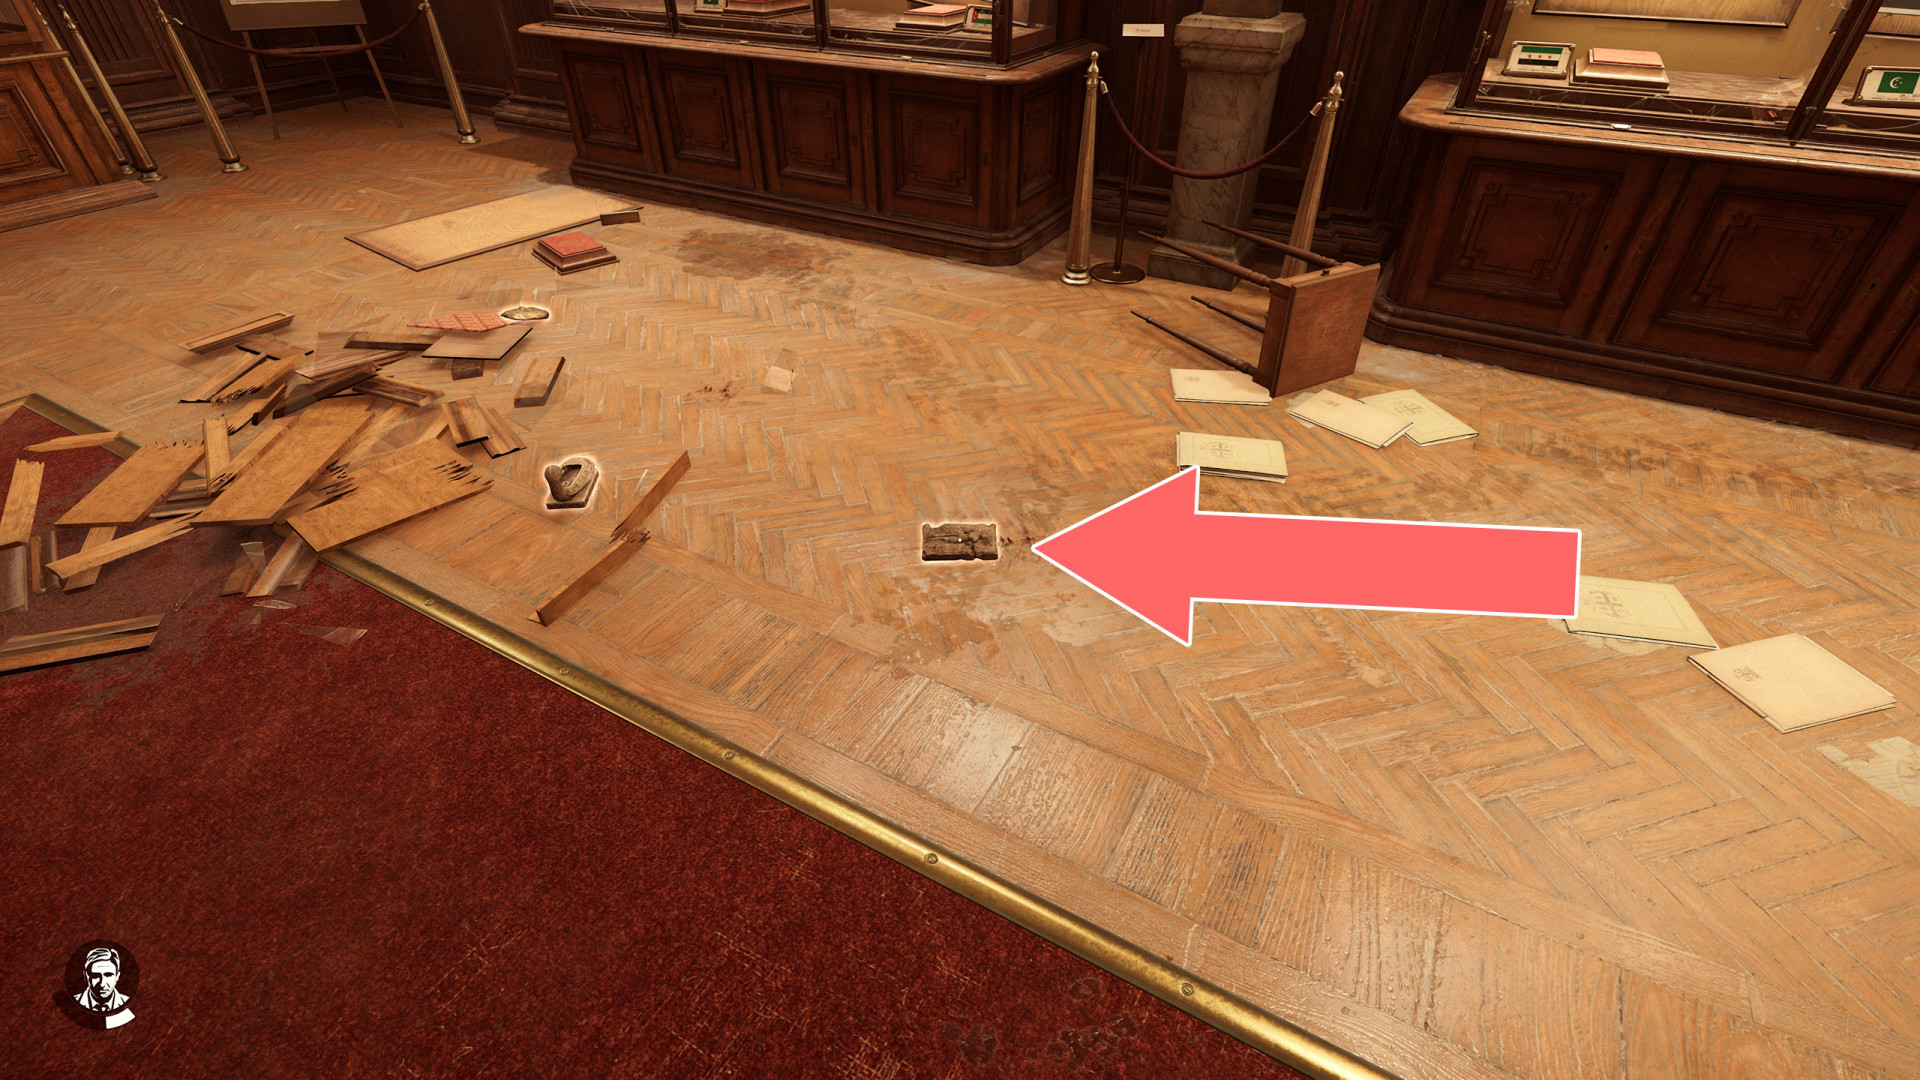
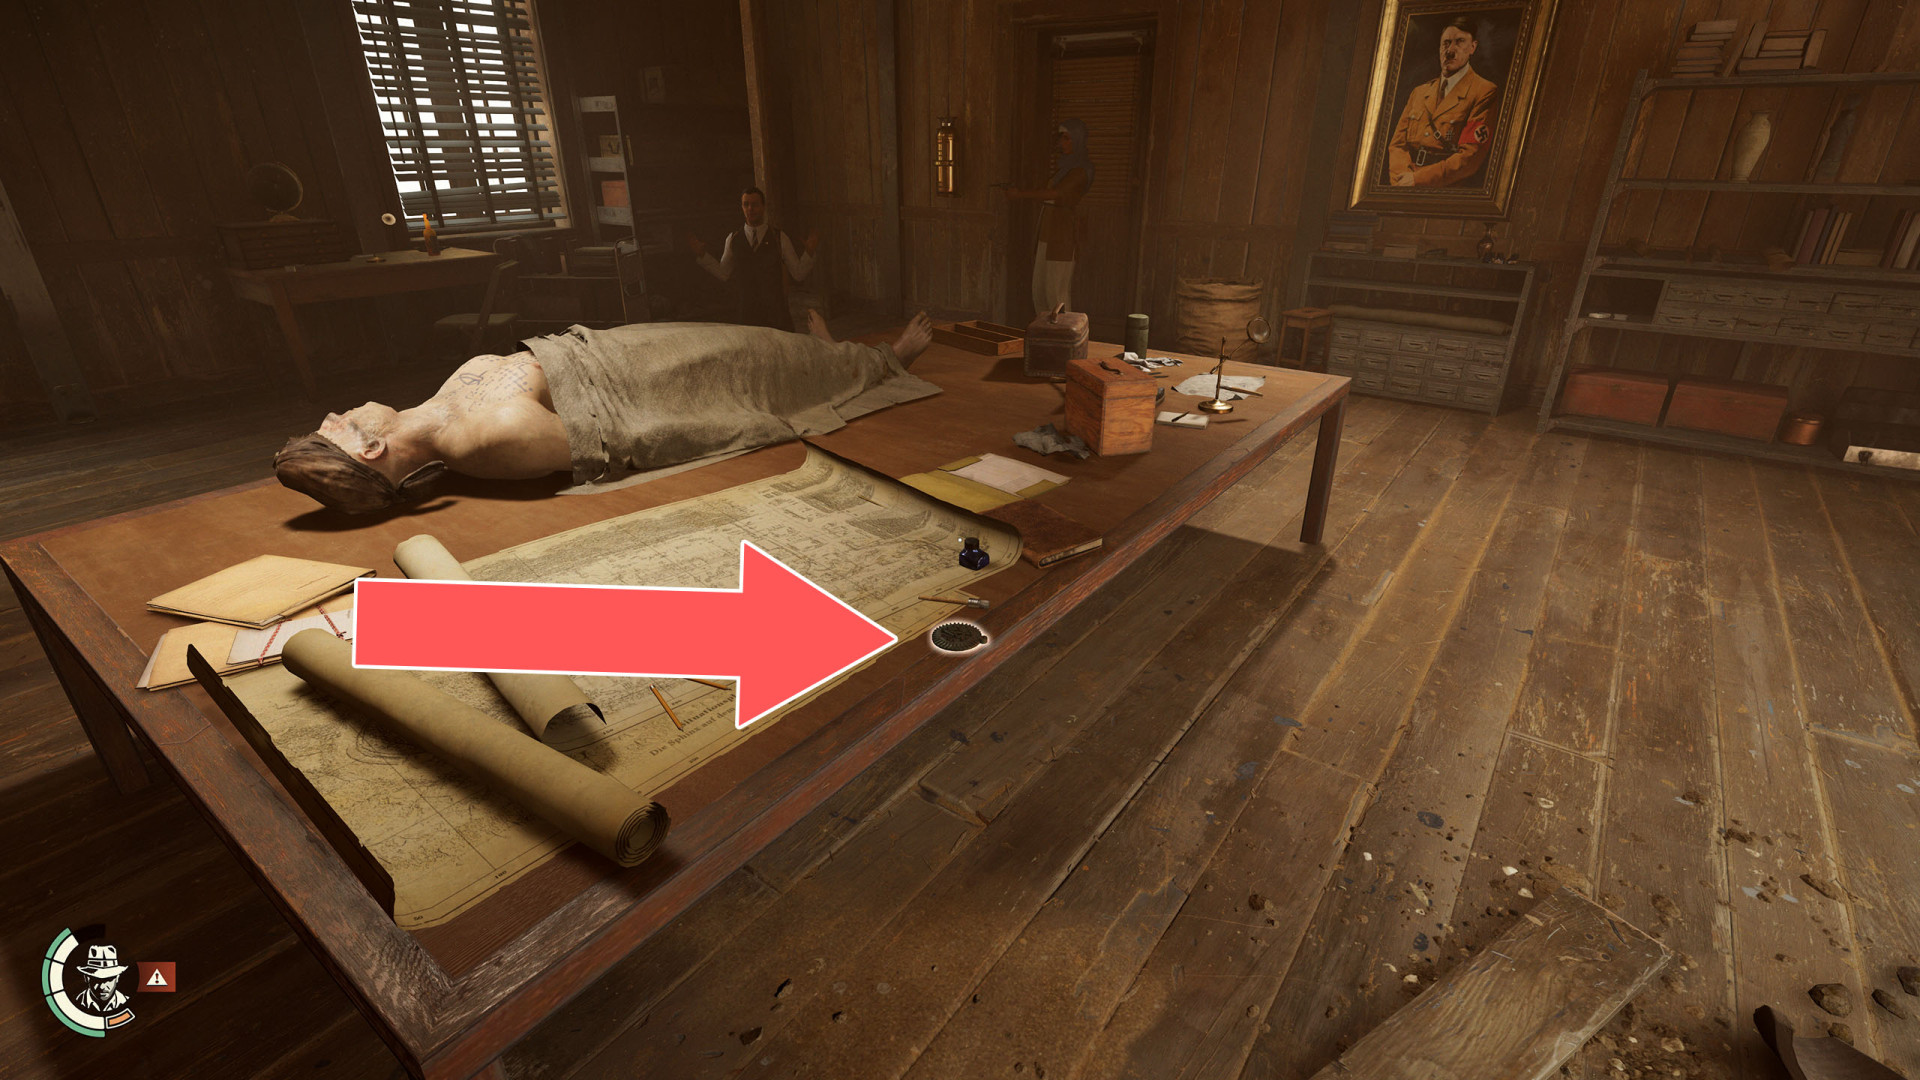
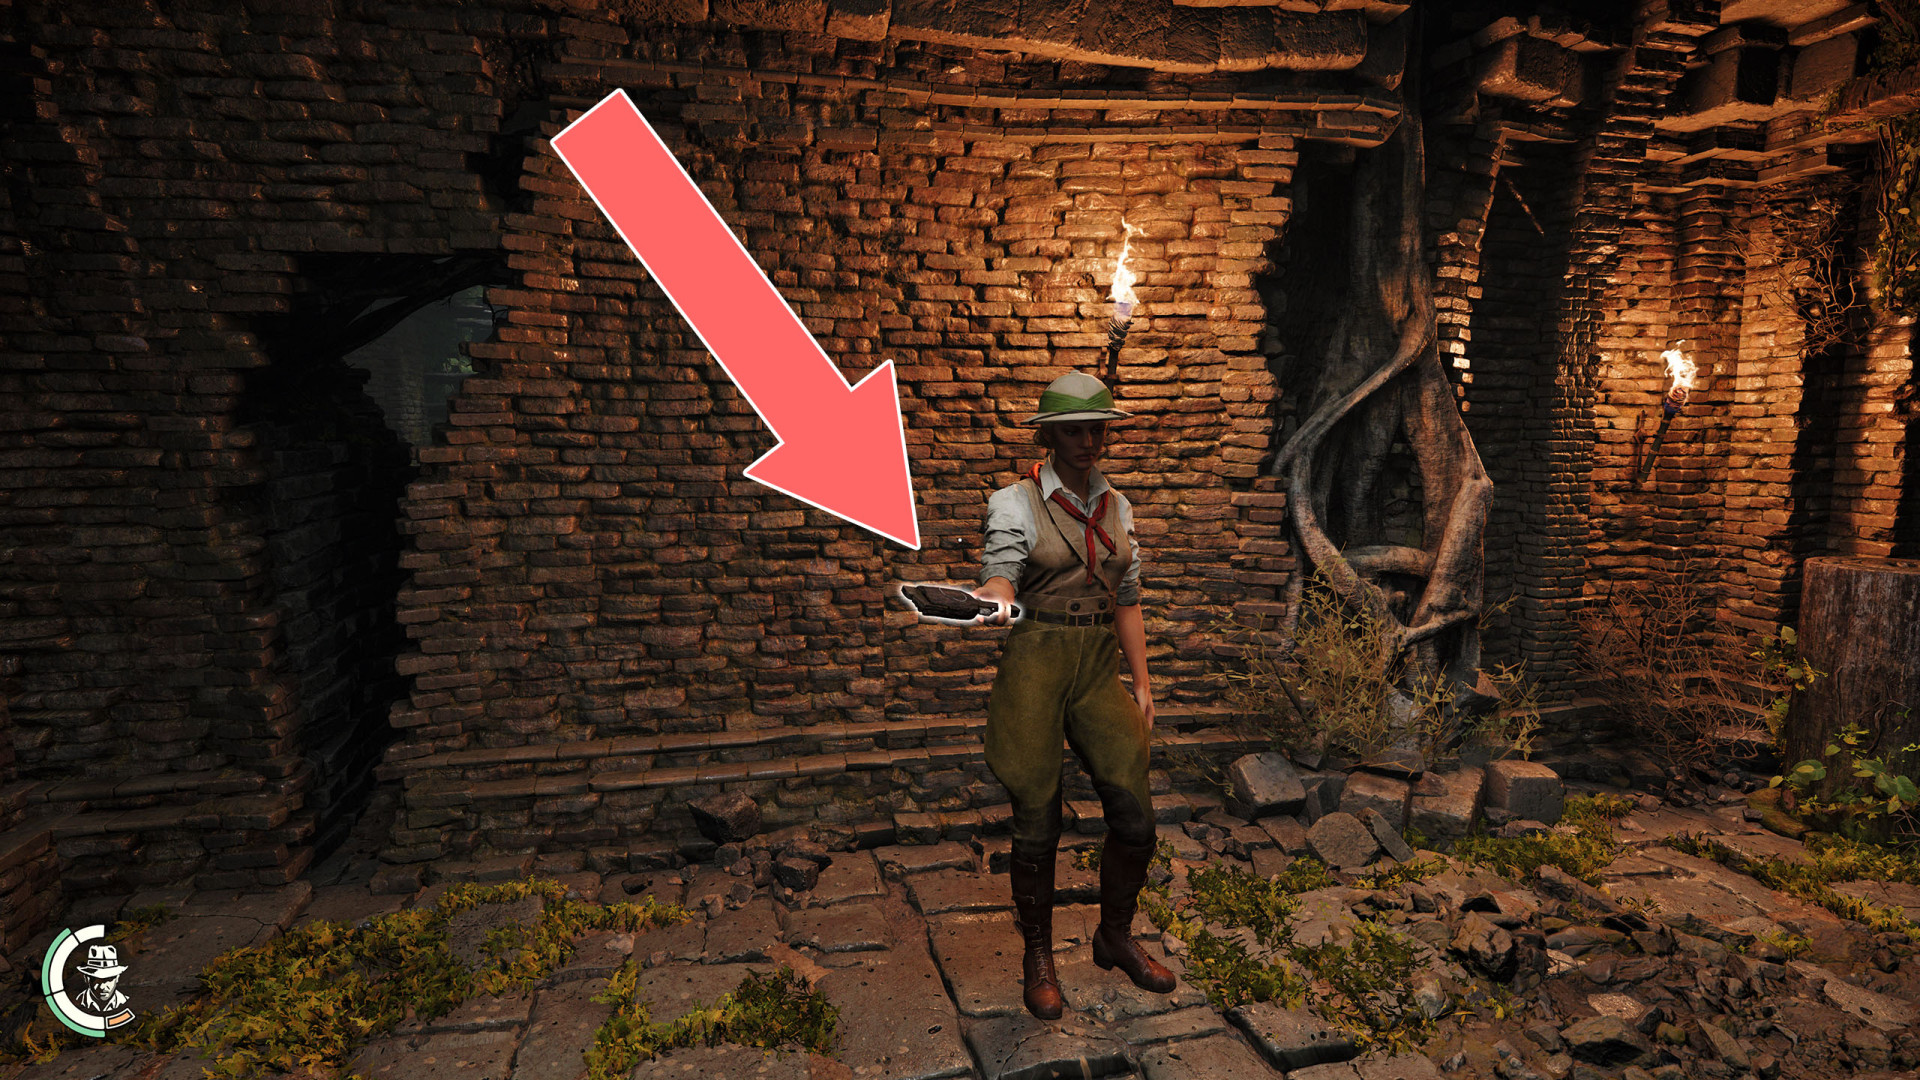
1 Bastet Statue
Lying on the floor. One of the items needed to solve the first puzzle. Related puzzle: The Exhibit.
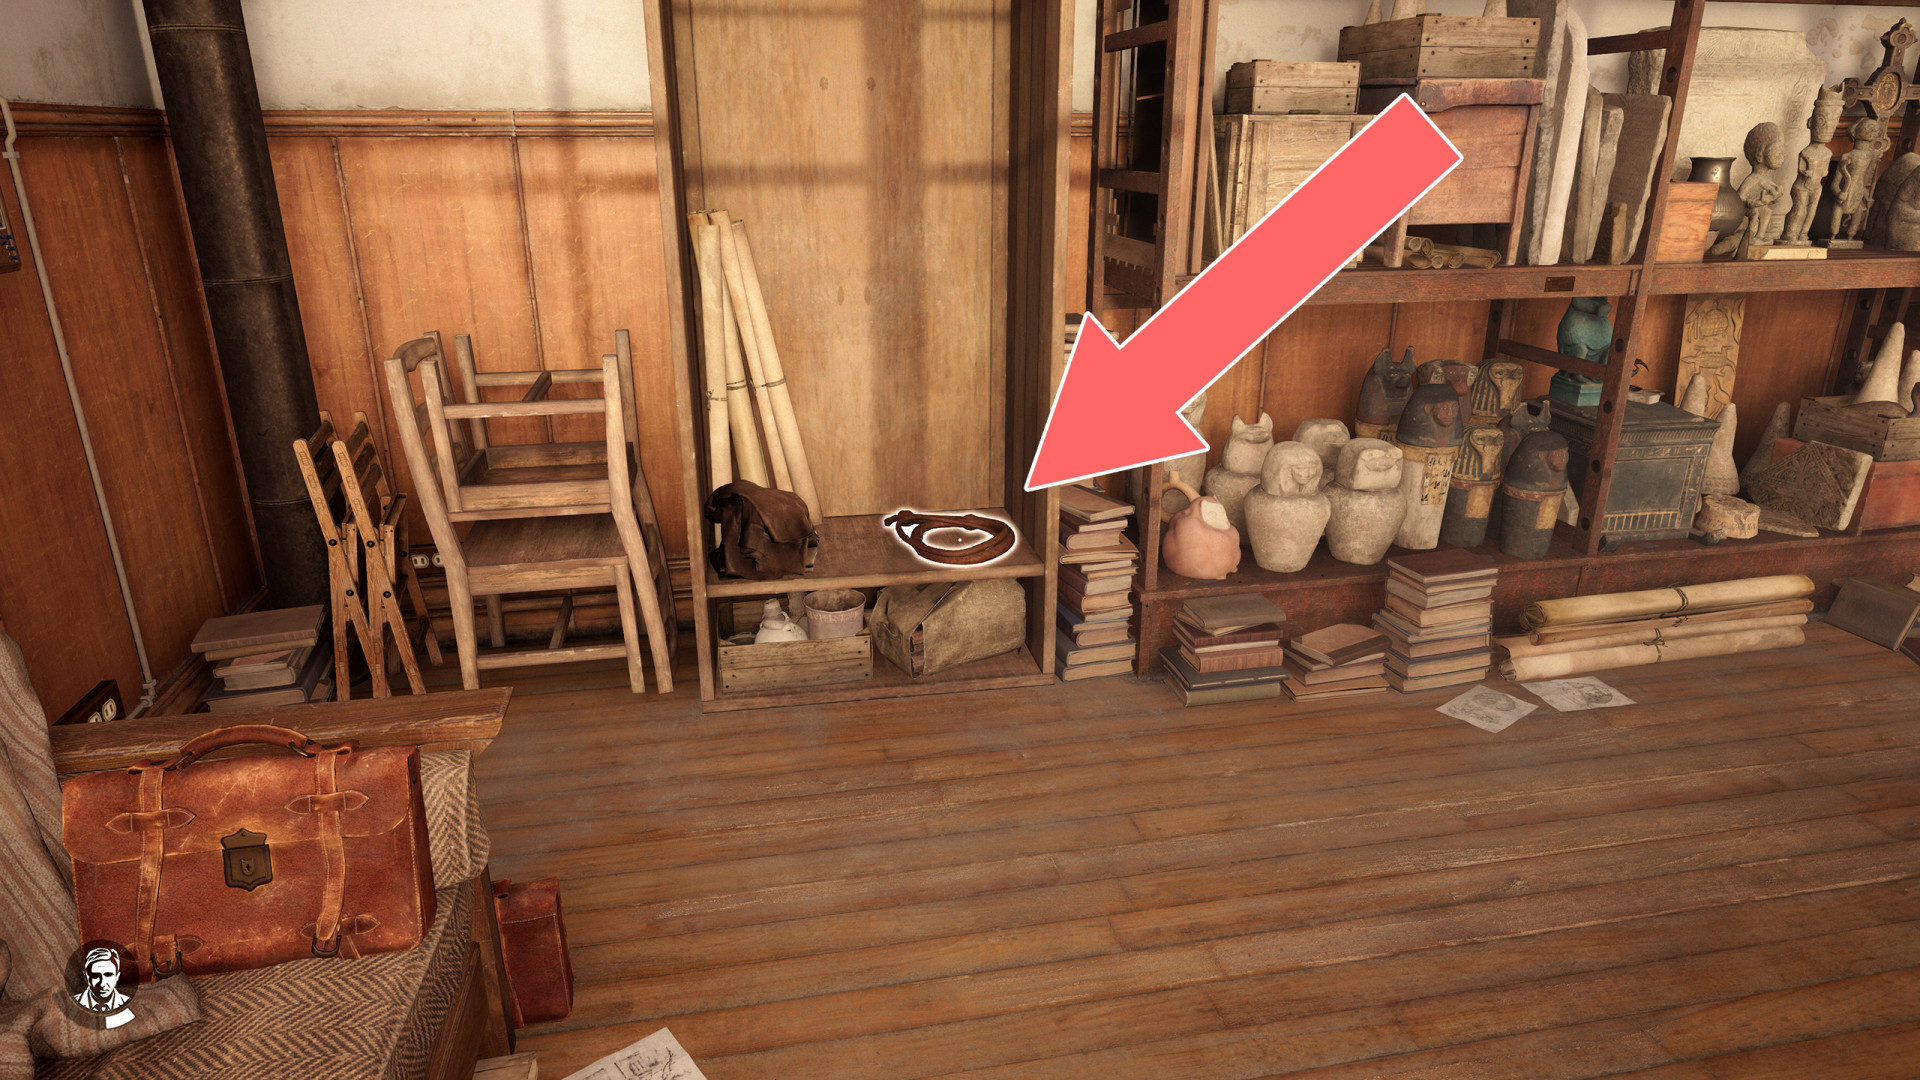
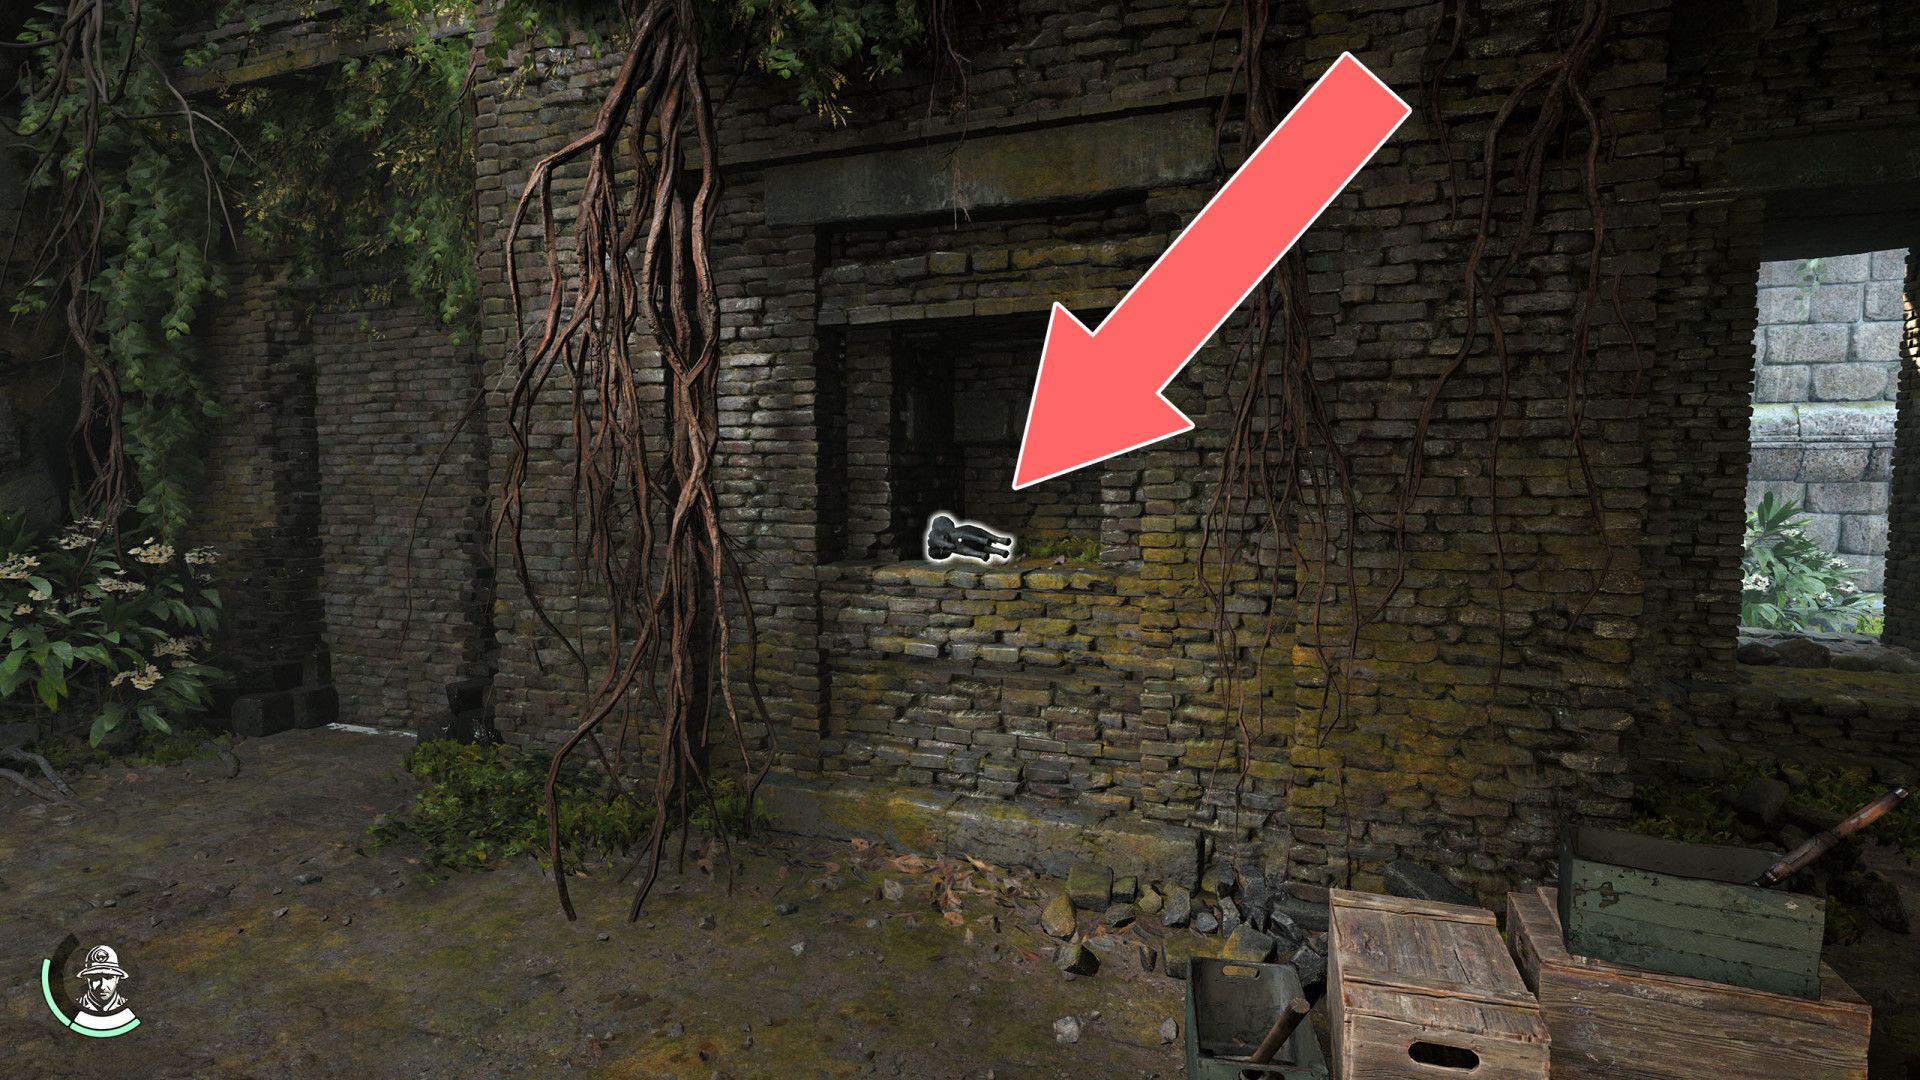
2Bullwhip
It is in the closet. Related adventure: The Adventure Begins.
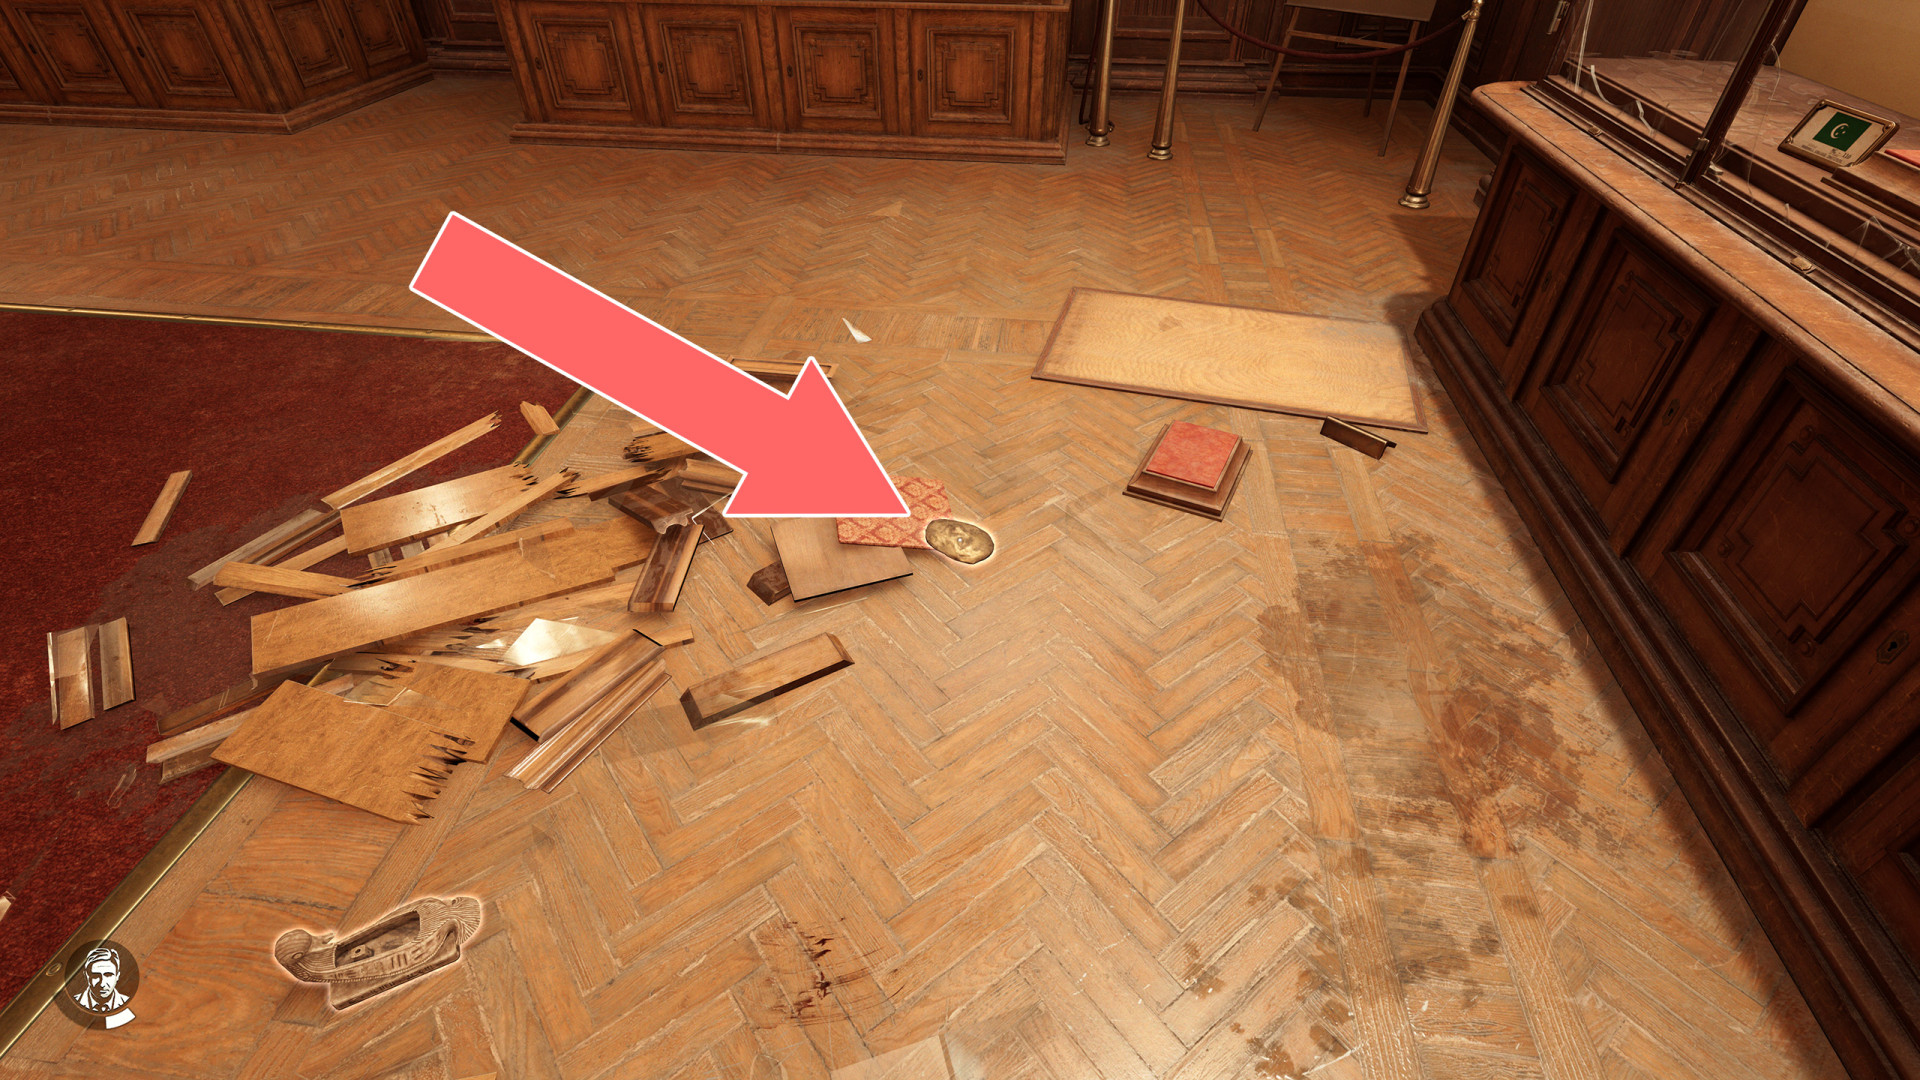
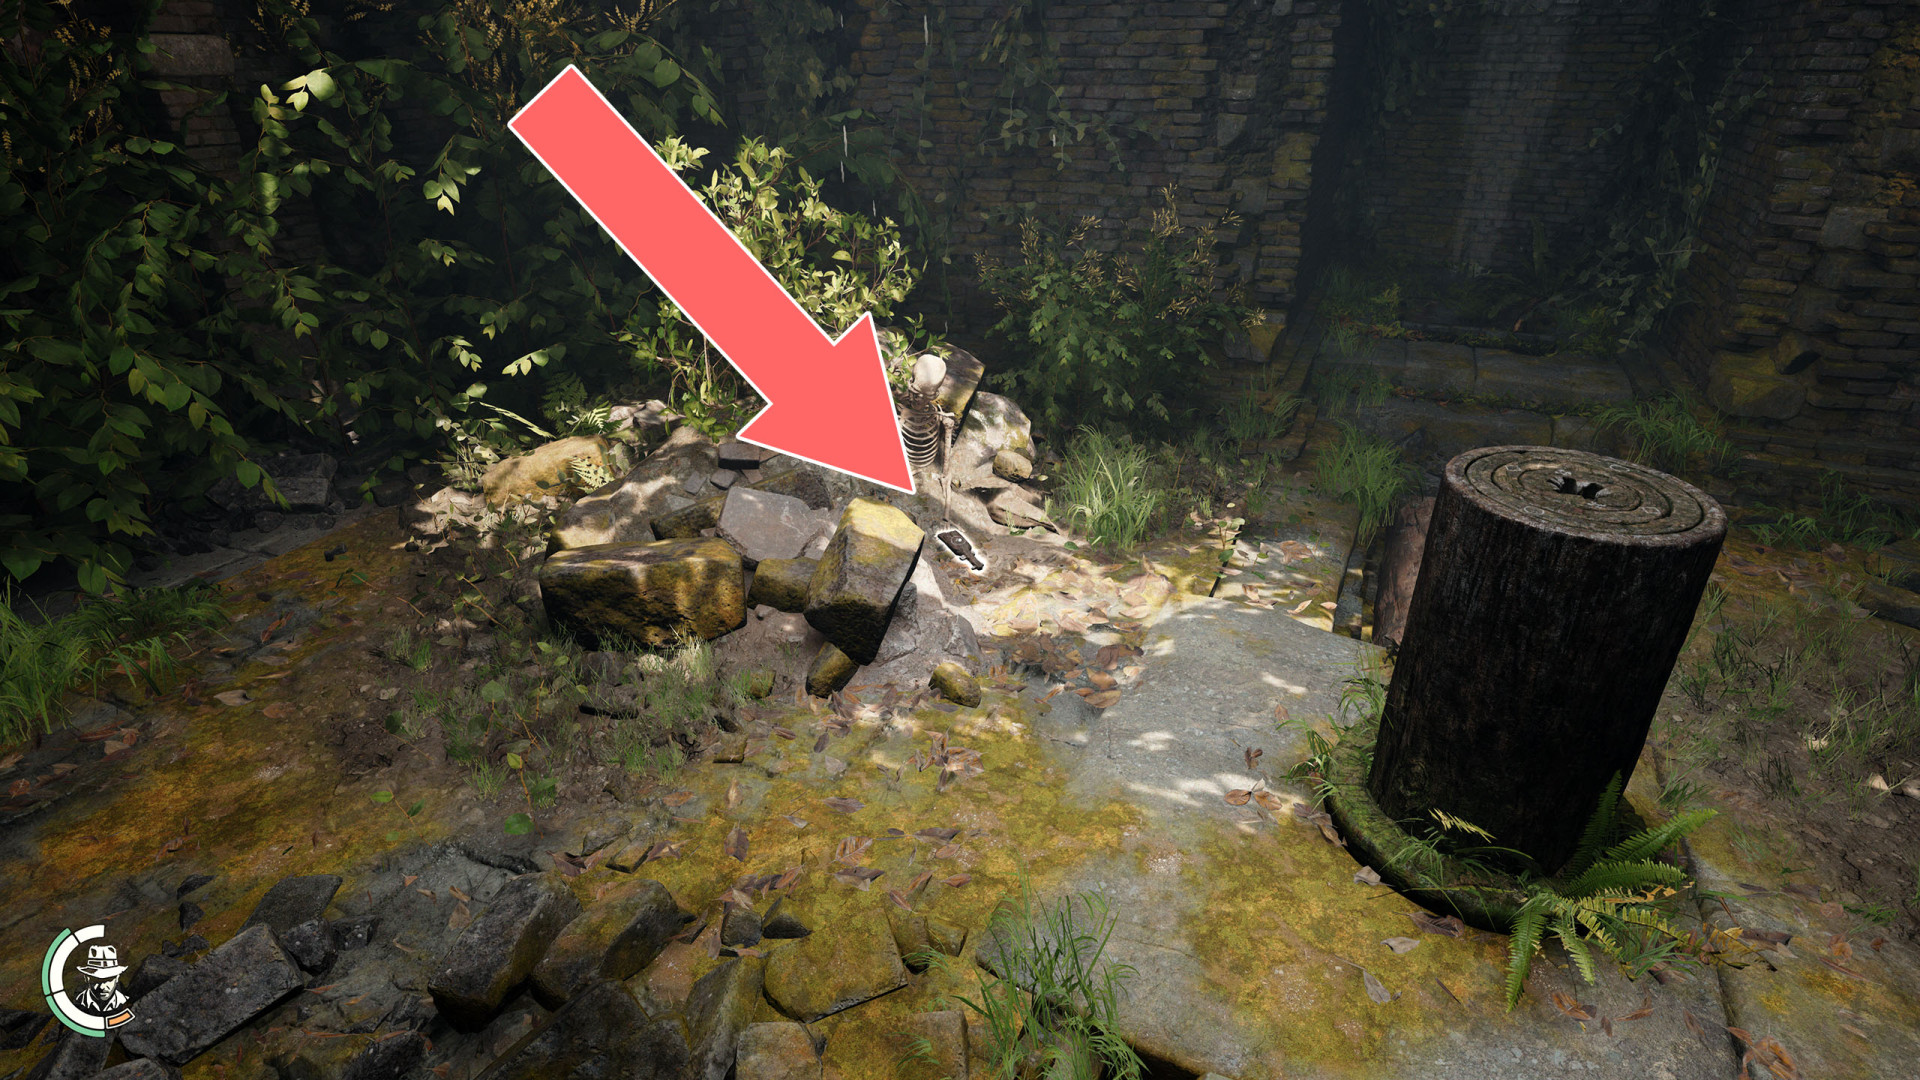
3Funerary Mask
Lying on the floor. One of the items needed to solve the first puzzle. Related puzzle: The Exhibit.
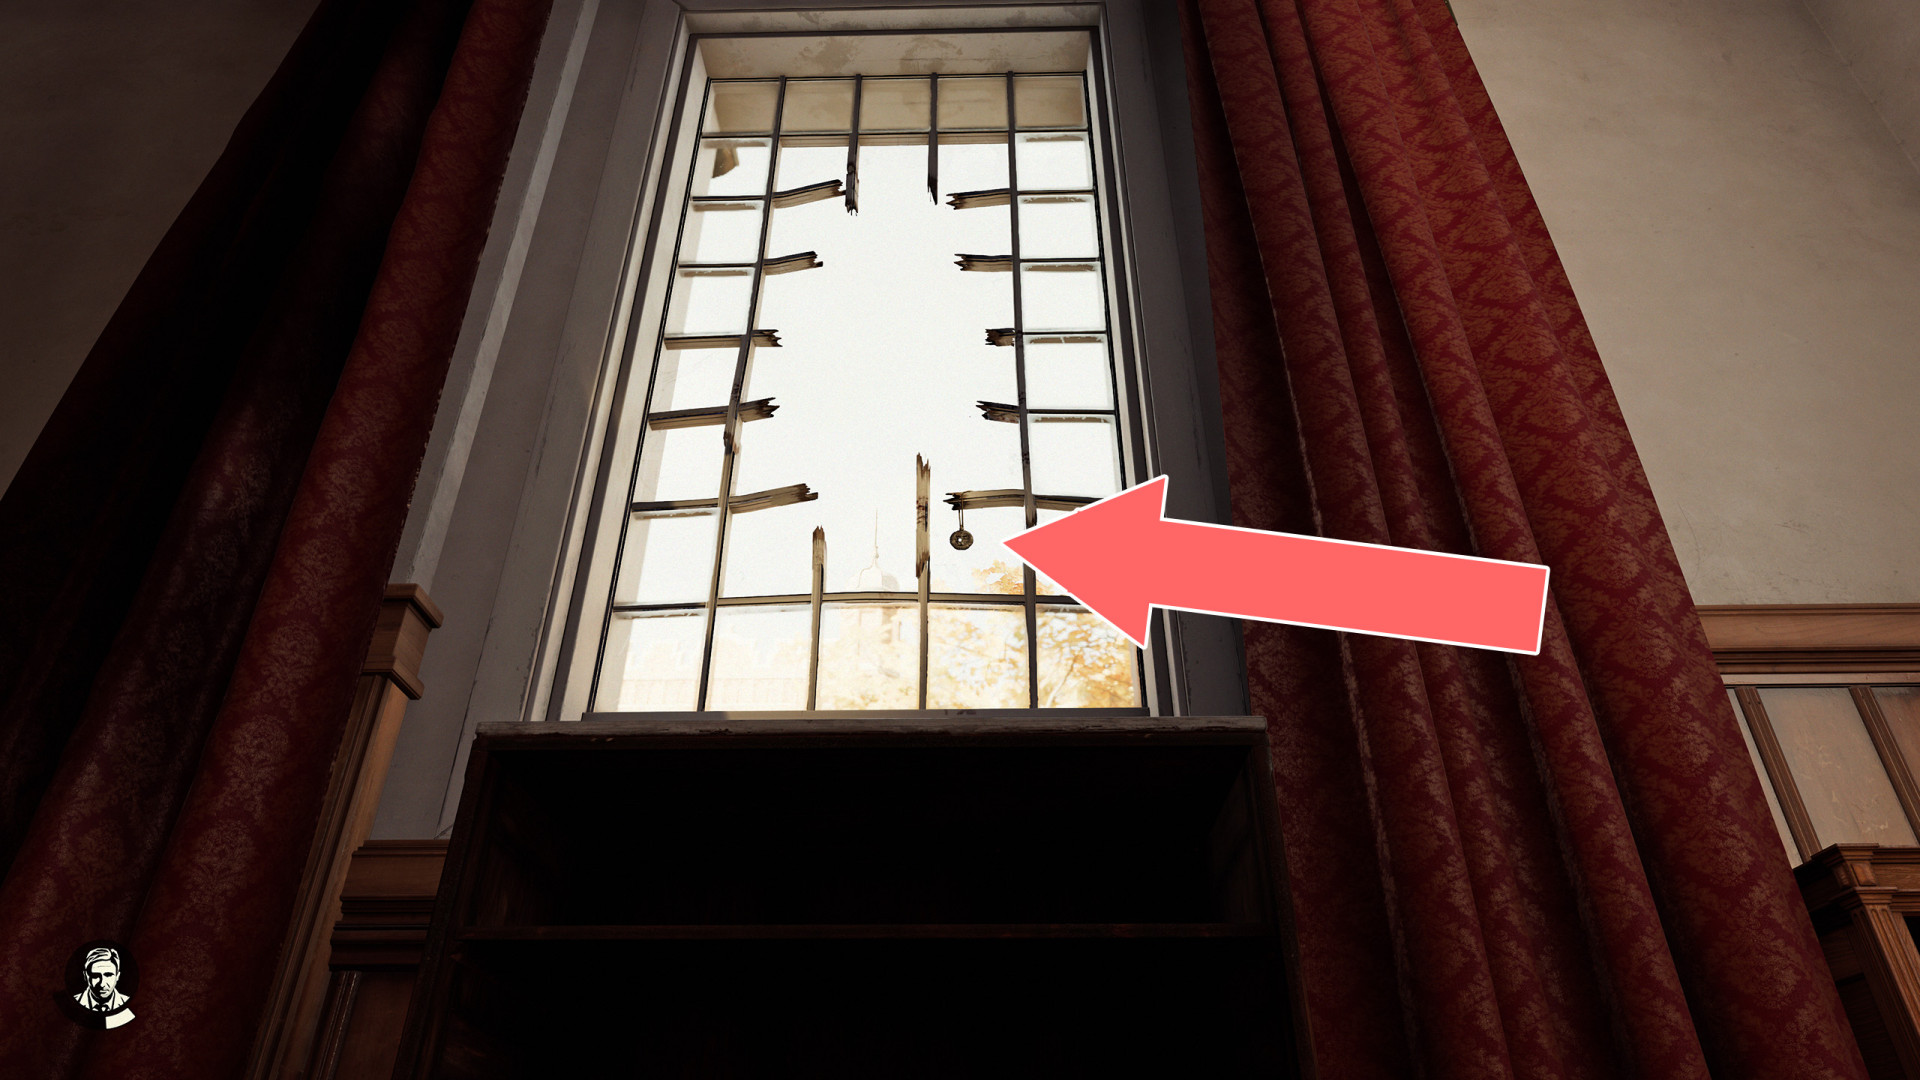
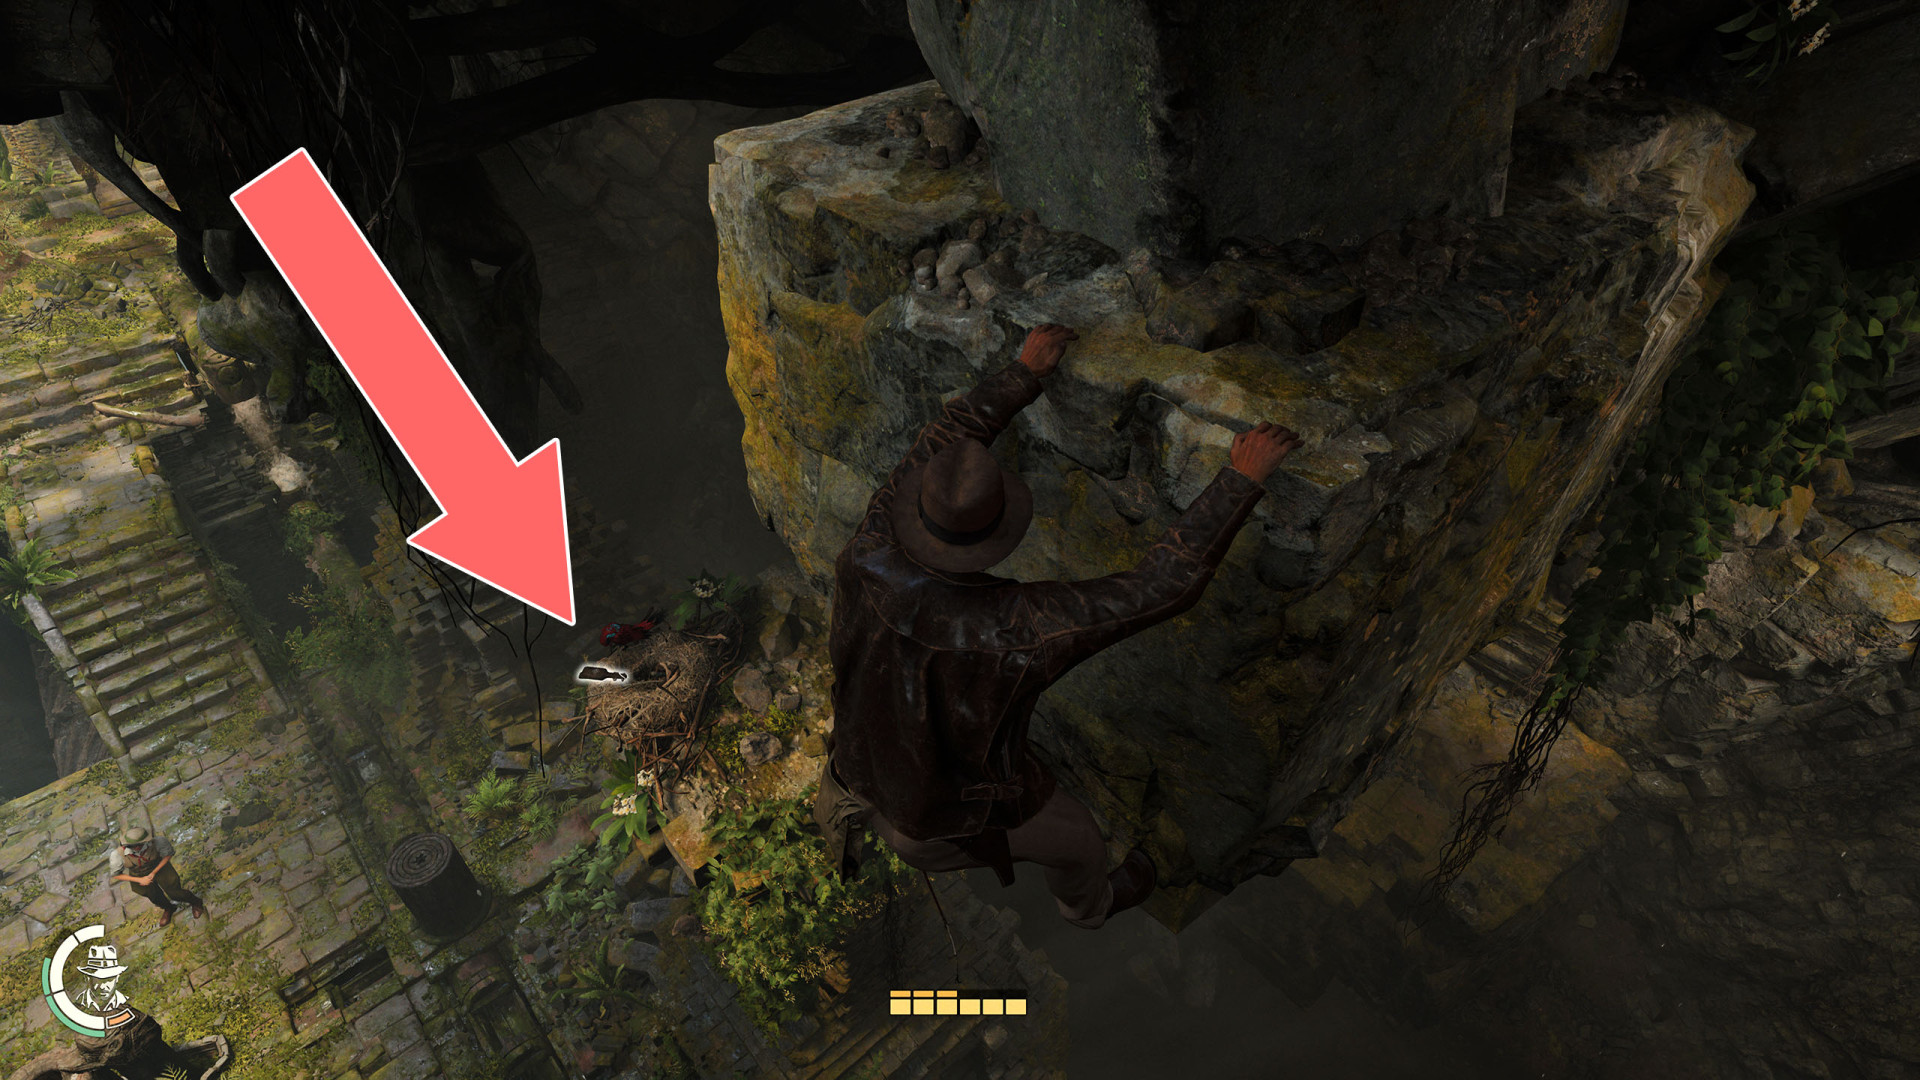
4Giant's Pendant
Lift the bookcase, climb on it and collect the pendant hanging on the broken window. Related adventure: The Break-in.
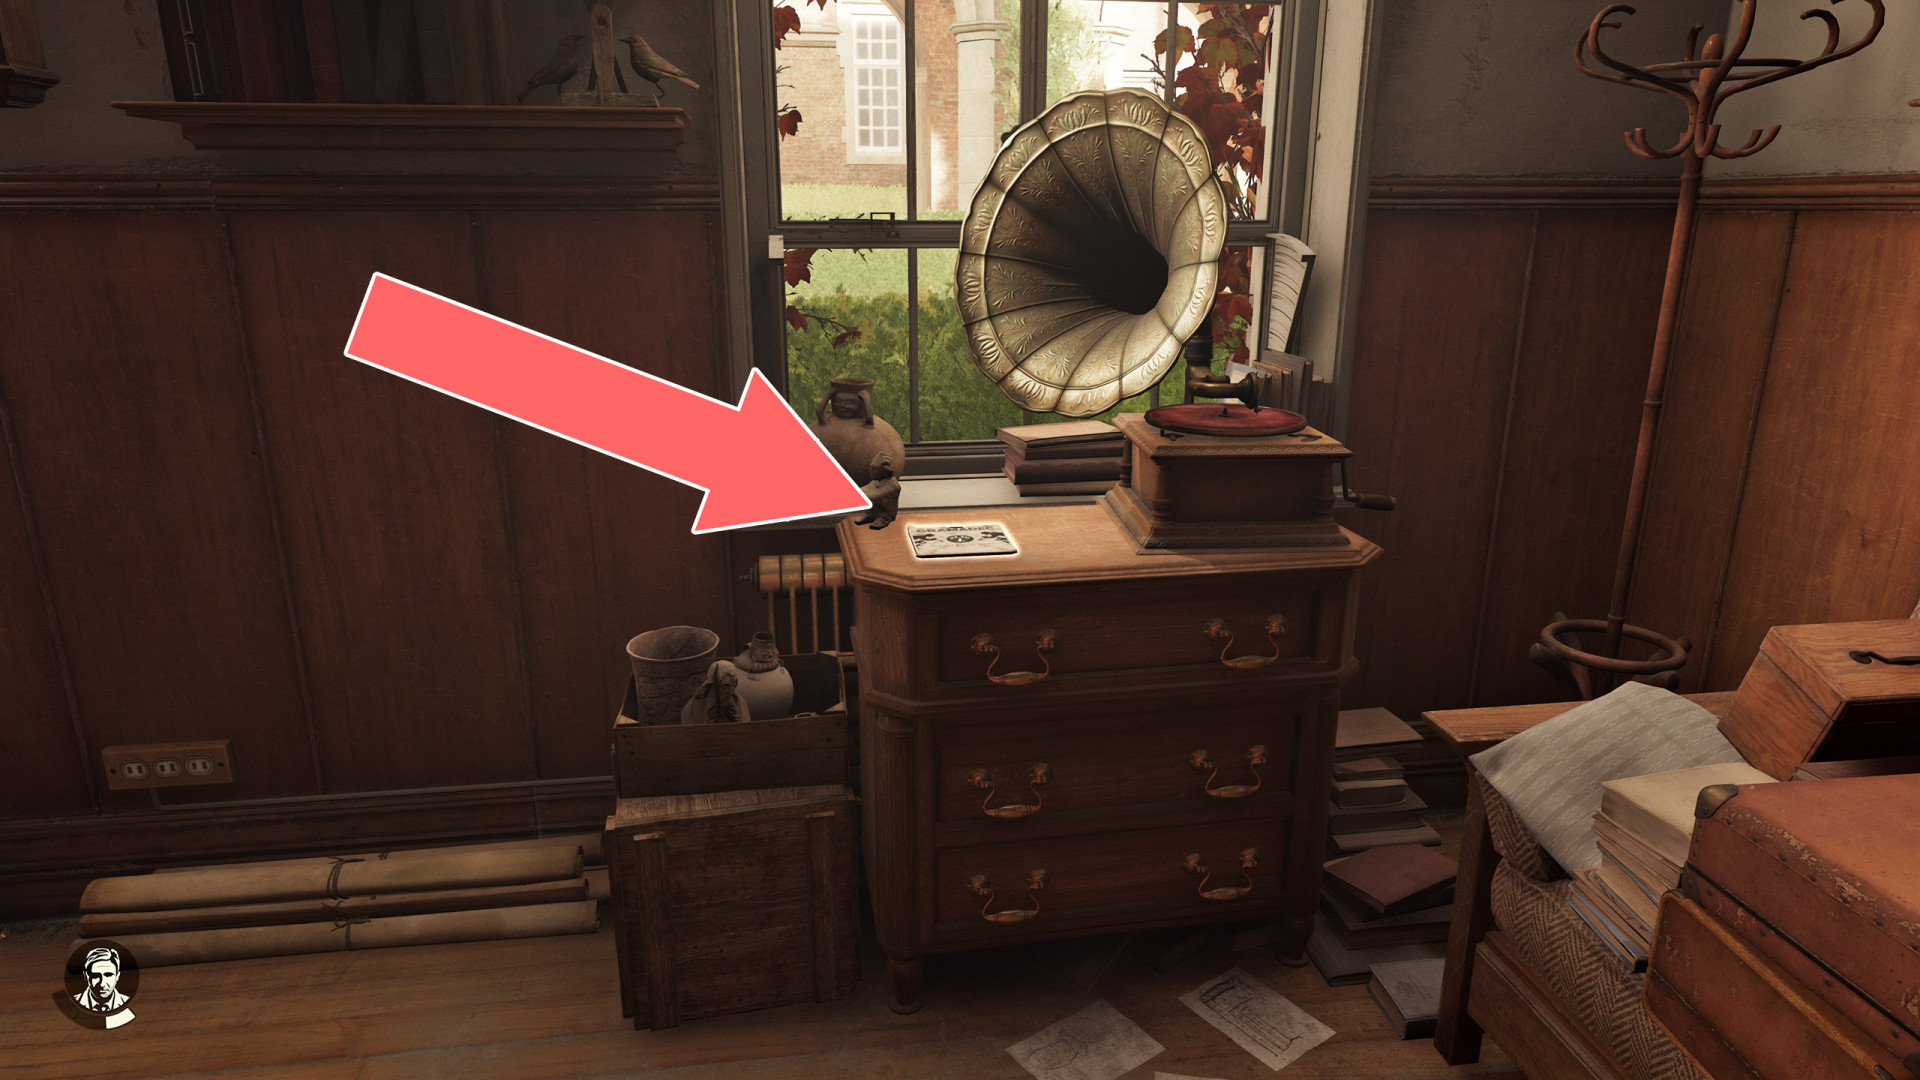
5Gramophone Record
It is on the cabinet, next to the gramophone. Related adventure: The Adventure Begins.
6Ivory Case
Lying on the floor. One of the items needed to solve the first puzzle. Related puzzle: The Exhibit.
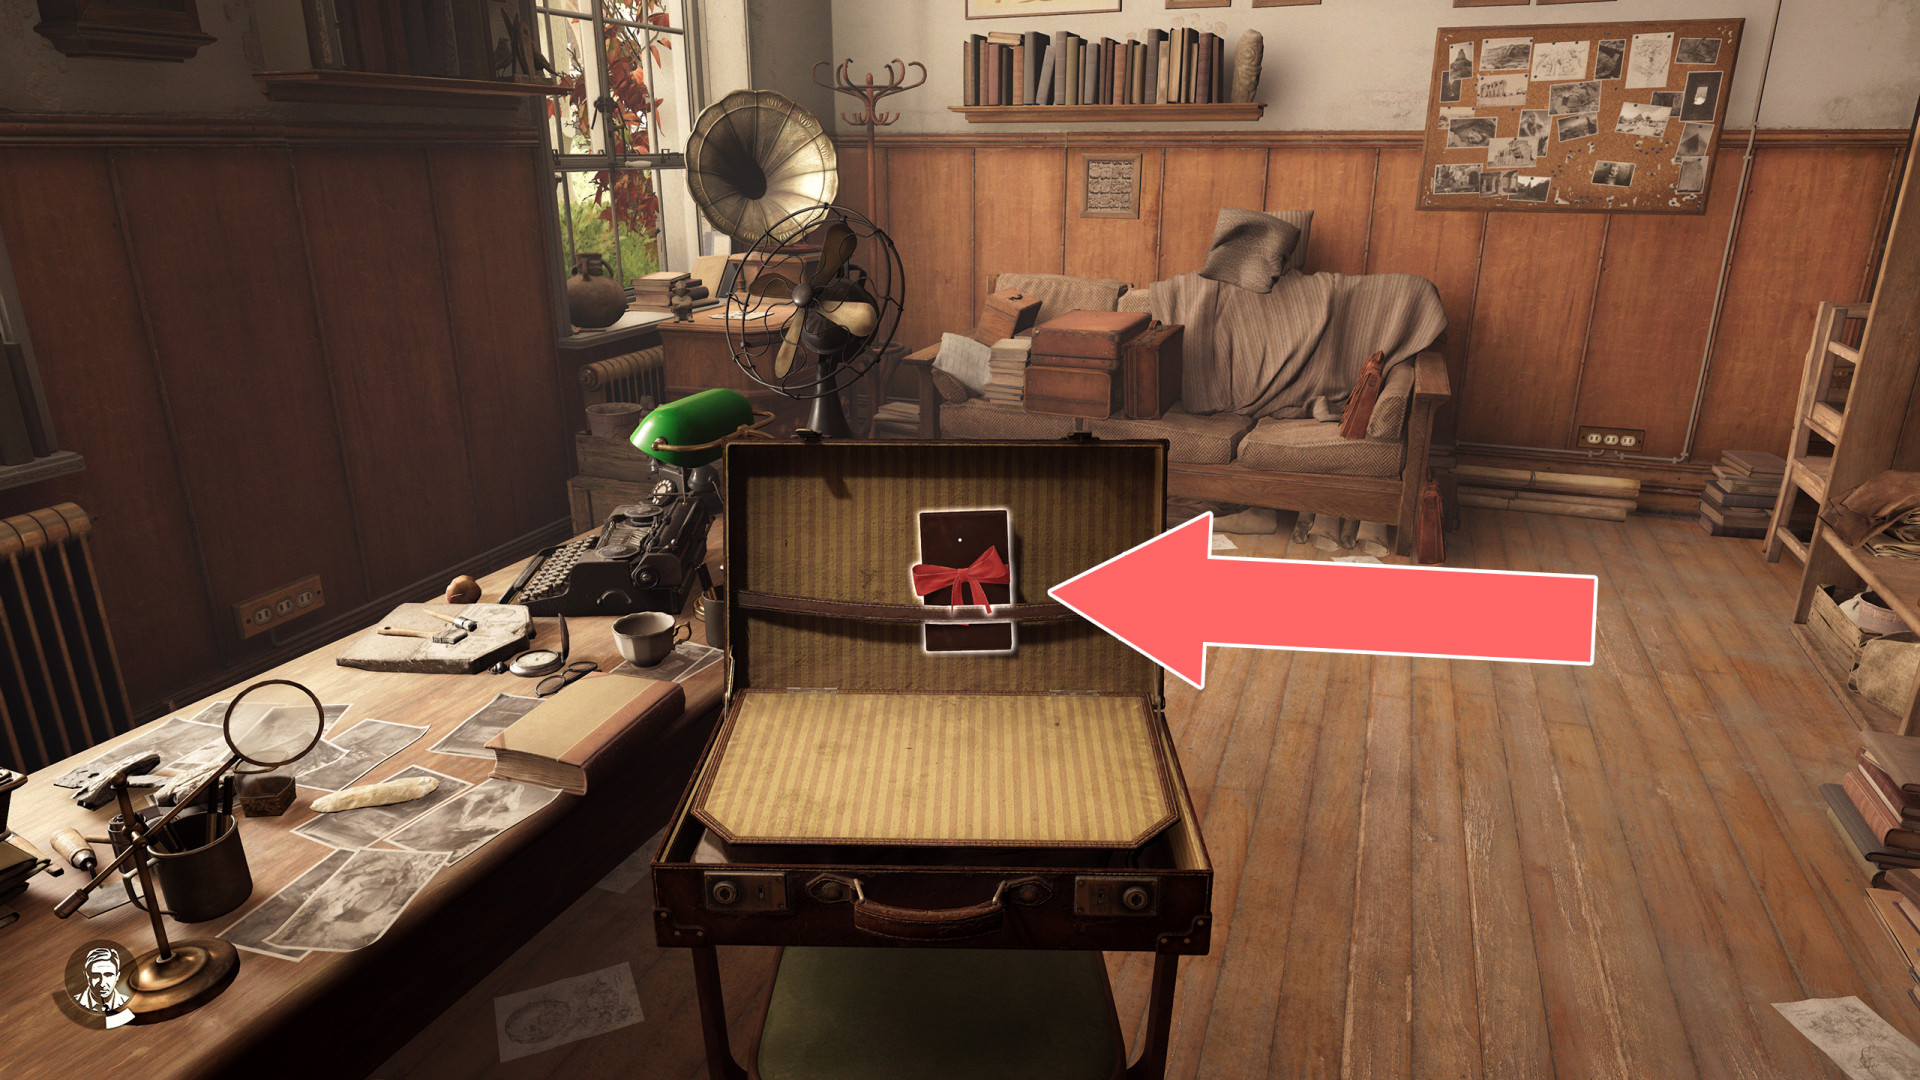
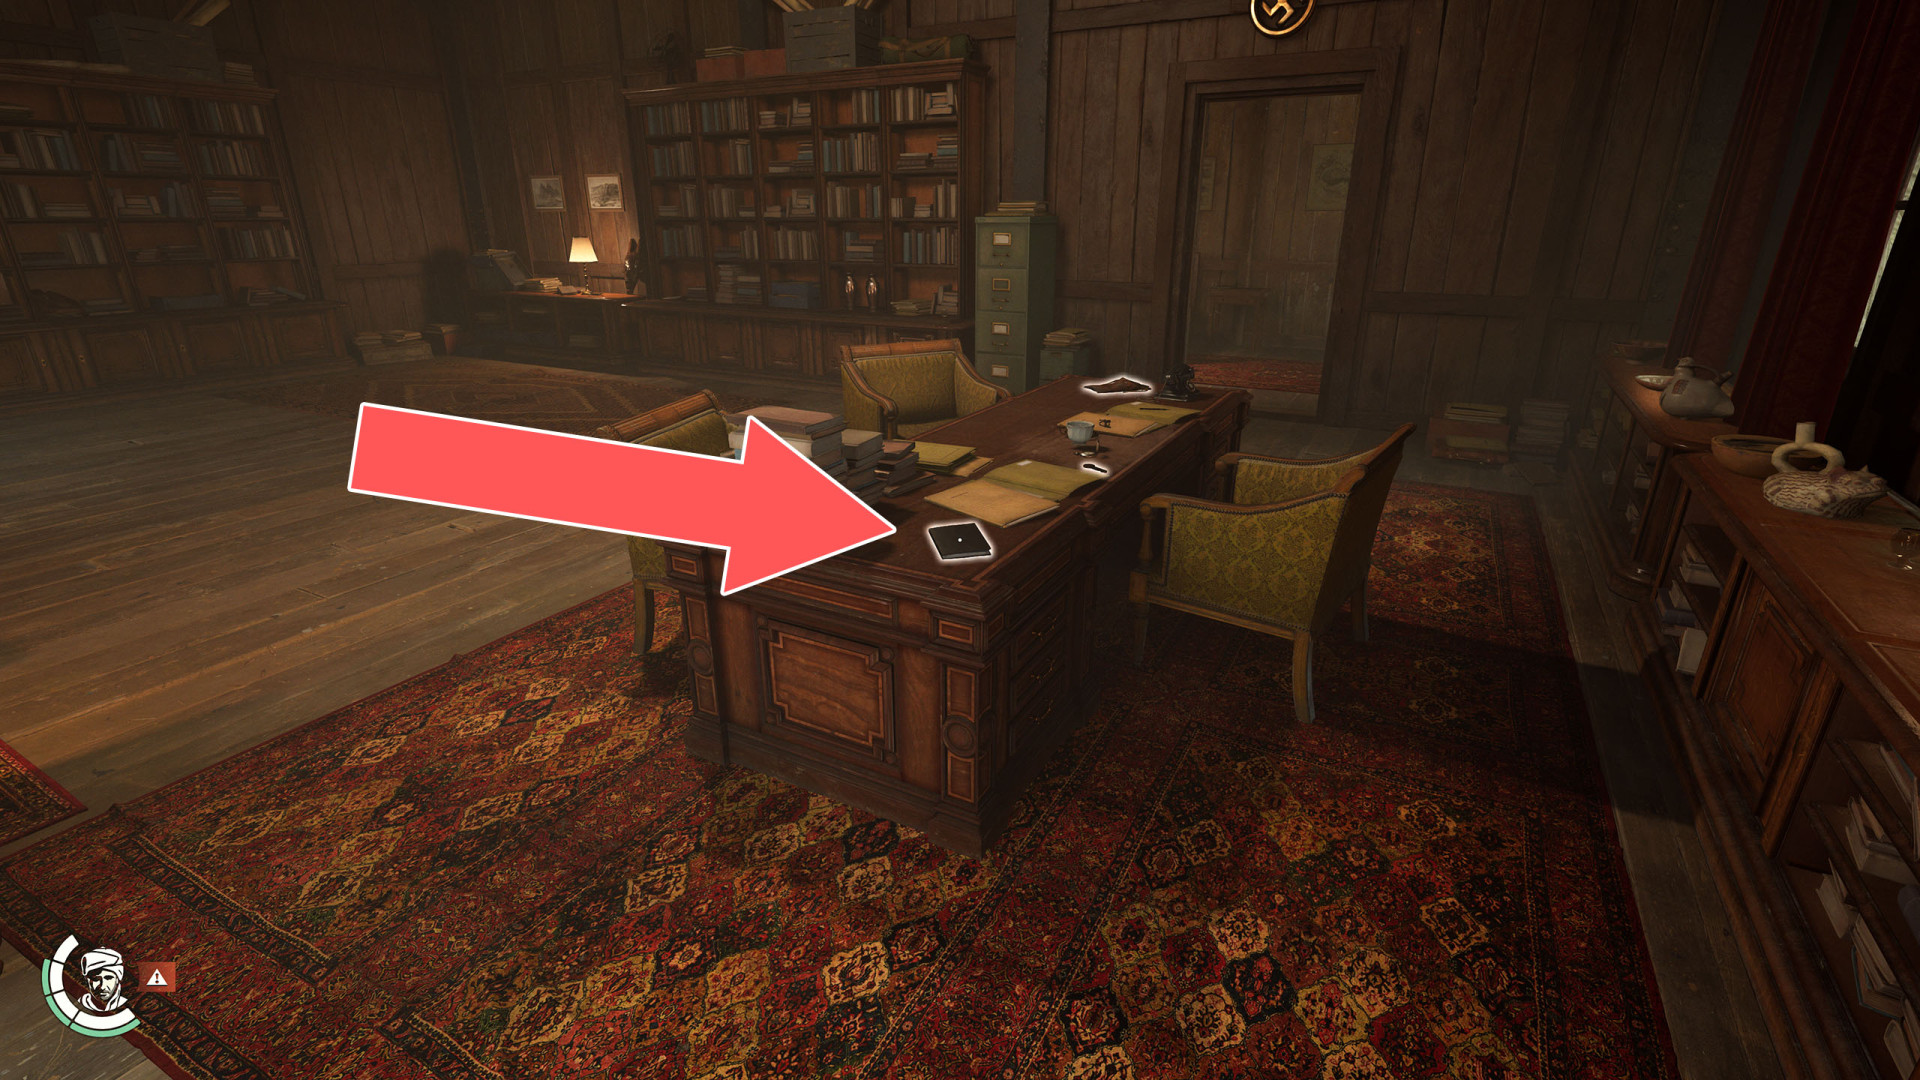
7Journal
You must pick it up at the end of the "The Break-in" quest.
8Terracotta Relief
Lying on the floor. One of the items needed to solve the first puzzle. Related puzzle: The Exhibit.
Locations on The Vatican
9Antique Bust
10Antique Bust (Necropolis #1)
11Antique Bust (Necropolis #2)

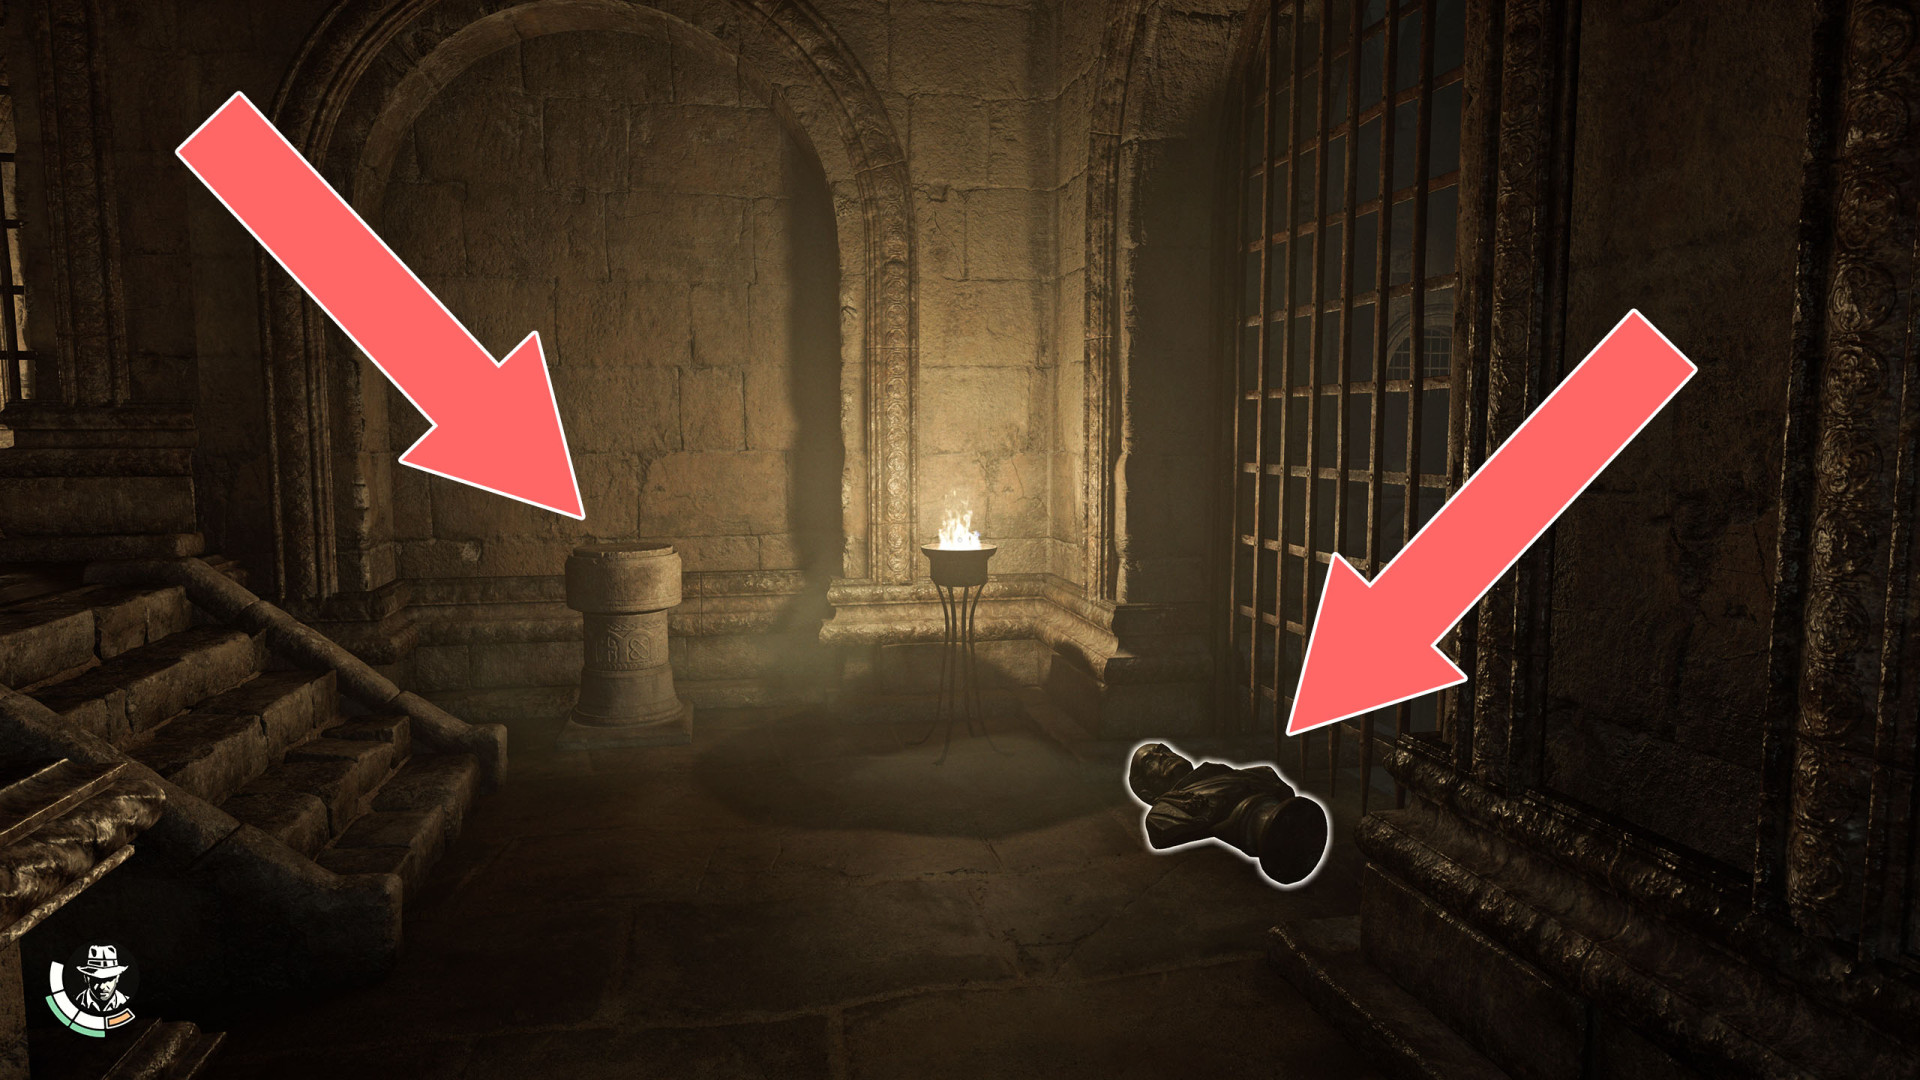
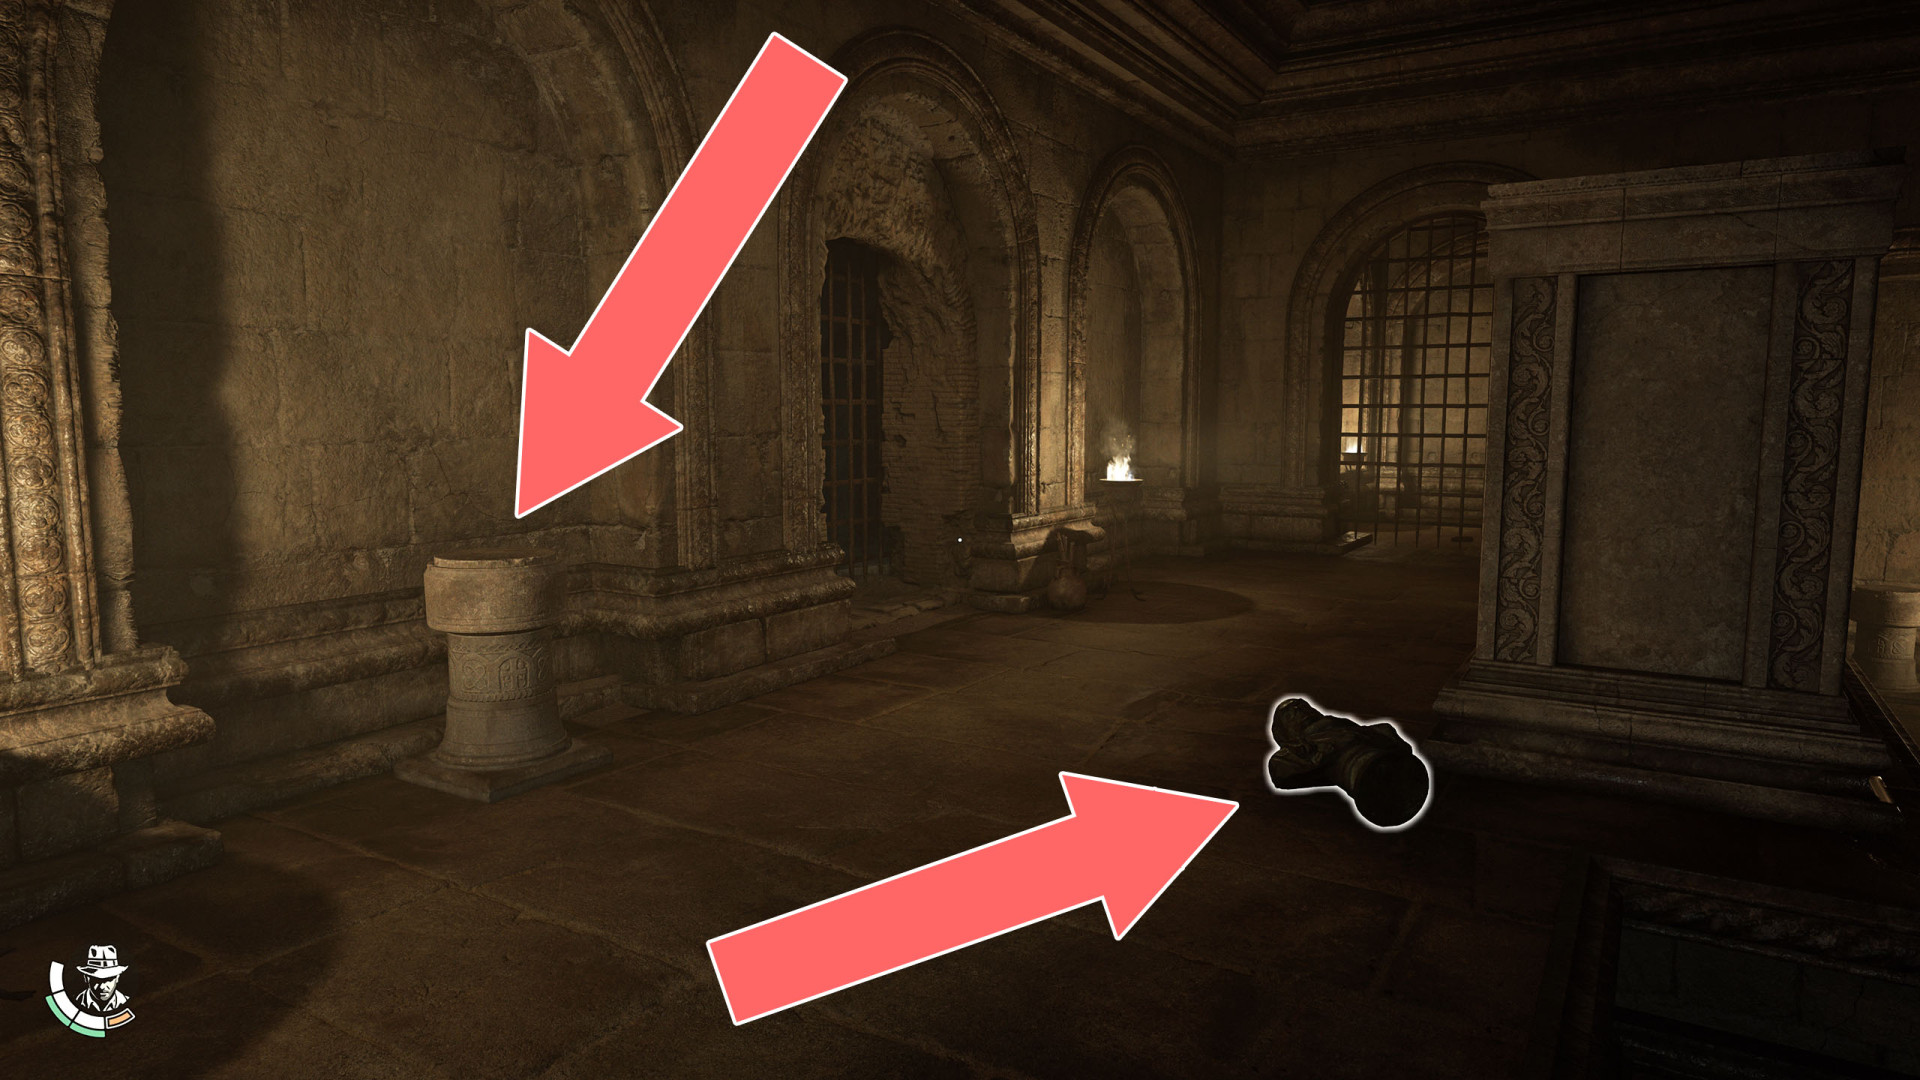
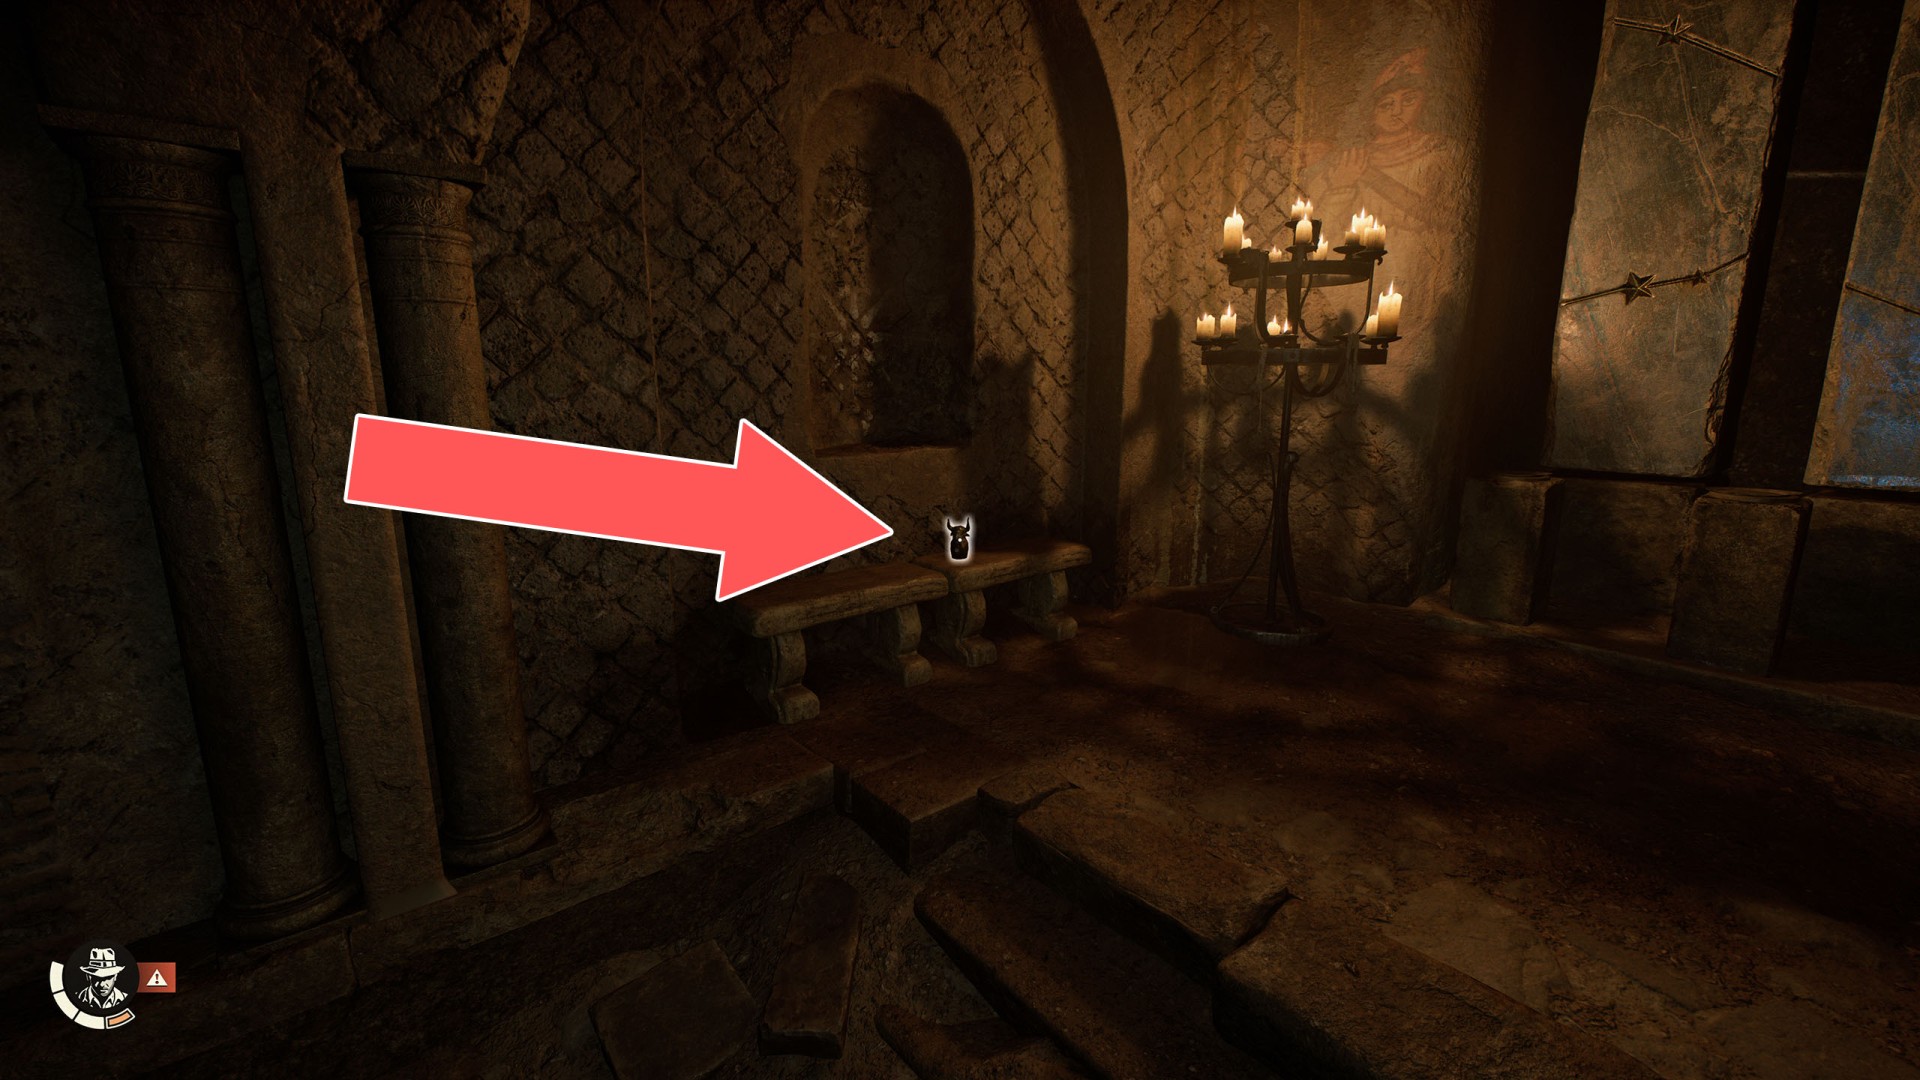
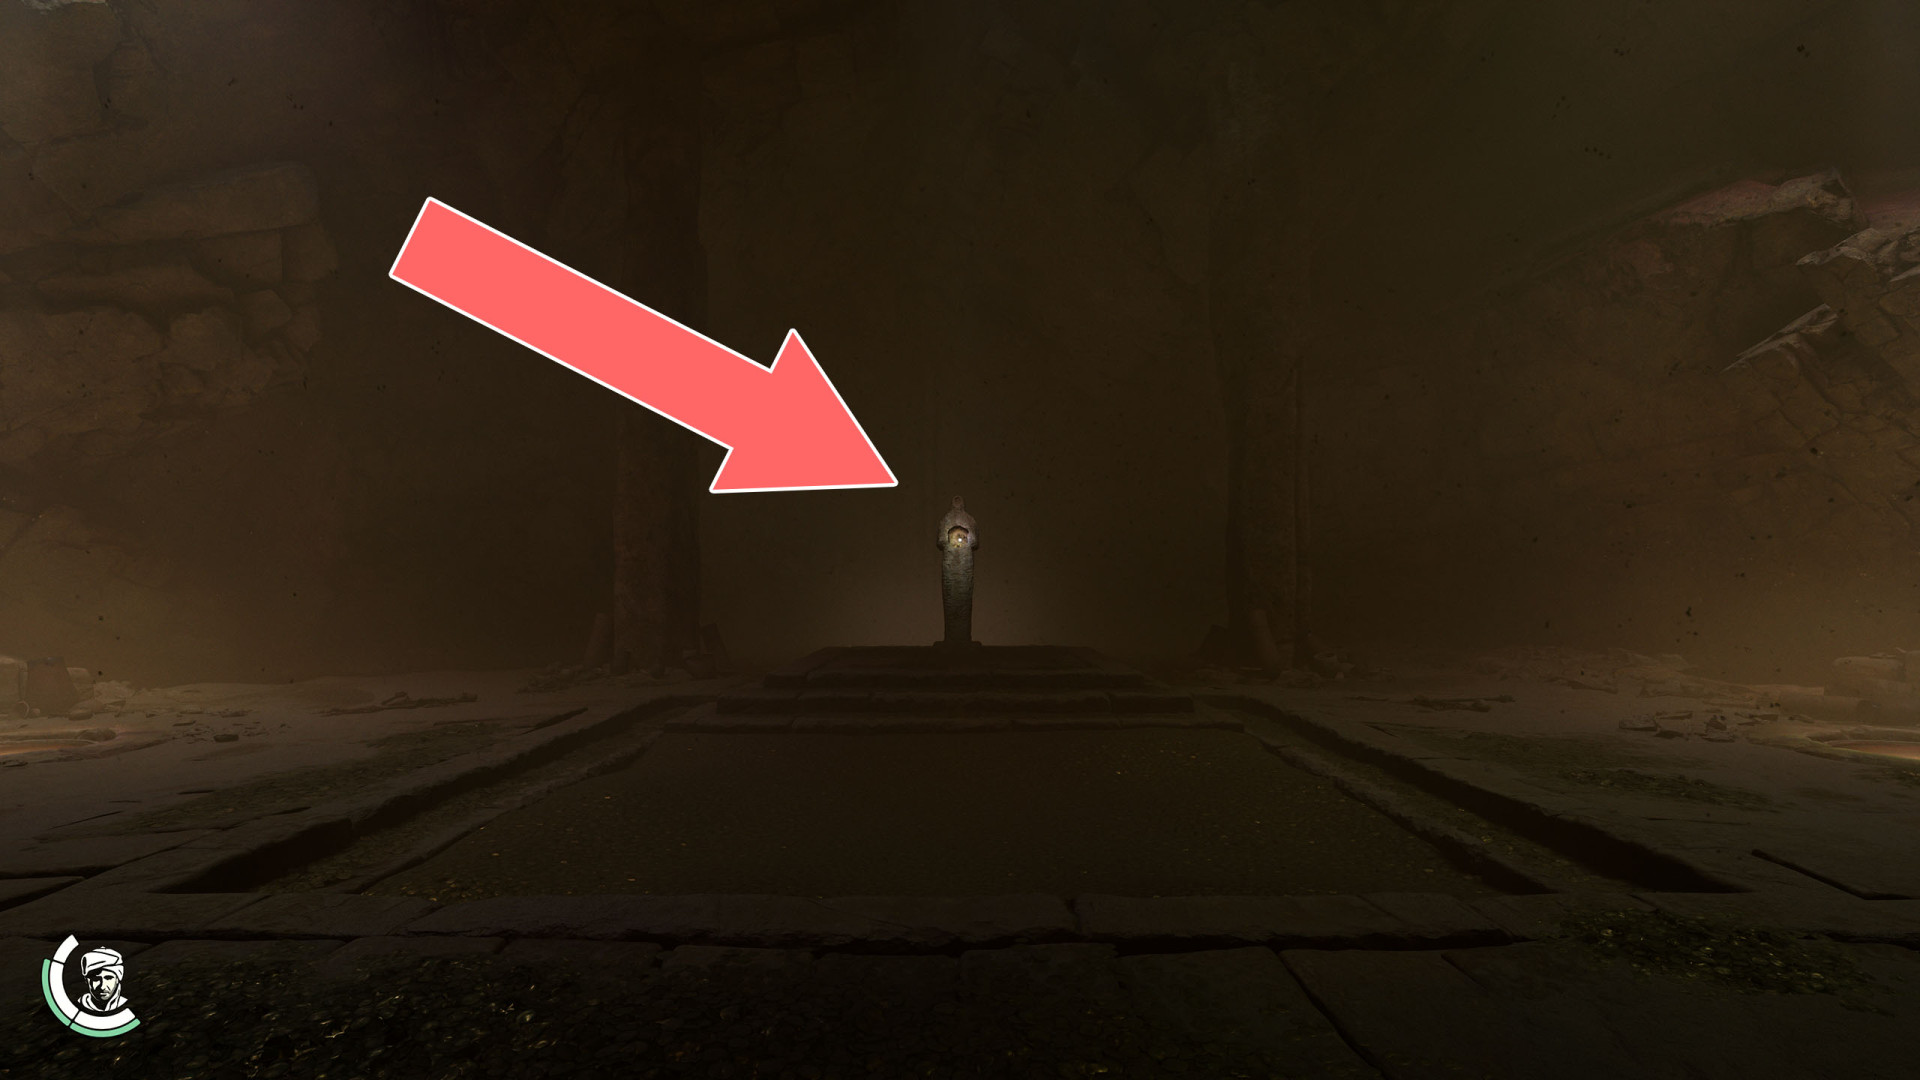
12Antique Bust (Underworld)
After solving the "Sacred Wounds" puzzle take it and place it on the Pedestal (Underworld).

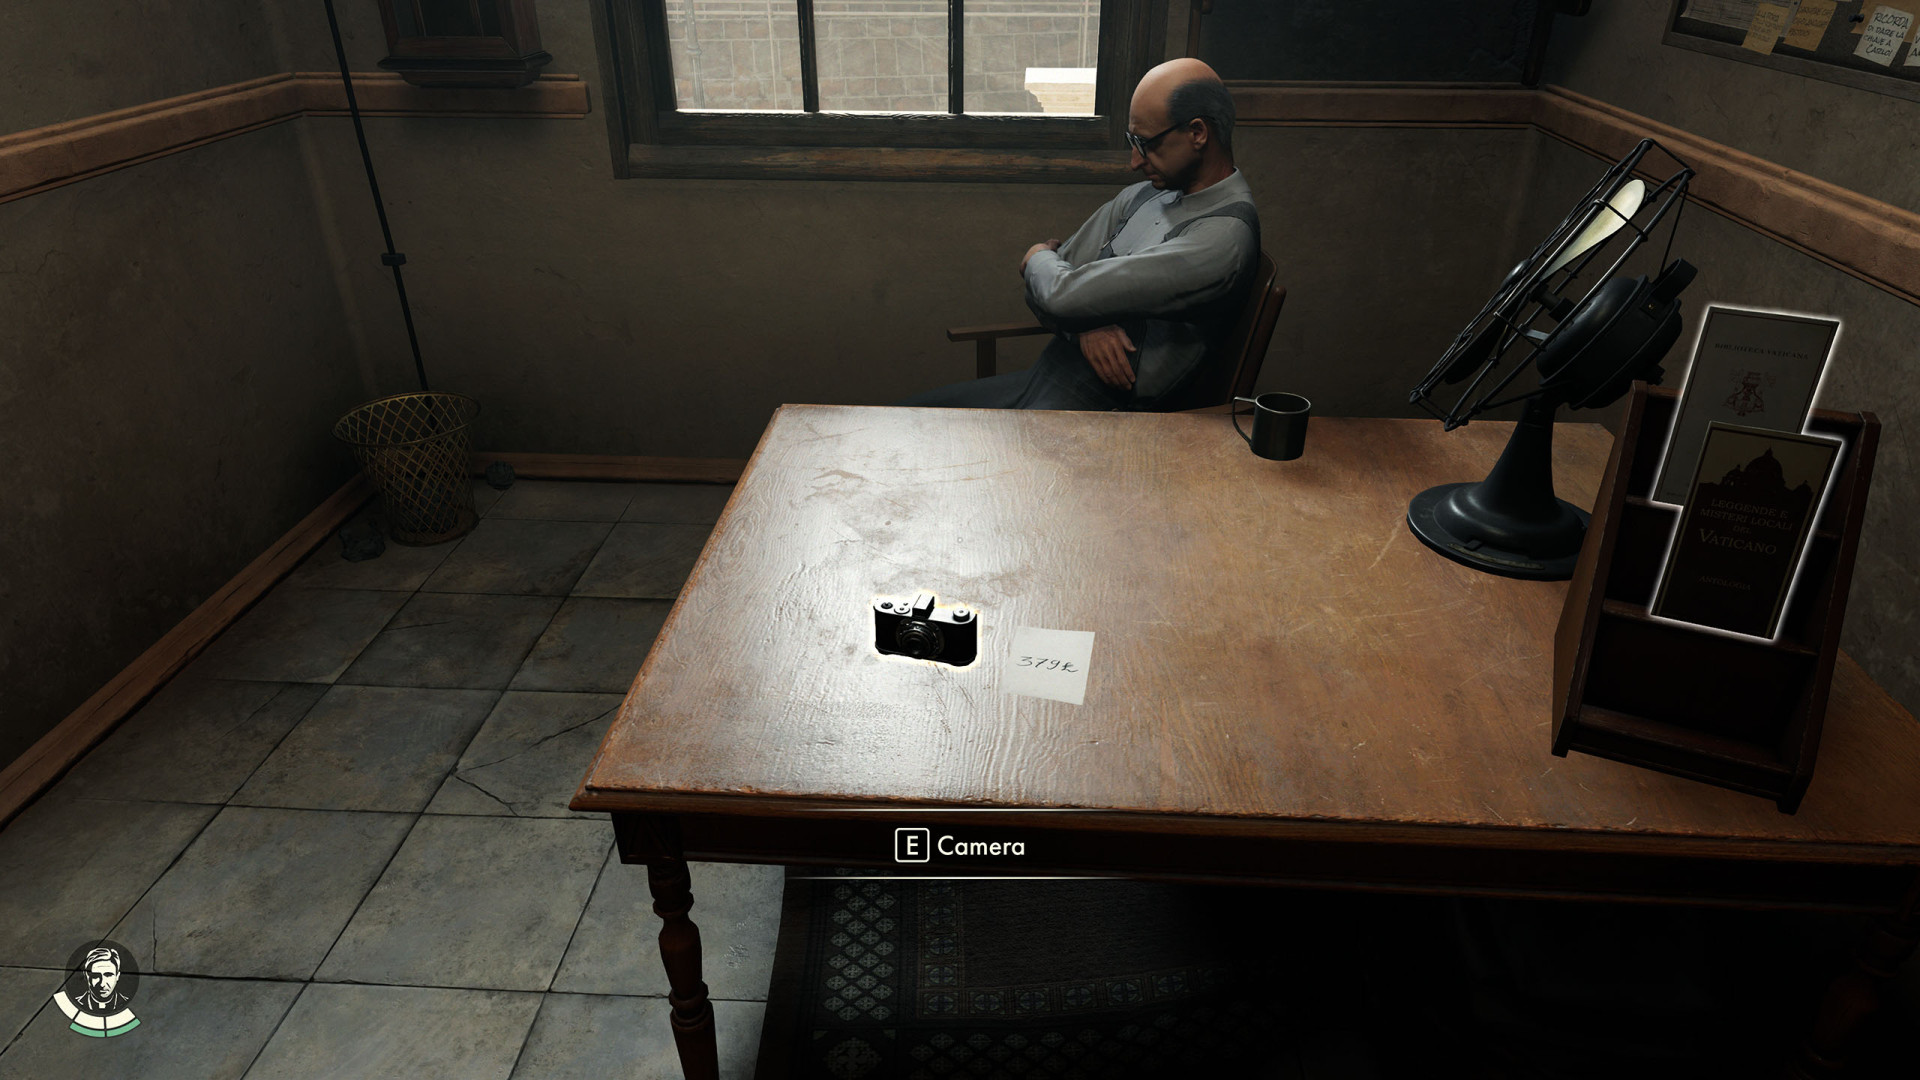
13Camera
It will allow you to take photos that are both needed for the main storyline of the game as well as many side activities.
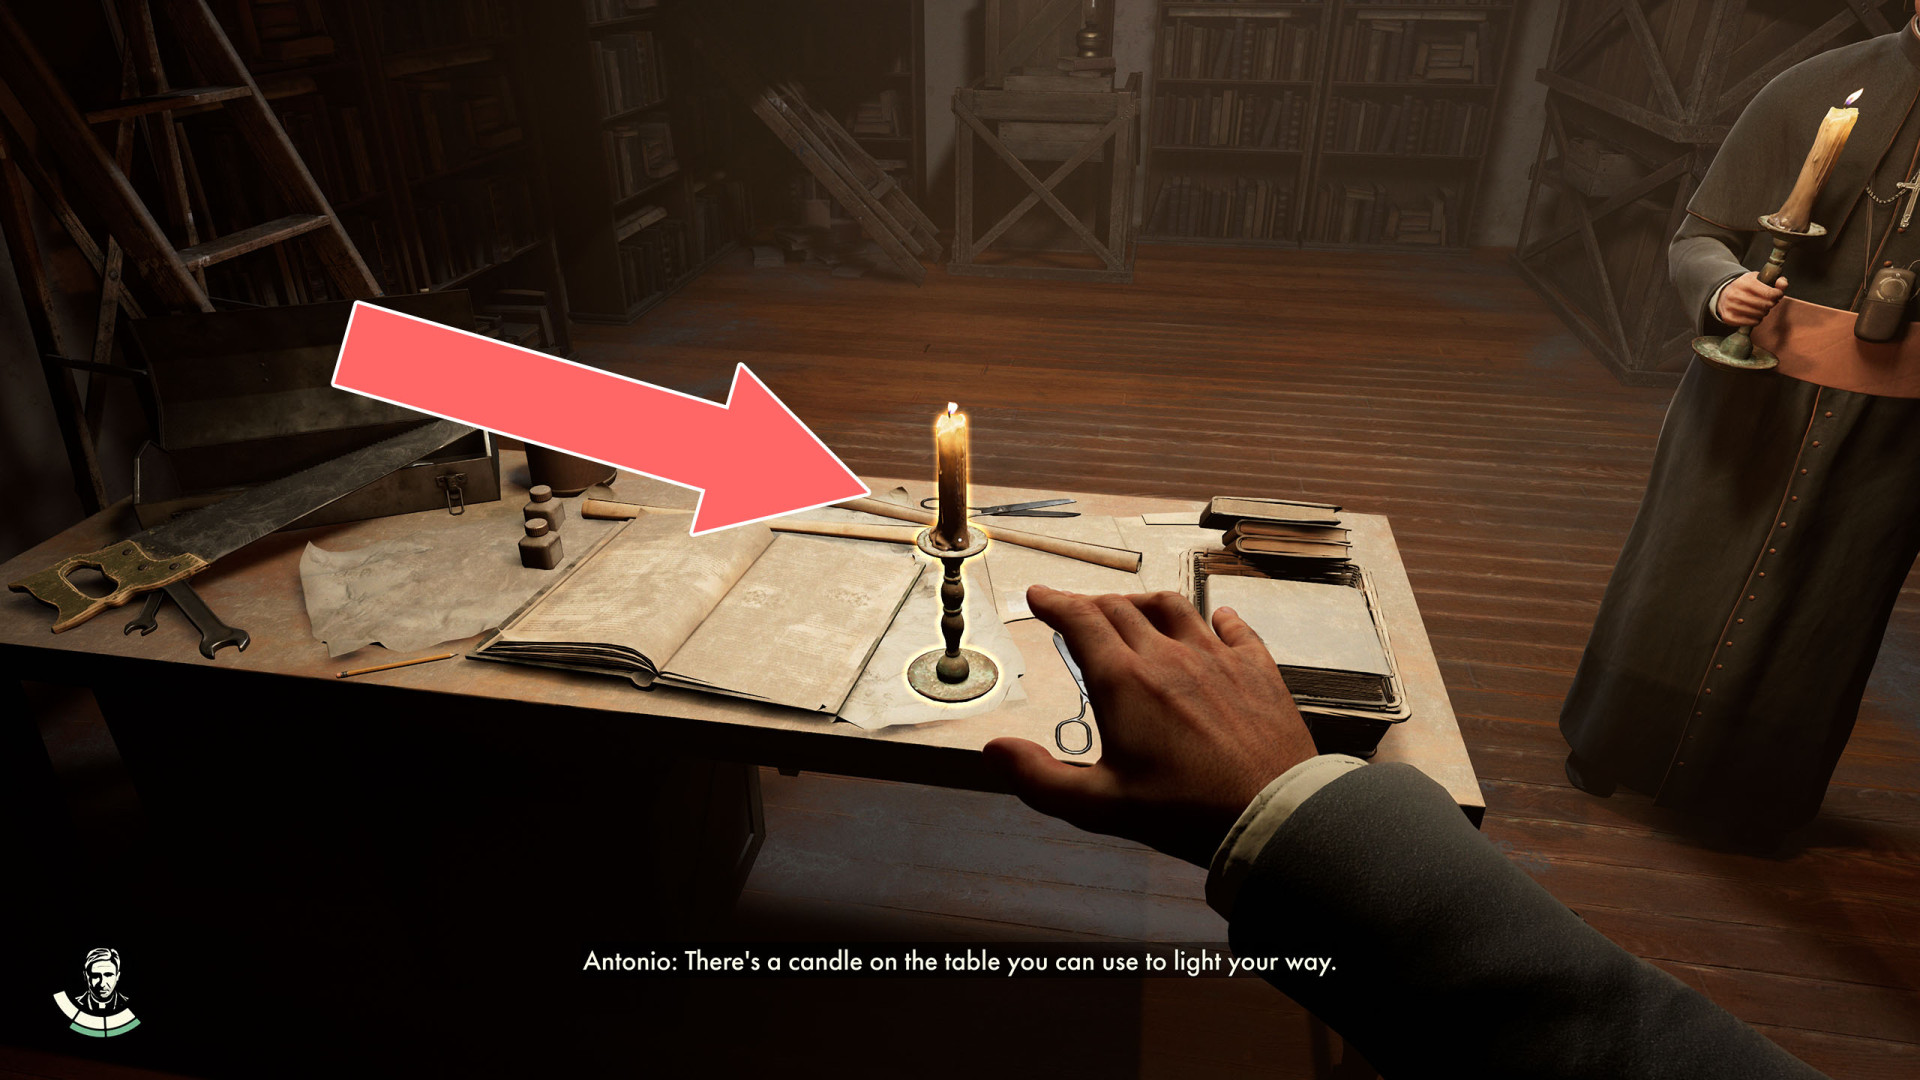
14Candle
Pick it up to be able to explore the Secret Entrance.
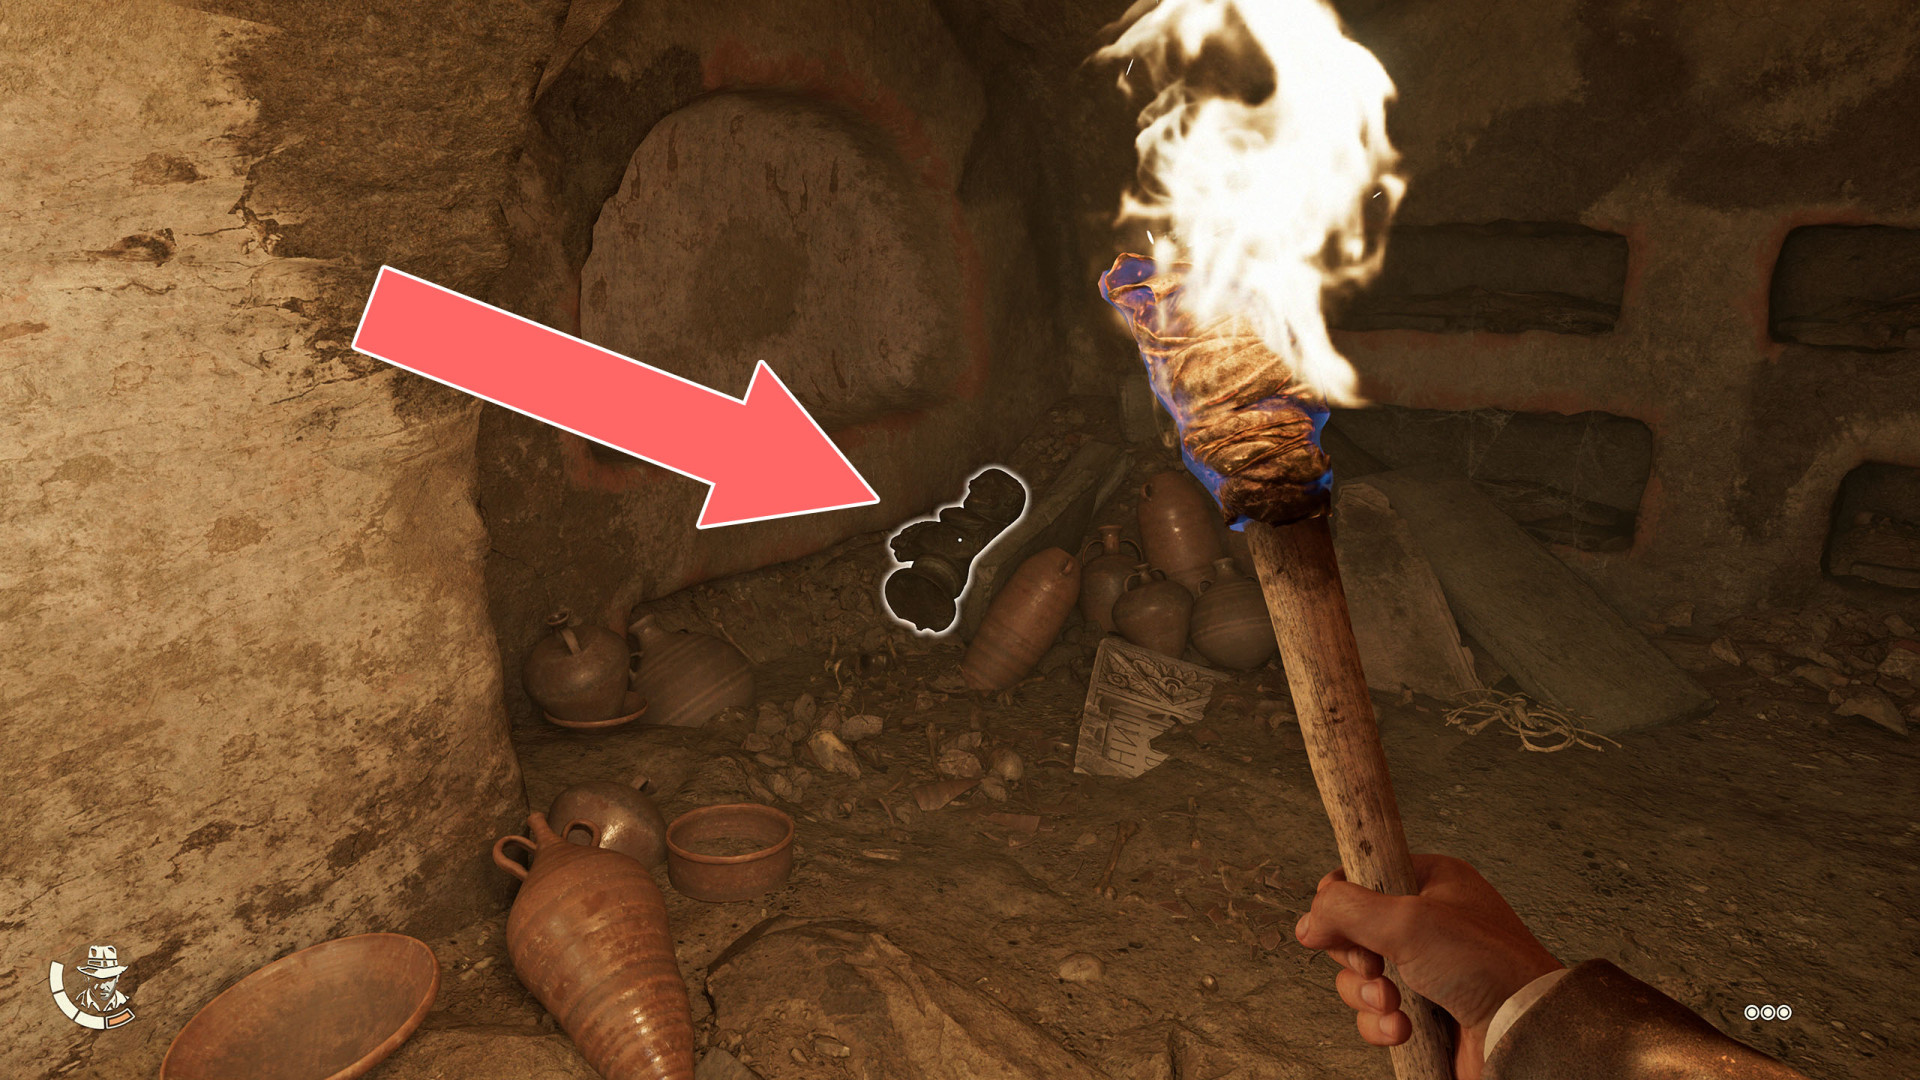
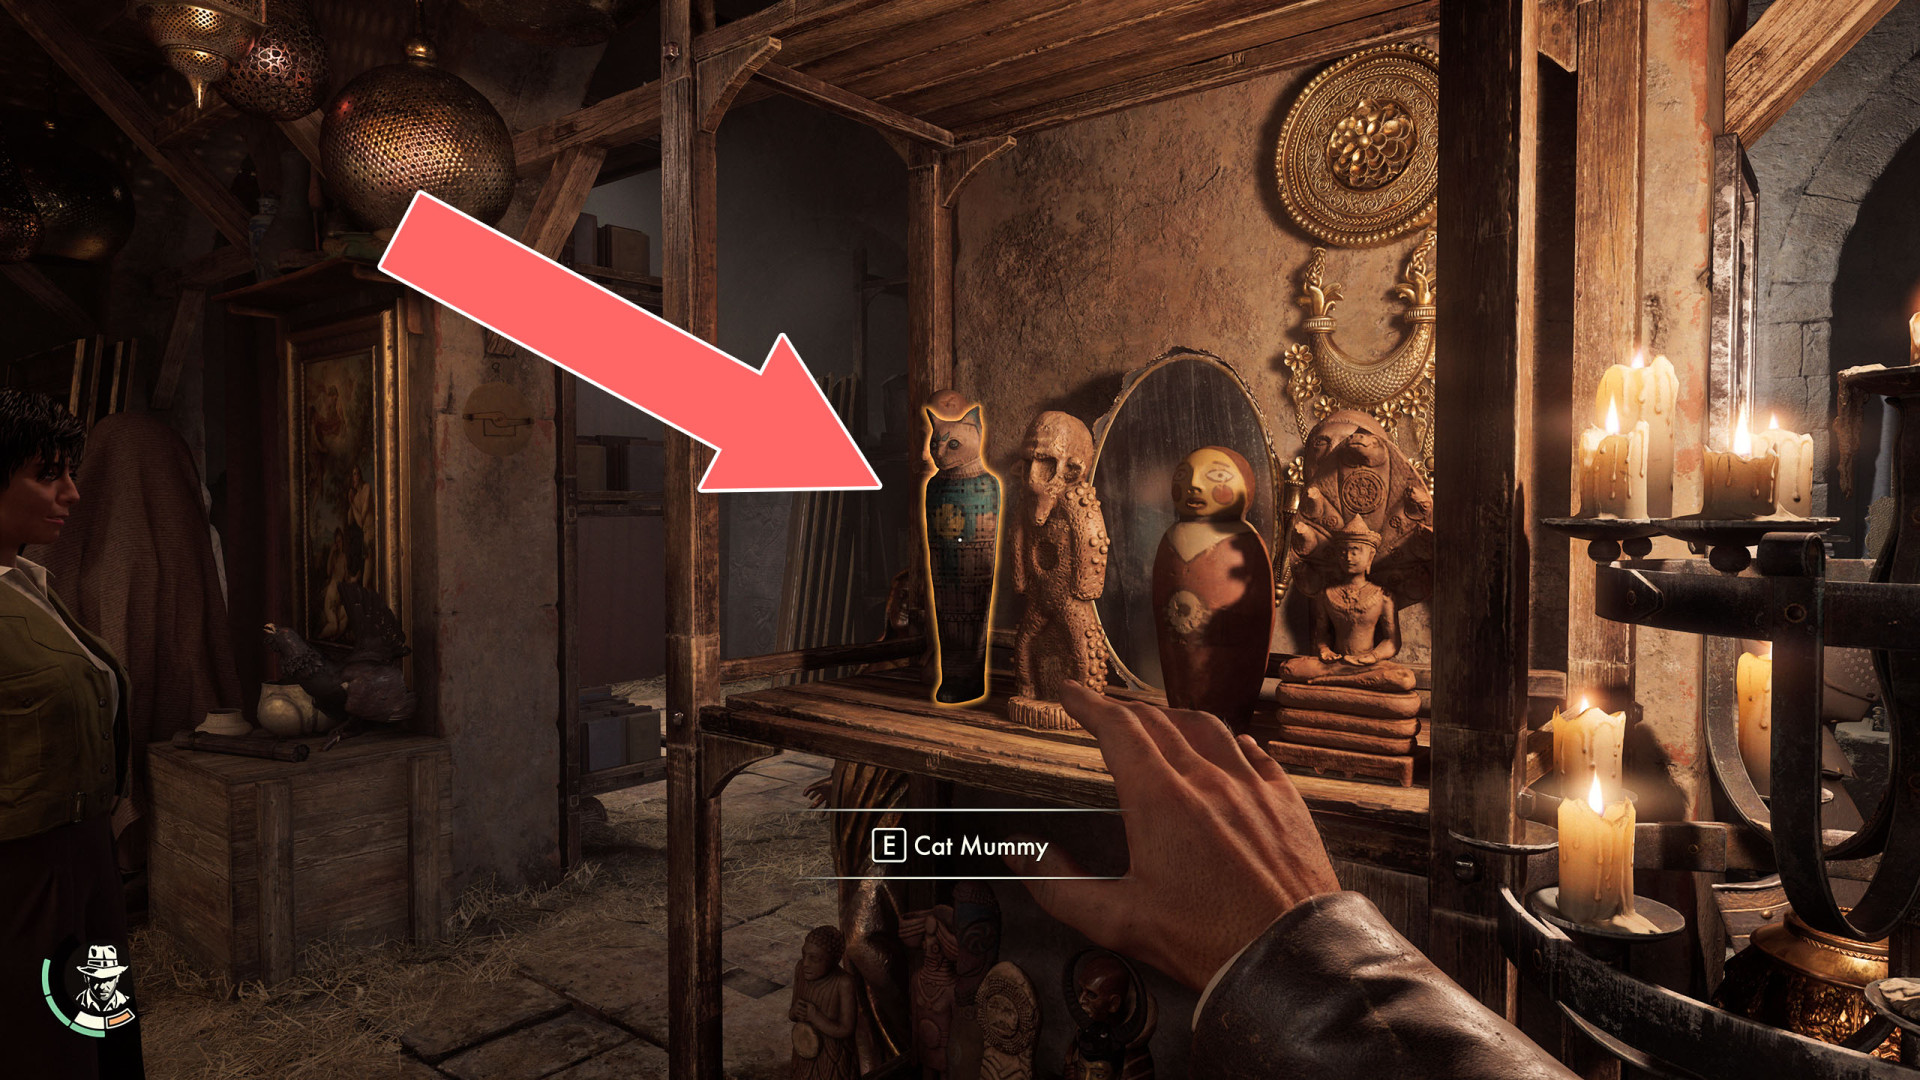
15Cat Mummy
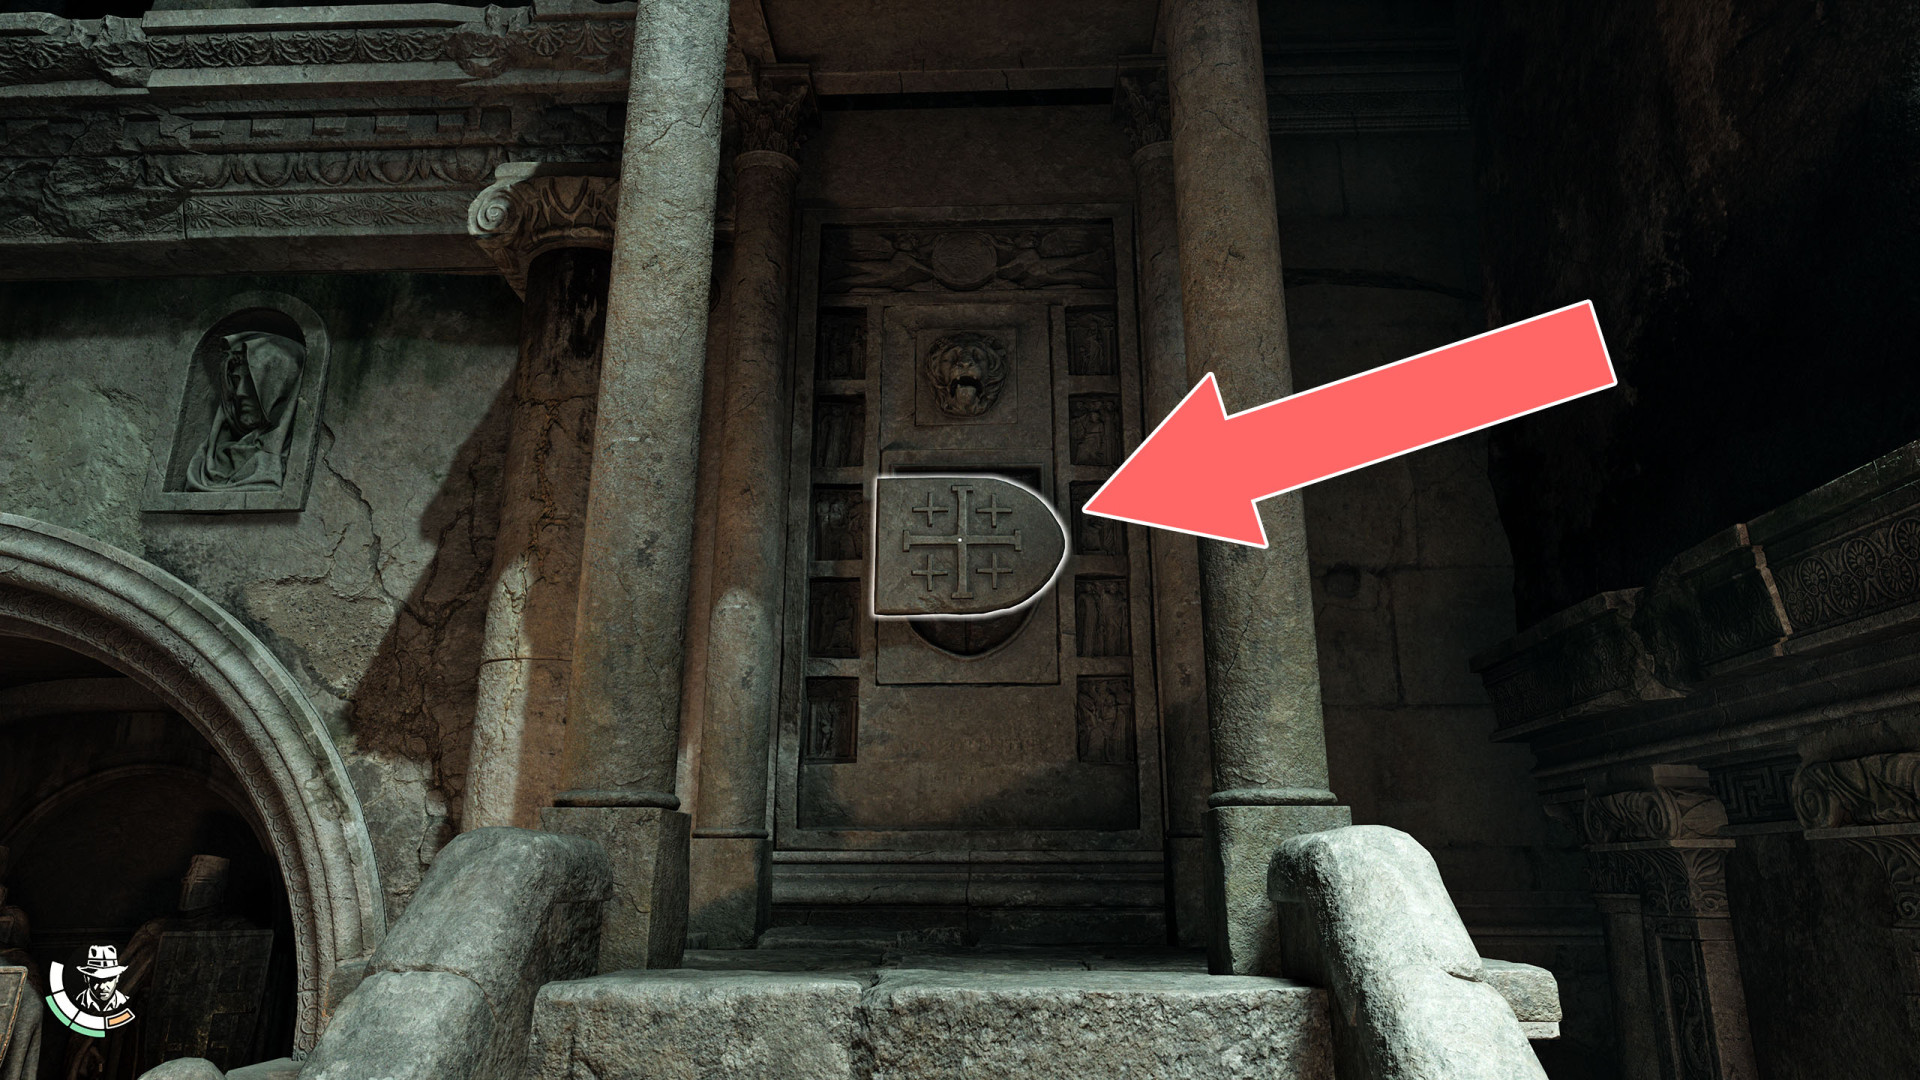
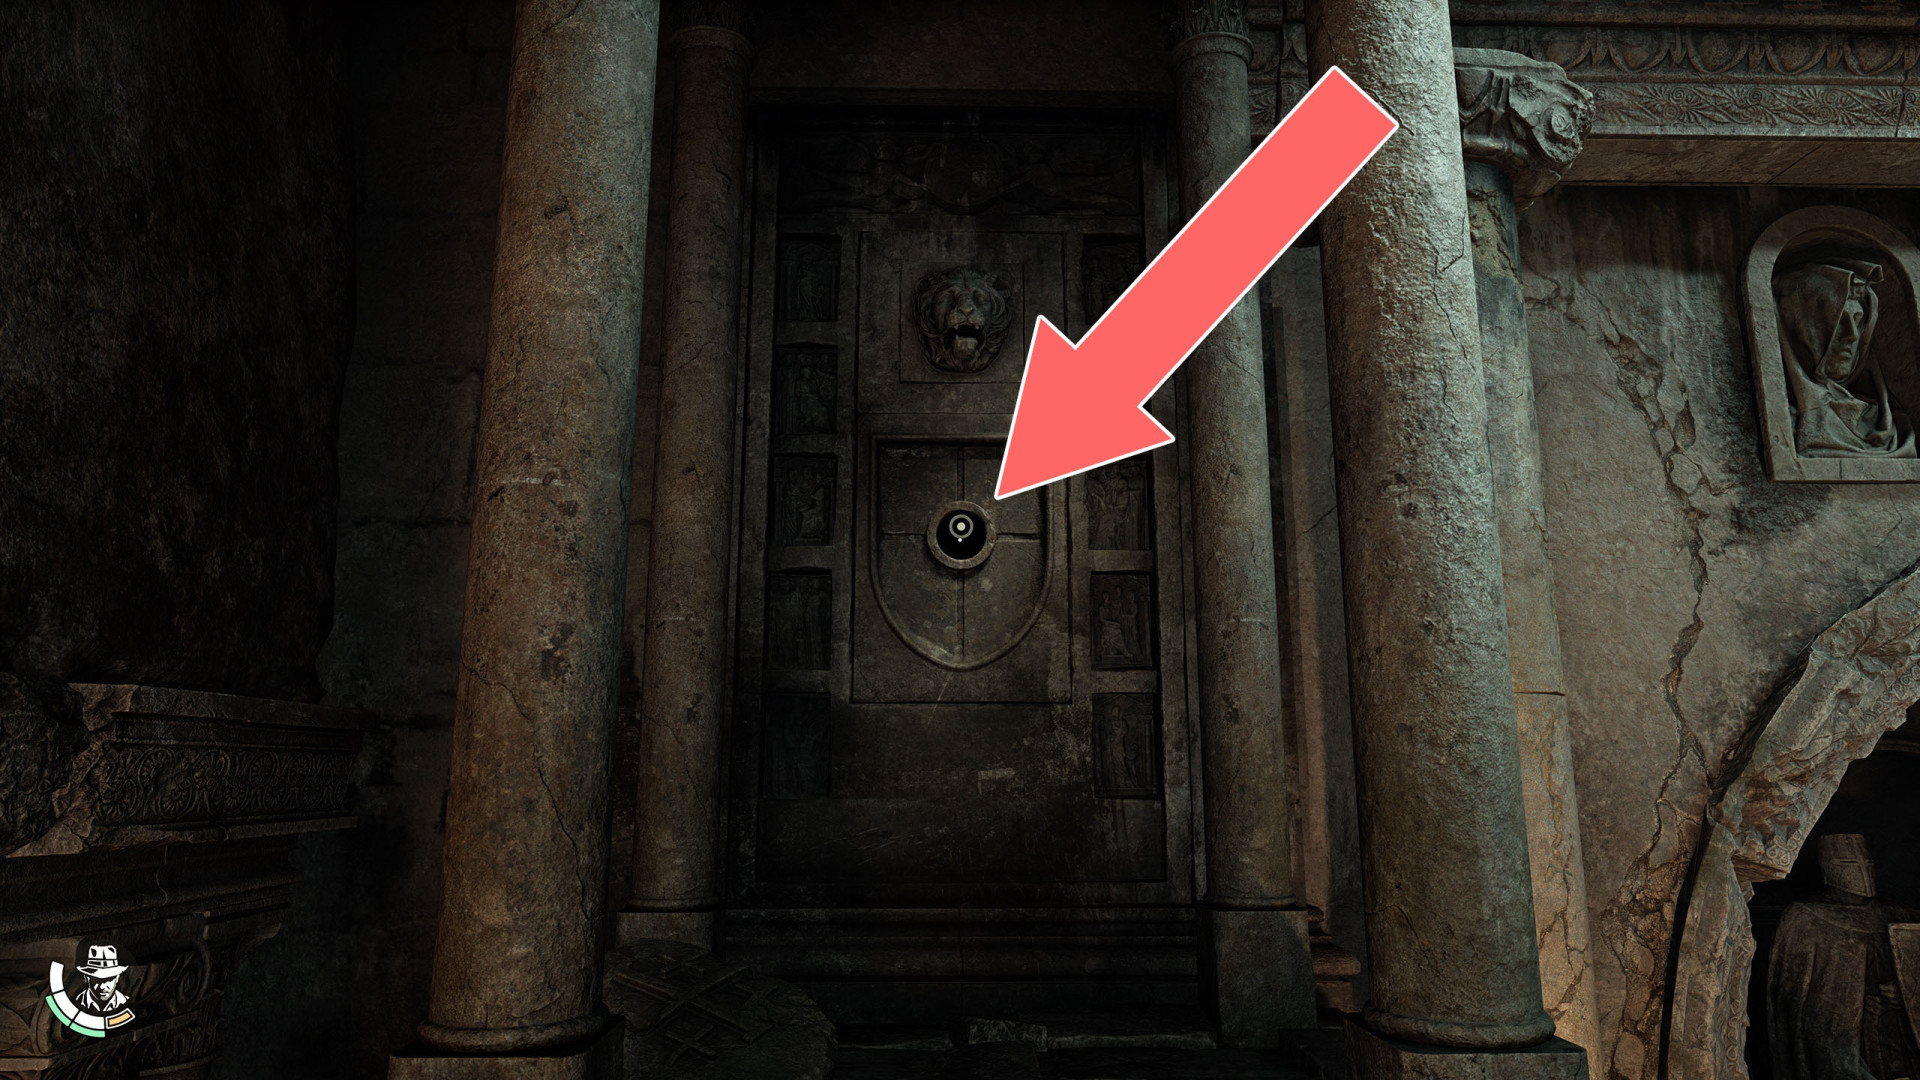
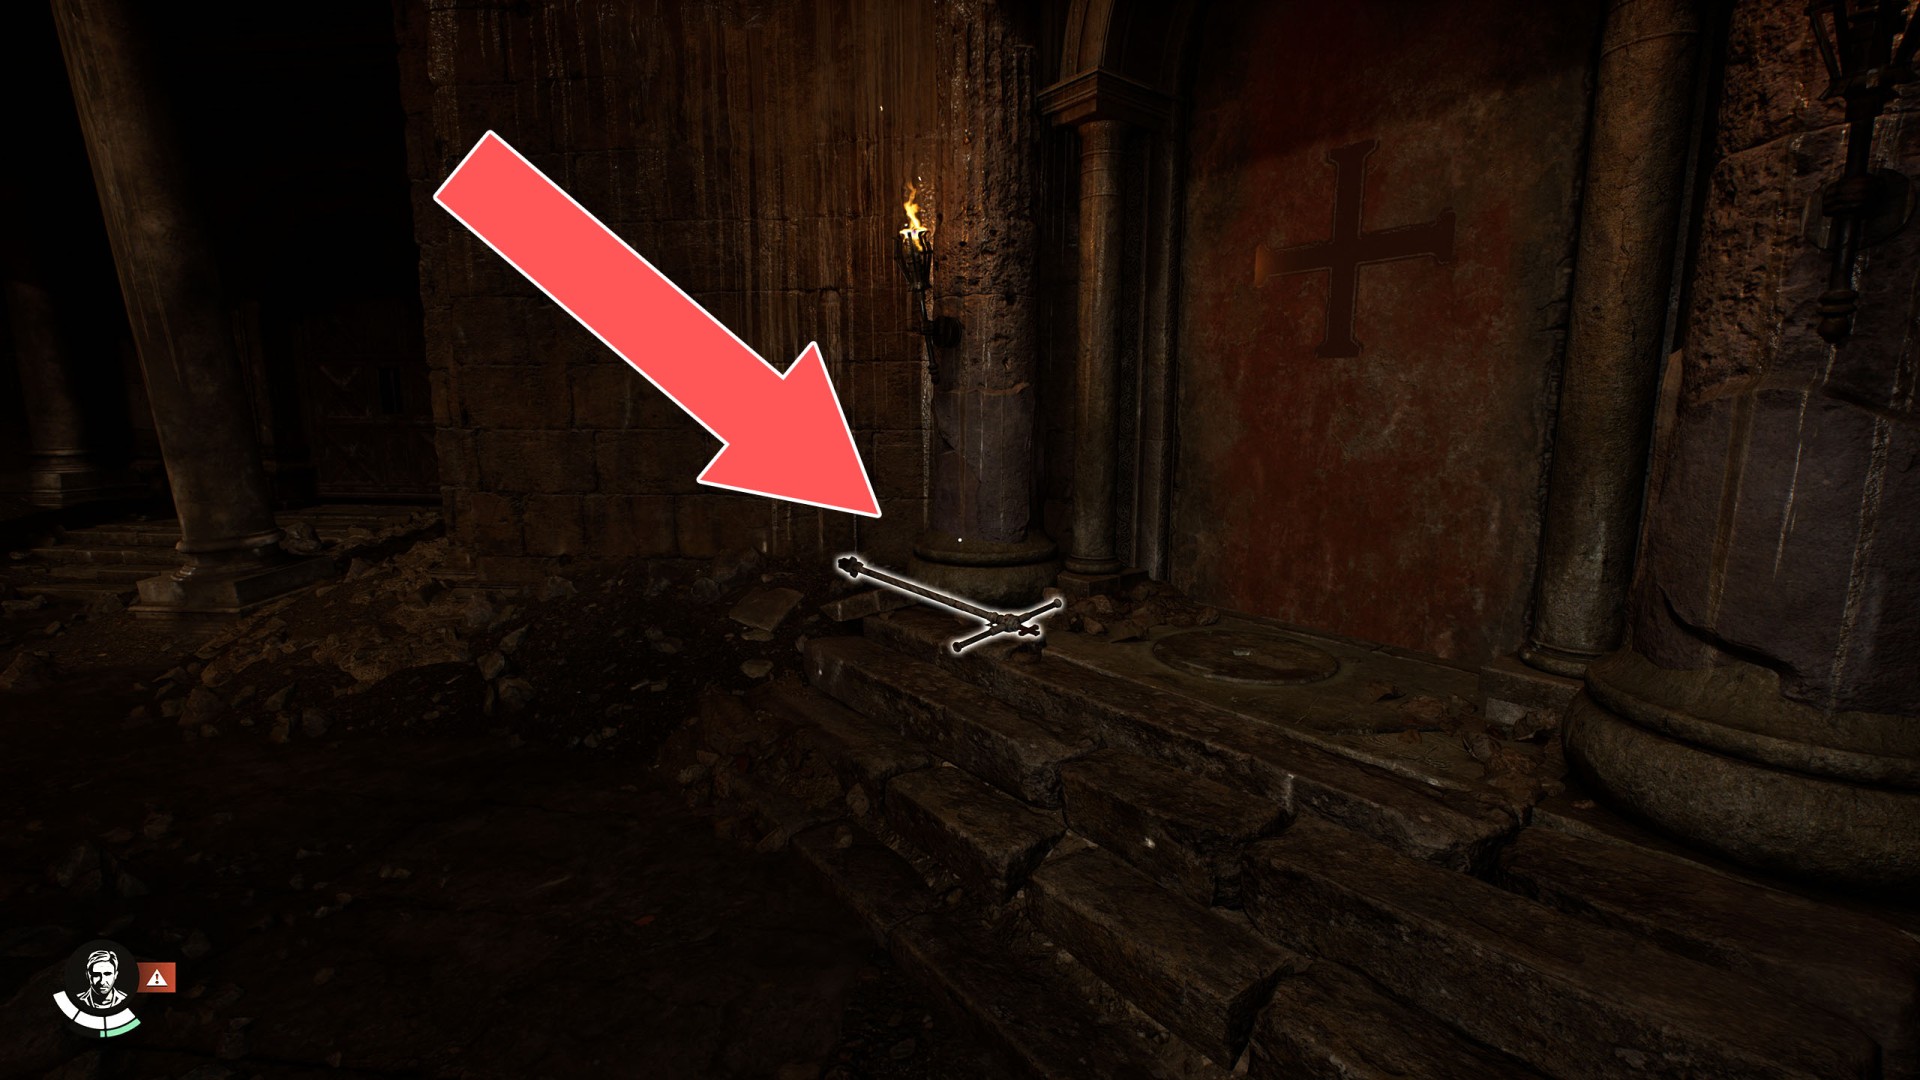
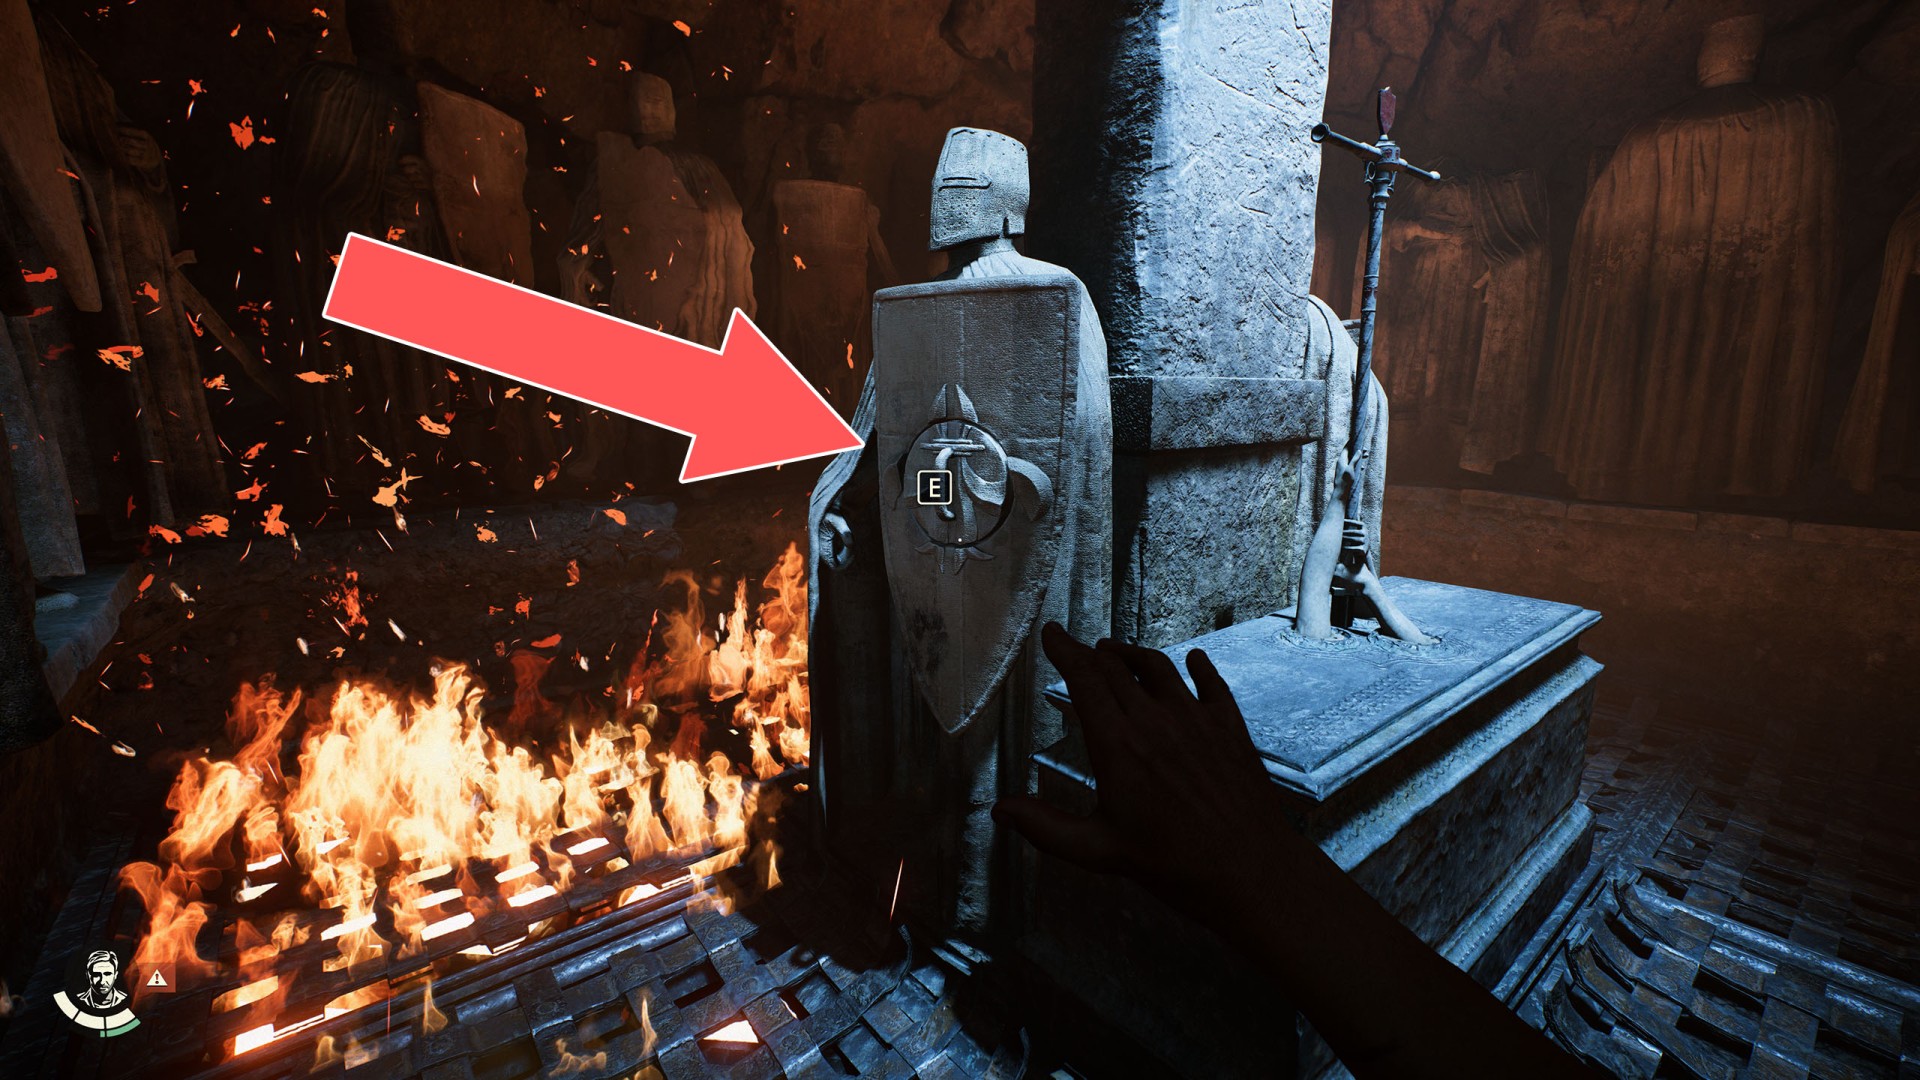
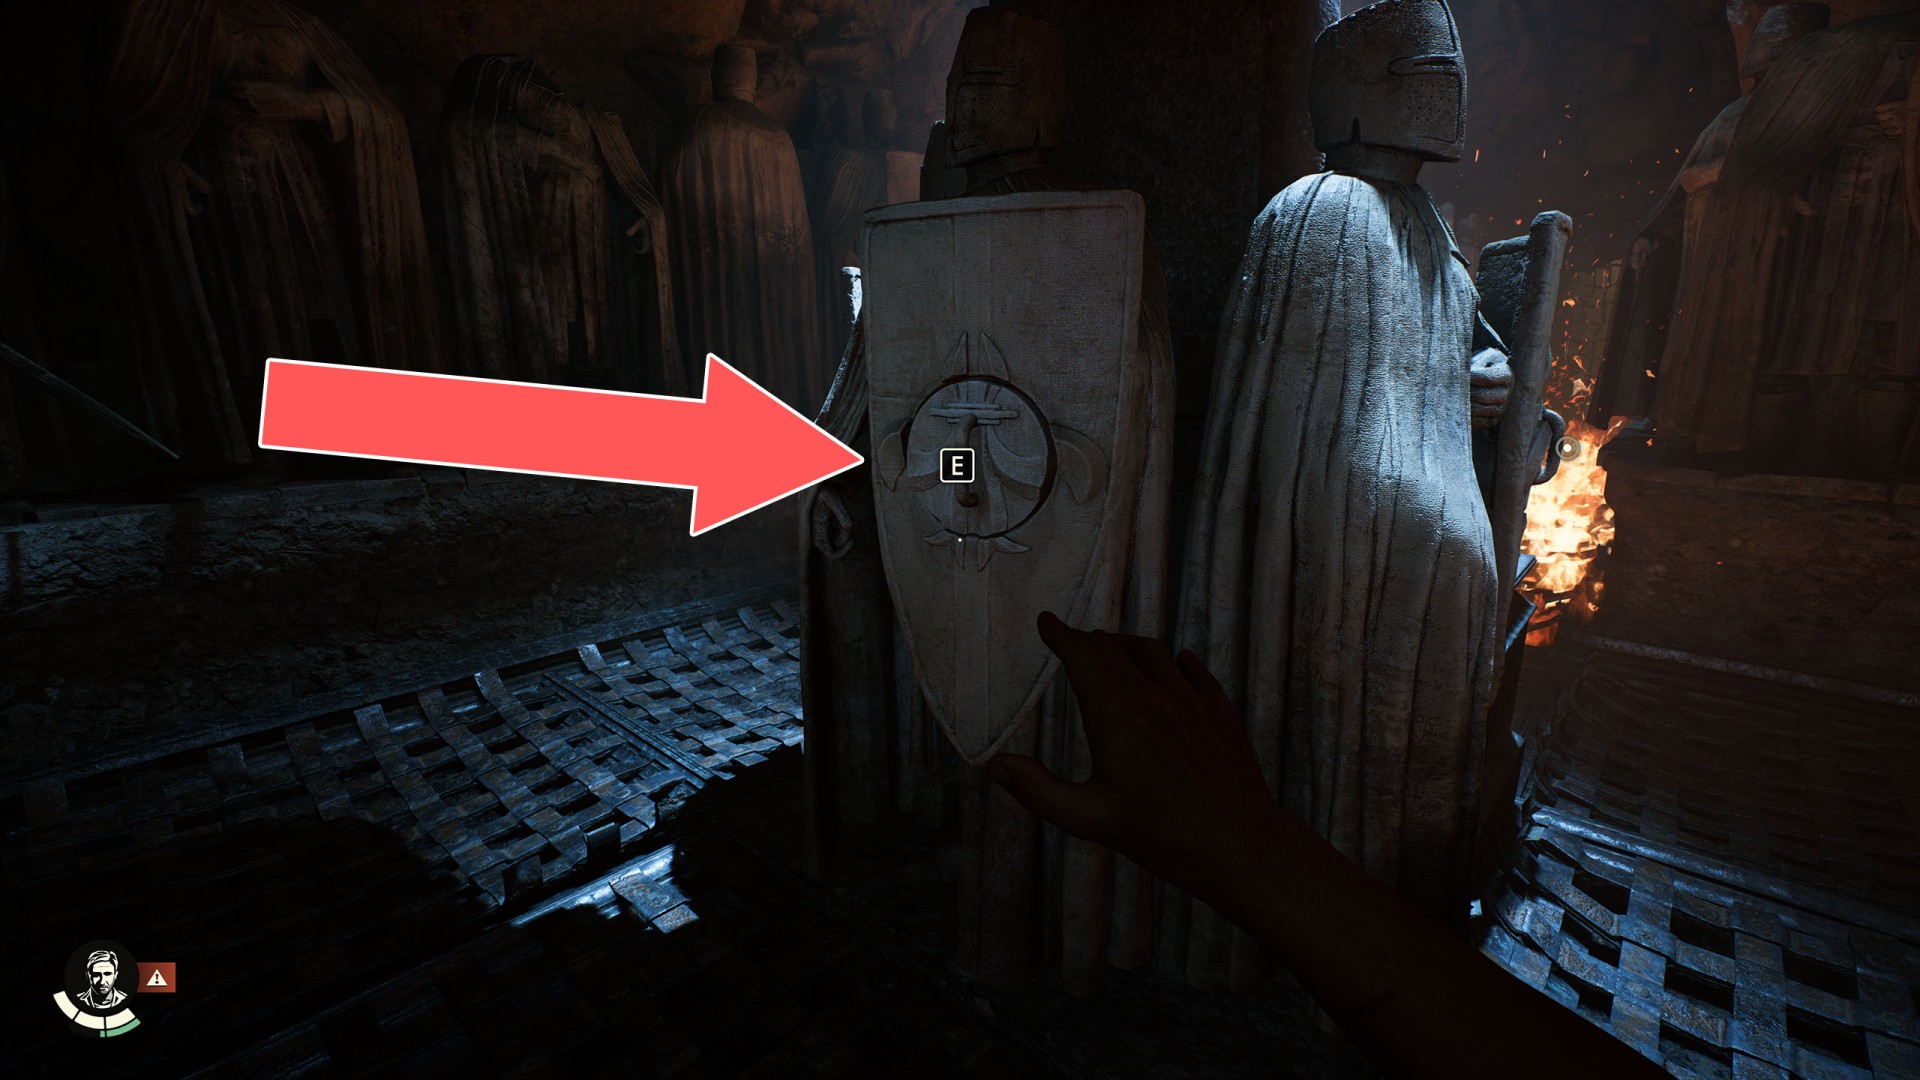
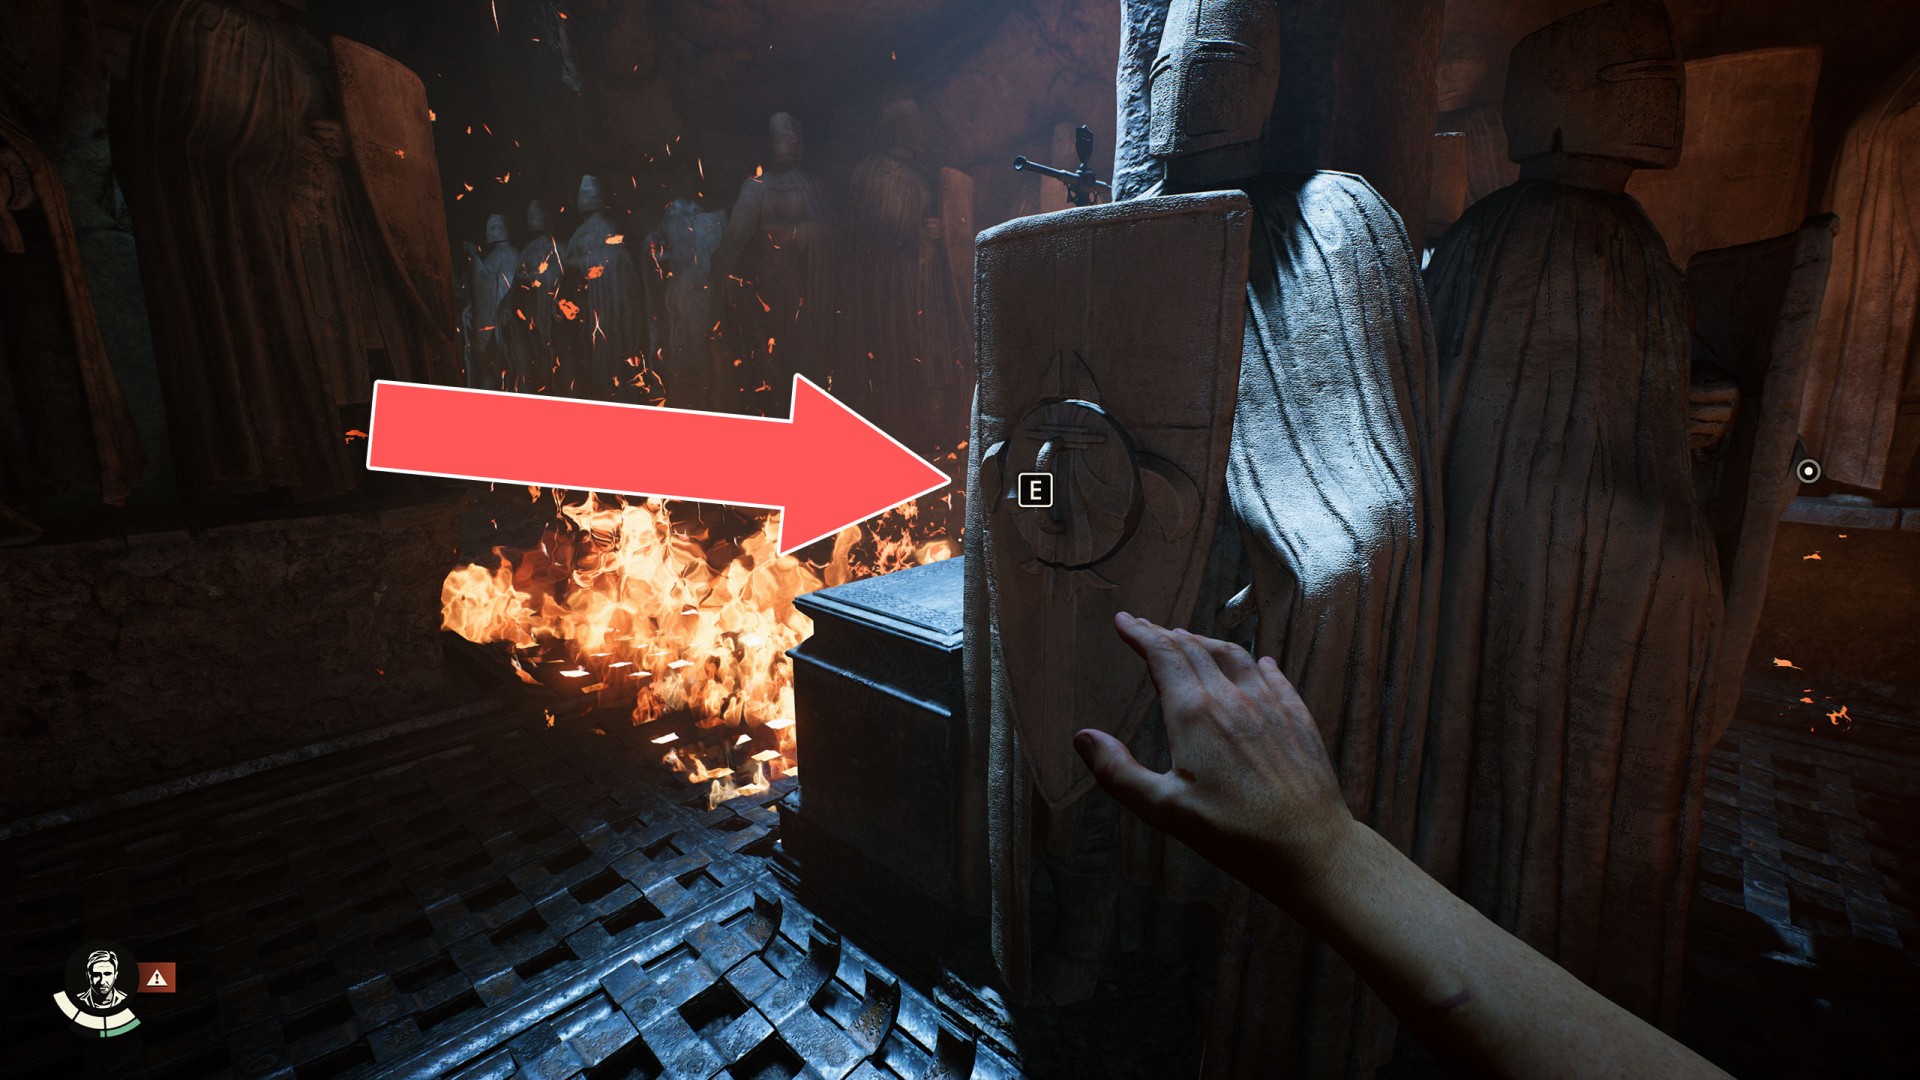
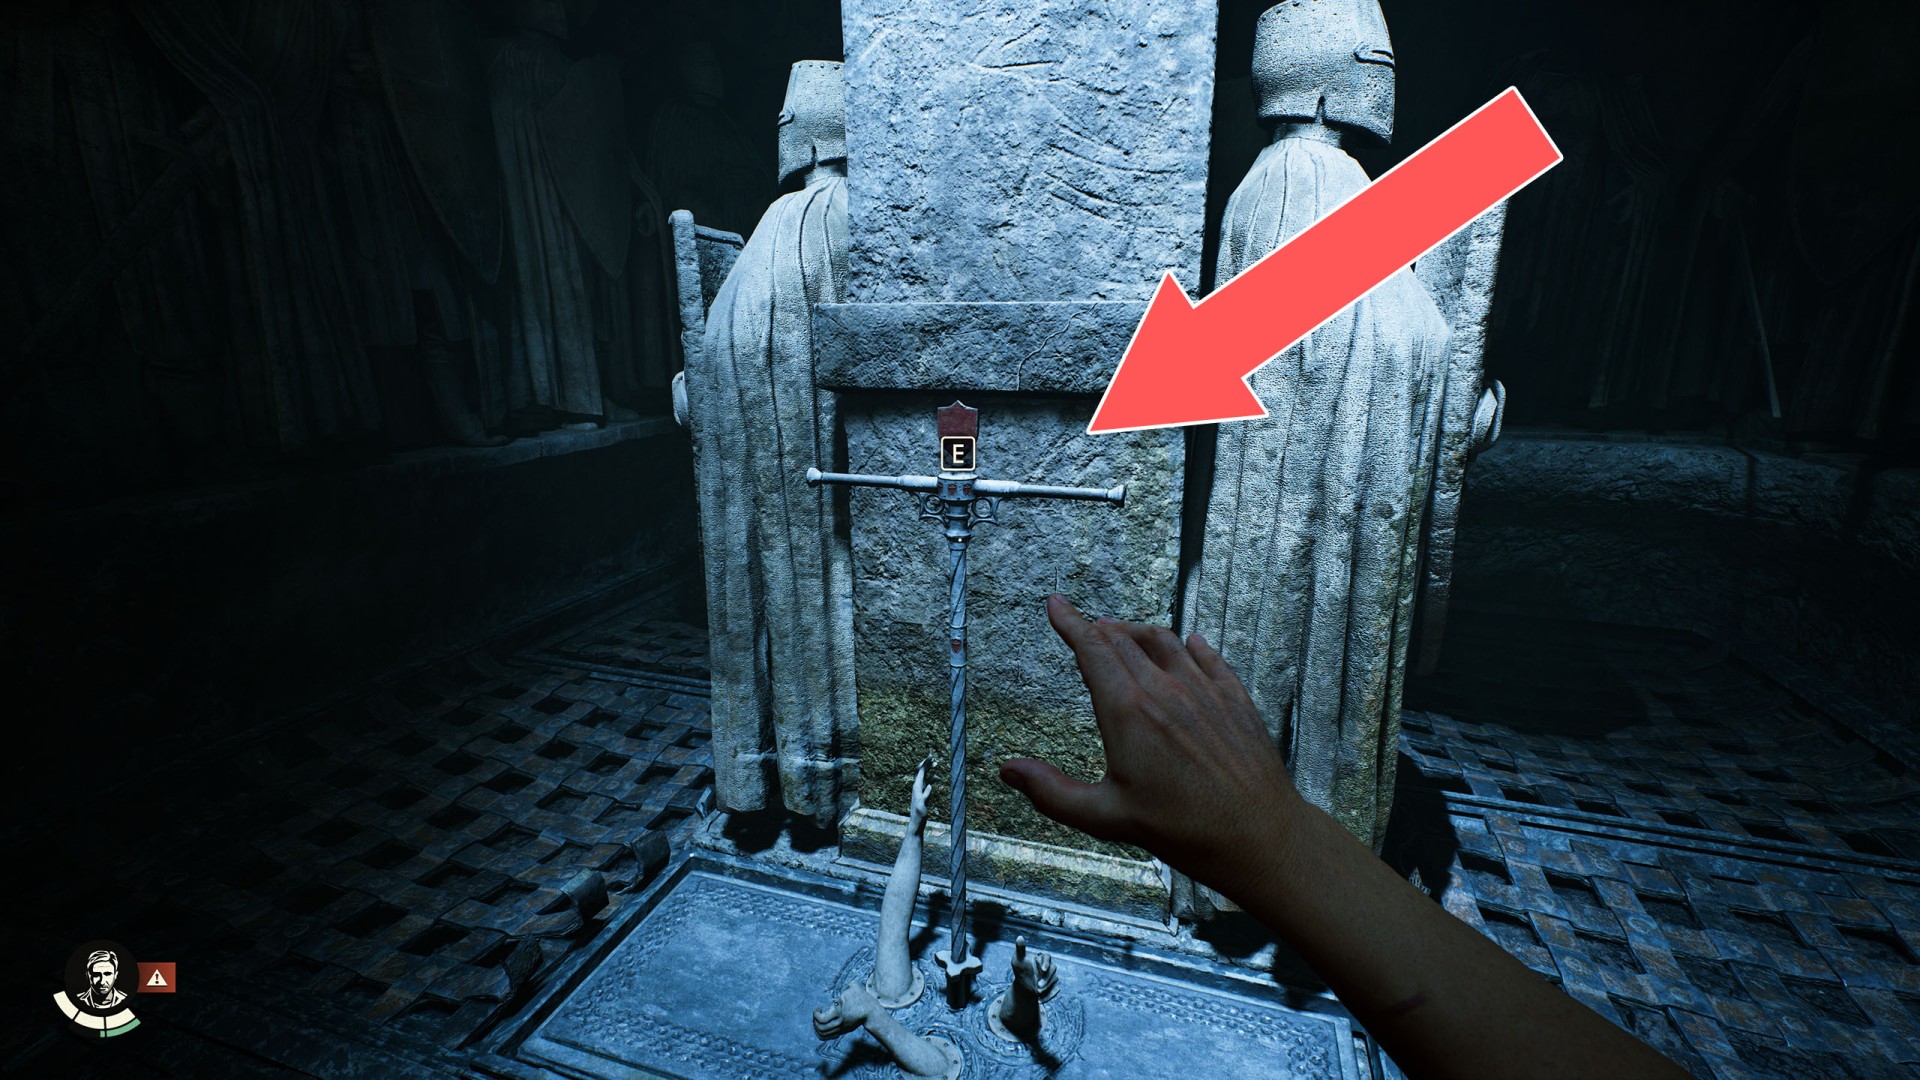
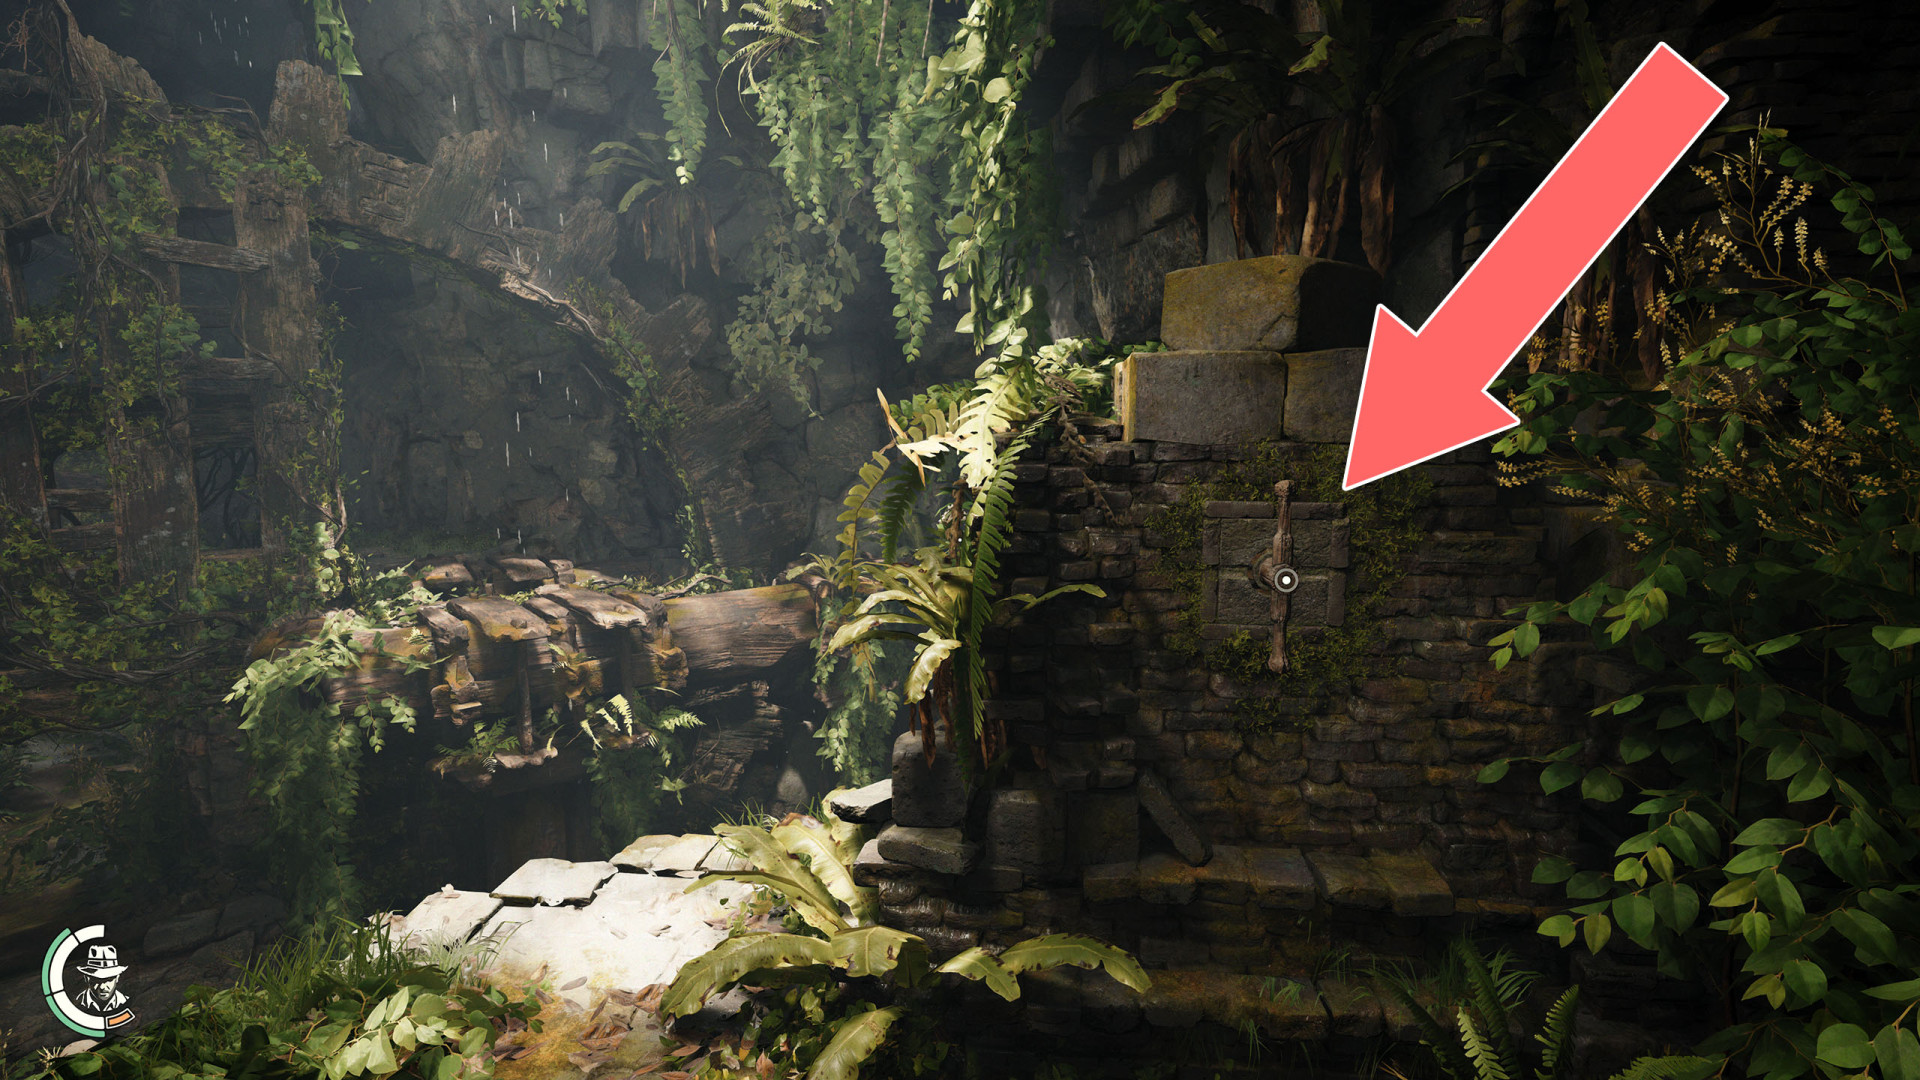
16 Crusader Shield / Hidden Lever
17Dragon Claw

18Golden Dragon Path Lever
19Hidden Lever
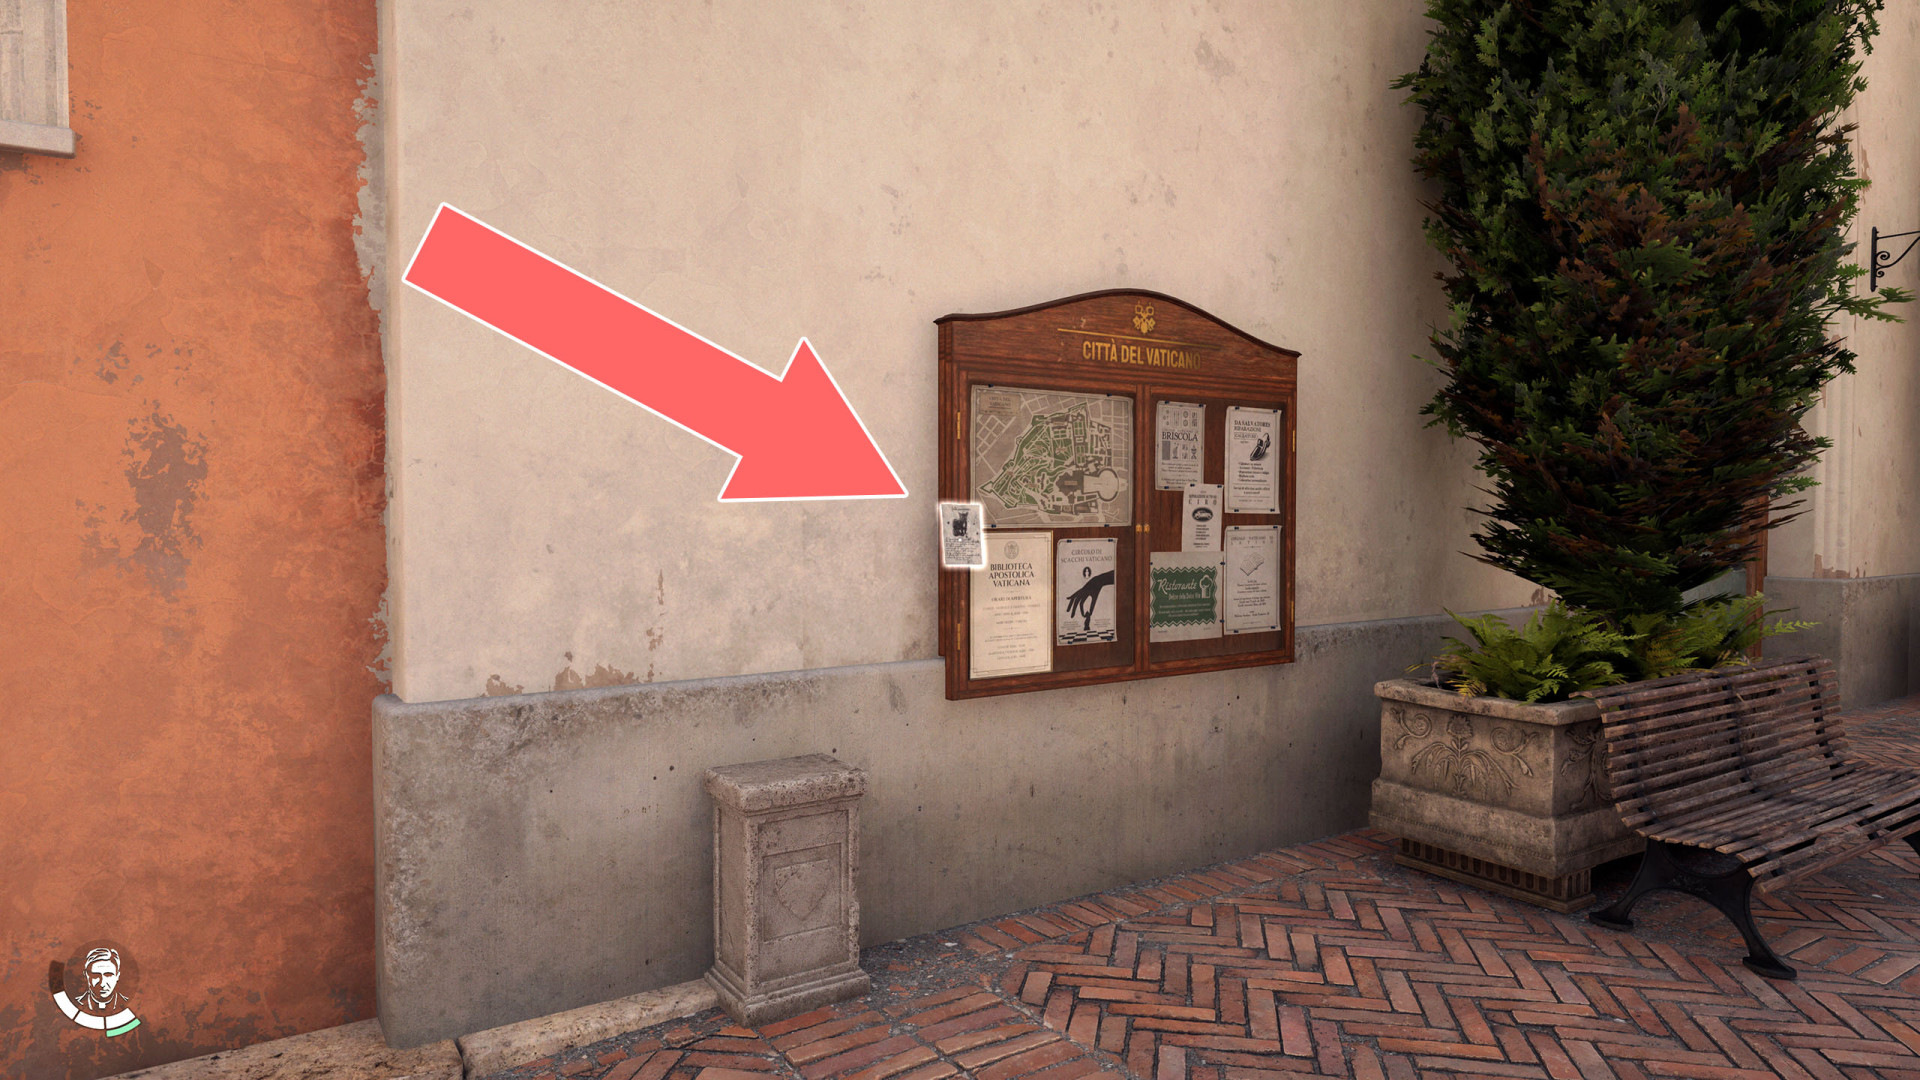
20Missing Cat Flyer
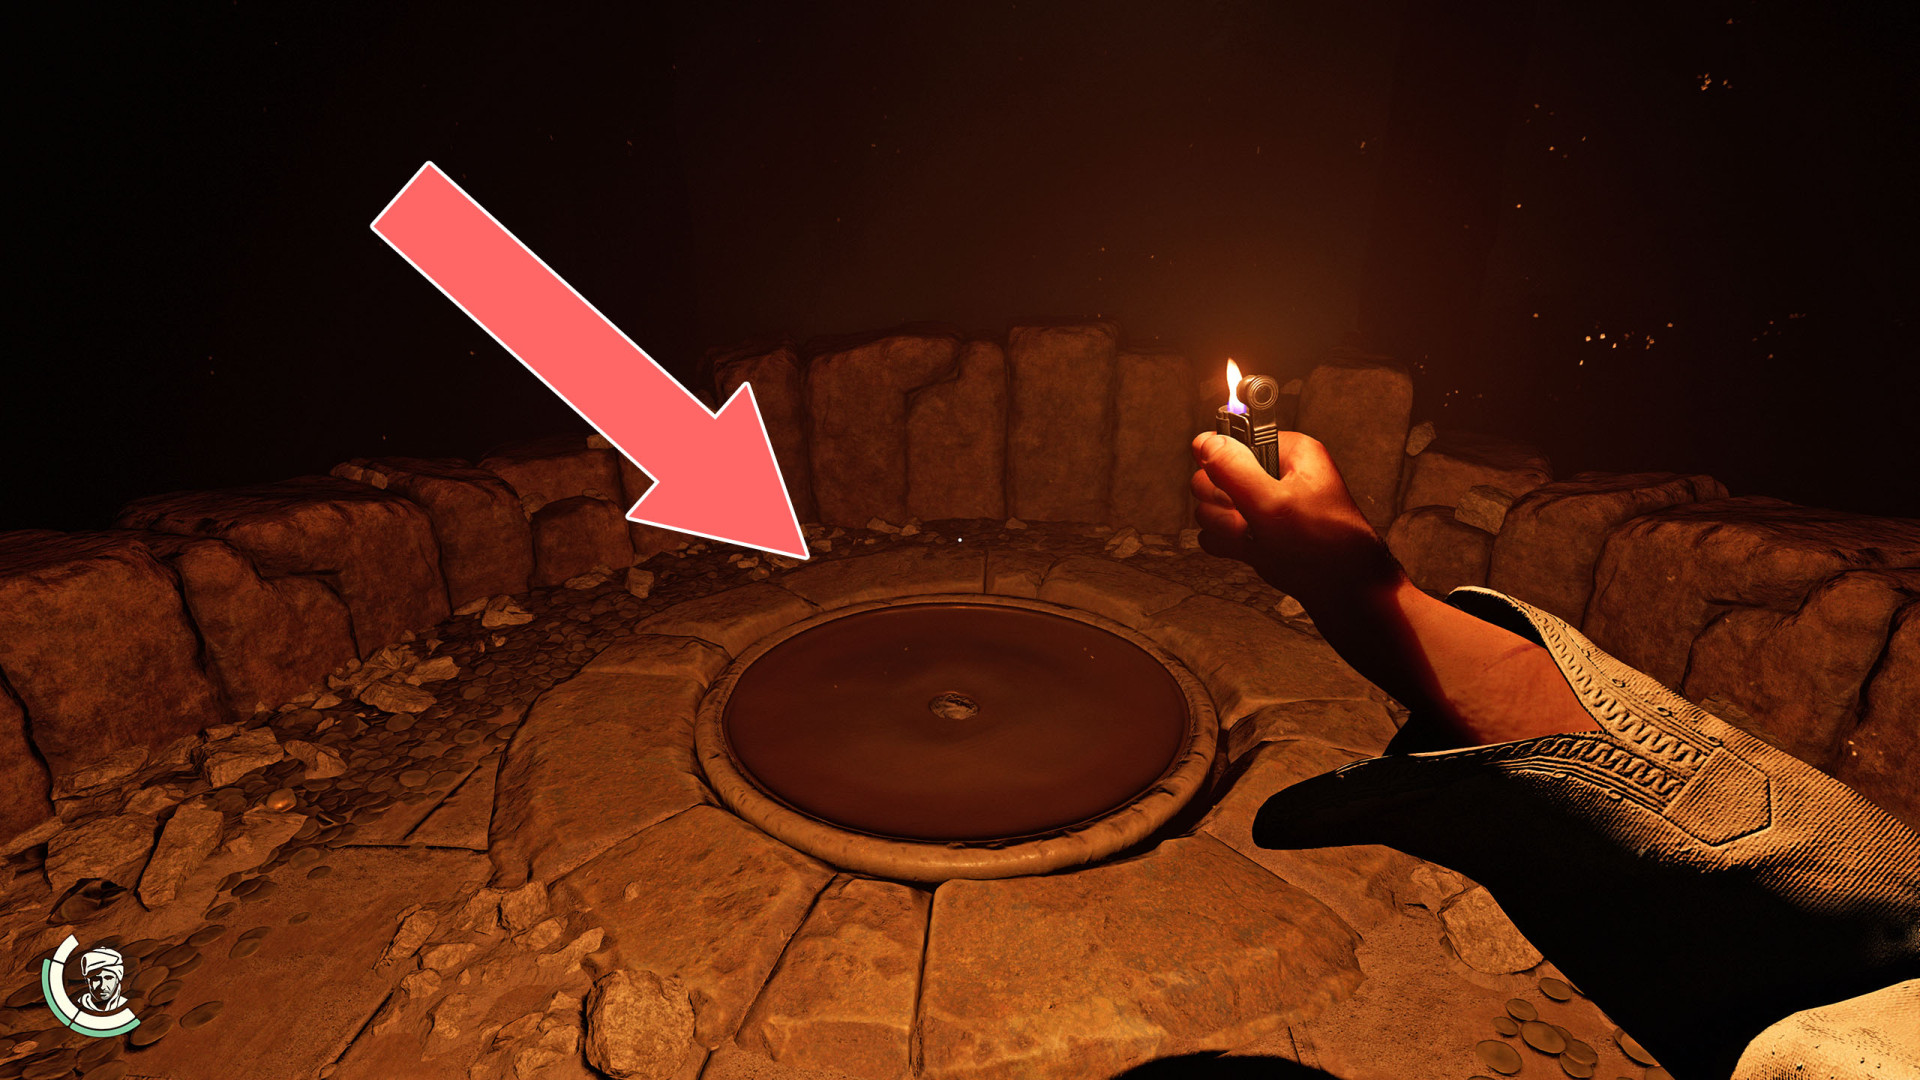
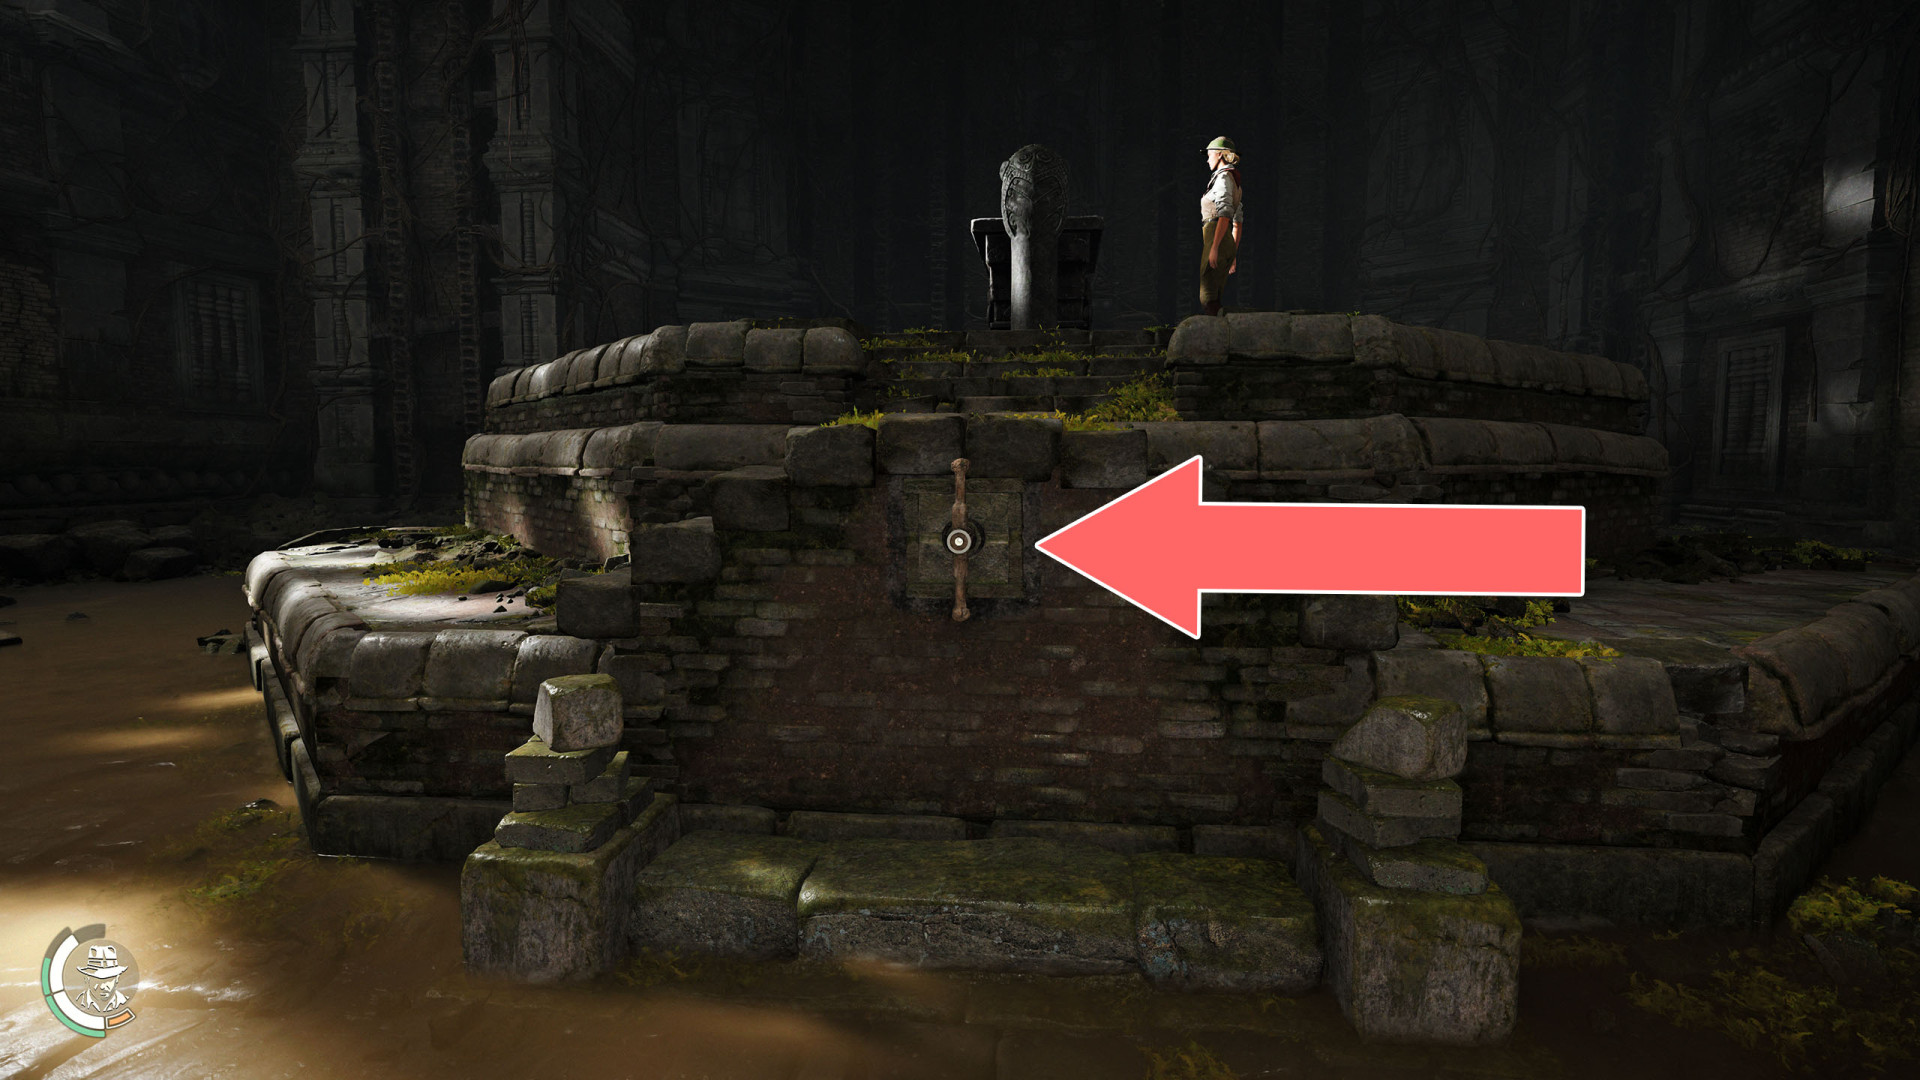
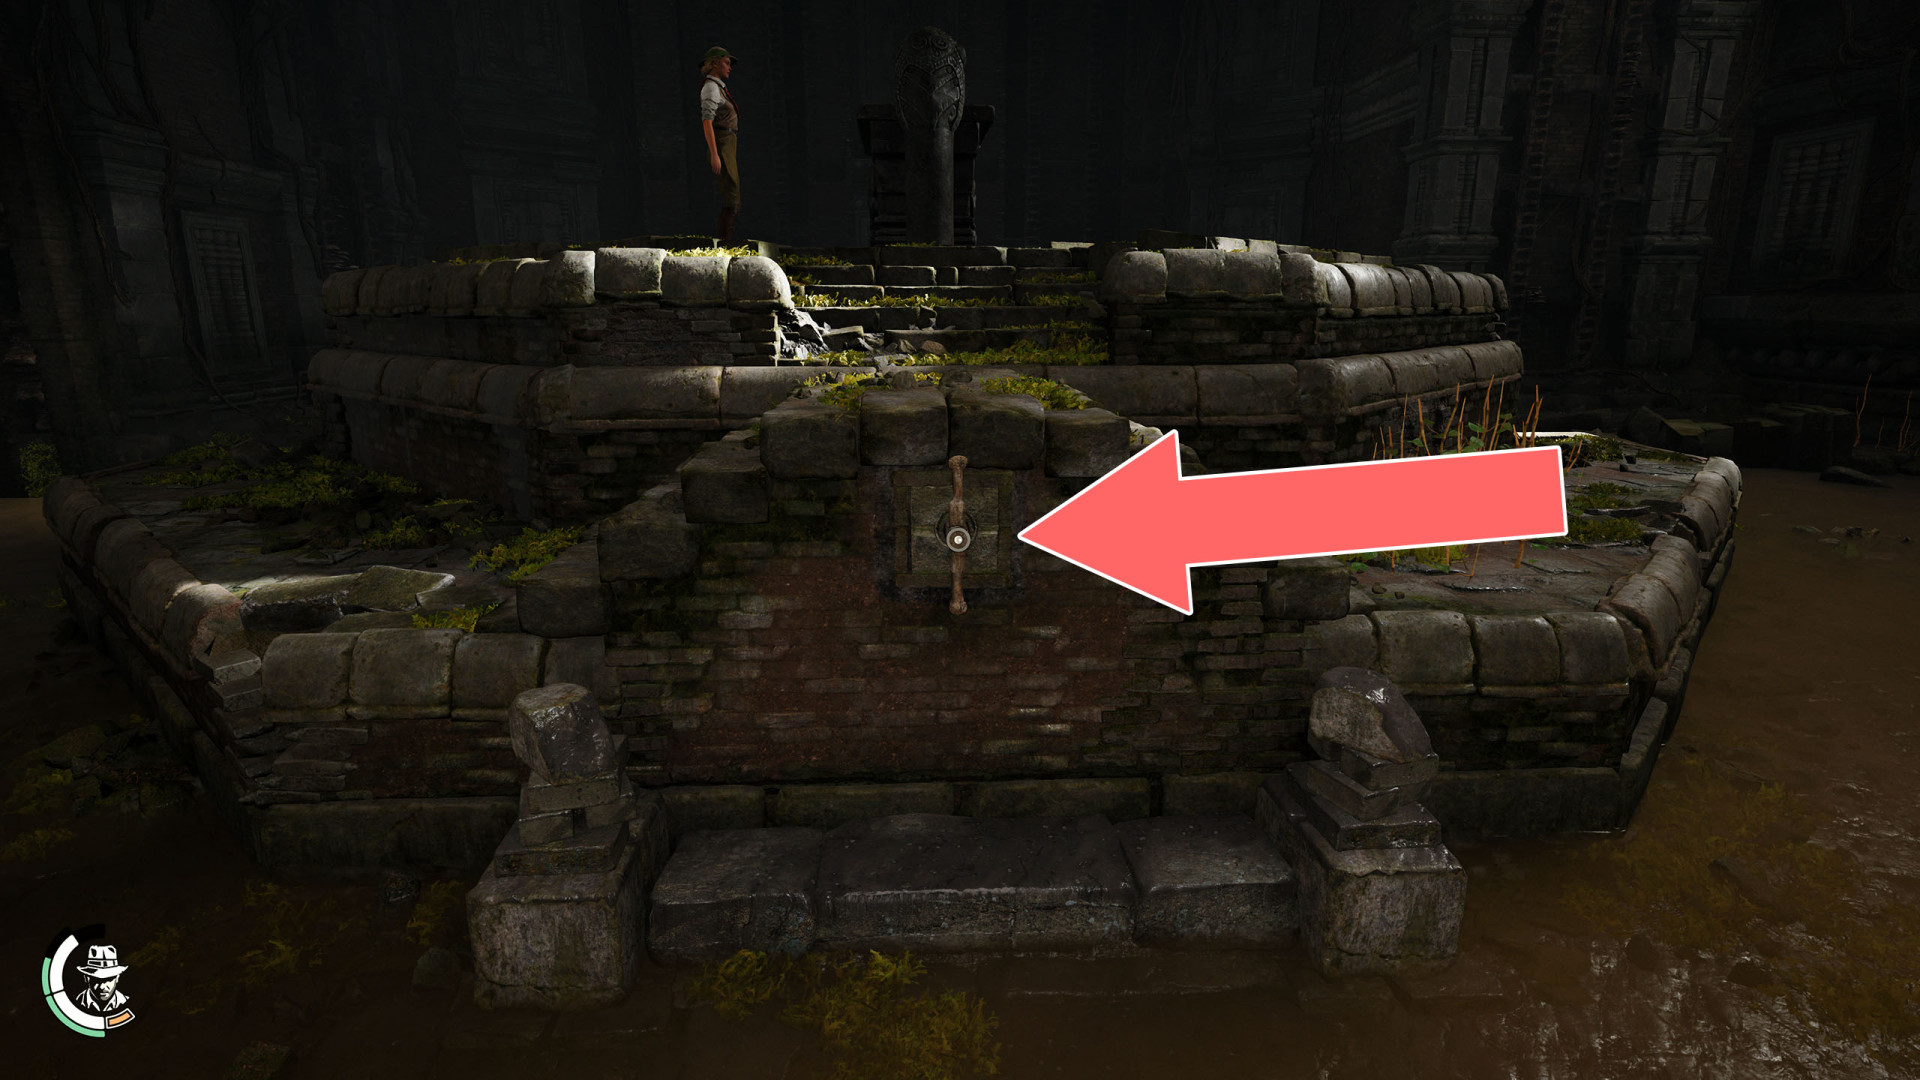
21Pedestal (Fountain)
22Pedestal (Necropolis #1)
23Pedestal (Necropolis #2)
24Pedestal (Necropolis #3)
25Pedestal (Necropolis #3)
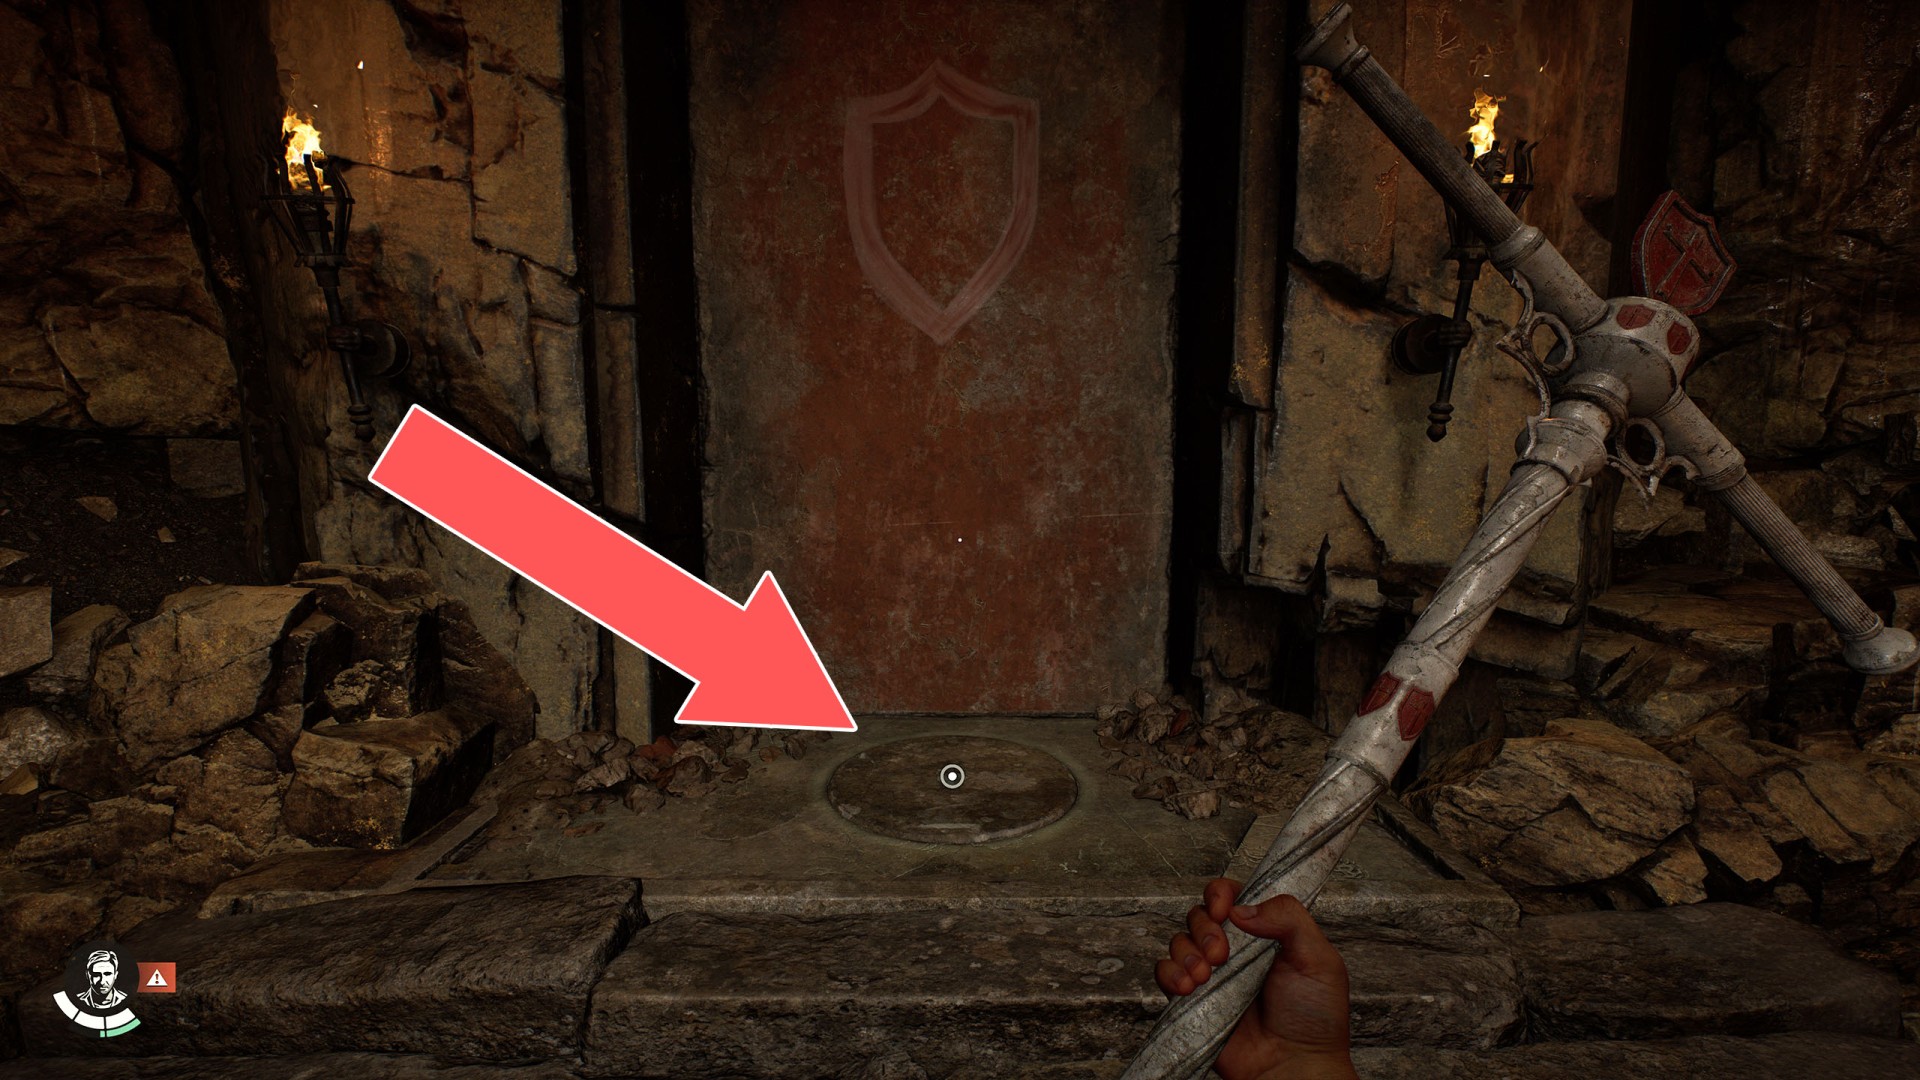
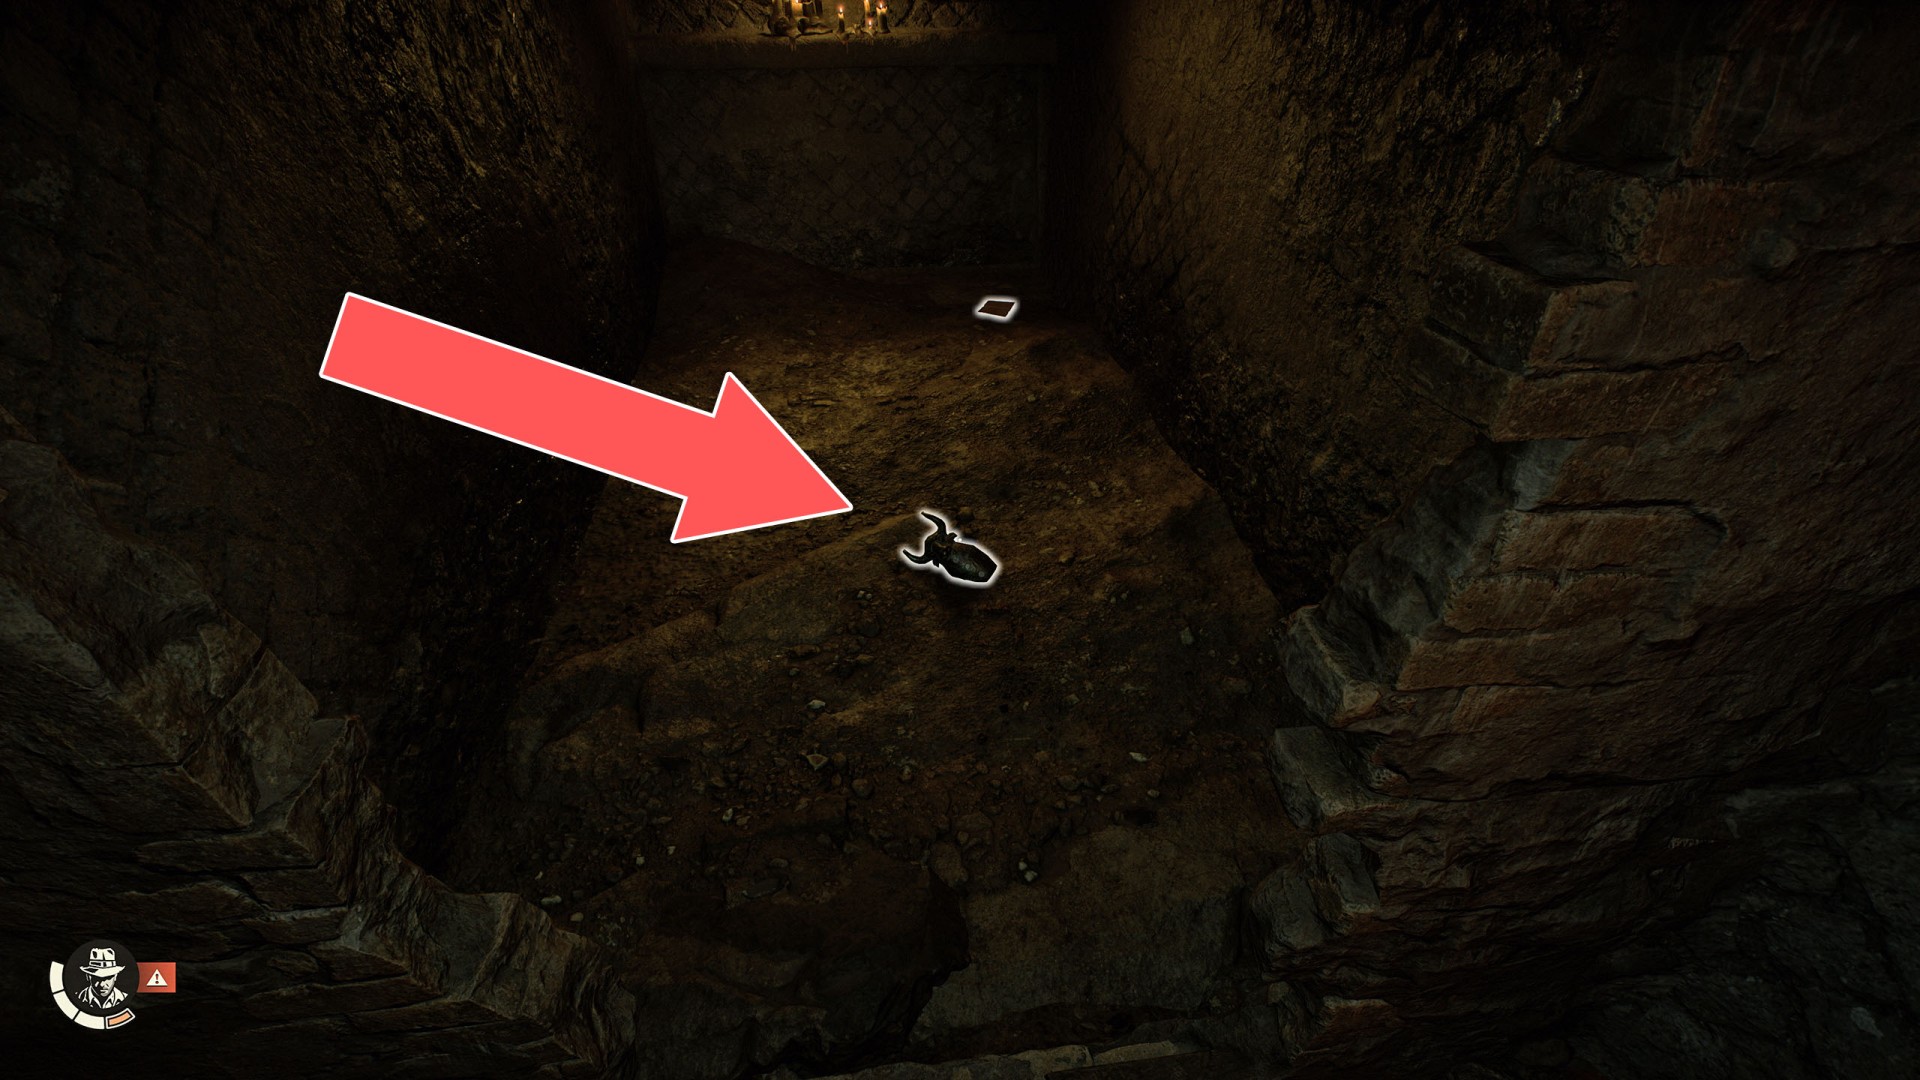
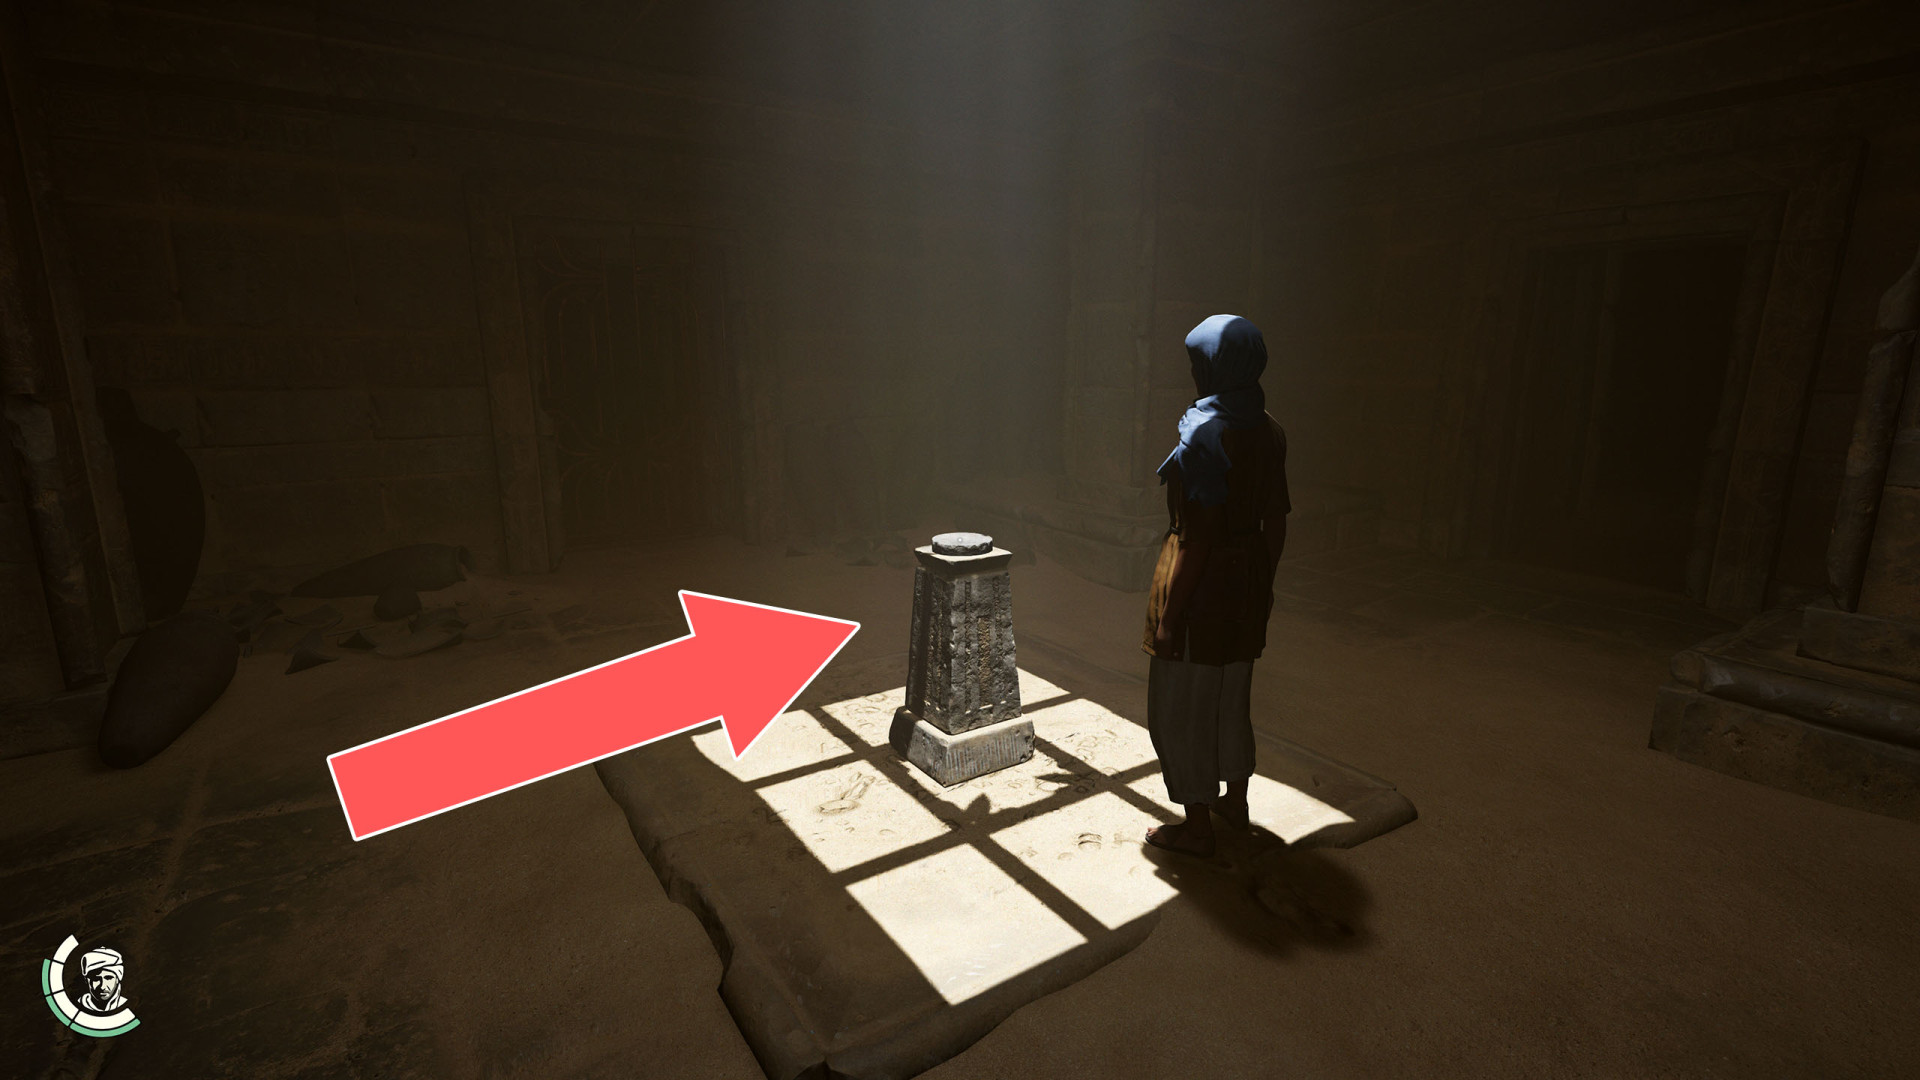
26Pedestal (Underworld)
Place the Antique Bust (Underworld) on it.
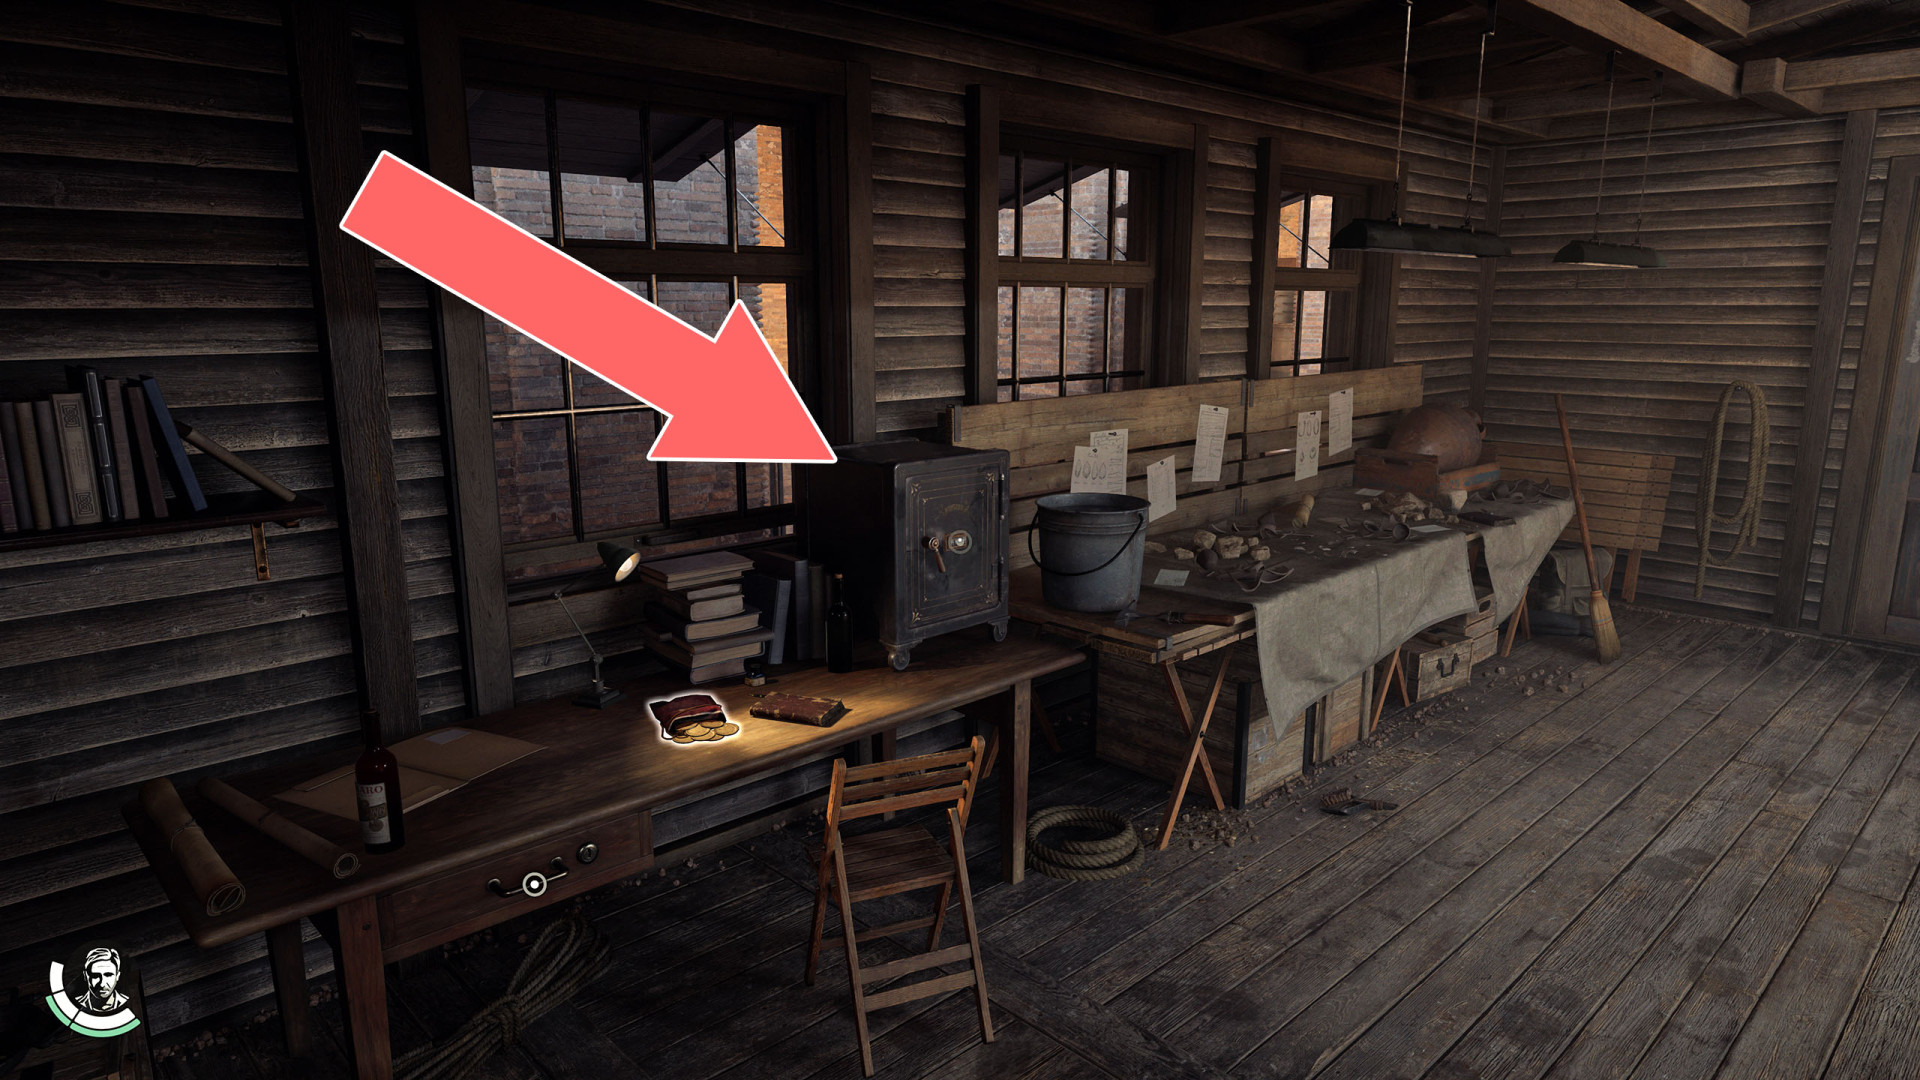
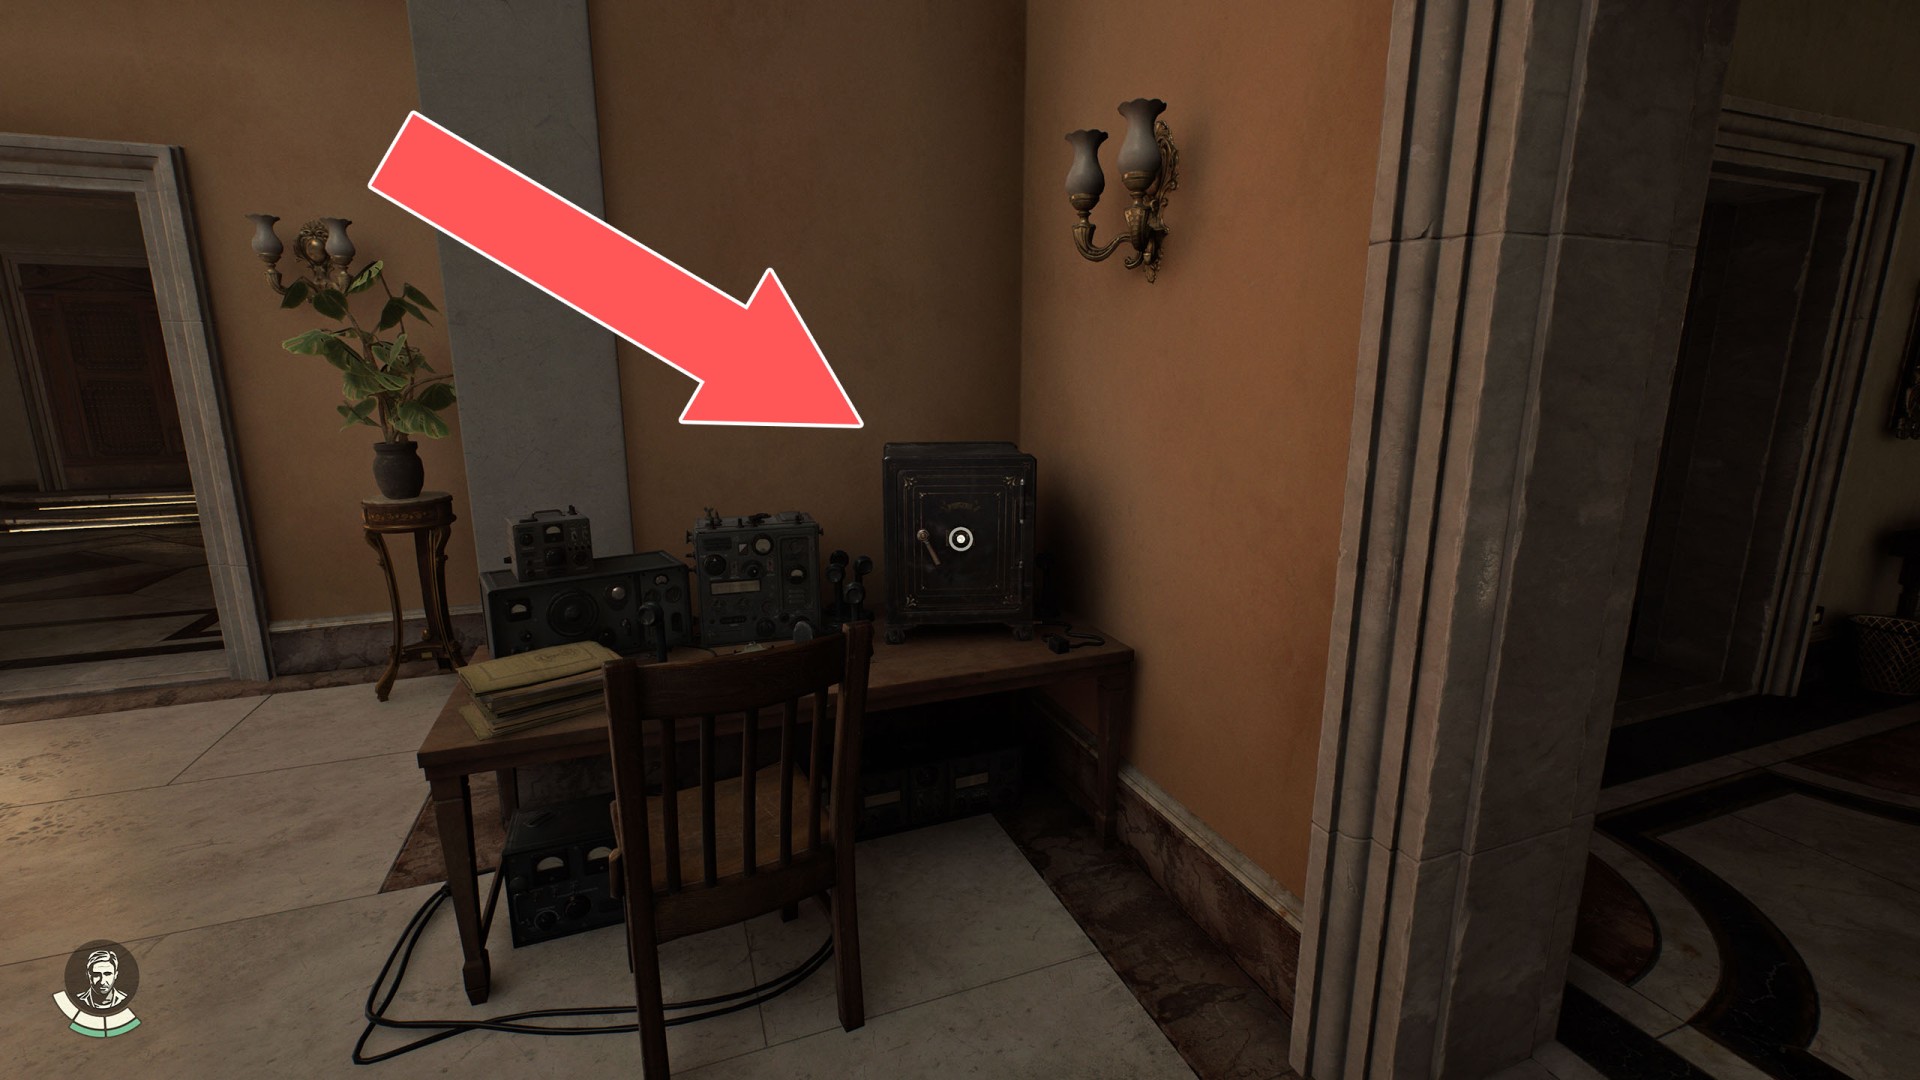
27 Safe
Safe
Lock combination: 5873.
28Safe
Lock combination: 1891.
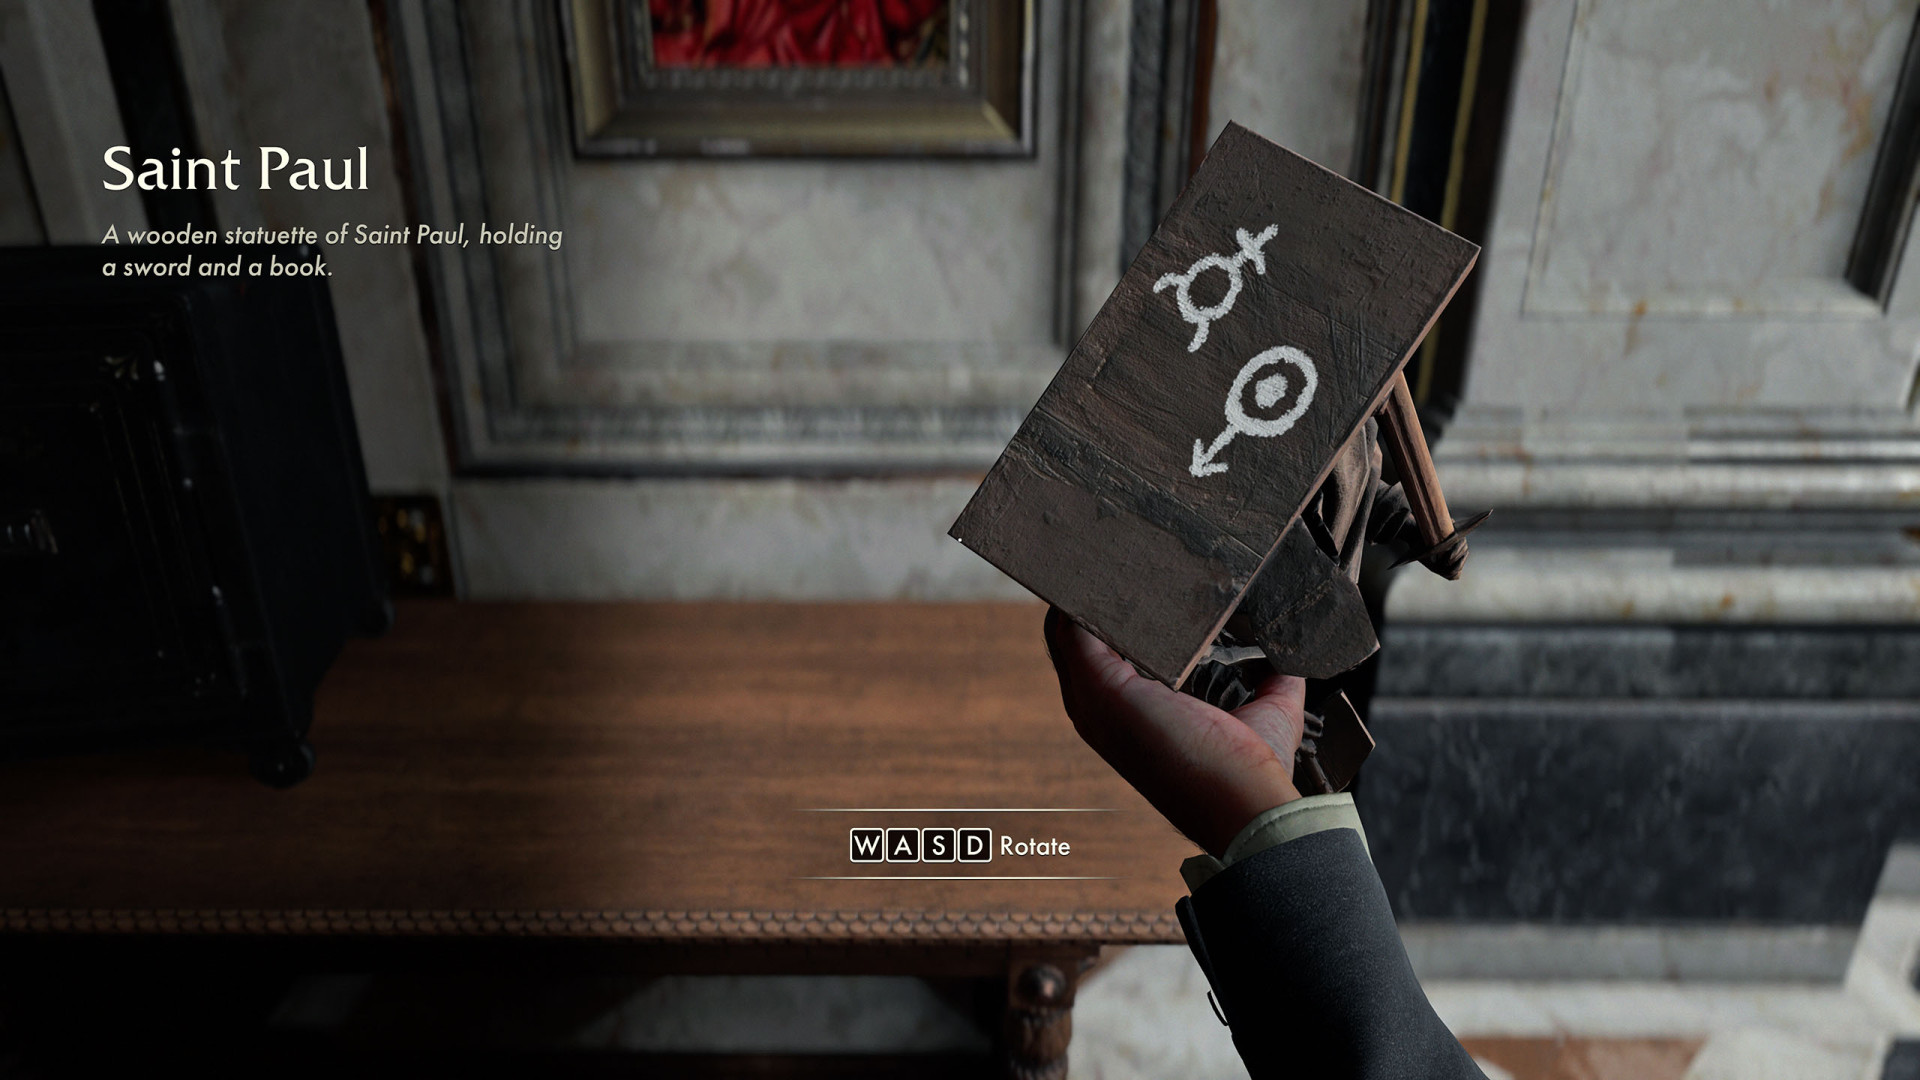
29Saint Paul Statue
Related mystery: Secret of Secrets.
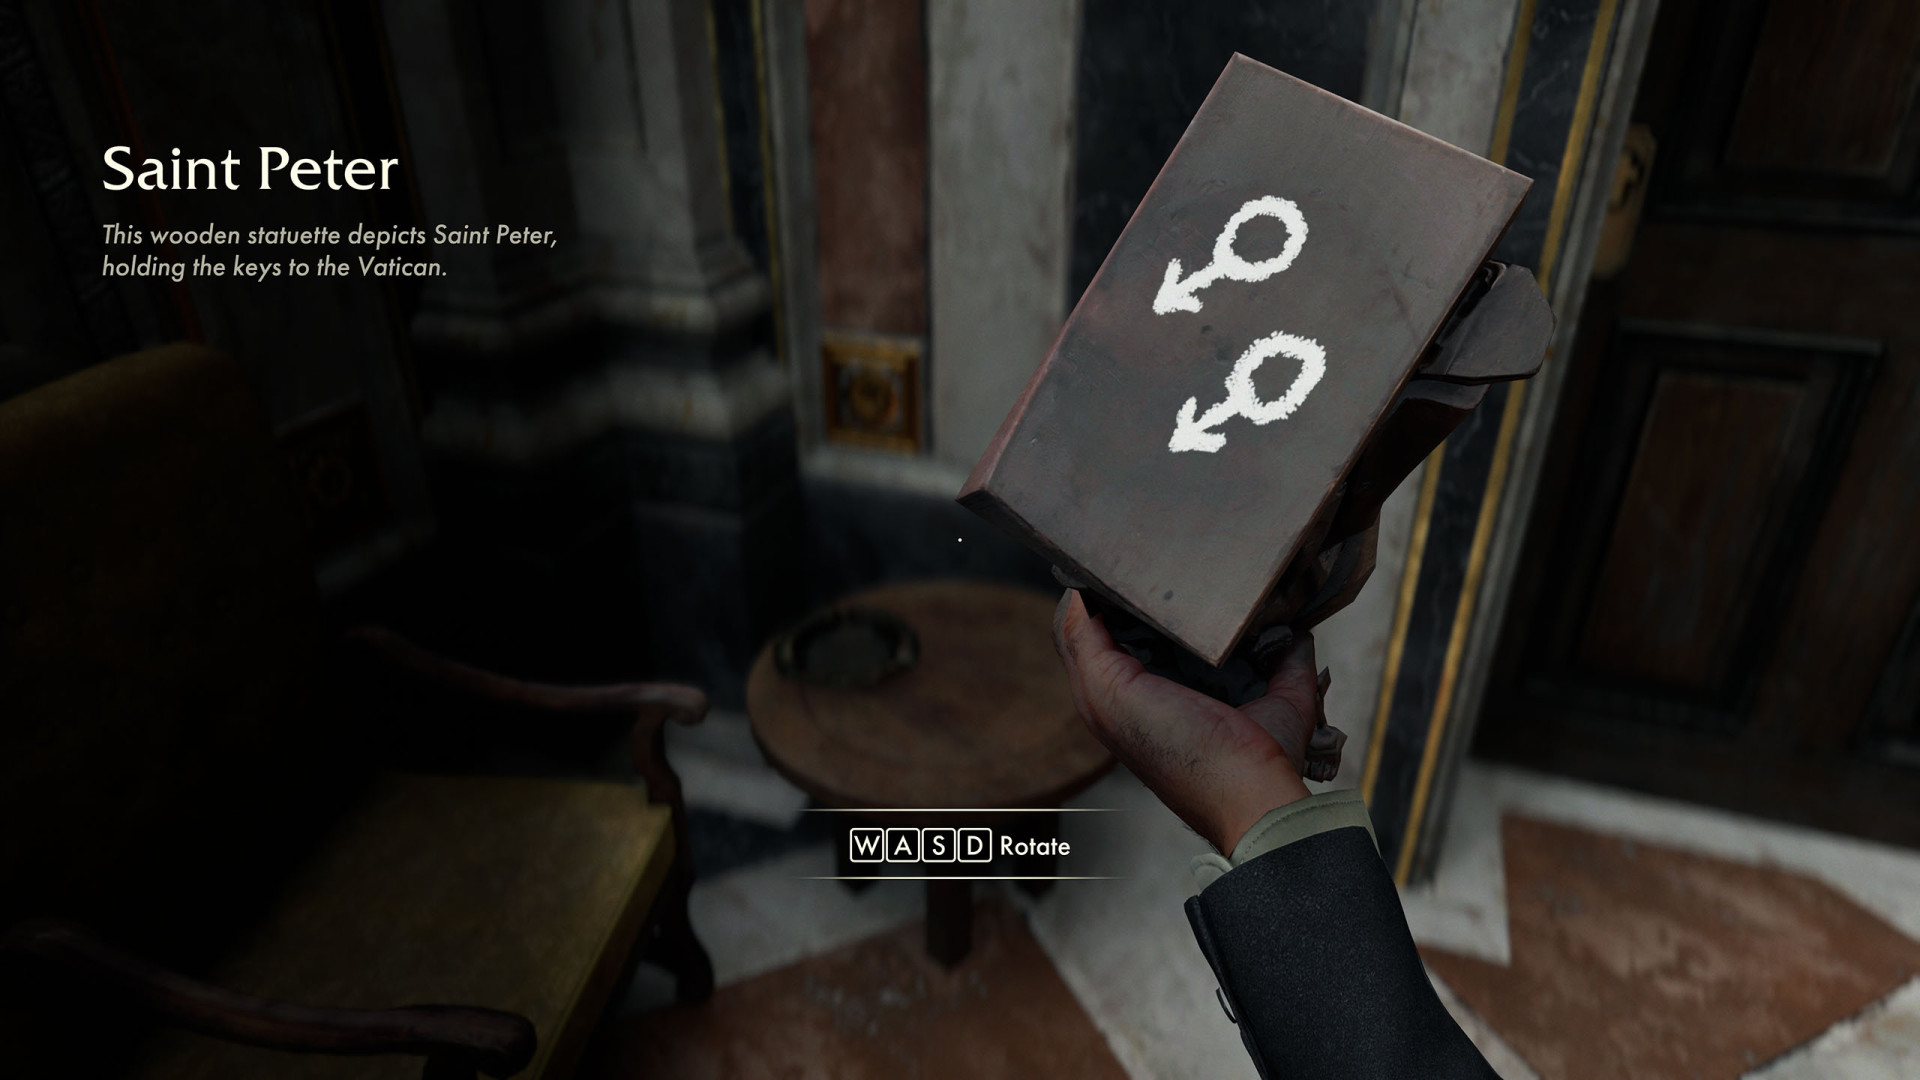
30Saint Peter Statue
Related mystery: Secret of Secrets.
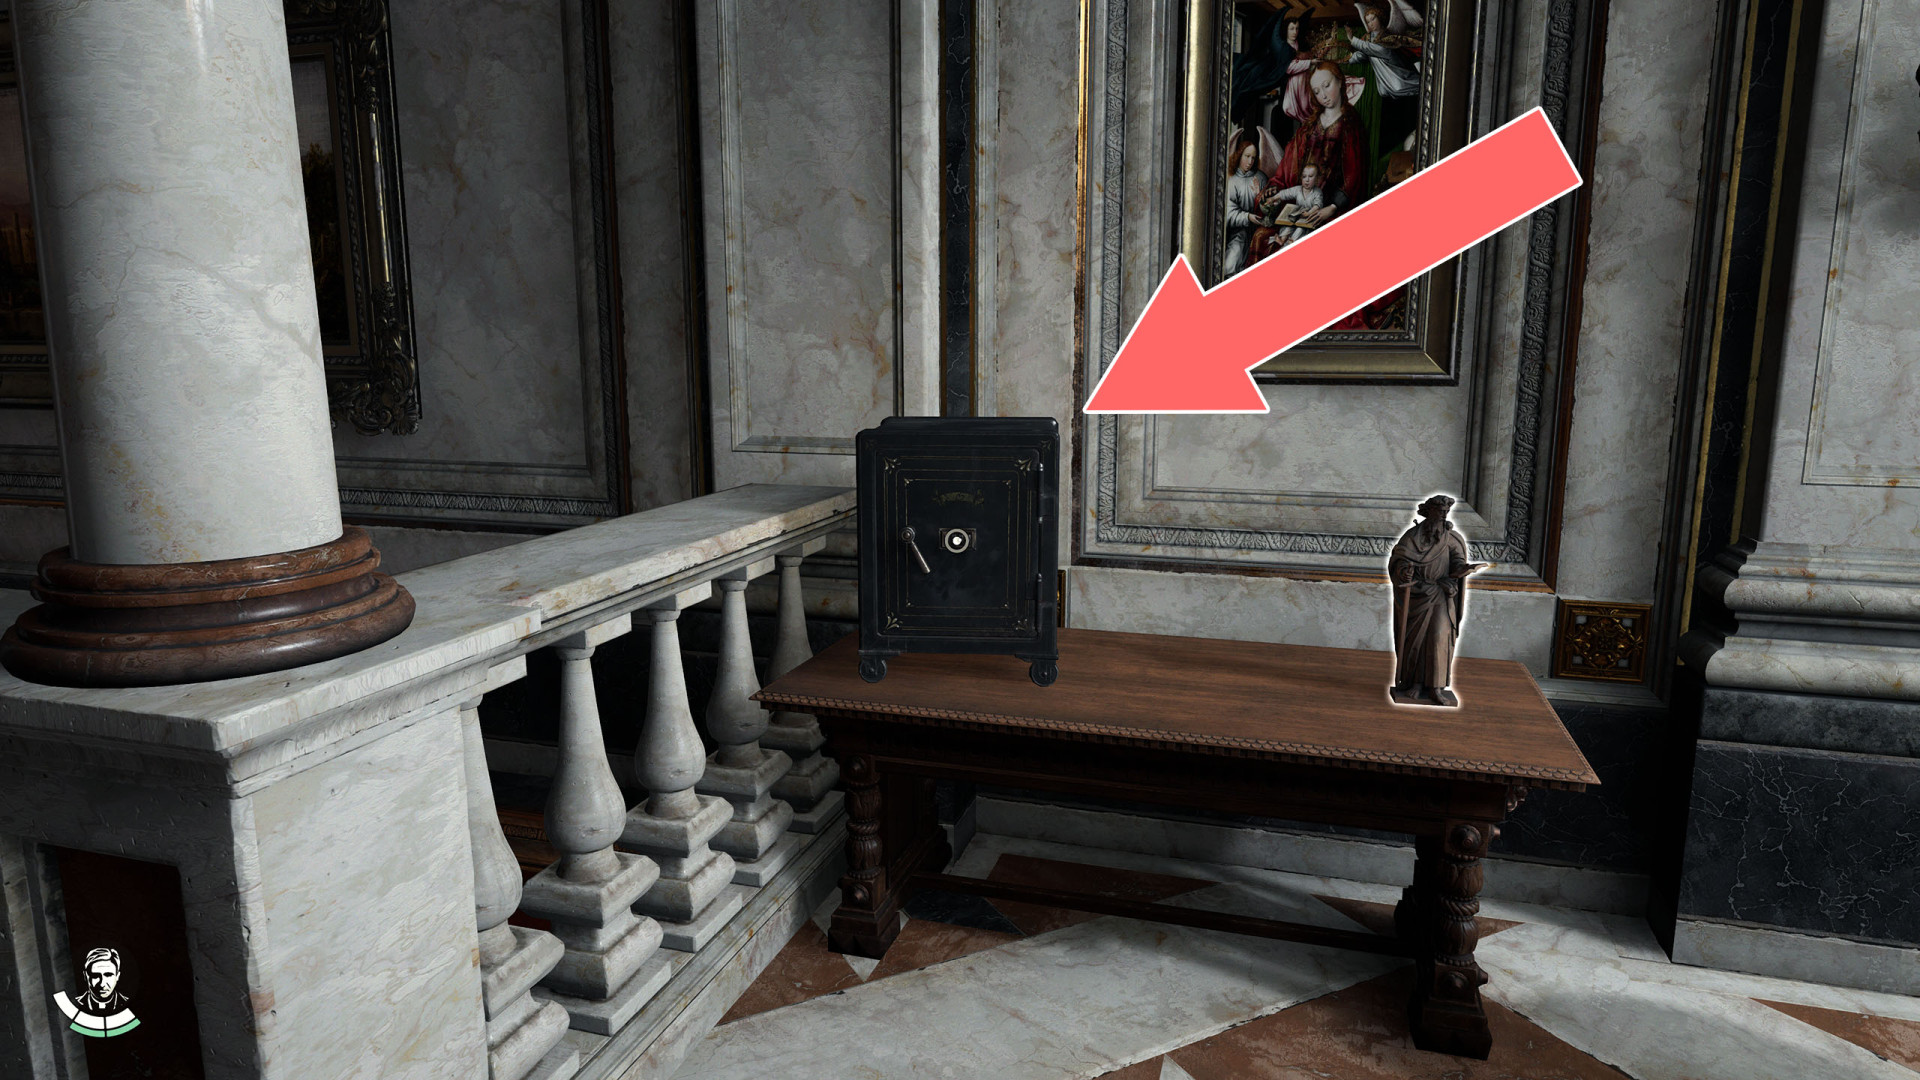
31Secret of Secrets Safe
Safe combination: 4471. Related mystery: Secret of Secrets.
32Shipment Container
Lock combination: 6380.

33Silver Dragon Path Lever

34Stone Tablet
35Stone Tablet

36The Stone Fragment
37Unknown Language Book
38Ventura's Bookcase
Locations on Rome
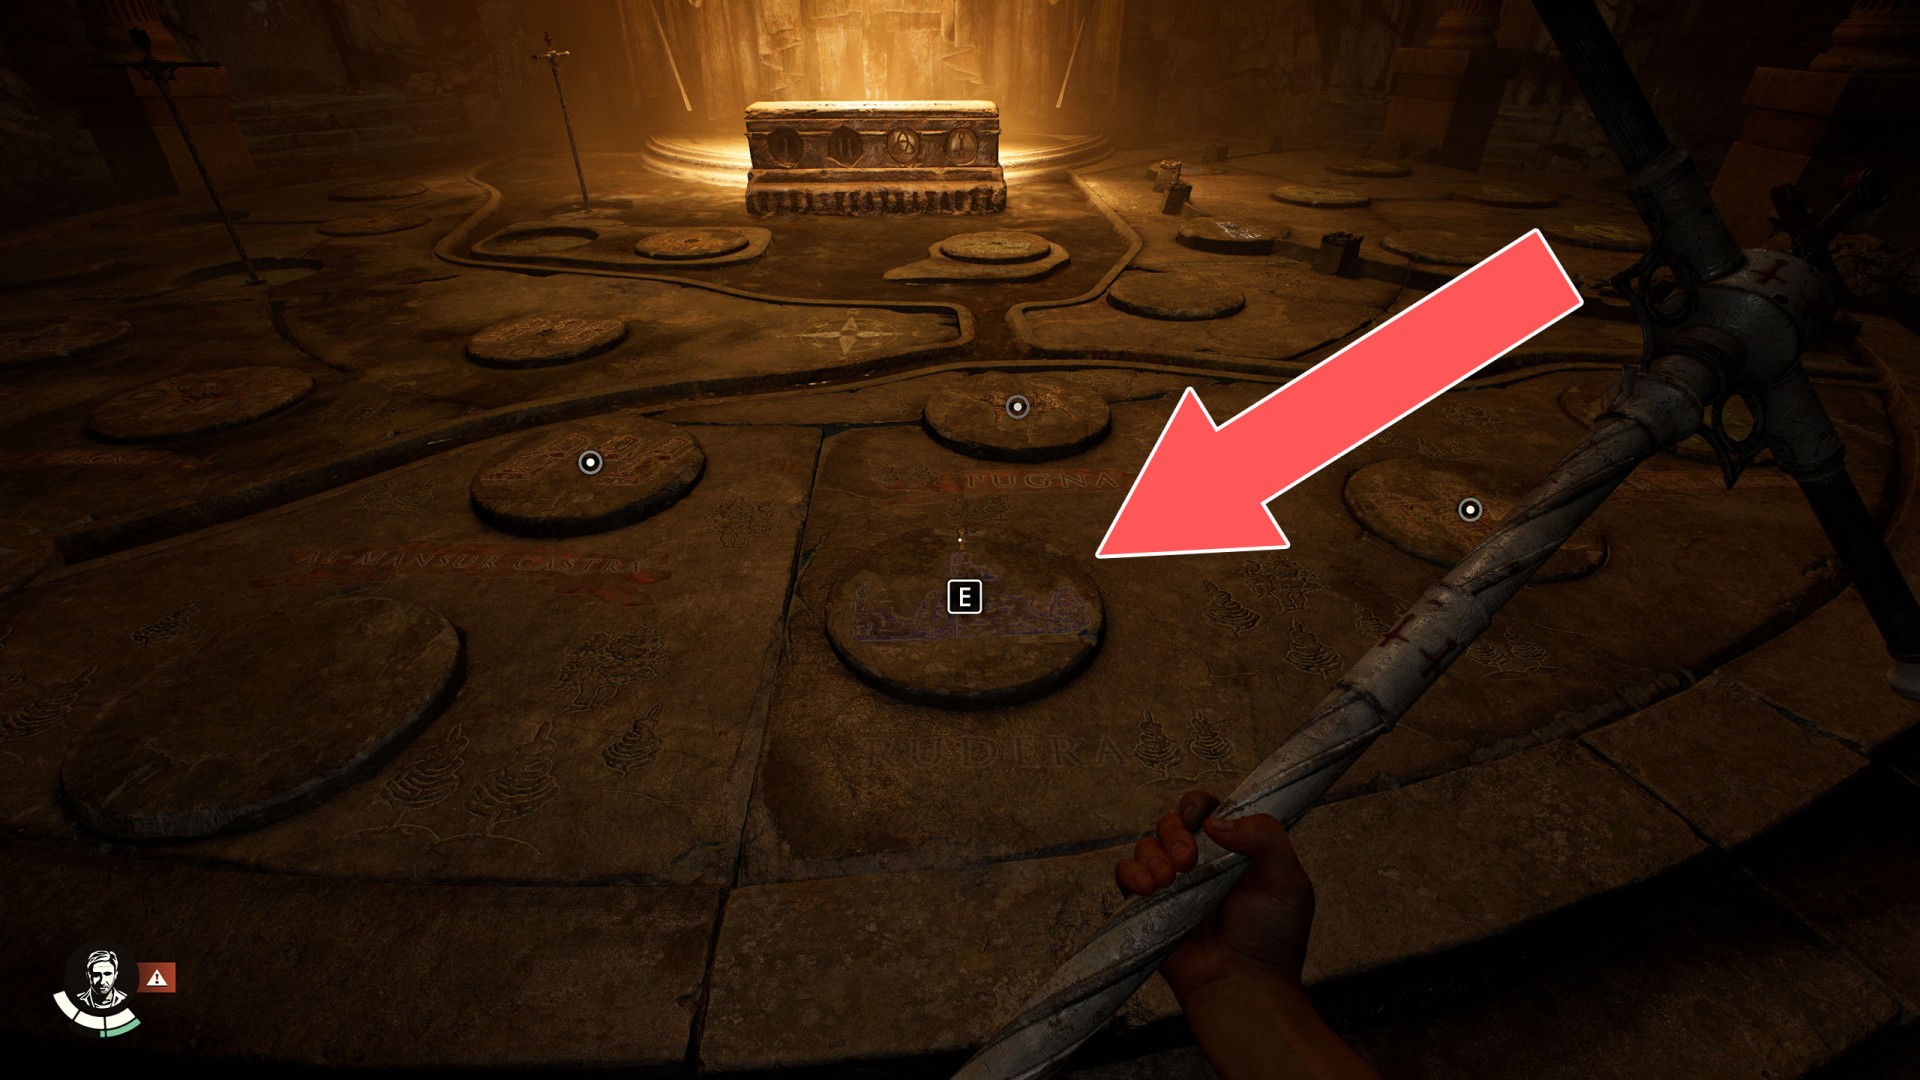
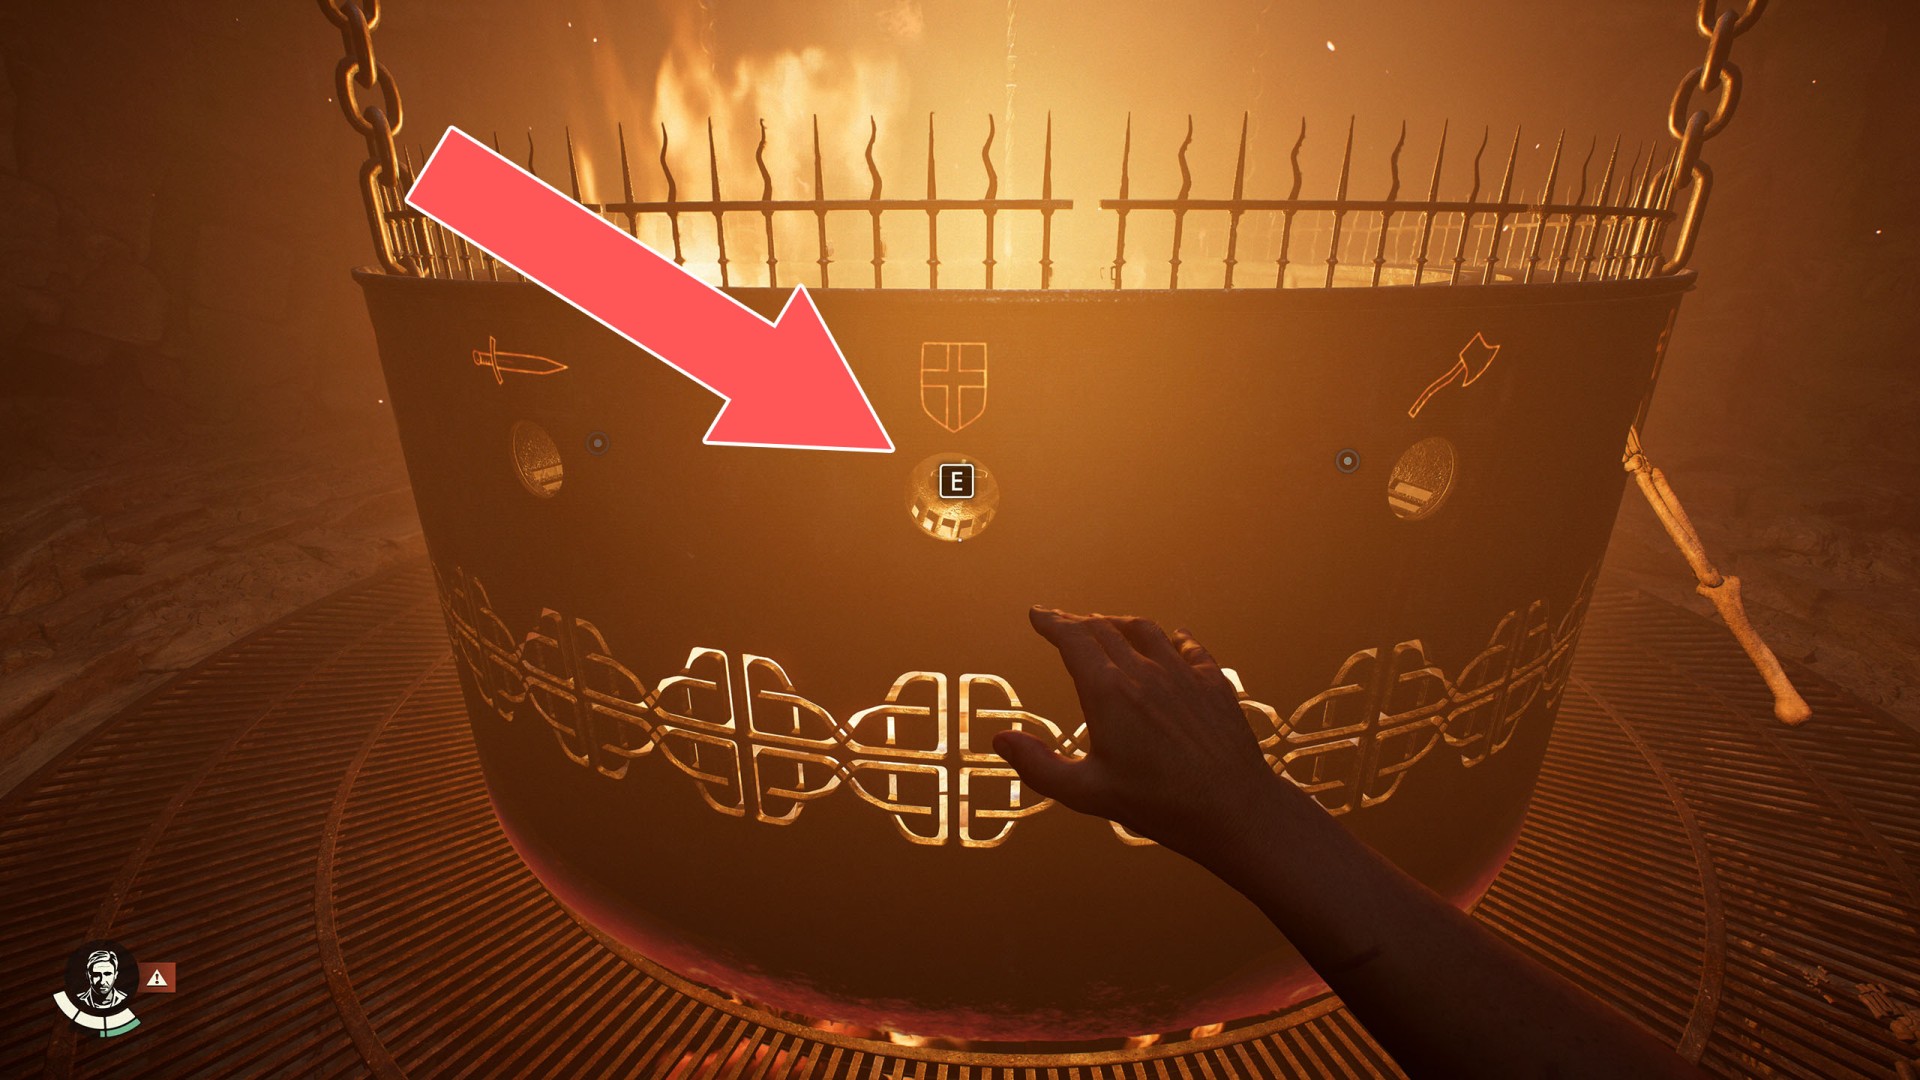
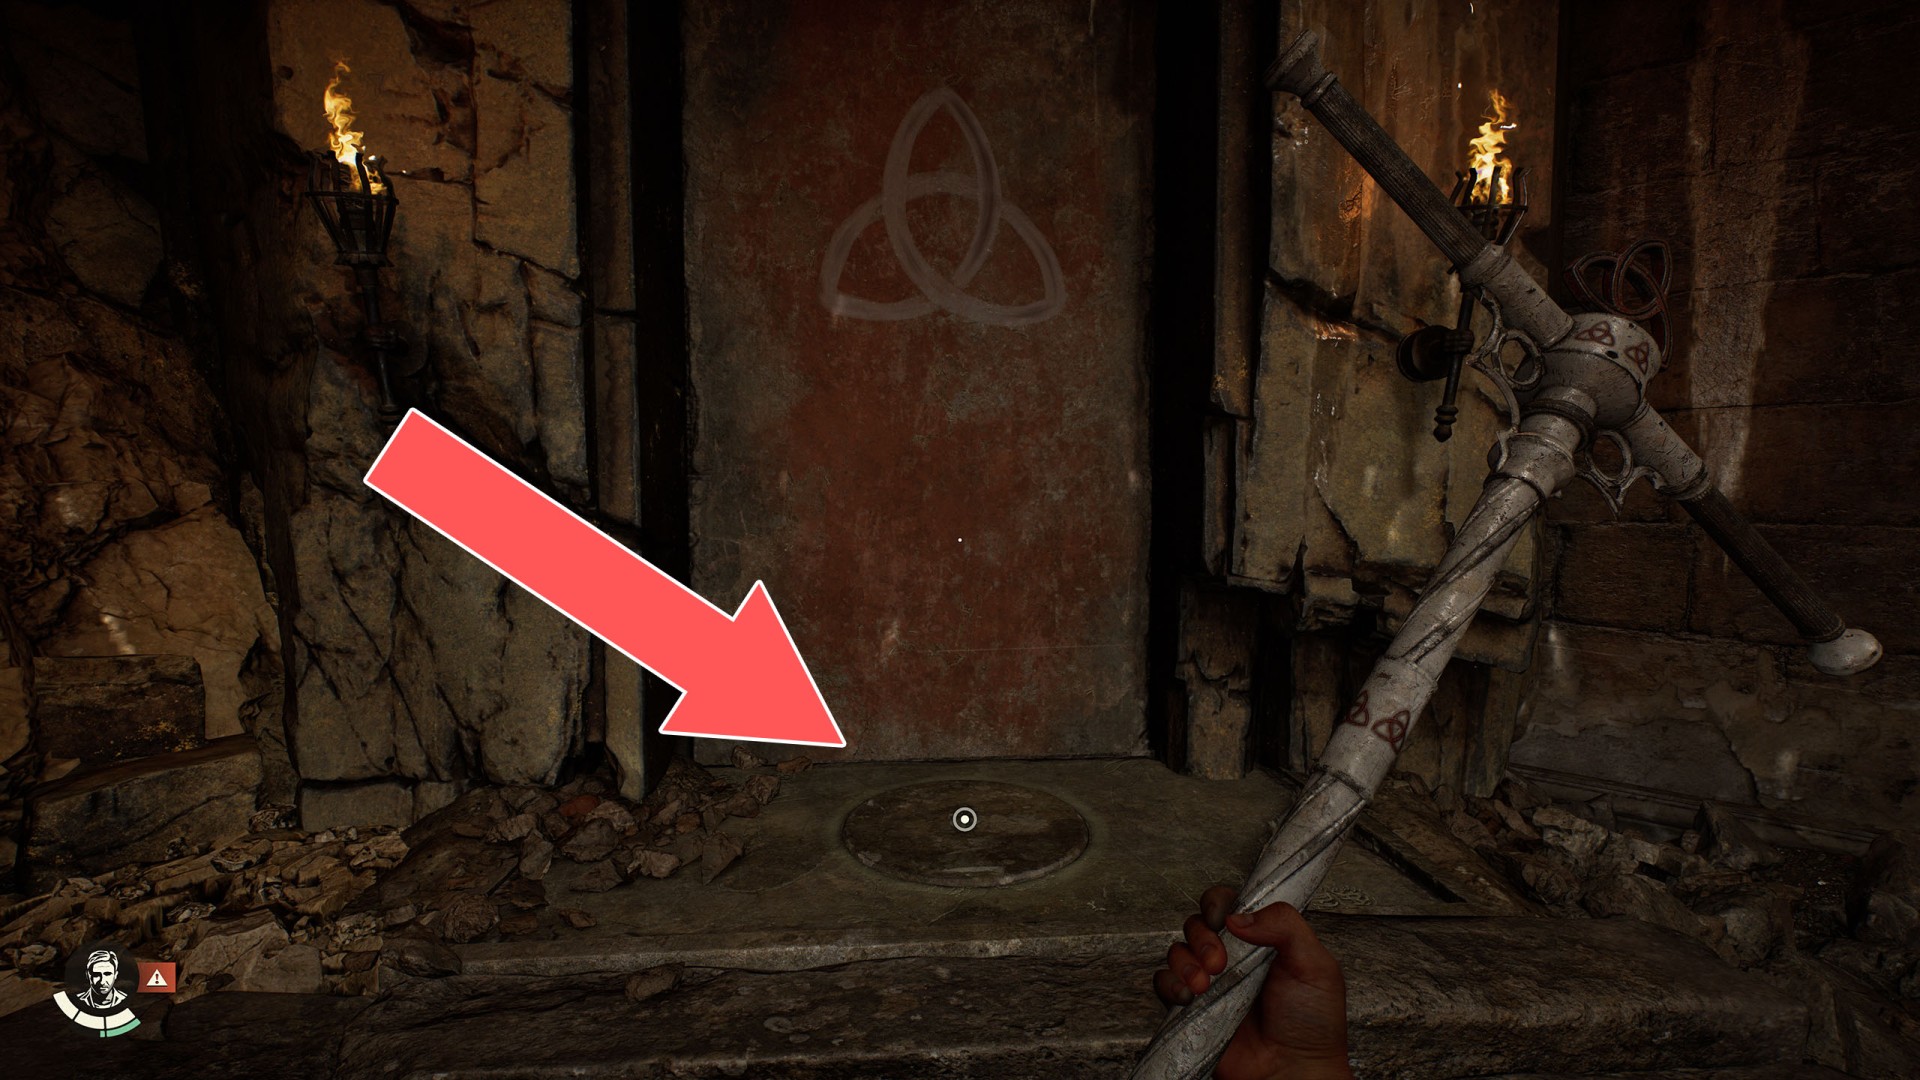
39Aethopolis Slot
Use the Cross Scepter and turn it twice (180 degrees) in any direction. Related puzzle: Tomb of Gibborim.

40Al-Mansur Castra Slot
Use the Sword Scepter and turn it once to the right. Related puzzle: Tomb of Gibborim.

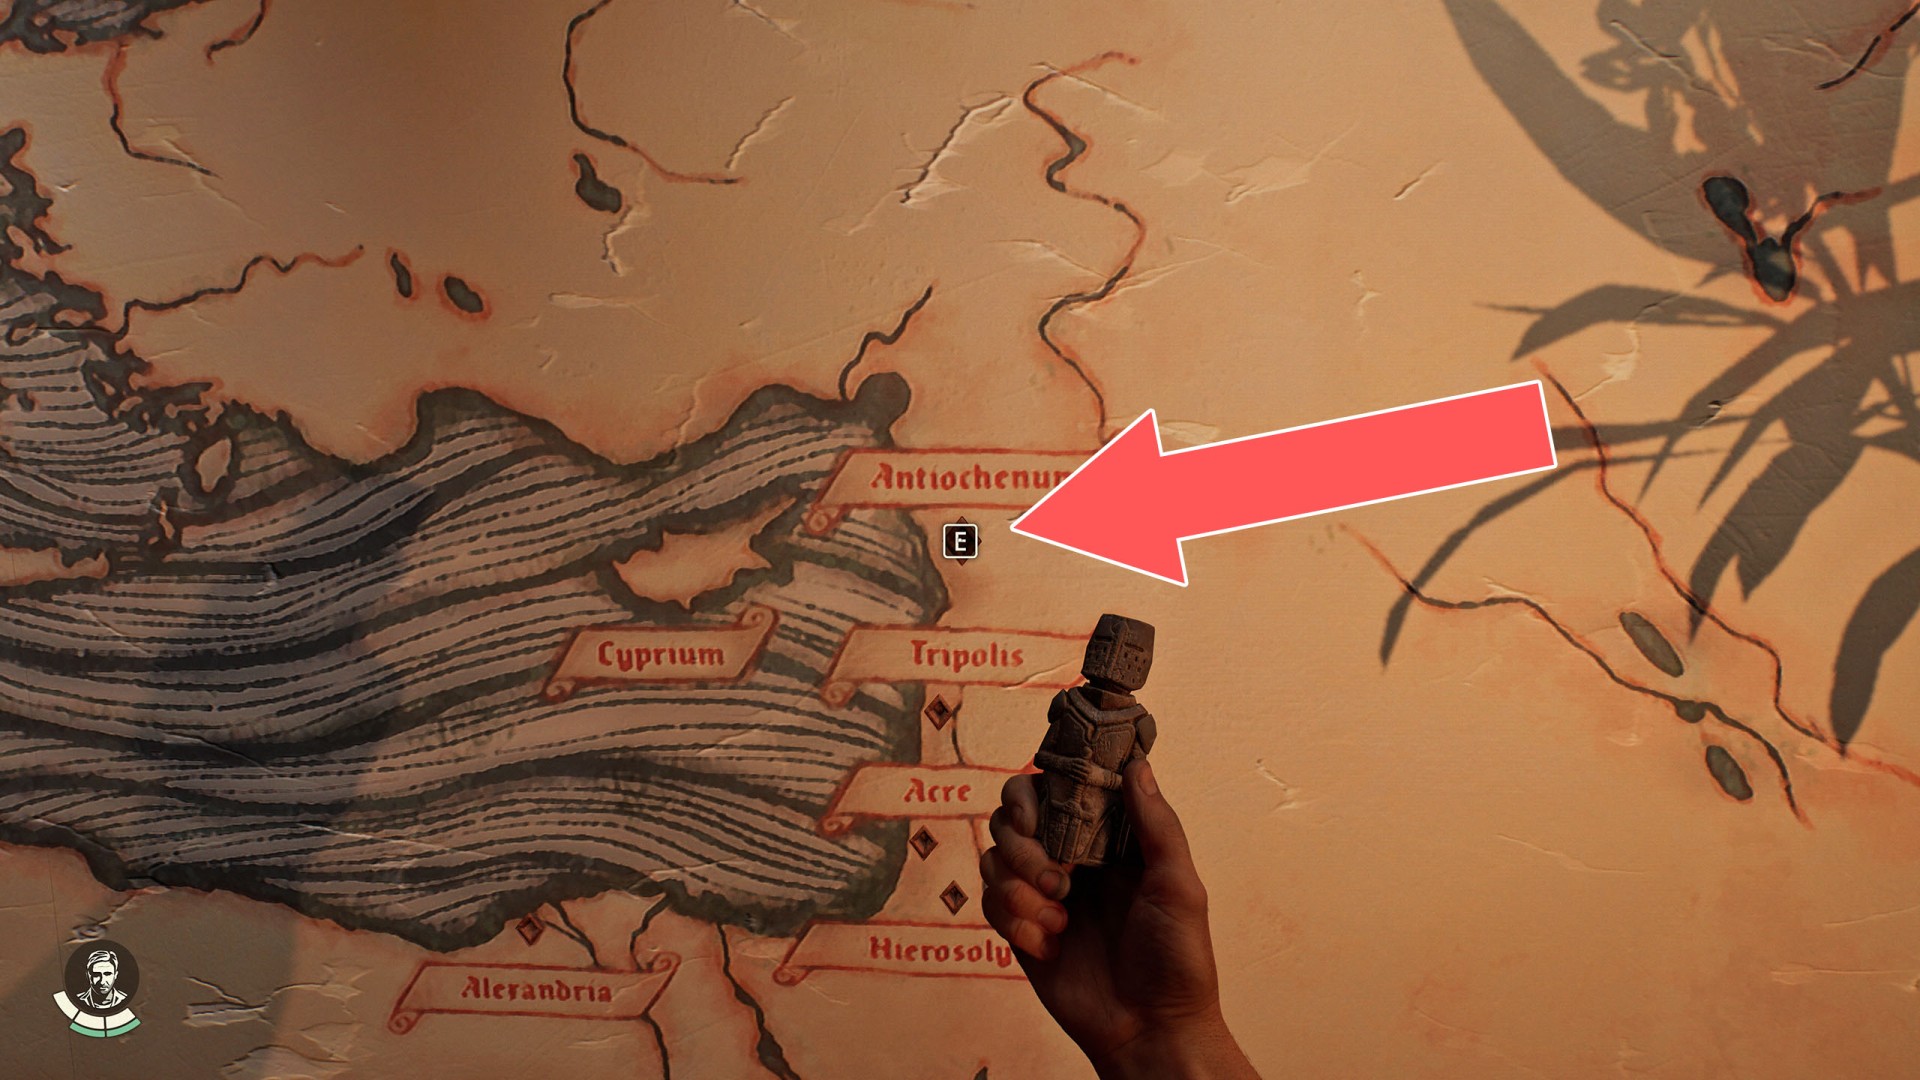
41Antioch Slot
Place the Crusader Figurine here. Related adventure: The Order of Giants.
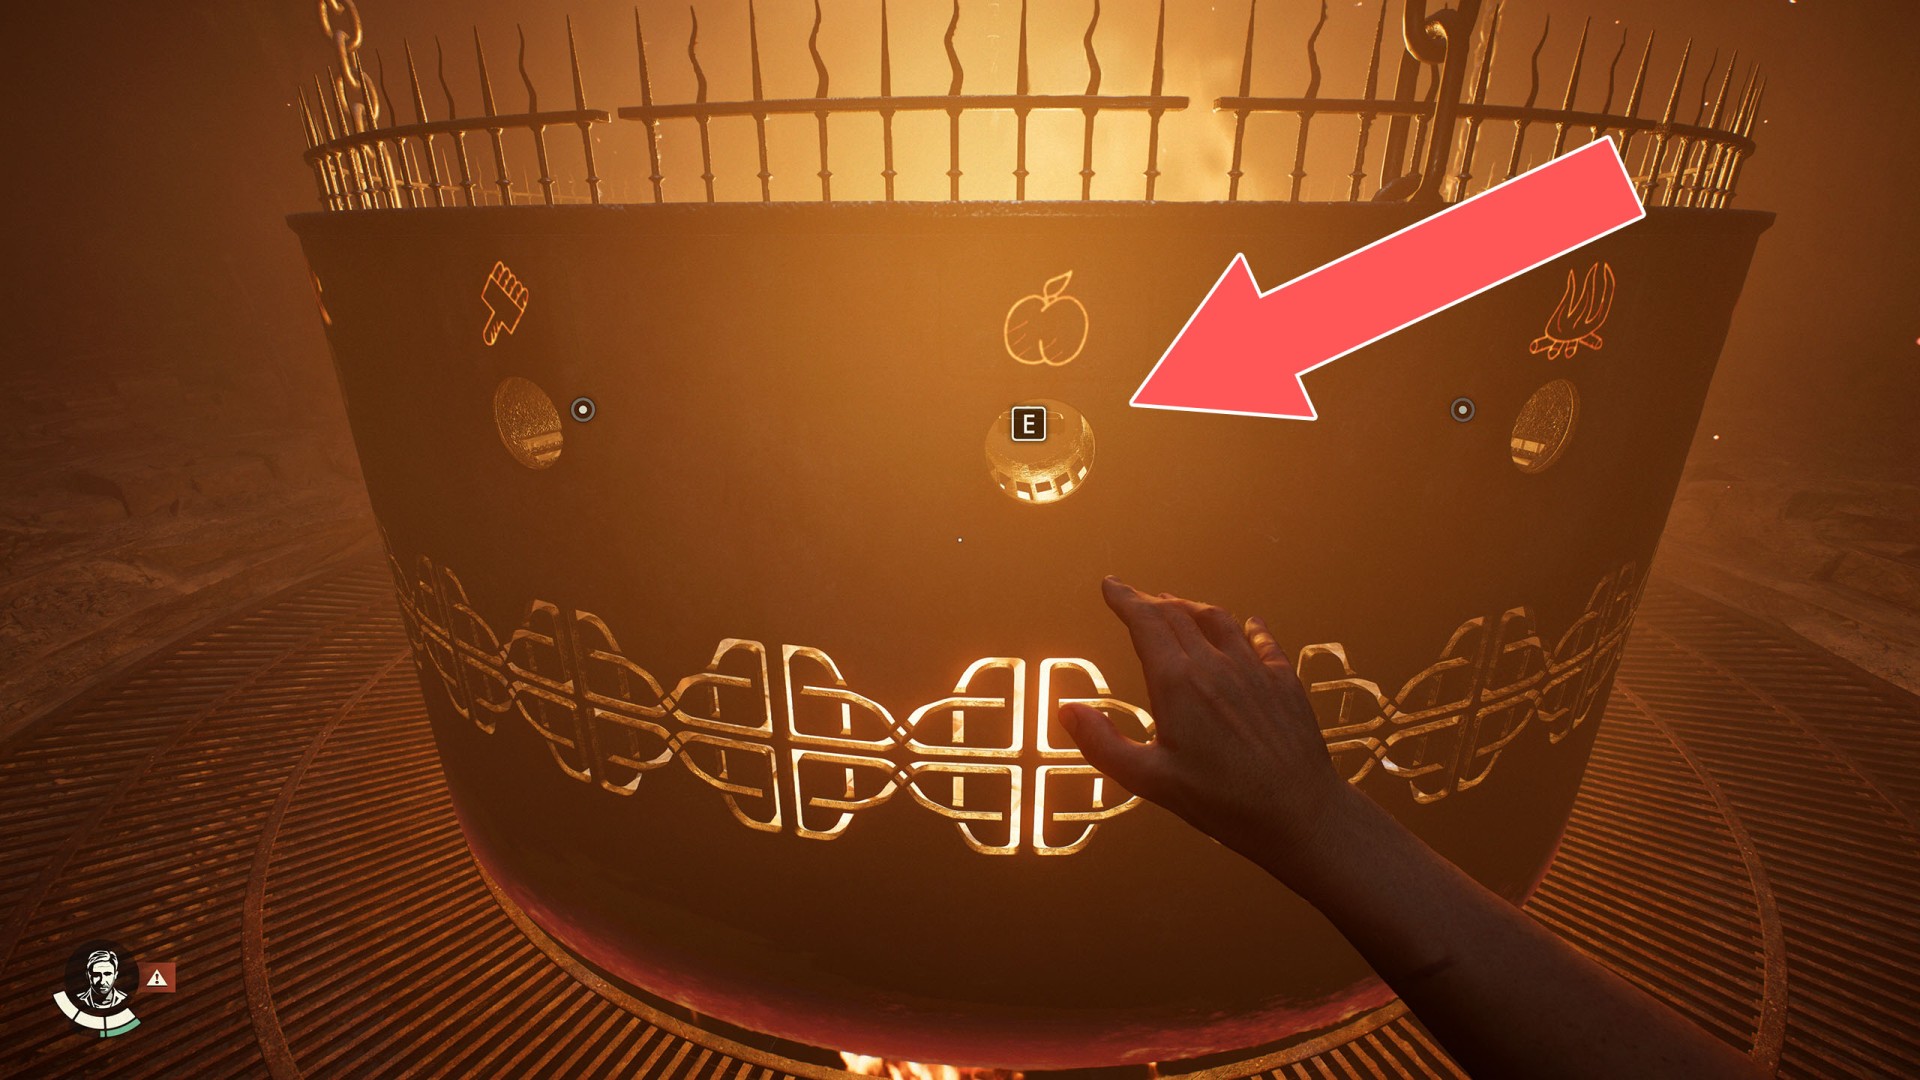
42Apple Symbol Handle (3)
Related puzzle: Tomb of Gibborim.
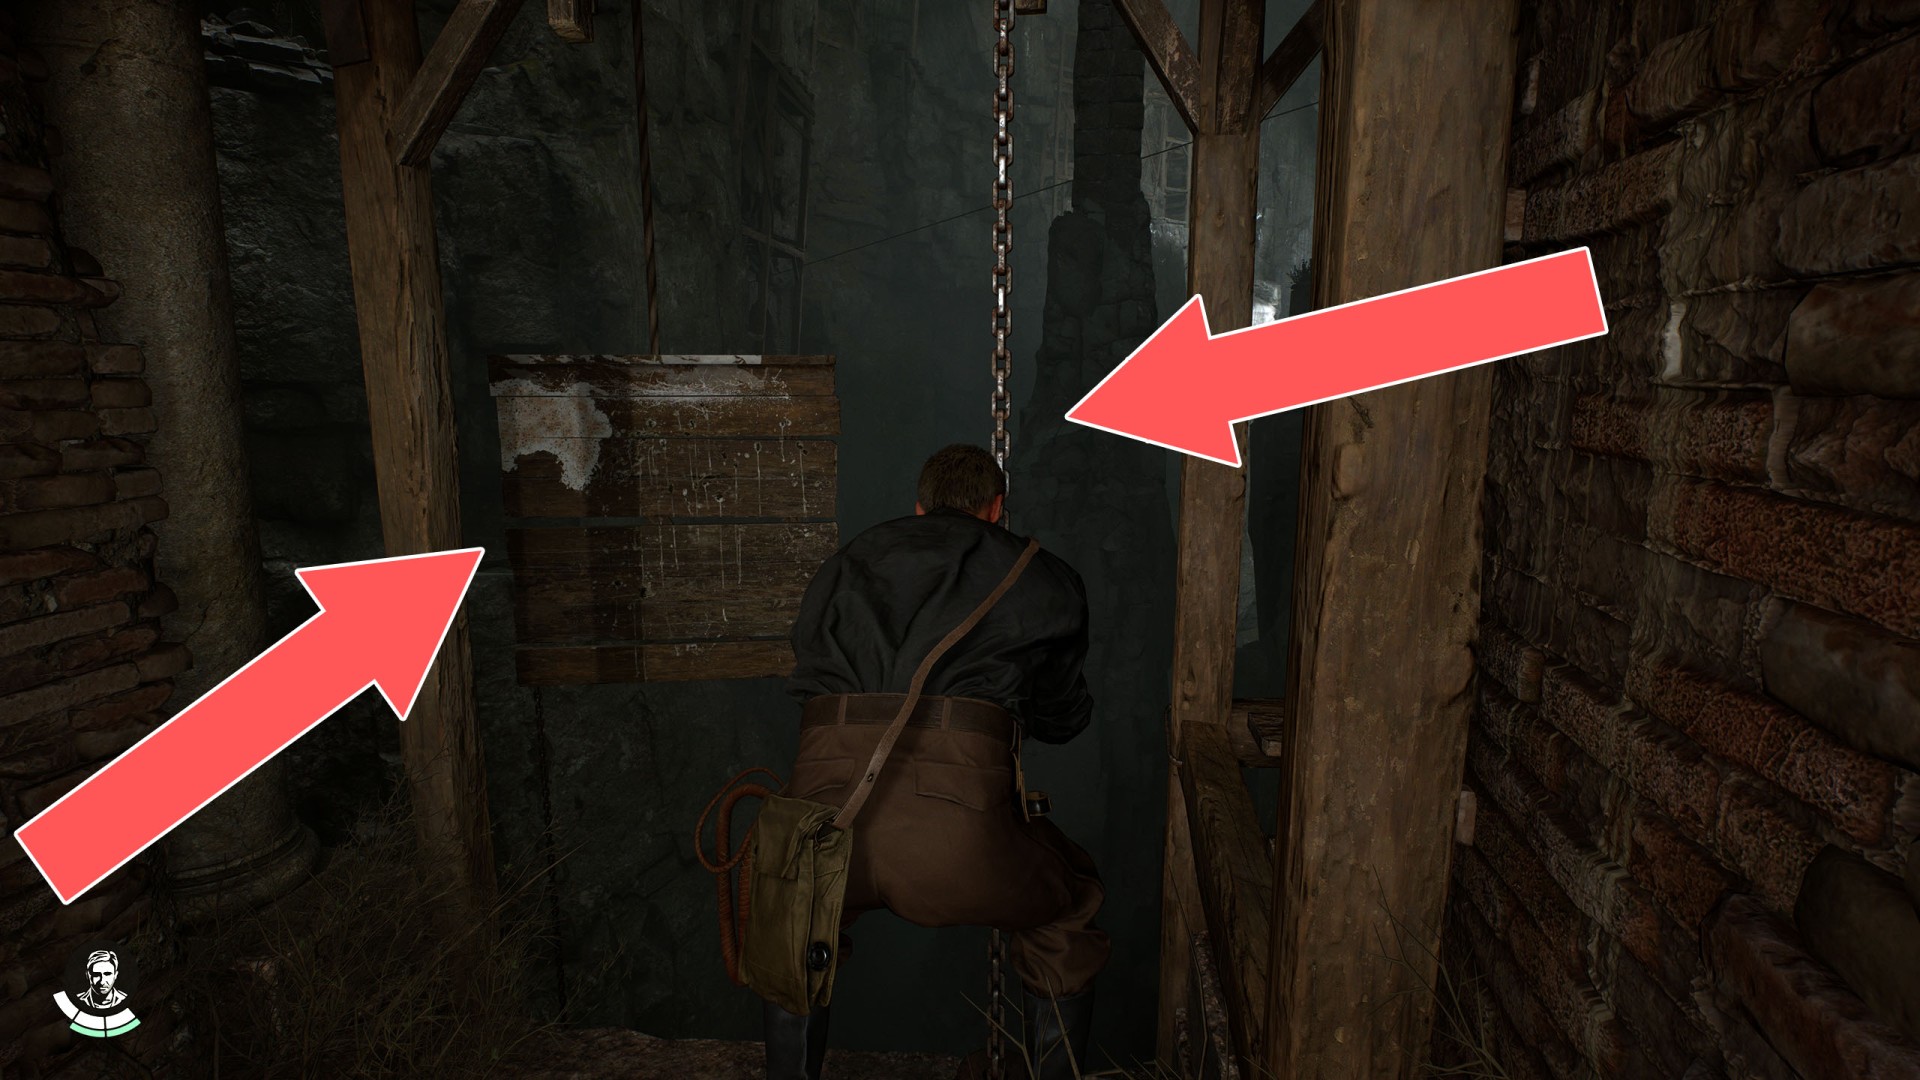
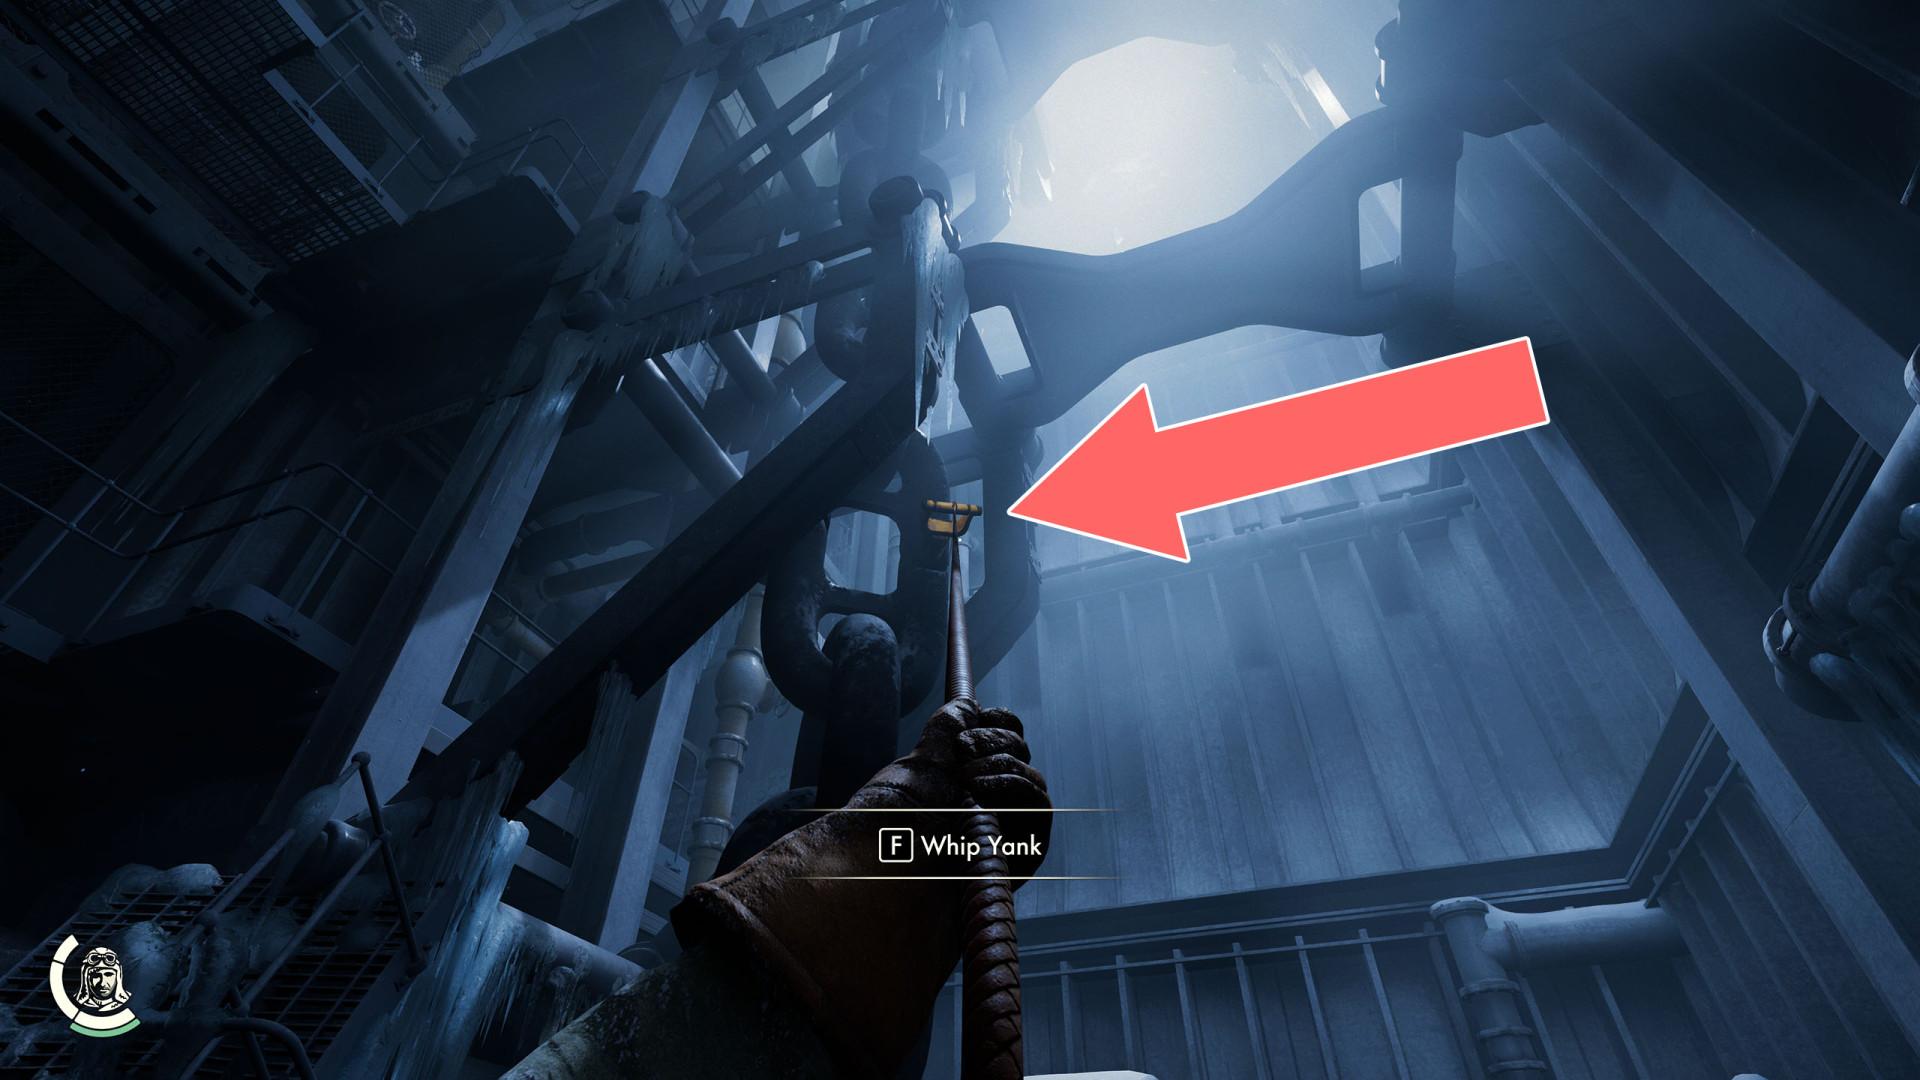
43Chain
Pull this chain several times to bring the crane with the Grappling Point toward you.
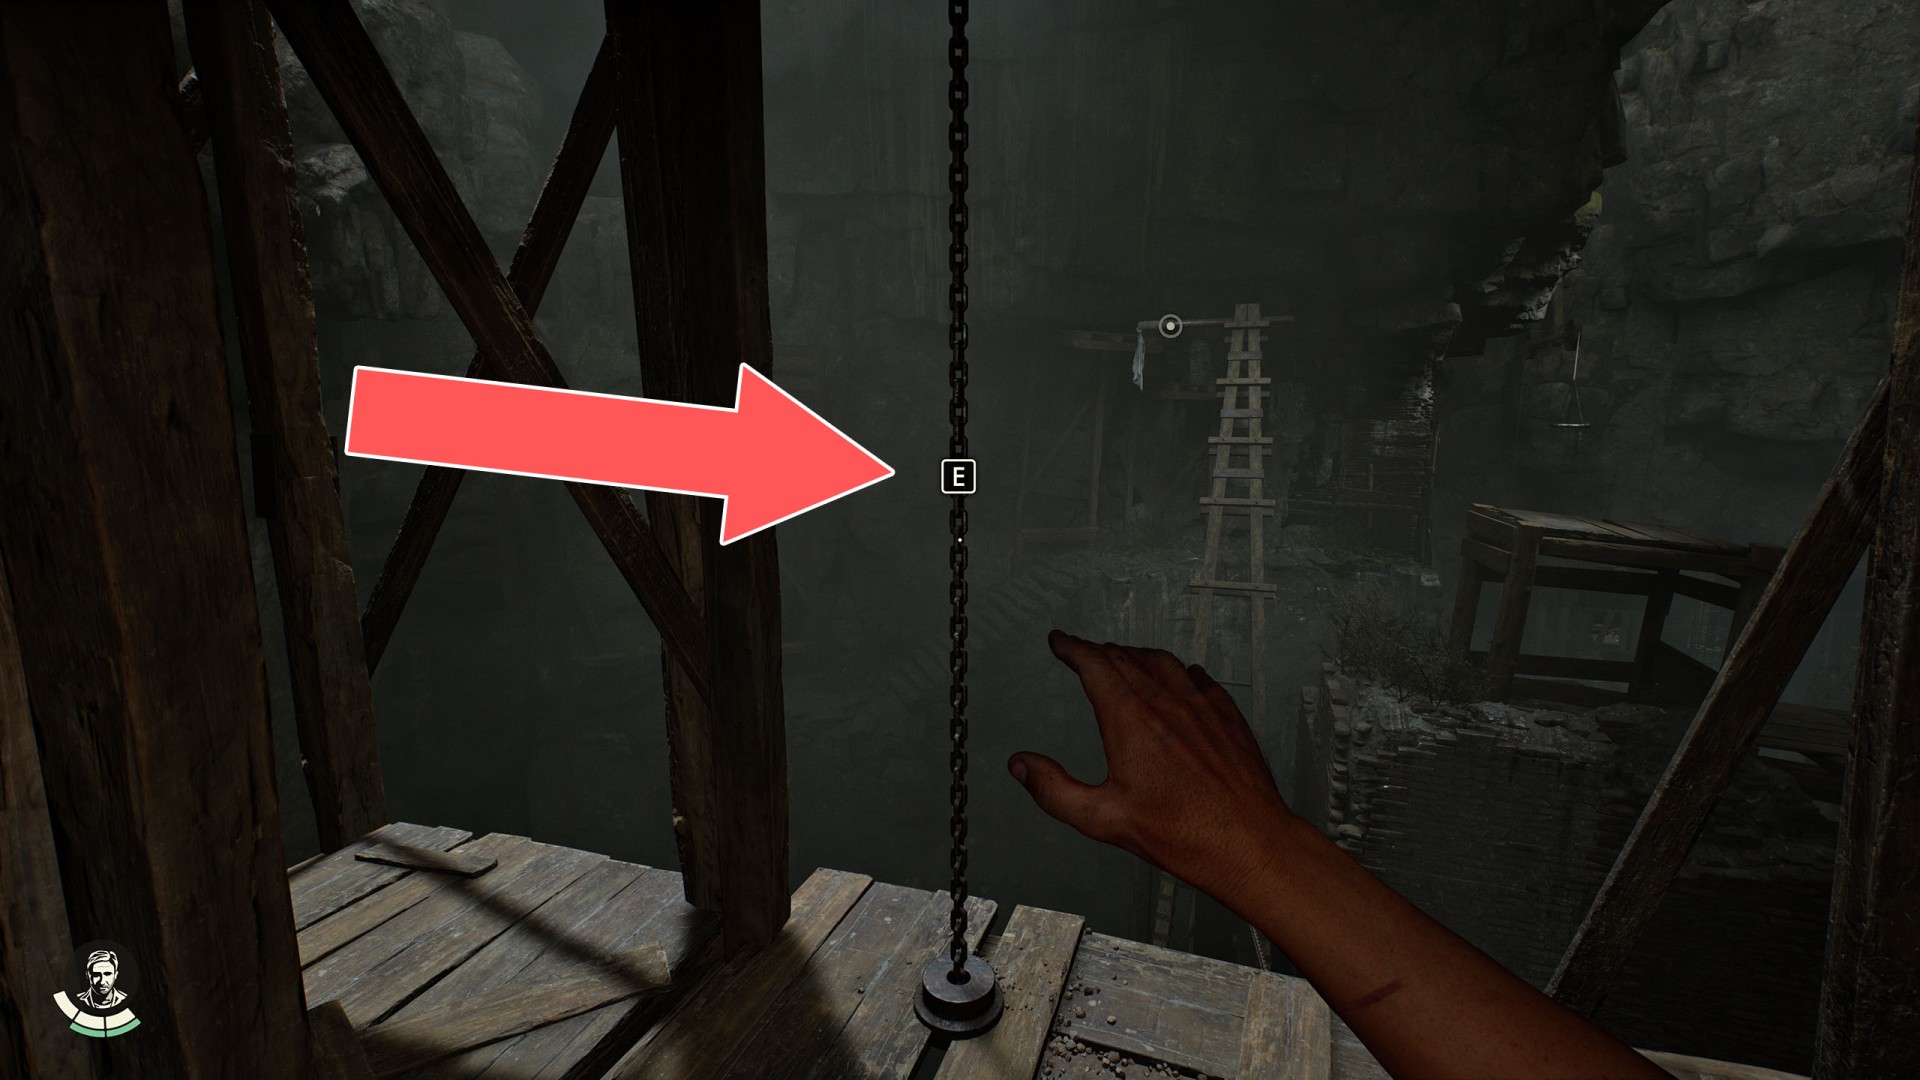
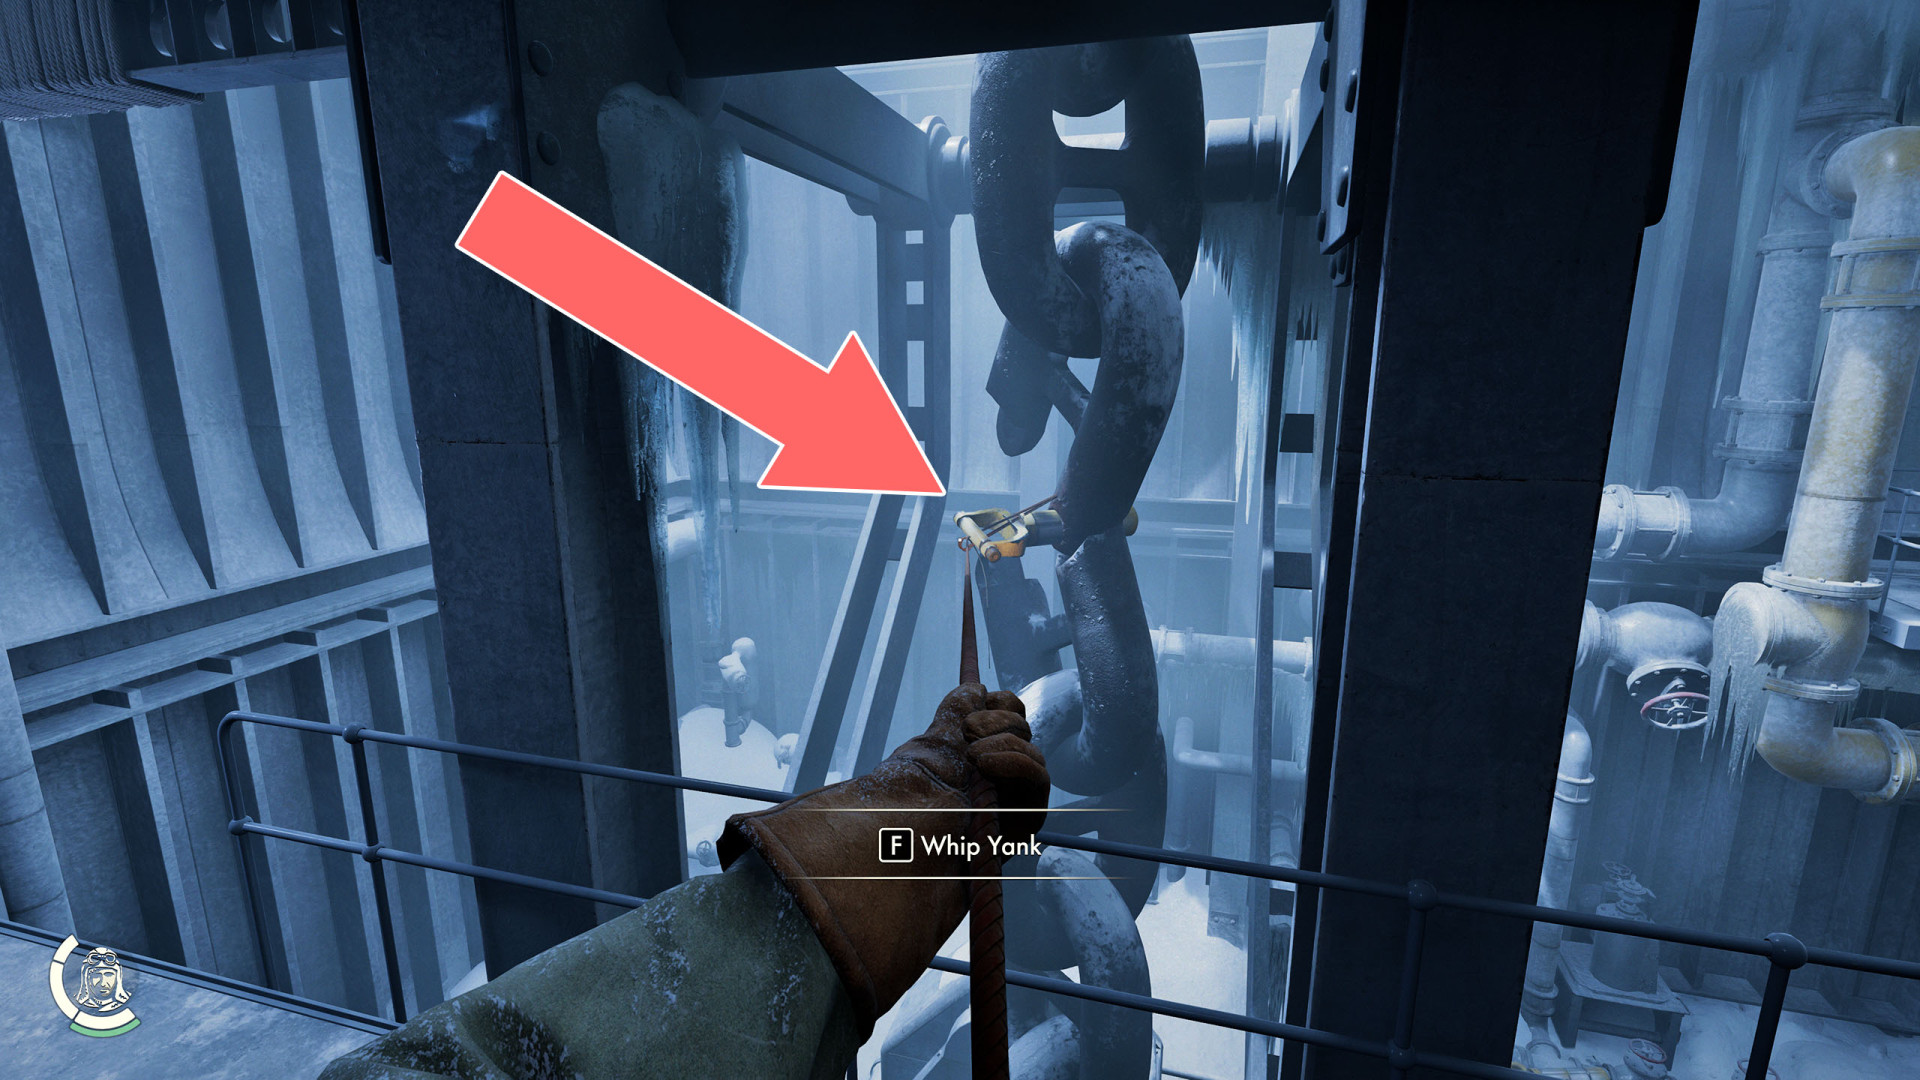
44Chain
Pull it several times to move the crane arm with the Grappling Point on it. When you release the chain, the crane arm will slowly begin to return to its previous position, so hurry and use the grappling point before it moves too far away.
45Chain
Use it several times to bring the Grappling Point closer to you.
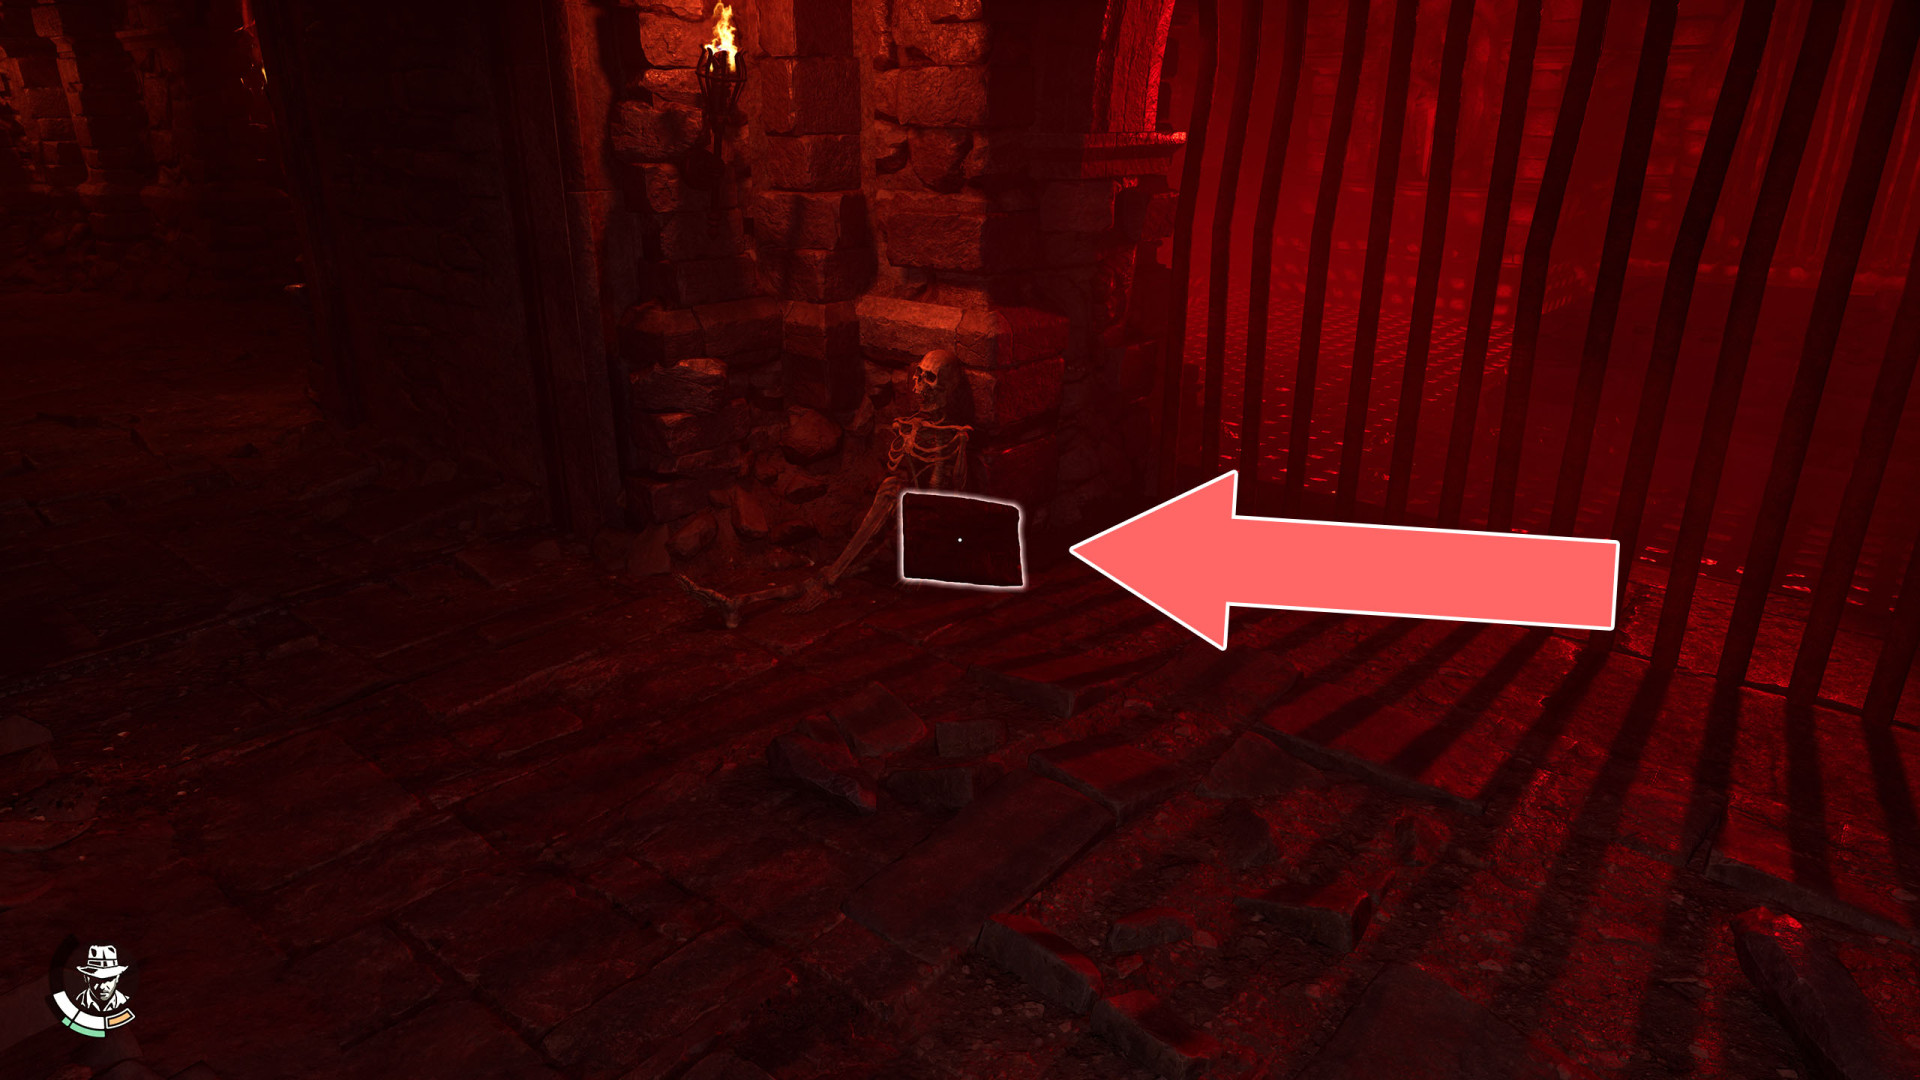
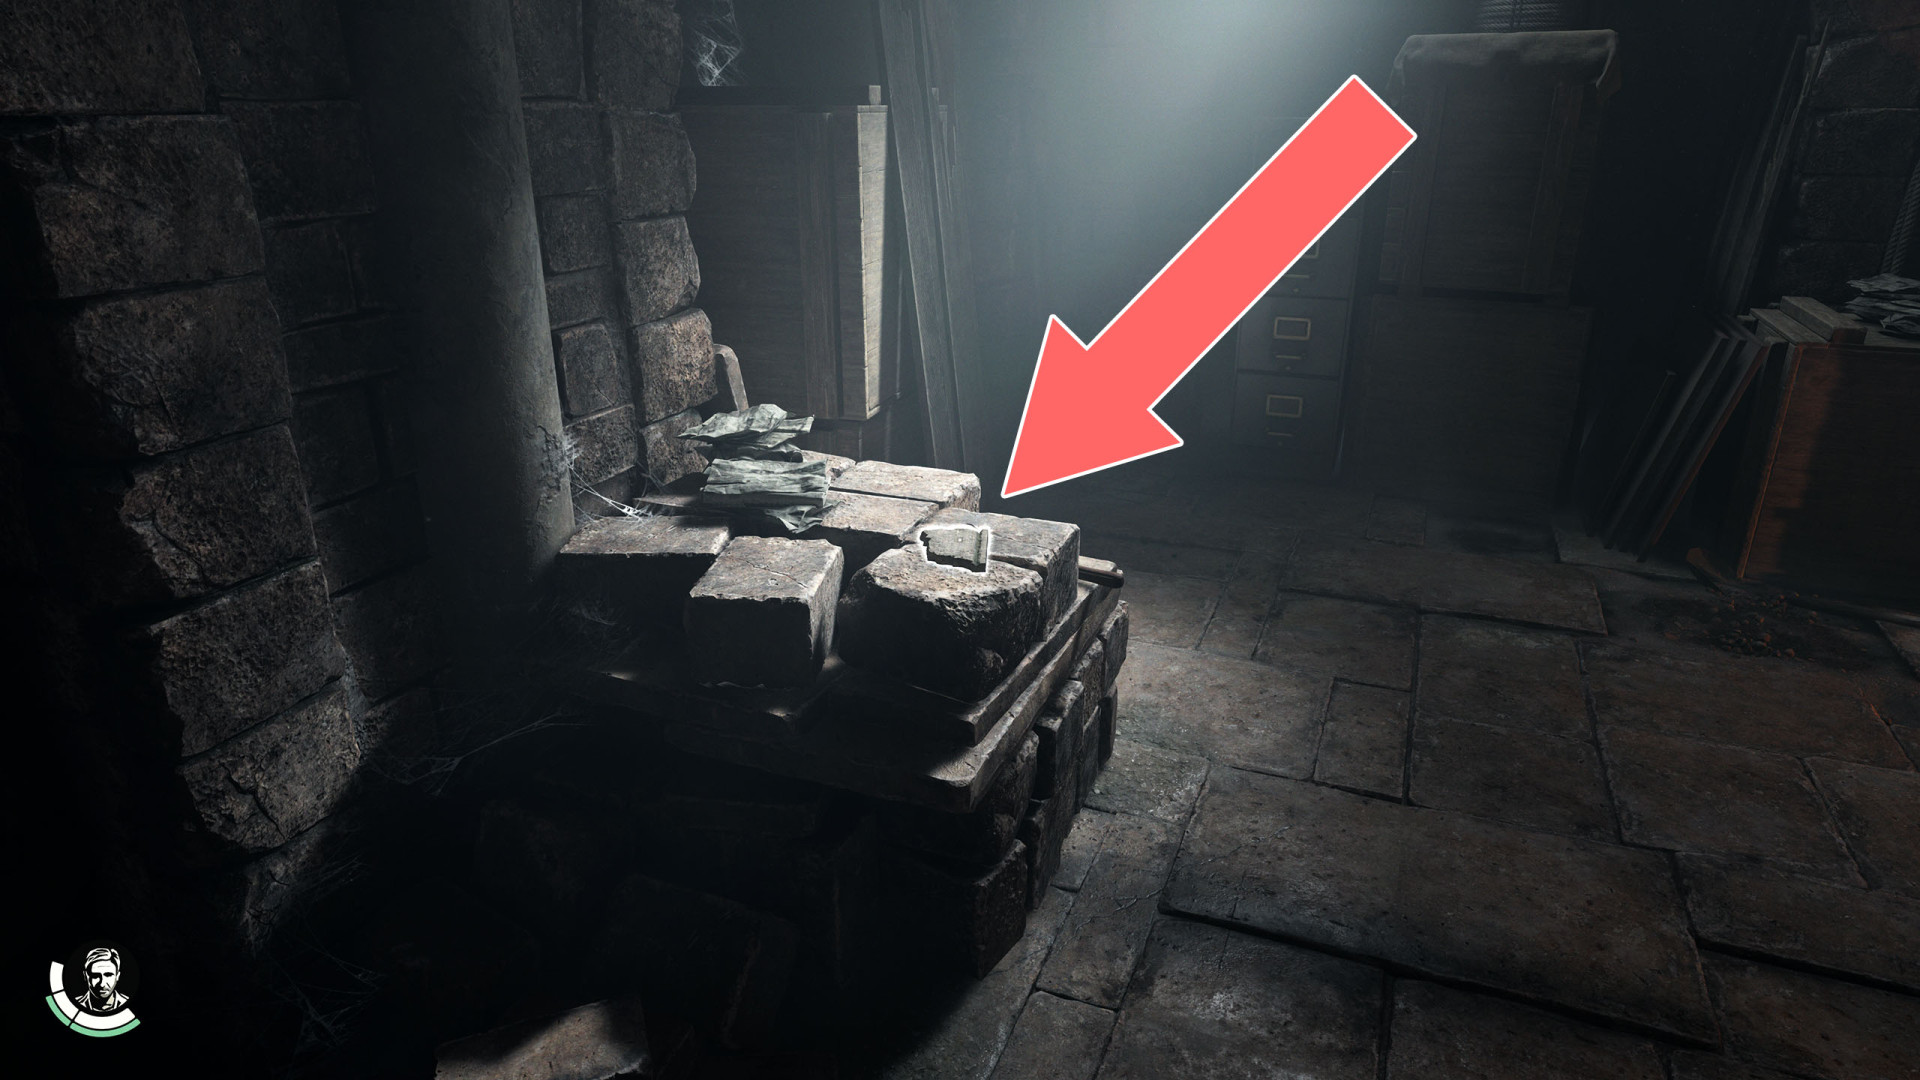
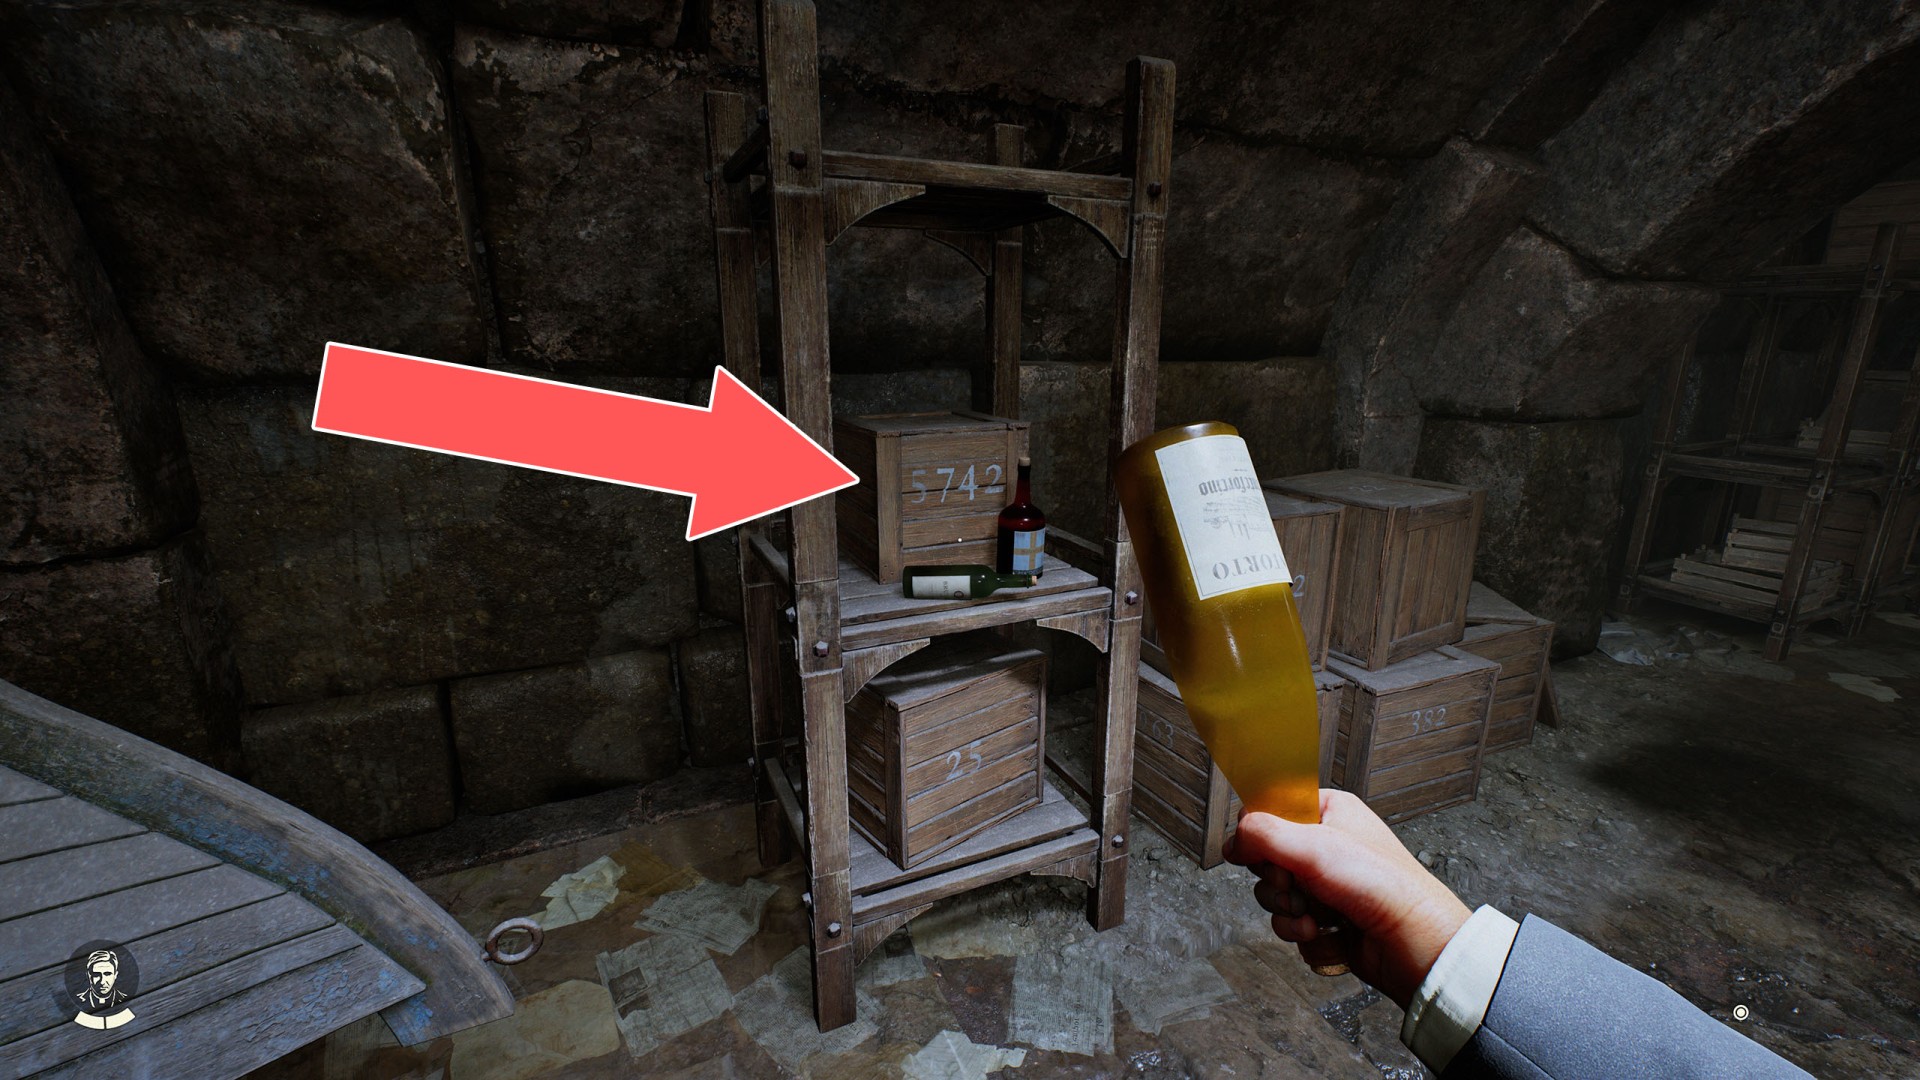
46Cloaca Maxima Safe
Safe combination: 5-7-4-2. The correct combination is on one of the boxes in the side tunnel. Inside you will find the Leo Artifact.

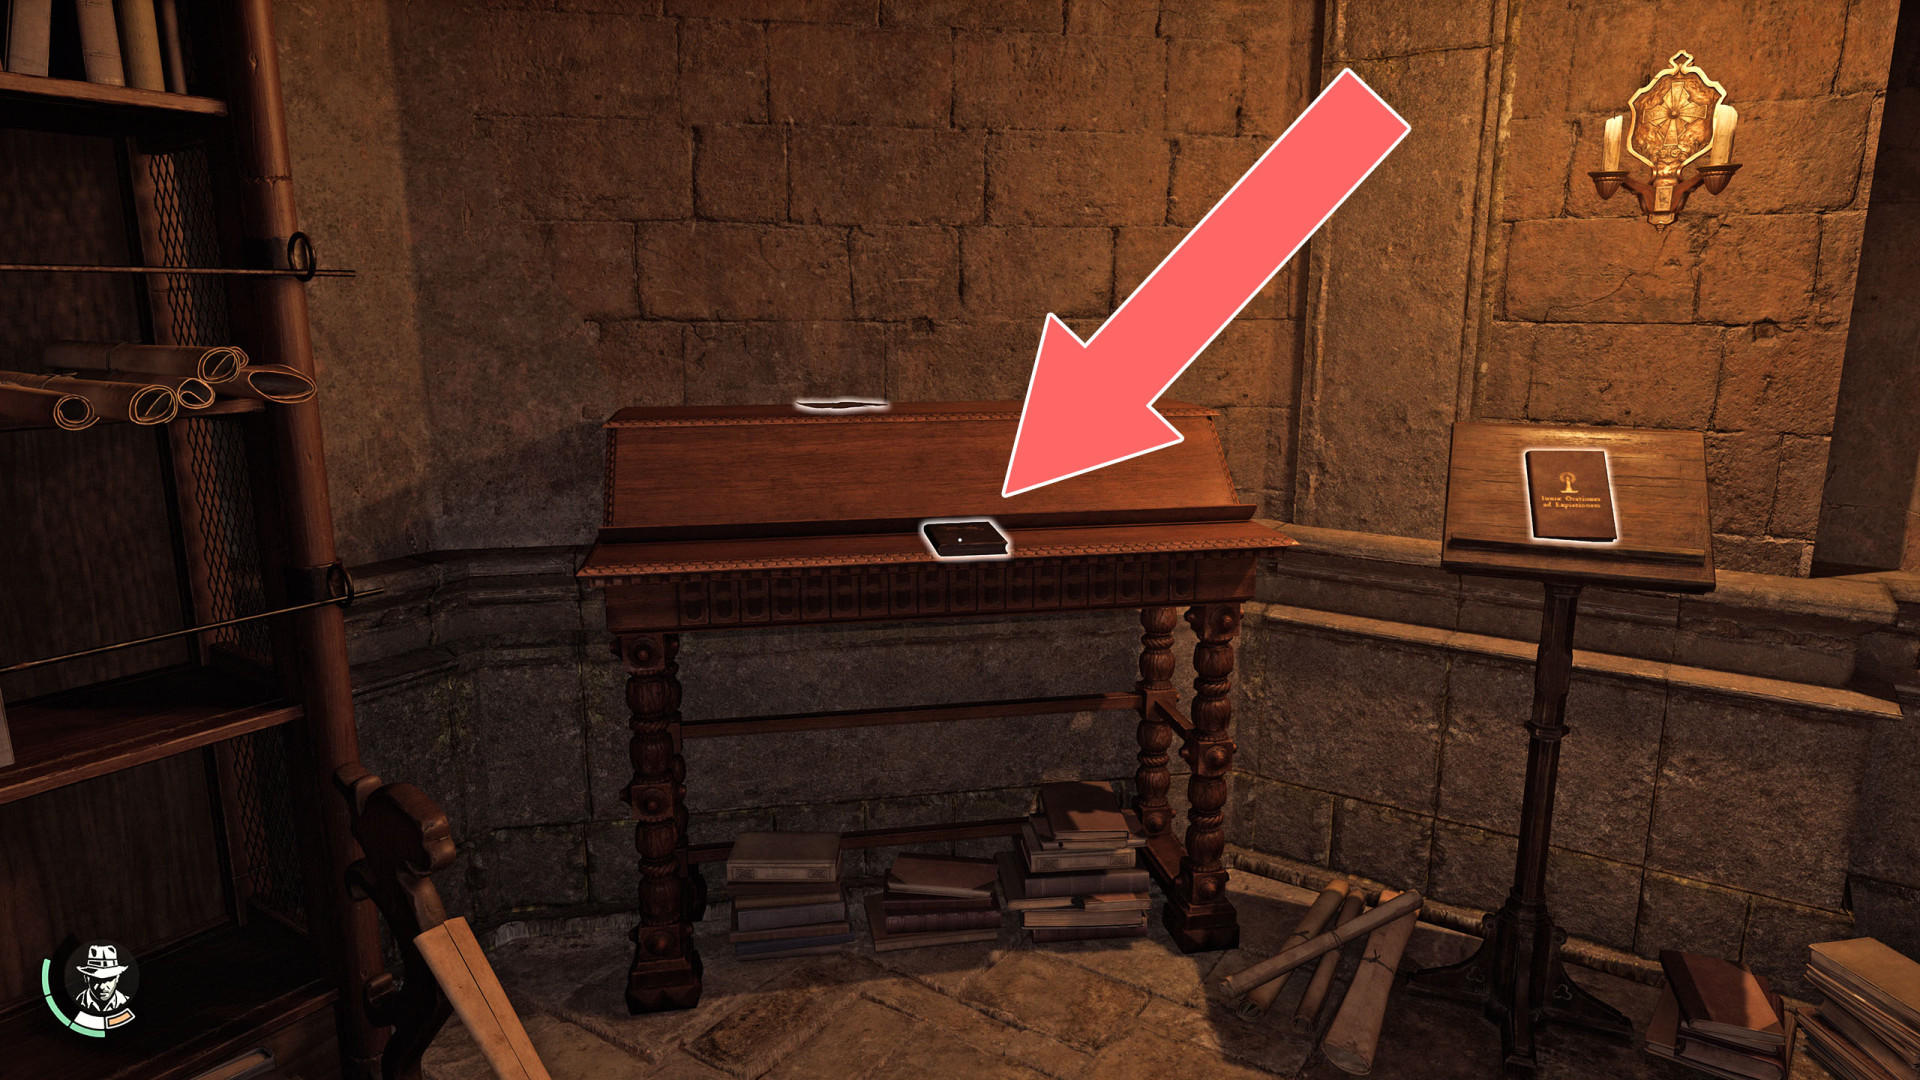
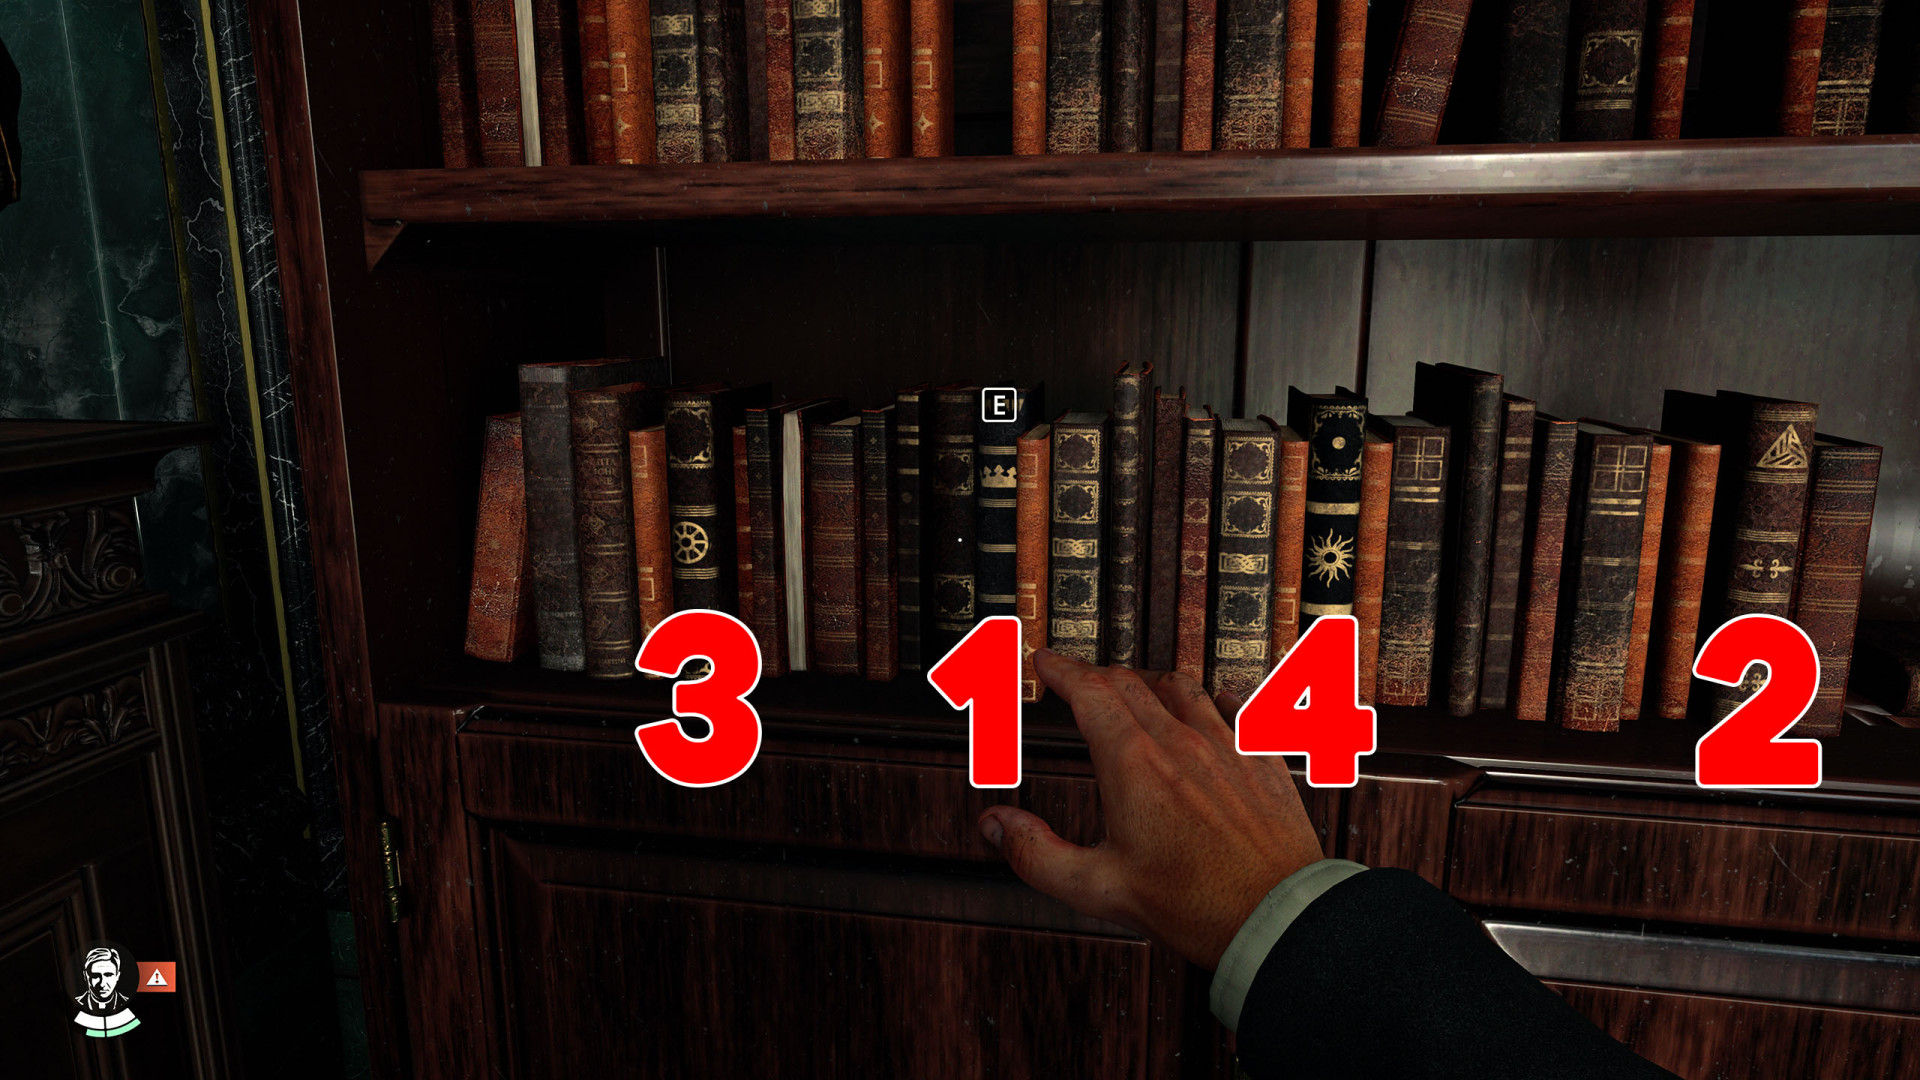
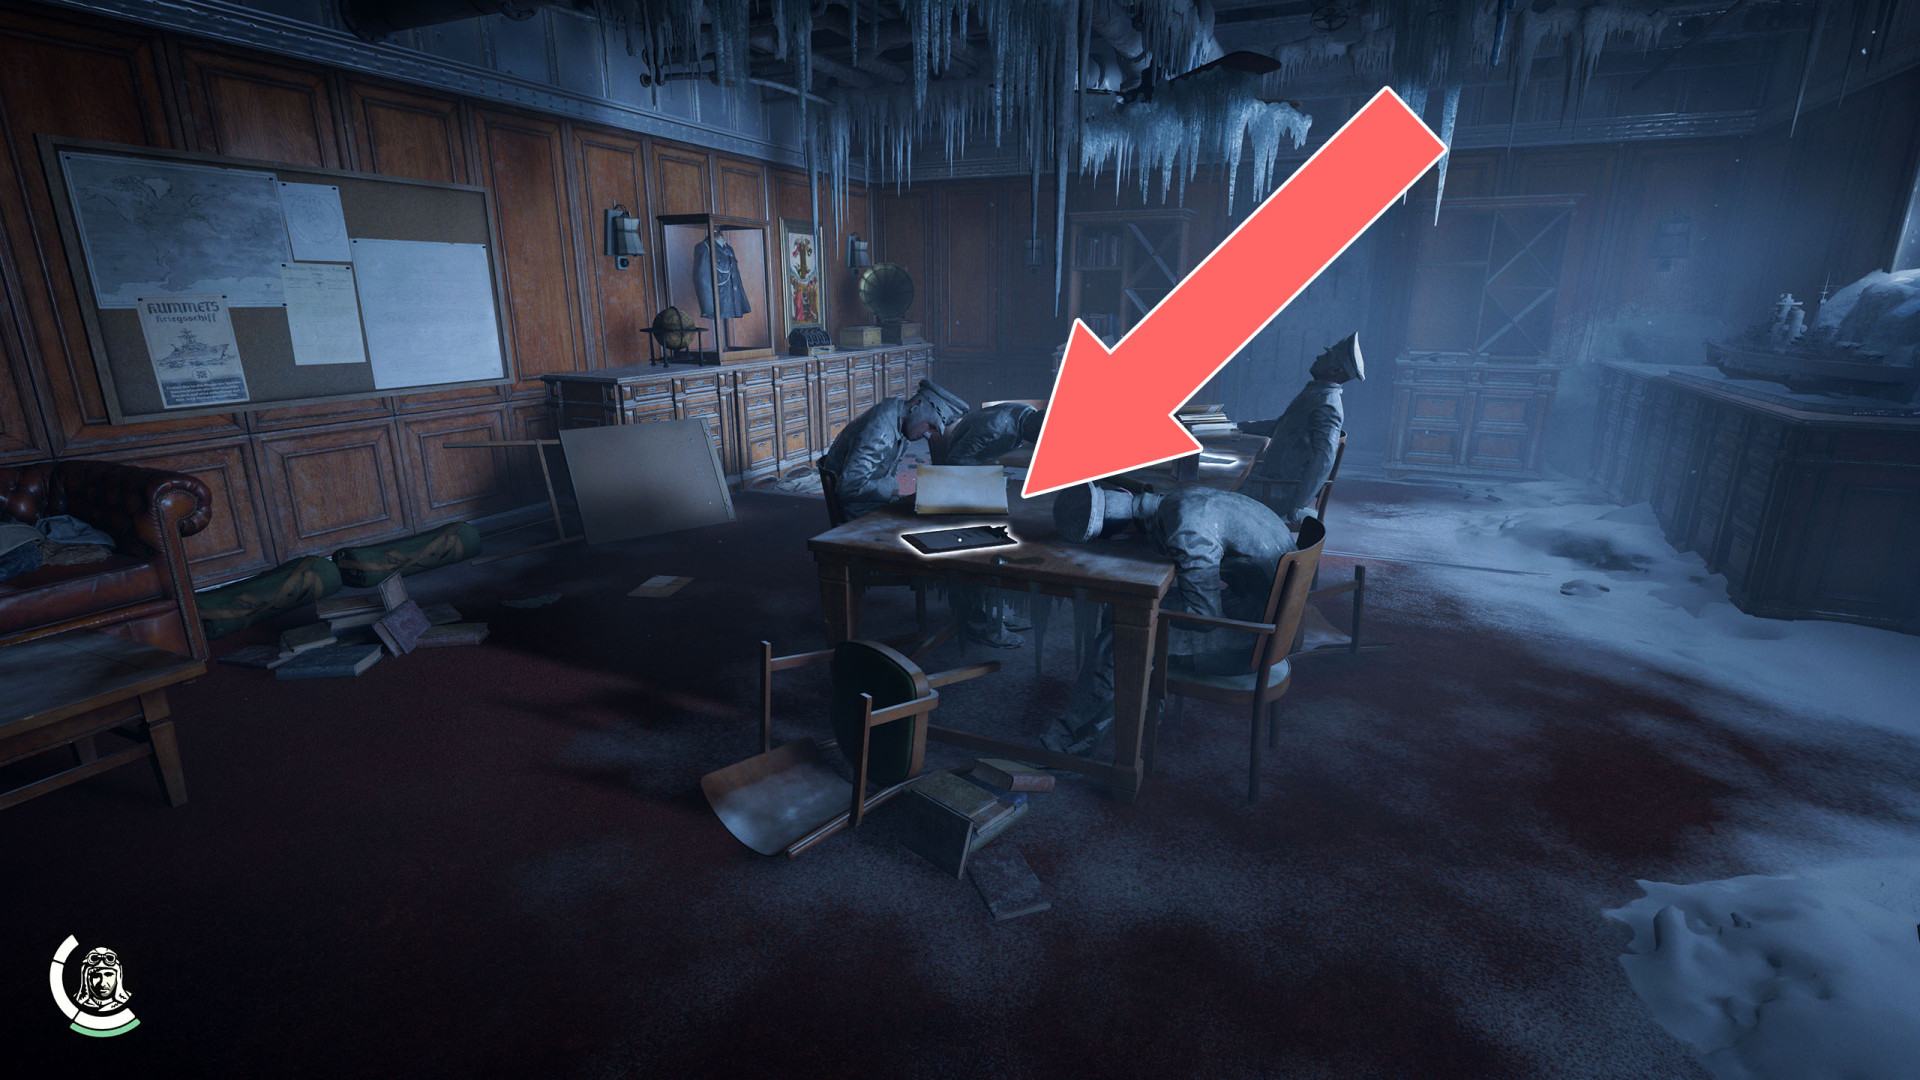
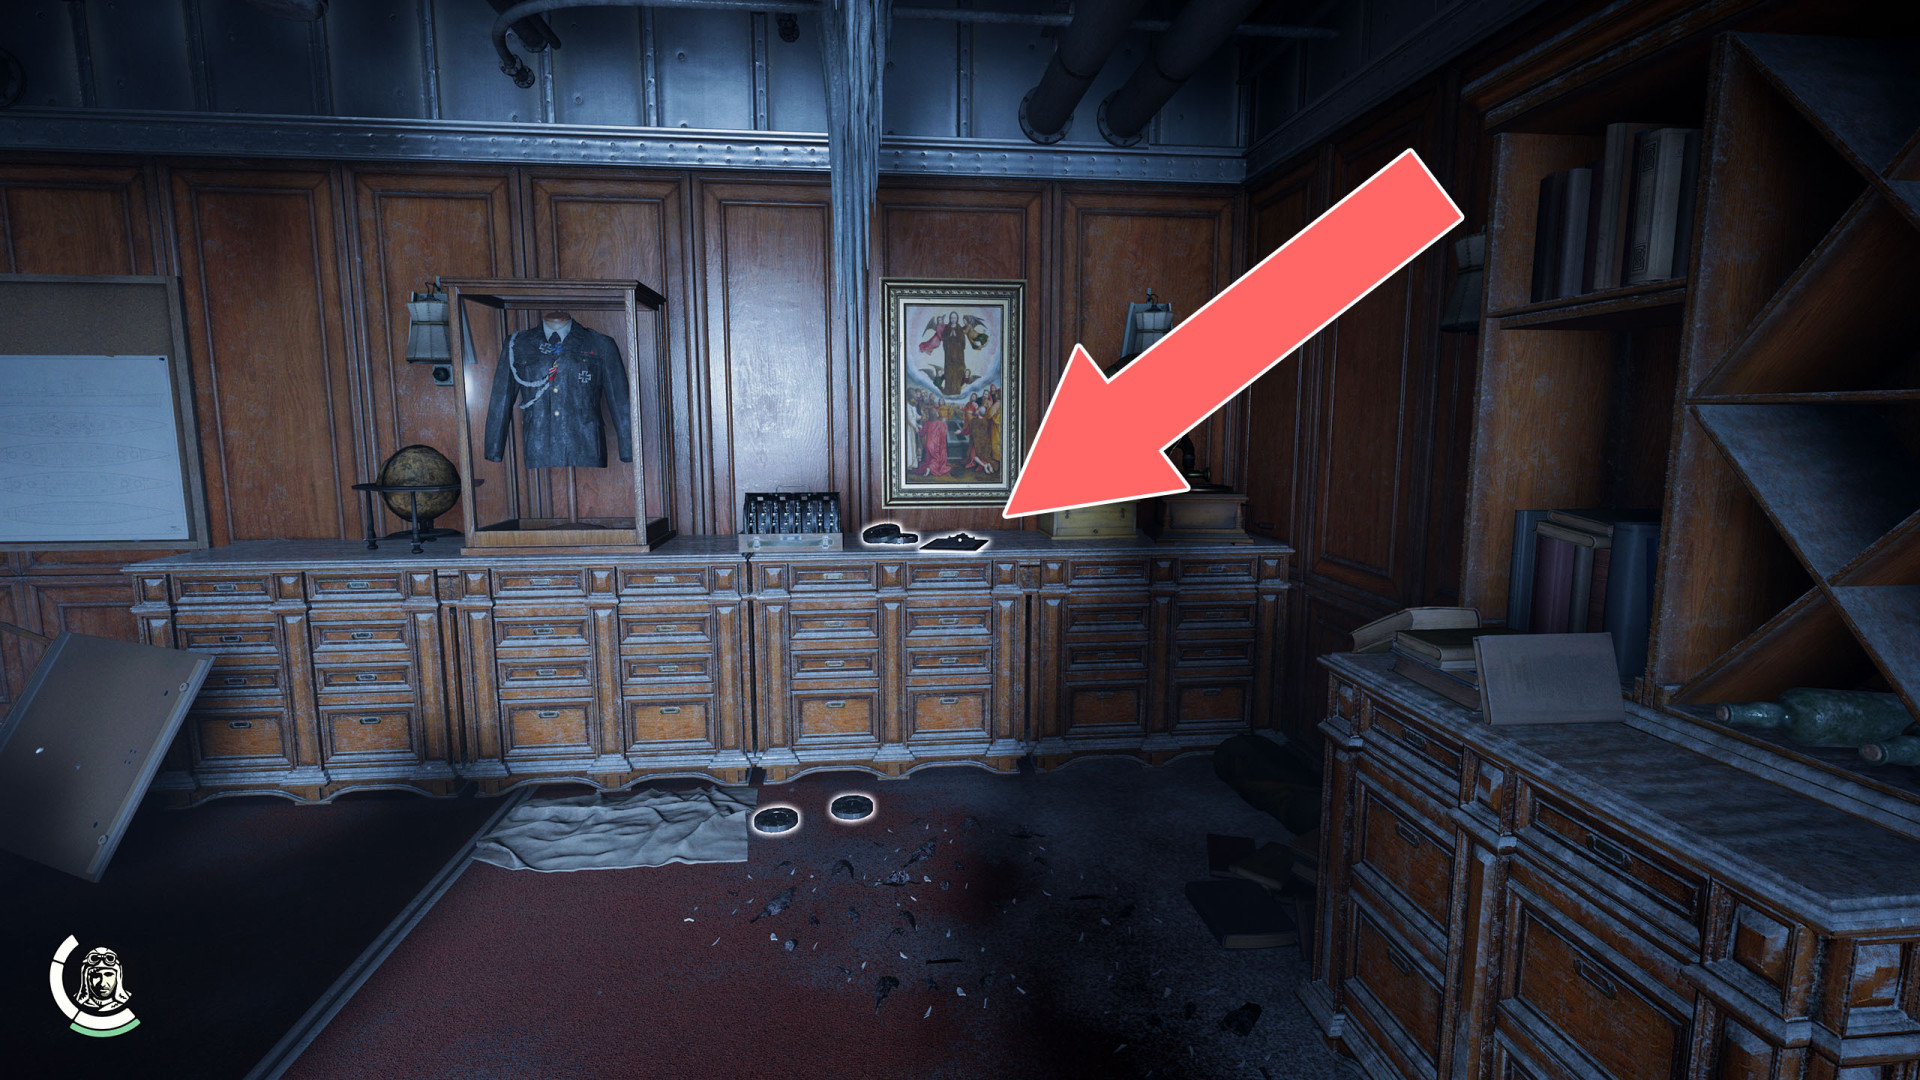
47Collegial Hall Safe
Safe combination: 1-2-2-2. Related mystery: A Collegial Mystery.
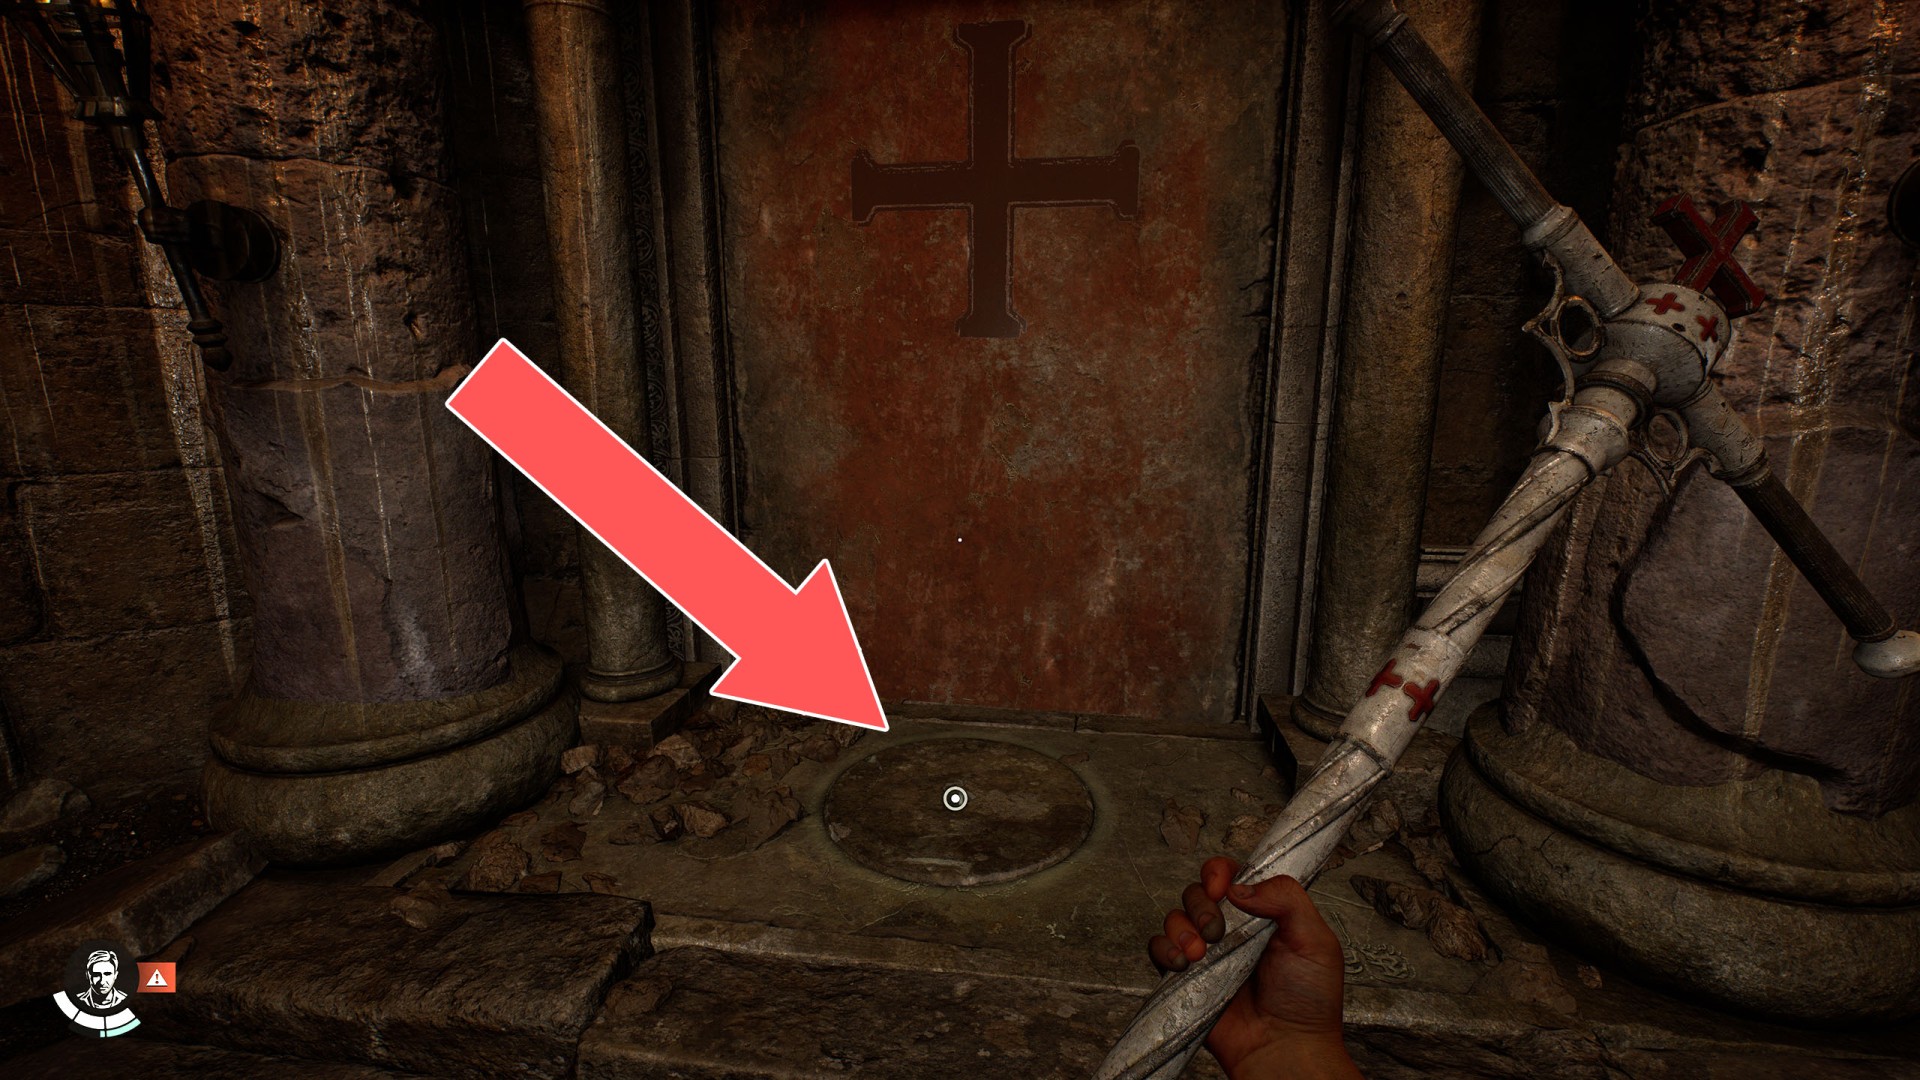
48Cross Scepter
Related puzzle: Tomb of Gibborim.
49Cross Slot
Related puzzle: Tomb of Gibborim.
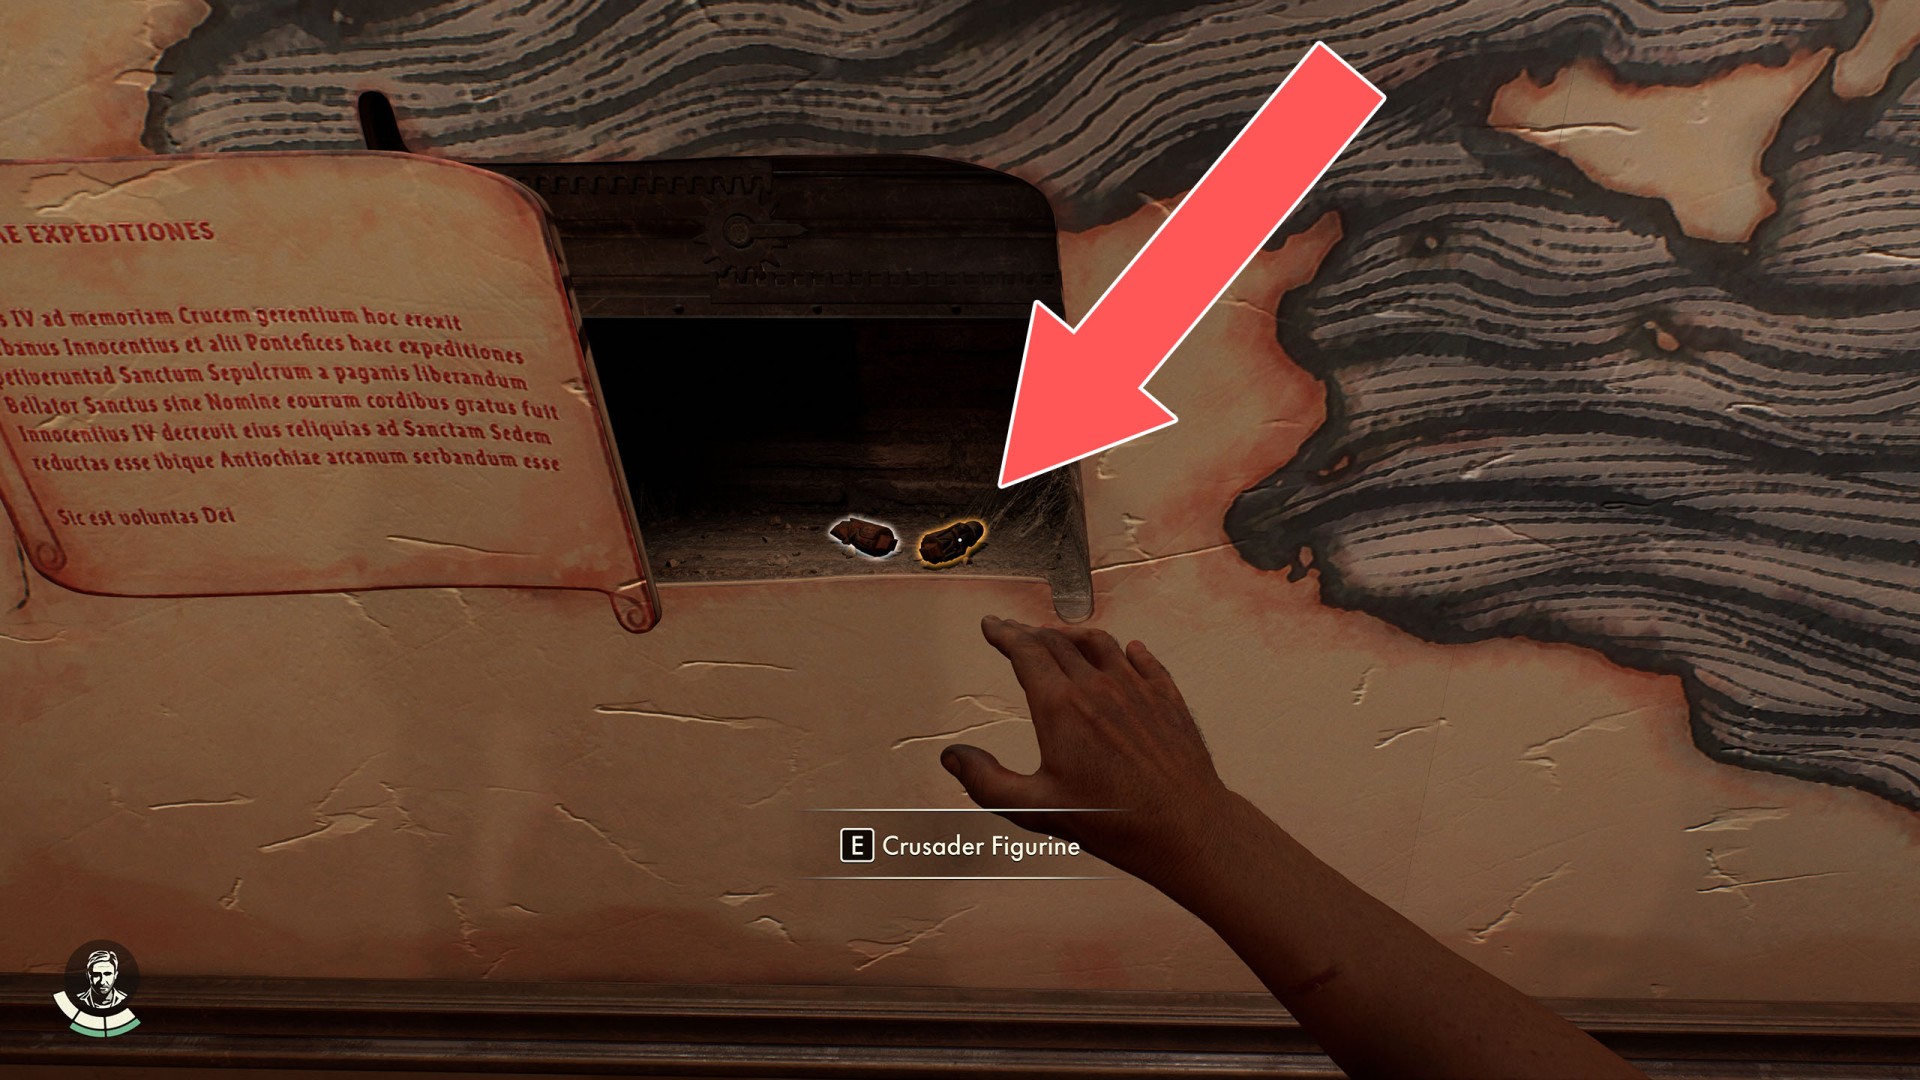
50Crusader Figurine
In a secret compartment that opens when you press the Holy Expeditions badge on the mural. Related adventure: The Order of Giants.
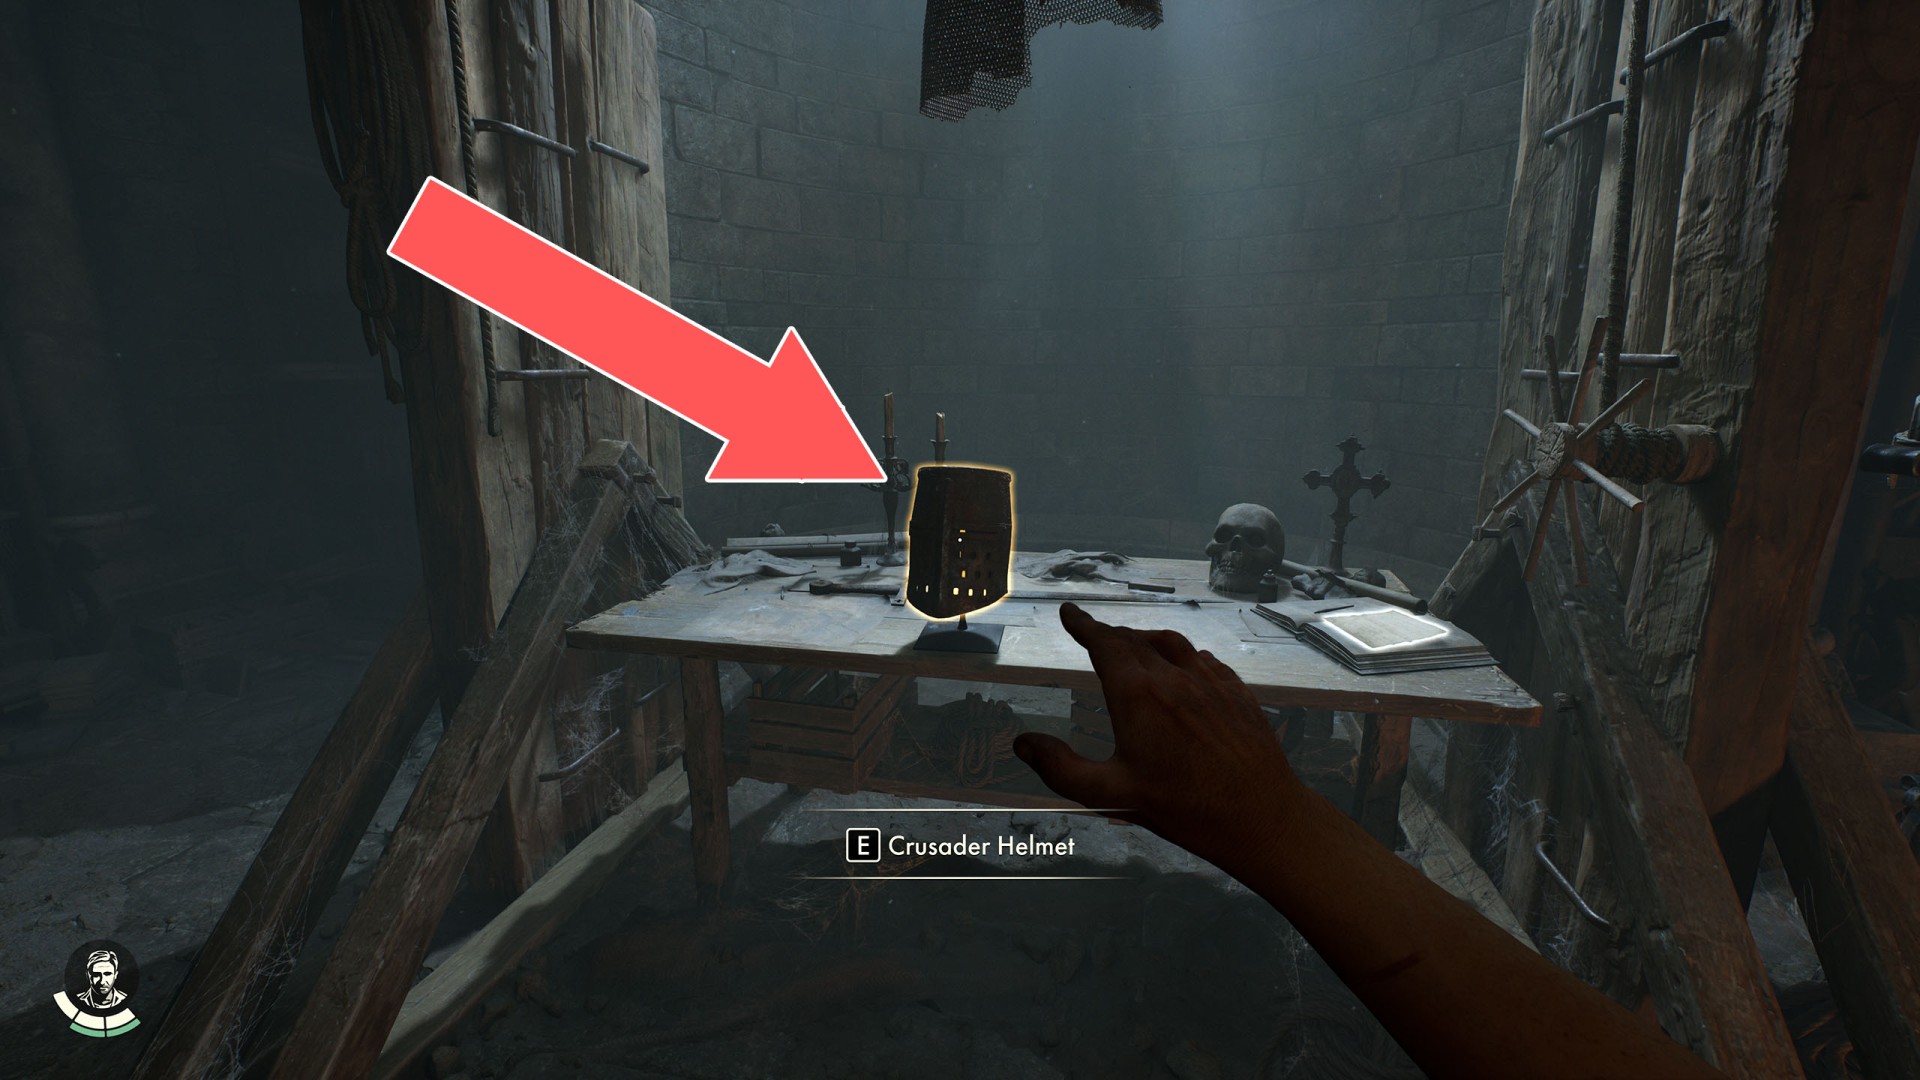
51Crusader Helmet
Related adventure: The Order of Giants. Inside you will find the Nephilim Orders and the Crusader Helmet Key.
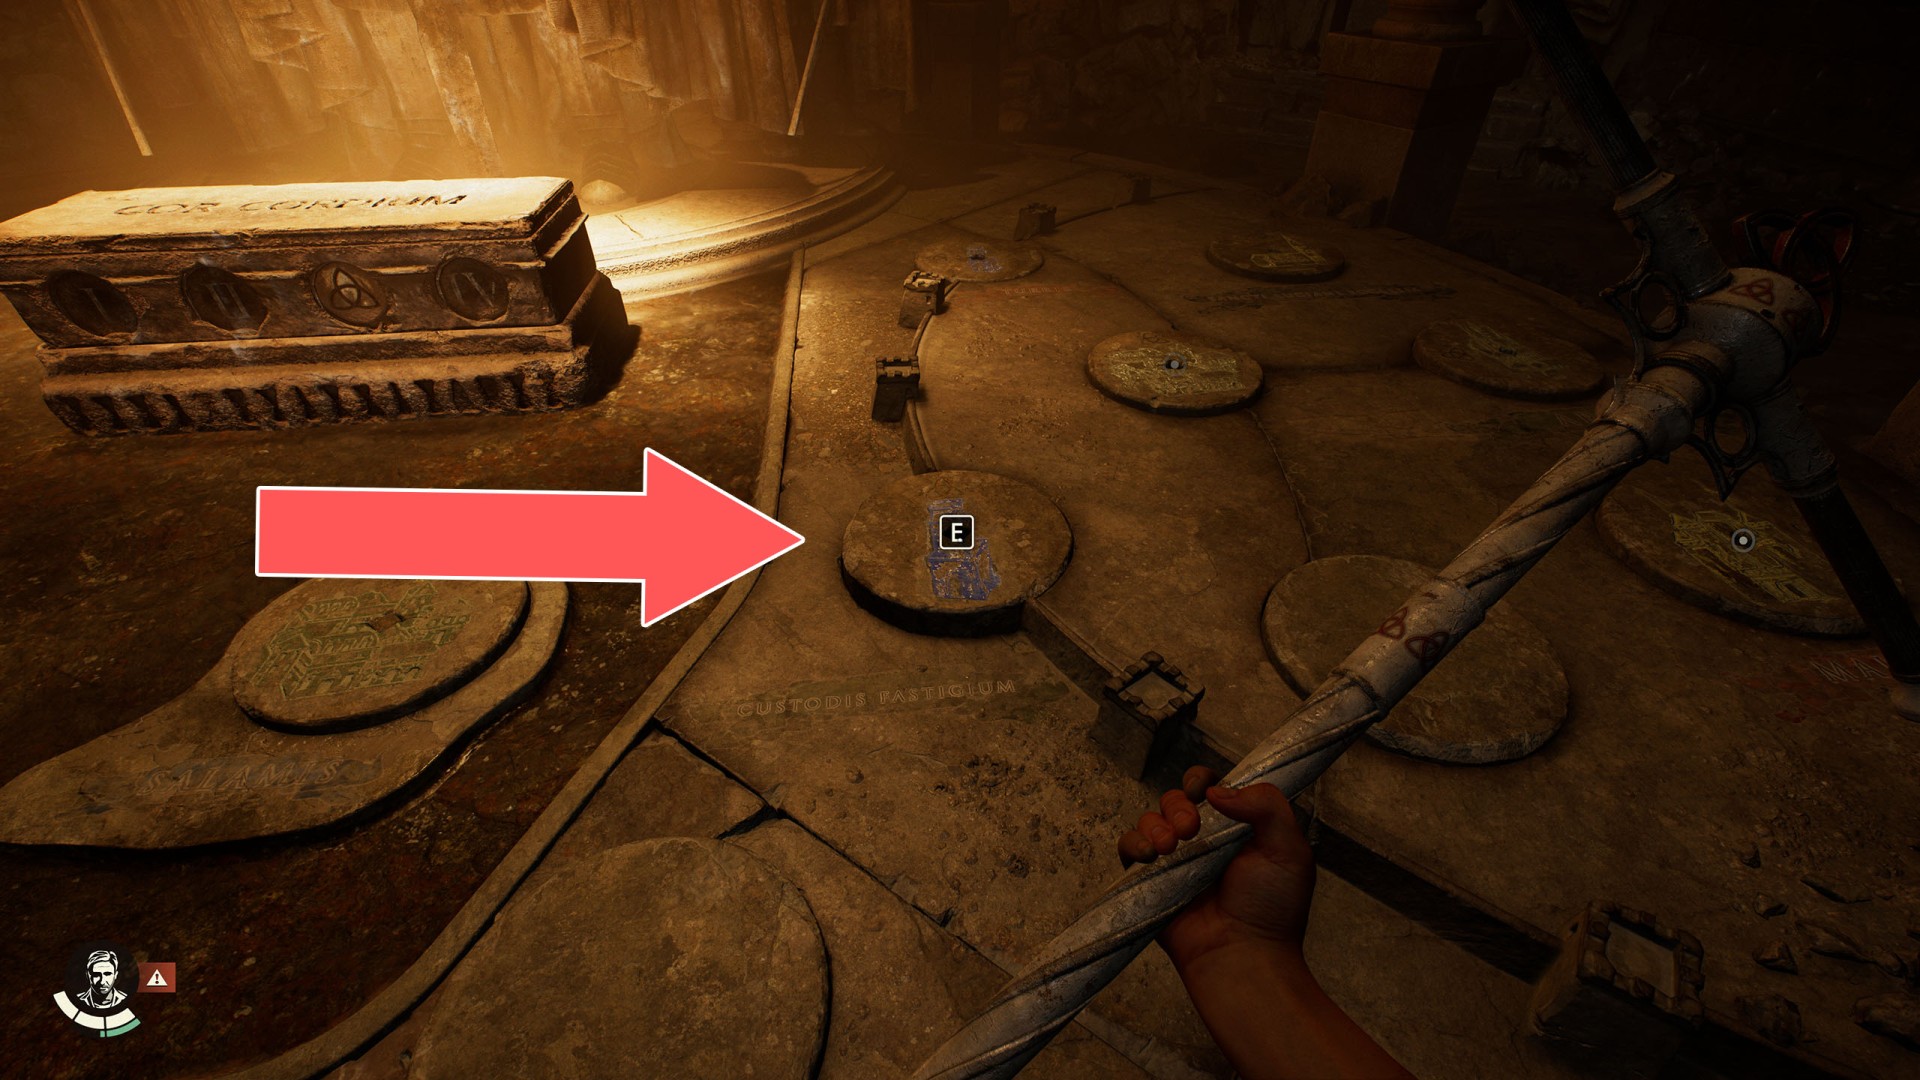
52Custodis Fastigium Slot
Use the Trinity Scepter and turn it once to the right. Related puzzle: Tomb of Gibborim.
53Cylinder Piece (Shrine of the Gladiator)
Another of the three cylinder pieces you need to collect. It's a reward for completing the Gladiator Shrine puzzle.
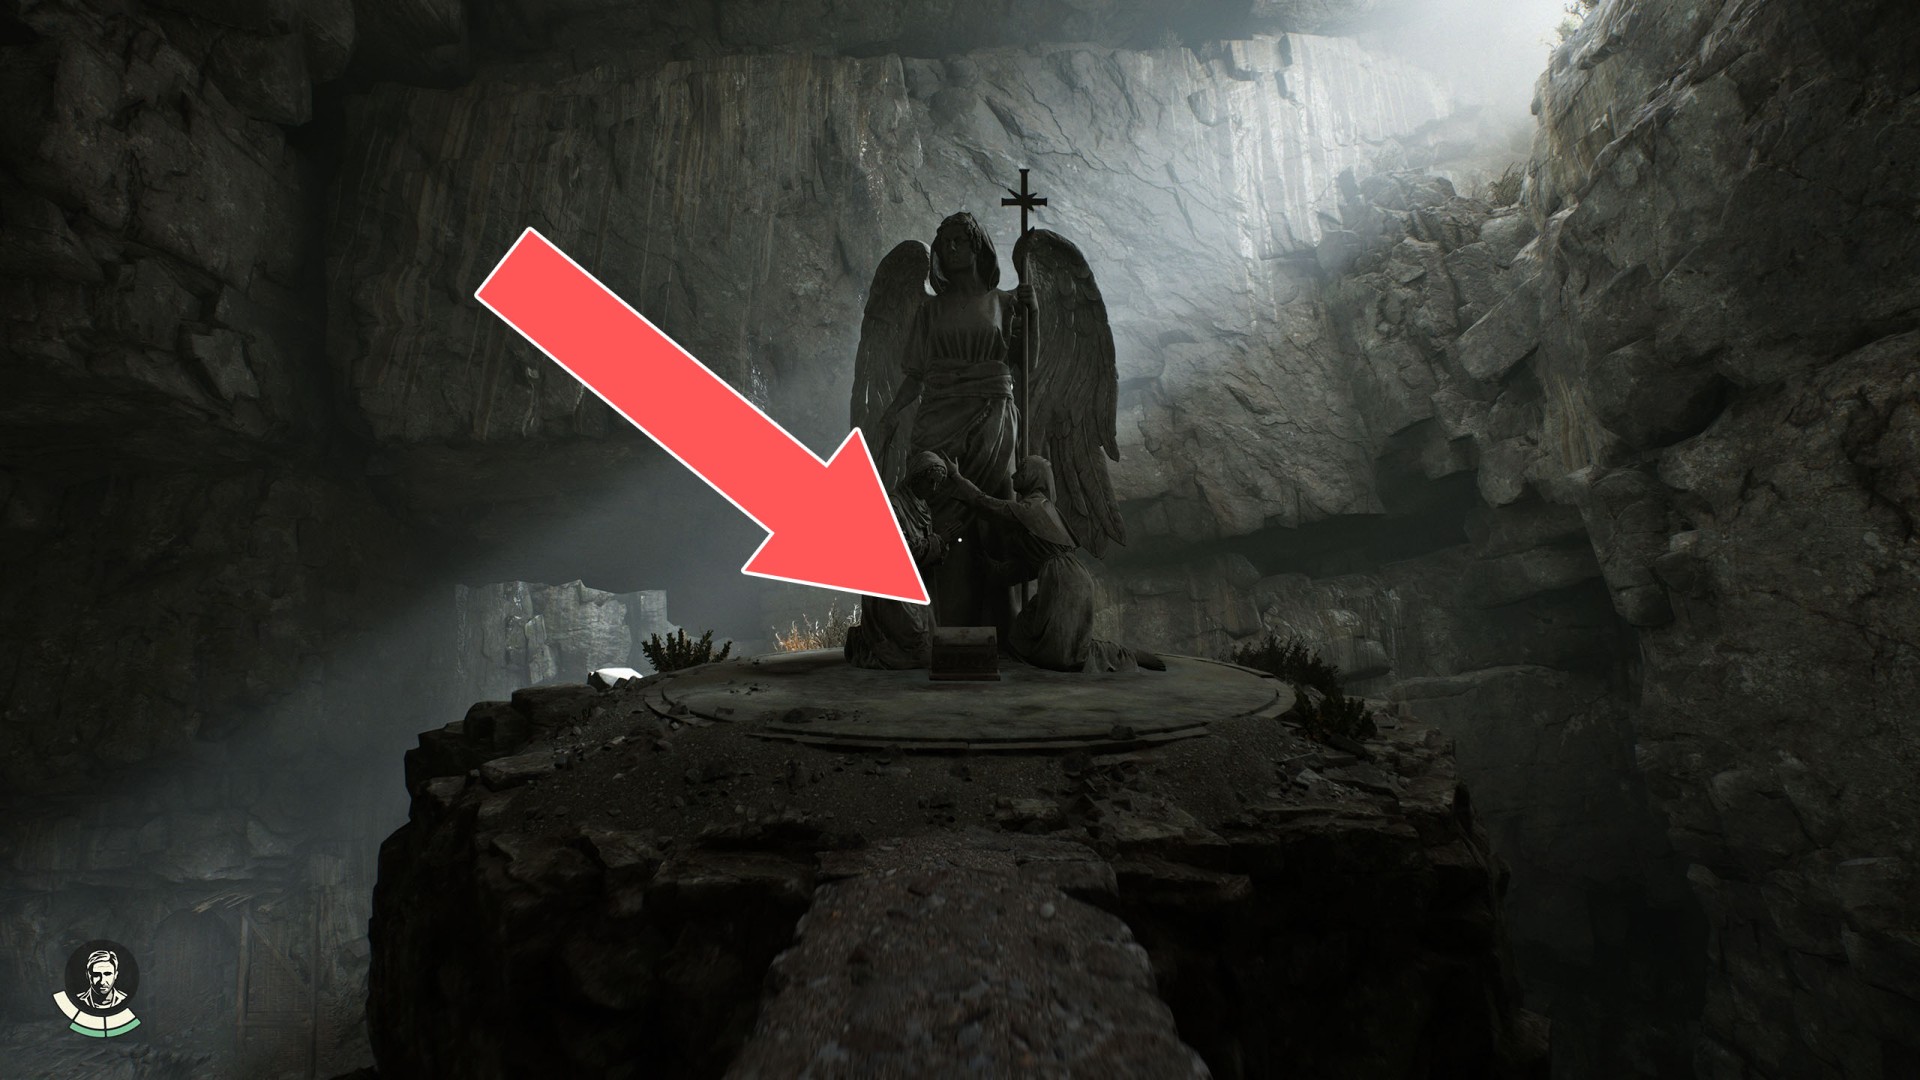
54Cylinder Piece (Tomb of Gibborim)
Another of the three cylinder pieces you need to collect. It's a reward for completing Tomb of Gibborim puzzle.
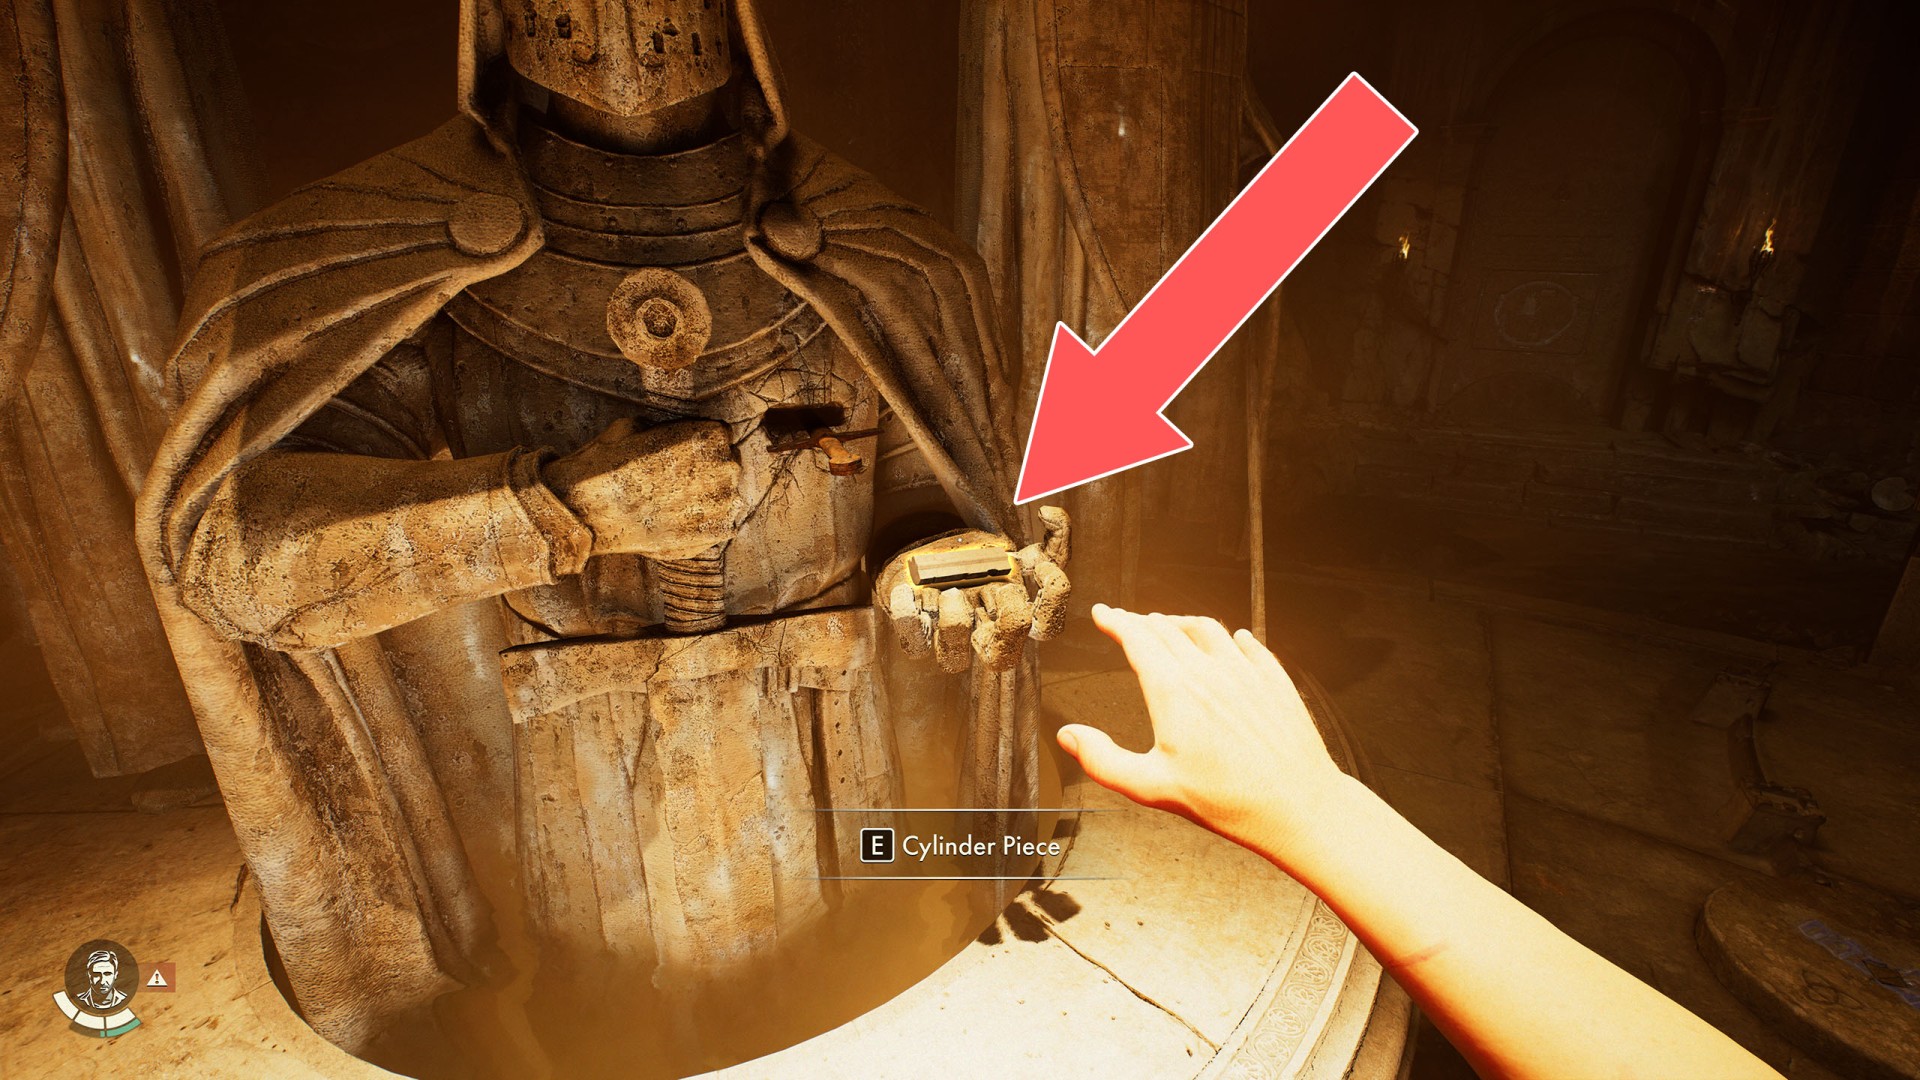
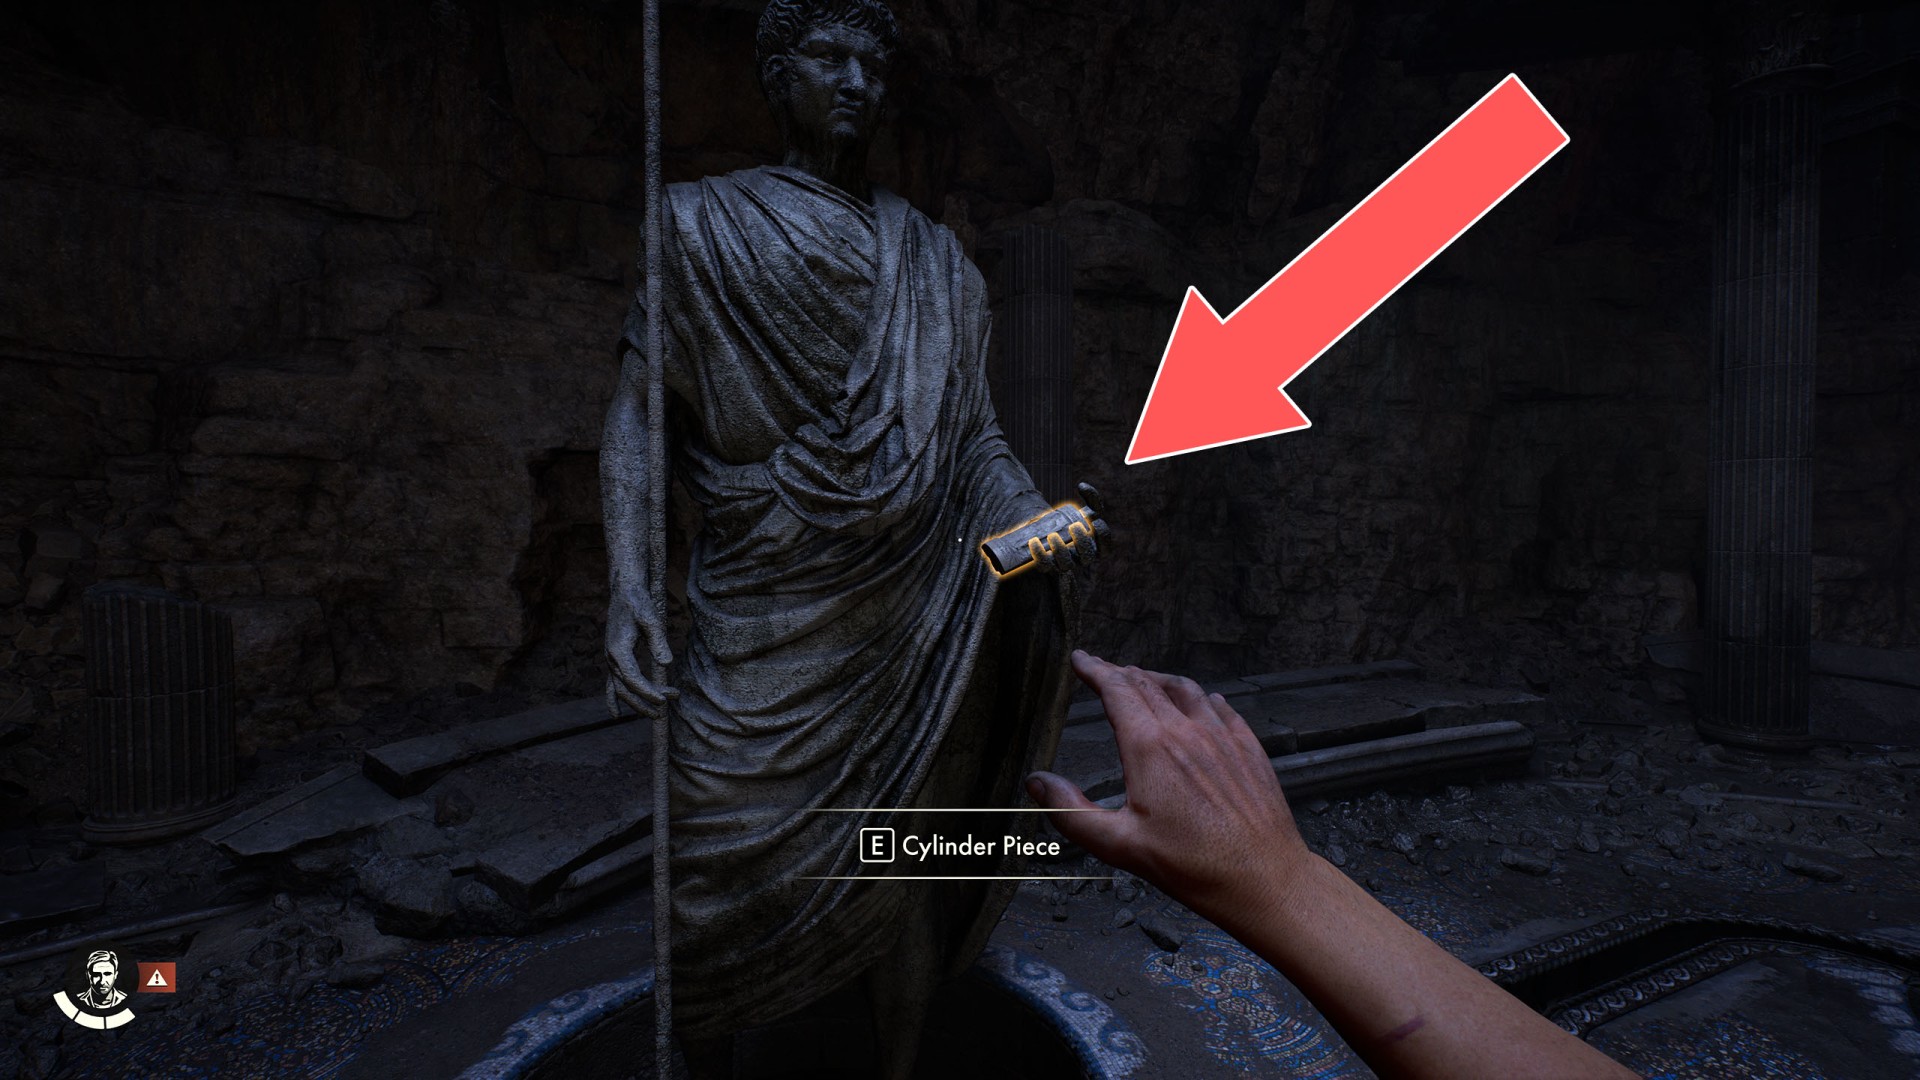
55Cylinder Piece (Tomb of Junia)
The first of the cylinder pieces you need to collect.
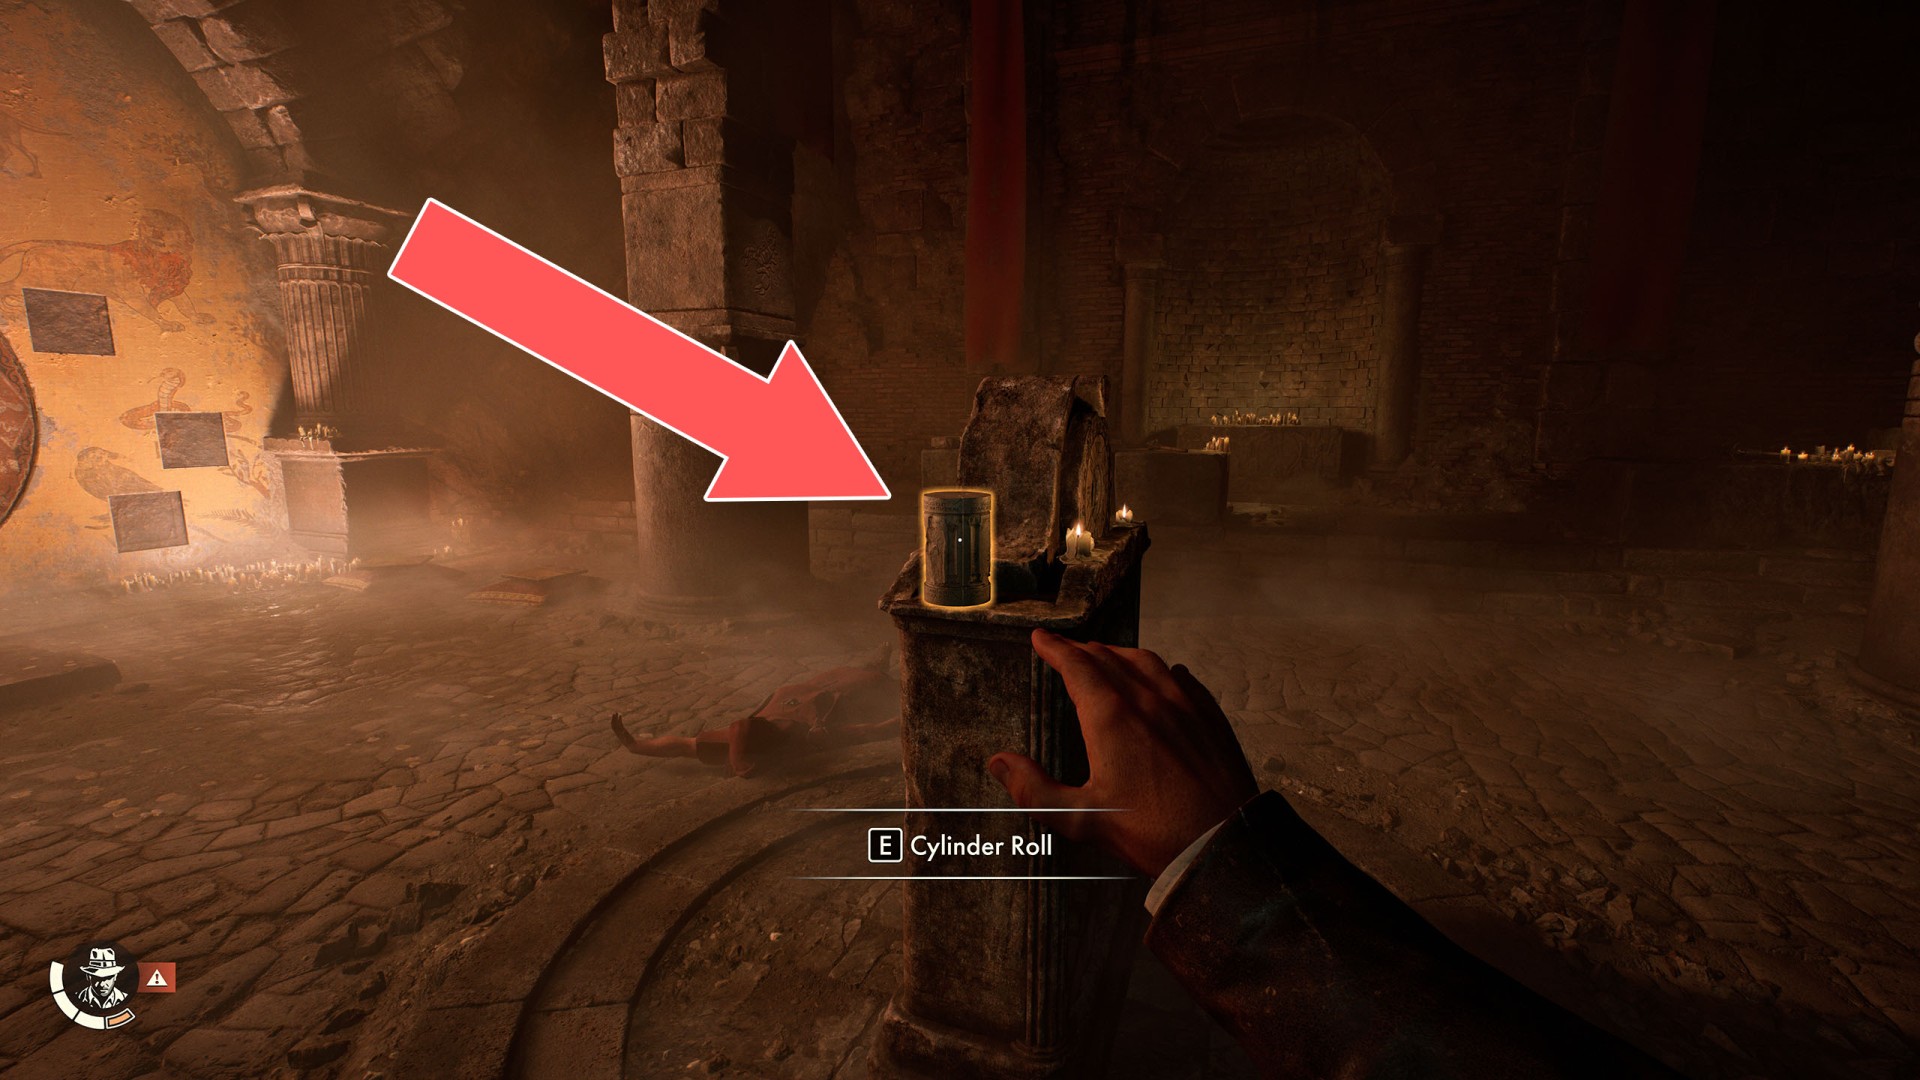
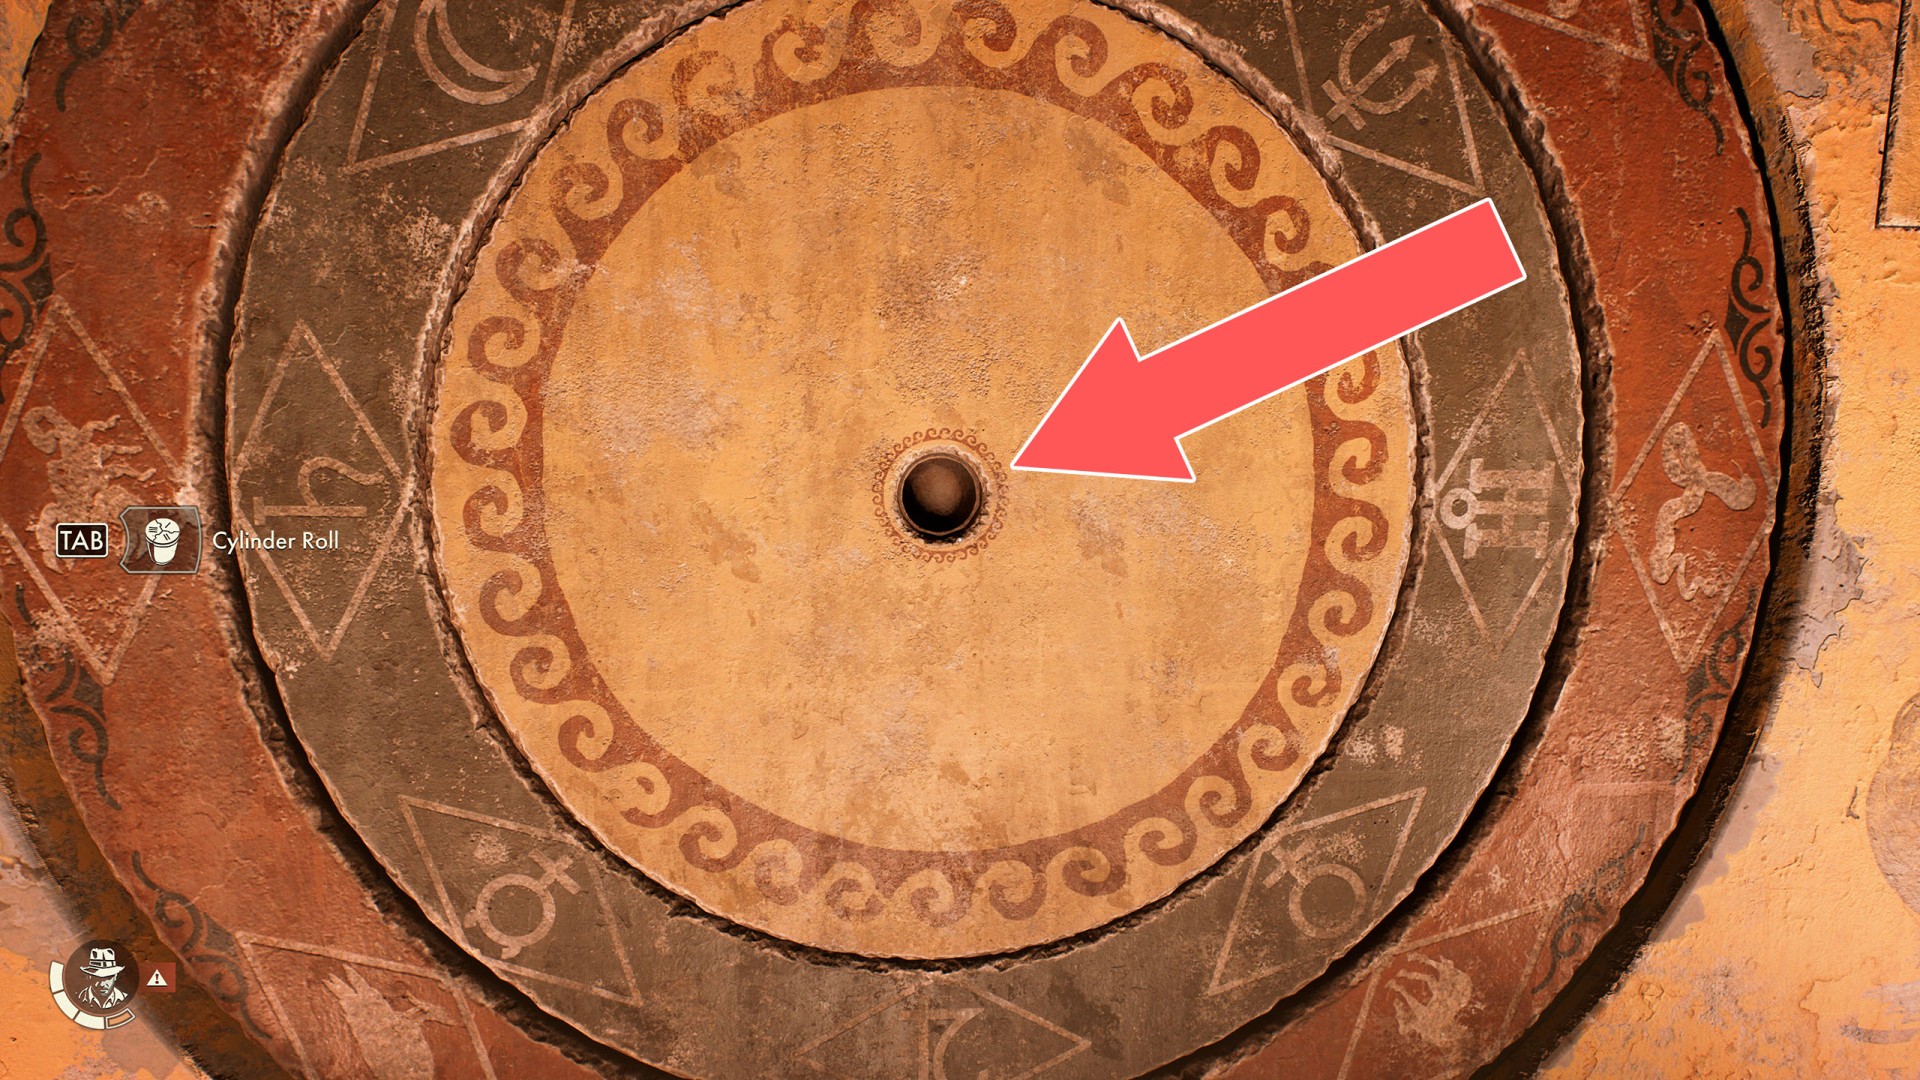
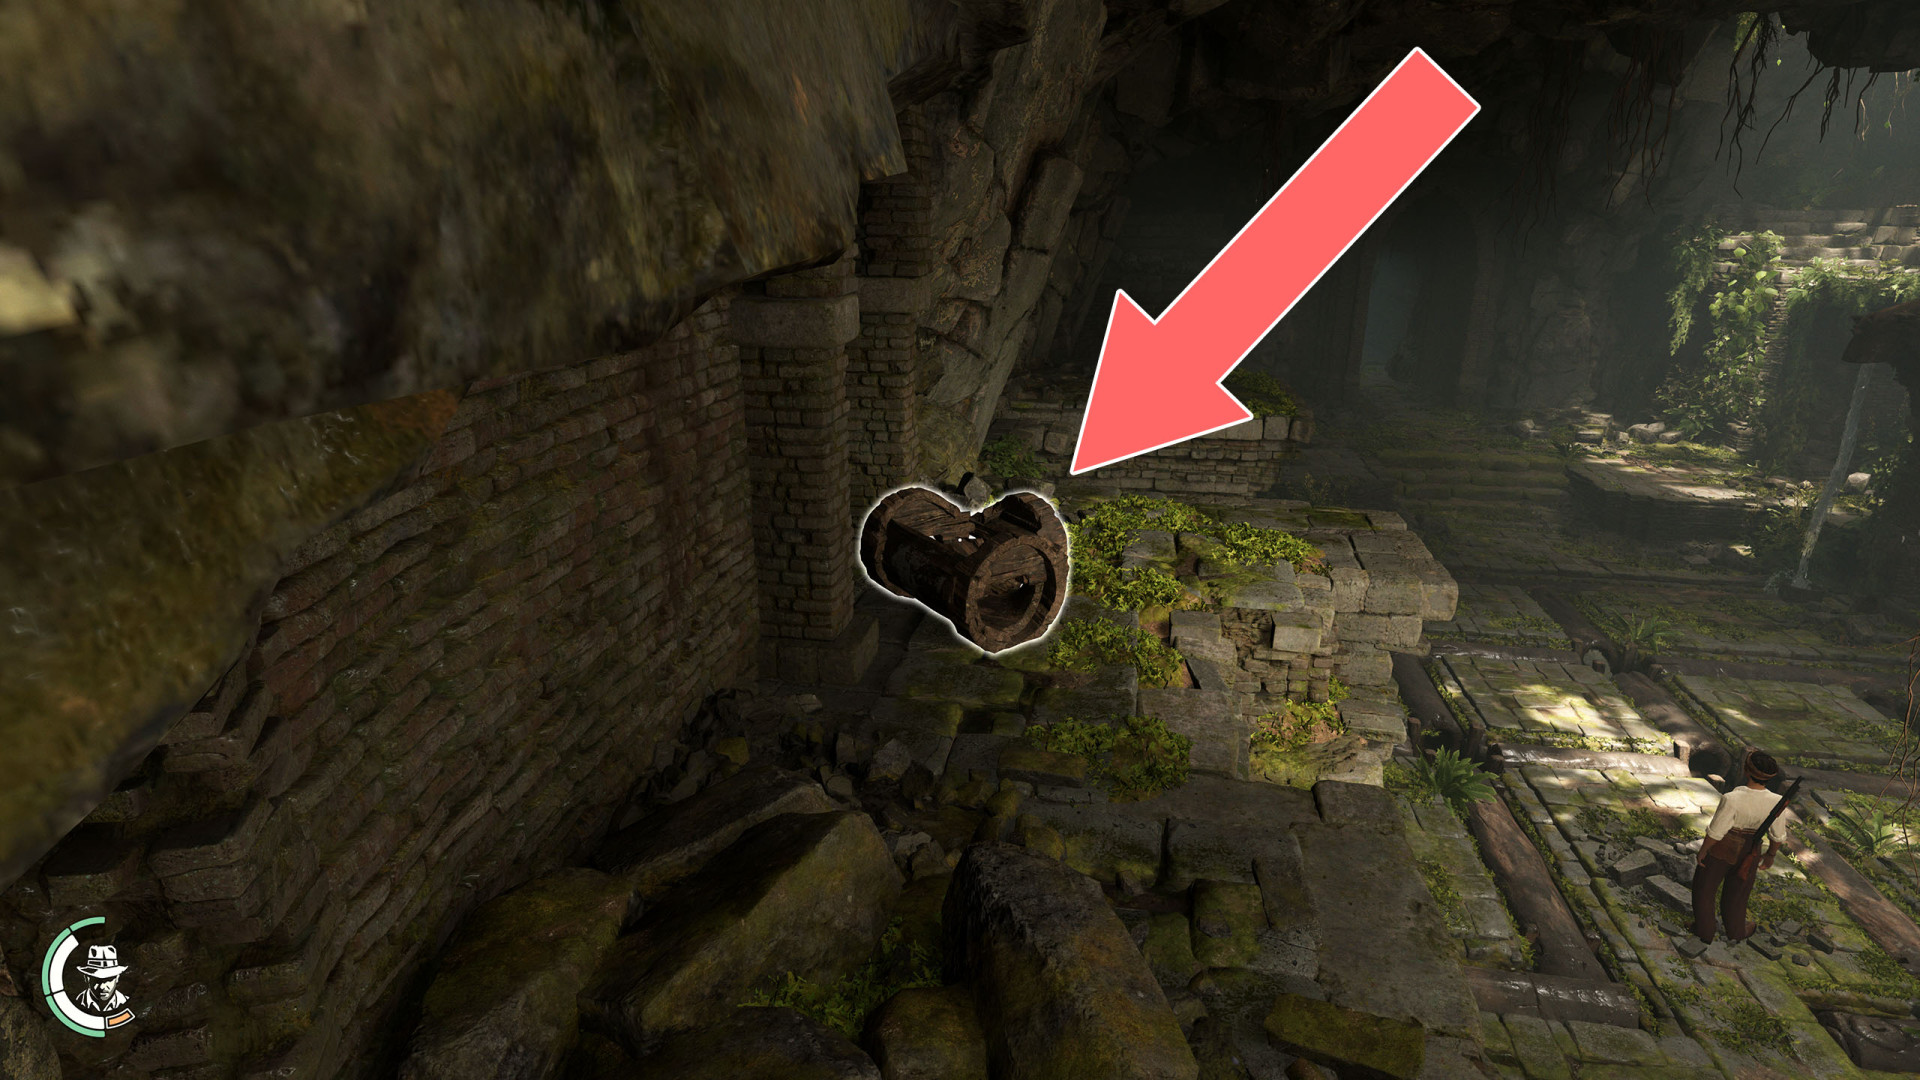
56Cylinder Roll
Related puzzle: Monster's Gate.
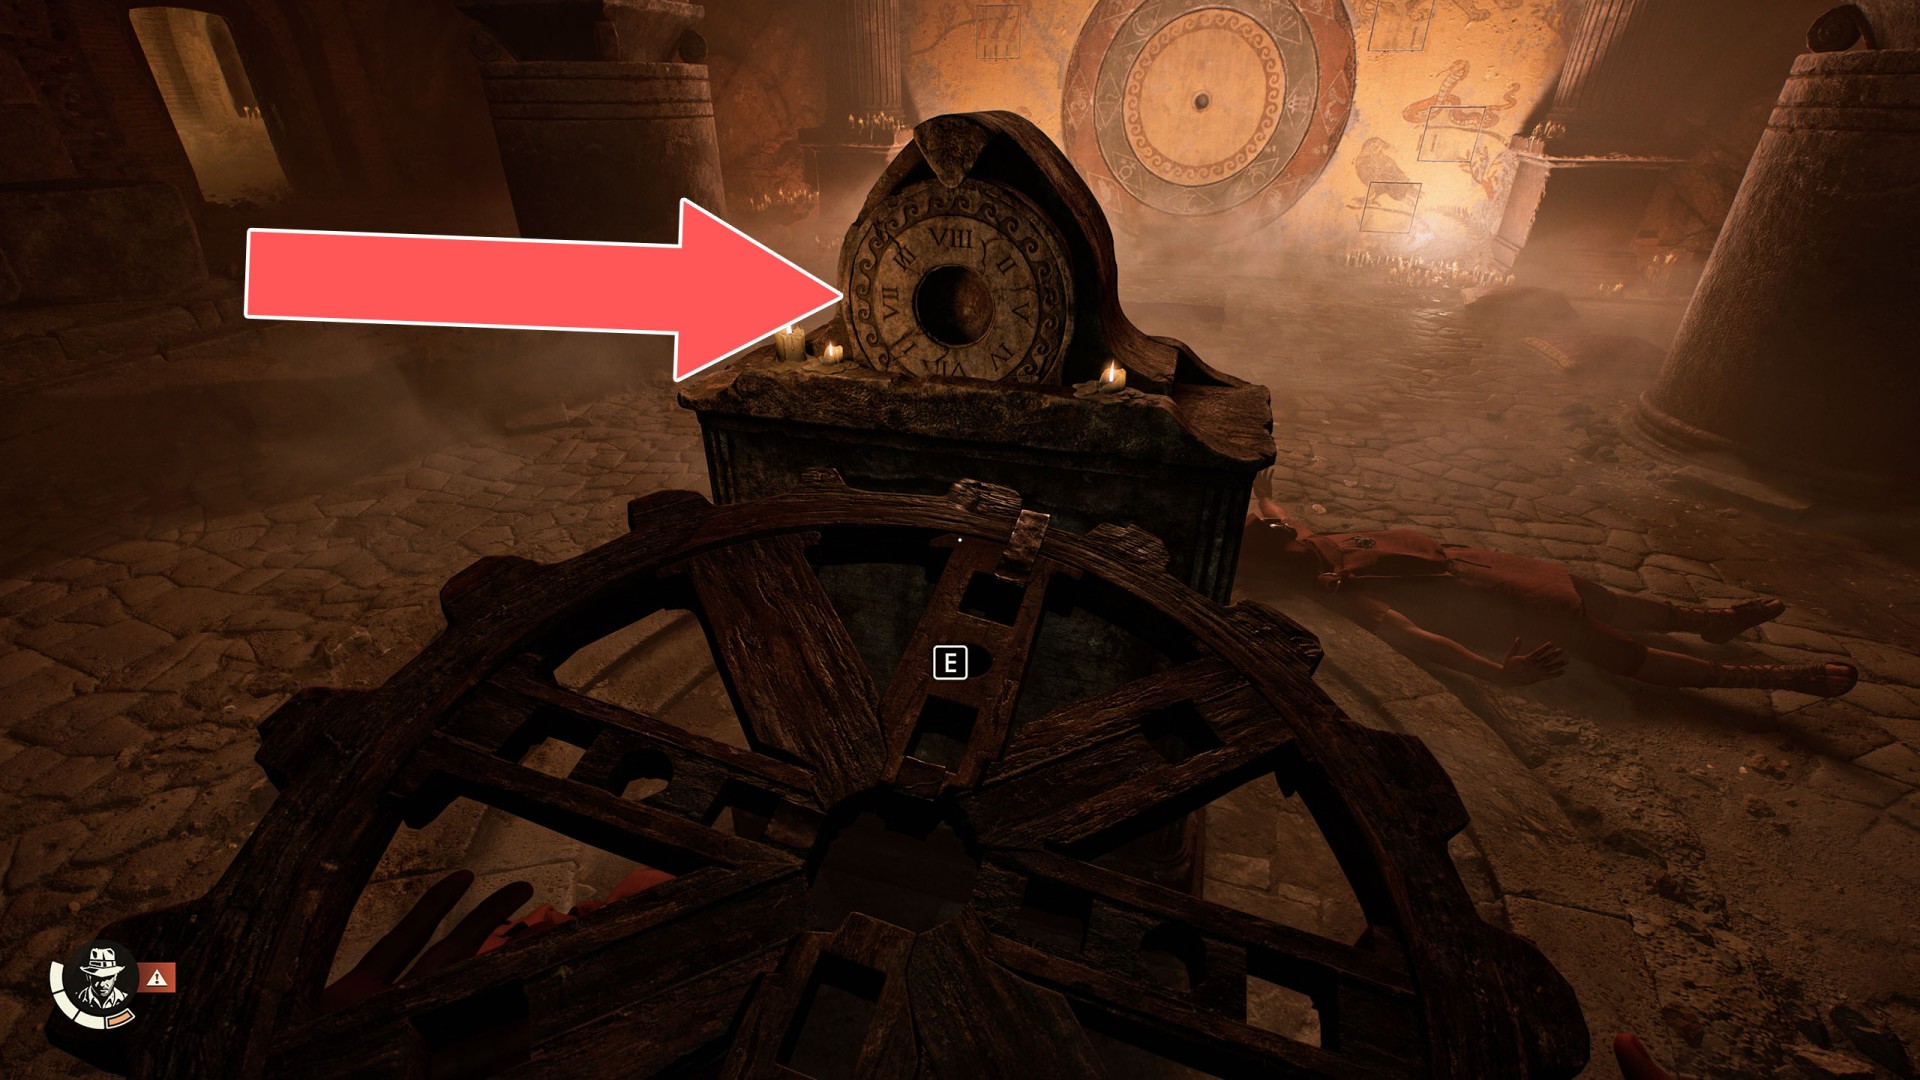
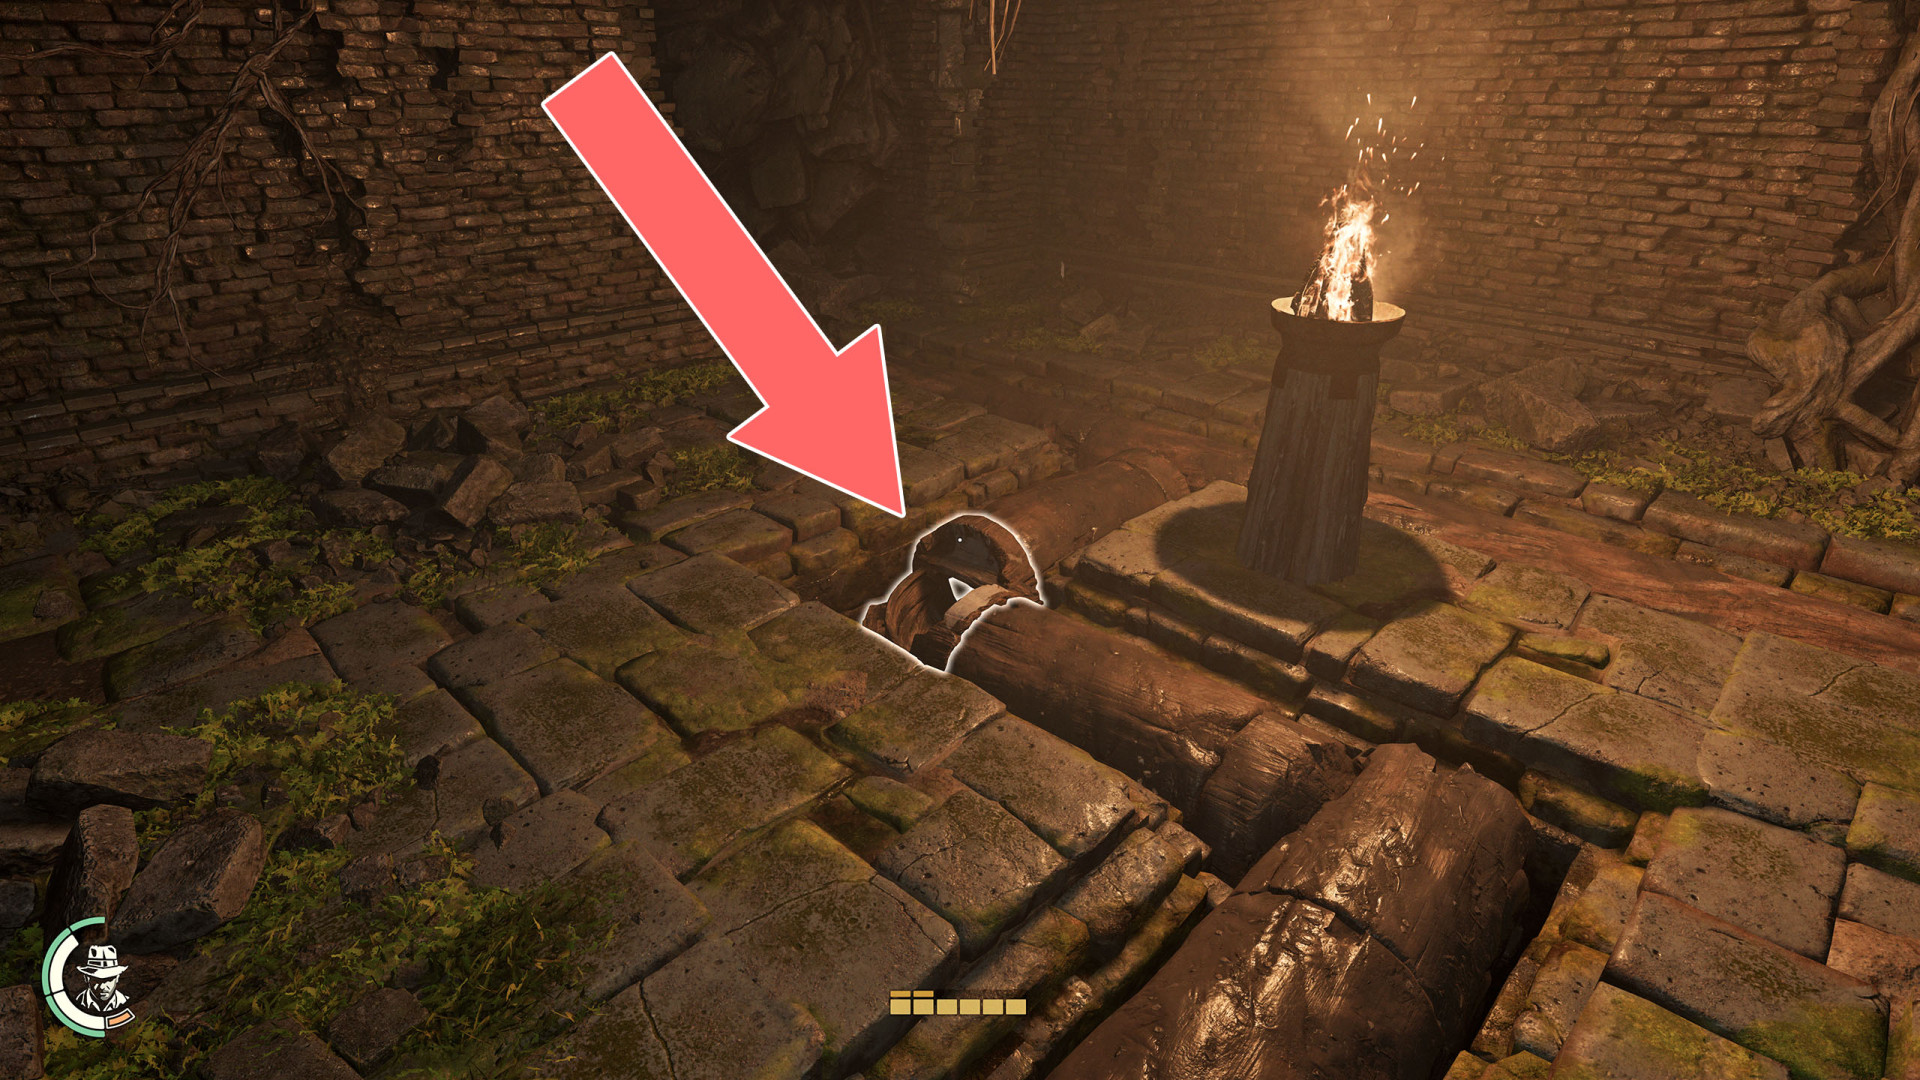
57Cylinder Roll Slot (Console)
Related puzzle: Monster's Gate. To use it, you must first install the Wooden Cog. Then use the Cylinder Roll to rotate it, allowing you to get clues about the correct symbols.
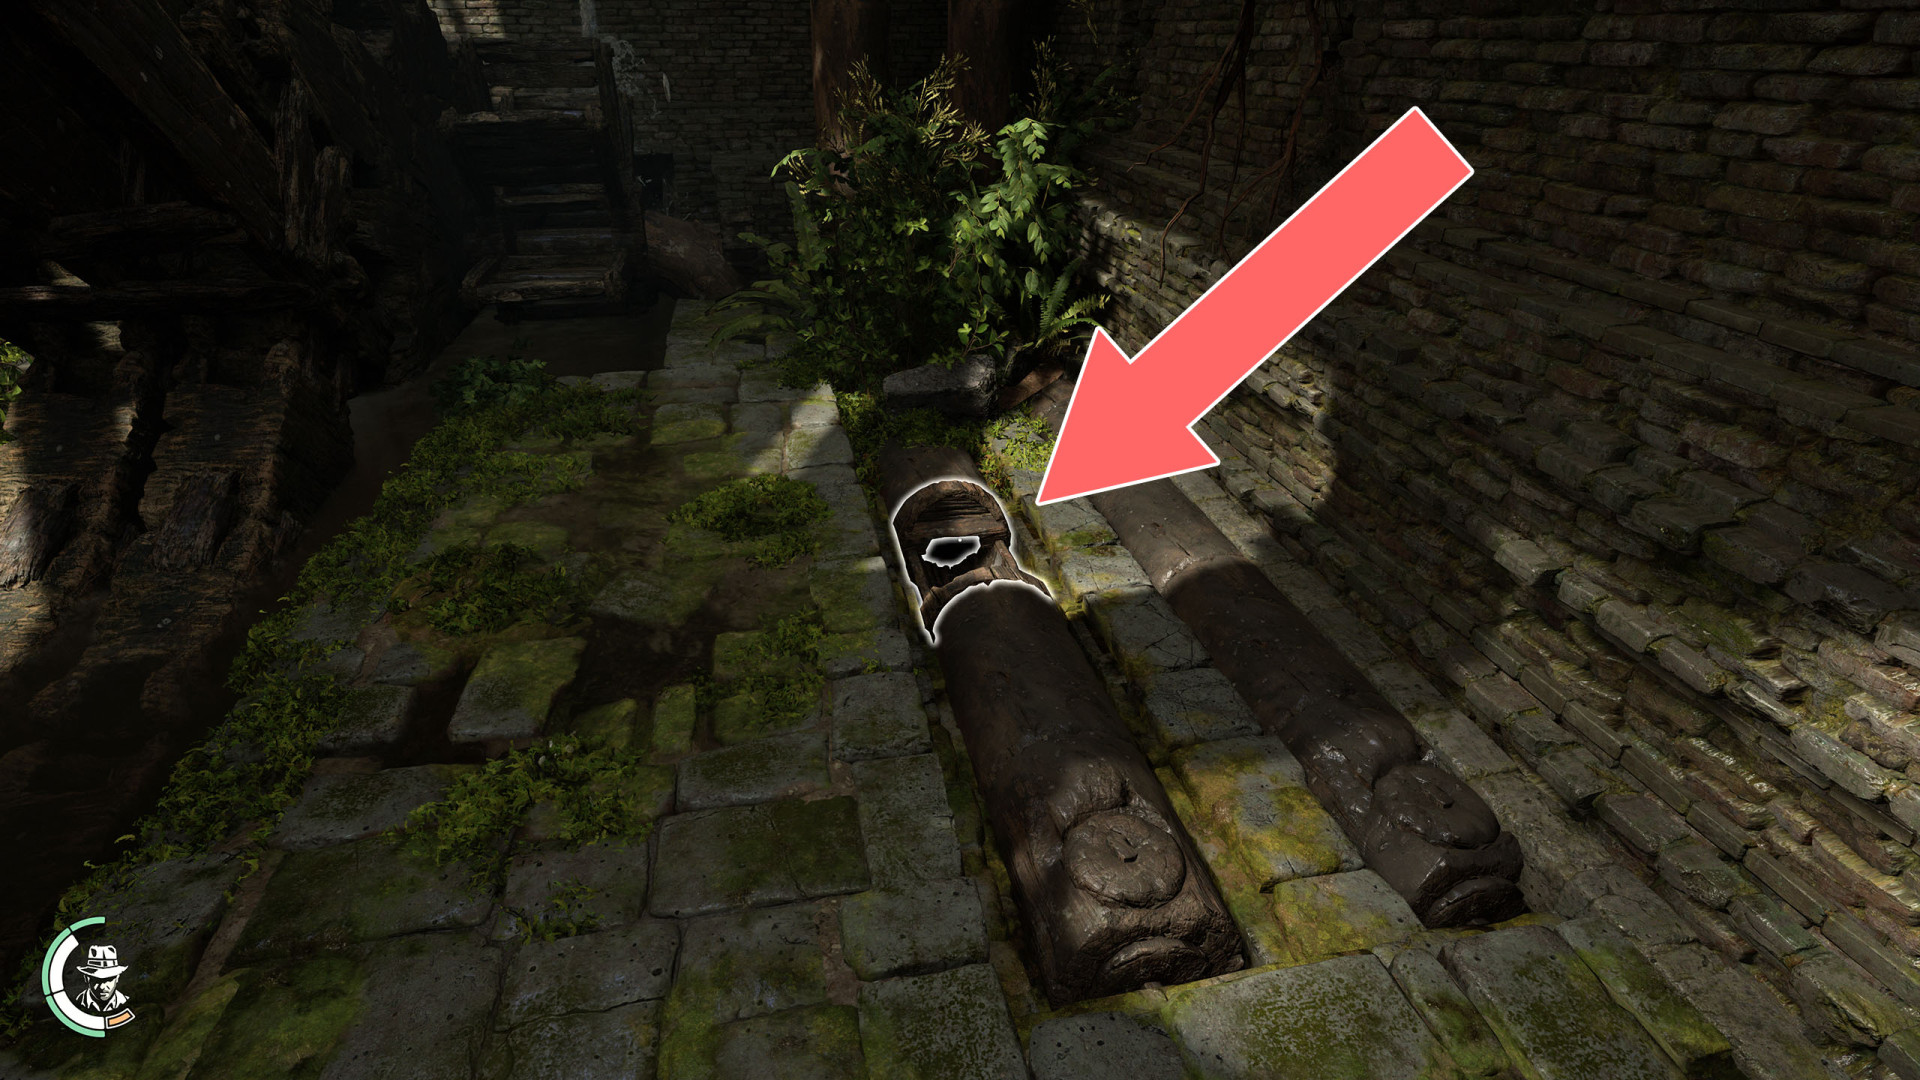
58Cylinder Roll Slot (Mural)
Once you have properly aligned the symbols on the columns, use the Cylinder Roll here and turn it to complete the puzzle and open the passage.
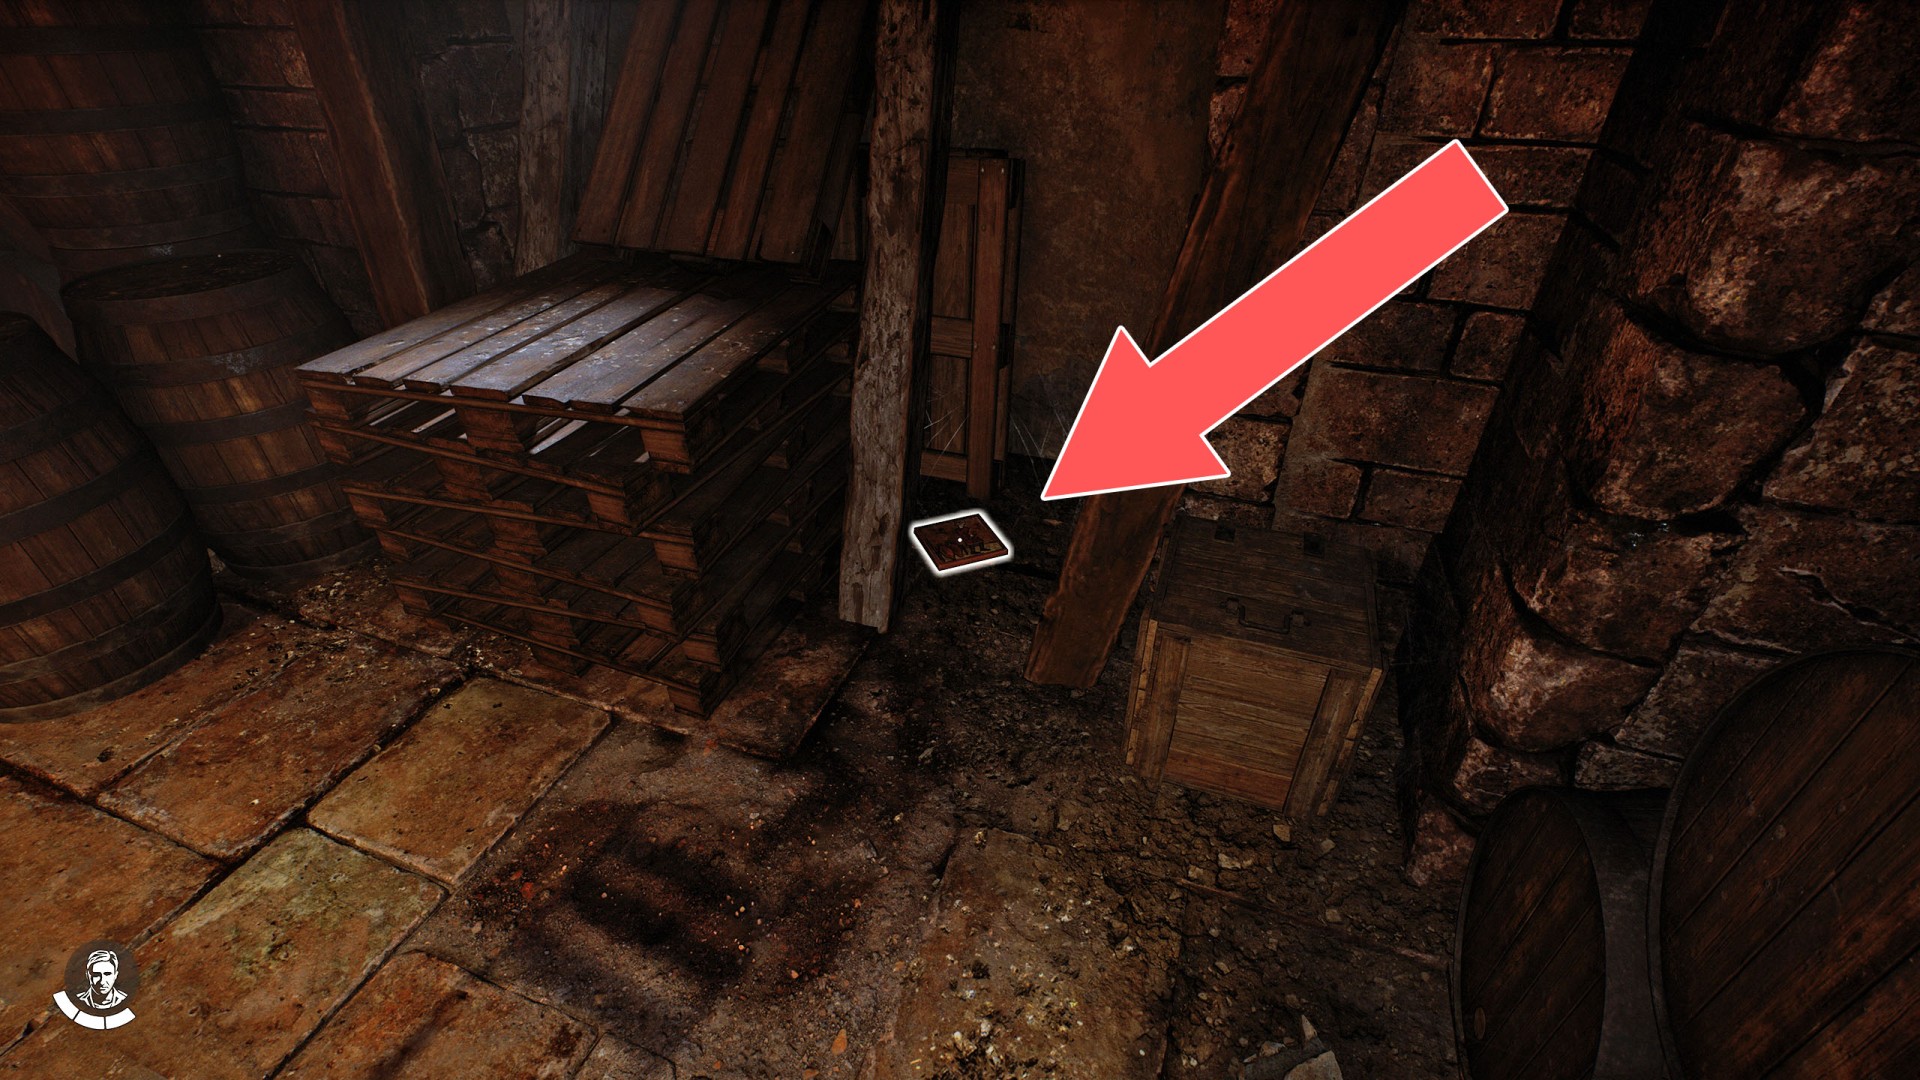
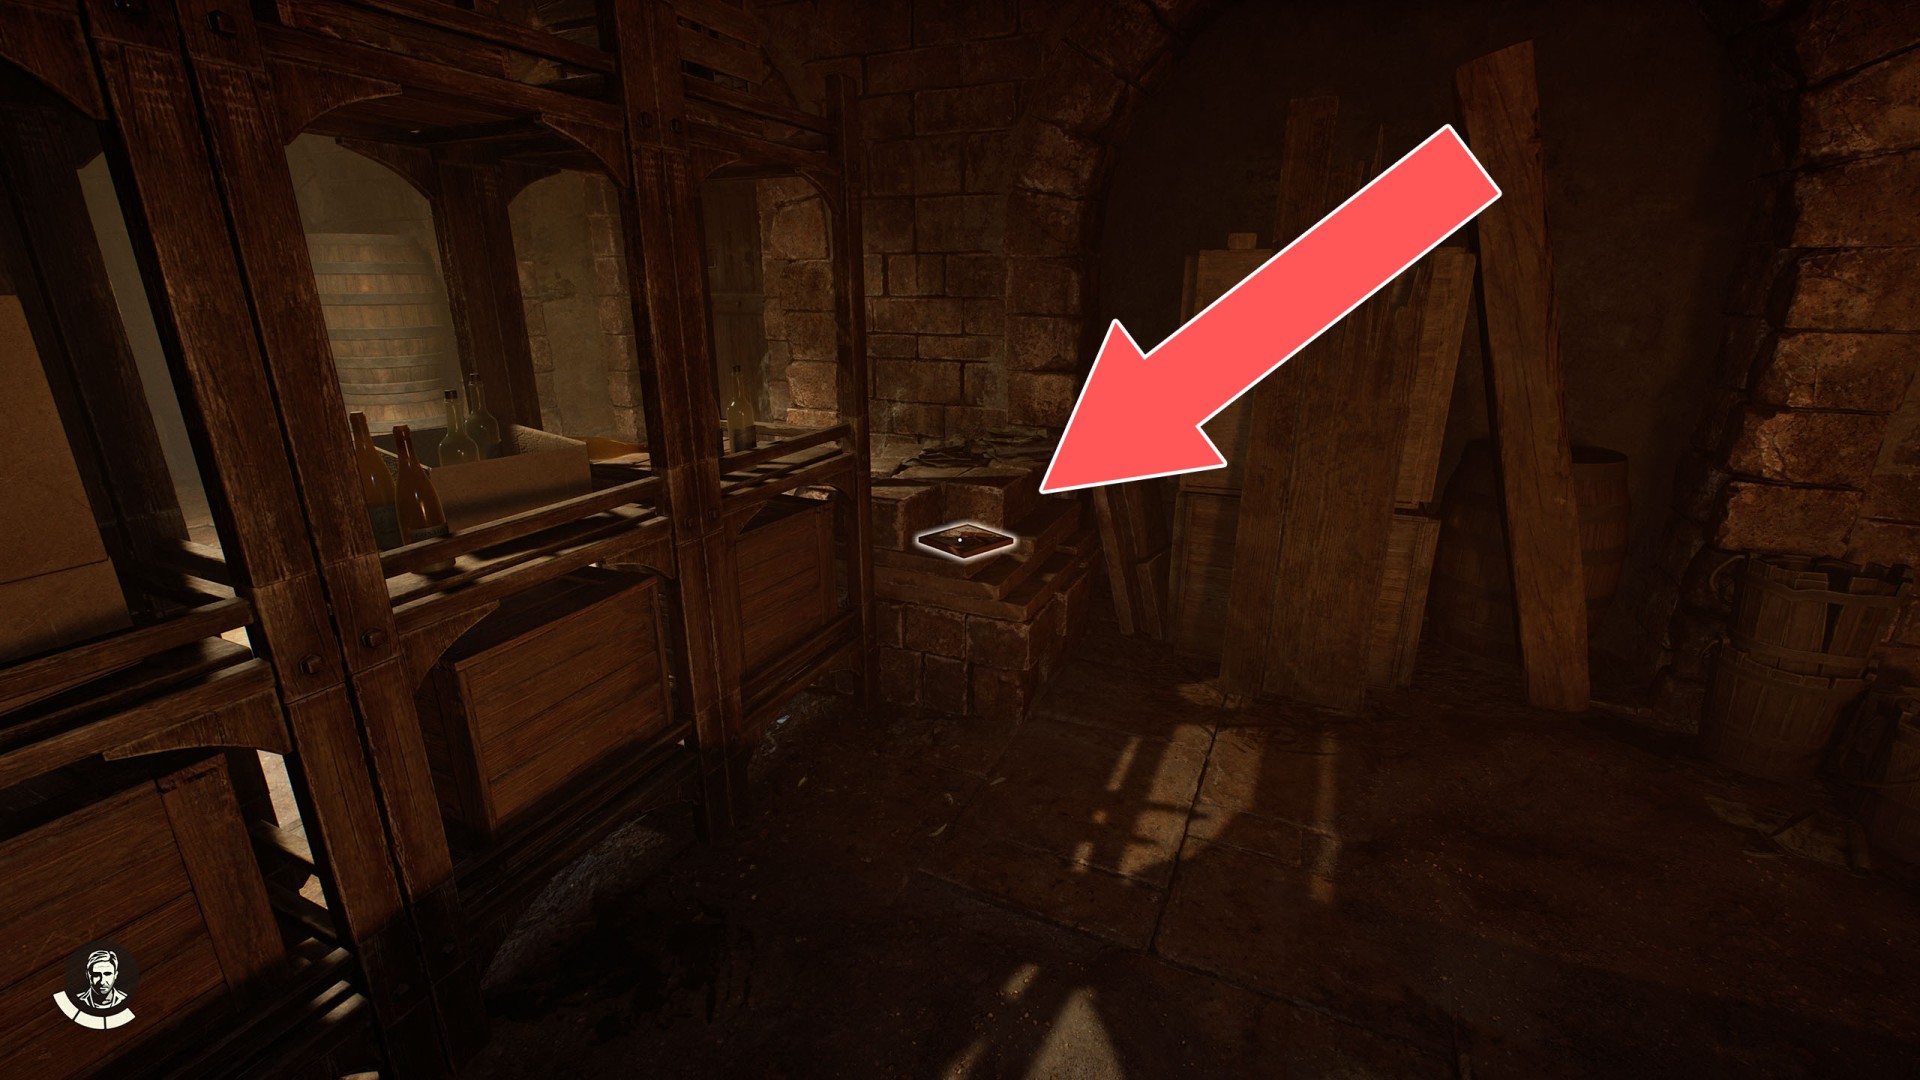
59Ferment
Related mystery: A Tale of Wine Making.
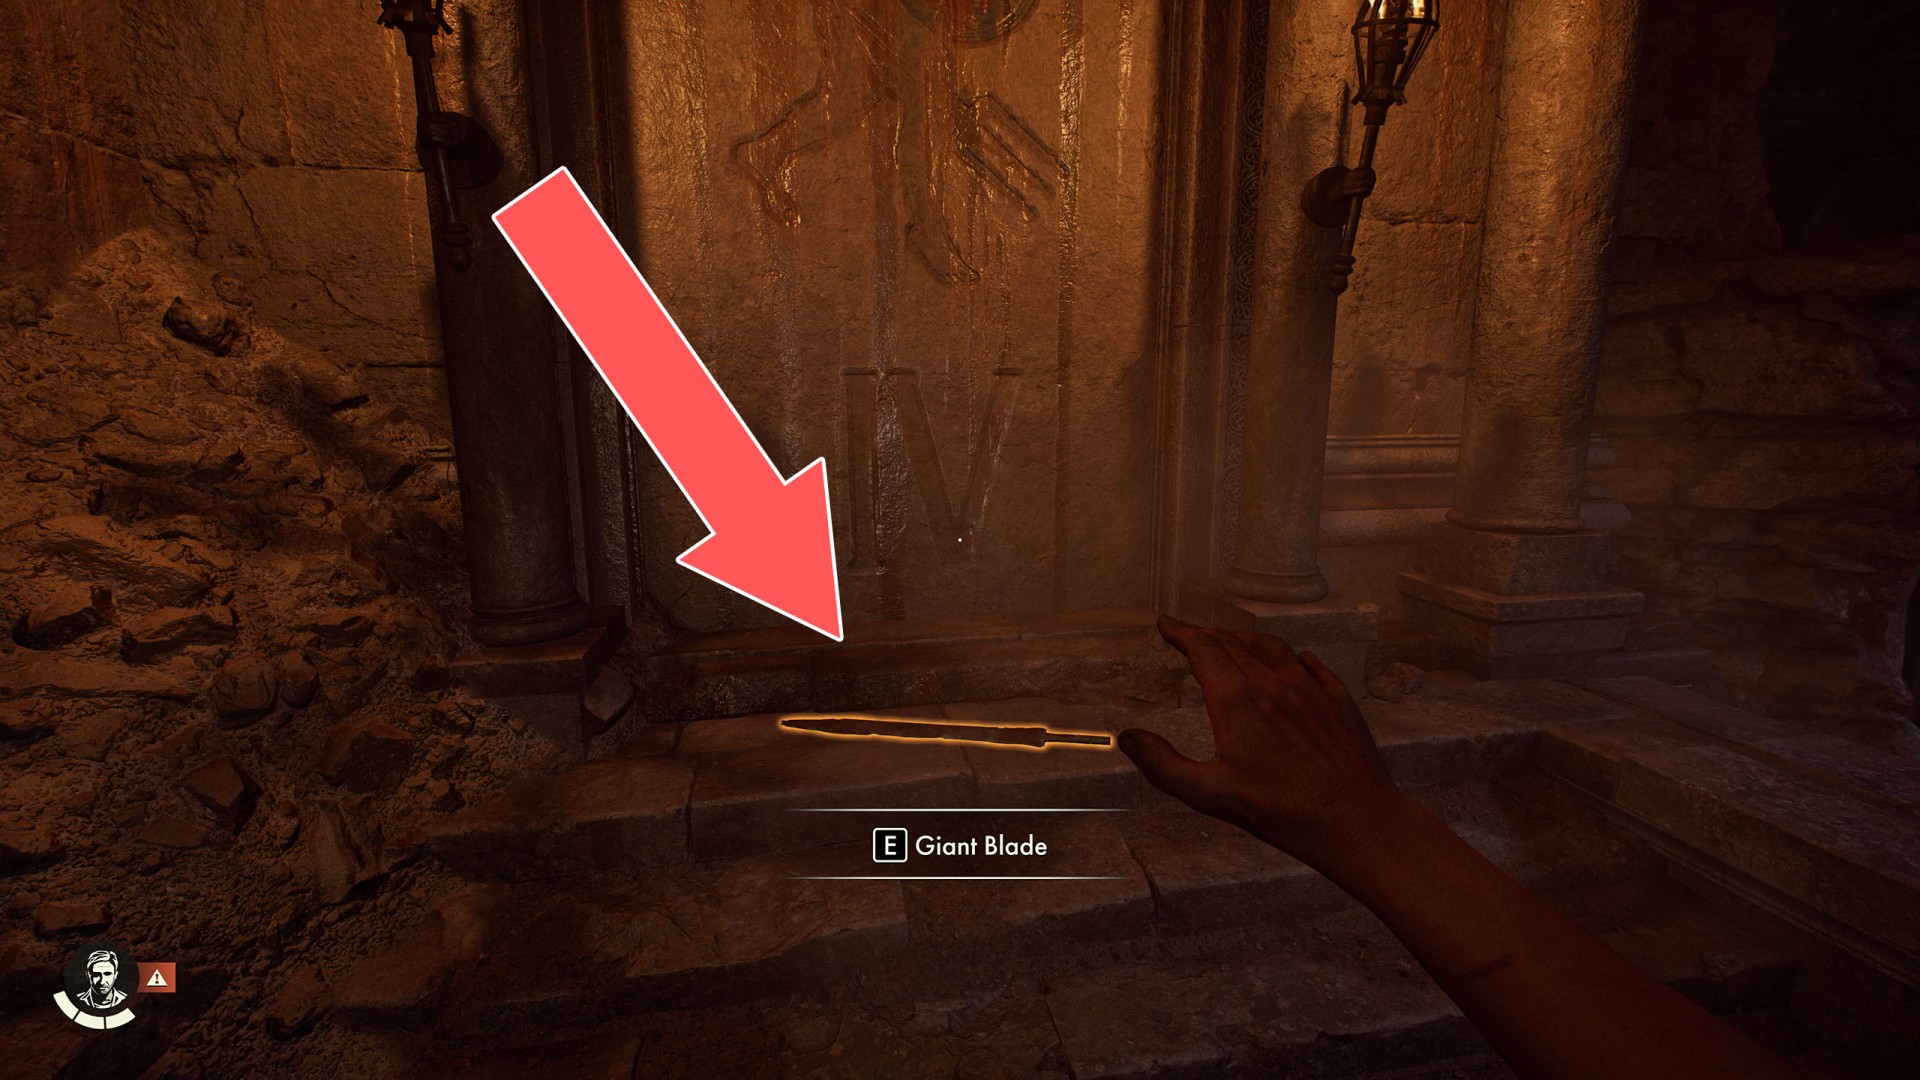
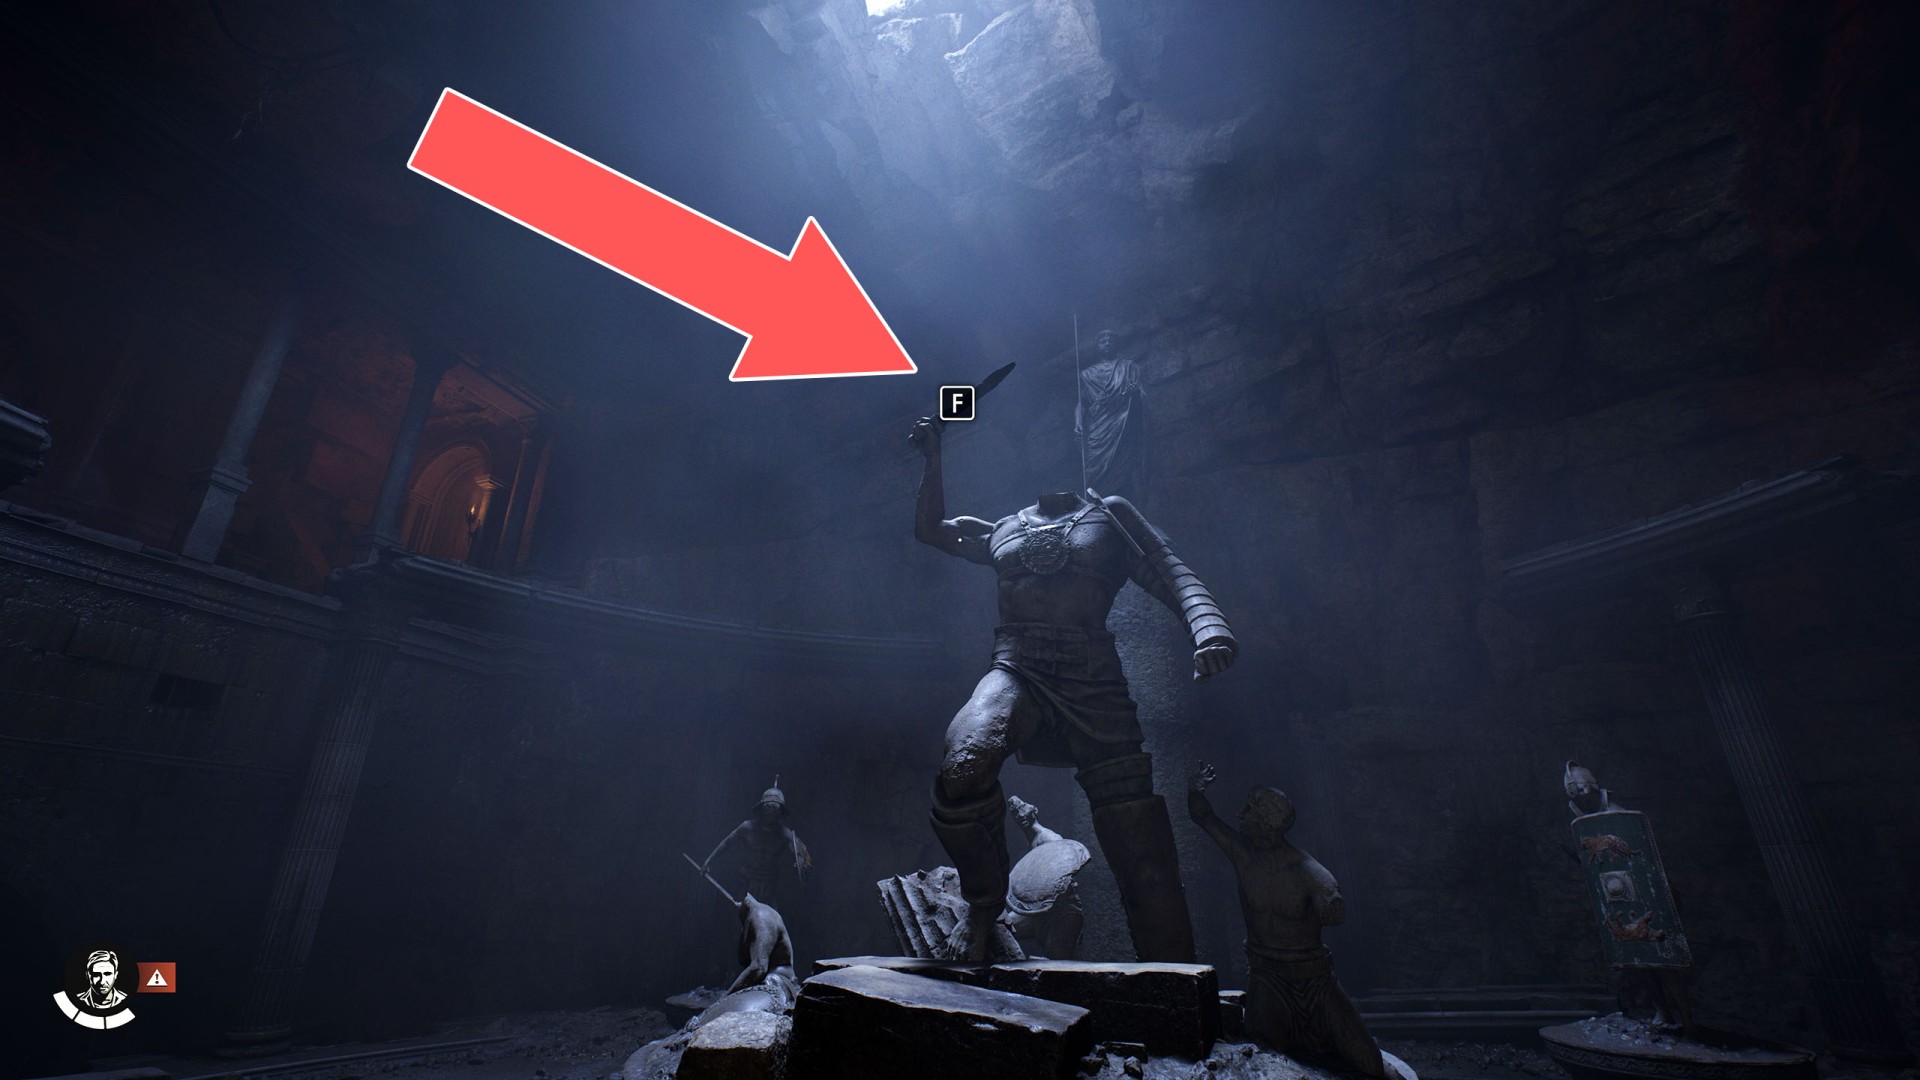
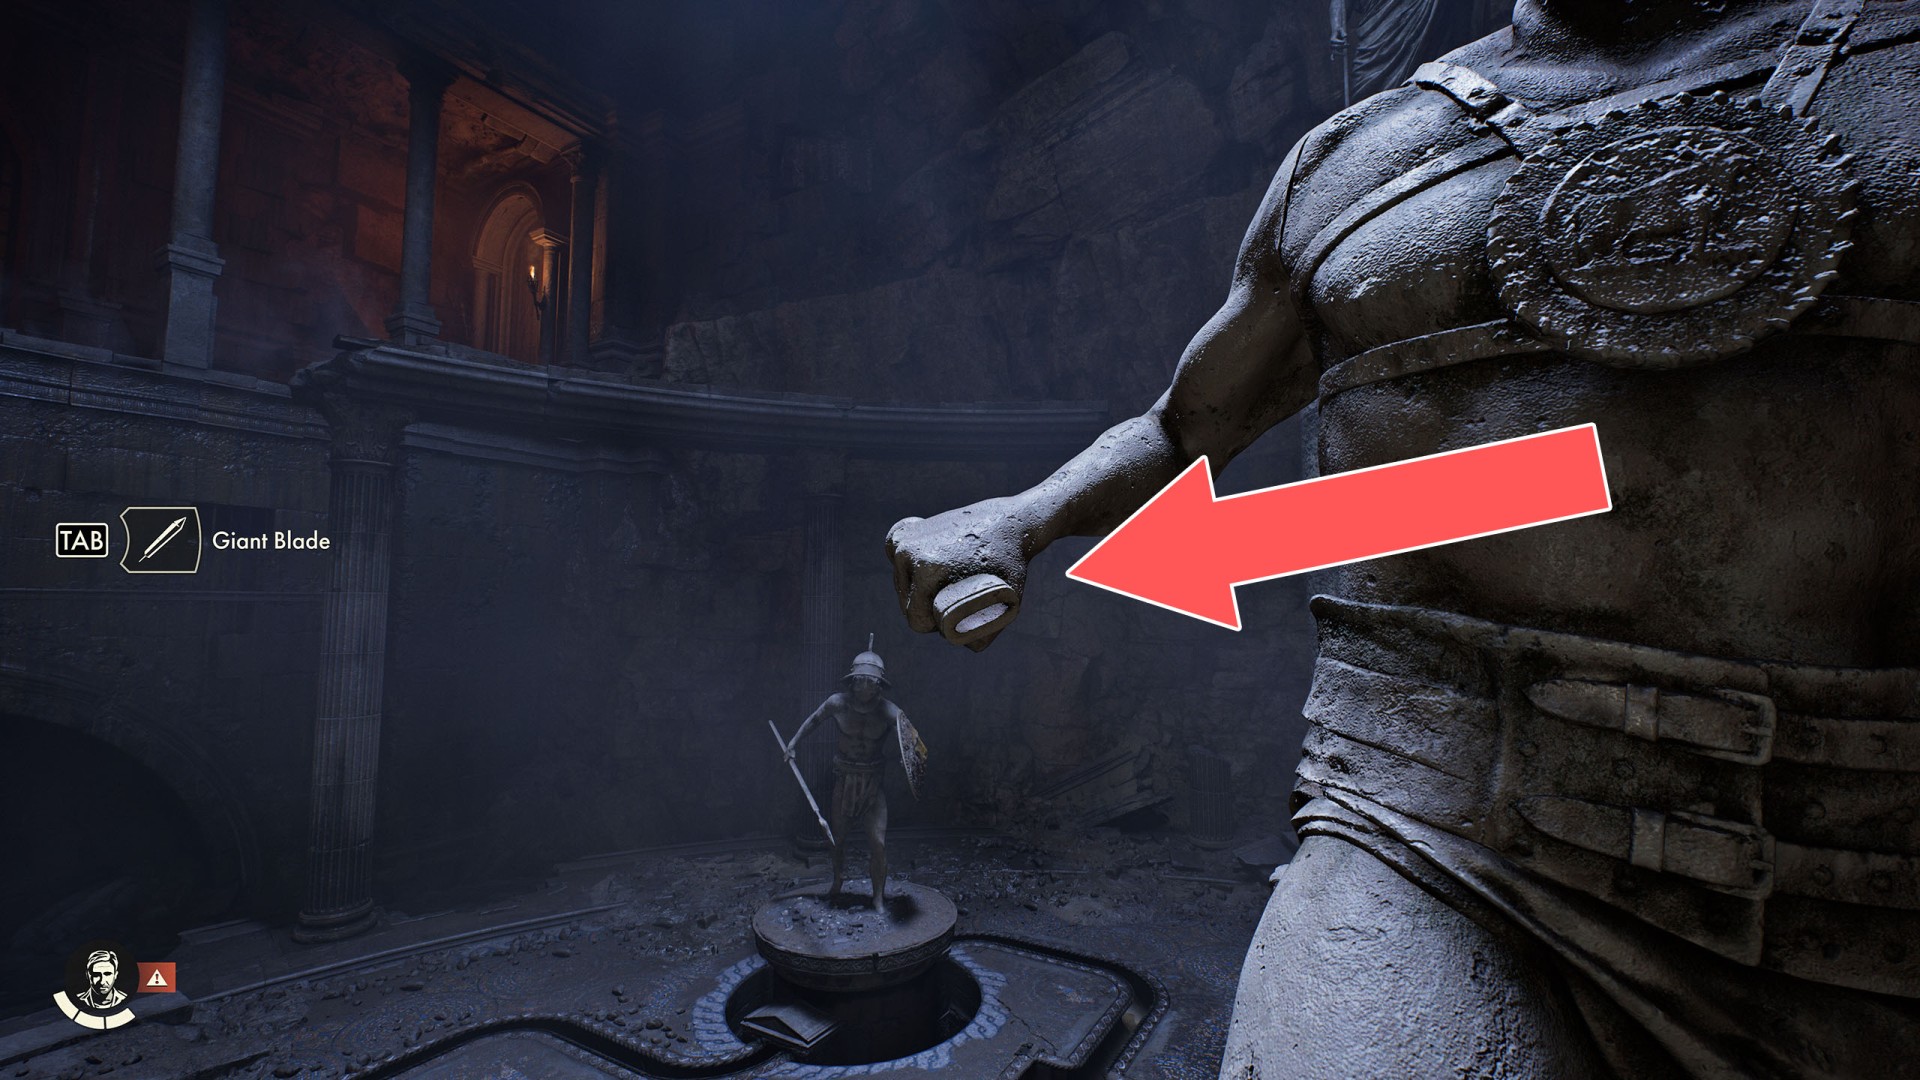
60Giant Blade
Related puzzle: Gladiator Shrine. Place it in the Statue's Hand.
61Grow
Related mystery: A Tale of Wine Making.

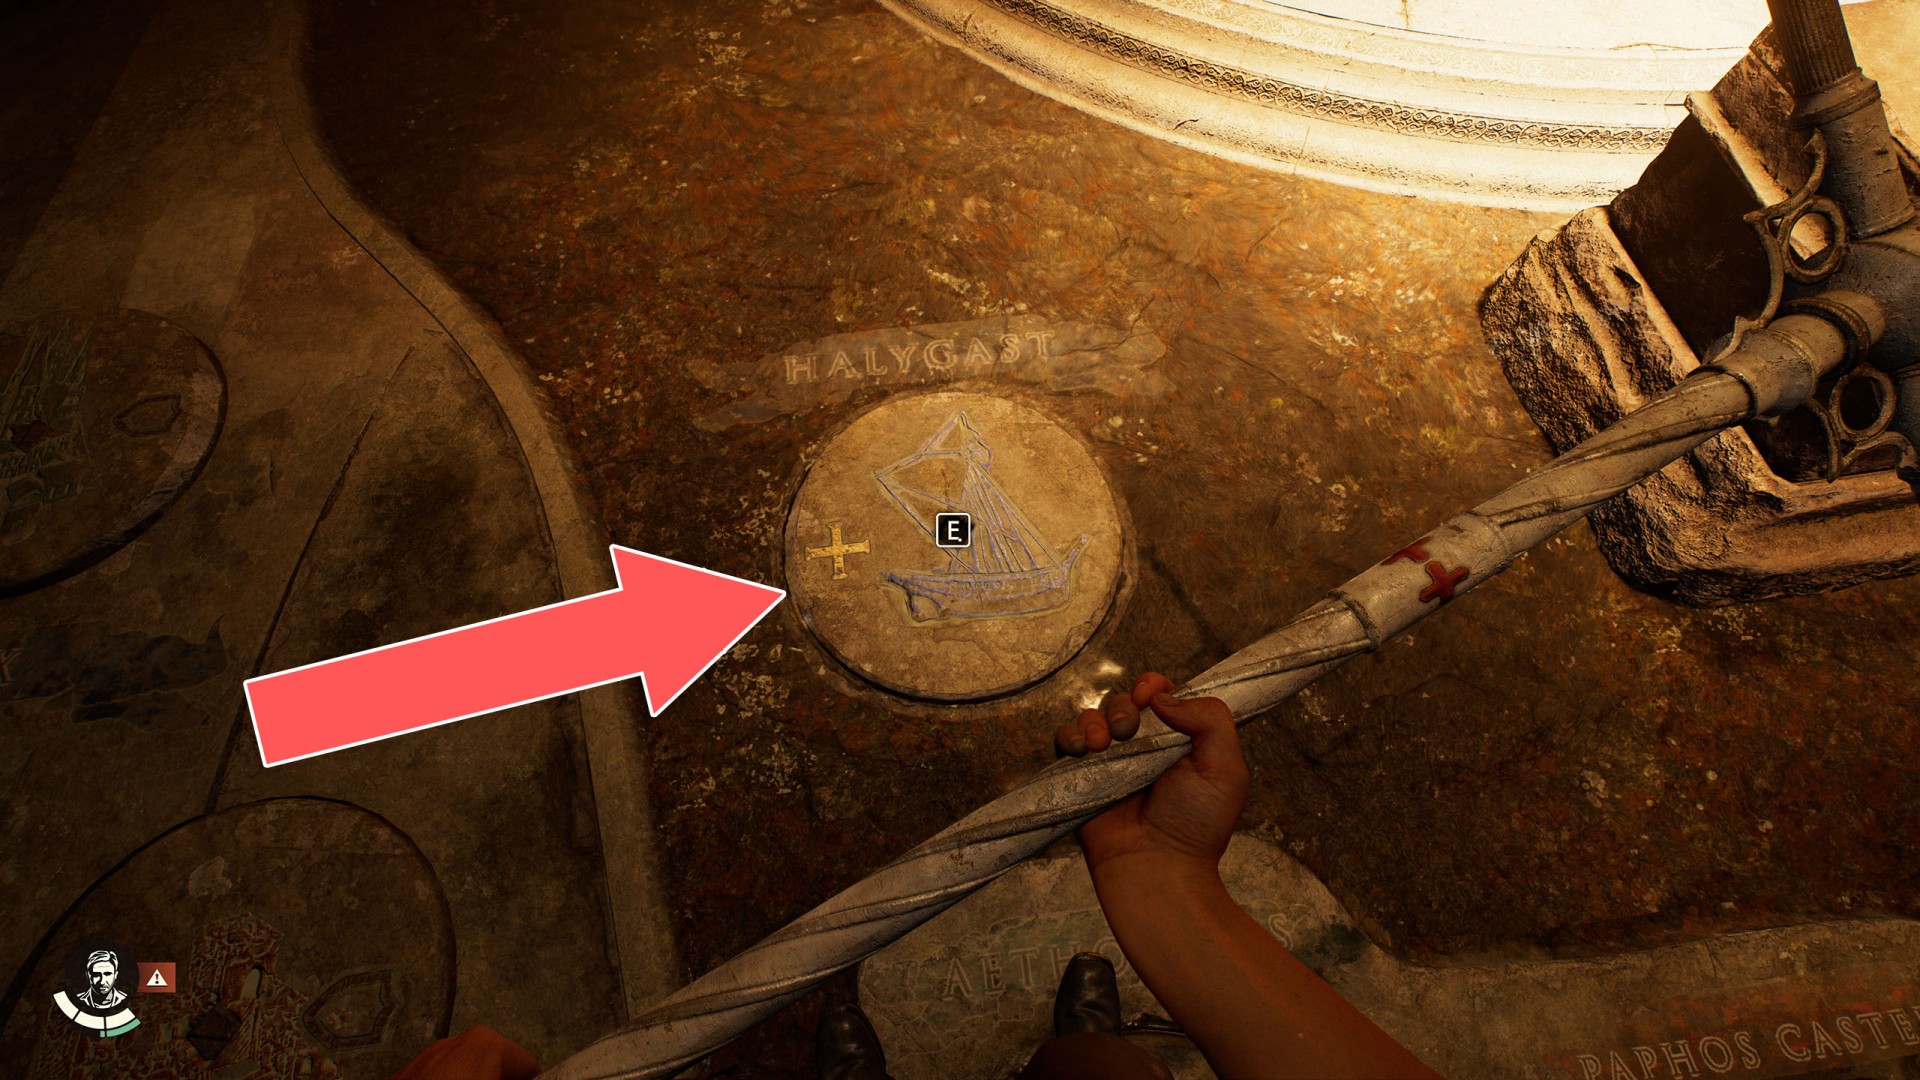
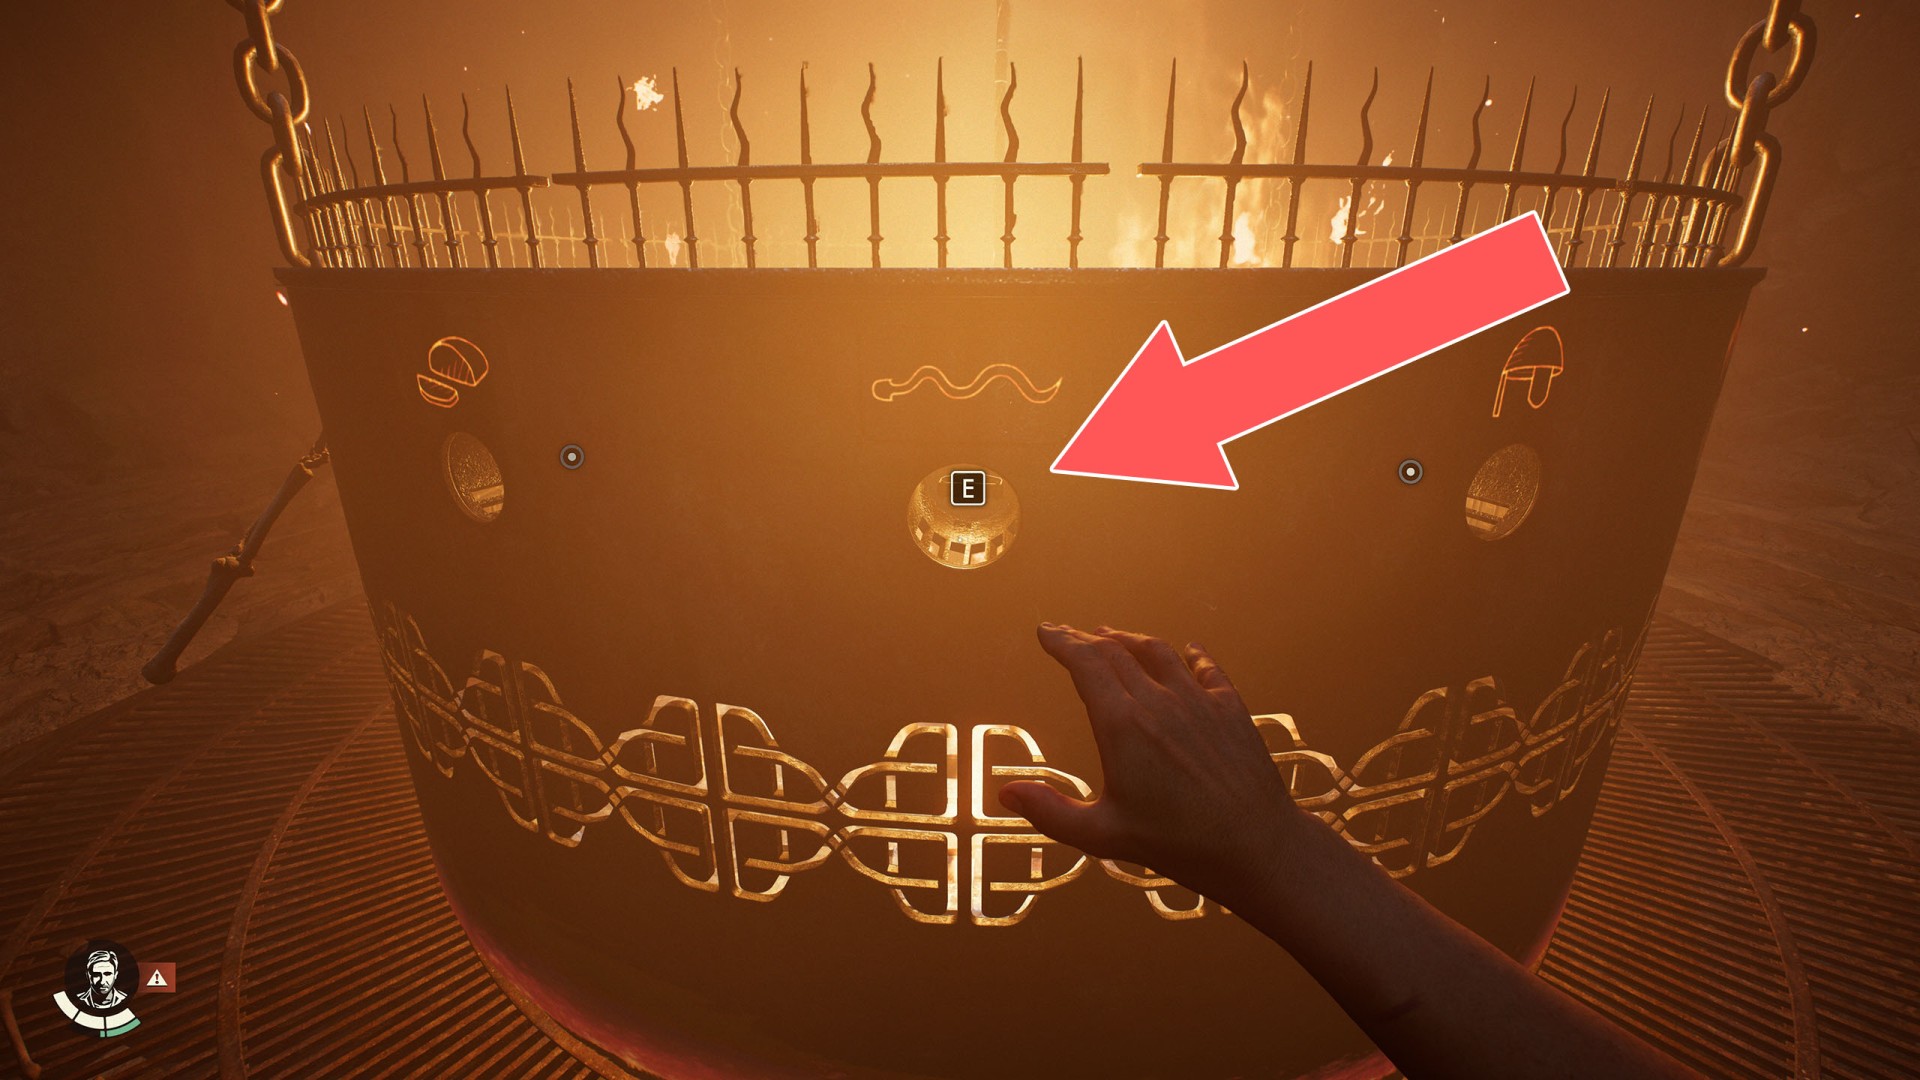
62Halygast Slot
Use the Cross Scepter and turn it twice (180 degrees) in any direction. Related puzzle: Tomb of Gibborim.
63Harvest
Related mystery: A Tale of Wine Making.
64Hori Castrum Slot
Use the Shield Scepter and turn it twice (180 degrees) in any direction. Related puzzle: Tomb of Gibborim.

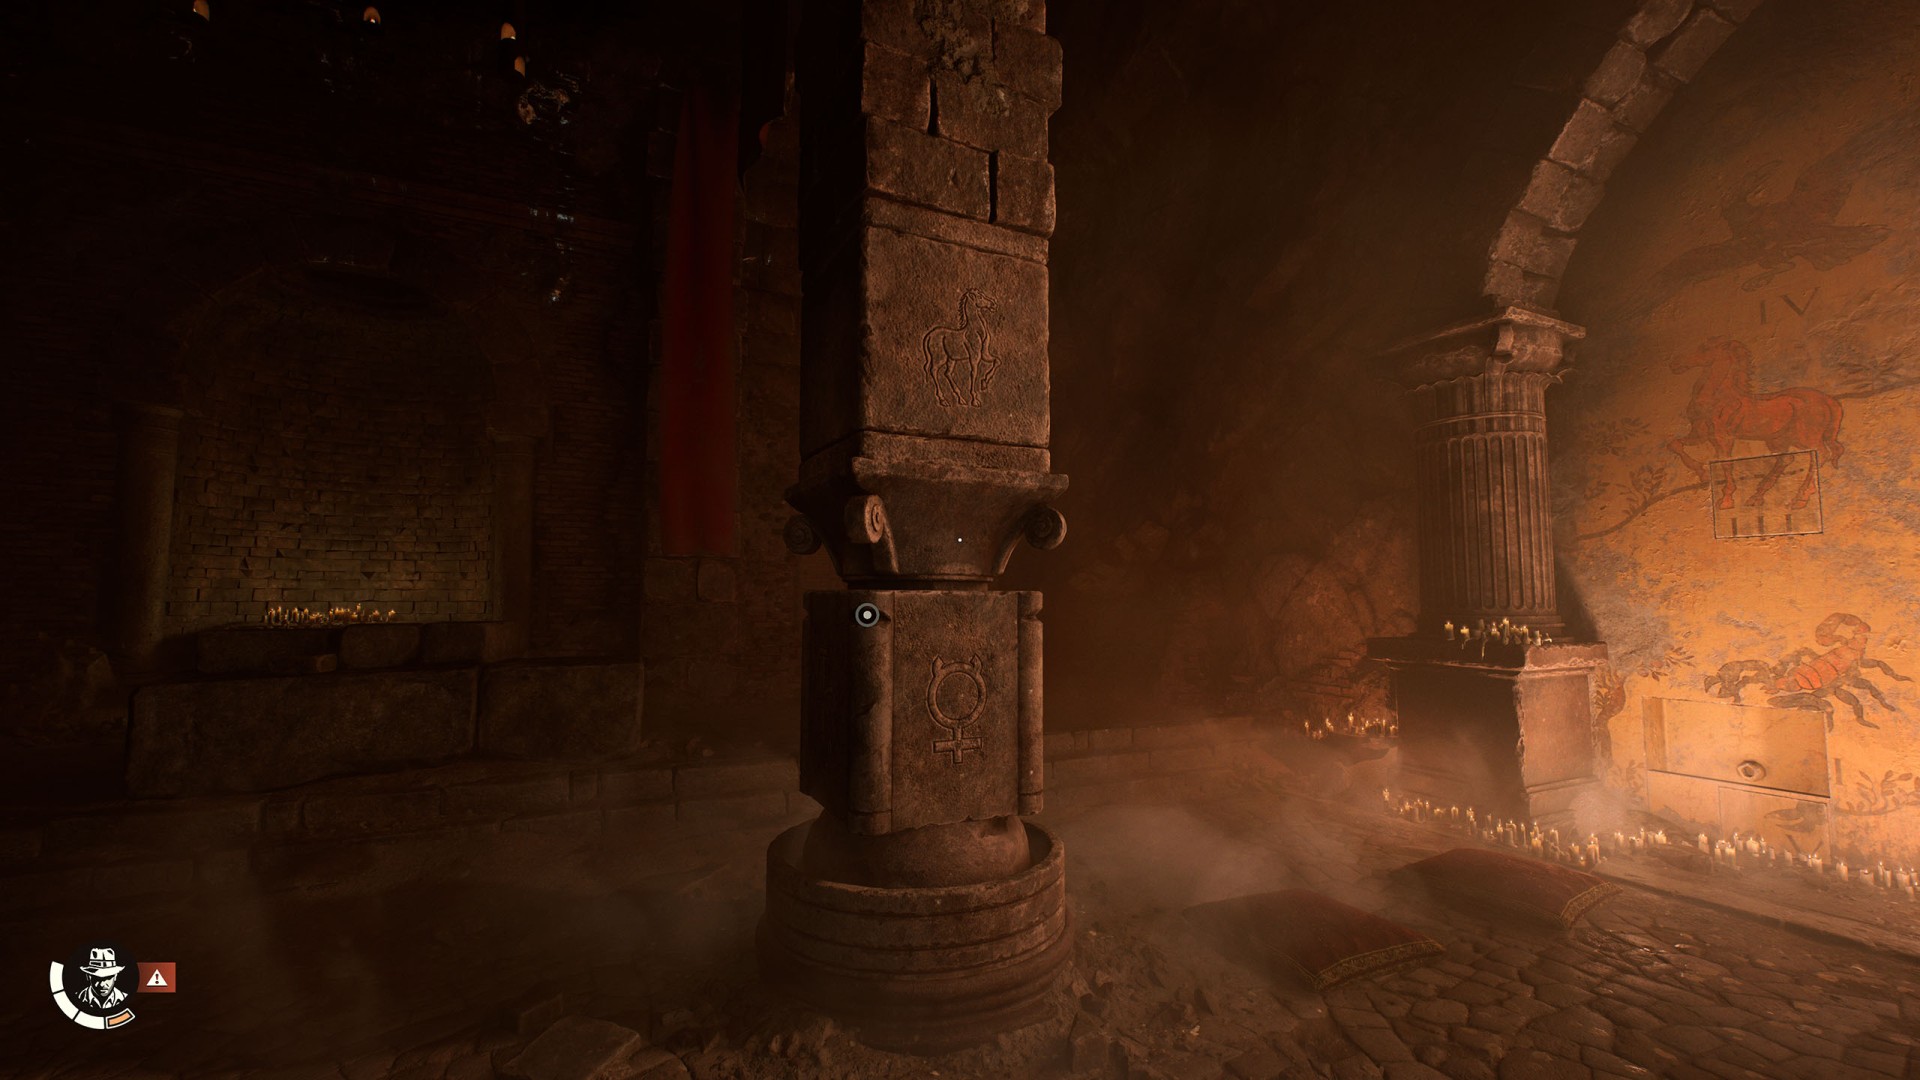
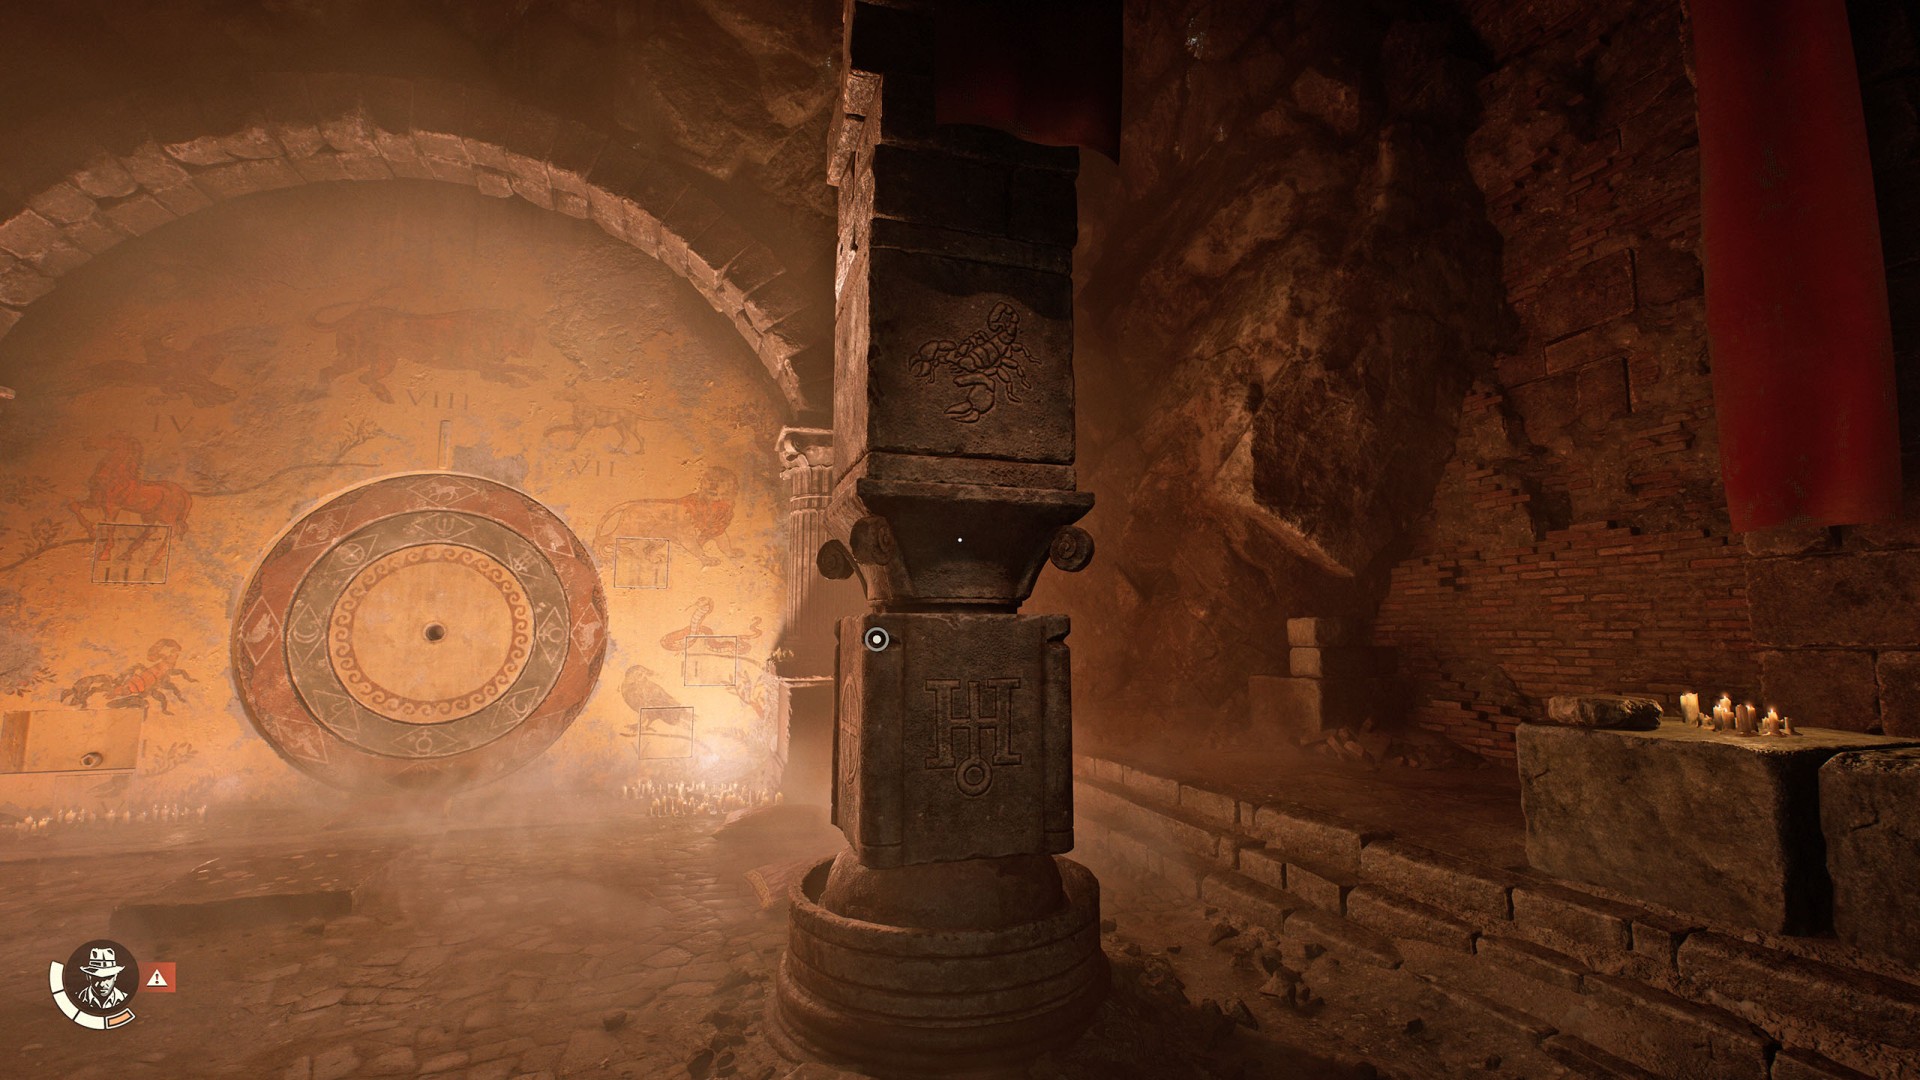
65Horse Pillar
Related puzzle: Monster's Gate. You need to set it up as shown in the screenshot below.
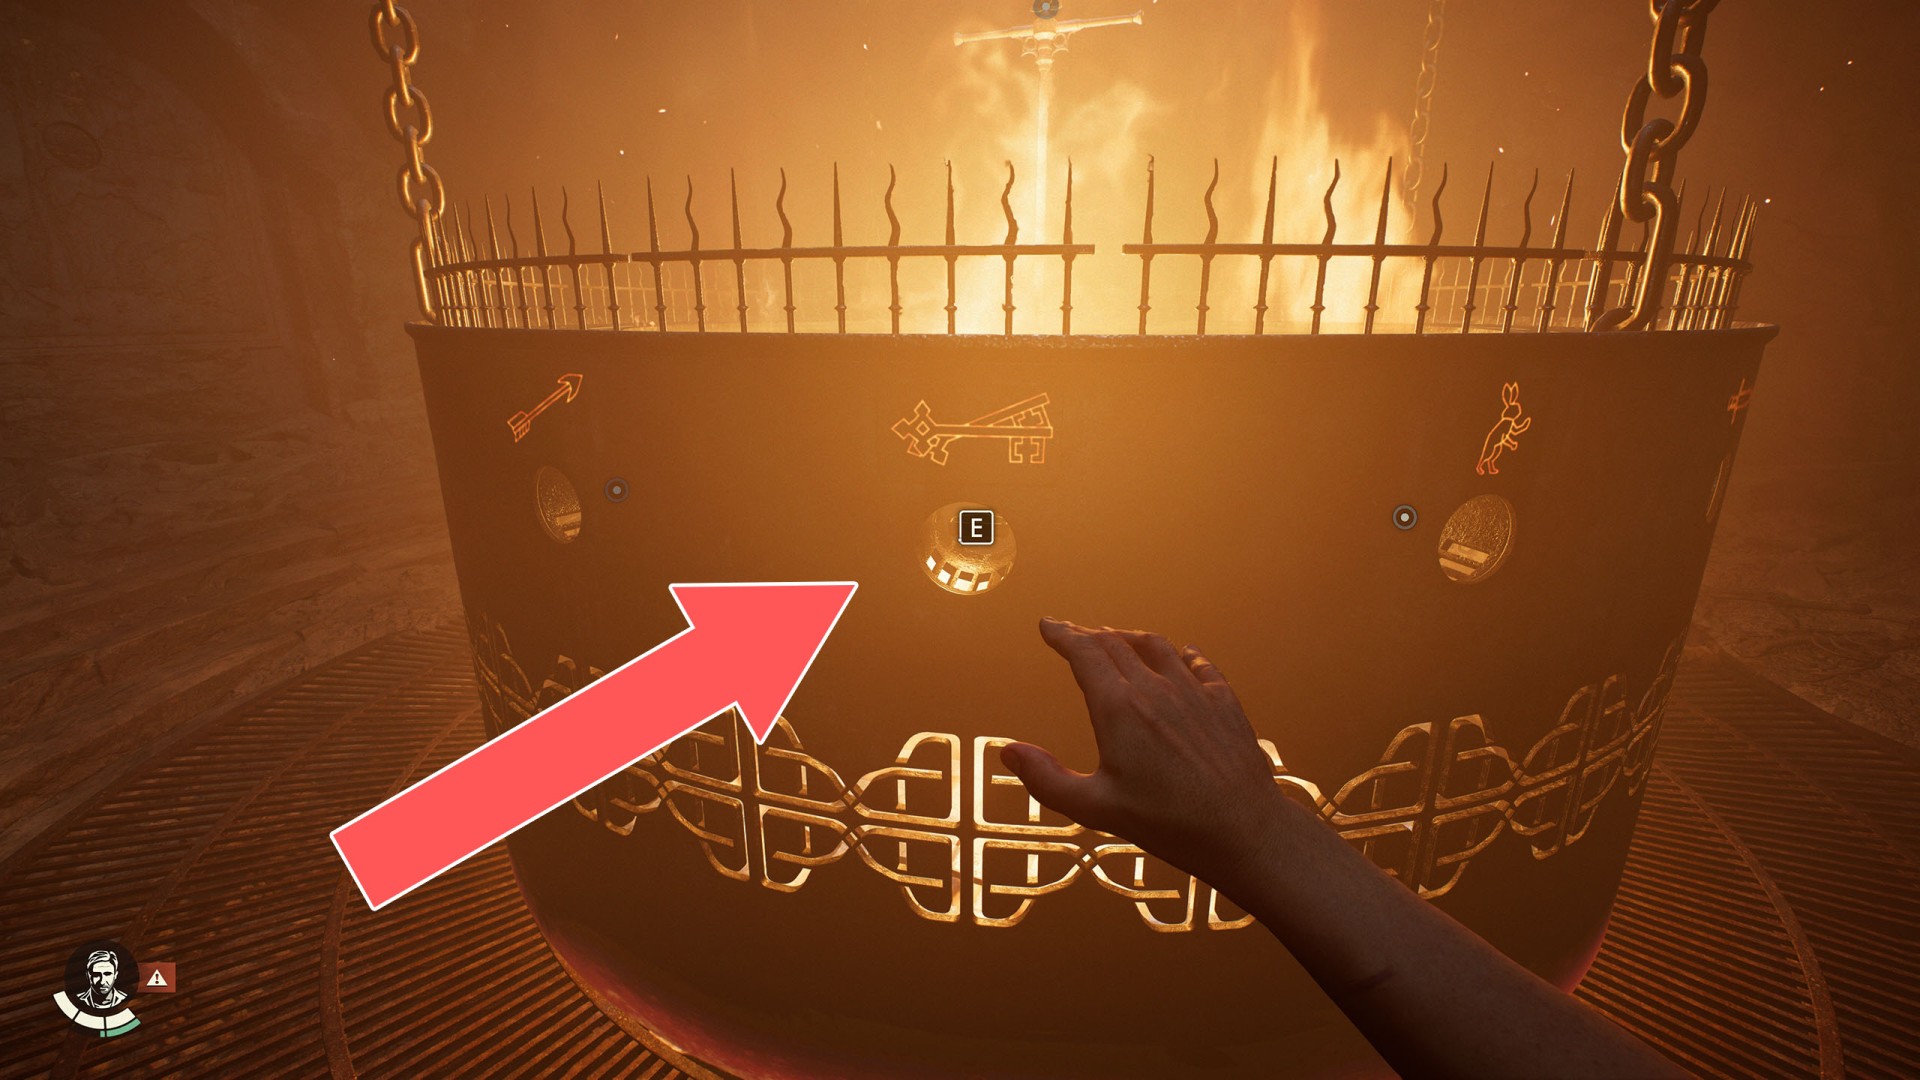
66Keys Symbol Handle (1)
Related puzzle: Tomb of Gibborim.
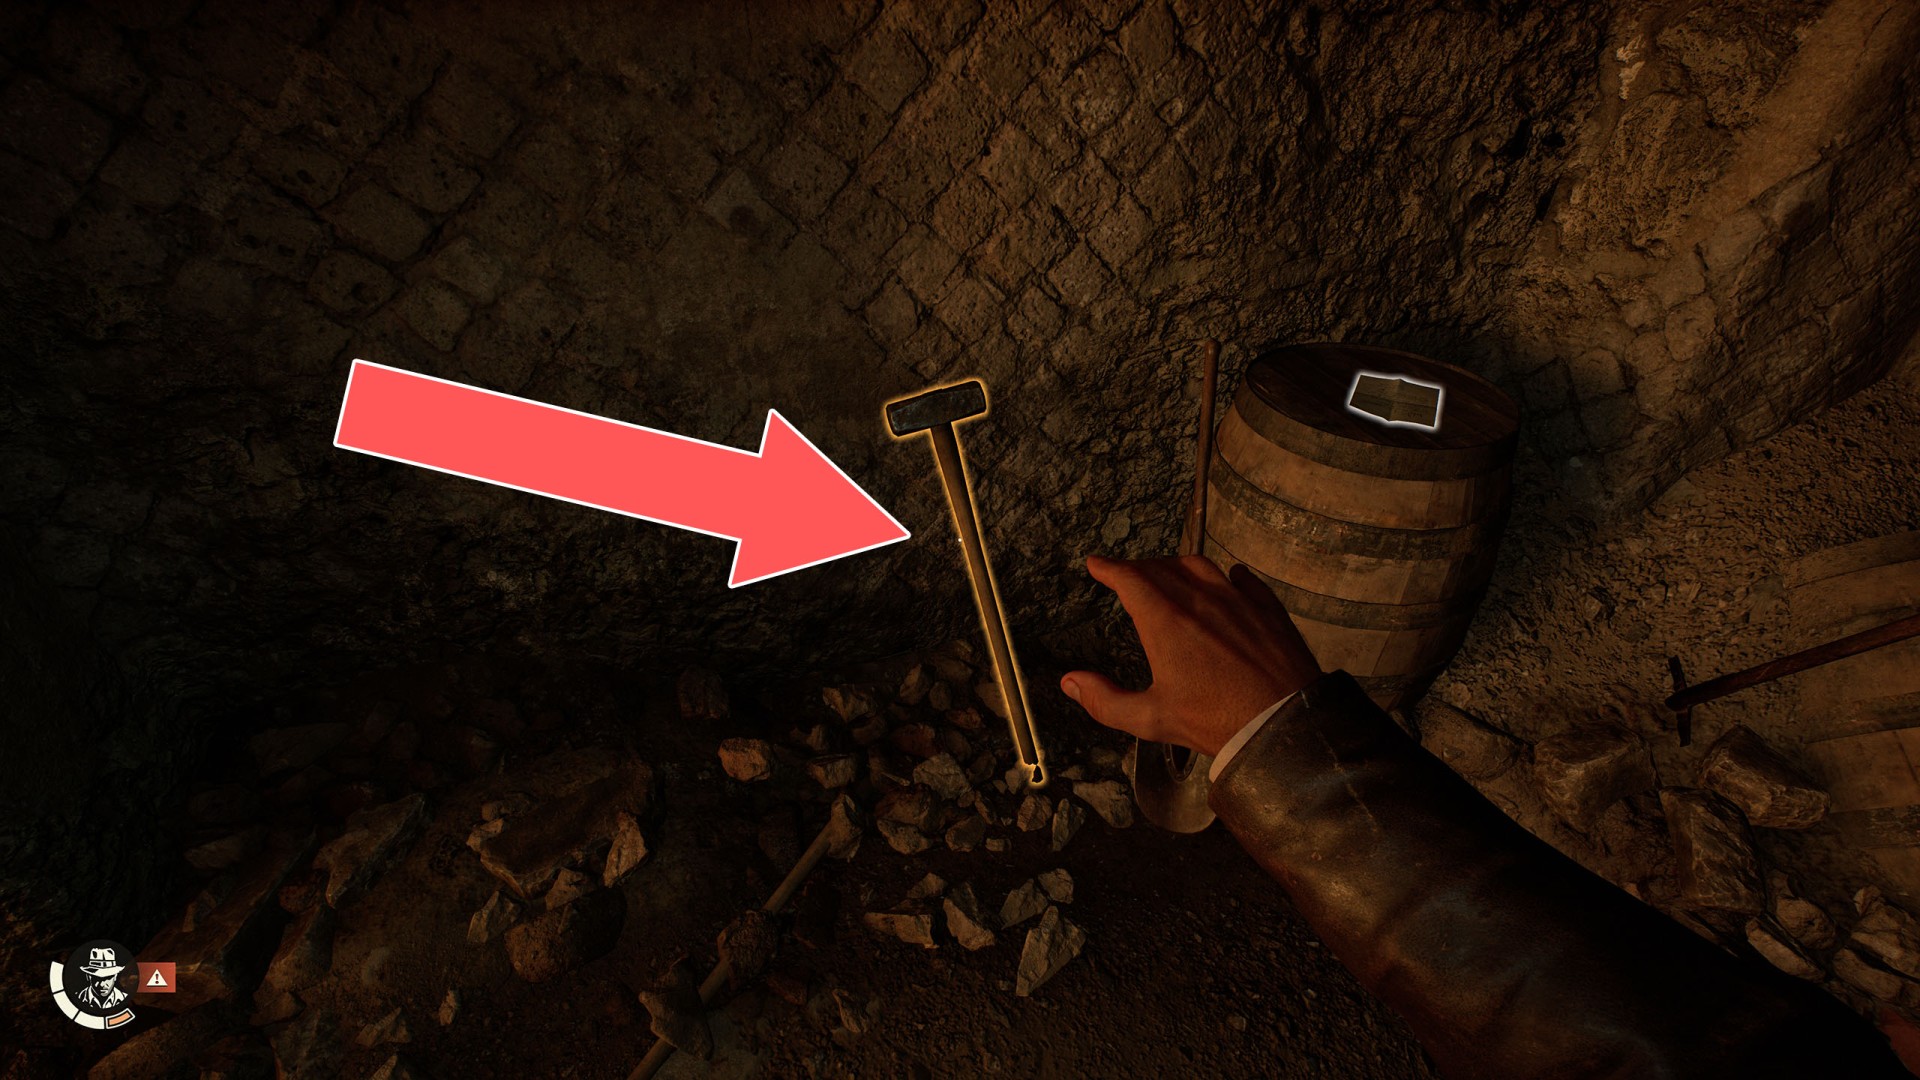
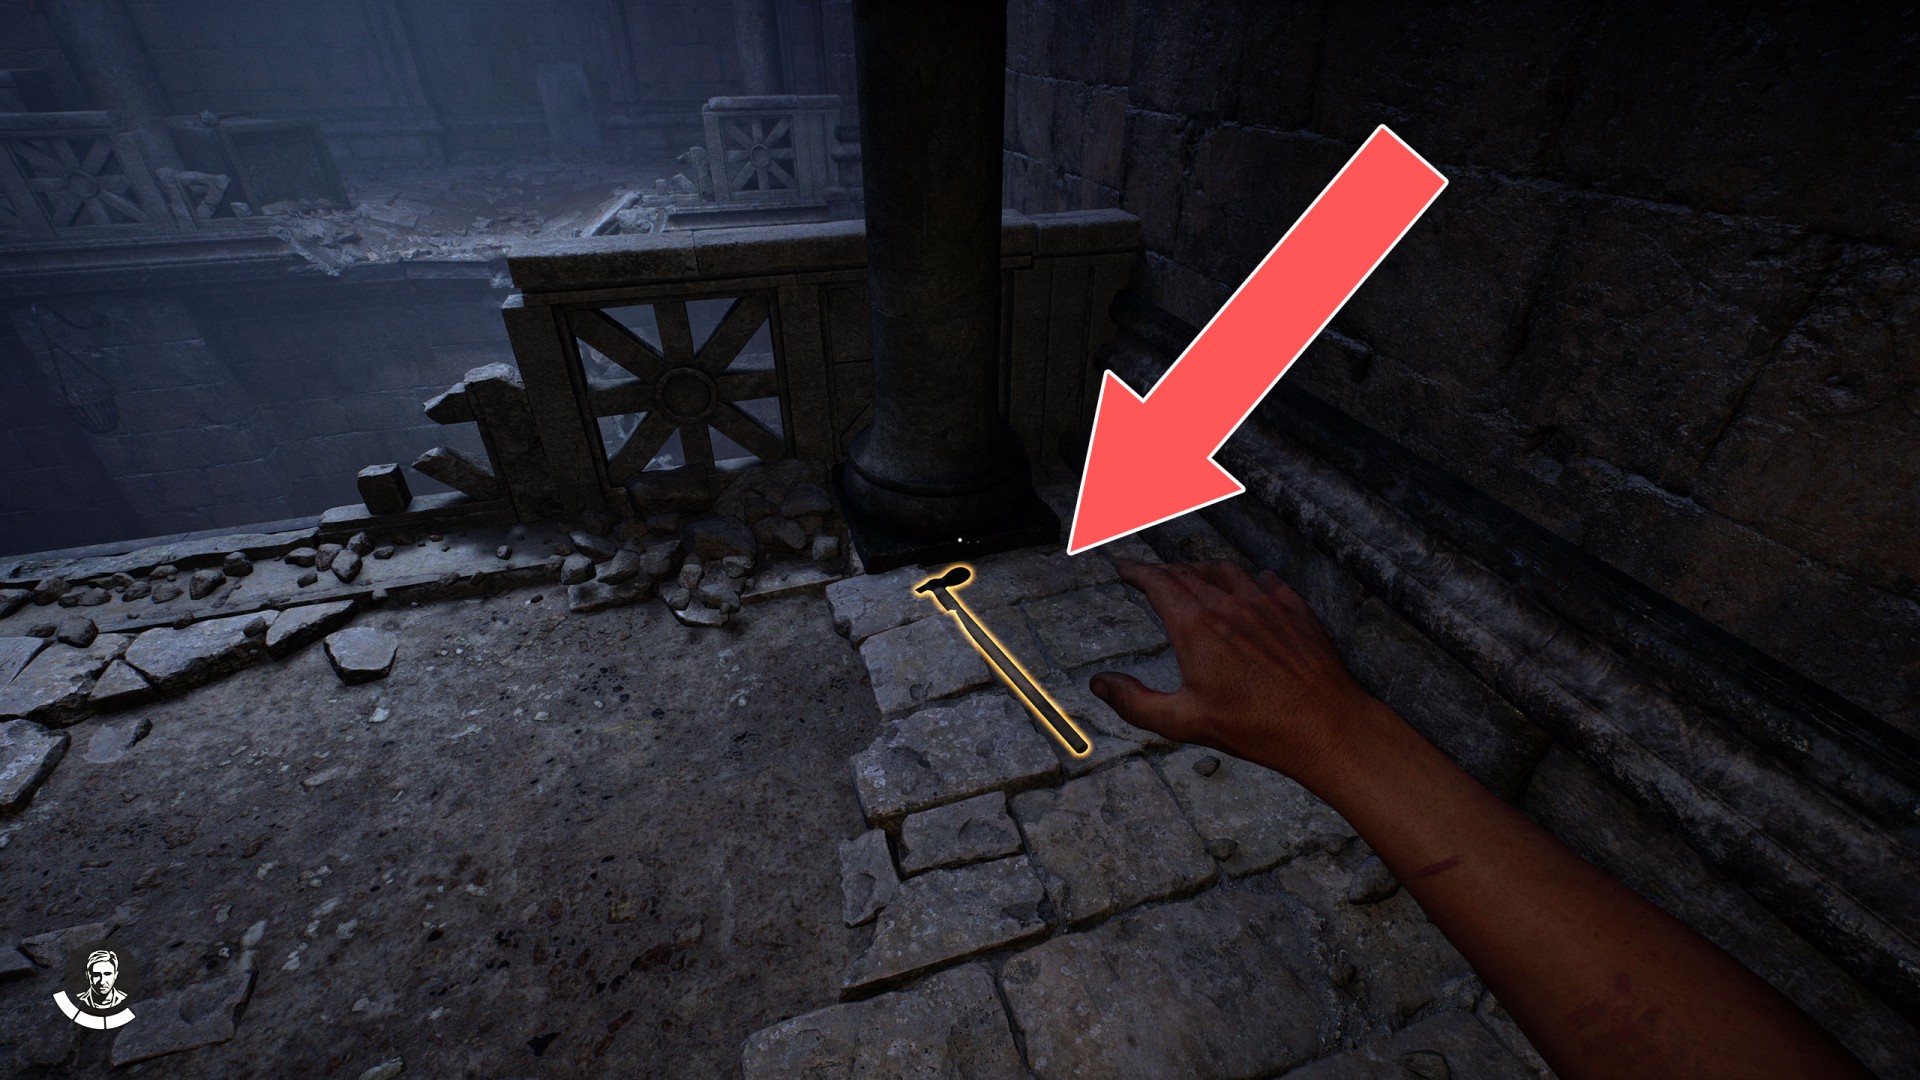
67Large Hammer
You can use it to break down the Weak Wall.
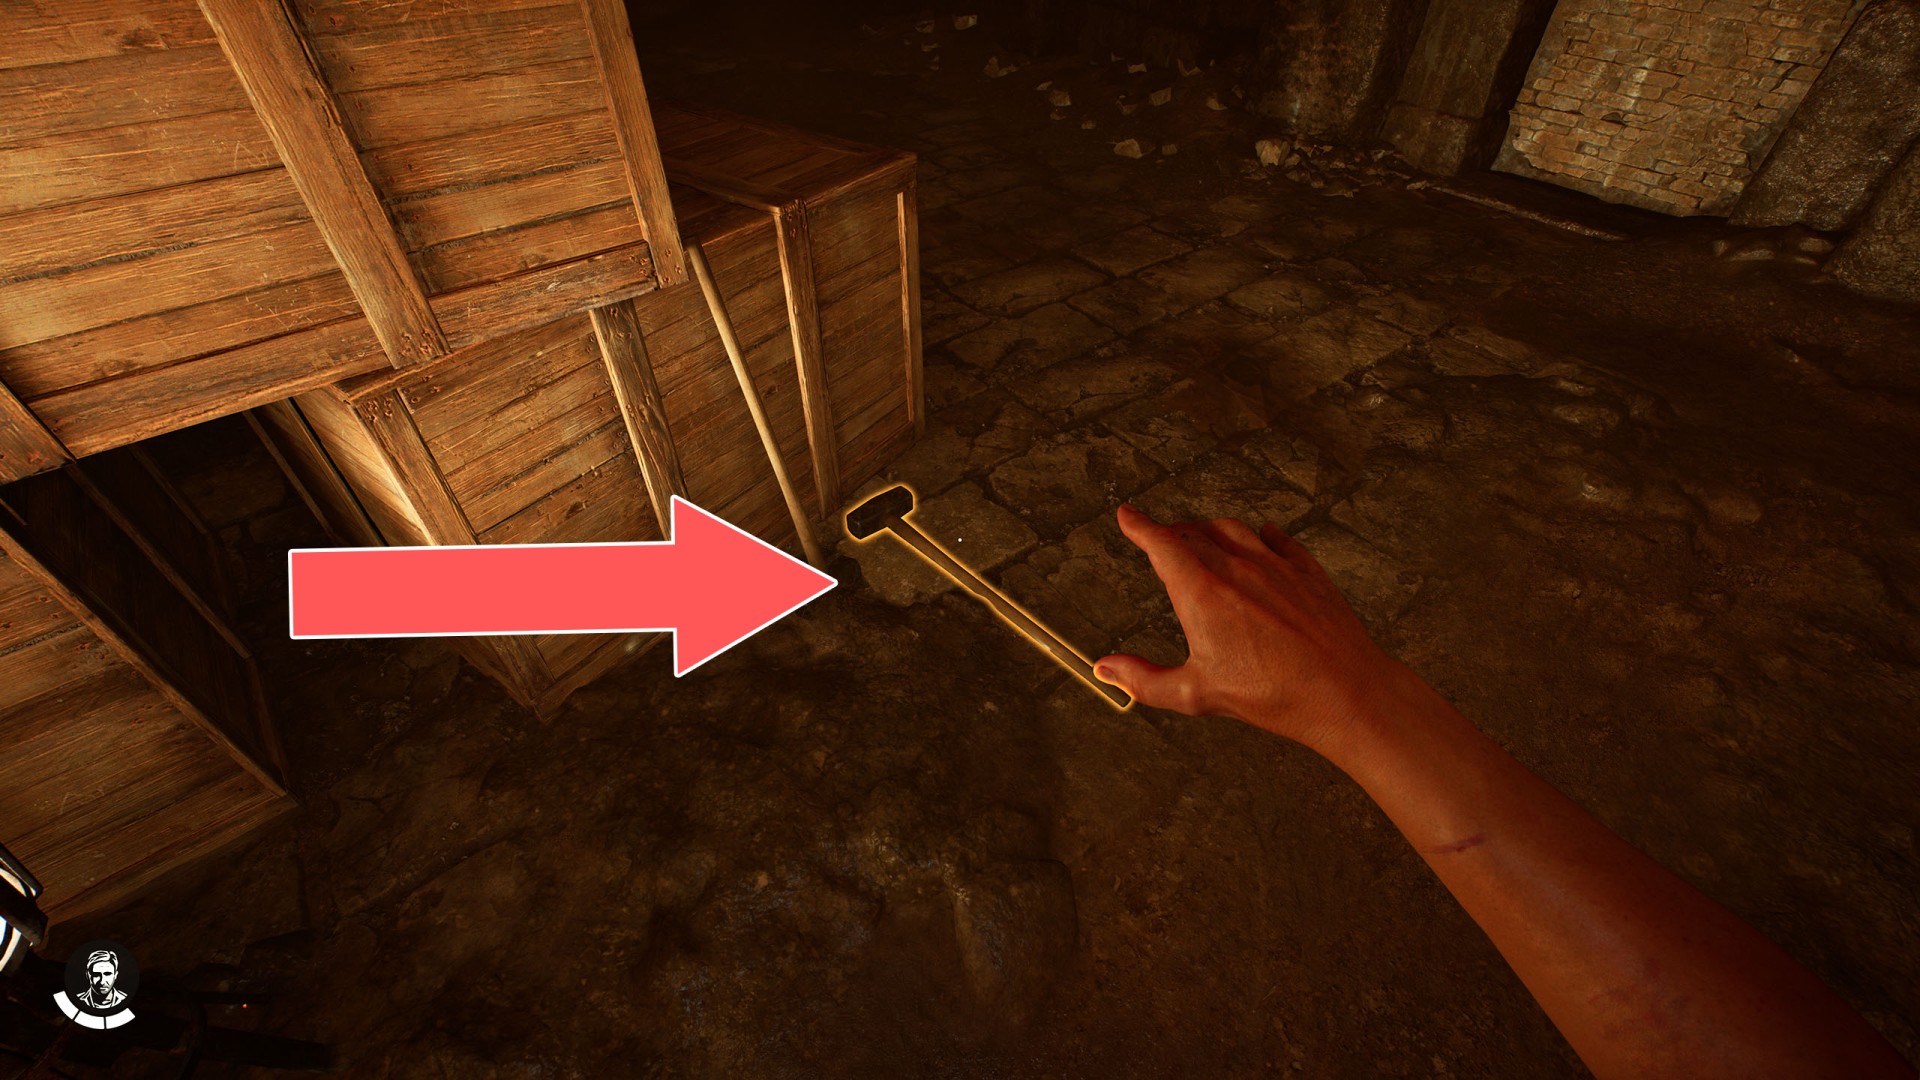
68Large Hammer
You can use it to break down the Weak Wall.
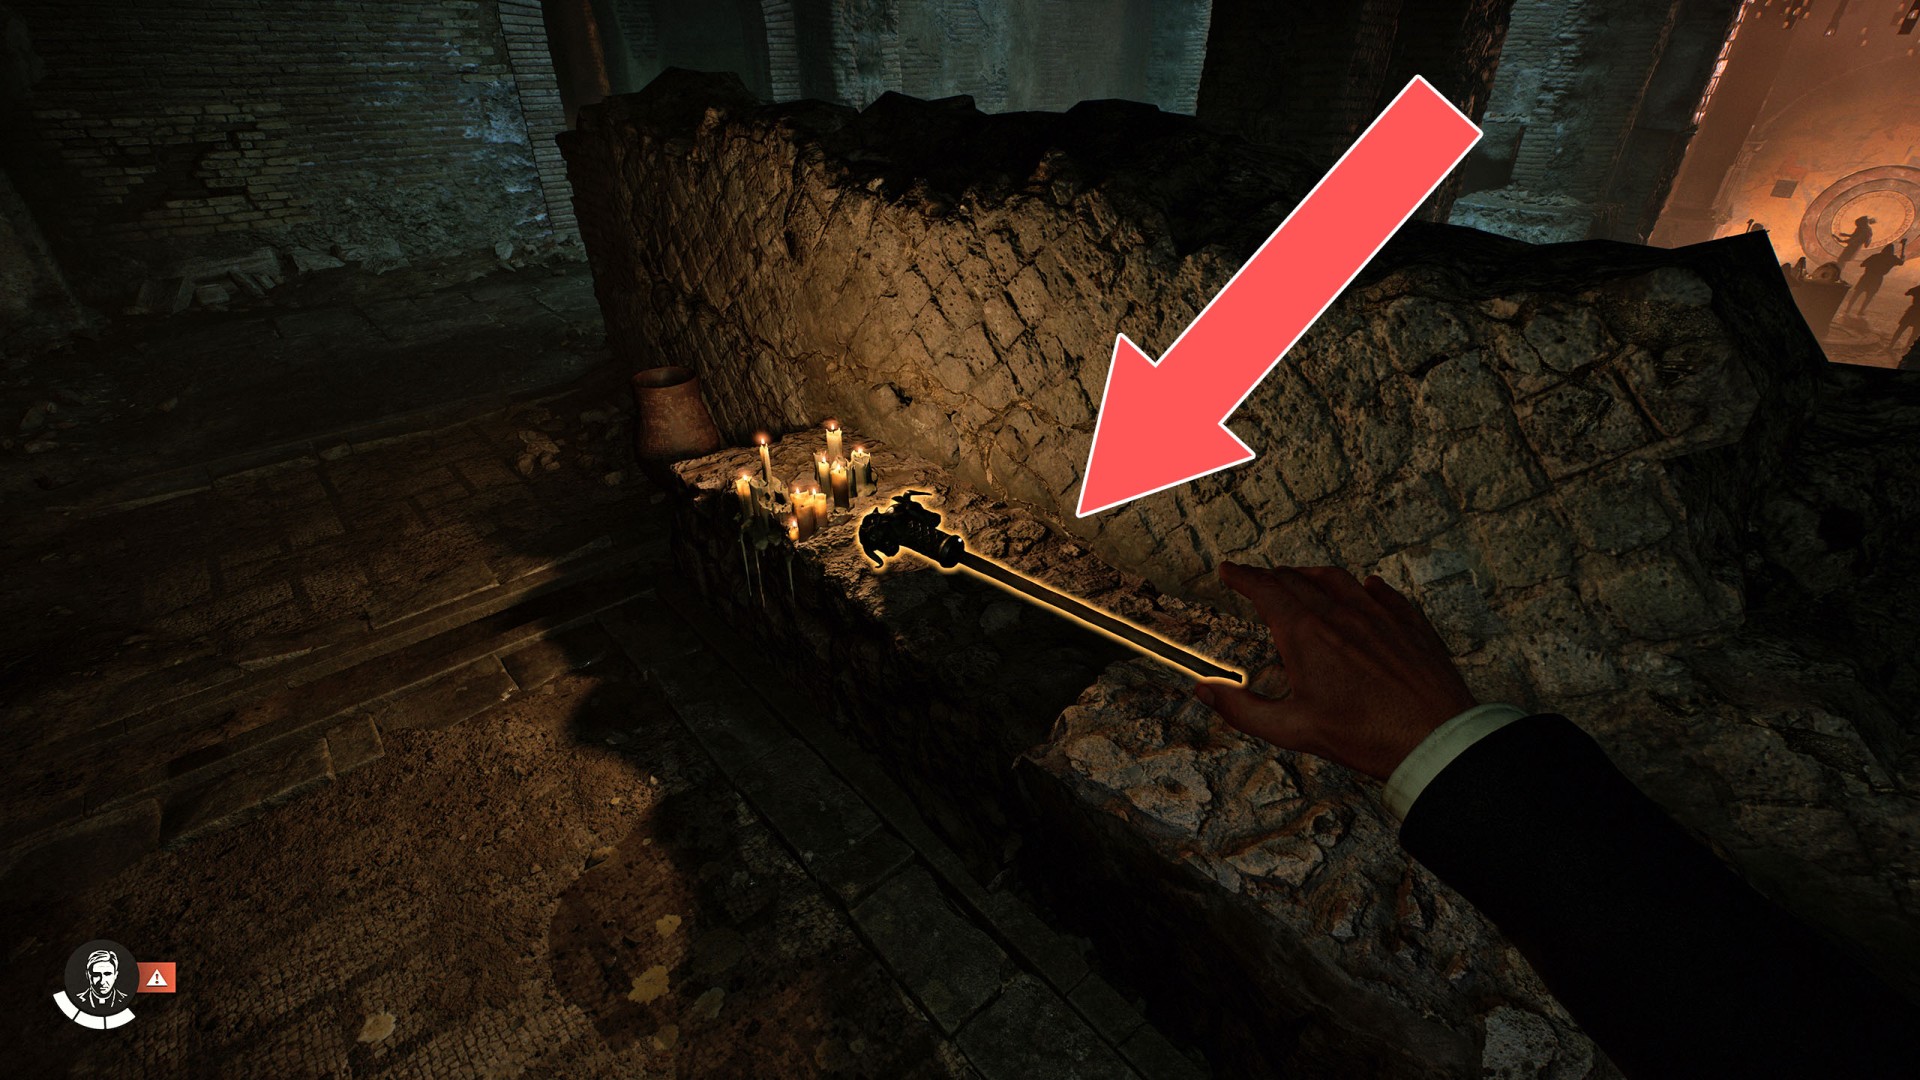
69Large Mace
You can use it to break down the Weak Wall blocking an access to the Corax Artifact.
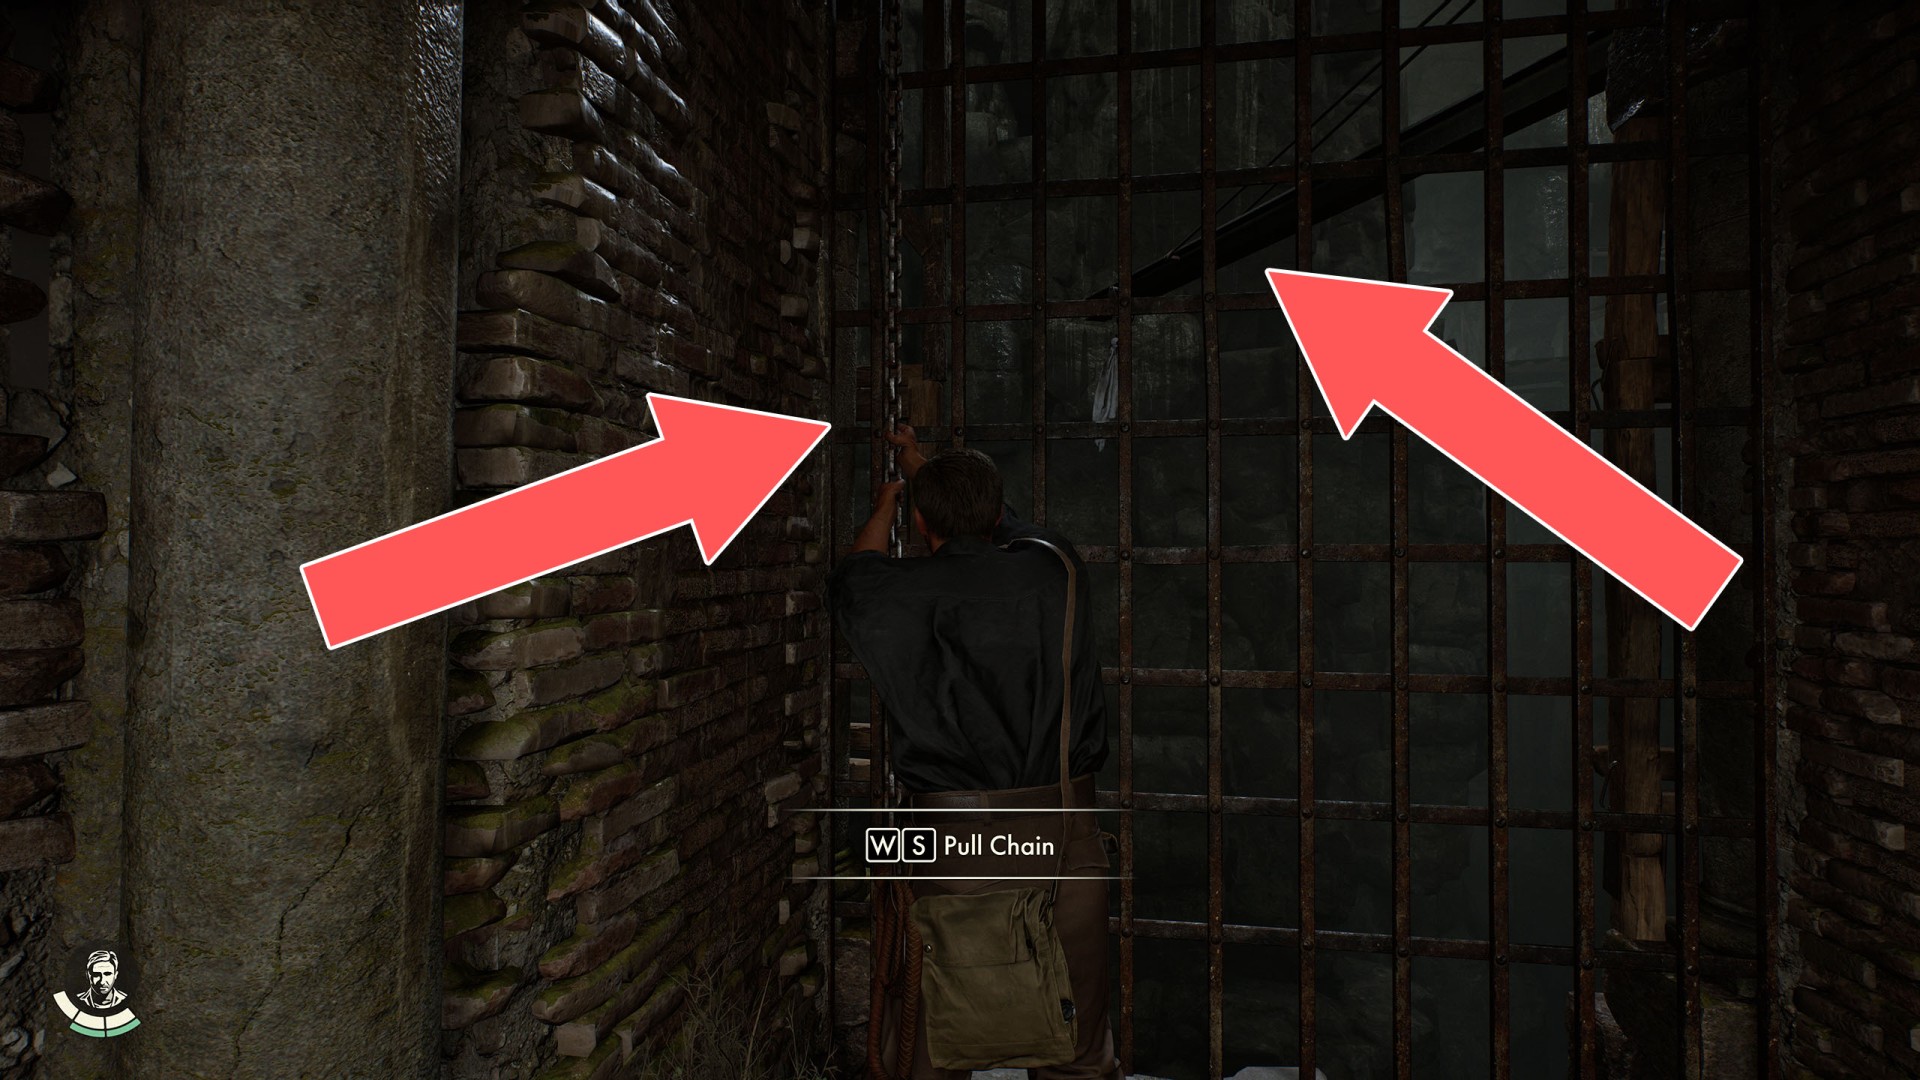
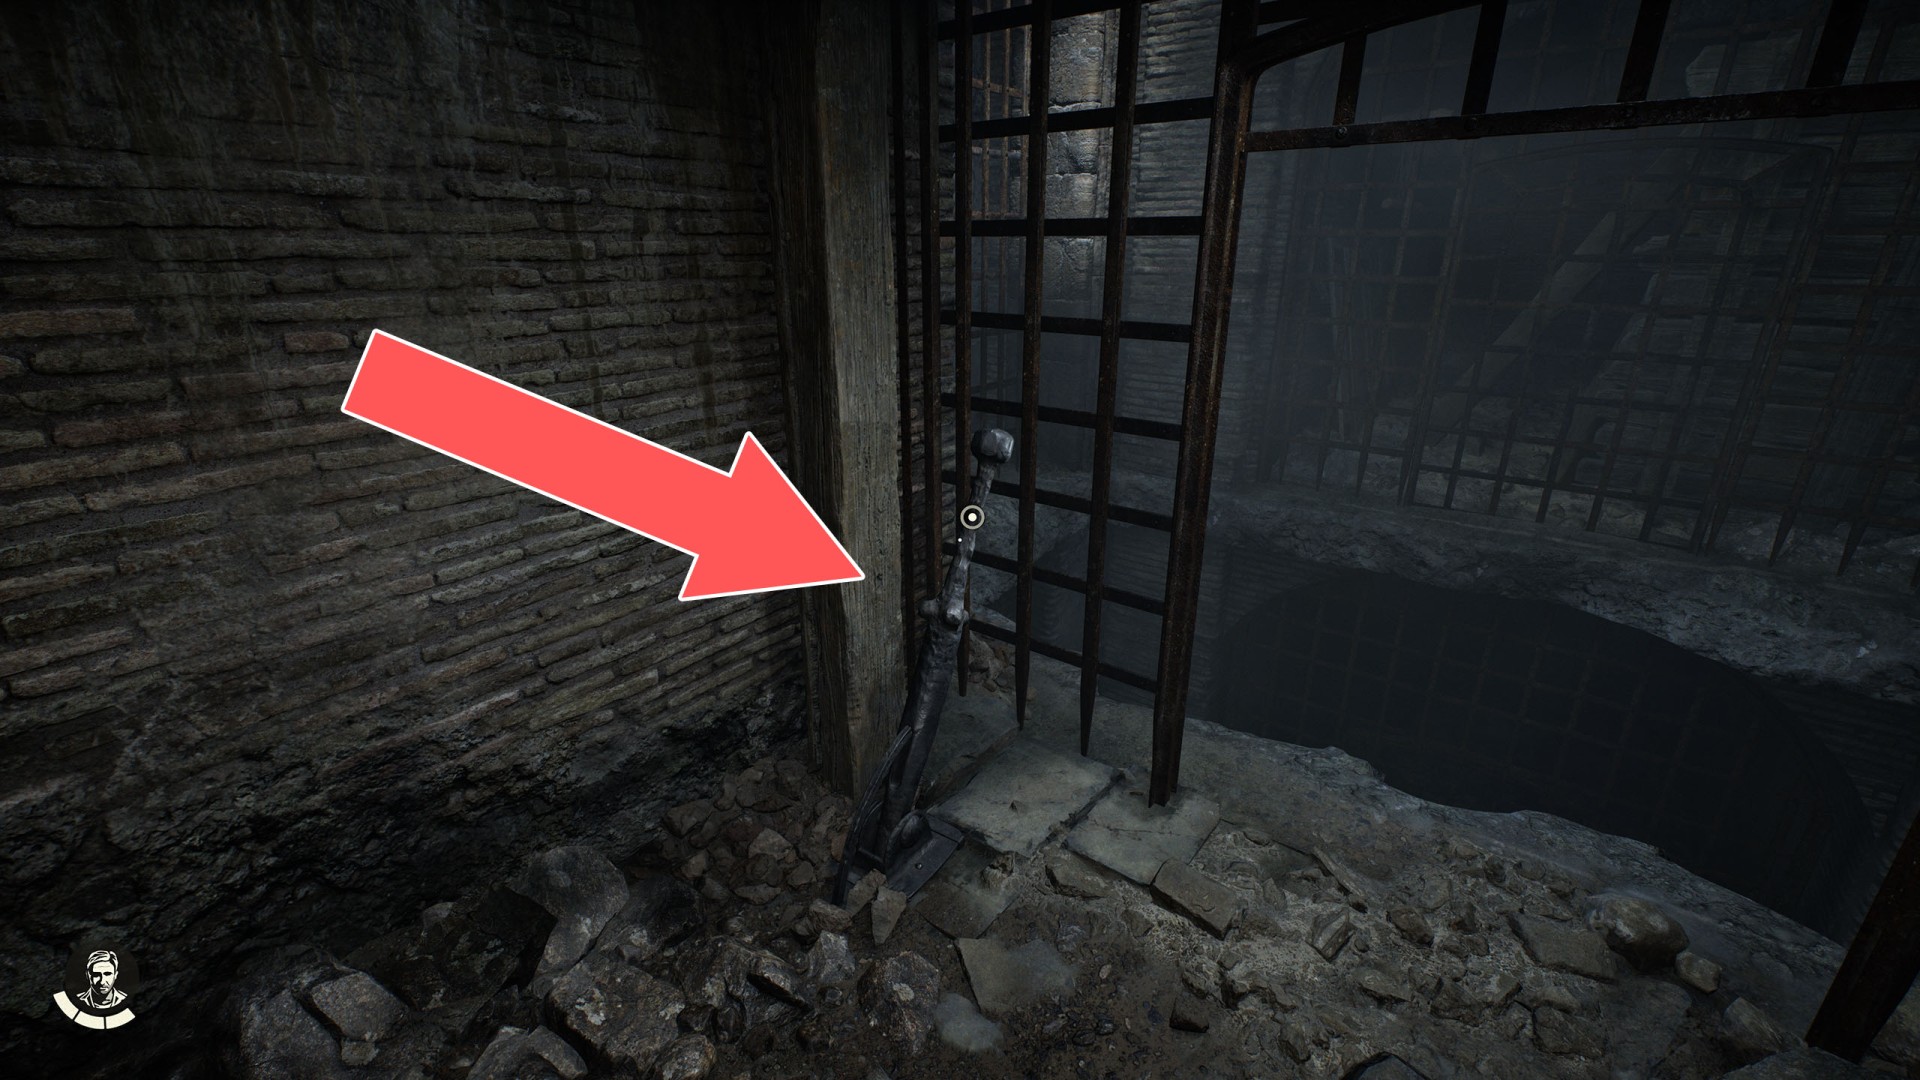
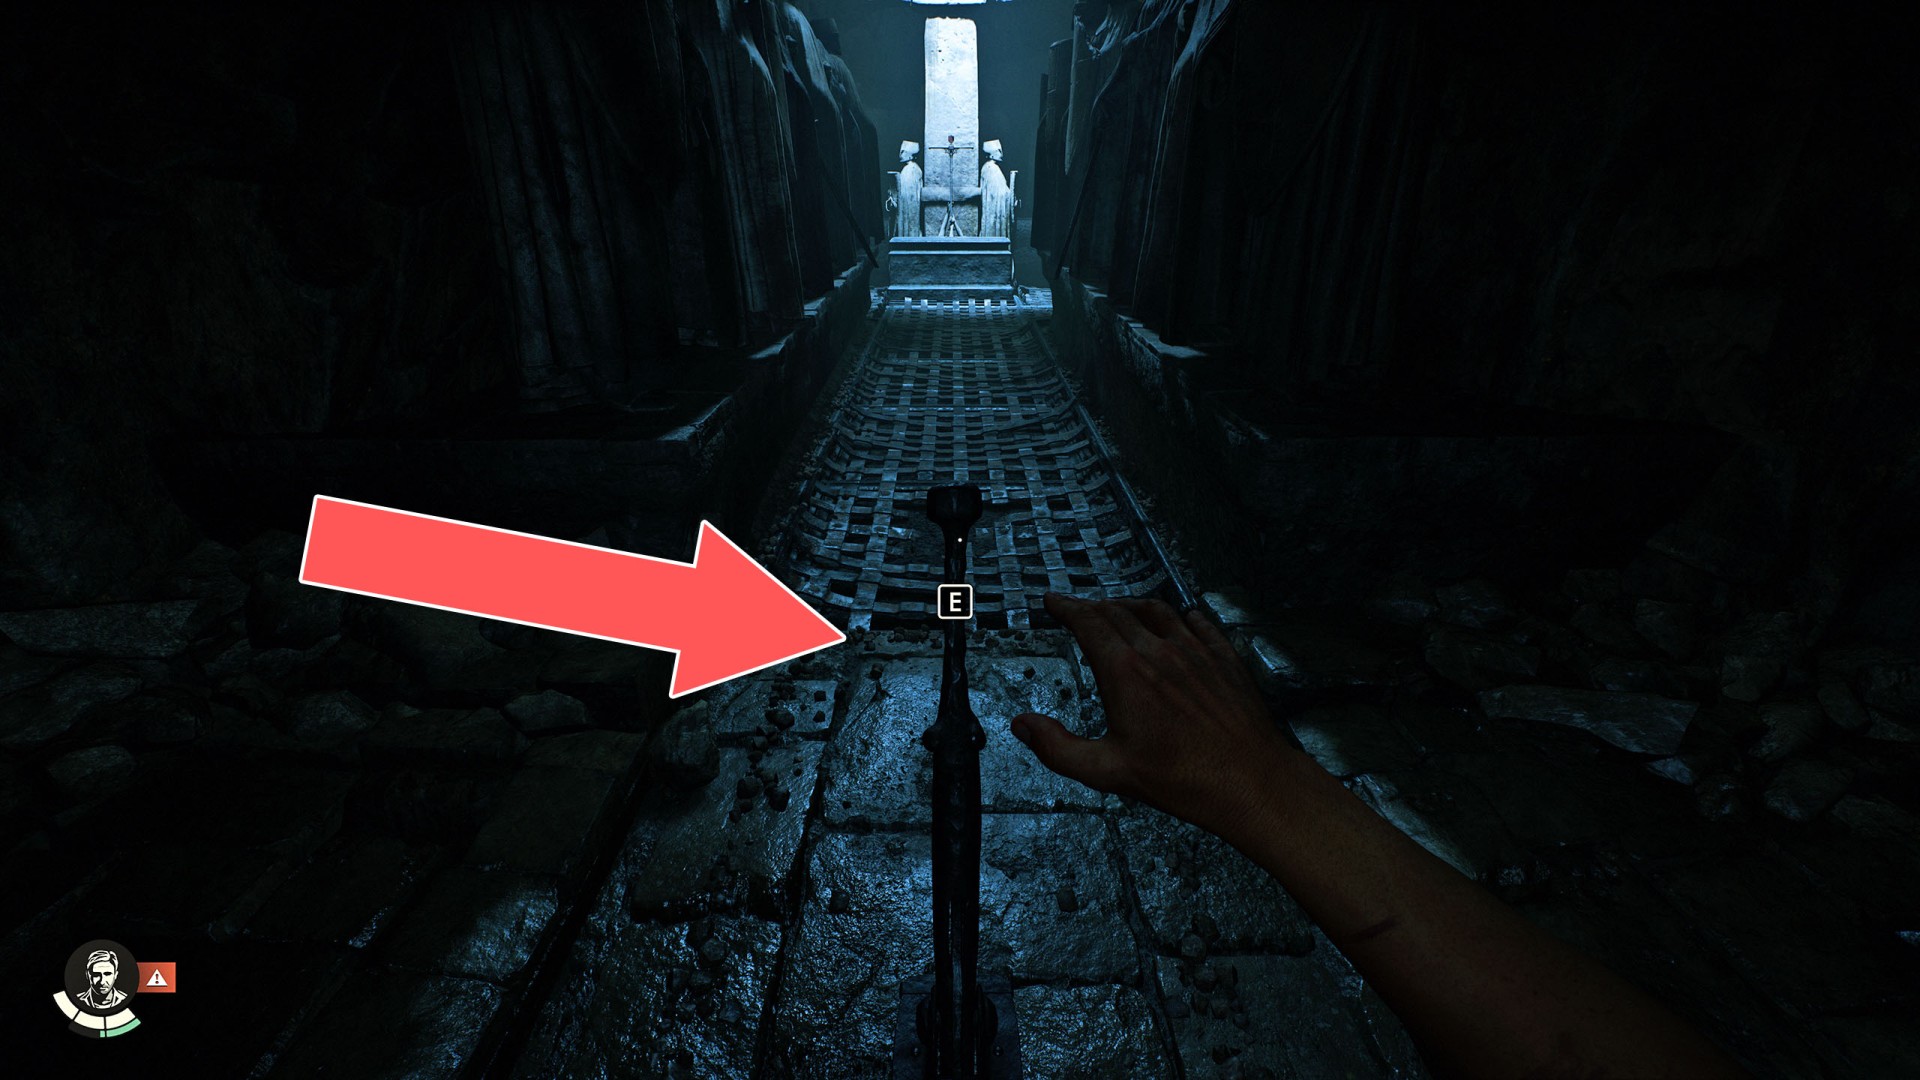
70Lever
Use it to lower the cage so you can continue along its roof.
71Lever (Shield Scepter Trial)
Related puzzle: Tomb of Gibborim.
72Lever (Trinity Scepter Trial)
Related puzzle: Tomb of Gibborim.
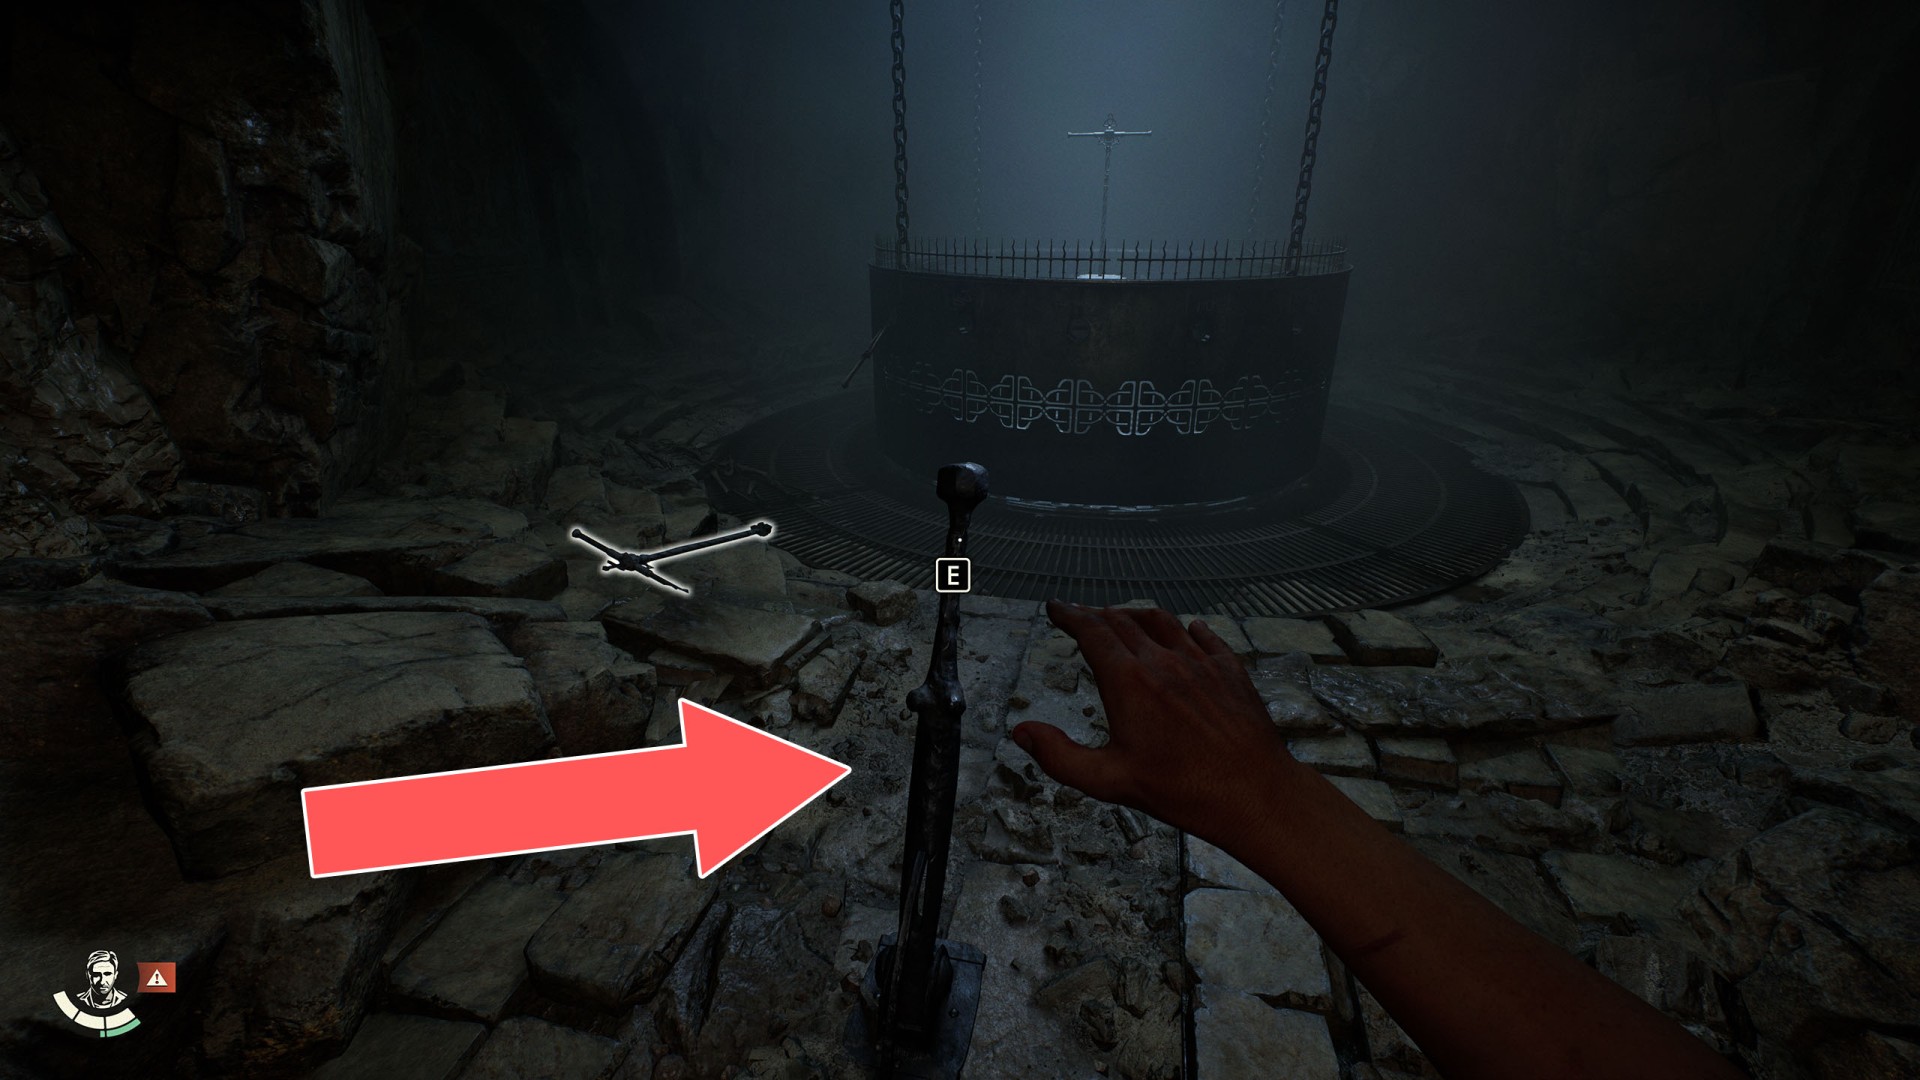
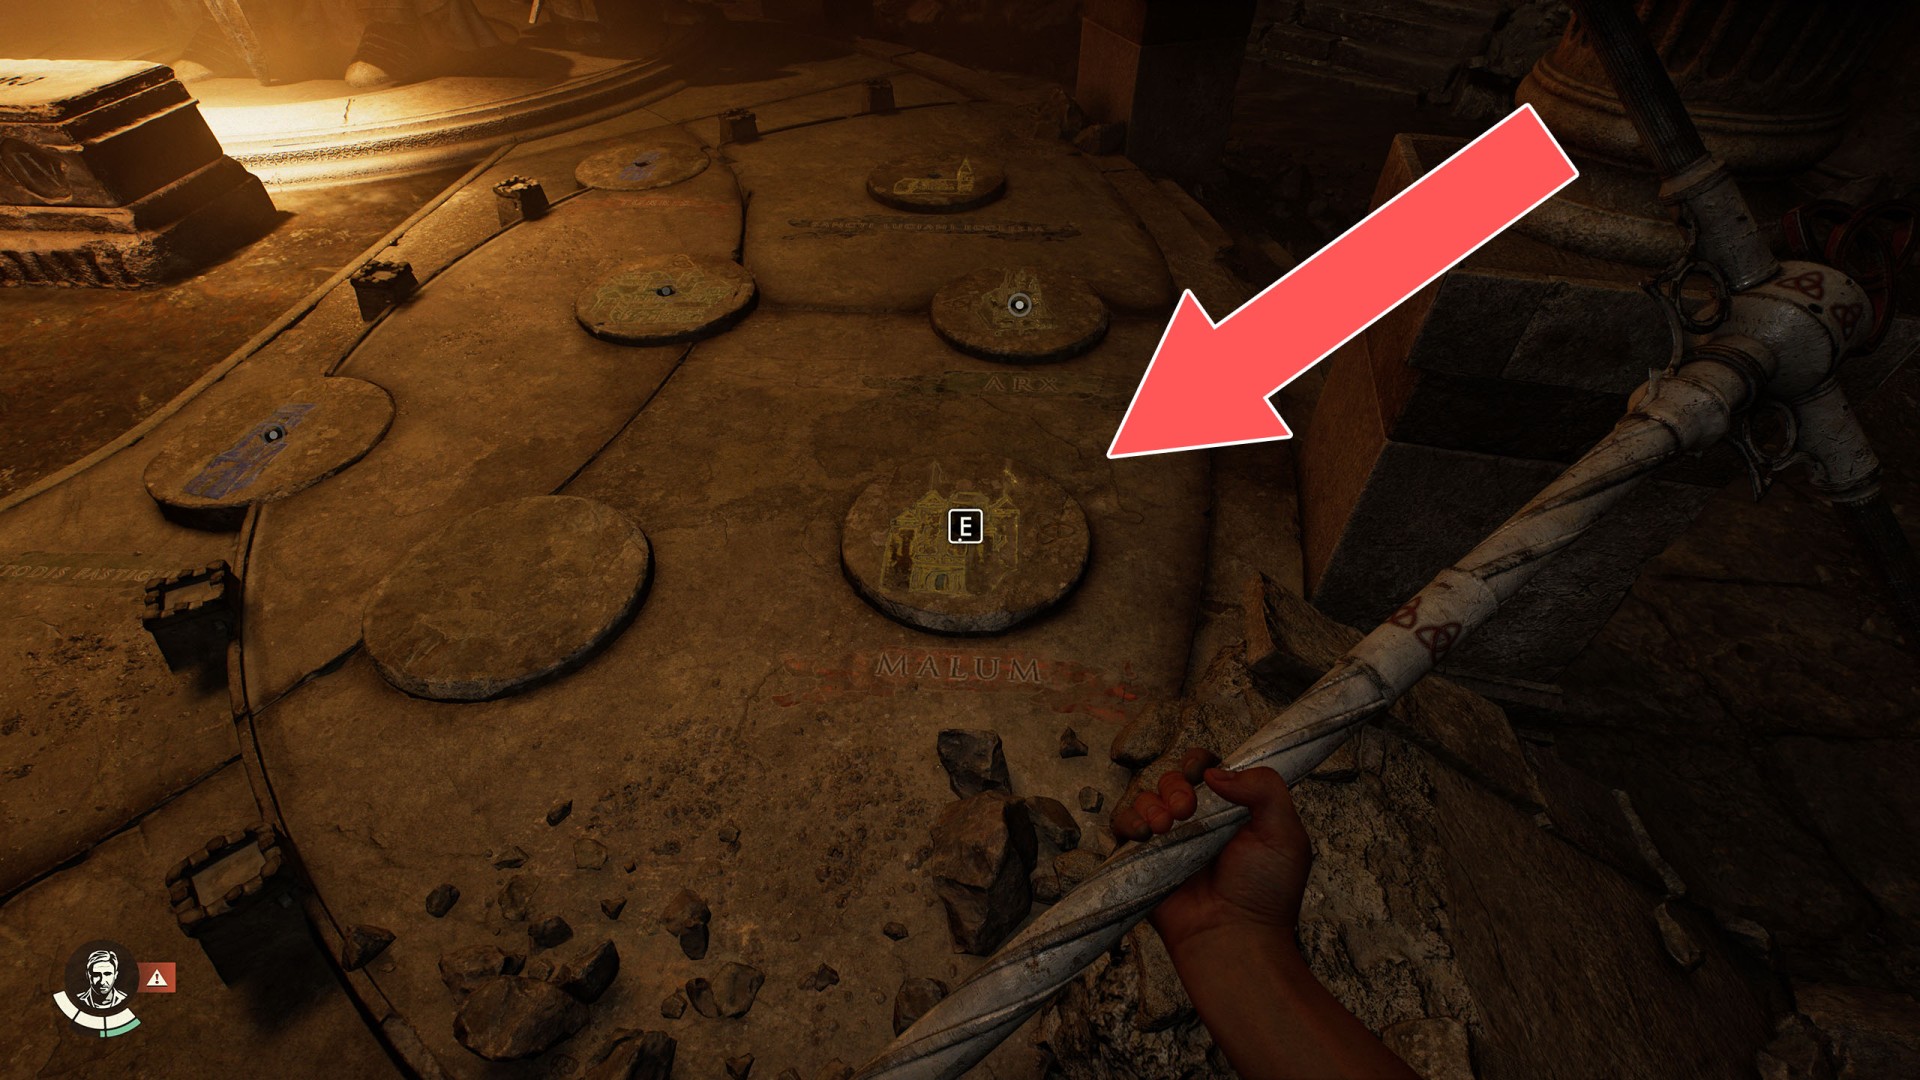
73Malum Slot
Use the Trinity Scepter and turn it once to the left. Related puzzle: Tomb of Gibborim.
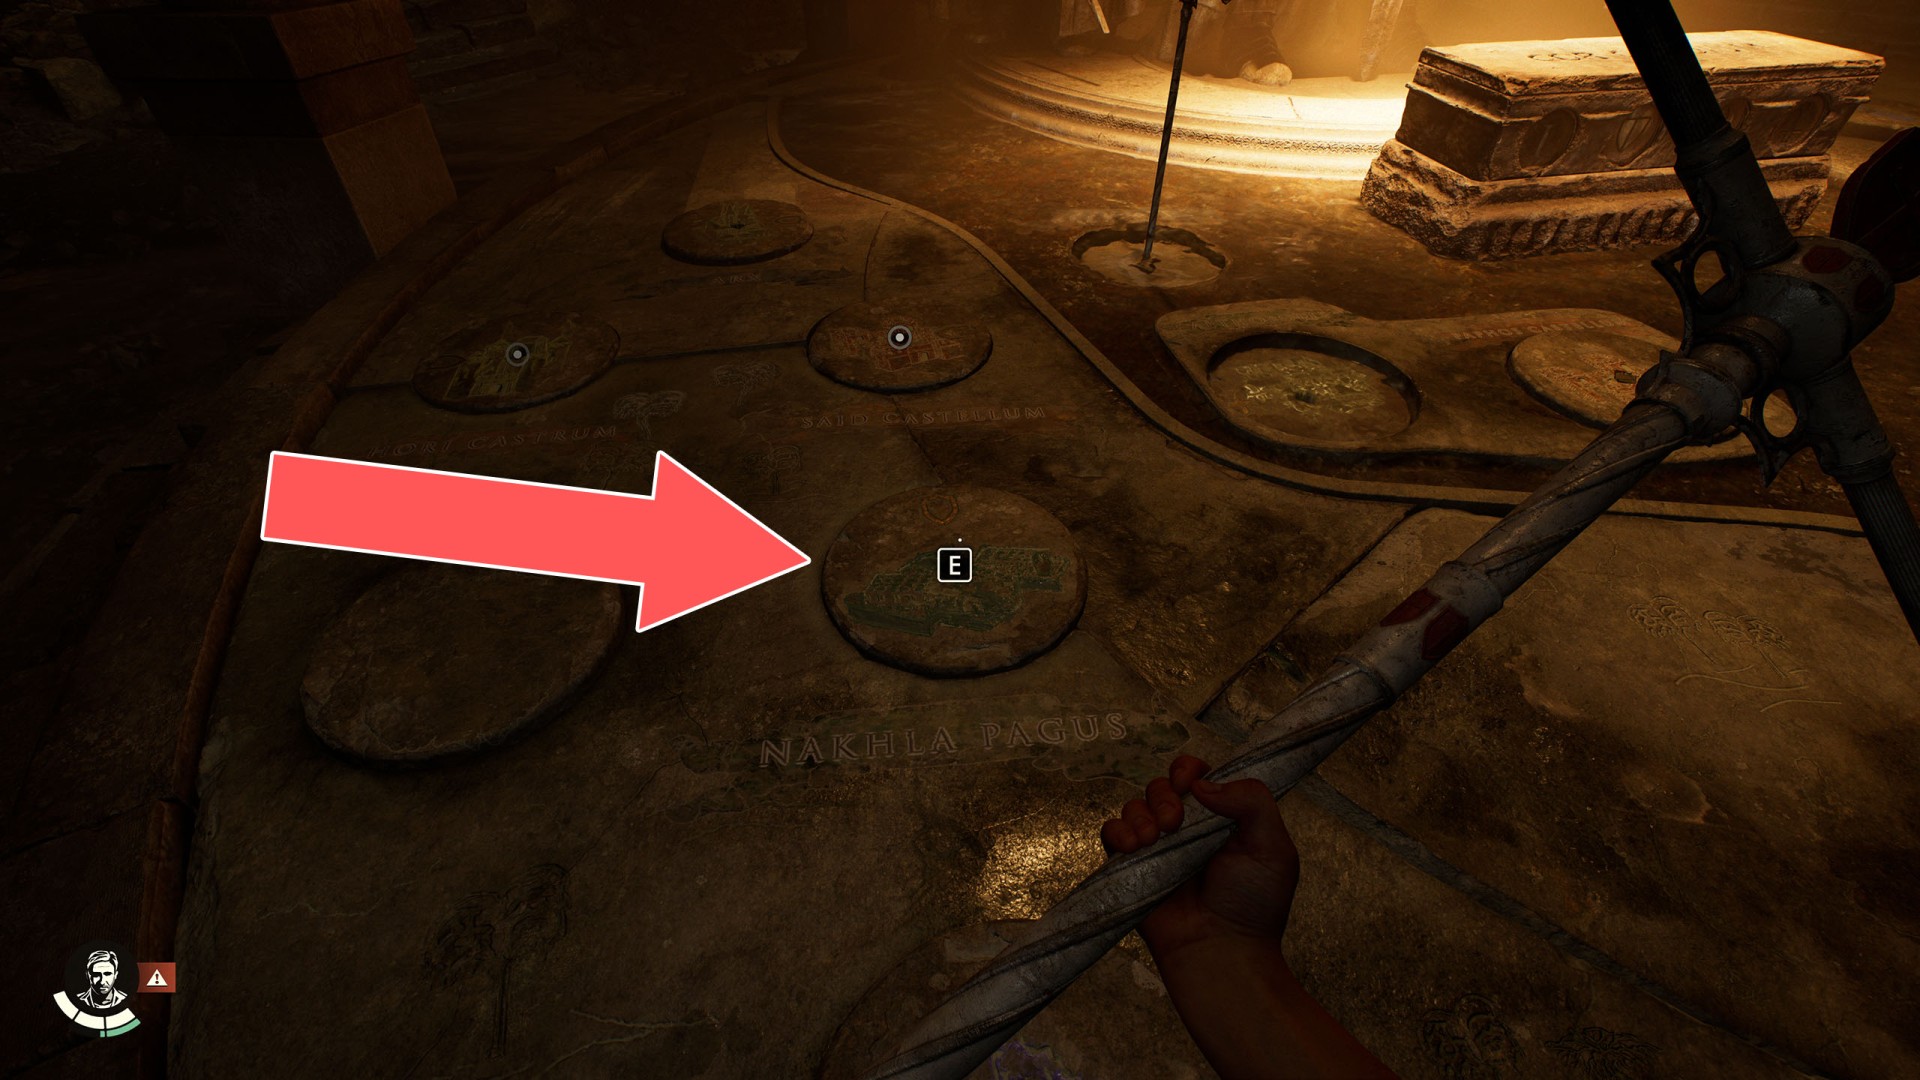
74Nakhala Pagus Slot
Use the Shield Scepter and turn it twice (180 degrees) in any direction. Related puzzle: Tomb of Gibborim.
75Pickaxe
You can use it to break down the Weak Wall blocking an access to the Miles Artifact.
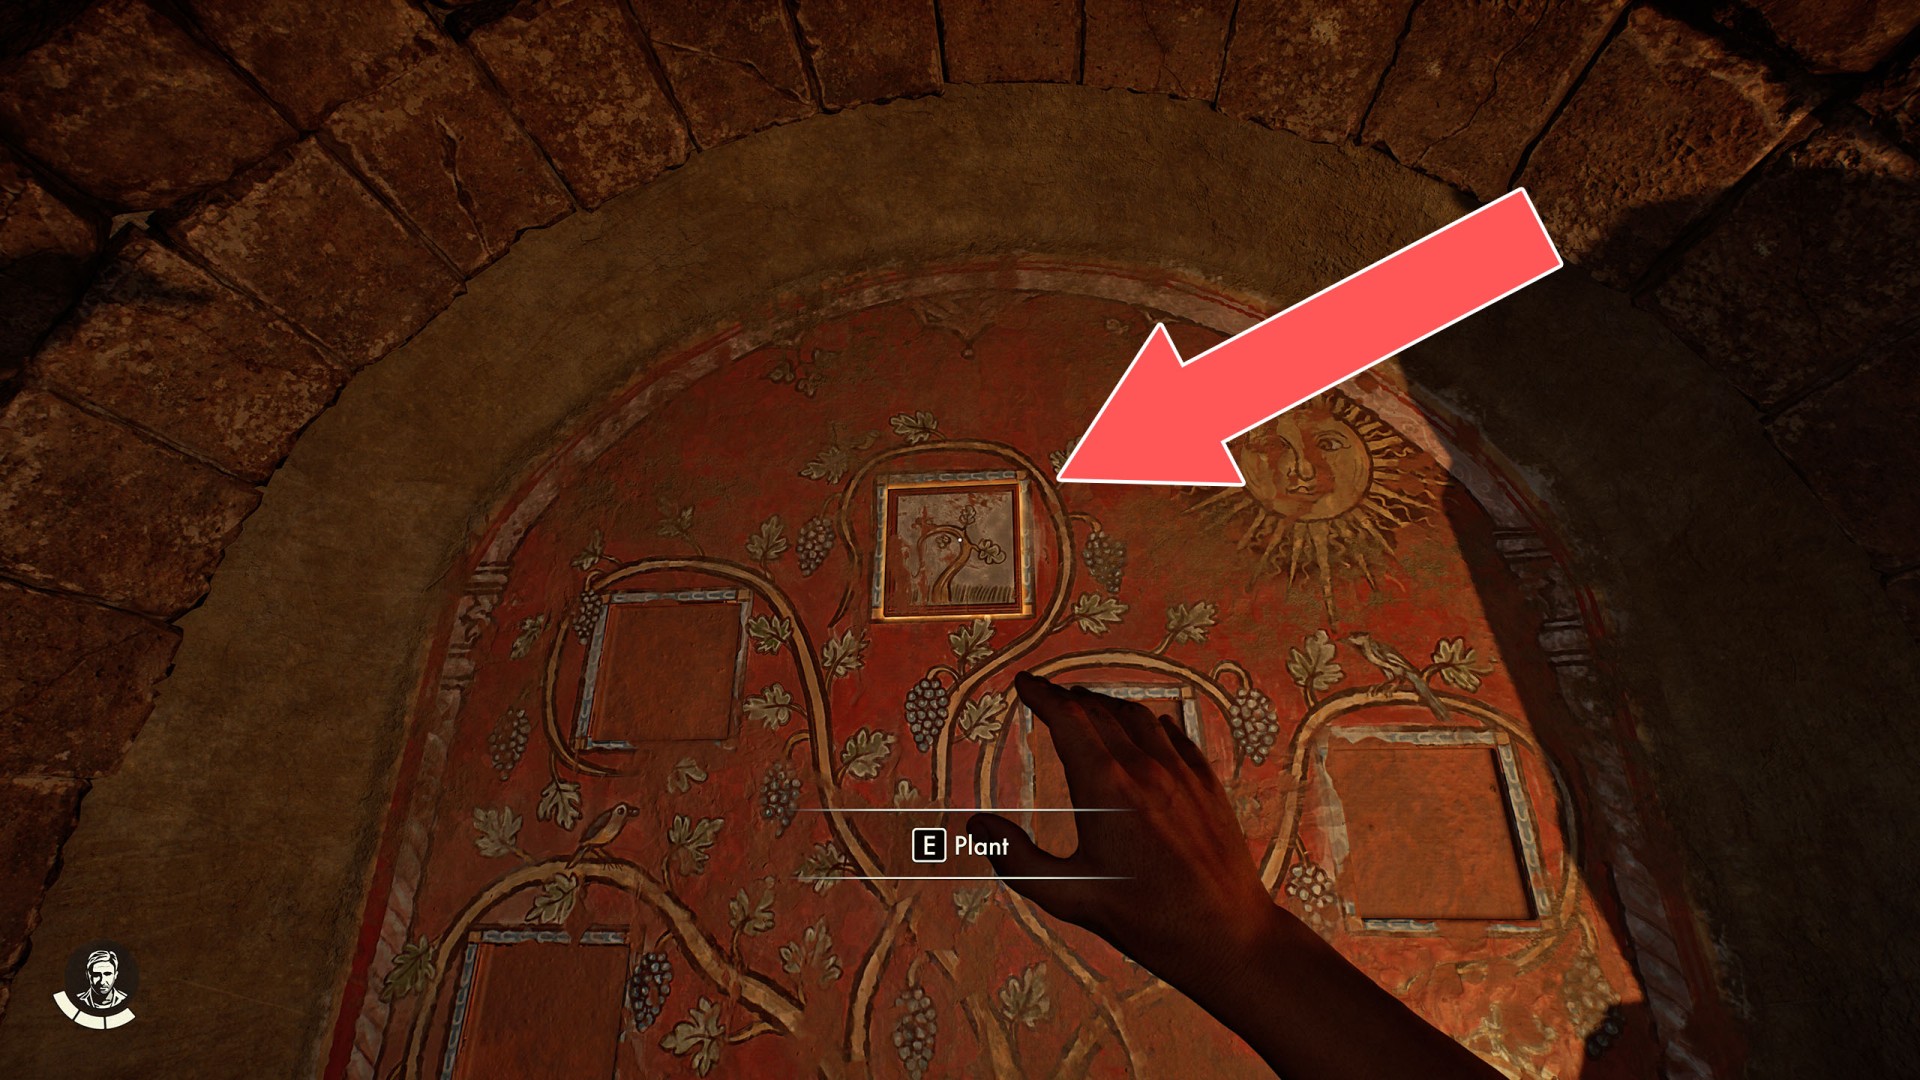
76Plant
Related mystery: A Tale of Wine Making.
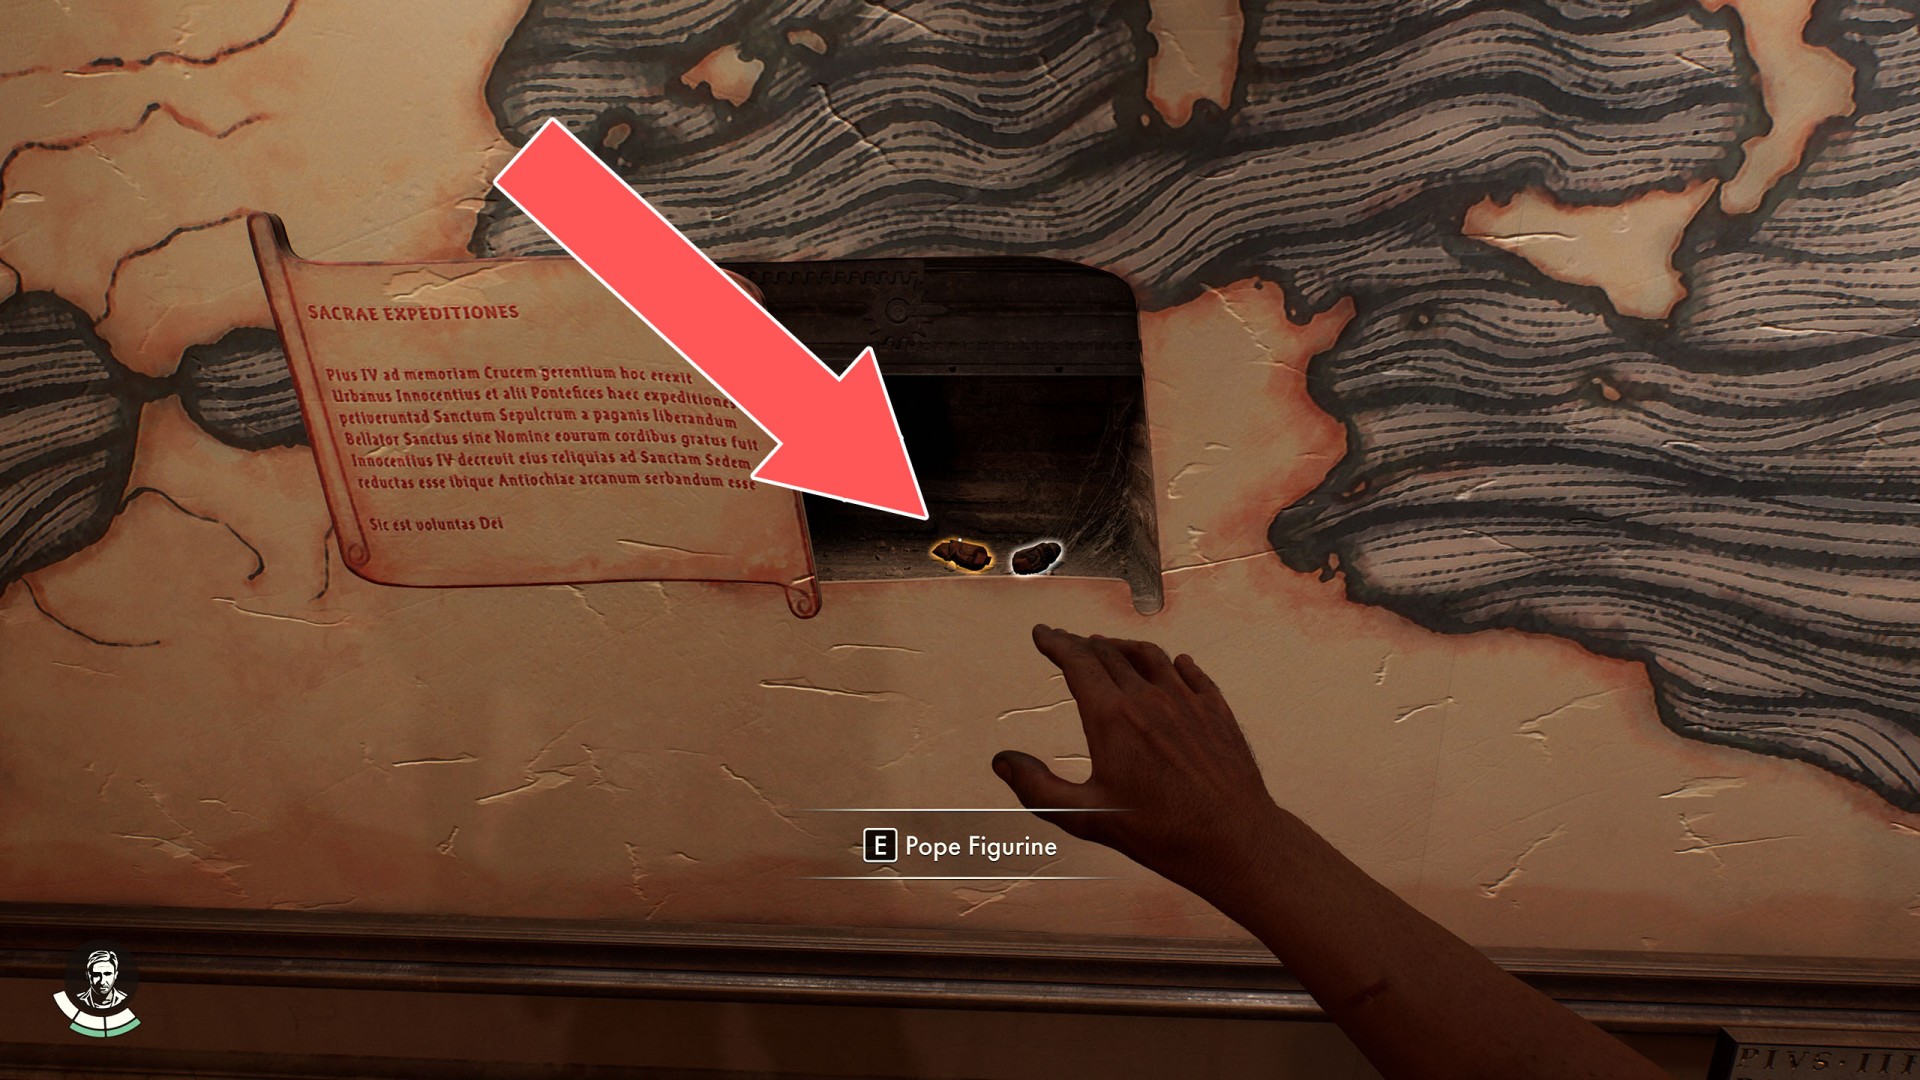
77Pope Figurine
In a secret compartment that opens when you press the Holy Expeditions badge on the mural. Related adventure: The Order of Giants.
78Process
Related mystery: A Tale of Wine Making.
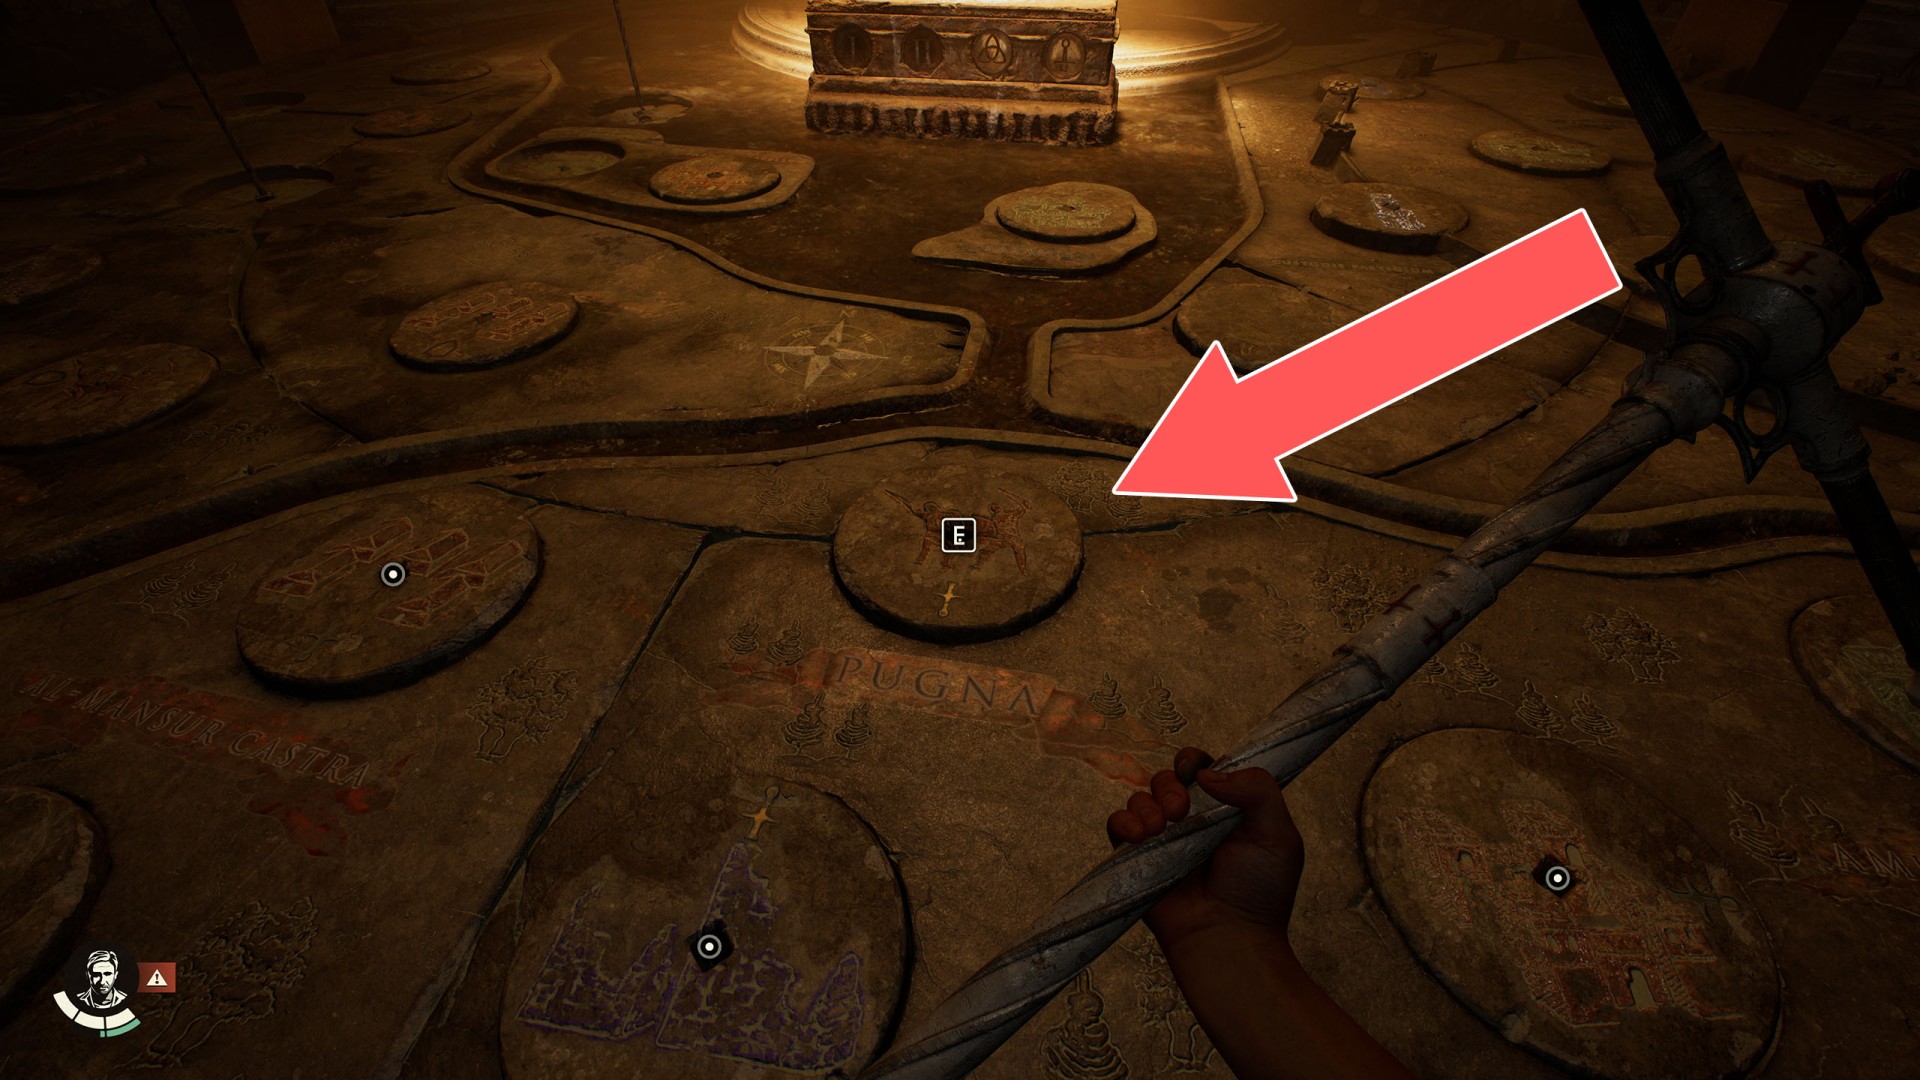
79Pugna Slot
Use the Sword Scepter and turn it twice (180 degrees) in any direction. Related puzzle: Tomb of Gibborim.
80Raised Sword
Related puzzle: Gladiator Shrine. You will be able to use it when you place the Giant Blade in the Statue's Hand. Pull it using the whip to release the rolling ball.
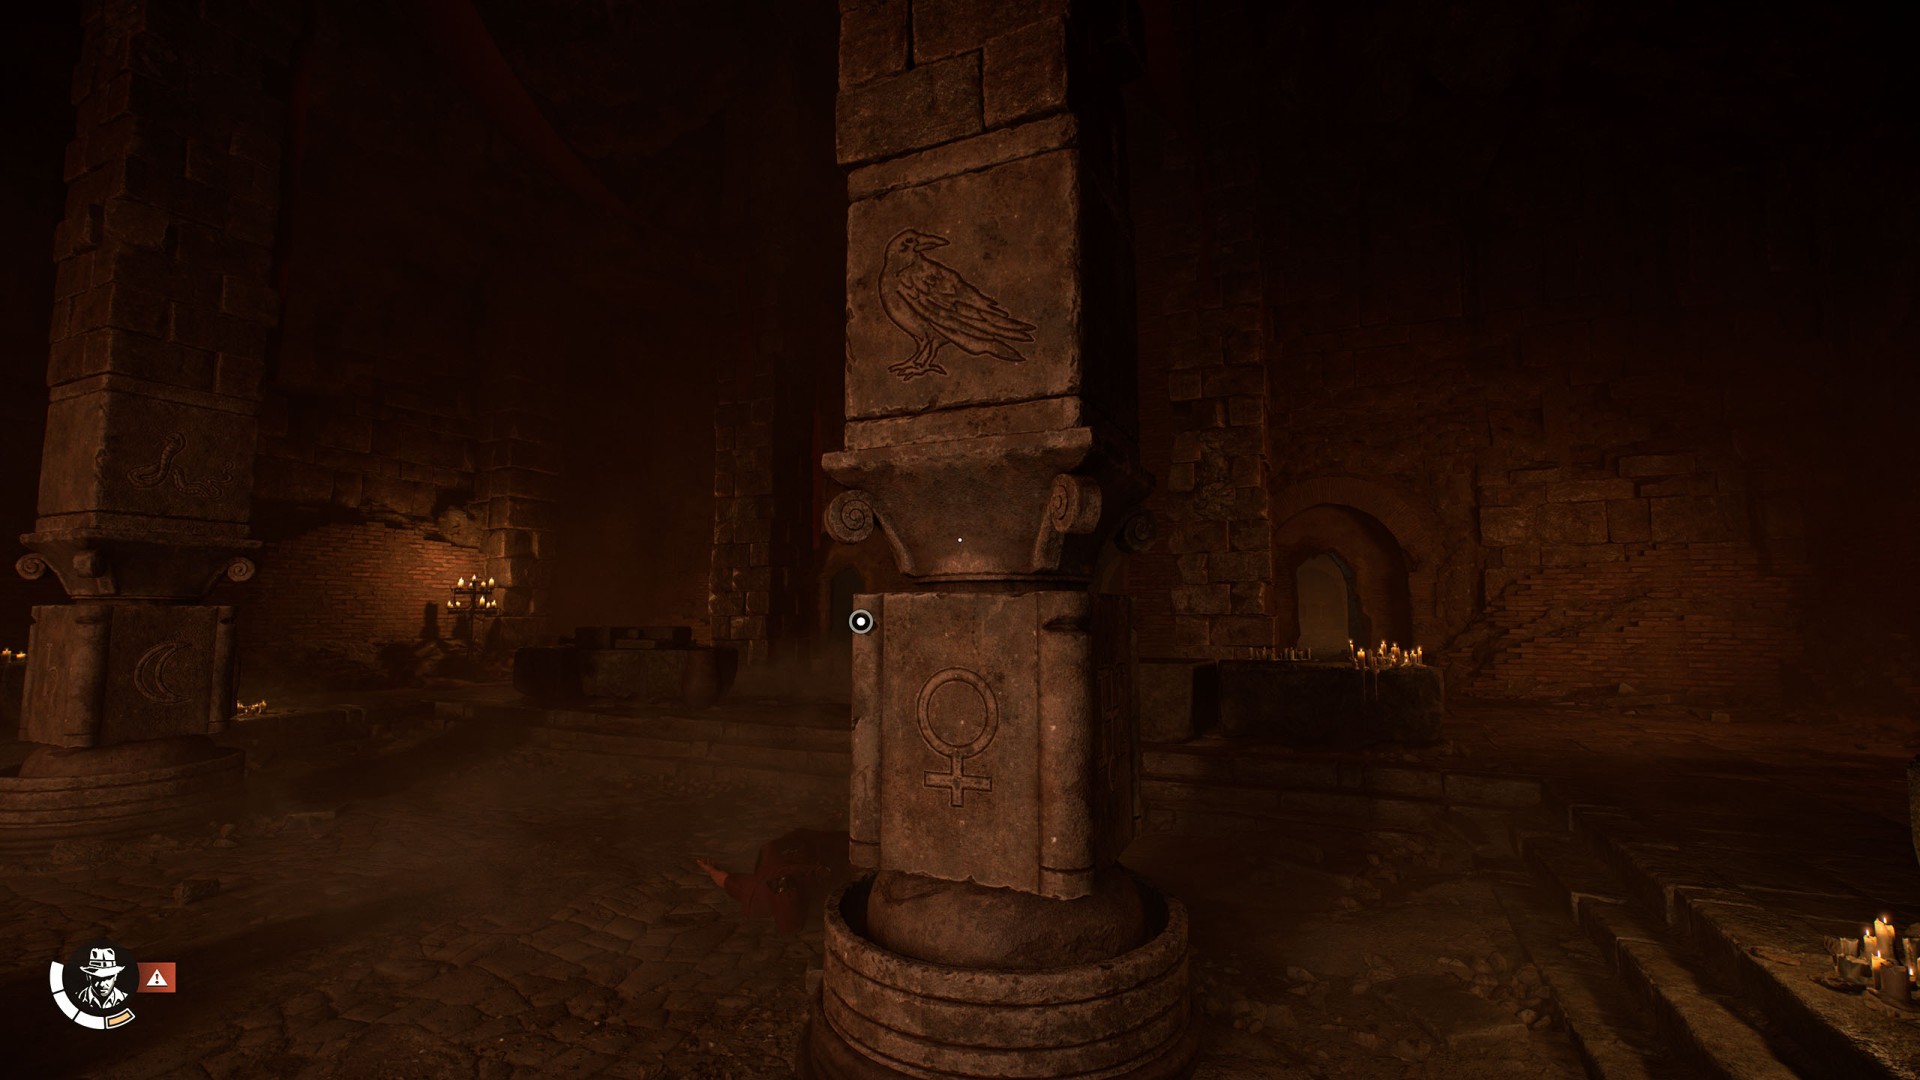
81Raven Pillar
Related puzzle: Monster's Gate. You need to set it up as shown in the screenshot below.
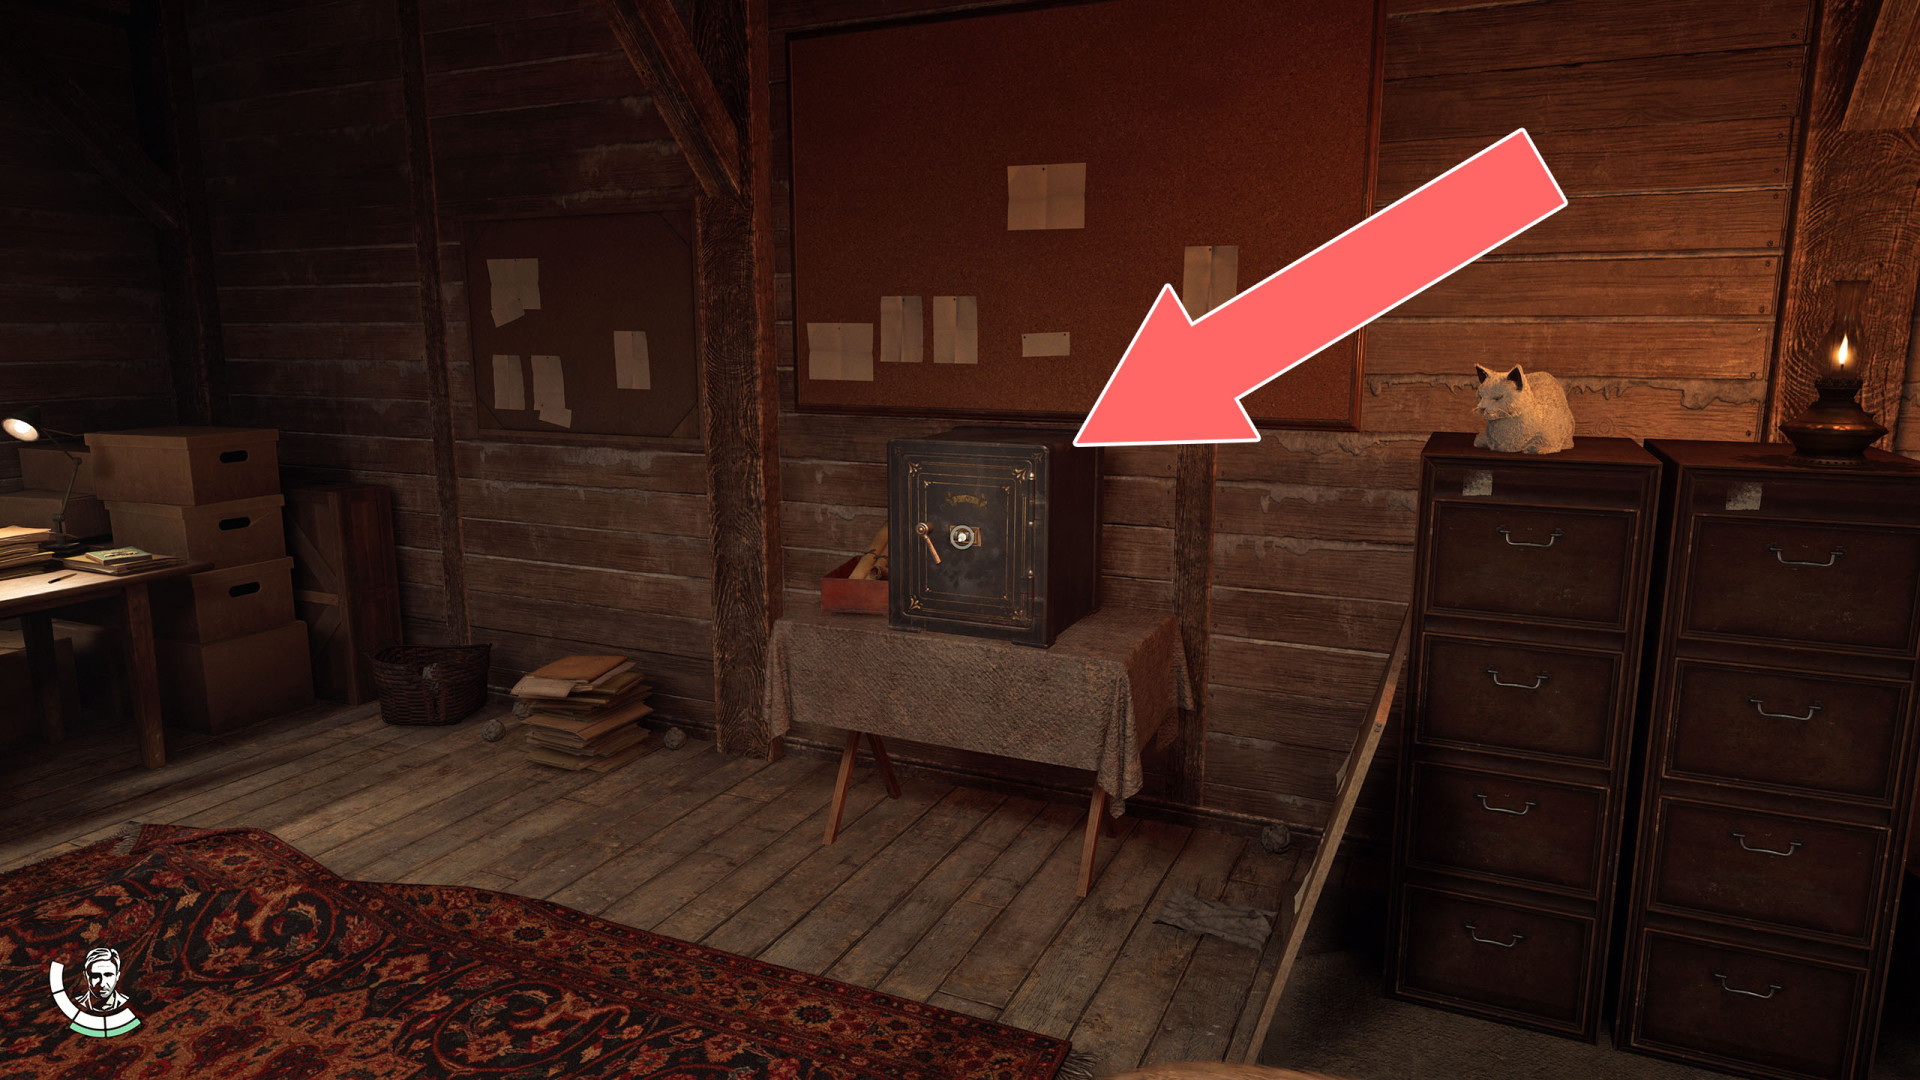
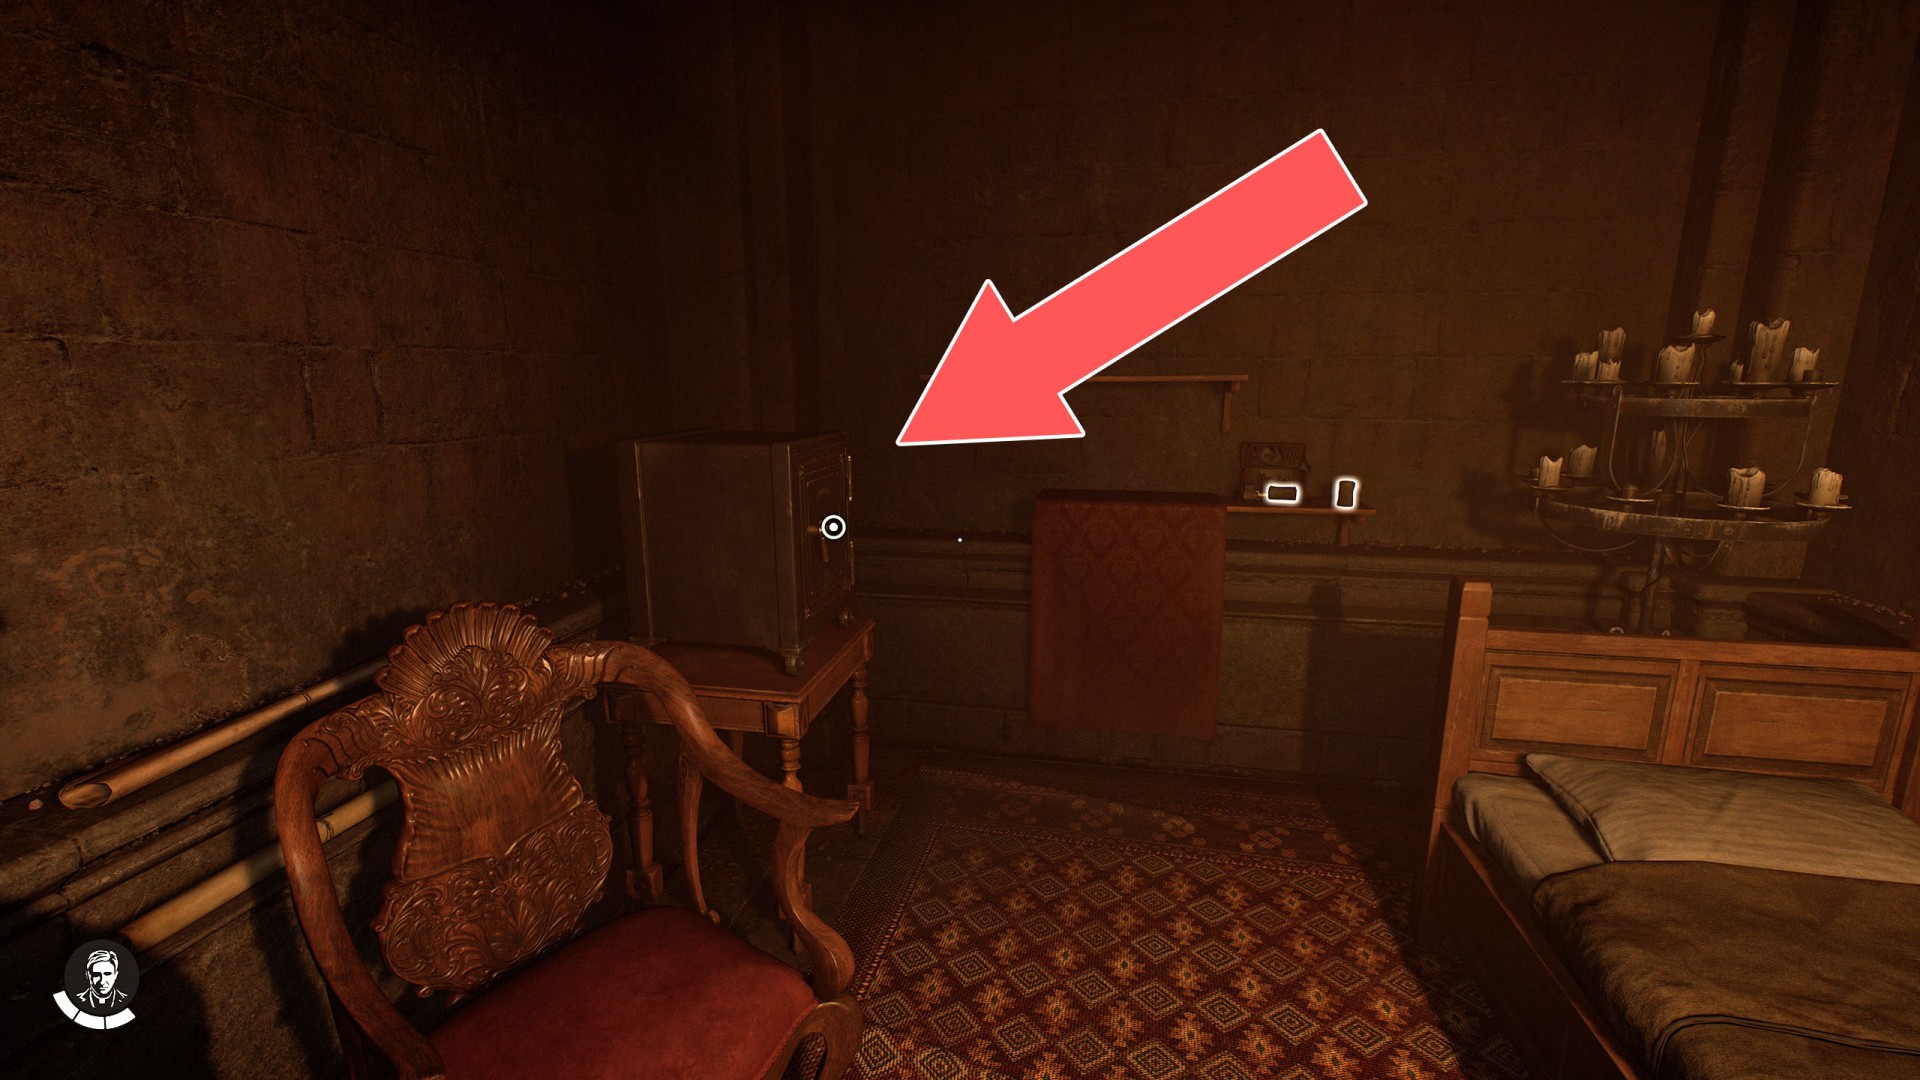
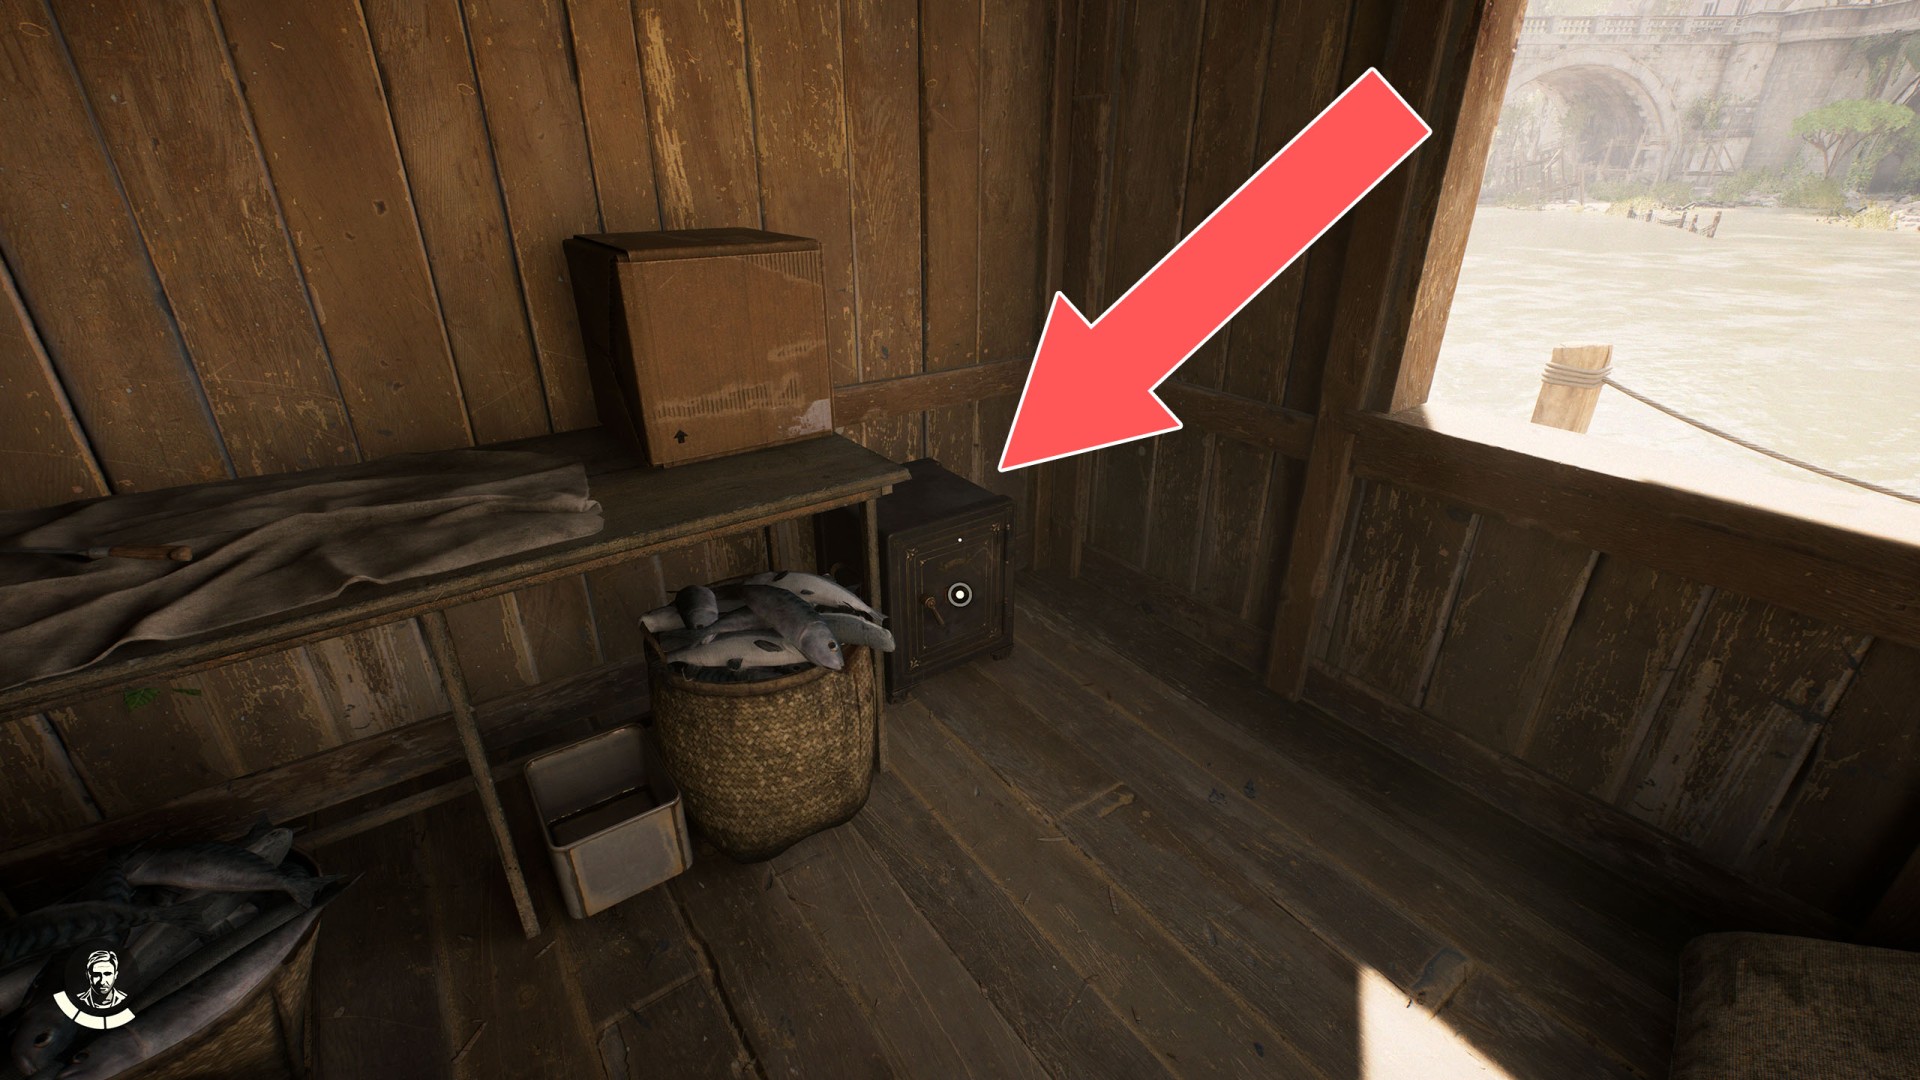
82Ricci's Safe
Safe combination: 4-7-6-8. A hint about the combination can be found in note "Code to Safe". Related adventure: The Order of Giants.
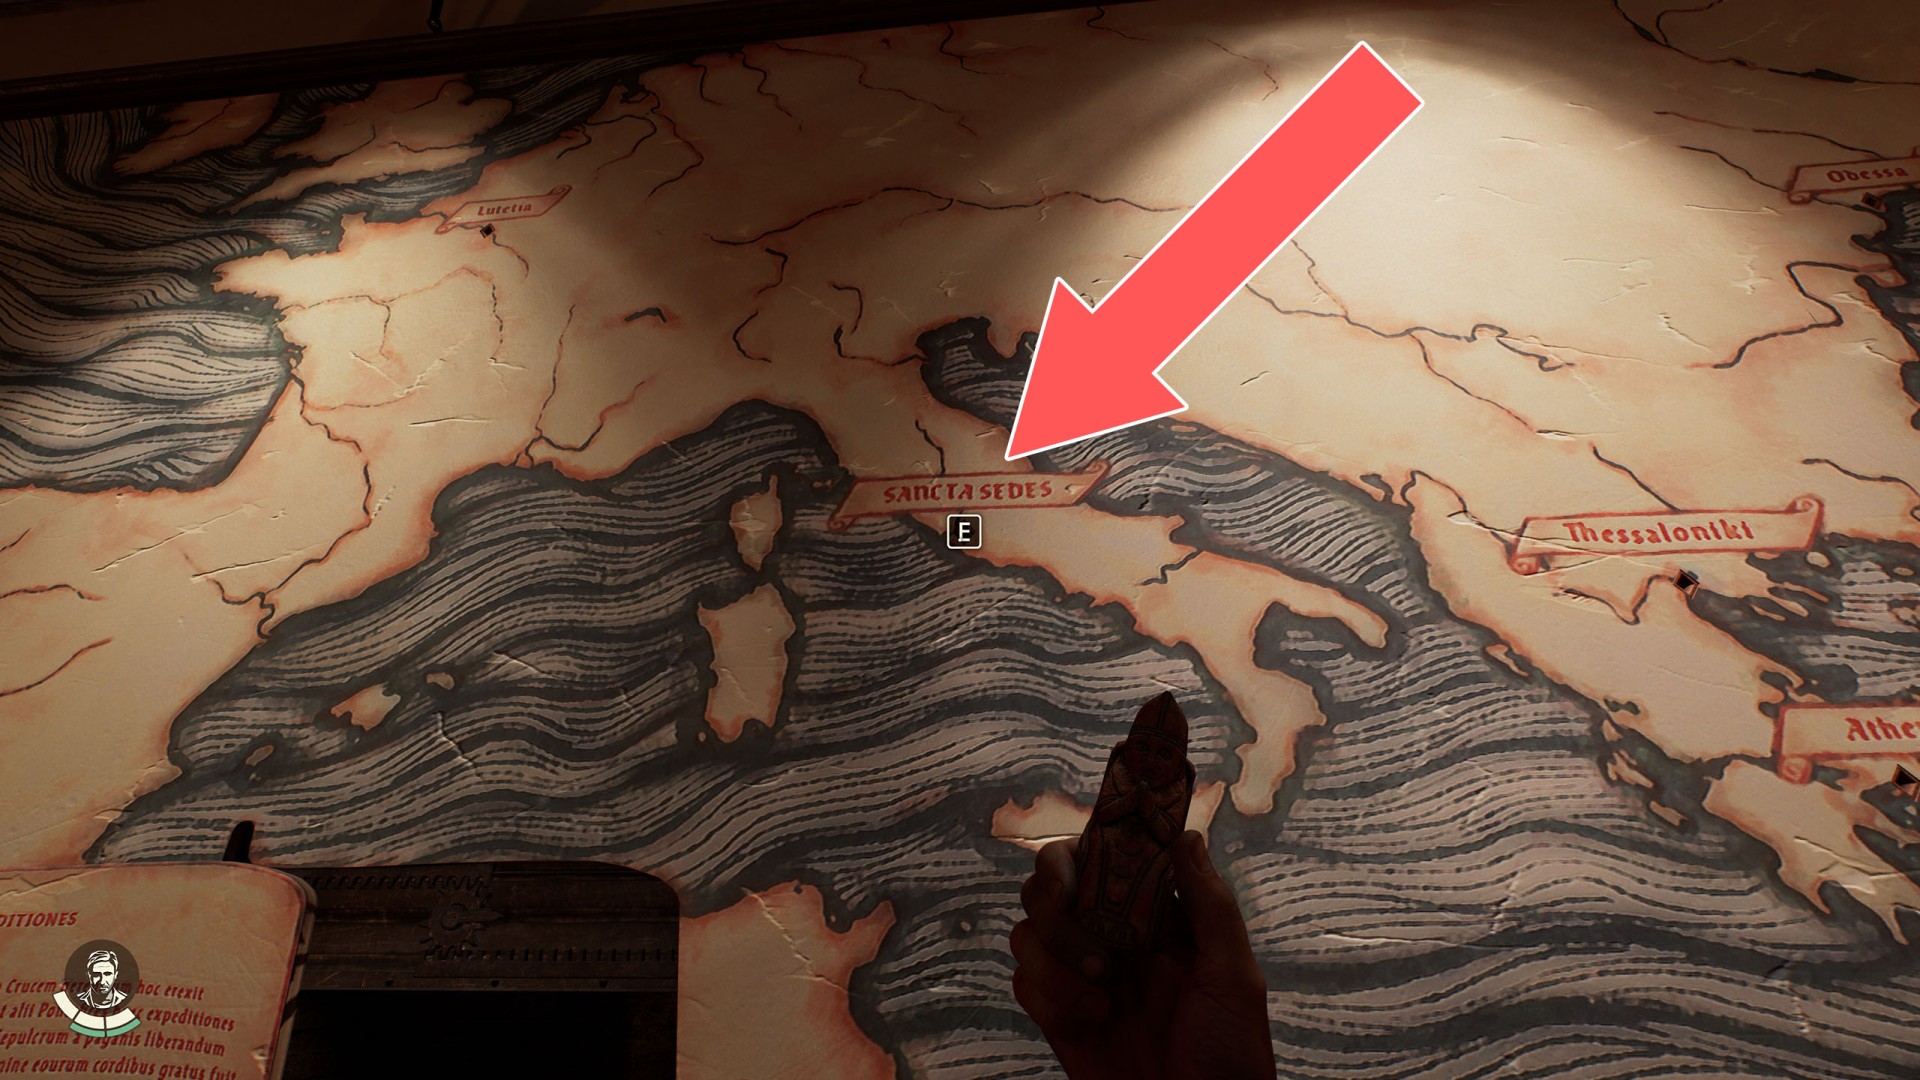
83Rome Slot
Place the Pope Figurine here. Related adventure: The Order of Giants.
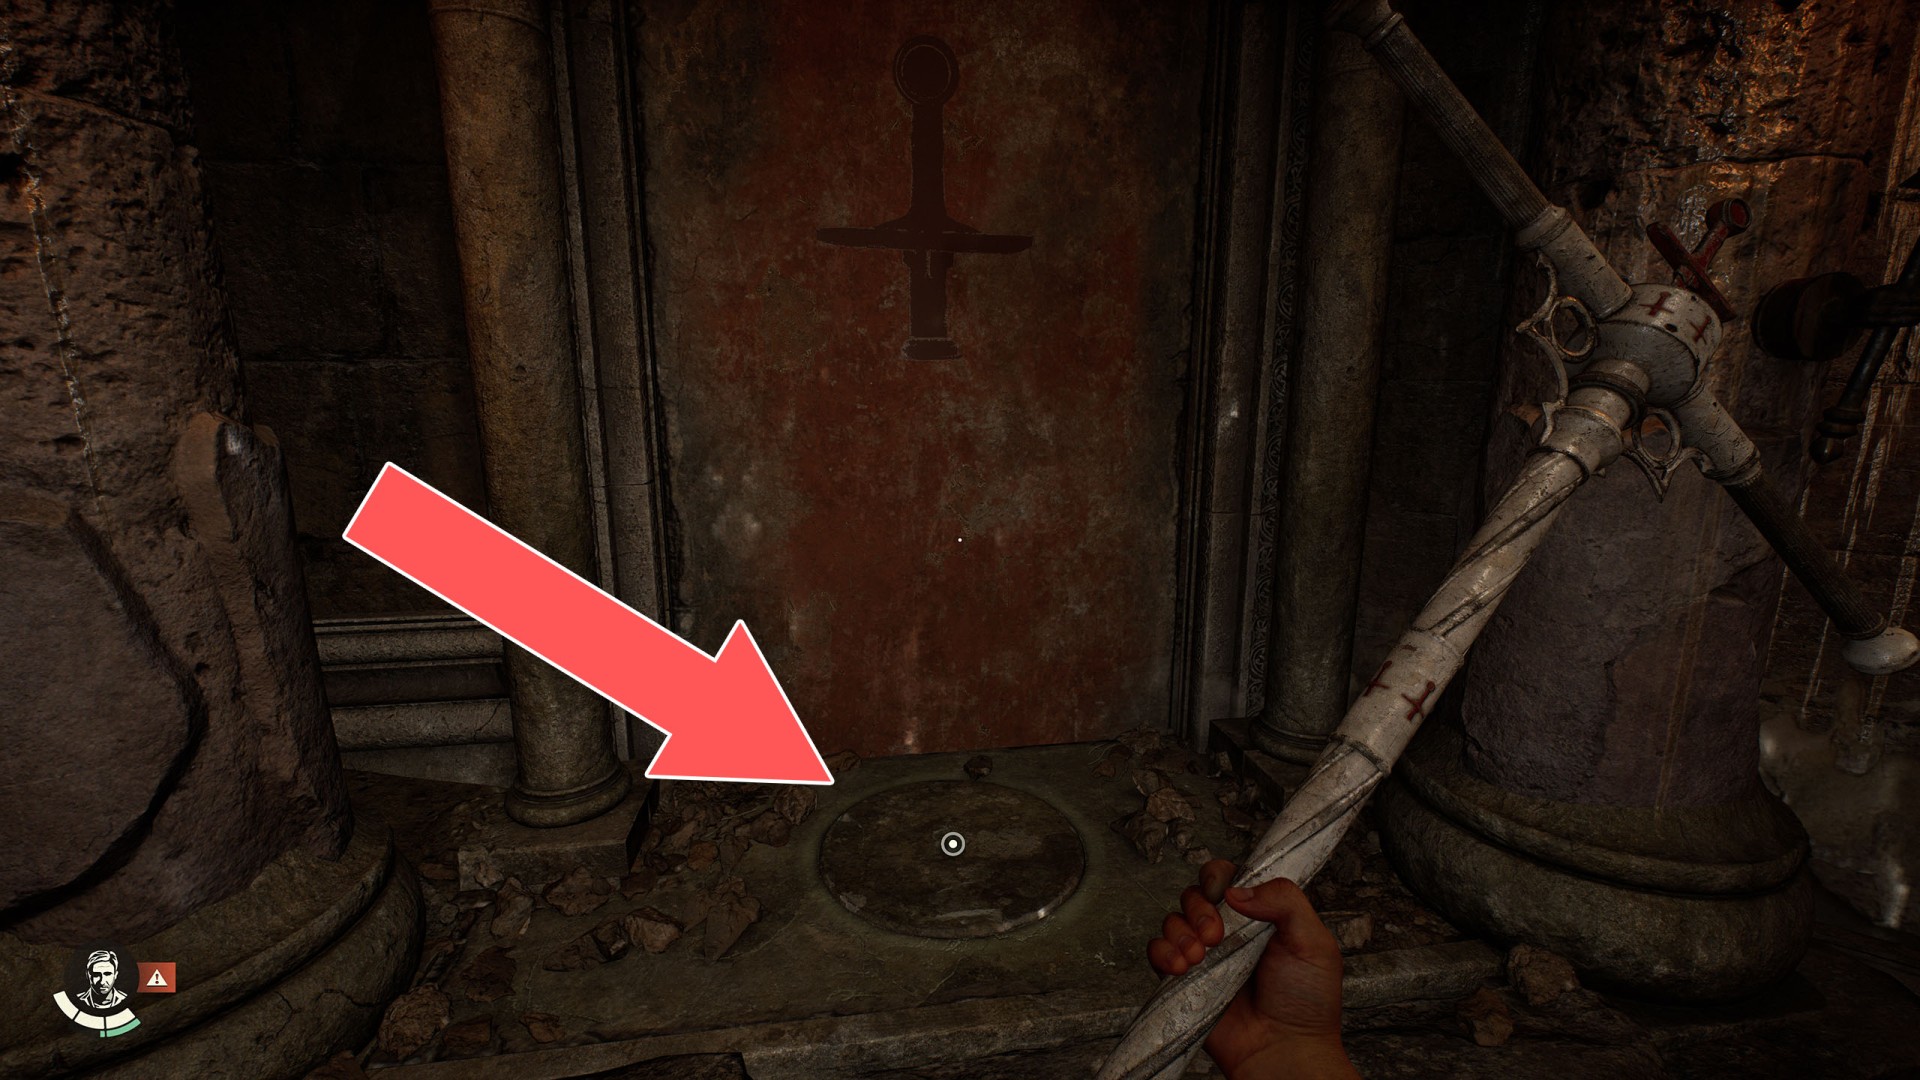
84Rudera Slot
Use the Sword Scepter and turn it once to the right. Related puzzle: Tomb of Gibborim.
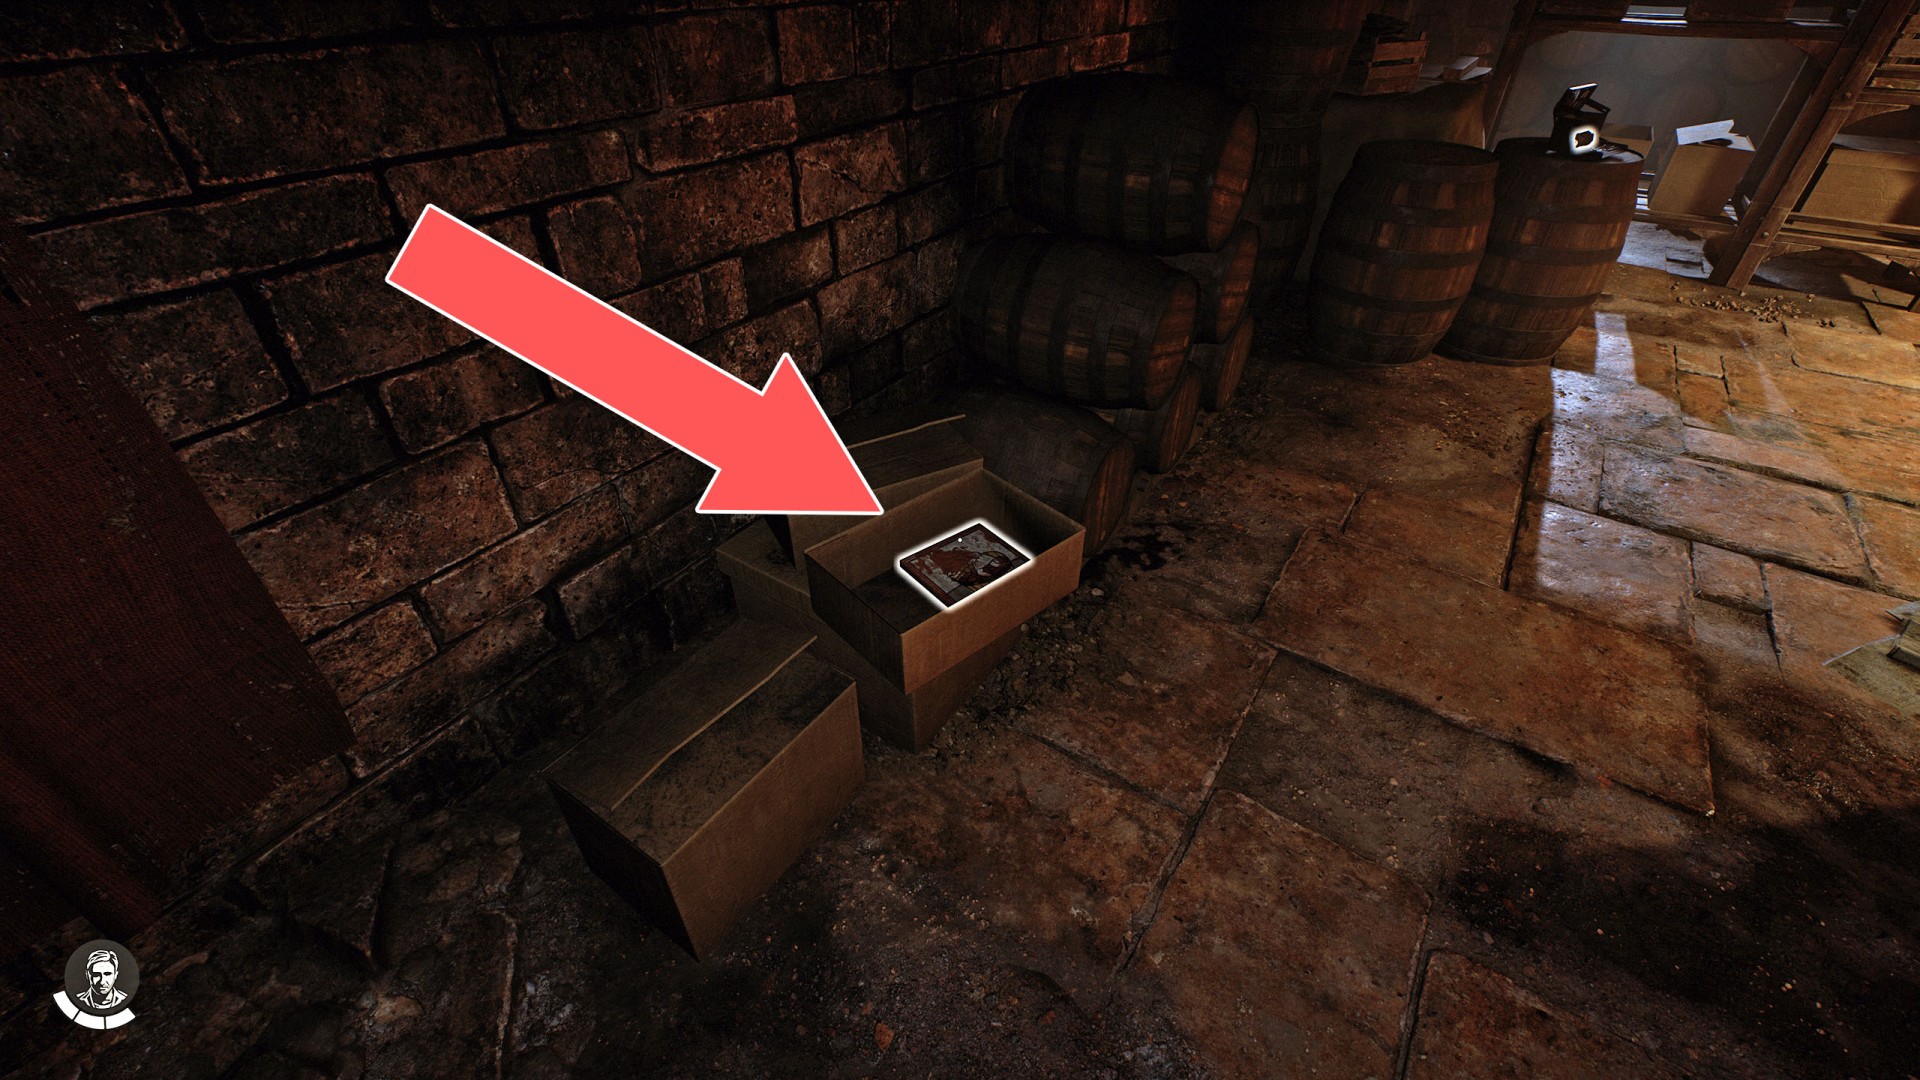
85Safe Combination
Correct combination (5-7-4-2) for opening the Cloaca Maxima Safe.
86Sancti Luciani Ecclesia Slot
Use the Trinity Scepter and turn it twice (180 degrees) in any direction. Related puzzle: Tomb of Gibborim.

87Scorpion Pillar
Related puzzle: Monster's Gate. You need to set it up as shown in the screenshot below.
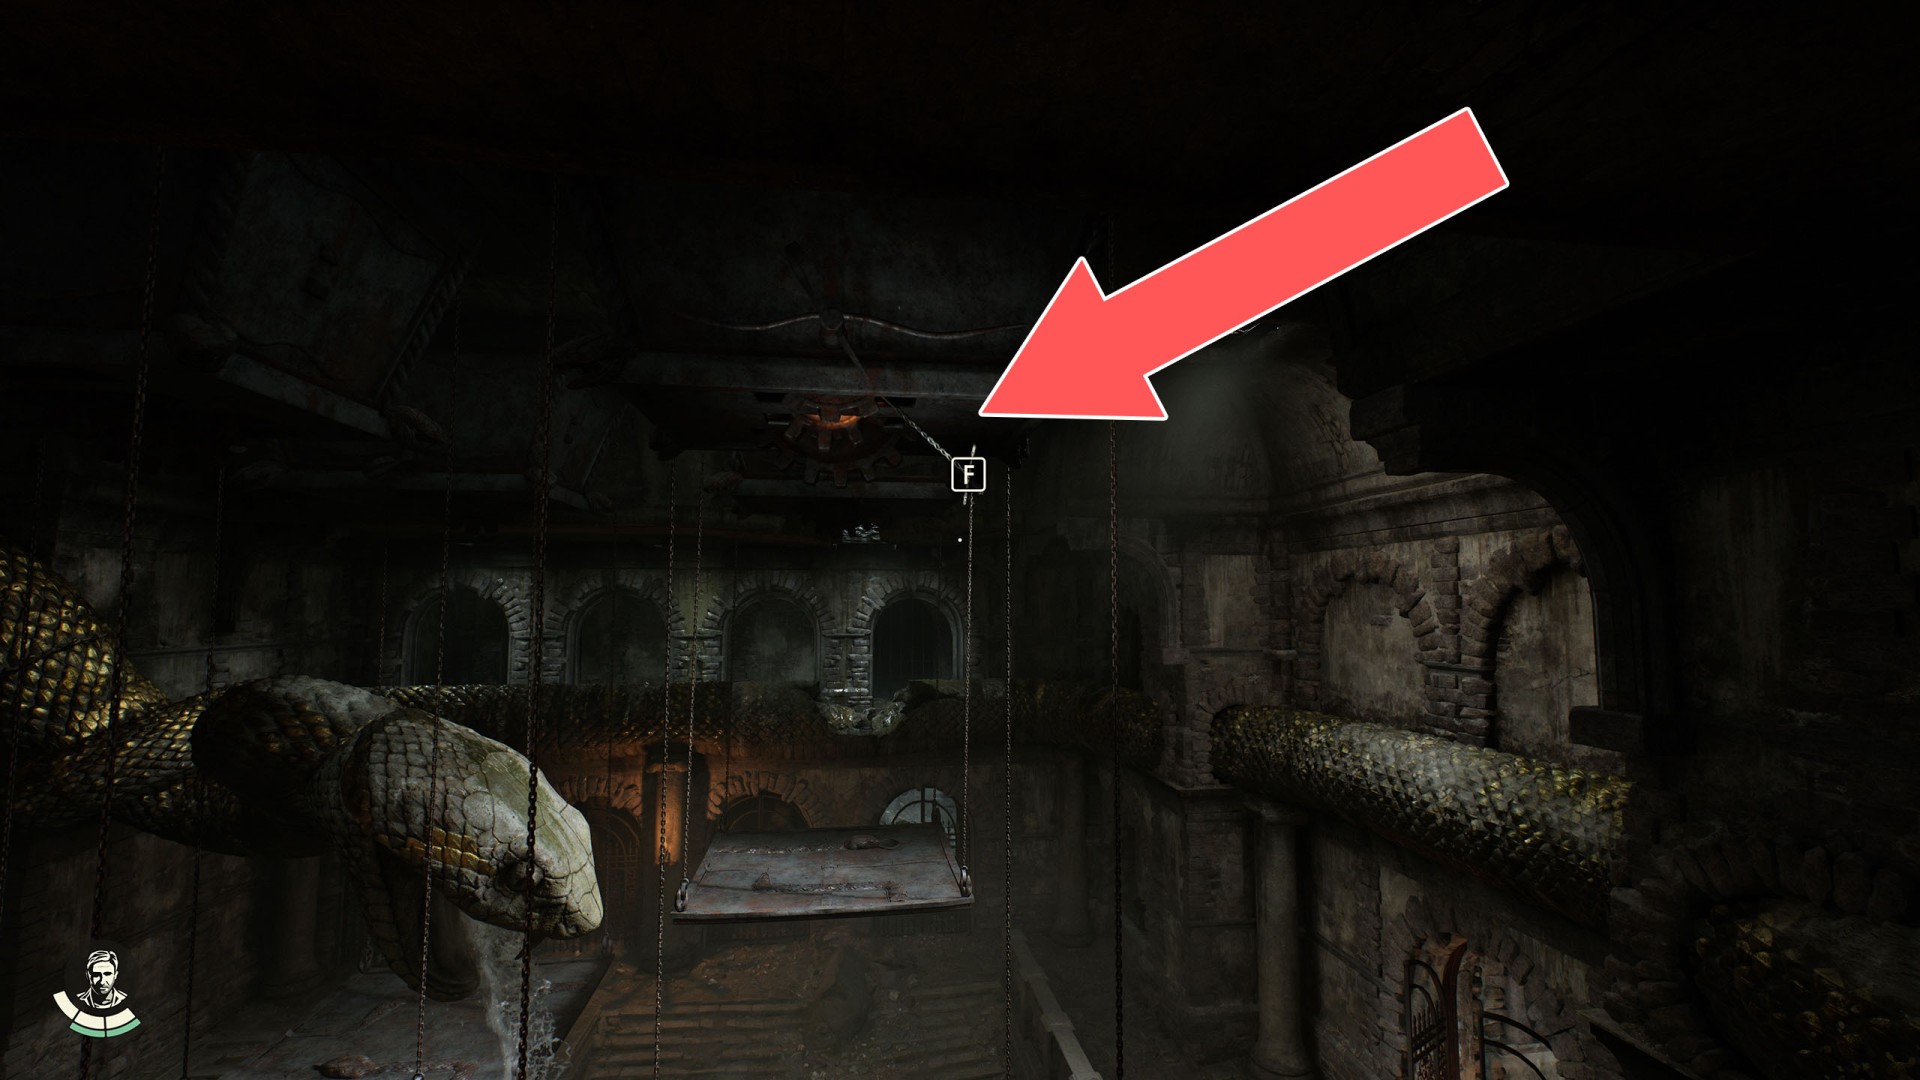
88Serpent Wrench
Related puzzle: The Water Serpent.

89Serpent Wrench
This wrench got stuck in the mechanism that lifts one of the platforms. At some point in solving The Water Serpent puzzle, you will have to remove it with your whip.
90Shield Handle #1
Related puzzle: Tomb of Gibborim.
91Shield Handle #2
Related puzzle: Tomb of Gibborim.
92Shield Handle #3
Related puzzle: Tomb of Gibborim.
93Shield Scepter
Related puzzle: Tomb of Gibborim.
94Shield Slot
Related puzzle: Tomb of Gibborim.
95Shield Symbol Handle (2)
Related puzzle: Tomb of Gibborim.
96Snake Pillar
Related puzzle: Monster's Gate. You need to set it up as shown in the screenshot below.
97Snake Symbol Handle (4)
Related puzzle: Tomb of Gibborim.
98Statue's Hand
Related puzzle: Gladiator Shrine. Place the Giant Blade here.
99Storage Shed Safe
Safe combination: 1-2-3-4. You can find this combination in DiMaggio's Note.
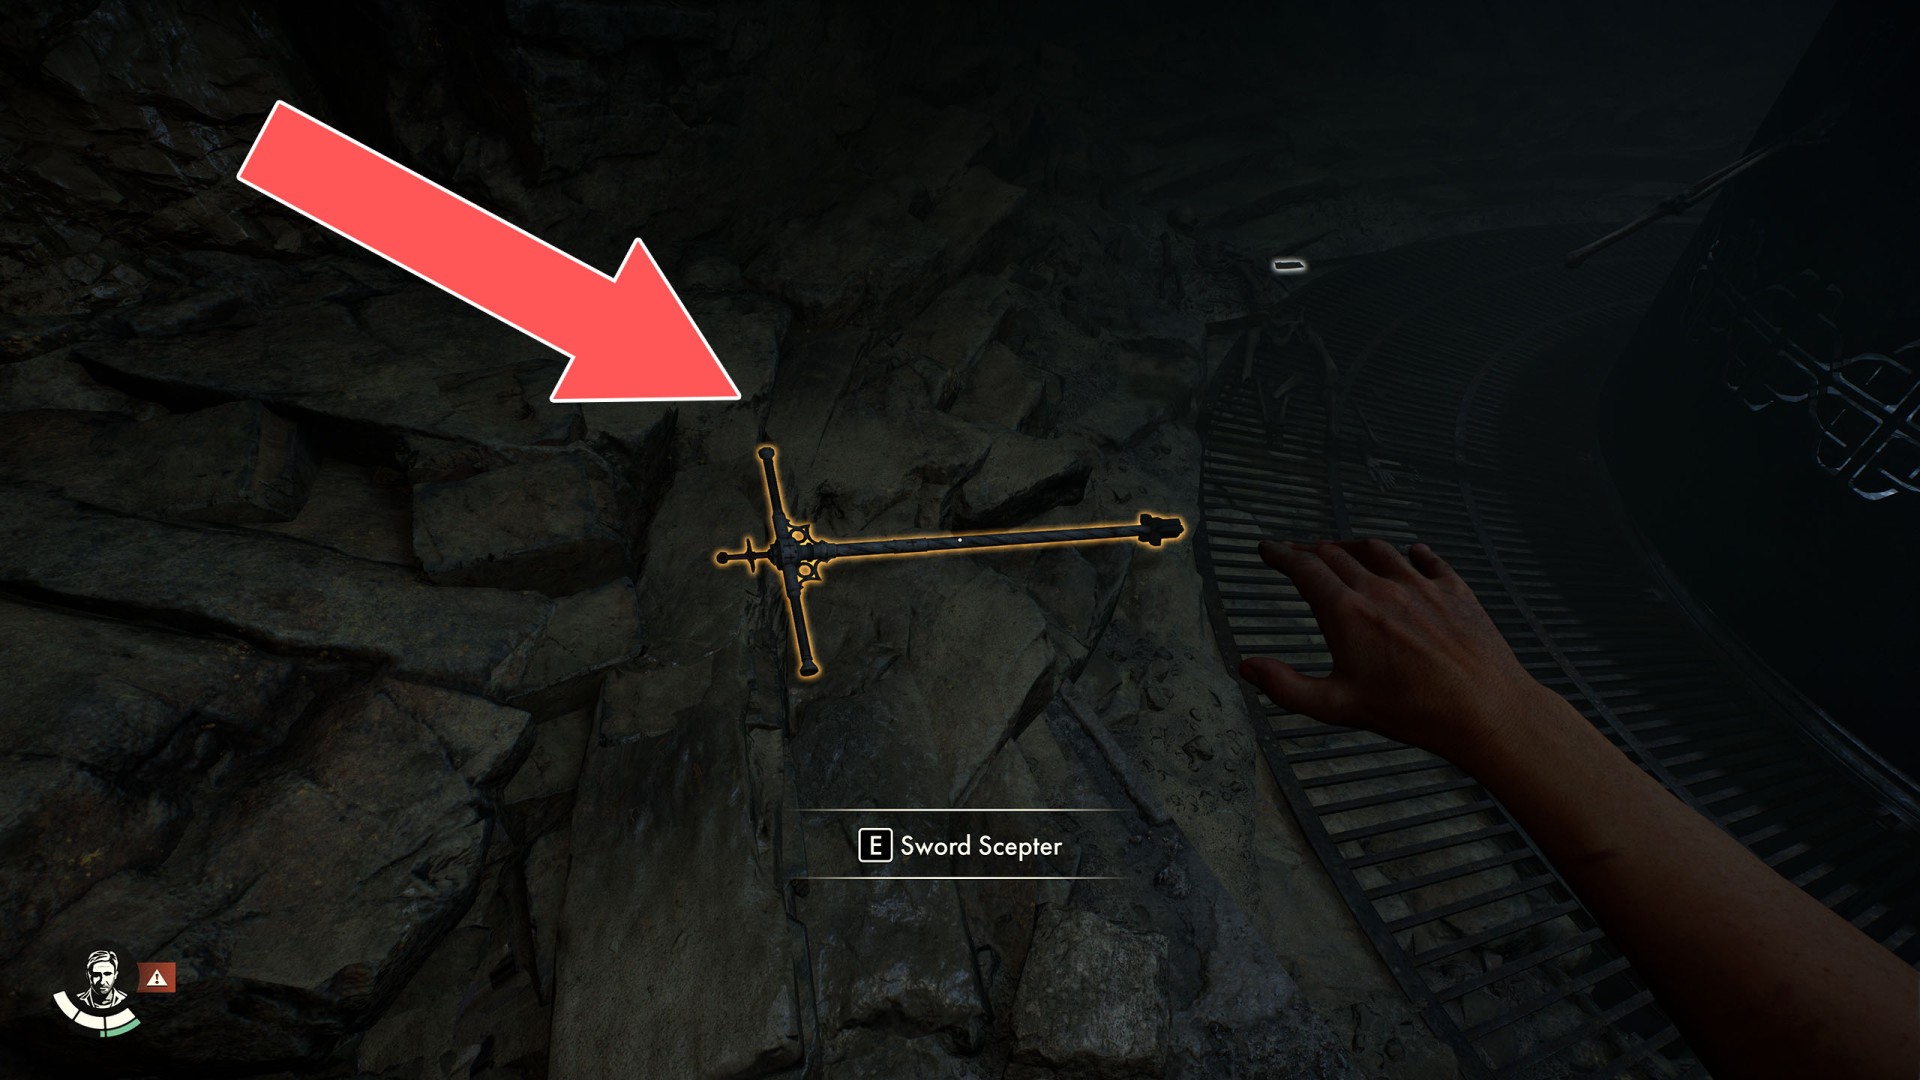
100Sword Scepter
Related puzzle: Tomb of Gibborim.
101Sword Slot
Related puzzle: Tomb of Gibborim.
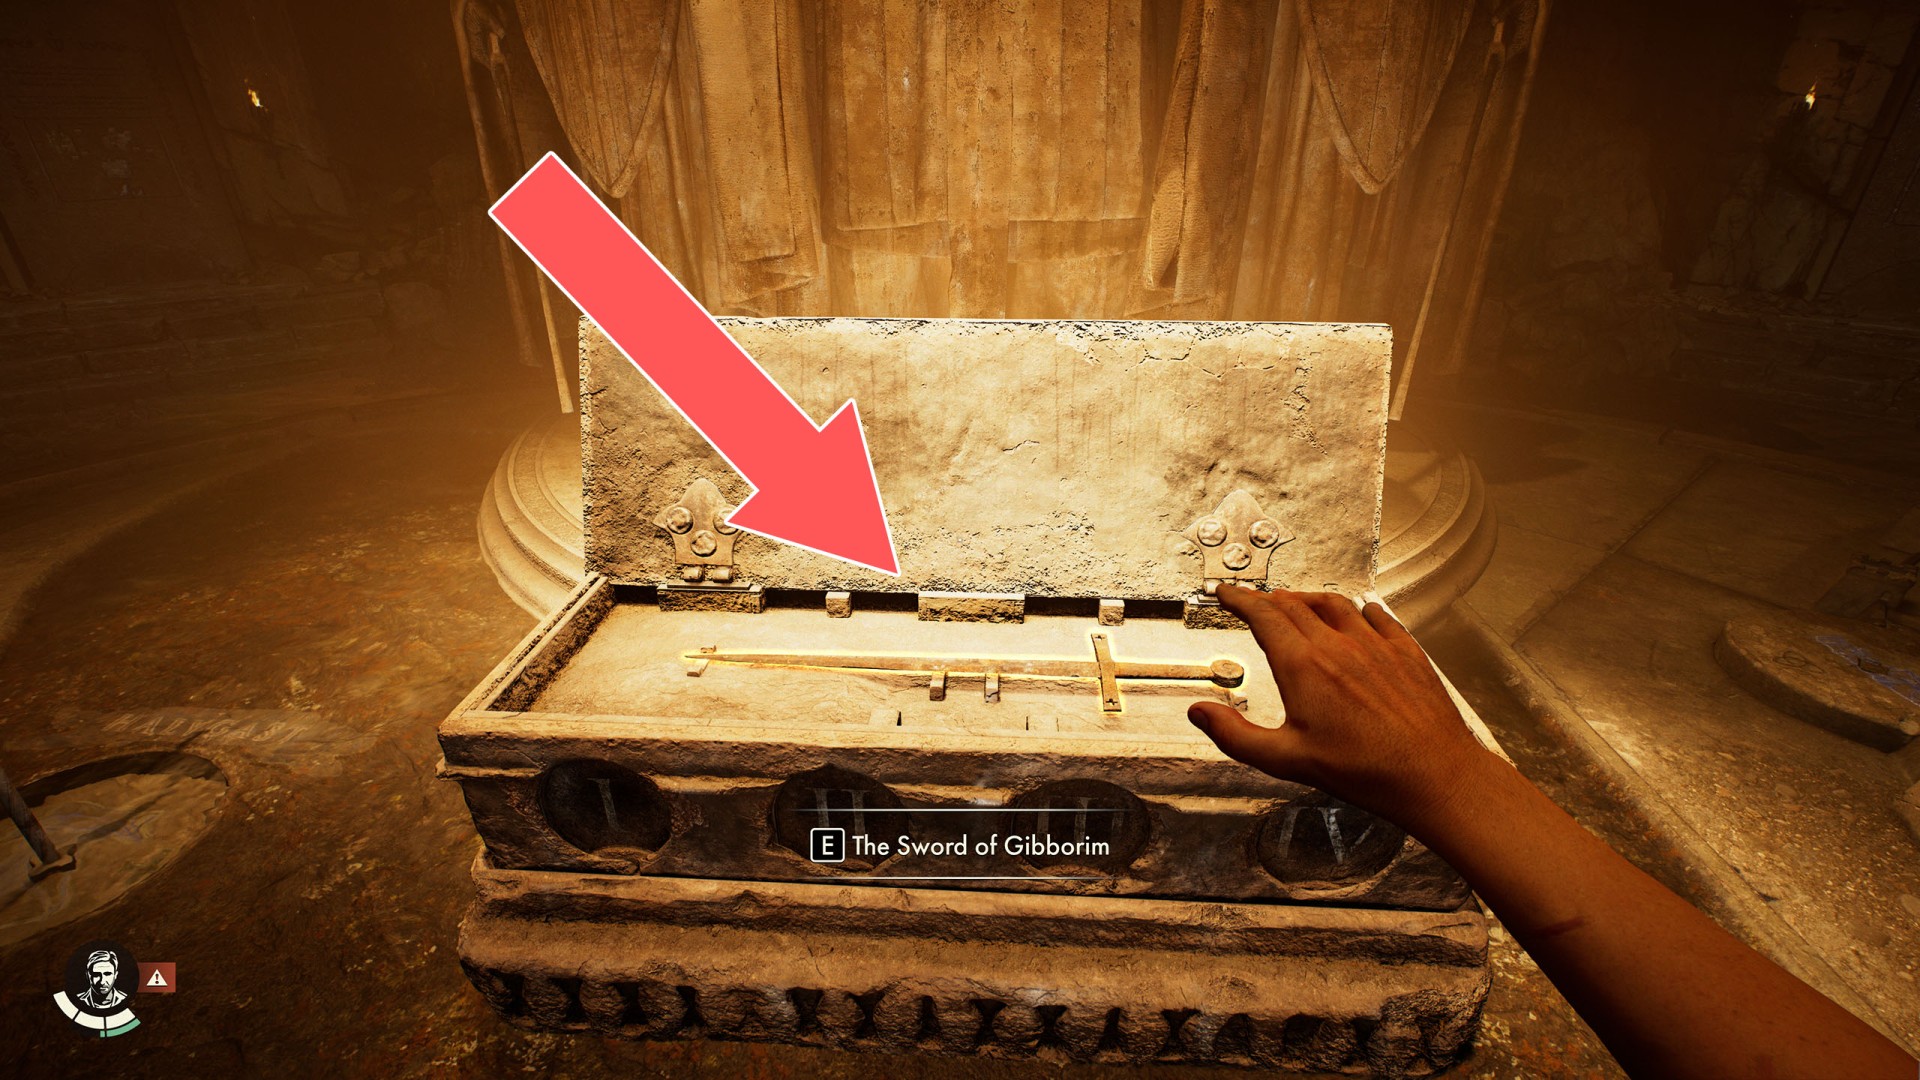
102The Sword of Gibborim
Related puzzle: Tomb of Gibborim.
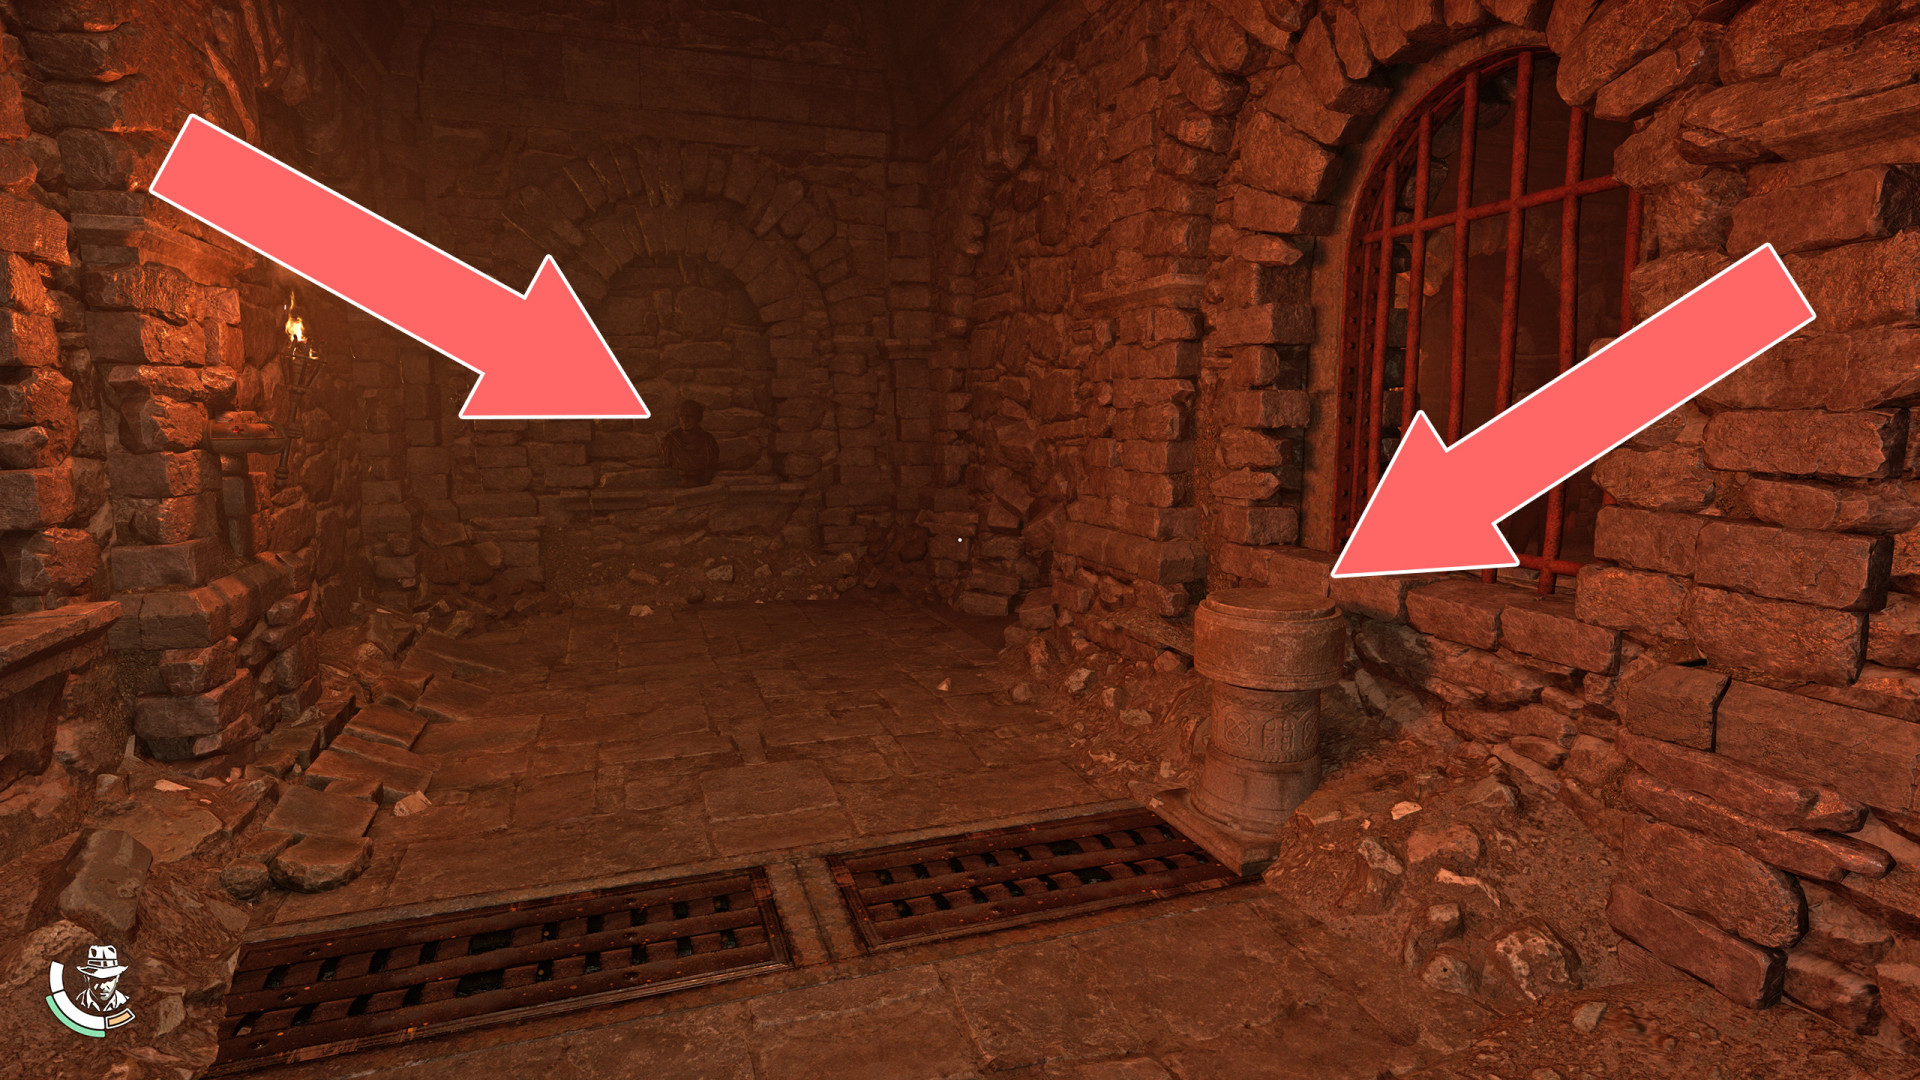
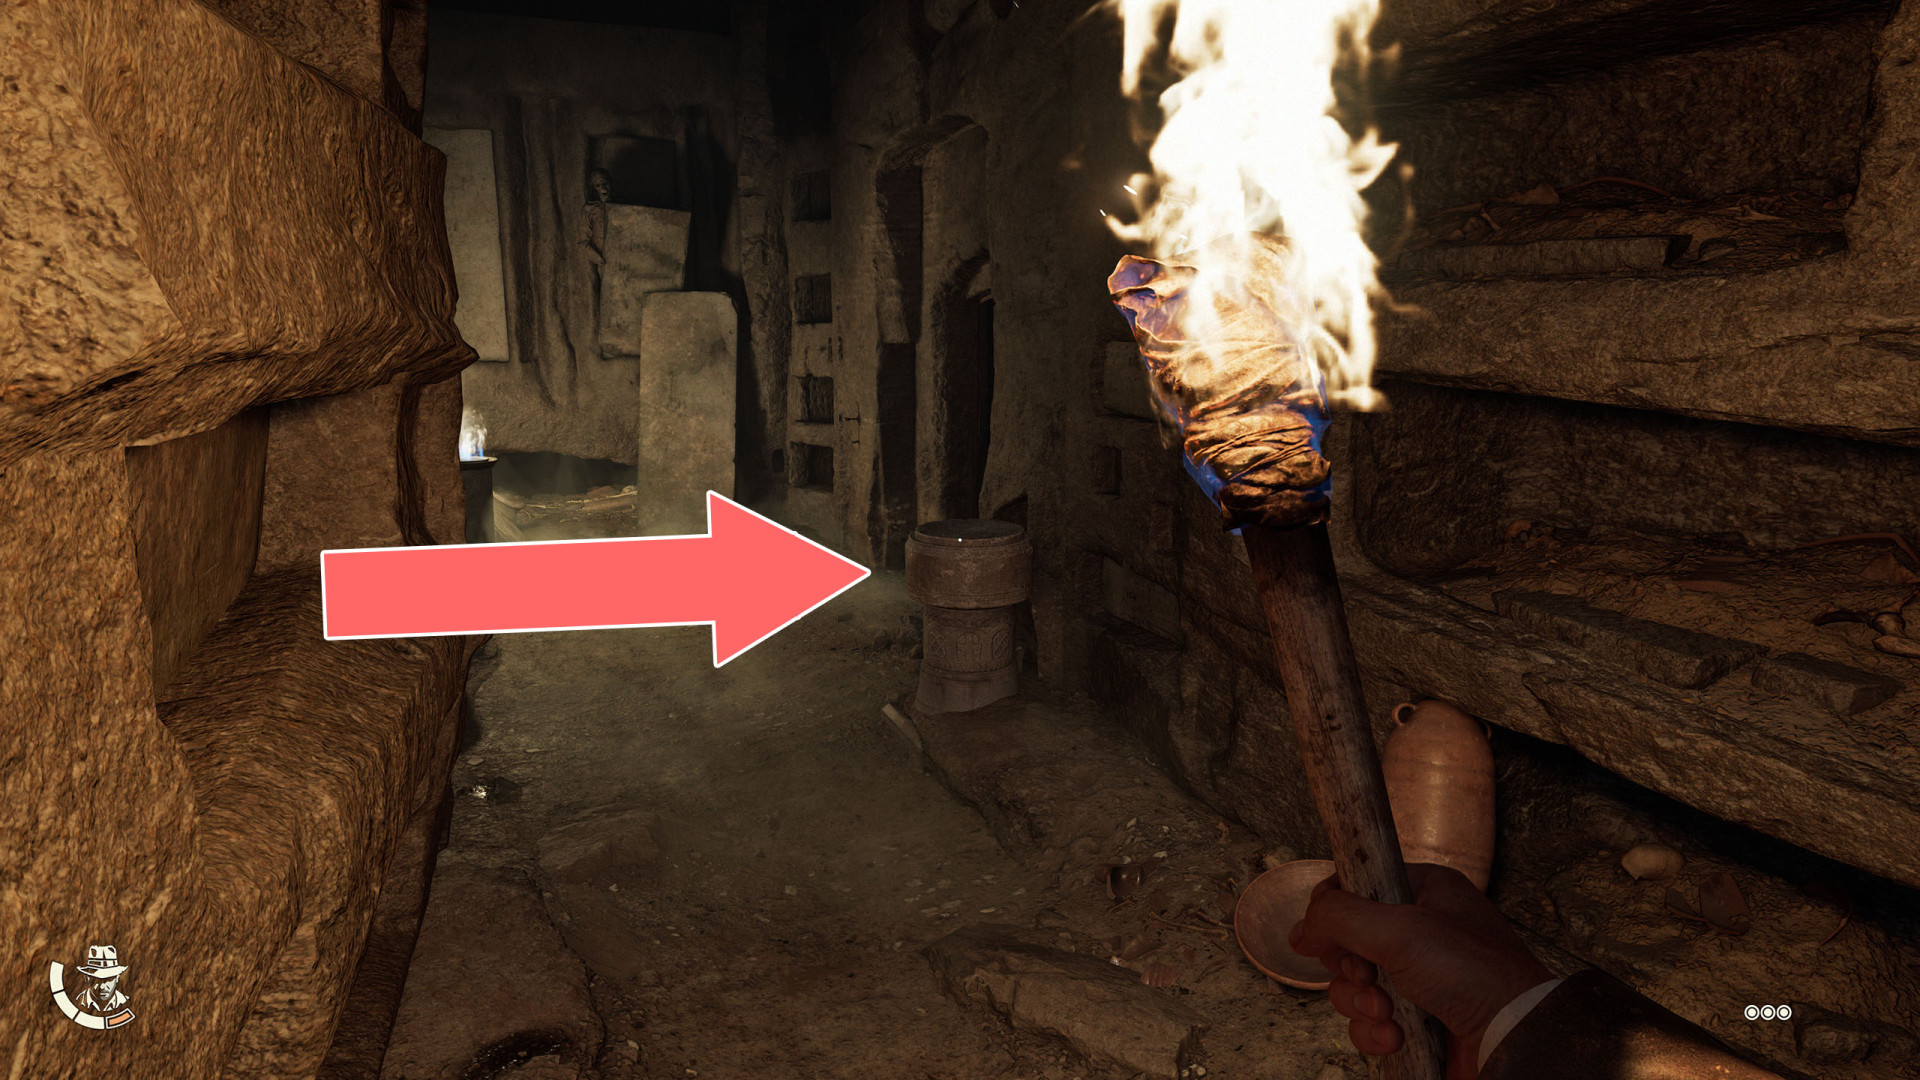
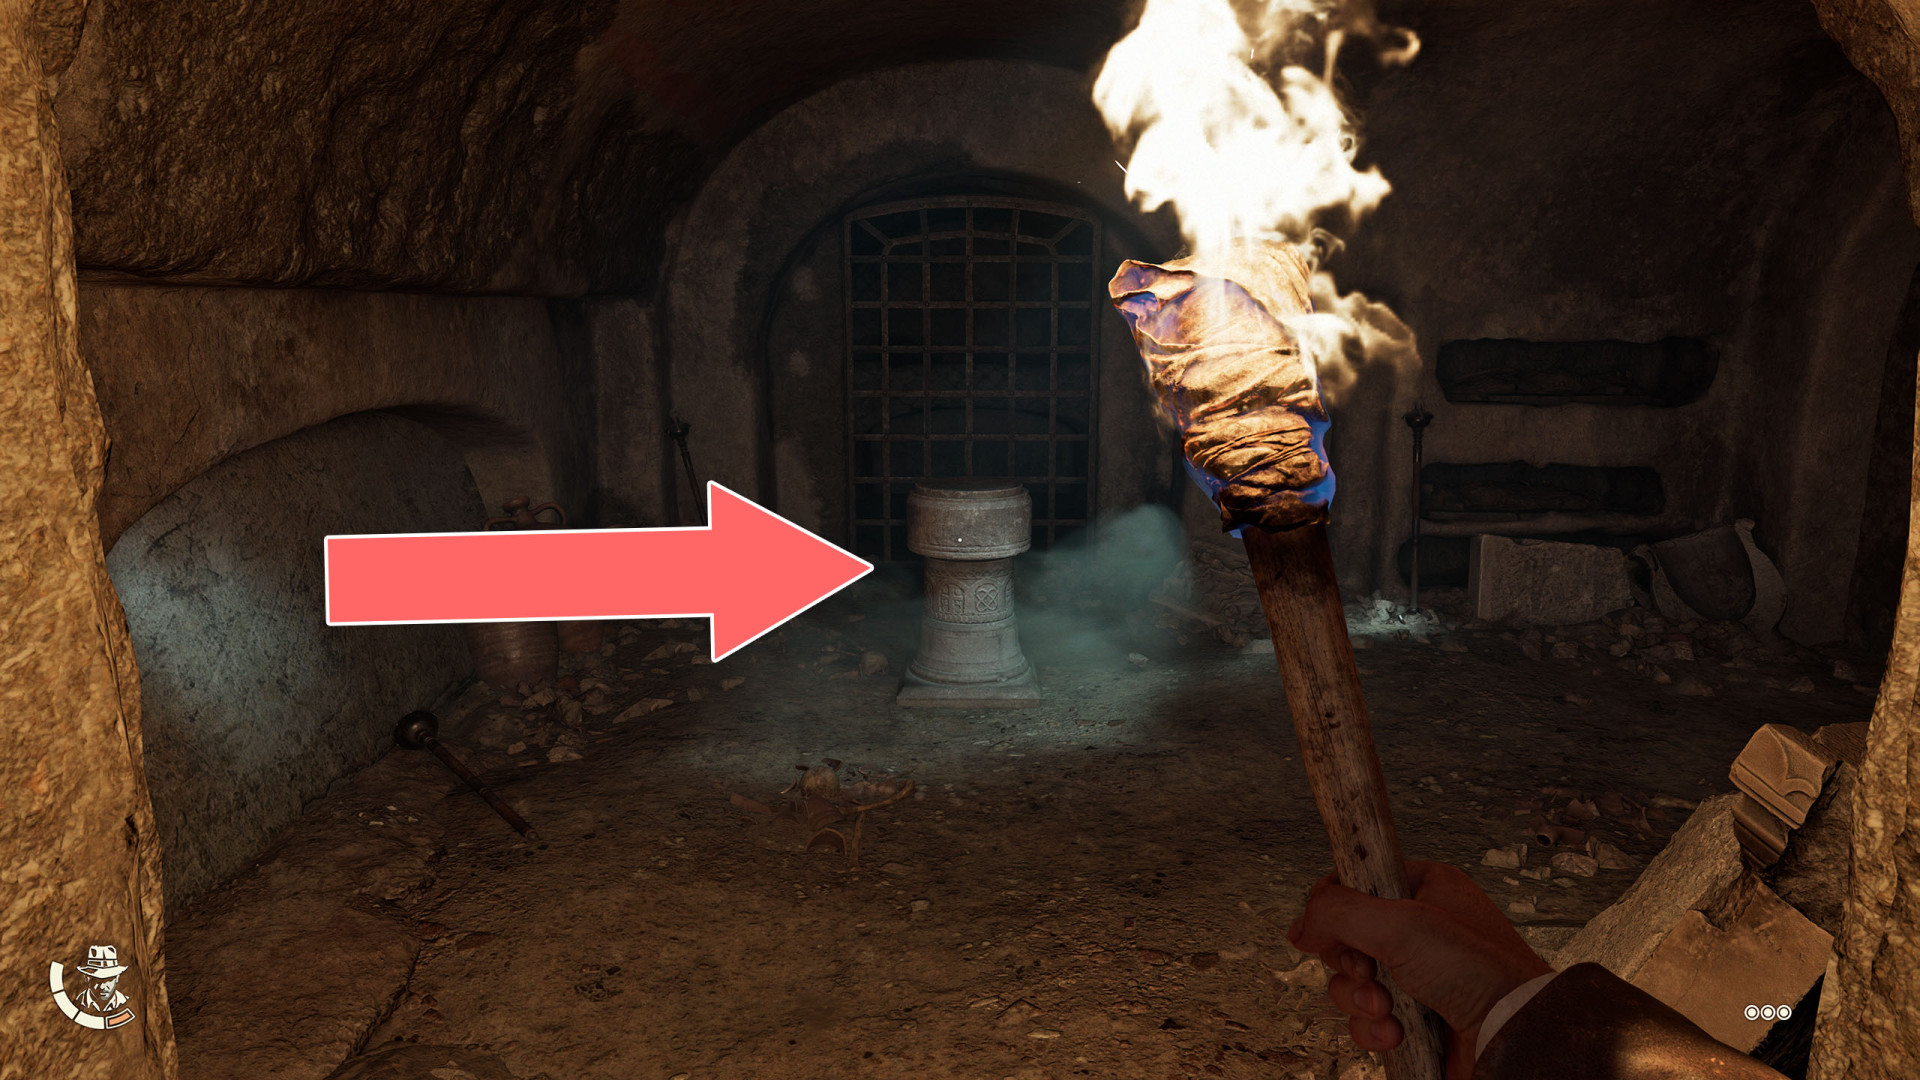
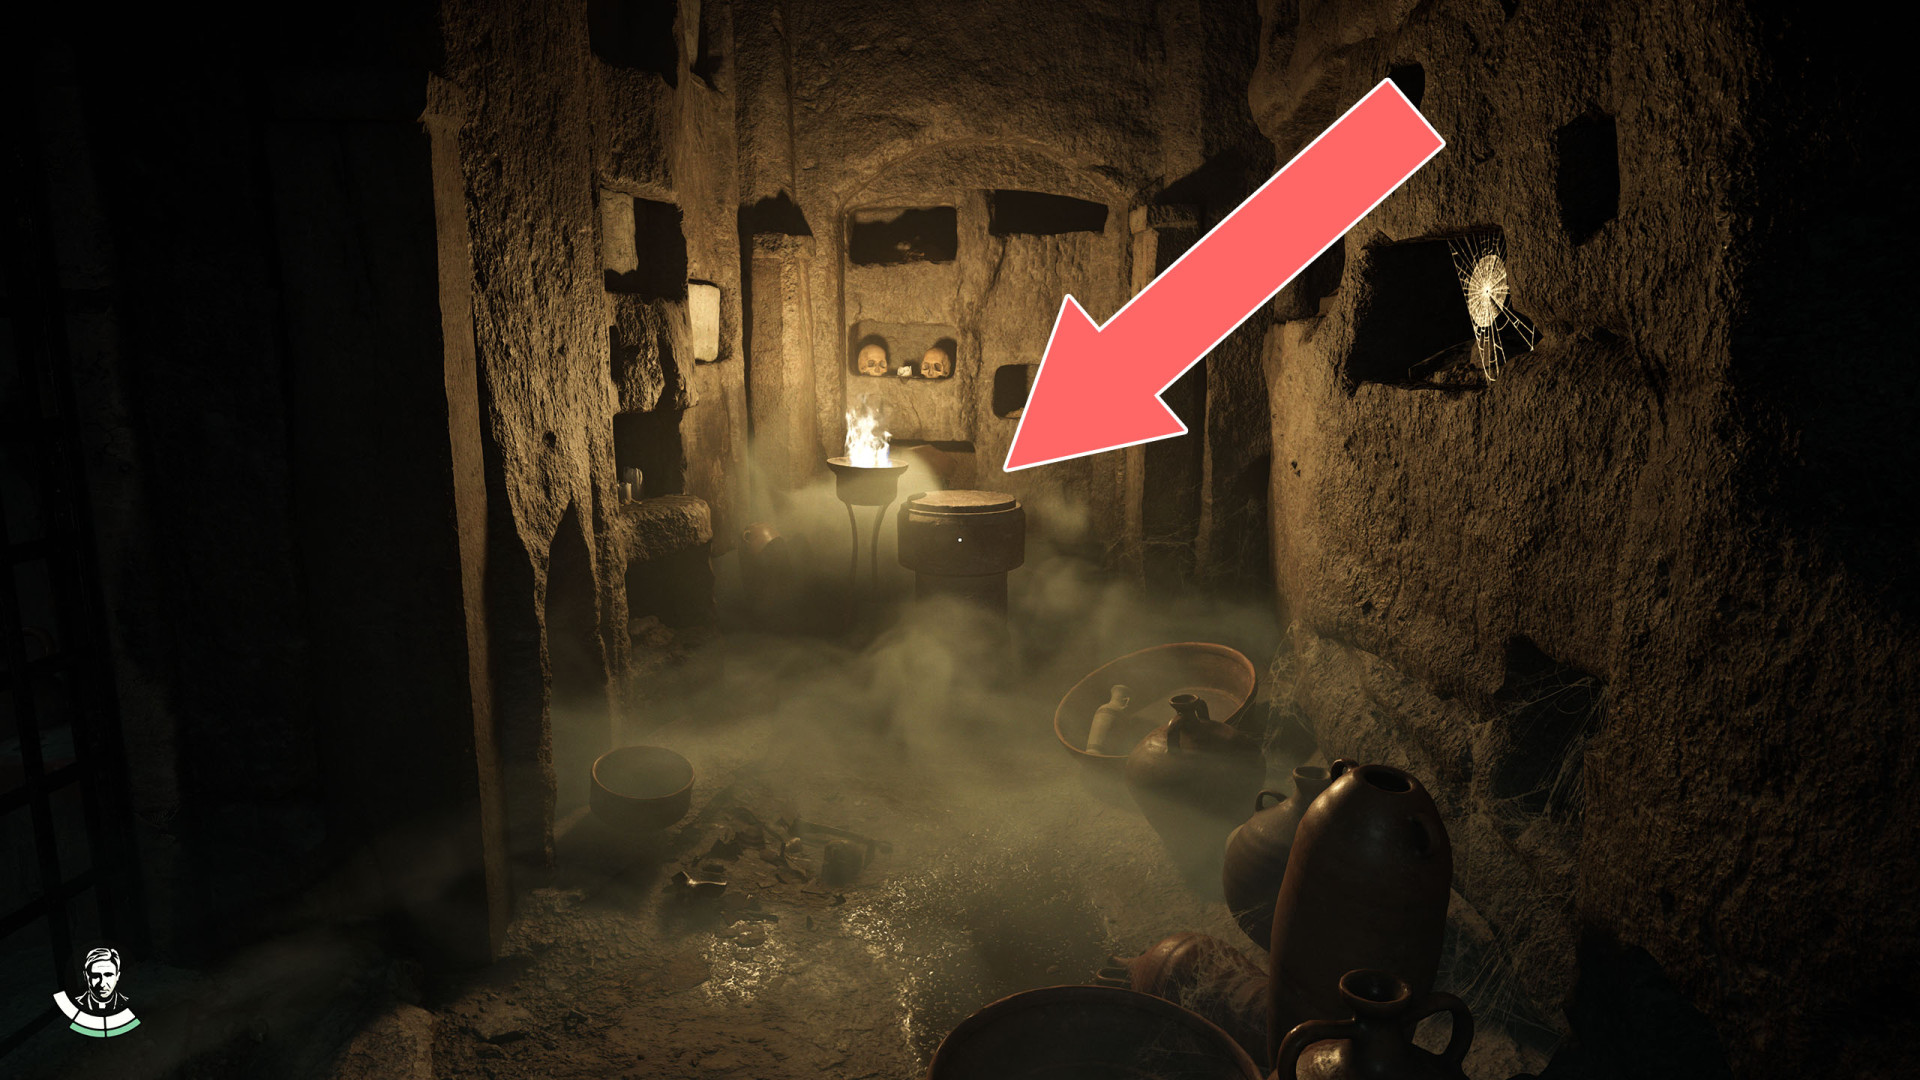
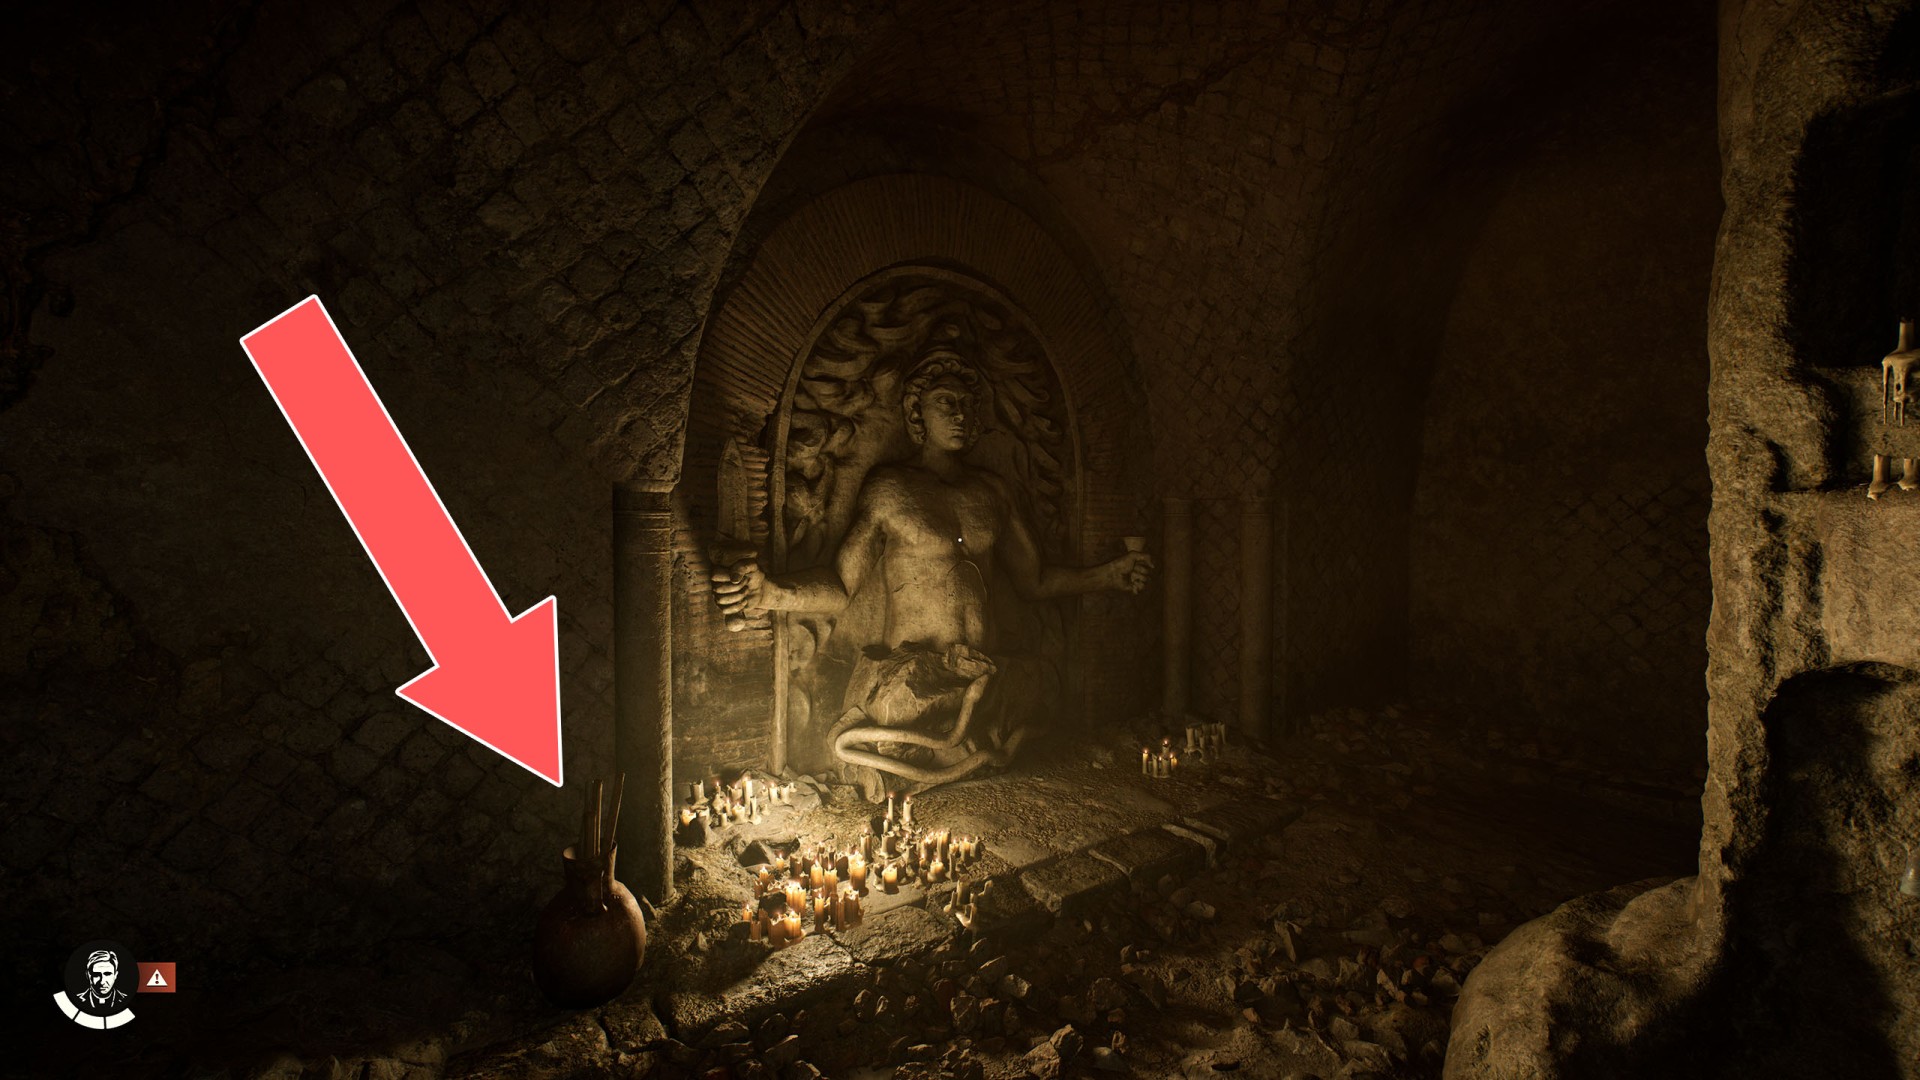
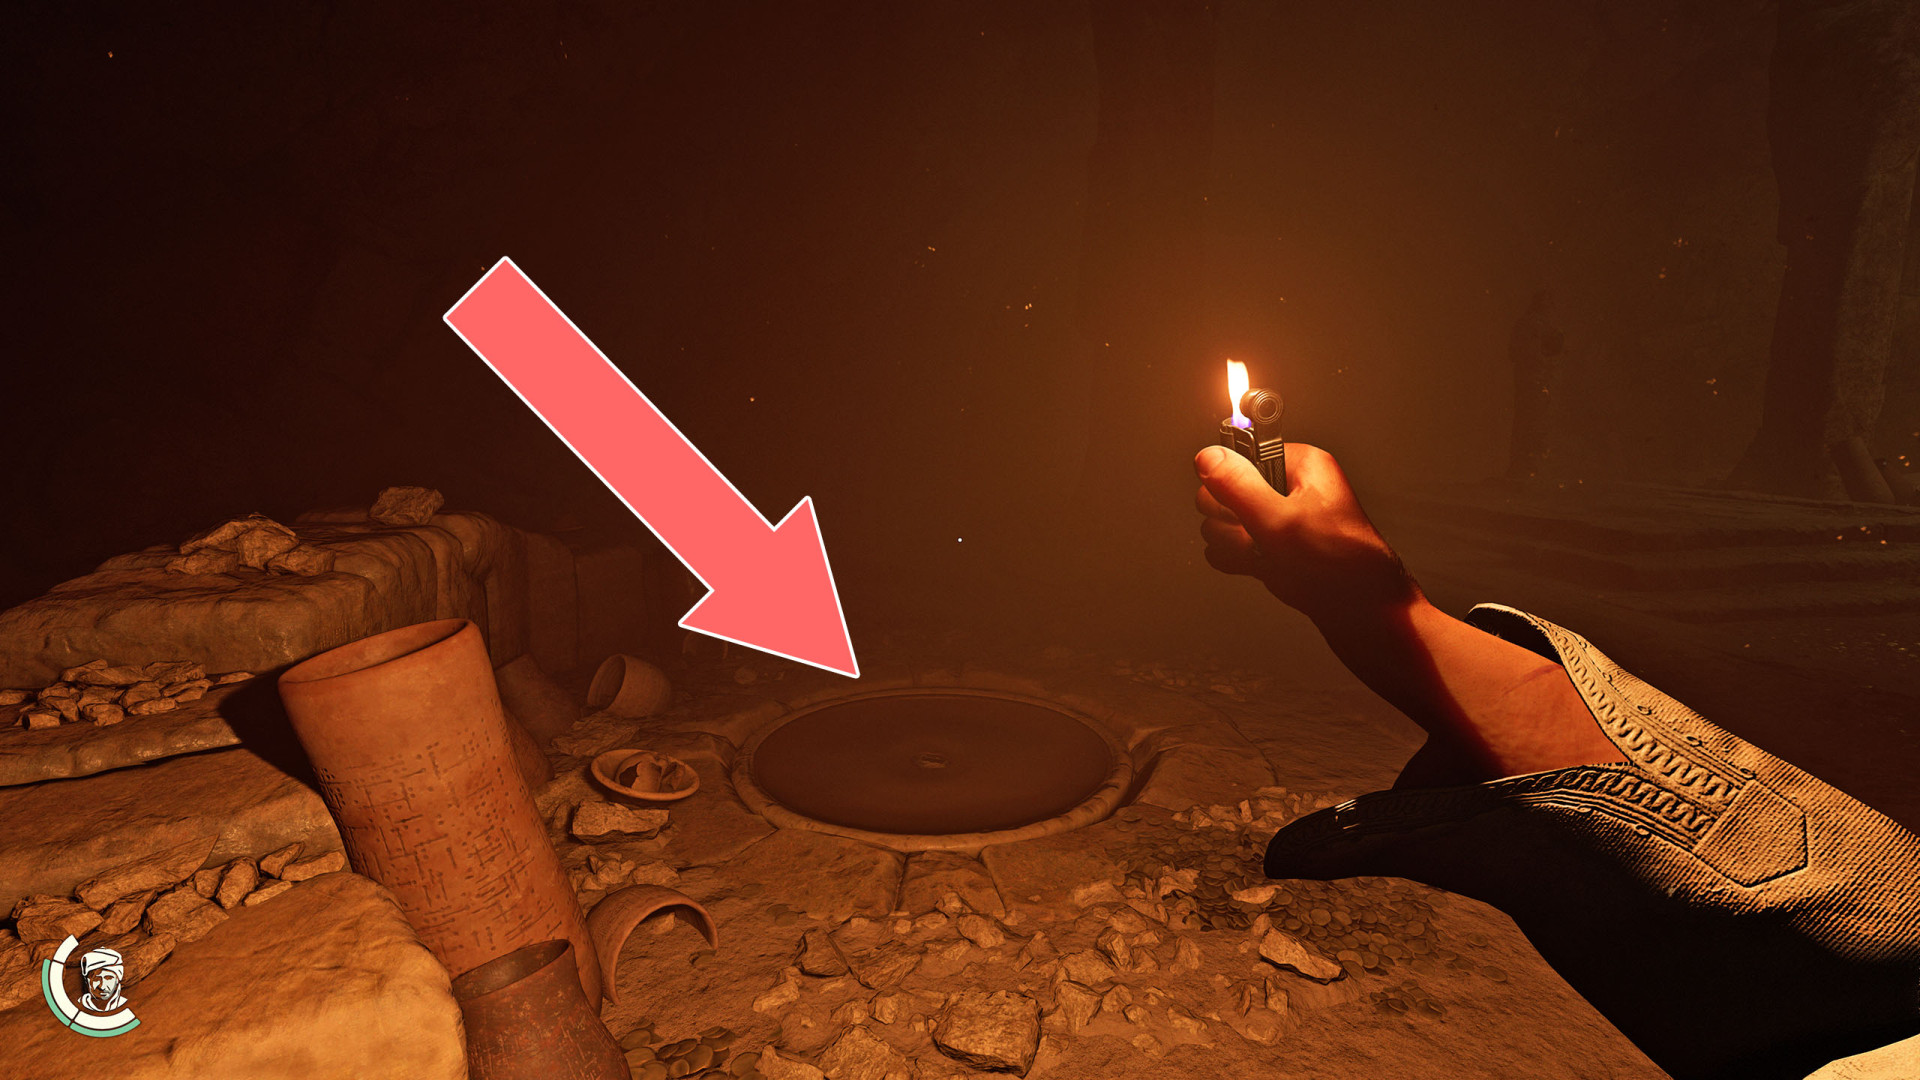
103Torches
A jug with torches. Use one of them to get the Pater Artifact.
104Trinity Scepter
Related puzzle: Tomb of Gibborim.
105Trinity Slot
Related puzzle: Tomb of Gibborim.
106Weight (1)
107Weight (3)
108Weight x3 (2) (2) (1)
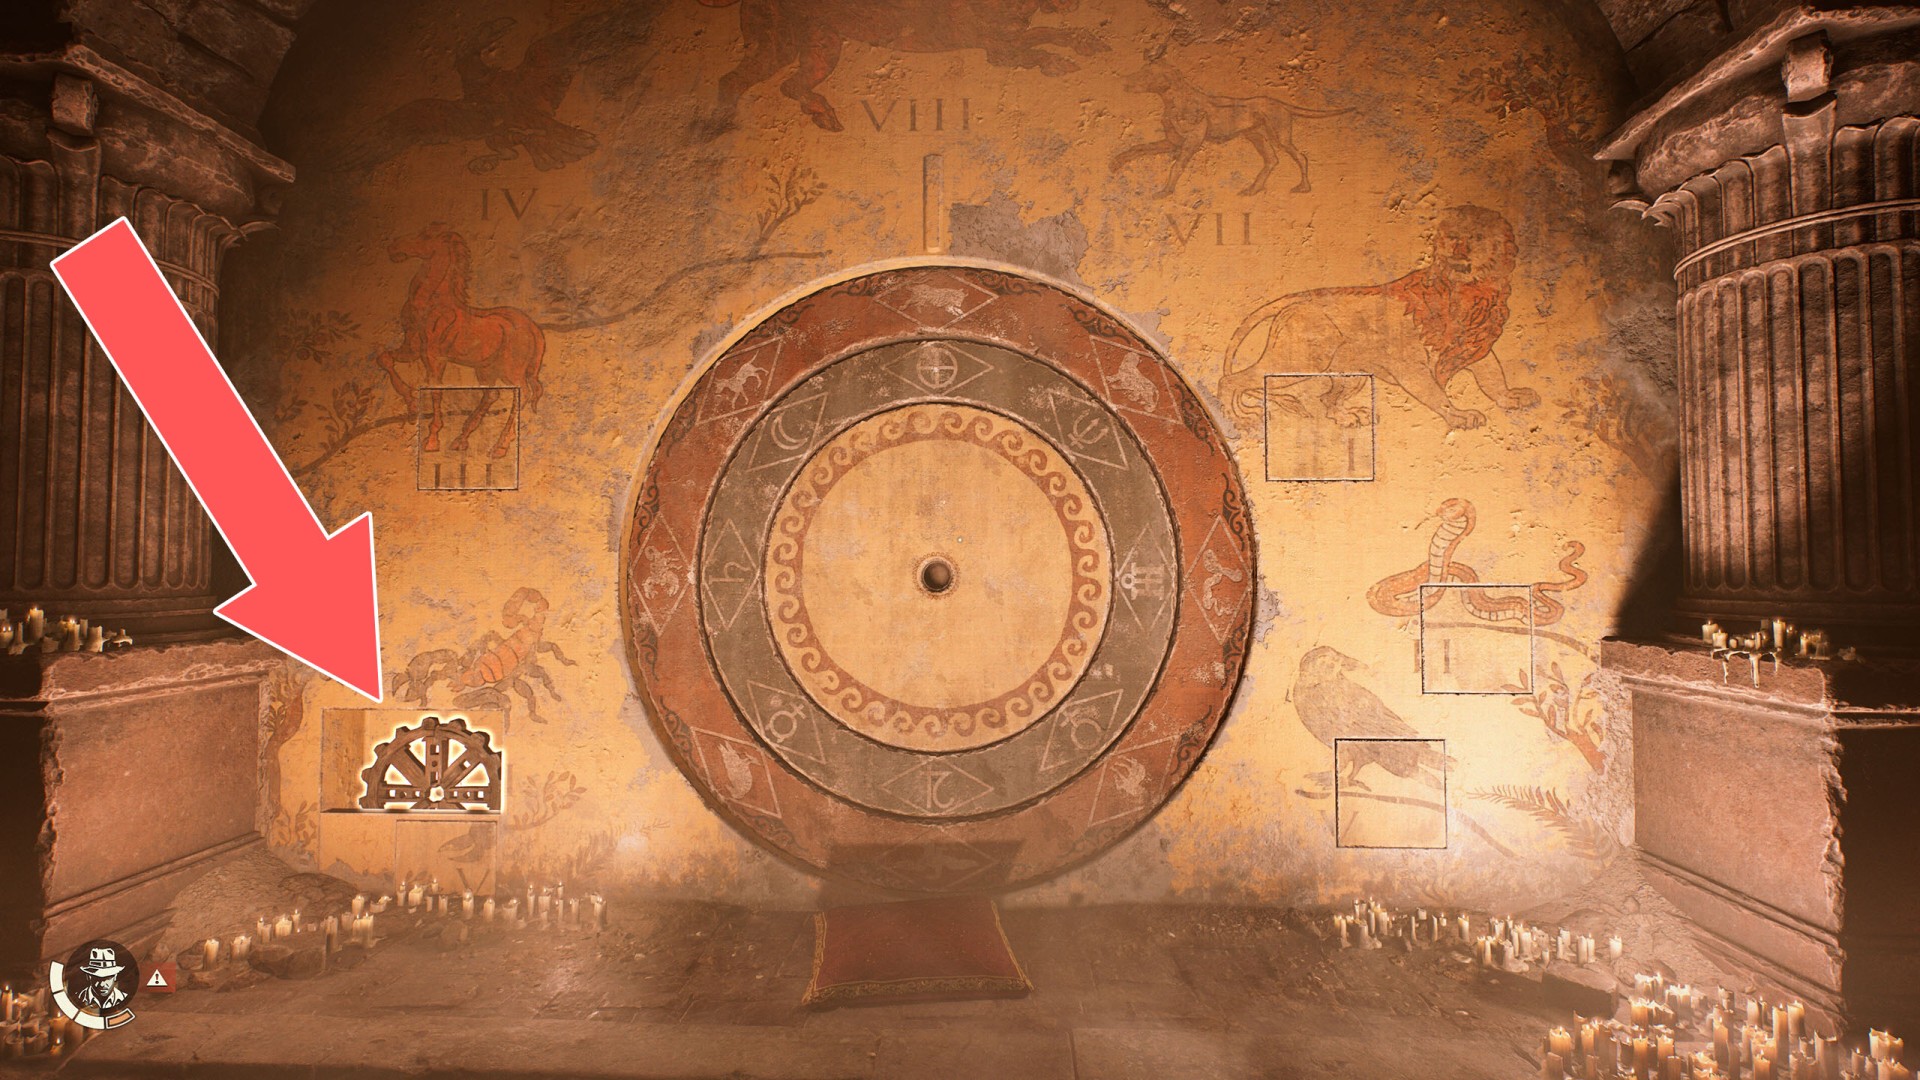
109Wooden Cog
Related puzzle: Monster's Gate. To open the cache containing this cog, you must collect the panels lying on the ground and place them in the appropriate slots on the mural. You must match the fragments to complete the images of the animals.
Locations on Gizeh
110Baboon Canopic Jar
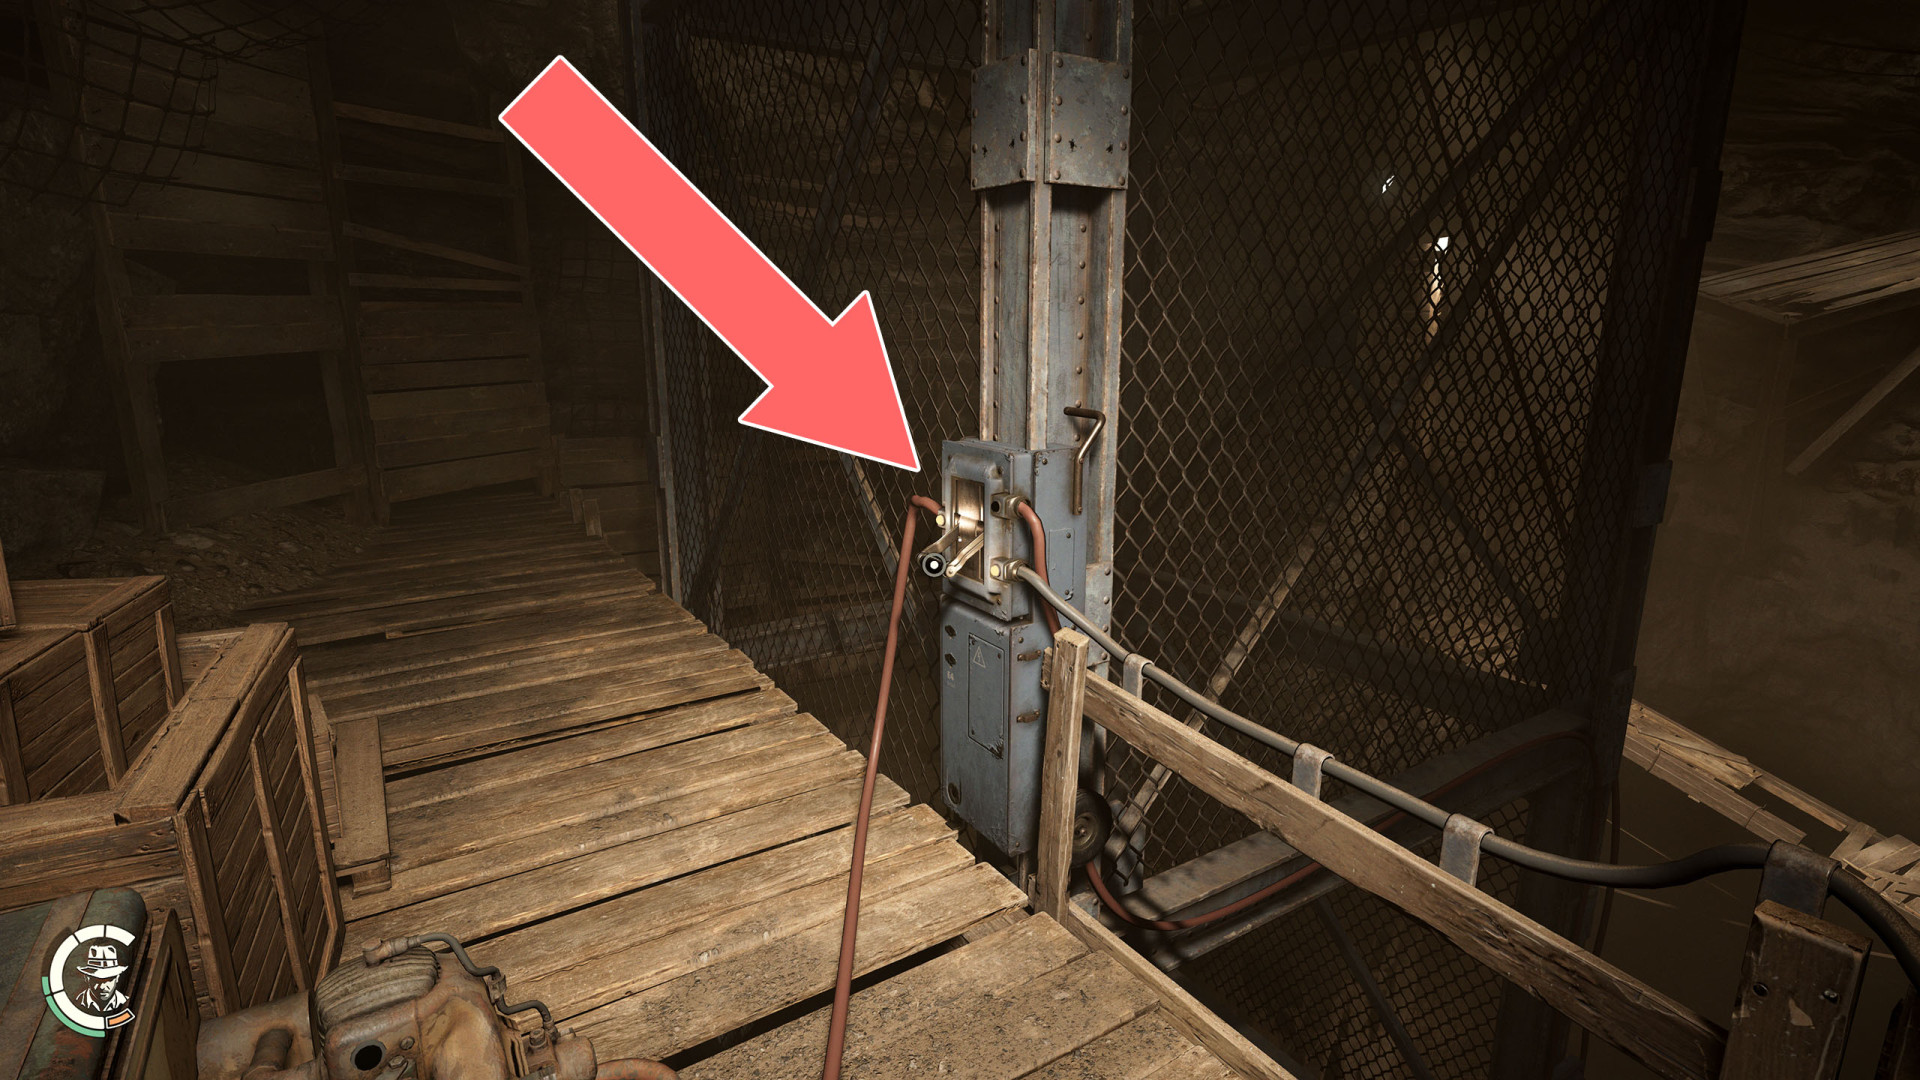
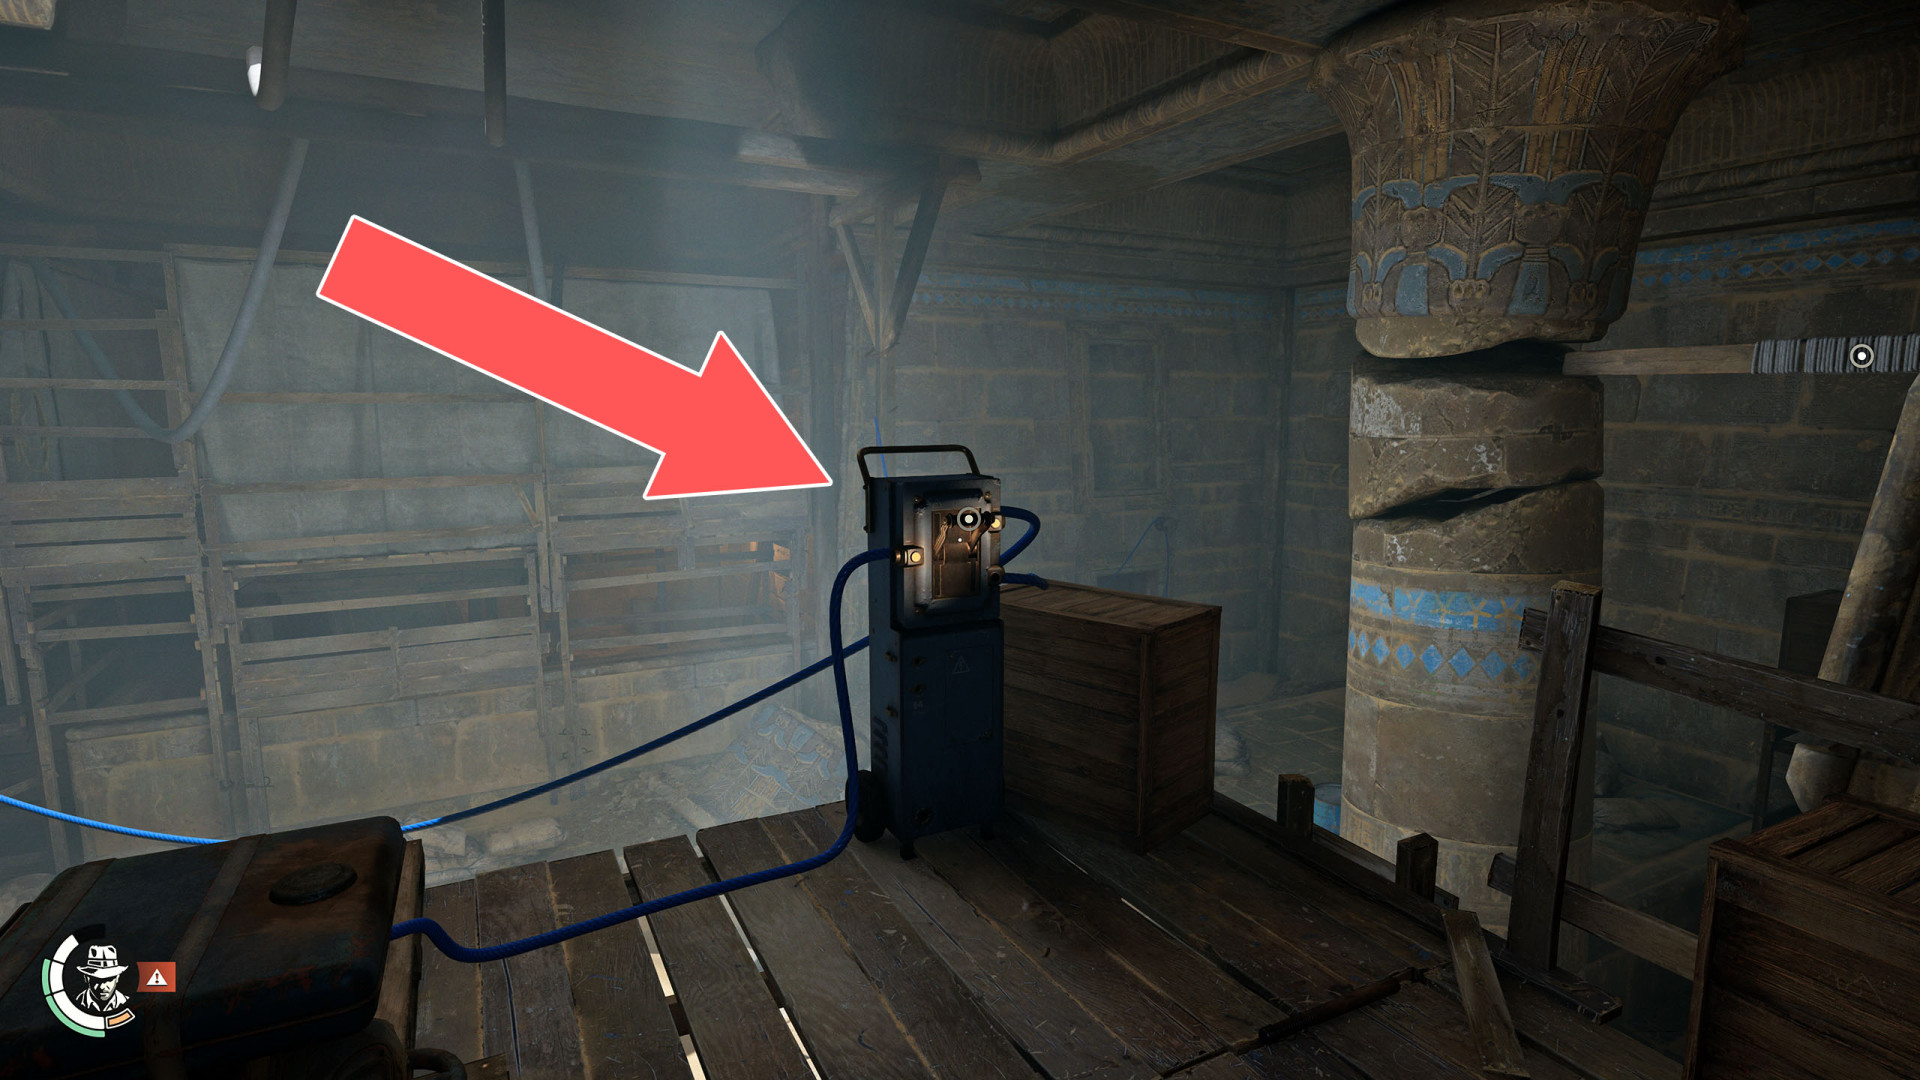
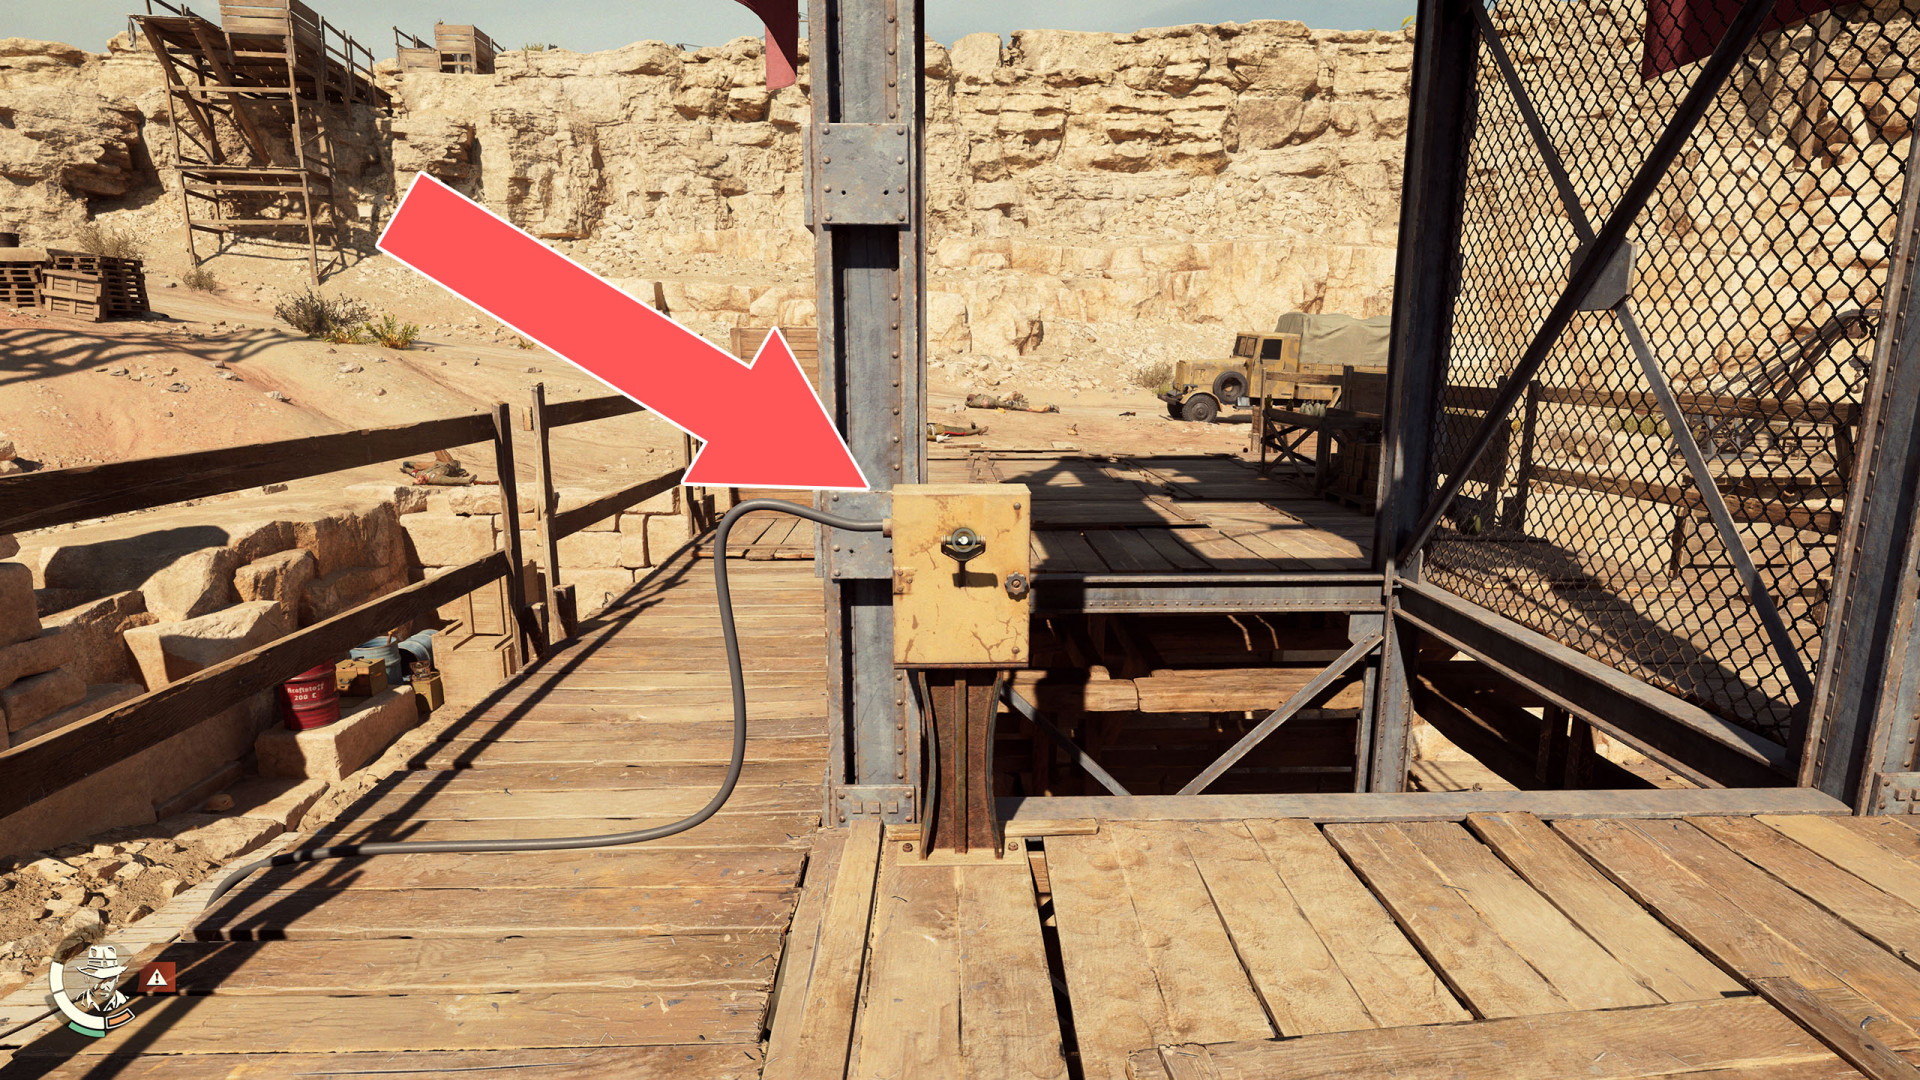
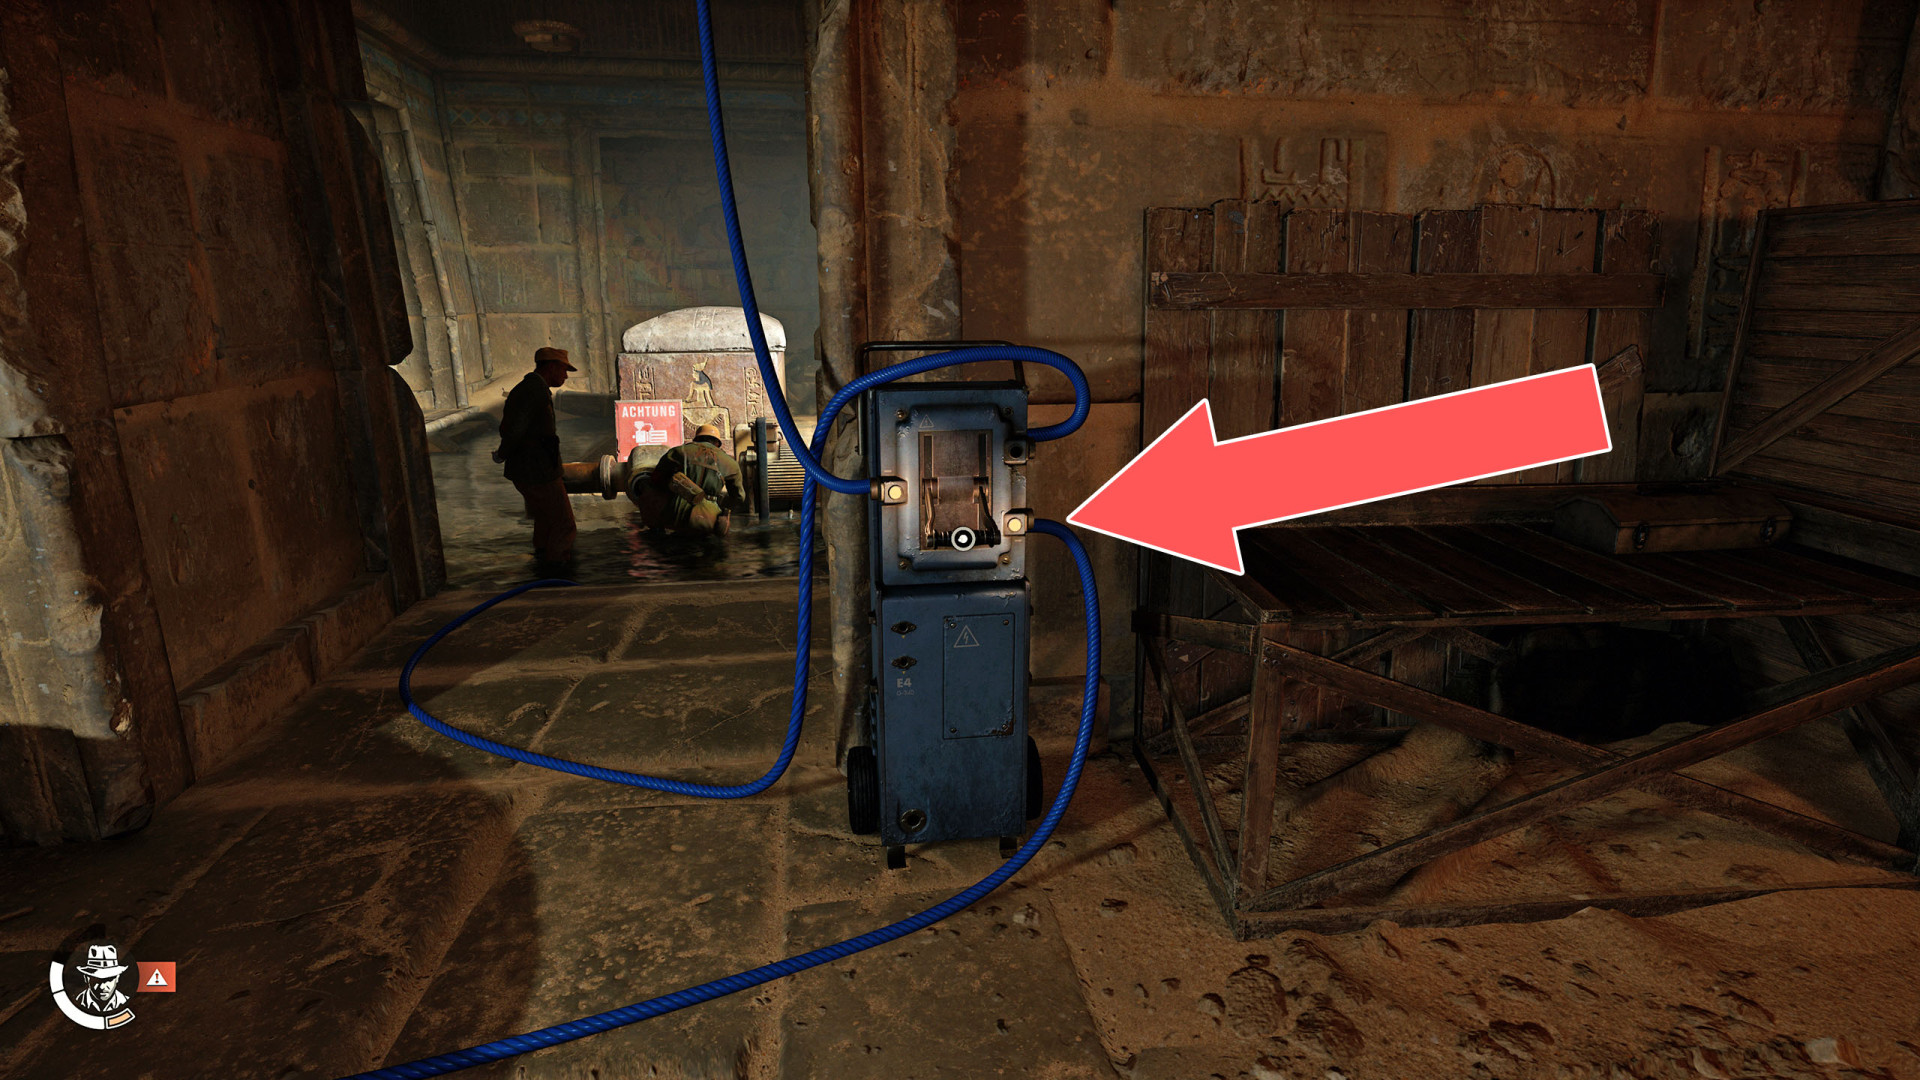
111Blue Cable Power Switch
One of the switches that must be toggled to restore power to the elevator.
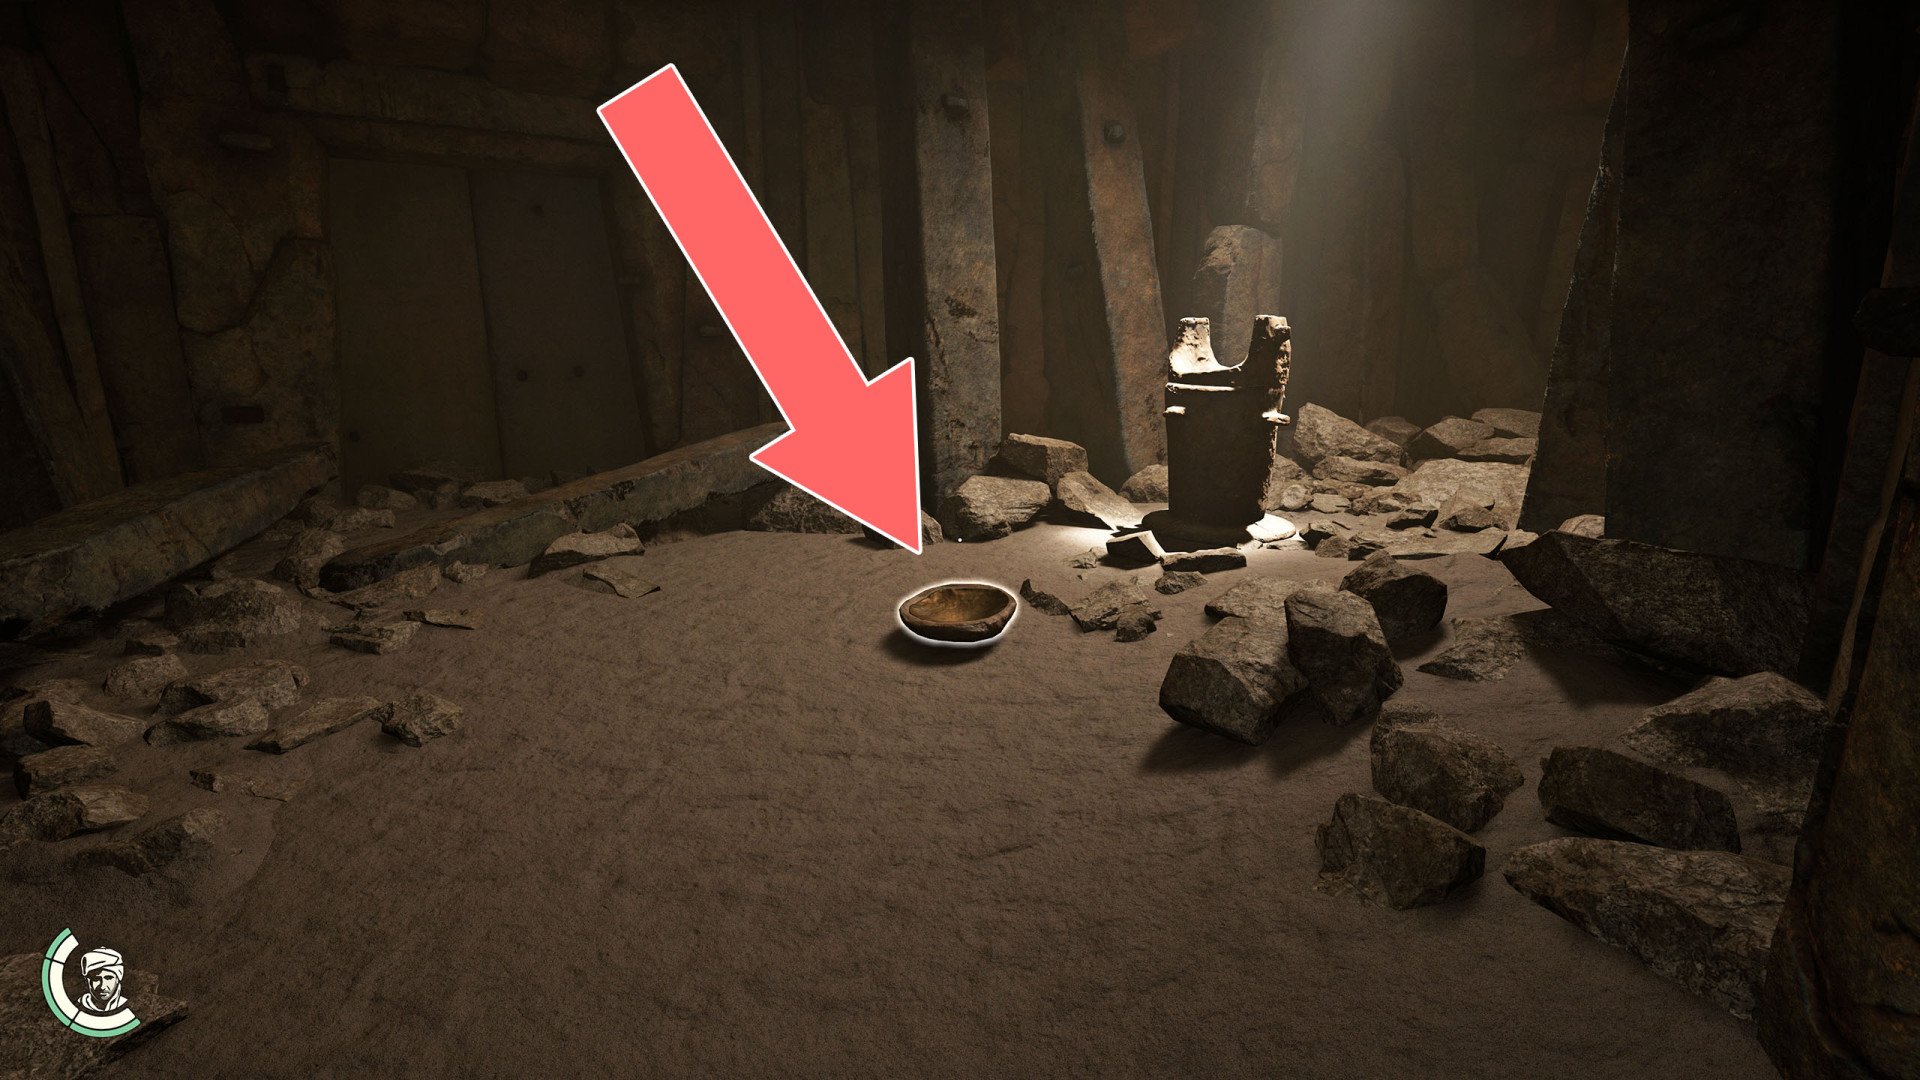
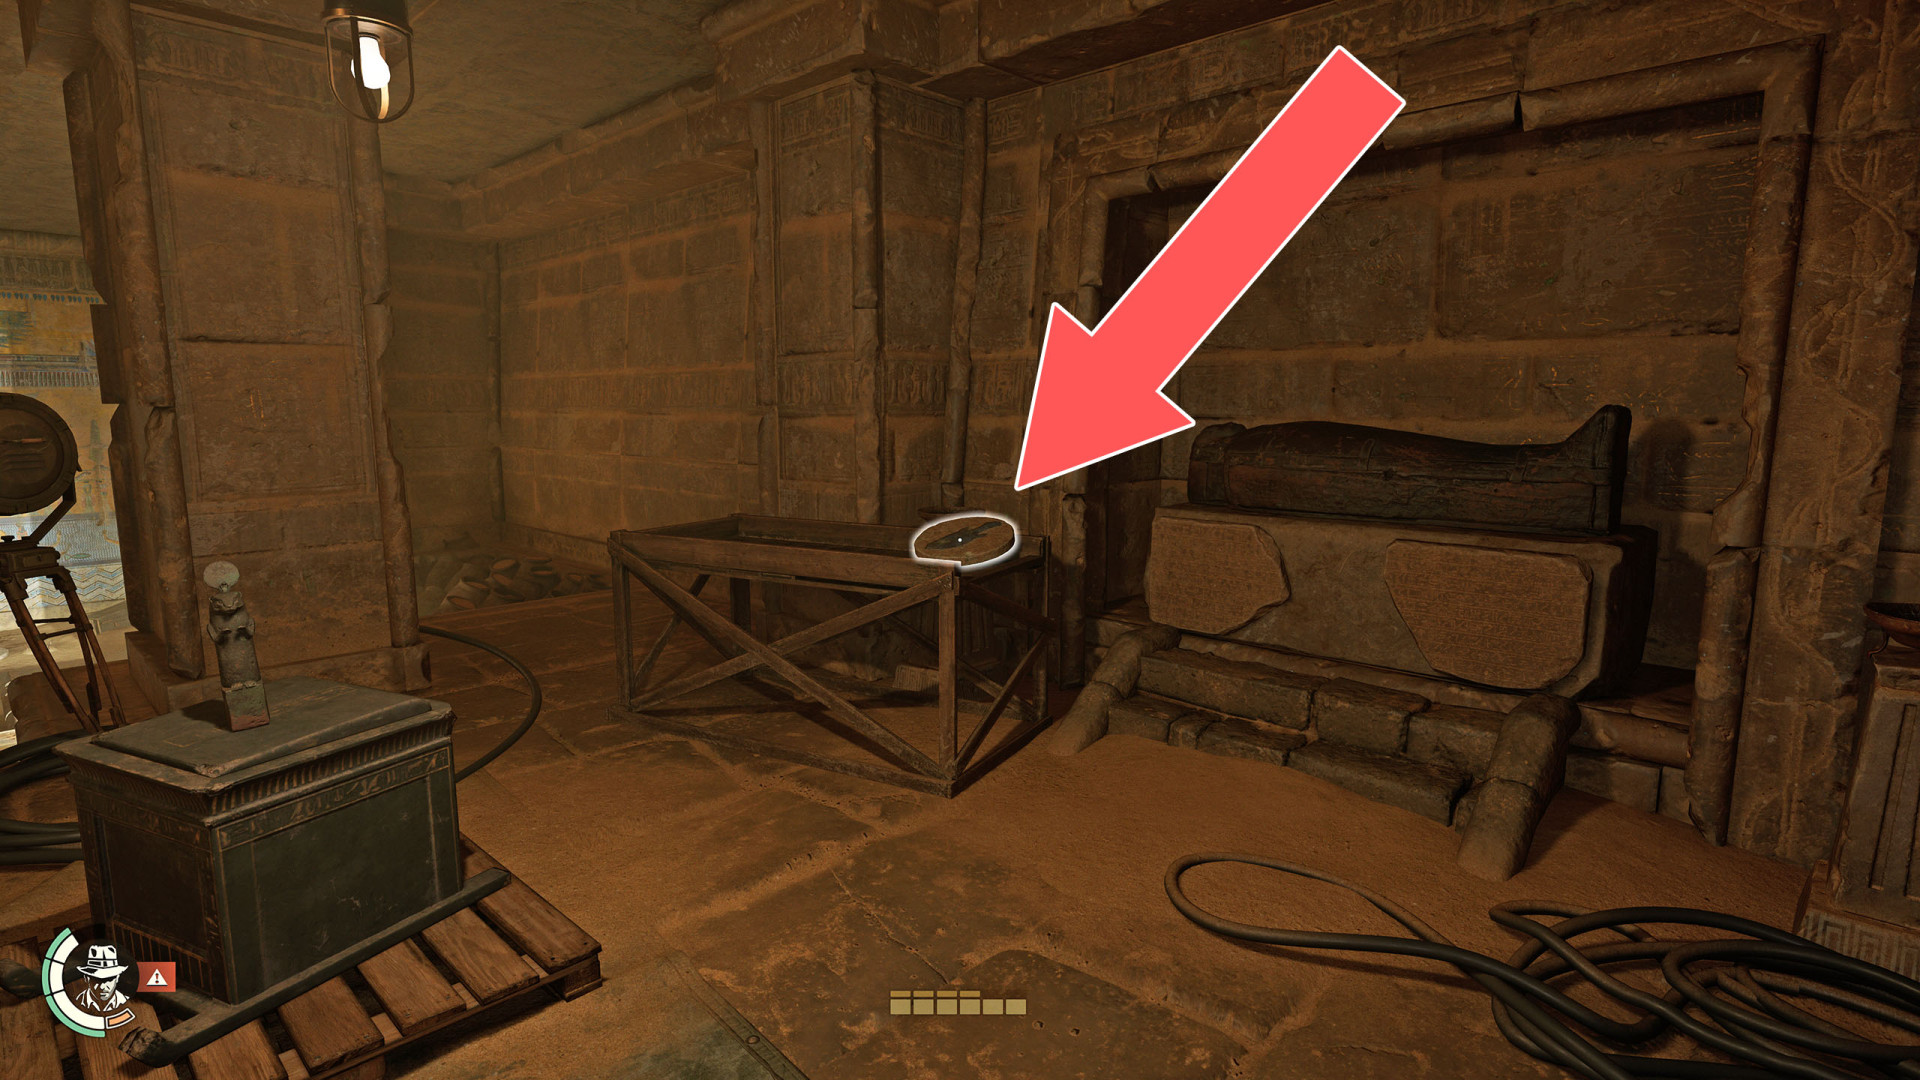
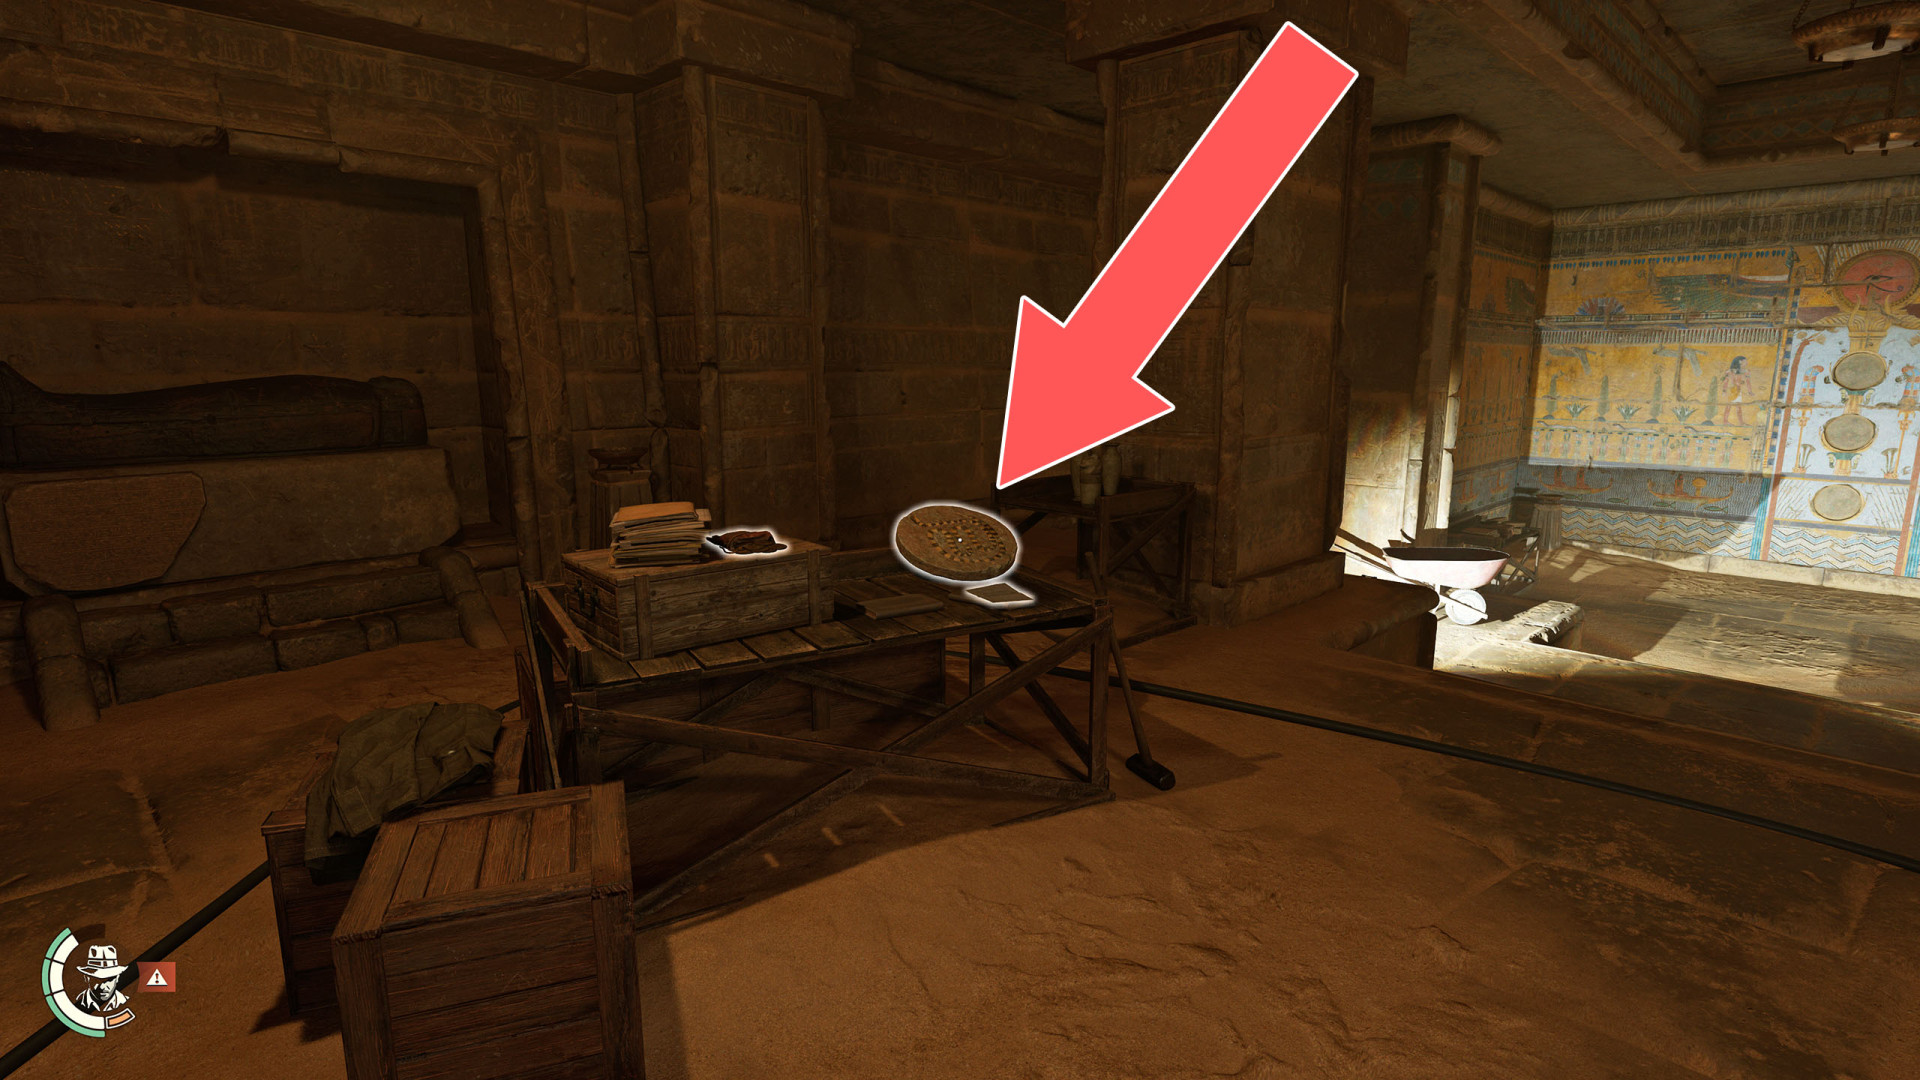
112Brass Mirror
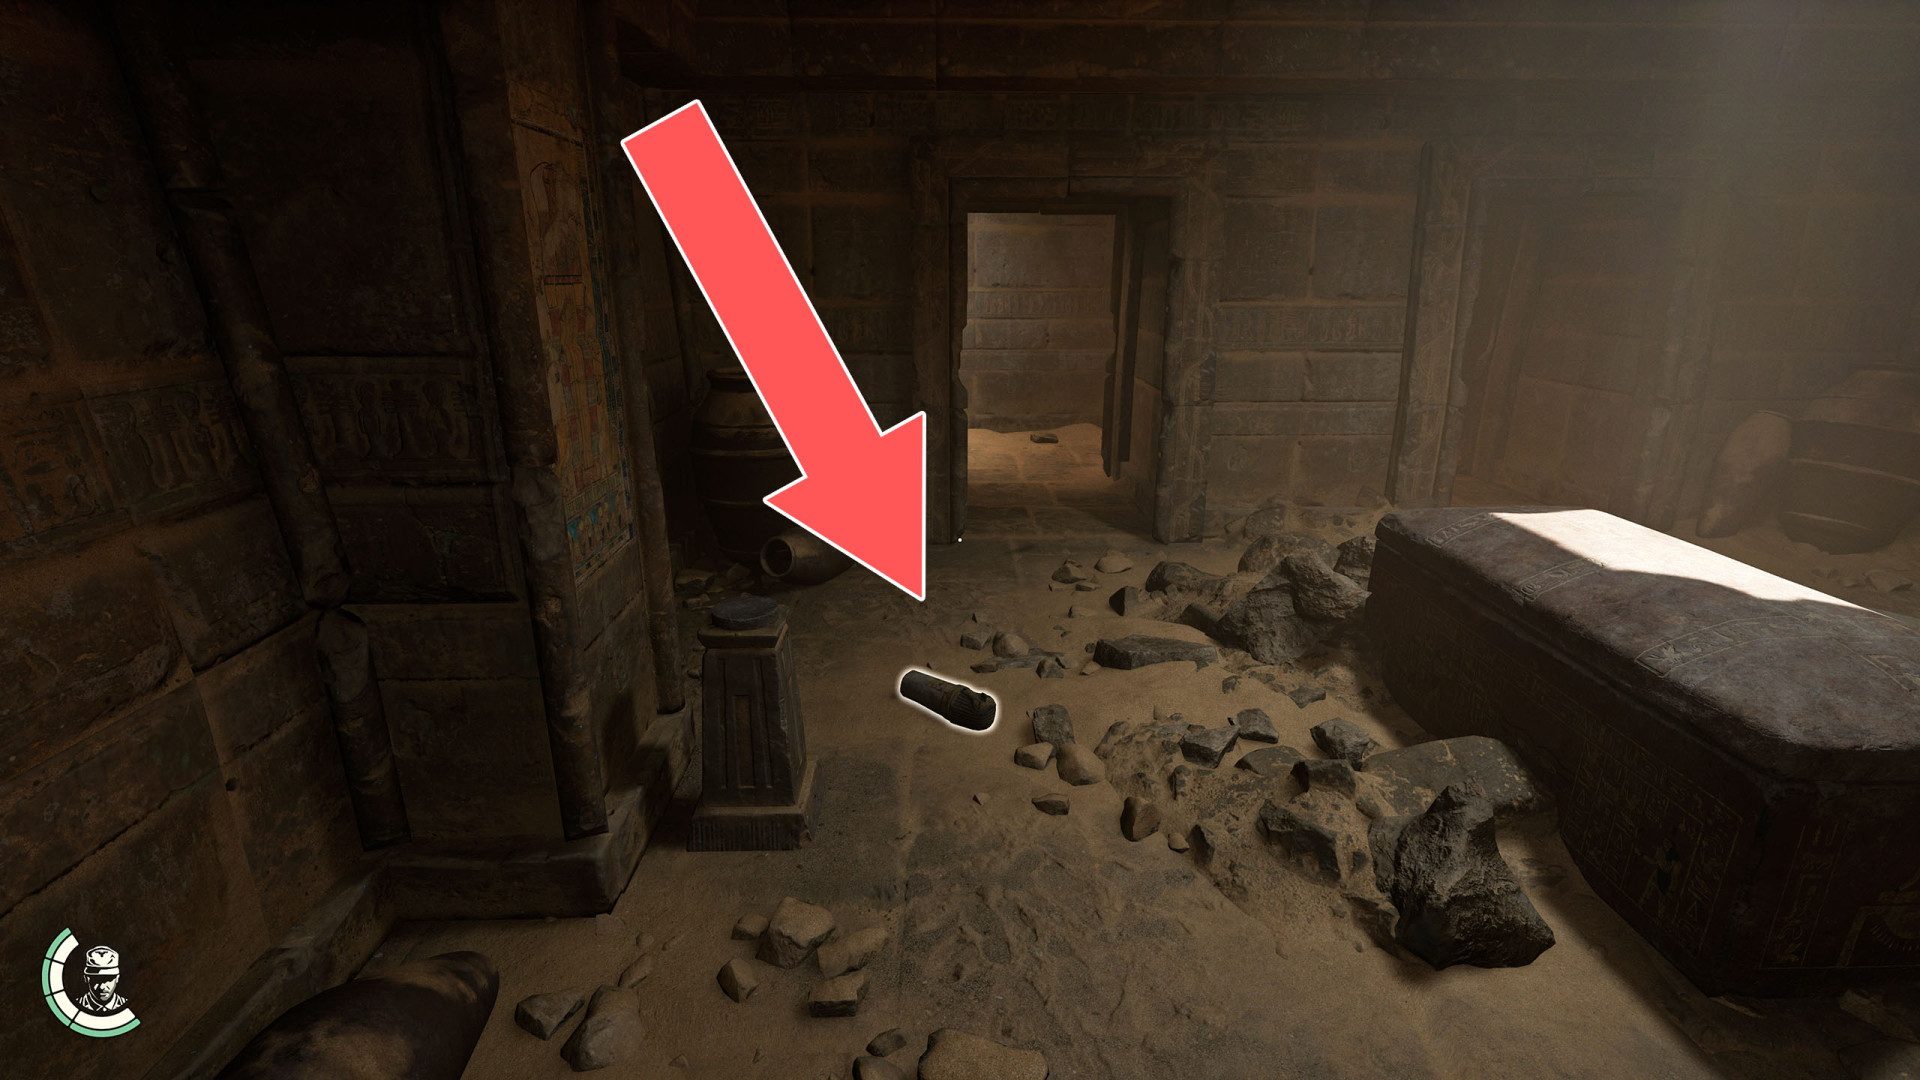
113Canopic Jar
114Egyptian Numeral Code
115Elevator Lever
116Falcon Canopic Jar
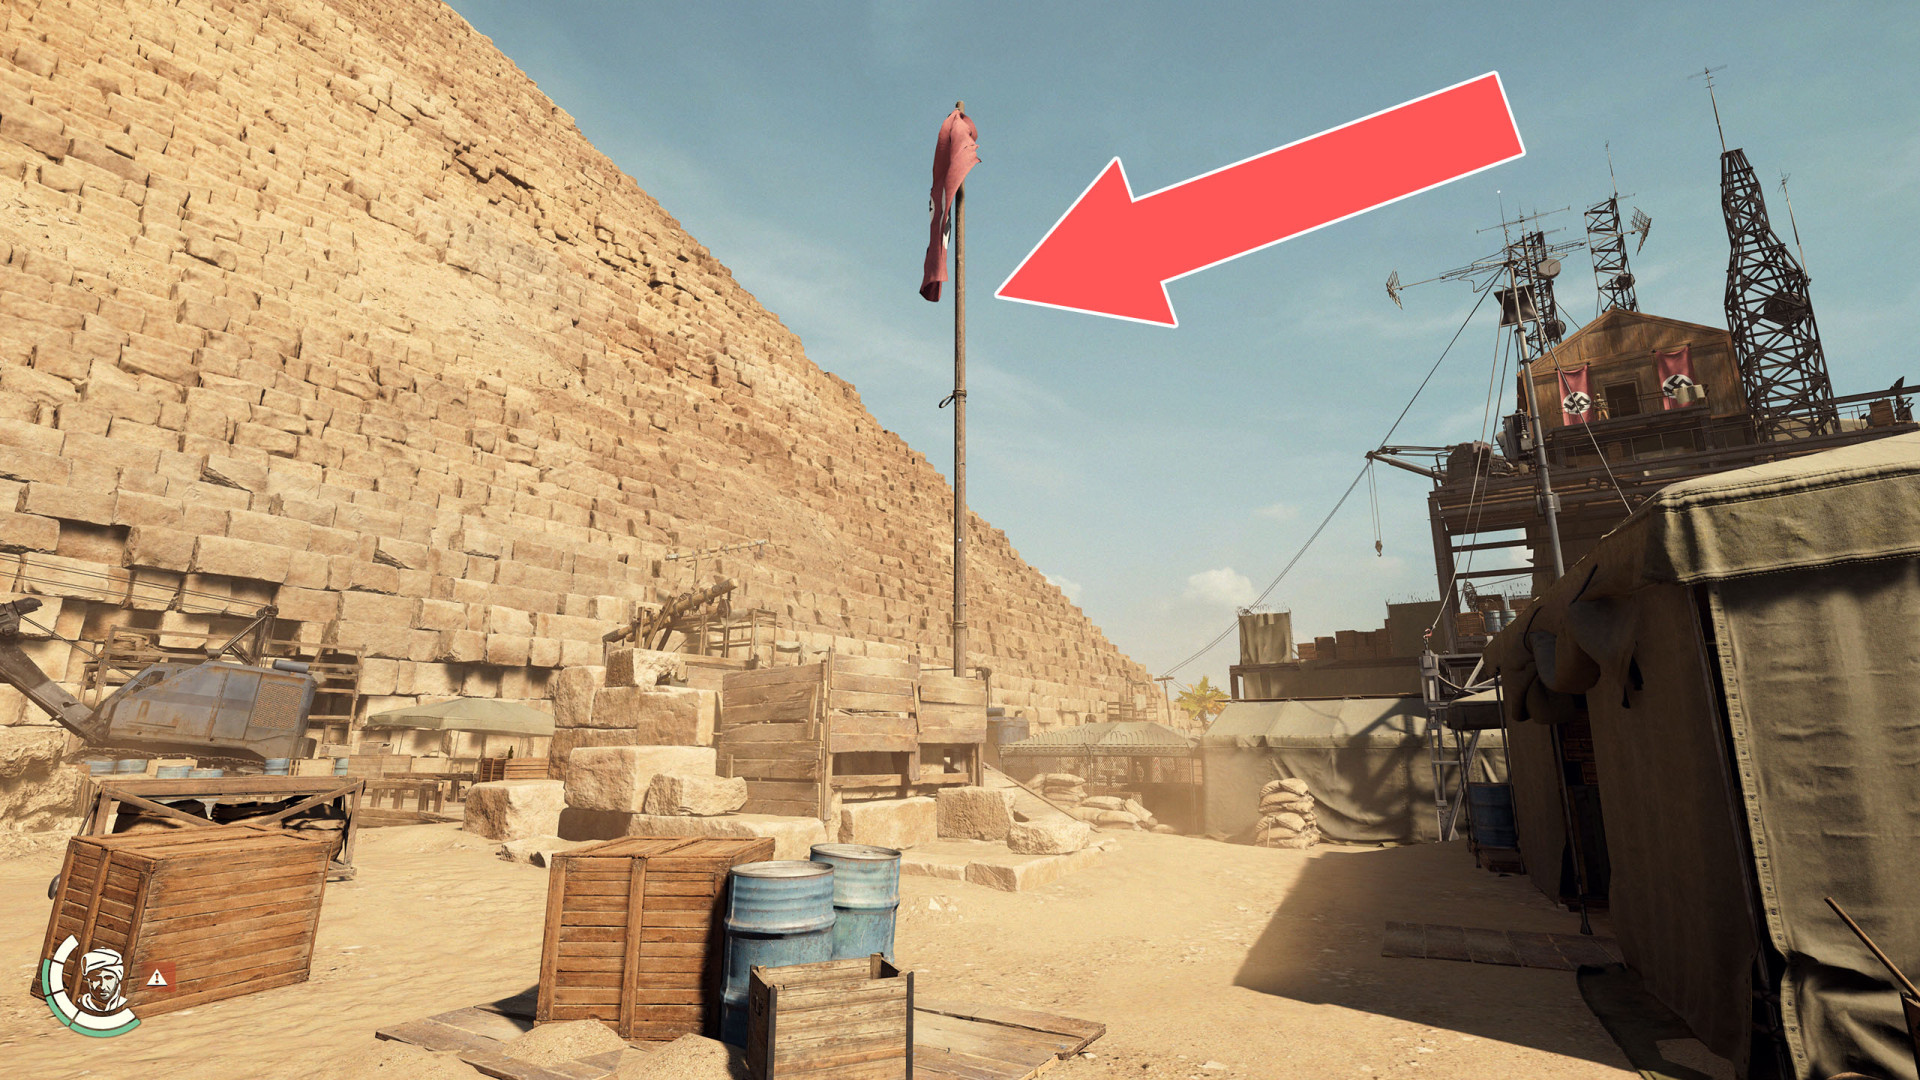
117Flag
118Gold Mask
Related fieldwork: Sanctuary of the Guardians.

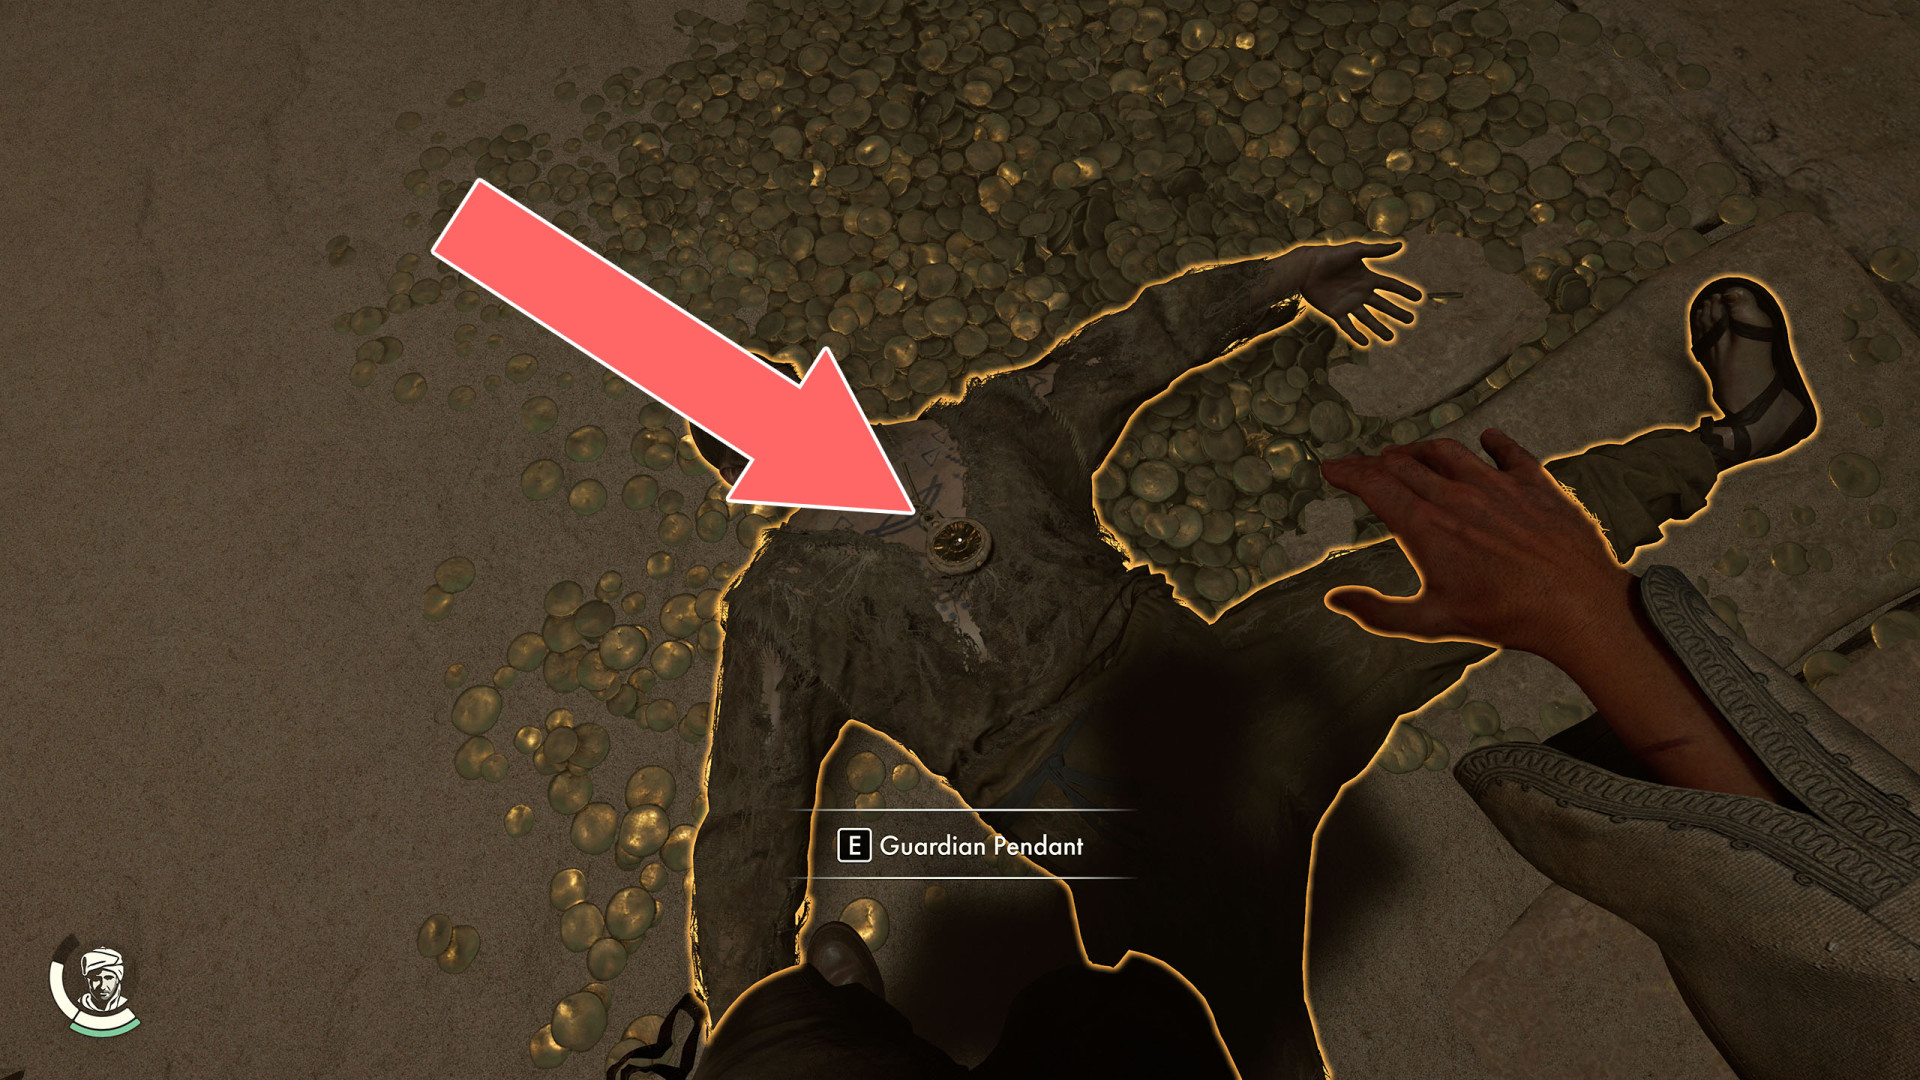
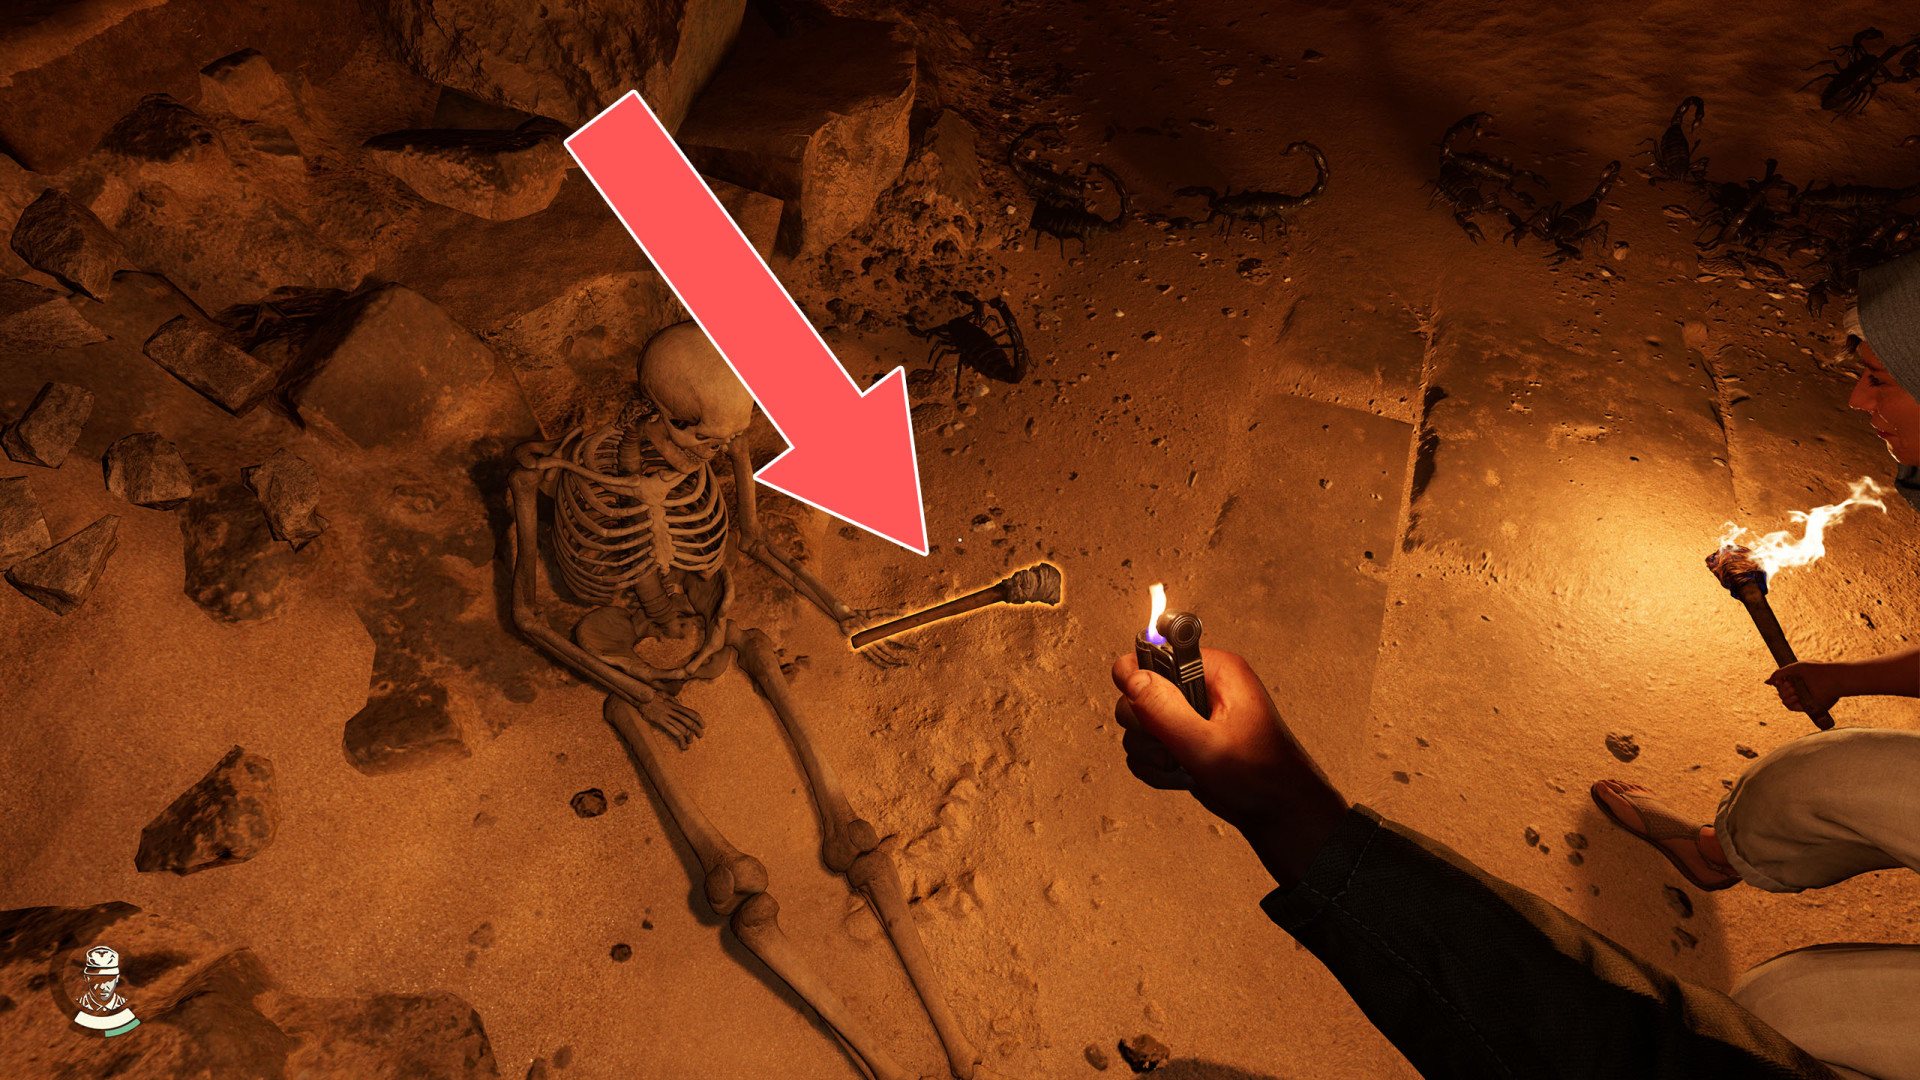
119Guardian Pendant
120Heavy Weapon
121Human Canopic Jar
122Jackal Canopic Jar
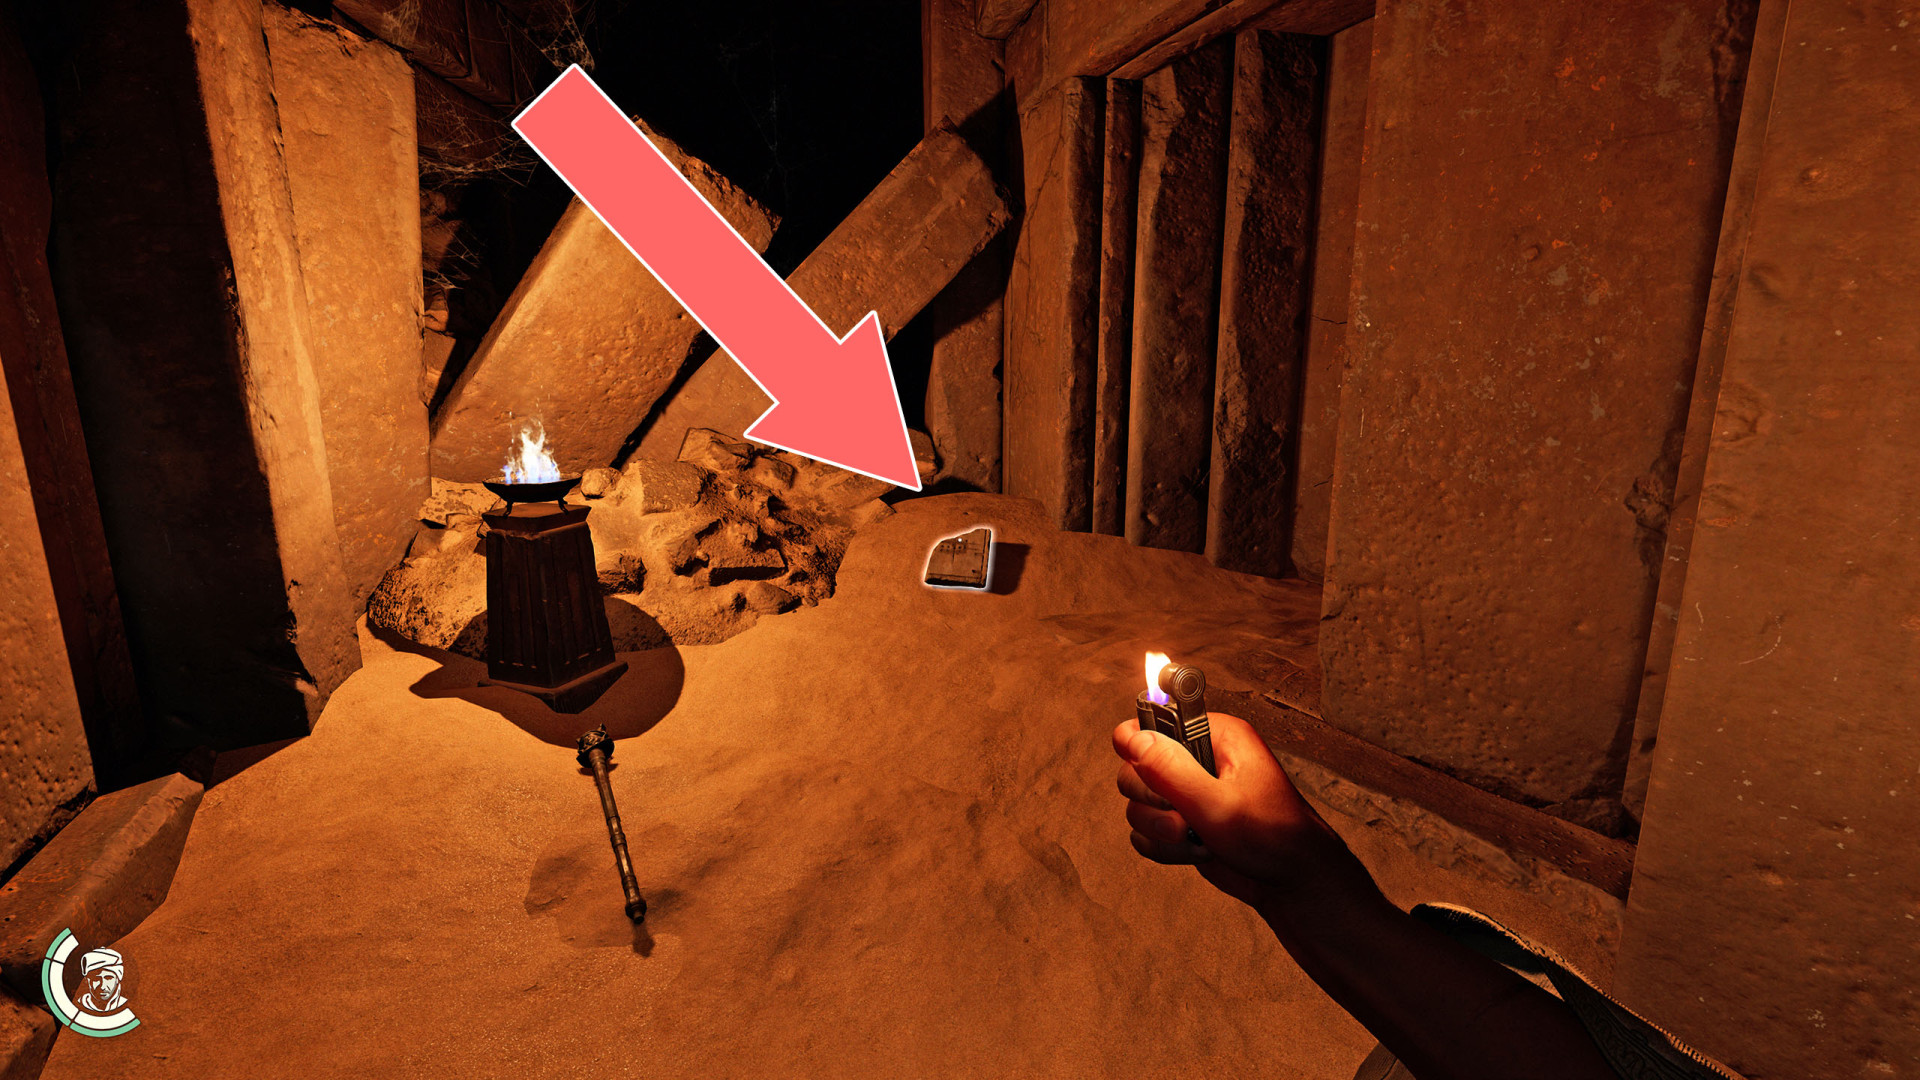
123Laura's Journal
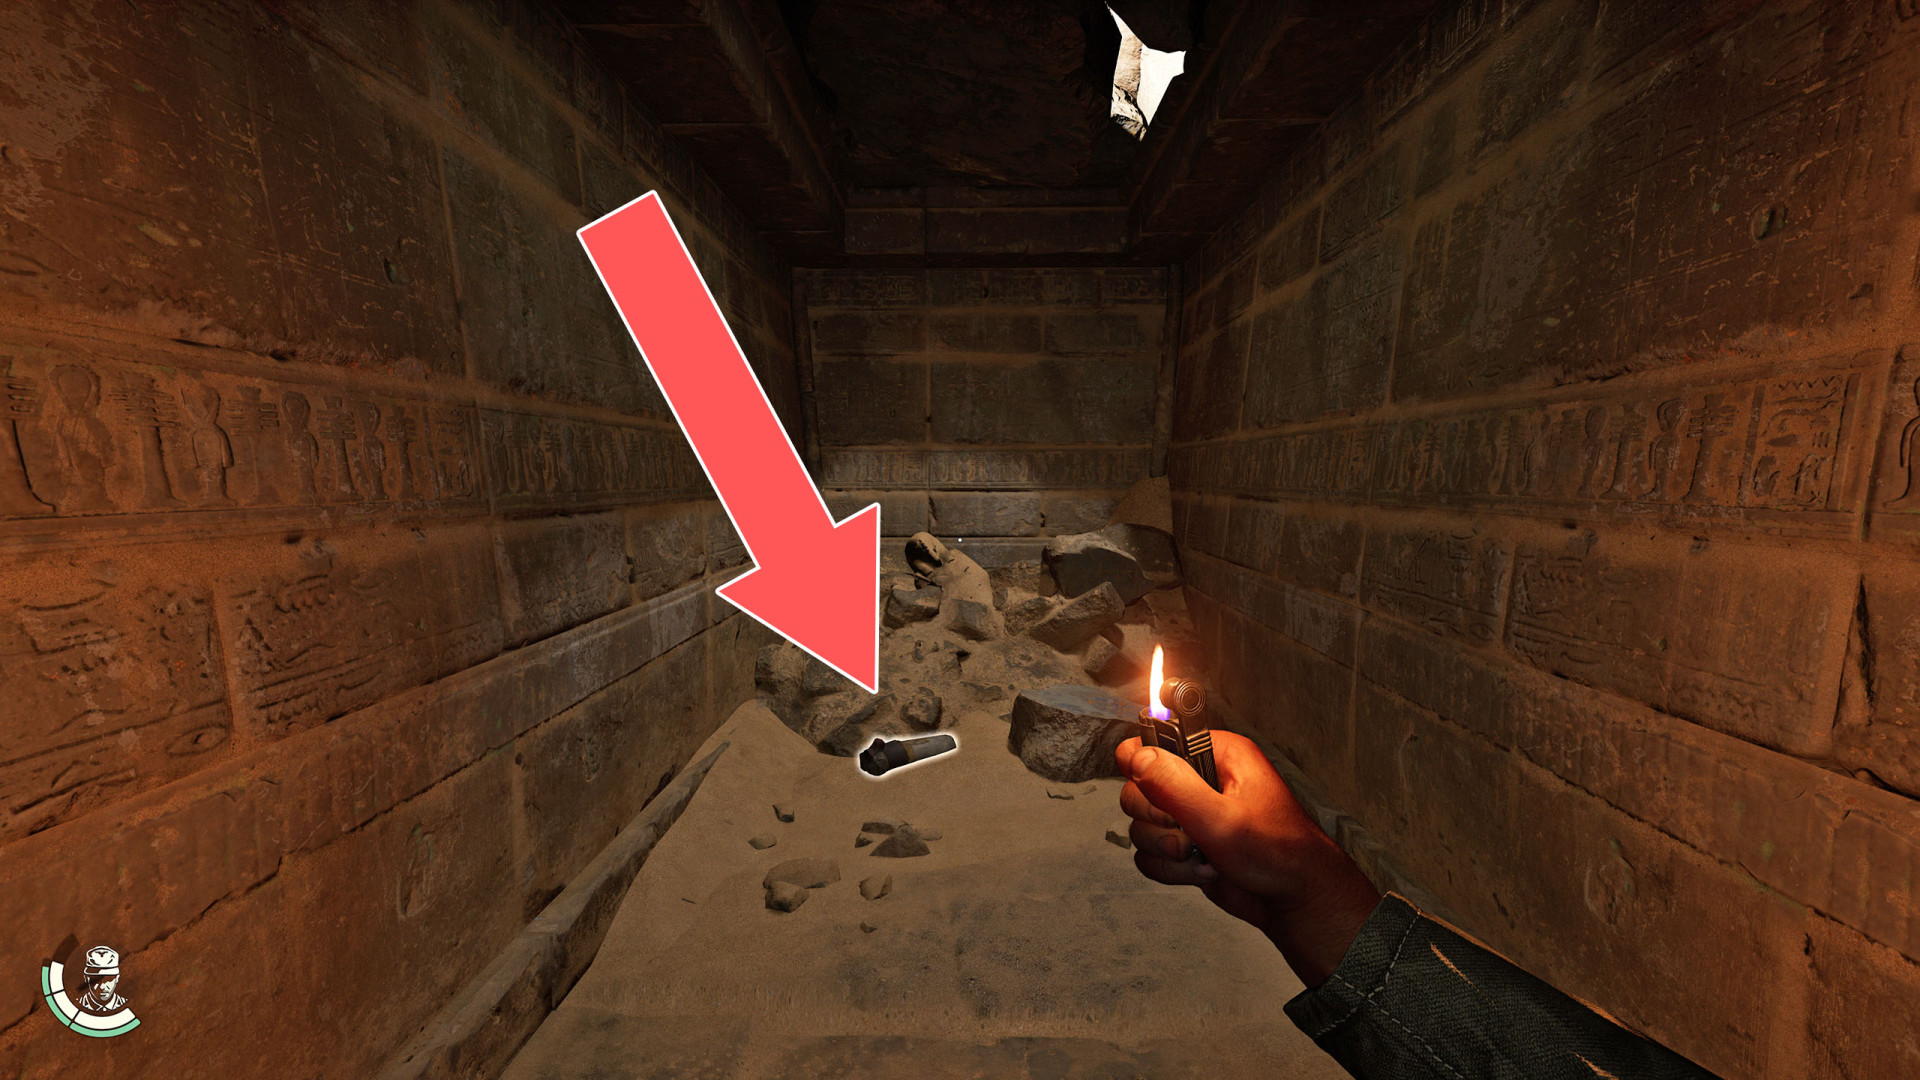
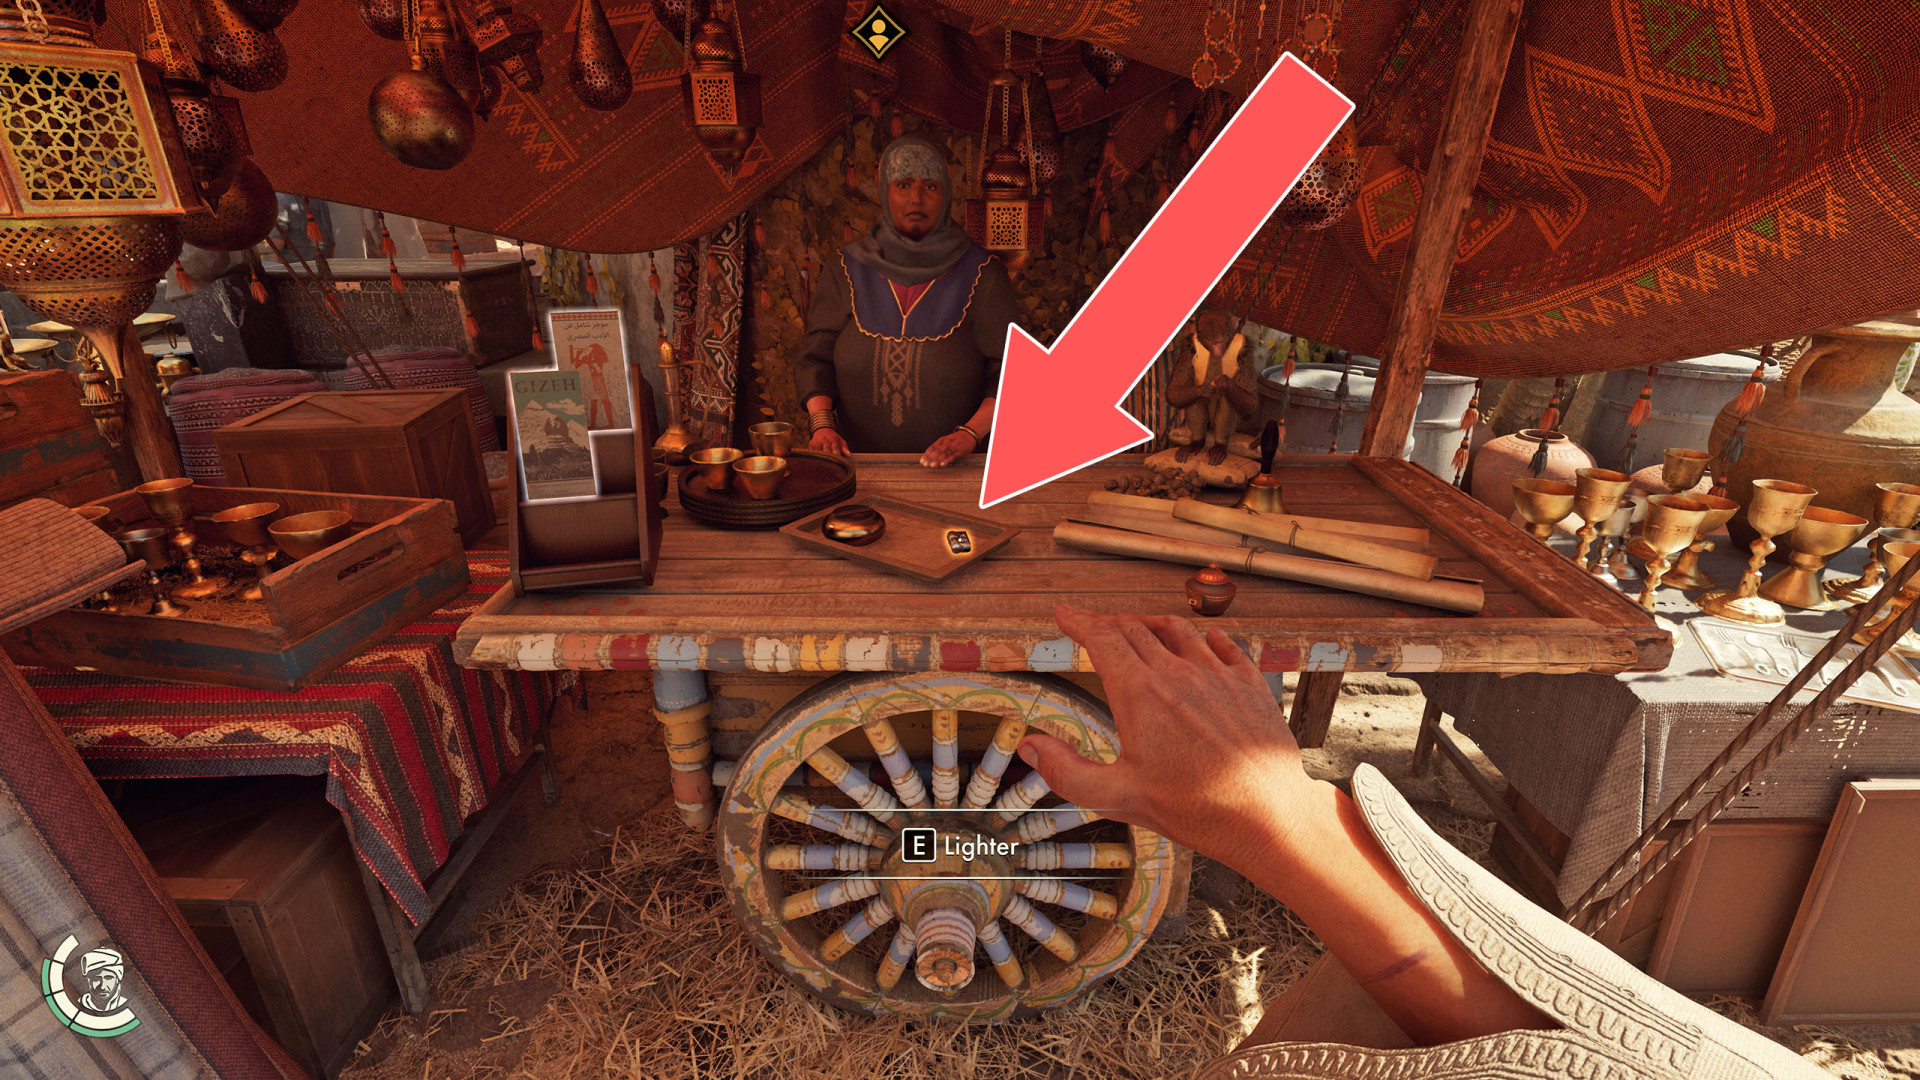
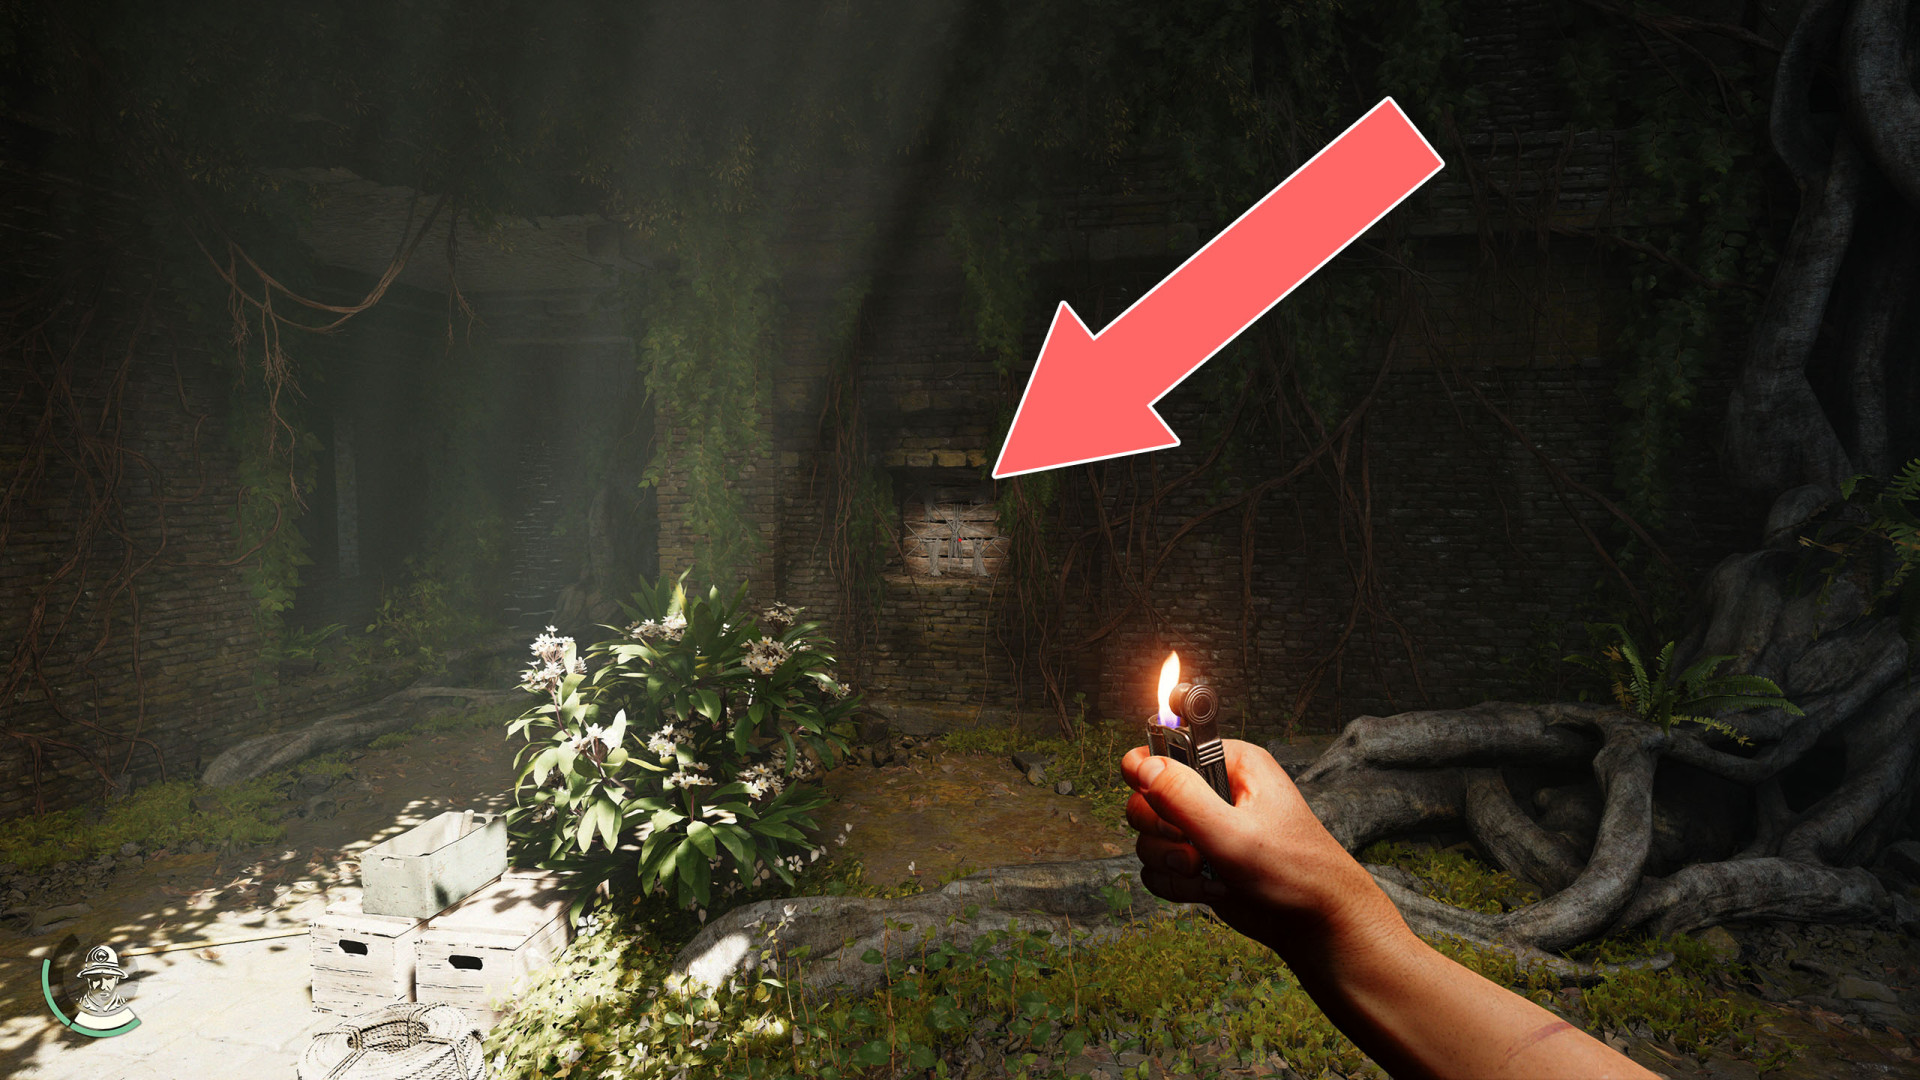
124Lighter
You can buy it from Asmaa for 75 Pounds.
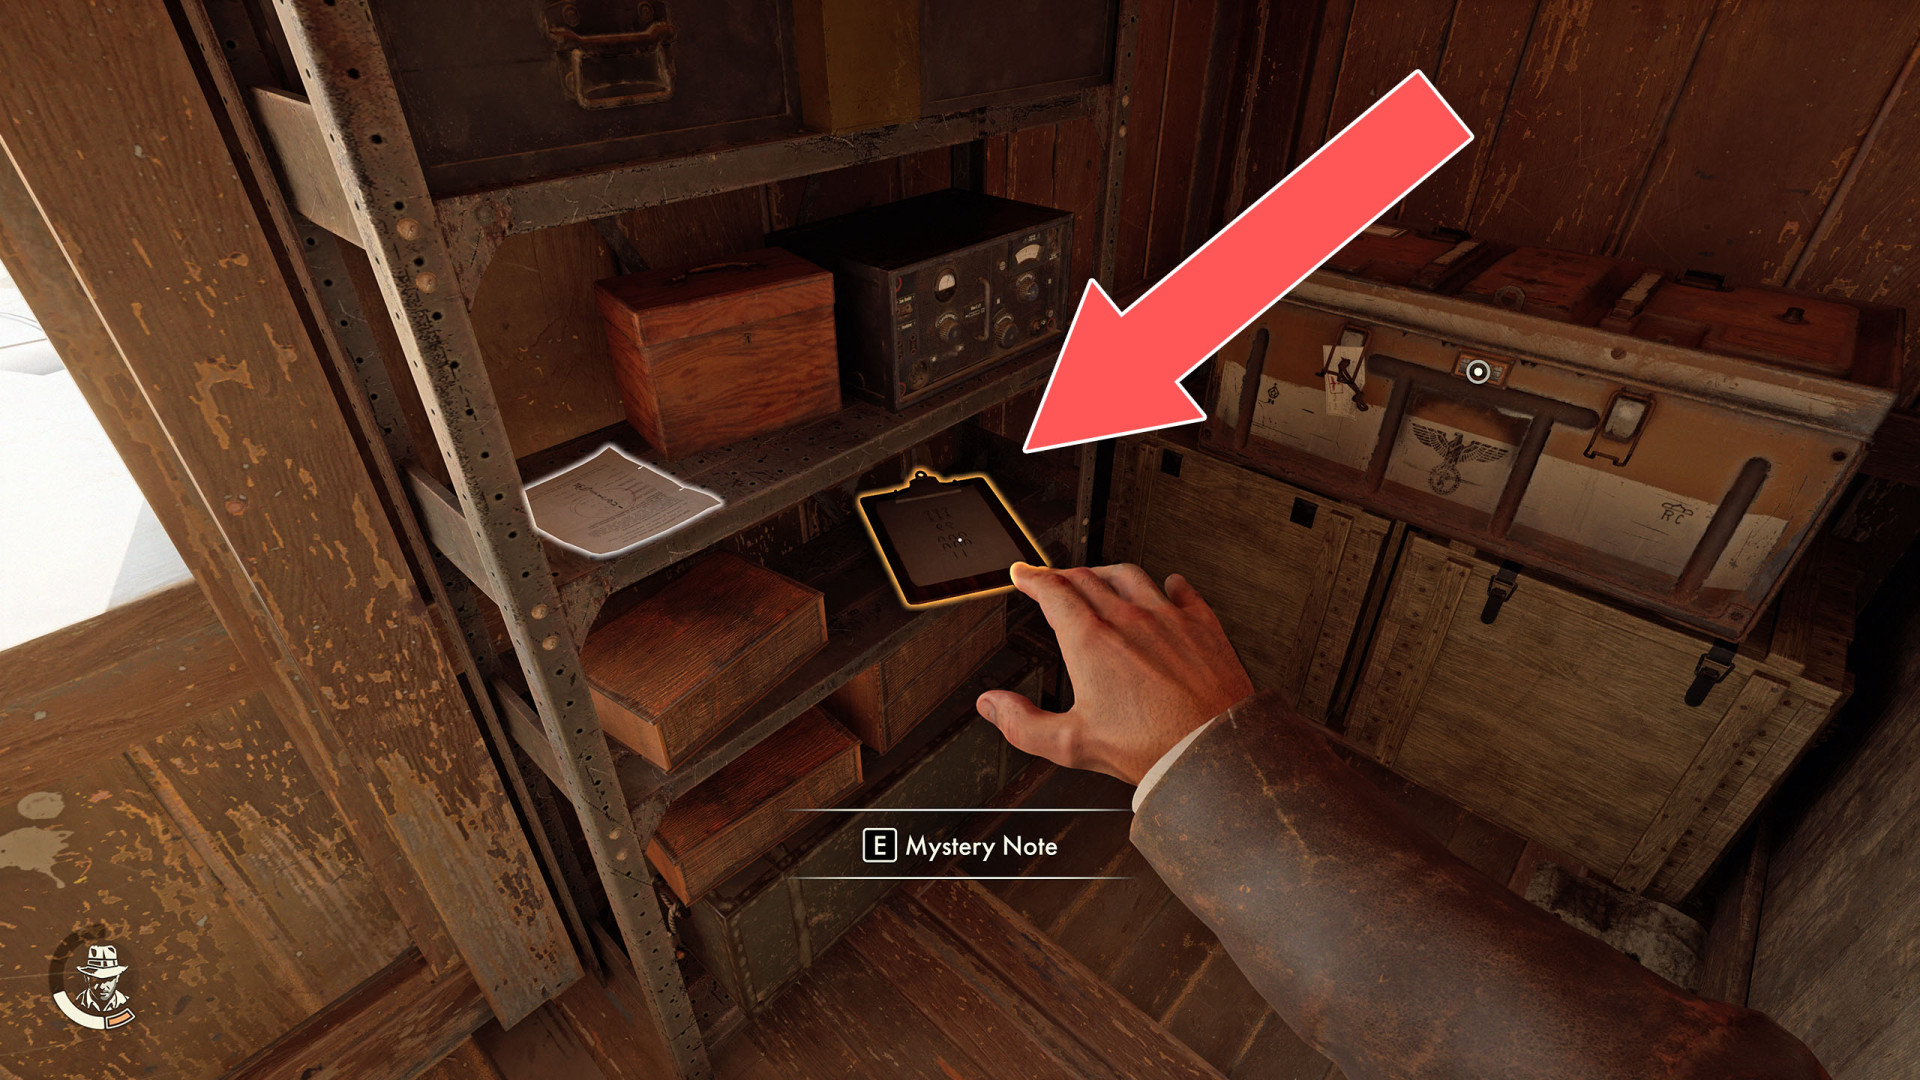
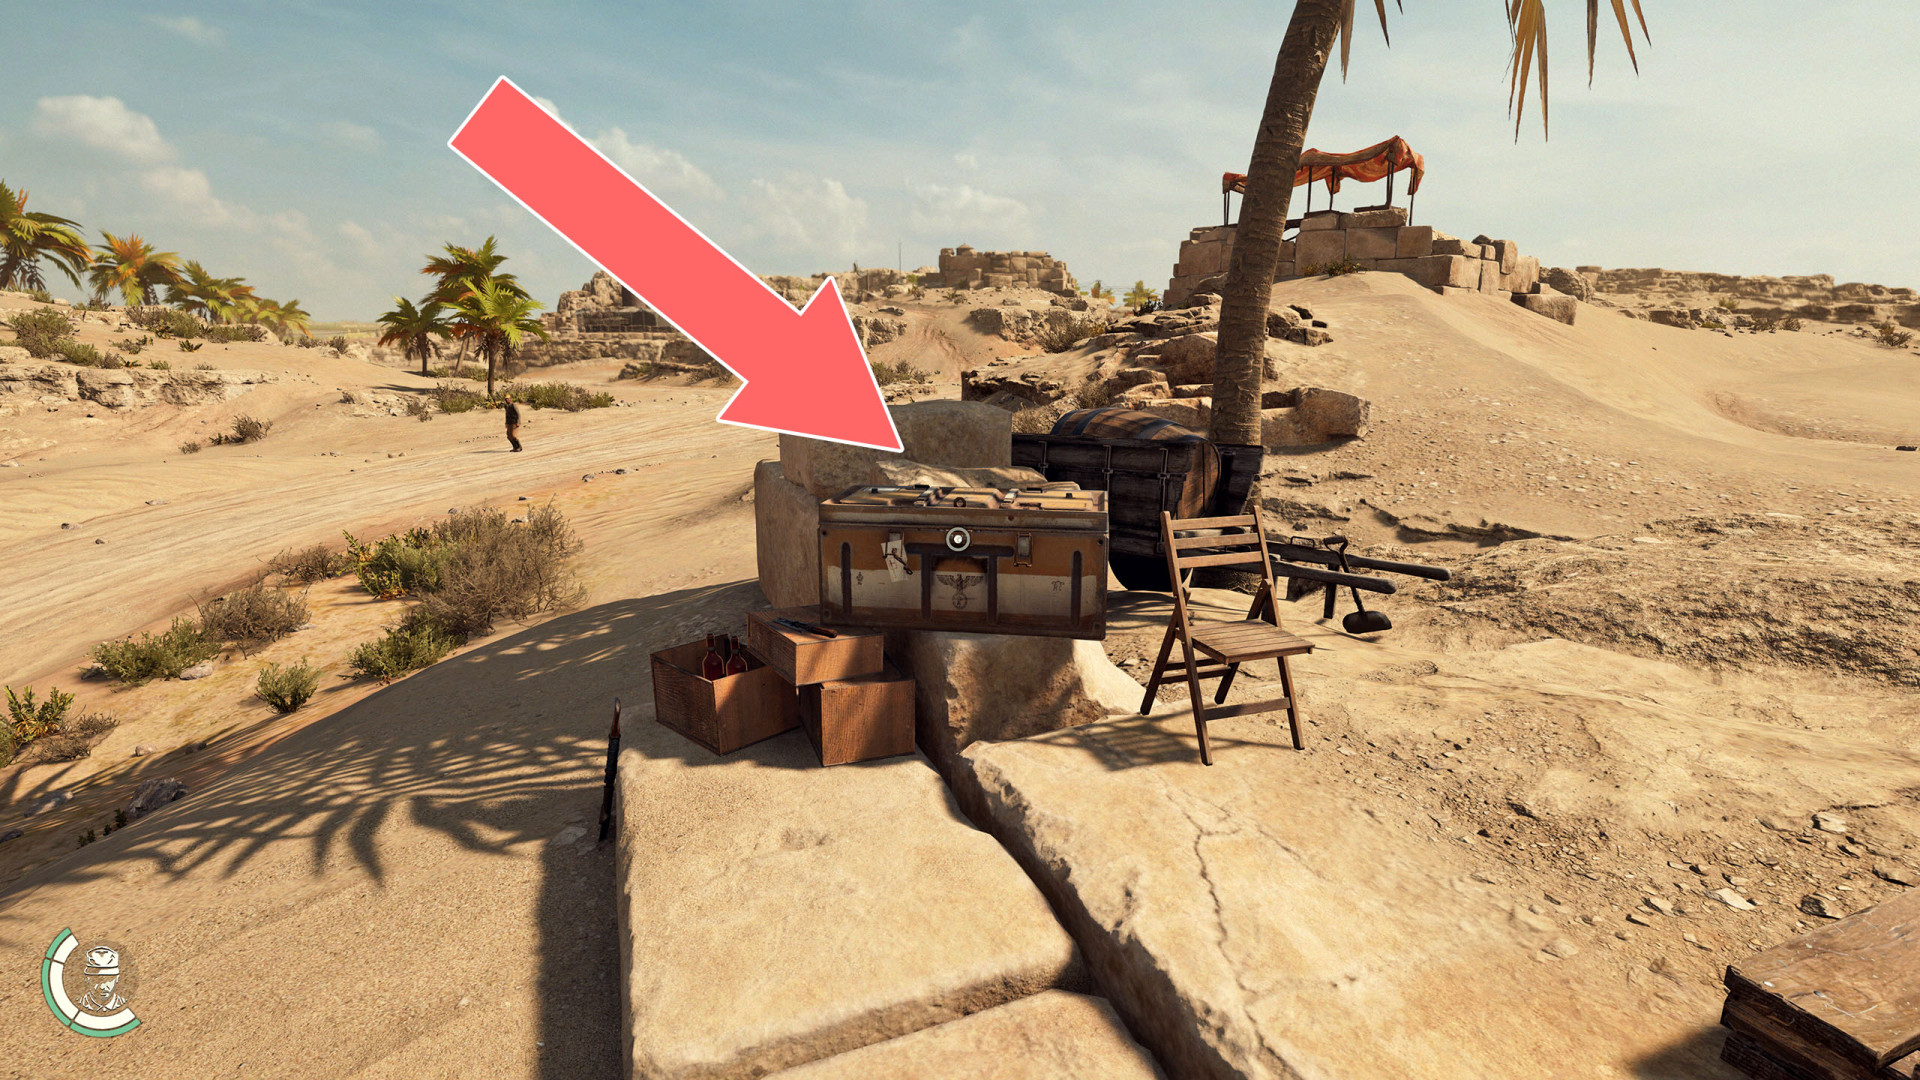
125Locked Crate
Lock combination: 0926. It can be found on the Nazi Note. Related mystery: Bright Future.
126Mirror #A1
Show the map
127Mirror #A2
Show the map
128Mirror #A3
Show the map
129Mirror #A4
Show the map
130Mirror #A5
Show the map
131Mirror #A6
Show the map
132Mirror #B1
Show the map
133Mirror #B2
Show the map
134Mirror #B3
Show the map
135Mirror #B4
Show the map
136Mirror #C1
137Mirror #C2
138Mirror #C3
139Mirror #C4
Use the Brass Mirror to fix it.
140Mirror #C5
141Pendant
142Power Switch
When you toggle this switch, the enemies in the adjacent room will be electrocuted.
143Pressure Plate #A1
144Pressure Plate #B1
145Pressure Plate #B2

146Pressure Plate #B3
147Red Cable Power Switch
One of the switches that must be toggled to restore power to the elevator.
148Statue
149Stone Glyph (Bird)
150Stone Glyph (Fish)
151Stone Glyph (Snake)
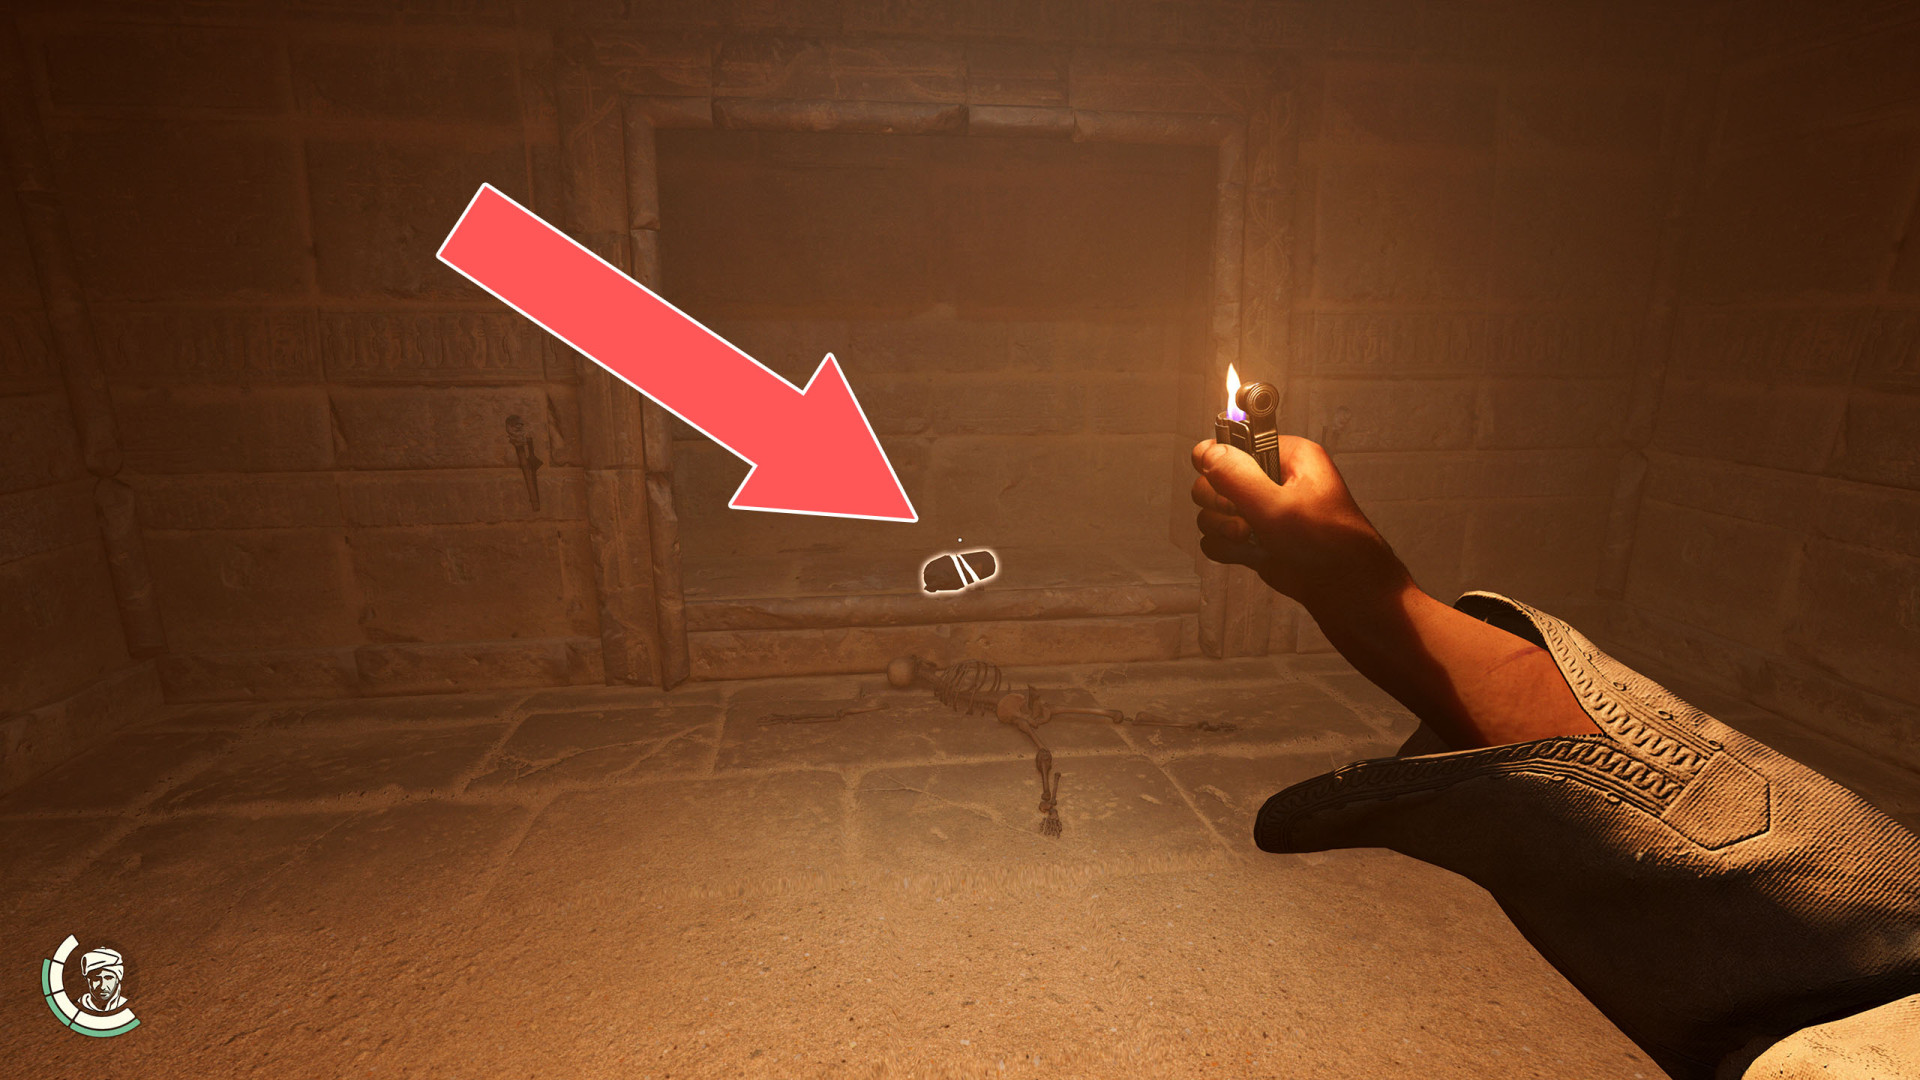
152Tablet Piece
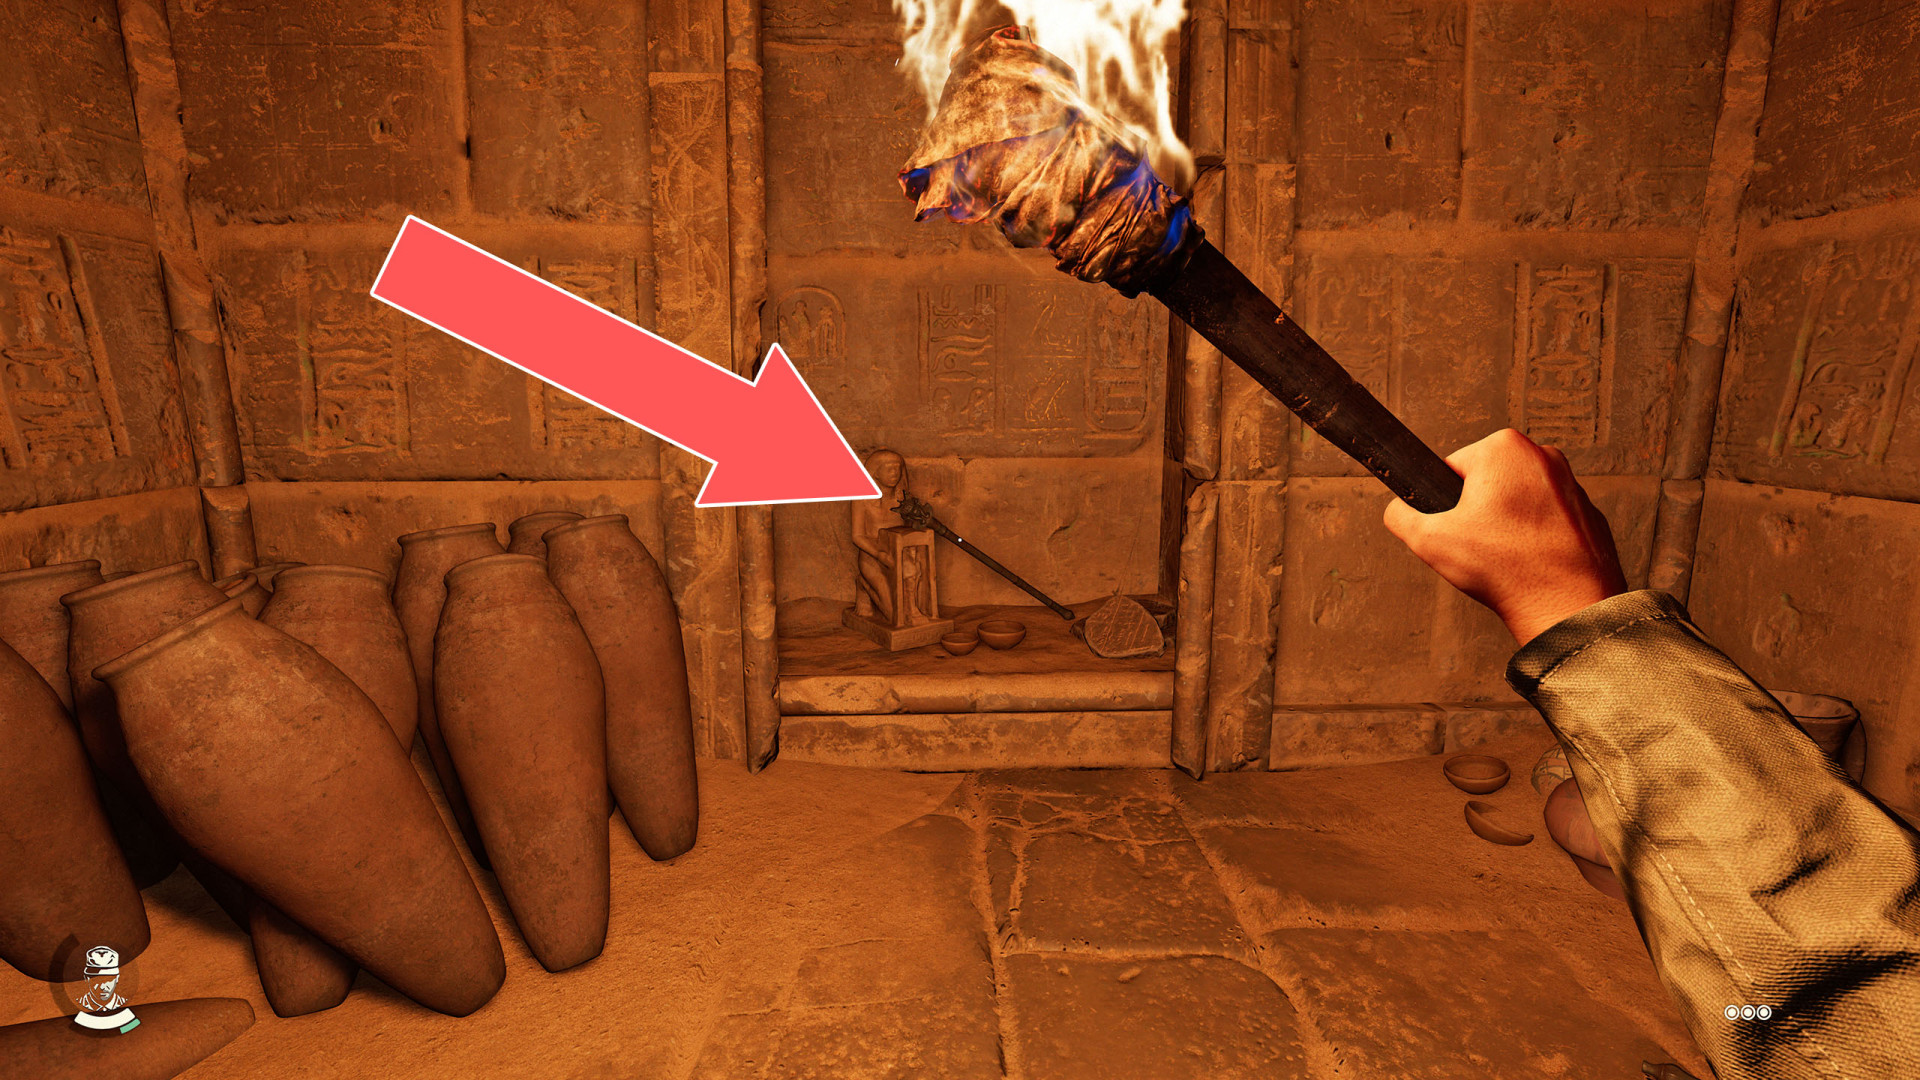
153Torch
Locations on The Himalayas
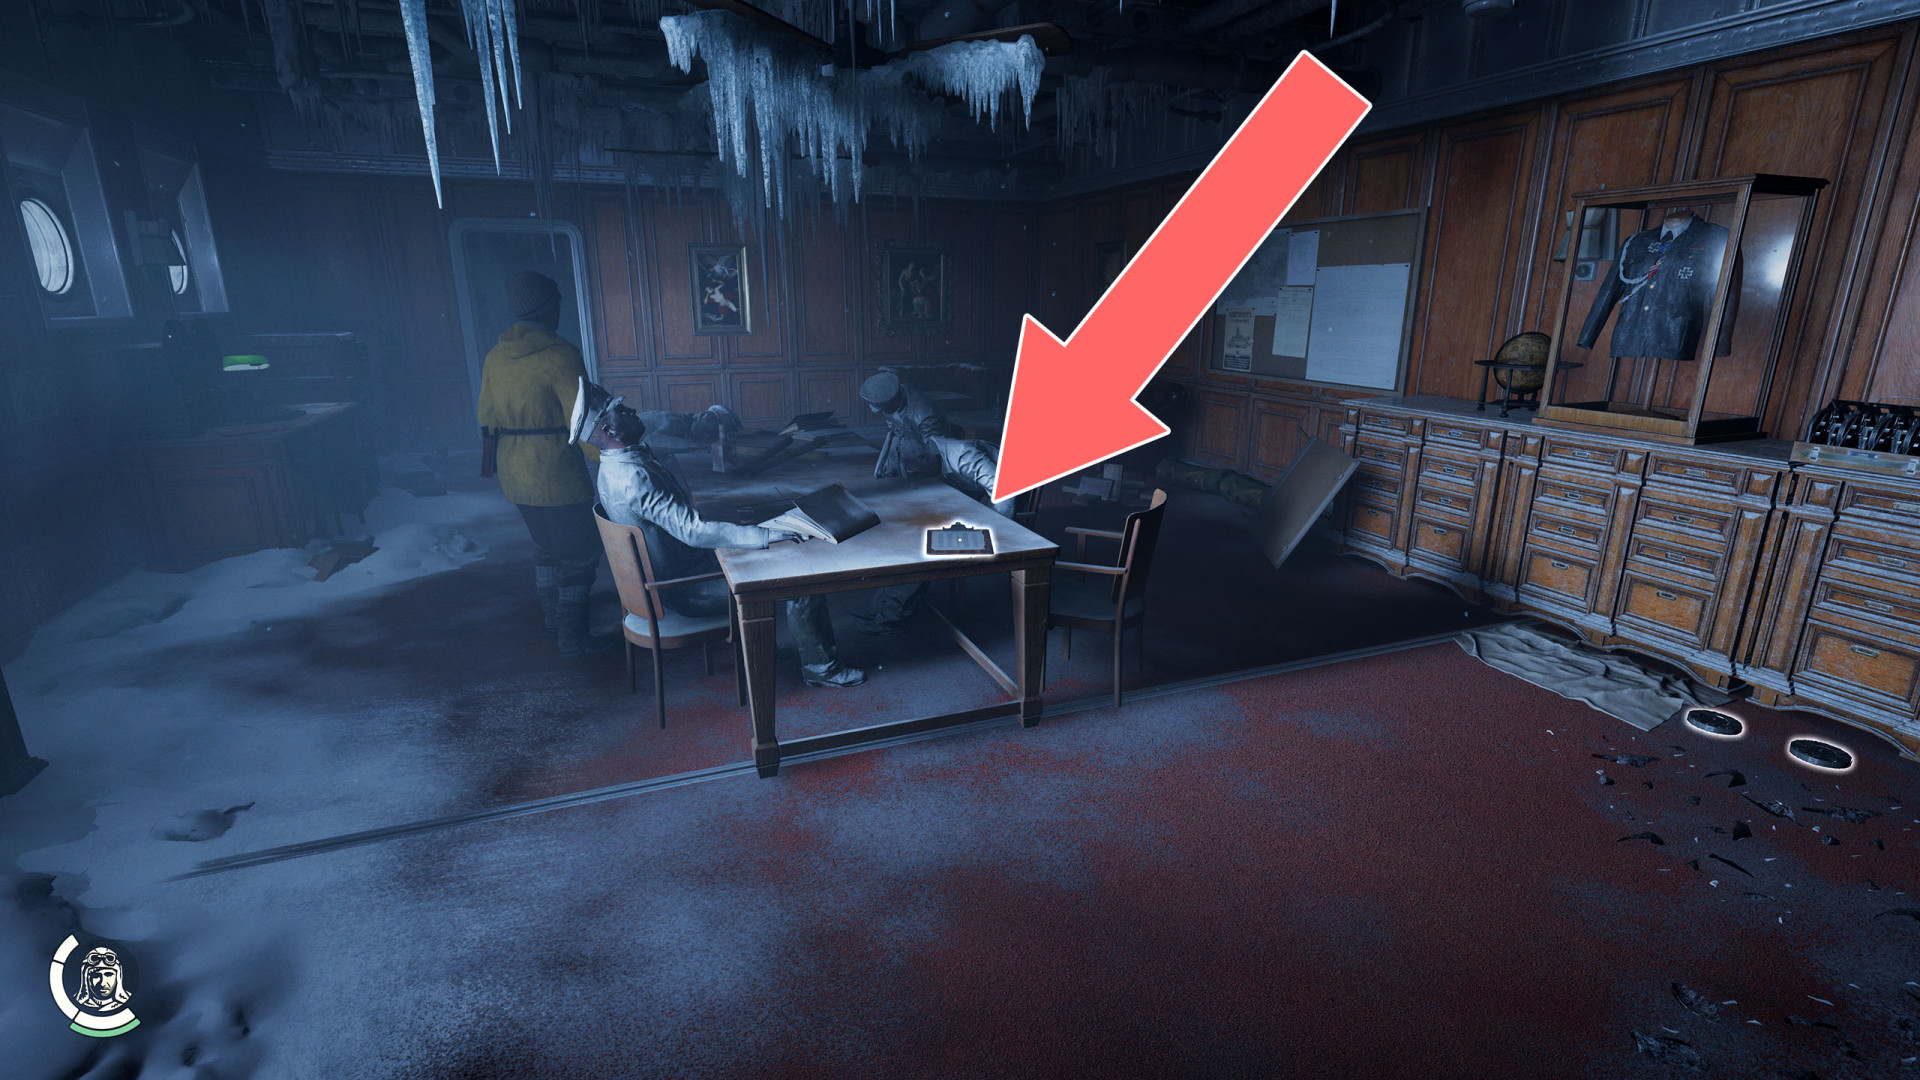
154Captain's Code
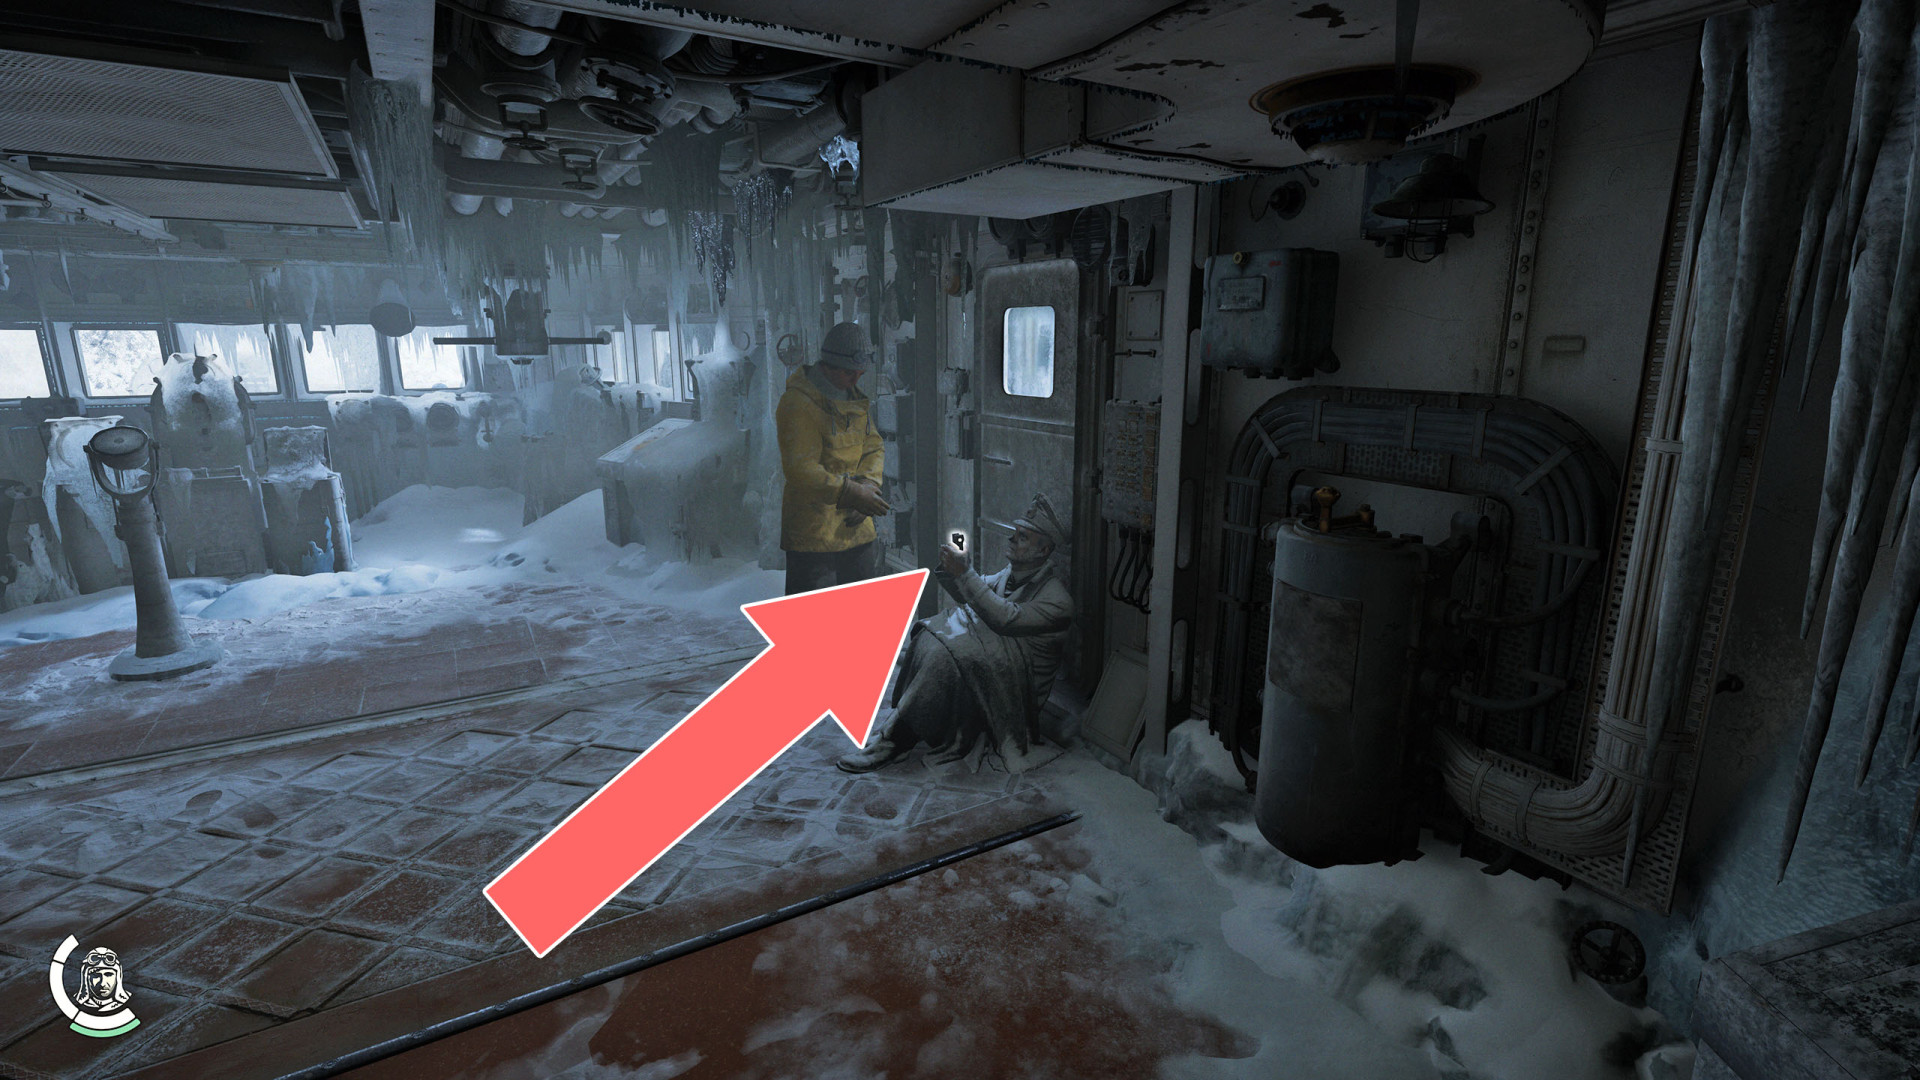
155Chain Rivet #1
156Chain Rivet #2
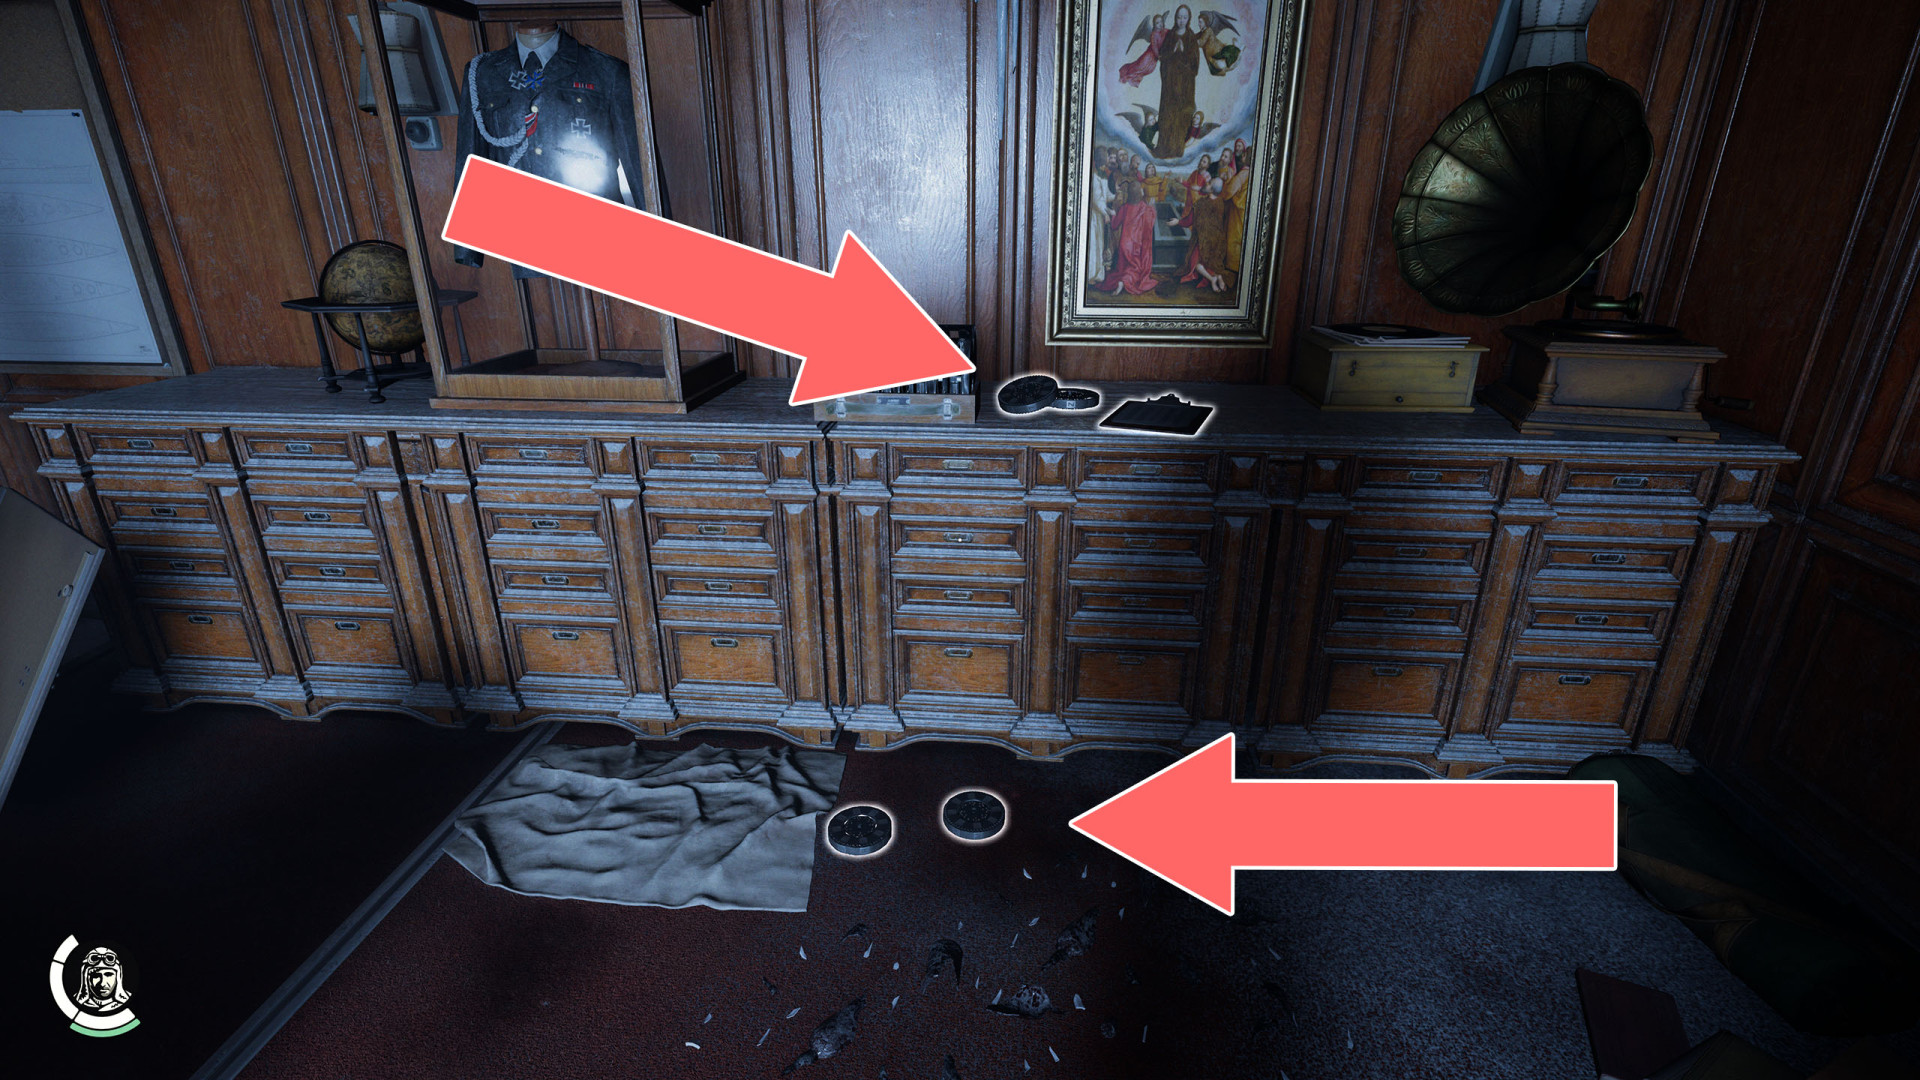
157Code Table
158Code Table
159Code Wheel x 4
160Machu Picchu Stone
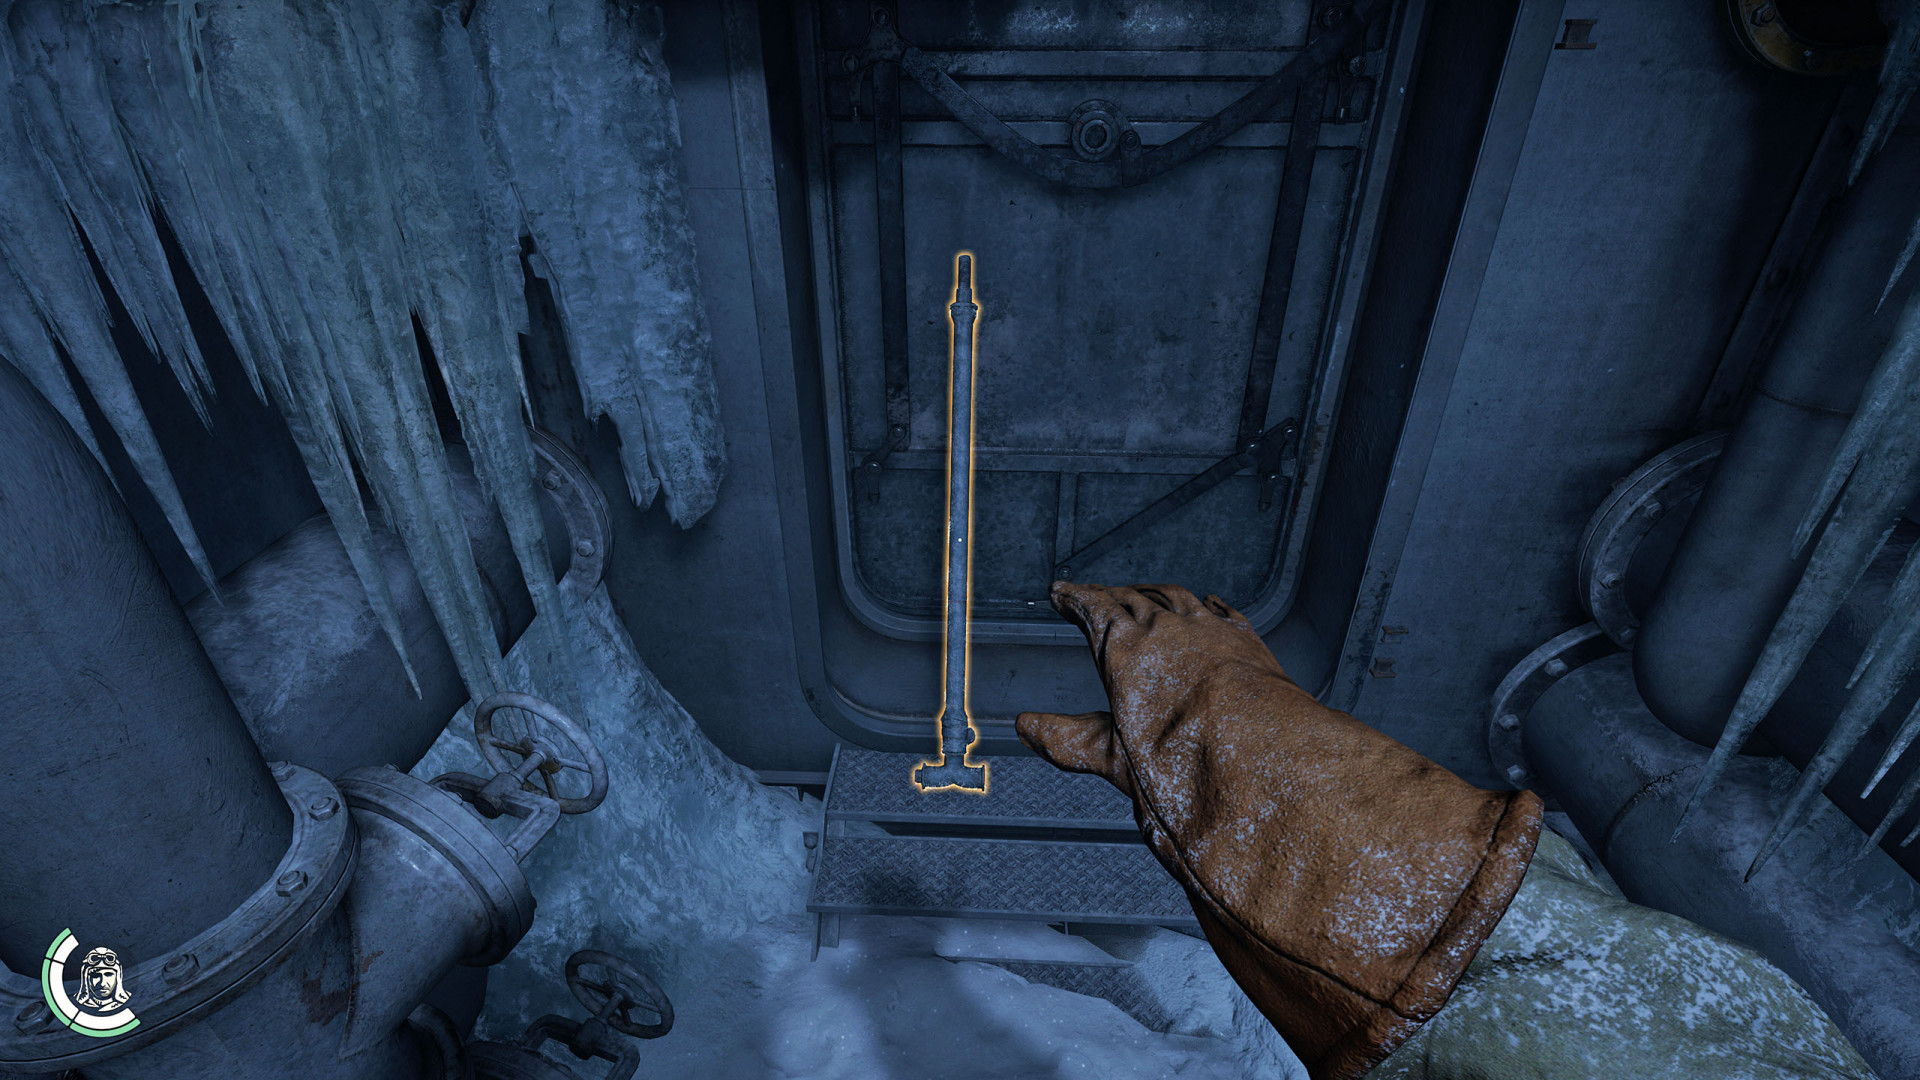
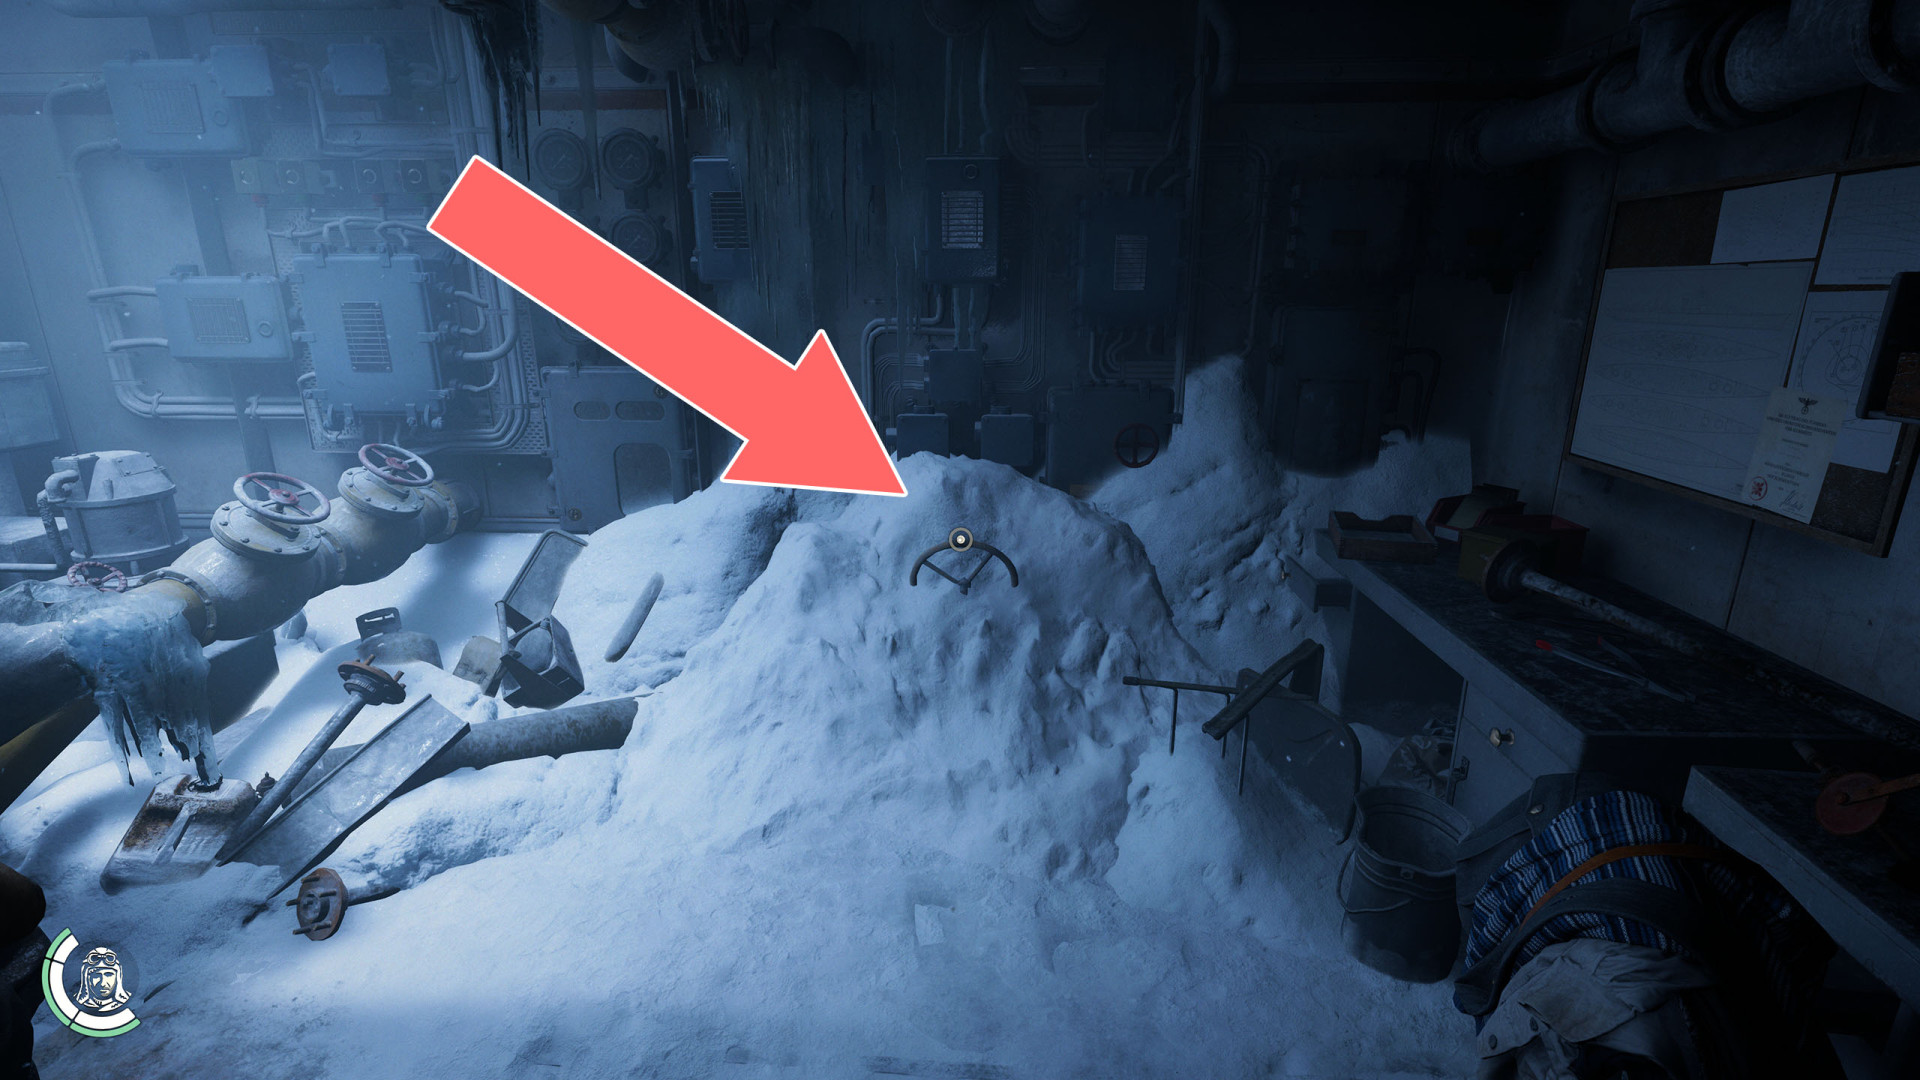
161Pipe
Use it to break down the Icy Wall.
162Valve Wheel
Locations on Sukhothai
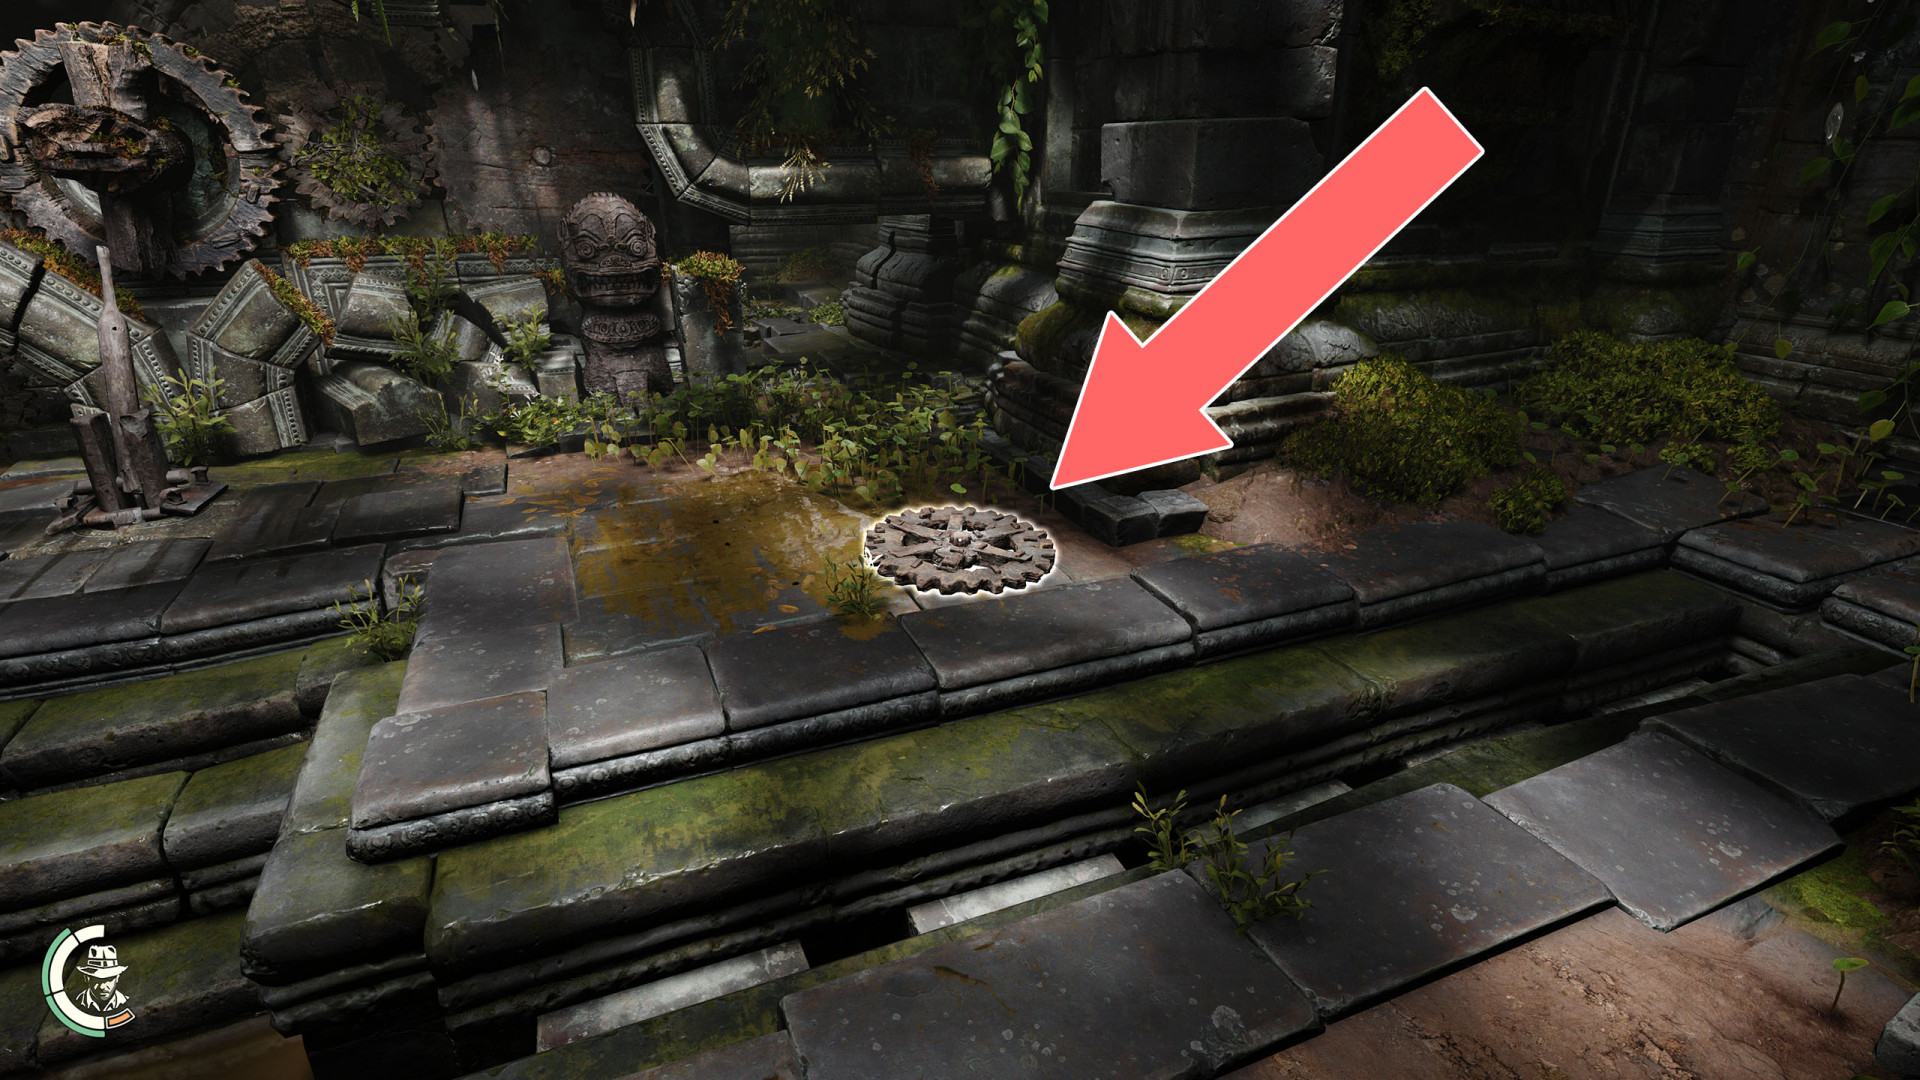
163Big Cogwheel
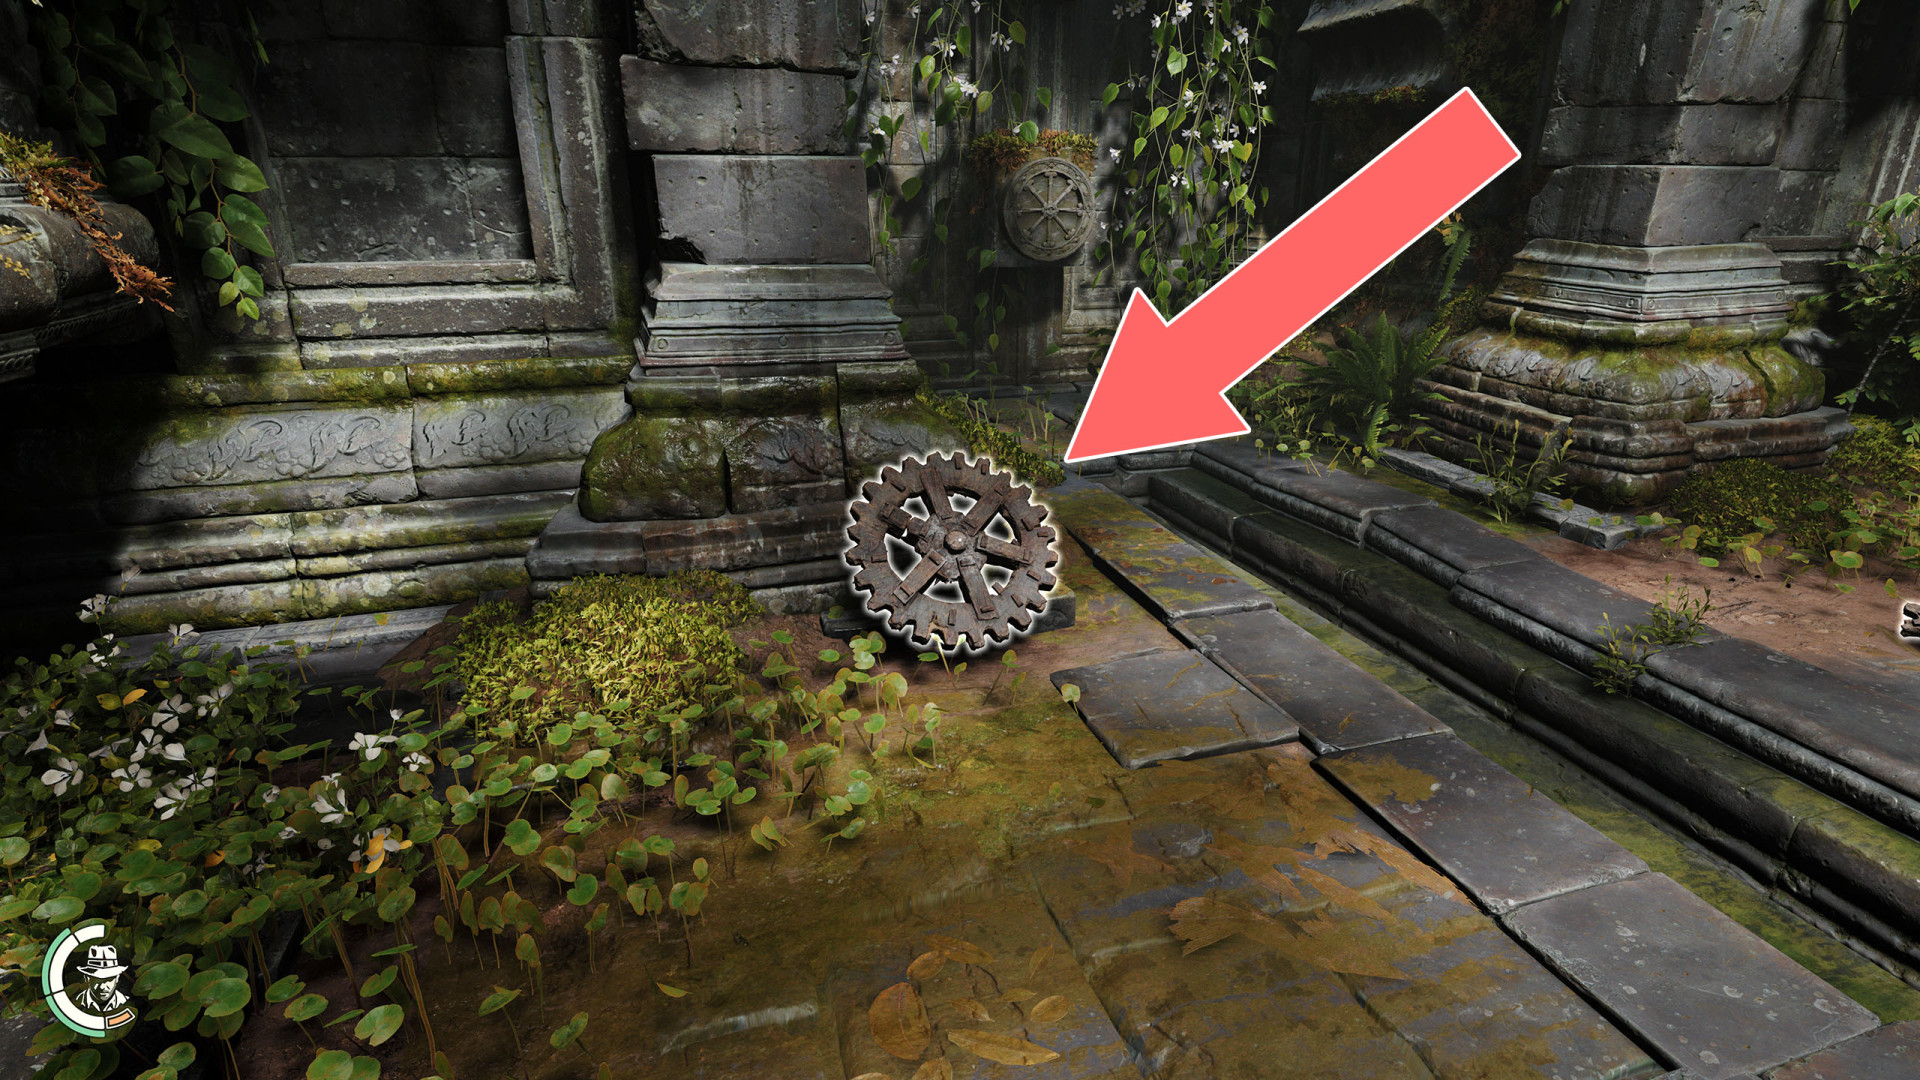
164Big Cogwheel
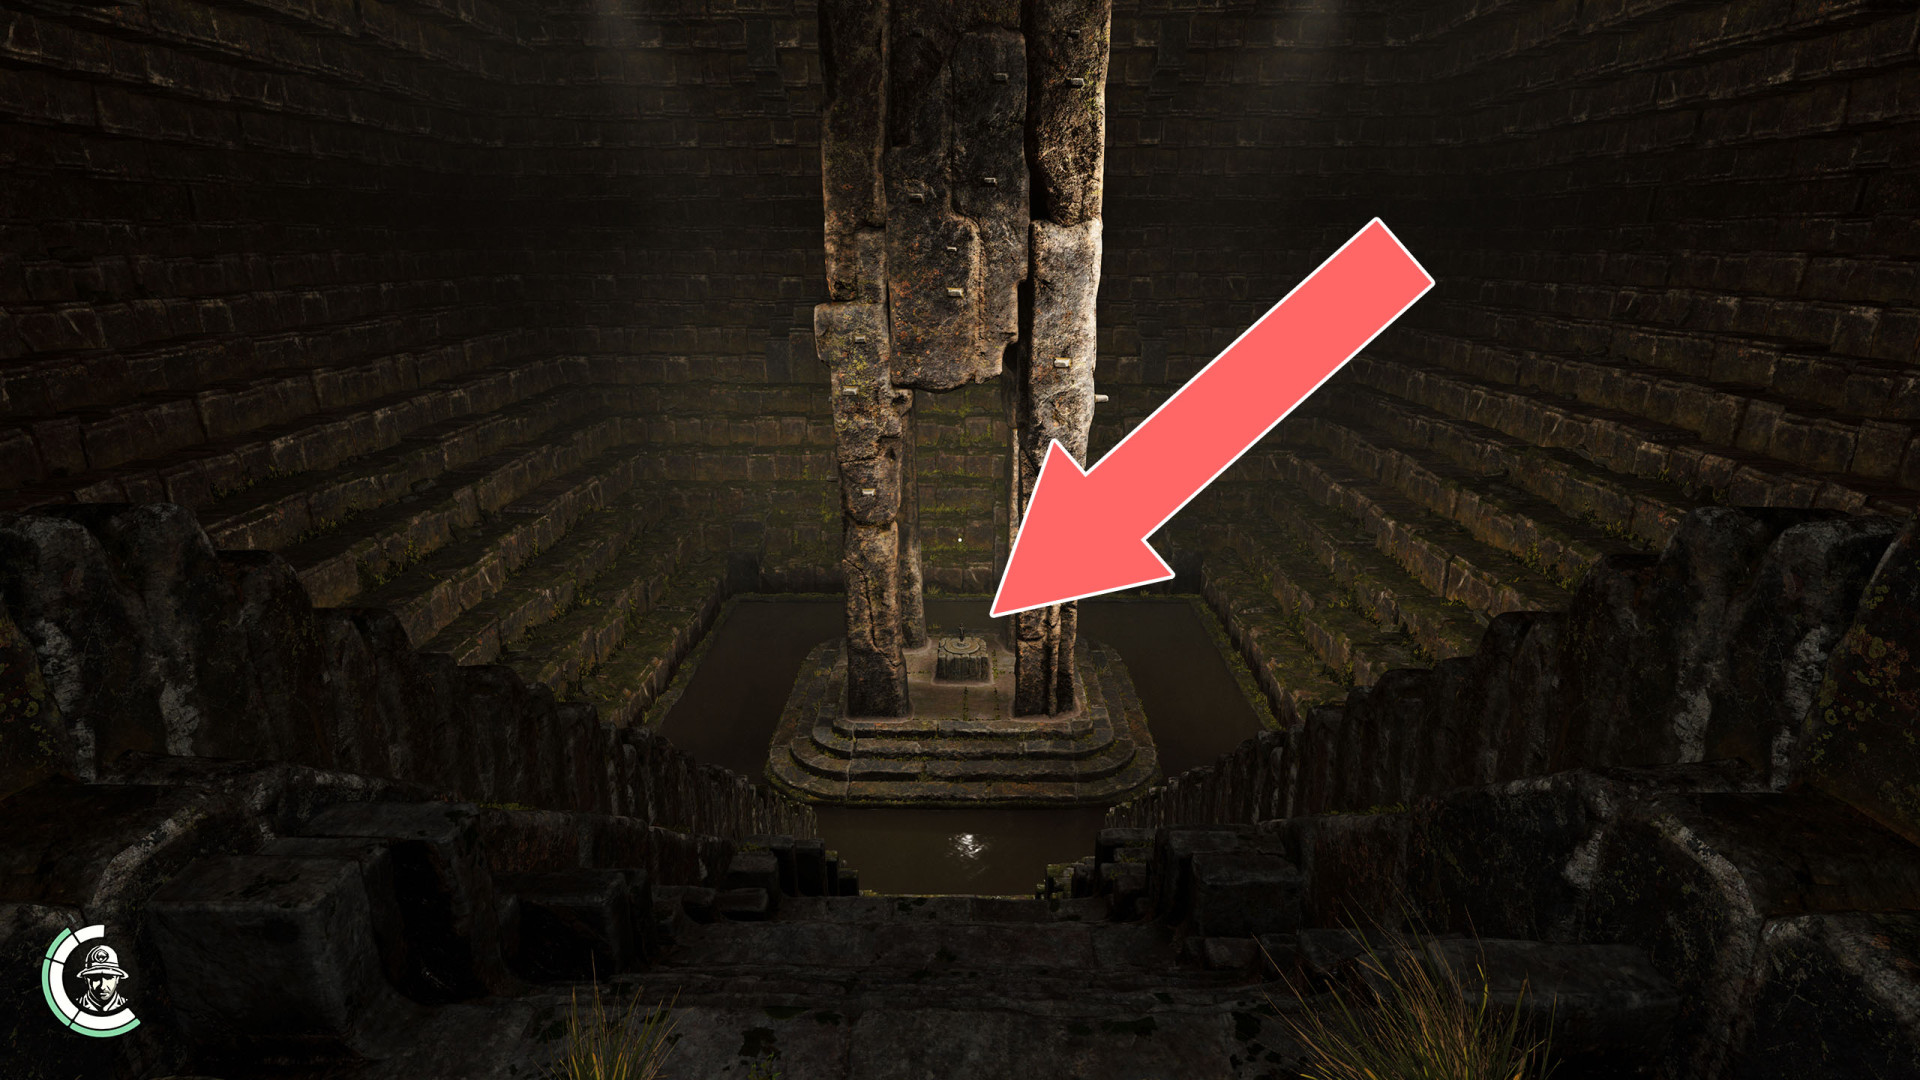
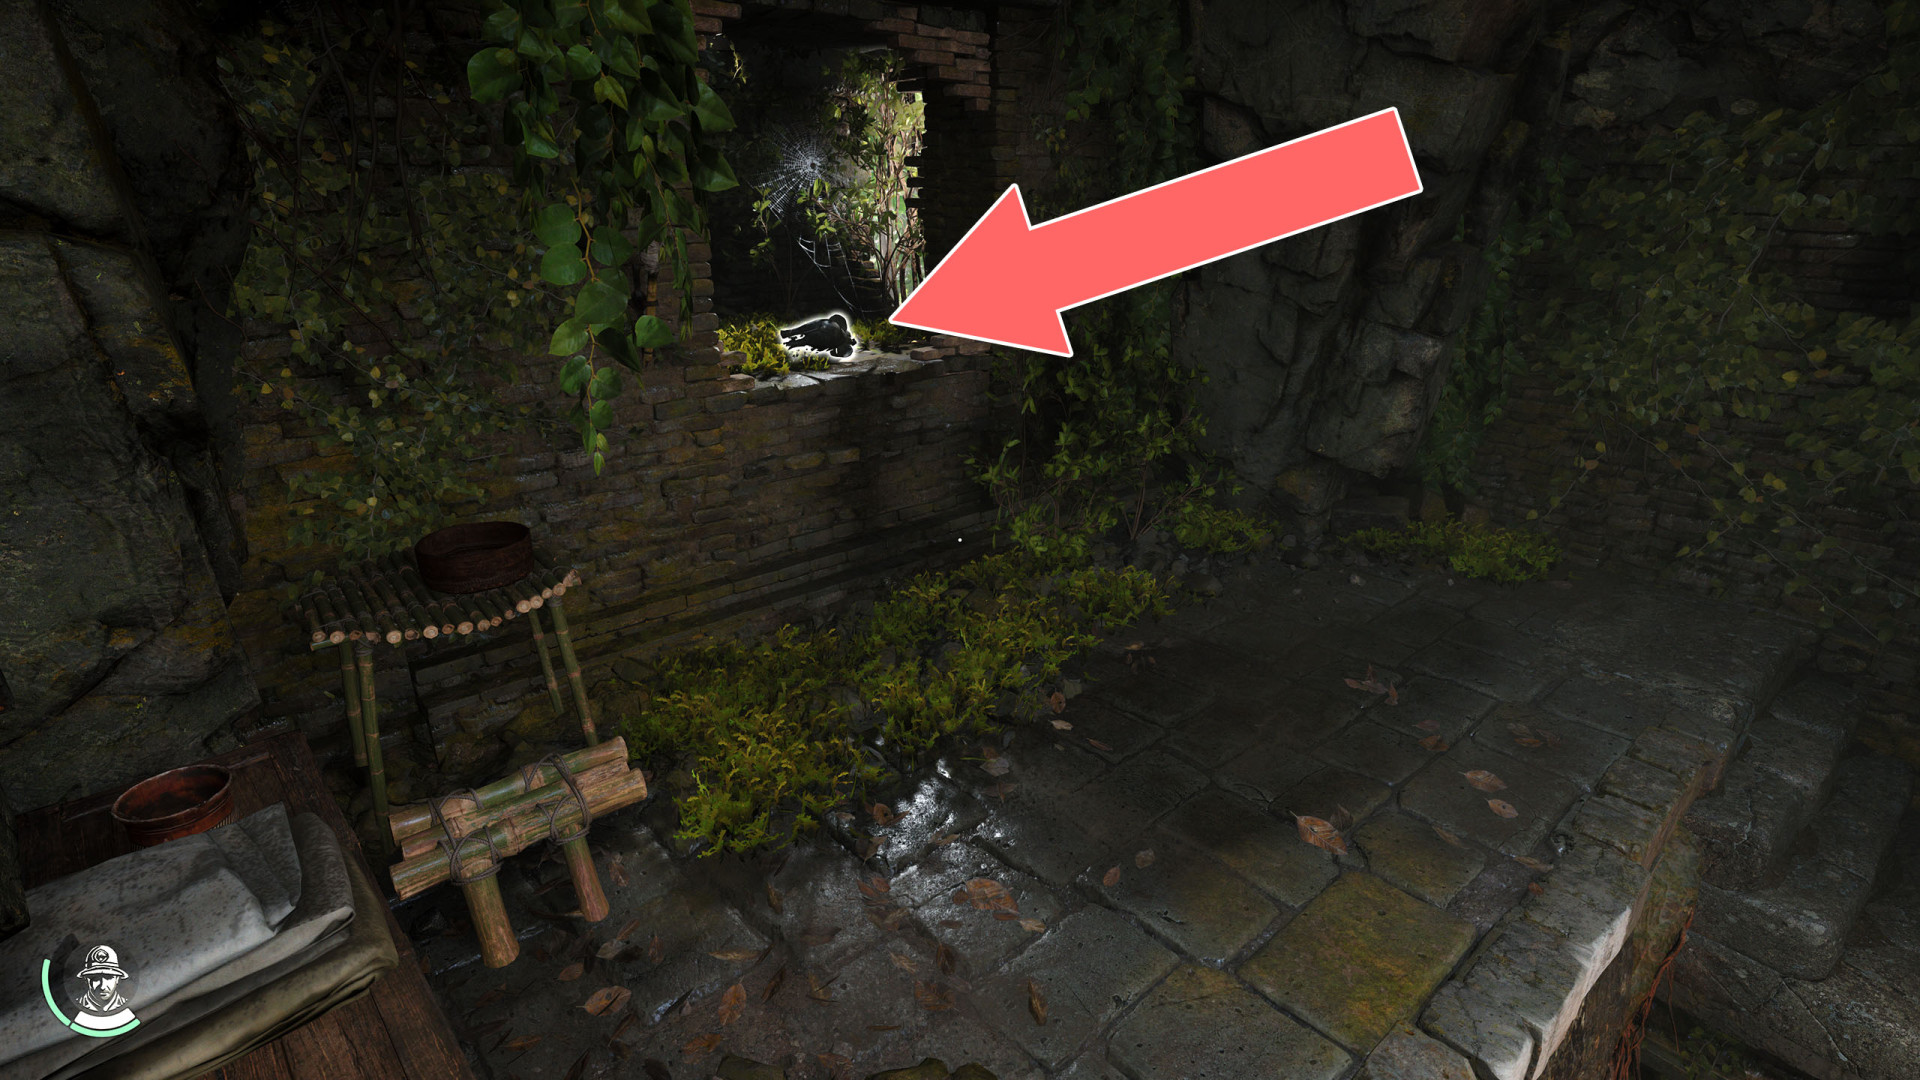
165Blessed Pearl
You can reach this place after going all the way down in the northern shaft.
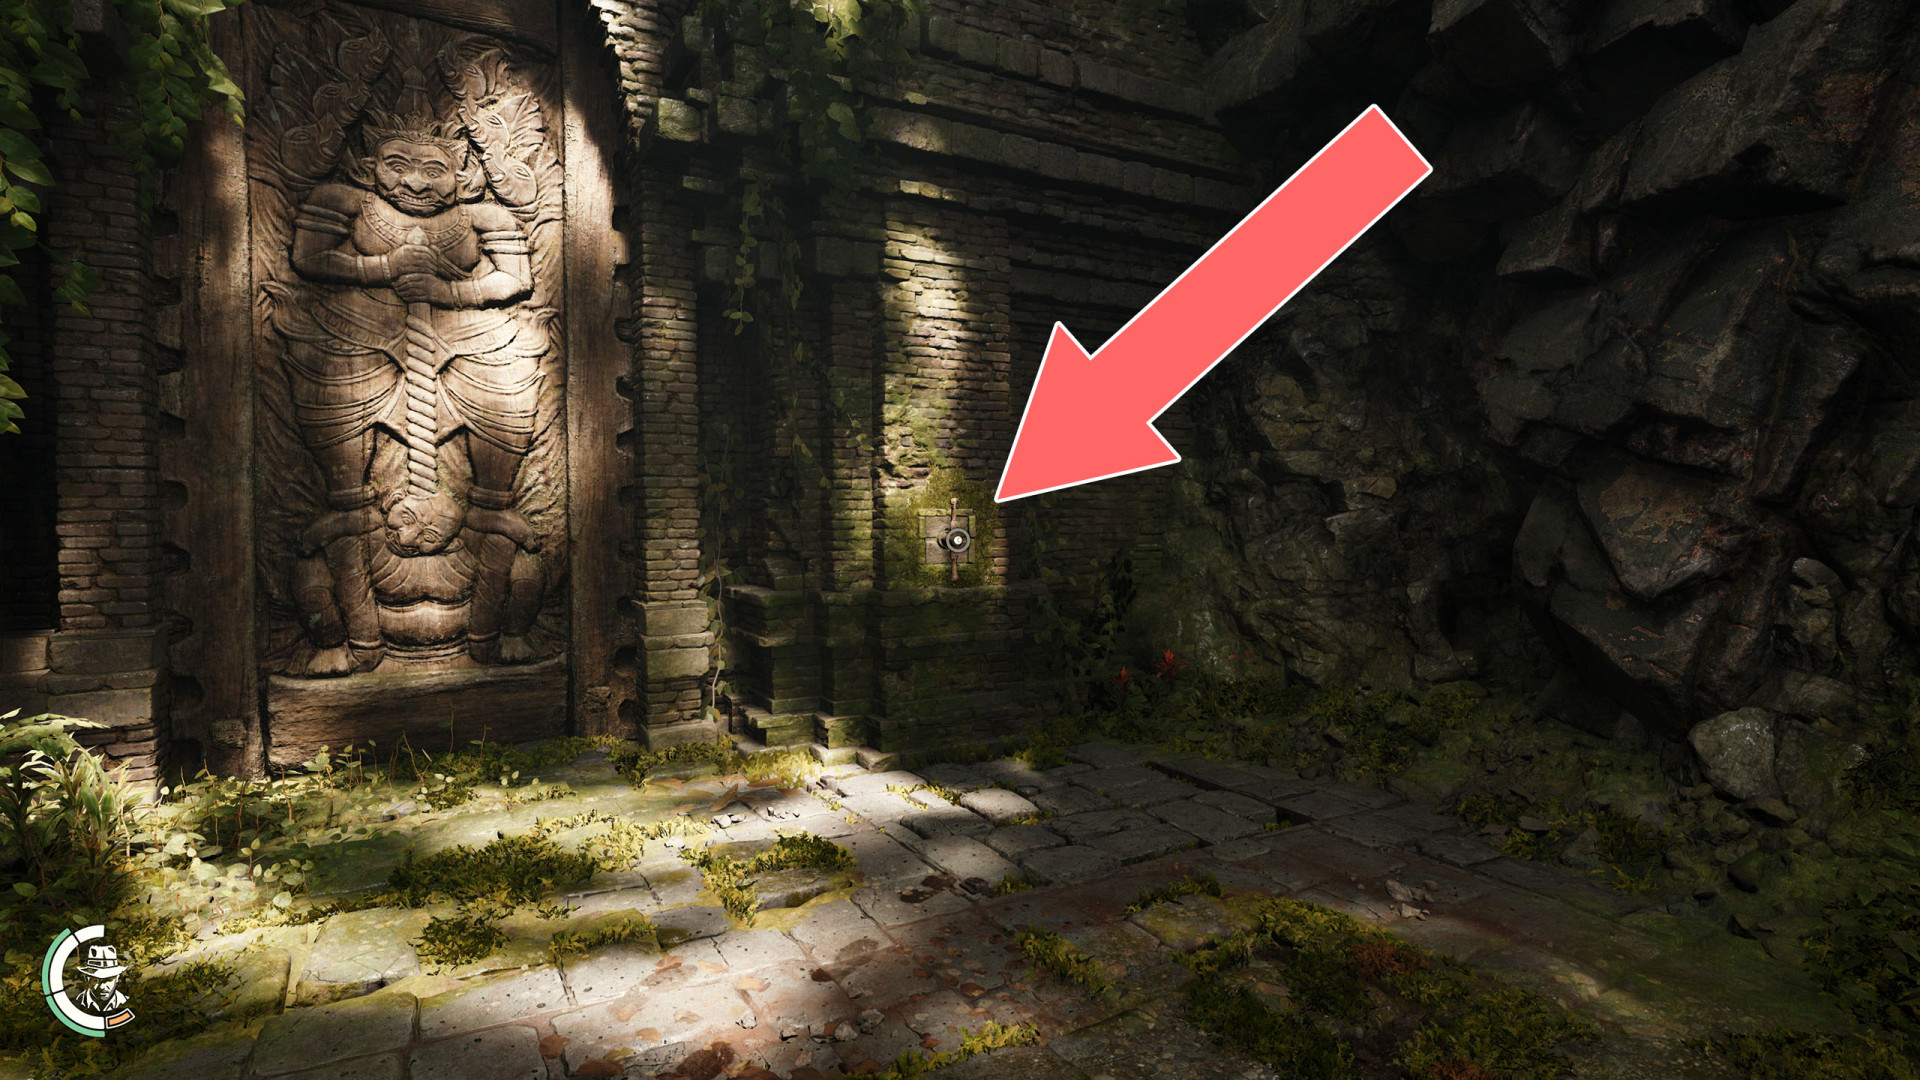
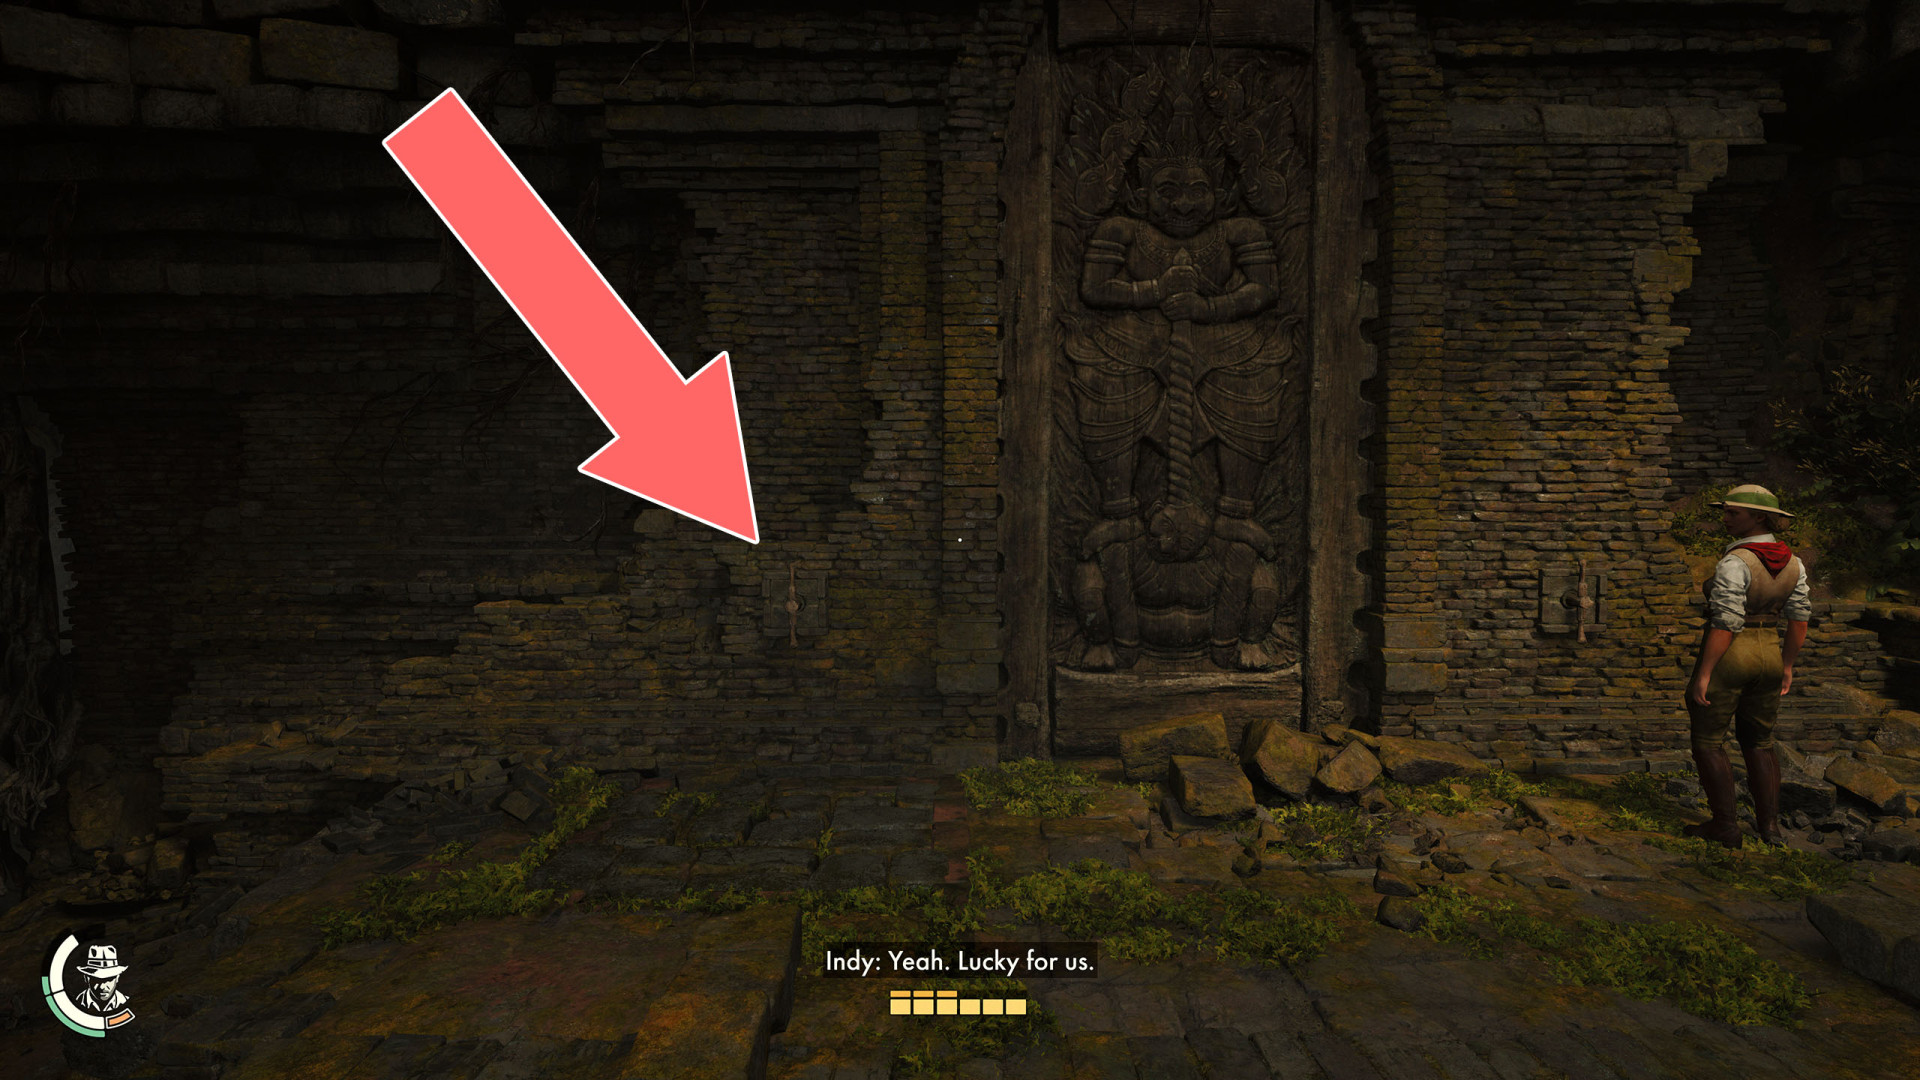
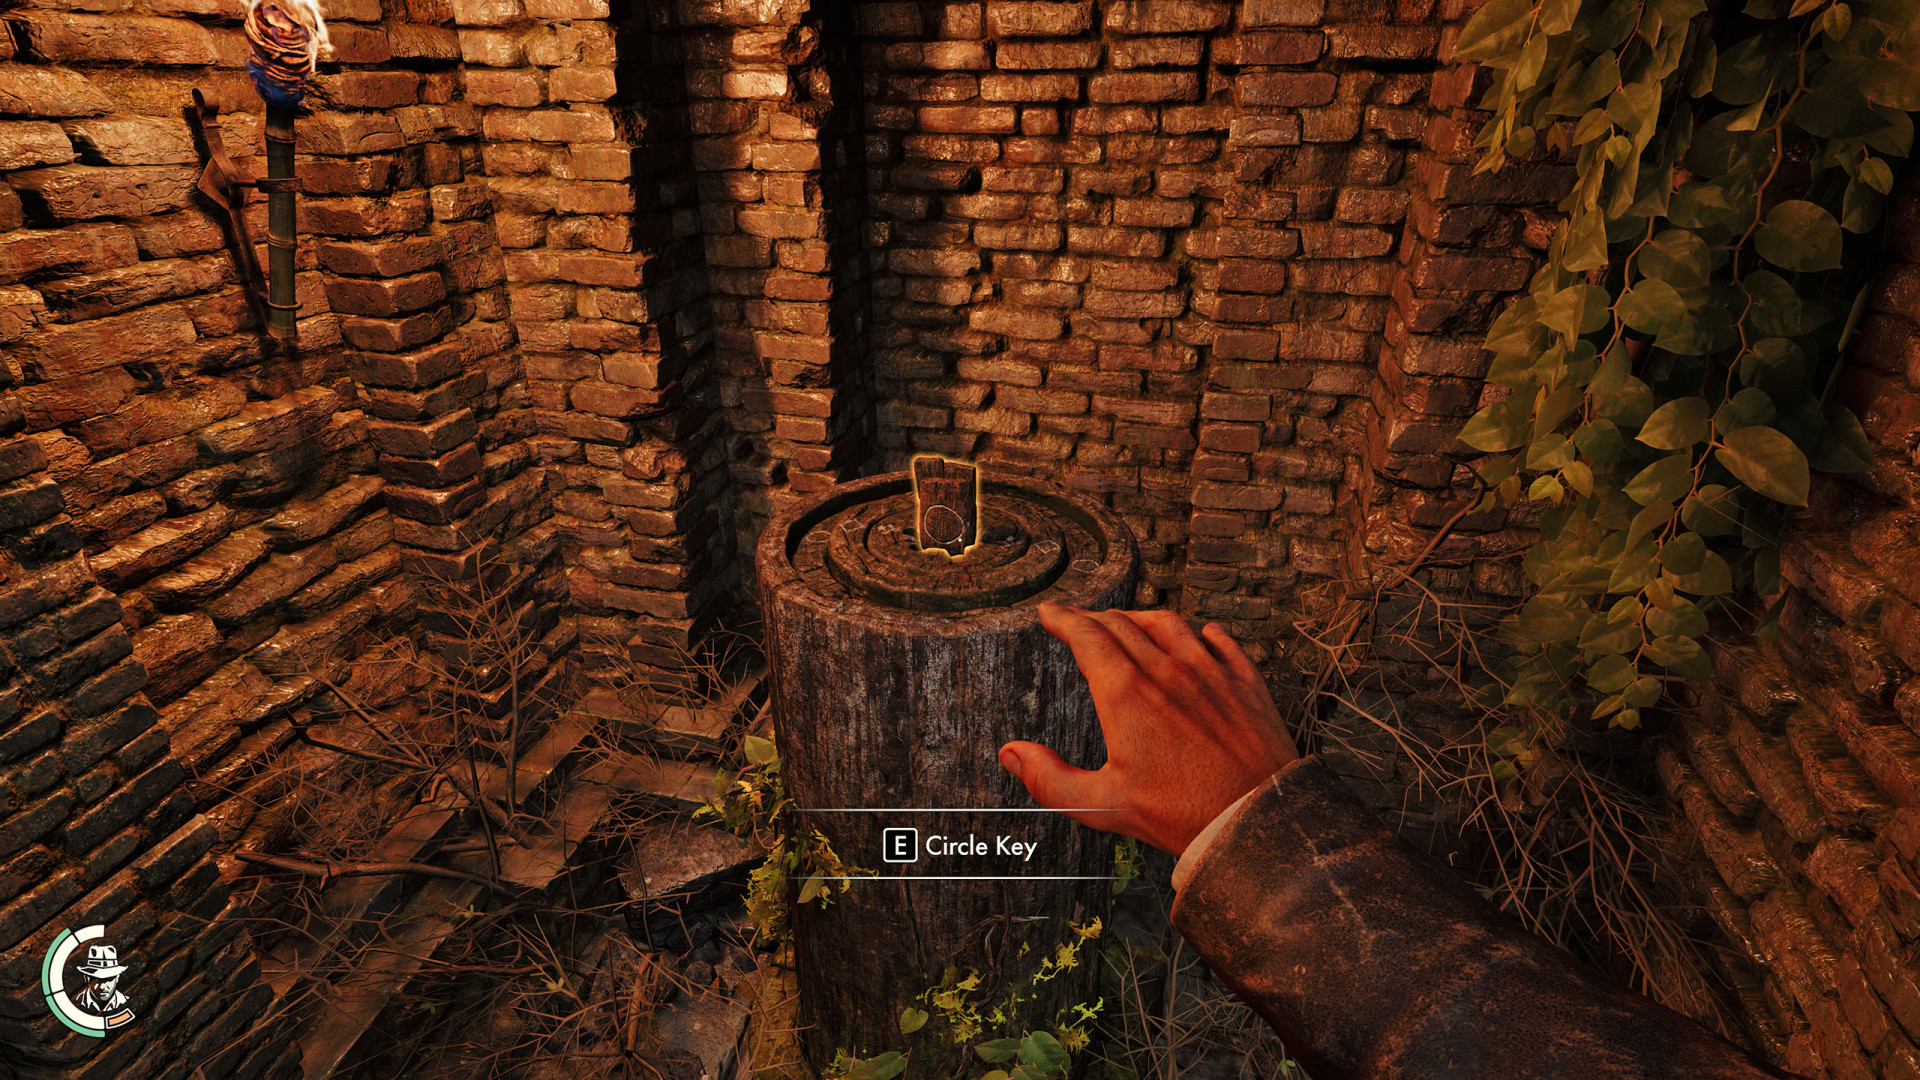
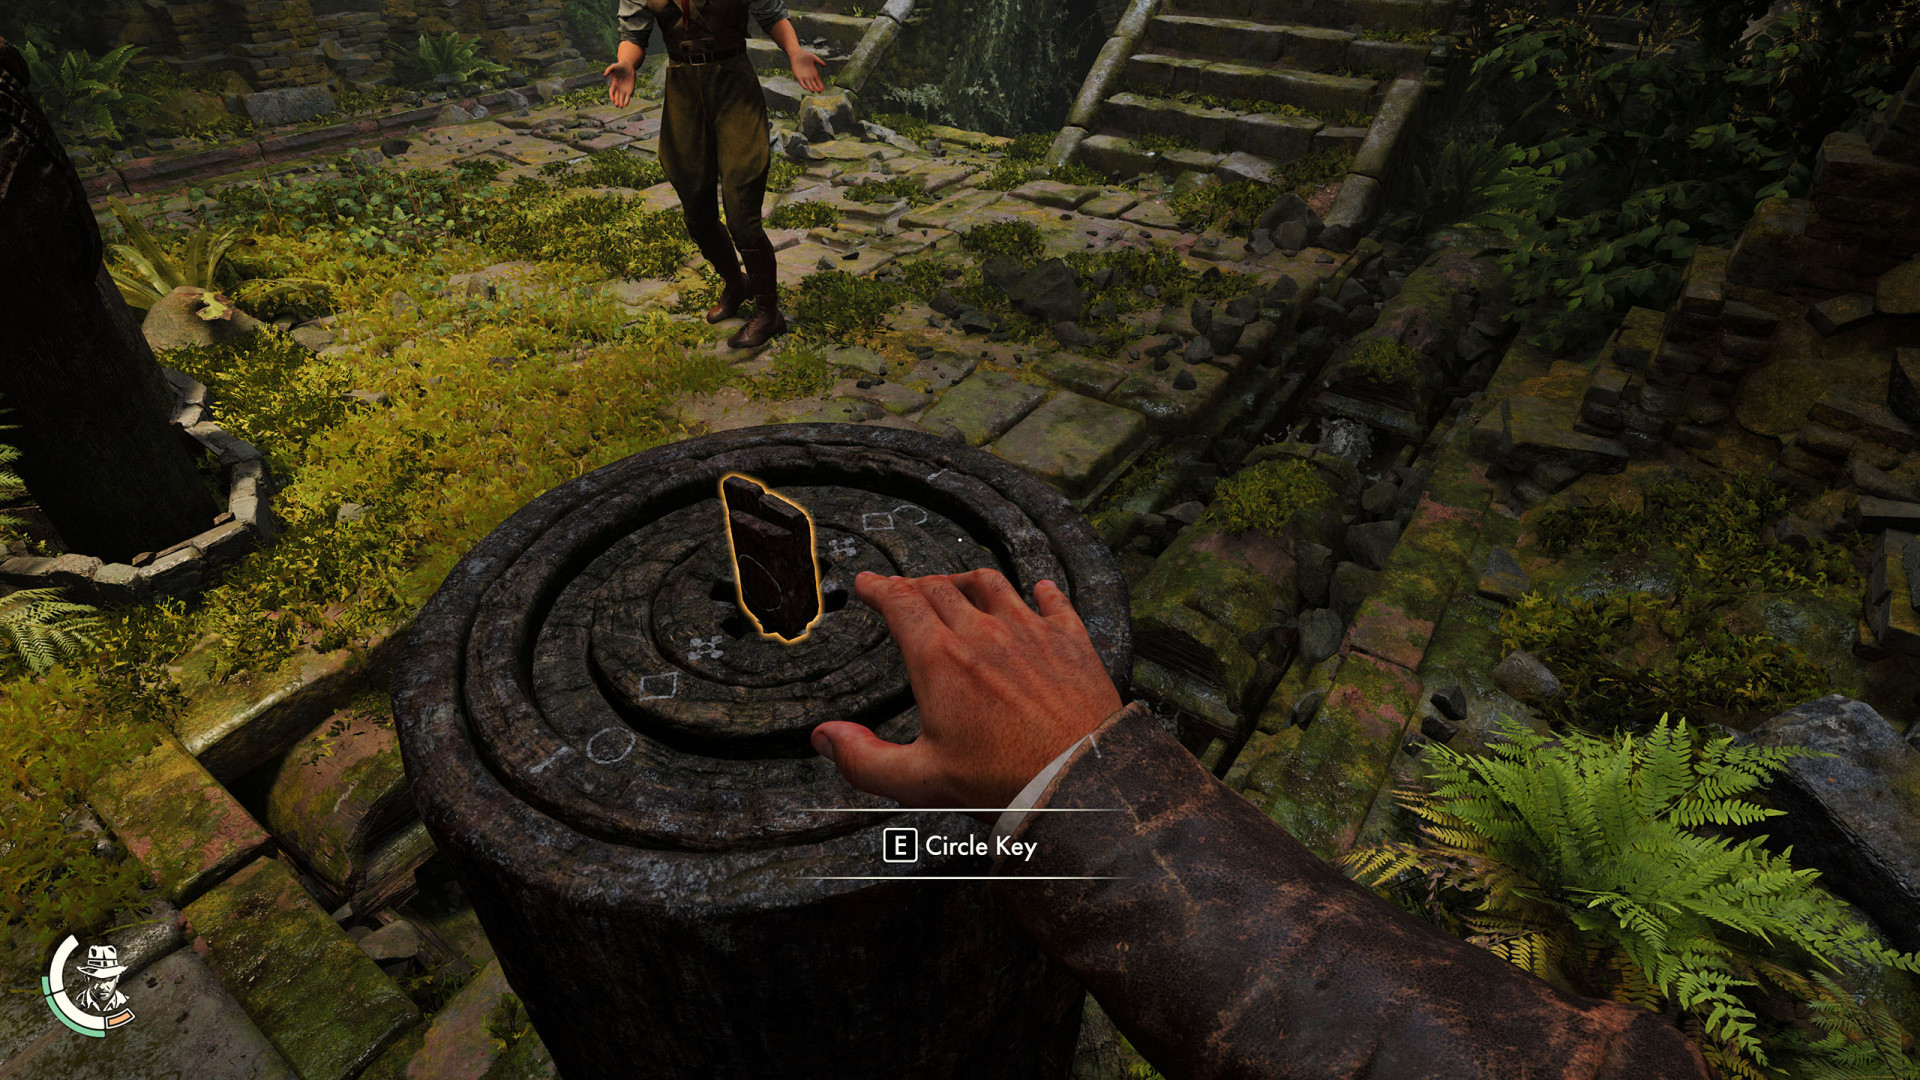
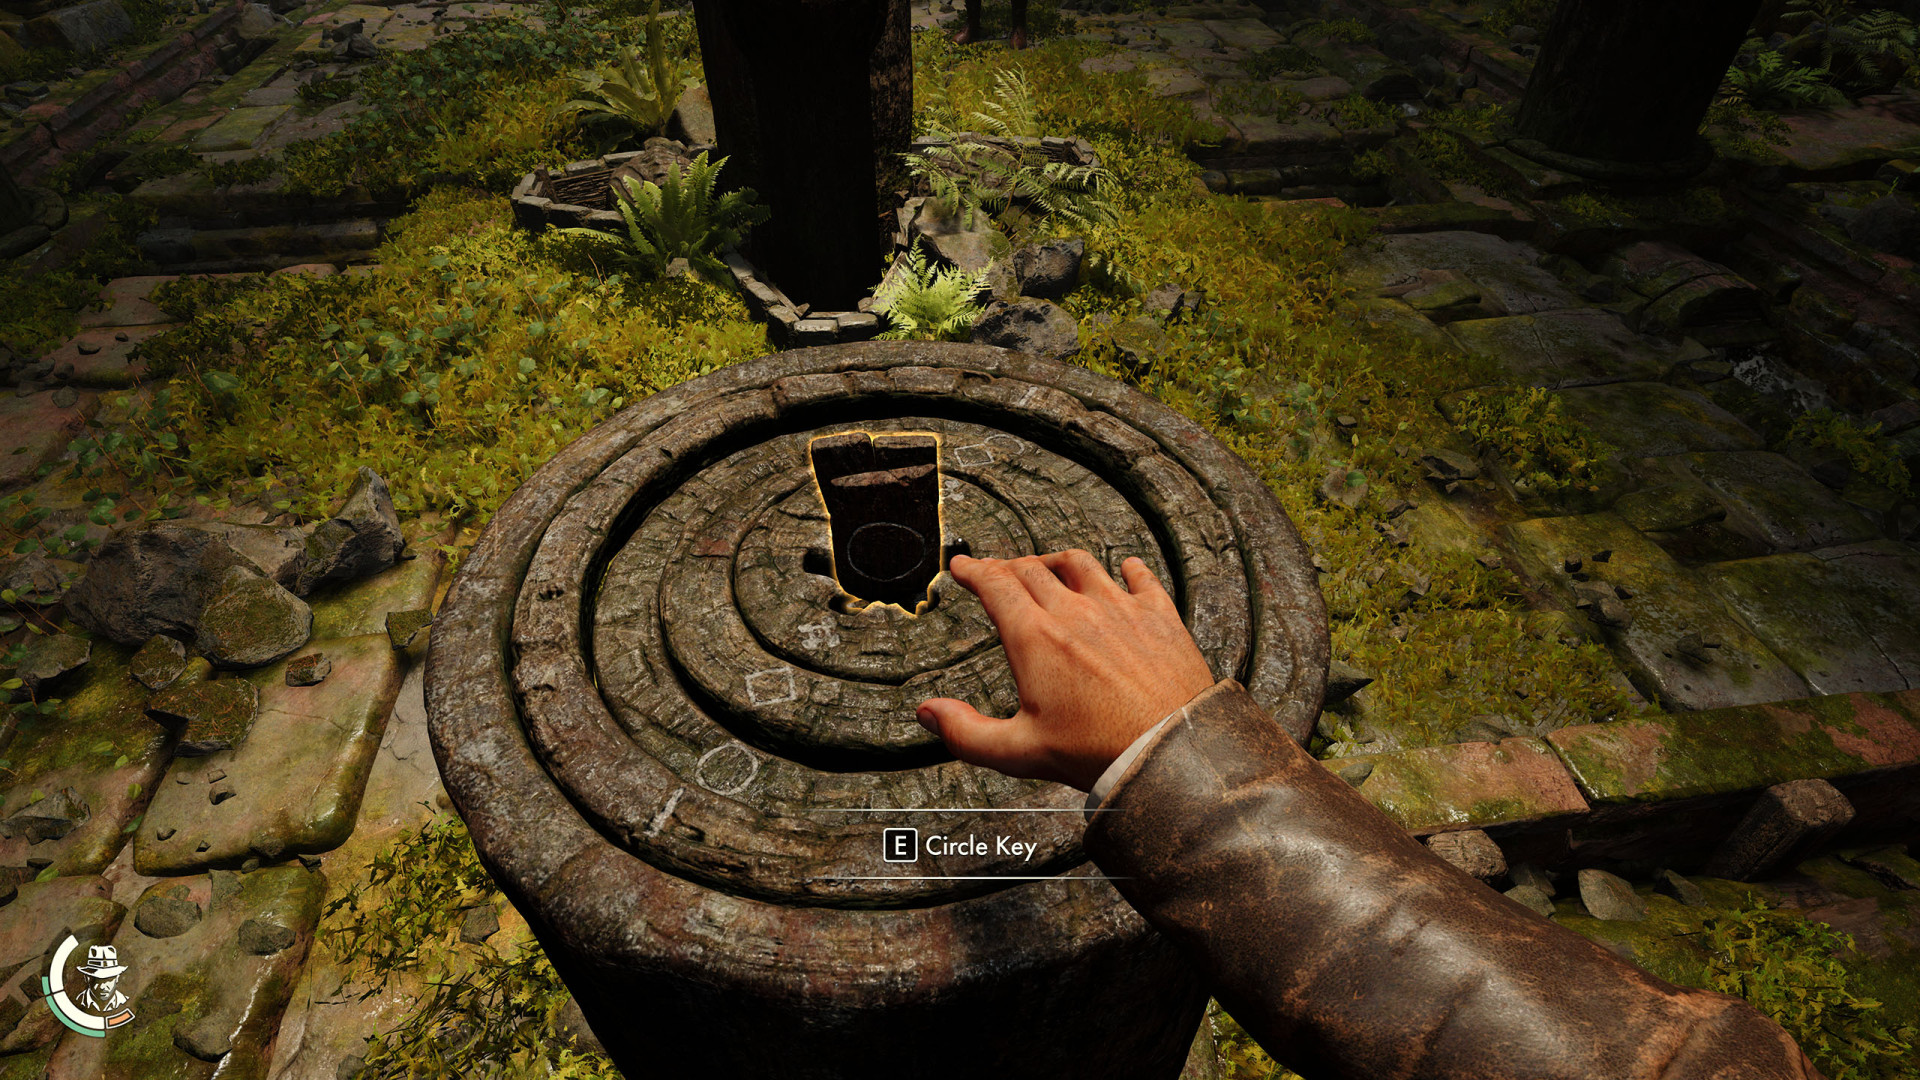
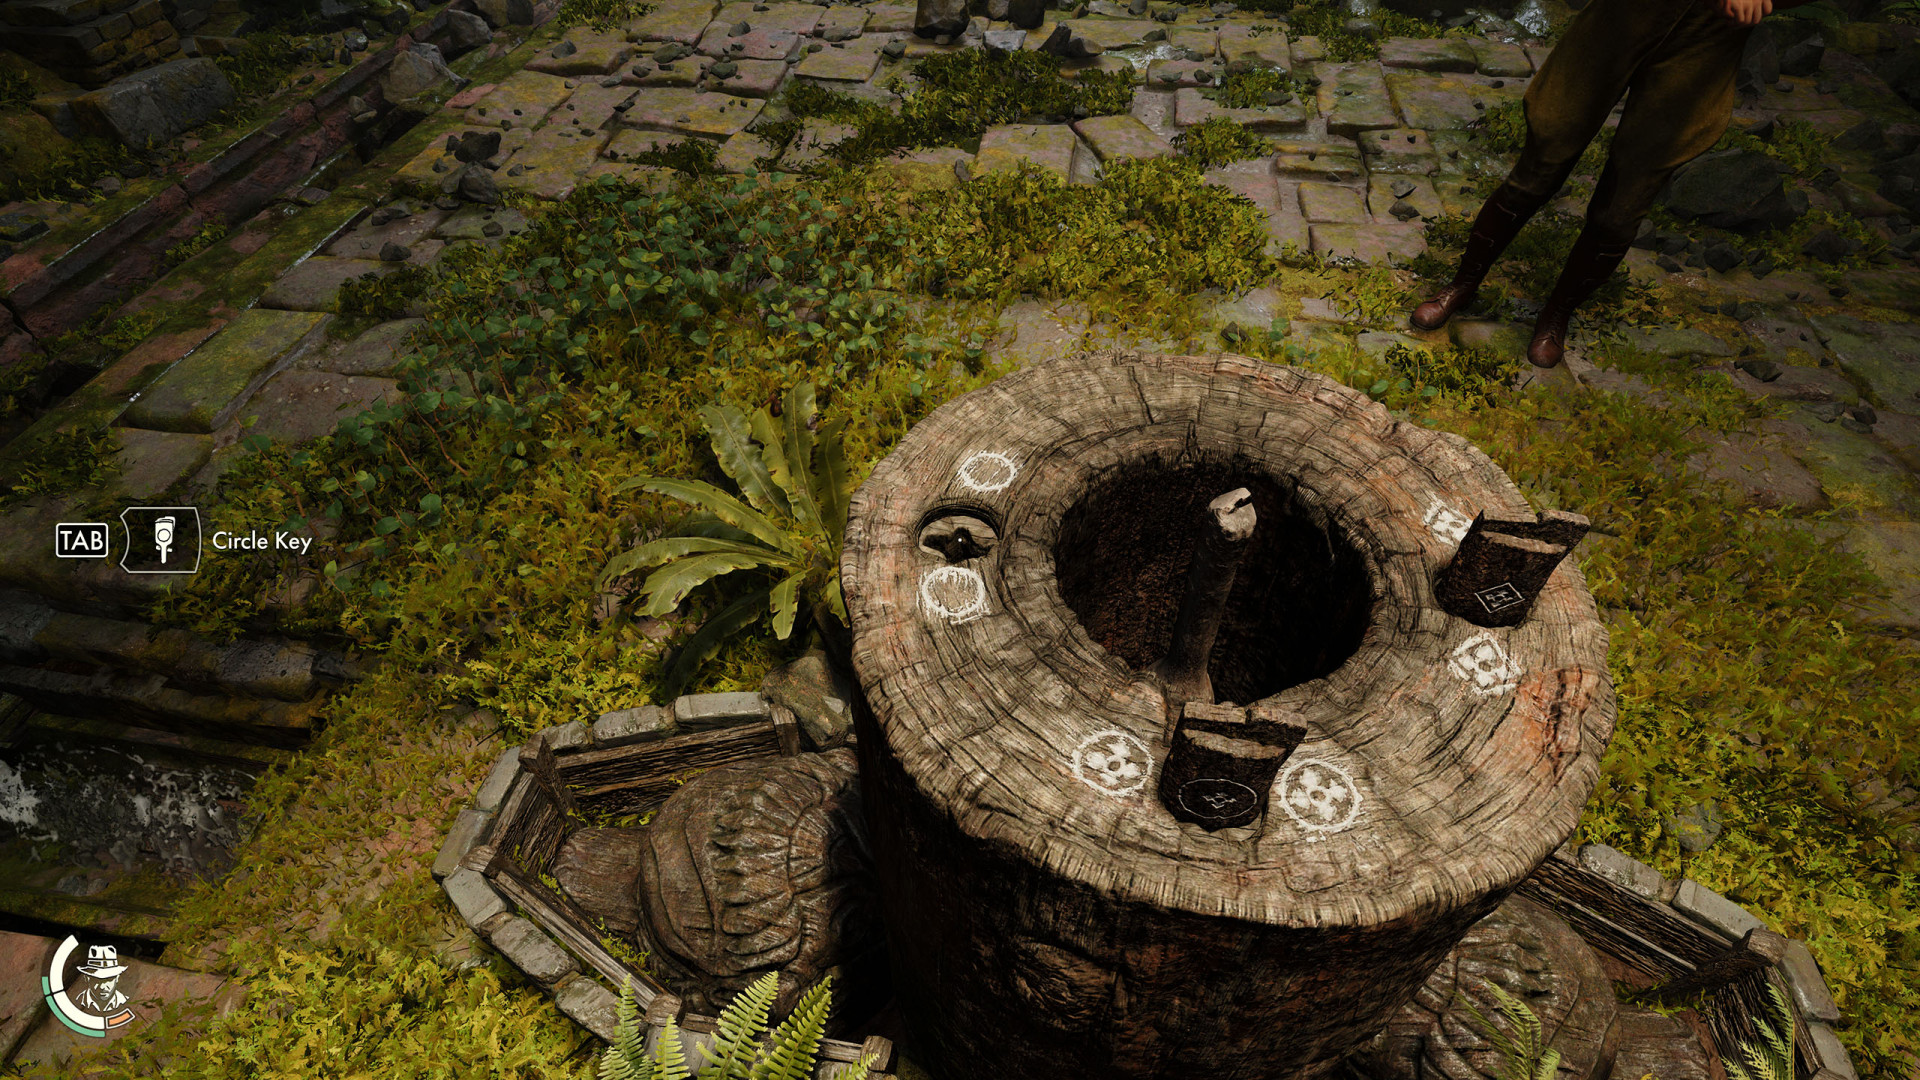
166Circle Key
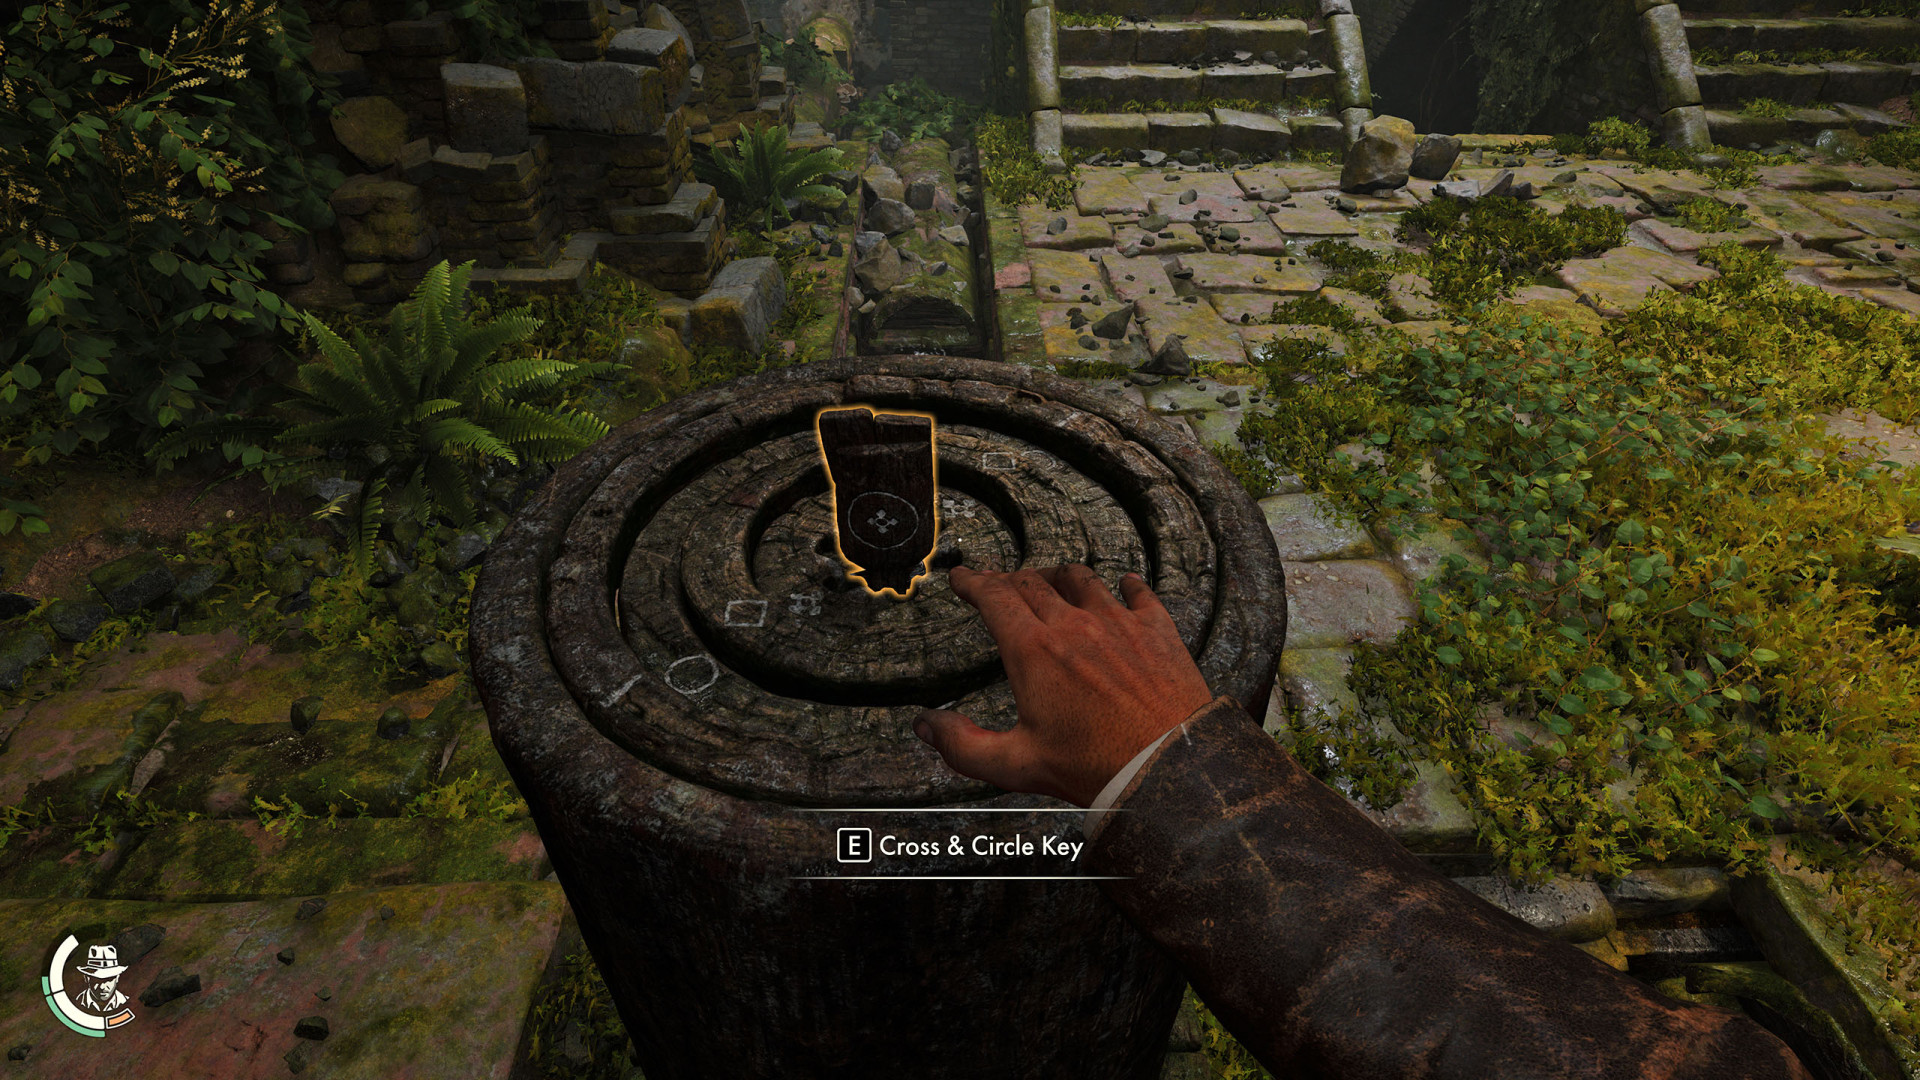
167Cross & Circle Key
168Cross & Diamond Key
169Elephant Statuette #1
170Elephant Statuette #2
Inside a small alcove behind a burnable wall.
171Elephant Statuette #3
172Fish Crate
173Game Piece x 2
174Game Piece x 3
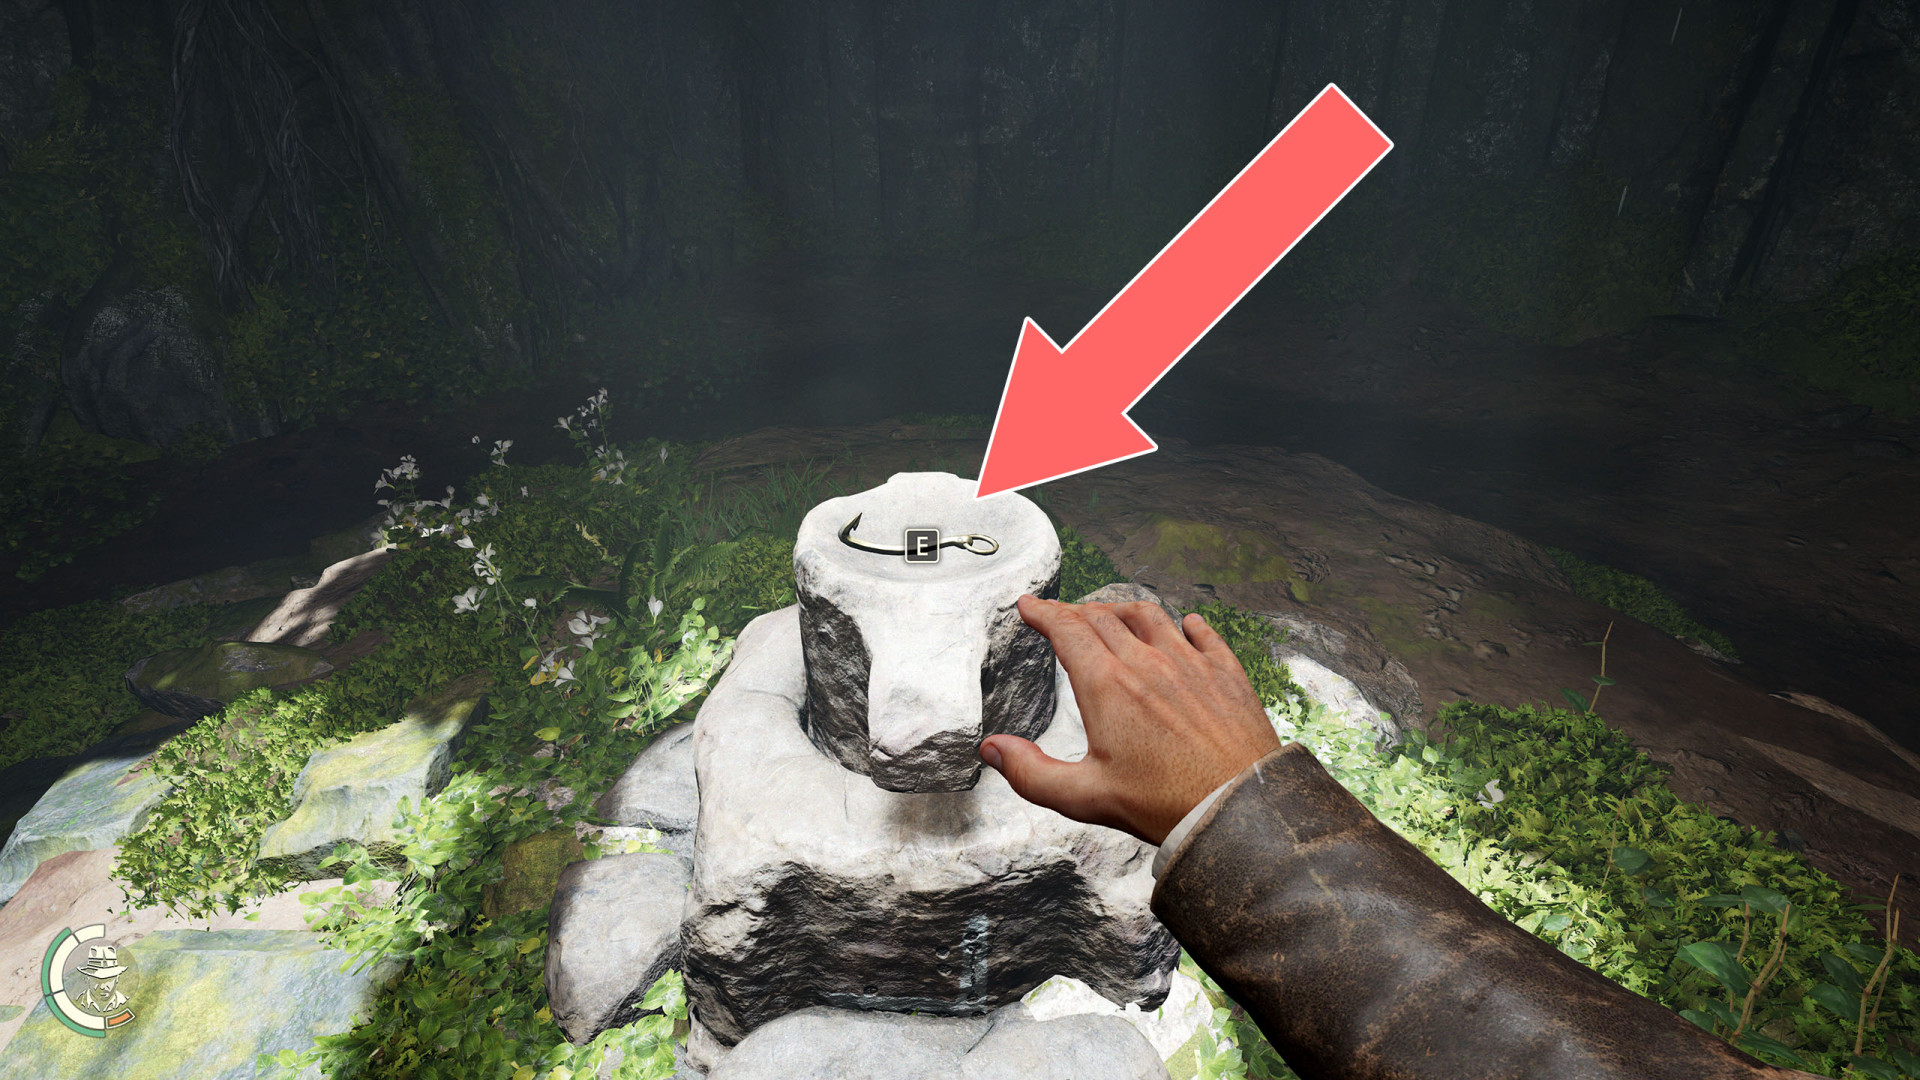
175Golden Fishing Hook
176Hammer
177Handle
178Handle
179Handle
180Handle (2)
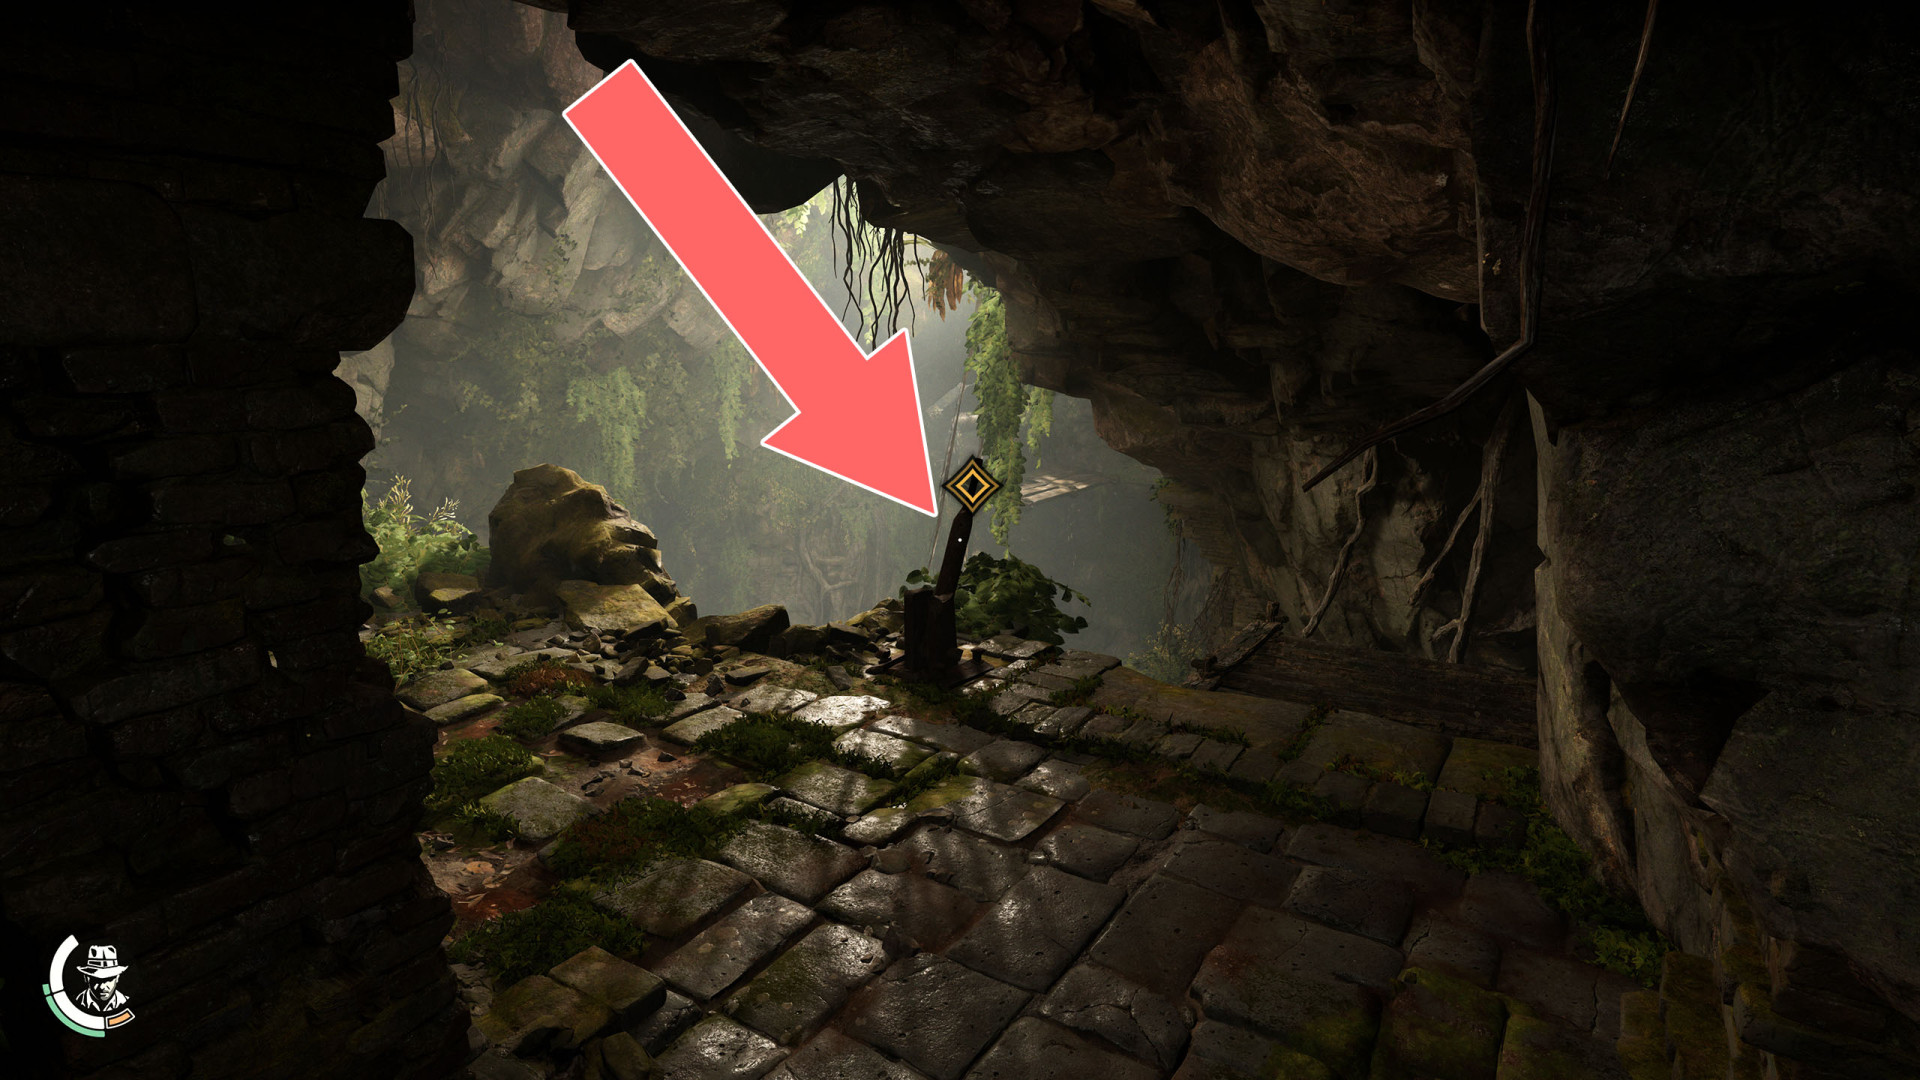
181Lever
182Lever
When you turn it the trapdoor will open and you will slide down the ramp to the trap room.
183Lever
184Lever
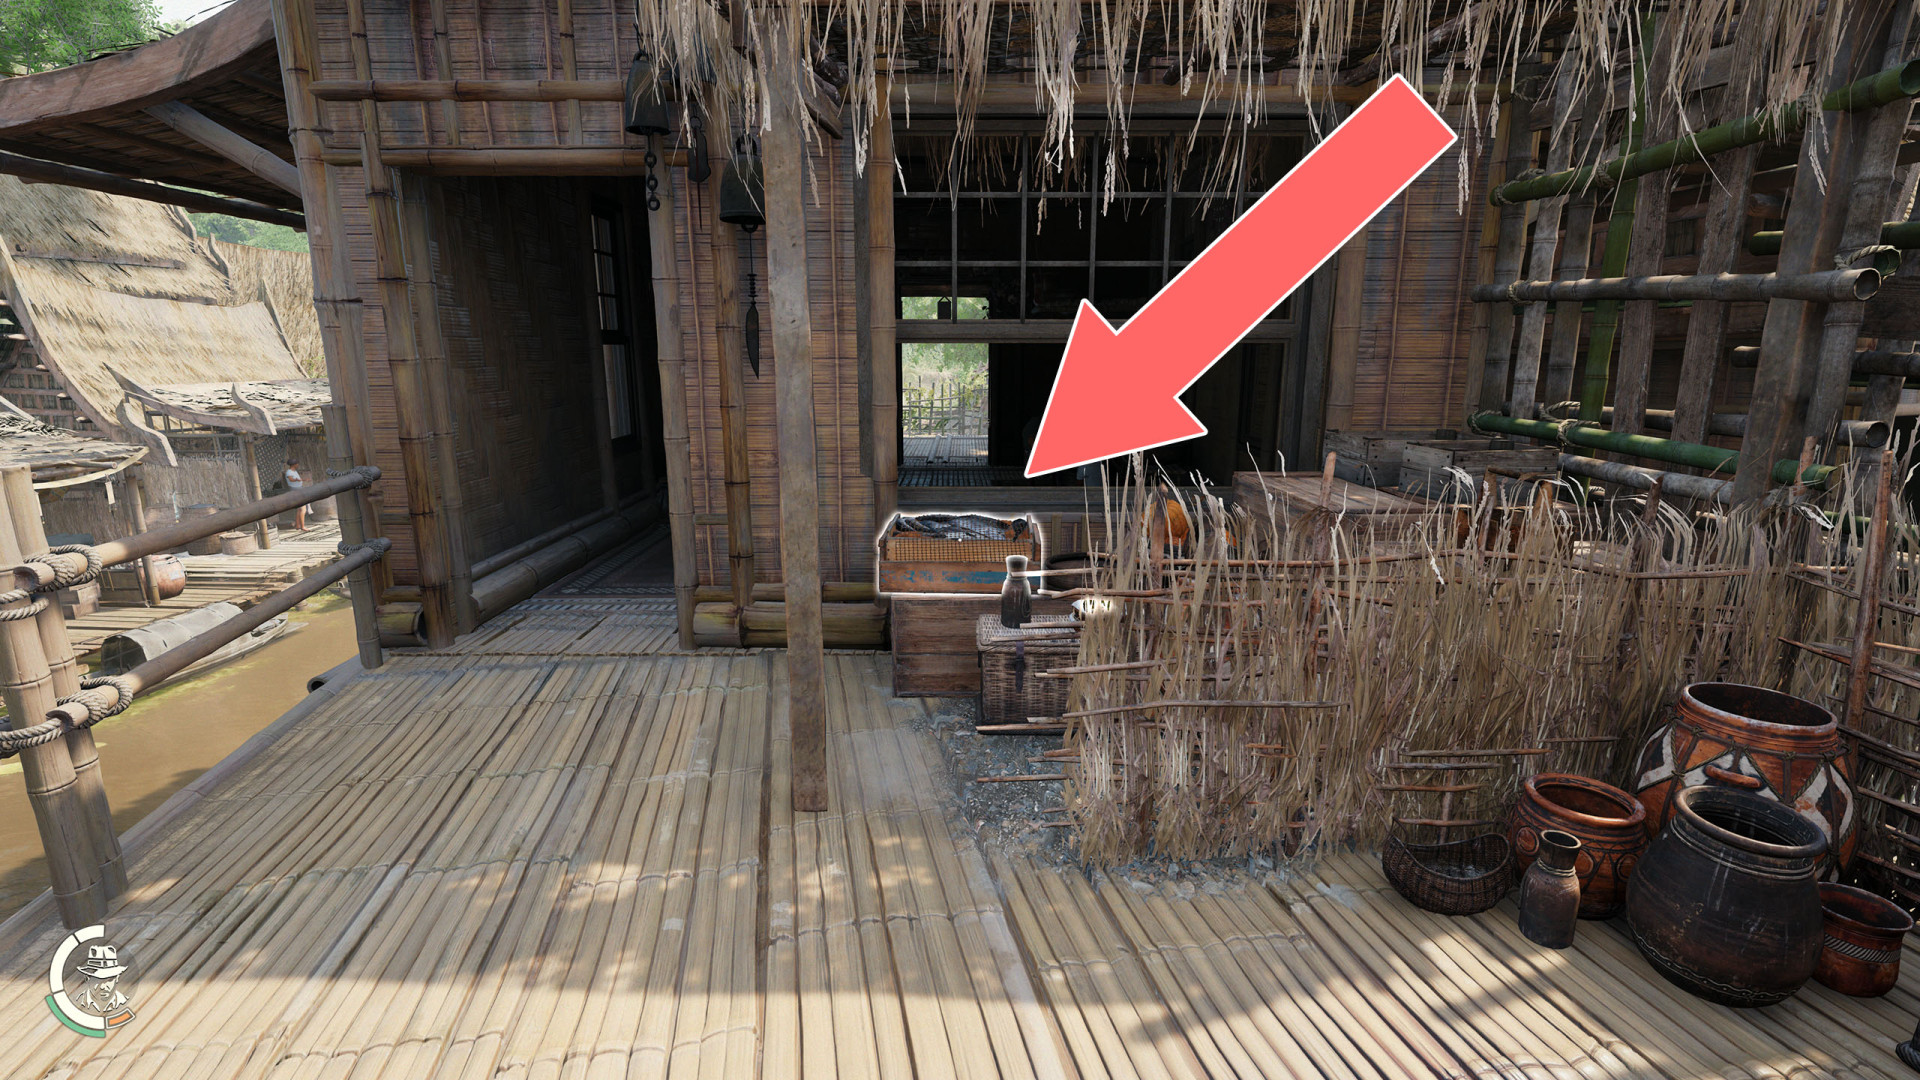
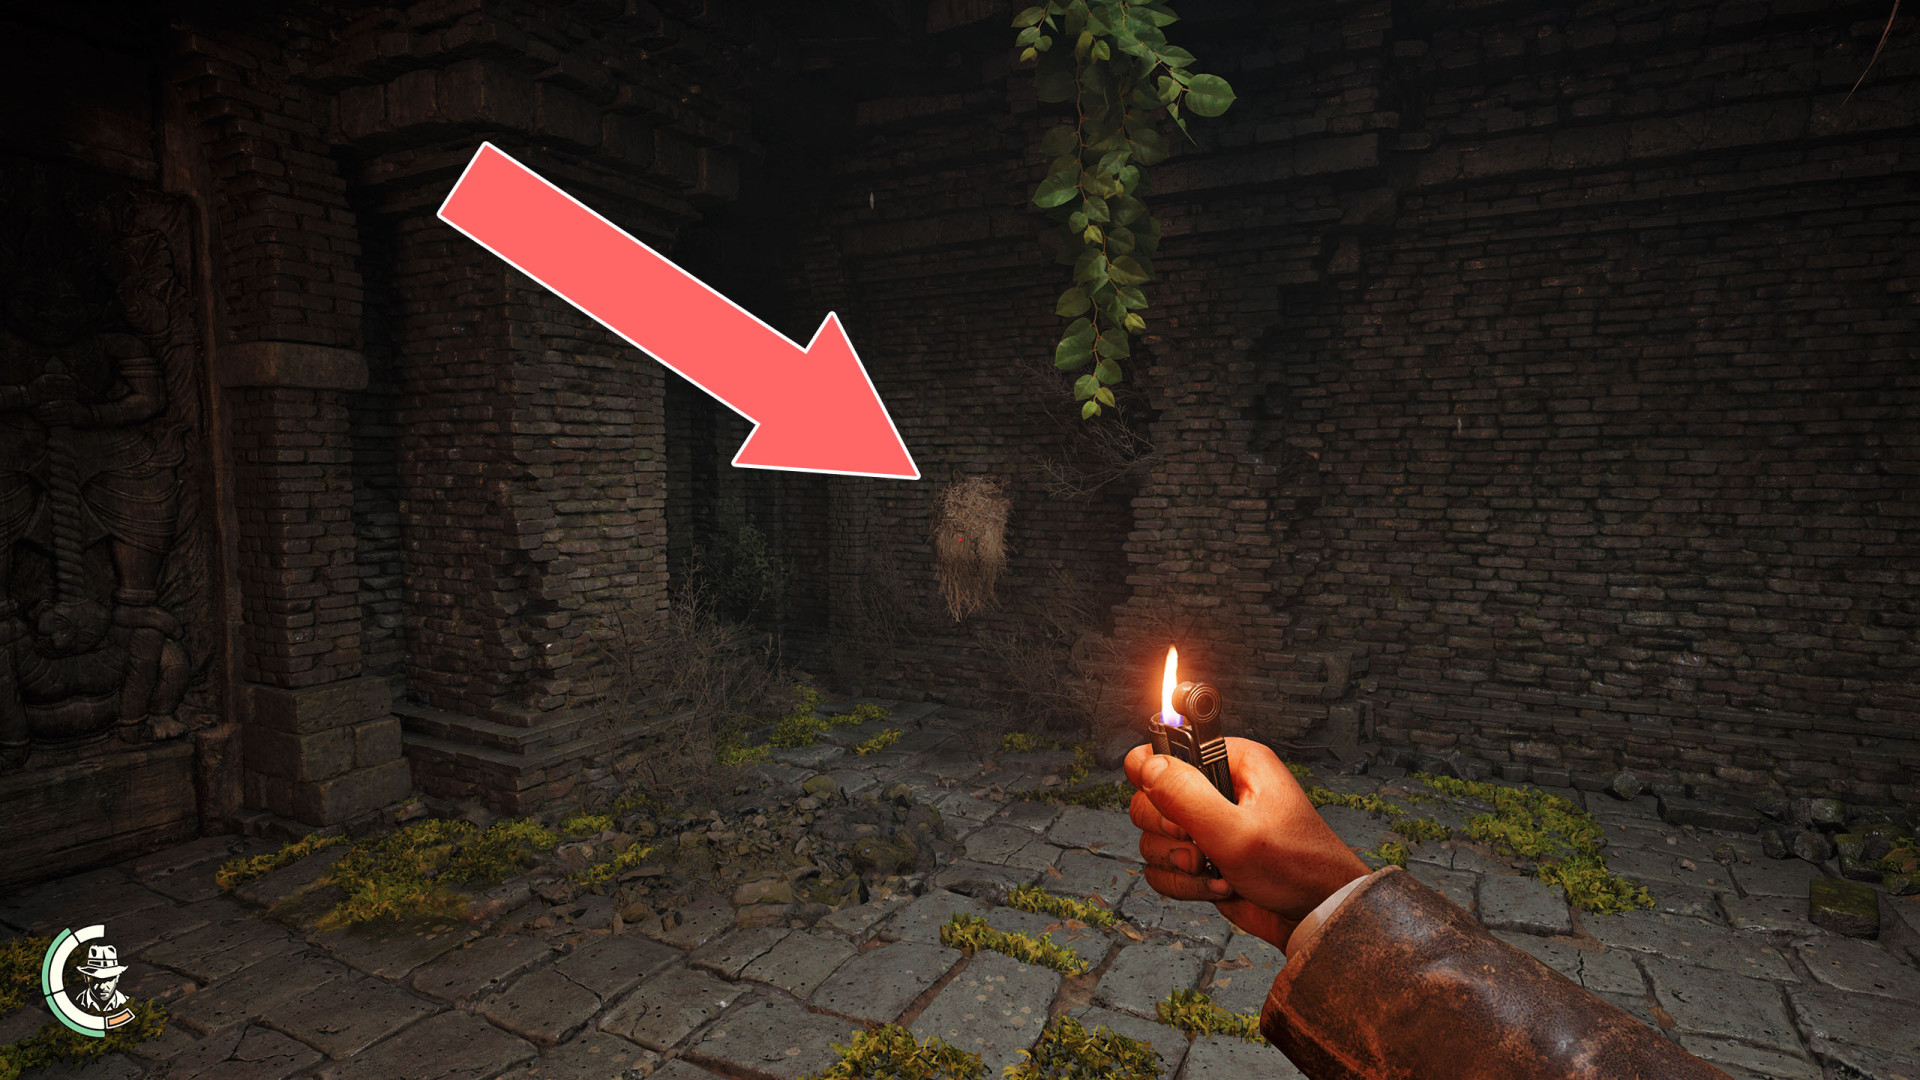
185Lever
Hidden under some hay you can burn using the lighter.
186Lever
Use it to stop the cogwheels.
187Pipe Segment (1)
188Pipe Segment (2)

189Pipe Segment (3)
190Pipe Segment (4)
191Pipe Segment (5)
192Pipe Segment (6)
193Pipe Segment (7)
194Pipe Slot #A1
Show the map
195Pipe Slot #B1
196Pipe Slot #B2
197Pipe Slot #C1
198Pipe Slot #C2
199Pipe Slot #C3
200Pipe Slot #C4
201Platform
202Plugged Pipe
203Plugged Pipe
204Plugged Pipe

205Rebreather
798 Baht
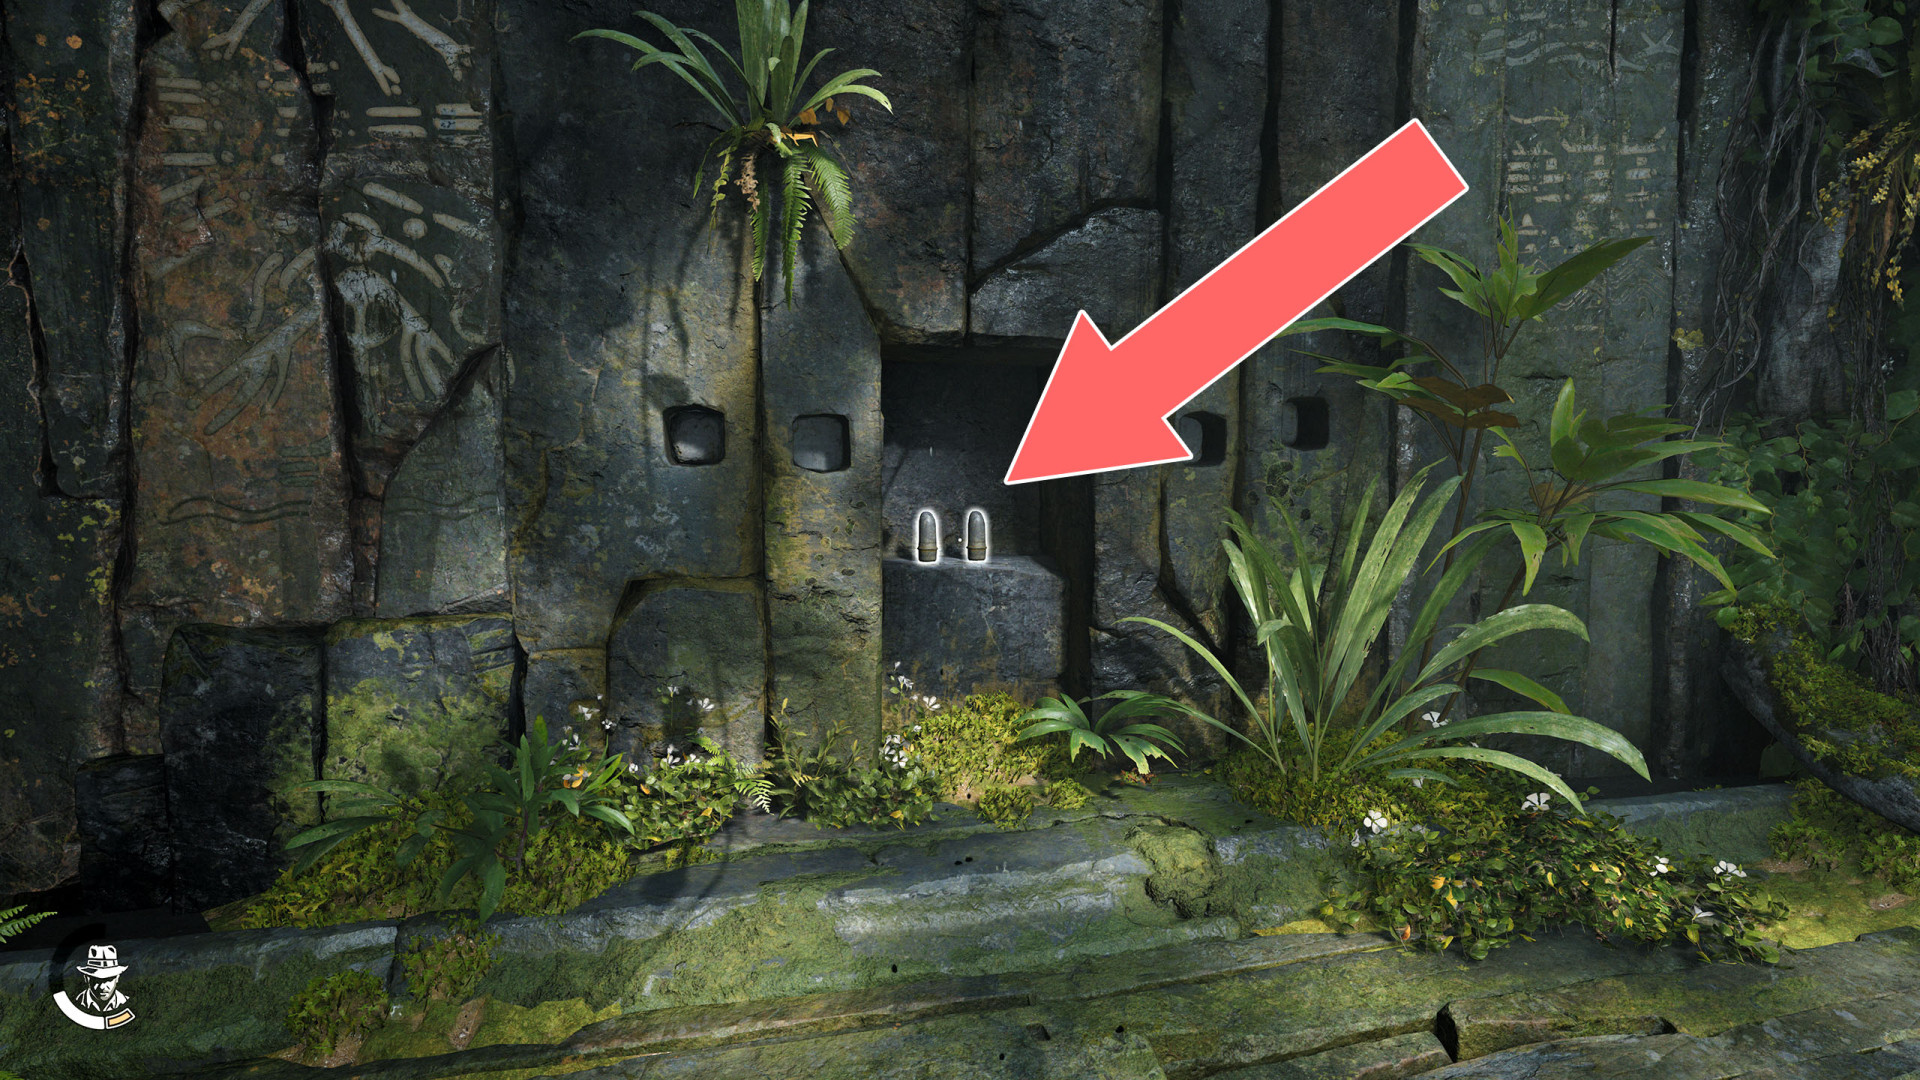
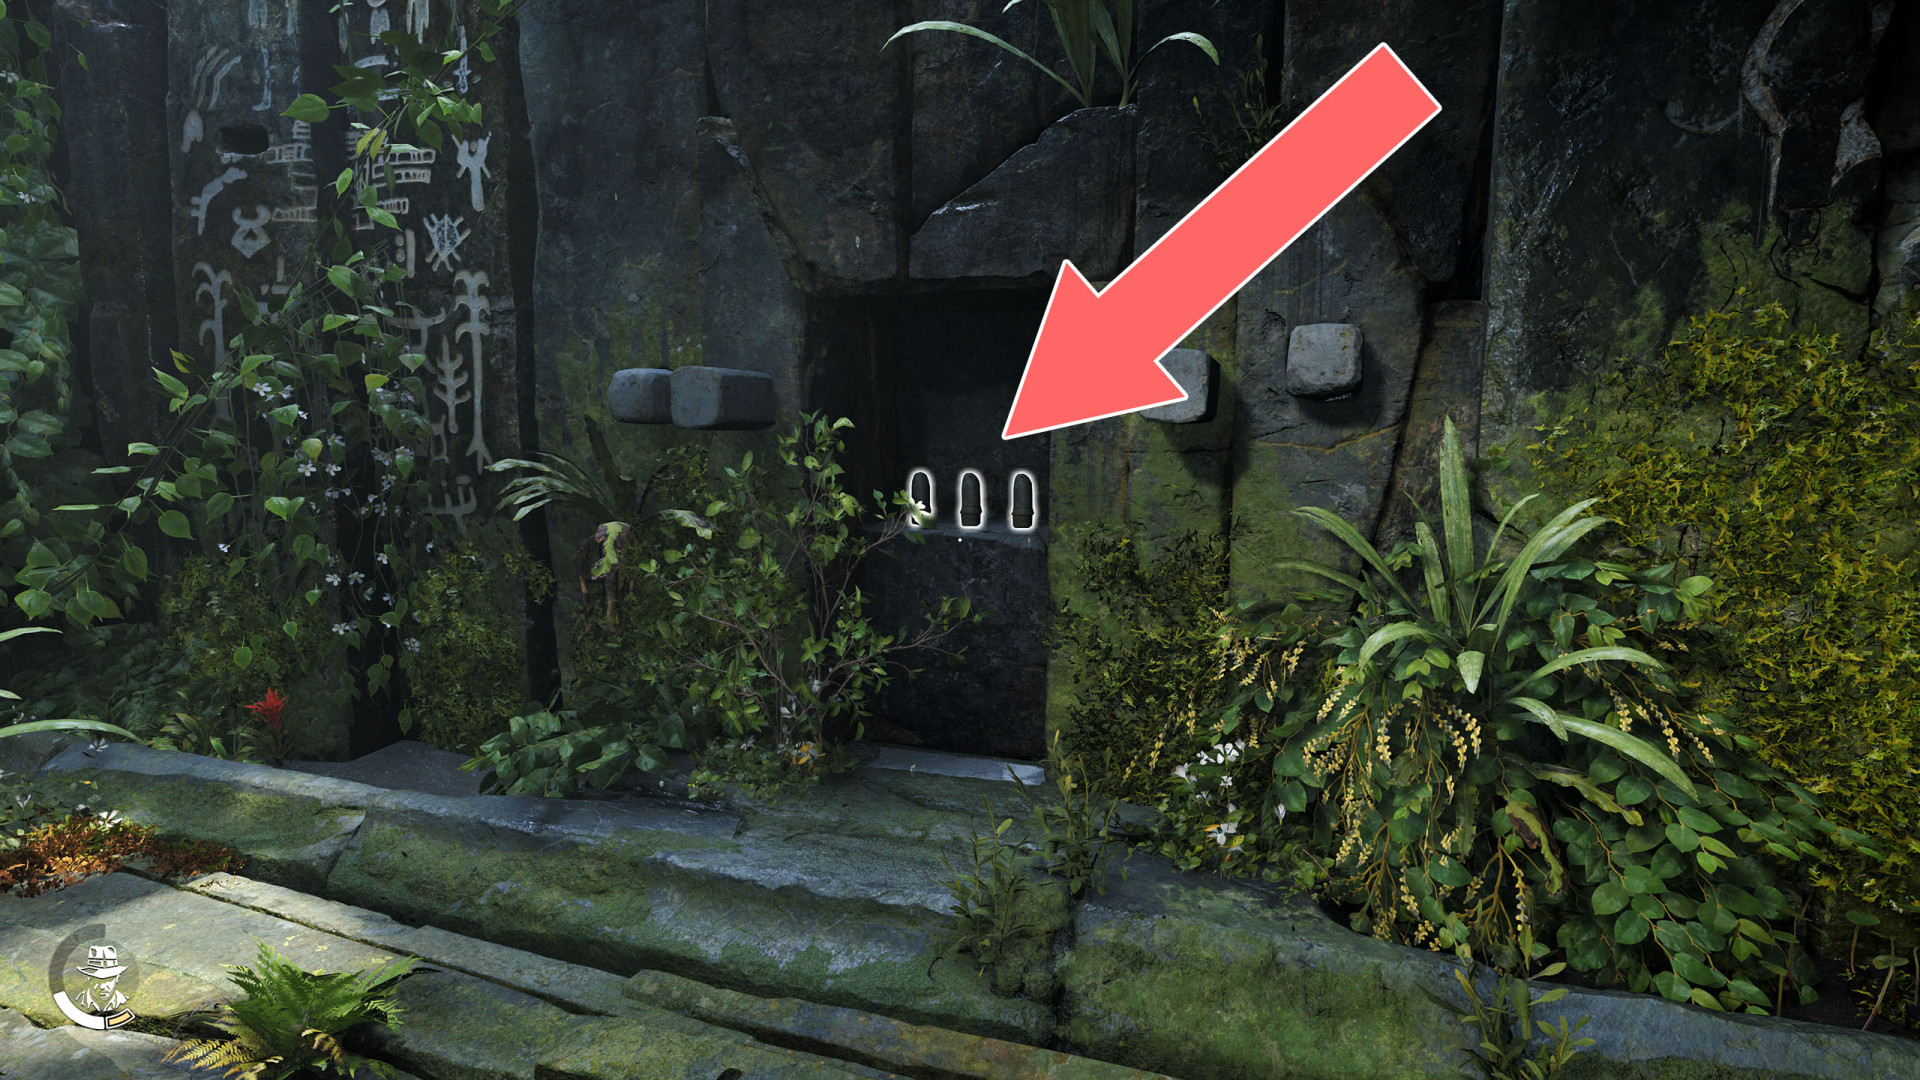
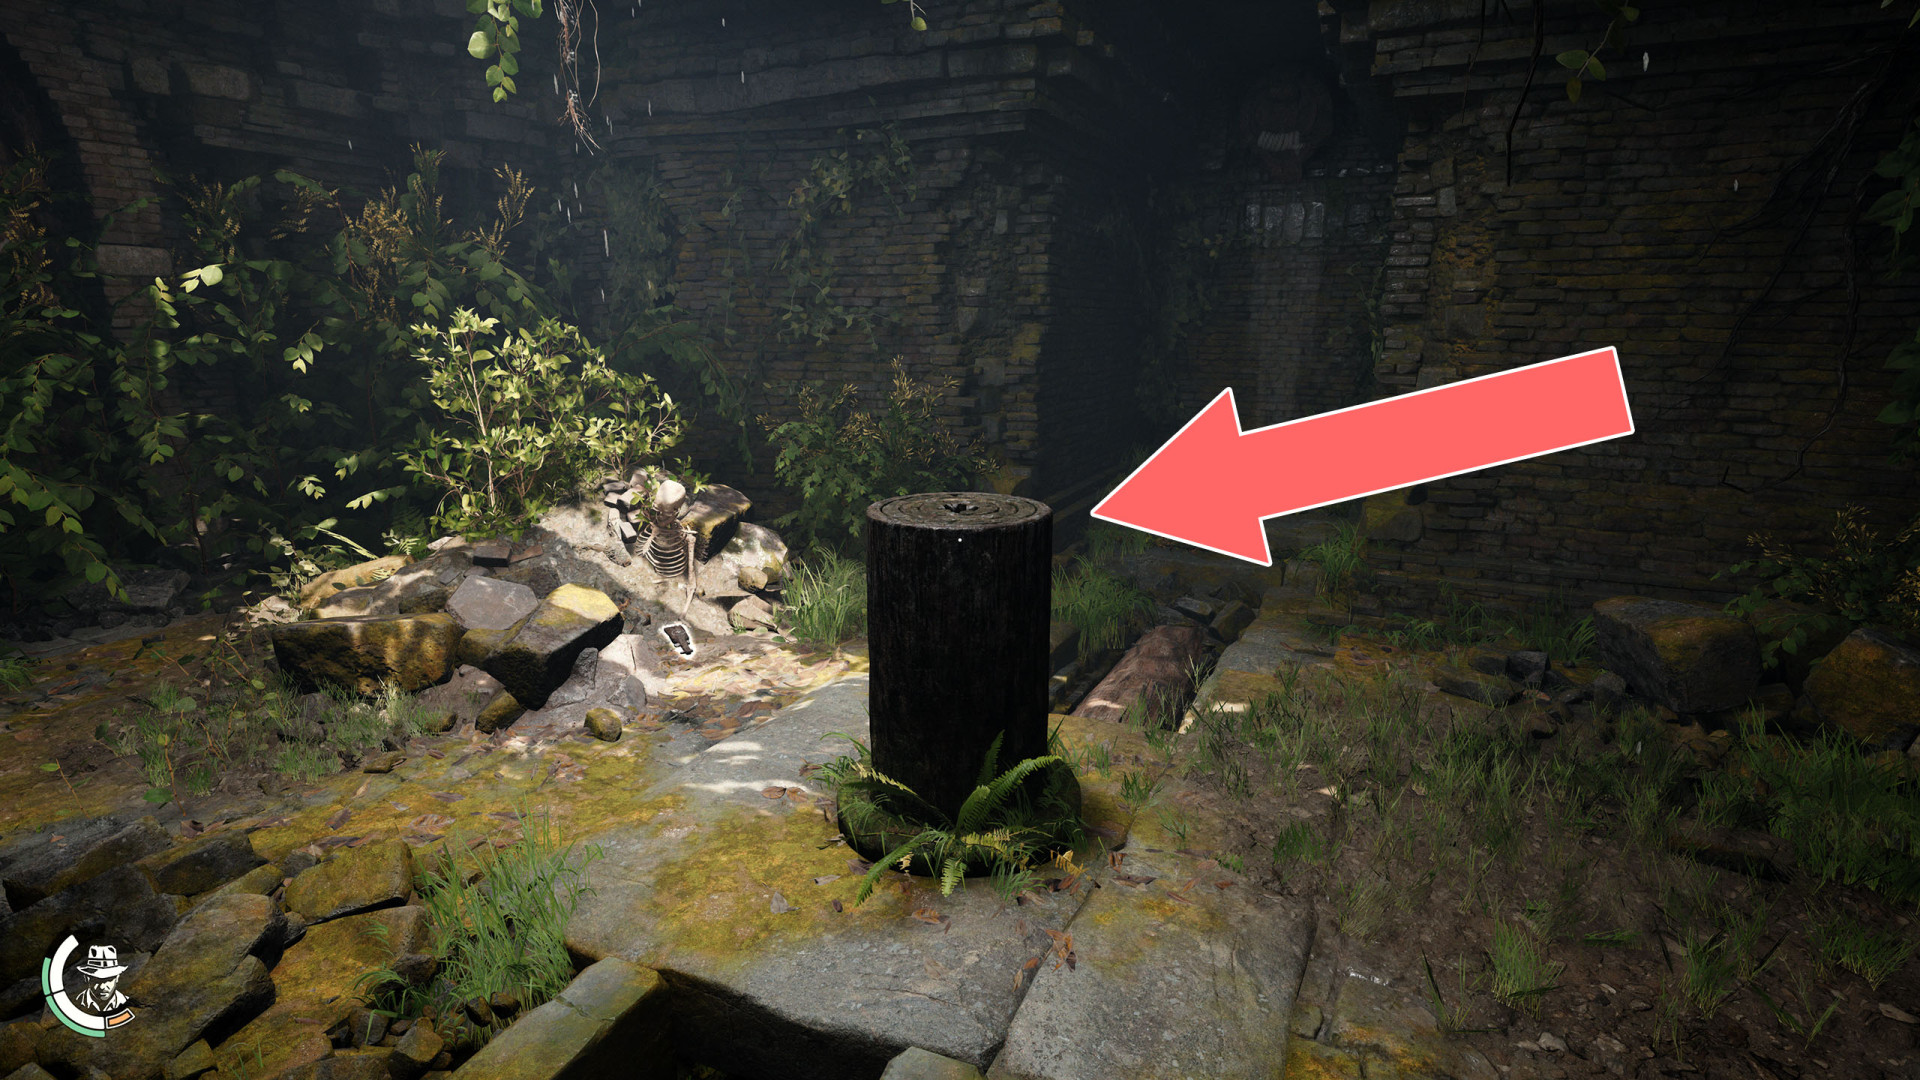
206Symbol Pedestal #1
Insert the Circle Key and pull it out when all three symbols on the pedestal line up.
207Symbol Pedestal #2
Use the Cross & Circle Key to line up diamond and cross symbols then pull it out. Then use the Circle Key to line up all three symbols.
208Symbol Pedestal #3
Use the Cross & Circle Key to line up all symbols.
209Symbol Pedestal #4
Use the Cross & Circle Key to lineup cross and diamond symbols then use the Circle Key to line up all symbols.
210Symbol Pedestal #5
Use the Cross & Diamond Key to line up diamond symbol with the line on the outer ring.
Use the Cross & Circle Keykey to line up dimond symbol and cross symbol.
Use the Circle Key to line up all symbols.
211Symbol Pedestal #6
212Tar Jars
213Tar Jars
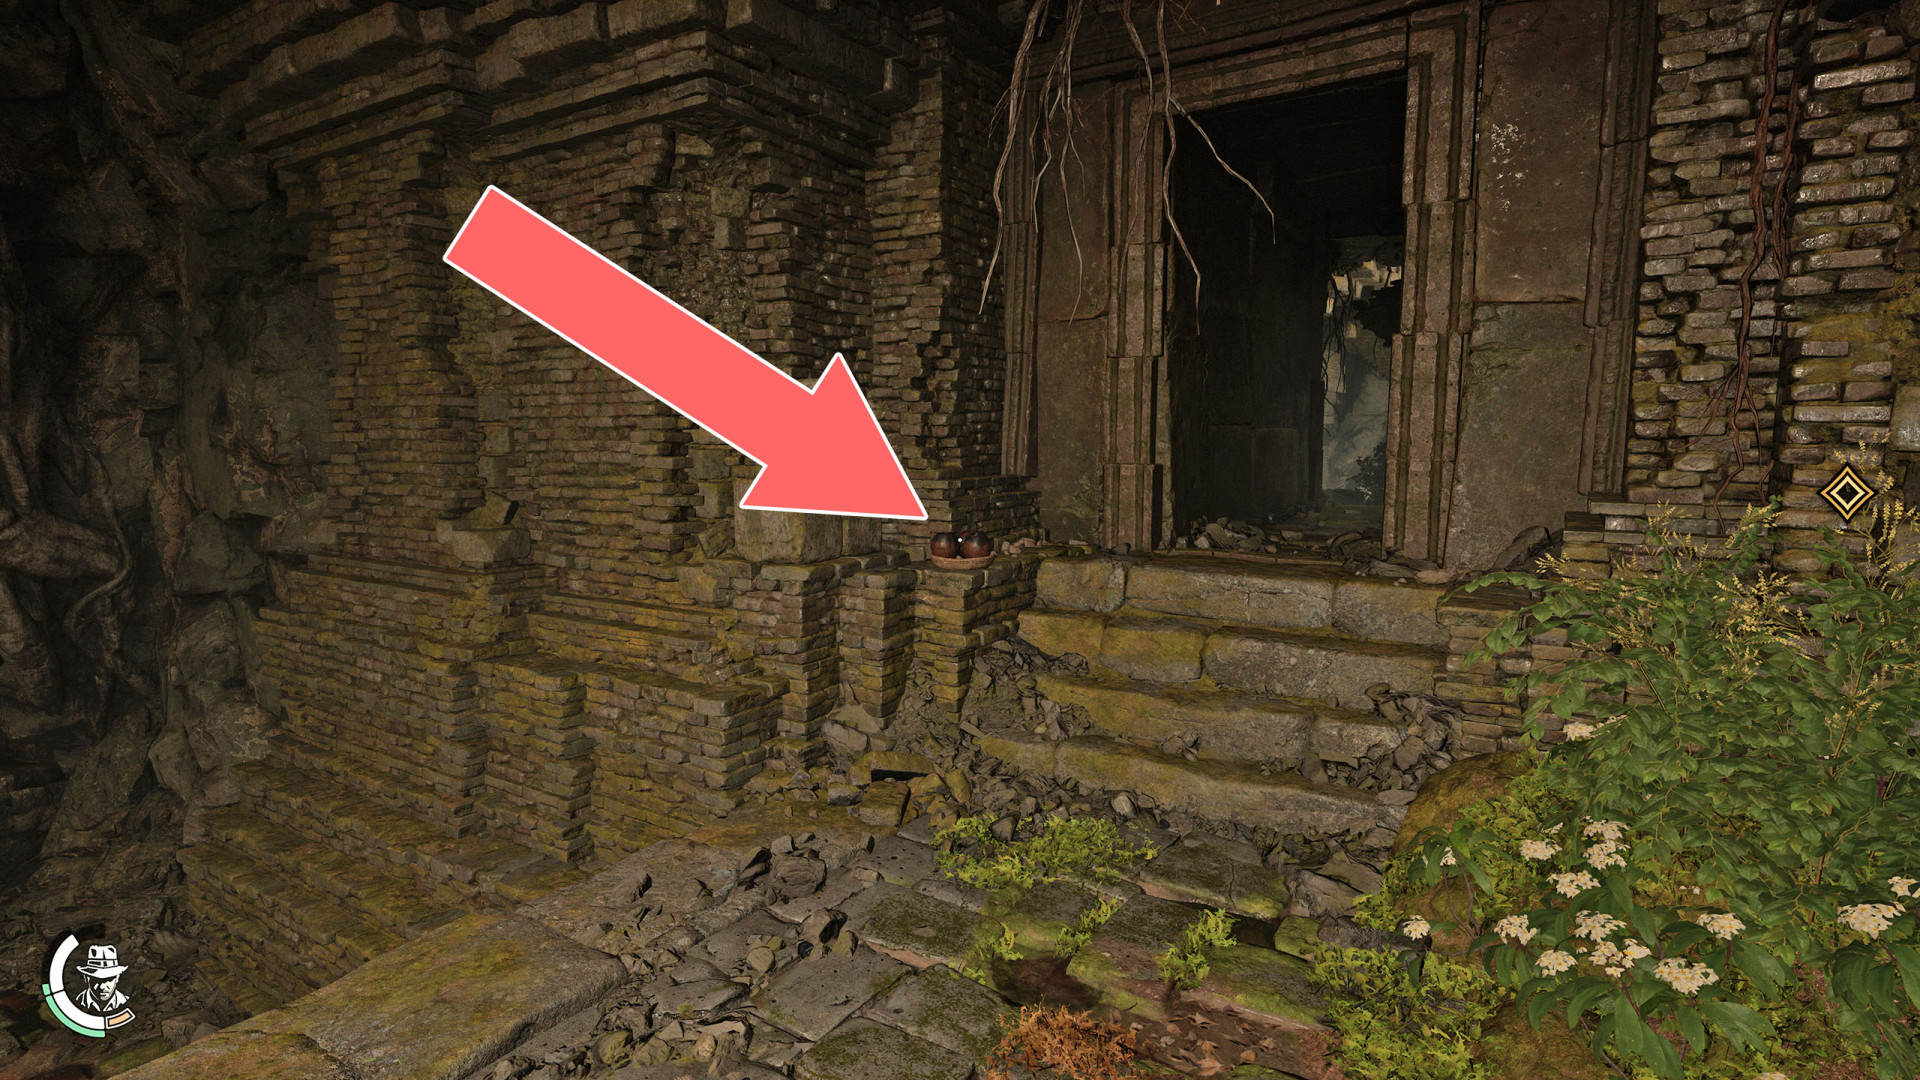
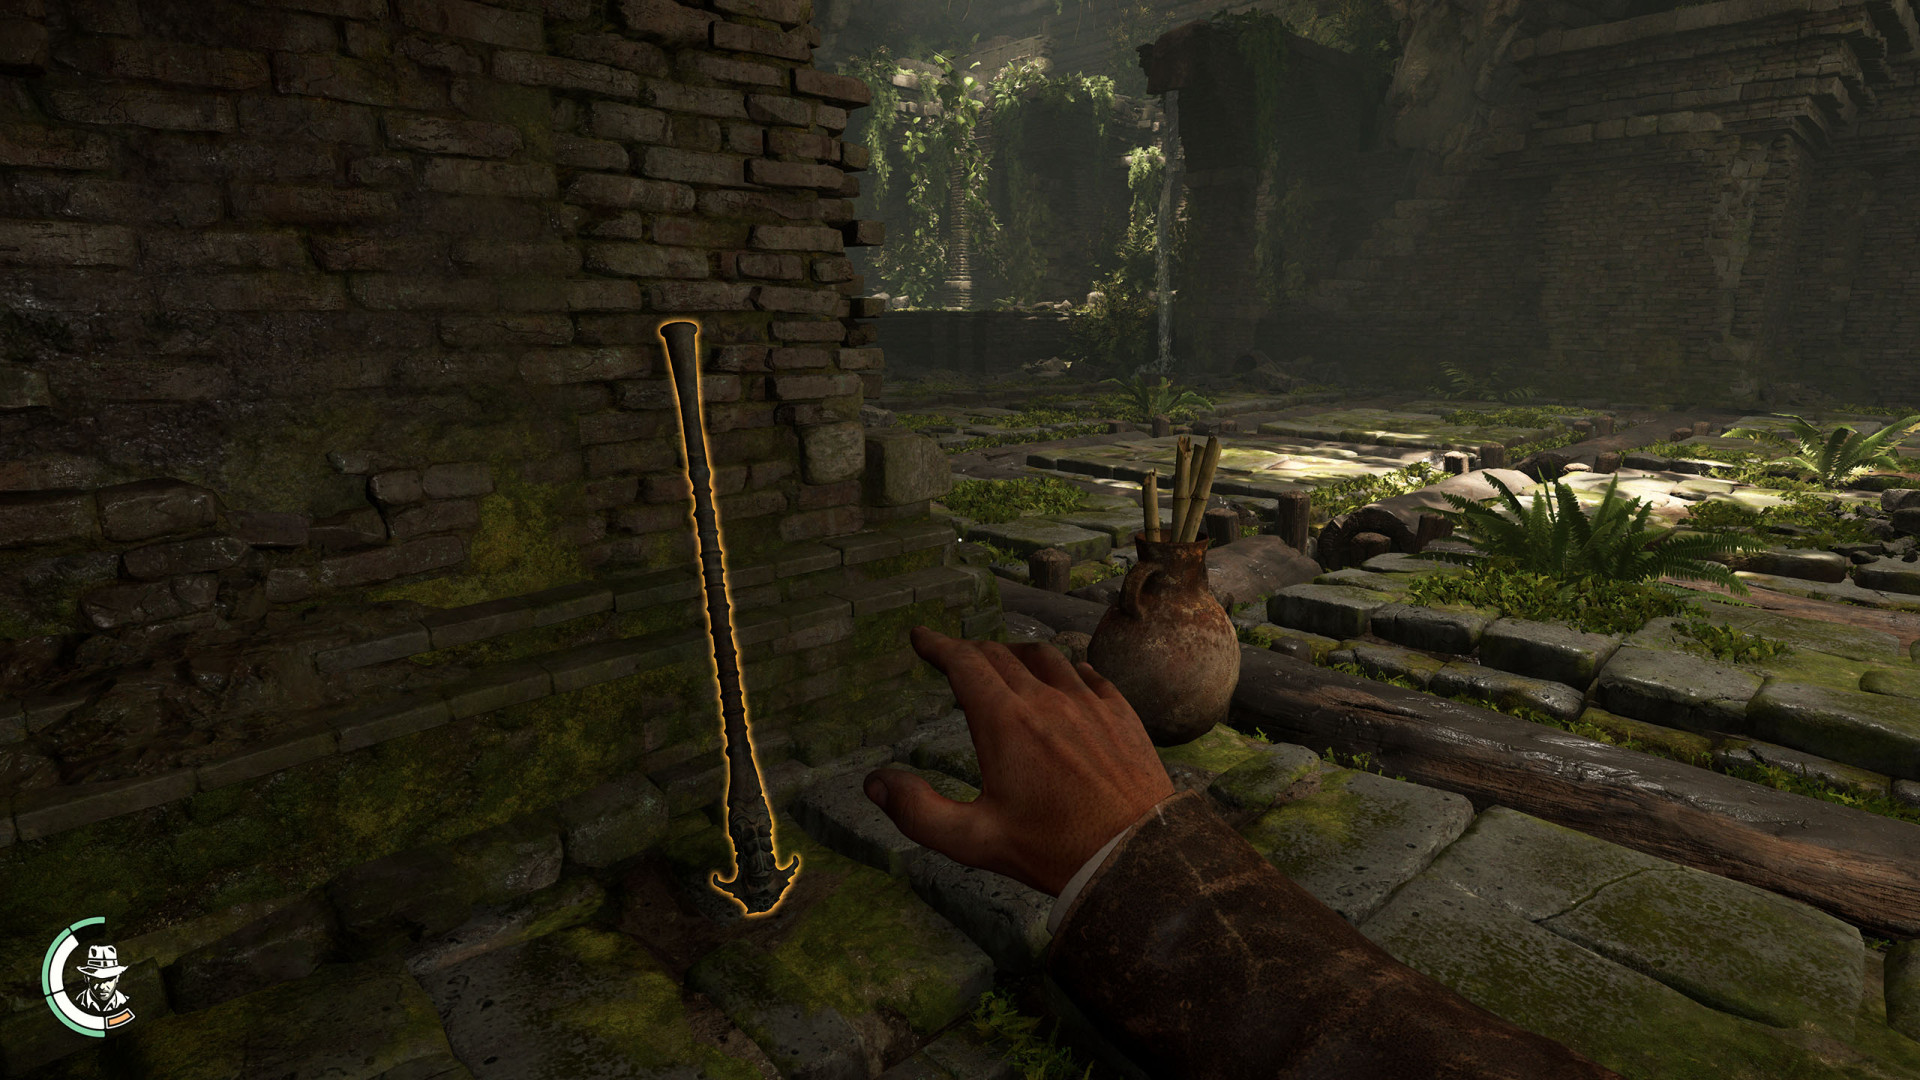
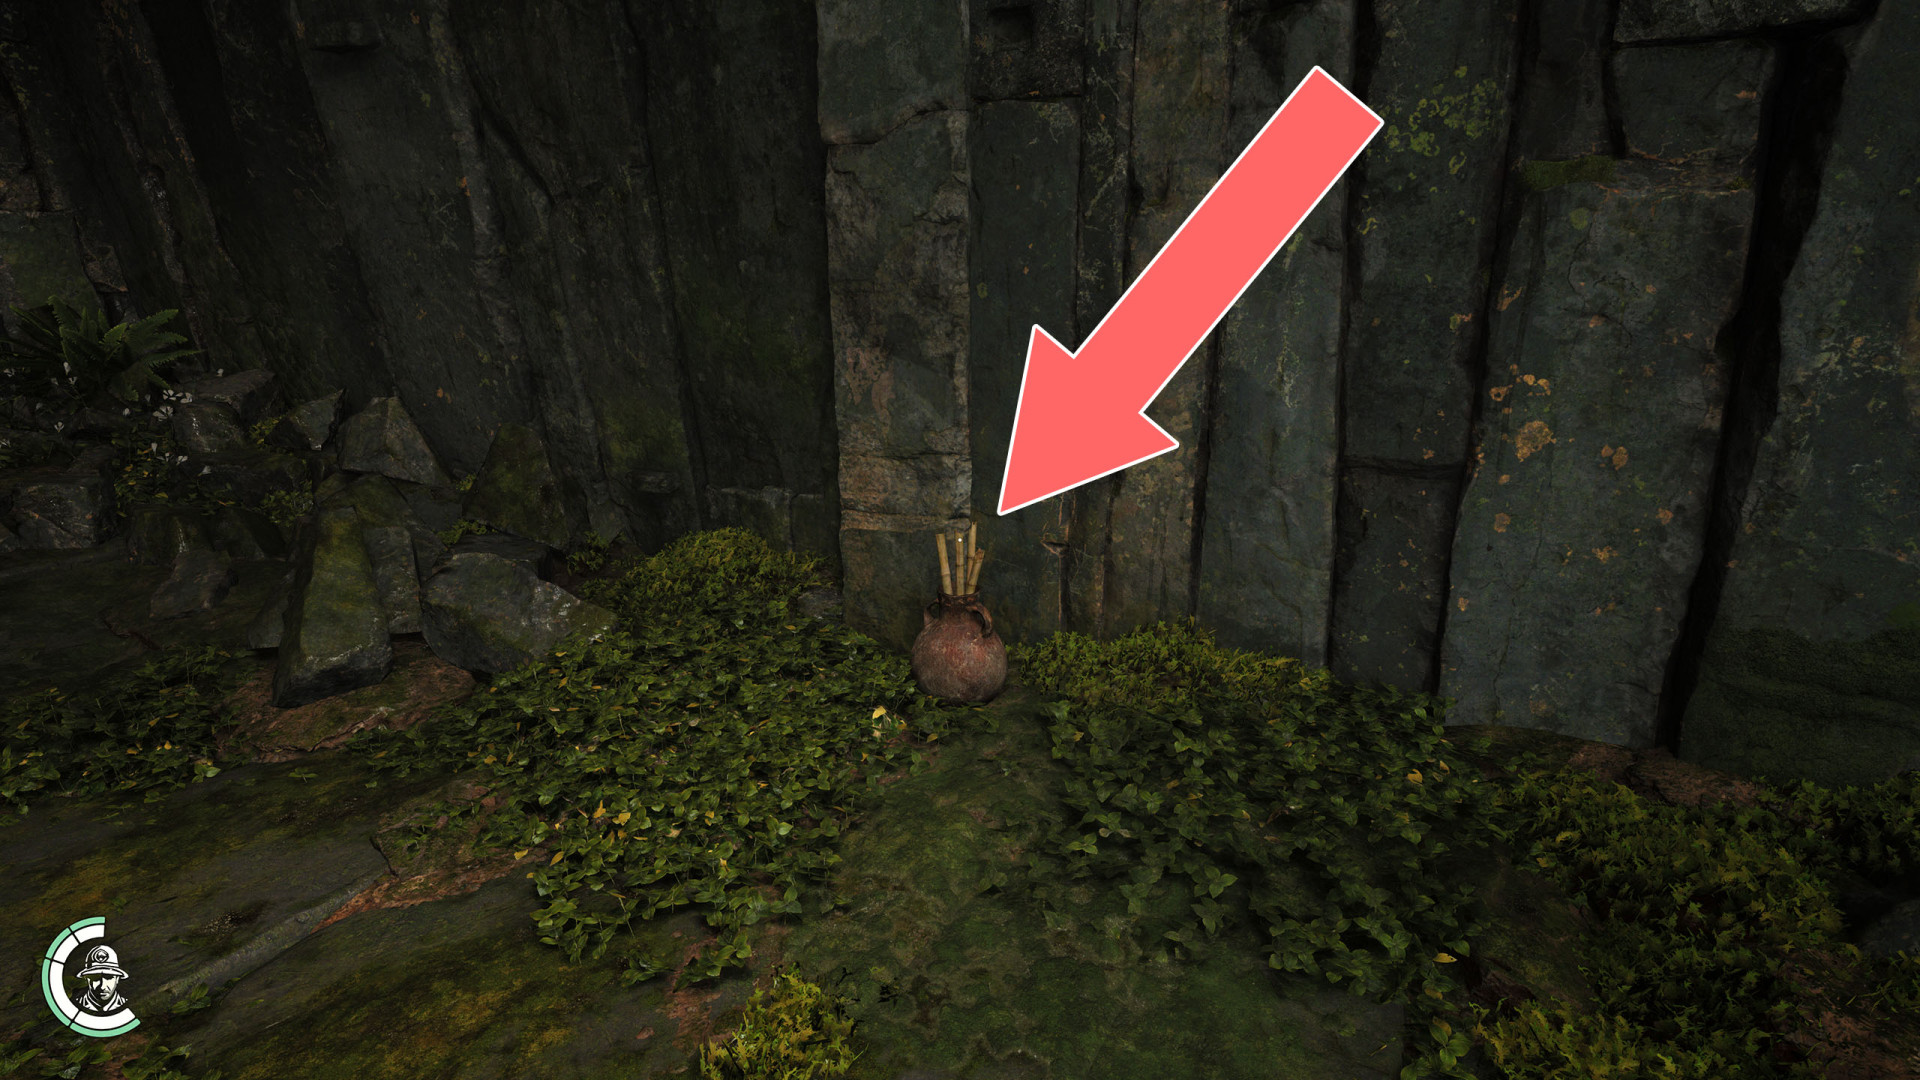
214Torches
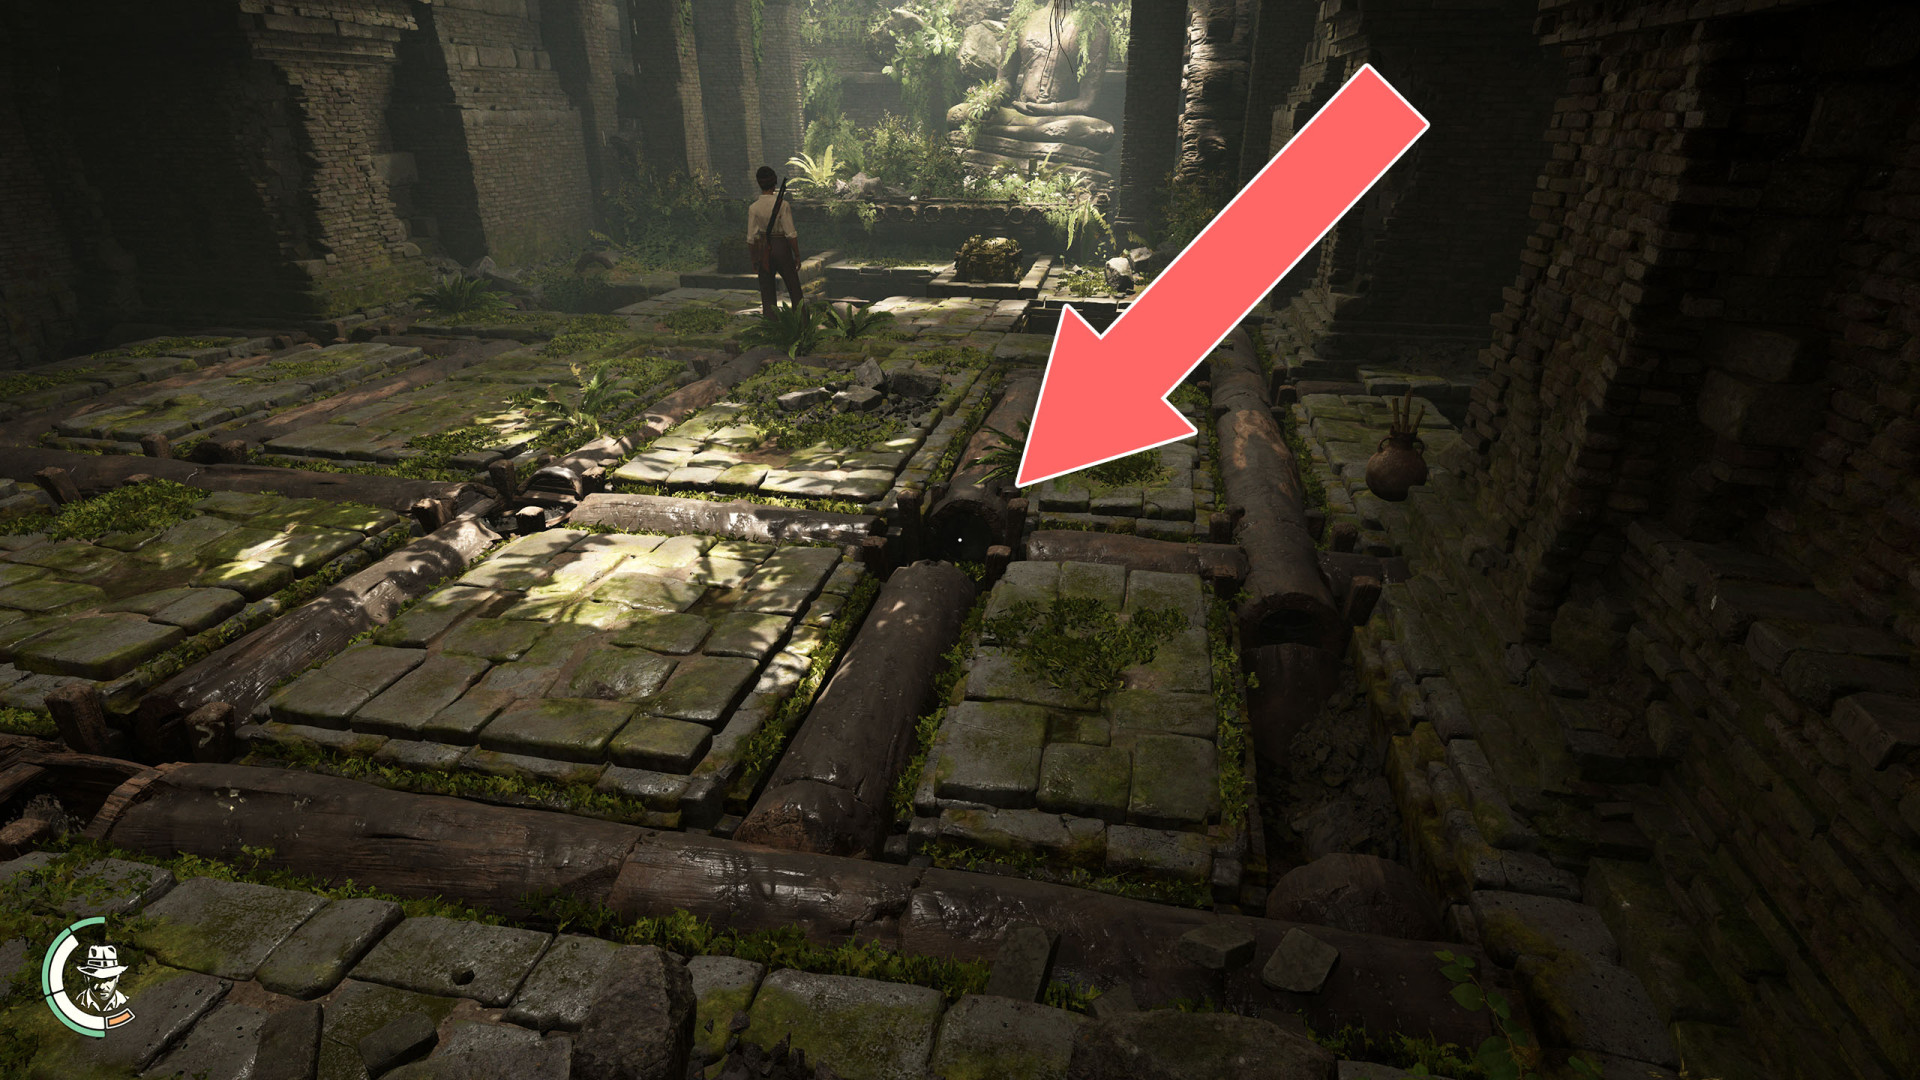
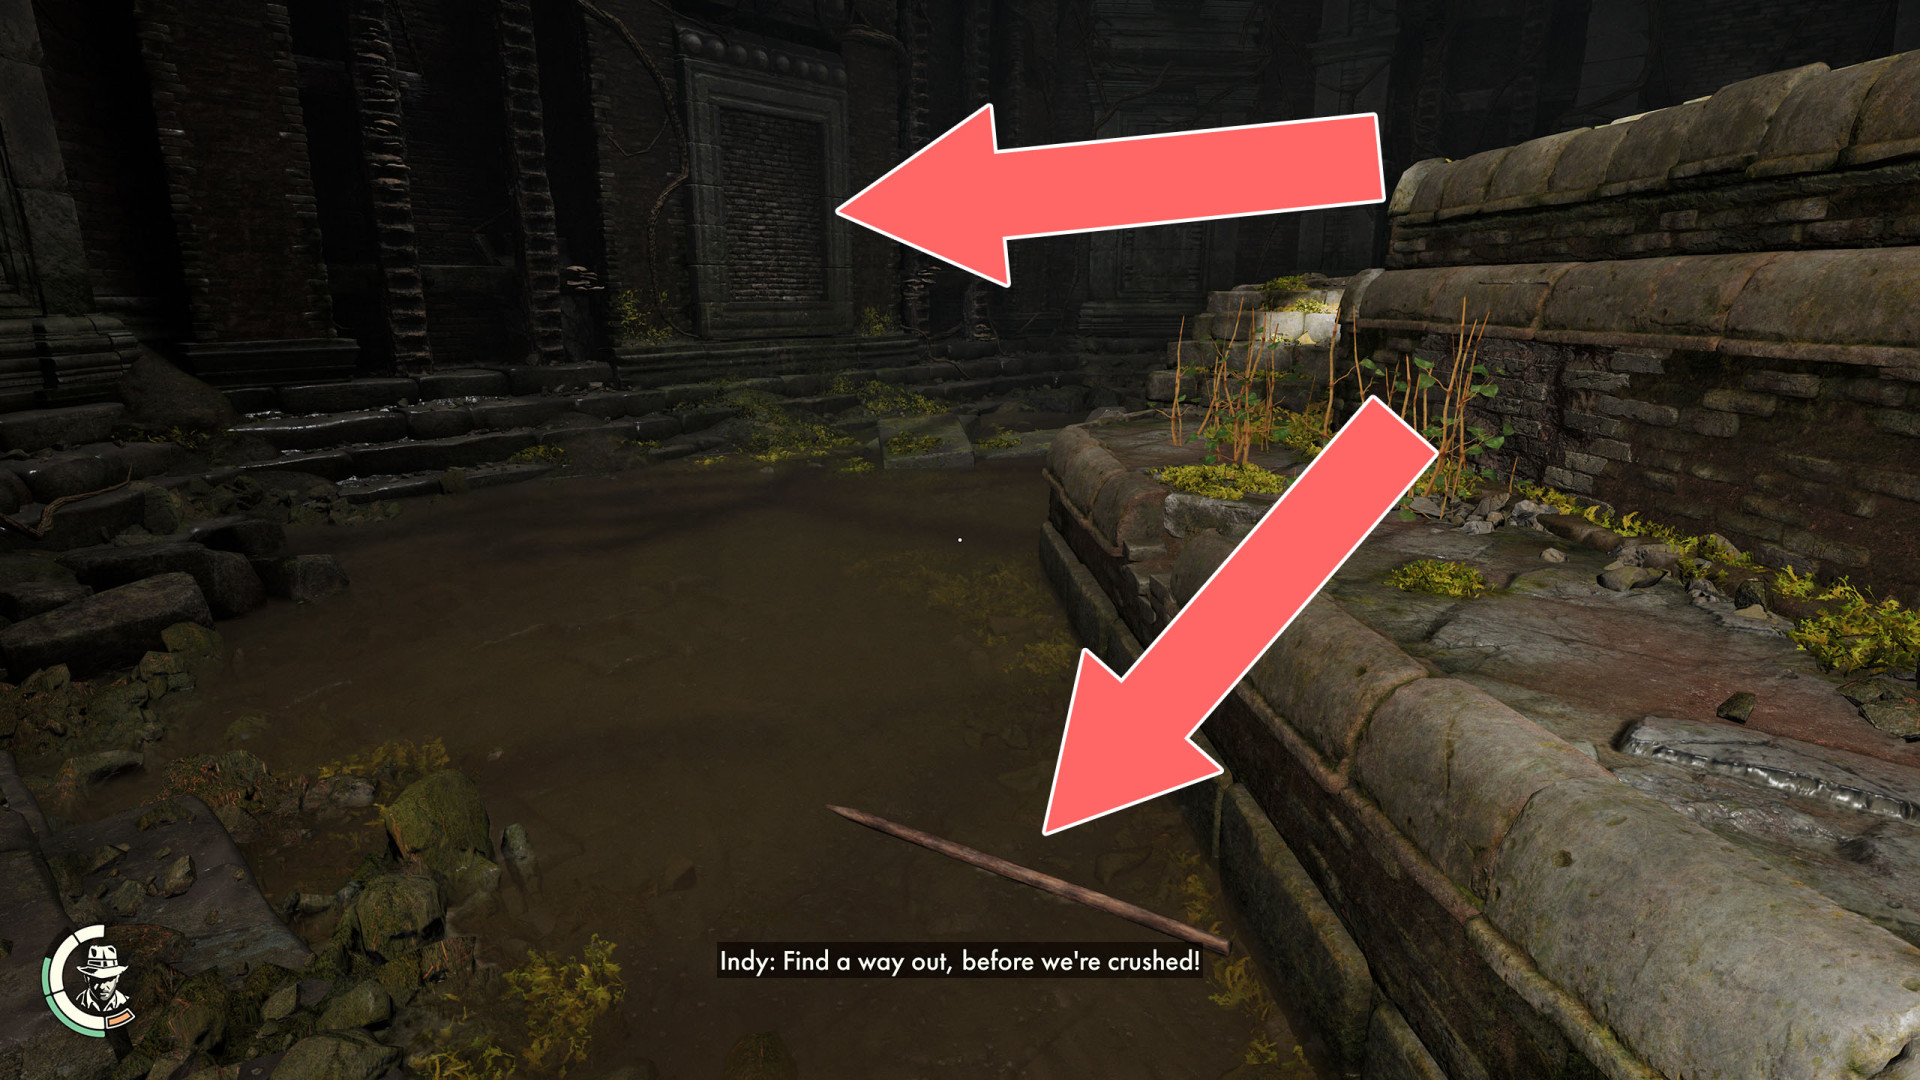
215Weak Wall
Destroy it with one of the wooden poles that will fall to the ground when the ceiling begins to lower when you open the sarcophagus. When you do this the water will start flooding the room.
Locations on Iraq
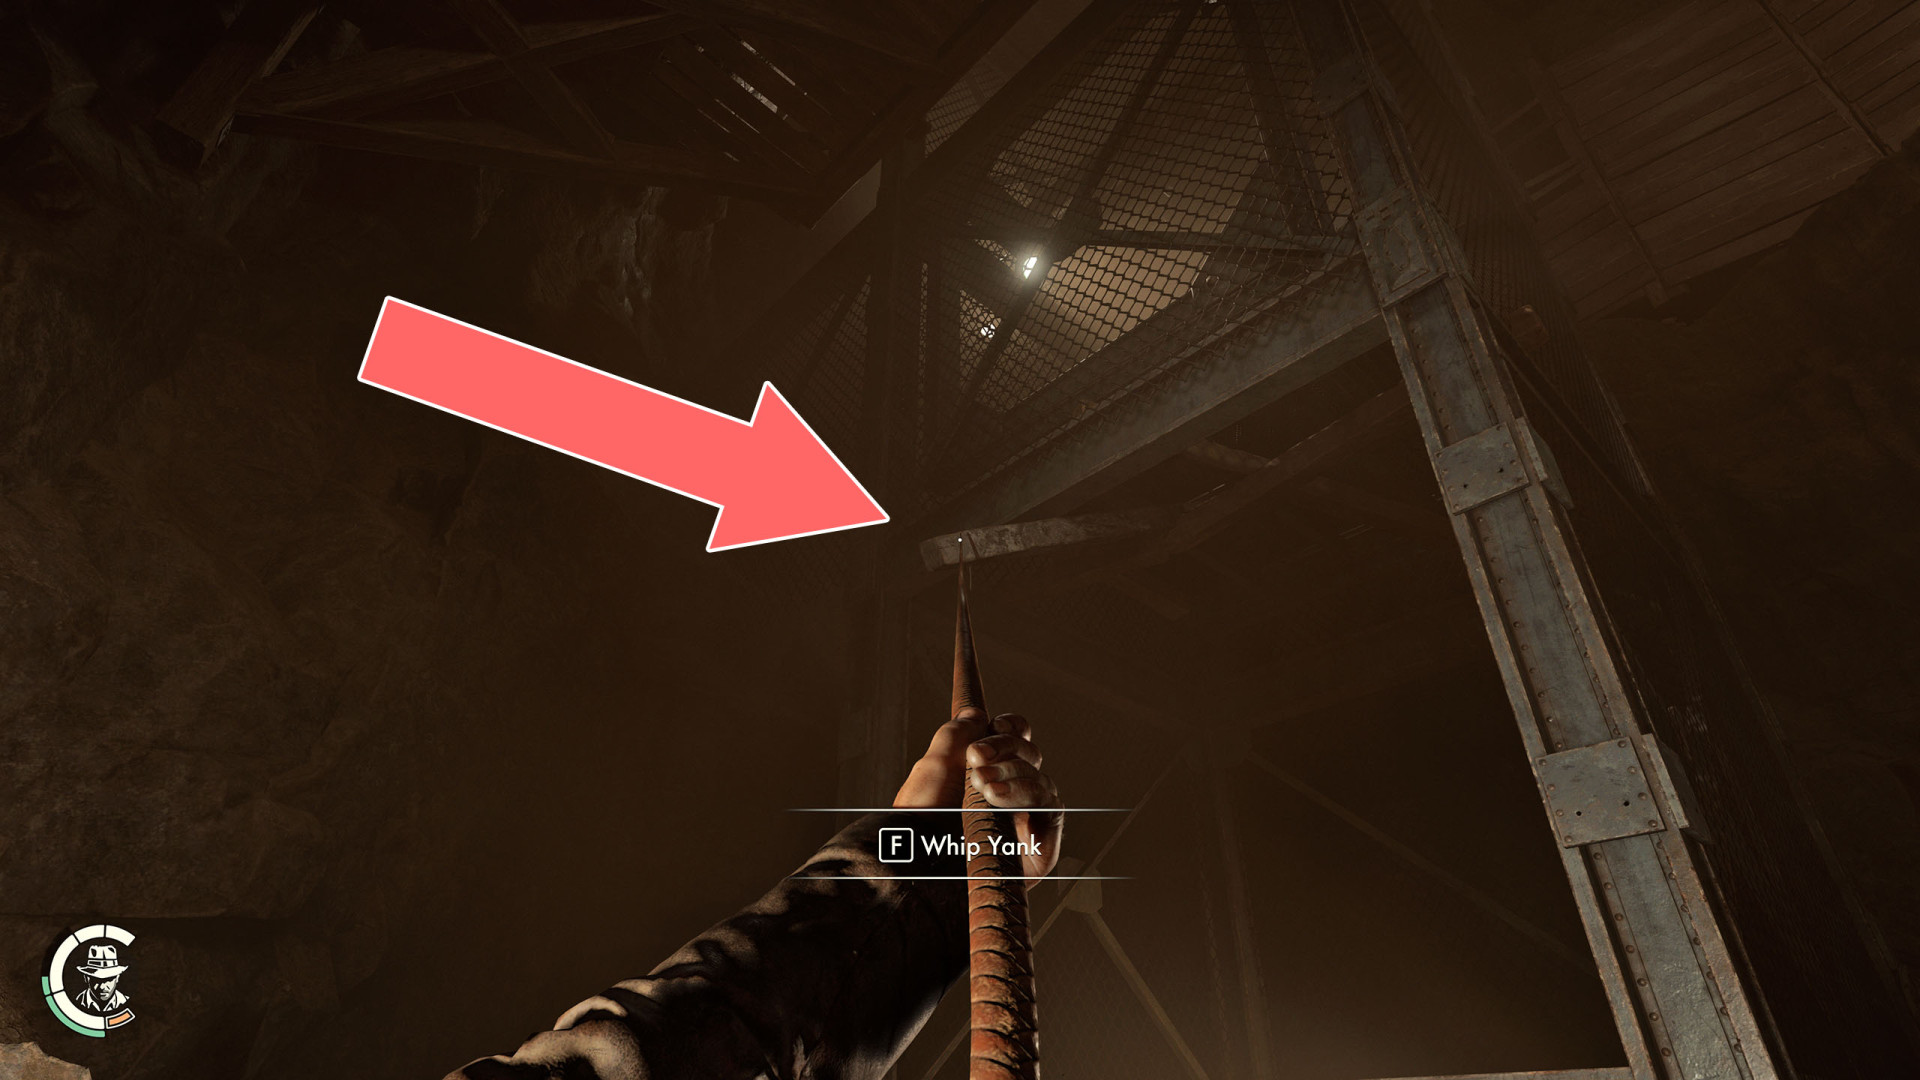
216Beam
Whip yank it to unblock the elevator.
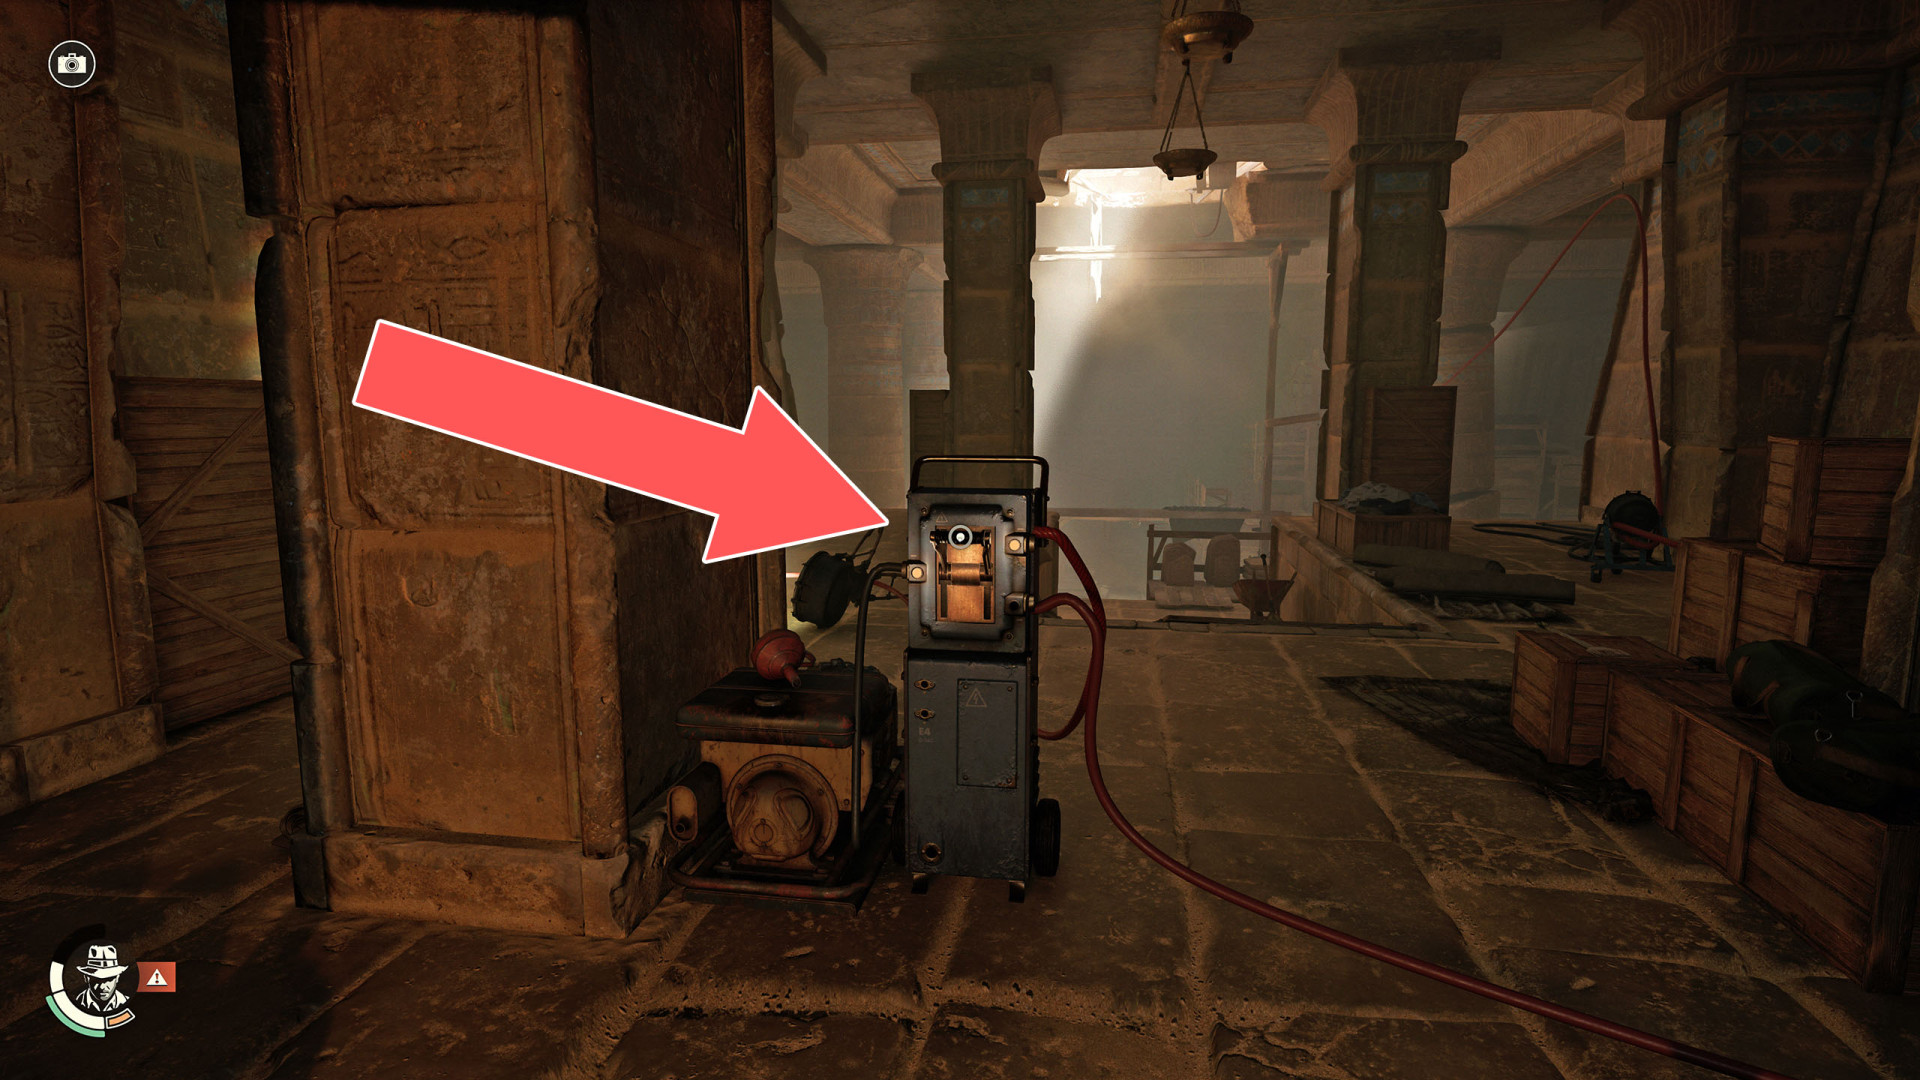
217Elevator Power Switch
Switch it to restore power to the elevator.