In Resident Evil Requiem, Key Items are special objects required to progress through the story. They are used to unlock new areas, solve puzzles, etc. Key Items typically include keys, keycards, mechanical components, puzzle objects, and other unique story-related items.
Key Items
Locations on Wrenwood
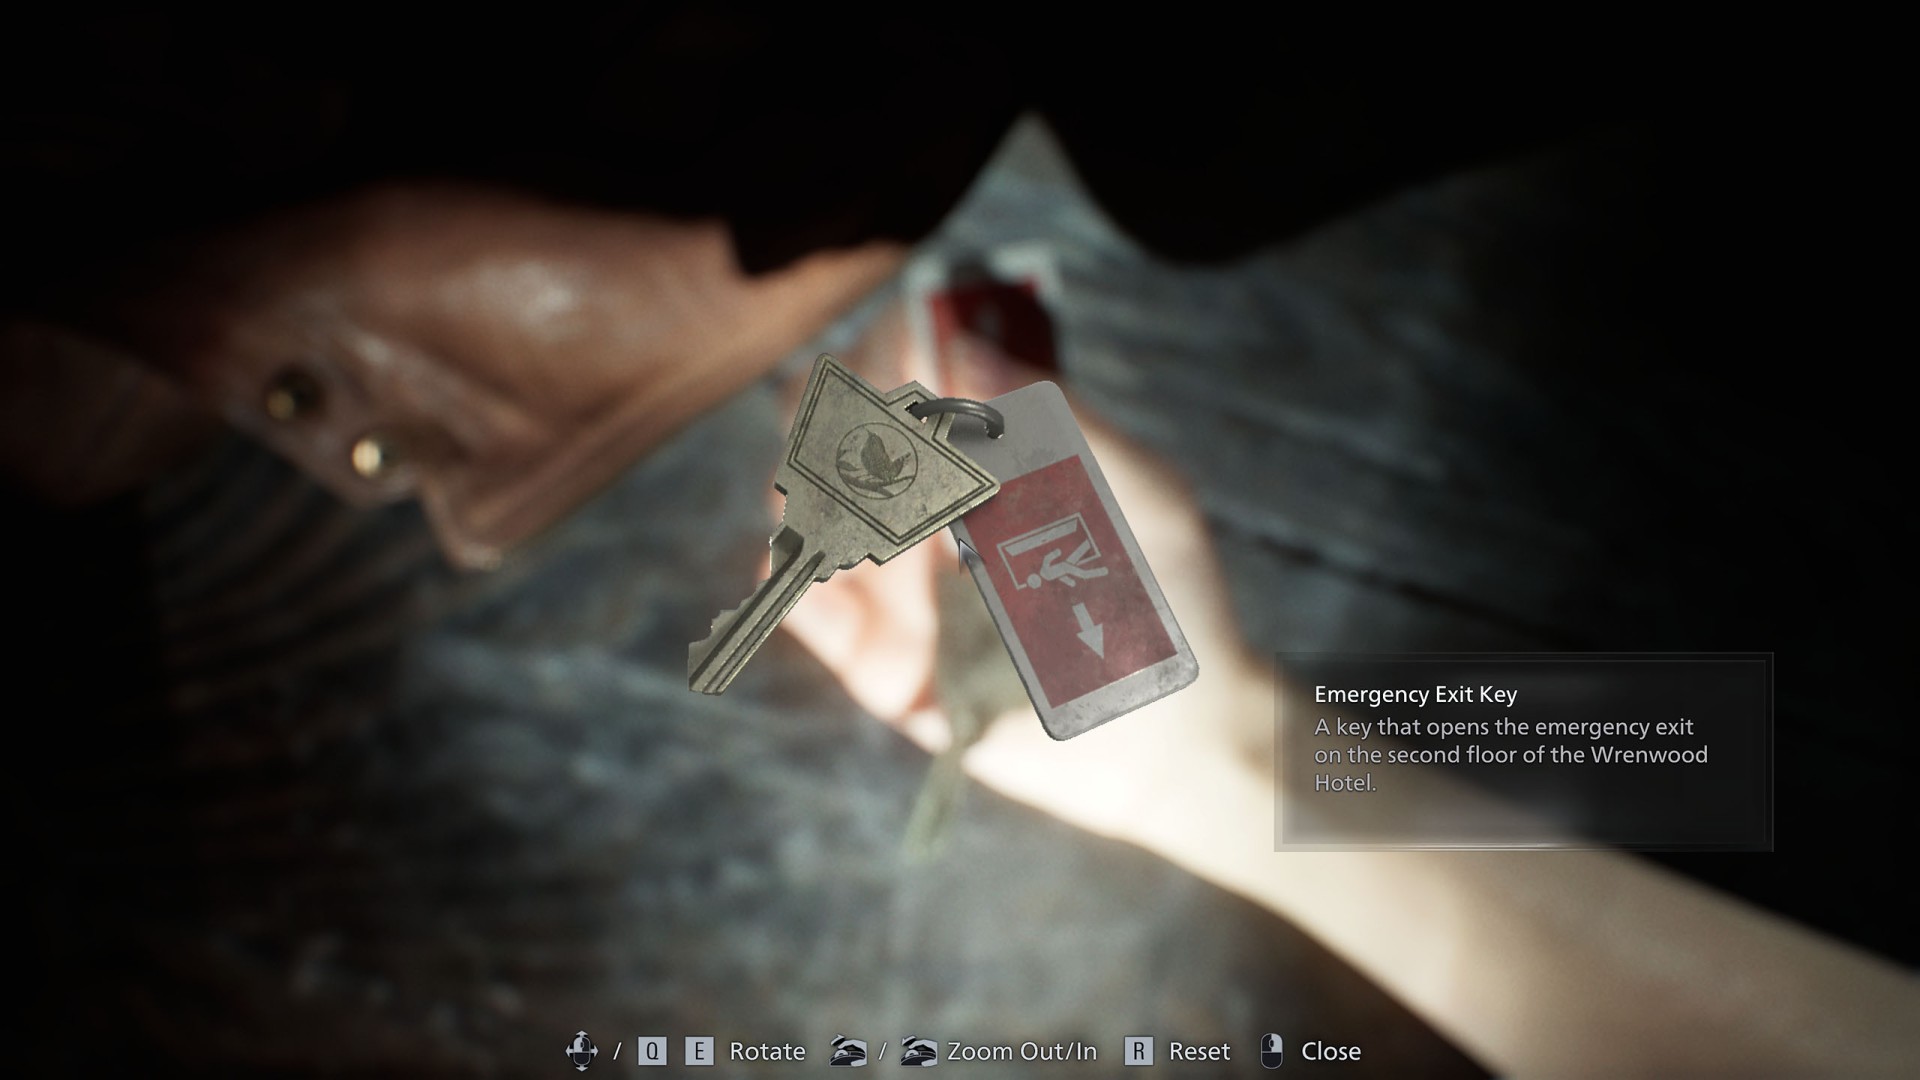
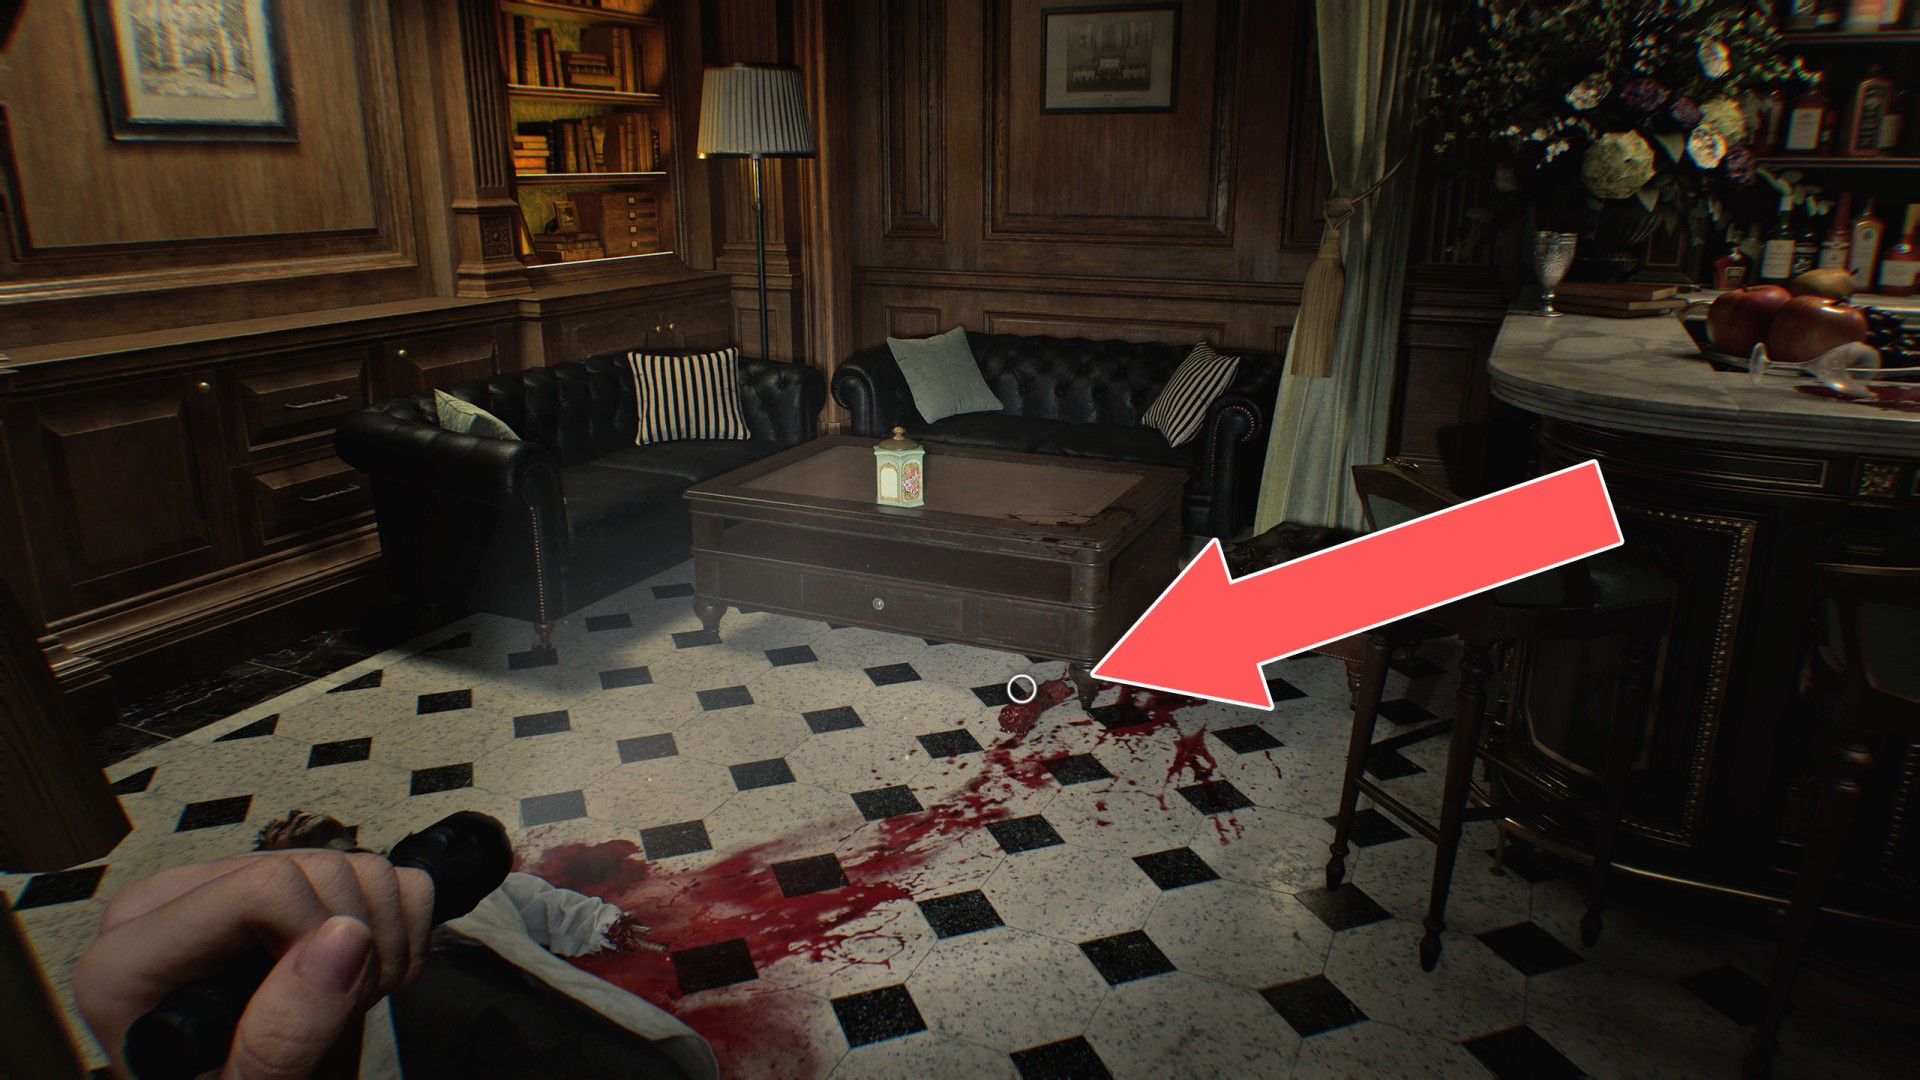
1 Emergency Exit Key
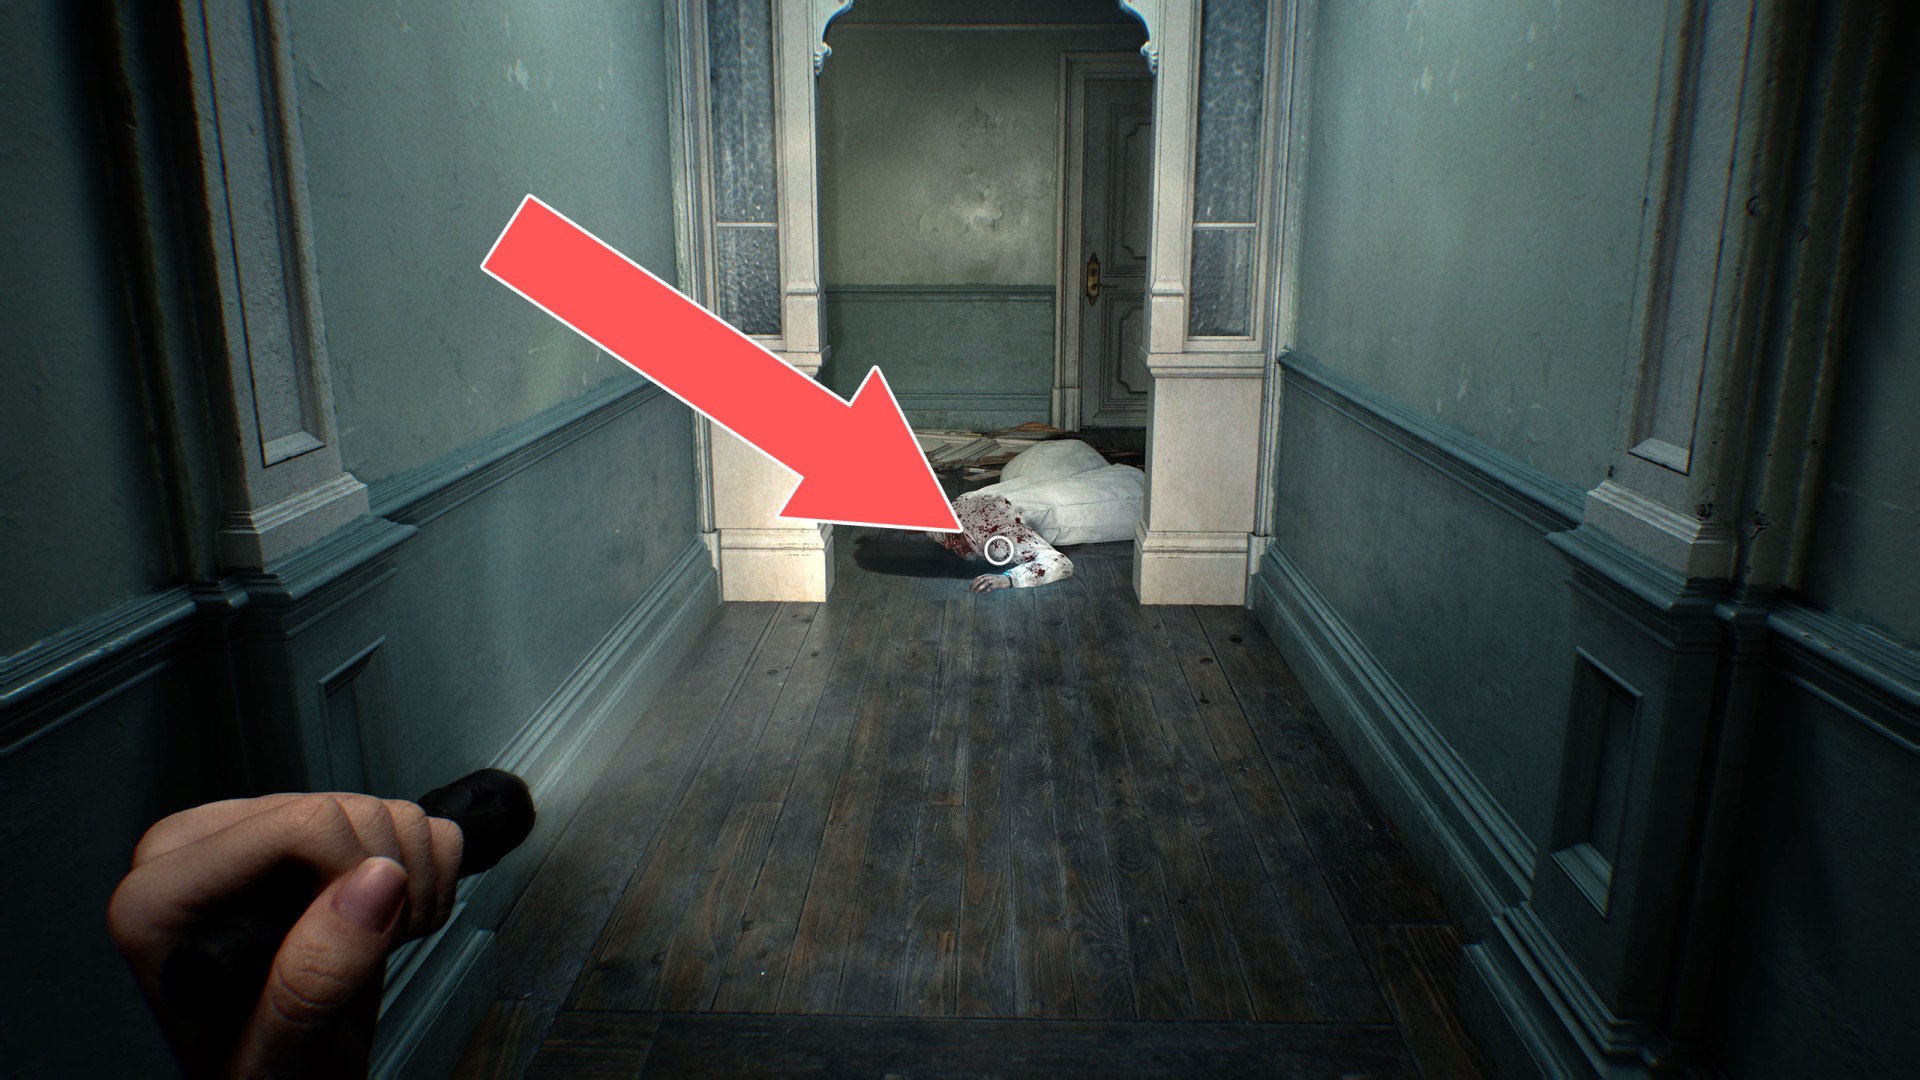
You will find it and pick it up automatically during the struggle with the infected police officer after you find the Alyssa's Journal.
Unlocks: Emergency Exit Door.
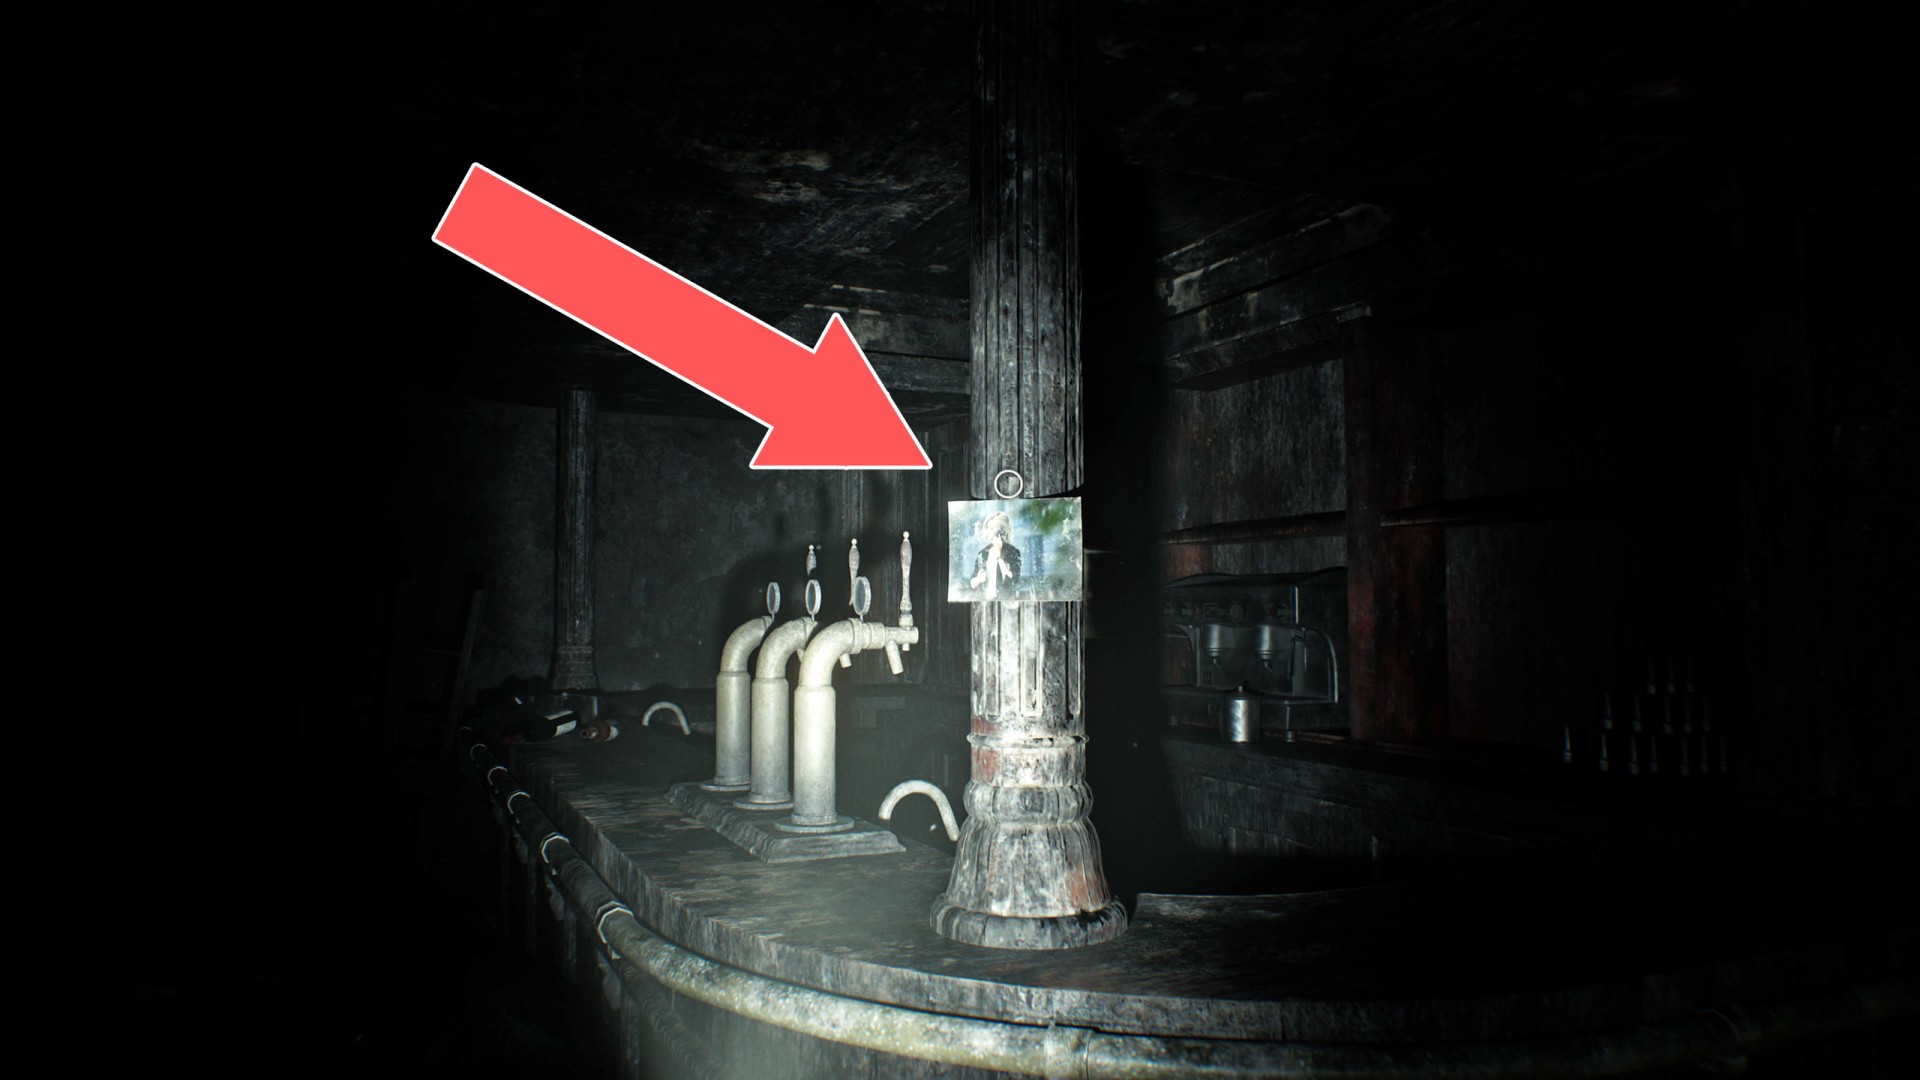
2Old Key
Take the photo of Grace attached to the bar post, turn it around, and you will see a key attached to the back of the photo.
Unlocks: Lounge & Bar Door.
3Wire Cutters
Show the map
Locations on Rhodes Hill
4Artificial Heart
One of the items you need to collect to get the ID Wristband (Level 2).
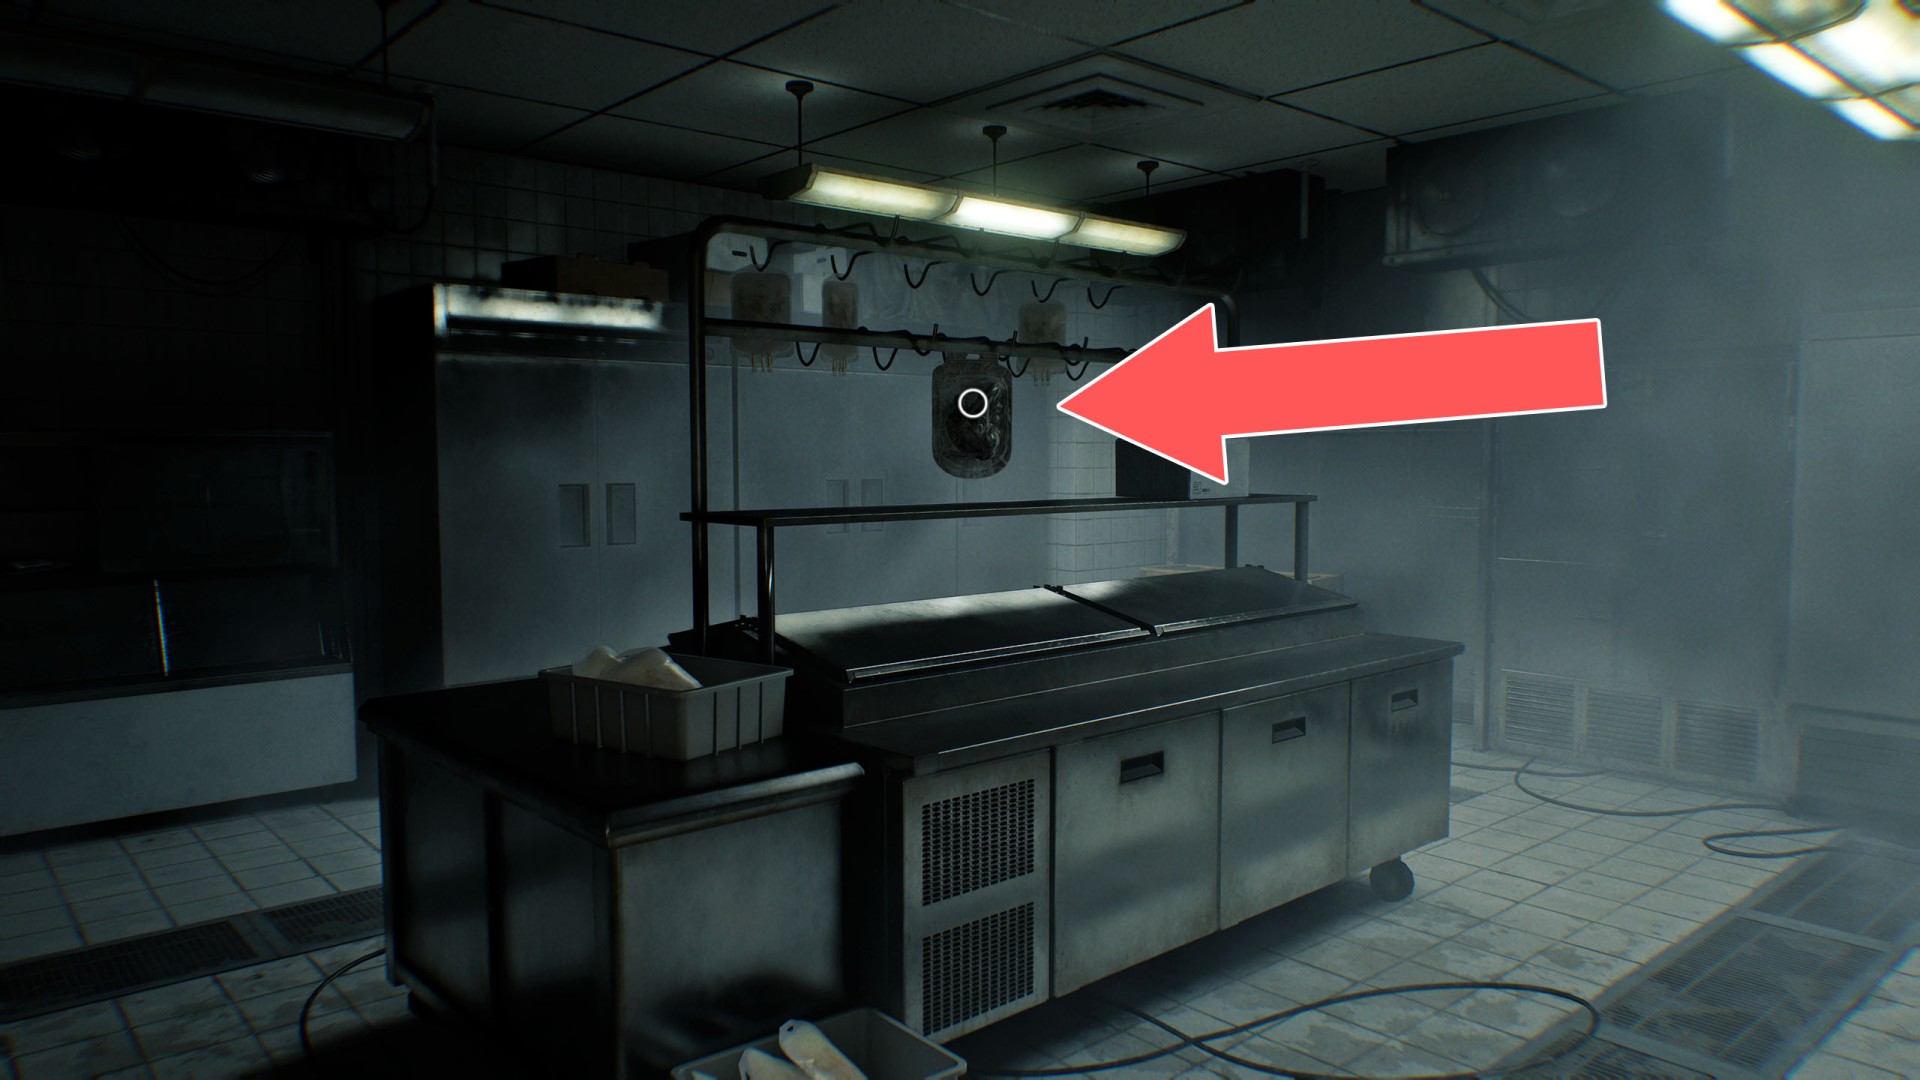
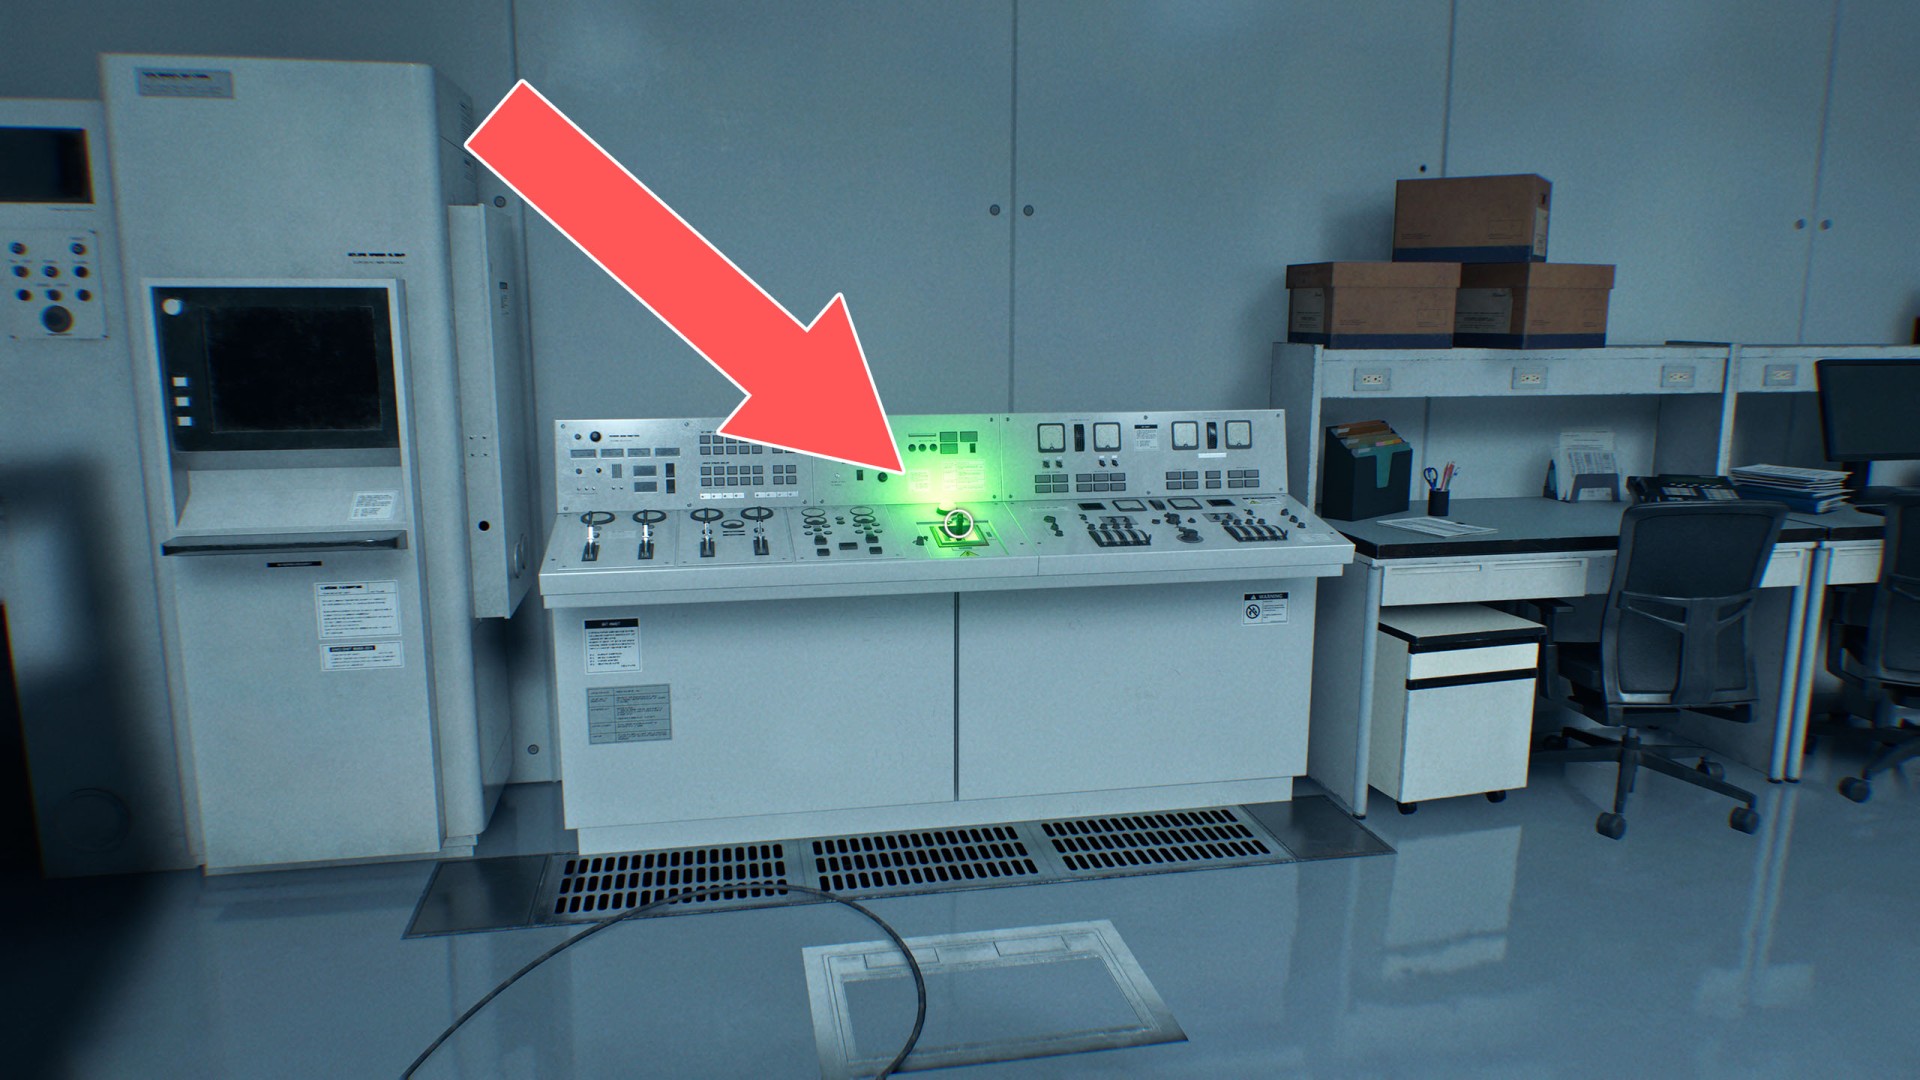
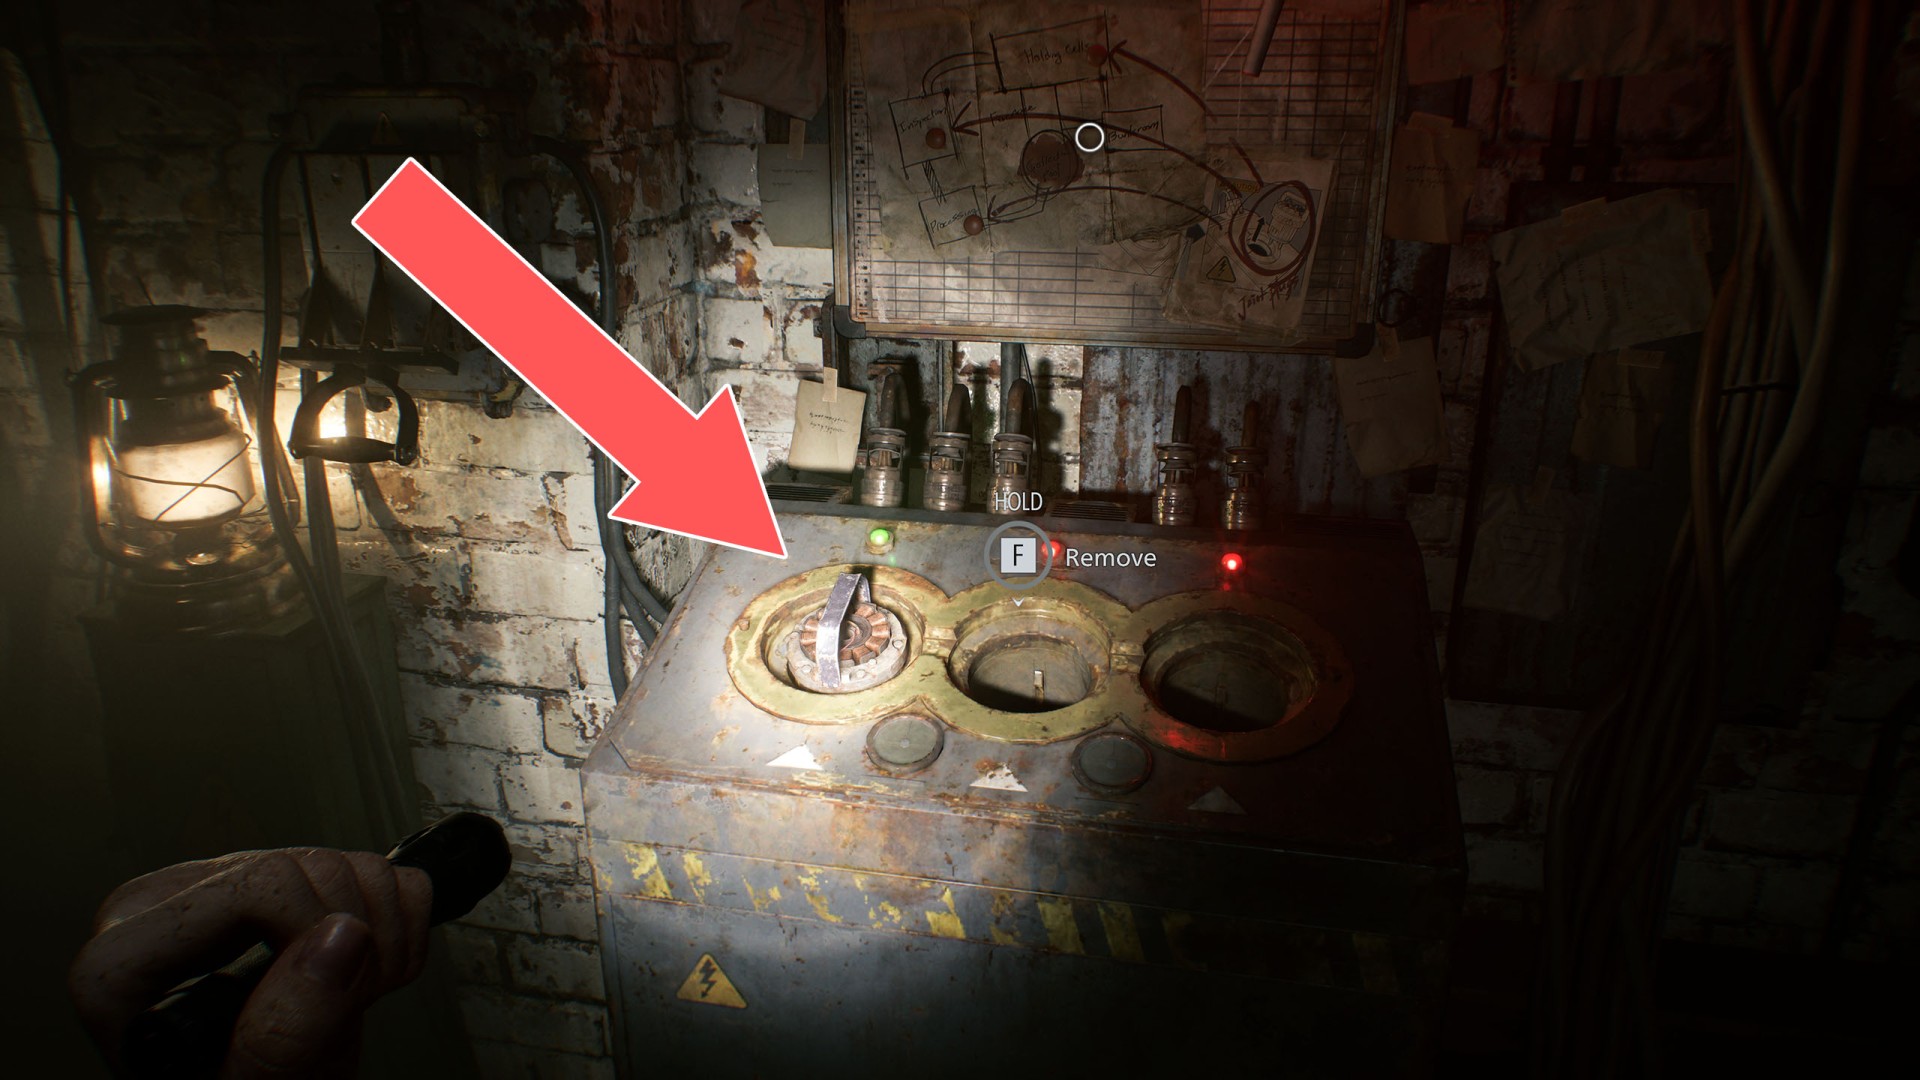
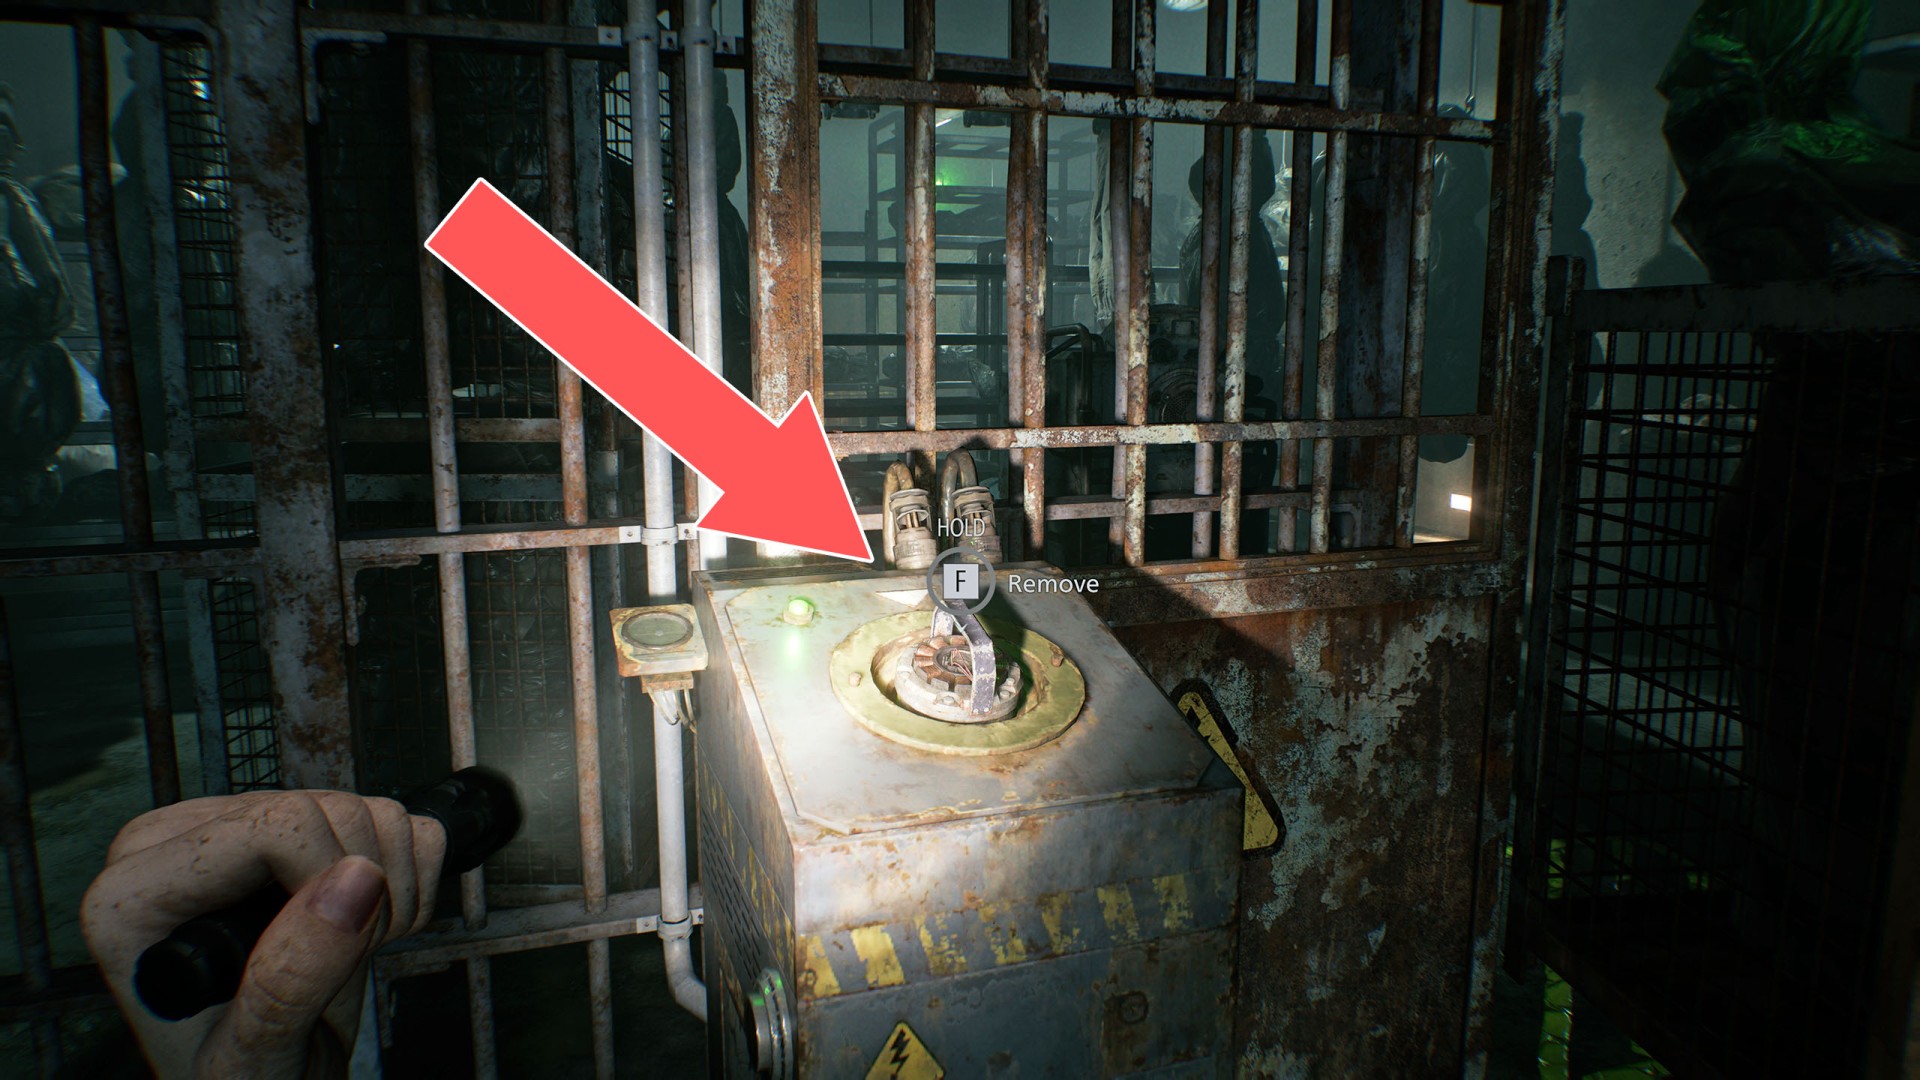
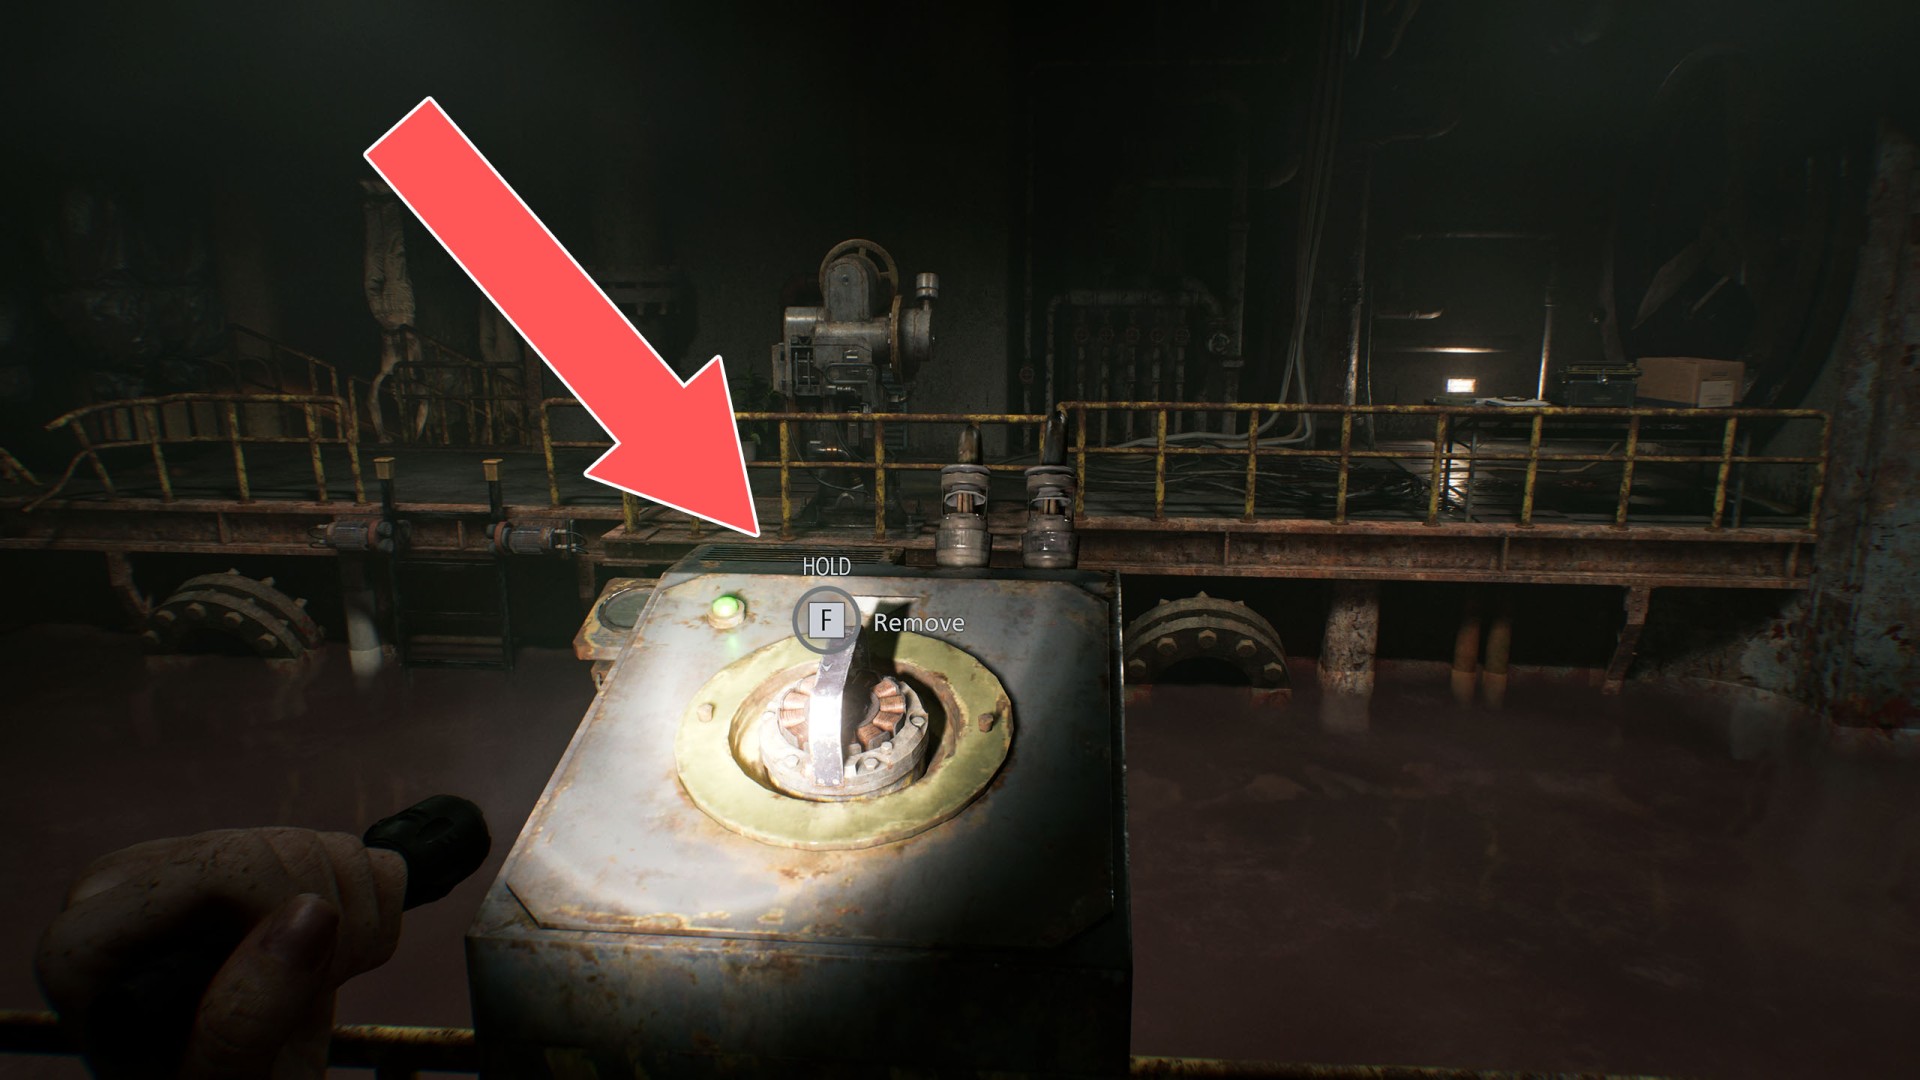
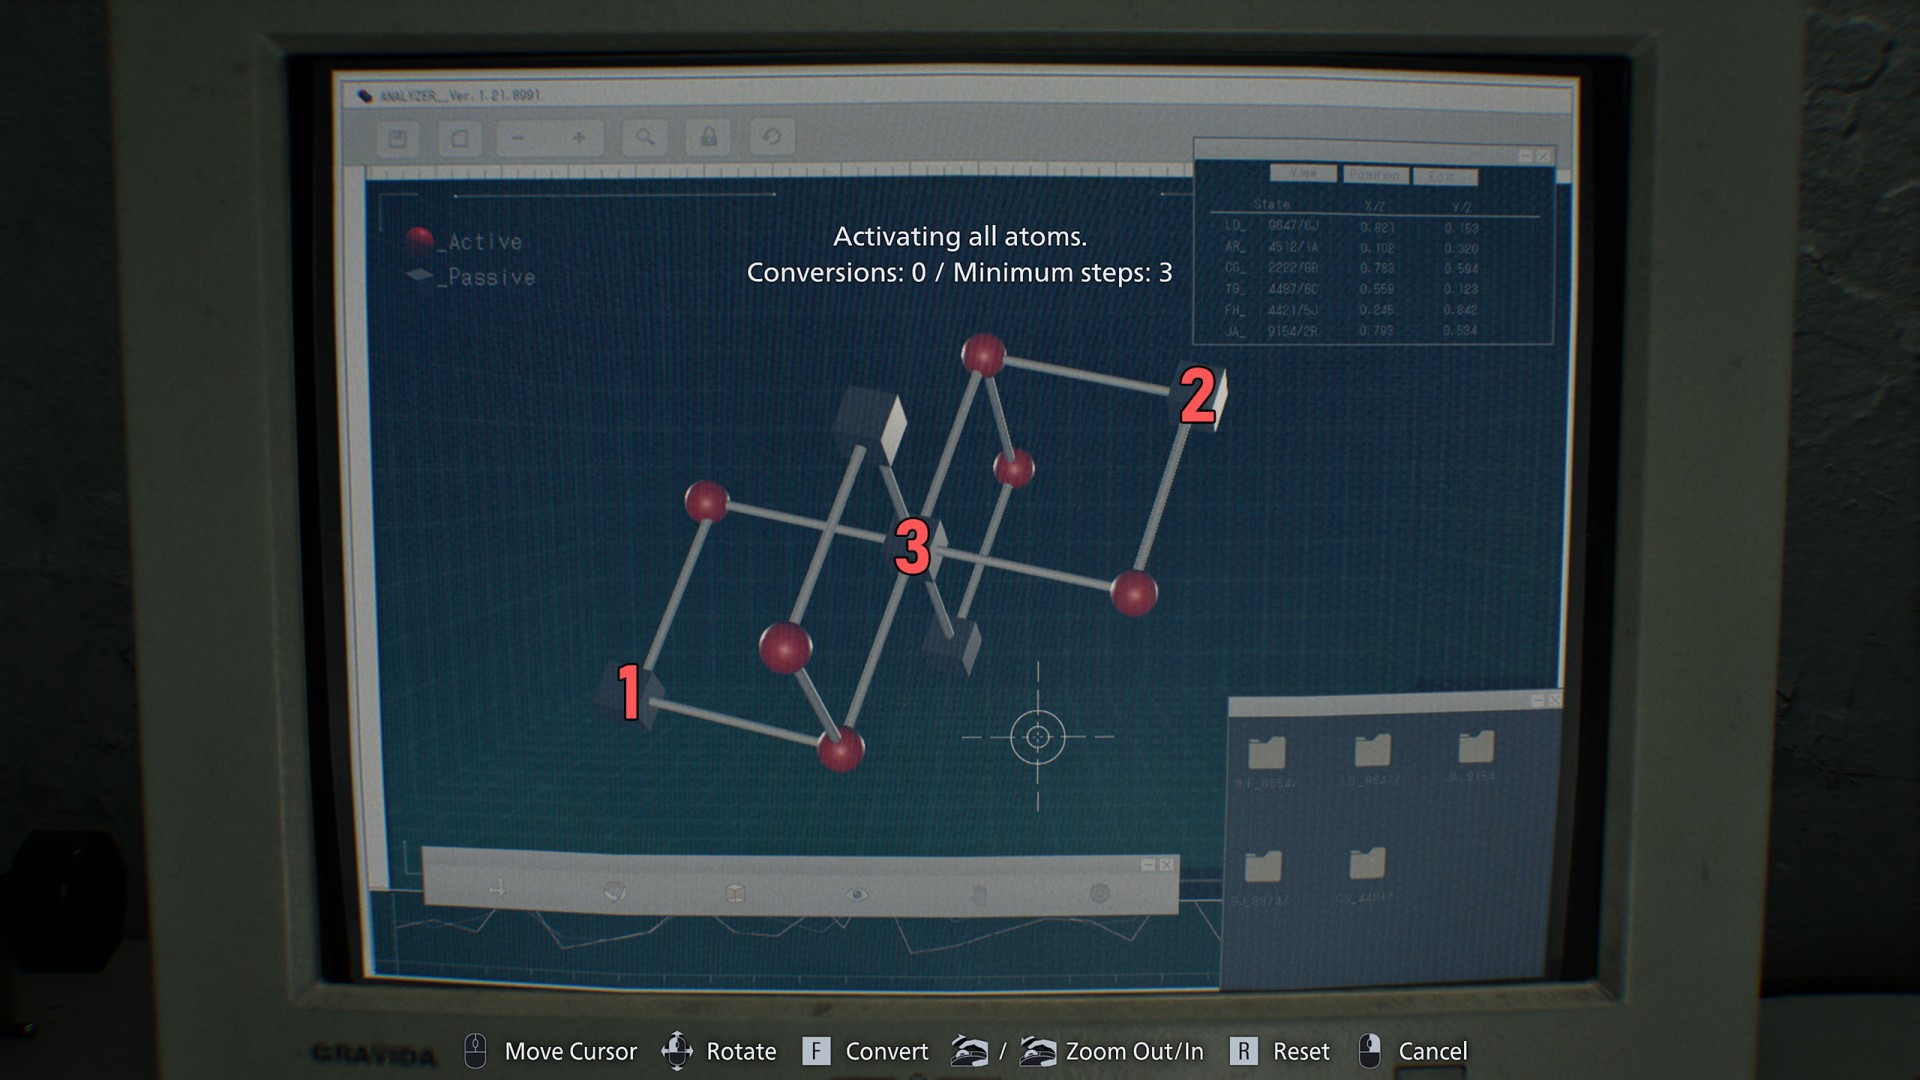
5Artificial Lungs
One of the items you need to collect to get the ID Wristband (Level 2). To open the transporter:
- Turn the dial to HAND
- Move the switch to meet the middle line
- Move switch 2 down
- Move switch 5 down
- Turn the dial to AUTO
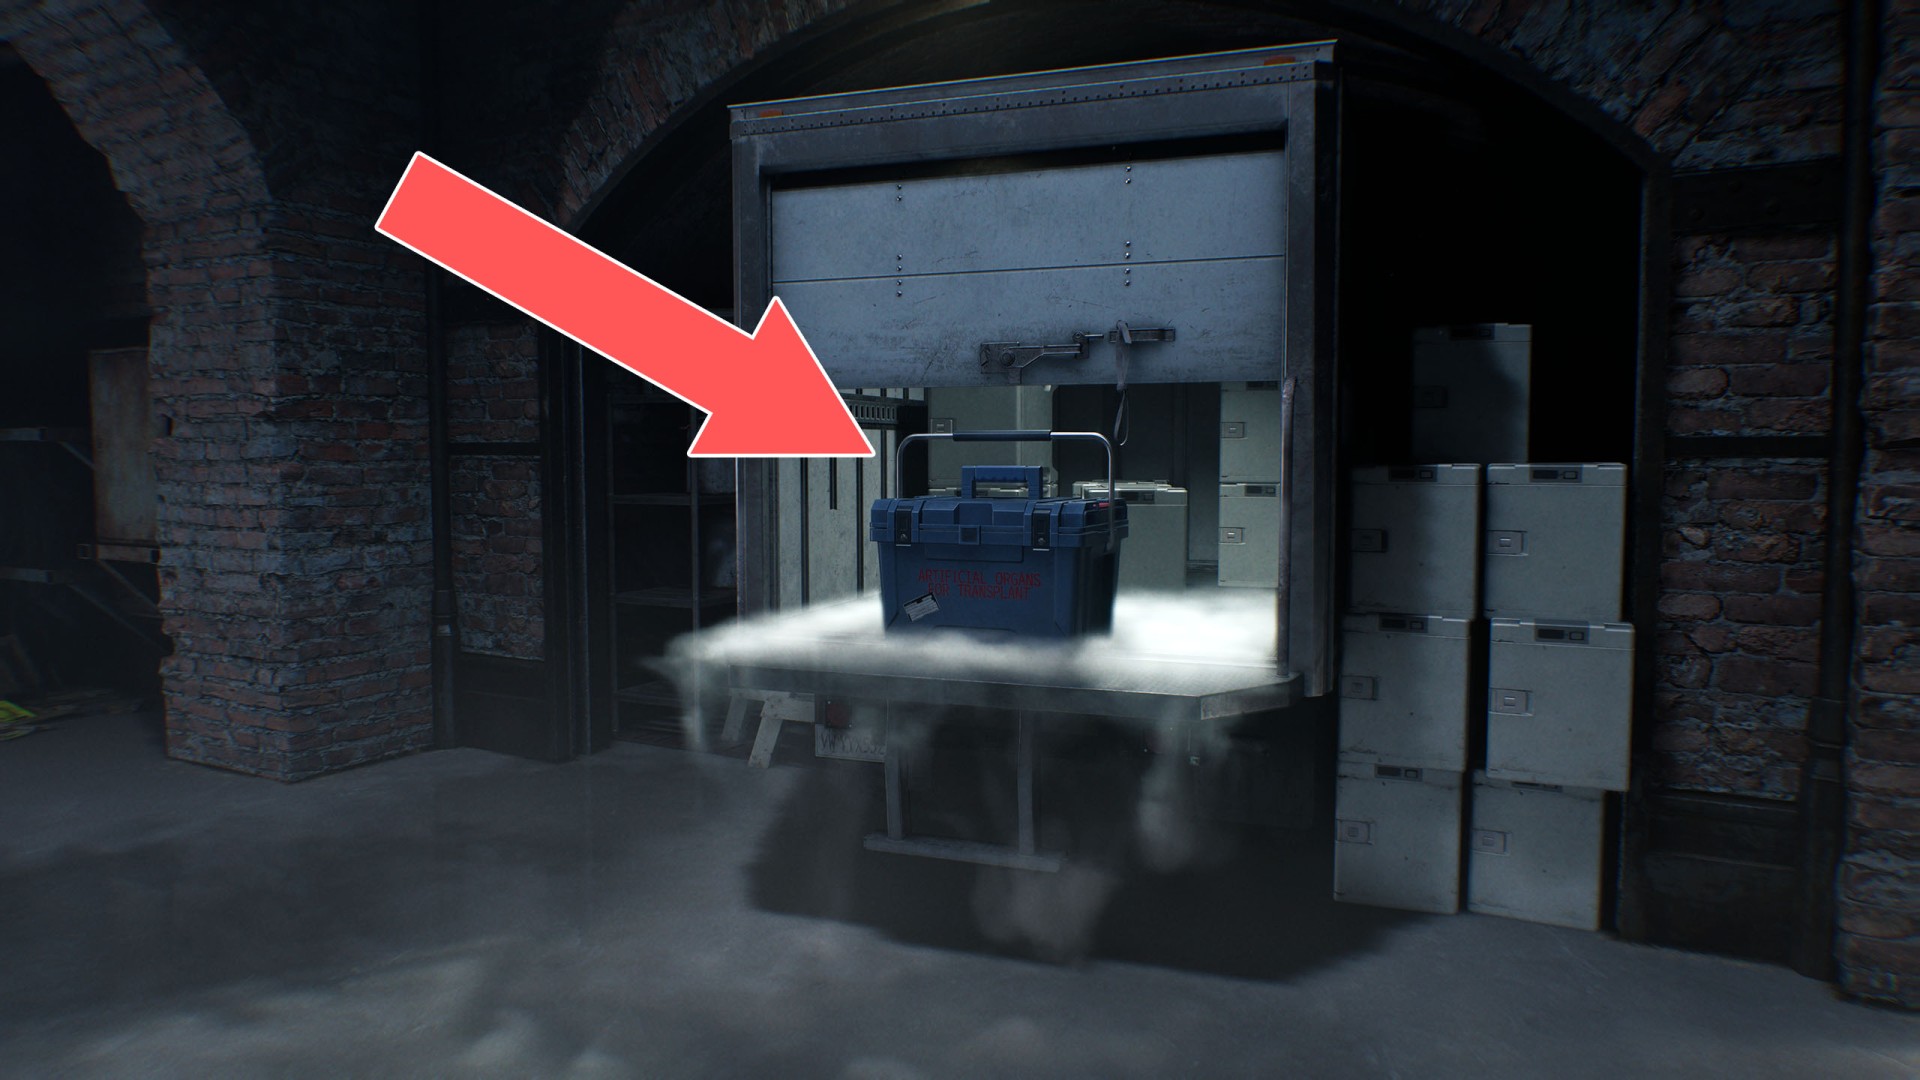
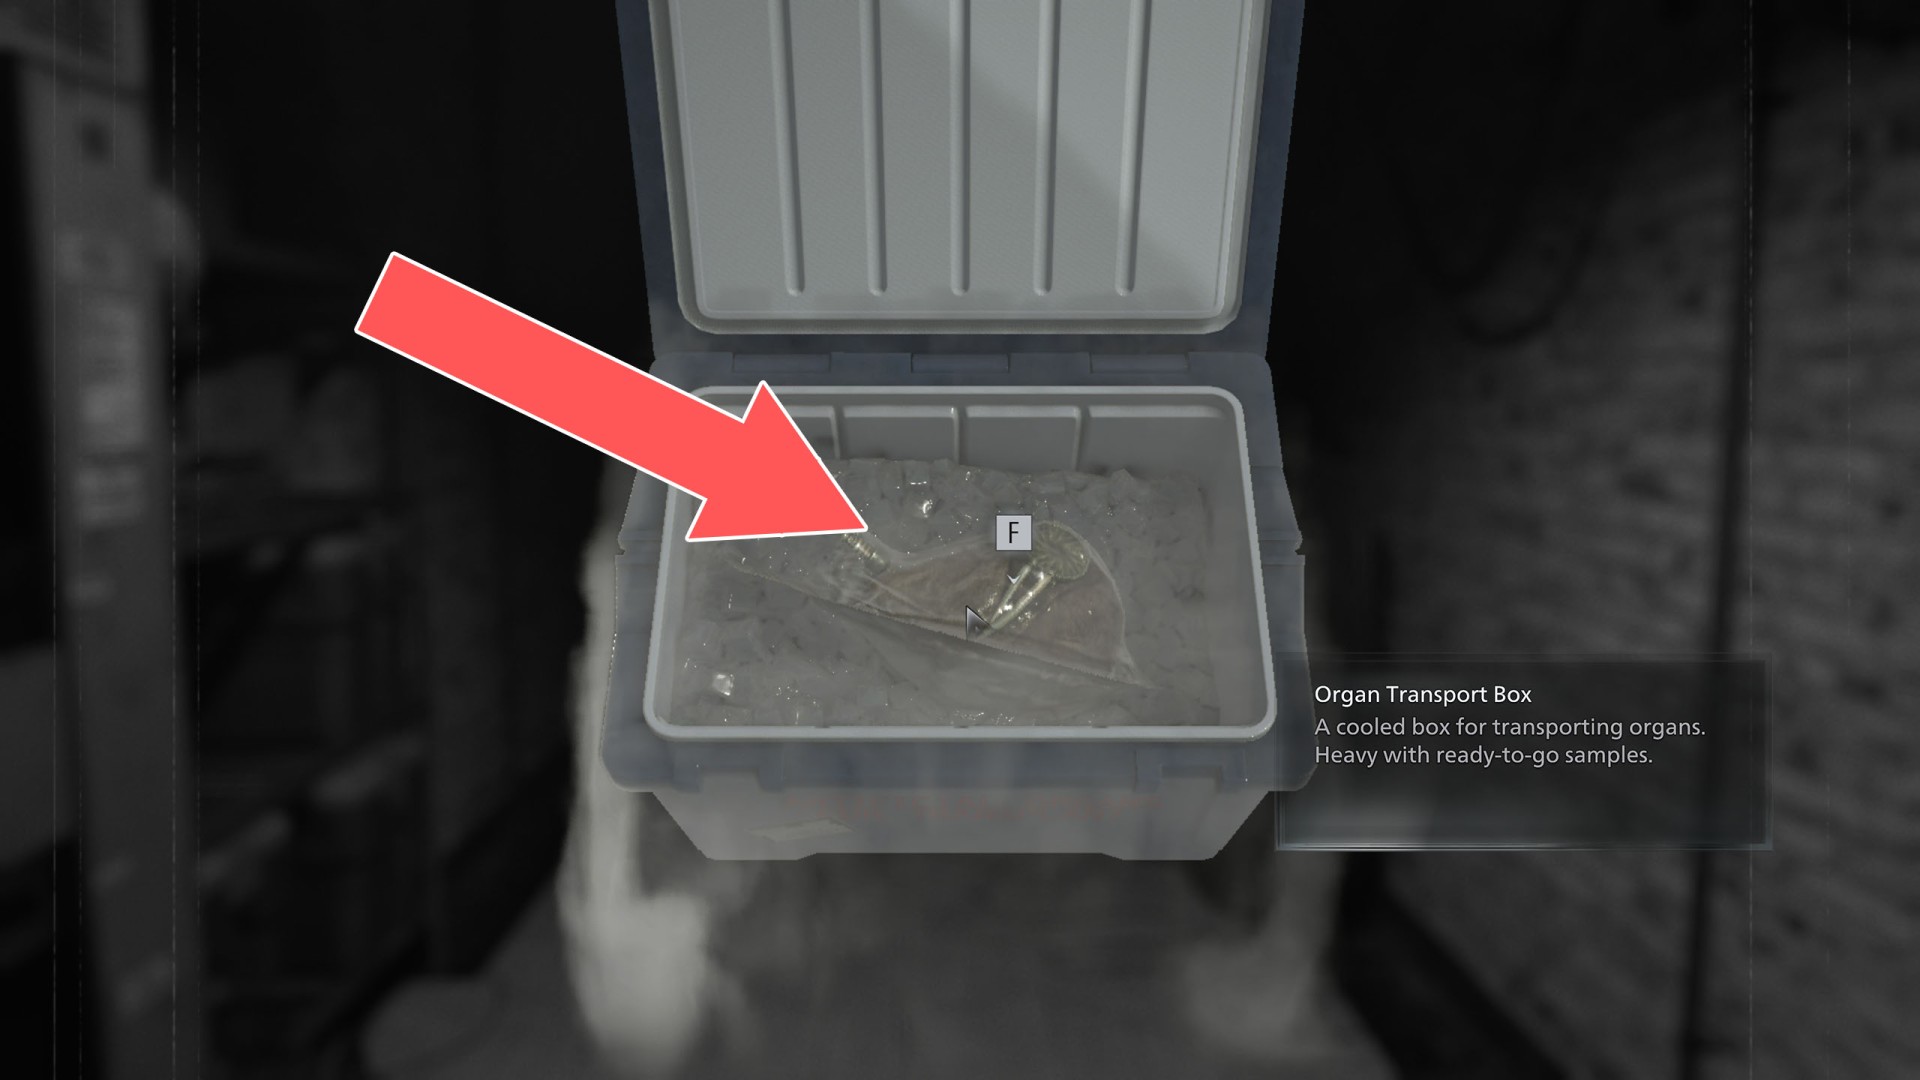
Solution hint: Unlocking the Organ Transport Box
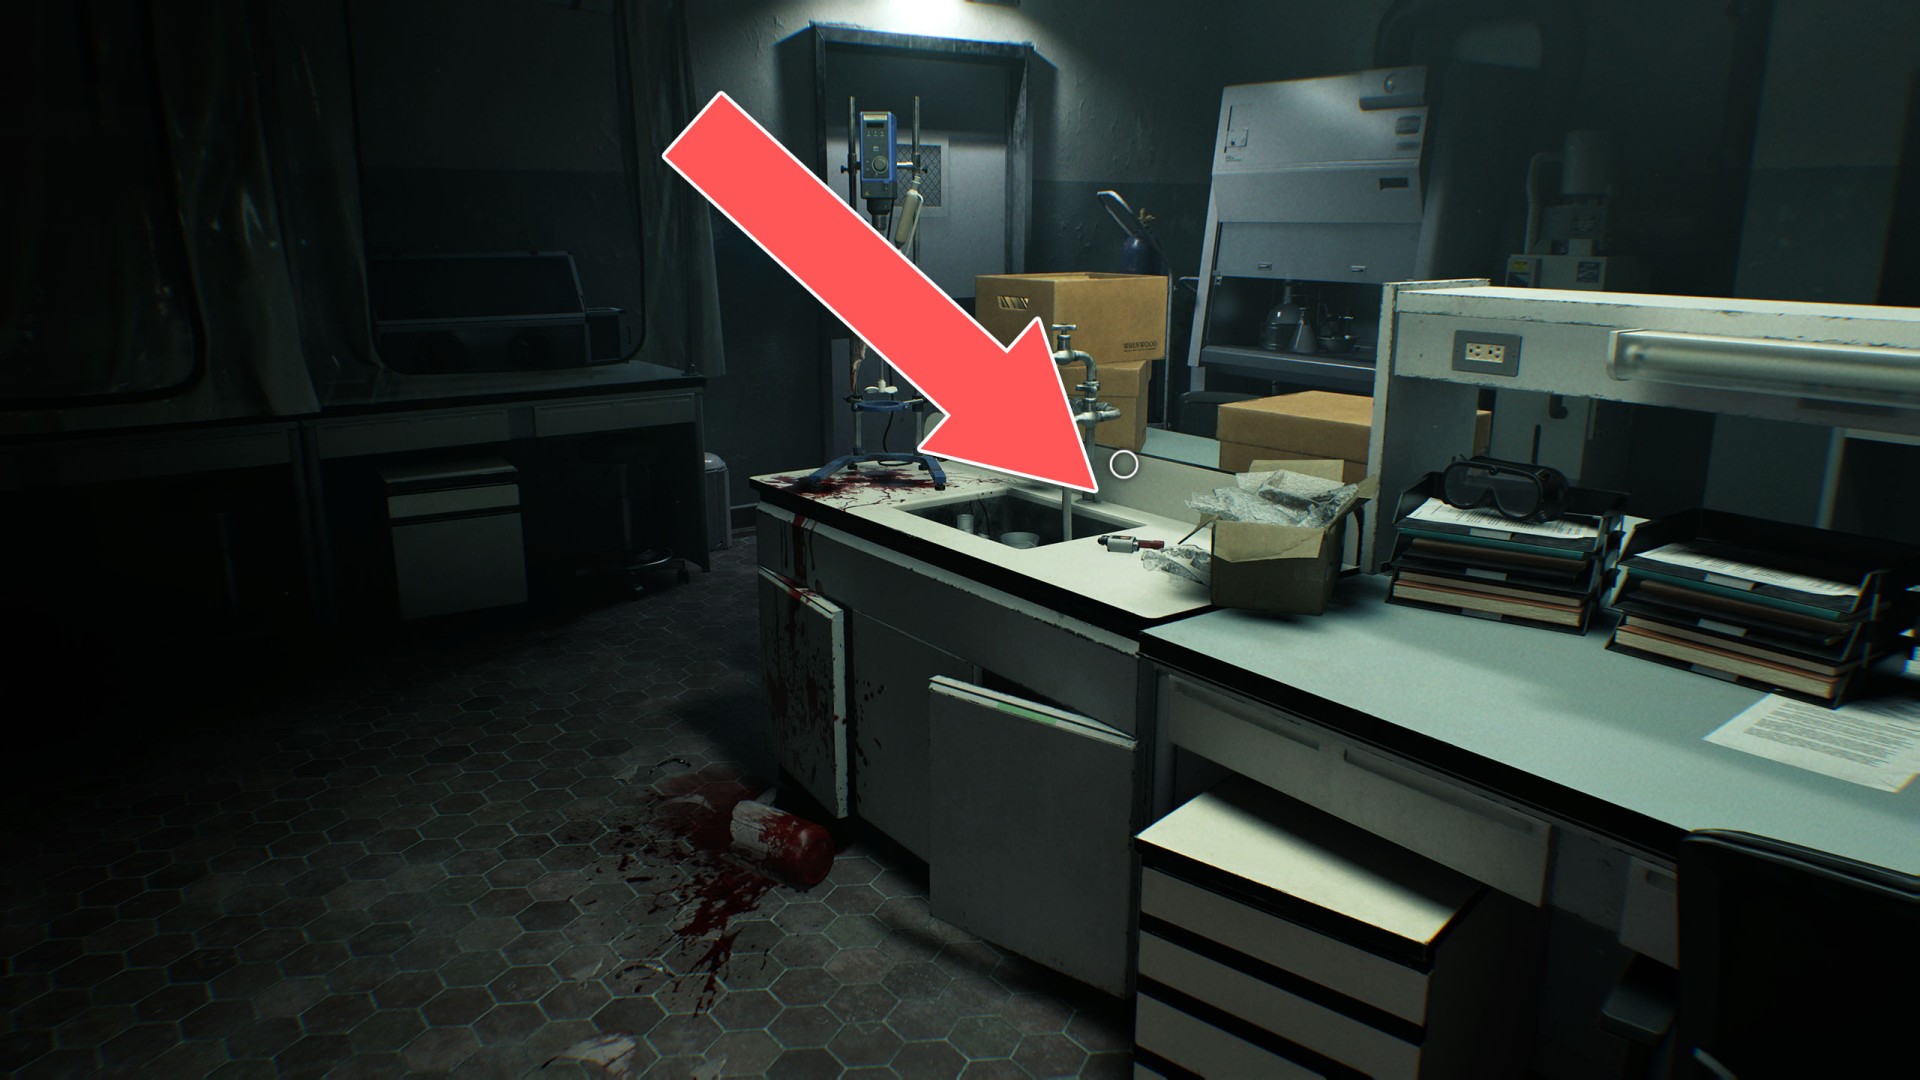
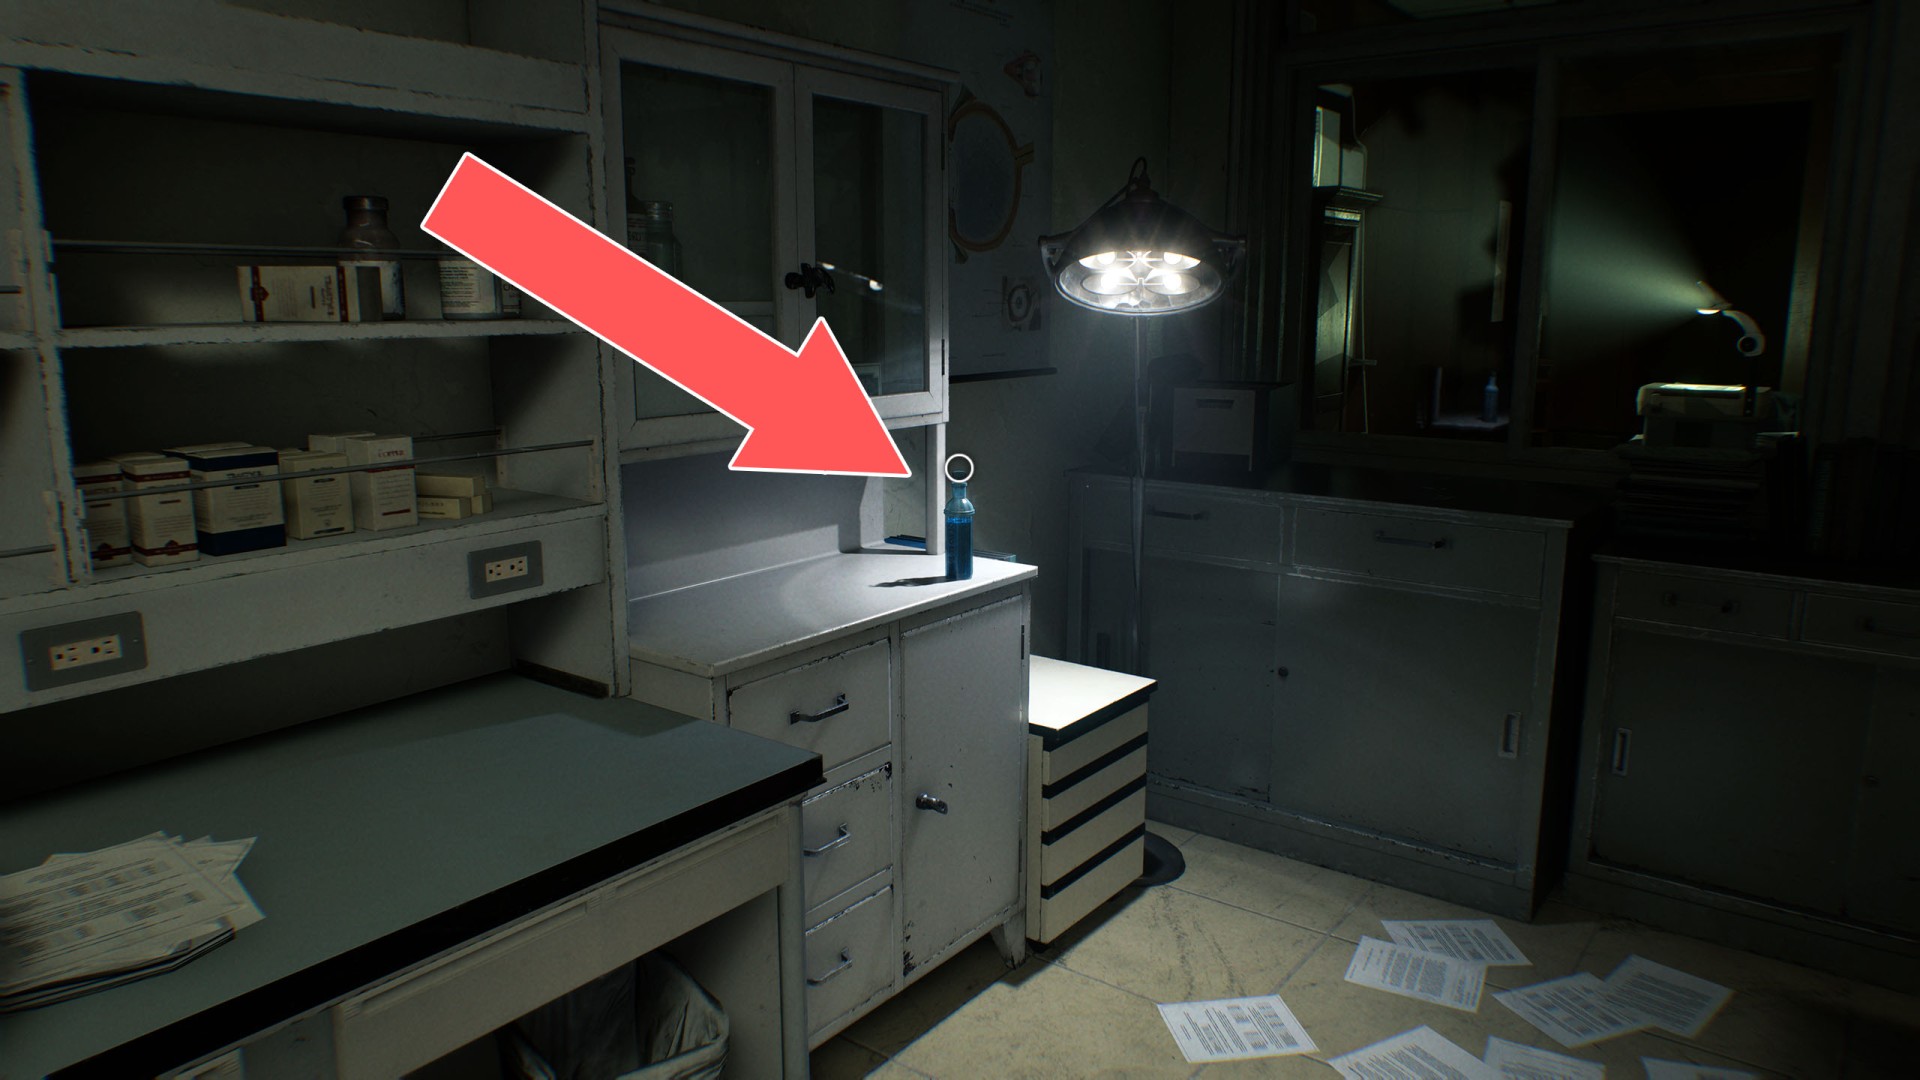
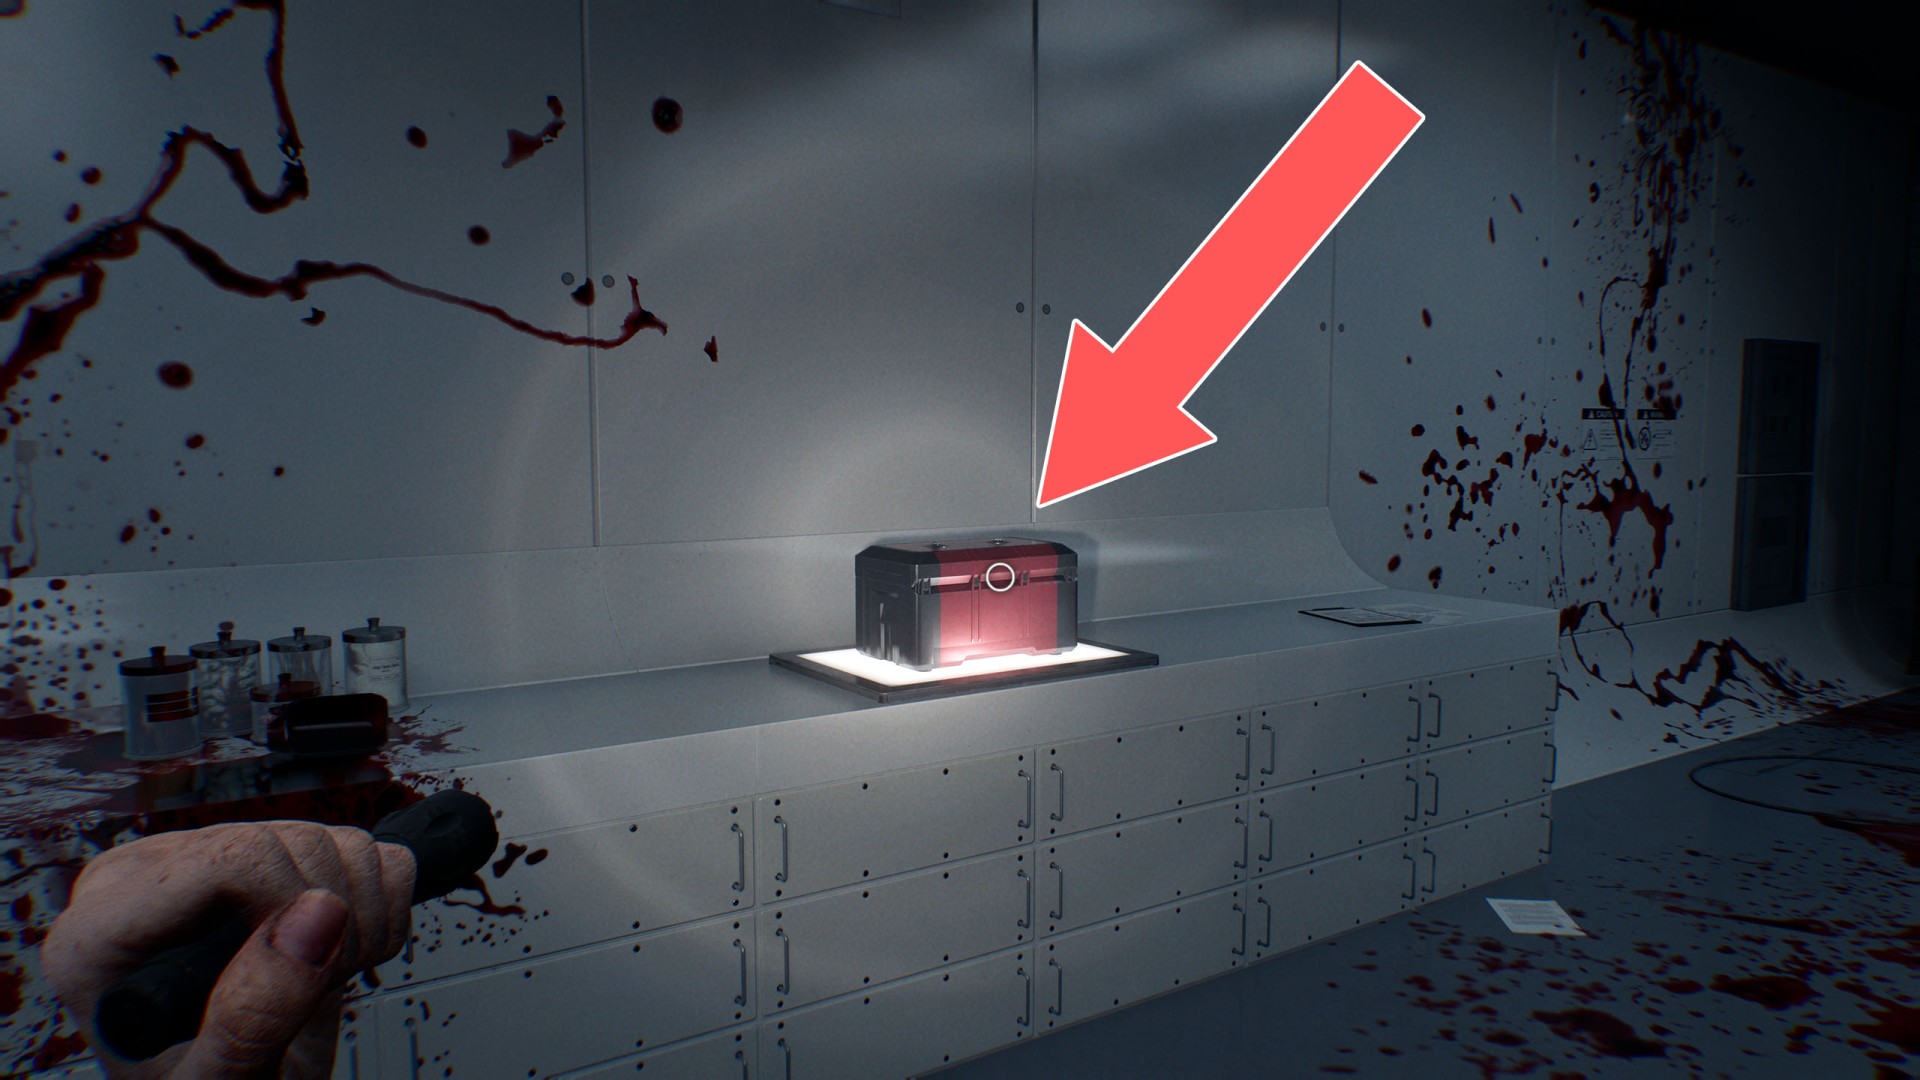
6Blood Collector
With it, you will be able to collect Infected Blood. Its initial capacity is 100 units, but it can be upgraded to 150 units after obtaining the Override Manual.
Description: An analysis device that collects blood which can be altered to craft other items.
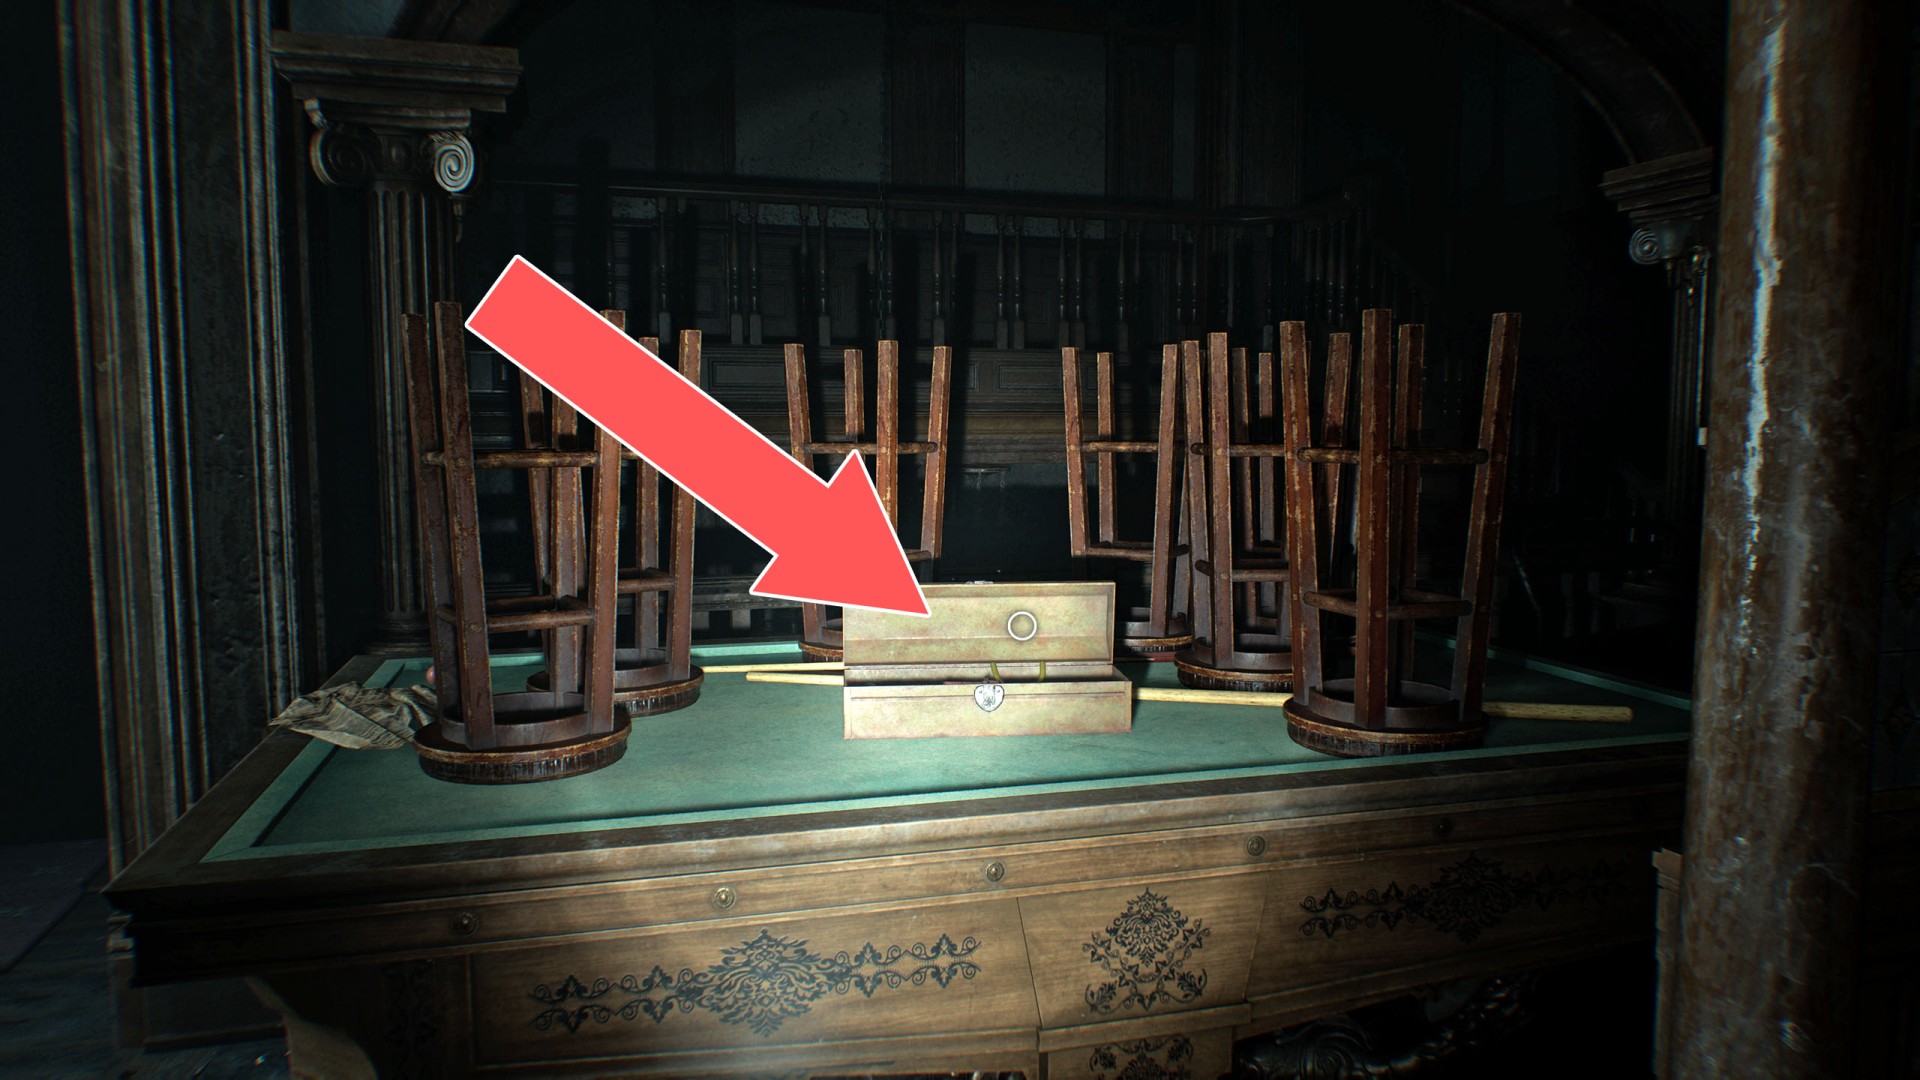
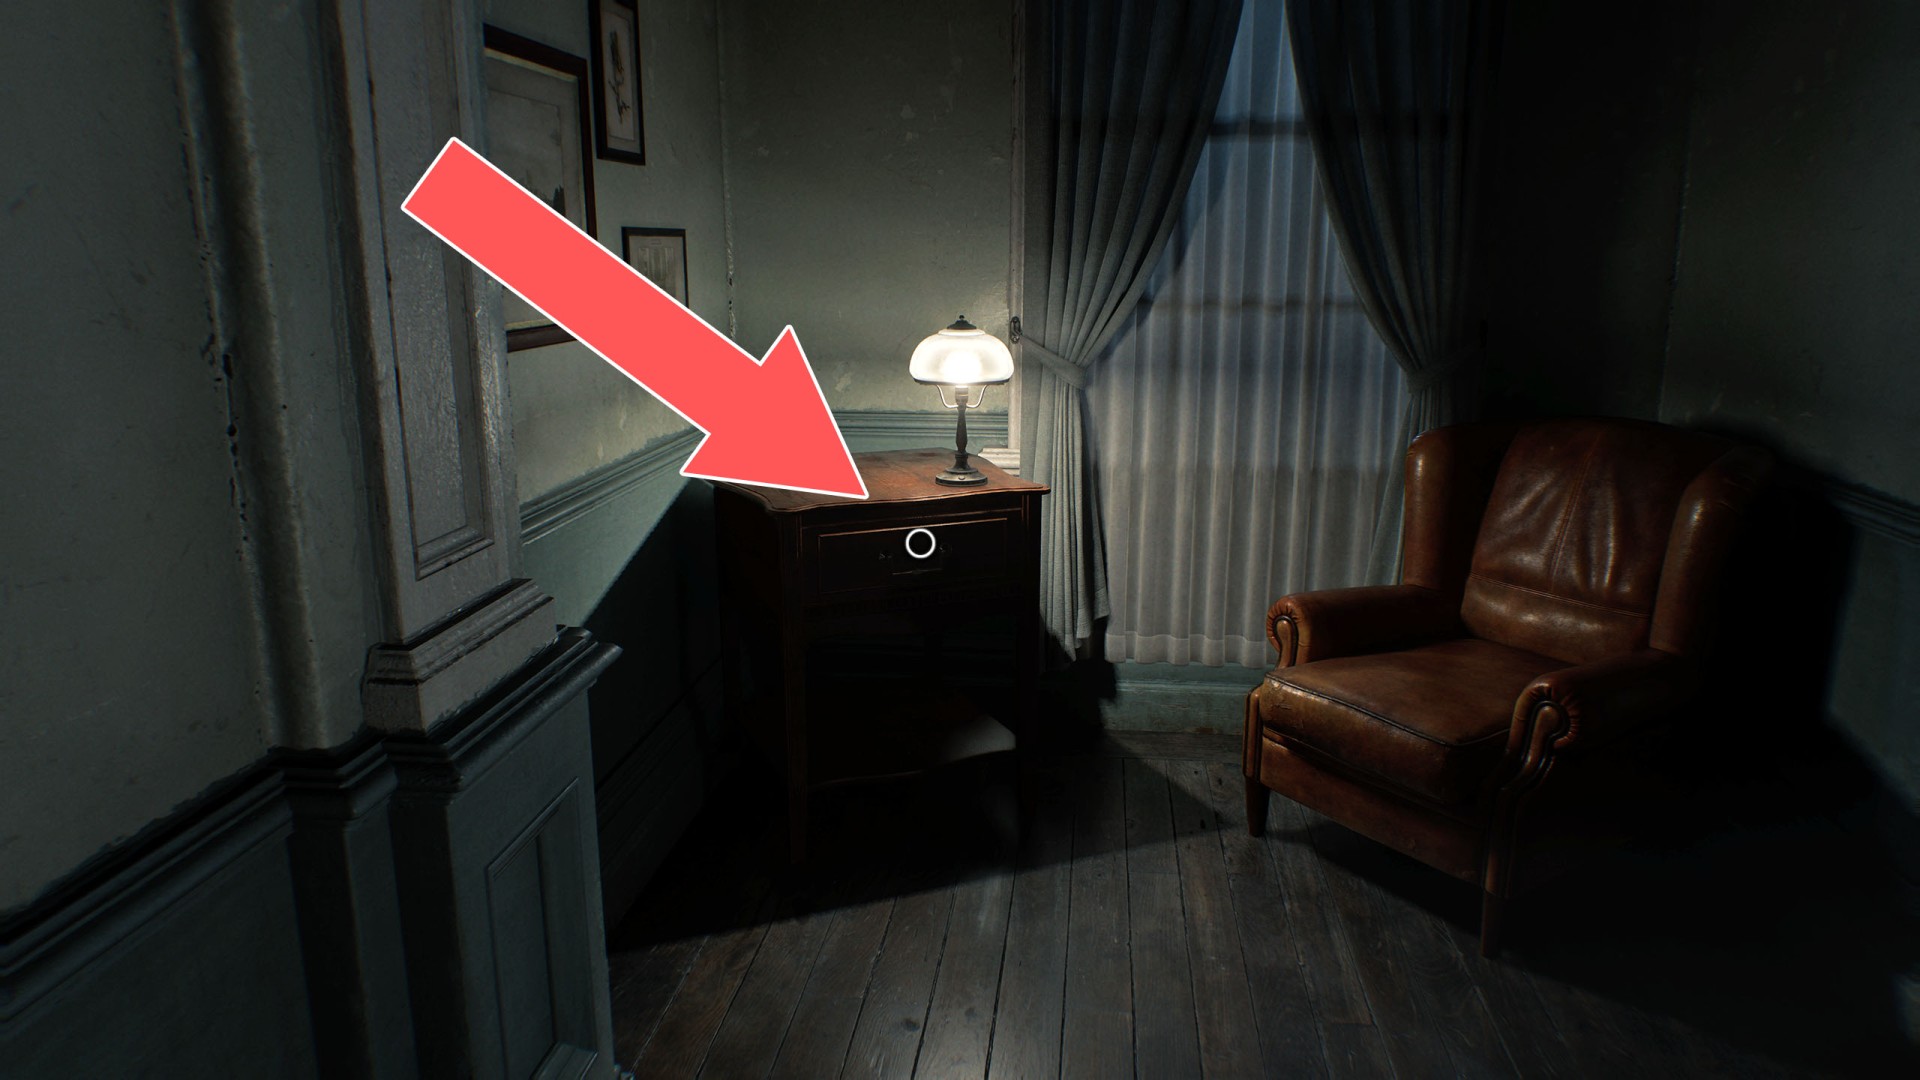
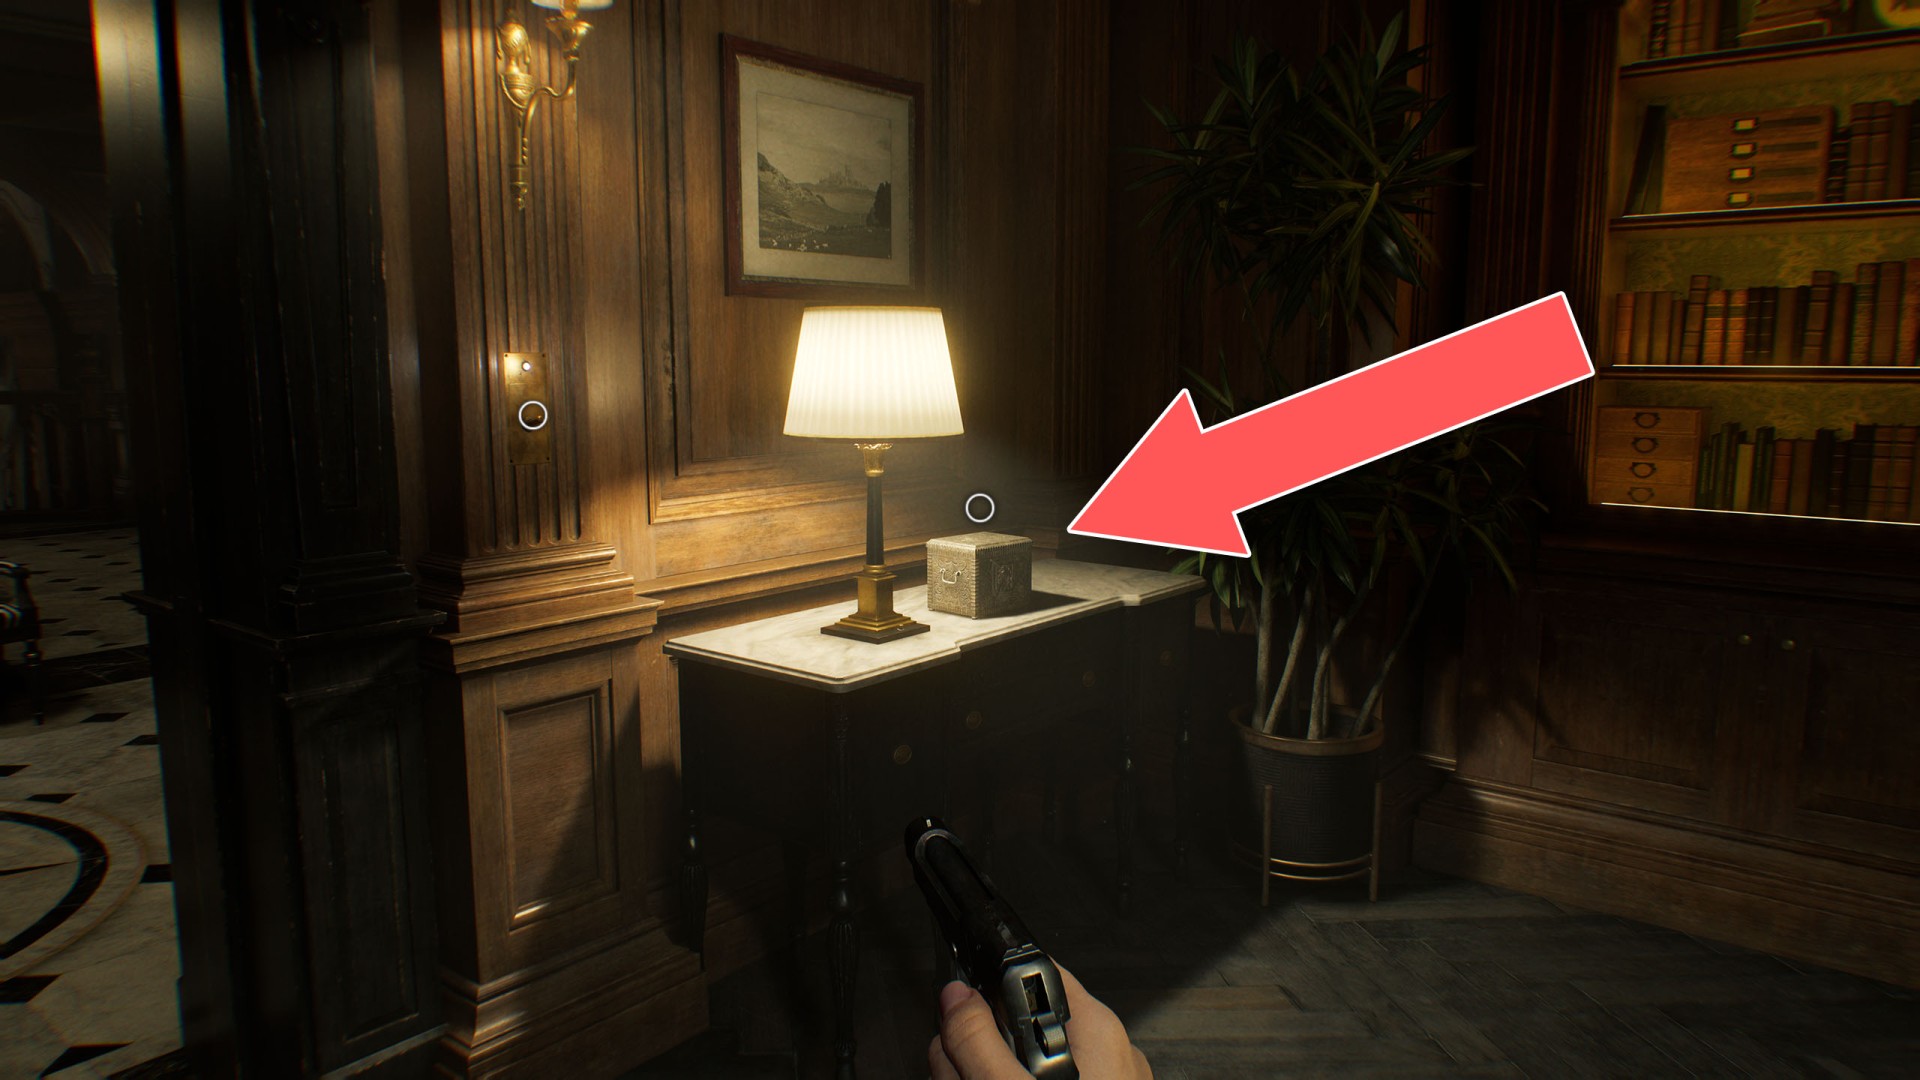
7Cherub Key
In the drawer of the small table standing at the end of the hallway, by the window.
Unlocks: Cherub Relief Door.
8Corrosive
This substance is required to open the locker containing the Sun Quartz.
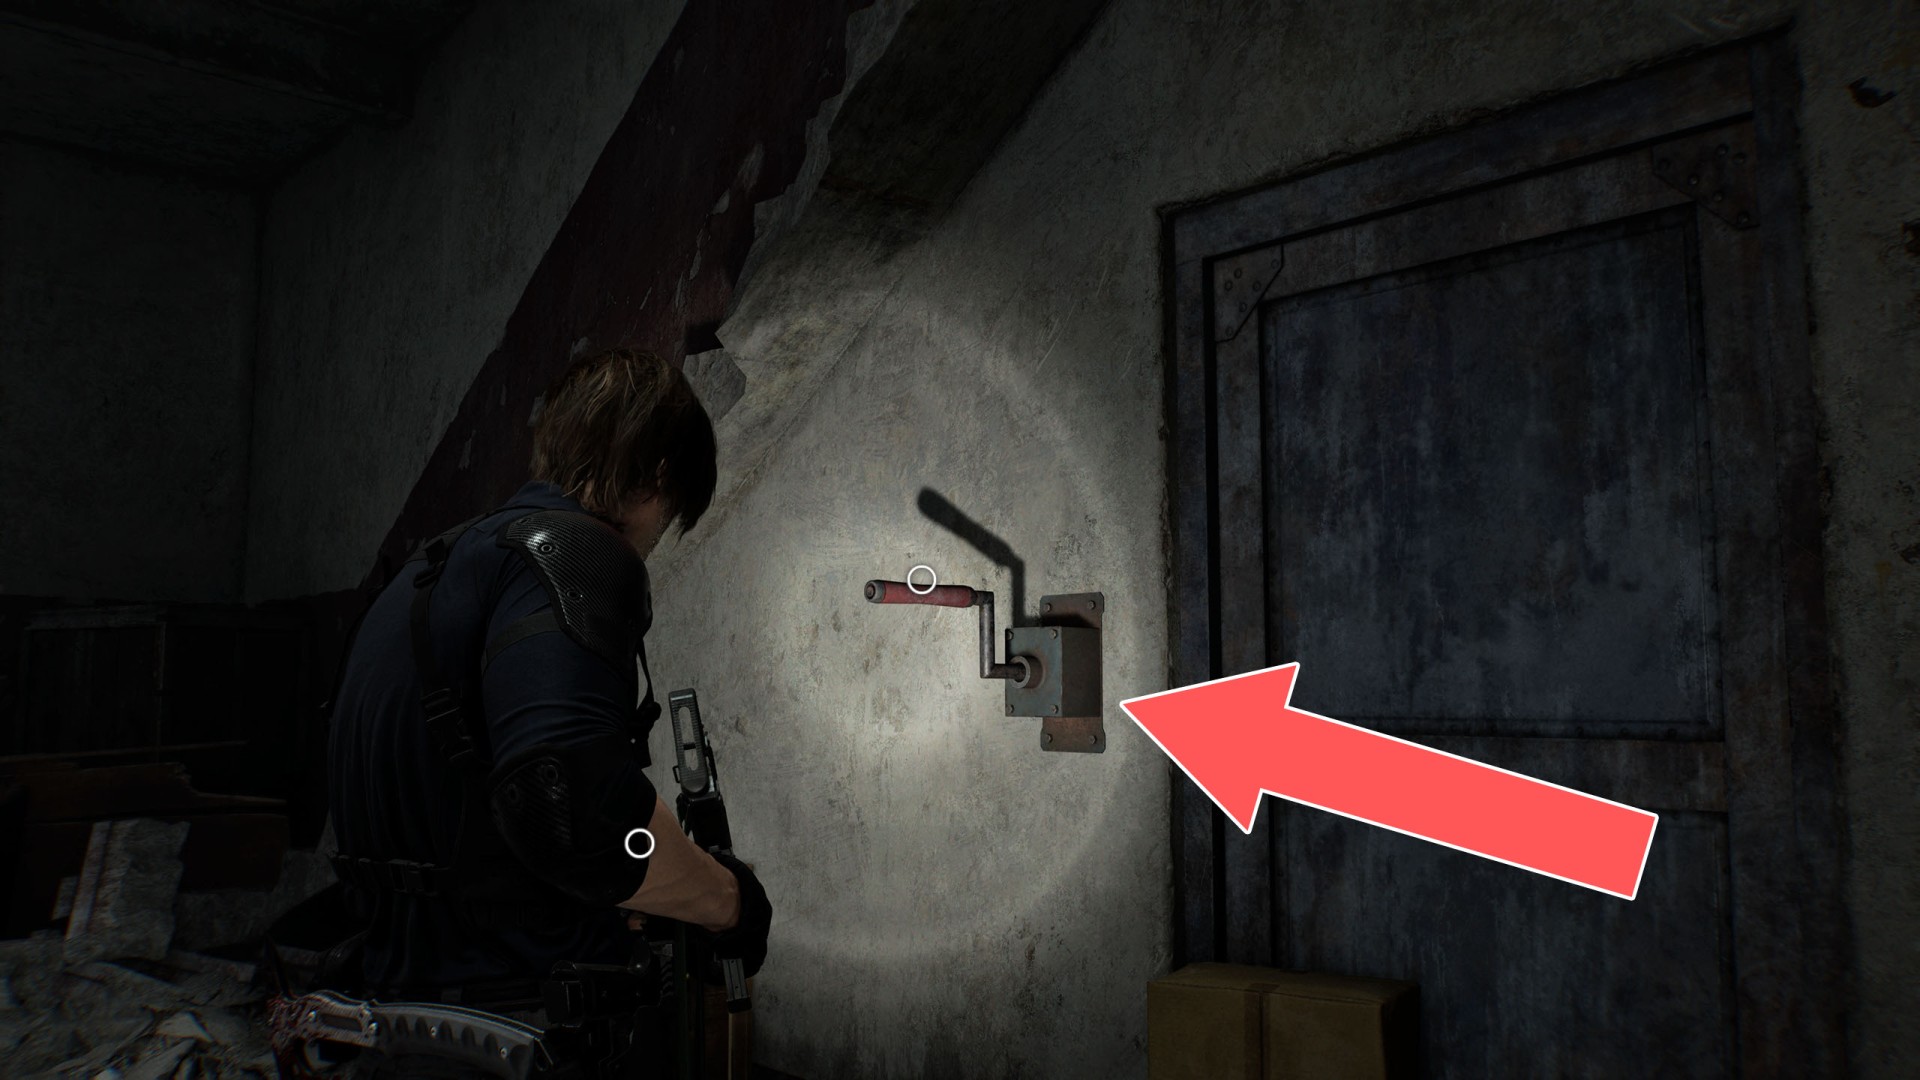
9Crank Lever
Required to operate the Power Distribution Unit #2.
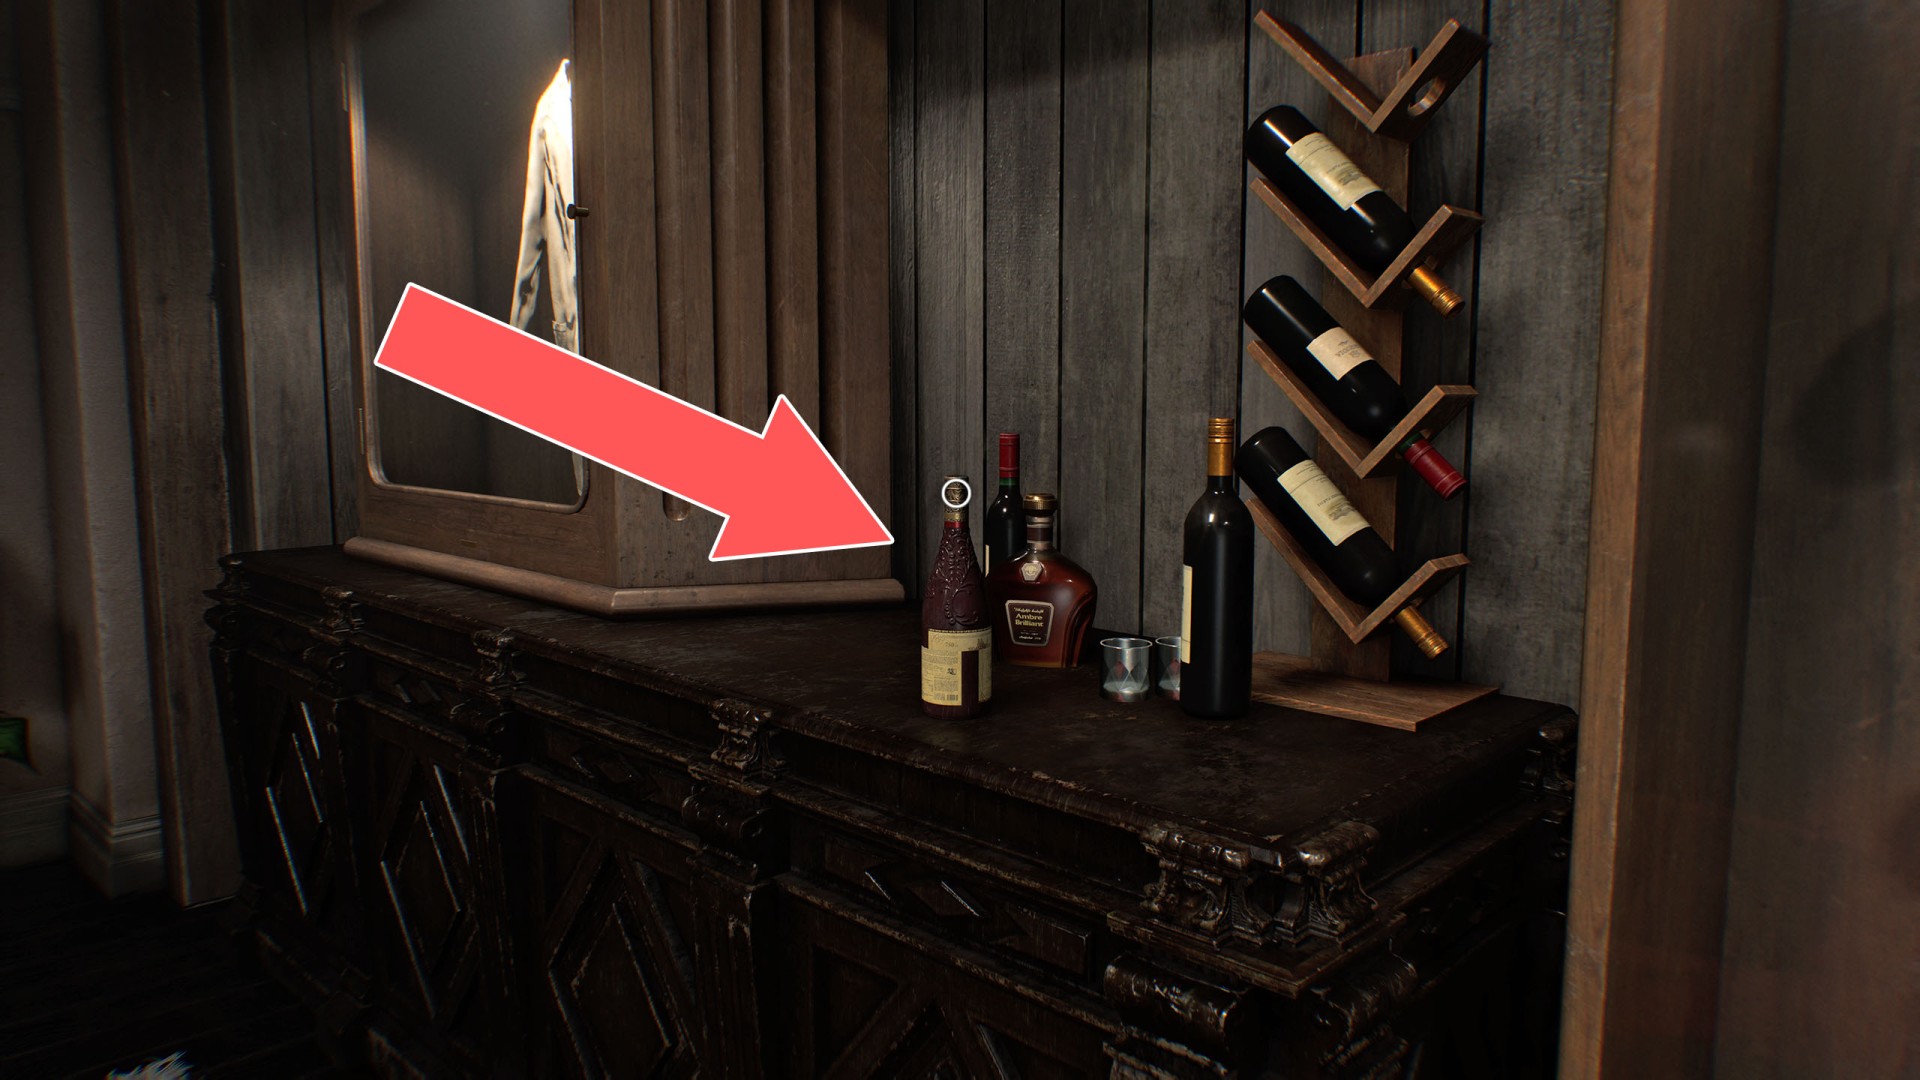
10Double Helix Model
Model is inside the vine bottle. Rotate the label on the bottle until it looks complete, then pull the bottle apart to open it. You need it to fill in the Incomplete DNA and start the elevator.
11East Wing Keycard
Show the map
12Forklift Key
Show the map
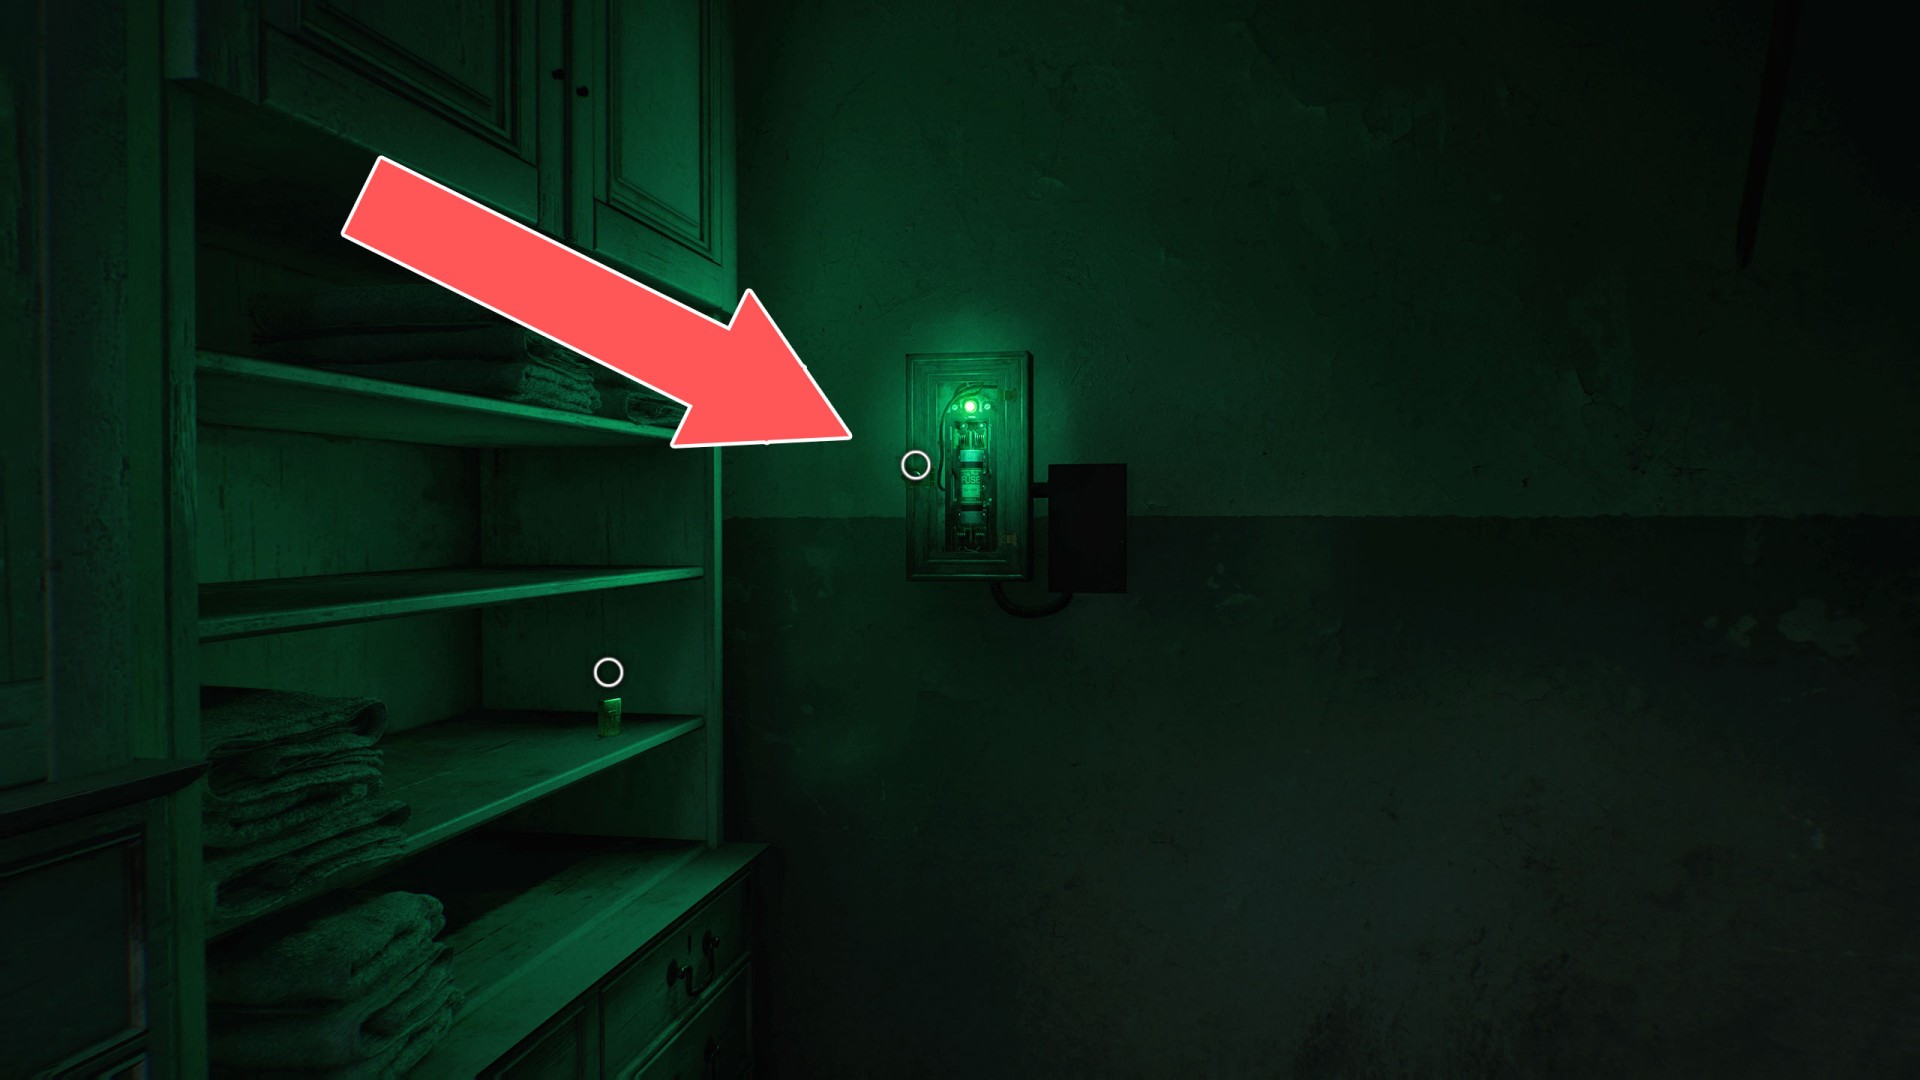
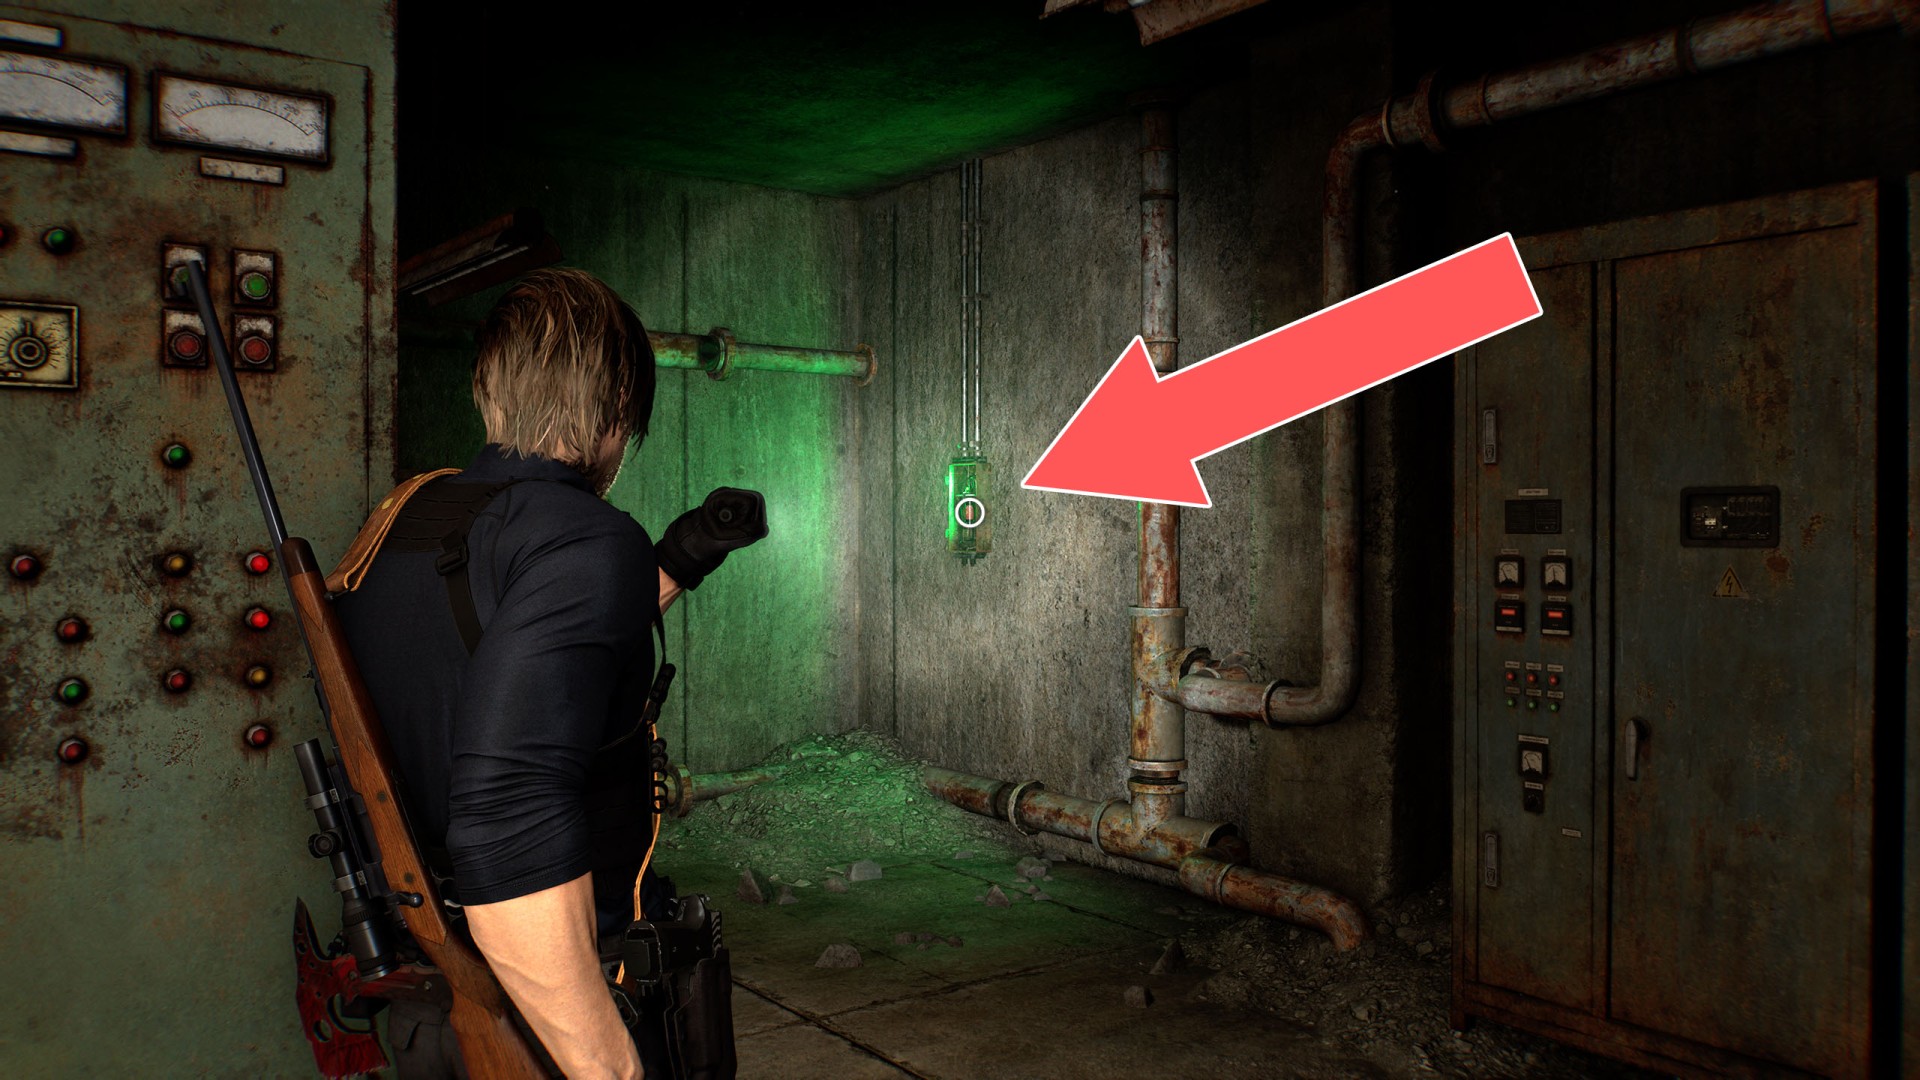
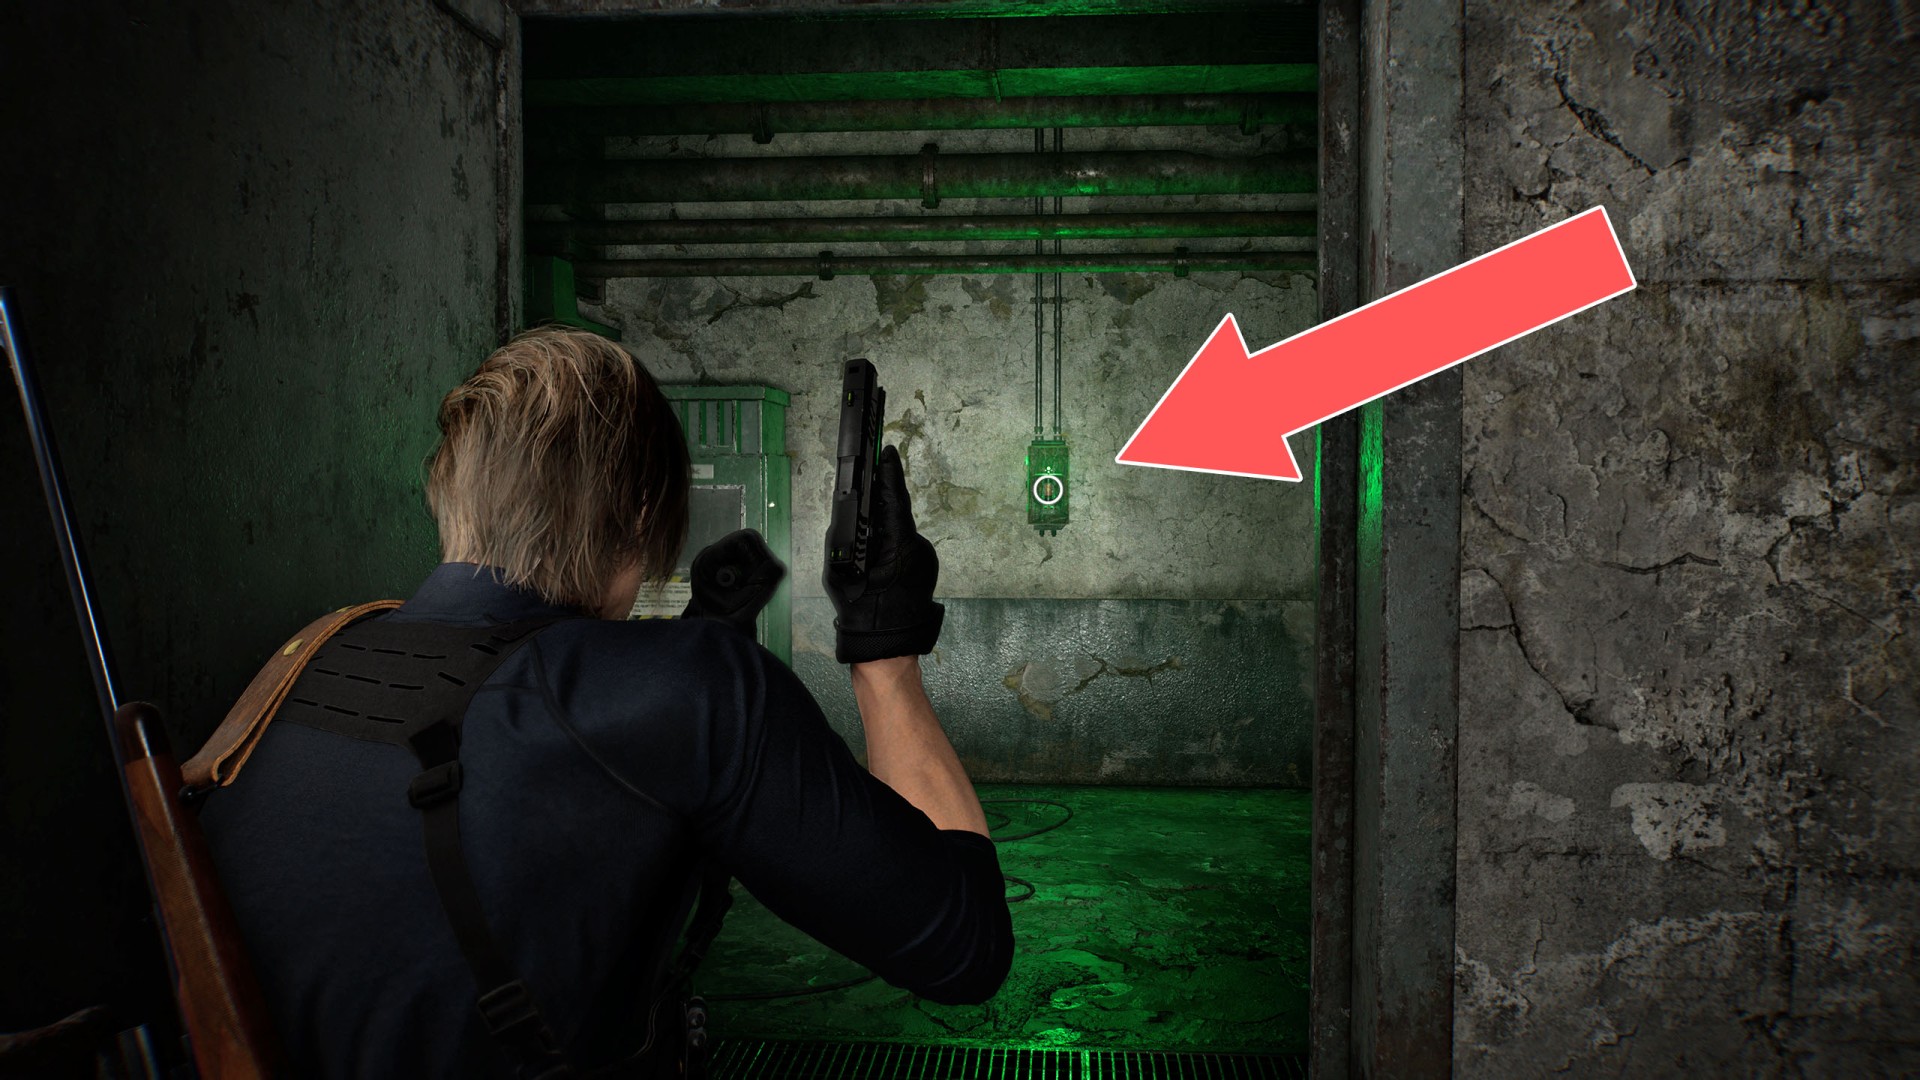
13Fuse Box (Locked)
You must use the Screwdriver to open the box. Once you take the fuse, you will need to run quickly toward the Fuse Box located near the gate.
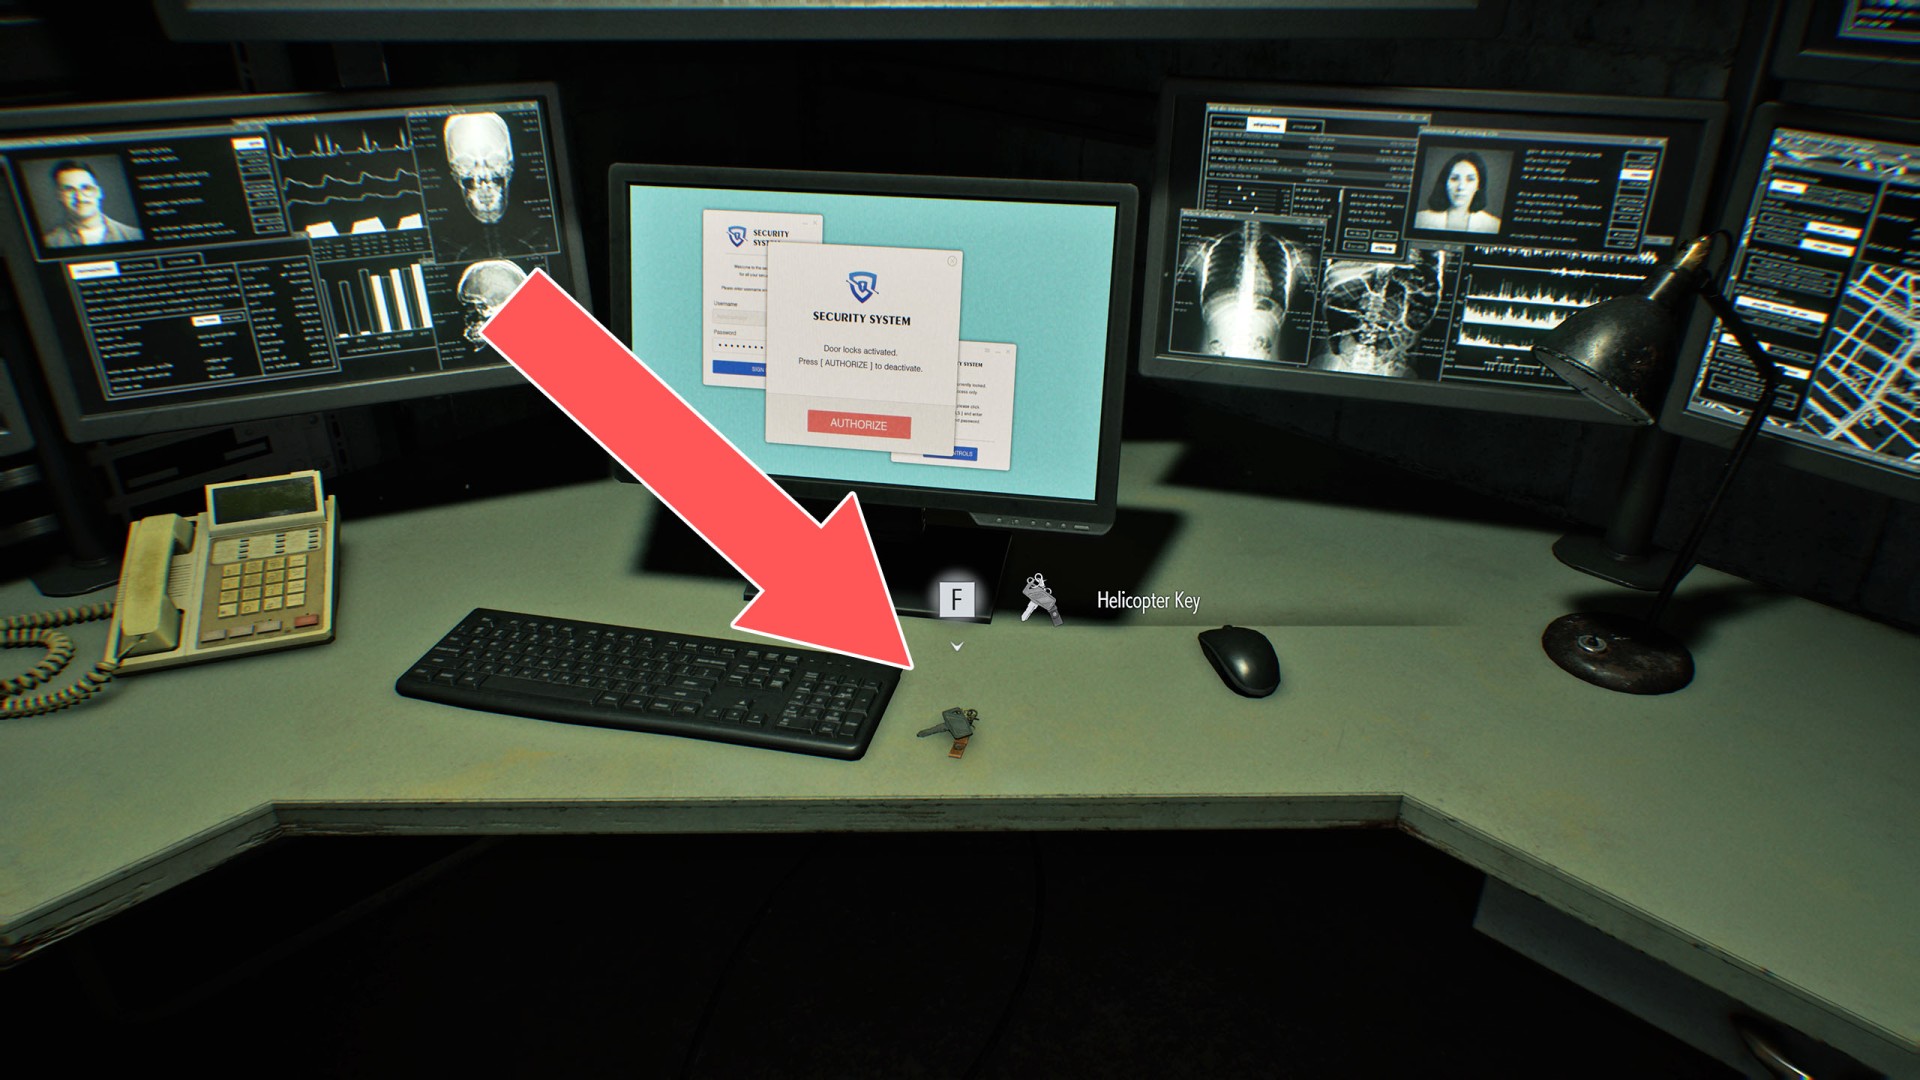
14Helicopter Key
Required to start the helicopter located in the courtyard.
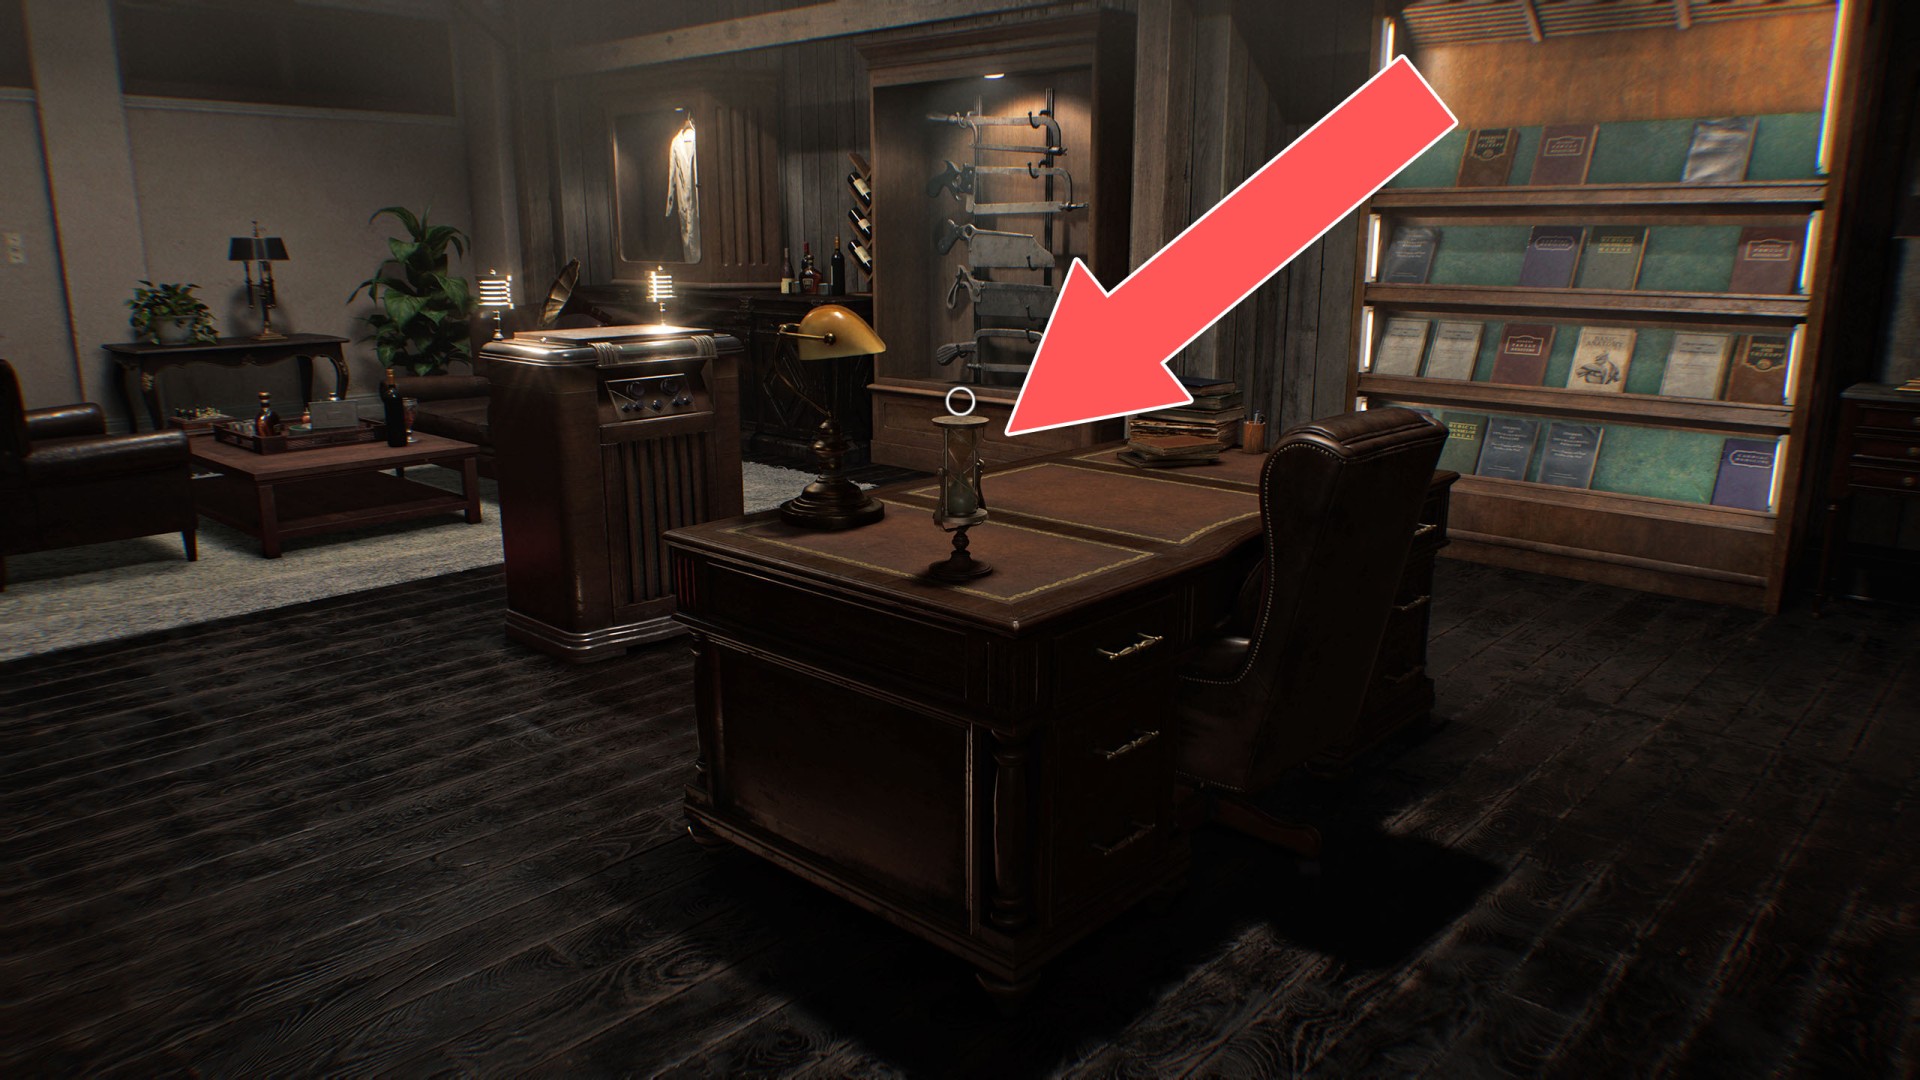
15Hourglass
16ID Wristband (Level 1)
This wristband allows you to open Level 1 doors:
17ID Wristband (Level 2)
To get this wristband you need to collect the Artificial Lungs and Artificial Heart, put them inside the organless body then kill it.

18ID Wristband (Level 3)
Unlocks: Security Door (Level 3) and Security Door (Level 3).
19Joint Plug #1
20Joint Plug #2
21Joint Plug #3
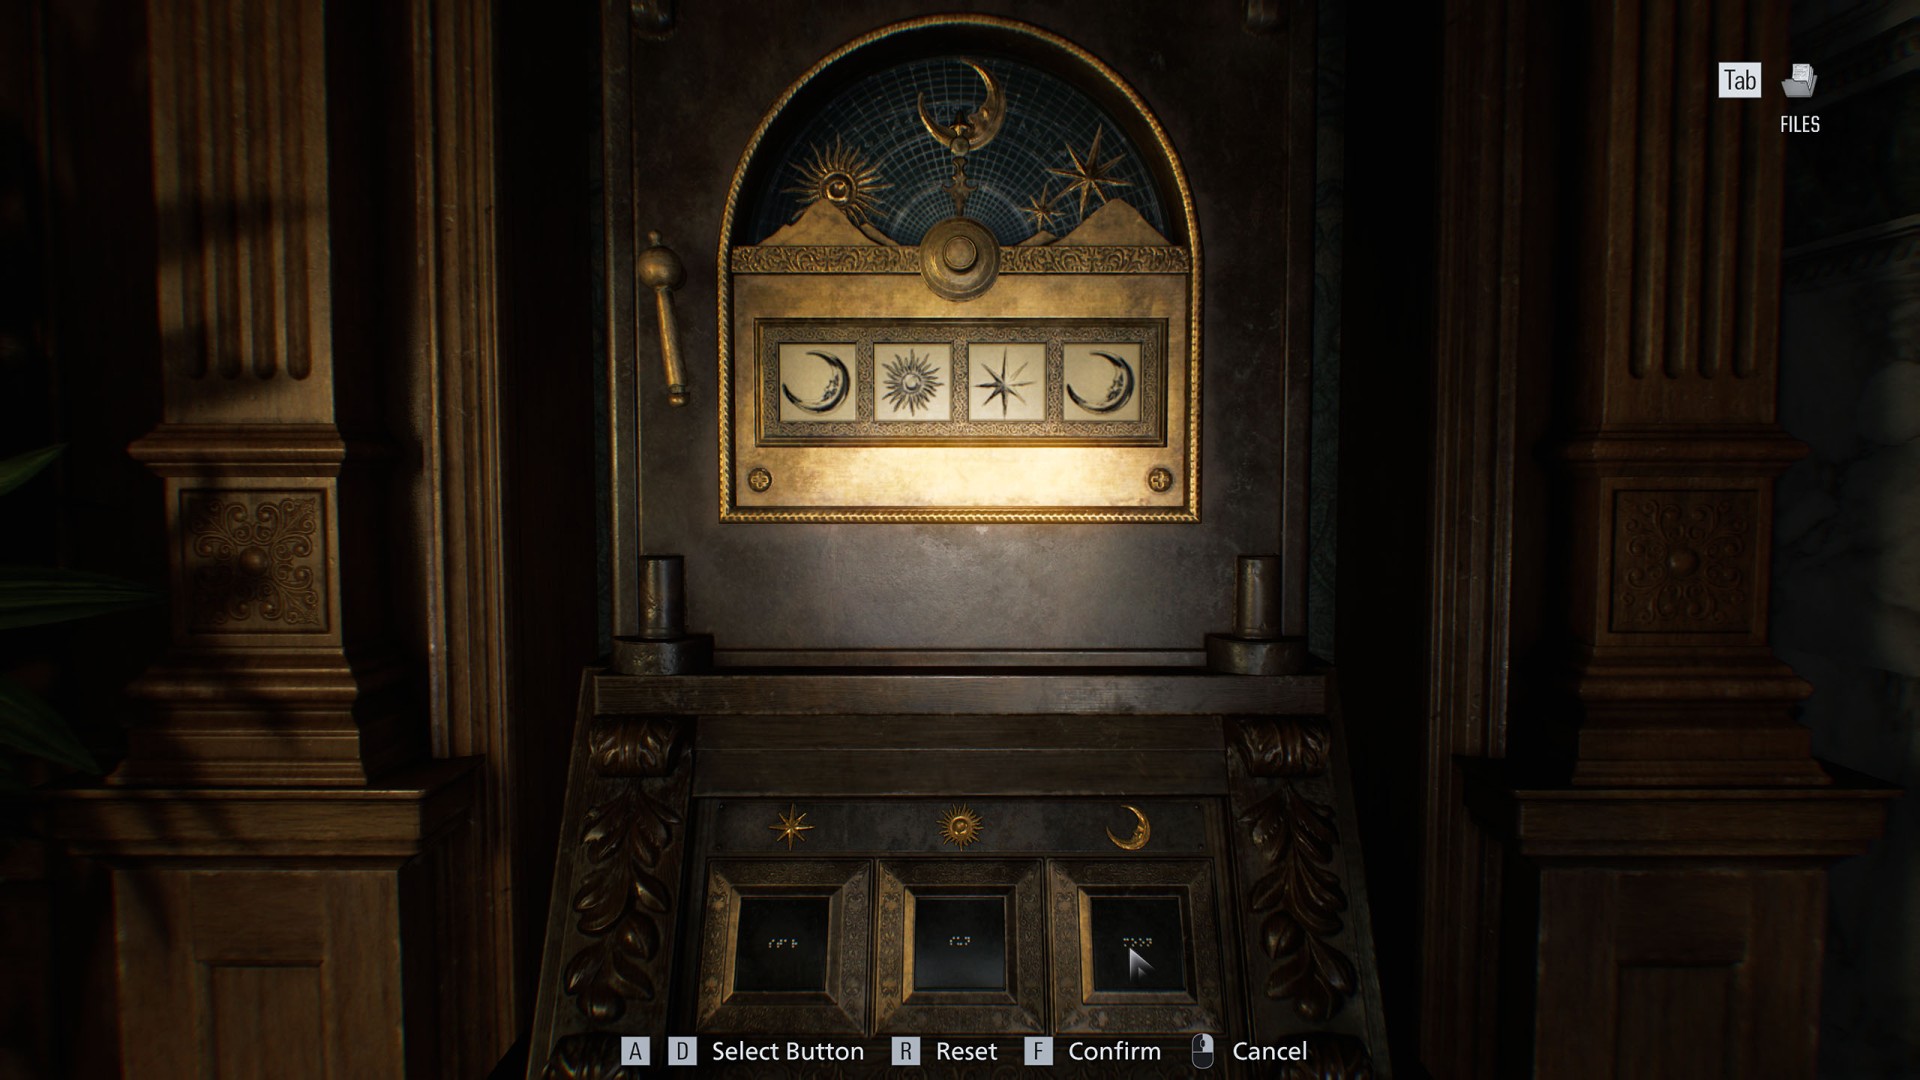
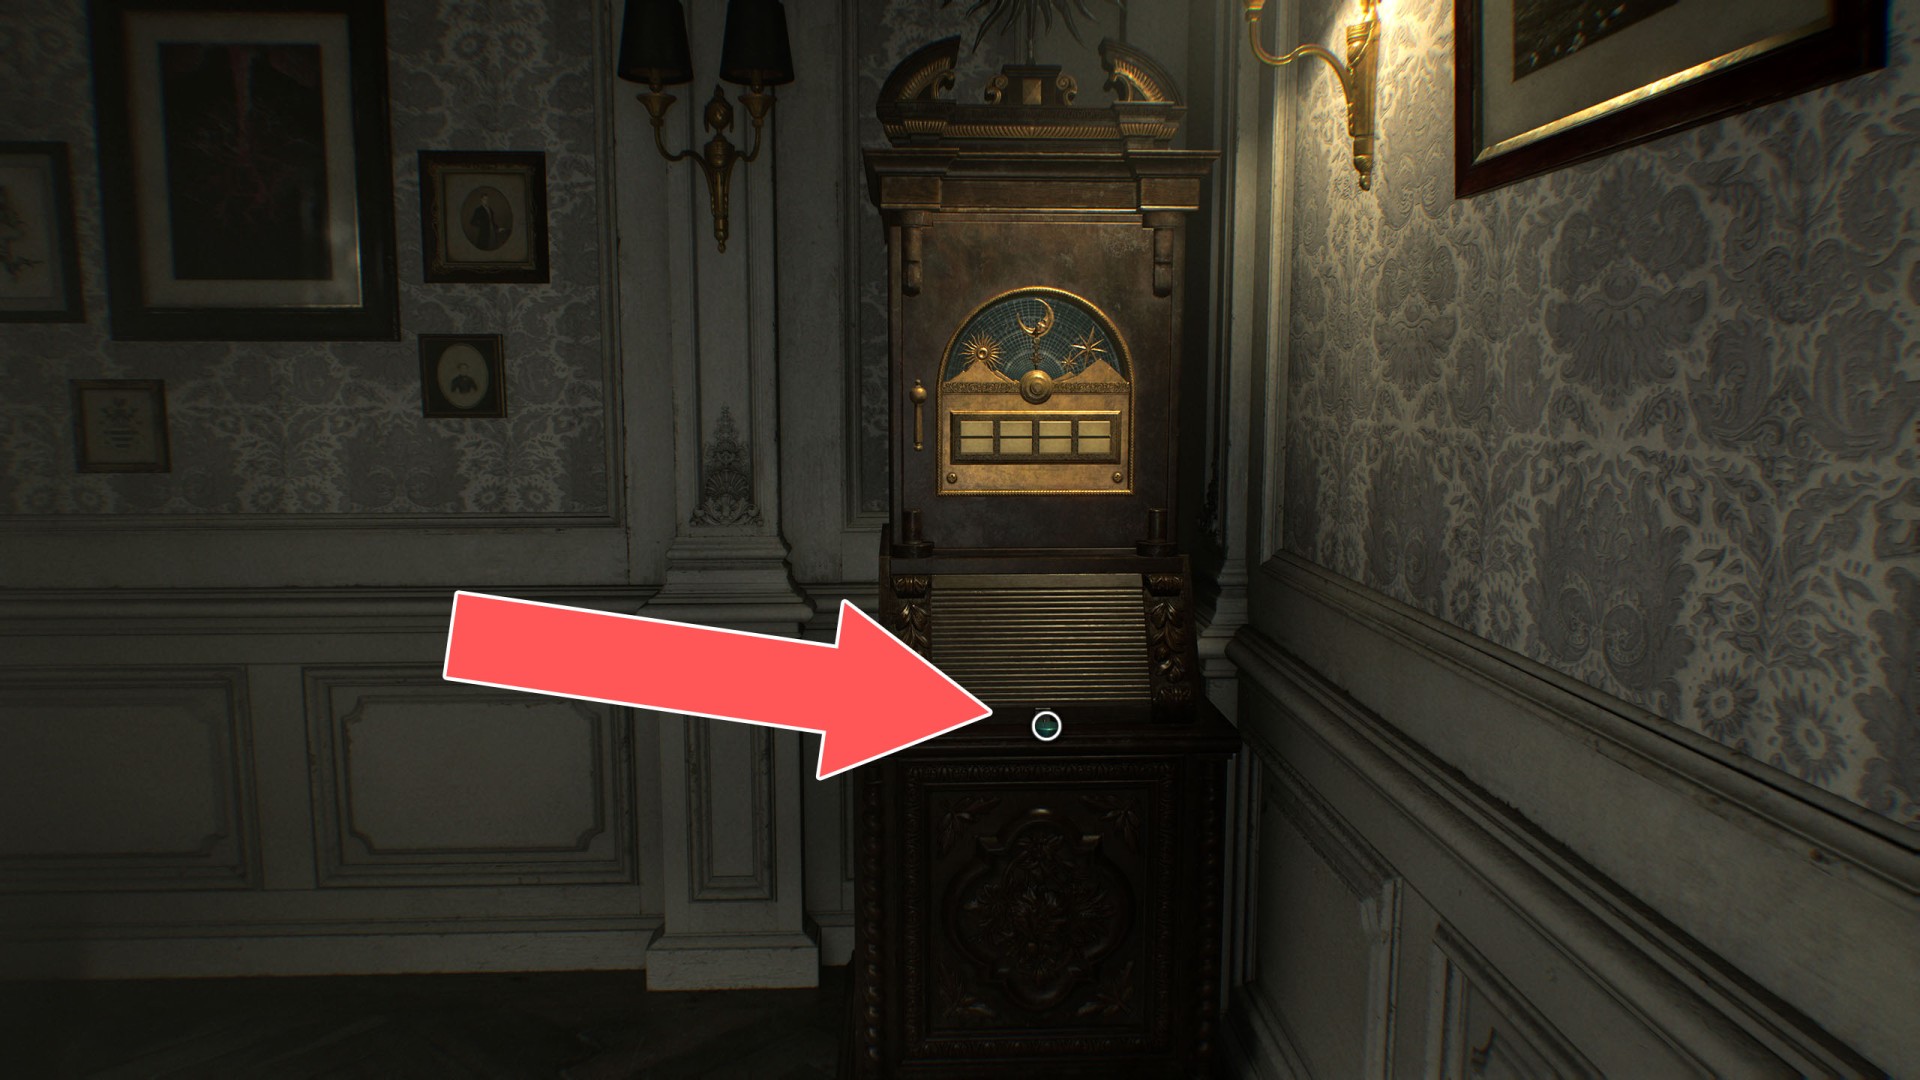
22Moon Quartz
It's first of the items you need to open the Courtyard Door.
To open the locker and take the quartz, you must enter the symbols in the correct order: Moon - Sun - Star - Moon. The hint can be found in the Chairman's Note.
23Pantry Key
You will obtain it after killing the Chef. Once you're able to do so, you'll likely encounter him patrolling hallway near the Parlor Door.

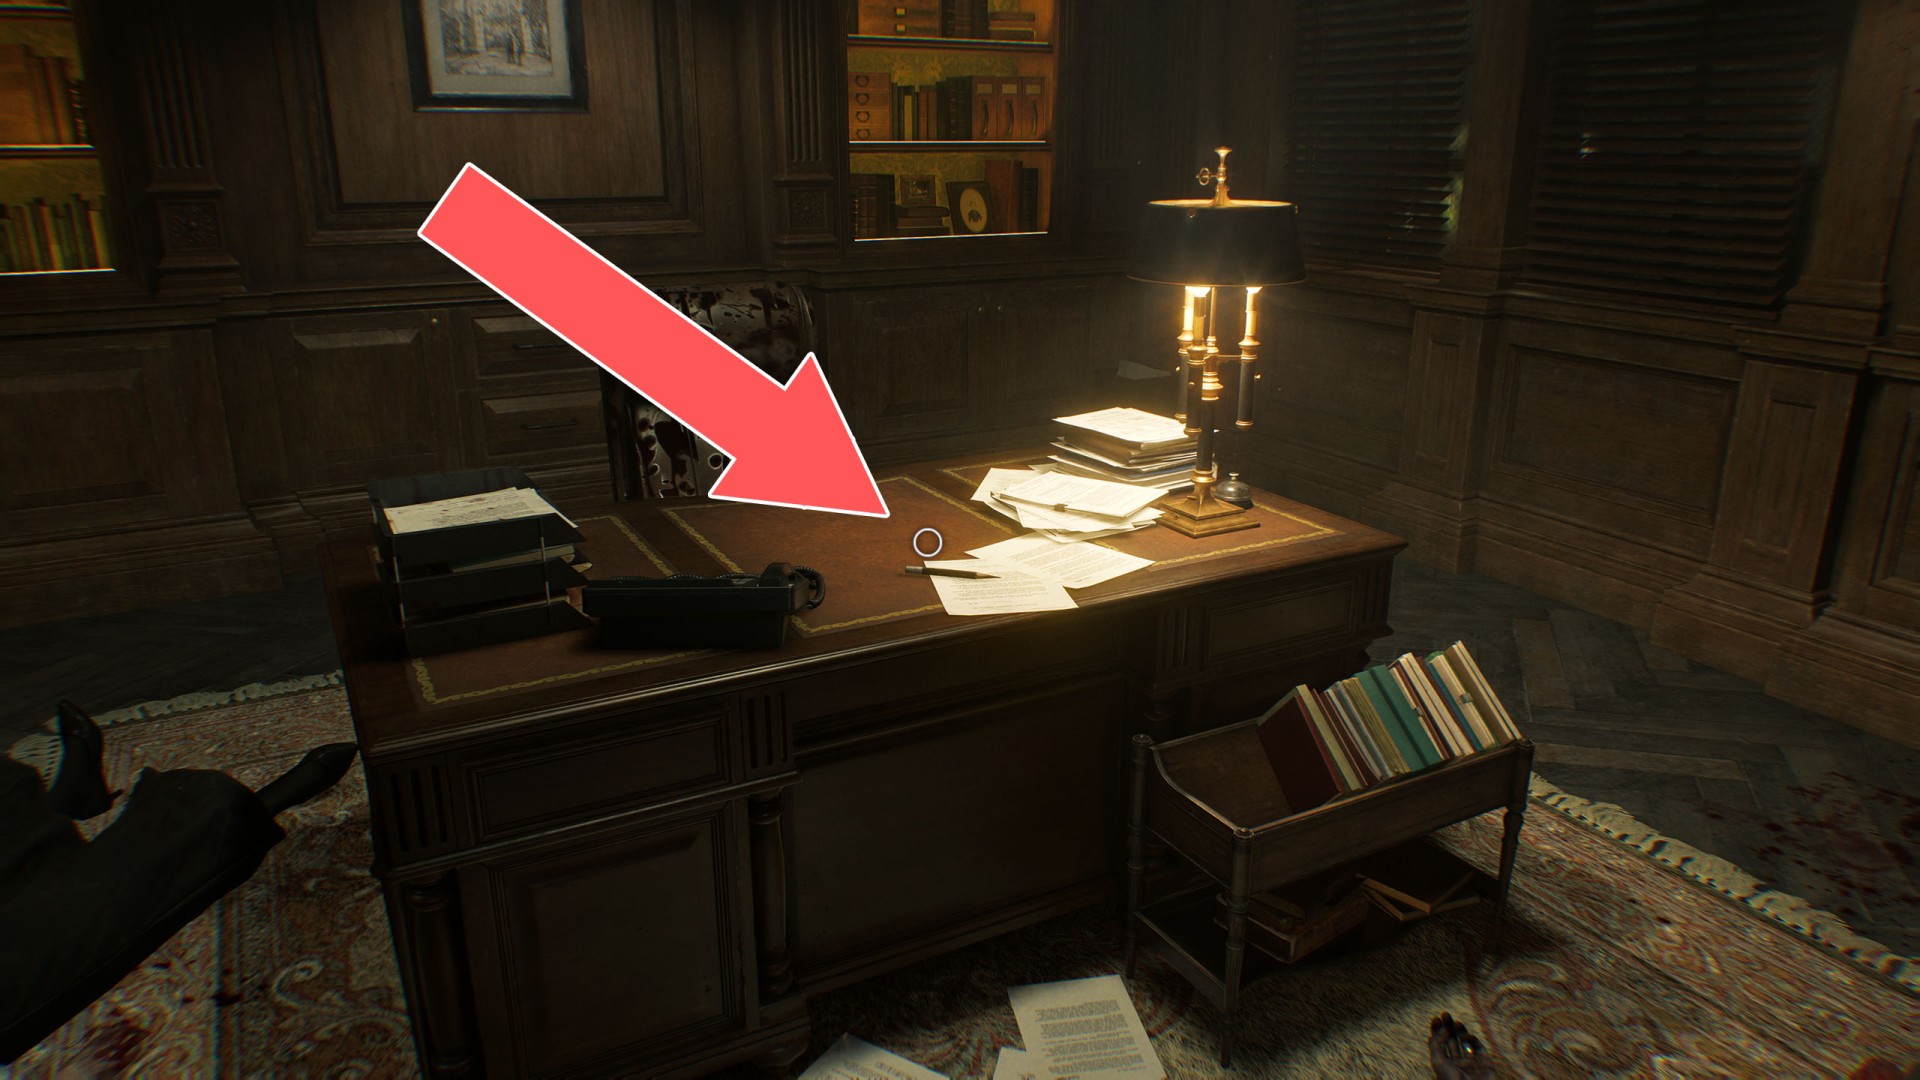
24Pencil
It will allow you to reveal and read the Chairman's Note, which contains the hint - combination to the locker holding the Moon Quartz.
25Red Jewel
It's inside the Unicorn Trinket Box. Examine the box and press the button on the back to open it. You need this item to unlock the Parlor Door.
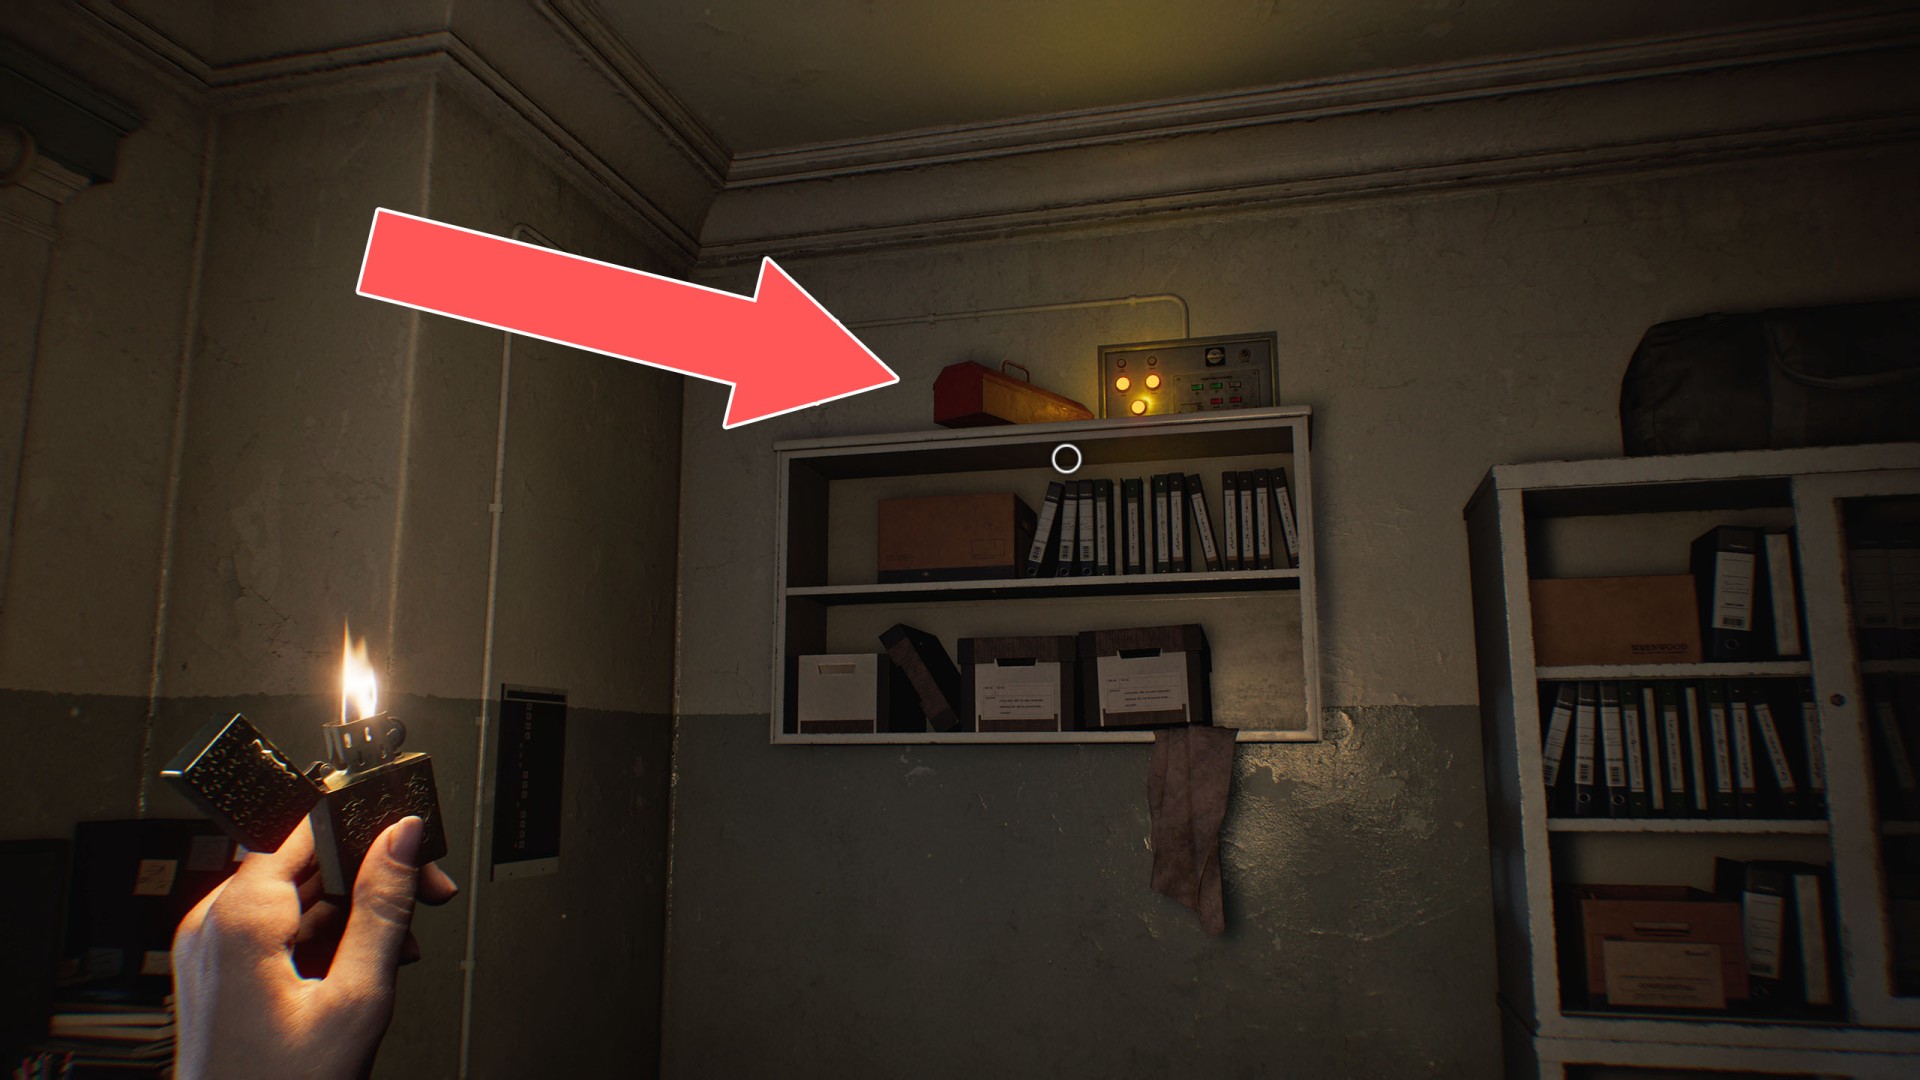
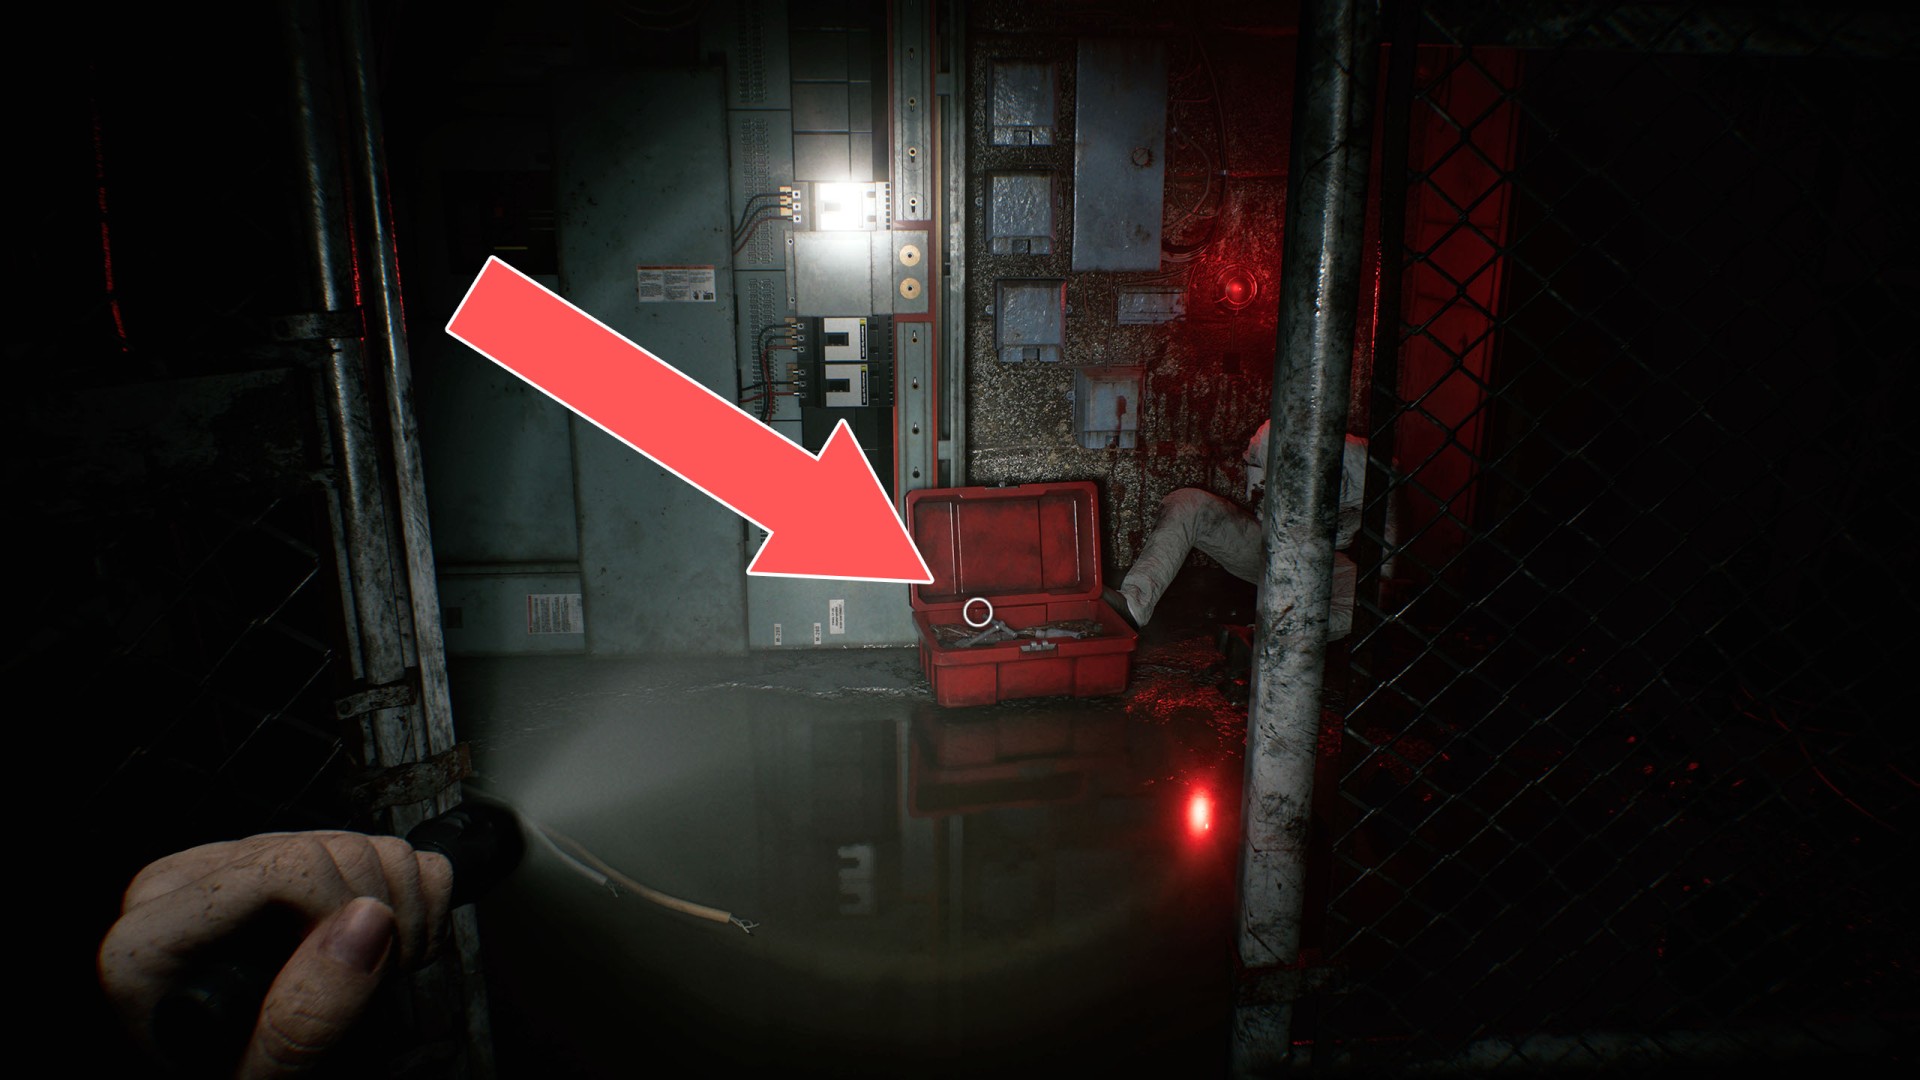
26Screwdriver
It is located in the toolbox sitting on the top shelf. To reach it, move the cart standing nearby and climb onto it. You must act quickly, because "The Girl" attracted by the noise will chase you.
Unlocks: Fuse Box (Locked).
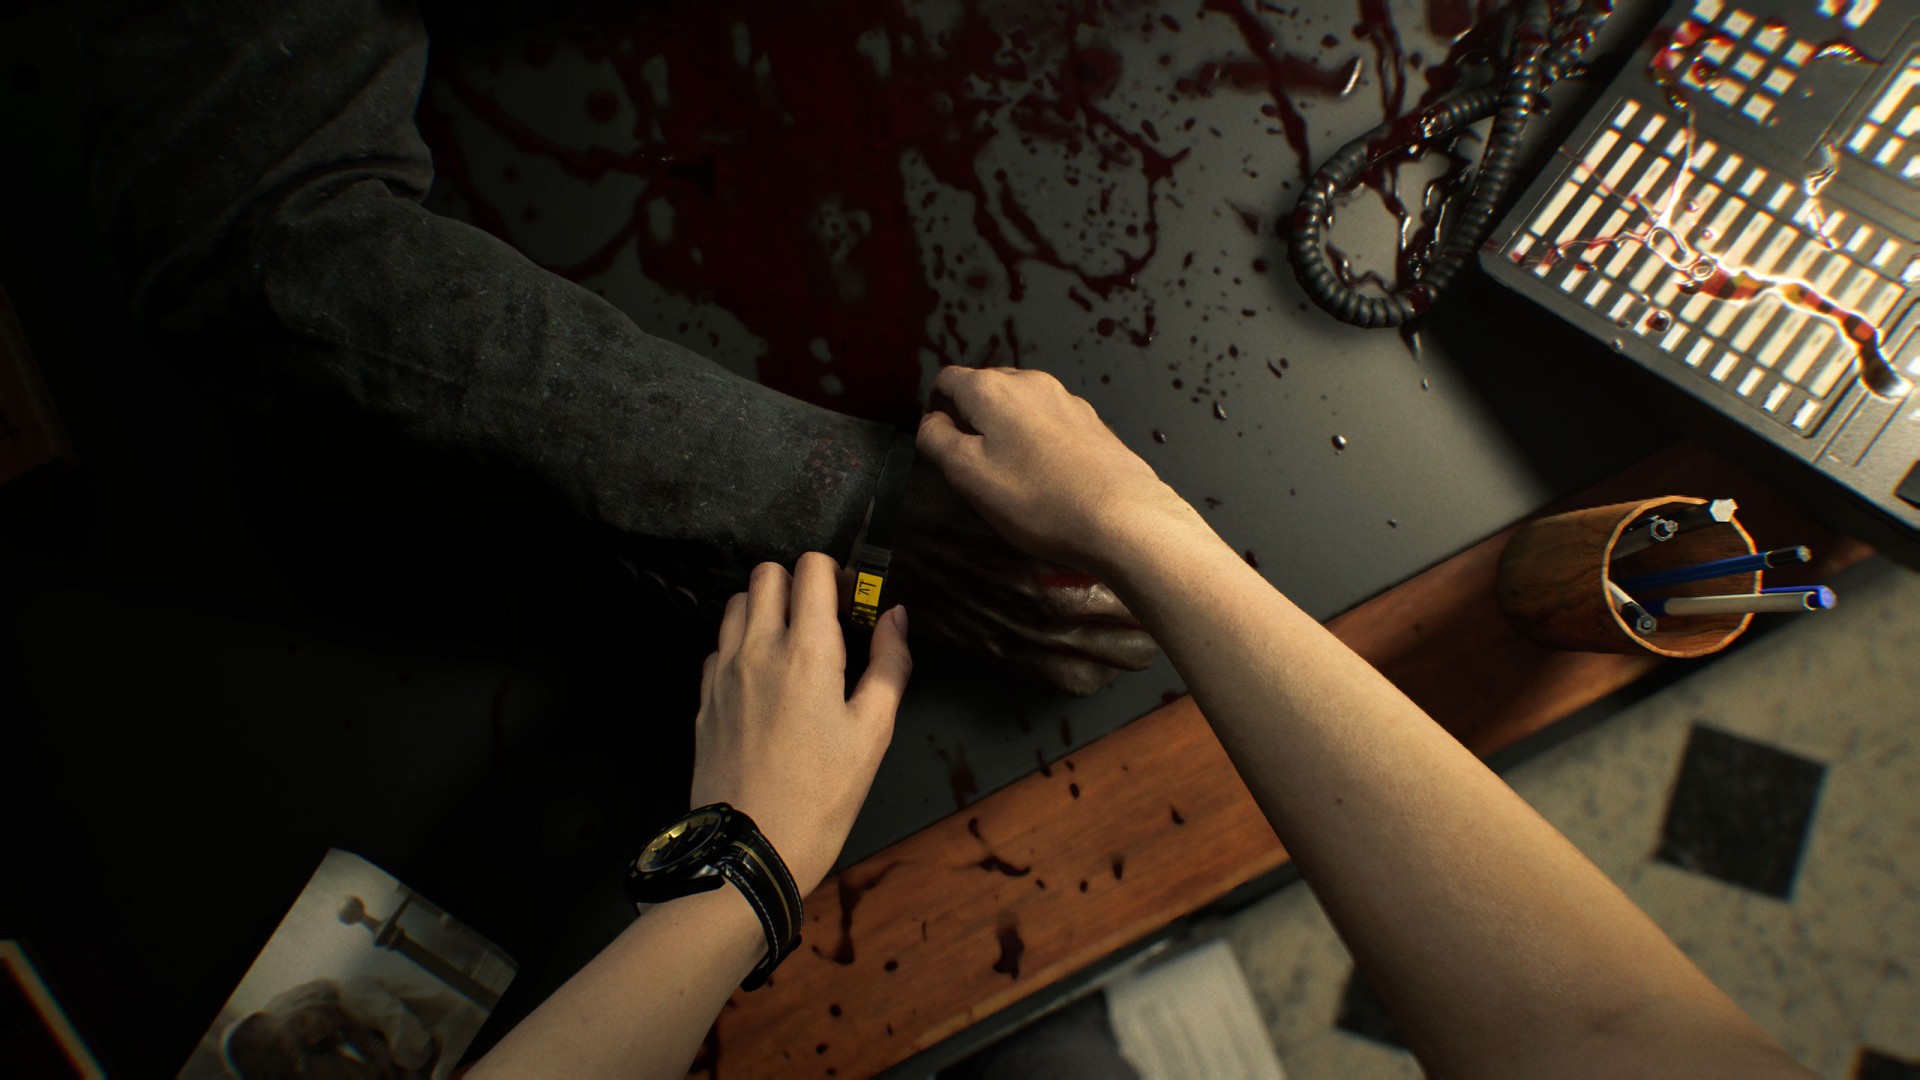
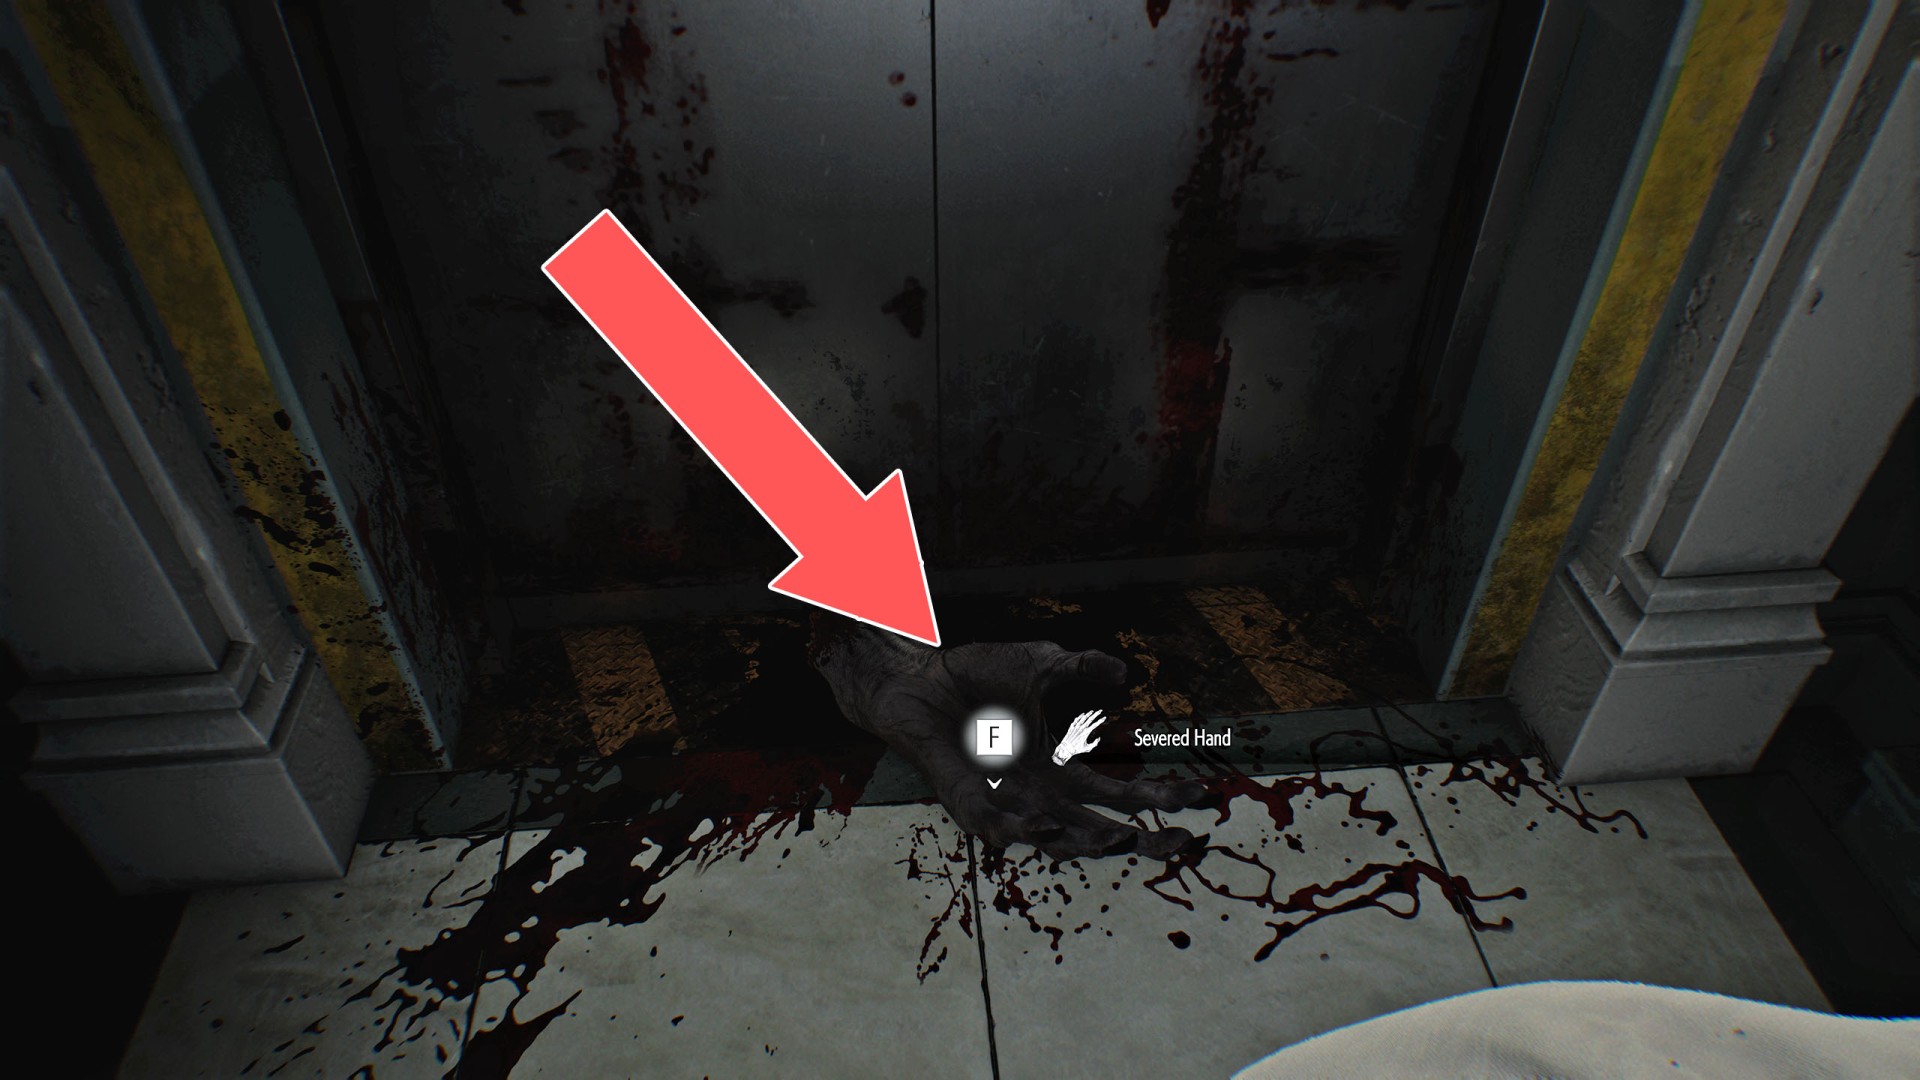
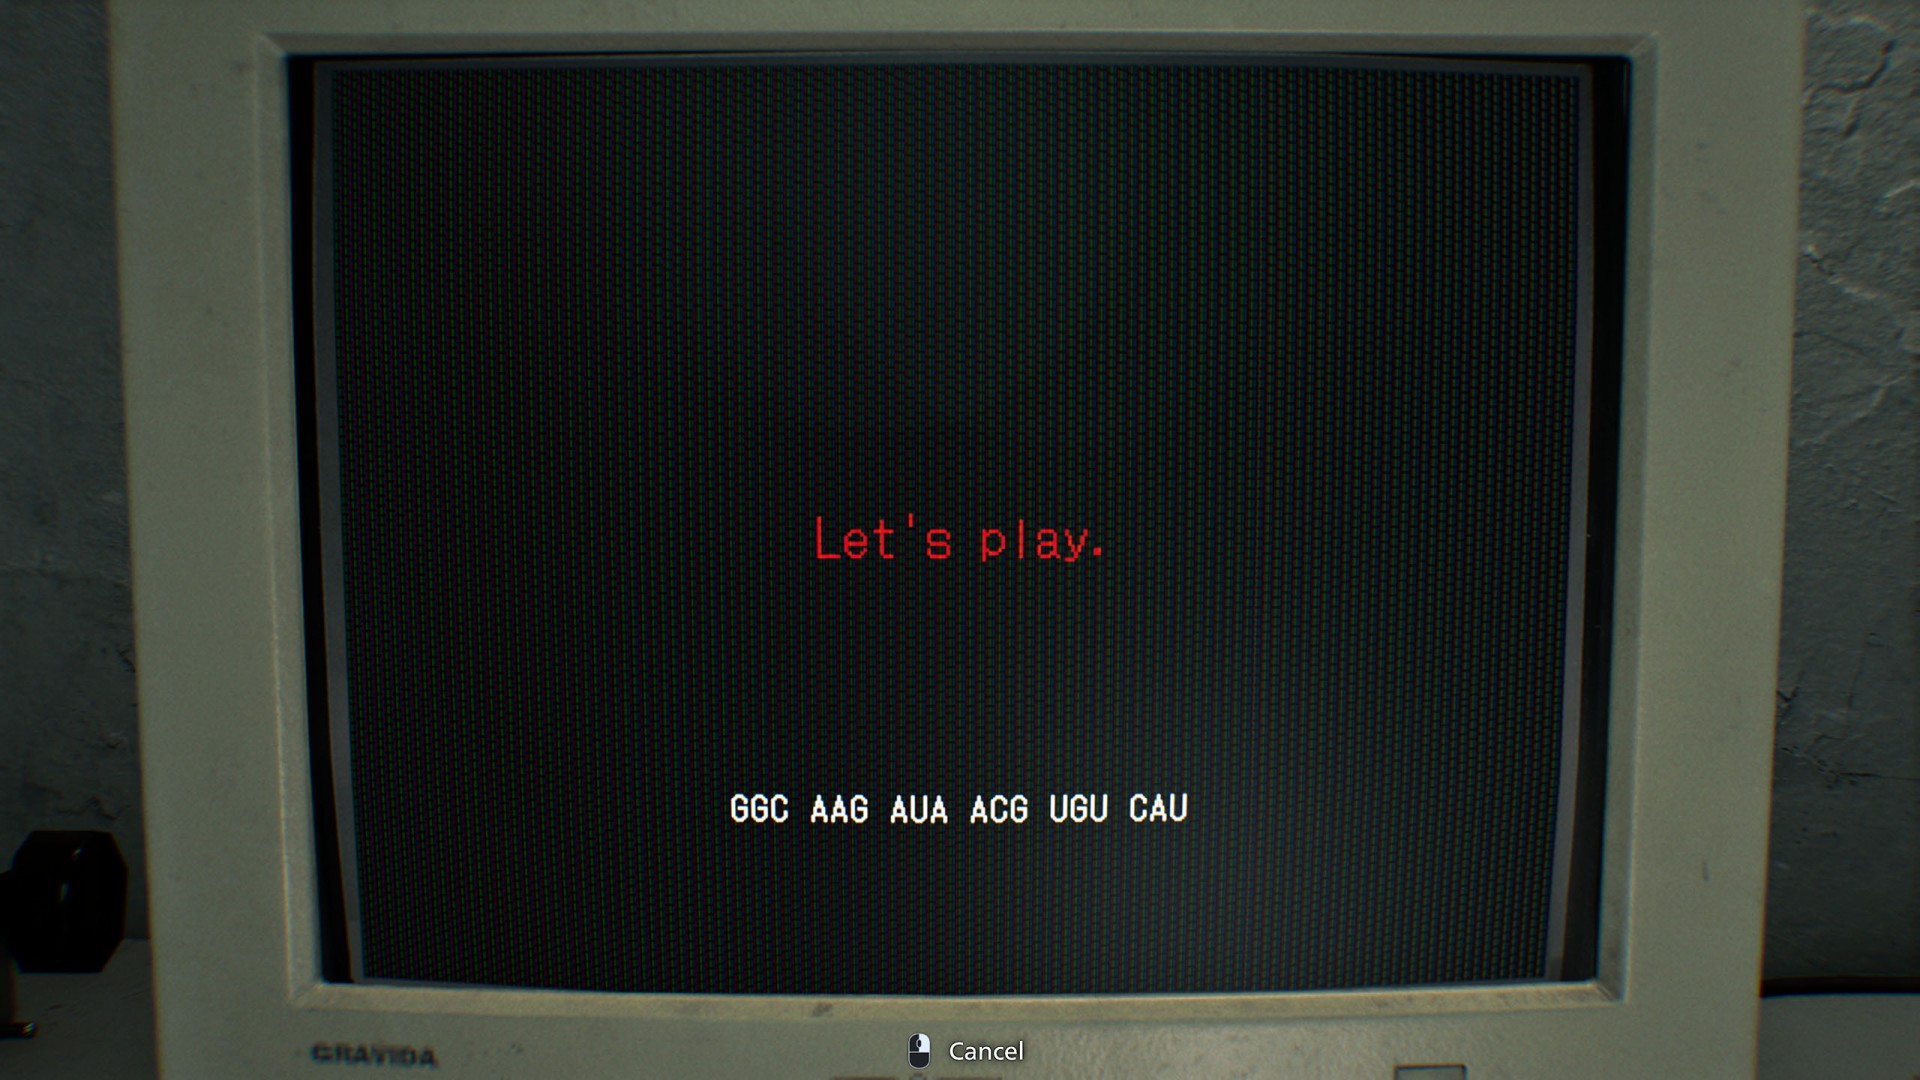
27Severed Hand
You can pick it up as Grace after exiting the basement elevator. You can then scan it under a microscope to reveal a hidden message.
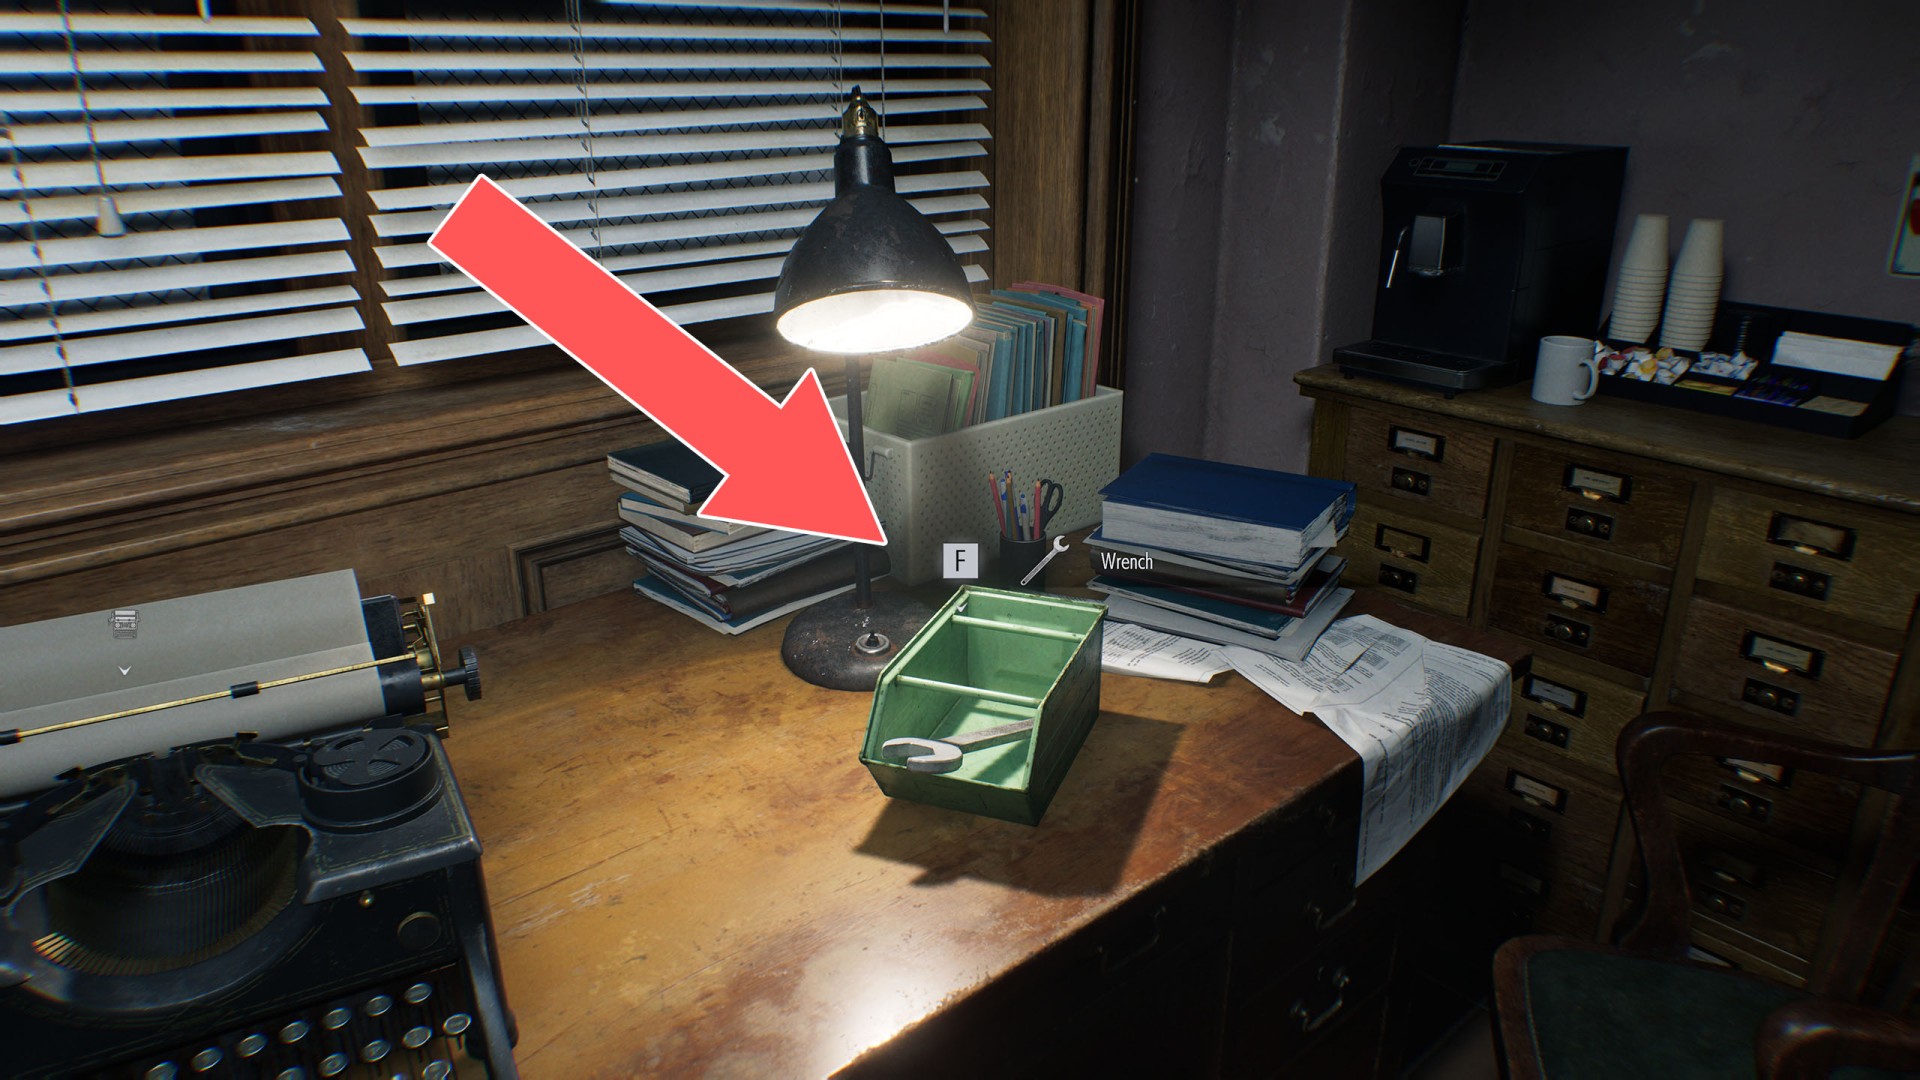
28Square Socket Wrench
You need it to open the Power Distributor (Bolted).
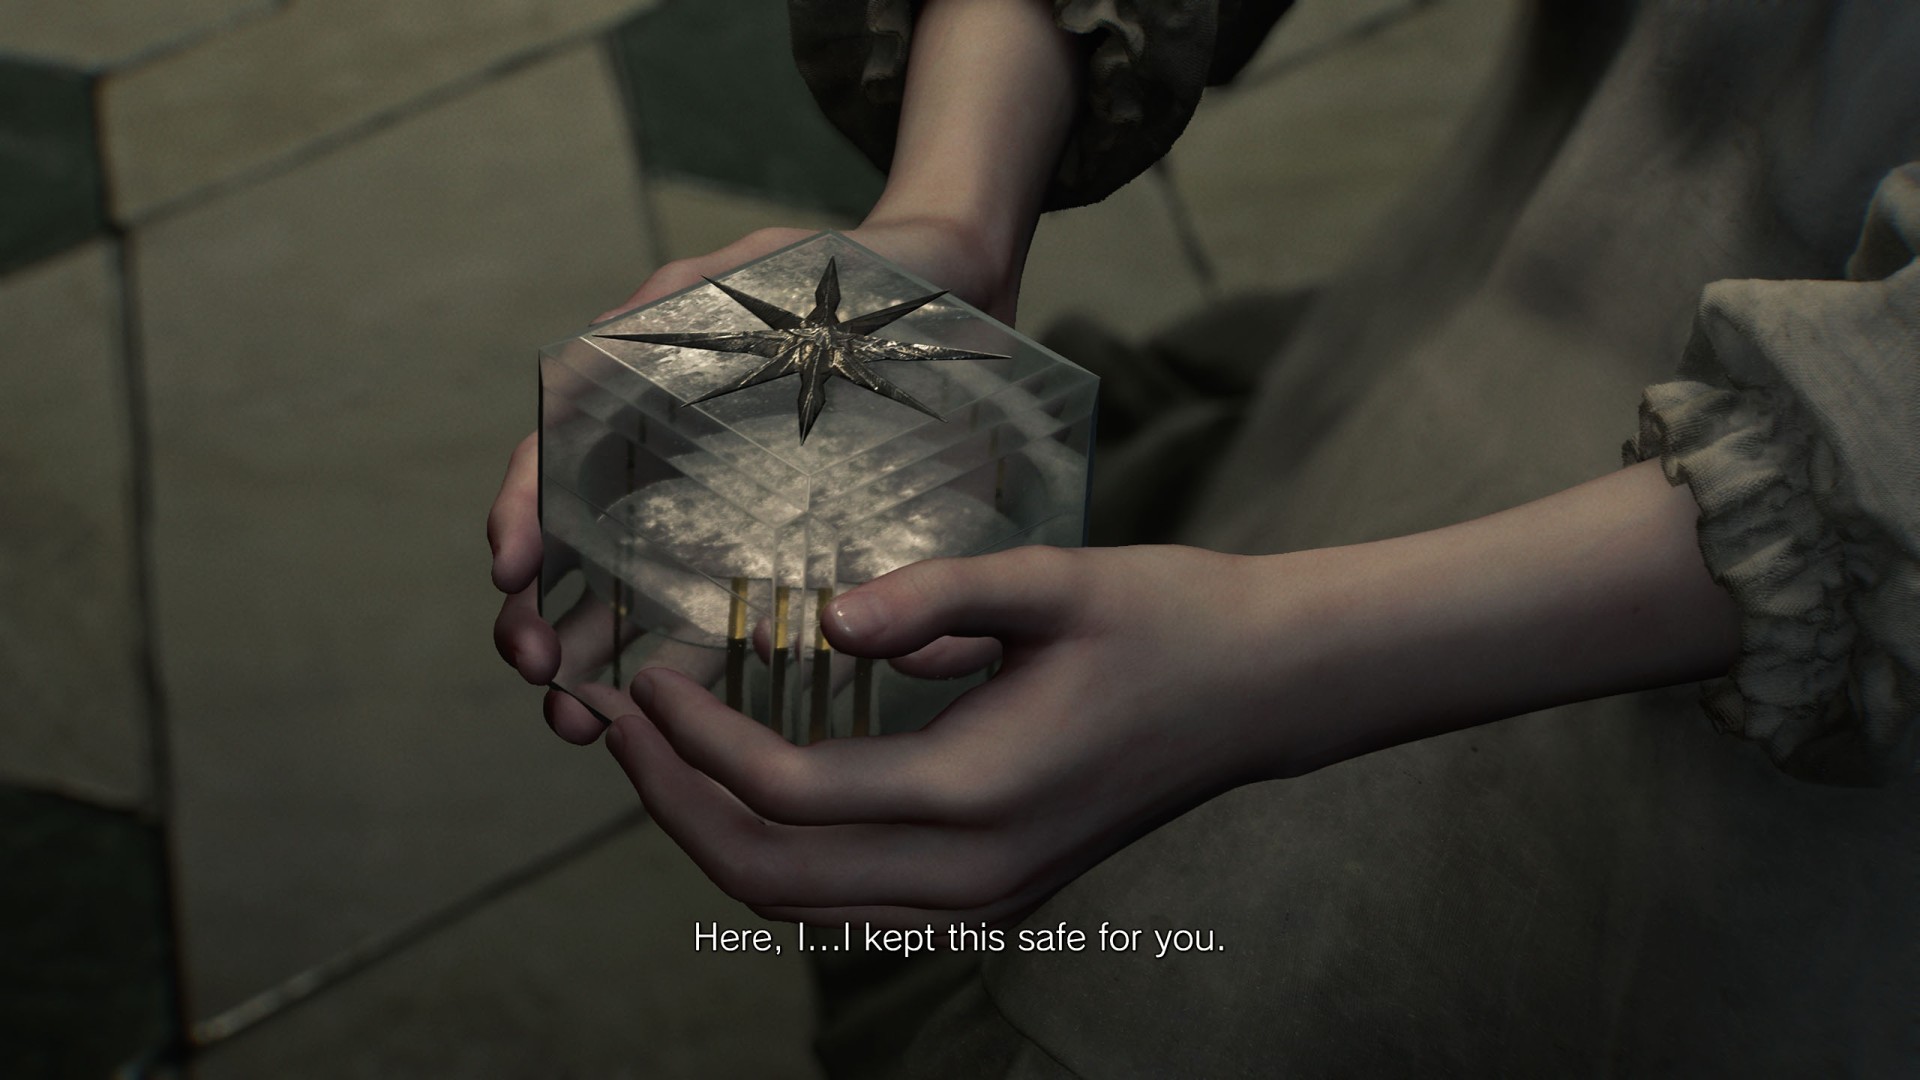
29Star Quartz
Grace will receive this from Emily once you escape the basement and exit the elevator. This is the final crystal you need to open the Courtyard Door.
30Sun Quartz
Use the Corrosive to destroy the padlock then Star - Sun - Moon - Sun (You can figure out the code from the photographs in the room, two photographs each show two parts of the combination).
31West Wing Keycard
Show the map

32Wrench
You can use it to unlock the Door without Handwheel.
Locations on Raccoon City
33Battery #1
One of the two batteries you need to collect to open the Locked Gate.
34Battery #2
One of the two batteries you need to collect to open the Locked Gate.
35Broken Signal Receiver
This is the second item you'll need to collect to make the detonator, which is used to unlock the Raccoon City Main Gate. You need the Repair Kit to fix it.
36BSAA Container Key
You can use it to unlock the BSAA Container Door, BSAA Container Door, and BSAA Container Door.

37Cedarbrook Apartments Key
Unlocks: Cedarbrook Apartments Back Gate.

38Distributor
This is the first item you'll need to collect to make the detonator, which is used to unlock the Raccoon City Main Gate.
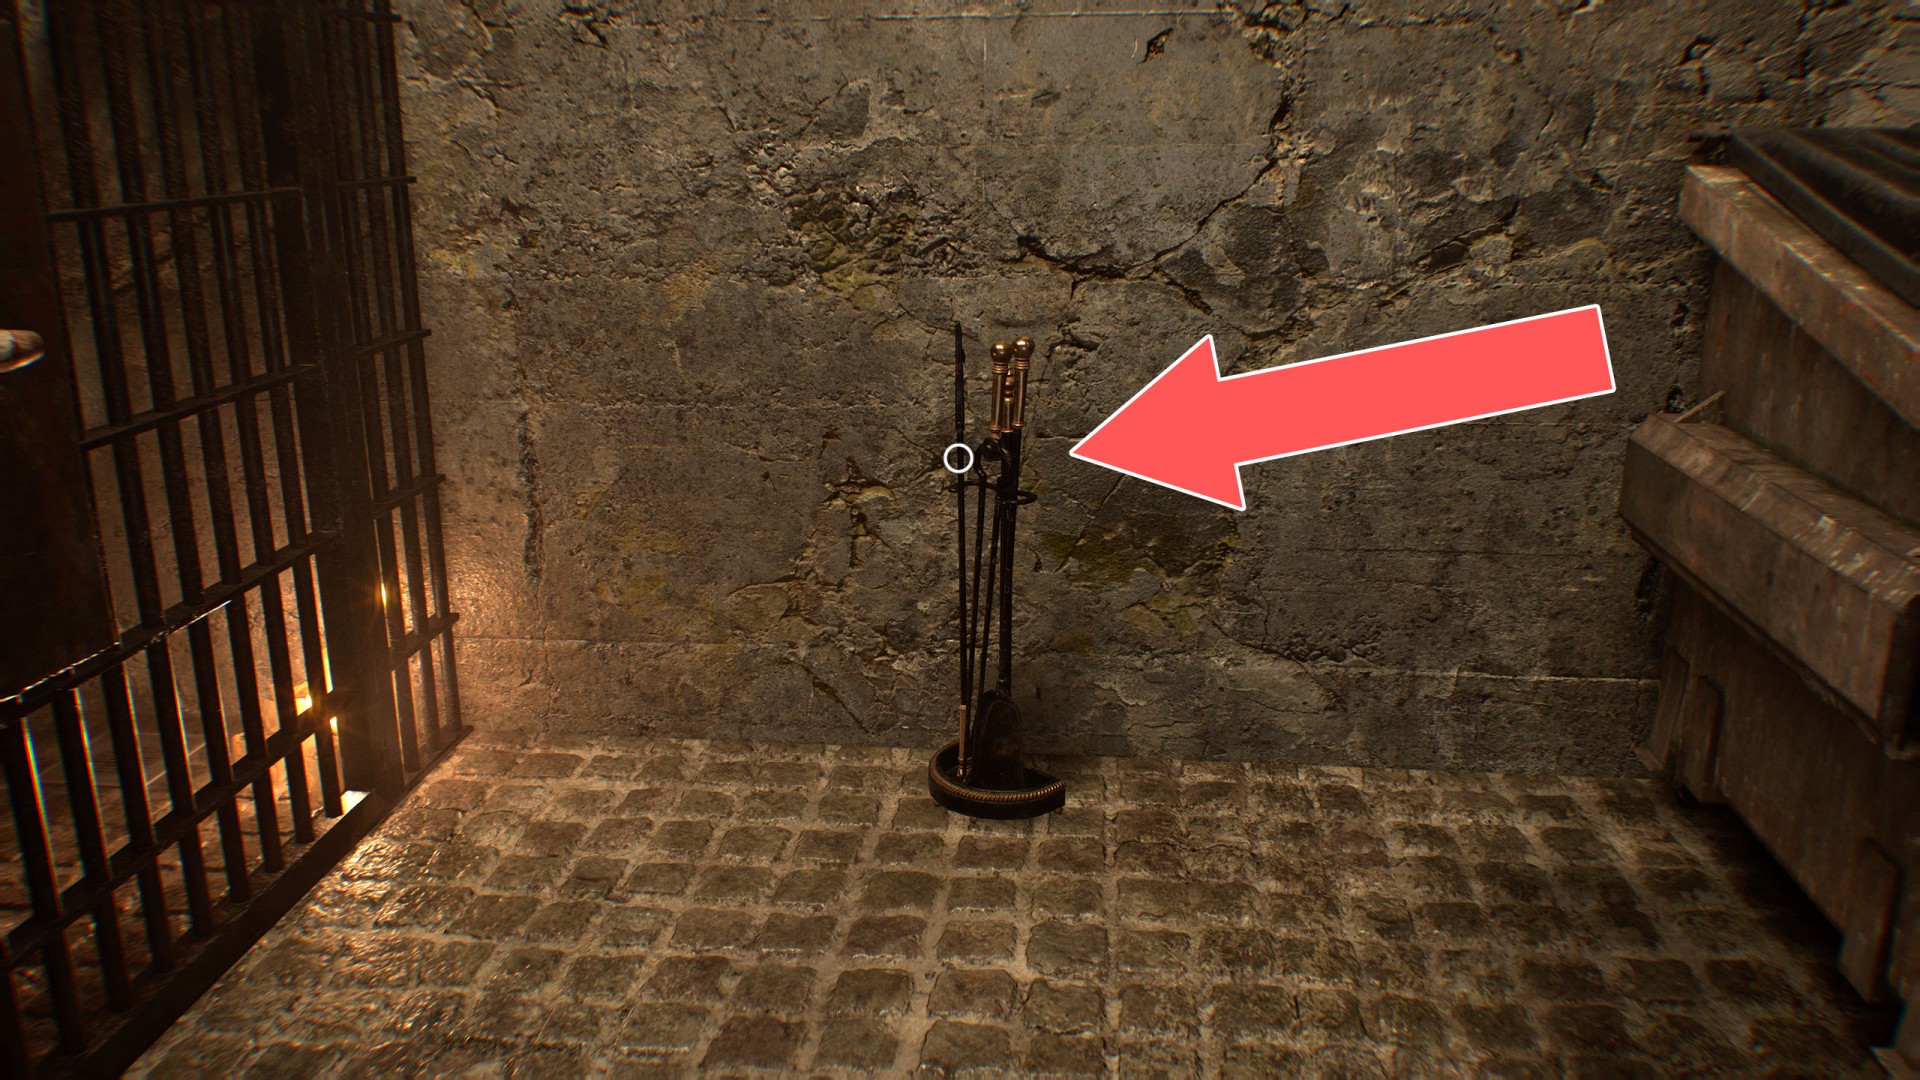
39Fire Poker
This will allow you to lower the Ladder and escape from the underground.
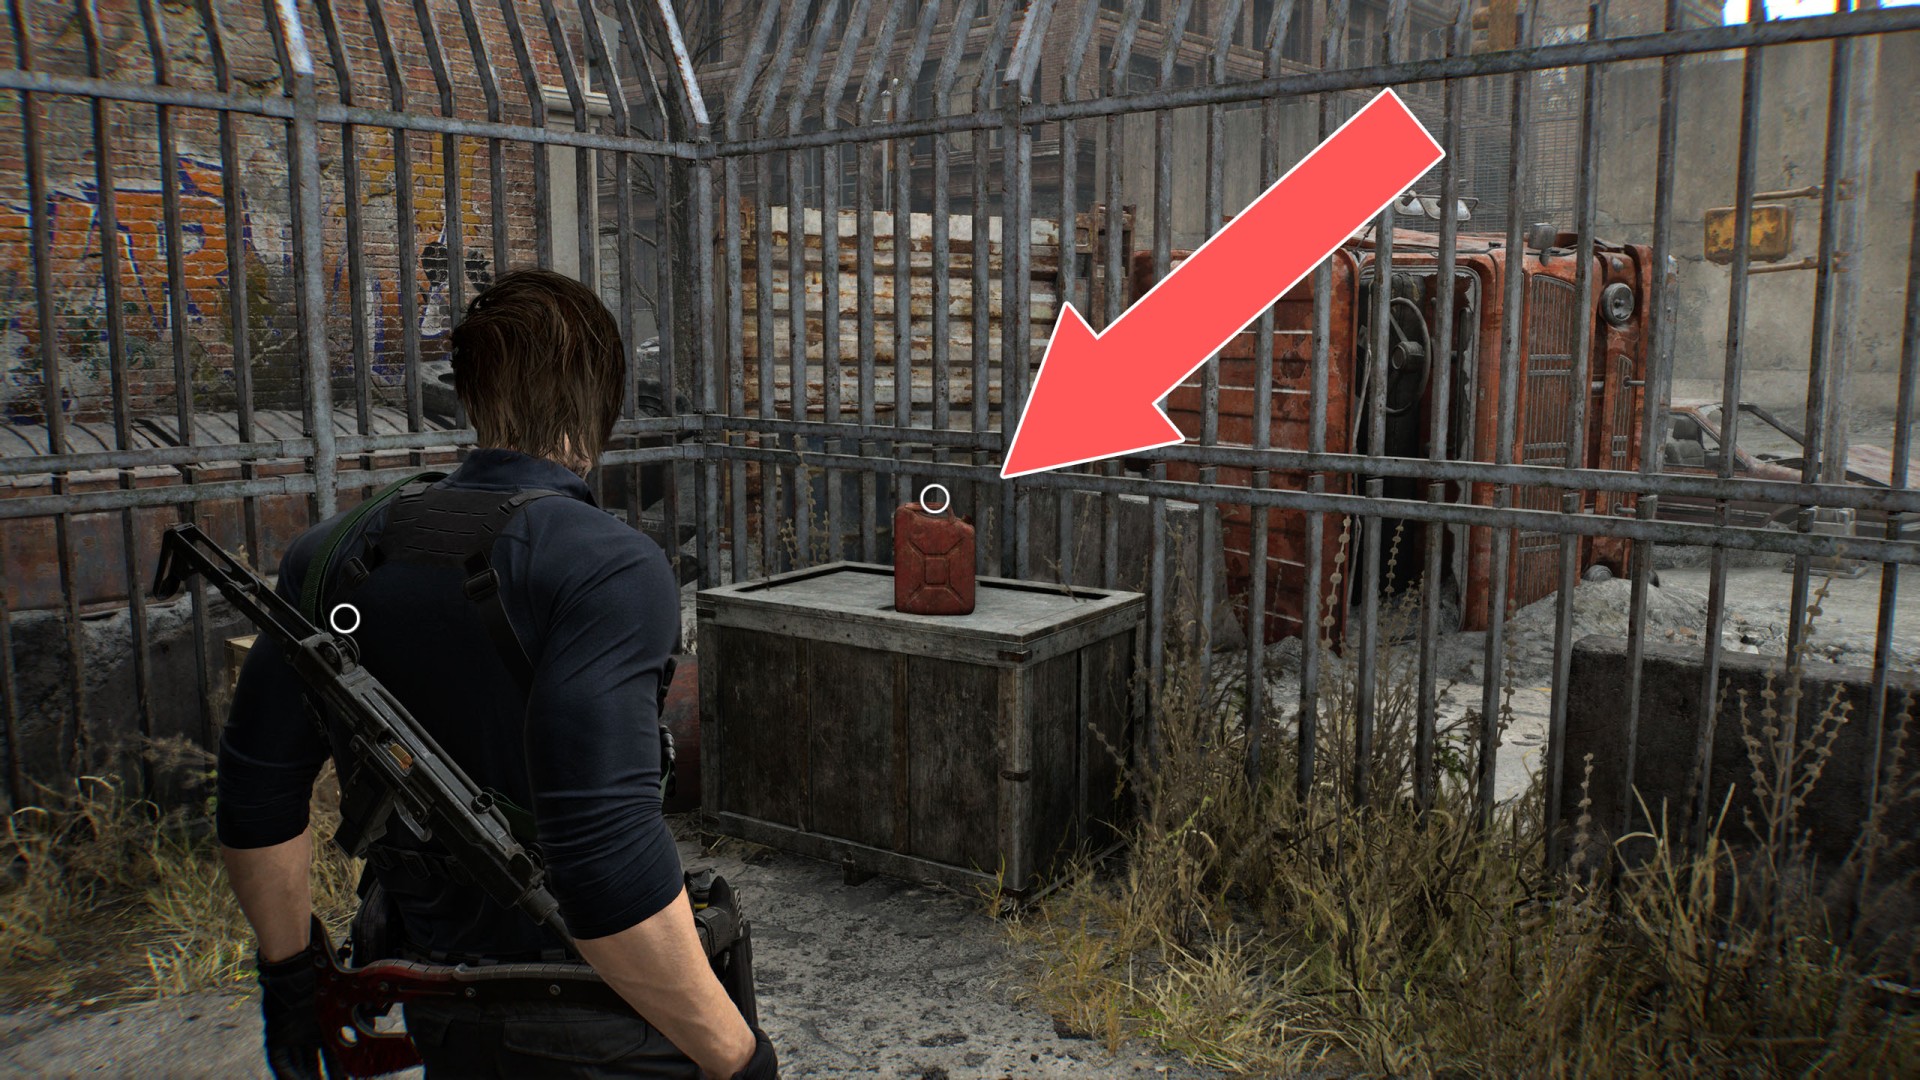
40Gas Can
After filling it with fuel from the Fuel Tank, you can use it to power up Gas Powered Generator #3, Gas Powered Generator #1, and Gas Powered Generator #2.
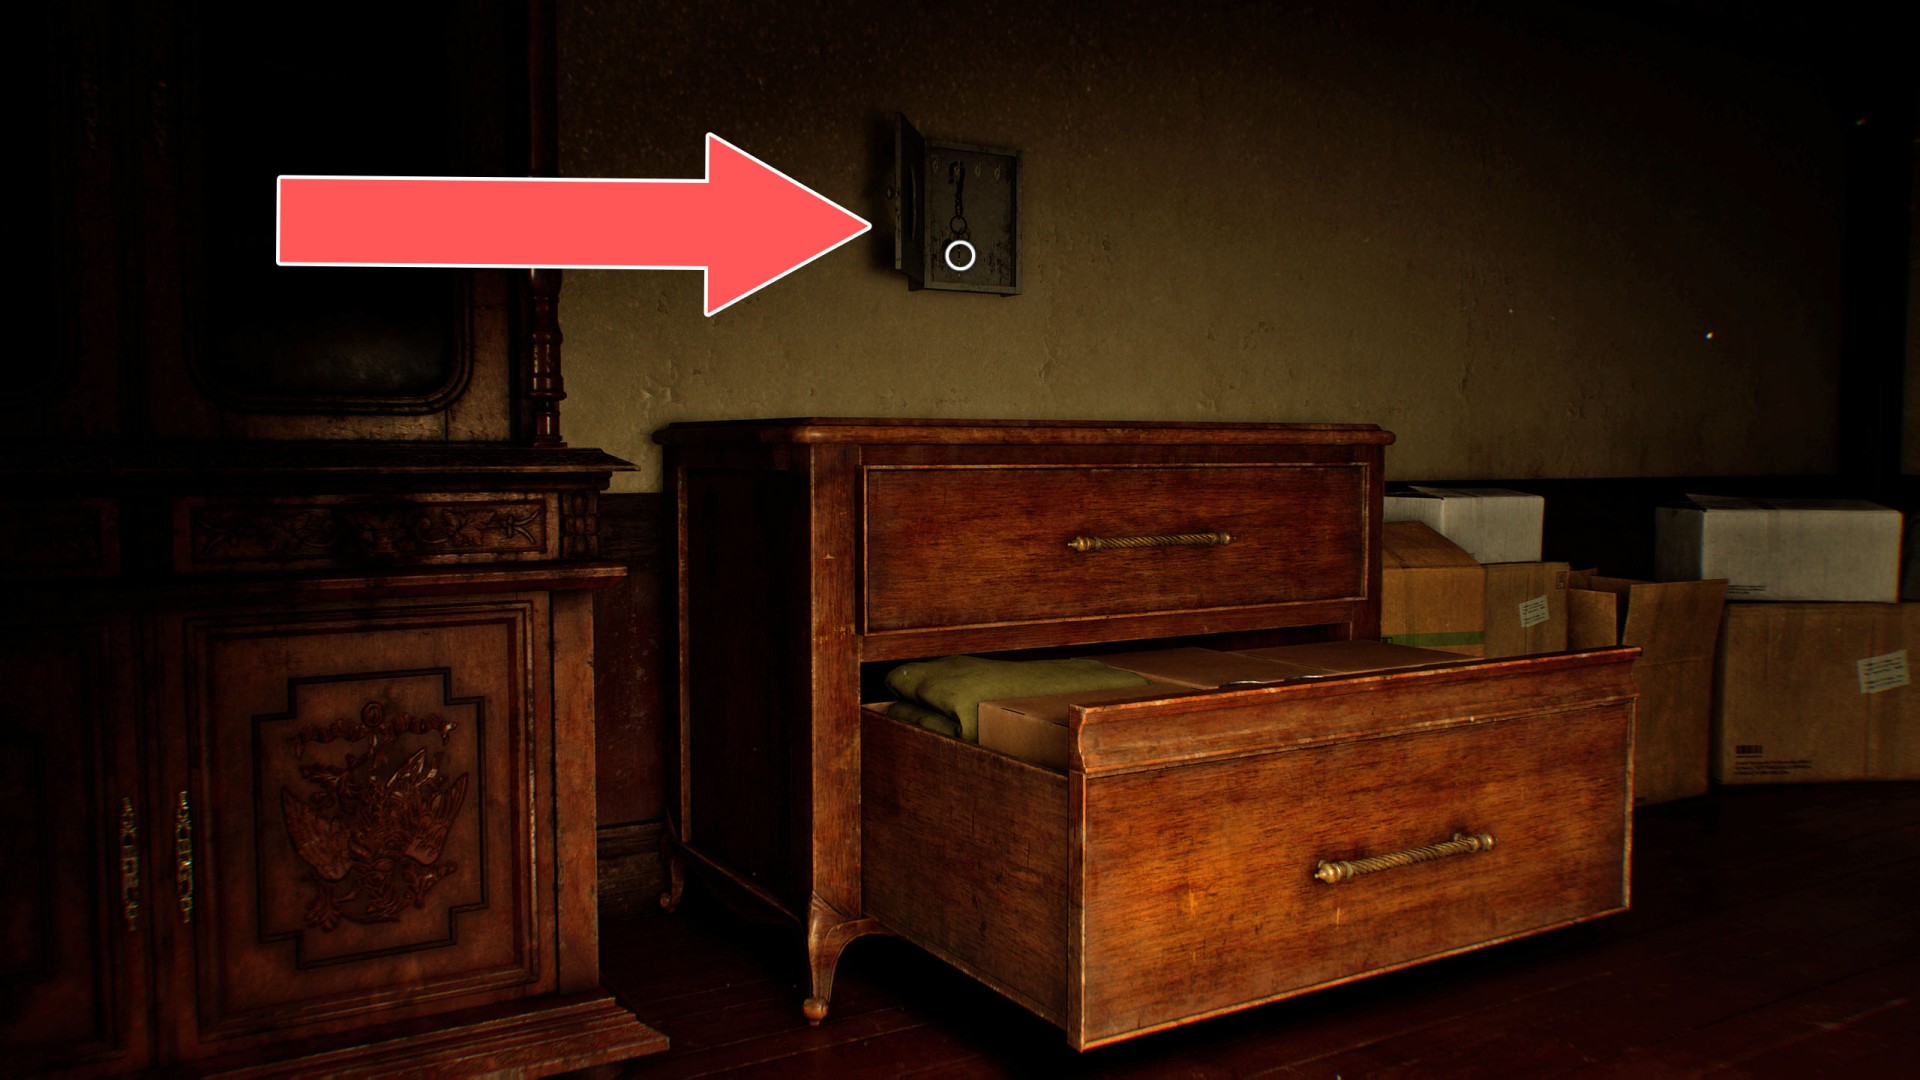
41Hatch Key
To get this key, first turn on the light, then pull out the drawer and use it to climb up. Unlocks: Hatch.
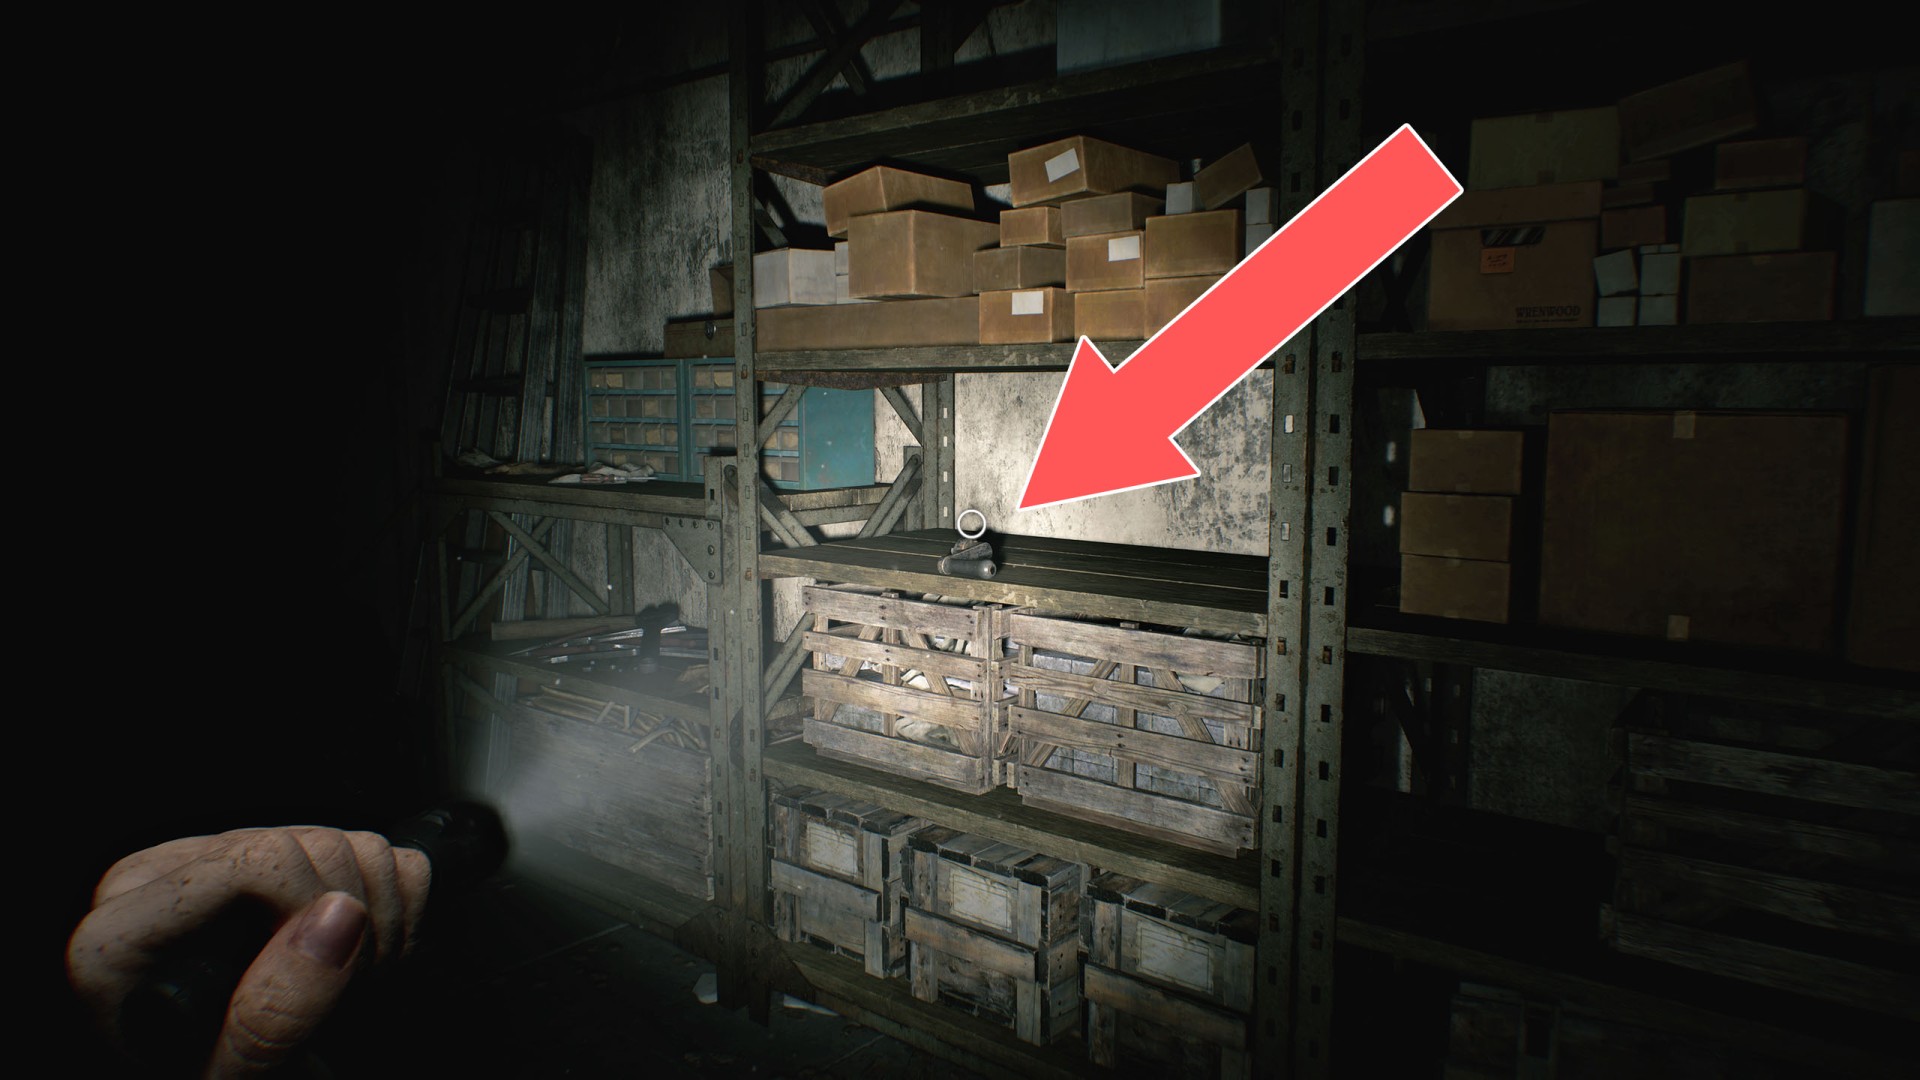
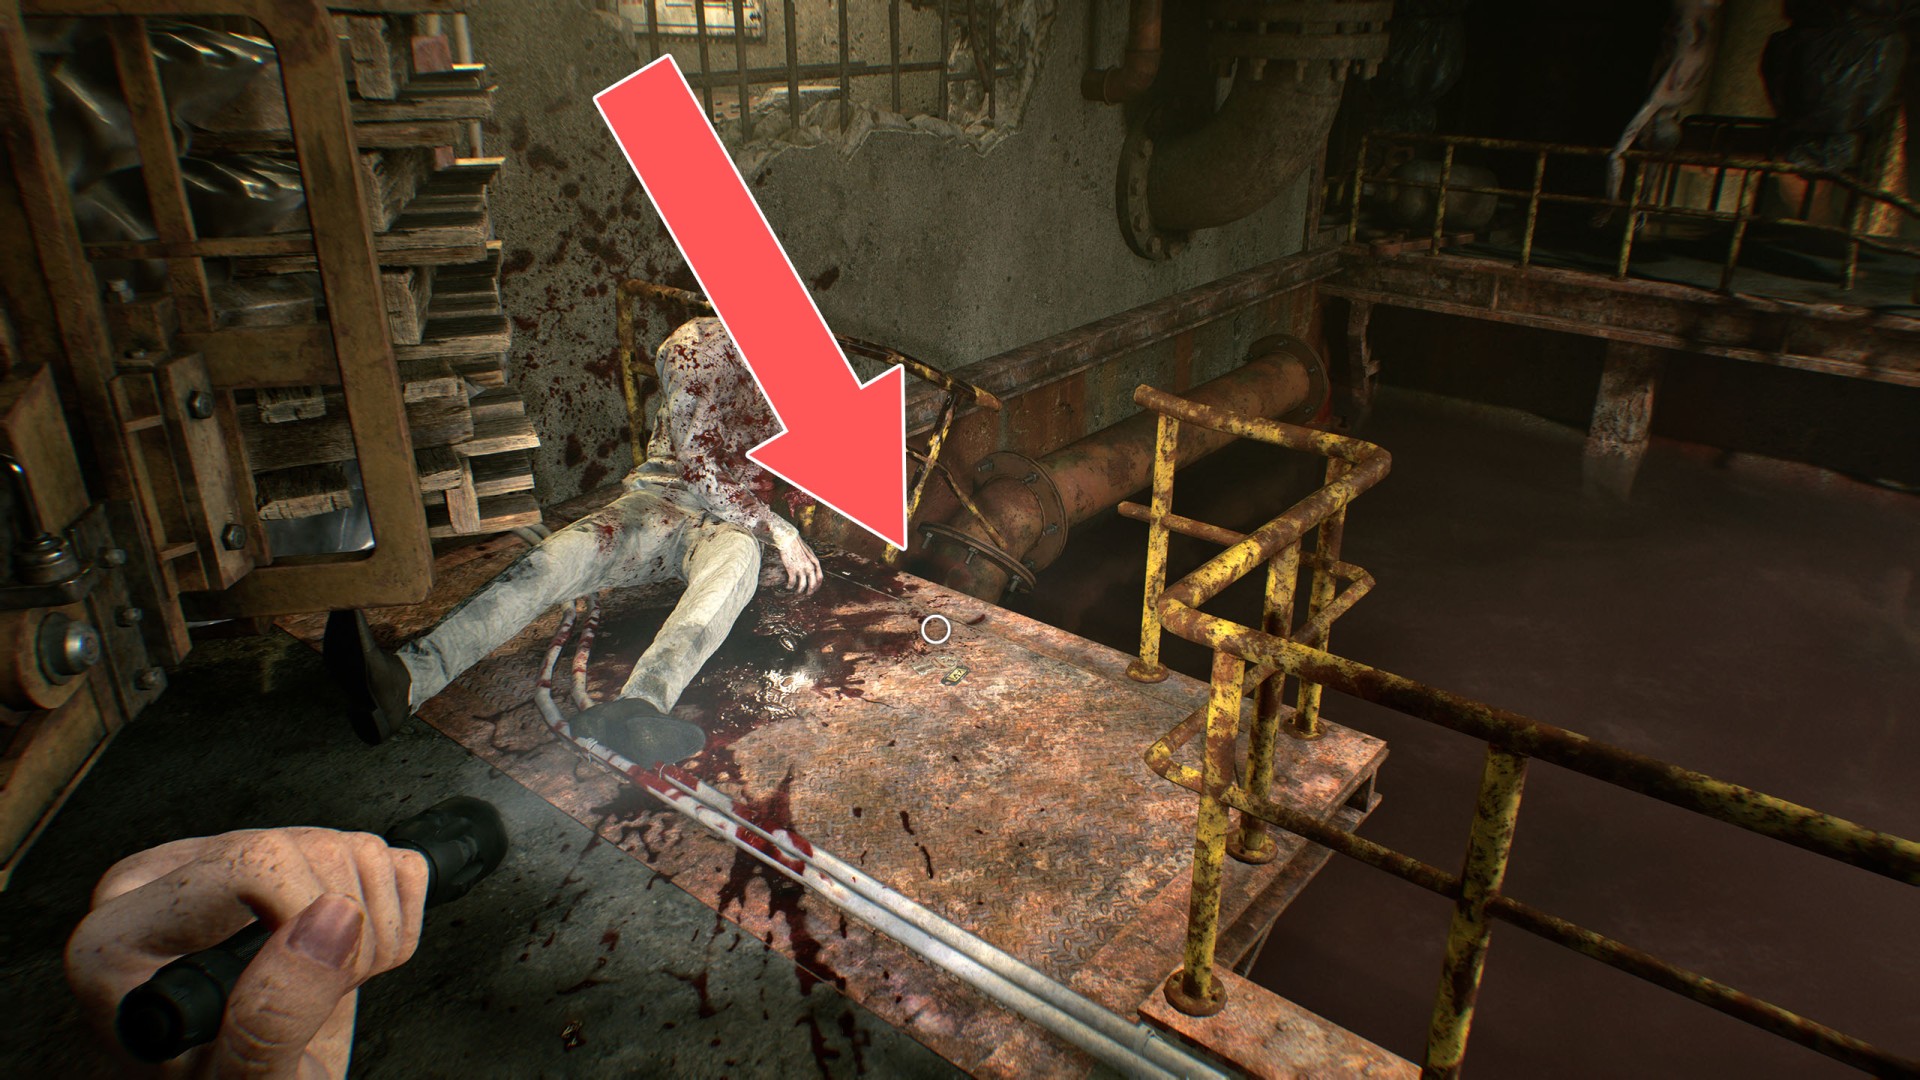
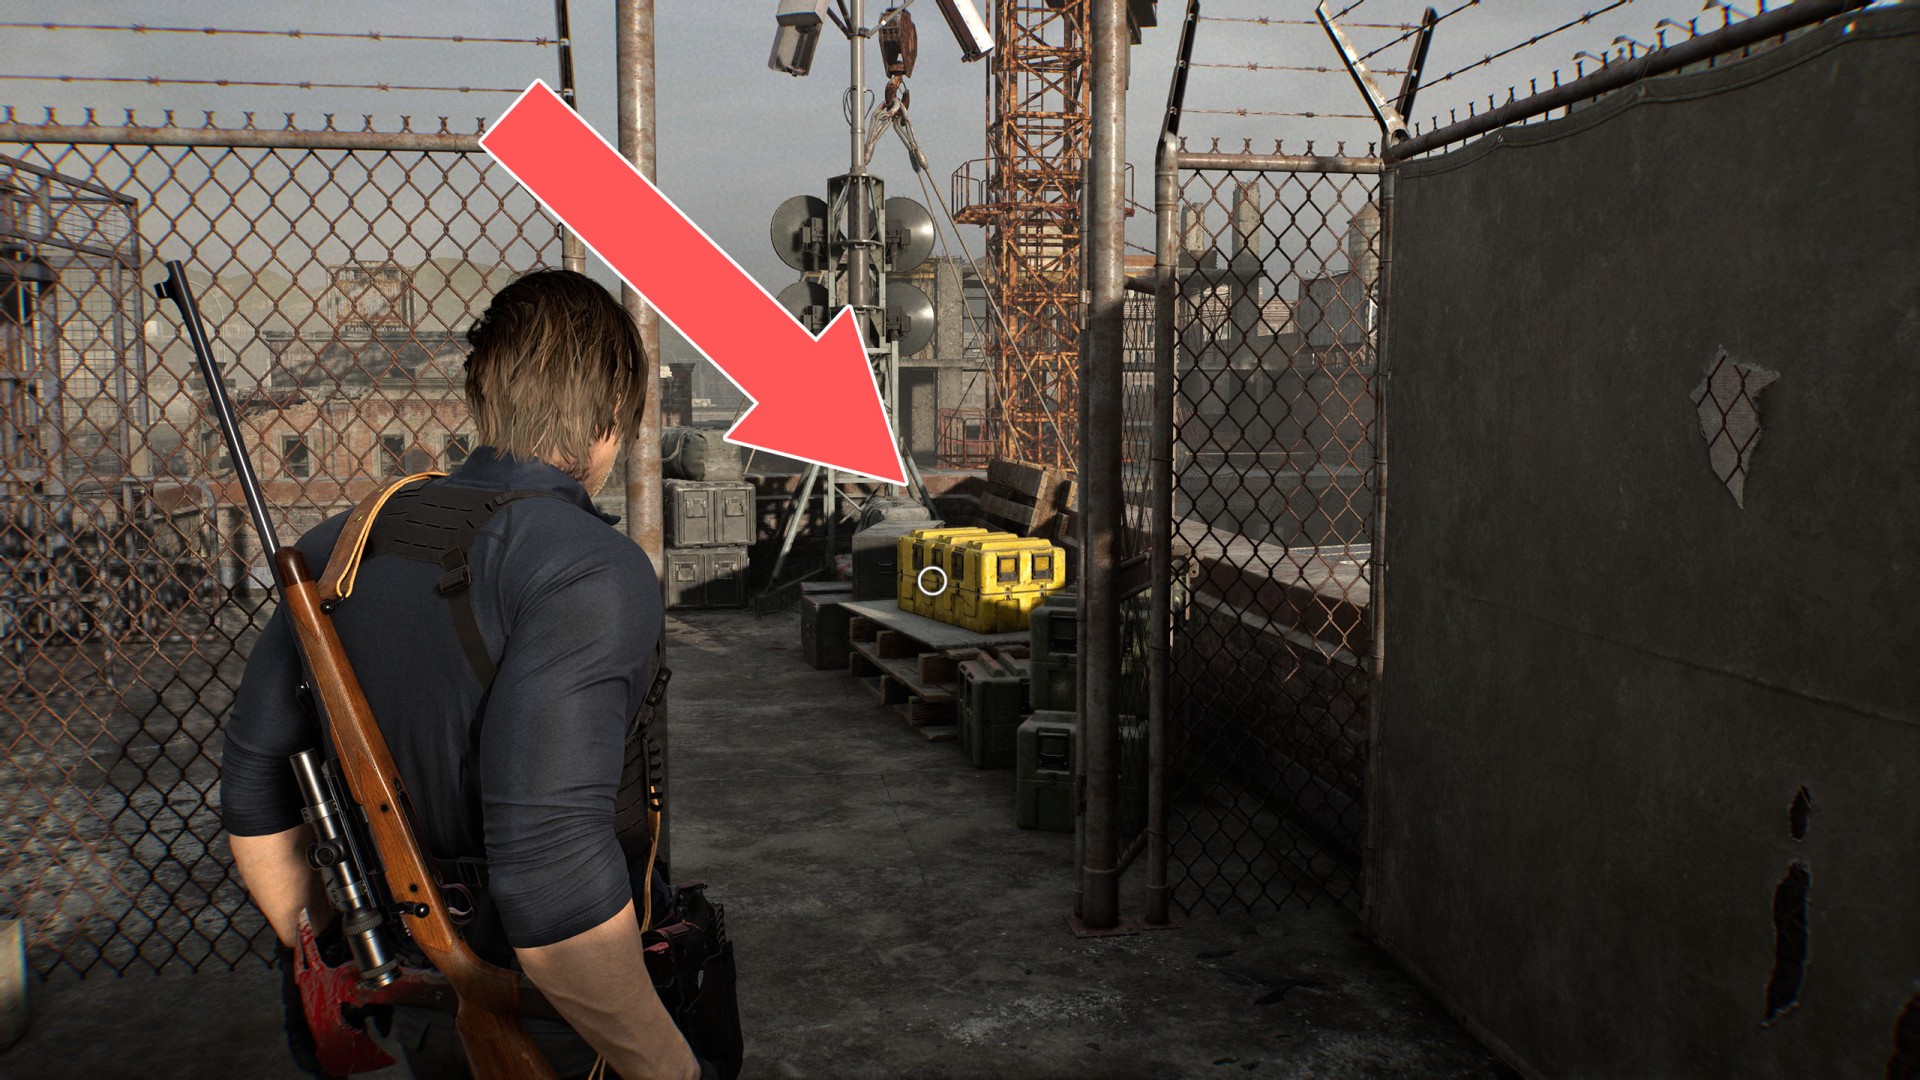
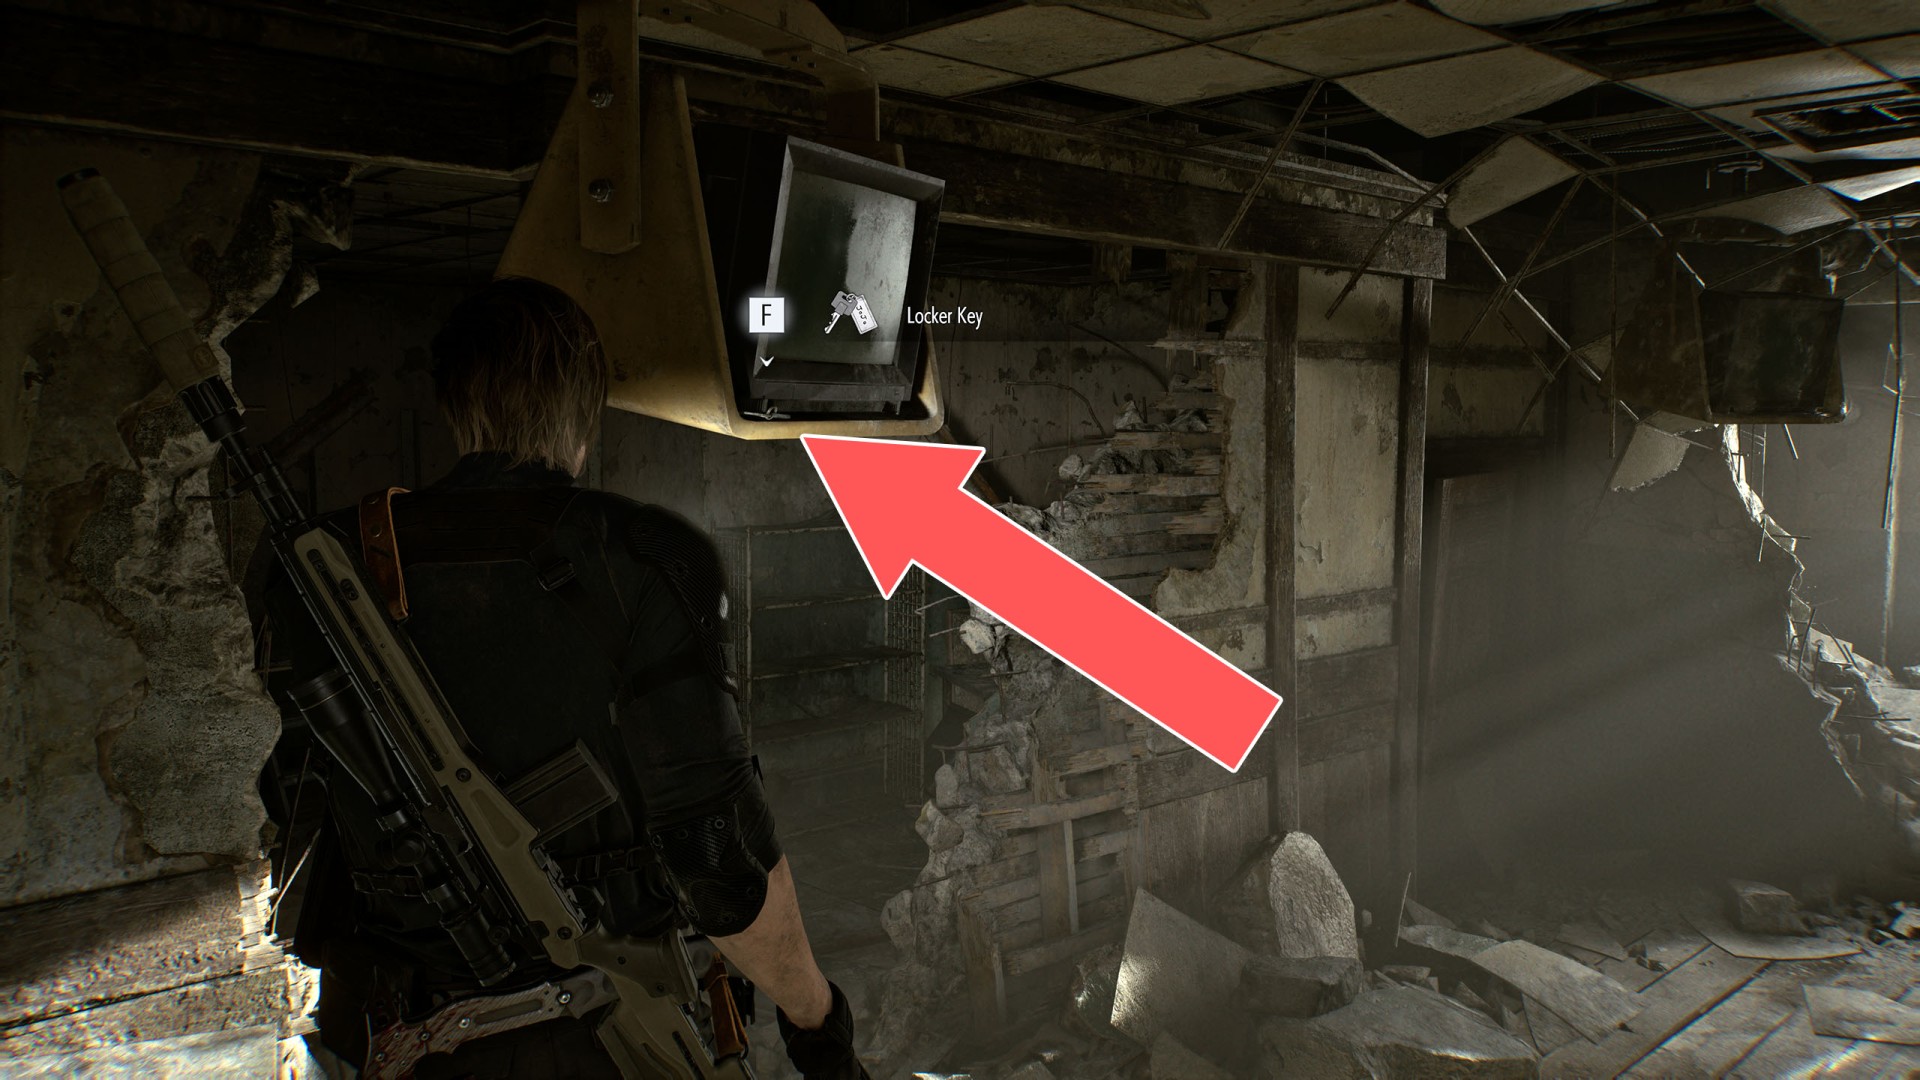
42Locker Key
The key will only appear once you have read notes Scavenger Hunt - Clue 1 and Scavenger Hunt - Clue 2. To grab it, climb up onto the wooden pallets. Unlocks: Locked Locker.
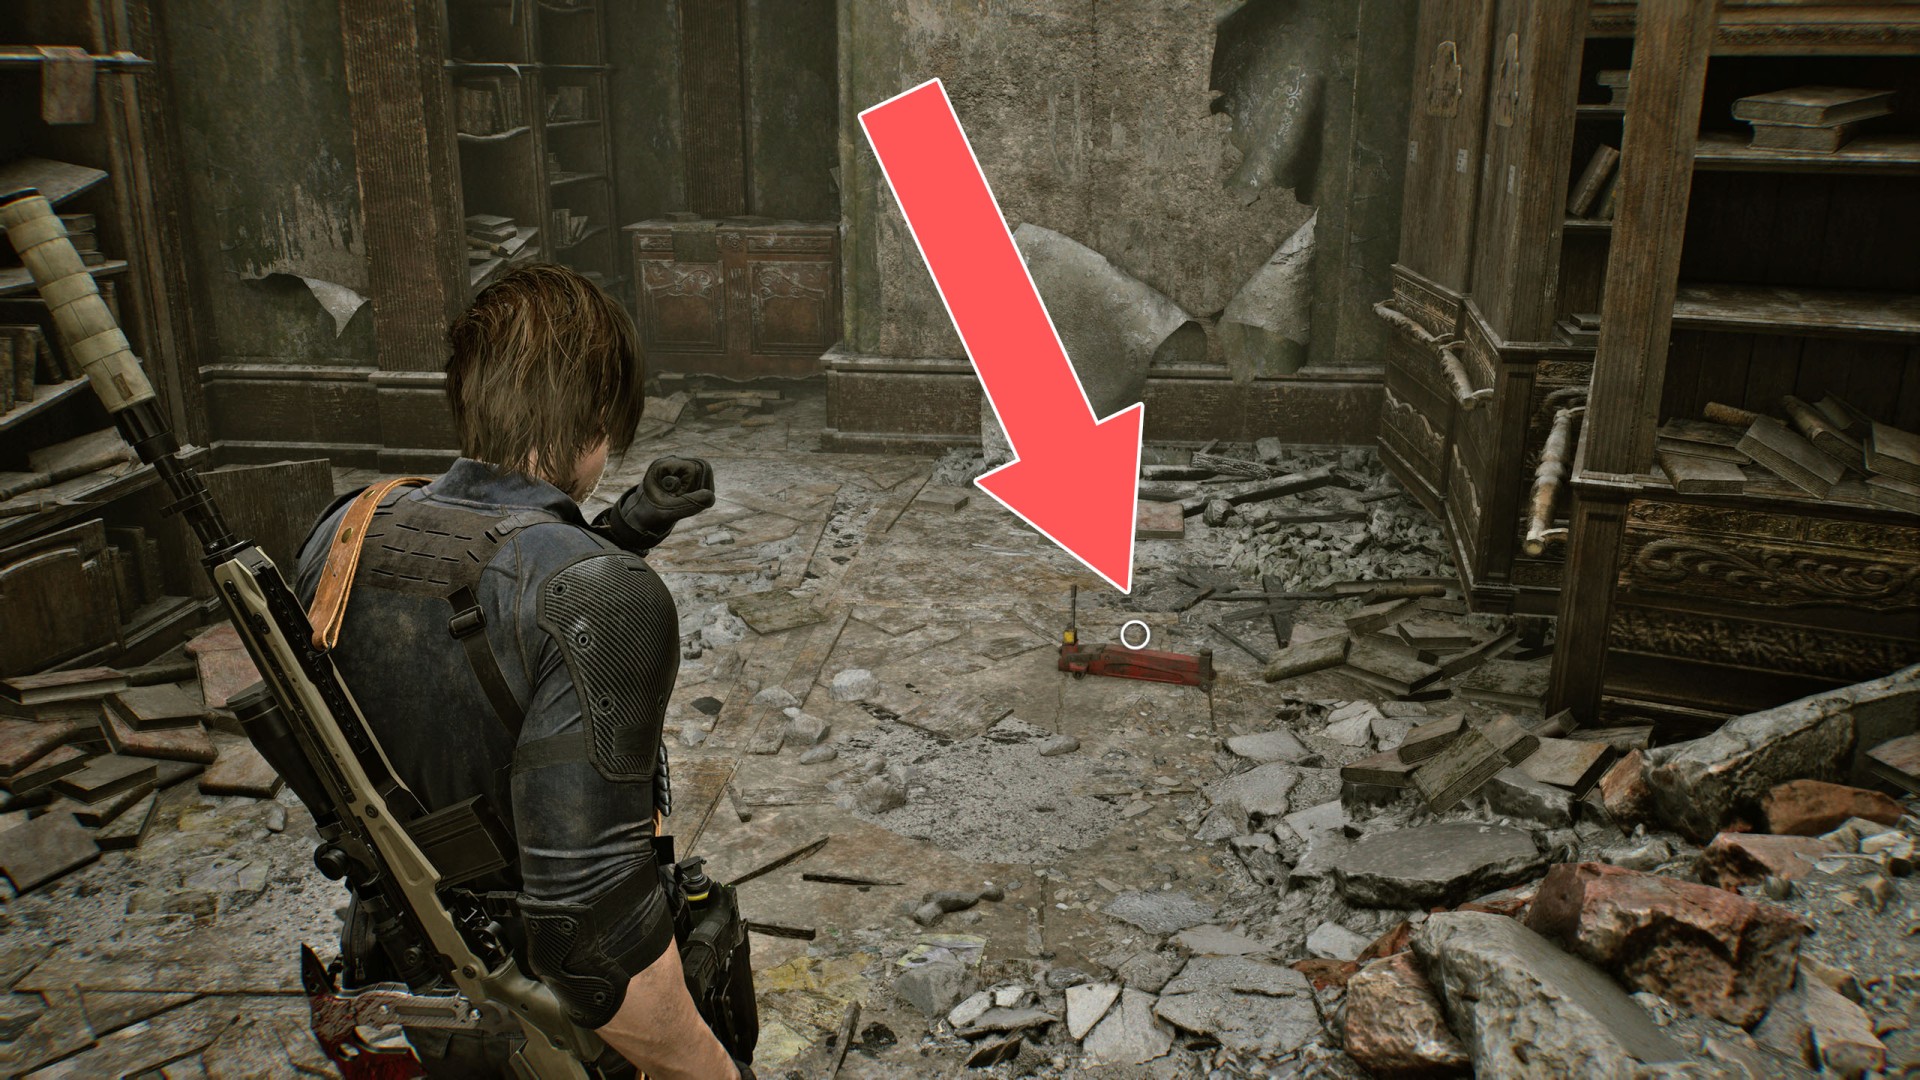
43Mechanic Jack
You can use ot to unlock the Rusted Shutter or Rusted Shutter.
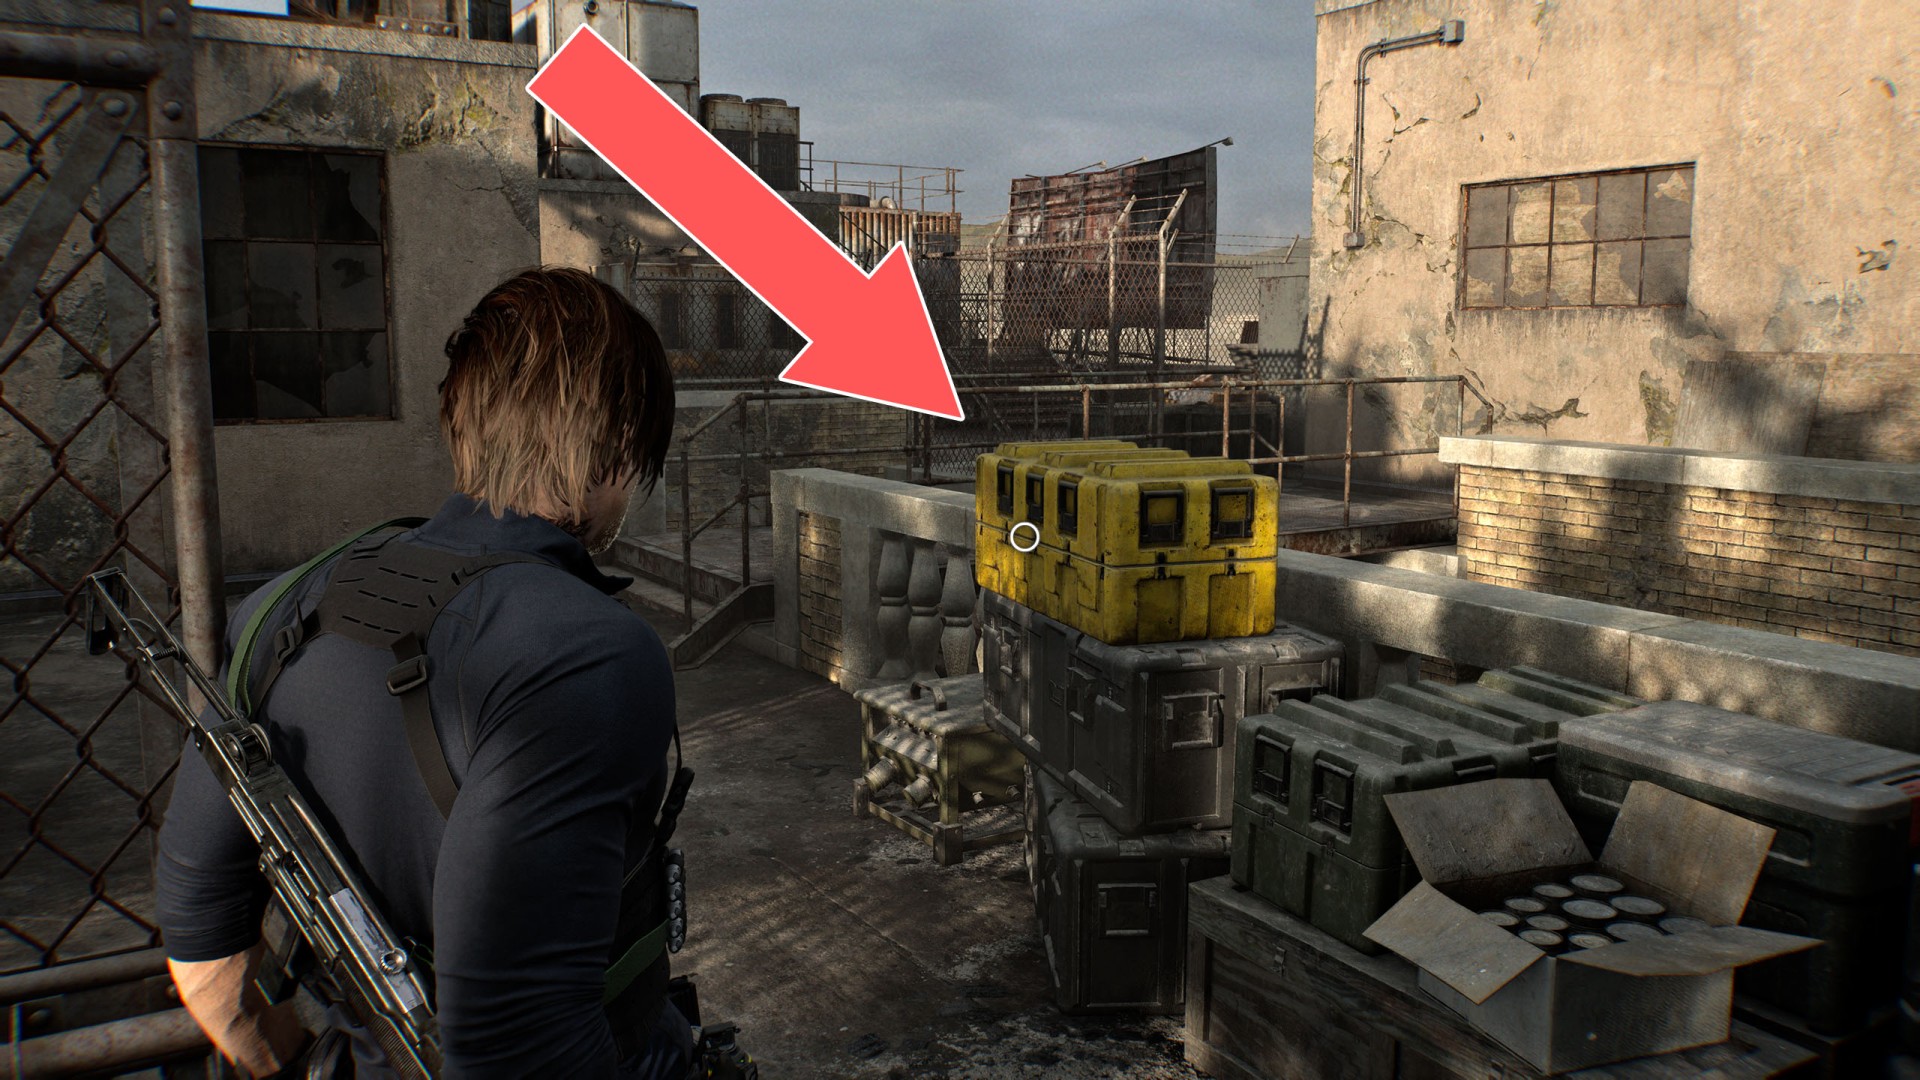
44Relay
This is one of the items you need to create a detonator and open the Raccoon City Main Gate.
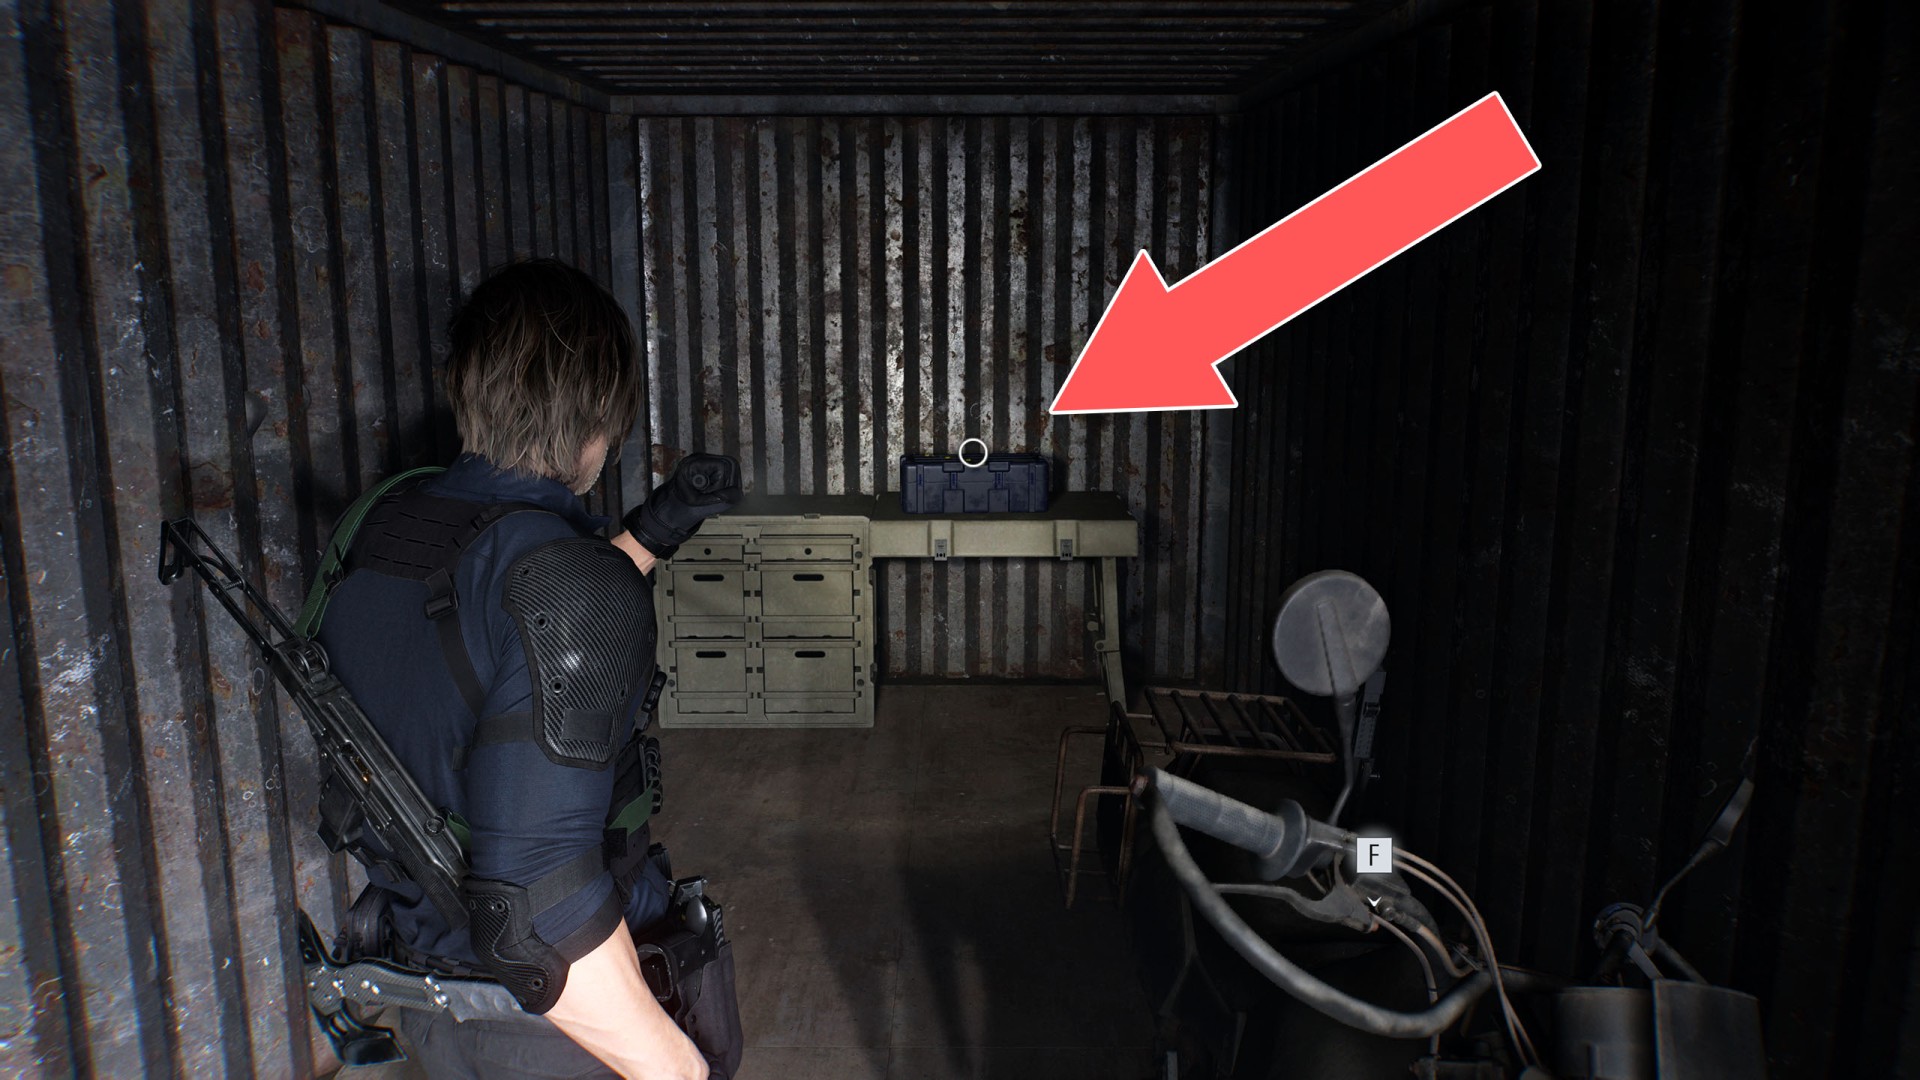
45Repair Kit
You need that to repair the Broken Signal Receiver.
46Rusty Crank
You can use it to open the Rusty Crank Door, Locked Gate, or Sewage Facility Door.
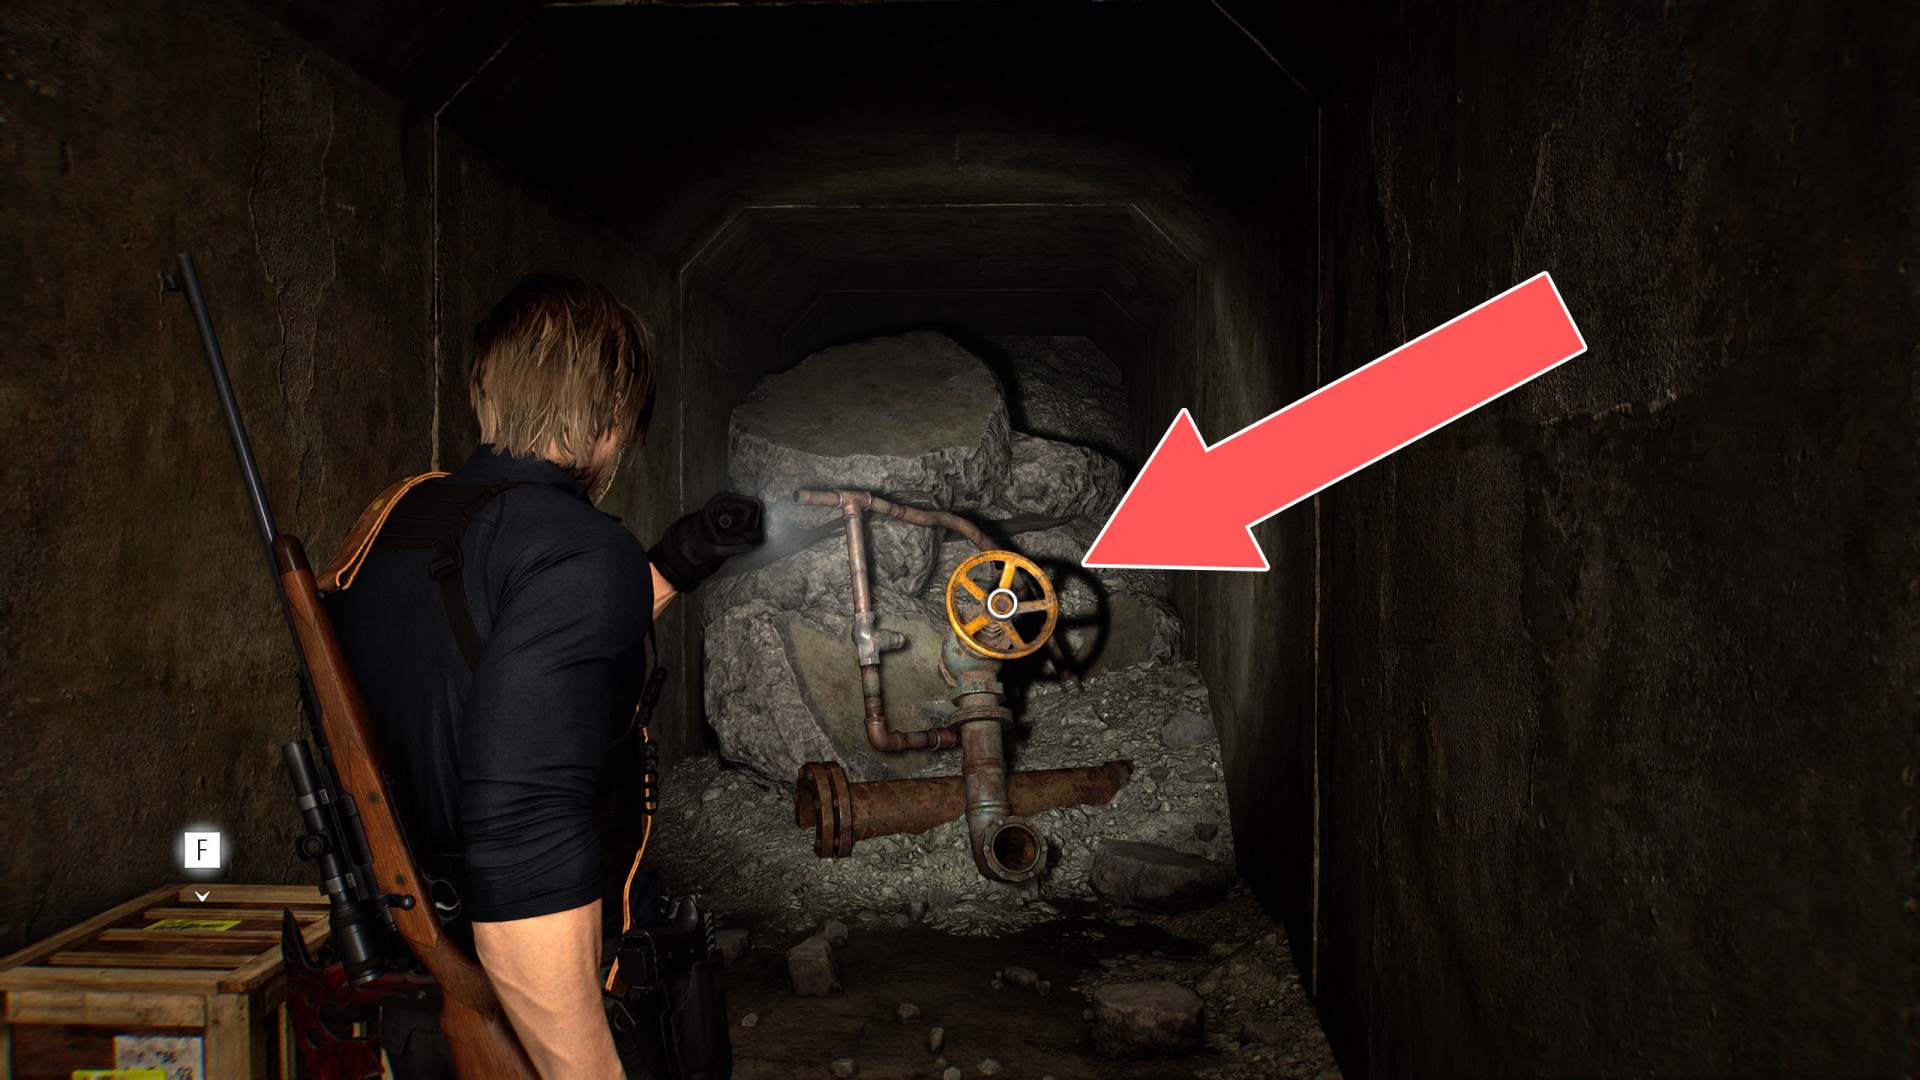
47Valve Handwheel
Related: Valve Handwheel Slot.
Locations on ARK
48Animus Orb
One of two orbs needed to unlock the Archives Door.
49Magnetic Key
You can only pick it up after restoring power to the room.
You can use it to unlock: Cleanroom Door and Lobby Door.
50Noblesse Orb
One of two orbs needed to unlock the Archives Door.
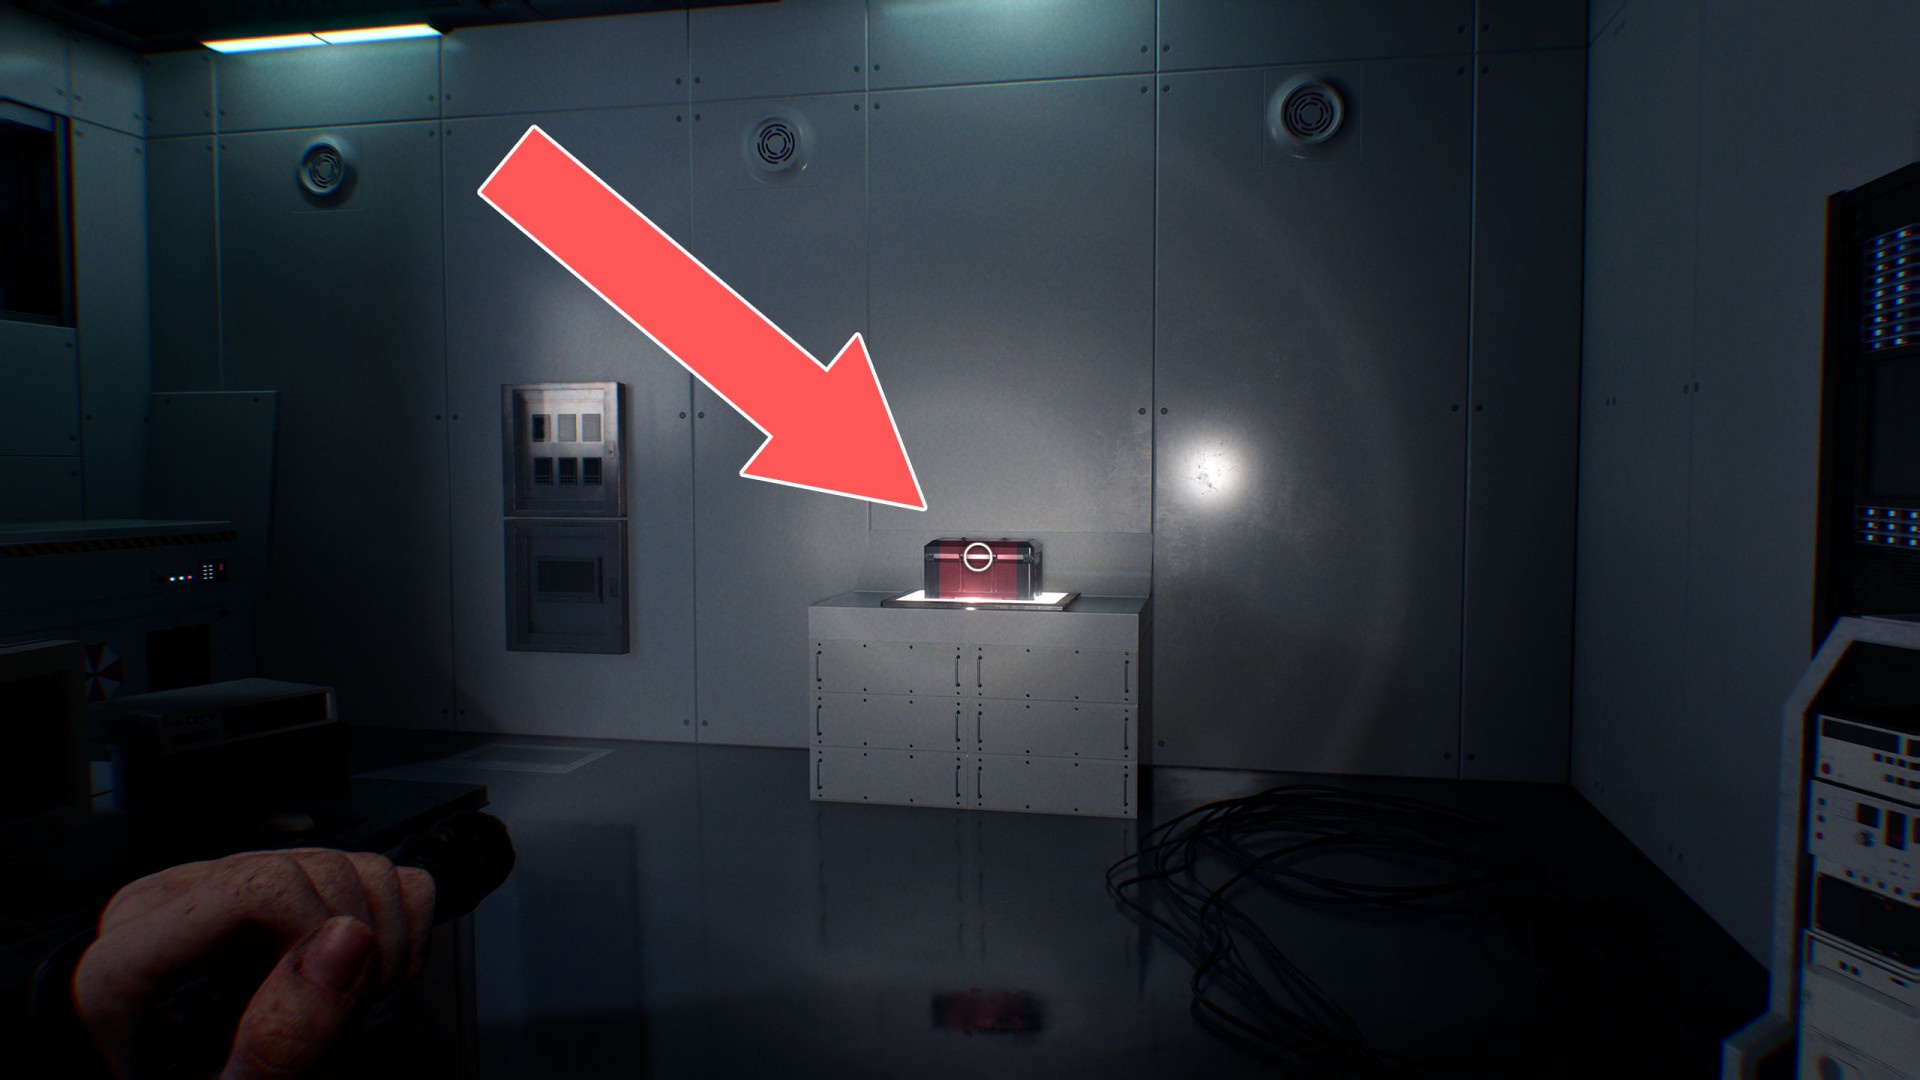
51Override Key (Bioweapon Repository 11)
Unlocks: Elevator.
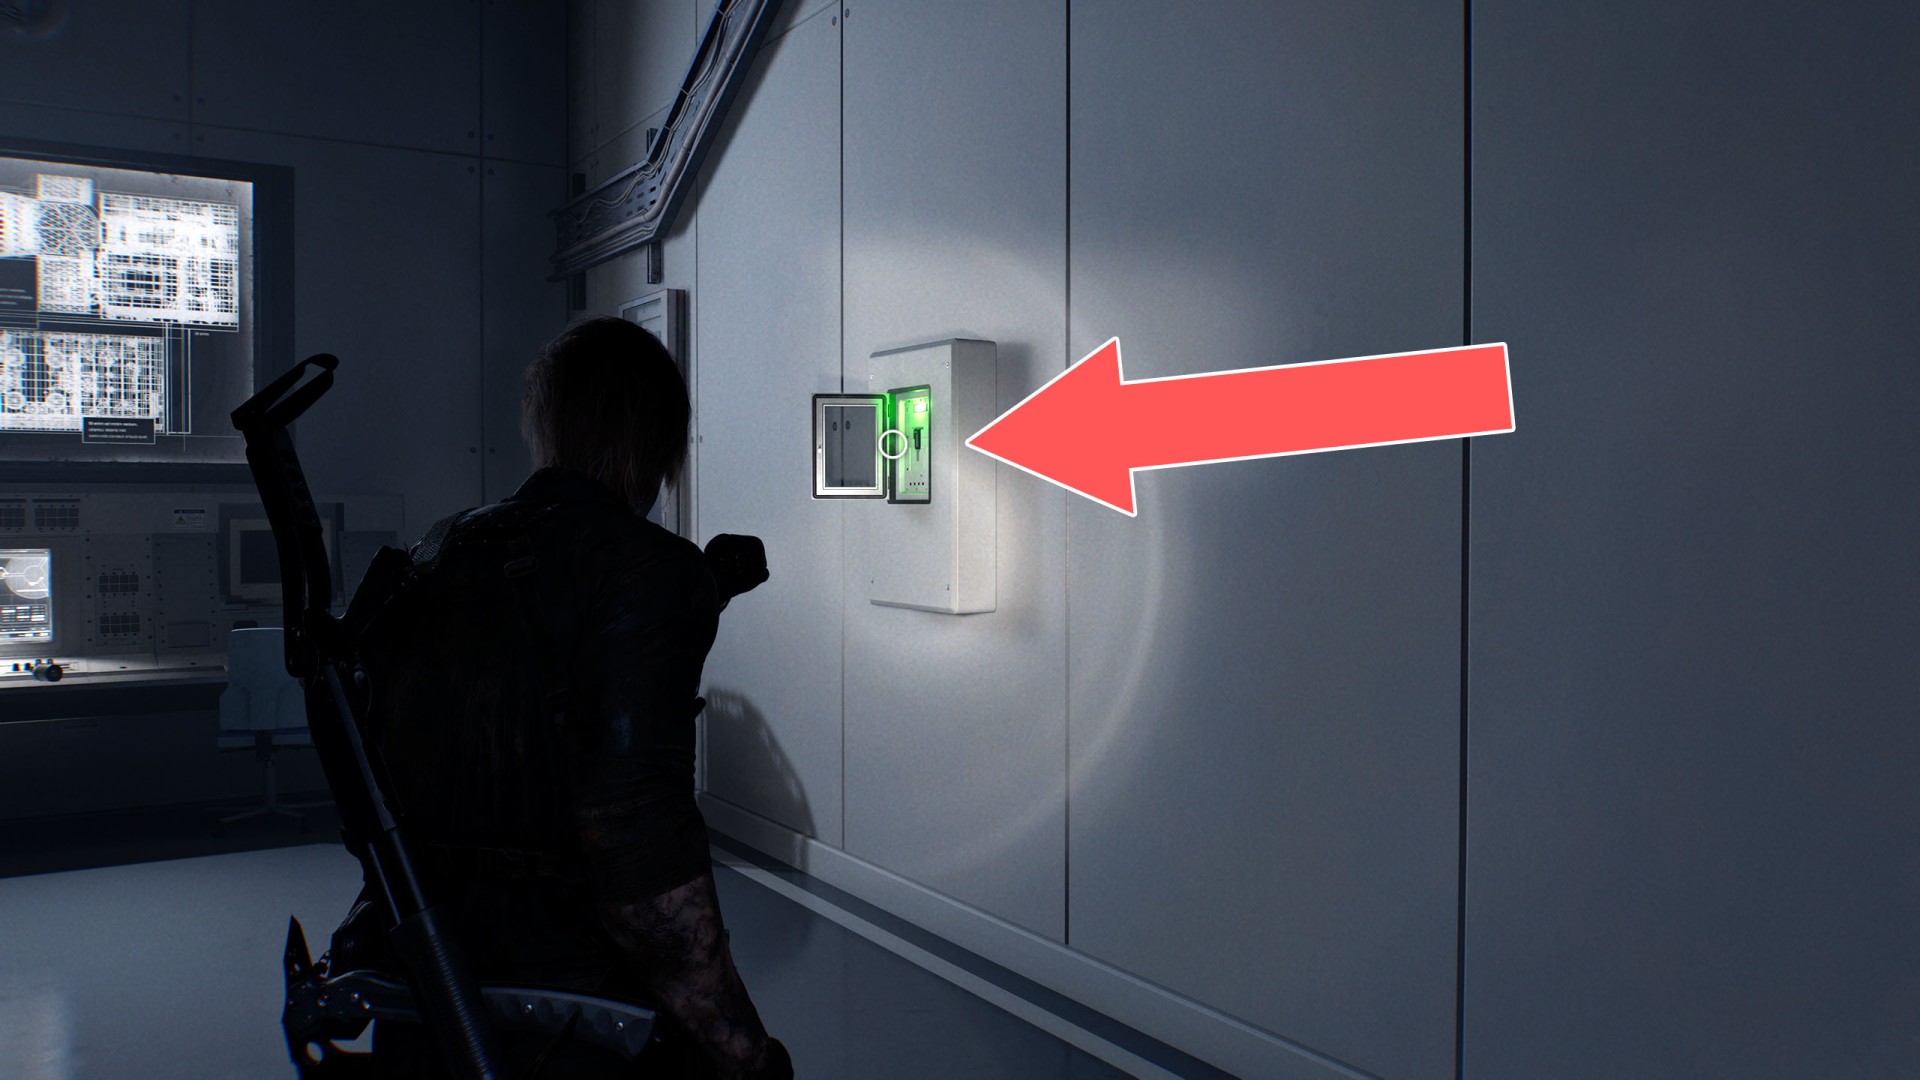
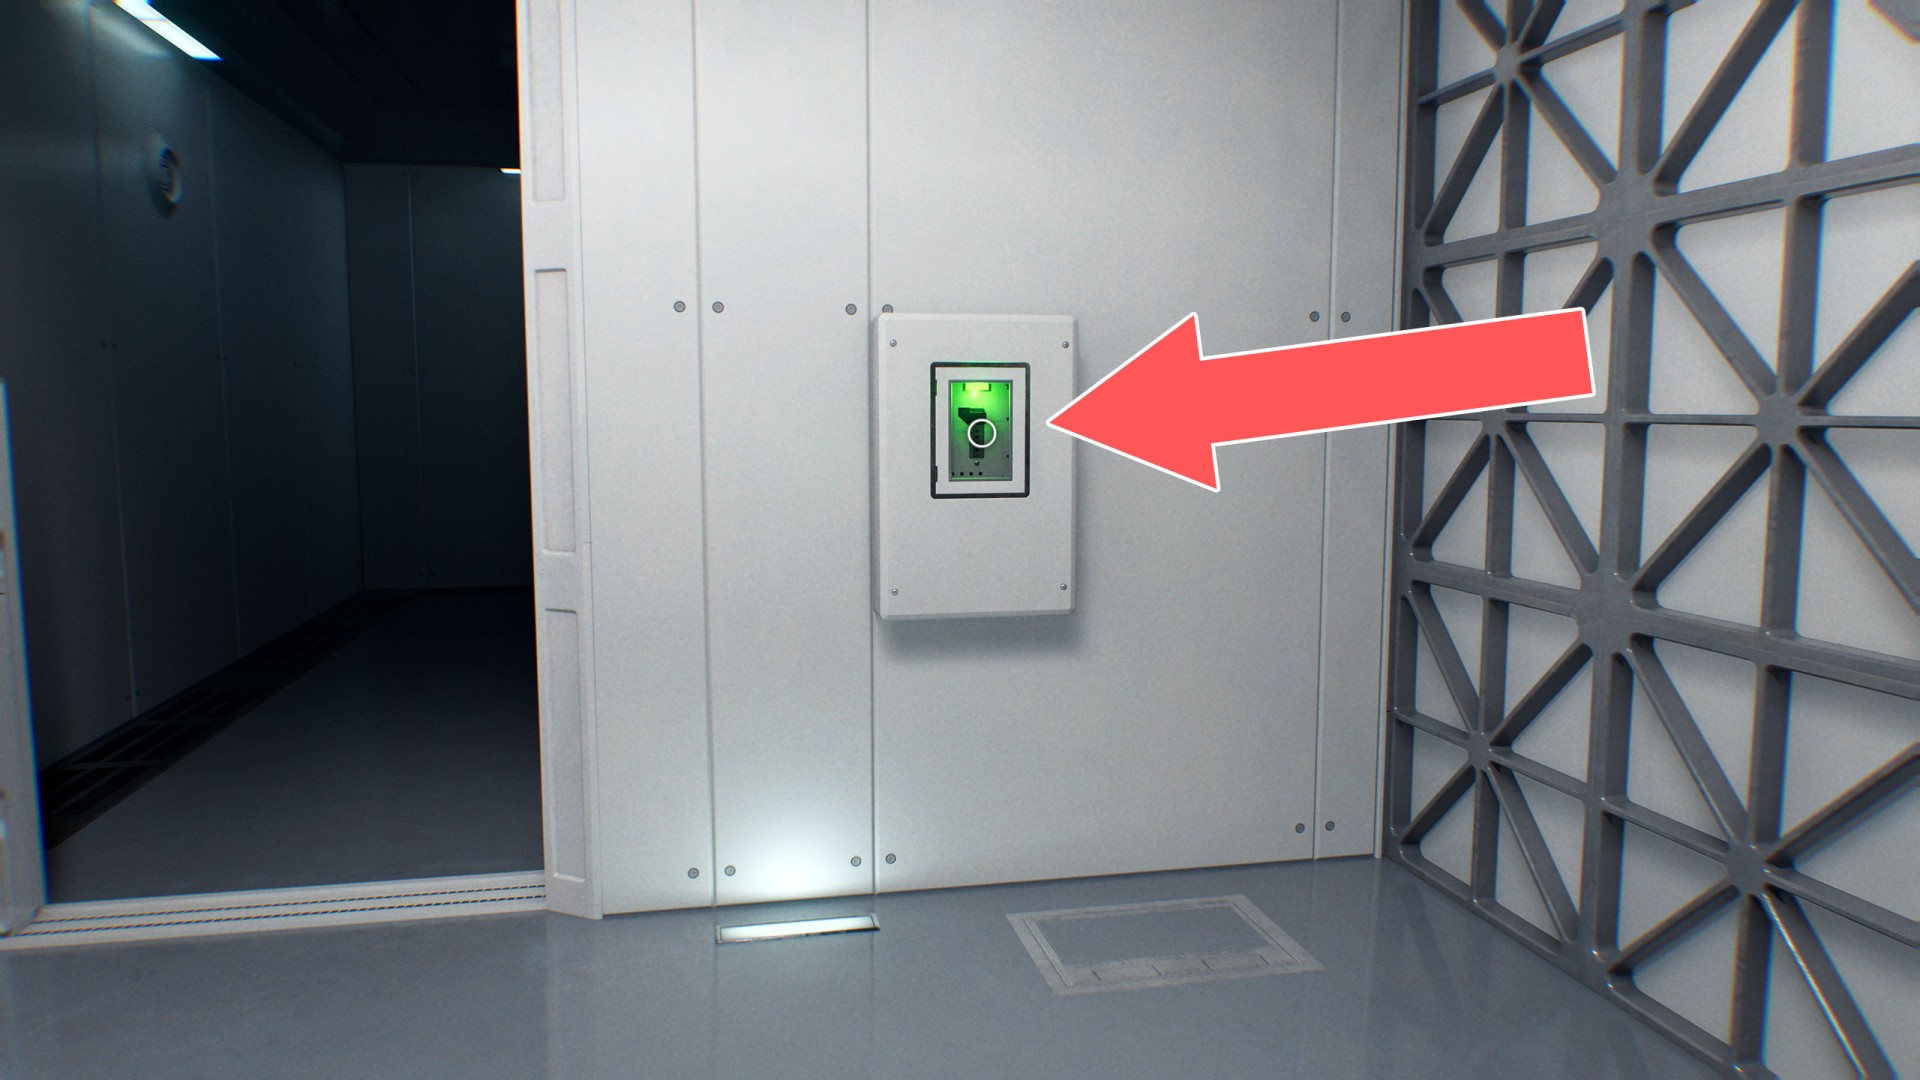
52Override Key (Dump Control Room)
Unlocks: Dump Control Room Panel.
Description: A power activation key. It should restore electricity to the Dump Control Room.