Norway - Map Markers Summary
Treasure Hoard Map x1, Treasure Hoard Map Treasure x1, Flying Papers x4, Books of Knowledge x4, Gear x5, Carbon Ingots x15, Lost Drengr x2, Legendary Animals x2, World Events x11, Fly Agaric x2, Cairn x1, Animus Anomaly x1, Flyting x1, Special Gear x2, Orlog Players x2, Drinking Challenges x2, Traders x3, Locations x29, Highpoints x6, Opals x50, Harbors x7, Other x1
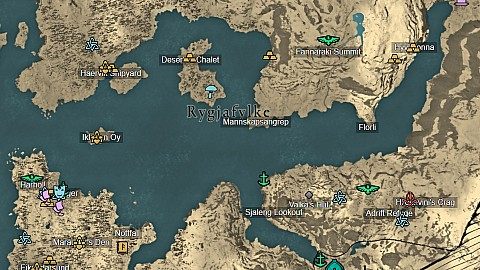
The following legend of Norway interactive game map defines the points of interest / markers displayed on the map. Each marker corresponds to a specific element to facilitate efficient navigation and interaction with the map.
Treasure Hoard Maps contain tips that will lead you to hidden, unique customisation items. After finding the map you can go to the place shown or described on the map and take the treasure. Treasure Hoard Maps count as ARTIFACTS.
 Rygjafylke Hoard Map
The map is on a table in one of the houses.
Rygjafylke Hoard Map
The map is on a table in one of the houses.
Places where you can find treasures described on Treasure Hoard Maps.
 Rygjafylke Hoard Map (Treasure)
The treasure is located on the island in Hordafylke. It's a Snakebite Scheme (Sail).
Rygjafylke Hoard Map (Treasure)
The treasure is located on the island in Hordafylke. It's a Snakebite Scheme (Sail).
Pieces of paper floating in the air. When you get close to them they will start to fly away. Follow them until they stop and then collect them before they reset and return to the starting position. After collecting each of them you will receive a new tattoo design. Flying Papers count as ARTIFACTS.
 Hordafylke / Alrekstad #1
A piece of paper floating in the air above the tree branch. When you get close to it, it will fly away. Follow it along the stream until it stops at the bridge near the lake and then collect it before it resets.
Hordafylke / Alrekstad #1
A piece of paper floating in the air above the tree branch. When you get close to it, it will fly away. Follow it along the stream until it stops at the bridge near the lake and then collect it before it resets.
Hordafylke / Alrekstad #2
A piece of paper floating in the air above the tree branch. When you get close to it, it will fly away. Follow it along the roofs until it stops at the roof of one of the houses and then collect it before it resets.
Rygjafylke / Stavanger #1
A piece of paper floating in the air above the roof of the house. When you get close to it, it will fly away. Follow it along the roofs until it stops at the docks and then collect it before it resets.
Rygjafylke / Stavanger #2
A piece of paper floating in the air above the roof of the house. When you get close to it, it will fly away. Follow it along the roofs until it stops at the docks and then collect it before it resets.
Books of Knowledge unlock new abilities and improve current abilities. Books of Knowledge count as WEALTH.
 Mark of Death
Ranged ability. The book is located in the basement under the house. To get to the basement you need to do a few things. First, find the key in the pig enclosure.
Mark of Death
Ranged ability. The book is located in the basement under the house. To get to the basement you need to do a few things. First, find the key in the pig enclosure.
Rage of Helheim
Melee ability. The book is located in a cave hidden behind a waterfall.
Thorn of Slumber
Ranged ability. The book is located on the lower level of the tower standing in the middle of the camp. You can get there by the ladder from the middle level of the tower.
Throwing Axe Fury
Melee ability. The book is located in a cave which entrance is in the southern part of the village.
Gear and Weapons items count as WEALTH.
 Bone-Biter
Chest is inside the house. The island is occupied by several opponents.
Bone-Biter
Chest is inside the house. The island is occupied by several opponents.
Iron-Star Flail
The chest is located in the building next to the temple in the upper part of the fortress. You can easily get to it after completing "A Cruel Destiny" quest.
Recurve Bow
The chest is located in the cellar, which can be accessed by descending a ladder.
War Hammer
The chest is located on a platform hung from a tree. You can jump on it from the roof of the house.
Yngling Seax Dagger
The chest is inside a large house and is guarded.
You can use Carbon Ingots to enhance the quality of your Gear and Weapons at the settlement's blacksmith from Fine to Superior. Carbon Ingots count as WEALTH.
 Hordafylke Ingot
The chest is inside the red tent in the upper part of the camp.
Hordafylke Ingot
The chest is inside the red tent in the upper part of the camp.
Rygjafylke Ingot #1
The treasure chest is located on top of the rock.
Rygjafylke Ingot #2
The chest is located in a house which door is barred from the inside but you can enter it through an open window.
Rygjafylke Ingot #3
Enter the hidden passage. The entrance is located north of the marker.
Rygjafylke Ingot #4
Kill War-Band Chief and loot her corpse.
Rygjafylke Ingot #5
The chest is inside the house and it's locked so you neeed to find a key. Head to the north-east where you will find three wolves and a dead body. Kill the wolves and loot Ornir's key from the skeleton. Return to the hut and open the chest.
Rygjafylke Ingot #6
The chest is located at the bottom of the tower but the door is locked from inside so you have to enter the tower from the top, preferably by walking the rope.
Rygjafylke Ingot #7
The chest is located underground.The entrance is in the house located northeast of the marker.
Rygjafylke Ingot #8
The chest is inside the house in a restricted area. To get inside destroy part of the roof and enter through the hole.
Rygjafylke Ingot #9
The chest is located underwater, in the wreck of a sunken ship. You will have to dive.
Rygjafylke Ingot #10
Kill Arrow-Horde and loot her corpse.
Rygjafylke Ingot #11
The chest is located in a cave with an entrance on a slope south of the marker. The entrance is located to the east from the destroyed hanging bridge.
Rygjafylke Ingot #12
Use your bow to destroy a fragment of the wall and go inside through the created hole.
Rygjafylke Ingot #13
Kill the Skull-Crusher and loot his corpse.
Rygjafylke Ingot #14
To get to the part of the house where the chest is located you must first enter the other part of the house and throw a torch over the palisade inside the house.
Update: Nowadays to get inside you only need to destroy the weak wooden door with your weapon.
Lost Drengr are human boss enemies. They are powerful vikings that want to duel you. Speak to them and then fight them. Lost Drengr count as MYSTERIES.
 Erik Loyalskull
Power: -.The warrior is located inside the "Hildesvini's Crag" cave which entrance is near the lake. He is a strong opponent and you won't be able to beat him early in the game.
Erik Loyalskull
Power: -.The warrior is located inside the "Hildesvini's Crag" cave which entrance is near the lake. He is a strong opponent and you won't be able to beat him early in the game.
Orwig Neverdeath
Power: 370.
Legendary Animals are bigger, stronger, and far more dangerous than any other animals. After defeating them, you will get rare trophies. Return these trophies to the hunter in your settlement to receive a reward. Legendary Animals count as MYSTERIES.
 Bear of the Blue Waters
Power: 310.
Bear of the Blue Waters
Power: 310.
Elk of Bloody Peaks
Power: -.
World Events are some kind of side quests that can be found in Assassin's Creed: Valhalla. They are usually short, do not have log entries, and you will receive experience points for their completion. World events count as MYSTERIES.
 A Desperate Bounty
Get closer to the man who claims that the bandits took the jarl. Follow him and kill the four bandits who will attack you. Then talk to the man.
A Desperate Bounty
Get closer to the man who claims that the bandits took the jarl. Follow him and kill the four bandits who will attack you. Then talk to the man.
A New England
Talk to the old man and then follow him all the time. When you finally reach the camp, approach the straw dummy and examine it. Whether you lie or tell the truth is of little importance.
Battle Born
Talk to the boys. Run with them to nearby, ruined building and destroy the four dummies that are there. Take the contents of the chest and then talk to the boy again. +2 Skill Points.
Comb of Champions
Talk to the woman sitting on the shore of the lake and then dive into the lake and find her comb lying at the bottom. Odin's Sight is very useful here. Then return to the woman and give her back her comb.
Old Man on the Edge
Talk to a man standing on top of the cliff. Then throw down all the crates lying nearby and talk to the man again.
Raider Recruit
Talk to the man and then follow him to the place where the fistfights take place. Beat your opponents and talk to the man again. 40 Silver.
The Dreamwalking Warrior
Try to wake up the sleeping warrior and then follow him as he sleepwalks. Slide down the rope and talk to the warrior.
The Hunt for Honor
Talk to a man in the camp. Then lure a bear or wolf, which you should find nearby, to his camp. Let the man hit the animal and then help him kill it. After you kill the animal, talk to the man again to end the event. If you do not help him, the man will die but the event will end too.
The Plight of the Warlock
Talk to the hunter and then follow him to the warlock's hut. When you are talking to the warlock, the hunter will attack him. Kill the warlock (20 silver) or hunter (20 + 20 silver).
The Rekindling
Talk to the raid-loving woman standing in front of the house, follow her into the house, use your weapon to demolish the house equipment and then drop or throw a torch on the floor. After a while you will receive the key with which you open the chest.
The Silver-Tongued Traitor
Talk to the trader Sulke. After a while you will recognize the items he sells as items from your former home. Sulke will try to escape. Kill him as soon as possible so you do not have to search for him around the village.
Hallucination Challenges. Eat the Fly Agaric mushrooms to start the hallucination. These can be challenges where you have to follow the clues and activate or go through the gates in the correct order. Other challenges can involve defeating enemies that will attack you. Fly Agaric count as MYSTERIES.
 Hordafylke
Kill four elite Jotnar warriors.
Hordafylke
Kill four elite Jotnar warriors.
Rygjafylke
After eating the mushrooms, you will have to run into three portals with the same figures as those standing in the middle. You must do this in the right order.
1. The first gate leads to Thruthheim, Where Thor thunders until Ragnarök.
2. The second gate leads to Freyja's Folkvang, For good men and women grown weary of battle.
3. The third gate leads to Gladsheim, Where the All-Father welcomes his blood-drinkers.
The Cairns are challenges in which we have to stack rocks one on top of the other so that we can create a balanced pile of a certain height. The Cairns count as MYSTERIES.
 Torghatten Rock / Hordafylke
Animus Anomalies are platforming sections. The goal of each Animus Anomaly is to reach its top. If you fall or touch certain objects, you will be desynchronized and respawn at a checkpoint a few steps back. Animus Anomalies count as MYSTERIES.
 Hlutrholt Anomaly
Win the flyting duels to increase your charisma. Flyting is a contest consisting of the exchange of three insults between you and your opponent, often conducted in verse. When you accept a flyting duel, you must place a wager to begin - 100 silver, 150, or 200 silver. The flyting duels count as MYSTERIES.
 Manning, Fighter of Wolves / Stavanger / Rygjafylke
A. What you make up in muscles, you're lacking in spine.
B. They seem perfectly placed to give children a scare.
C. No, you're quite like your arms: just incredibly thick.
Manning, Fighter of Wolves / Stavanger / Rygjafylke
A. What you make up in muscles, you're lacking in spine.
B. They seem perfectly placed to give children a scare.
C. No, you're quite like your arms: just incredibly thick.
 Gungnir
You will find the spear inside the Goinnhellir cave, but only after you have completed the main story. You must also have all four adrenaline slots unlocked in the skill tree.
Gungnir
You will find the spear inside the Goinnhellir cave, but only after you have completed the main story. You must also have all four adrenaline slots unlocked in the skill tree.
Mjolnir
You will only be able to get Thor's hammer when you have collected all parts of Thor's Set, which means at the very end of the game. You will find the hammer at the bottom of the ravine. You will be able to pick it up only when you wear all the parts of Thor's armor.
You must beat all Orlog Players for the "Orlog Champion" achievement / trophy.
 Fornburg Player
Rygjafylke Player
 Alrekstad
Stavanger
 Alrekstad Trader
Alrekstad Trader
Stavanger Trader
Interesting places that play a certain role, for example you have to visit them while doing certain quests, etc.
 Adrift Refuge
Bolrikbjorn
Deserted Chalet
Eikundarsund
Elgrfors
Gryttirsand
Haervik Shipyard
Harholl
Heillboer
Helskip
Hildesvini's Crag
Hlutrholt
Hoettrstrand
Hyvlatonna
Ikke en Oy
Mannskapsangrep
Marauder's Den
Sjaleng Lookout
Stavanger
Torghatten Rock
Ulvannos Iron Mine
Highpoints can be synchronized by climbing them and pressing the interaction button. They can then be used as the FAST TRAVEL points.
 Fannaraki Summit
Harholl
Hordafylke
Rygjafylke
Rygjafylke
Ulriken Peak
Opals are rare resources that can be found while exploring the Assassin's Creed Valhalla world and earned by completing daily and weekly challenges. They serve as currency to purchase from special merchants.
 Hordafylke Opal
Hordafylke Opal
Hordafylke Opal
Hordafylke Opal
Hordafylke Opal
Hordafylke Opal
Hordafylke Opal
Hordafylke Opal
Hordafylke Opal
Hordafylke Opal
Hordafylke Opal
Hordafylke Opal
You can enter the cave through the underwater tunnel on the east side.
Hordafylke Opal
Hordafylke Opal
Hordafylke Opal
Hordafylke Opal
Hordafylke Opal
Hordafylke Opal
Hordafylke Opal
Hordafylke Opal
Hordafylke Opal
Hordafylke Opal
Hordafylke Opal
Hordafylke Opal
Hordafylke Opal
Rygjafylke Opal
Rygjafylke Opal
Rygjafylke Opal
Rygjafylke Opal
Rygjafylke Opal
Rygjafylke Opal
Rygjafylke Opal
Rygjafylke Opal
Rygjafylke Opal
Rygjafylke Opal
Rygjafylke Opal
Rygjafylke Opal
Rygjafylke Opal
Rygjafylke Opal
Rygjafylke Opal
Rygjafylke Opal
Rygjafylke Opal
Rygjafylke Opal
Rygjafylke Opal
Rygjafylke Opal
Rygjafylke Opal
Rygjafylke Opal
Rygjafylke Opal
Rygjafylke Opal
Rygjafylke Opal