Welcome to guides4gamers.com

Koboh - Star Wars Jedi Survivor Map

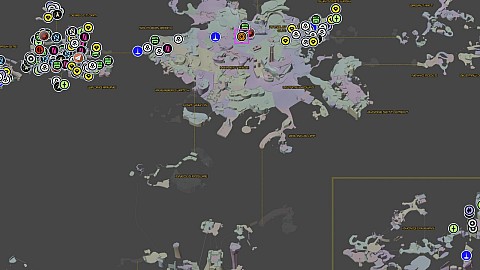
An interactive map of Koboh, one of the planets we can visit when playing Star Wars Jedi: Survivor.

Important abilities that are gained during missions taking place on Koboh

  1. Relter Tame - This ability allows you to glide using Relters.
  2. Nekko Mount - This ability allows you to ride nekko mounts. When you sit on the back of a nekko you can jump higher than usual. When riding on the nekko you can also traverse slippery terrain on which you would normally slide.
  3. Koboh Grinder - This ability allows BD-1 to spray Koboh matter. You can use it to "carry fire" and destroy obstacles made of Koboh matter.
  4. Lift and Slam - With these abilities, you can lower or raise doors, platforms, etc. and thus gain access to previously inaccessible places, or open certain containers.
  5. BD-1 Electro Dart - This ability allows BD-1 to shoot an electric dart to overcharge certain objects (electric devices). BD-1's Dart can also make enemy droids easier to hack, out of combat.
  6. Slice: Security Droid
  7. Slice: BX Droids

All Koboh Collectibles

The rugged planet of Koboh was once the frontier of the Republic's reach for centuries, but is now little more than a shadow on the edge of the Outer Rim. In the wake of the Republic's departure, Koboh became a home for a community of prospectors looking to strike it rich from the planet's natural resources and lost treasures. Lacking in much of either, however, and plagued by bandit incursions, Koboh has settled into a dusty, mostly forgotten galactic footnote.

Subzones: Rambler's Reach, Dredger Gorge, Basalt Forest, Prospector's Folly, Stone Spires, Viscid Bog, Mountain Observatory.

Koboh

Koboh - Map Markers Summary

New Abilities or Upgrades x8, Map Upgrades x3, Perks x13, Chests x124, Databanks x185, Databank x1, Treasures x133, Essences x56, Force Tears x9, Chamber Entrances x7, Seed Pods x145, Fish x10, Bounties x7, Shops x3, Significant Opponents x25, Rumors x12, Mission Objectives x8, Meditation Points x38, Blocked Paths x37, Shortcuts x68, Relters x45, Other x12

Legend / Points of interest

The following legend of Koboh interactive game map defines the points of interest / markers displayed on the map. Each marker corresponds to a specific element to facilitate efficient navigation and interaction with the map.

Icon of Other Derelict Dam Secret Area You can arrive here on the Giant Bird which you will first set free when visiting Forest Array and which you will later find in Boiling Bluff.
Icon of Other Exit to Southern Reach
Icon of Other Frog for Rambler's Reach Outpost Force Tear?
Icon of Other Giant Bird It will take you to the Derelict Dam Secret Area. Requires: Upgraded Ascension Cable.
Icon of Other Holotactics Table
Icon of Other Phon'Qi Caverns Entrance
Icon of Other Phon'Qi Caverns Entrance Connected to Phon'Qi Caverns Entrance.
Icon of Other Smuggler's Tunnels Entrance
Icon of Other Sodden Grotto Entrance
Icon of Other Starting Point on Koboh This is where you start when you arrive to Koboh the first time.
Icon of Other Underwater Tunnel
Icon of Other Water Treatment Entrance Related point: Big Round Hatch.

New Abilities or Upgrades

Icon of Upgrade BD-1 Electro Dart BD-1 can now fire a dart to overcharge certain objects. BD-1's Dart can also make enemy droids easier to hack, out of combat.
Icon of Upgrade Koboh Grinder BD-1 can now spray Koboh matter. In this way you can "carry fire" and destroy obstacles made of Koboh matter.
Icon of Upgrade Lift and Slam With these abilities, you can lower or raise doors, platforms, etc. and thus gain access to previously inaccessible places, or open certain containers.
Icon of Upgrade Nekko Mount You can now ride nekko mounts. When you sit on the back of a nekko you can jump higher than usual. When riding on the nekko you can also traverse slippery terrain on which you would normally slide.
Icon of Upgrade Relter Tame This ability allows you to glide using Relters.
Icon of Upgrade Slice: BX Droids
Icon of Upgrade Slice: MagnaGuard
Icon of Upgrade Slice: Security Droid

Map Upgrades

Icon of Map Upgrade Map Upgrade: Chests
Icon of Map Upgrade Map Upgrade: Seed Pods To unlock this upgrade you have to recruit Pili Walde and use all 10 unique seeds to fill three garden plots located on the roof. The color of the plant does not matter. Once all the plants have grown, this upgrade will be unlocked.
Icon of Map Upgrade Map Upgrade: Upgrades To get this upgrade you'll first need to complete all seven Chambers found on Koboh.

Perks

Icon of Perk Ambidexterity Location: Devastated Settlement Meditation Chamber. To get this perk collect the Devastated Settlement Essence 5/5. Slots: 3. Effect: Shooting targets temporarily increases lightsaber damage.
Icon of Perk Dexterity Location: Chamber of Reason. To get this perk collect the Chamber of Reason Essence 1/1. Slots: 2. Effect: Lightsaber throws deal more damage.
Icon of Perk Fellowship Location: Chamber of Clarity. To get this perk collect the Chamber of Clarity Essence 1/1. Slots: 4. Effect: BD-1 holds an extra stim for Cal. Stims will not refill to max until Cal rests.
Icon of Perk Fortification Location: Forest Array. To get this perk collect the Forest Array Essence 2/2. Slots: 3. Effect: Life regenerates up to a minimum amount.
Icon of Perk Fortitude Location: Fogged Expanse. To get this perk collect the Fogged Expanse Essence 1/2. Slots: 4. Effect: Increases lightsaber damage, but incoming damage is also increased.
Icon of Perk Marksmanship Location: Devastated Settlement. To get this perk collect the Devastated Settlement Essence 3/5. Slots: 3. Effect: When in blaster stance, Cal's blaster shots do more damage.
Icon of Perk Patience Location: Chamber of Detachment. To get this perk collect the Chamber of Detachment Essence 1/1. Slots: 3. Effect: Using Slow also refills some Life.
Icon of Perk Perplexity Location: Diagnostics Corridor / Grand Oculus. To get this perk collect the Diagnostics Corridor Essence 2/2. Slots: 2. Effect: Increases damage dealt by characters affected by Confusion.
Icon of Perk Persistence Location: Chamber of Fortitude. To get this perk collect the Chamber of Fortitude Essence 1/1. Slots: 2. Effect: Each enemy killed during Slow gives a small amount of Life.
Icon of Perk Precision Location: Devastated Settlement. To get this perk collect the Devastated Settlement Essence 2/5. Slots: 2. Effect: Parry Timing is shorter but Cal deals more stamina damage to enemies when he parries.
Icon of Perk Recuperation Location: Chamber of Connection. To get this perk collect the Chamber of Connection Essence 1/1. Slots: 3. Effect: The minimum level that the Force Meter automatically regenerates to is increased.
Icon of Perk Resilience Location: Chamber of Duality. To get this perk collect the Chamber of Duality Essence 1/1. Slots: 1. Effect: Block Meter is increased.
Icon of Perk Shatter Location: Sodden Grotto. To get this perk collect the Sodden Grotto Essence 1/1. Slots: 2. Effect: Attacks are more effective at breaking enemies' guard.

Chests

Chests are one of the collectibles that count towards a zone's overall status. They are generally various types of containers that in the majority of cases contain cosmetic items, but sometimes they can also be stim canister, skill, etc.

Icon of Chest Alignment Control Tower Chest 1/2 Pommel - Harmony.
Icon of Chest Alignment Control Tower Chest 2/2 Map Upgrade: Ugrades. This terminal counts as chest. To be able to use this terminal you'll first need to complete (pick up essences) all seven Chambers found on Koboh. From the moment you do this, all the upgrades you have not yet collected will be marked on the maps.
Icon of Chest Basalt Rift Chest 1/5 Shirt - Hunter.
Icon of Chest Basalt Rift Chest 2/5 Pants - Hunter. Order BD-1 to slice this chest.
Icon of Chest Basalt Rift Chest 3/5 Stim Canister.
Icon of Chest Basalt Rift Chest 4/5 Hair - Crew Cut. Order BD-1 to slice this chest.
Icon of Chest Basalt Rift Chest 5/5 Pommel - Diligence. It's inside a small cave at ther bottom level. Order BD-1 to slice this chest.
Icon of Chest Bilemaw Den Chest 1/1 Material - Tactical.
Icon of Chest Bygone Settlement Chest 1/4 Jacket - Wanderer.
Icon of Chest Bygone Settlement Chest 2/4 Head - Geonosian. To get here you need to start by climbing up to the rocky ledge located in the middle of the settlement. From there, you will be able to jump onto a line. Ride the rope, run along the vertical walls, ride another rope and you will reach the platform where the chest is located.
Icon of Chest Bygone Settlement Chest 3/4 Hair - Choppy Forward. Start on the platform where the Bygone Settlement Chest 2/4 is located. Use the rope to jump to the other side.
Icon of Chest Bygone Settlement Chest 4/4 Legs - Geonosian.
Icon of Chest Chamber of Clarity Chest 1/1 Weapon Materials - Unique Non-Metal.
Icon of Chest Chamber of Connection Chest 1/1 Emitter - Persistence.
Icon of Chest Chamber of Detachment Chest 1/1 BD-1 Materials - Jedi Paint.
Icon of Chest Chamber of Duality Chest 1/1 Weapon Materials - Jedi Paint.
Icon of Chest Chamber of Fortitude Chest 1/1 BD-1 Materials - Two-Tone Metal. Order BD-1 to slice it.
Icon of Chest Chamber of Reason Chest 1/1 Emitter - Diligence.
Icon of Chest Corroded Silo Chest 1/3 Beard - Goatee and Mustache.
Icon of Chest Corroded Silo Chest 2/3 Body - Arakyd Heavy. Lift it then Slam it.
Icon of Chest Corroded Silo Chest 3/3 Weapon Materials - Bumpy Rubber. Lift it then Slam it.
Icon of Chest Derelict Dam Chest 1/8 Body - Scrapyard.
Icon of Chest Derelict Dam Chest 2/8 Weapon Materials - Light Metal.
Icon of Chest Derelict Dam Chest 3/8 Hair - Mullet.
Icon of Chest Derelict Dam Chest 4/8 BD-1 Materials - Anodized Metal.
Icon of Chest Derelict Dam Chest 5/8 Jacket - Tactical. Order BD-1 to slice it.
Icon of Chest Derelict Dam Chest 6/8 Head - Scrapyard. Move the crate to allow you to jump on the wall you can run along.
Icon of Chest Derelict Dam Chest 7/8 Weapon Materials - Two-Tone Metal. It's a red chest. Requires: BD-1 Electro Darts. To unlock this chest, use the darts and shoot the elecrtic device located on the other side of the cave. Once you open the chest you will be attacked by Vashtan Wolfe.
Icon of Chest Derelict Dam Chest 8/8 Stim Canister. To reach this chest you must open the Big Metal Gate and defeat Gorocco Matriarch.
Icon of Chest Devastated Settlement Chest 1/3 Weapon Materials - Hard Leather.
Icon of Chest Devastated Settlement Chest 2/3 Switch - Harmony. Order BD-1 to slice this chest.
Icon of Chest Devastated Settlement Chest 3/3 Beard - Full Goatee and Mustache.
Icon of Chest Flooded Bunker Chest 1/2 Weapon Materials - Coated Metal.
Icon of Chest Flooded Bunker Chest 2/2 BD-1 Materials - Coated Metal.
Icon of Chest Fogged Expanse Chest 1/3 Jacket - Exile.
Icon of Chest Fogged Expanse Chest 2/3 Beard - Soul Patch.
Icon of Chest Fogged Expanse Chest 3/3 Pommel - Detachment. Requires: Lift and Slam.
Icon of Chest Foothill Falls Chest 1/4 Hair - Slicked Back.
Icon of Chest Foothill Falls Chest 2/4 Pommel - Patience.
Icon of Chest Foothill Falls Chest 3/4 Stim Canister. Use the nekko you find in the cave to get to the platform above the building. The terminal you find there will allow you to call up a rolling mine. Throw the mine through the hole in the roof at the door blocking access to the chest.
Icon of Chest Foothill Falls Chest 4/4 Weapon Materials - Droid Paint. To get to the platform where the chest is you must have the Upgraded Ascension Cable. But you can also open it from a lower platform. All you need is to have the Lift and Slam ability.
Icon of Chest Forest Array Chest 1/6 Beard - Light Mustache.
Icon of Chest Forest Array Chest 2/6 Switch - Diligence.
Icon of Chest Forest Array Chest 3/6 Material - Hunter.
Icon of Chest Forest Array Chest 4/6 Head - Swooper.
Icon of Chest Forest Array Chest 5/6 Grip - Diligence.
Icon of Chest Forest Array Chest 6/6 Material - Hunter.
Icon of Chest Fort Kah'lin Chest x/3 Jacket - Mountaineer. Persuade Filkus Gorr.
Icon of Chest Fort Kah'lin Chest x/3 Outfit - Poncho.
Icon of Chest Fort Kah'lin Chest x/3 Shirt - Bomber.
Icon of Chest Forward Control Tower Chest 1/1 Hair - Center Part.
Icon of Chest Generator Underbelly Chest 1/1 Slice: BX Droids.
Icon of Chest Gorge Crash Site Chest 1/2 Photoreceptors - Scrapyard.
Icon of Chest Gorge Crash Site Chest 2/2 Beard - Short Beard.
Icon of Chest Harvest Ridge Chest 2/2 Music Track: Shortpaw's Dance.
Icon of Chest Harvest Ridge Chest x/2 Pants - Wanderer.
Icon of Chest Hunter's Quarry Chest 1/3 BD-1 Materils - Light Metal.
Icon of Chest Hunter's Quarry Chest 2/3 Jacket - Bomber. Order BD-1 to slice this chest.
Icon of Chest Hunter's Quarry Chest 3/3 Jacket - Hunter. Order BD-1 to slice this chest.
Icon of Chest Imperial Post 8L-055 Chest 1/2 Weapon Materials - Textured Rubber. It's a red chest. Requires: BD-1 Electro Dart.
Icon of Chest Imperial Post 8L-055 Chest 2/2 Barrel - RSKF-44.
Icon of Chest Loading Gantry Chest 1/5 Beard - Short Goatee.
Icon of Chest Loading Gantry Chest 2/5 Barrel - Enforcer.
Icon of Chest Loading Gantry Chest 3/5 Grip - Persistence.
Icon of Chest Loading Gantry Chest 4/5 Jacket - Commander.
Icon of Chest Loading Gantry Chest 5/5 Pants - Commander. Requires: BD-1 Electro Dart.
Icon of Chest Lucrehulk Core Chest 1/2 Photoreceptors - Geonosian. Requires: Lift and Slam.
Icon of Chest Lucrehulk Core Chest 2/2 Pommel - Persistence. Requires: Lift and Slam. Lift it then slam it.
Icon of Chest Mountain Ascent Chest 1/6 Slice: Security Droid. It's a terminal. Order BD-1 to slice it.
Icon of Chest Mountain Ascent Chest 2/6 Beard - Light Mustache and Patch.
Icon of Chest Mountain Ascent Chest 3/6 Beard - Mustache and Patch. Order BD-1 to slice this chest.
Icon of Chest Mountain Ascent Chest 4/6 Jacket - Drifter. Requires: Lift and Slam.
Icon of Chest Mountain Ascent Chest 5/6 Pants - Bomber.
Icon of Chest Mountain Ascent Chest 6/6 Audio Sensor - Scrapyard. Requires: Lift and Slam.
Icon of Chest Nekko Pools Chest 1/1 Body - Swooper.
Icon of Chest Observatory Understructure Chest 1/2 Stim Canister.
Icon of Chest Observatory Understructure Chest 2/2 Grip - Showdown.
Icon of Chest Phon'Qi Caverns Chest 1/7 Emitter - Duelist.
Icon of Chest Phon'Qi Caverns Chest 2/7 Jacket - Bomber.
Icon of Chest Phon'Qi Caverns Chest 3/7 Switch - Duelist.
Icon of Chest Phon'Qi Caverns Chest 4/7 Pommel - Duelist.
Icon of Chest Phon'Qi Caverns Chest 5/7 Grip - Duelist.
Icon of Chest Phon'Qi Caverns Chest 6/7 Slice: MagnaGuard.
Icon of Chest Phon'Qi Caverns Chest 7/7 Map Upgrade: Chests.
Icon of Chest Pyloon's Saloon Chest 1/2 Outfit - Scrapper.
Icon of Chest Pyloon's Saloon Chest 2/2 Music Track - Eerin Siinaa. To get into this room you must find a way to open Moran Locker Door.
Icon of Chest Rambler's Reach Outpost Chest 1/10 Stim Canister. To enter the room where this chest is you must buy a Mysterious Keycode from Doma's Outpost Commodities shop, it will cost you 10 Priorite Shards.
Icon of Chest Rambler's Reach Outpost Chest 2/10 Shirt - Tactical. This chest is on the roof of the building.
Icon of Chest Rambler's Reach Outpost Chest x/10 Pommel - Edgehawk. Requires: Lift and Slam.
Icon of Chest Rambler's Reach Outpost Chest x/10 Barrel - Arakyd Heavy. Requires: Lift and Slam.
Icon of Chest Rambler's Reach Outpost Chest x/10 Material - Bomber. Requires: Lift and Slam.
Icon of Chest Rambler's Reach Outpost Chest x/10 BD-1 Materials - Rebel Paint. Requires: Lift and Slam.
Icon of Chest Rambler's Reach Outpost Chest x/10 Map Upgrade: Seed Pods.
Icon of Chest Rambler's Reach Outpost Chest x/10 Blaster - Swoop. Requires: BD-1 Electro Dart.
Icon of Chest Rambler's Reach Outpost Chest x/10 Jacket - Duelist. Recruit T-1N8.
Icon of Chest Rambler's Reach Outpost Chest x/10 BD-1 Materials - Unique Metal. Requires: Nekko Mount, Lift and Slam.
Icon of Chest Rift Passage Chest 1/1 BD-1 Materials - Kashyyyk Paint. Requires: BD-1 Electro Dart.
Icon of Chest Riverbed Watch Chest 1/1 Hair - Bun. Order BD-1 to slice this chest.
Icon of Chest Smuggler's Tunnels Chest 1/1 Pants -Tactical.
Icon of Chest Sodden Grotto Chest 1/1 Legs - Scrapyard.
Icon of Chest Southern Reach Chest 1/3 Beard - Full Beard.
Icon of Chest Southern Reach Chest 2/3 Weapon Materials - Kashyyyk Paint.
Icon of Chest Southern Reach Chest 3/3 Blaster - Quickdraw. Requires: Lift and Slam, Koboh Grinder.
Icon of Chest Swindler's Wash Chest 1/2 Material - Tactical. Order BD-1 to slice this chest.
Icon of Chest Swindler's Wash Chest 2/2 Material - Tactical.
Icon of Chest Untamed Downs Chest 1/6 Jacket - Mountaneer. Convince Garra.
Icon of Chest Untamed Downs Chest 2/6 Lightsaber - Santari Khri.
Icon of Chest Untamed Downs Chest 3/6 Audio Sensors - Geonosian.
Icon of Chest Untamed Downs Chest 4/6 Legs - Swooper.
Icon of Chest Untamed Downs Chest 5/6 Jacket - Hunter. It's a red chest. Requires: BD-1 Electro Dart.
Icon of Chest Untamed Downs Chest 6/6 Grip - Arakyd Heavy. It's a red chest. Requires: BD-1 Electro Dart.
Icon of Chest Viscid Bog Chest 1/3 Jacket - Drifter.
Icon of Chest Viscid Bog Chest 2/3 Stim Canister.
Icon of Chest Viscid Bog Chest 3/3 Switch - Persistence.
Icon of Chest Water Treatment Works Chest 1/4 Switch - Edgehawk.
Icon of Chest Water Treatment Works Chest 2/4 Emitter - Edgehawk.
Icon of Chest Water Treatment Works Chest 3/4 Grip - Edgehawk.
Icon of Chest Water Treatment Works Chest 4/4 Hair - Scrapper.
Icon of Chest Winding Ravine Chest 1/3 Weapon Materials - Warm Metal. To get to this chest you must run along the walls and turn to a side alley.
Icon of Chest Winding Ravine Chest 2/3 Beard - Goatee. To get here you must stack one crate on top of another and move them to the right place.
Icon of Chest Winding Ravine Chest 3/3 Lightsaber - Hunter. To get here you must first reach the Relter and fly down to this rock shelf.
Icon of Chest Yurt Barracks Chest 1/3 Grip - Enforcer. Orde BD-1 to slice this chest.
Icon of Chest Yurt Barracks Chest 2/3 Body - Geonosian.
Icon of Chest Yurt Barracks Chest 3/3 Body - Enforcer. It's a red chest. Requires: BD-1 Electro Dart.

Databanks

Databanks are generally scannable objects or items that you discover along the way and which, in most cases, count toward a zone's overall completion stat. They are a source of information about the game world and, if you wish, the information they contain can be reviewed using the "Databank" tab.

Icon of Databank Alignment Control Tower Databank 1/1 302 - Patience. It's a Force Echo.
Icon of Databank Basalt Rift Databank 1/8 133 - Basalt Pillars. Order BD-1 to scan it.
Icon of Databank Basalt Rift Databank 2/8 144 - Turf Wars. Order BD-1 to scan it.
Icon of Databank Basalt Rift Databank 3/8 132 - Same Story, Different Planet. It's a Force Echo.
Icon of Databank Basalt Rift Databank 4/8 136 - Bilemaw's Revenge. Order BD-1 to scan it.
Icon of Databank Basalt Rift Databank 5/8 140 - Risk and Research. Order BD-1 to scan it.
Icon of Databank Basalt Rift Databank 6/8 137 - The Short Straw. Order BD-1 to scan it.
Icon of Databank Basalt Rift Databank 7/8 143 - Bilemaw Pools. Order BD-1 to scan it.
Icon of Databank Basalt Rift Databank 8/8 139 - Koboh Dust. Order BD-1 to scan it.
Icon of Databank Boiling Bluff Databank 1/2 255 - The Wheel Turns. It's a Force Echo.
Icon of Databank Boiling Bluff Databank 2/2 248 - Turgle, Saved. It's a Force Echo.
Icon of Databank Bygone Settlement Databank 1/2 300 - Ancient Architecture.
Icon of Databank Bygone Settlement Databank 2/2 299 - Digger Crawler. Order BD-1 to scan it.
Icon of Databank Chamber of Clarity Databank 1/4 150 - Trials. It's a Force Echo.
Icon of Databank Chamber of Clarity Databank 2/4 149 - Concerted Effort. It's a Force Echo.
Icon of Databank Chamber of Clarity Databank 3/4 151 - A Candid Moment. It's a Force Echo.
Icon of Databank Chamber of Clarity Databank 4/4 148 - Tenacity. It's a Force Echo.
Icon of Databank Chamber of Connection Databank 1/4 204 - Homesick. It's a Force Echo.
Icon of Databank Chamber of Connection Databank 2/4 205 - Mind Challenge. It's a Force Echo.
Icon of Databank Chamber of Connection Databank 3/4 206 - Insolence, or Bravery. It's a Force Echo.
Icon of Databank Chamber of Connection Databank 4/4 207 - Private Doubts. It's a Force Echo.
Icon of Databank Chamber of Detachment Databank 1/3 208 - A Rare Find. It's a Force Echo.
Icon of Databank Chamber of Detachment Databank 2/3 209 - Missing in Action. It's a Force Echo.
Icon of Databank Chamber of Detachment Databank 3/3 210 - Worlds Away. It's a Force Echo.
Icon of Databank Chamber of Duality Databank 1/1 214 - Disaster. Order BD-1 to scan it.
Icon of Databank Chamber of Fortitude Databank 1/2 211 - A World of Wonder. It's a Force Echo.
Icon of Databank Chamber of Fortitude Databank 2/2 212 - Hand in Hand.
Icon of Databank Chamber of Reason Databank 1/5 199 - The Goals of Khri. It's a Force Echo.
Icon of Databank Chamber of Reason Databank 2/5 200 - Talk of the Future. It's a Force Echo.
Icon of Databank Chamber of Reason Databank 3/5 201 - In Good Time. It's a Force Echo.
Icon of Databank Chamber of Reason Databank 4/5 203 - A Secret Meeting. Order BD-1 to scan it.
Icon of Databank Chamber of Reason Databank 5/5 202 - Dead End. It's a Force Echo.
Icon of Databank Corroded Silo Databank 1/3 289 - Curiosity Sours. Order BD-1 to scan the datapad.
Icon of Databank Corroded Silo Databank 2/3 291 - New Acquisitions. Order BD-1 to scan the datapad.
Icon of Databank Corroded Silo Databank 3/3 259 - Whispered Words. It's a Force Echo.
Icon of Databank Derelict Dam Databank 1/10 117 - Murdered Prospector. It's a Force Echo.
Icon of Databank Derelict Dam Databank 2/10 128 - Gorocco Nest. Order BD-1 to scan it.
Icon of Databank Derelict Dam Databank 3/10 122 - Destroyed Dam. Order BD-1 to scan it.
Icon of Databank Derelict Dam Databank 4/10 116 - Drowned Prospector. It's a Force Echo.
Icon of Databank Derelict Dam Databank 5/10 127 - Dead Bedlam Raider.
Icon of Databank Derelict Dam Databank 6/10 126 - Dam Flow Pipes. Order BD-1 to scan the pipes.
Icon of Databank Derelict Dam Databank 7/10 123 - Crumbling Dam Wall. Order BD-1 to scan it.
Icon of Databank Derelict Dam Databank 8/10 118 - A Desperate Escape. It's a Force Echo.
Icon of Databank Derelict Dam Databank 9/10 121 - Creature Bones. Order BD-1 to scan the fossil.
Icon of Databank Derelict Dam Databank 10/10 120 - Abandoned Encampment. Order BD-1 to scan the camp.
Icon of Databank Devastated Settlement Databank 1/15 216 - An Instruction. It's a Force Echo.
Icon of Databank Devastated Settlement Databank 2/15 217 - Technological Deficit.
Icon of Databank Devastated Settlement Databank 3/15 218 - A Patient Master. It's a Force Echo.
Icon of Databank Devastated Settlement Databank 4/15 224 - Thermal Vent. Order BD-1 to scan it.
Icon of Databank Devastated Settlement Databank 5/15 225 - Chamber Mural.
Icon of Databank Devastated Settlement Databank 6/15 219 - Idle Talk. It's a Force Echo.
Icon of Databank Devastated Settlement Databank 7/15 220 - The Seeds of Concern. It's a Force Echo.
Icon of Databank Devastated Settlement Databank 8/15 221 - A World Away.
Icon of Databank Devastated Settlement Databank 9/15 226 - Central Manse. Order BD-1 to scan it.
Icon of Databank Devastated Settlement Databank 10/15 227 - Training Courtyard. Order BD-1 to scan it.
Icon of Databank Devastated Settlement Databank 11/15 228 - Devastated Remains. Order BD-1 to scan it.
Icon of Databank Devastated Settlement Databank 12/15 413 - Broken High Republic Device. Interact with the device.
Icon of Databank Devastated Settlement Databank 13/15 229 - Theses of Yaddle. Order BD-1 to scan it.
Icon of Databank Devastated Settlement Databank 14/15 223 - Cataclysm. It's a Force Echo.
Icon of Databank Devastated Settlement Databank 15/15 230 - Fallen Padawan. Order BD-1 to scan it.
Icon of Databank Diagnostics Corridor Databank 1/2 106 - Merciless Rampage. It's a Force Echo.
Icon of Databank Diagnostics Corridor Databank 2/2 220 - Minor Oculus. Order BD-1 to scan it.
Icon of Databank Flooded Bunker Databank 1/2 280 - Damage Assessment. Order BD-1 to scan the datapad.
Icon of Databank Flooded Bunker Databank 2/2 276 - Abandoned Water Filtration System. Order BD-1 to scan it.
Icon of Databank Fogged Expanse Databank 1/3 171 - Monitoring Equipment. Order BD-1 to scan it.
Icon of Databank Fogged Expanse Databank 2/3 178 - A Deadly Encounter. It's a Force Echo.
Icon of Databank Fogged Expanse Databank 3/3 179 - Forging Forward Alone. It's a force Echo. You will be able to get here only after you get the BD-1 Electro Dart.
Icon of Databank Foothill Falls Databank 1/4 175 - A Curious Pair. It's a Force Echo.
Icon of Databank Foothill Falls Databank 2/4 168 - Cargo Elevator. Order BD-1 to scan the elevator.
Icon of Databank Foothill Falls Databank 3/4 191 - Child's Hideaway. Order BD-1 to scan it.
Icon of Databank Foothill Falls Databank 4/4 192 - Prospecting Network. Order BD-1 to scan it. Requires: Upgraded Ascension Cable.
Icon of Databank Forest Array Databank 1/6 138 - Koboh Barrier. Order BD-1 to scan it.
Icon of Databank Forest Array Databank 2/6 145 - Epic Moltings. Order BD-1 to scan it.
Icon of Databank Forest Array Databank 3/6 142 - Auxiliary Array Telescope. Order BD-1 to scan it.
Icon of Databank Forest Array Databank 4/6 141 - Orb Amplifier. Order BD-1 to scan it.
Icon of Databank Forest Array Databank 5/6 146 - Indomitable. Order BD-1 to scan the shield.
Icon of Databank Forest Array Databank 6/6 135 - Central Rotational Apparatus. Order BD-1 to scan it.
Icon of Databank Fort Kah'lin Databank x/5 264 - Victorious Surrender. It's a Force Echo.
Icon of Databank Fort Kah'lin Databank x/5 298 - A House Divided. Order BD-1 to scan the datapad. You need an Upgraded Ascension Cable to get here.
Icon of Databank Fort Kah'lin Databank x/5 263 - Internal Affairs. It's a Force Echo. You need an Upgraded Ascension Cable to get here.
Icon of Databank Fort Kah'lin Databank x/5 297 - Bandit Camp. Order BD-1 to scan it.
Icon of Databank Fort Kah'lin Databank x/5 296 - Past Signs of Life. Order BD-1 to scan it.
Icon of Databank Forward Control Tower Databank 1/2 160 - Emergency Landing. It's a Force Echo.
Icon of Databank Forward Control Tower Databank 2/2 166 - Escape Pod. Order BD-1 to scan it.
Icon of Databank Generator Underbelly Databank 1/3 164 - Landing Hydraulics. Order BD-1 to scan it.
Icon of Databank Generator Underbelly Databank 2/3 159 - A Droid Reborn. It's a Force Echo.
Icon of Databank Generator Underbelly Databank 3/3 165 - Power Generator. Order BD-1 to scan it.
Icon of Databank Gorge Crash Site Databank 1/4 115 - Broken Dredging Machine. It's a Force Echo.
Icon of Databank Gorge Crash Site Databank 2/4 124 - Broken Mining Droid. Order BD-1 to scan the remains of the droid.
Icon of Databank Gorge Crash Site Databank 3/4 125 - Crushed Prospector. Order BD-1 to scan it.
Icon of Databank Gorge Crash Site Databank 4/4 129 - Koboh Tar. Order BD-1 to scan it.
Icon of Databank Harvest Ridge Databank 1/1 240 - Home on the Range. It's a Force Echo.
Icon of Databank Hunter's Quarry Databank 1/9 285 - A New Beginning. Order BD-1 to scan the datapad.
Icon of Databank Hunter's Quarry Databank 2/9 257 - A Task Too Far. It's a Force Echo.
Icon of Databank Hunter's Quarry Databank 3/9 286 - A Mechanical Touch. Order BD-1 to scan the datapad.
Icon of Databank Hunter's Quarry Databank 4/9 292 - A Gift Revoked. Order BD-1 to scan the datapad.
Icon of Databank Hunter's Quarry Databank 5/9 268 - The Wise Hunters.
Icon of Databank Hunter's Quarry Databank 6/9 271 - Gorocco Sanctuary.
Icon of Databank Hunter's Quarry Databank 7/9 243 - Free Sample. It's a Force Echo.
Icon of Databank Hunter's Quarry Databank 8/9 262 - An Honest Appraisal. It's a Force Echo.
Icon of Databank Hunter's Quarry Databank 9/9 294 - The Koboh Emergence. Order BD-1 to scan the datapad.
Icon of Databank Igneous Fissure Databank 1/2 273 - Caged Nekko. Order BD-1 to scan the cage.
Icon of Databank Igneous Fissure Databank 2/2 253 - Dark Waters. It's a Force Echo.
Icon of Databank Imperial Post 8L-055 Databank 1/2 173 - Abandoned Prospector Equipment. Order BD-1 to scan it.
Icon of Databank Imperial Post 8L-055 Databank 2/2 174 - Docking Clamp Overrides. Shoot an electric device with BD-1 Electro Dart and this will trigger the zipline that you can use to reach the top level of the hangar.
Icon of Databank Loading Gantry Databank 1/3 163 - Sunken AAT. Order BD-1 to scan it.
Icon of Databank Loading Gantry Databank 2/3 161 - Storage Tanks. Order BD-1 to scan it.
Icon of Databank Loading Gantry Databank 3/3 157 - Brave New World.
Icon of Databank Lucrehulk Core Databank 1/3 158 - The Origins of Purpose. It's a Force Echo.
Icon of Databank Lucrehulk Core Databank 2/3 153 - A New Master. It's a Force Echo.
Icon of Databank Lucrehulk Core Databank 3/3 155 - Look On My Works. It's a Force Echo.
Icon of Databank Marl Cavern Databank 1/1 172 - Storage Tanks. Order BD-1 to scan the tank.
Icon of Databank Mountain Ascent Databank 1/4 177 - Braving the Heights. It's a Force Echo.
Icon of Databank Mountain Ascent Databank 2/4 169 - Shiverpede Nest. Order BD-1 to scan the nest.
Icon of Databank Mountain Ascent Databank 3/4 176 - Crashed TIE Fighter. It's a Force Echo.
Icon of Databank Mountain Ascent Databank 4/4 170 - Mountainside Hut. Order BD-1 to scan the building.
Icon of Databank Nekko Pools Databank 1/1 134 - Nekko Scratches. Order BD-1 to scan it.
Icon of Databank Observation Deck Databank 1/1 111 - Grand Oculus. Order BD-1 to scan it.
Icon of Databank Observatory Understructure Databank 1/2 109 - Erratic Dust. Order BD-1 to scan it.
Icon of Databank Observatory Understructure Databank 2/2 107 - Forfeit your Lives. It's a Force Echo.
Icon of Databank Phon'Qi Caverns Databank 1/14 183 - Makeshift Grave. It's a Force Echo.
Icon of Databank Phon'Qi Caverns Databank 10/14 188 - Scientific Frisson. It's a Force Echo.
Icon of Databank Phon'Qi Caverns Databank 11/14 197 - Dead Jedi. Order BD-1 to scan it.
Icon of Databank Phon'Qi Caverns Databank 12/14 189 - A Fallen Knight. It's a Force Echo.
Icon of Databank Phon'Qi Caverns Databank 13/14 190 - Rayvis' Search. It's a Force Echo.
Icon of Databank Phon'Qi Caverns Databank 14/14 198 - Republic Control Room. Order BD-1 to scan it.
Icon of Databank Phon'Qi Caverns Databank 2/14 184 - Abandoned Corpse. It's a Force Echo.
Icon of Databank Phon'Qi Caverns Databank 3/14 193 - Cavern Fungus. Order BD-1 to scan it.
Icon of Databank Phon'Qi Caverns Databank 4/14 194 - Cave Turbolift Network. Order BD-1 to scan it.
Icon of Databank Phon'Qi Caverns Databank 5/14 187 - A Gen'Dai Plots. It's a Force Echo.
Icon of Databank Phon'Qi Caverns Databank 6/14 195 - Raider Depot. Order BD-1 to scan it.
Icon of Databank Phon'Qi Caverns Databank 7/14 186 - A Cave Too Far. It's a Force Echo.
Icon of Databank Phon'Qi Caverns Databank 8/14 196 - Rancor Prey. Order BD-1 to scan it.
Icon of Databank Phon'Qi Caverns Databank 9/14 185 - As Above, So Below. It's a Force Echo.
Icon of Databank Pyloon's Saloon Databank 1/2 112 - Hallikset. Order BD-1 to scan the object hanging on the wall.
Icon of Databank Pyloon's Saloon Databank 2/2 113 - Moran's Possessions. Order BD-1 to scan the boxes standing in the room.
Icon of Databank Rambler's Reach Outpost Databank x/6 274 - Relter Egg. Order BD-1 to scan the eggs.
Icon of Databank Rambler's Reach Outpost Databank x/6 241 - The First Move. It's a Force Echo.
Icon of Databank Rambler's Reach Outpost Databank x/6 260 - Death in the Family. Persuade Soont Madas. Then he will open the entrance to the basement.
Icon of Databank Rambler's Reach Outpost Databank x/6 288 - Forever Curious. Order BD-1 to scan the datapad. Requires: Lift and Slam, Merrin's Charm.
Icon of Databank Rambler's Reach Outpost Databank x/6 290 - Obsession. Order BD-1 to scan the datapad. Requires: Lift and Slam, Merrin's Charm.
Icon of Databank Rambler's Reach Outpost Databank x/6 284 - Turgle's Shiny Shell. Order BD-1 to scan it.
Icon of Databank Rehabilitation Wing Databank 1/1 147 - Beyond the Abyss. It's a Force Echo.
Icon of Databank Riverbed Watch Databank 1/4 249 - Doma, Unbowed. It's a Force Echo.
Icon of Databank Riverbed Watch Databank 2/4 295 - The Warlord's Standard. Order BD-1 to scan it.
Icon of Databank Riverbed Watch Databank 3/4 265 - A Brokered Alliance. It's a Force Echo.
Icon of Databank Riverbed Watch Databank 4/4 238 - Battle Droid Blues. It's a Force Echo.
Icon of Databank Smuggler's Tunnels Databank 1/5 213 - No Way Out. Order BD-1 to scan the collapsed passage.
Icon of Databank Smuggler's Tunnels Databank 2/5 282 - List of Grievances. Order BD-1 to scan the datapad lying on the table.
Icon of Databank Smuggler's Tunnels Databank 3/5 281 - Jailbreak Inventory. Order BD-1 to scan the datapad.
Icon of Databank Smuggler's Tunnels Databank 4/5 251 - Death in the Dark. It's a Force Echo.
Icon of Databank Smuggler's Tunnels Databank 5/5 283 - One Last Victory. Order BD-1 to scan the datapad.
Icon of Databank Sodden Grotto Databank 1/4 245 - Dead Researcher. It's a Force Echo.
Icon of Databank Sodden Grotto Databank 2/4 277 - Dead Gorgers. Order BD-1 to scan it.
Icon of Databank Sodden Grotto Databank 3/4 278 - Massive Ribcage. Order BD-1 to scan it.
Icon of Databank Sodden Grotto Databank 4/4 246 - Prospector Remains. It's a Force Echo.
Icon of Databank Southern Reach Databank 1/3 267 - Unusual Silo. Order BD-1 to scan it.
Icon of Databank Southern Reach Databank 2/3 254 - Amphibian Blues. It's a Force Echo.
Icon of Databank Southern Reach Databank 3/3 239 - Besotted. It's a Force Echo.
Icon of Databank Summit Ridge Databank 1/2 180 - Journey's End. It's a Force Echo.
Icon of Databank Summit Ridge Databank 2/2 108 - High-Altitude Research. Order BD-1 to scan it.
Icon of Databank Untamed Downs Databank 1/14 242 - Breaking, Not Entering. It's a Force Echo.
Icon of Databank Untamed Downs Databank 2/14 252 - Turgle Makes a Deal. It's a Force Echo.
Icon of Databank Untamed Downs Databank 3/14 269 - Bilemaw Burrow. It's in a cave with a bilemaw inside. Order BD-1 to scan it.
Icon of Databank Untamed Downs Databank 4/14 256 - A Small Mercy. It's a Force Echo.
Icon of Databank Untamed Downs Databank 5/14 258 - Technological Betrayal. It's a Force Echo.
Icon of Databank Untamed Downs Databank 6/14 261 - Shelter of Last Resort. It's a Force Echo.
Icon of Databank Untamed Downs Databank 7/14 272 - Mogu Den. Order BD-1 to scan it.
Icon of Databank Untamed Downs Databank 8/14 247 - The Ties That Bind. It's a Force Echo.
Icon of Databank Untamed Downs Databank 9/14 279 - An Ecological Study. Order BD-1 to scan the datapad.
Icon of Databank Untamed Downs Databank 10/14 270 - Warning Sign. Order BD-1 to scan it.
Icon of Databank Untamed Downs Databank 11/14 244 - The Feeding Grounds. It's a Force Echo.
Icon of Databank Untamed Downs Databank 12/14 275 - The Deep Caverns. Order BD-1 to scan it.
Icon of Databank Untamed Downs Databank 13/14 293 - The Truth. Order BD-1 to scan the datapad.
Icon of Databank Untamed Downs Databank 14/14 287 - Gift of Fire. Order BD-1 to scan the datapad.
Icon of Databank Viscid Bog Databank 1/5 232 - Risky Business. It's a Force Echo.
Icon of Databank Viscid Bog Databank 2/5 236 - Crashed Vulture Droid. Order BD-1 to scan it.
Icon of Databank Viscid Bog Databank 3/5 235 - Hastily Abandoned Site. Order BD-1 to scan it.
Icon of Databank Viscid Bog Databank 4/5 233 - Abominable Bogling. It's a Force Echo.
Icon of Databank Viscid Bog Databank 5/5 234 - Sights Set. It's a Force Echo. Requires: Upgraded Ascension Cable.
Icon of Databank Water Treatment Works Databank 1/2 266 - Leaking Water Storage. Order BD-1 to scan it.
Icon of Databank Water Treatment Works Databank 2/2 250 - Lawful Good. It's a Force Echo.
Icon of Databank Yurt Barracks Databank 1/3 162 - Bedlam Raider Yurt. Order BD-1 to scan it.
Icon of Databank Yurt Barracks Databank 2/3 154 - One Man's Junk. It's a Force Echo.
Icon of Databank Yurt Barracks Databank 3/3 156 - Location Is Everything. It's a Force Echo.
Icon of Databank Derelict Dam Databank (Bonus) 119 - The Dredger Run. It's a Force Echo. This databank does not count towards the collectible progress of this zone. You will find it here once you make progress in the main storyline of the game.

Treasures

Icon of Treasure Alignment Control Tower Treasure 1/1
Icon of Treasure Basalt Rift Treasure 1/5 Priorite Shard. Destroy one of the stone pillars.
Icon of Treasure Basalt Rift Treasure 2/5 Priorite Shard.
Icon of Treasure Basalt Rift Treasure 3/5 Datadisc.
Icon of Treasure Basalt Rift Treasure 4/5 Priorite Shard. It's a scavenger droid.
Icon of Treasure Basalt Rift Treasure 5/5 Datadisc.
Icon of Treasure Boiling Bluff Treasure 1/2 Priorite Shard.
Icon of Treasure Boiling Bluff Treasure 2/2 Priorite Shard.
Icon of Treasure Bygone Settlement Treasure 1/5 Priorite Shard.
Icon of Treasure Bygone Settlement Treasure 2/5 Priorite Shard.
Icon of Treasure Bygone Settlement Treasure 3/5 Priorite Shard.
Icon of Treasure Bygone Settlement Treasure 4/5 Priorite Shard.
Icon of Treasure Bygone Settlement Treasure 5/5 Priorite Shard.
Icon of Treasure Chamber of Clarity Treasure 1/1 Datadisc.
Icon of Treasure Chamber of Connection Treasure 1/1 Datadisc.
Icon of Treasure Chamber of Detachment Treasure 1/1 Datadisc.
Icon of Treasure Chamber of Duality Treasure 1/1 Datadisc.
Icon of Treasure Chamber of Fortitude Treasure 1/1 Datadisc. It's inside a vase so break it.
Icon of Treasure Chamber of Reason Treasure 1/1 Datadisc.
Icon of Treasure Collapsed Passage Treasure 1/1 Datadisc.
Icon of Treasure Derelict Dam Treasure 1/10 Priorite Shard.
Icon of Treasure Derelict Dam Treasure 2/10 Priorite Shard.
Icon of Treasure Derelict Dam Treasure 3/10 Priorite Shard. To get here you must use a rolling mine and blow up the dam.
Icon of Treasure Derelict Dam Treasure 4/10 Priorite Shard. You can get here after blowing up the dam.
Icon of Treasure Derelict Dam Treasure 5/10 Priorite Shard.
Icon of Treasure Derelict Dam Treasure 6/10 Priorite Shard.
Icon of Treasure Derelict Dam Treasure 7/10 Priorite Shard.
Icon of Treasure Derelict Dam Treasure 8/10 Priorite Shard. You can get here by jumping up one of the walls.
Icon of Treasure Derelict Dam Treasure 9/10 Priorite Shard. Requires: Upgraded Ascension Cable (Grappling Hook).
Icon of Treasure Derelict Dam Treasure 10/10 Priorite Shard. It's a scavenger droid, kill it and loot the shard.
Icon of Treasure Devastated Settlement Treasure 1/9 Datadisc.
Icon of Treasure Devastated Settlement Treasure 2/9 Datadisc.
Icon of Treasure Devastated Settlement Treasure 3/9 Datadisc. Requires: Koboh Grinder.
Icon of Treasure Devastated Settlement Treasure 4/9 Datadisc. Requires: Koboh Grinder.
Icon of Treasure Devastated Settlement Treasure 5/9 Datadisc.
Icon of Treasure Devastated Settlement Treasure 6/9 Datadisc. It's a scavenger droid.
Icon of Treasure Devastated Settlement Treasure 7/9 Datadisc. Requires: Koboh Grinder.
Icon of Treasure Devastated Settlement Treasure 8/9 Datadisc. Requires: Koboh Grinder.
Icon of Treasure Devastated Settlement Treasure 9/9 Datadisc.
Icon of Treasure Diagnostics Corridor Treasure 1/1 Datadisc.
Icon of Treasure Flooded Bunker Treasure 1/1 Priorite Shard.
Icon of Treasure Fogged Expanse Treasure 1/7 Priorite Shard.
Icon of Treasure Fogged Expanse Treasure 2/7 Priorite Shard. Requires: Lift and Slam.
Icon of Treasure Fogged Expanse Treasure 3/7 Priorite Shard.
Icon of Treasure Fogged Expanse Treasure 4/7 Priorite Shard. Requires: Upgraded Ascension Cable.
Icon of Treasure Fogged Expanse Treasure 5/7 Priorite Shard. Requires: Upgraded Ascension Cable.
Icon of Treasure Fogged Expanse Treasure 6/7 Priorite Shard. Requires: BD-1 Electro Dart & Lift and Slam. Check the description of the Fogged Expanse Essence 2/2 to find out how to get here.
Icon of Treasure Fogged Expanse Treasure 7/7 Priorite Shard. It's a scavenger droid. Kill it and it will drop the shard.
Icon of Treasure Foothill Falls Treasure 1/2 Priorite Shard.
Icon of Treasure Foothill Falls Treasure 2/2 Priorite Shard.
Icon of Treasure Forest Array Treasure 1/10 Datadisc.
Icon of Treasure Forest Array Treasure 2/10 Datadisc.
Icon of Treasure Forest Array Treasure 3/10 Datadisc.
Icon of Treasure Forest Array Treasure 4/10 Datadisc. If you hold the ball then the dust will move away from you and you will be able to safely walk here.
Icon of Treasure Forest Array Treasure 5/10 Datadisc.
Icon of Treasure Forest Array Treasure 6/10 Datadisc. If you hold the ball then the dust will move away from you and you will be able to safely walk here.
Icon of Treasure Forest Array Treasure 7/10 Datadisc. If you hold the ball then the dust will move away from you and you will be able to safely walk here.
Icon of Treasure Forest Array Treasure 8/10 Datadisc. If you hold the ball then the dust will move away from you and you will be able to safely walk here.
Icon of Treasure Forest Array Treasure 9/10 Datadisc. If you hold the ball then the dust will move away from you and you will be able to safely walk here.
Icon of Treasure Forest Array Treasure 10/10 Datadisc. Requires: Koboh Grinder.
Icon of Treasure Fort Kah'lin Treasure 1/1 Priorite Shard.
Icon of Treasure Forward Control Tower Treasure 1/1 Priorite Shard.
Icon of Treasure Generator Underbelly Treasure 1/2 Priorite Shard.
Icon of Treasure Generator Underbelly Treasure 2/2 Priorite Shard.
Icon of Treasure Gorge Crash Site Treasure 1/2 Priorite Shard. To get here run along the wall and jump up to reach the shelf where the treasure is located.
Icon of Treasure Gorge Crash Site Treasure 2/2 Priorite Shard.
Icon of Treasure Harvest Ridge Treasure 1/1 Priorite Shard.
Icon of Treasure Hunter's Quarry Treasure 1/2 Priorite Shard.
Icon of Treasure Hunter's Quarry Treasure 2/2 Datadisc. Requires: Upgraded Ascension Cable.
Icon of Treasure Igneous Fissure Treasure 1/1 Priorite Shard.
Icon of Treasure Loading Gantry Treasure 1/4 Priorite Shard.
Icon of Treasure Loading Gantry Treasure 2/4 Priorite Shard.
Icon of Treasure Loading Gantry Treasure 3/4 Priorite Shard.
Icon of Treasure Loading Gantry Treasure 4/4 Priorite Shard.
Icon of Treasure Lucrehulk Core Treasure 1/2 Priorite Shard. It's a scavenger droid.
Icon of Treasure Lucrehulk Core Treasure 2/2 Priorite Shard. Requires: Lift and Slam (To deactivate shooting turrets).
Icon of Treasure Marl Cavern Treasure 1/1 Priorite Shard.
Icon of Treasure Moldy Depths Treasure 1/1 Datadisc.
Icon of Treasure Mountain Ascent Treasure 1/4 Priorite Shard.
Icon of Treasure Mountain Ascent Treasure 2/4 Priorite Shard.
Icon of Treasure Mountain Ascent Treasure 3/4 Priorite Shard. Requires: Lift and Slam.
Icon of Treasure Mountain Ascent Treasure 4/4 Priorite Shard.
Icon of Treasure Nekko Pools Treasure 1/2 Priorite Shard.
Icon of Treasure Nekko Pools Treasure 2/2 Priorite Shard.
Icon of Treasure Observatory Understructure Treasure 1/2 Datadisc.
Icon of Treasure Observatory Understructure Treasure 2/2 Datadisc. It's a scavenger droid.
Icon of Treasure Phon'Qi Caverns Treasure x/7 Datadisc. Break a vase.
Icon of Treasure Phon'Qi Caverns Treasure x/7 Datadisc.
Icon of Treasure Pyloon's Saloon Treasure 1/1 Priorite Shard. Interact with the toilet.
Icon of Treasure Rambler's Reach Outpost Treasure x/7 Priorite Shard. Kill the scavenger droid and loot its remains.
Icon of Treasure Rambler's Reach Outpost Treasure x/7 Datadisc.
Icon of Treasure Rambler's Reach Outpost Treasure x/7 Priorite Shard. Requires: Nekko Mount.
Icon of Treasure Rambler's Reach Outpost Treasure x/7 Priorite Shard. Stable a nekko (violet / purple), rest at the meditation point and return to the stables.
Icon of Treasure Rambler's Reach Outpost Treasure x/7 Priorite Shard. Kill the scavenger droid and loot its remains.
Icon of Treasure Rambler's Reach Outpost Treasure x/7 Priorite Shard. Use Relter to get here.
Icon of Treasure Rift Passage Treasure 1/1 Datadisc. Requires: Dash.
Icon of Treasure Riverbed Watch Treasure 1/2 Priorite Shard.
Icon of Treasure Riverbed Watch Treasure 2/2 Priorite Shard. It's a scavenger droid.
Icon of Treasure Smuggler's Tunnels Treasure 1/4 Priorite Shard.
Icon of Treasure Smuggler's Tunnels Treasure 2/4 Priorite Shard.
Icon of Treasure Smuggler's Tunnels Treasure 3/4 Priorite Shard.
Icon of Treasure Smuggler's Tunnels Treasure 4/4 Priorite Shard. Break the vase.
Icon of Treasure Sodden Grotto Treasure 1/2 Priorite Shard.
Icon of Treasure Sodden Grotto Treasure 2/2 Priorite Shard. It's a scavenger droid.
Icon of Treasure Southern Reach Treasure 1/7 Priorite Shard.
Icon of Treasure Southern Reach Treasure 2/7 Datadisc. It's a scavenger droid.
Icon of Treasure Southern Reach Treasure 3/7 Priorite Shard.
Icon of Treasure Southern Reach Treasure 4/7 Priorite Shard.
Icon of Treasure Southern Reach Treasure 5/7 Priorite Shard. Force Pull the skull and then the shard will drop to the ground.
Icon of Treasure Southern Reach Treasure 6/7 Priorite Shard. Requires: Relter Tame.
Icon of Treasure Southern Reach Treasure 7/7 Priorite Shard. Requires: Lift and Slam.
Icon of Treasure Summit Ridge Treasure 1/2 Priorite Shard.
Icon of Treasure Summit Ridge Treasure 2/2 Datadisc.
Icon of Treasure Swindler's Wash Treasure 1/3 Priorite Shard.
Icon of Treasure Swindler's Wash Treasure 2/3 Priorite Shard.
Icon of Treasure Swindler's Wash Treasure 3/3 Priorite Shard.
Icon of Treasure Untamed Downs Treasure 1/6 Priorite Shard.
Icon of Treasure Untamed Downs Treasure 2/6 Priorite Shard.
Icon of Treasure Untamed Downs Treasure 3/6 Priorite Shard.
Icon of Treasure Untamed Downs Treasure 4/6 Priorite Shard. Requires: Merrin's Charm.
Icon of Treasure Untamed Downs Treasure 5/6 Requires: Lift and Slam.
Icon of Treasure Untamed Downs Treasure 6/6 Priorite Shard. Requires: Lift and Slam.
Icon of Treasure Viscid Bog Treasure 1/1 Datadisc. Requires: Lift and Slam.
Icon of Treasure Winding Ravine Treasure 1/2 Priorite Shard.
Icon of Treasure Winding Ravine Treasure 2/2 Priorite Shard. Bouncing off the walls of stone pillars, you need to get to the top of one of them.
Icon of Treasure Yurt Barracks Treasure 1/3 Priorite Shard.
Icon of Treasure Yurt Barracks Treasure 2/3 Priorite Shard.
Icon of Treasure Yurt Barracks Treasure 3/3 Priorite Shard.

Essences

Essences look like small blue, glowing totems of the energy at which you can kneel and when you do so they will boost your stats. Health Essences and Force Essences will increase your maximum health or force, Skill Point Essences will grant you 1 skill point, and Perk Essences will unlock a new perk that can't be found anywhere else.

Icon of Essence Bilemaw Den Essence 1/1 Confusion: Major Fauna (Use it to confuse large creatures. Confused enemies will attack Cal if no hostile are near).
Icon of Essence Bygone Settlement Essence 1/1 Skill Point Essence.
Icon of Essence Chamber of Clarity Essence 1/1 Perk - Fellowship - "BD-1 holds an extra stim for Cal. Stims will not refill to max until Cal rests."
Icon of Essence Chamber of Connection Essence 1/1 Perk - Recuperation - "The minimum level that the Force Meter automatically regenerates to is increased."
Icon of Essence Chamber of Detachment Essence 1/1 Perk - Patience - "Using Slow also refills some Life."
Icon of Essence Chamber of Duality Essence 1/1 Perk - Resilience - "Block Meter is increased." You will be able to pick it up after Zee is set free.
Icon of Essence Chamber of Fortitude Essence 1/1 Perk - Persistence - "Each enemy killed during Slow gives a small amount of Life."
Icon of Essence Chamber of Reason Essence 1/1 Perk - Dexterity - "Lightsaber throws deal more damage."
Icon of Essence Derelict Dam Essence 1/5 Health Essence.
Icon of Essence Derelict Dam Essence 2/5 Skill Point Essence.
Icon of Essence Derelict Dam Essence 3/5 Force Essence.
Icon of Essence Derelict Dam Essence 4/5 Perk Slot Essence. To get here you must first blow up the Cracked Wall. Then use the "Koboh Grinder" ability to burn the vines preventing you from climbing.
Icon of Essence Derelict Dam Essence 5/5 Skill Point. Requires: Upgraded Ascension Cable (Grappling Hook).
Icon of Essence Devastated Settlement Essence 1/5 Force Essence.
Icon of Essence Devastated Settlement Essence 2/5 Perk - Precision - "Parry Timing is shorter but Cal deals more stamina damage to enemies when he parries."
Icon of Essence Devastated Settlement Essence 3/5 Perk - Marksmanship - "When in blaster stance, Cal's blaster shots do more damage."
Icon of Essence Devastated Settlement Essence 4/5 Health Essence. Requires: Koboh Grinder. In order to open the door to this room, you need to bring the orb you find on the level above here. To be able to take this orb you must use the Koboh Grinder ability.
Icon of Essence Devastated Settlement Essence 5/5 Perk - Ambidexterity - "Shooting targets temporarily increases lightsaber damage."
Icon of Essence Diagnostics Corridor Essence 1/2 Force Essence.
Icon of Essence Diagnostics Corridor Essence 2/2 Perk - Perplexity - "Increases damage dealt by characters affected by Confusion." You get here after the fight with Dagan Gera.
Icon of Essence Flooded Bunker Essence 1/1 Health Essence.
Icon of Essence Fogged Expanse Essence 1/2 Perk - Fortitude - "Increases lightsaber damage, but incoming damage is also increased." It's in the corner of the arena where you fight Vile Bilemaw.
Icon of Essence Fogged Expanse Essence 2/2 Skill Point Essence. Requires: BD-1 Electro Dart. Get to the rock shelf where the Fogged Expanse Databank 3/3 is located and at the right moment use dart to shoot the electric device next to the essence. This will cause the door to open.
Icon of Essence Forest Array Essence 1/2 Skill Point Essence. This essence is located below the main footbridge.
Icon of Essence Forest Array Essence 2/2 Perk - Fortification - "Life regenerates up to a minimum amount." To get here start near where the Forest Array Chest 4/6 is. Jump over two horizontal poles, then use the suspended rope.
Icon of Essence Fort Kah'lin Essence 1/1 Skill Point Essence.
Icon of Essence Forward Control Tower Essence 1/1 Health Essence.
Icon of Essence Generator Underbelly Essence 1/1 Force Essence.
Icon of Essence Gorge Crash Site Essence 1/1 Skill Point Essence. Requires the "Force Lift" ability. Use the "Force Lift" ability to lift a platform half-sunk in tar. When you do this the essence will show up on it.
Icon of Essence Harvest Ridge Essence 1/1 Perk Slot Essence.
Icon of Essence Hunter's Quarry Essence 1/2 Force Essence. You can smash this barier using a rolling mine that you can find inside the nearby building. You can get inside the building through a hole in the roof.
Icon of Essence Hunter's Quarry Essence 2/2 Skill Point Essence.
Icon of Essence Lucrehulk Core Essence 1/2 Skill Point Essence. Requires: Lift and Slam.
Icon of Essence Lucrehulk Core Essence 2/2 Health Essence. You can easily get here by taking the elevator down from the Forward Control Tower.
Icon of Essence Marl Cavern Essence 1/1 Health Essence.
Icon of Essence Observation Deck Essence 1/1 Health Essence.
Icon of Essence Phon'Qi Caverns Essence 1/3 Force Essence. You can get here through an Underwater Tunnel.
Icon of Essence Phon'Qi Caverns Essence 2/3 Skill Point Essence.
Icon of Essence Phon'Qi Caverns Essence 3/3 Skill Point Essence.
Icon of Essence Rambler's Reach Outpost Essence x/2 Skill Point Essence.
Icon of Essence Rambler's Reach Outpost Essence x/2 Skill Point Essence. Requires: BD-1 Electro Dart.
Icon of Essence Rehabilitation Wing Essence 1/1 Health Essence.
Icon of Essence Riverbed Watch Essence 1/1 Health Essence. Get it to complete the "Investigate the Raider Watchtower" rumor.
Icon of Essence Smuggler's Tunnels Essence 1/2 Skill Point Essence.
Icon of Essence Smuggler's Tunnels Essence 2/2 Perk Slot Essence.
Icon of Essence Sodden Grotto Essence 1/1 Perk - Shatter - "Attacks are more effective at breaking enemies' guard."
Icon of Essence Southern Reach Essence 1/1 Skill Point Essence.
Icon of Essence Summit Ridge Essence 1/1 Skill Point Essence.
Icon of Essence Swindler's Wash Essence 1/1 Health Essence.
Icon of Essence Untamed Downs Essence 1/2 Skill Point Essence.
Icon of Essence Untamed Downs Essence 2/2 Health Essence.
Icon of Essence Viscid Bog Essence 1/1 Health essence. Requires: Upgraded Ascension Cable. Start with Relter, fly down where you jump over the balloons, then ride the zipline and use one more balloon.
Icon of Essence Winding Ravine Essence 1/1 Skill Point Essence. To get here you need to set one crate at the bottom and slide another crate over it.
Icon of Essence Yurt Barracks Essence 1/3 Health Essence.
Icon of Essence Yurt Barracks Essence 2/3 Skill Point Essence.
Icon of Essence Yurt Barracks Essence 3/3 Skill Point Essence.

Force Tears

Force Tears are special challenges that you will face after interacting with a glowing, purple object. For each, you must either complete an enemy encounter or a platform challenge while the timer ticks. Once you complete them all, you will unlock the "Blood, Sweat, and Tears" achievement / trophy.

Icon of Force Tear Derelict Dam Force Tear 1/1 Fractured Agility. This is a platform challenge, your task is to get to the other side of the level.
Icon of Force Tear Devastated Settlement Force Tear 1/1 Fractured Punishment. Kill all enemies.
Icon of Force Tear Gorge Crash Site Force Tear 1/1 Fractured Burden. Get on the elevator to make the platform start moving up and quickly jump off. Use the "Force Slam" ability to open the hatch to the small room below the elevator in which the Force Tear is hidden. You have to kill all enemies.
Icon of Force Tear Hunter's Quarry Force Tear 1/1 Fractured Delusion. Deafeat all enemies.
Icon of Force Tear Marl Cavern Force Tear 1/1 Fractured Power. Requires: Upgraded Ascension Cable. You have to defeat all enemies using the Crossguard Stance.
Icon of Force Tear Rambler's Reach Outpost Force Tear 1/2 Fractued Duality. Defeat all enemies using the Double-Bladed Stance.
Icon of Force Tear Rambler's Reach Outpost Force Tear 2/2 Fractured History - Defeat the horrors of Bogano. First find the Frog and interact with it. Then you will be able to interact with the frog in the store and thus activate this Force Tear.
Icon of Force Tear Smuggler's Tunnels Force Tear 1/1 Fractured Momentum. This is a platform challenge, your task is to get to the other side of the level.
Icon of Force Tear Swindler's Wash Force Tear 1/1 Fractured Resolve. It's located in a small cave hidden behind a waterfall. This is a platform challenge, your task is to get to the other side of the level.

Chamber Entrances

Locations of the entrances to all seven meditation chambers located on Koboh. The first of the chambers you will visit will be the Chamber of Duality, which you will visit while doing one of the main story missions during your first visit to Koboh.

Icon of Chamber Entrance Chamber of Clarity Entrance
Icon of Chamber Entrance Chamber of Connection Entrance
Icon of Chamber Entrance Chamber of Detachment Entrance
Icon of Chamber Entrance Chamber of Duality You will reach the Chamber of Duality during one of the main missions from the other side and you will leave it this way. This is also the way you can return there if you need to.
Icon of Chamber Entrance Chamber of Fortitude Entrance
Icon of Chamber Entrance Chamber of Reason Entrance
Icon of Chamber Entrance Devastated Settlement Chamber Entrance The "standard" entrance (through the cube) is destroyed and this can be called an "alternative" entrance.

Fish

Icon of Fish Barbed Hookfish Talk to Skoova and after a while you will recieve a fish.
Icon of Fish Big-mouth Faa
Icon of Fish Blinding Rayfish Talk to Skoova and after a while you will recieve a fish.
Icon of Fish Blue-finned Crayfish Talk to Skoova and after a while you will recieve a fish.
Icon of Fish Fingerlip Garpon Talk to Skoova and after a while you will recieve a fish.
Icon of Fish Frilled Newt Talk to Skoova and after a while you will recieve a fish.
Icon of Fish Glottsamcrab Talk to Skoova and after a while you will recieve a crab.
Icon of Fish Mee Fish Talk to Skoova and after a while you will recieve a fish.
Icon of Fish See Fish Talk to Skoova and after a while you will recieve a fish.
Icon of Fish Viscid Lurker Talk to Skoova and after a while you will recieve a fish.

Bounties

Most of the Bounties only spawn after the main story of the game is completed. Once you find and kill all targets you will unlock the "Caij Match" achievement / trophy.

Icon of Bounty Jo the Cannibal
Icon of Bounty Kip Ostar
Icon of Bounty Korej Lim This is the first of the bounty hunters you will meet. You can't miss him. After defeating him, Caij Bounties will be unlocked.
Icon of Bounty Meyen Corr
Icon of Bounty Raz
Icon of Bounty Selfin Jook
Icon of Bounty Vaslyn Martz

Shops

Icon of Shop Caij's Bounty Board
Icon of Shop Doma's Outpost Commodities The store will be unlocked after visiting the Chamber of Duality. You can spend Priorite Shards here.
Icon of Shop Zee's Datadisc Decryption

Significant Opponents

Significant, named opponents who will stand in your way. The list includes both opponents who are part of the game's main storyline and cannot be missed, as well as so-called "Legendary Adversaries" who are optional, but whom you must defeat to unlock the "I'm a Living Legend" achievement / trophy (Defeat all legendary adversaries).

Icon of Significant Opponent "Prince" Patren Boss.
Icon of Significant Opponent Anoth Estra Boss.
Icon of Significant Opponent Beetu Deetu Legendary Enemy. It will emerge here only later in the game. You should notice a spacecraft dropping the capsule and the droid leaving it.
Icon of Significant Opponent Cleland Cudds
Icon of Significant Opponent Dagan Gera
Icon of Significant Opponent Dagan Gera Related to the game's main storyline. Cannot be missed.
Icon of Significant Opponent Dagan Gera The scene of the second confrontation with Dagan Gera.
Icon of Significant Opponent E3-VE3 Legendary Enemy.
Icon of Significant Opponent Gorocco Matriarch Legendary Enemy.
Icon of Significant Opponent Hytho Pixx Boss.
Icon of Significant Opponent Mads Gresh Boss.
Icon of Significant Opponent Rancor Legendary Enemy.
Icon of Significant Opponent Rick the Door Technician Related to the game's main storyline. Cannot be missed.
Icon of Significant Opponent San Dersen Boss.
Icon of Significant Opponent Sebb Eshan Boss.
Icon of Significant Opponent Spawn of Oggdo Legendary Enemy.
Icon of Significant Opponent Tague Louesh Related to the game's main storyline. Cannot be missed.
Icon of Significant Opponent The Massiff Legendary Enemy.
Icon of Significant Opponent The Mire Terror Legendary Enemy.
Icon of Significant Opponent Urgost, Fist of Rayvis Legendary Enemy.
Icon of Significant Opponent Urjef Mekor Boss.
Icon of Significant Opponent Vashtan Wolfe Boss. He will attack you when you open the Derelict Dam Chest 7/8.
Icon of Significant Opponent Vile Bilemaw Legendary Enemy. To get here you need to jump down at the place where the Fogged Expanse Chest 2/3 is located and slide down the slippery ramp.
Icon of Significant Opponent Zeik Related to the game's main storyline. Cannot be missed.

Rumors

Icon of Rumor Check on the Jawa Settlement
Icon of Rumor Explore the High Republic Chamber in the Forest Talk to Toa.
Icon of Rumor Explore the High Republic Chamber in the Valley You will receive it during one of your conversations with Toa.
Icon of Rumor Find Missing Prospectors Talk to Prospector.
Icon of Rumor Find the Gorge's Secret Talk to the Prospector.
Icon of Rumor Find The Musician & Their Droid Talk to Monk after you come back from the Forest Array.
Icon of Rumor Help Zygg in the Swamp
Icon of Rumor Investigate the Abandoned Shack Talk to the Prospector.
Icon of Rumor Investigate the Central Valley Facility Talk to Turgle.
Icon of Rumor Investigate the Raider Watchtower Talk to the Prospector here. Objective: Riverbed Watch Essence 1/1.
Icon of Rumor Locate the Odd Pair You will receive it during one of your conversations with Moran.
Icon of Rumor Recruit the Mysterious Fisherman Talk to the Prospector.

Mission Objectives

Icon of Other Ashe Javi & DD-EC You can recruit them as DJs for the Pyloon's Saloon. Objective of the "Find The Musician & Their Droid" rumor.
Icon of Other Bhima and Tulli When you recruit them they will set up a Holotactics Game table in the Pyloon's Saloon.
Icon of Other Gyro Module When you pick this up the ground will collapse and you will fall down. You will end up near the Collapsed Passage Meditation Point.
Icon of Other Jawa
Icon of Other Pit Droid Once you lift the nearby platform half-submerged in tar you will be able to recruit him.
Icon of Other Roller Mine Summoning Machine
Icon of Other T-1N8
Icon of Other Wini's Databank Requires: Lift and Slam. Objective of: Help Zygg in the Swamp.

Meditation Points

Interacting with a Meditation Point will save the game, and access several other game options such as: Stances, Rest, Perks, Training, Skills or Fast Travel. Resting at a Meditation Point will restore Cal's Health, Force and Stims, as well as respawn all enemies.

How to Fast Travel in Star Wars Jedi: Survivor?

This option will be unlocked soon after you reach the planet Koboh for the first time. You can Fast Travel between Meditation Points located on the planet you are currently on. Sit at the Meditation Point, and select the Fast Travel option on the lower-right side. You will see a list of all Meditation Points you have been to, located on the same planet you are on. Just select the one you want to go to.

Blocked Paths

Various passageways, such as force fields or locked doors or gates that require some specific ability or progress in the game's main storyline to pass through or unlock.

Shortcuts

When you get to this place for the first time, and this will mostly involve traversing some sort of platform section, you will be able to activate a shortcut, such as a rope that will allow you to move faster between different sections of the map.

Relters

Stand below the relter and jump to grab on and glide.