Welcome to guides4gamers.com

Svartalfheim - God of War Ragnarök Map

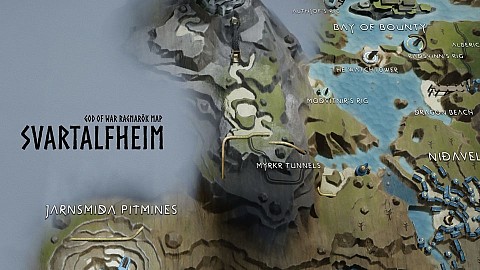
An interactive map of Svartalfheim, one of the realms we explore in God of War Ragnarök. This map shows all the locations you need to visit to complete this realm at 100%, as well as other locations with interesting items, etc.

Svartalfheim

Svartalfheim - Map Markers Summary

Mystic Gateways x7, Jewels of Yggdrasil x2, Yggdrasil's Dew x5, Odin's Ravens x13, Artifacts x11, Legendary Chests x13, Nornir Chests x10, Relic x1, Chests x62, Misc Loot x7, Draugr Holes x2, Lore x12, Treasure Maps x4, Buried Treasures x3, Key Items x4, Favors x6, Nine Realms in Bloom x1, Major Enemies x3, Yggdrasil Rifts x7, Hel Tear x1, Berserker Gravestones x3, Remnants of Asgard x3, Shops x4, Entrances x3, Passages x3, Locked Passage x1, Boast Docks x20

Legend / Points of interest

The following legend of Svartalfheim interactive game map defines the points of interest / markers displayed on the map. Each marker corresponds to a specific element to facilitate efficient navigation and interaction with the map.

Mystic Gateways

Mystic Gateways act as fast travel points in God of War Ragnarök. By interacting with such a waygate you will be able to travel to other waygates available at the current stage of the game.

Icon of Mystic Gateway Aurvangar Wetlands
Icon of Mystic Gateway Jarnsmida Pitmines This waygate cannot be unlocked during your first visit to this place because you do not have the right skill - sigil arrows. Using sigil arrows and Blades of Chaos you will be able to burn the vines blocking access to the gate. It will be possible when you return here later. To get here later you must have the Draupnir Spear, take the Ferry and cross The Applecore.
Icon of Mystic Gateway Nidavellir
Icon of Mystic Gateway Nidavellir Beach
Icon of Mystic Gateway The Applecore You will only be able to unlock this waygate when you return to the mine a little later when you already have the Draupnir Spear.
Icon of Mystic Gateway The Applecore Descent This mystic waygate will be unlocked when you complete the game's main storyline and then talk to Ratatoskr.
Icon of Mystic Gateway The Watchtower

Jewels of Yggdrasil

Finding all Jewels of Yggdrasil is required to fully repair the Amulet of Yggdrasil. Initially the amulet has only 2 of 9 slots unlocked, each jewel allows you to unlock an additional slot. In total, you can find 7 jewels.

Icon of Jewel of Yggdrasil Jewel of Yggdrasil (Svartalfheim #1) Drops from one of the ogres you have to fight here during the "Forging Destiny" main quest.
Icon of Jewel of Yggdrasil Jewel of Yggdrasil (Svartalfheim #2) You can find it inside the Svartalfheim Legendary Chest (Alberich Island).

Yggdrasil's Dew

Icon of Yggdrasil's Dew Yggdrasil's Dew of Cooldown Permanently increases COOLDOWN by 2.
Icon of Yggdrasil's Dew Yggdrasil's Dew of Defence Permanently increases DEFENCE by 2.
Icon of Yggdrasil's Dew Yggdrasil's Dew of Runic Power Permanently increases RUNIC by 2. To be able to get here you must first lower the gate blocking the access. To do this, you need to use a special seal that is located on the bank to the east of this place. This will be possible after visiting Vanaheim.
Icon of Yggdrasil's Dew Yggdrasil's Dew of Runic Power Permanently increases RUNIC by 2.
Icon of Yggdrasil's Dew Yggdrasil's Dew of Strength Permanently increases STRENGTH by 2.

Odin's Ravens

You must find all the Odin's Ravens to complete the "Eyes of Odin" favor. When you find one of Odin's Ravens, you need to destroy it with one of your weapons. Once you've destroyed enough of them (6/12/18/28/38/48), return to the Raven Tree in Niflheim to open the unlocked legendary chest and receive rewards for doing that.

Icon of Odin's Raven Svartalfheim Odin's Raven (Alberich Hollow) You will be able to get here only after you acquire the Draupnir Spear.
Icon of Odin's Raven Svartalfheim Odin's Raven (Alberich Island #1) You will be able to get here only after you acquire the Draupnir Spear.
Icon of Odin's Raven Svartalfheim Odin's Raven (Alberich Island #2) This raven can be seen through a small hole in the rocks. In order to get to the island you must own the Draupnir Spear.
Icon of Odin's Raven Svartalfheim Odin's Raven (Althjof's Rig) Throw the axe through a gap in the wooden wall.
Icon of Odin's Raven Svartalfheim Odin's Raven (Aurvangar Wetlands) This raven sits on top of the rock.
Icon of Odin's Raven Svartalfheim Odin's Raven (Jarnsmida Pitmines) This raven is flying around here. At the right moment, throw your axe towards it.
Icon of Odin's Raven Svartalfheim Odin's Raven (Lyngbakr Island) After cutting off the second chain you will be able to pick up a bomb that will allow you to destroy the golden crystals blocking the passage - red chest here. Next, you need to get through a narrow passage - yellow chest here. Look to the right.
Icon of Odin's Raven Svartalfheim Odin's Raven (Nidavellir) This raven sits on top of the roof of one of the lower buildings.
Icon of Odin's Raven Svartalfheim Odin's Raven (Radsvinn's Rig) This raven sits on a hook hanging from a crane.
Icon of Odin's Raven Svartalfheim Odin's Raven (The Applecore) You will find this raven near the door leading to the room where the passage to the chamber where Tyr is imprisoned begins.
Icon of Odin's Raven Svartalfheim Odin's Raven (The Forge #1) This raven is circling around. At the right moment, throw your axe towards it.
Icon of Odin's Raven Svartalfheim Odin's Raven (The Forge #2)
Icon of Odin's Raven Svartalfheim Odin's Raven (The Watchtower) This raven is on the move, flying in a circle, following the same route all the time. Position yourself and throw your axe at it when it is coming. If you miss, you can try again in a short while.

Artifacts

Icon of Artifact Kvasir's Poems 1/14 -The Sunrise of Nothingness You will pass by it trying to get to the second of the chains that open the gate.
Icon of Artifact Kvasir's Poems 2/14 - Large Society Ground Orb, The Performance It sits on crates standing on the dock. First, use the sonic arrows to destroy the green shields blocking the passage. If you don't have the sonic arrows yet then you will receive them soon from Sindri (main story).
Icon of Artifact Kvasir's Poems 3/14 - We Who Remain, Part the Second You will find the book next to the corpse, on the top level of the island.
Icon of Artifact Kvasir's Poems 4/14 - Tool and Bang The artifact lies on the ground near the Svartalfheim Legendary Chest (Jarnsmida Pitmines). In the description of this chest you will find information on how to get here.
Icon of Artifact Kvasir's Poems 11/14 - Sanguinity You will be able to reach this area as long as you have the Draupnir Spear.
Icon of Artifact Things Left Behind 1/6 - Hreidmar's Brassard The artifact lies on the ground next to the corpse. To get here you must freeze the geyser with your axe.
Icon of Artifact Things Left Behind 2/6 - Griep's Firebomb This artifact lies on the ground in a side alley.
Icon of Artifact Things Left Behind 3/6 - Bari's Grenade Destroy the wooden structure and crate and pick up the artifact that lies on the ground.
Icon of Artifact Things Left Behind 4/6 - Lofnheid's Whetstone This artifact lies on the ground, near the water at the bottom of the pitmines.
Icon of Artifact Things Left Behind 5/6 - Althjof's Statue This Artifact is located in the room behind a large wooden door. The door is located in the same room as the Yellow Chest.
Icon of Artifact Things Left Behind 6/6 - Durinn's Stone Statue This artifact is located on a higher level of the mine. You can get here in the later stage of your search for Tyr.

Legendary Chests

You can find 60+ Legendary Chests in God of War Ragnarök, 53 of which must be found to complete all realms at 100%. None of these 53 chests can be missed. They are large gold chests and always contain some sort of reward.

Icon of Legendary Chest Svartalfheim Legendary Chest (Alberich Hollow #1) Contains: Muspelpheim Seed Half (Key Item). You will be able to get here only after you acquire the Draupnir Spear. Use the bomb you find nearby to get rid of the ore blocking access to the chest.
Icon of Legendary Chest Svartalfheim Legendary Chest (Alberich Hollow #2) Contains: 1x Folkvangr Whetstone, 5000 Hacksilver. Getting this chest open is one of the objectives of "The Lost Treasure" favor.
Icon of Legendary Chest Svartalfheim Legendary Chest (Alberich Island) Contains: Jewel of Yggdrasil, 30x Whispering Slab, 45000 Hacksilver. It is also a chest the opening of which is an objective of "The Lost Treasure" favor. To get here you need the Draupnir Spear.
Icon of Legendary Chest Svartalfheim Legendary Chest (Althjof's Rig) Contains: Njörd's Tempest (Leviatan Axe - Light Runic Attack) . To reach this chest you first need to reach the room where the "Passion" scroll is located. Check its description to learn how to get there.
Icon of Legendary Chest Svartalfheim Legendary Chest (Aurvangar Wetlands) Contains: Deadly Obsidian Handles (Blades of Chaos Attachment). To get to this chest you must sail your boat to the small pond at the back, step out of the boat there and climb up the rocks.
Icon of Legendary Chest Svartalfheim Legendary Chest (Jarnsmida Pitmines) Contains: Pommels of the Undying Spark (Blades of Chaos Attachment). To get to this chest you must use the giant crane that is located here.
Icon of Legendary Chest Svartalfheim Legendary Chest (Lyngbakr Island) Contains: Rönd of Aggravation (Shield Attachment), 5x Whispering Slab. You will reach this chest when you cut off all three binding ropes of Lyngbakr, that is, during the favor "The Weight of Chains".
Icon of Legendary Chest Svartalfheim Legendary Chest (Modvitnir's Rig) Contains: Muspelpheim Seed Half (Key Item). You will pass this chest on your way to the Modvitnir's Rig platform.
Icon of Legendary Chest Svartalfheim Legendary Chest (Myrkr Tunnels) Contains: Fog of Fimbulwinter (Leviathan Axe - Heavy Runic Attack). You visit this place during the main mission "Forging Destiny".
Icon of Legendary Chest Svartalfheim Legendary Chest (Nidavellir) Contains: Luminous Recovery Handles (Blades of Chaos Attachment). To get here you need the Draupnir Spear, which you will acquire later in the game's main storyline.
Icon of Legendary Chest Svartalfheim Legendary Chest (The Applecore #2) Contains: Banahogg Knob (Leviathan Axe Attachment). This chest is hidden in a secret room. You can't get to it during your first visit to this place because you don't have the right skill. It will be possible when you return here later.
Icon of Legendary Chest Svartalfheim Legendary Chest (The Applecore) Contains: Fortified Frost Knob (Leviathan Axe Attachment). It's in the same room as the "Svartalfheim Draugr Hole (The Applecore)". You can enter this room through a large door located near the "Things Left Behind 6/6 - Durinn's Stone Statue" artifact.
Icon of Legendary Chest Svartalfheim Legendary Chest (The Forge) Contains: Atlas Eruption (Blades of Chaos - Heavy Runic Attack).

Nornir Chests

Icon of Nornir Chest Svartalfheim Nornir Chest (Alberich Island) Contains: Horn of Blood Mead. You have to strike three bells in a short period of time. One of the bells is located on the rocks to the right of the chest, but you should hit it last. Start with the bell located farthest away.
Icon of Nornir Chest Svartalfheim Nornir Chest (Aurvangar Wetlands #1) Contains: Idunn Apple. To open the chest you must destroy three statues. The first one is located on the right side of the chest. The second is on the island behind the chest and you can throw an axe at it.
Icon of Nornir Chest Svartalfheim Nornir Chest (Aurvangar Wetlands #2) Contains: Horn of Blood Mead. Find three spinners and turn them to match the symbols, by throwing the axe at the paddles.
Icon of Nornir Chest Svartalfheim Nornir Chest (Dragon Beach) Contains: Idunn Apple. To open this chest you must destroy three statues by throwing your axe at them.
Icon of Nornir Chest Svartalfheim Nornir Chest (Jarnsmida Pitmines) Contains: Horn of Blood Mead. To open this chest you must light three fires. The first one is located right next to the chest.
Icon of Nornir Chest Svartalfheim Nornir Chest (Myrkr Tunnels) You visit this place during the main mission "Forging Destiny". To unlock this chest you must ignite three braziers.
Icon of Nornir Chest Svartalfheim Nornir Chest (Radsvinn's Rig) Contains: Idunn Apple. Ignite the torches above the three runes to unlock this chest. The first rune is located to the left of the chest and you should use the Blades of Chaos.
Icon of Nornir Chest Svartalfheim Nornir Chest (The Applecore #1) In order to be able to climb to the place where this chest is, you must have the Draupnir Spear. This chest is located not far from the "Demise of Dagestr" treasure map. To unlock this chest you have to embed spears in each of the 3 runes then detonate them all at the same time.
Icon of Nornir Chest Svartalfheim Nornir Chest (The Applecore #2) This chest is located close to The Applecore mystic waygate. To unlock this chest you have to embed spears in each of the 3 runes then detonate them all at the same time.
Icon of Nornir Chest Svartalfheim Nornir Chest (The Forge) To unlock this chest you need the Draupnir Spear which you will acquire later in the game, in the mission "Forging Destiny". Embed spears in each of the 3 runes then detonate at once.

Relics

Icon of Relic Talisman of Meign You collect it while searching for Tyr during the main quest "The Quest for Tyr". Effect: "Grants a bonus to Melee damage for a short duration." Upgrades increase this effect and its duration.

Misc Loot

Icon of Misc Loot Althjof's Rig Contains: Nidavellir Ore (Unique Resource), 2x Slag Deposits, 500 Hacksilver. This is one of the three places you must visit to complete the "In Service of Asgard" favor.
Icon of Misc Loot Huldra Charge Draupnir Spear Light Runic Attack. Drops from one of the ogres you have to fight here.
Icon of Misc Loot Modvitnir's Rig Contains: Nidavellir Ore (Unique Resource), 2x Forged Iron, 500 Hacksilver. This is one of the three places you must visit to complete the "In Service of Asgard" favor.
Icon of Misc Loot Orm Throw an axe at it from behind. Drops: Shattered Rune +4 (Unique Resource).
Icon of Misc Loot Orm Get on the platform and throw an axe at it from behind. Drops: Shattered Rune +4 (Unique Resource).
Icon of Misc Loot Radsvinn's Rig Contains: Nidavellir Ore (Unique Resource), 2x Rawhide, 500 Hacksilver. This is one of the three places you must visit to complete the "In Service of Asgard" favor.

Draugr Holes

Icon of Draugr Hole Svartalfheim Draugr Hole (The Applecore) Drops: Chaos Spark (Weapon Upgrade), 15x Dust of Realms (Unique Resource), 2x Sovereign Coals (Unique Resource), 500 Hacksilver. You will find it in the room you enter through a large door located near the "Things Left Behind 6/6 - Durinn's Stone Statue" artifact.
Icon of Draugr Hole Svartalfheim Draugr Hole (The Watchtower) Drop: Dust of Realms (Unique Resource), Chaos Spark (Weapon Upgrade), Sovereign Coals +2 (Unique Resource), 250 Hacksilver, Cursed Empress Handless (Blades Attachment).

Lore

Icon of Lore Climbing the Ladder The scroll lies on the ground next to the crates.
Icon of Lore Cooperation After jumping over the waterway (the one you travelled by boat earlier), turn into the corridor on the right, destroy the boards and drop down. There you will find a stone board.
Icon of Lore Dear Overseer The scroll lies on the ground.
Icon of Lore Don't Breathe Glowing blue runes inscribed on a wooden wall.
Icon of Lore Passion The scroll is located at the highest level. You will be able to get here once you reach the main furnace of the Althjof's Rig. To make it possible you must move the hook you can use to jump as high as possible.
Icon of Lore Regarding The Removal Of Resources Stone board on the back of Lyngbakr.
Icon of Lore The Forge Glowing blue runes inscribed on a wall.
Icon of Lore The Pit-Mine Glowing blue runes inscribed on the wall.
Icon of Lore The Squasher Runes inscribed on the wall that are located on the lowest level.
Icon of Lore The Vault Use a sonic arrow to destroy the door blocking access to a small room with blue runes written on the wall.
Icon of Lore Unsafe Roads
Icon of Lore Warning

Treasure Maps

Treasure Maps provide clues about the location of a certain treasure. Finding them in advance is necessary to be able to pick up the treasure they point to. Treasure maps count as "Lore."

Icon of Treasure Map Demise of Dagestr In order to be able to climb to the level where this map is located you must have the Draupnir Spear.
Icon of Treasure Map Fruits of Industry You will be able to get here only after you acquire the Draupnir Spear.
Icon of Treasure Map Mining Glory To get here you will need the Draupnir Spear, which you will acquire later in the game's main storyline.
Icon of Treasure Map Washed Ashore You will be able to get here only after you acquire the Draupnir Spear.

Buried Treasures

The locations of buried treasures depicted on Treasure Maps.

Icon of Treasure Map Fruits of Industry (Treasure) Contains: Svartalfheim's Lifeblood (Amulet Enchantment), 1x Petrified Bone, 1x Luminous Alloy, 1x Asgardian Ingot, 40x Shattered Rune (Unique Resource).
Icon of Treasure Map Mining Glory (Treasure) Contains: Muspelheim's Blessing (Amulet Enchantment), 1x Petrified Bone, 1x Luminous Alloy, 1x Asgardian Ingot, 40x Shattered Rune (Unique Resource), 1500 Hacksilver.
Icon of Treasure Map Washed Ashore (Treasure) Contains: Jotunheim's Virtue (Amulet Enchantment), 1x Petrified Bone, 1x Luminous Alloy, 1x Asgardian Ingot, 40x Shattered Rune (Unique Resource).

Key Items

Icon of Key Item Hammer of the Revolution This is the item you need to find for the "Spirit of Rebellion" favor.
Icon of Key Item Muspelpheim Seed Half 1/2 One half of a Yggdrasil Seed needed to travel to Muspelheim's Crucible. You will find it in the legendary chest you will pass on your way to the Modvitnir's Rig platform.
Icon of Key Item Muspelpheim Seed Half 2/2 One half of a Yggdrasil Seed needed to travel to Muspelheim's Crucible. You will find it in the legendary chest located here. You will be able to get here only after you acquire the Draupnir Spear.
Icon of Key Item Prongfruit This is one of the ingredients you need to find to complete the favor "Across the Realms".

Favors

Icon of Favor Born From Fire
Icon of Favor In Service of Asgard This favour will begin when you talk to the man in the tavern.
Icon of Favor Spirit of Rebellion Reward: Mountain Splitter (Light Runic Attack)
Icon of Favor The Crucible This mission will start when you find one of the Muspelpheim Seed Halves. You will find one of them in the legendary chest you will pass on your way to the Modvitnir's Rig platform.
Icon of Favor The Lost Treasure You will be able to get here and start this favor only after you obtain the Draupnir Spear.
Icon of Favor The Weight of Chains This quest will start automatically when you reach the island which is located in the middle of the lake (Lynkbakr will at that time be submerged so the map will look slightly different then on my map).

Nine Realms in Bloom

Nine Realms in Bloom. Collecting all nine flowers is the objective of the "Nine Realms in Bloom" favor. This favor appears in your journal when you find the first of the flowers. The flowers are located in places you will reach in the later stages of the game and some of them you will be able to collect only after completing the main storyline of the game. Once you collect all nine flowers, you will unlock "The Florist" trophy.

Icon of Nine Realms in Bloom Sparkthorn (Svartalfheim) To get here you need the Draupnir Spear, which you will acquire later in the game's main storyline.

Major Enemies

Icon of Major Enemy Dreki Mini-boss. Drops: Flames of Anguish (Blades Light Runic Attack), Chaos Flame, Dragon Tooth (Unique Resource).
Icon of Major Enemy Miklimunnr In the same room where you found Tyr. You will have to fight him when you return here later. Drops: Hind of the Four Winds (Draupnir Spear Handle), 10x Bonded Leather, 496 Hacksilver.
Icon of Major Enemy Ormstunga Drops: Emblem of Elusion (Amulet Enchantment), Svefnthorn (Unique Resource).

Yggdrasil Rifts

Icon of Yggdrasil Rift Svartalfheim Yggdrasil Rift (Alberich Hollow) Contains: Lindwyrm, Gale Spark, 15x Dust of Realms (Unique Resource), 2x Lindwyrm Scales, 2000 Hacksilver.
Icon of Yggdrasil Rift Svartalfheim Yggdrasil Rift (Alberich Island) Contains: Lindwyrm, Gale Spark, 25x Dust of Realms (Unique Resource), 2x Lindwyrm Scales, 3000 Hacksilver. You will be able to get here only after you acquire the Draupnir Spear.
Icon of Yggdrasil Rift Svartalfheim Yggdrasil Rift (Dragon Beach) You will be able to get here only after you acquire the Draupnir Spear. Contains: 1x Petrified Bone, 1x Luminous Alloy, 1x Asgardian Ingot, 15x Dust of Realms (unique Resource), 1500 Hacksilver.
Icon of Yggdrasil Rift Svartalfheim Yggdrasil Rift (Myrkr Tunnels) You visit this place during the main mission "Forging Destiny". Contains: 5x Dust of Realms, 3x Stonewood, 4x Dwarven Steel, 2x Honed Metal, 500 Hacksilver.
Icon of Yggdrasil Rift Svartalfheim Yggdrasil Rift (The Applecore) Contains: Lindwyrm, Gale Spark, 40x Dust of Realms (Unique Resource), +3 Lindwyrm Scales, 4000 Hacksilver. This rift is located close to The Applecore mystic waygate.
Icon of Yggdrasil Rift Svartalfheim Yggdrasil Rift (The Forge #1) Contains: Lindwyrm, Hind of Attuned Elements (Draupnir Spear Handle), Gale Spark, 5x Dust of Realms, 2x Lindwyrm Scales, 1000 Hacksilver.
Icon of Yggdrasil Rift Svartalfheim Yggdrasil Rift (The Forge #2) Contains: 15x Dust of Realms, 6x Stonewood, 8x Dwarven Steel, 4x Honed Metal, 1000 Hacksilver.

Hel Tears

Closing all 6 Hel Tears is required to complete the favor "Hel to Pay". Hel Tears are the source of the Frozen Sparks. When you collect all 6 sparks then they will turn into the Frozen Flame, an item that will allow you to upgrade your axe.

Icon of Hel Tear Svartalfheim Hel Tear (Aurvangar Wetlands) Contains: Frozen Spark, 4x Essence of Hel (Unique Resource), 100x Dust of Realms (Unique Resource), 10000 Hacksilver.

Berserker Gravestones

You will be able to activate Berserker Gravestones when you acquire the special item - "Inert Hilt of Skofnung", which will happen during the main quest "The Word of Fate". After activating them, you will fight a battle against unique, powerful opponents.

Icon of Berserker Gravestone Svartalfheim Berserker Gravestone (Alberich Island) Beigadr the Feared. Drops: Asgard's Might (Amulet Enchantment), 2x Tempered Remnants, 25x Shattered Rune (Unique Resource), 25x Bonded Leather.
Icon of Berserker Gravestone Svartalfheim Berserker Gravestone (Jarnsmida Pitmines) Bodvar the Fierce & Starolfr the Troublesome. Drops: Hind of the Nine Realms (Draupnir Spear Handle), Gale Flame, 5x Tempered Remnants, 75x Shattered Rune (Unique Resource), 80x Bonded Leather.
Icon of Berserker Gravestone Svartalfheim Berserker Gravestone (Nidavellir) Hardrefill the Callous. Drops: Asgard's Fortitude (Amulet Enchantment), 25x Shattered Rune (Unique Resource), 2x Tempered Remnants, 25 Bonded Leather.

Remnants of Asgard

The Remnants of Asgard will become available when the main storyline of the game is completed. After the credits the favor "The Last Remnants of Asgard" should appear in your journal. Your task is to find the remnants scattered throughout the realms and destroy the Einherjar guards in the area.

Icon of Remnants of Asgard Svartalfheim Remnants of Asgard (Aurvangar Wetlands)
Icon of Remnants of Asgard Svartalfheim Remnants of Asgard (Dragon Beach)
Icon of Remnants of Asgard Svartalfheim Remnants of Asgard (Jarnsmida Pitmines)

100% Realm Completion List - Svartalfheim

List of all sub-regions of the map of Svartalfheim with all the collectibles needed to complete the map at 100%.