This collection includes every marker from the Legendary Chests category of points of interest in God of War Ragnarök, all placed on interactive maps created specifically for the game.
In God of War Ragnarök you can find 60+ Legendary Chests, 53 of which must be found to complete all realms at 100%. None of these 53 chests can be missed. They are large gold chests and always contain some sort of reward.
Note: Legendary chests from the Atreus story sections that are not needed for 100% completion can be missed but in that case you can buy the items contained in them from the blacksmith's store.
The index below enables quick navigation to the desired marker / point of interest.
It does not count towards the completion of this realm. Contains: Sonic Aftershock (Accessory). You can open this chest during the main mission "Old Friends", after the meeting with Freya.
Show the mapContains: Lion's Roar Sauroter (Draupnir Spear Handle). To access this chest you must have the Draupnir Spear and use it to destroy the ice rock.
Show the mapContains: Tartarus Rage (Blades of Chaos - Heavy Runic Attack). It's in the "Raider Hideout" cave.
Show the mapContains: Cyclone of Chaos (Blades of Chaos - Light Runic Attack). This chest is in the "Raiders Stronghold" area.
Show the mapContains: Ivaldi's Anvil (Leviathan Axe - Heavy Runic Attack).
Show the map
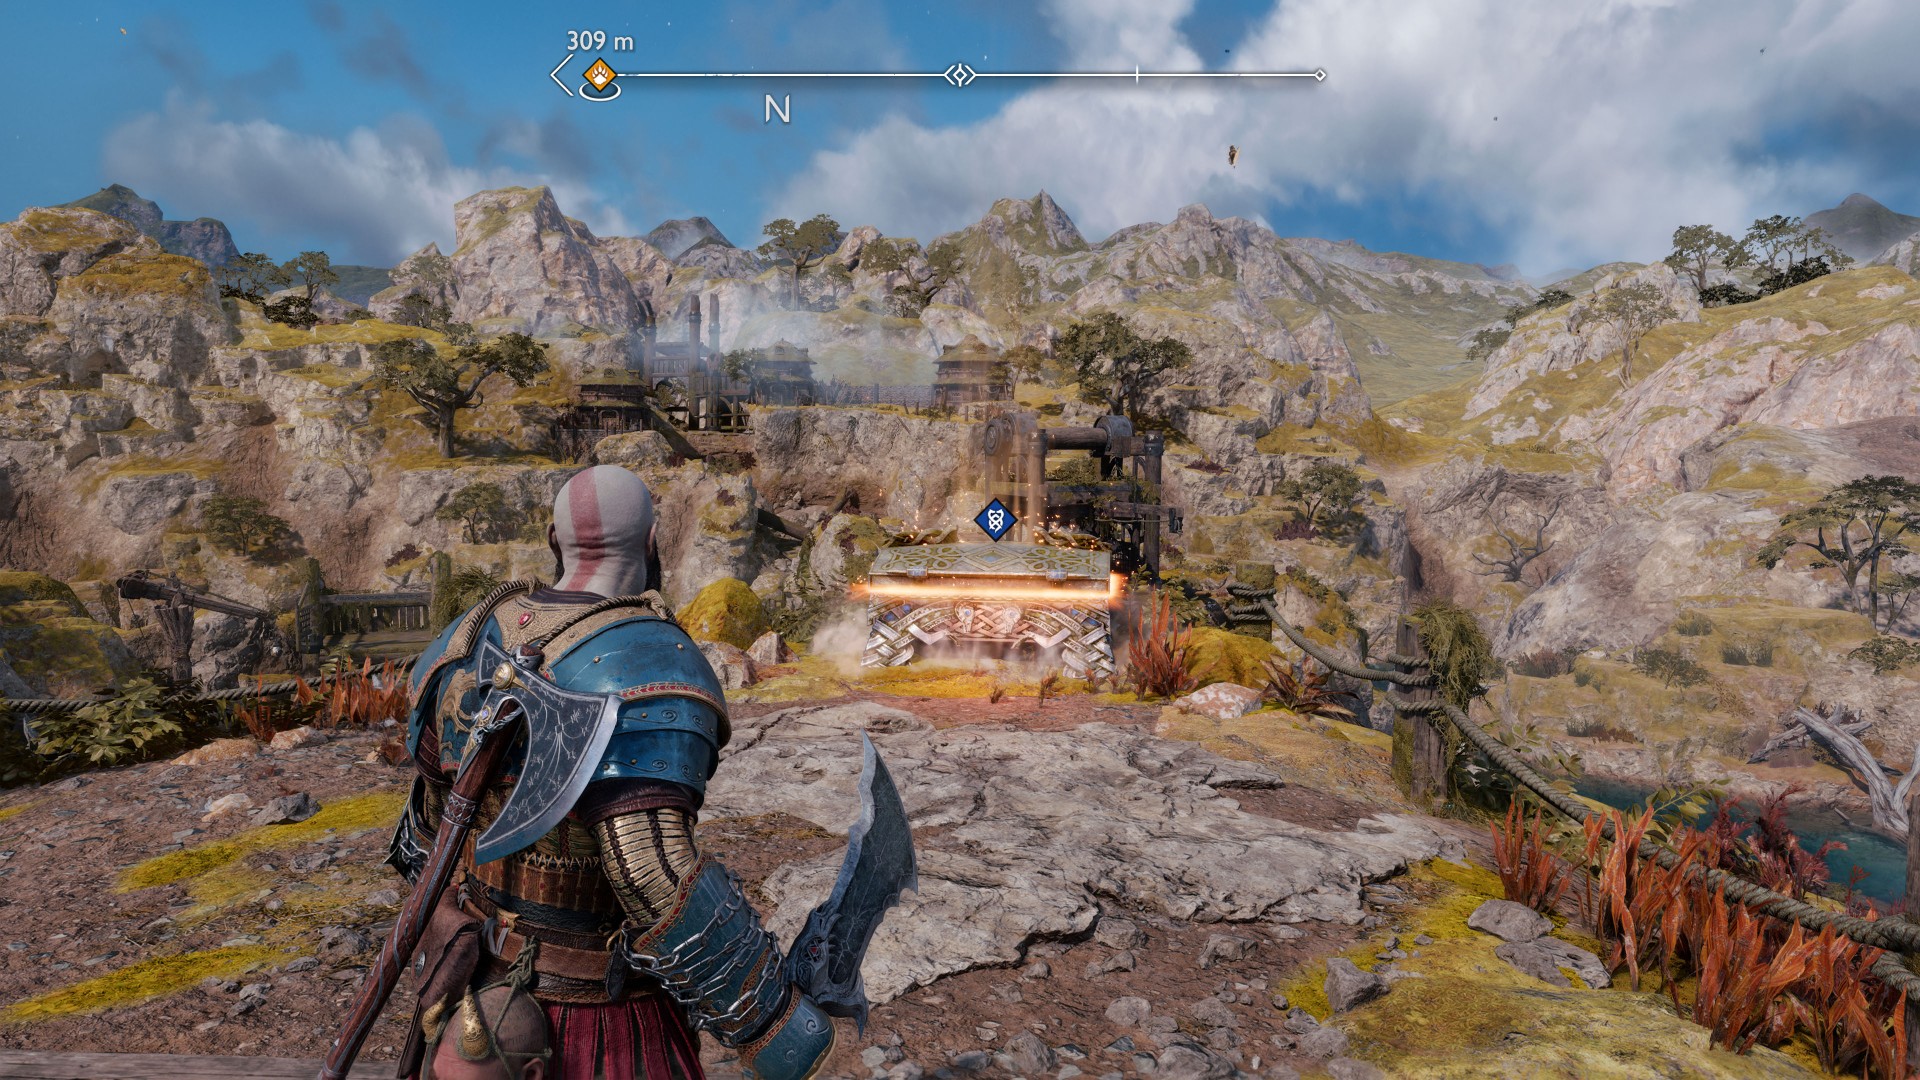
Contains: Sigil Punishment (Accessory). To get to this chest you must start by moving the large shield covering the entrance to the right. Then you will be able to climb up it to the right side.
Being at the top, throw your axe at the red jar. This will unlock the passage to the other side. You can try to move the column that has fallen over, but this will not yet have the desired effect.
Return to the bottom and move the shield to the left and then climb up after it to the left side.
Go to the other (right) side and move forward the column that has fallen. It will now reach the target position.
Return to the ground and try to move the shield to the right again. The protruding column will make it stop in a position that allows access to the gate.
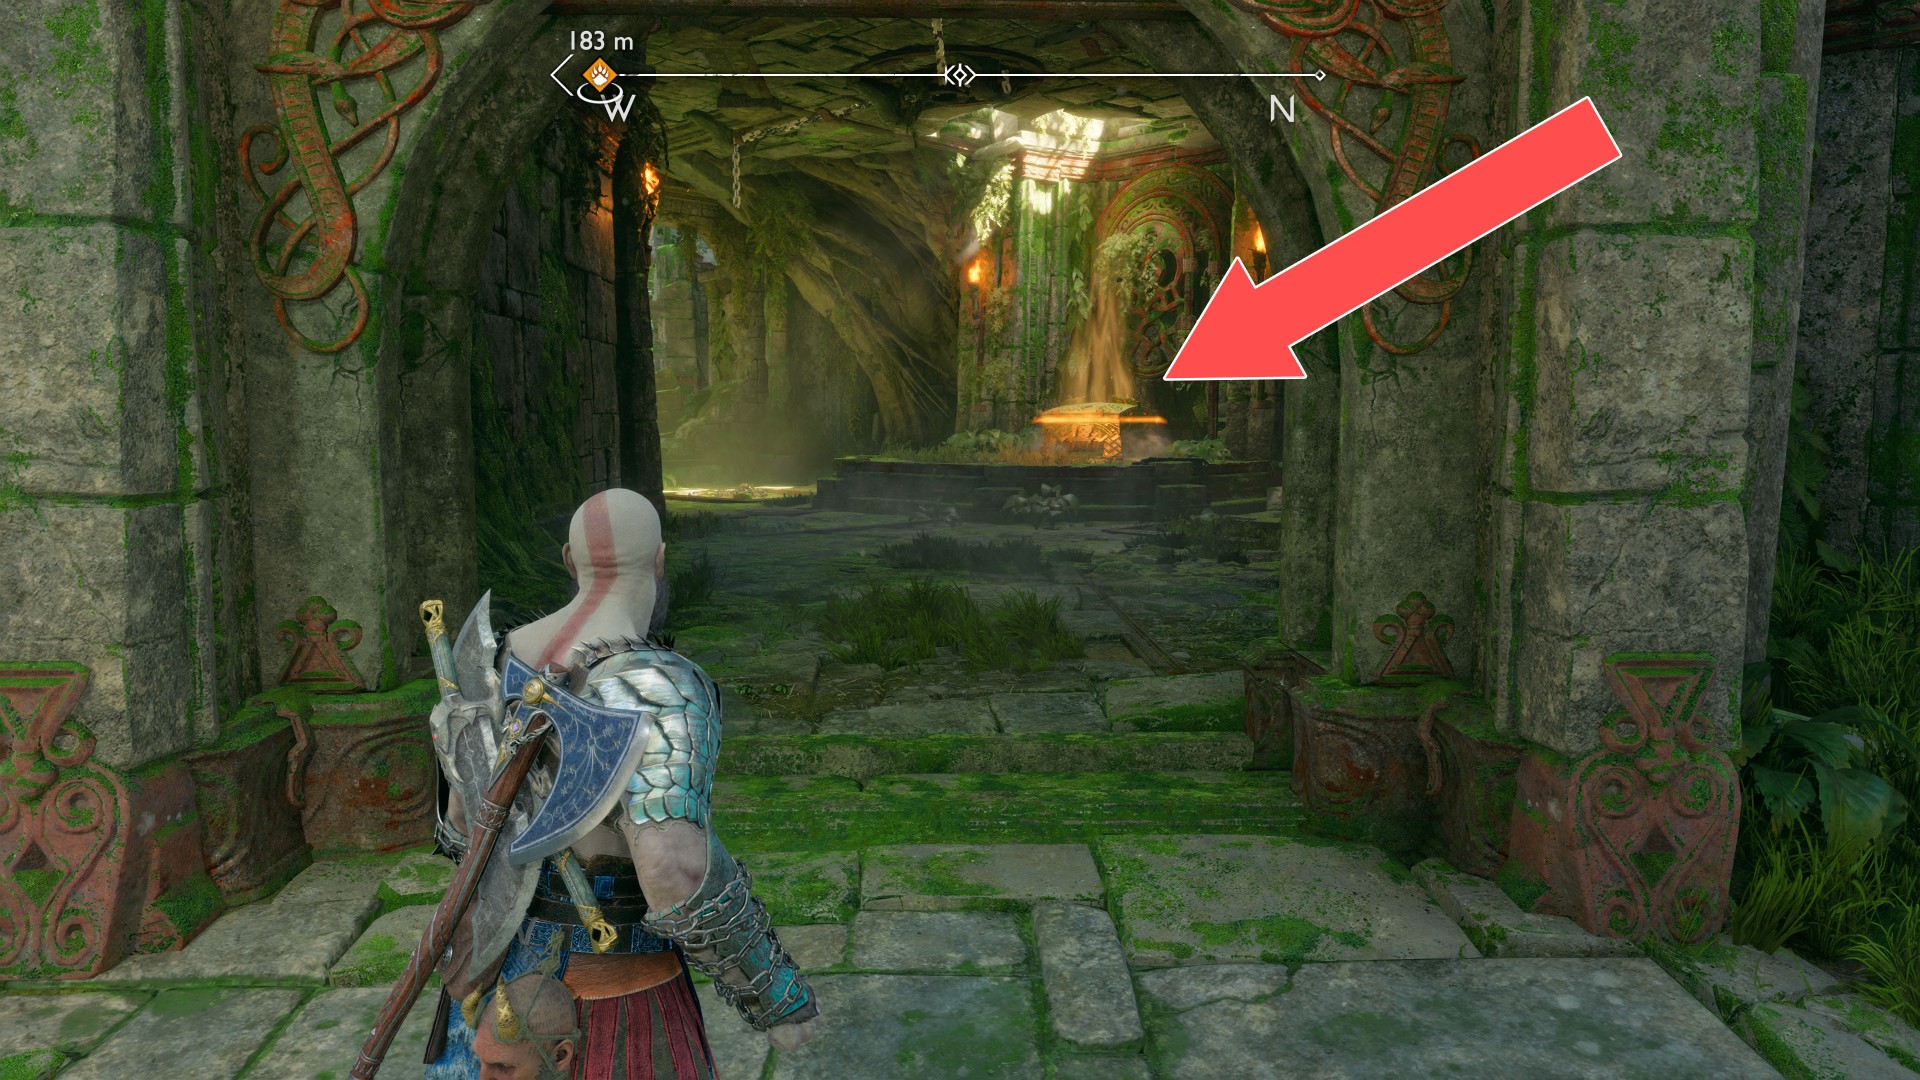
Use the wheel to open the gate. Then throw an axe at one of the gears on either side of the gate to freeze it. Use the sigil arrow to extend the freeze and recall your axe. Quickly toss your axe at the wheel on the other side to freeze it as well, and quickly, before the power of the sigil arrow expires, enter the cave.
To leave the cave, destroy the chain lock.
Show the mapContains: Jewel of Yggdrasil. This legendary chest is located in the same room as the Mystic Gate but on the other side of the cleft so to get to it you must first go outside and walk around.
To do so, you must climb up the stone wall.
Keep walking ahead until you reach a large chain. This will reveal a hidden passage to the part where the chest is located.
You can then go down the stairs and open the chest.
Show the mapContains: Rond of Purification (Shield Attachment). The chest is behind in a small room hidden behind a stone slab that you have to smash.
Show the mapContains: Muspelpheim Seed Half (Key Item). You will be able to get here only after you acquire the Draupnir Spear. Use the bomb you find nearby to get rid of the ore blocking access to the chest.
Show the mapContains: 1x Folkvangr Whetstone, 5000 Hacksilver. Getting this chest open is one of the objectives of "The Lost Treasure" favor.
Show the mapContains: Jewel of Yggdrasil, 30x Whispering Slab, 45000 Hacksilver. It is also a chest the opening of which is an objective of "The Lost Treasure" favor. To get here you need the Draupnir Spear.
Once you reach this island, use your spear to blow up one of the rocks.
Then pull the chain and throw the axe at the gear wheel to freeze it.
Go to the wooden platform and use the spear to destroy the rock obscuring the geyser.
Return to the chain, recall the axe, pull the chain and throw the axe to freeze the geyser.
Jump onto the elevator platform and recall your axe. The elevator will move upwards.
Show the mapContains: Njörd's Tempest (Leviatan Axe - Light Runic Attack) . To reach this chest you first need to reach the room where the "Passion" scroll is located. Check its description to learn how to get there.
Show the mapContains: Deadly Obsidian Handles (Blades of Chaos Attachment). To get to this chest you must sail your boat to the small pond at the back, step out of the boat there and climb up the rocks.
Show the mapContains: Pommels of the Undying Spark (Blades of Chaos Attachment). To get to this chest you must use the giant crane that is located here.
When you reach the higher level, move the waterway located there. By doing so, you will cause the giant crane to start rotating and the stone block that hangs from it will move towards you.
When it stops, climb onto the stone block.
Then throw your axe at the end of the waterway to freeze the water. This will cause the crane to return to its original position.
When the crane stops, jump off the stone block to the hill where the chest is.
Show the mapContains: Rönd of Aggravation (Shield Attachment), 5x Whispering Slab. You will reach this chest when you cut off all three binding ropes of Lyngbakr, that is, during the favor "The Weight of Chains".
Show the mapContains: Muspelpheim Seed Half (Key Item). You will pass this chest on your way to the Modvitnir's Rig platform.
Show the mapContains: Fog of Fimbulwinter (Leviathan Axe - Heavy Runic Attack). You visit this place during the main mission "Forging Destiny".
Show the mapContains: Luminous Recovery Handles (Blades of Chaos Attachment). To get here you need the Draupnir Spear, which you will acquire later in the game's main storyline.
Show the mapContains: Banahogg Knob (Leviathan Axe Attachment). This chest is hidden in a secret room. You can't get to it during your first visit to this place because you don't have the right skill. It will be possible when you return here later.
Show the mapContains: Fortified Frost Knob (Leviathan Axe Attachment). It's in the same room as the "Svartalfheim Draugr Hole (The Applecore)". You can enter this room through a large door located near the "Things Left Behind 6/6 - Durinn's Stone Statue" artifact.
Show the mapContains: Atlas Eruption (Blades of Chaos - Heavy Runic Attack).
Show the mapContains: Hades Retribution (Blades of Chaos - Light Runic Attack). To get here, you must turn right off the main path at some point and go down to a lower level twice.
Here there is a passage that will allow you to reach this legendary chest, the "Alfheim Odin's Raven (Temple of Light #1)", and the "The Bifröst Bridge" lore scroll.
Show the mapContains: Hilt of Gram (Relic). To get here you must go through the gate located under the main path.
Grab the chain and pull it to lift the mirror to the very top. Then throw your axe at the mirror so that it bounces and gets stuck in the white marble. Then release the chain, everything will return to its original position, and then recall your axe. The axe returning to you should hit and destroy the lock holding the cage with the legendary chest which will cause the cage to drop down.
Go down and take the contents of the chest.
Show the mapContains: Rune-Engraved Release (Accessory). To get to this chest you must swing a large stone hanging on a rope and then throw your axe at its wall made of Twilight Stone. The axe will bounce and destroy the crystal, making the light barrier disappear.
Show the mapContains: Gauntlets of Radiance (Wrist Armour).
Show the mapContains: Rönd of Affliction (Shield Attachment). You need to position yourself near the connection at the bottom and throw your axe at the twilight stone. When the axe cuts two connections then call it back to you and then when it is coming back to you it should cut the connection near which you are standing.
Show the mapContains: Shoulder Straps of Radiance (Chest Armor). Underground, in "The Below" area. You will walk past this chest on your way back to the surface during the "Secret of the Sands" favor.
Show the mapContains: Hel's Touch (Leviathan Axe - Light Runic Attack). Underground, in "The Burrows" area. In the cave, on the way to Hafgufa, you must throw an axe at the twilight stone so that it destroys the obstacle obstructing the point that allows climbing.
The climbing route thus opened will enable you to reach the rock shelf in the upper part of the cave where you will find the chest.
Show the mapContains: Nemean Crush (Blades of Chaos - Heavy Runic Attack). Underground, in "The Burrows" area. This one is the room you will reach after destroying the Halgufa's bindings.
Show the mapContains: Hardened War Handles (Blades of Chaos Attachment). In order to access this chest you need to cut three joints at the same time and thus remove the roots that stand in your way. To do this, you must clear one of the twilight stones from the vines that overgrow it, position both twilight stones accordingly and make an axe throw.
To get rid of the vines you must use sigil arrows and the blades of chaos.
Show the mapContains: Skadi's Edge (Leviatan Axe - Light Runic Attack). Just few steps after you came across the twilight stones for the first time, jump down and enter the small cave. This is the same cave where the "Kvasir's Poems 5/14 - Afterlife Abandonment" artifact is.
Show the mapIt does not count towards the completion of this realm. Contains: Runic Potency (Accessory).
Show the mapIt does not count towards the completion of this realm. Contains: Rampaging Ibex (Runic Summon).
Show the mapIt does not count towards the completion of this realm. Contains: Runestone Refinement (Accessory). Approach the wooden structure on the other side of the river and climb up the wooden structure. Then jump over the water by hooking up to the grappling hook above.
Show the mapContains: Mist of Helheim (Leviathan Axe - Heavy Runic Attack). To get to this chest you must cross The Veiled Passage.
To get rid of the ore preventing you from jumping down to the level where the chest is, you must lower the bridge, cross to the other side and properly shoot three sigil arrows. With their help you will be able to blast the red jar standing at the bottom.
Show the mapContains: 500x Divine Ashes. In order to get to this chest you must own the Draupnir Spear. With it you will be able to blow the rock that blocks access to the chest.
Show the mapContains: Leviathan's Roar (Leviathan Axe - Heavy Runic Attack). To reach this chest you will need the Draupnir Spear. Use the spear to smash the pillar and climb to the top of the wooden structure and then proceed to the chest.
To be able to climb up you have to blow up this pillar.
Show the mapContains: Jewel of Yggdrasil. To get to this chest you must first get to the bridge located slightly to the north. You can do this by proceeding from the "River Delta" boat dock. Then use the sigil arrows and set fire to the vines.
When you burn the vines then throw an axe at the lock on the chain on which hangs the counterweight for the gate to the room where the chest is.
Go to the garden area, preferably slide down the rope there located on the other side of the bridge and enter the room with the chest through the gate that opened.
Show the mapContains: Grip of the Fallen Alchemist (Leviathan Axe Attachment).
Show the mapContains: Rönd of Restoration (Shield Attachment). To get here you need to use the crane that stands nearby. If you rotate it properly you will be able to jump close to the shack with legendary chest inside. You can only enter the shack from behind.
To do this, turn left and follow the path until you reach Draugr Hole. When you kill the enemies you come across there, you will be able to enter the small passage.
The exit from the tunnel is at the back of the shack with the chest.
Show the mapContains: Shattered Star Shield (Shield). In order to approach this chest safely, you must first throw your axe and freeze the plant that generates the dangerous purple aura.
Show the mapContains: Helios Flare (Blades of Chaos - Light Runic Attack). To get to this chest you must first get rid of the stone pillar preventing the crane from being rotated. To do this, enter the small room next to the column.
There you should be able to hook up to the column and bring it down.
When the column is no longer a problem then rotate the crane so that you can jump from one platform to another. Hook over to the other side.
Proceed to the platform opposite the one with the chest on it. Position the crane so that you can hook up to the grappling point and jump to the other side.
Show the mapContains: Whisper of the World (Draupnir Spear - Light Runic Attack).
Show the mapContains: Jewel of Yggdrasil. You can spot this chest much earlier, through the closed gate, but you will only get here through the Round Hole, that is, after restoring the water in the rivers and traversing almost the entire jungle.
Show the mapContains: Honour The Fallen (Draupnir Spear - Heavy Runic Attack).
Show the mapContains: Wrath of the Frost Ancient (Leviathan Axe - Light Runic Attack). You will get to the chest through a small passage.
Show the mapContains: Rampage of the Furies (Blades of Chaos - Light Runic Attack). To open the gate and get to this chest, you must walk to the back of the rocks, burn the vines covering the crack in the rocks and, through the opening, throw an axe at the lock on the chain.
Show the mapIt does not count towards the completion of this realm. Contains: Onslaught Shield (Shield). You will reach this place after the first fight with Garm. If you do not open this chest just go forward then this shield can be bought later at any shop.
Show the mapIt does not count towards the completion of this realm. Contains: Wrath of the Wolf (Runic Summon).
Show the mapIt does not count towards the completion of this realm. Contains: Falling Sky (Bow Ability).
Show the mapIt does not count towards the completion of this realm. Contains: Thrust of a Thousand Soldiers (Draupnir Spear - Light Runic Attack).
Show the mapIt does not count towards the completion of this realm. Contains: Tame the Beast (Blades of Chaos - Heavy Runic Attack).
Show the mapContains: Nocked Proficiency (Accessory). This chest is located on the top level of the prison but to get to it you will have to go down to the lower levels first.
Using the chains that you find on the lower levels, you must position the spears in such a way that, using one of them, you will be able to jump to a level with a chest from the level below.
Show the mapIt does not count towards the completion of this realm. Contains: Bitter Squirrel (Runic Summon).
Show the mapContains: Girdle of Raven Tears (Waist Armor). To open this chest you must kill 6 Odin's Ravens.
Show the mapContains: Bracers of Raven Tears (Wrist Armor). To open this chest you must kill 12 Odin's Ravens.
Show the mapContains: Cuirass of Raven Tears (Chest Armor). To open this chest you must kill 18 Odin's Ravens.
Show the mapContains: Breath of Thamur (Leviathan Axe - Heavy Runic Attack). To open this chest you must kill 28 Odin's Ravens.
Show the mapContains: Meteoric Slam (Blades of Chaos - Heavy Runic Attack).
To open this chest you must kill 38 Odin's Ravens.
Show the map
Contains: The Finger of Ruin (Draupnir Spear - Heavy Runic Attack) To open this chest you must kill 48 Odin's Ravens.
Show the map