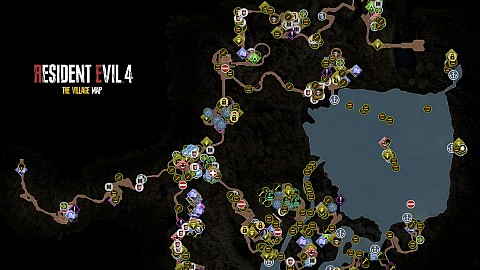
An interactive map of the Village, the first of the locations we explore in Resident Evil 4 Remake. The game world in Resident Evil 4 is only semi-open so once you leave the village, it will not be possible to return here. Also, access to various areas of the village is reduced as the game progresses, roadblocks occur, etc. Chapters 1-6 are set in the Village.
Markers on the map
Clockwork Castellans6
Boss Fights6
Treasures39
Files28
Puzzles17
Key Items20
Requests8
Request Objectives10
Request Objectives3
Request Objectives6
Request Objective1
Request Objective1
Request Objective1
Typewriters9
Merchants5
First Aid Sprays4
Herbs21
Eggs7
Locked Passages19
Weapons5
Grenades9
Ammo26
Gunpowder2
Resources6
Cabinets12
Crates57
Barrels141
Pesetas1
Boat Mooring Piers9
Traps30
Story Related9
Story Related7
Climbing Spots3
Misc7
Points of interest
Clockwork Castellans
Clockwork Castellans are small doll figurines hidden in various places in the game that need to be destroyed. Most of them are very difficult to spot but somewhat helpful in finding them is that when you are near the Clockwork Castellan, you will be able to hear its distinctive ticking-like sound...
Clockwork Castellan (Chapter 1)This Clockwork Castellan sits in the rafters inside the abandoned house on the southwestern side of the Lakeside Settlement.
Clockwork Castellan (Chapter 2)You will find this figurine inside an abandoned building you will pass by as you walk from the Abandoned Factory towards the Village Chief's Manor.
Clockwork Castellan (Chapter 3)This figure stands on top of a stack of crates. It can be seen through the gap between the crates and the canopy.
Clockwork Castellan (Chapter 4)You will find this figure on the other side of the fence in the Forest Altar location. To get here you need the Insignia Key so it will be possible only in the 4th chapter.
Clockwork Castellan (Chapter 5)You can find it in the attic of the Village Chief's Manor.
Clockwork Castellan (Chapter 6)This figure sits near a large bonfire that you will see on the right as you walk towards the Checkpoint.
Boss Fights
Locations where you will have to fight against more challenging opponents.
A Savage MuttChapter 5. You have to kill it for "A Savage Mutt" request. Drops: Alexandrite.
El GiganteDuring chapter 4, when you are returning to the church. He drops: Yellow Diamond. If you have freed the Trapped Dog then it will help you during this fight.
Treasures
Treasures, The Village. List of all the treasures that can be found in the Village (RE4 Remake) and which are needed to unlock the achievement / trophy "Bandit" - Obtain all treasures on the village treasure map in a single playthrough.
Note: Treasures that drop from monsters do not count towards this achievement / trophy.
Alexandrite #1Chapter 4.
Alexandrite #2Chapter 4. Shoot the silver cage. You can do it while you are on the scaffolding, which is during chapter 3, or you can shoot it later, when you are already at the bottom. The jewel will fall to the bottom and you will be able to pick it up only when you get there by boat, which will be possible in chapter 4.
Antique CameraChapter 5.
Antique Pipe #1Chapter 3. Shoot the silver cage.
Antique Pipe #2Chapter 5. Its a wayshrine so you need Old Wayshrine Key to unlock it.
Brass Pocket WatchChapter 3. It's in a locked drawer so you need one of the Small Keys to unlock it.
Butterfly LampChapter 4. Its a wayshrine so you need the Old Wayshrine Key to unlock it.
Chalice of AtonementChapter 6.
Depraved IdolChapter 4. You need to solve the Hexagon-shaped Puzzle to get this item.
Dirty Pearl Pendant #1Chapter 1. Shoot the silver cage hanging off the windmill.
Dirty Pearl Pendant #2Chapter 2. Shoot the silver cage.
Elegant BangleChapter 5.
Elegant Headdress #1Chapter 3.
Elegant Headdress #2Chapter 6. Its a wayshrine so you need the Old Wayshrine Key to unlock it.
Elegant MaskChapter 2. It's in a locked drawer so you need of of the Small Keys to unlock it.
EmeraldChapter 6. Shoot the silver cage.
FlagonChapter 1.
Gold BarChapter 4. It's in a locked drawer so you need one of the Small Keys to unlock it.
Pearl BangleChapter 4. Its a wayshrine so you need Old Wayshrine Key to unlock it.
Red Gemstone RingChapter 4.
Red9Chapter 4.
Ruby #1Chapter 1.
Ruby #2Chapter 1.
Ruby #3Chapter 2.
Ruby #4Chapter 2. It is in the drawer of the desk standing here.
Ruby #5Chapter 3.
Ruby #6Chapter 4. Shoot the silver cage.
Sapphire #1Chapter 2. The treasure is located inside the furnace. To take it, open the furnace door.
Sapphire #2Chapter 2.
Sapphire #3Chapter 2. Shoot the silver cage.
Splendid BangleChapter 4. Its a wayshrine so you need the Old Wayshrine Key to unlock it.
Velvet Blue #1Chapter 1. To get here, use the stairs to get to the upper floor of the building and vault through the window to the roof.
Velvet Blue #2Chapter 3. Shoot the silver cage hanging from the ceiling.
Velvet Blue #3Chapter 4. Shoot the silver cage.
Velvet Blue #4Chapter 4.
Vintage CompassChapter 3. It's in a locked drawer. You need one of the Small Keys to unlock it, so it will be possible at the earliest in the third chapter of the game.
Yellow Diamond #1Chapter 4/5. It's in a locked drawer so you need one of the Small Keys to unlock it.
Yellow Diamond #2Chapter 5. Shoot the silver cage.
Yellow Diamond #3Chapter 6.
Files
A list of all the Files, The Village (notes, photos, etc.) you can access while exploring the village in Resident Evil 4 Remake.
A Father's Portrait (Chapter 5)
Broken Cell Phone (Chapter 4)
Charred Picture Frame (Chapter 1)
Crude Charm (Chapter 1)It is on the bed inside the Hunter's Lodge. Examine it before heading to the upper floor of the building.
Iluminados 4:3 (Chapter 2)It contains the code for the Crystal Marble lock.
Iluminados 4:9 (Chapter 3)
Lakeside Map (Chapter 3)
Luis Serra Report (Chapter 3)You will get it at the beginning of Chapter 3.
Merchant Tip: Get Cash Back! (Chapter 3)
Merchant Tip: Get Rich Quick! (Chapter 2)
Merchant Tip: Midnight Stroll (Chapter 6)
Merchant Tip: The Prudent Choice (Chapter 3)
Mission BriefYou've had it from the very beginning of the game.
Officer's Badge (Chapter 1)You will be able to examine it after killing the first foe you come across here. Do it before heading to the upper floor of the building.
Old Man's Journal (Chapter 4)
Photo of a Boy and His Grandfather (Chapter 5)
Photo of a Family (Chapter 2)
Photo of Ashley (Chapter 3)
Photo of the Factory (Chapter 5)
Rearing Log (Chapter 4)You can get here after defeating El Gigante.
Scribbles About Dolls (Chapter 2)
Target Practice Rules (Chapter 3)
Tattered Officer's Cap (Chapter 4)
Tighten the Defenses (Chapter 6)
Village Records Vol. 1 (Chapter 5)
Village Records Vol. 2 (Chapter 5)
Village Records Vol. 3 (Chapter 2)
When Low on Boat Fuel (Chapter 3)
Puzzles
BoatIn order to start the boat and be able to go on the lake, you need to find the Boat Fuel.
Church GateTo open this gate you need to get the Church Insignia.
Door with InsigniaTo open this gate you need to get the Insignia Key.
Door with InsigniaTo open this gate you need to get the Insignia Key.
Door with Insignia (Town Hall)To open this door you need to get the Insignia Key so you will be able to do it in the third chapter.
Door with Round SlotTo open this door you need to get the Crystal Marble. Then you have to rotate it so that the bubbles line up with the pattern behind.
Handle
HandleThis handle you must turn to open the Locked Gate (Valley) and leave the valley.
Hexagon-shaped PuzzleStone Pedestal. First you need to find the three missing pieces: Hexagon Piece A, Hexagon Piece B, and Hexagon Piece C.
On Assisted / Standard: Spin the left side once, then spin the top side once.
On Hardcore / Pro: Spin right side x 2, then spin left side x 2, then spin top side once.
Hexagon-shaped SlotTo solve this puzzle and open the gate you need to find the Hexagonal Emblem.
Locked Door (Hunter's Lodge Basement)Basement entrance. You need the Hunter's Lodge Key to unlock this door.
PulpitPull the lever on the wall to open the panel. Attach the Blue Dial and turn the dials in such a way as to form the pattern shown in the picture below.
Stone DaisTo open this door you should press three symbols shown on the screen below.
Stone DaisTo open this door you should press three symbols shown on the screen below.
Windmill WorkingsTo repair the mechanism you need to get a Wooden Cog. When you fix the mechanism then you will be able to lift the Farm Gate and move on.
Key Items
Apostate's Head
Blasphemer's Head
Blue DialCabinet
Boat FuelFuel you need to get in order to start the Boat and be able to take it out on the lake.
Checkpoint CrankWhen you try to take it then the fight with Chainsaw Sisters begins.
Crystal MarbleCombination Lock. Correct combination is: crop - pig - babe (This code can be found in the book Iluminados 4:3 (Chapter 2)). The Crystal Marble you find in the cabinet is needed to open the Door with Round Slot located on the second floor of the manor.
Hexagon Piece AOne of the three pieces you need to find in order to complete the Hexagon-shaped Puzzle.
Hexagon Piece BOne of the three pieces you need to find in order to complete the Hexagon-shaped Puzzle.
Hexagon Piece COne of the three pieces you need to find in order to complete the Hexagon-shaped Puzzle.
Hexagonal EmblemYou need this item to complete the "Hexagon-shaped Slot" puzzle.
Notes from which you will learn about the Requests, what your task is and what the reward is for it. Reading them is not necessary to be able to fulfill a given request as long as you know what to do, but it makes it easier because it gives you clues, for example, markers will appear on the map.
A Savage MuttAvailable during Chapter 5. Area: Village Chief's Manor. Defeat the strong threat. Reward: Spinel x 8. Go to the Chief's Manor, then return to the village square and kill A Savage Mutt.
Catch Me a Big FishArea: Lake. Sell a Lunker Bass. Reward: Spinel x 4.
Request Objectives. All sorts of items and objects that you have to find and do something with, sometimes destroy, sometimes sell, in order to complete the requests available in the game.
Blue Medallion - Request 1 (1/5)One of the five medallions that you must destroy to complete the "Destroy the Blue Medallions" request.
Blue Medallion - Request 1 (2/5)One of the five medallions that you must destroy to complete the "Destroy the Blue Medallions" request.
Blue Medallion - Request 1 (3/5)One of the five medallions that you must destroy to complete the "Destroy the Blue Medallions" request.
Blue Medallion - Request 1 (4/5)One of the five medallions that you must destroy to complete the "Destroy the Blue Medallions" request.
Blue Medallion - Request 1 (5/5)One of the five medallions that you must destroy to complete the "Destroy the Blue Medallions" request.
Blue Medallion - Request 2 (1/5)One of the five medallions that you must destroy to complete the "Destroy the Blue Medallions 2" request.
Blue Medallion - Request 2 (2/5)One of the five medallions that you must destroy to complete the "Destroy the Blue Medallions 2" request.
Blue Medallion - Request 2 (3/5)One of the five medallions that you must destroy to complete the "Destroy the Blue Medallions 2" request.
Blue Medallion - Request 2 (4/5)One of the five medallions that you must destroy to complete the "Destroy the Blue Medallions 2" request.
Blue Medallion - Request 2 (5/5)One of the five medallions that you must destroy to complete the "Destroy the Blue Medallions 2" request.
Rat - Village (1/3)One of the rats you have to kill to complete the "Pest Control" request.
Rat - Village (2/3)One of the rats you have to kill to complete the "Pest Control" request.
Rat - Village (3/3)One of the rats you have to kill to complete the "Pest Control" request.
ViperHere you can find a snake you need to complete the request "Viper Hunter". The snake crawls on nearby platforms or swims in the water.
ViperHere you can find a snake you need to complete the request "Viper Hunter". The snake crawls nearby or swims in the water.
ViperHere you can find a snake you need to complete the request "Viper Hunter". The snake crawls on nearby platforms or swims in the water.
ViperHere you can find a snake you need to complete the request "Viper Hunter". The snake crawls on nearby platforms or swims in the water.
Viper (Crate)Here you can find a snake you need to complete the request "Viper Hunter".
Viper (Crate)Here you can find a snake you need to complete the request "Viper Hunter".
Gold Chicken EggThe chicken egg you need to complete the "Egg Hunt" request.
Lunker BassIt's a fish you need to complete the "Catch Me a Big Fish" request. Use the harpoon to kill it and then don't forget to pick it up.
Twin TombstonesTwin tombstone with two emblems that you must destroy to complete the request "Grave Robber".
Typewriters
The Typewriters can be used to save the game, as an additional place to store inventory items, and to customize the briefcase which provides various bonuses.
Merchants
Merchants at which you can buy new weapons, weapon parts, briefcase capacity upgrade, ingredients, recipes, etc. Their stock expands as you progress through the game. You can also sell found treasures at them.
Another function that merchants provide is upgrading the weapons you own. They will do this for the right amount of cash.
When you complete any of the Requests, you must return to any merchant in order to receive the reward for it in the form of an appropriate amount of Spinels. You can then exchange your Spinels for an item, such as a map showing where all the treasures are hidden or an exclusive weapon upgrade.
First Aid Sprays
First Aid Sprays are Health Items and can be used to fully heal your character.
Herbs
Herbs are Health Items. Green herbs can be used to partially heal your character. Green and other color herbs can be used to make mixed herbs. Mixed herbs containing yellow herbs permanently increase Leon's maximum life points.
Eggs
Eggs are Health Items and can be used to partially heal your character.
Weapons
Kitchen Knife
Kitchen Knife
Kitchen Knife
Red9
W-870It hangs on the wall on the upper floor of the building.
Crates
Breakable Crates contain randomized loot based on your character's status and inventory. They can contain ammo, herbs, gunpowder, gems, or Pesetas.
Barrels
Breakable Barrels contain randomized loot based on your character's status and inventory. They can contain ammo, herbs, gunpowder, gems, or Pesetas.
Boat Mooring Piers
At the end of chapter three you will unlock a Boat that will allow you to travel around the lake. Moving around the lake is an essential part of the fourth chapter of the game. At the piers, you can moor the boat and go ashore.
Traps
Various types of traps that you should avoid if you do not want to lose your health or die. You can neutralize these traps by simply shooting them. Be careful because as the game progresses, new traps may be set in places where they were not before.
Climbing Spots
In these places there are some kind of openings in the wall, ladders, etc. located somewhere high up. In order to use them, there must be a companion with you. Then you will be able to lift the other person up and then she/he will climb higher and, for example, lower the ladder for you to use, or go through the opening to the other side and open a door or gate for you, which can only be unlocked from the other side.