Welcome to guides4gamers.com

Port Maje, Pillars of Eternity II: Deadfire Map

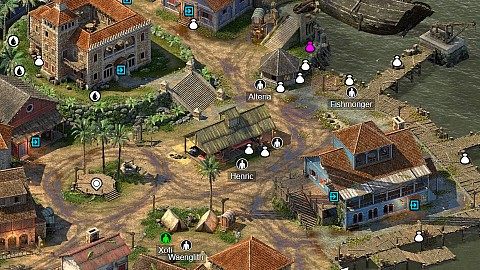
Map of Port Maje and its subzones such as: Port Maje Harbor, Gorecci Street, Sātahuzi, Rinco's Home, Governor Clario's Estate, The Kraken's Eye, Port Maje Jail, Chieftain's Lodge or Mokeha's Lodge.

Port Maje is one of the Vailian Trading Company's oldest colonies in the Deadfire Archipelago. Though it is not grand in stature, it sits on well-established trade routes from the Eastern Reach and is a common stopping point for ships in the region. It has a close, if often fraught, relationship with the nearby Huana village of Sātahuzi.

Port Maje

Port Maje - Map Markers Summary

Companion x1, NPCs x18, Locked / Secret Passages x3, Hidden Objects x3, Loot x60, Herbs, etc. x8, Enemy x1, Transitions x25, Other x2

Quests that begin on this map

An alphabetical list of quests that begin on this map.

Legend / Points of interest

The following legend of Port Maje interactive game map defines the points of interest / markers displayed on the map. Each marker corresponds to a specific element to facilitate efficient navigation and interaction with the map.

Icon of Other Jail Cell Wall Interactive only when you're doing The Drunk Sailor quest. You can blow it up with a bomb. Related quests: The Drunk Sailor.
Icon of Other Podium After you arrive to the town for the first time you will meet Governor Clario and Storm Speaker Ikawha here.Related quests: Stranded.

Companions

List of NPCs you can invite to your team.

Icon of Companion Xoti She can join your team. Priest, Monk or Contemplative (Priest + Monk).Related quests: The Lantern of Gaun.

NPCs

You can talk to them, sometimes you can buy something from them or sell them something. It may happen that as a result of a conversation or your actions, they will become aggressive towards you.

Icon of NPC Alteria Trader: Death's Maw (head, grants Death Runes).
Icon of NPC Commoner (Ghost) Related quests: The Lantern of Gaun.
Icon of NPC Eofania She will be here only during the day. Trader: Shorewalker Sandals (feet, +10% Stride, +1 Resolve).
Icon of NPC Fishmonger Trader: Food and Drink.
Icon of NPC Galian Galian + Baru.Related quests: The Better Man.
Icon of NPC Governor Clario Related quests: Stranded, The Veins of Eora, To Hunt a God.
Icon of NPC Henric Trader: Weapons, Armor, Clothing, Potions.
Icon of NPC Ilari Ilari + 2 x Gorecci Street Thug.Related quests: Restoring Order.
Icon of NPC Mokeha She will either be walking around the village or sleeping in her hut. She has Rinco's Coin Purse.Related quests: Burning Bridges.
Icon of NPC Norgund Trader: Consumable, Lockpicks, Ingredients.
Icon of NPC Rinco Related quests: Burning Bridges.
Icon of NPC Roparu Worker (Ghost) Related quests: The Lantern of Gaun.
Icon of NPC Rum-Dumb Riggere He can become a member of the crew of your ship.Related quests: The Drunk Sailor.
Icon of NPC Savia She has Port Maje Jail Key.Related quests: Restoring Order, The Drunk Sailor.
Icon of NPC Storm Speaker Ikawha Related quests: Burning Bridges.
Icon of NPC Thorel Innkeeper. Accept his quest then he will give you Kraken's Eye Room Key.Related quests: The Better Man.
Icon of NPC Waenglith She can bless you with Dawnstar's Blessing (+50% healing done, +2 Religion).Related quests: The Lighted Path.
Icon of NPC Well-traveled Supplier Special NPC - He will appear here when you use Berath's Blessings (5 points) while creating a new character. Trader, he sells magic and unique items.

Locked / Secret Passages

Secret passages, locked doors, etc.

Icon of Locked / Secret Locked Cell (Stealing) Lock level 3. Can be unlocked with the Port Maje Jail Key that Savia has.Related quests: The Drunk Sailor.
Icon of Locked / Secret Locked Door Lock level: 4. Can be unlocked with Kraken's Eye Room Key given by Thorel.

Hidden Objects

Hidden interactive objects containing more or less valuable items that you can take.

Icon of Loot Container Protective Eothasian Charm (neck, +1 Perception, Ability activates when Near Death).
Icon of Loot Rubble Ring of Unshackling (ring, grants Suppress Affliction).
Icon of Loot Straw Pile Lockpicks.

Loot

Different interactive objects containing more or less valuable items that you can take.

Icon of Loot 2 x Rack (Stealing)
Icon of Loot Barrel
Icon of Loot Barrel
Icon of Loot Barrel
Icon of Loot Barrel
Icon of Loot Barrel
Icon of Loot Barrel
Icon of Loot Barrel
Icon of Loot Barrel (Stealing)
Icon of Loot Basket (Stealing)
Icon of Loot Bookcase
Icon of Loot Bookcase (Stealing)
Icon of Loot Cabinet
Icon of Loot Cabinet (Stealing)
Icon of Loot Chest
Icon of Loot Chest (Stealing)
Icon of Loot Closet (Stealing)
Icon of Loot Coin Pile (Stealing)
Icon of Loot Corpse
Icon of Loot Corpse
Icon of Loot Corpse
Icon of Loot Crate
Icon of Loot Crate
Icon of Loot Crate
Icon of Loot Crate
Icon of Loot Crate
Icon of Loot Crate
Icon of Loot Crate
Icon of Loot Crate (Stealing)
Icon of Loot Crate (Stealing) Swordsman's Bracers (hands, 10% of incoming Hits converted to Grazes from Melee weapons).
Icon of Loot Crate (Stealing)
Icon of Loot Locked Chest (Stealing) Lock level: 4
Icon of Loot Locked Chest (Stealing) Lock level 3.
Icon of Loot Rack (Stealing)
Icon of Loot Shelf
Icon of Loot Shelf
Icon of Loot Shelf (Stealing)
Icon of Loot Stewpot (Stealing)
Icon of Loot Stuffed Kraken (Stealing) Kraken's Eye.
Icon of Loot Table
Icon of Loot Table
Icon of Loot Weapon Rack (Stealing)

Herbs, etc.

Different interactive objects containing ingredients that you can take.

Icon of Loot Glaive Berries
Icon of Loot Quill Leaf
Icon of Loot Rahi Pods
Icon of Loot Spire Sponge

Enemies

NPCs, monsters, etc. who will be aggressive towards you as soon as they see you.

Icon of Enemy Looters 3 x Looter. Two in the center, one on the side (next to the yellow house on the right).Related quests: Restoring Order.

Transitions

Places, where you can go to other locations or other maps.

Icon of Transition Chieftain's Lodge
Icon of Transition Governor Clario's Estate
Icon of Transition Mokeha's Lodge
Icon of Transition Port Maje Jail
Icon of Transition Rinco's Home
Icon of Transition The Kraken's Eye
Icon of Transition The Kraken's Eye (Upper Floor)
Icon of Transition To City Map
Icon of Transition To Fort Maje Harbor
Icon of Transition To Sātahuzi
Icon of Transition To The Kraken's Eye (Ground Floor)
Icon of Transition To The Kraken's Eye (Upper Floor)