Welcome to guides4gamers.com

Passages, No Rest for the Wicked Points of interest

This collection includes every marker from the Passages category of points of interest in No Rest for the Wicked, all placed on interactive maps created specifically for the game.

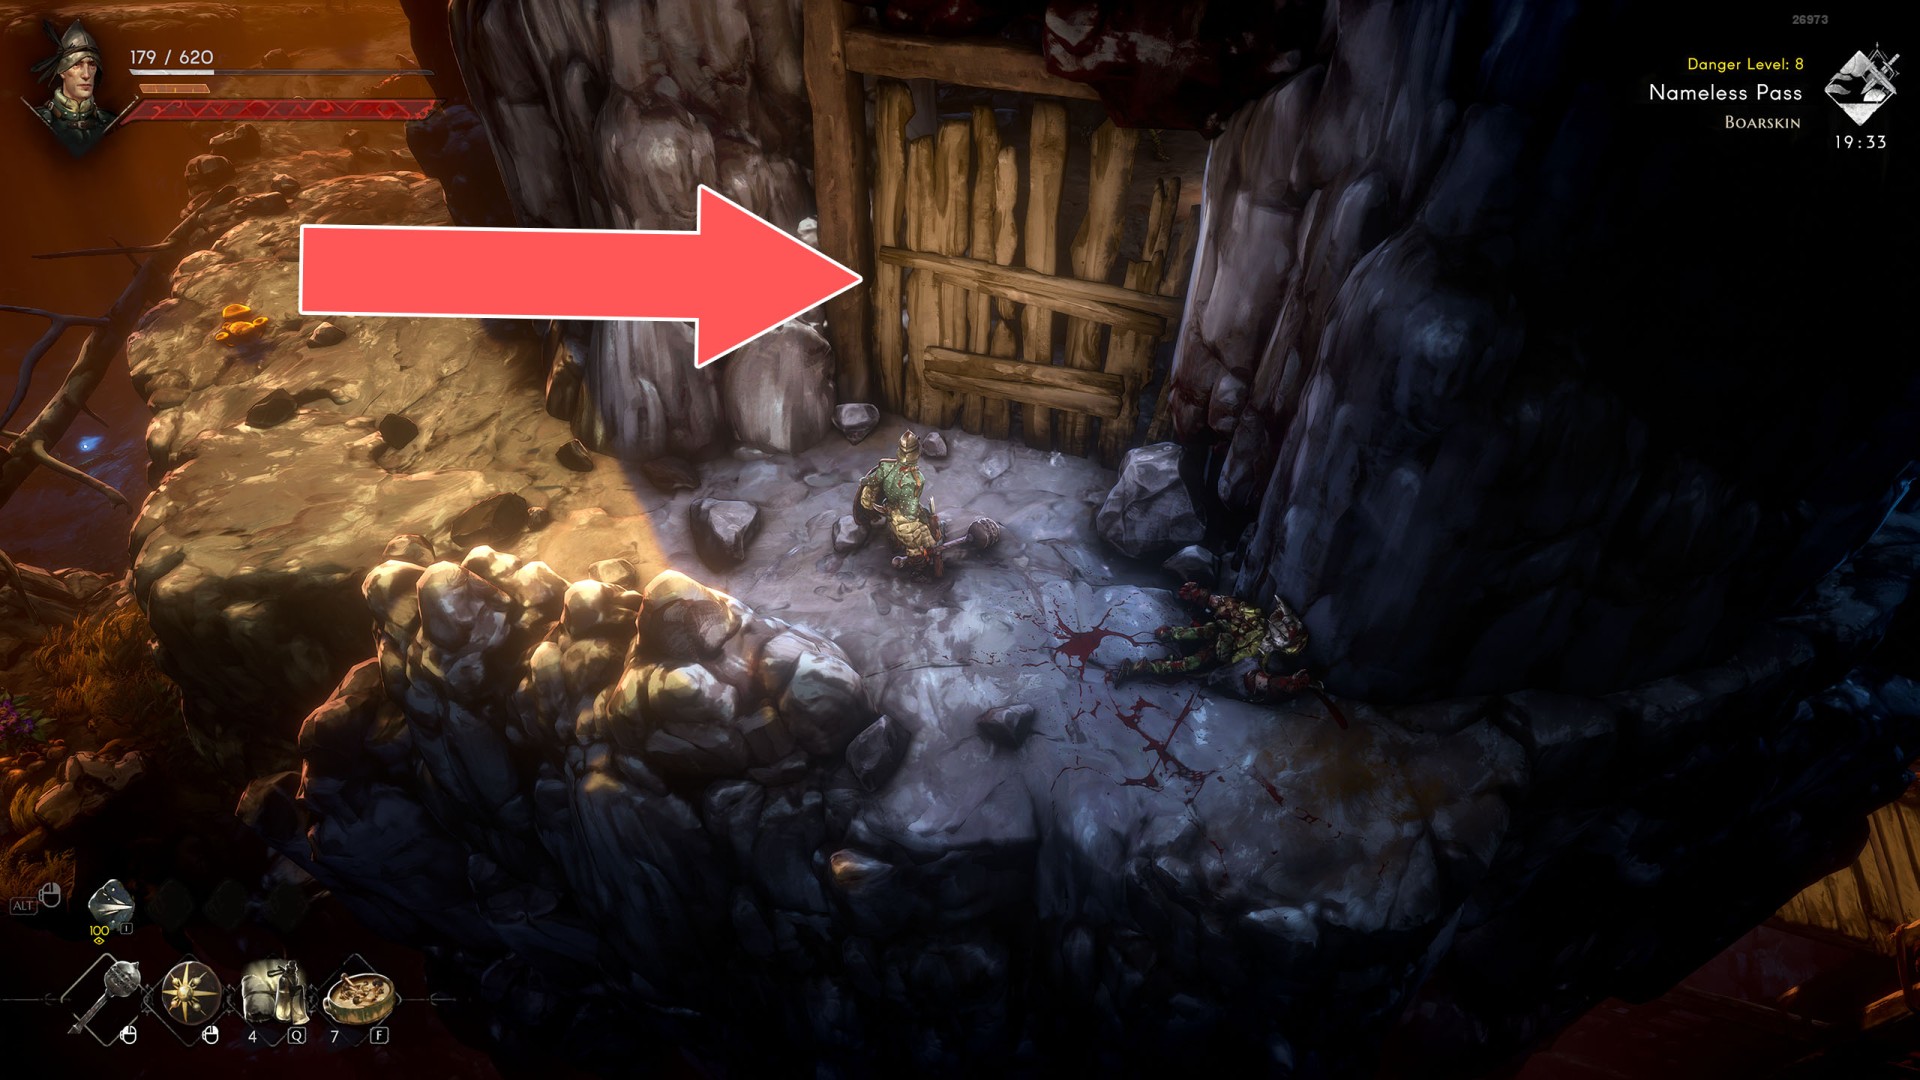
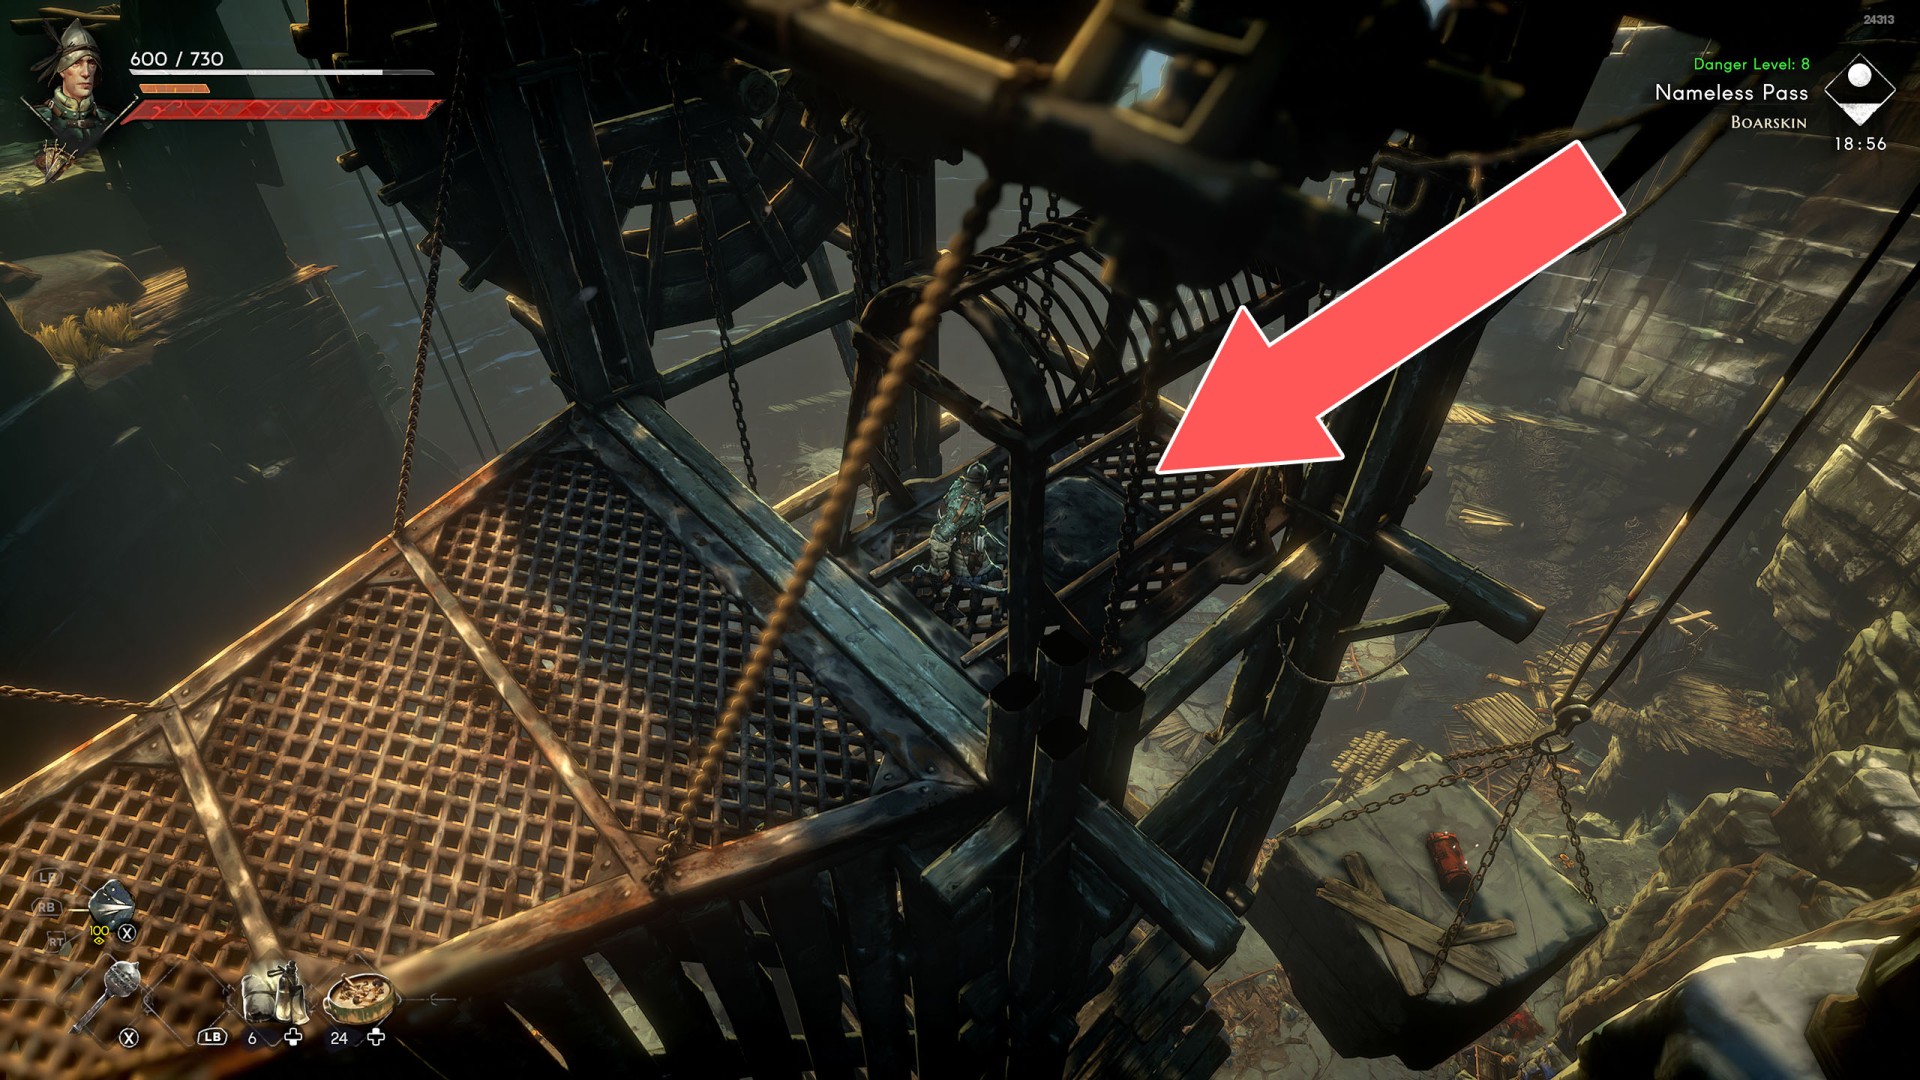
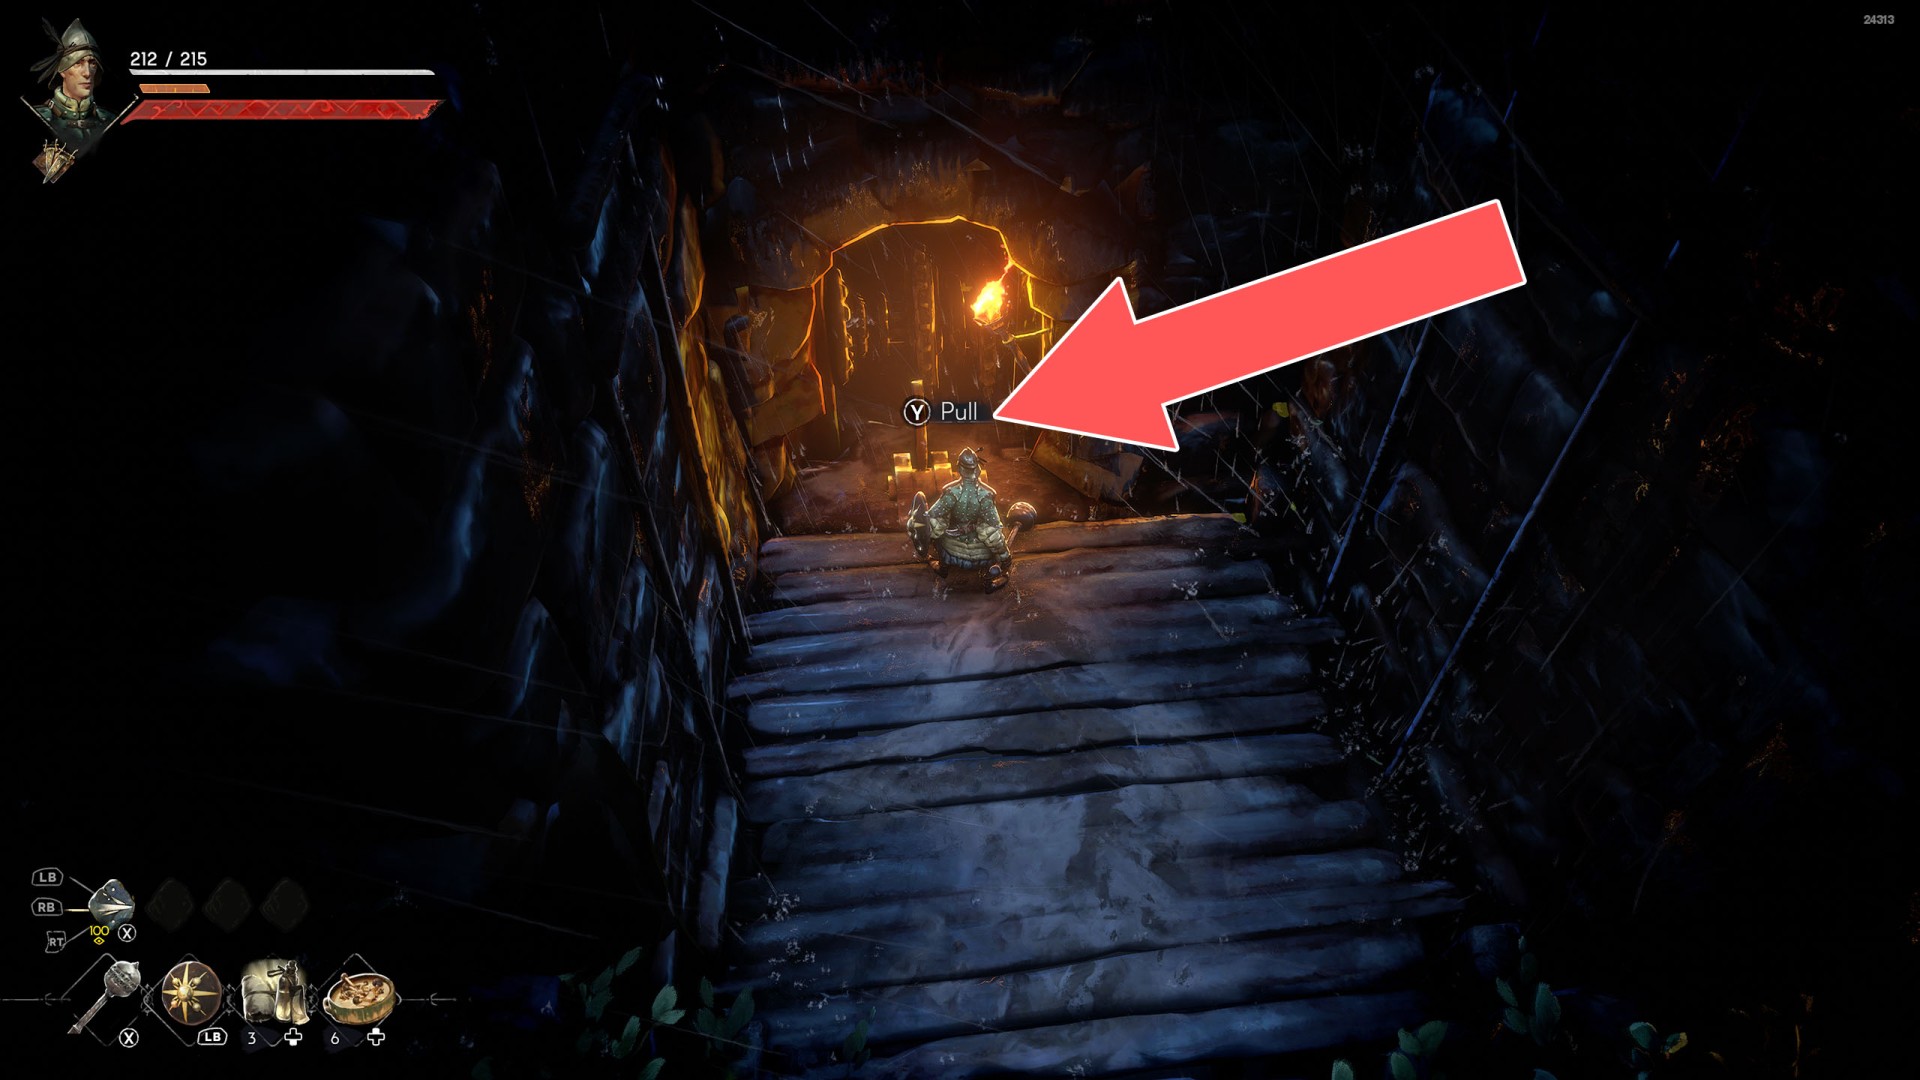
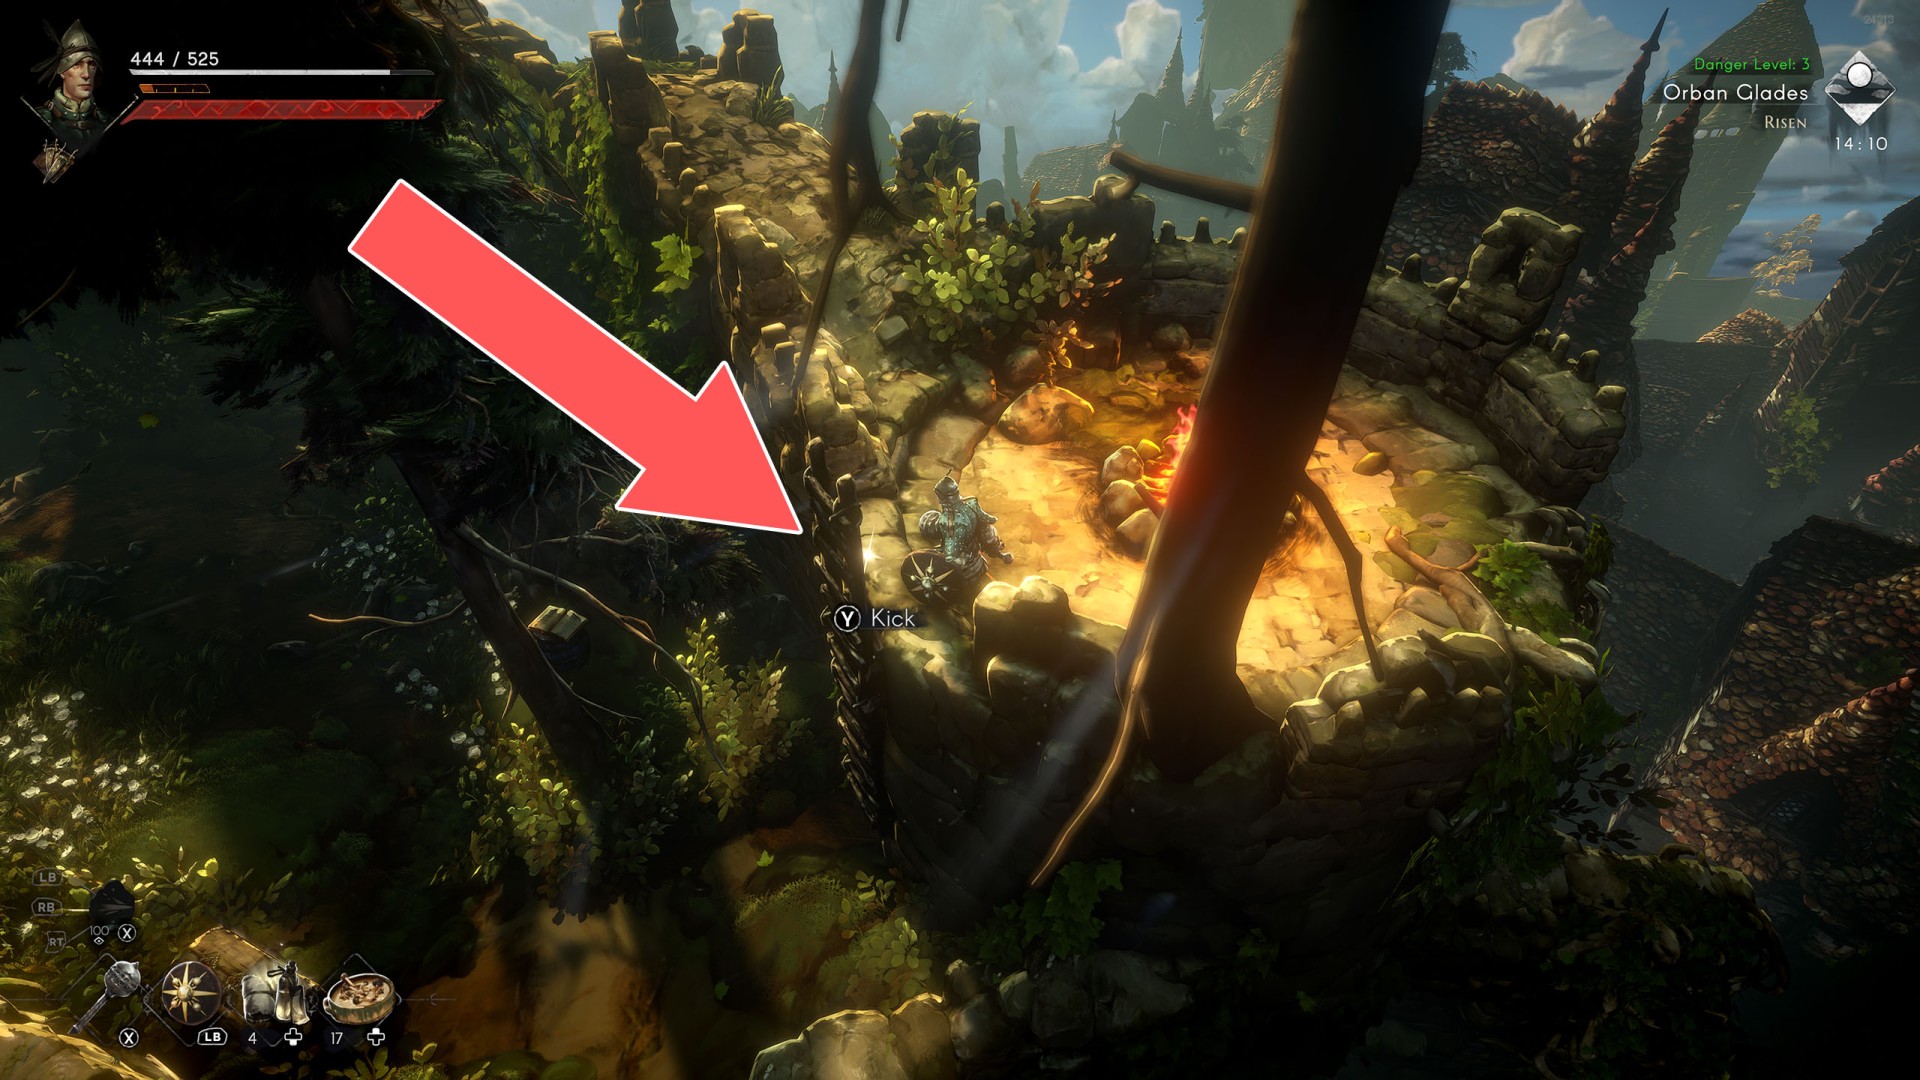
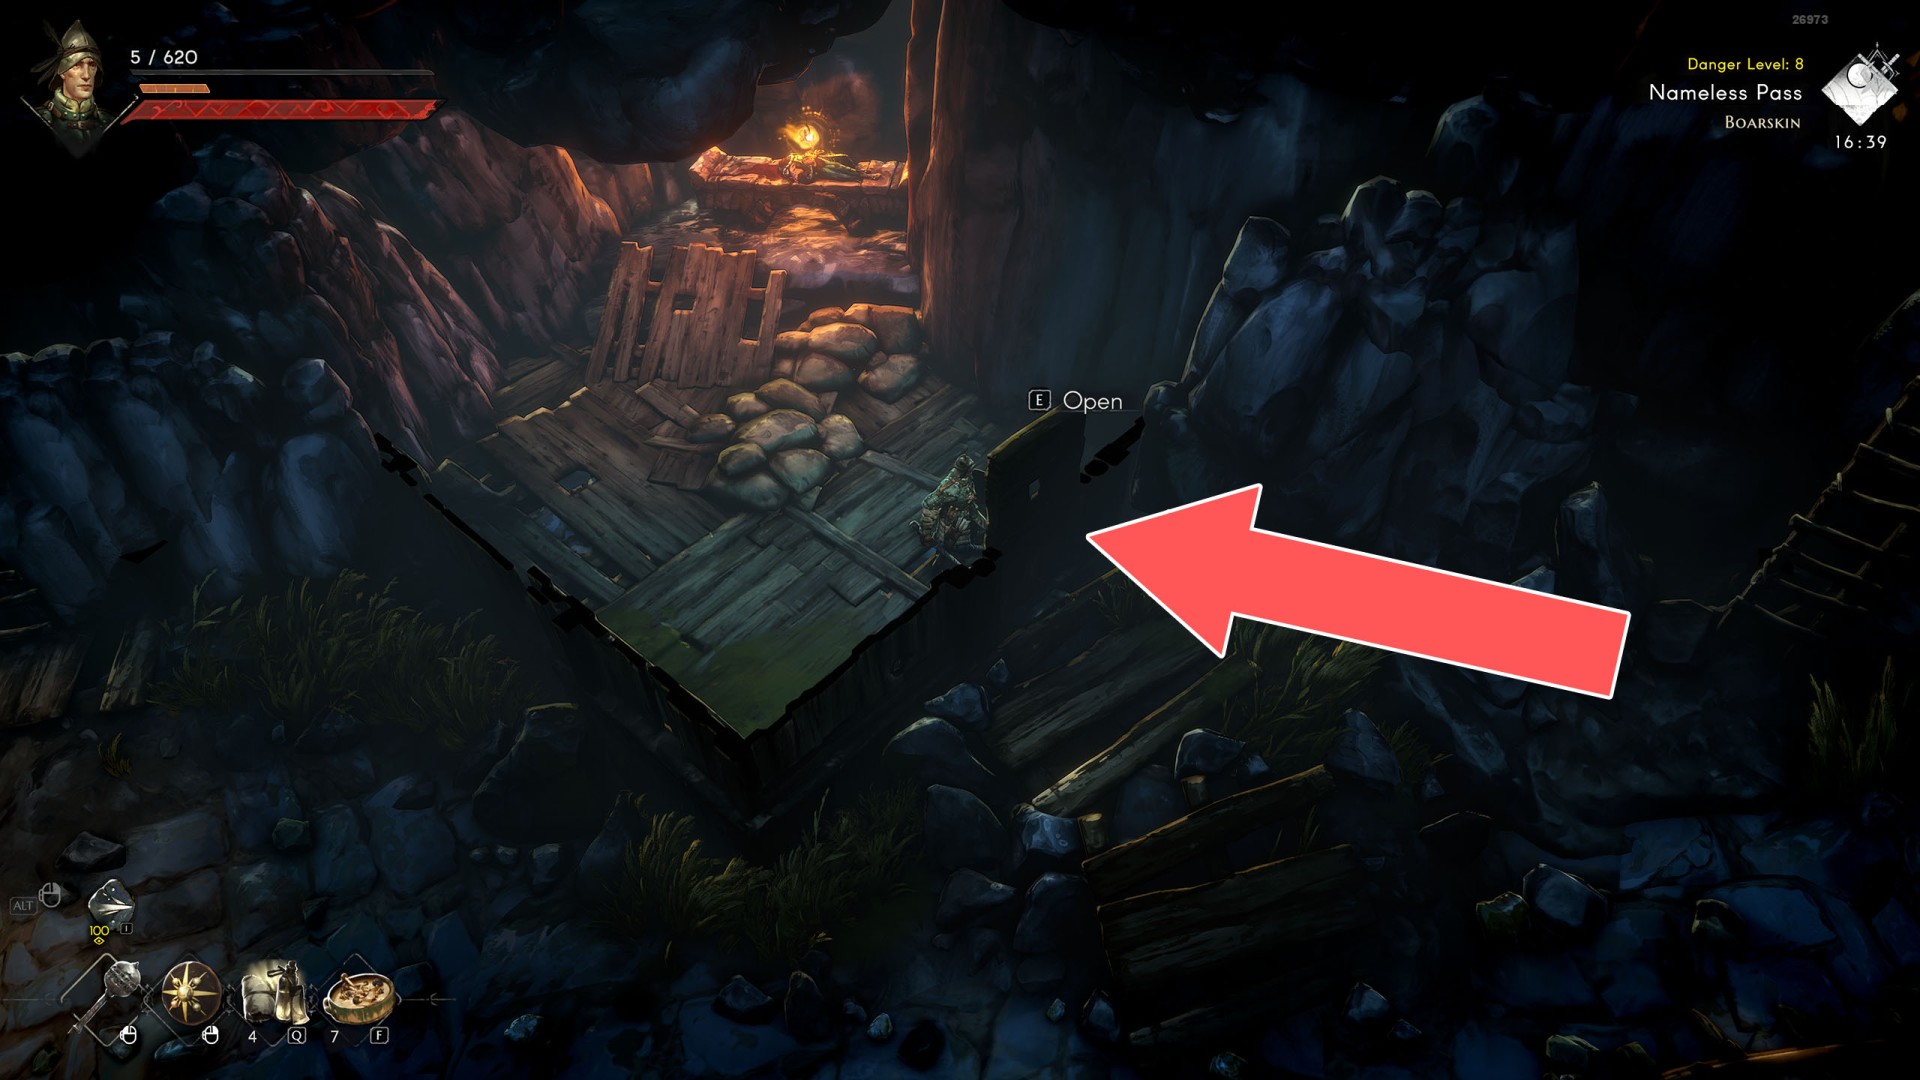
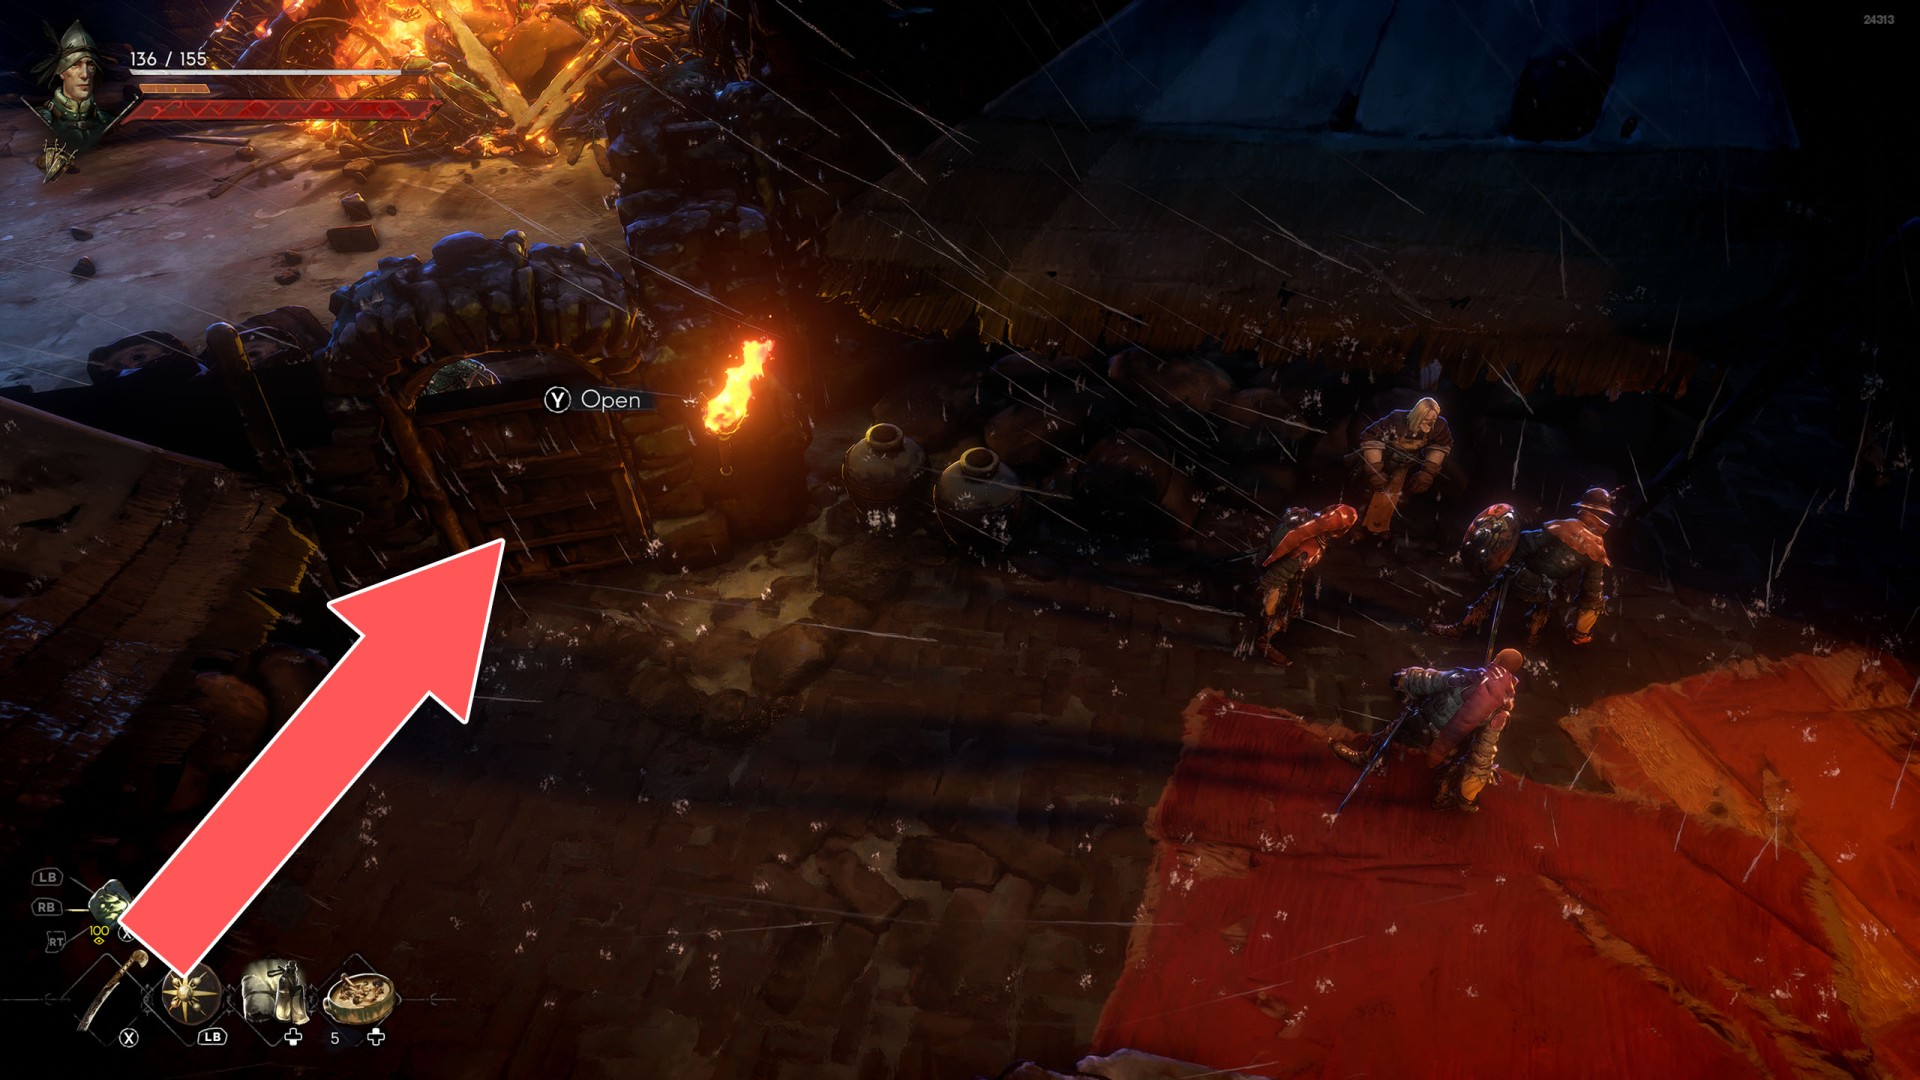
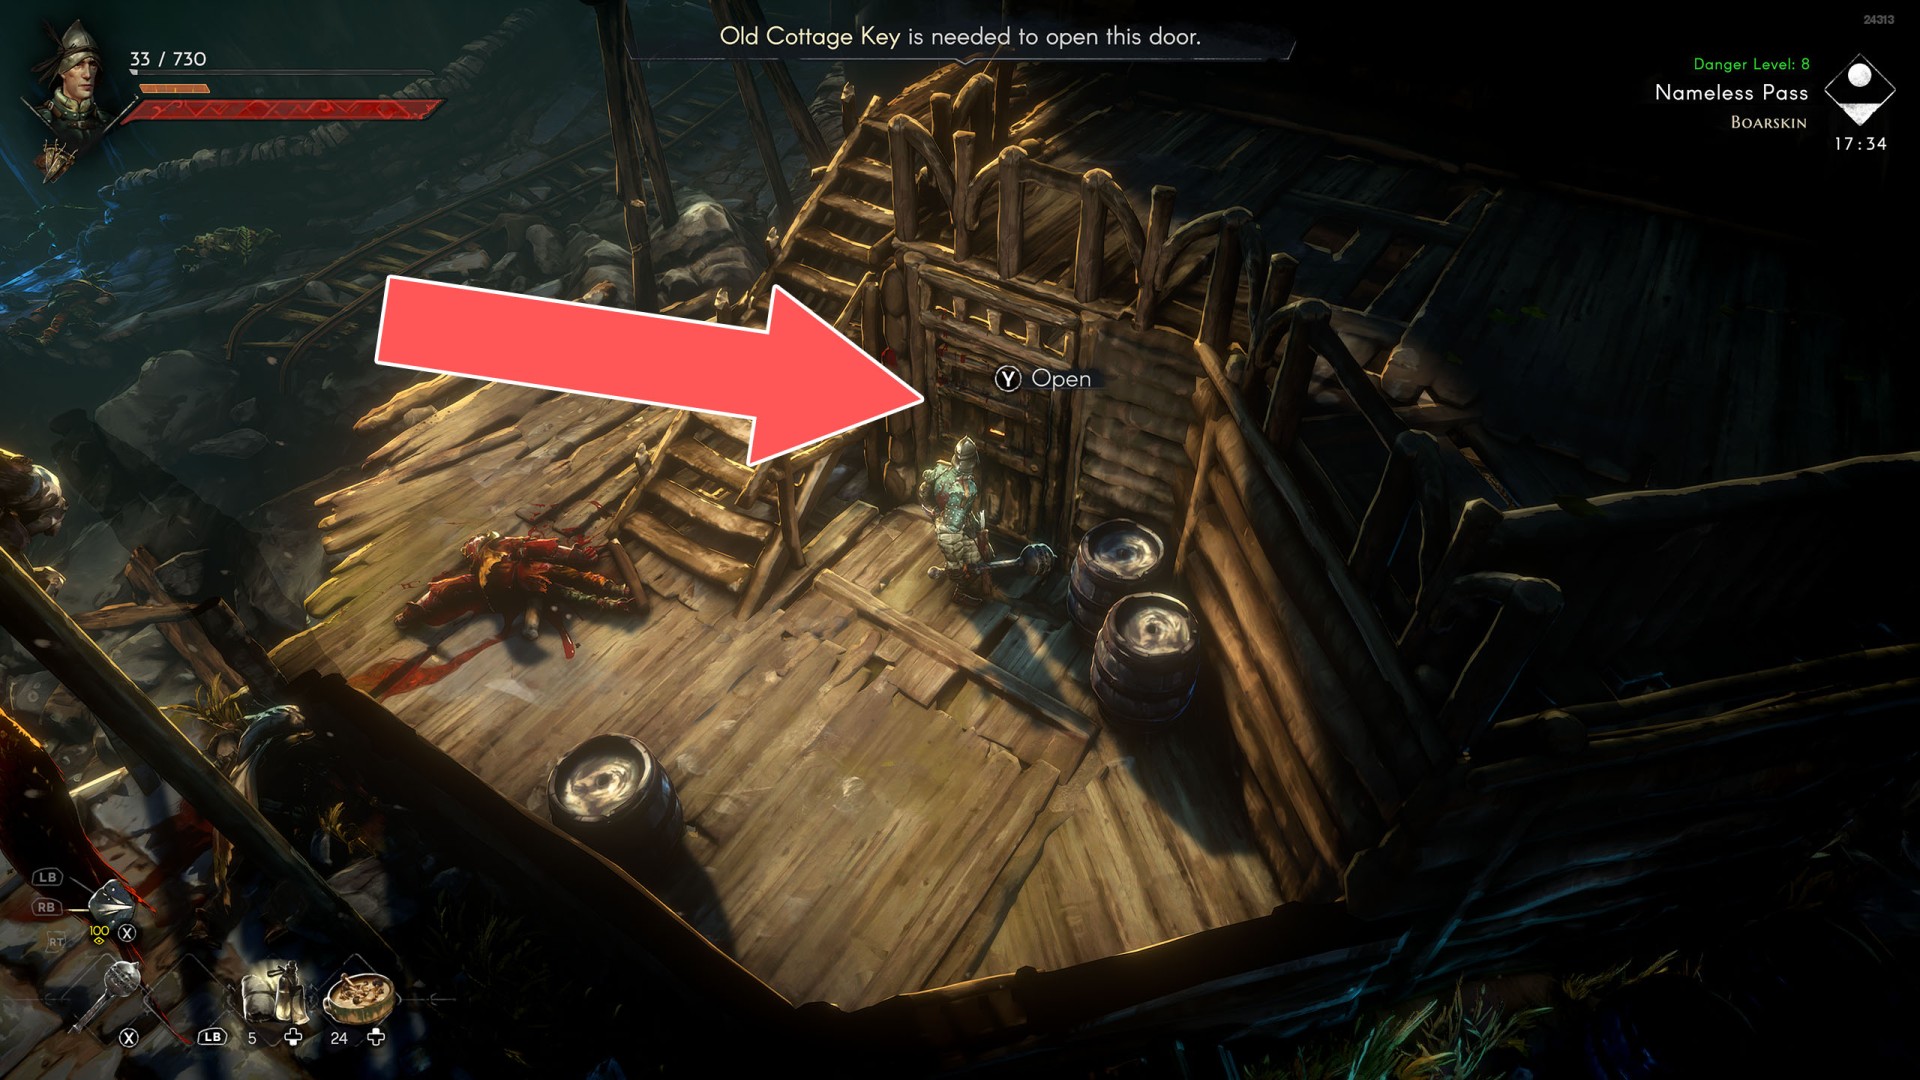
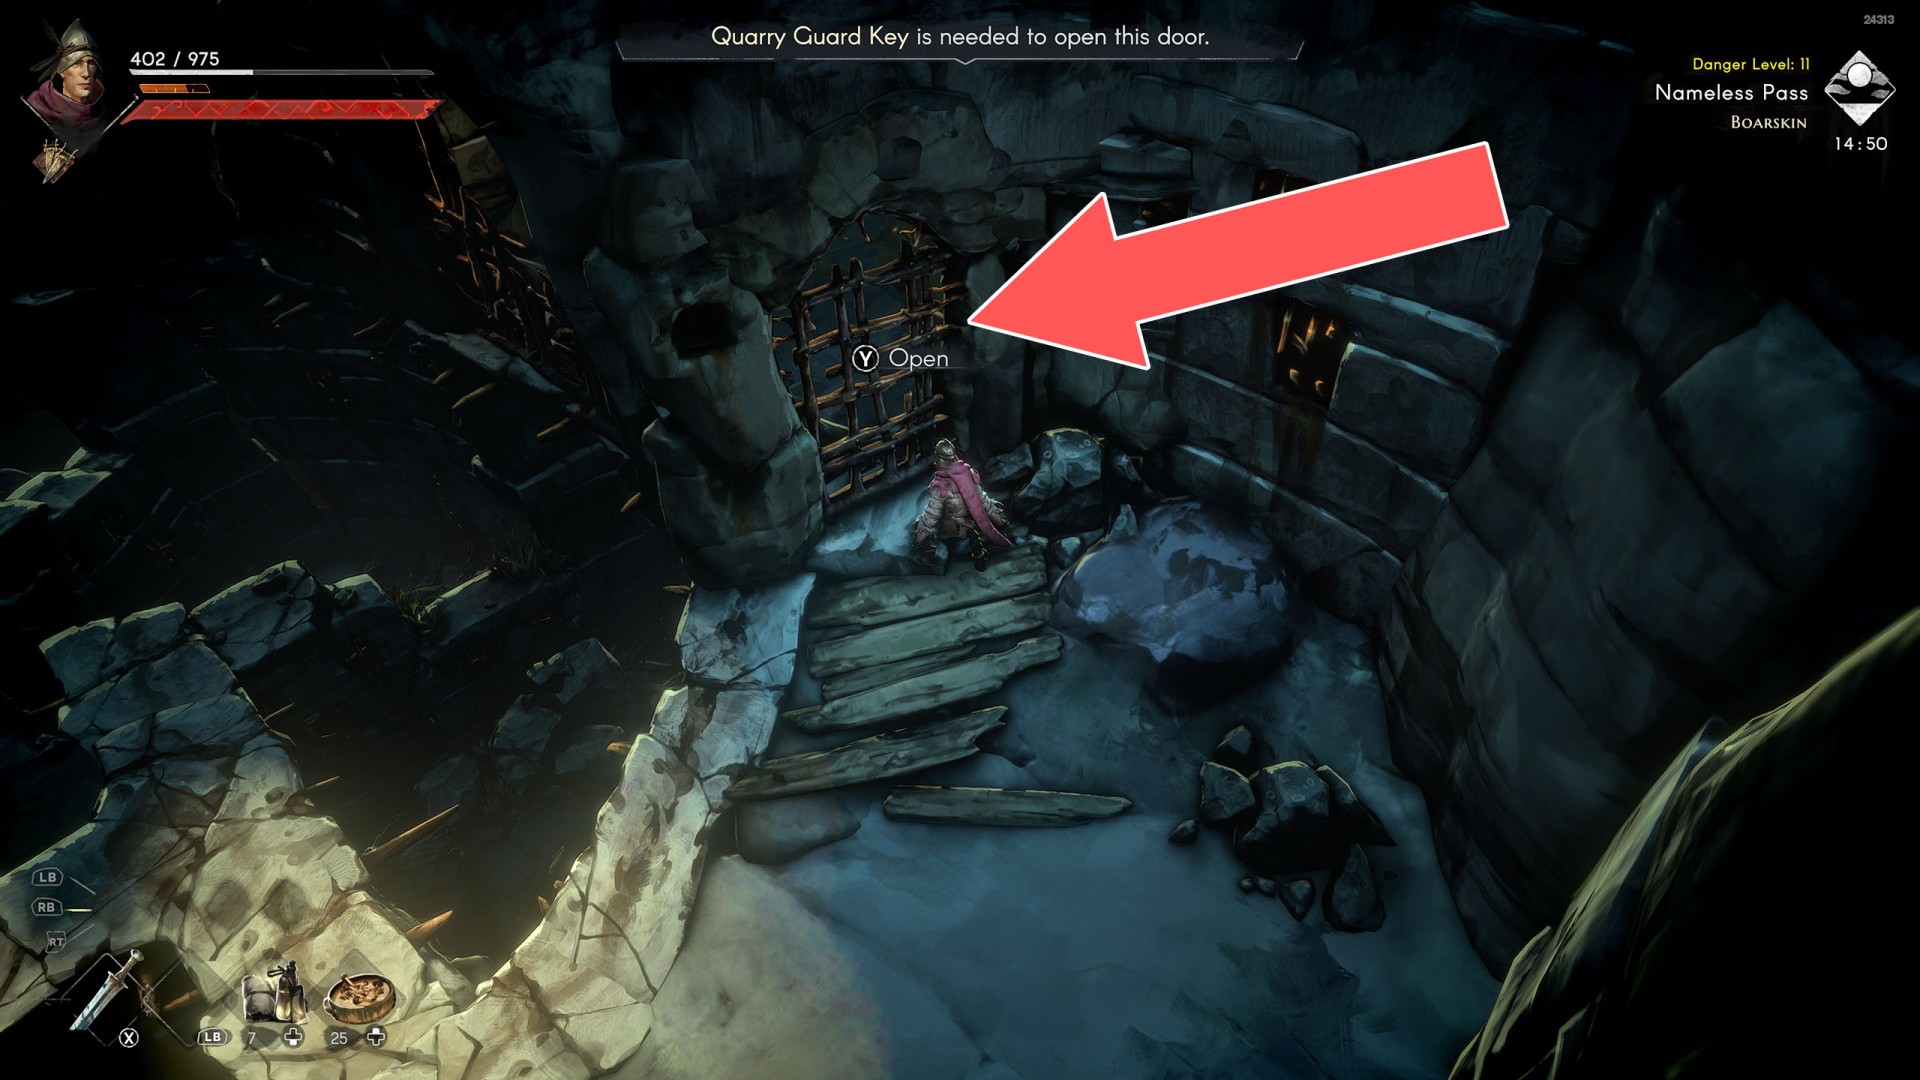
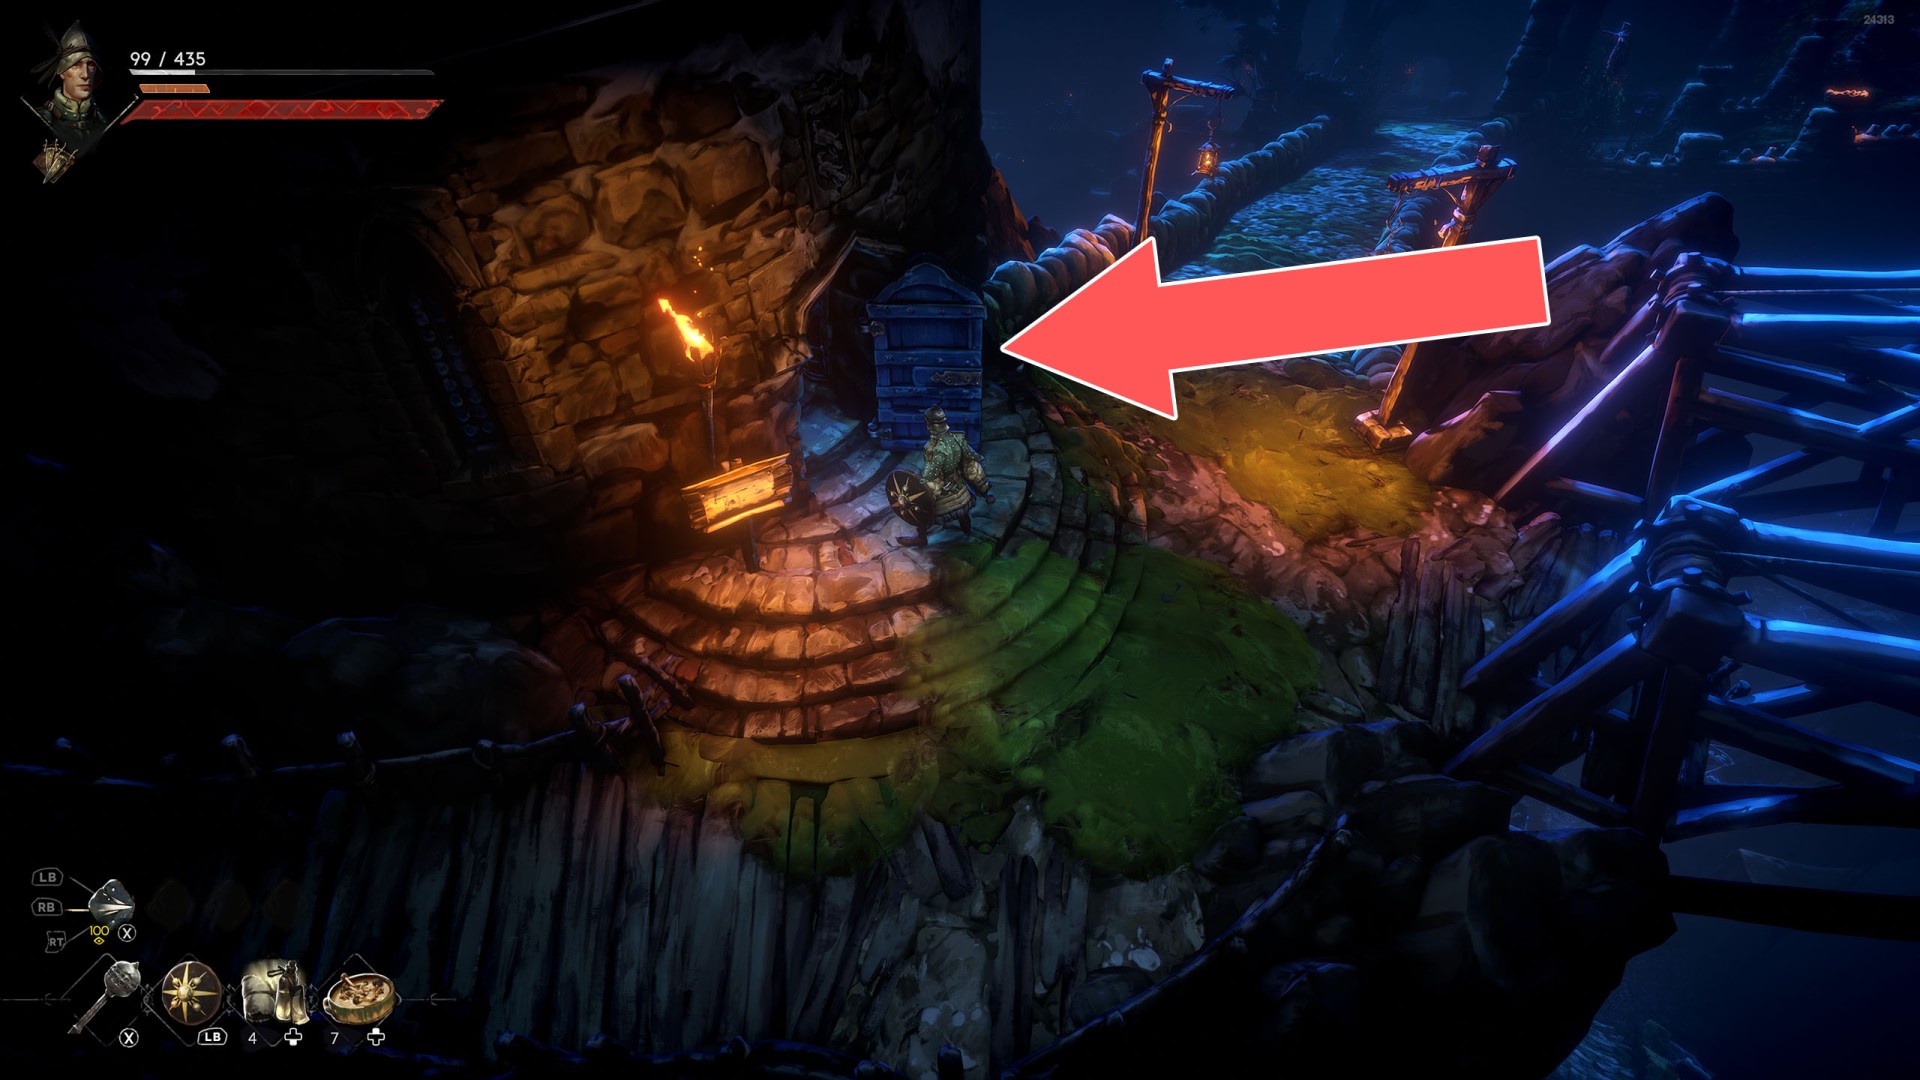
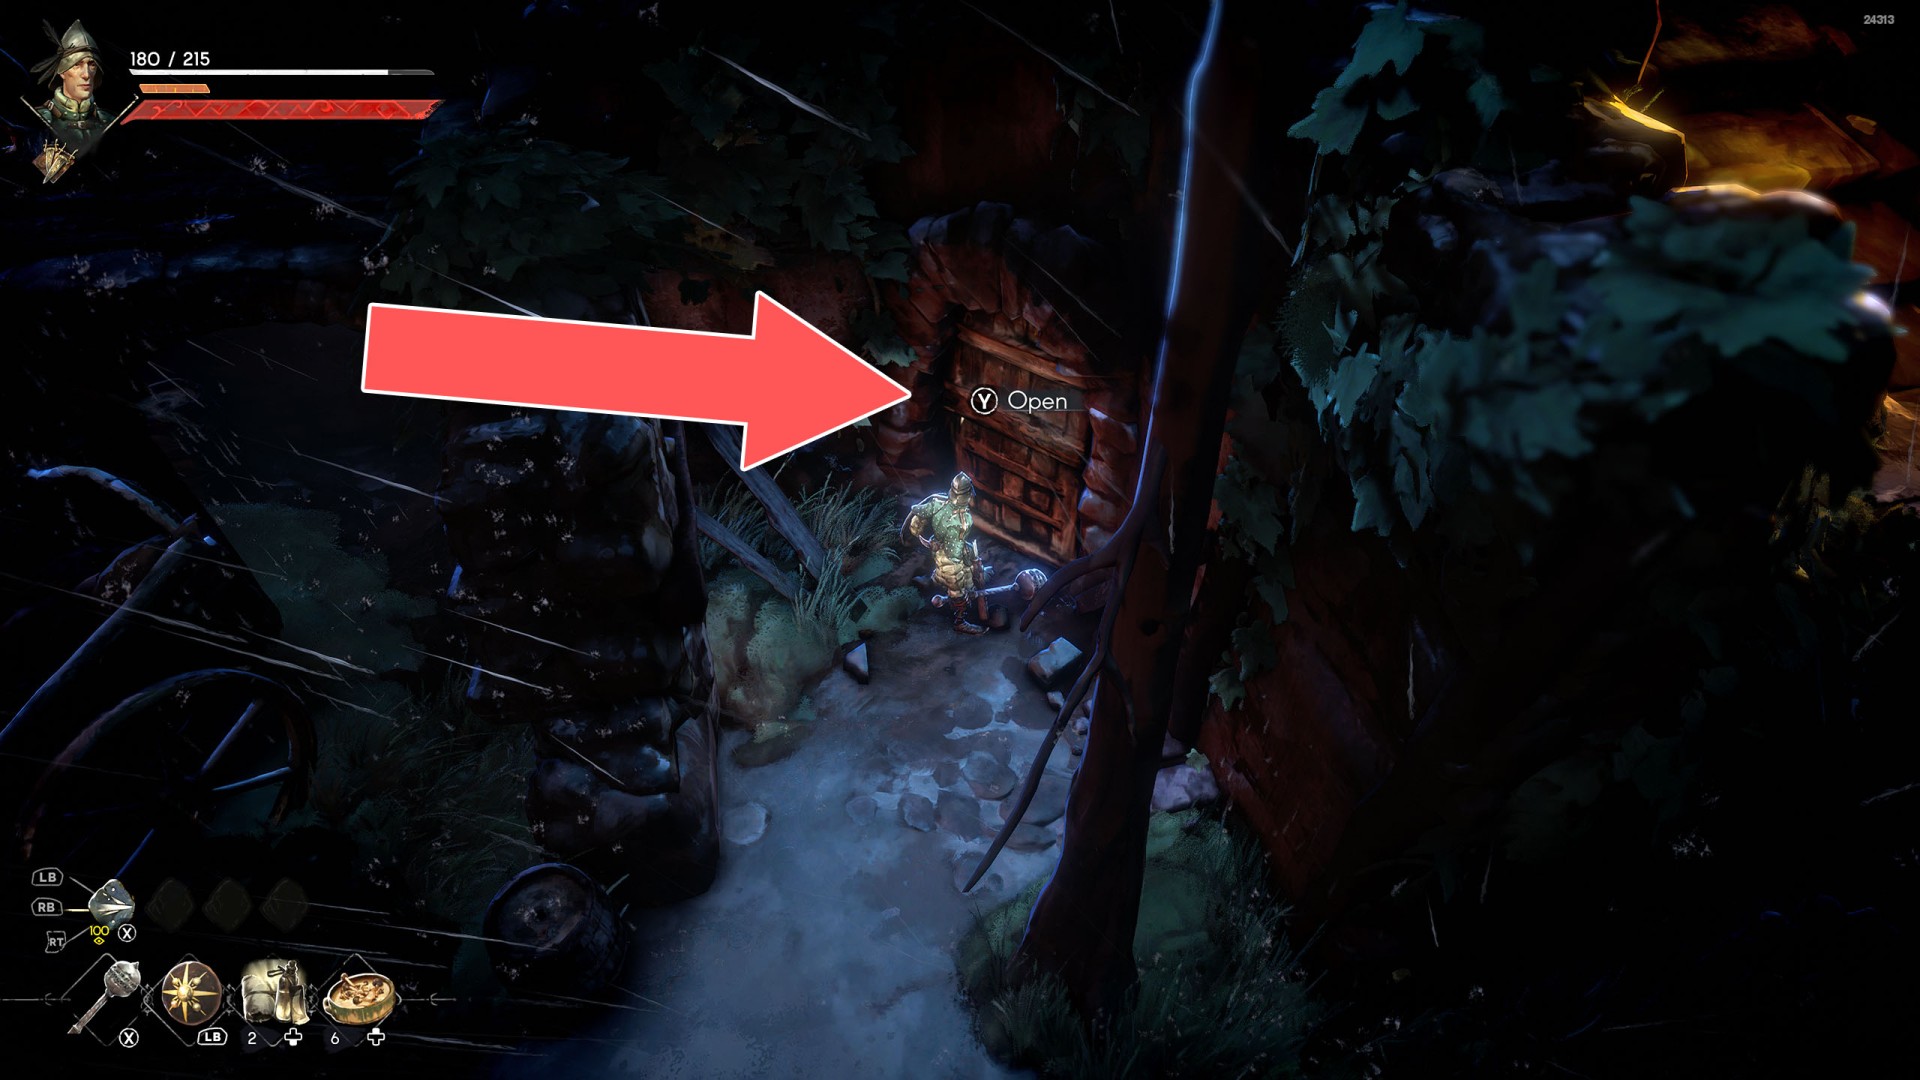
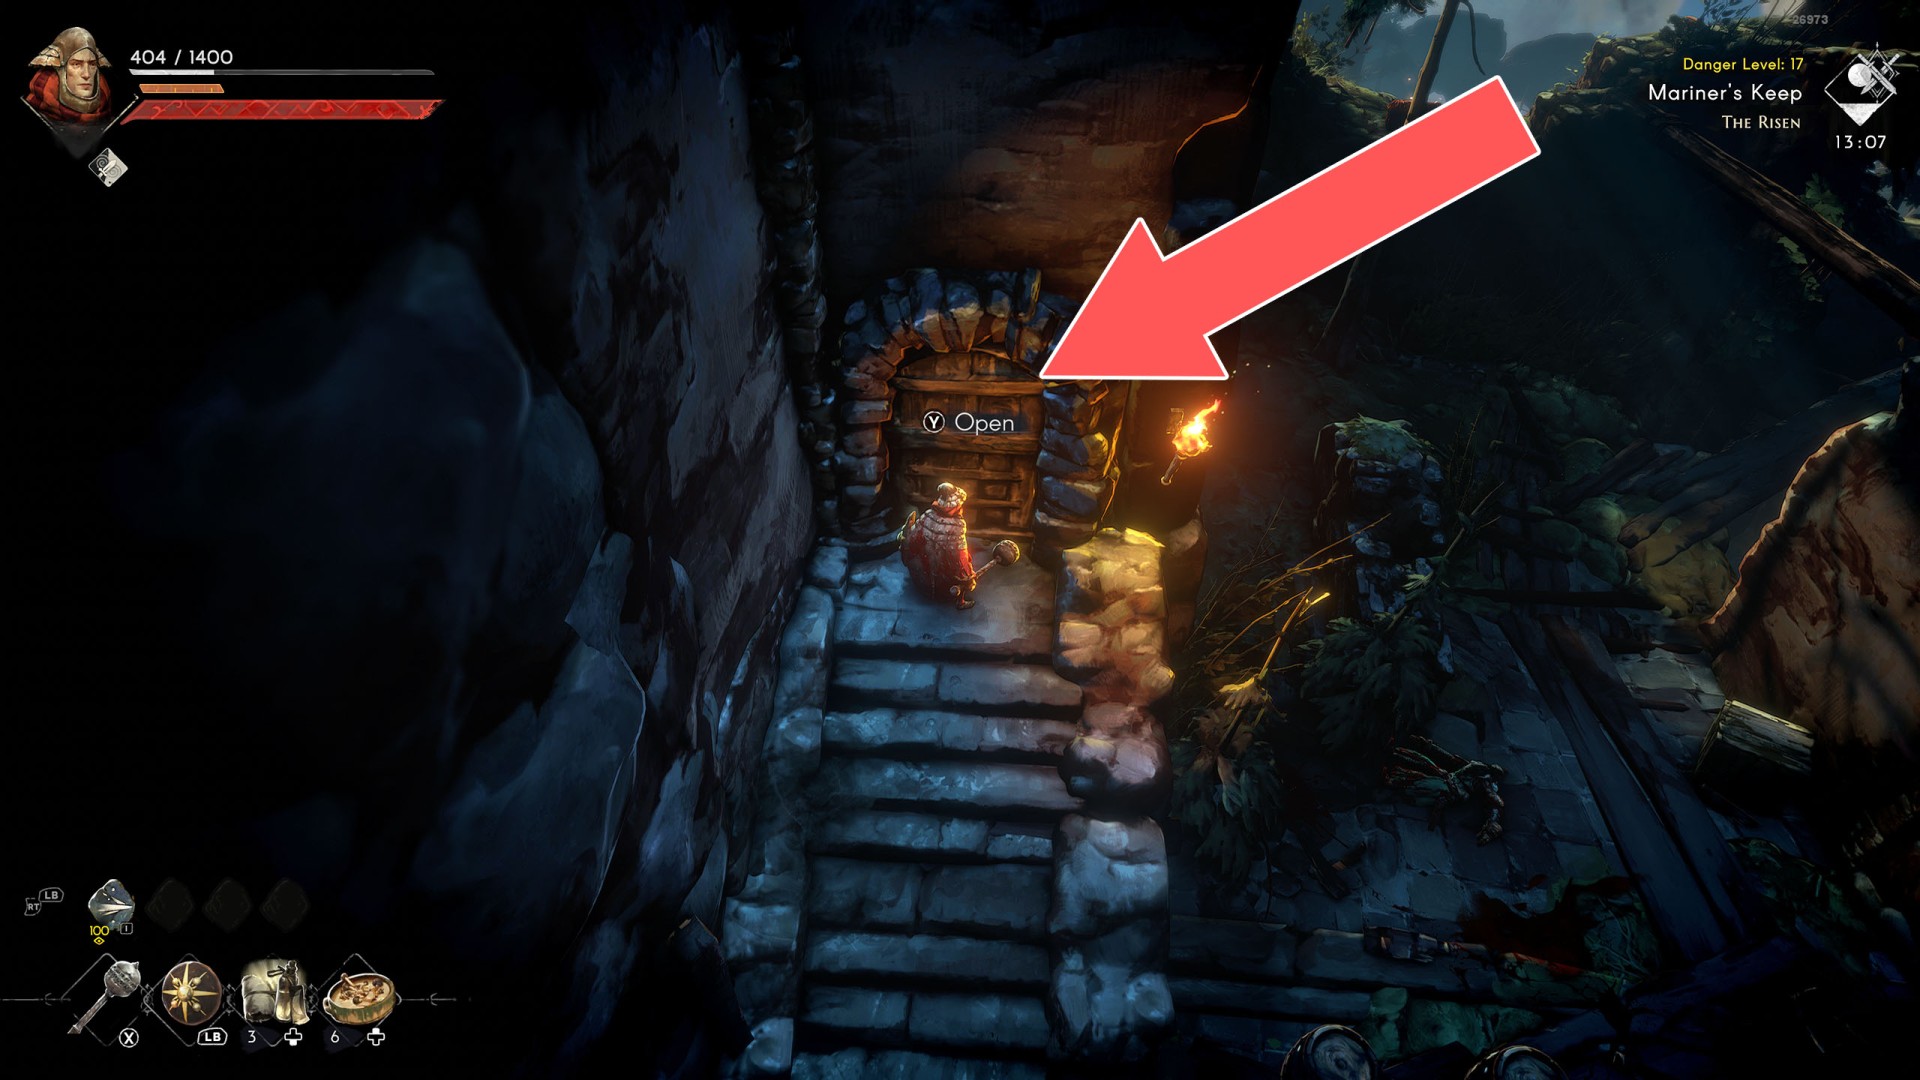
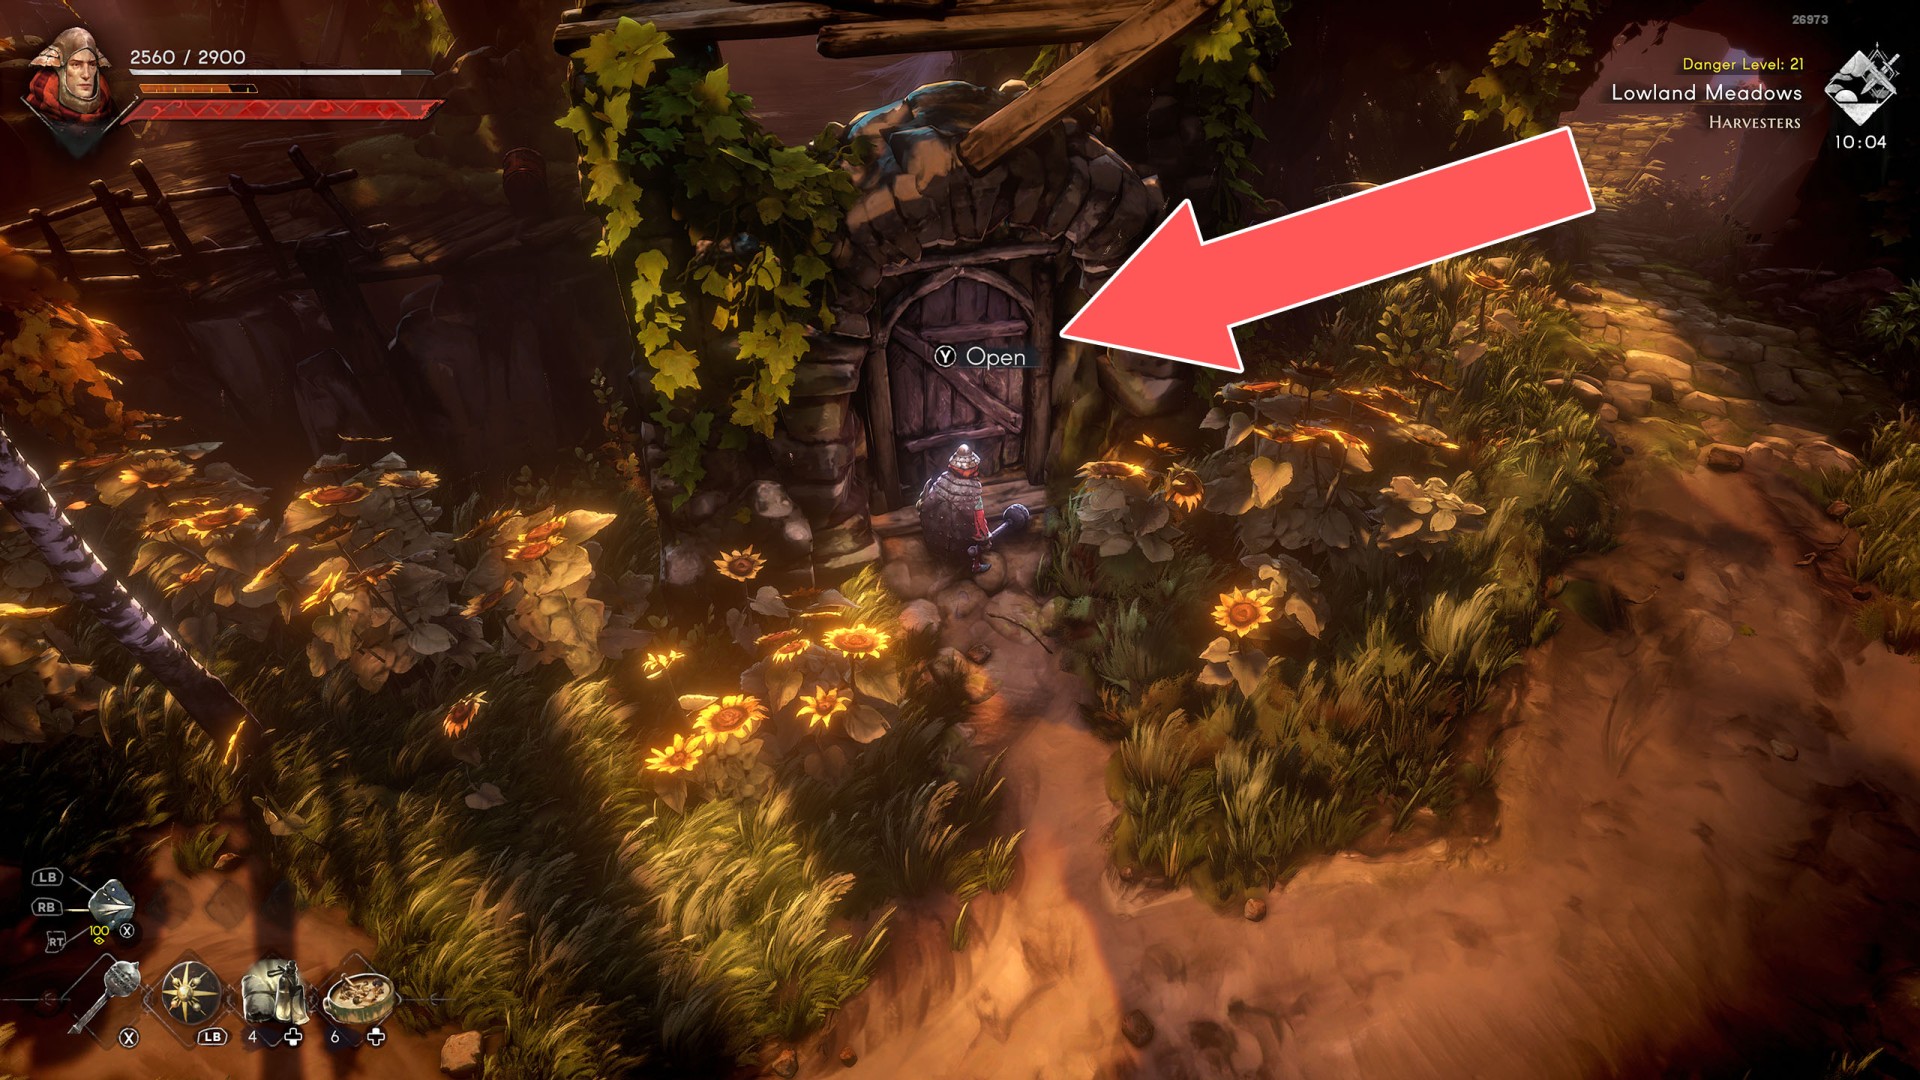
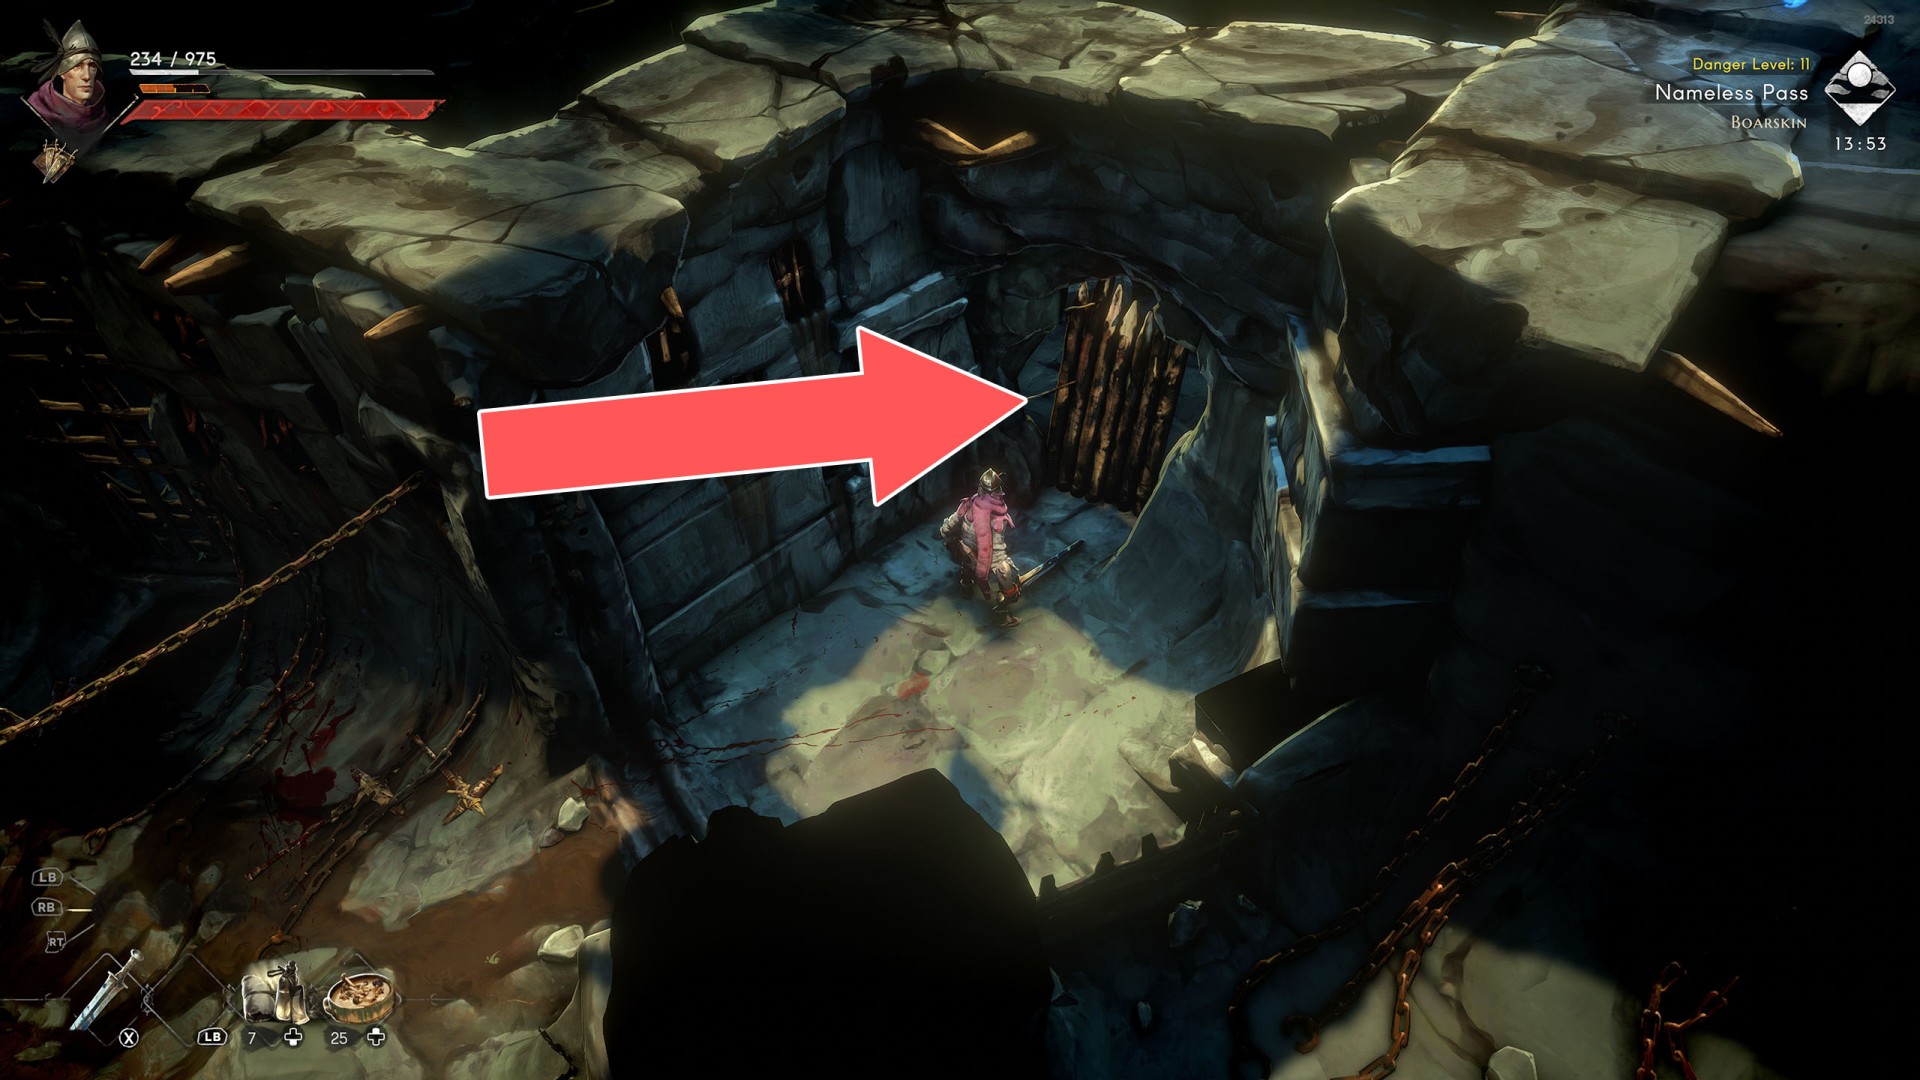
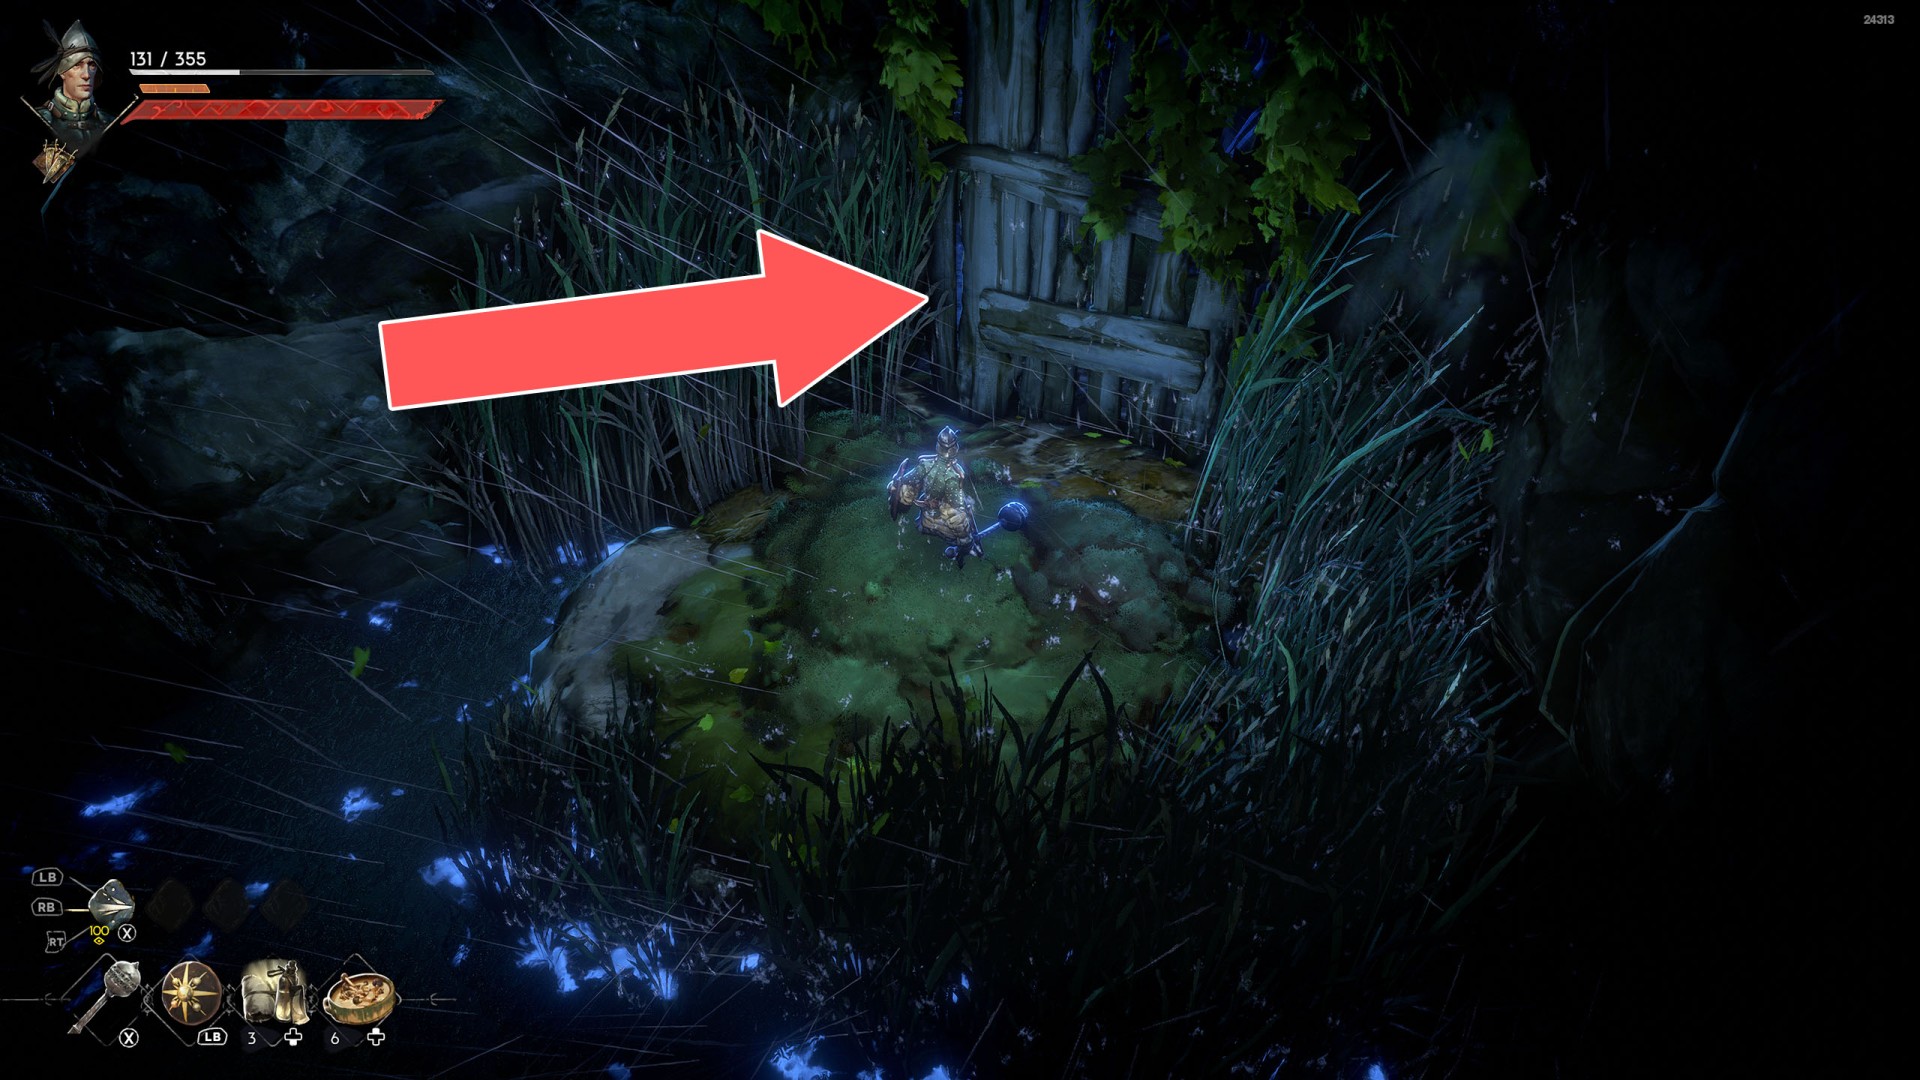
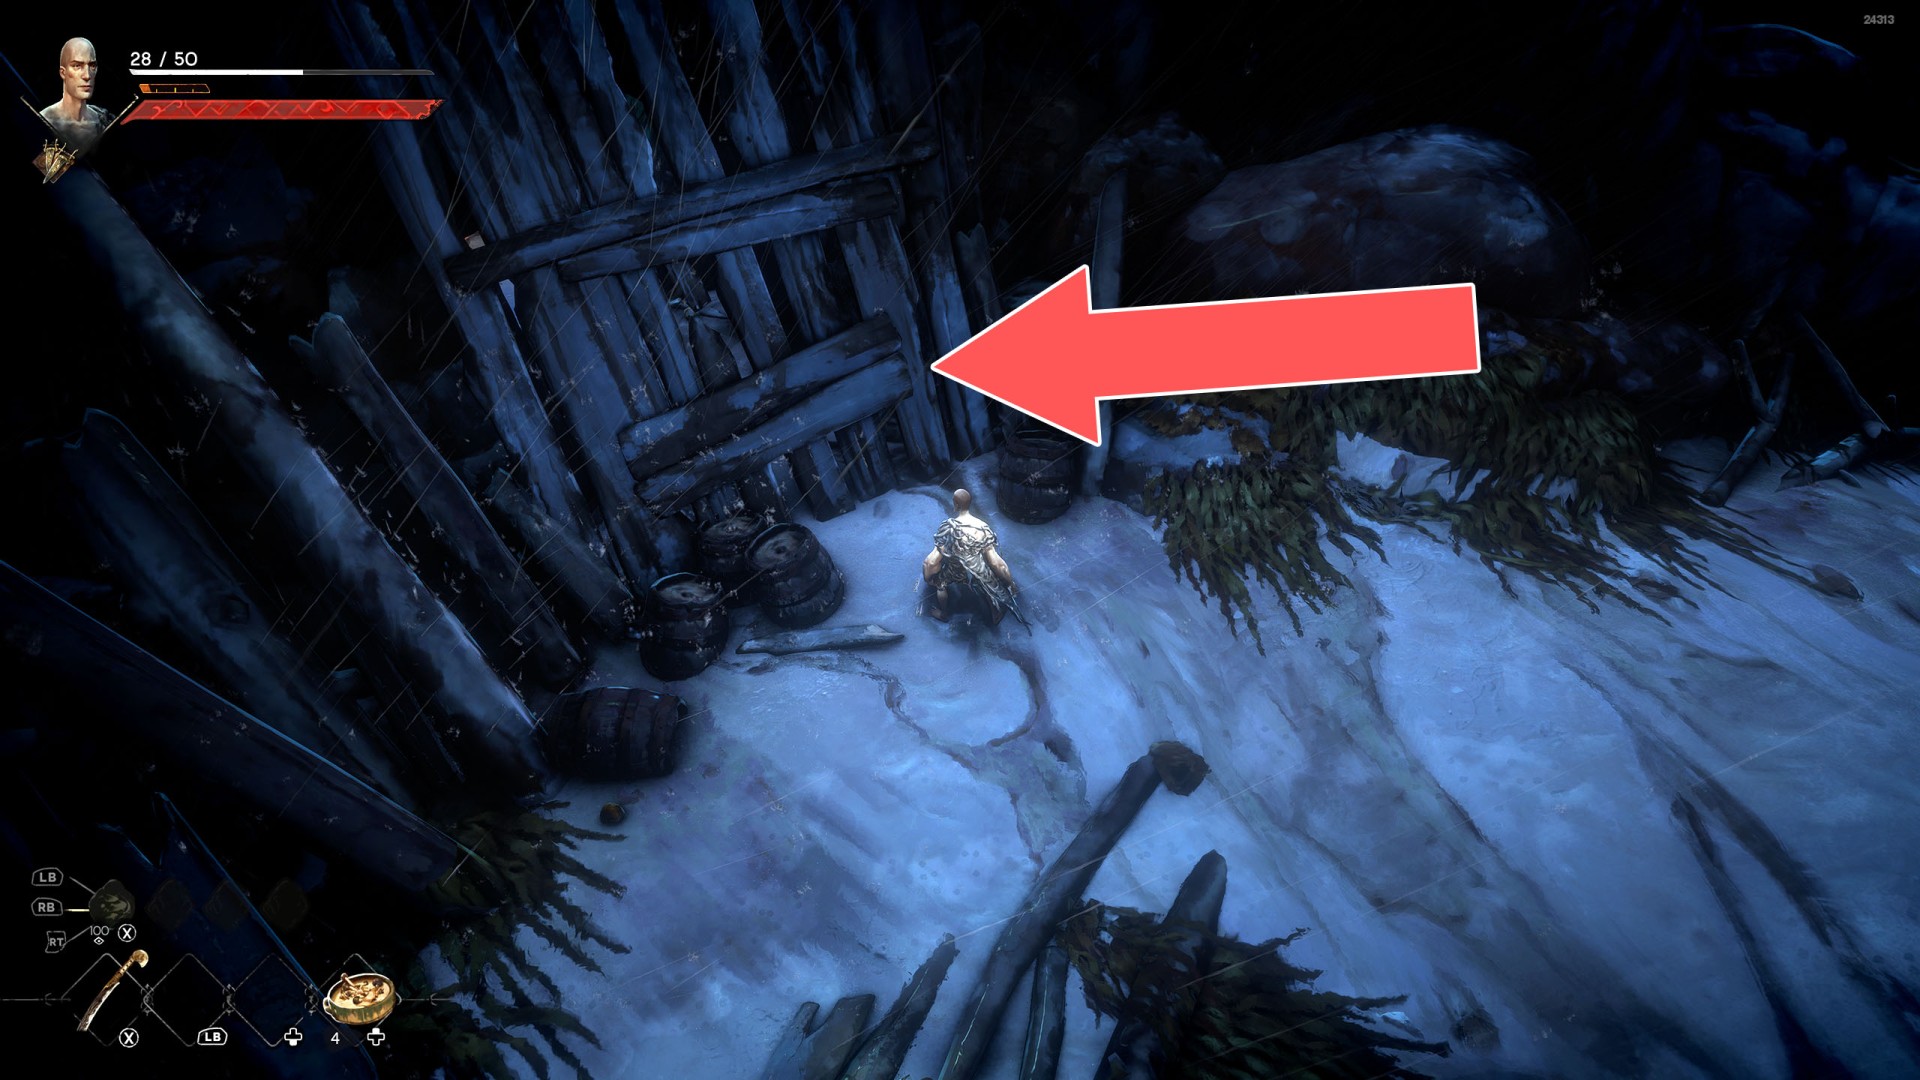
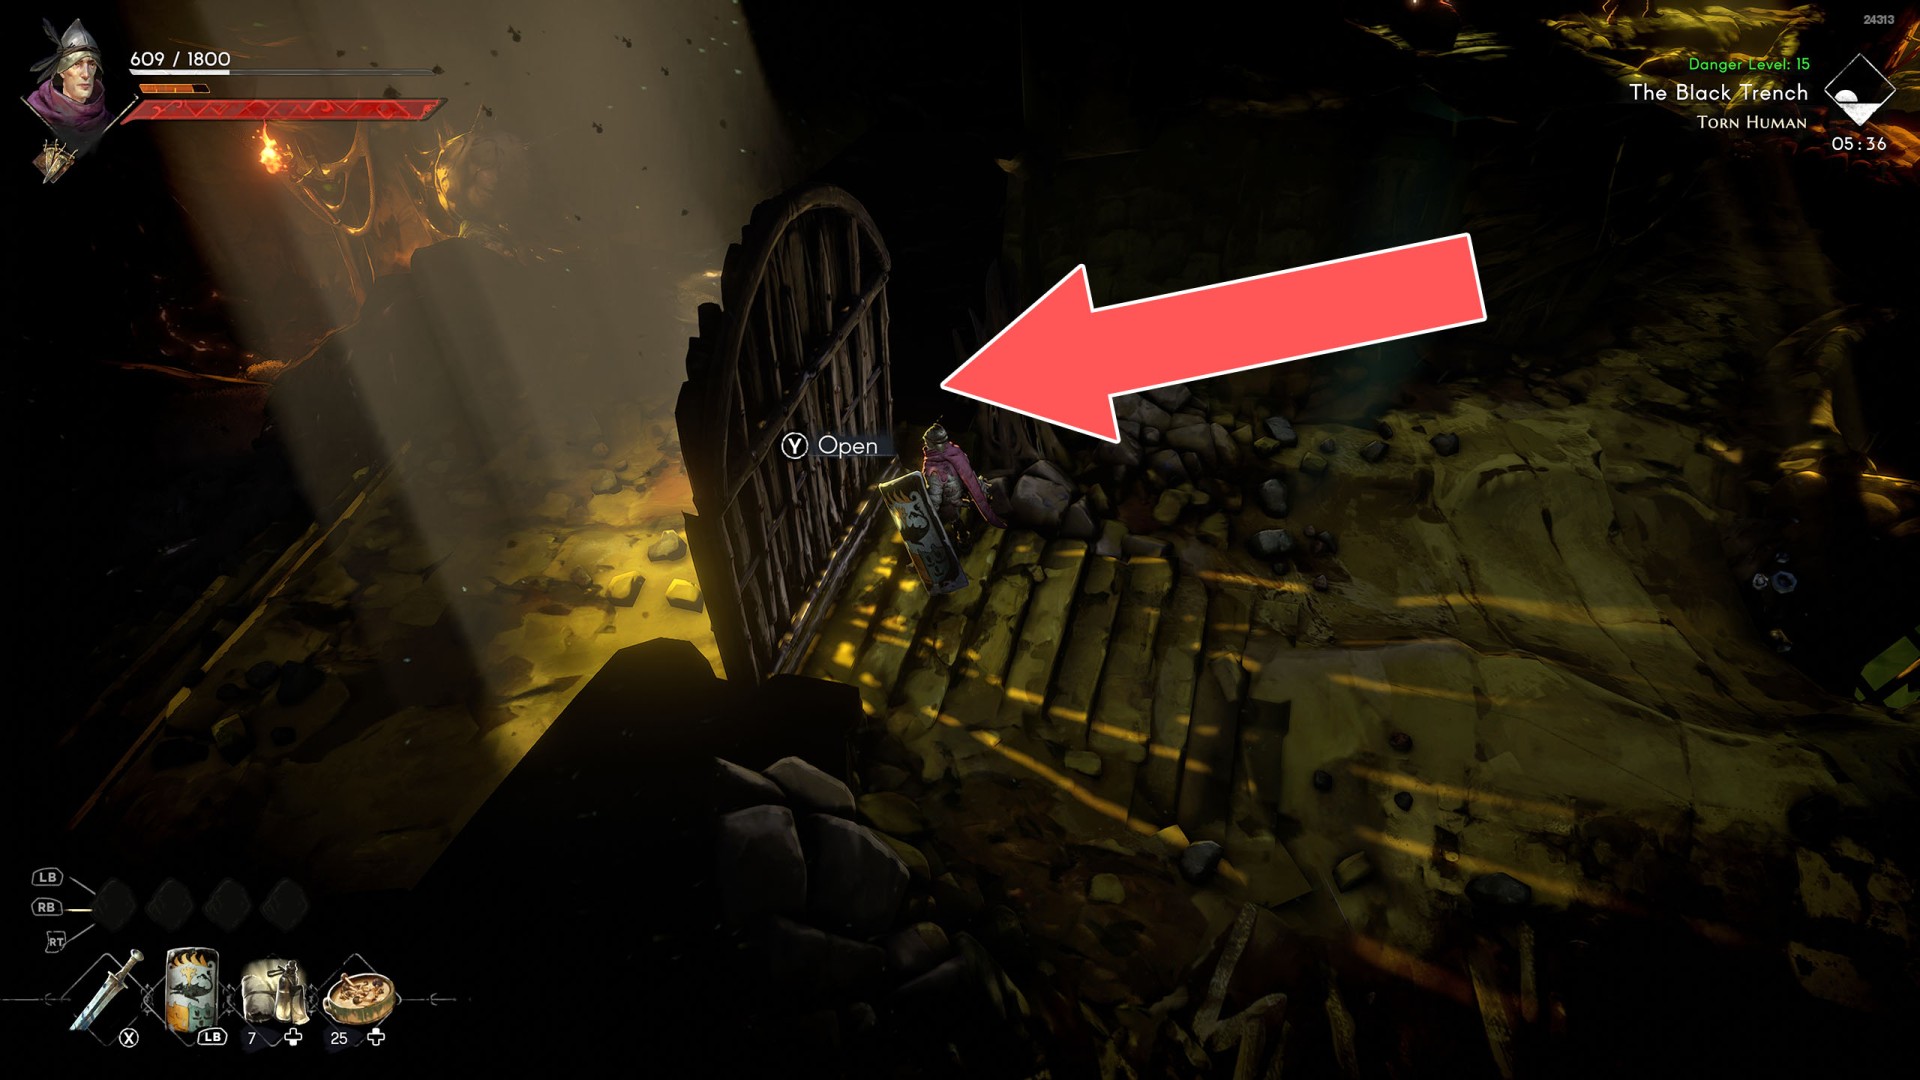
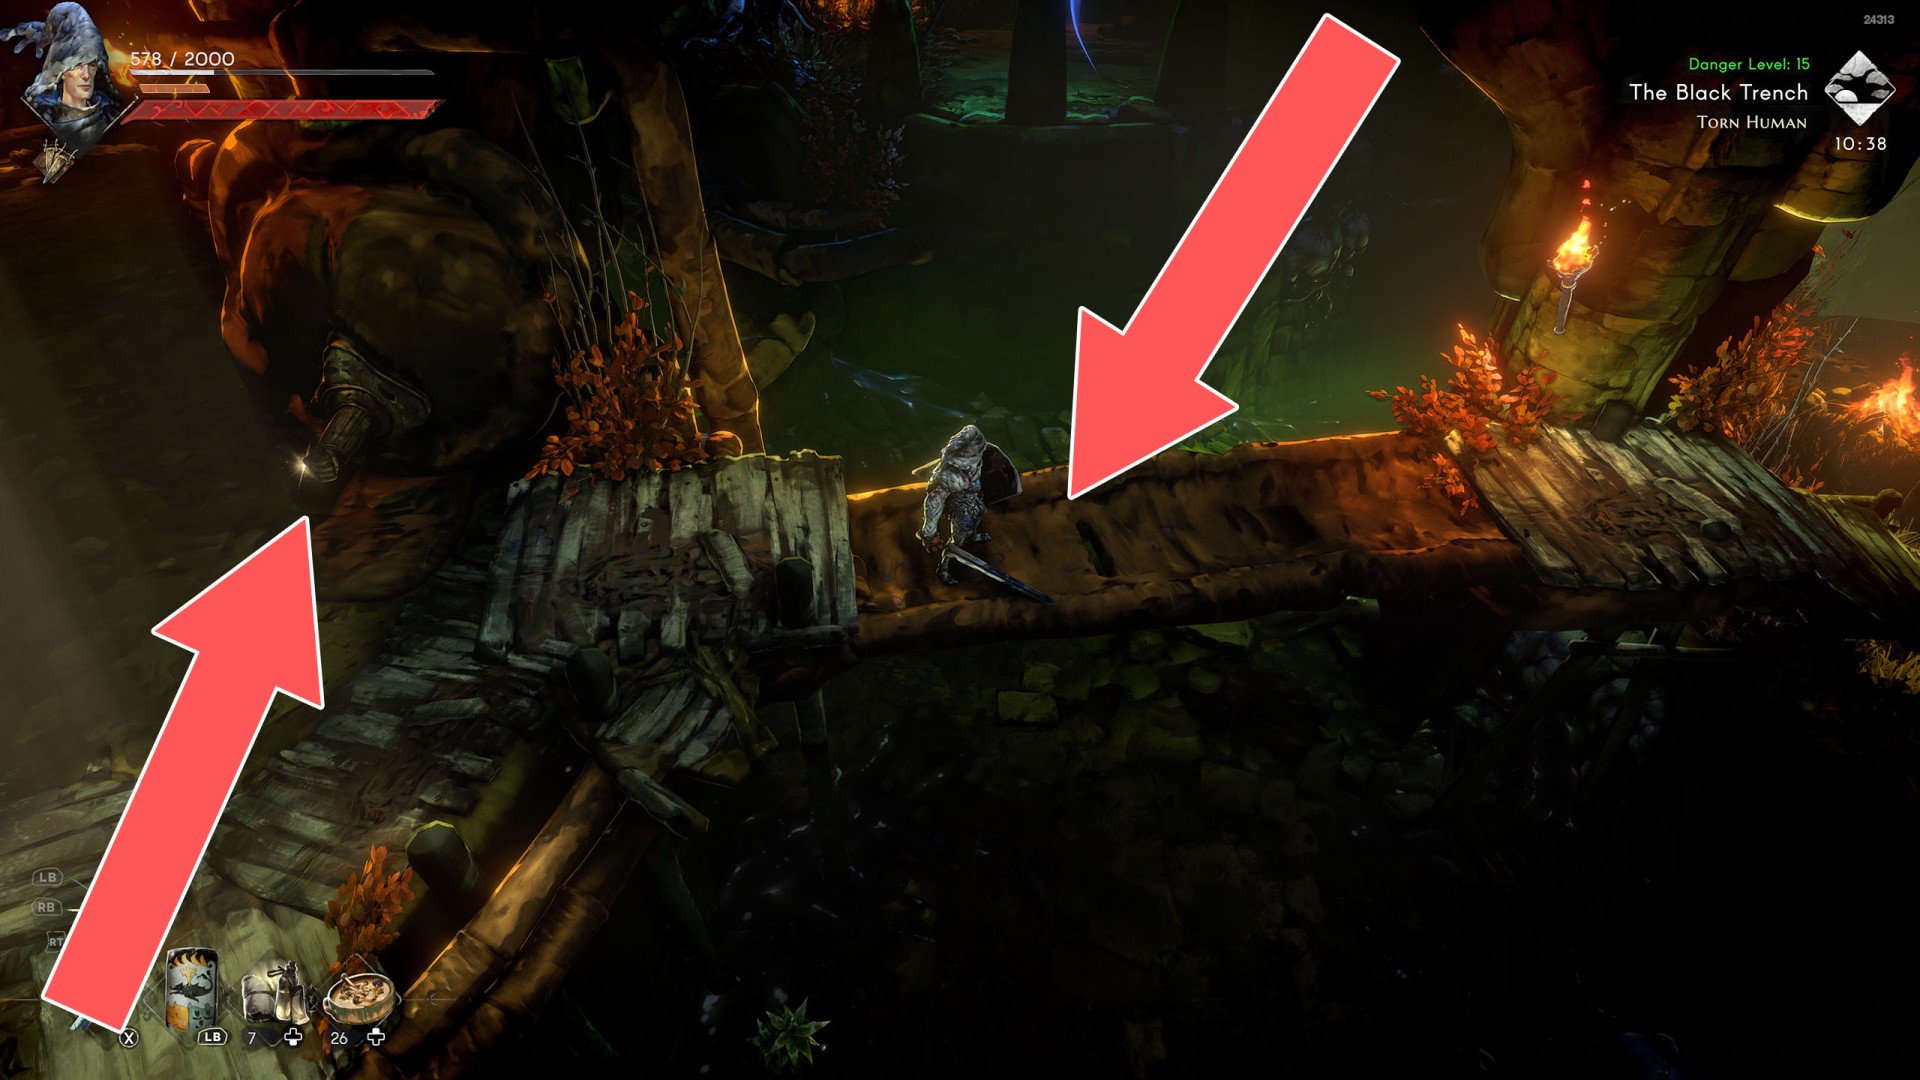
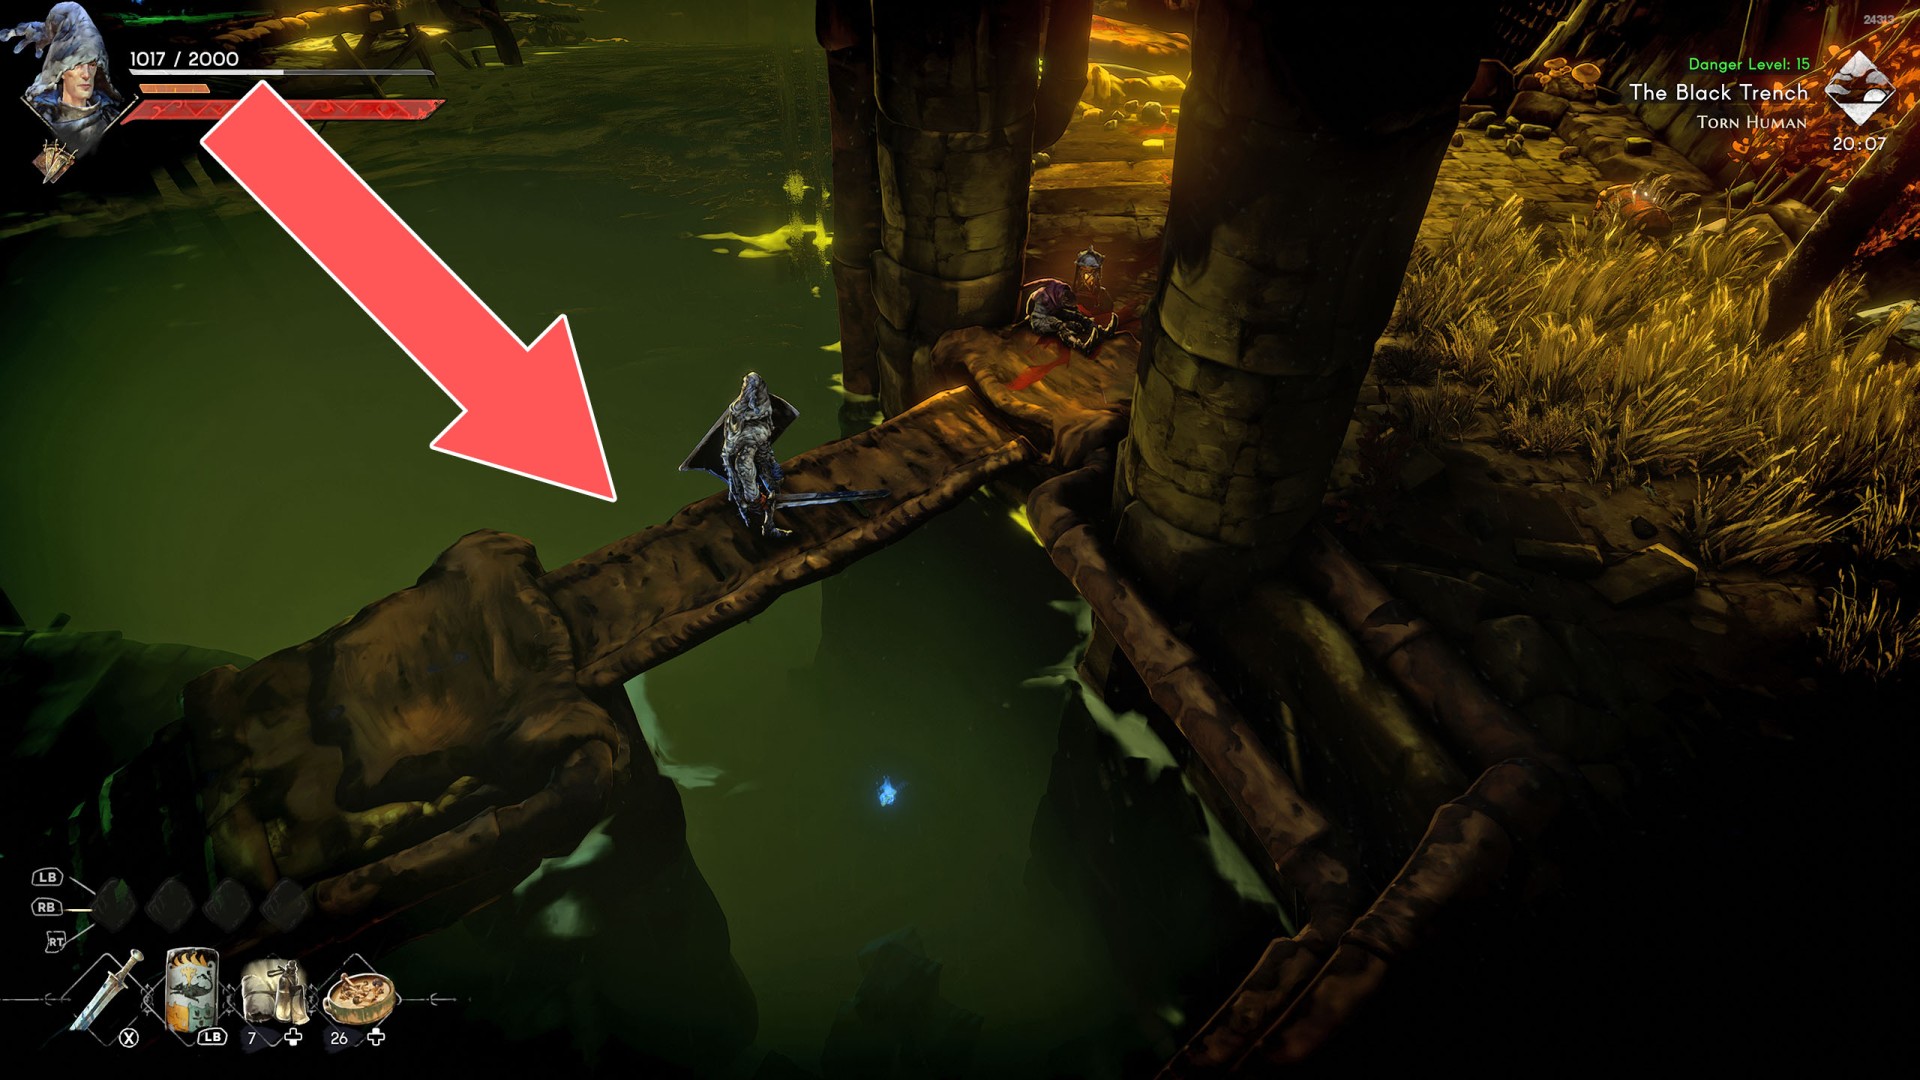
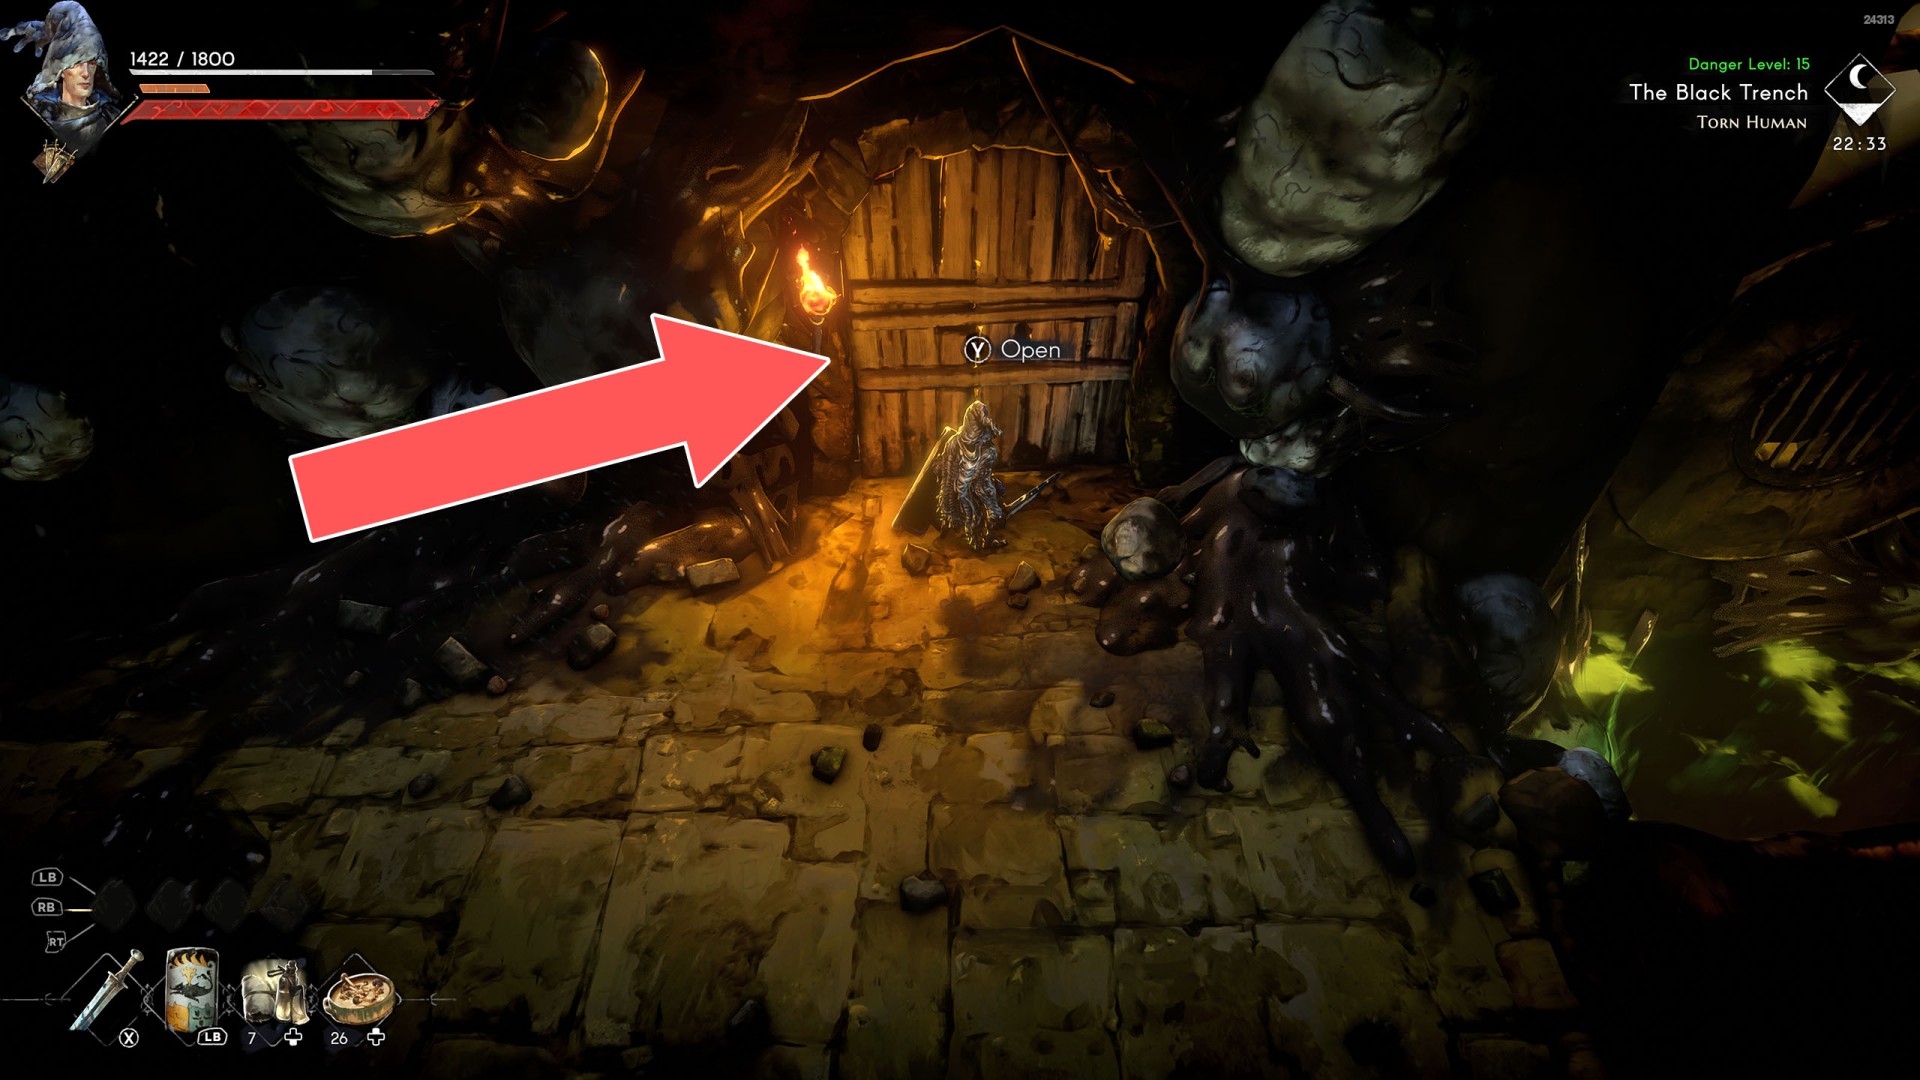
Various passageways, for example, closed doors or gates where you have to find a way to open them. Sometimes you will have to find the right key, sometimes they can only be unlocked from one of the sides. In some cases, all you have to do is use a weapon and destroy them.

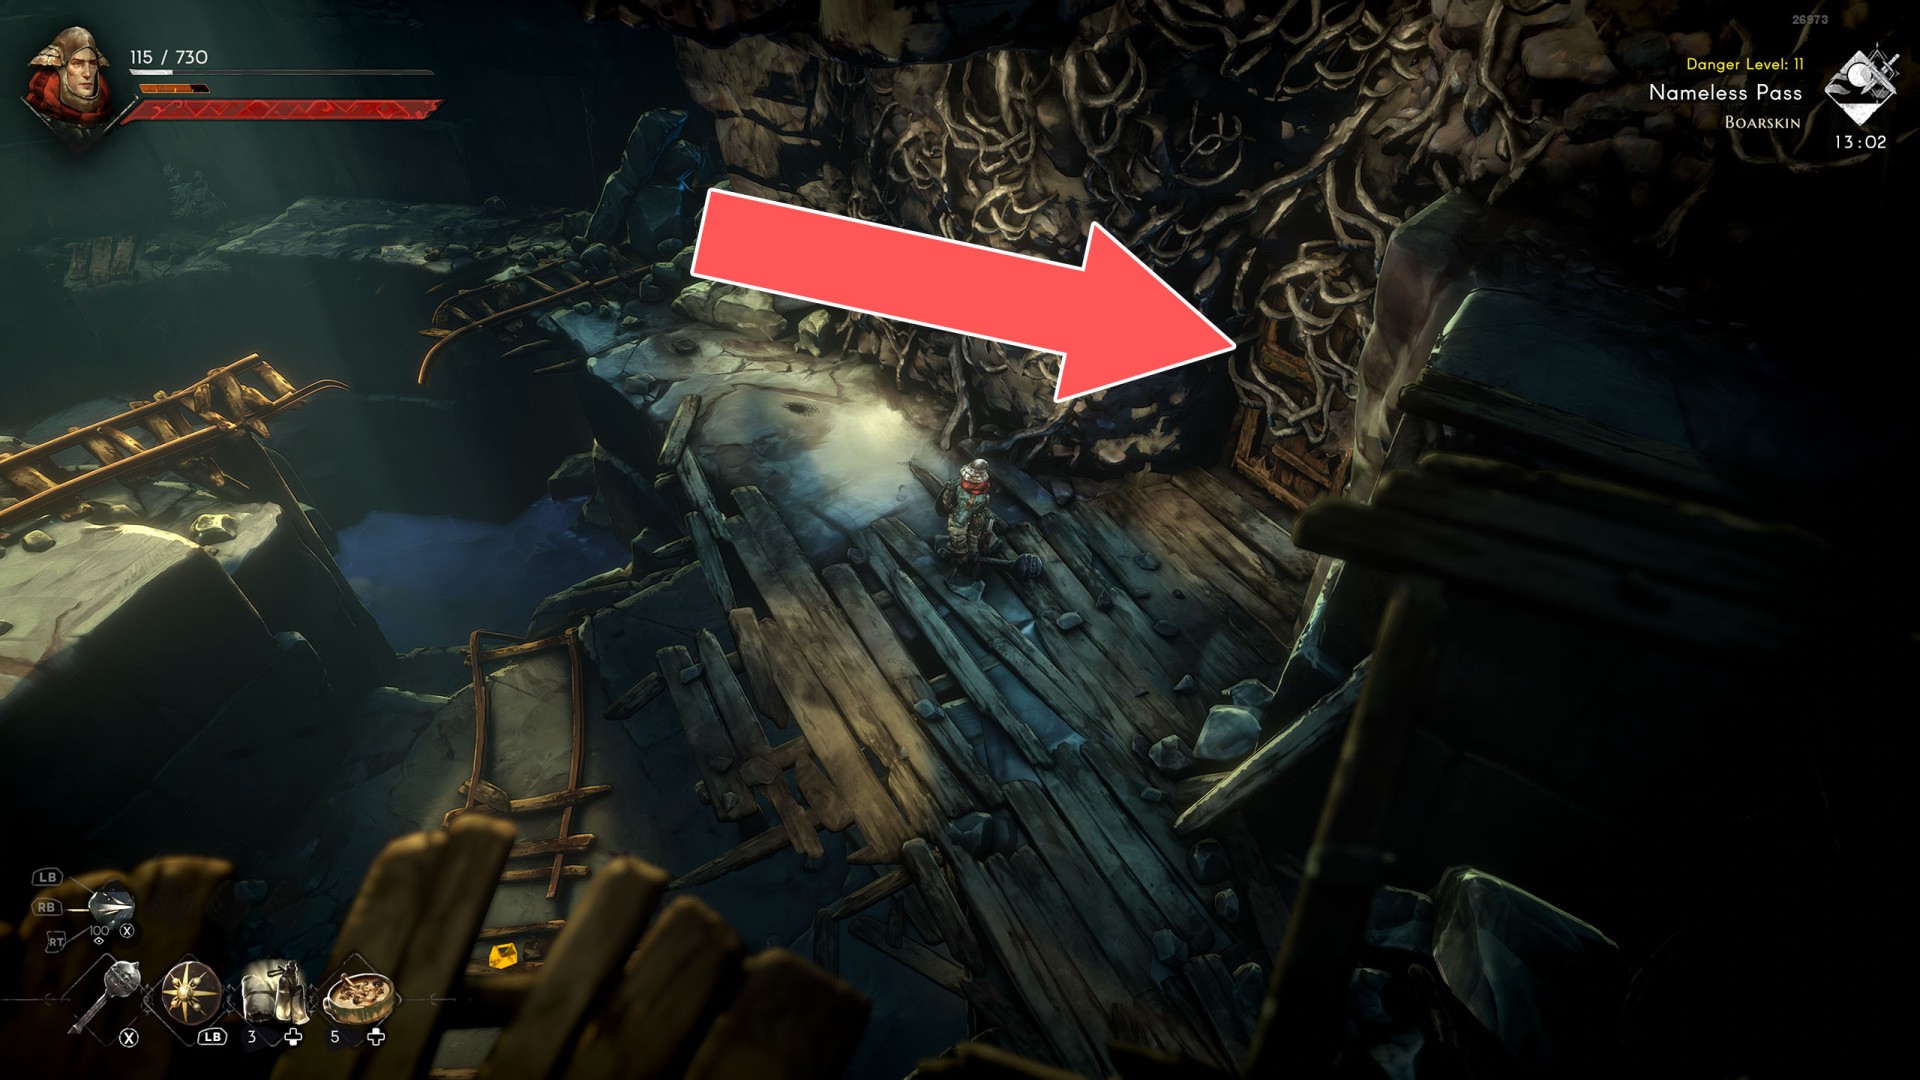
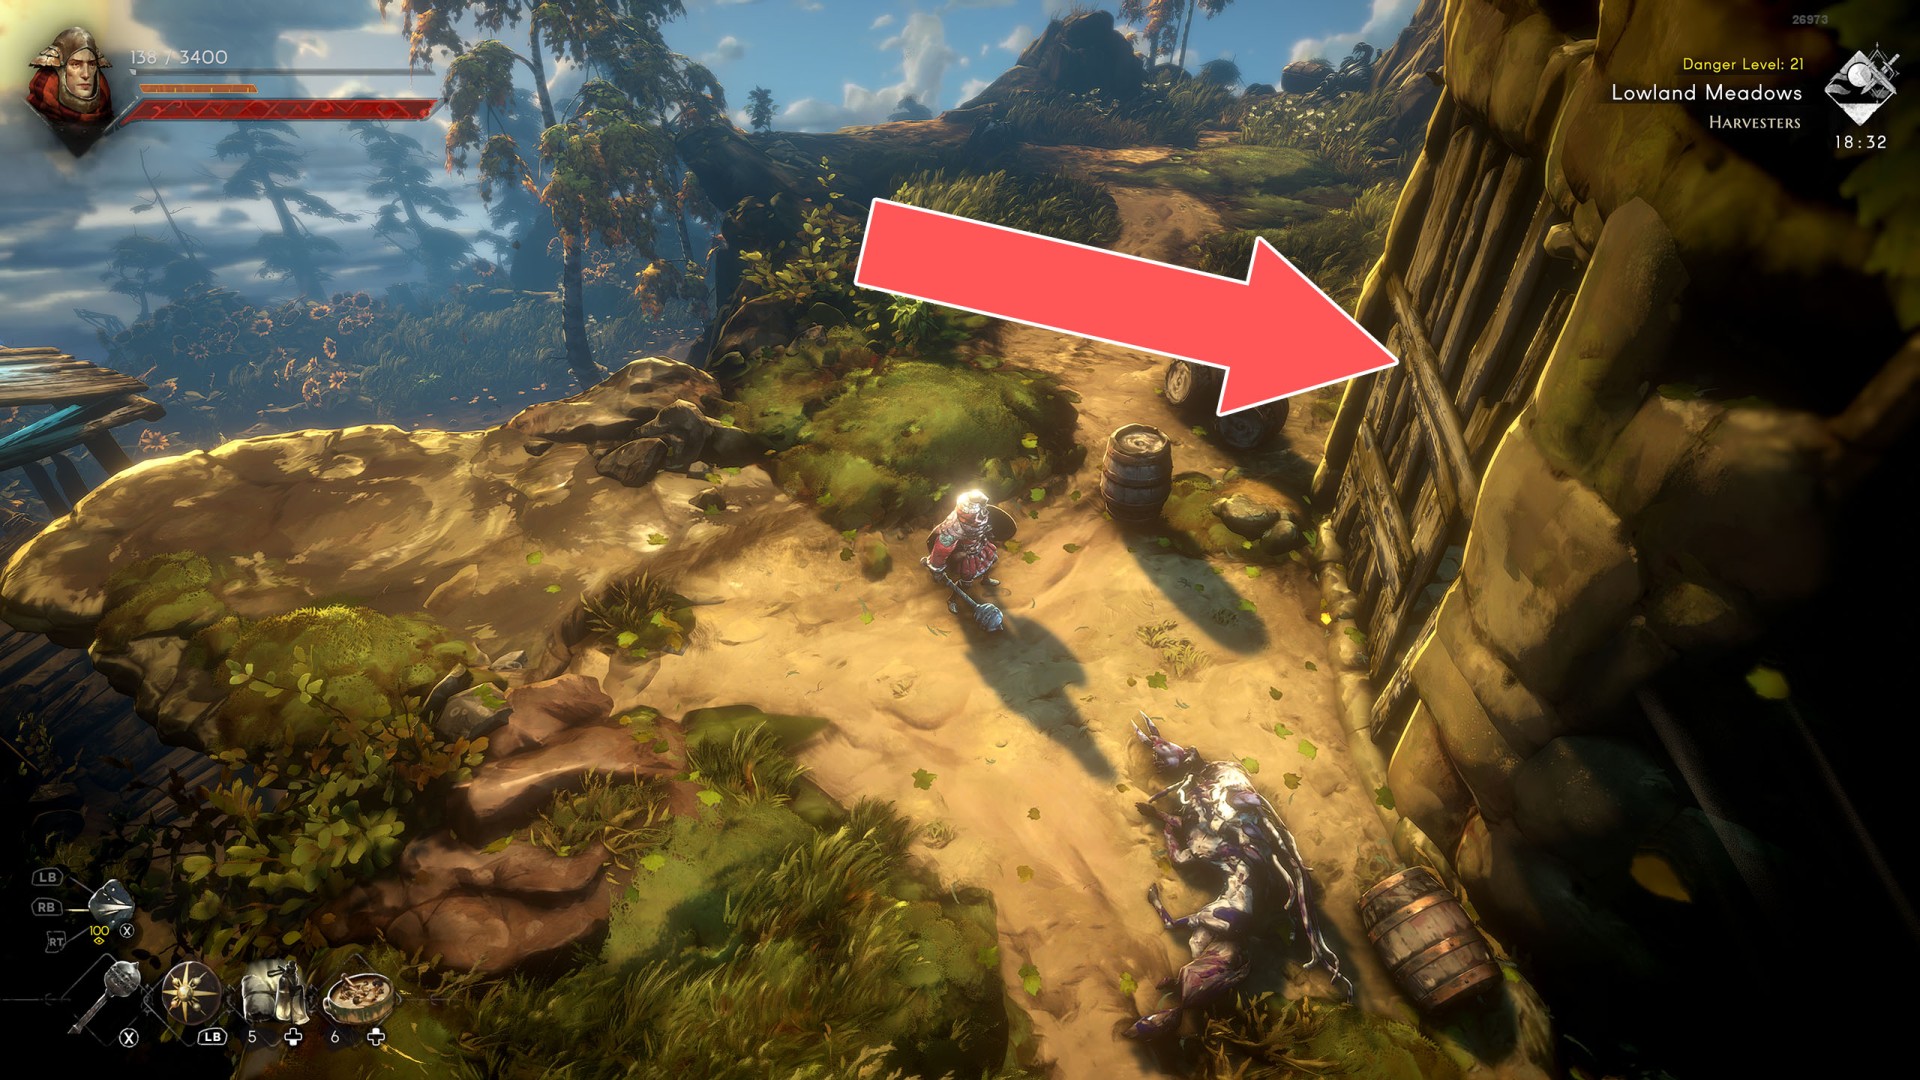
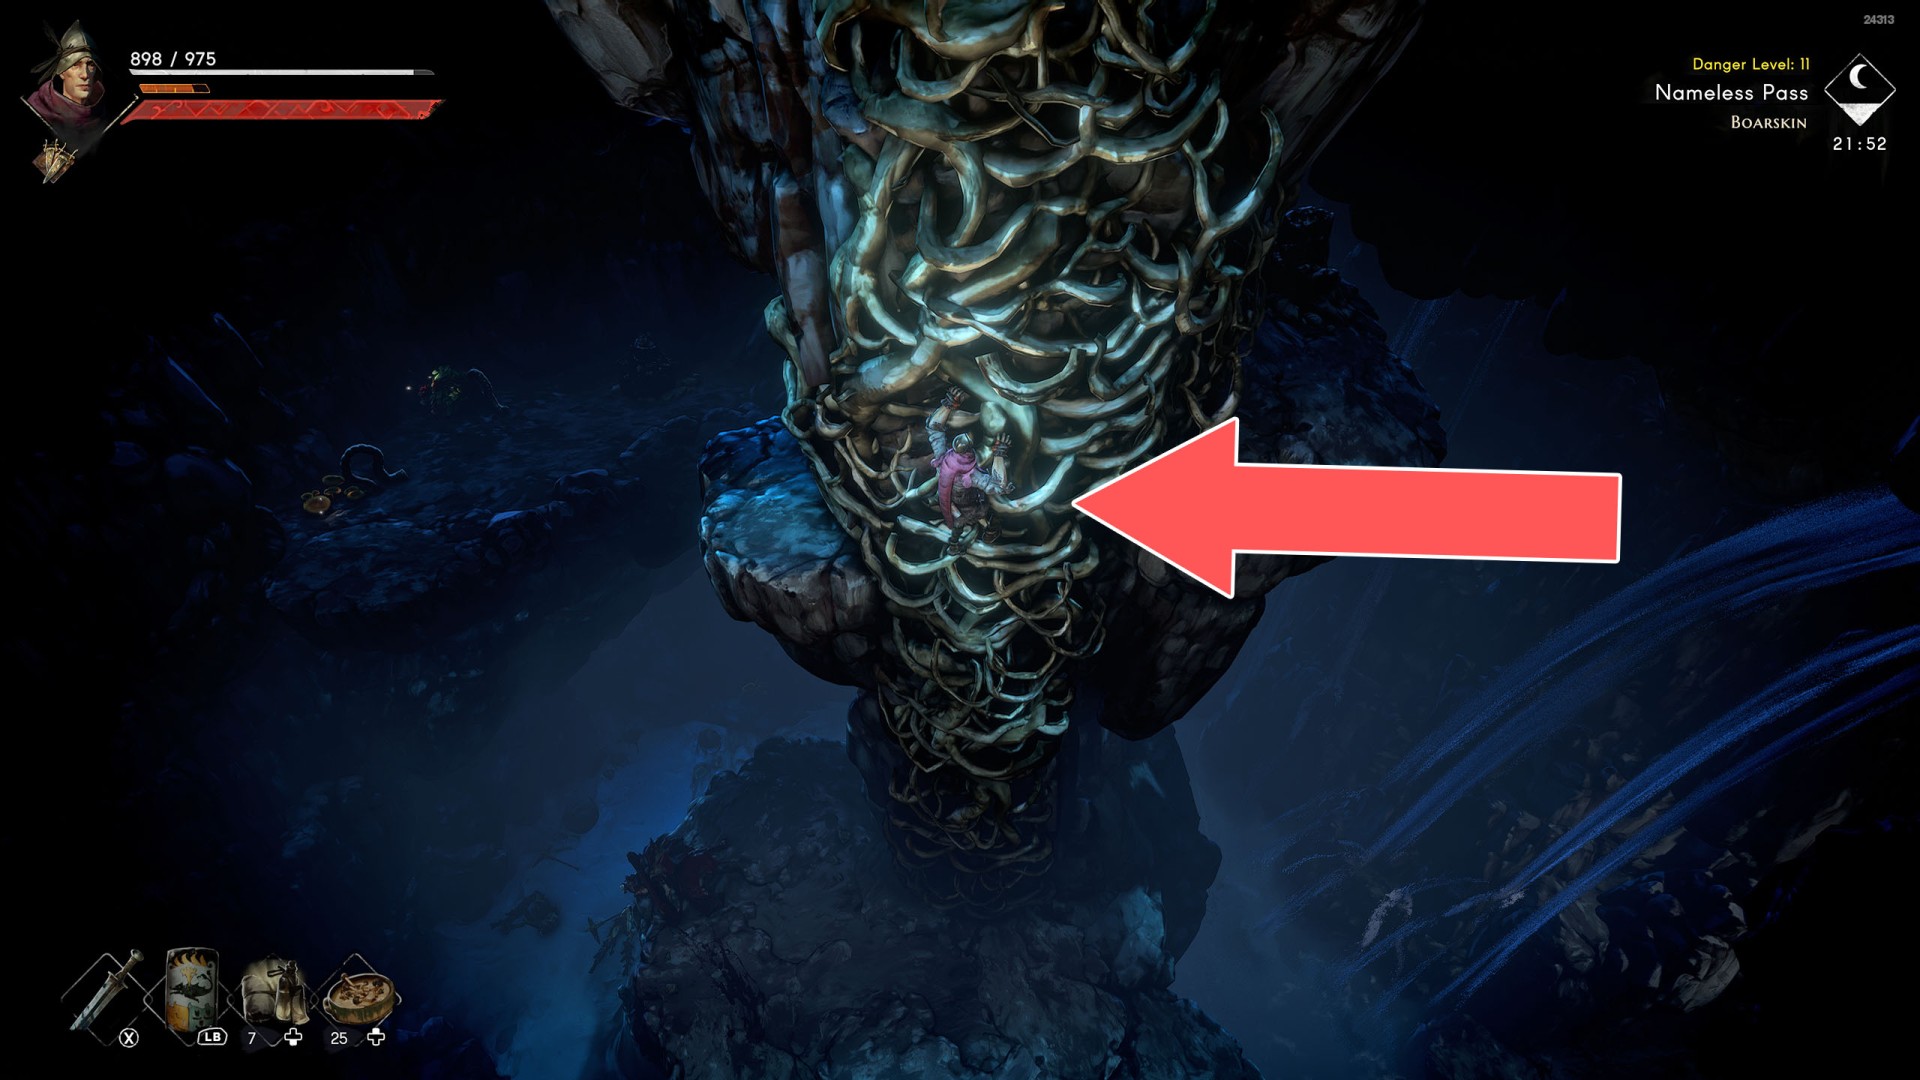
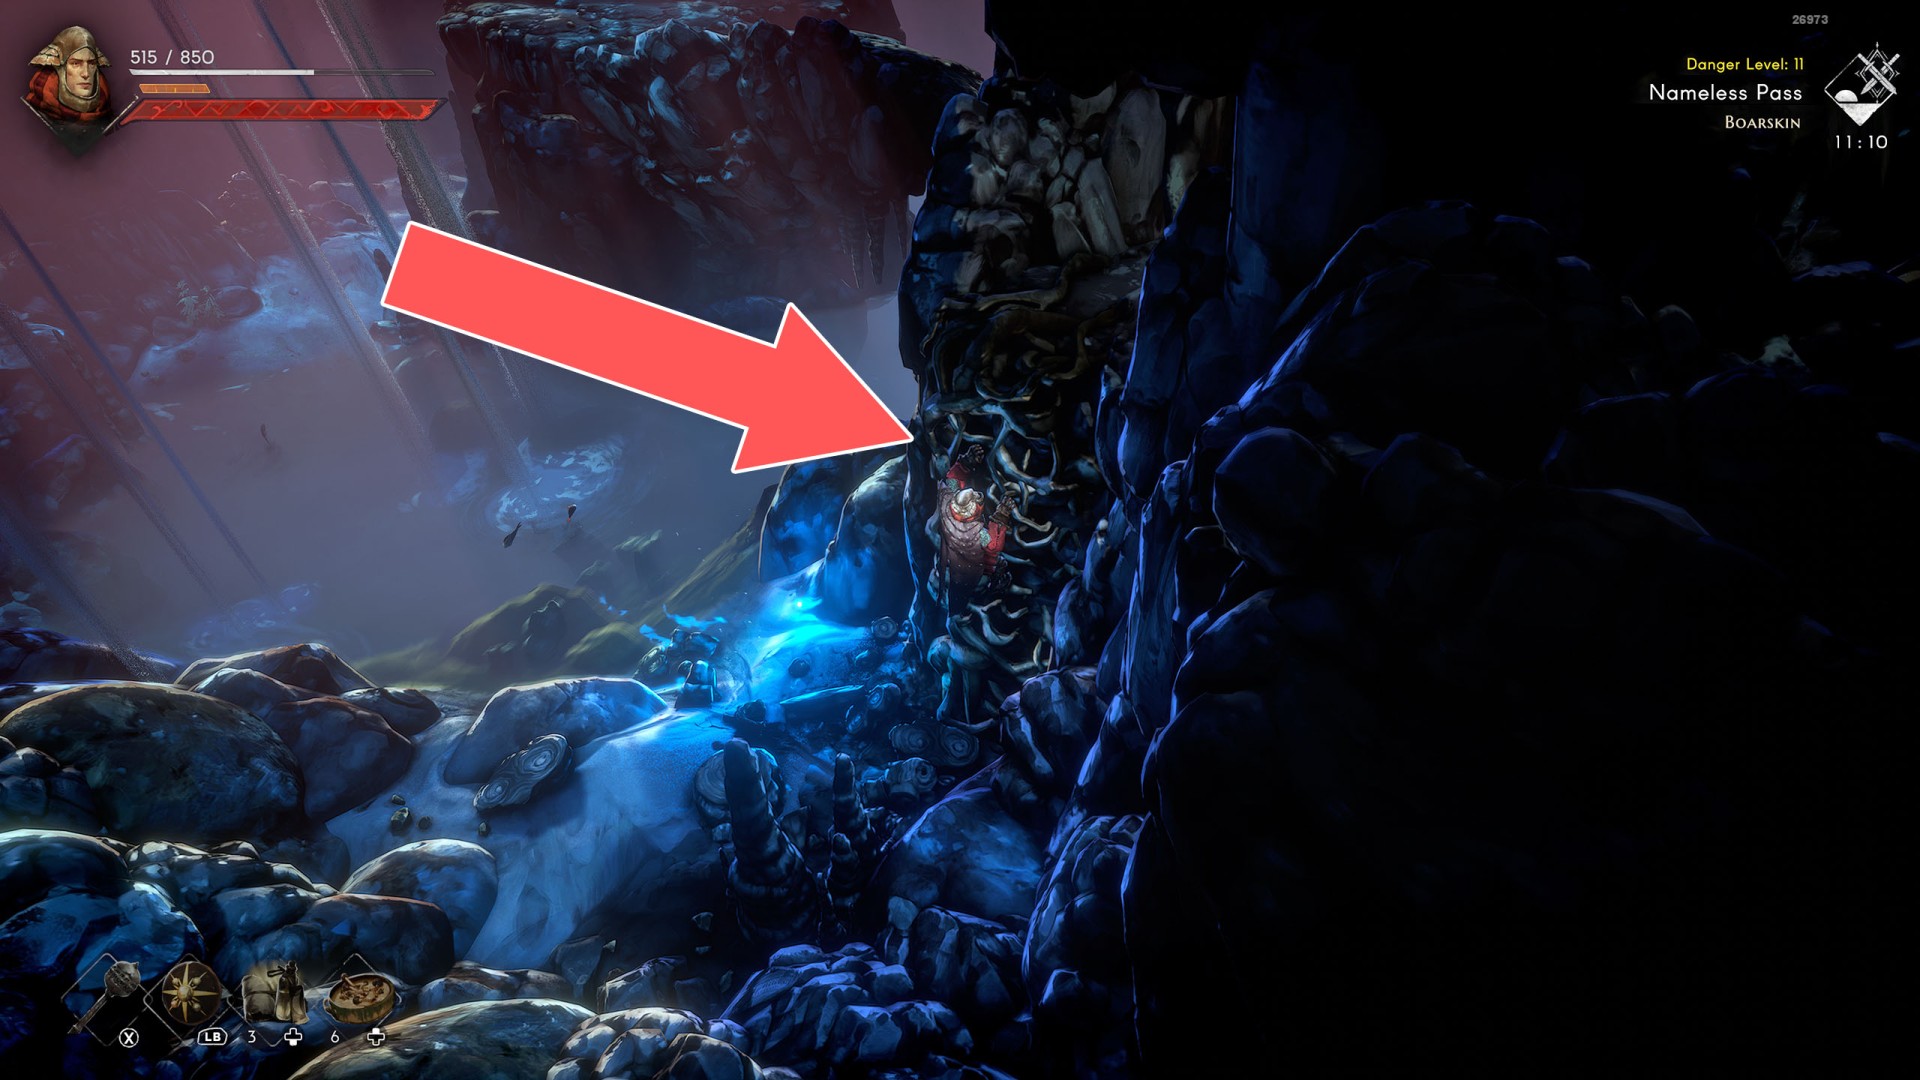
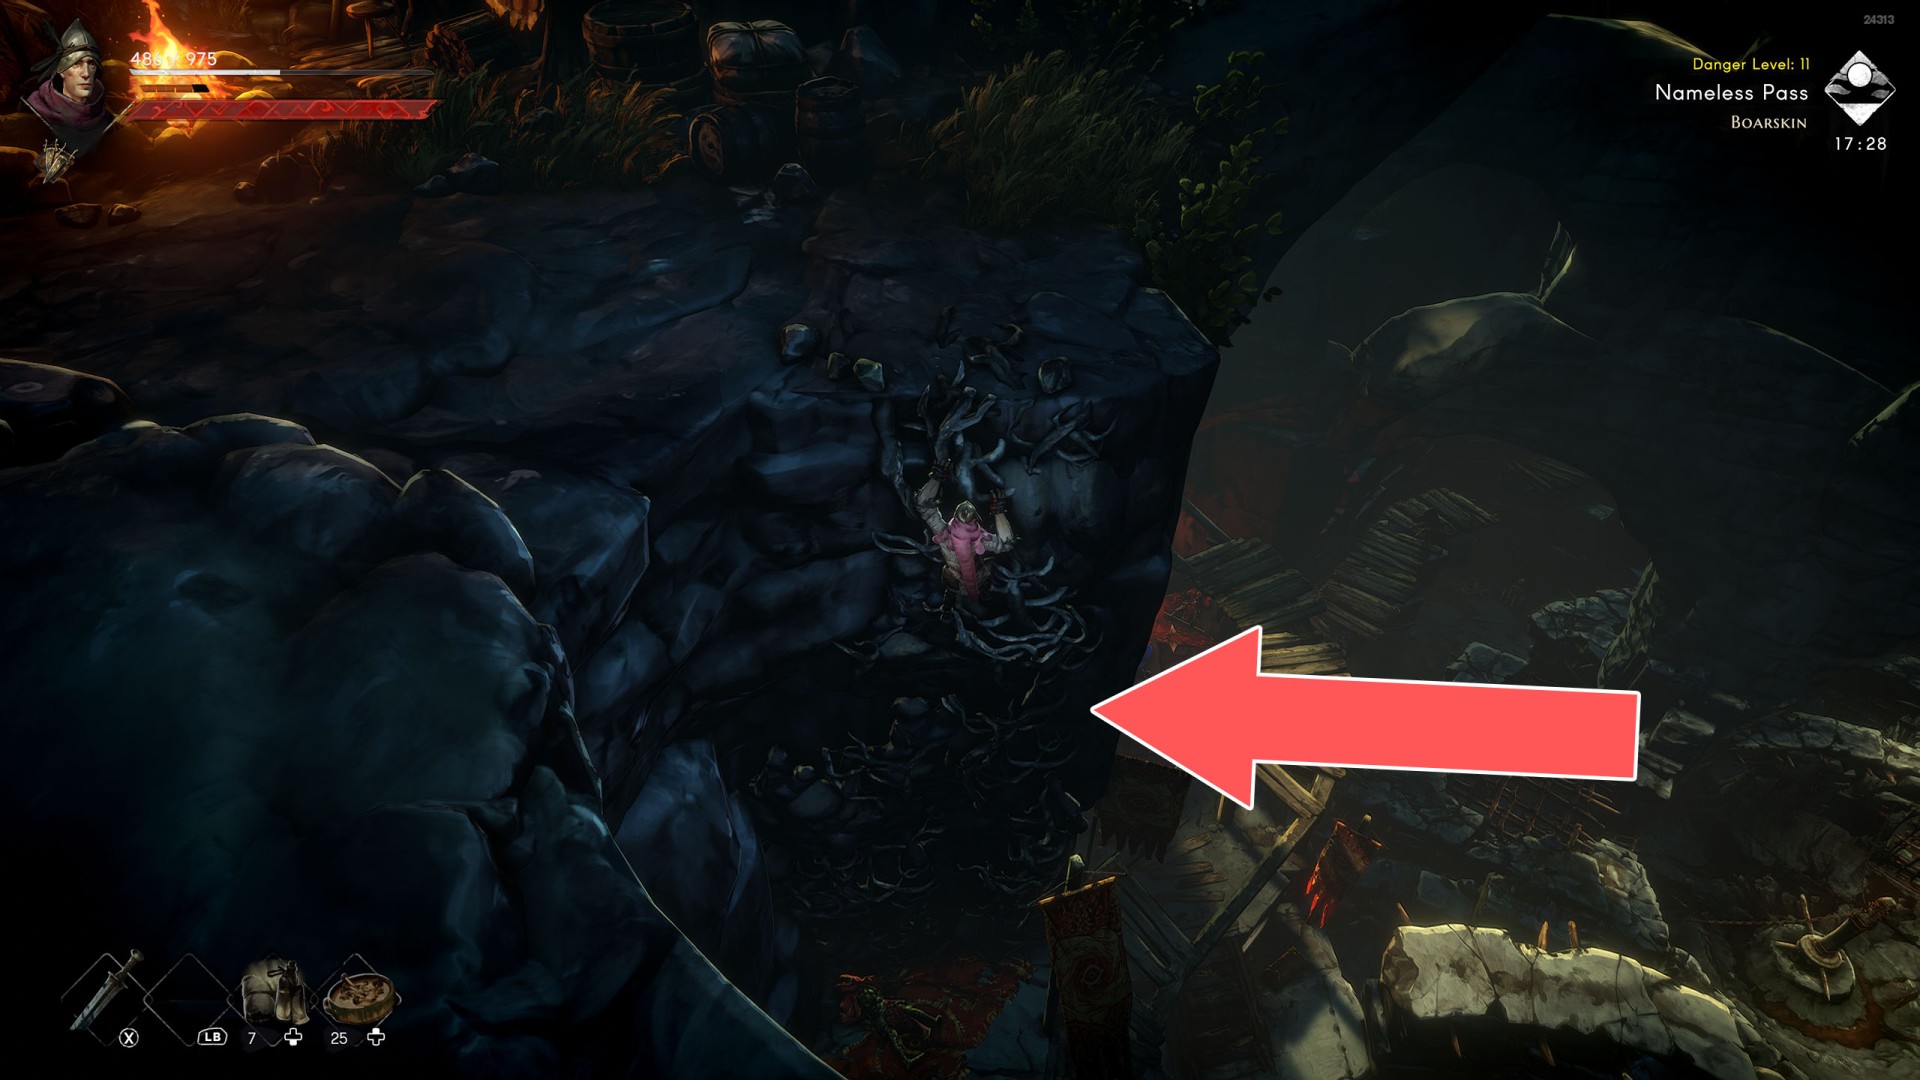
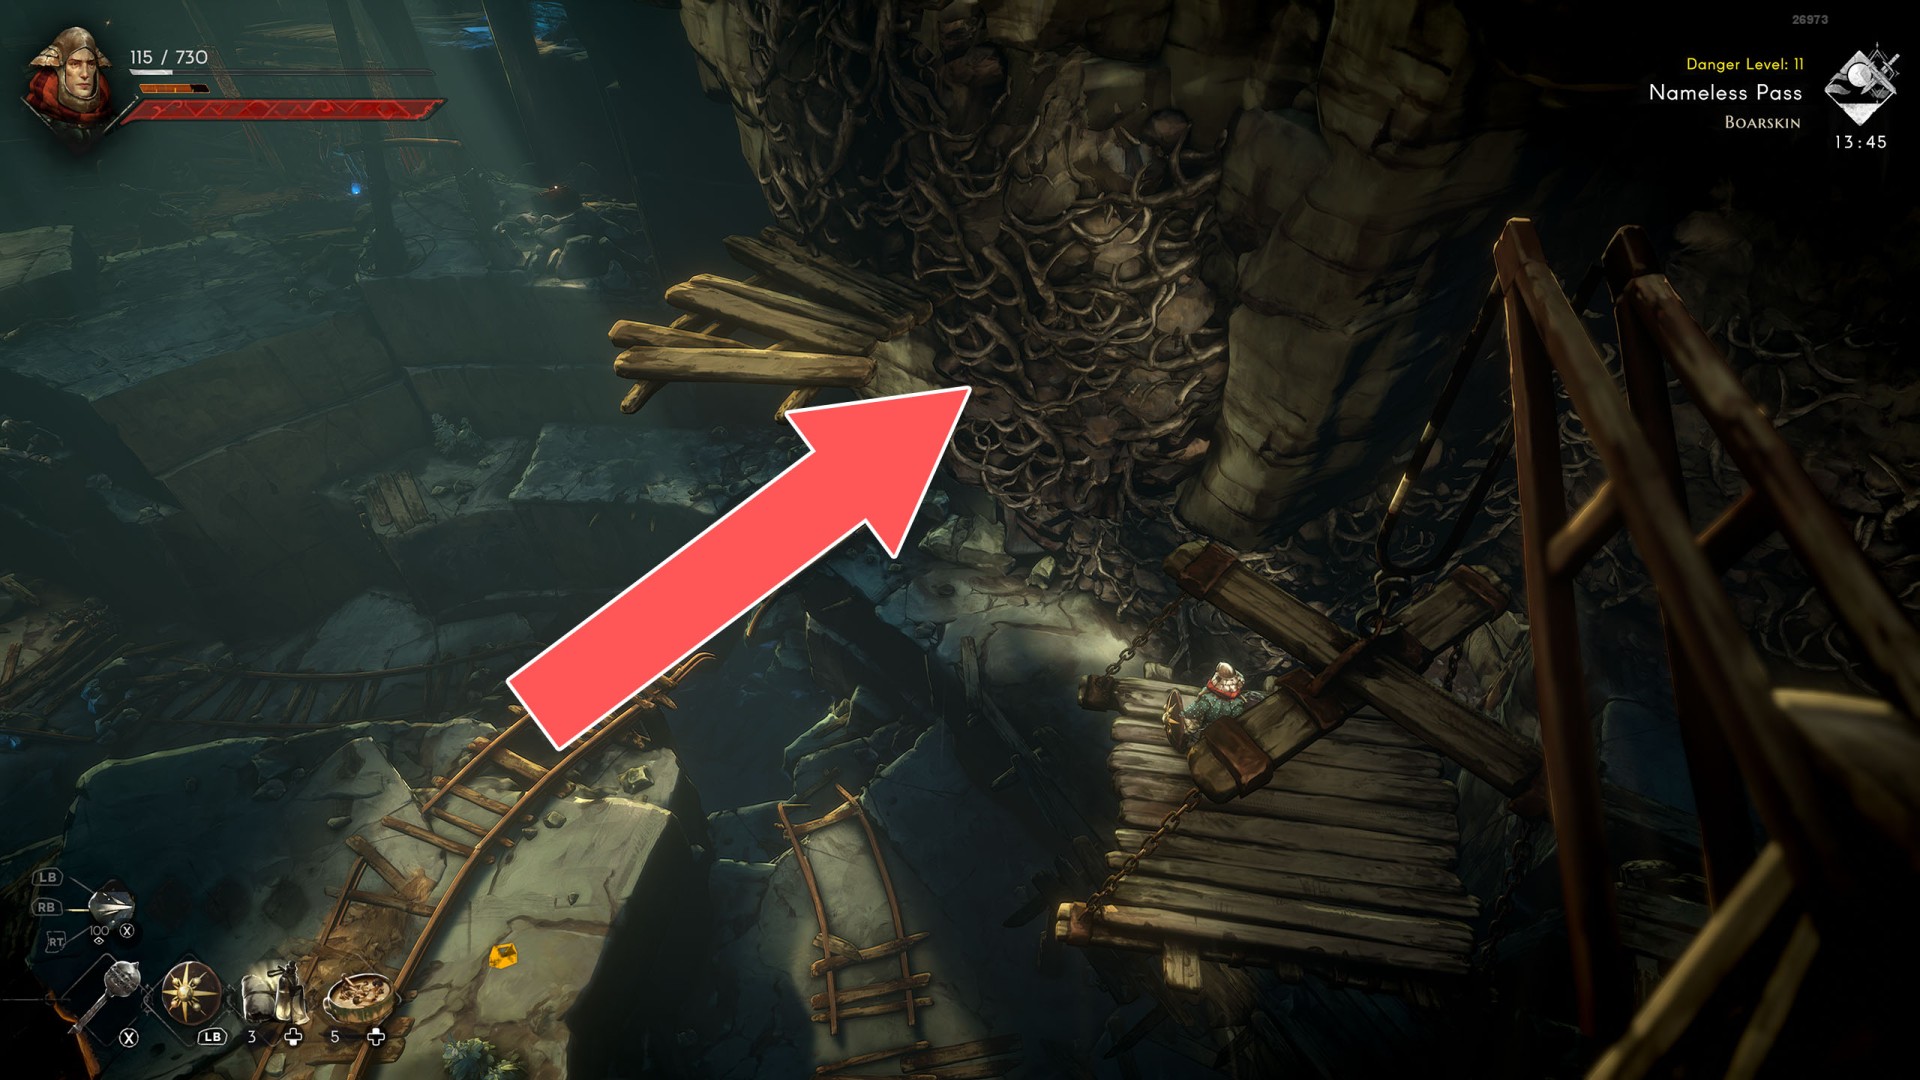
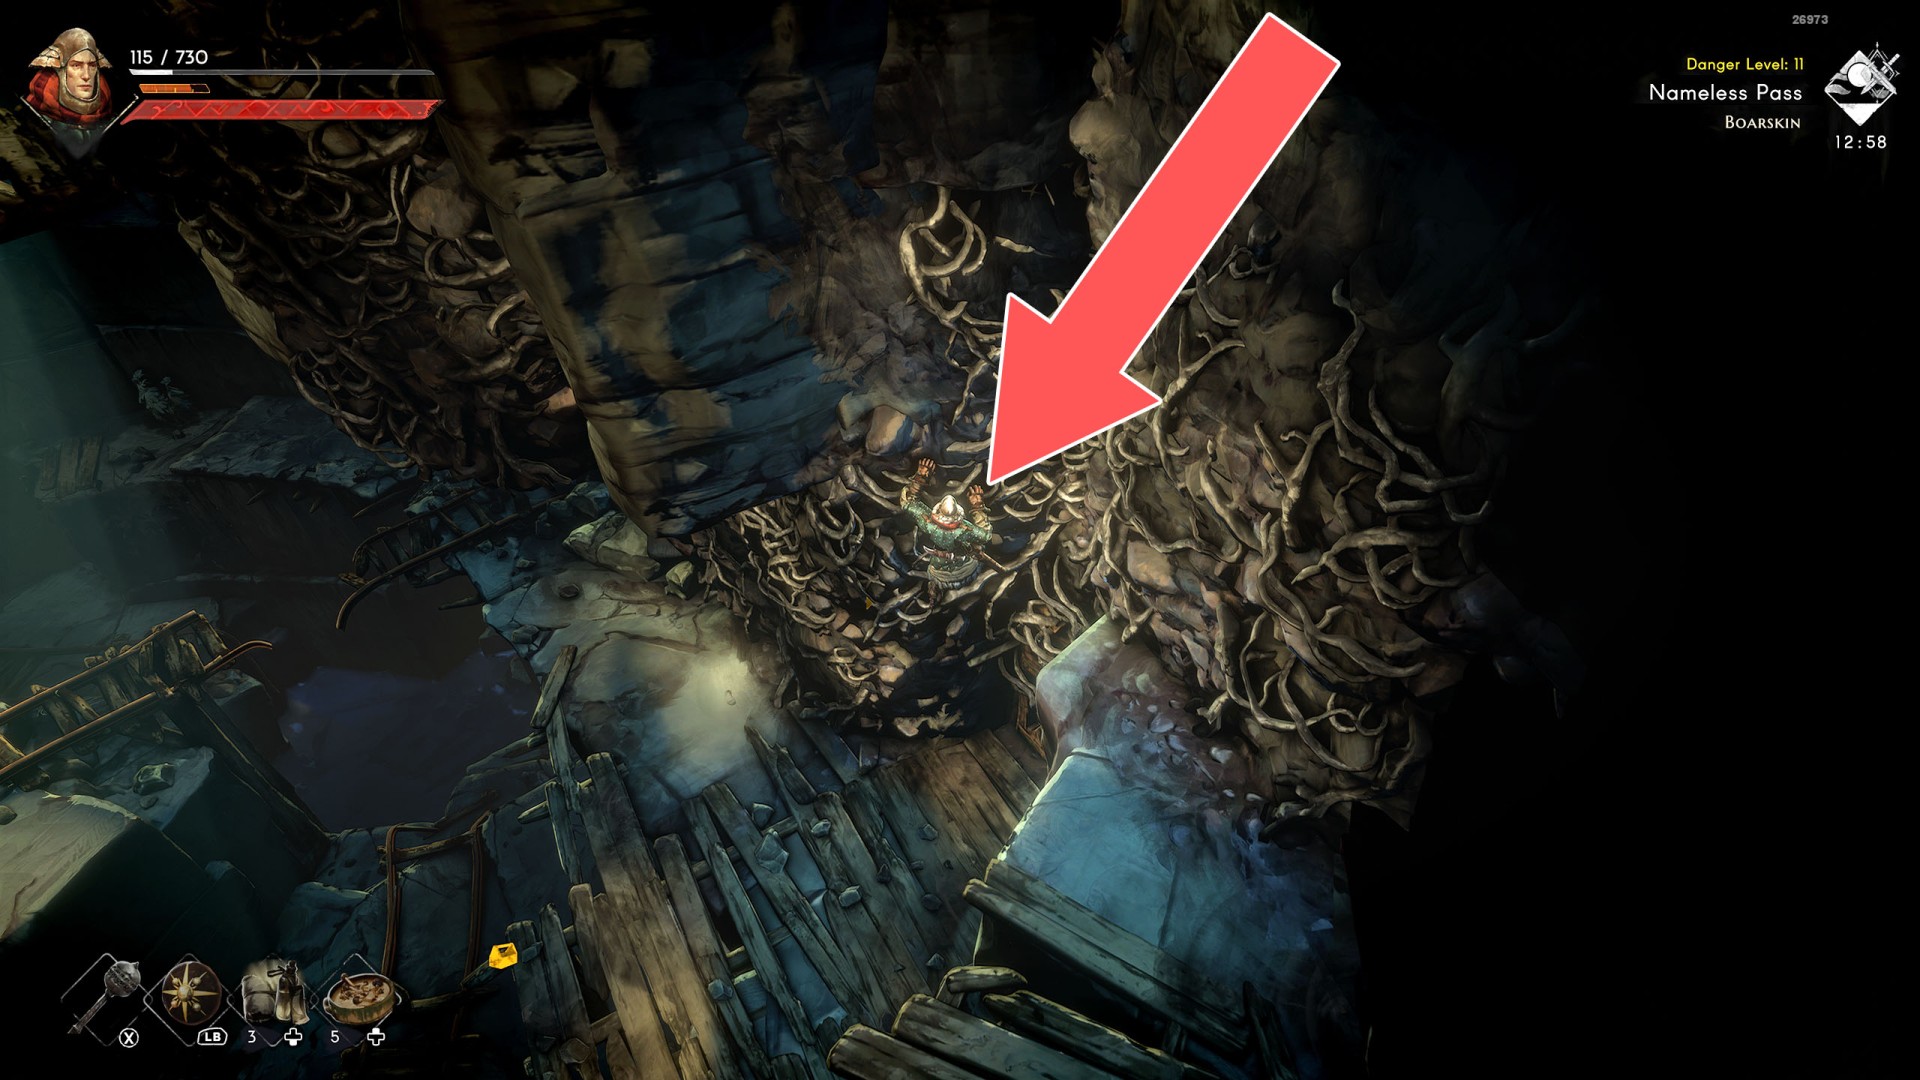
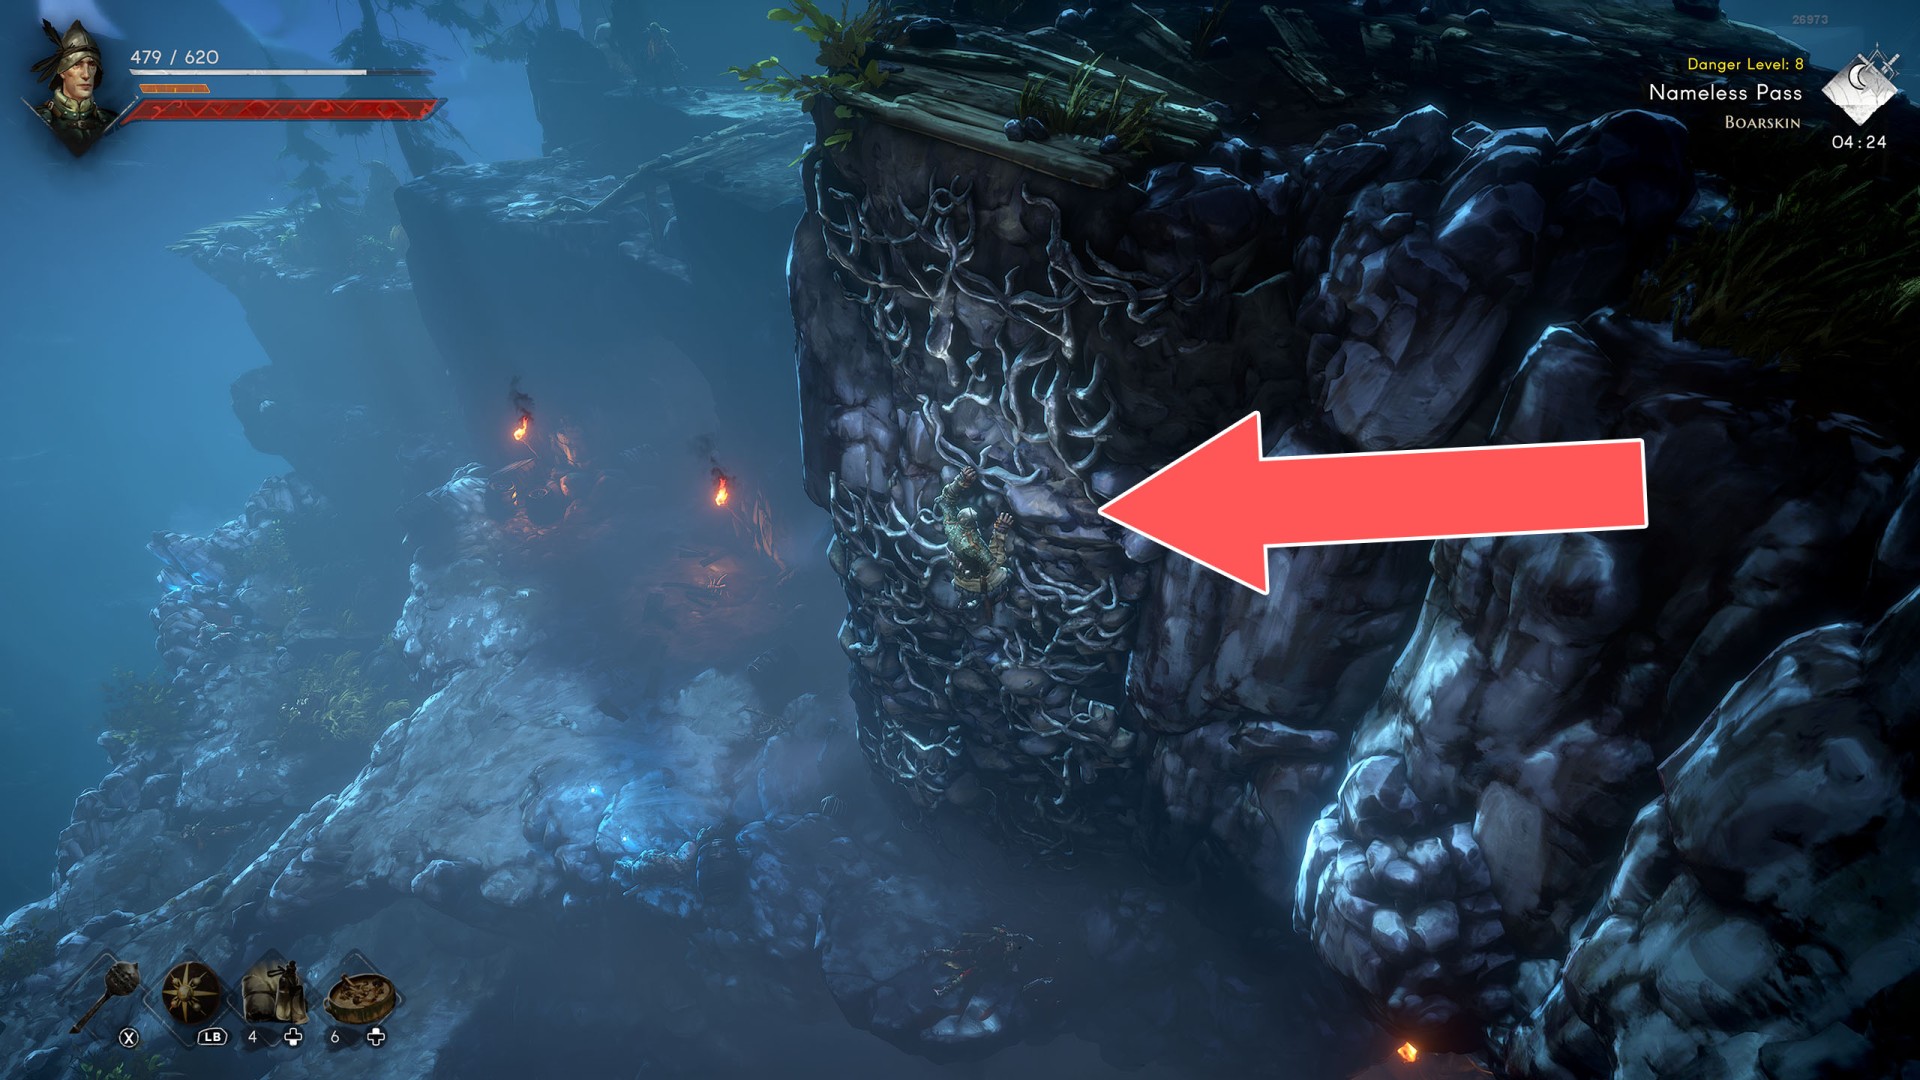
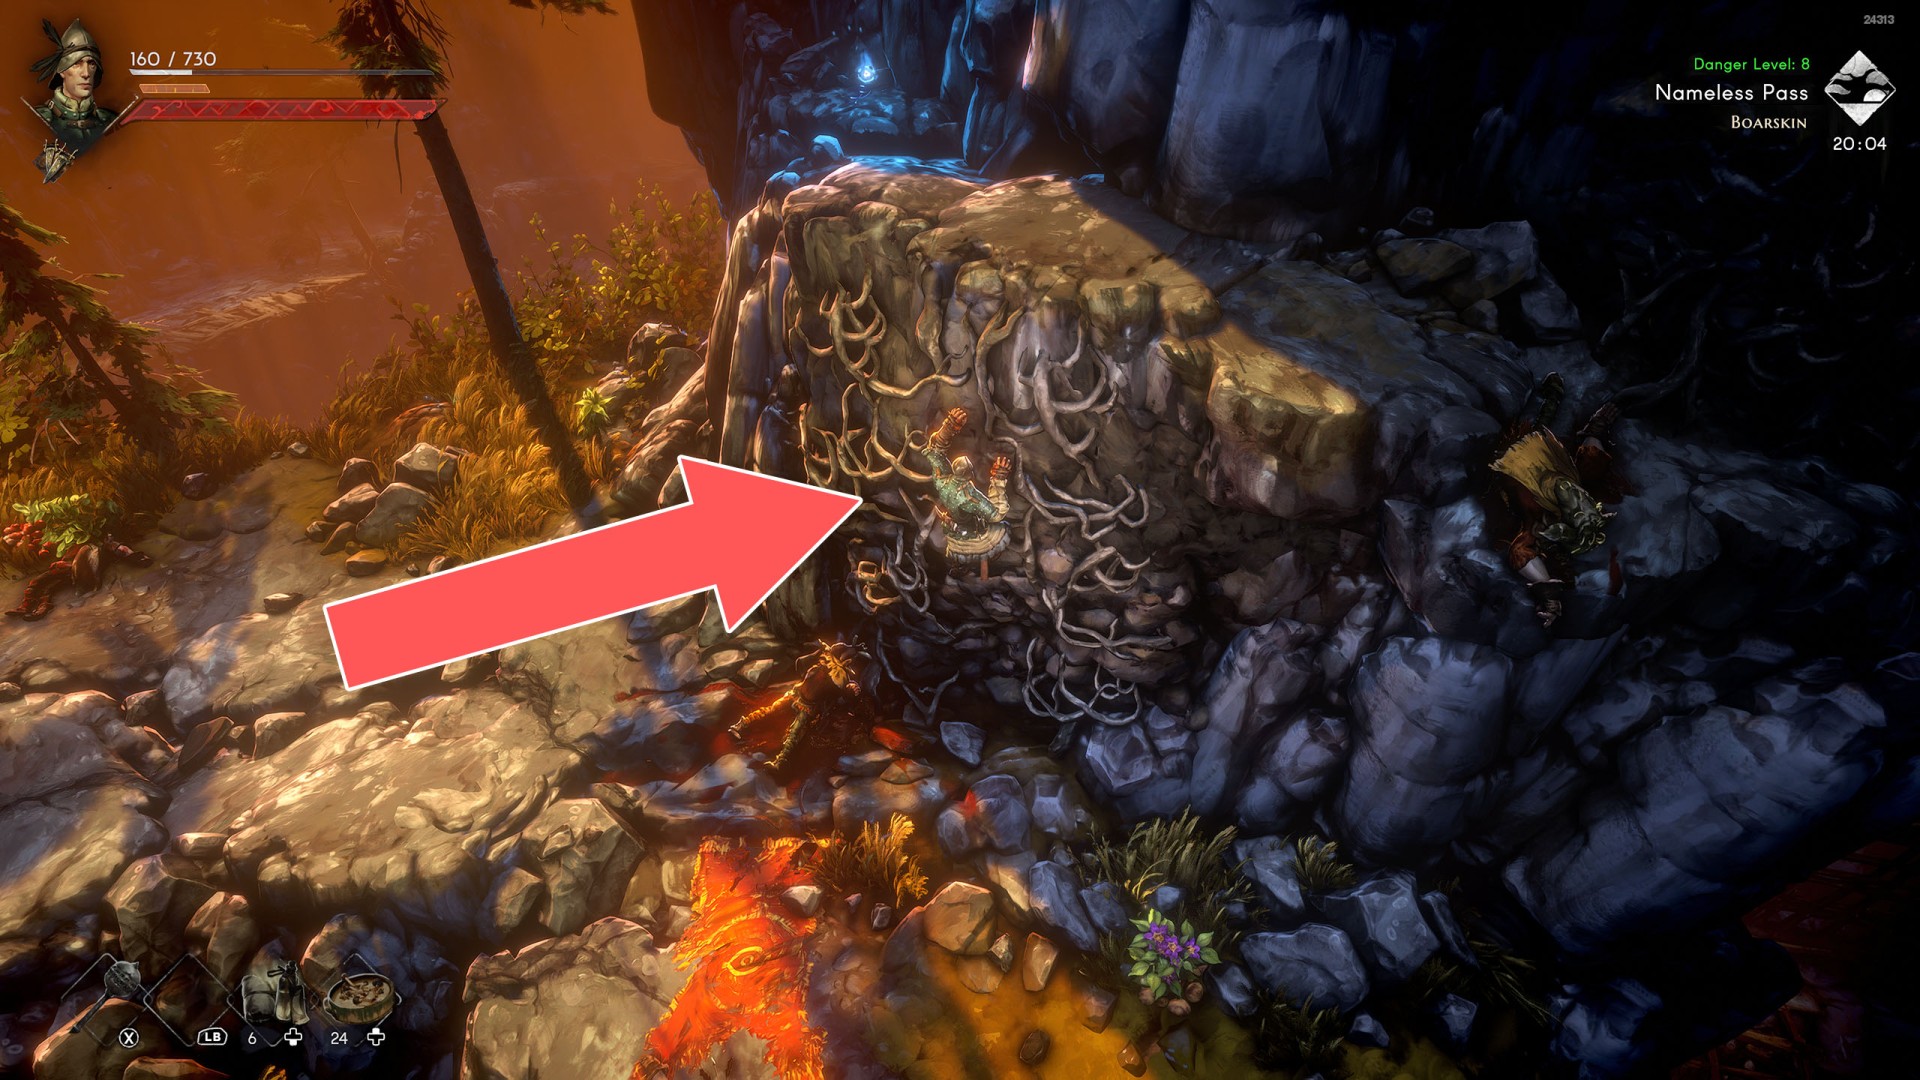
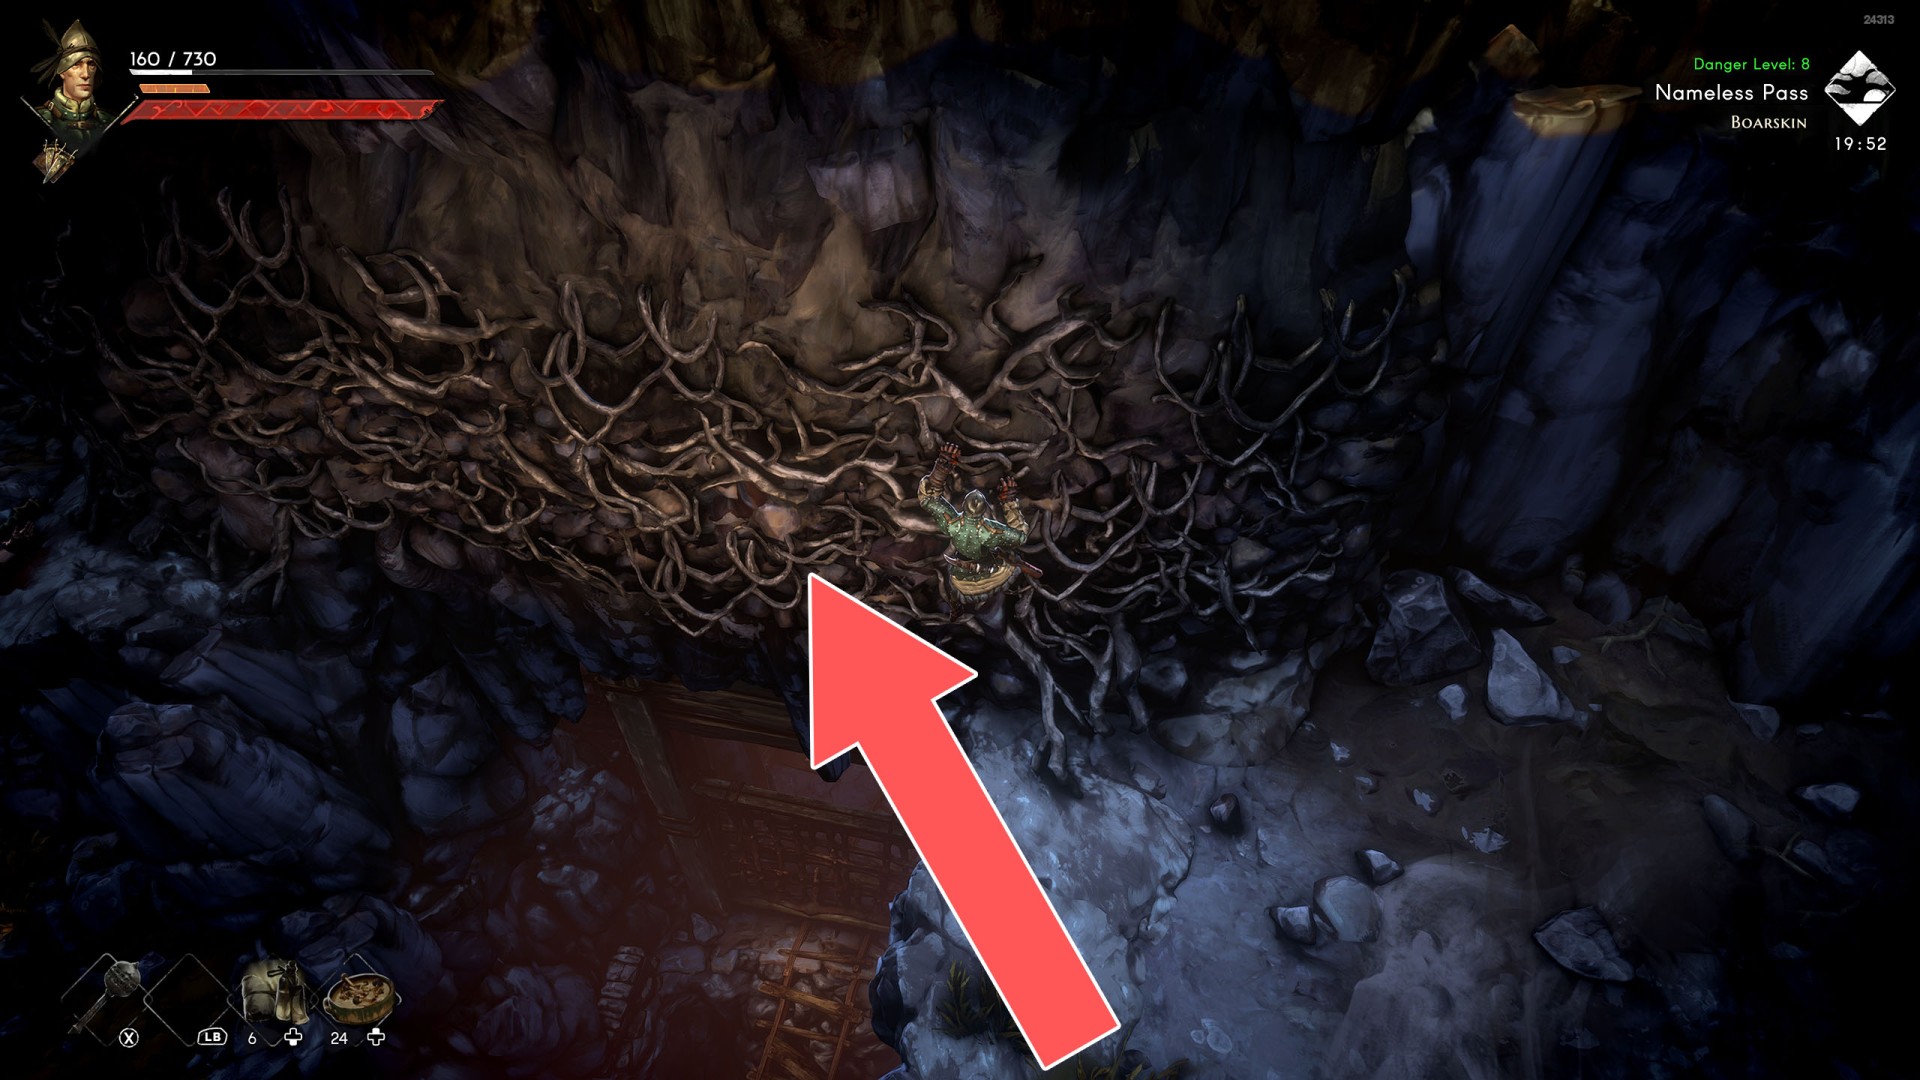
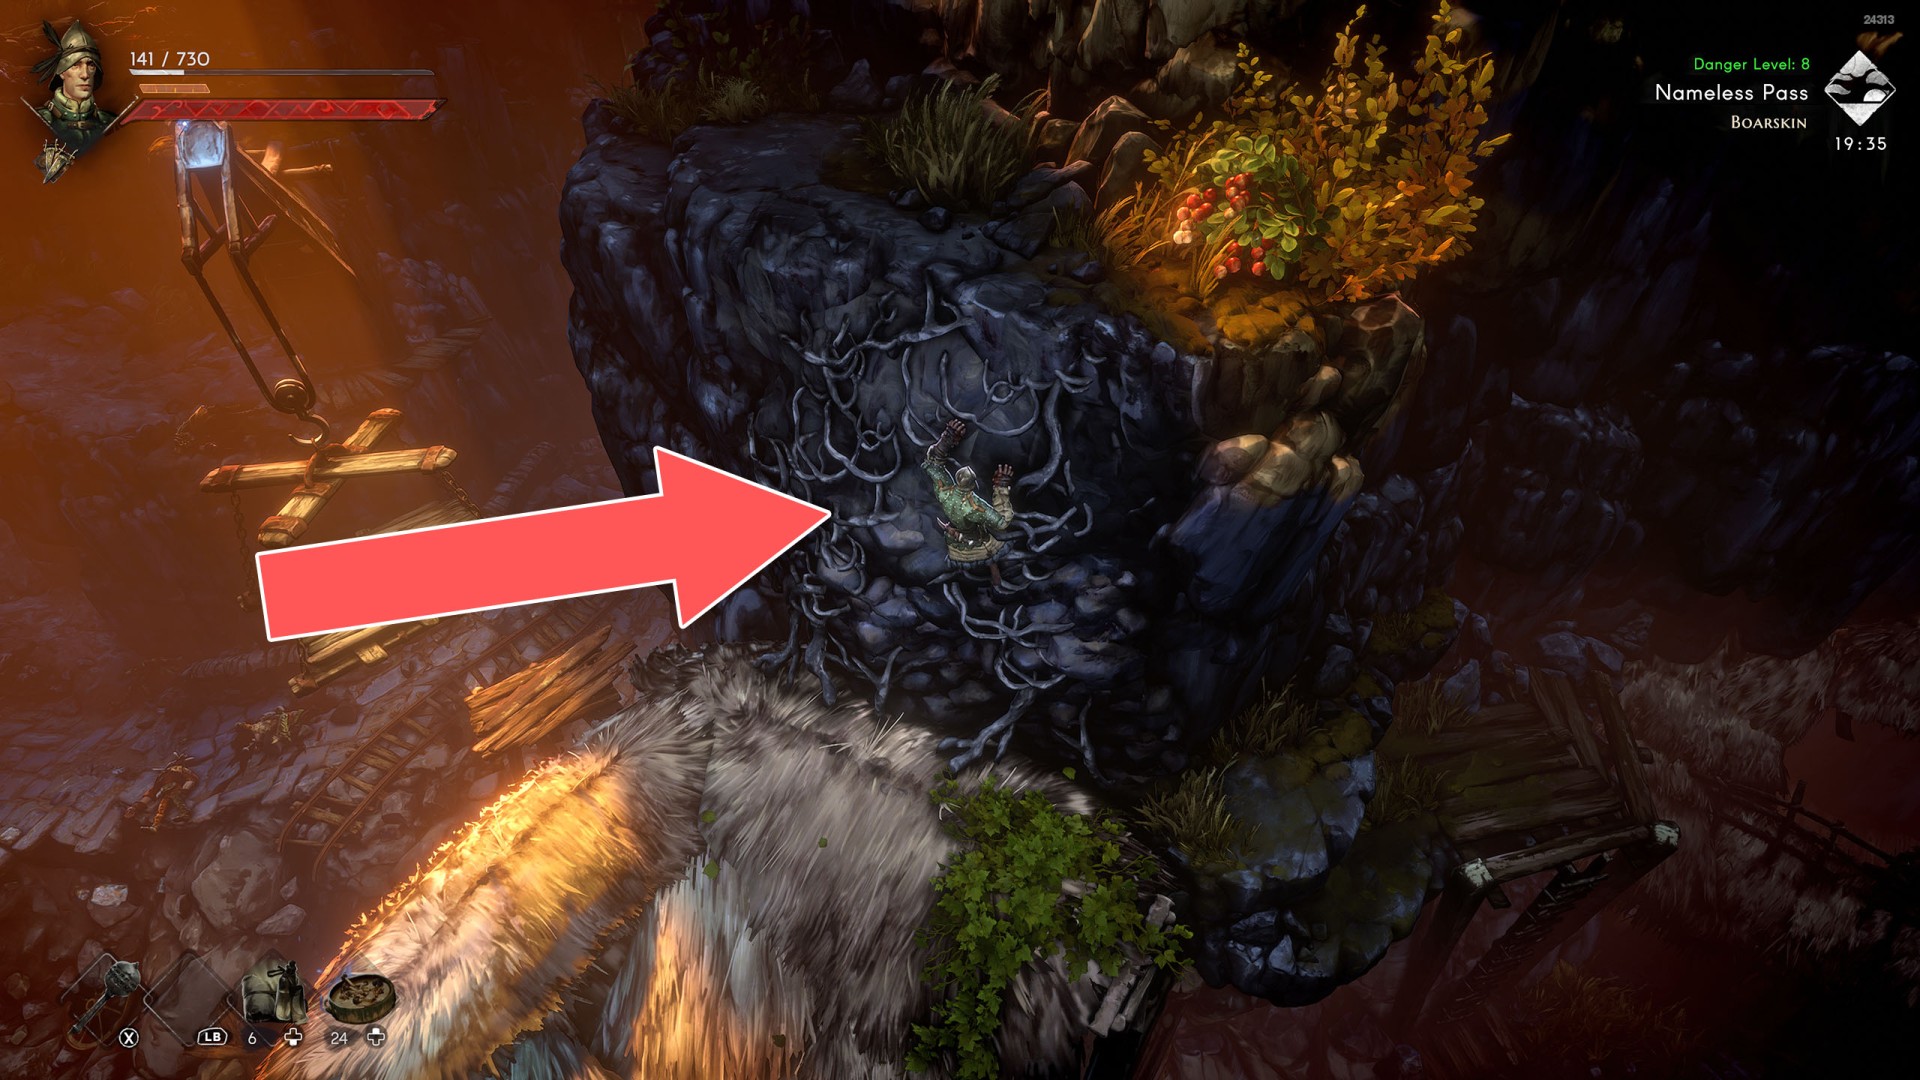
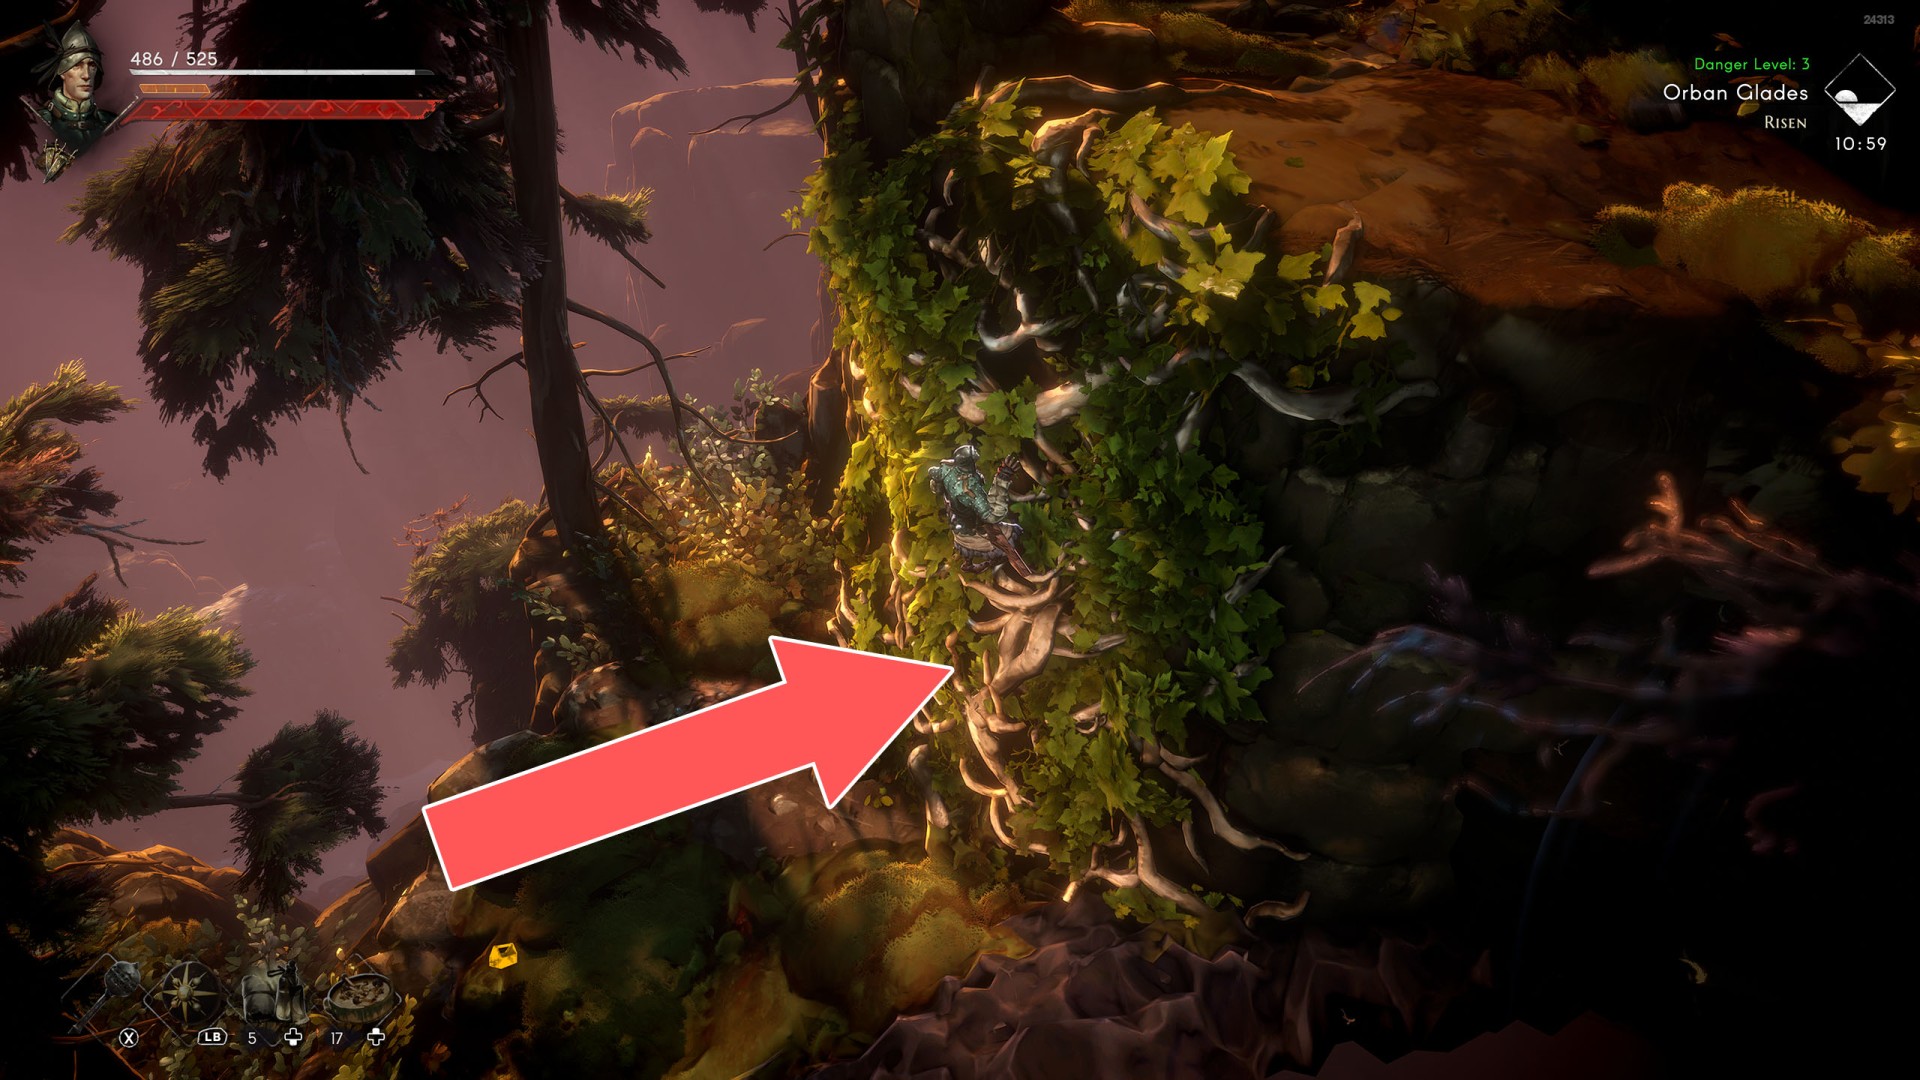
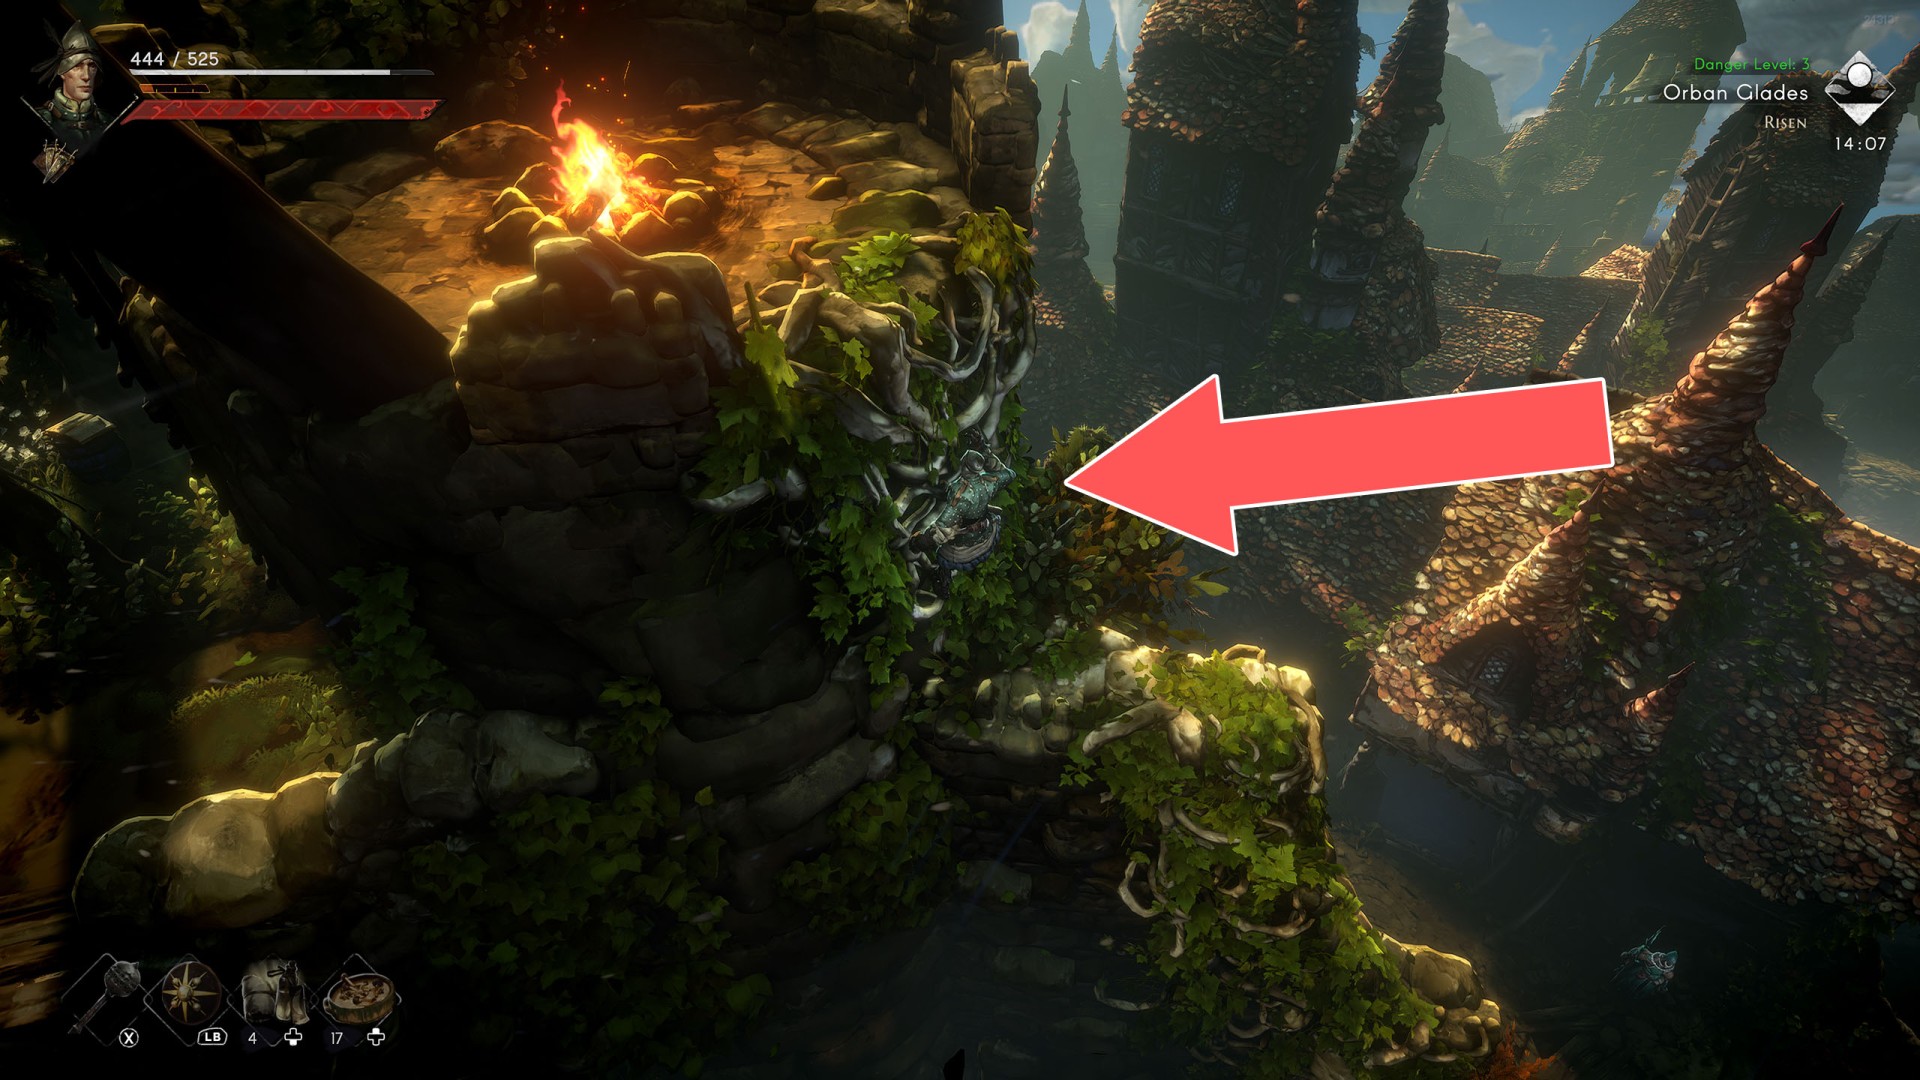
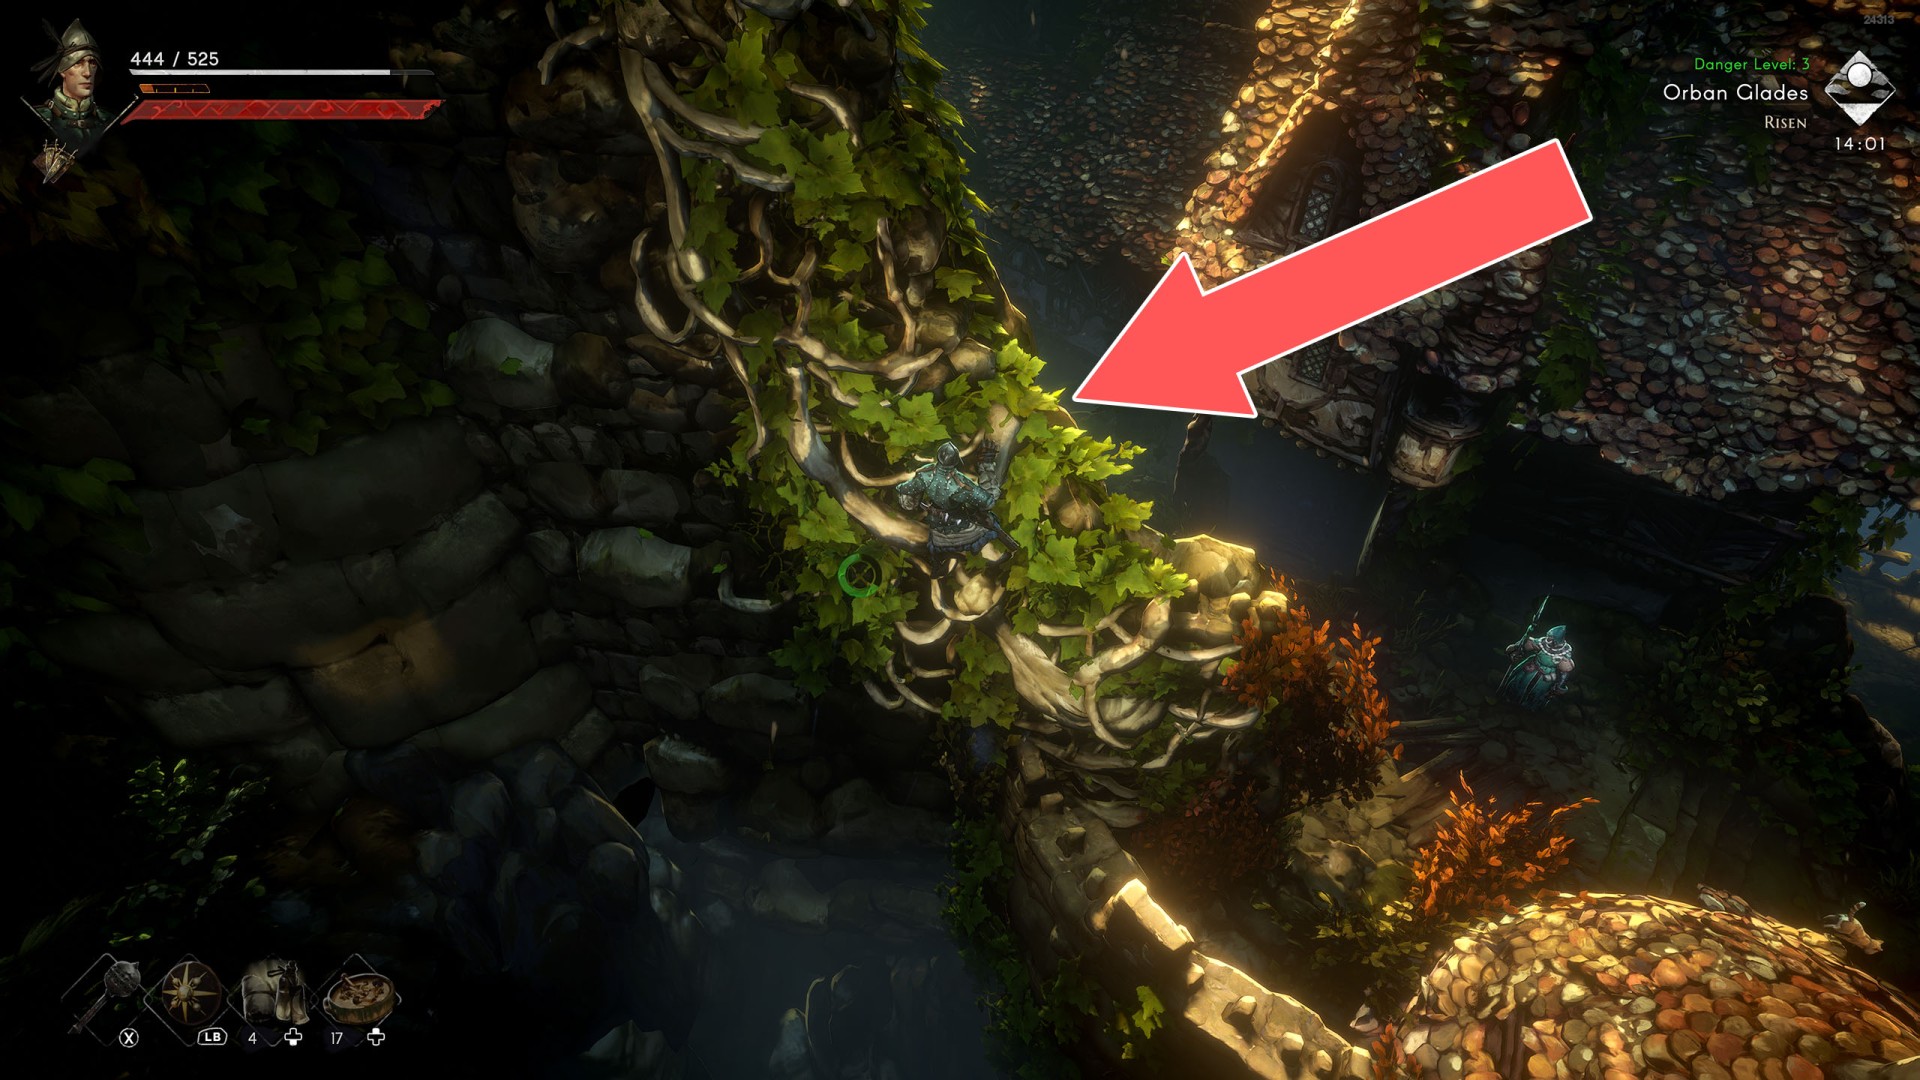
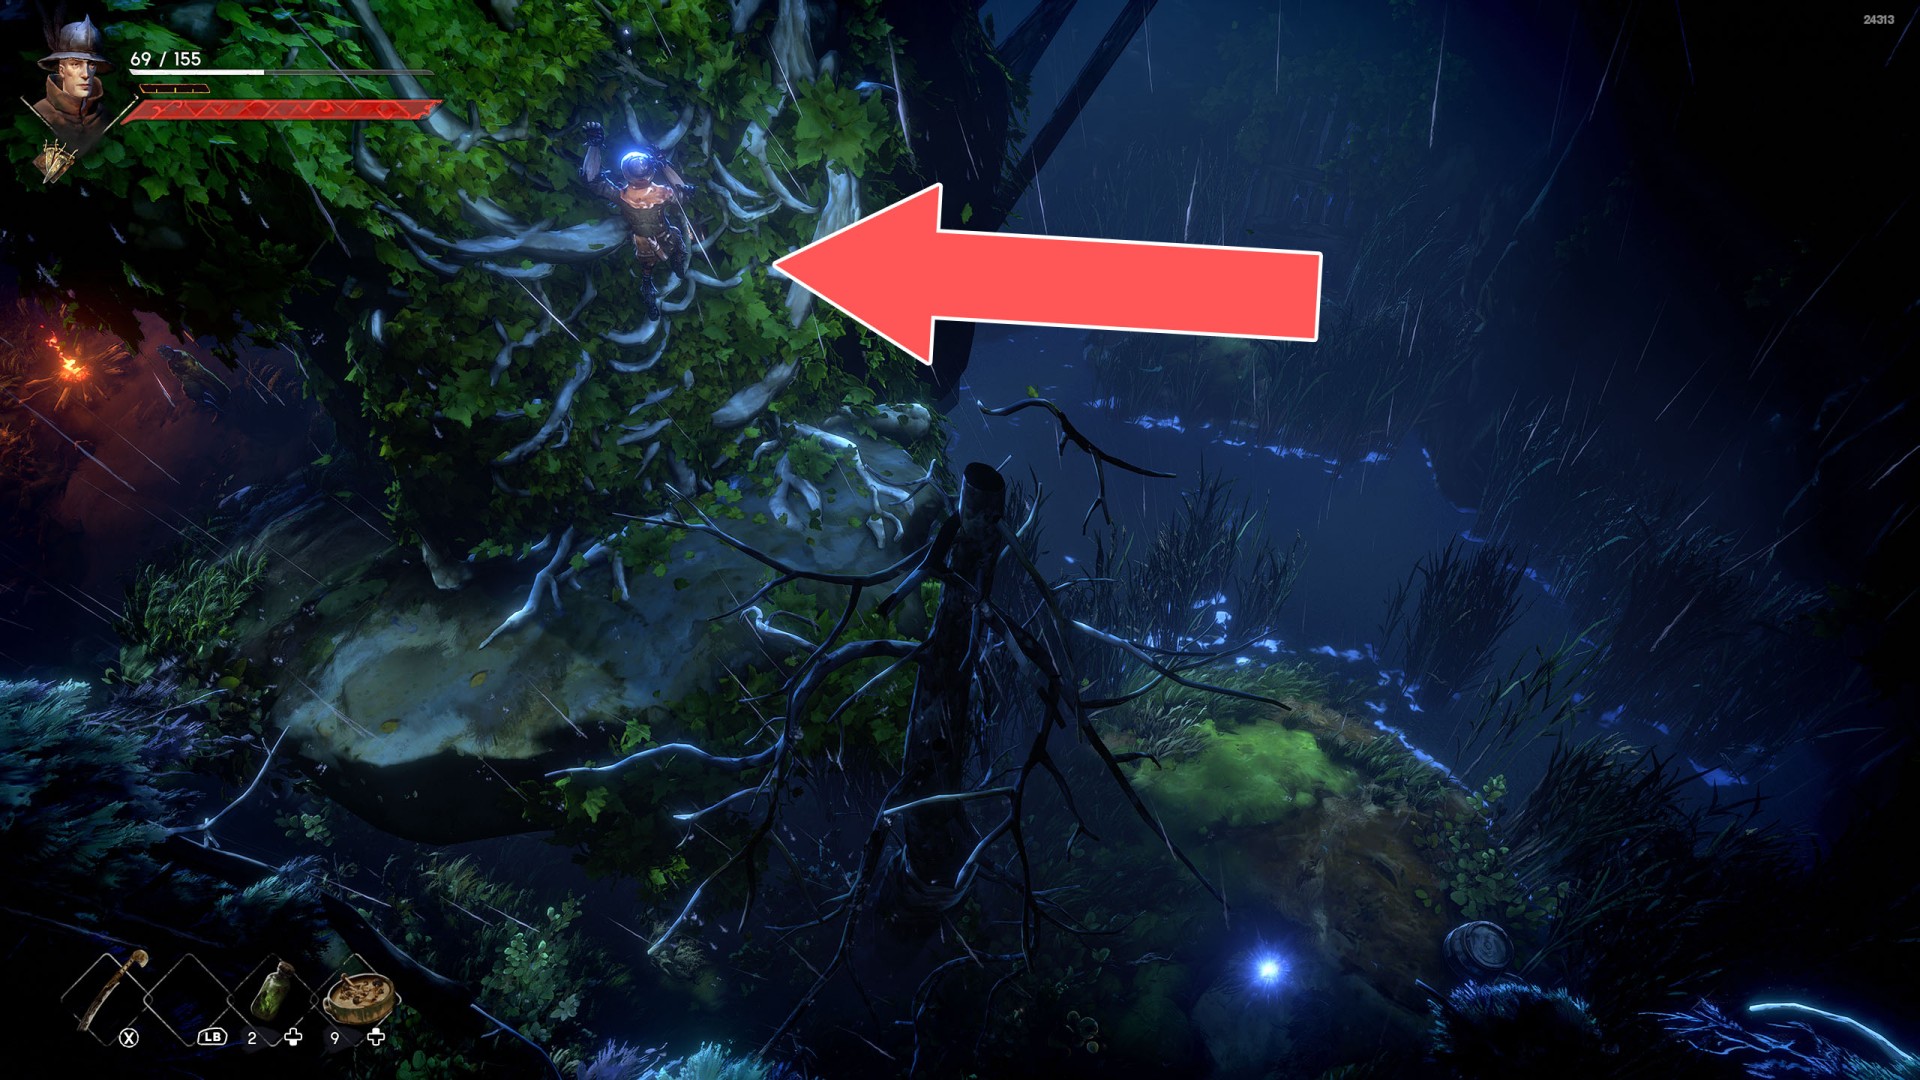
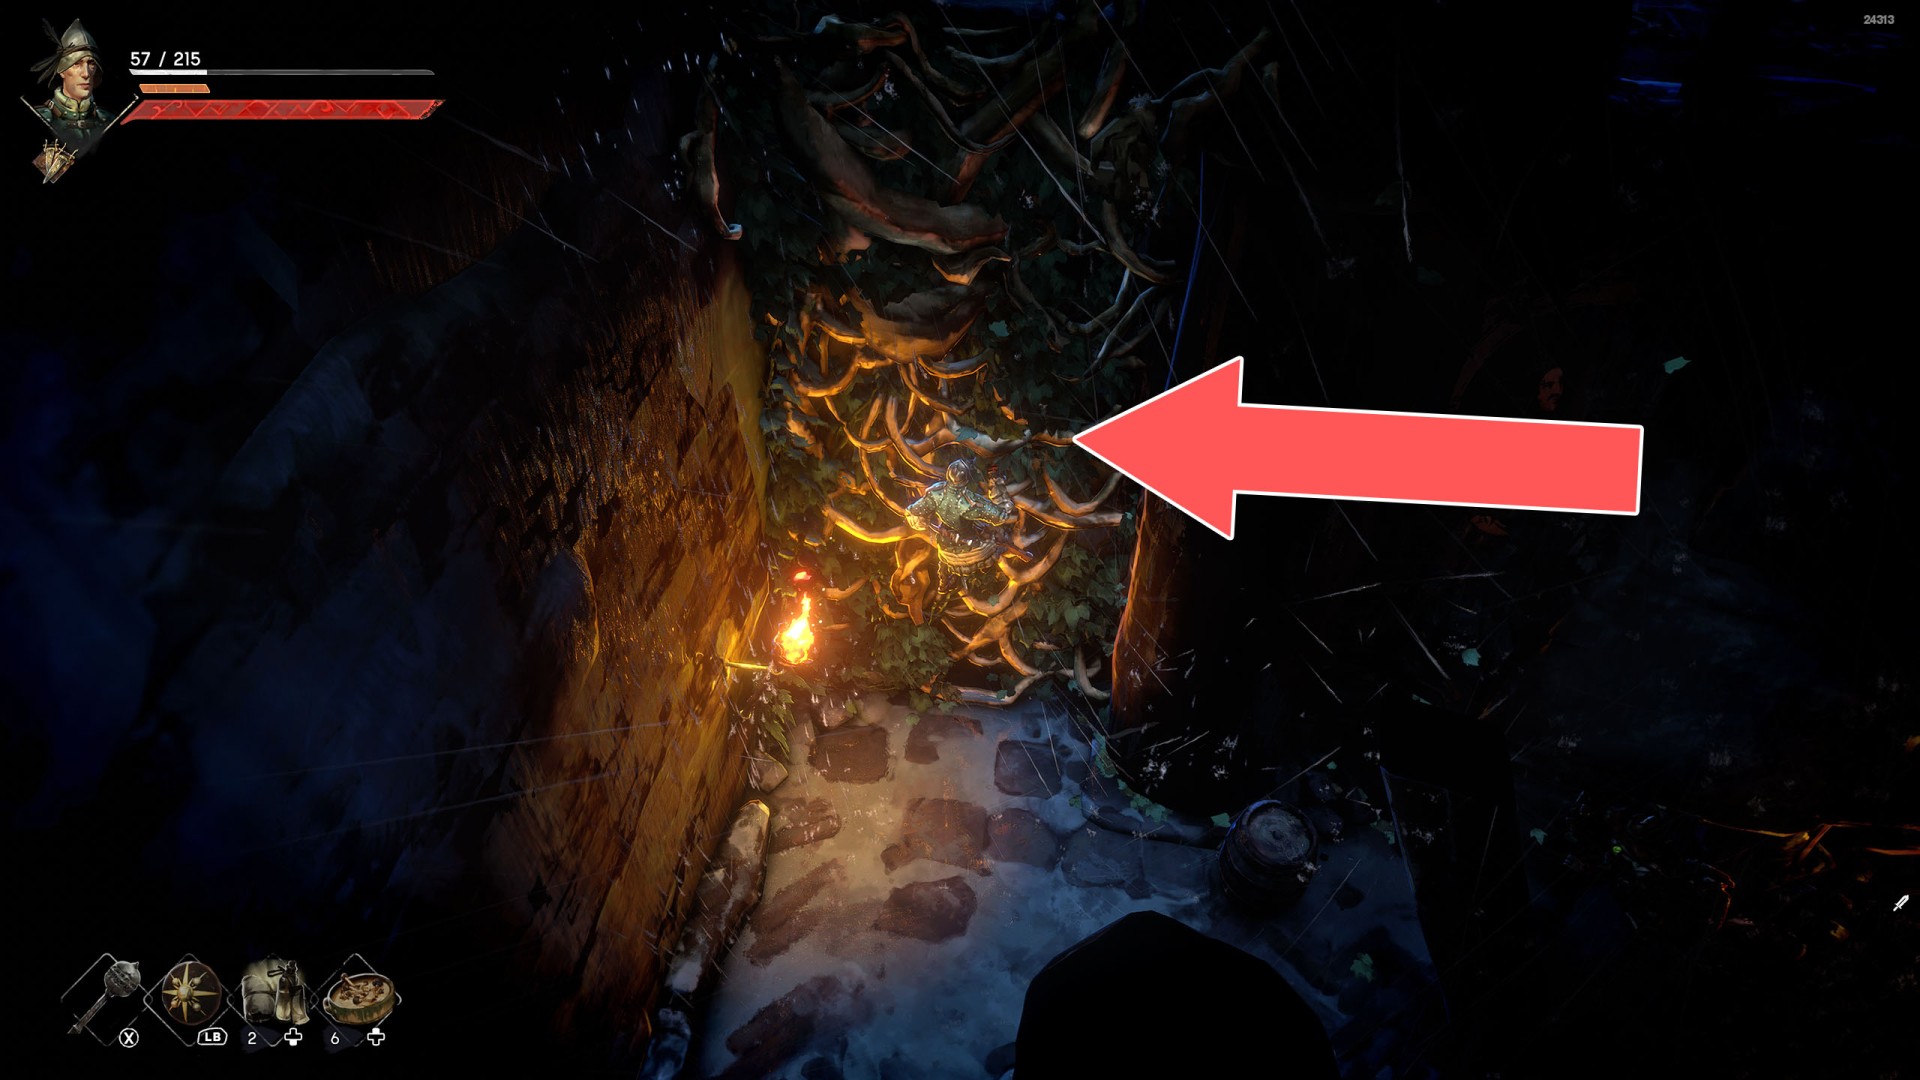
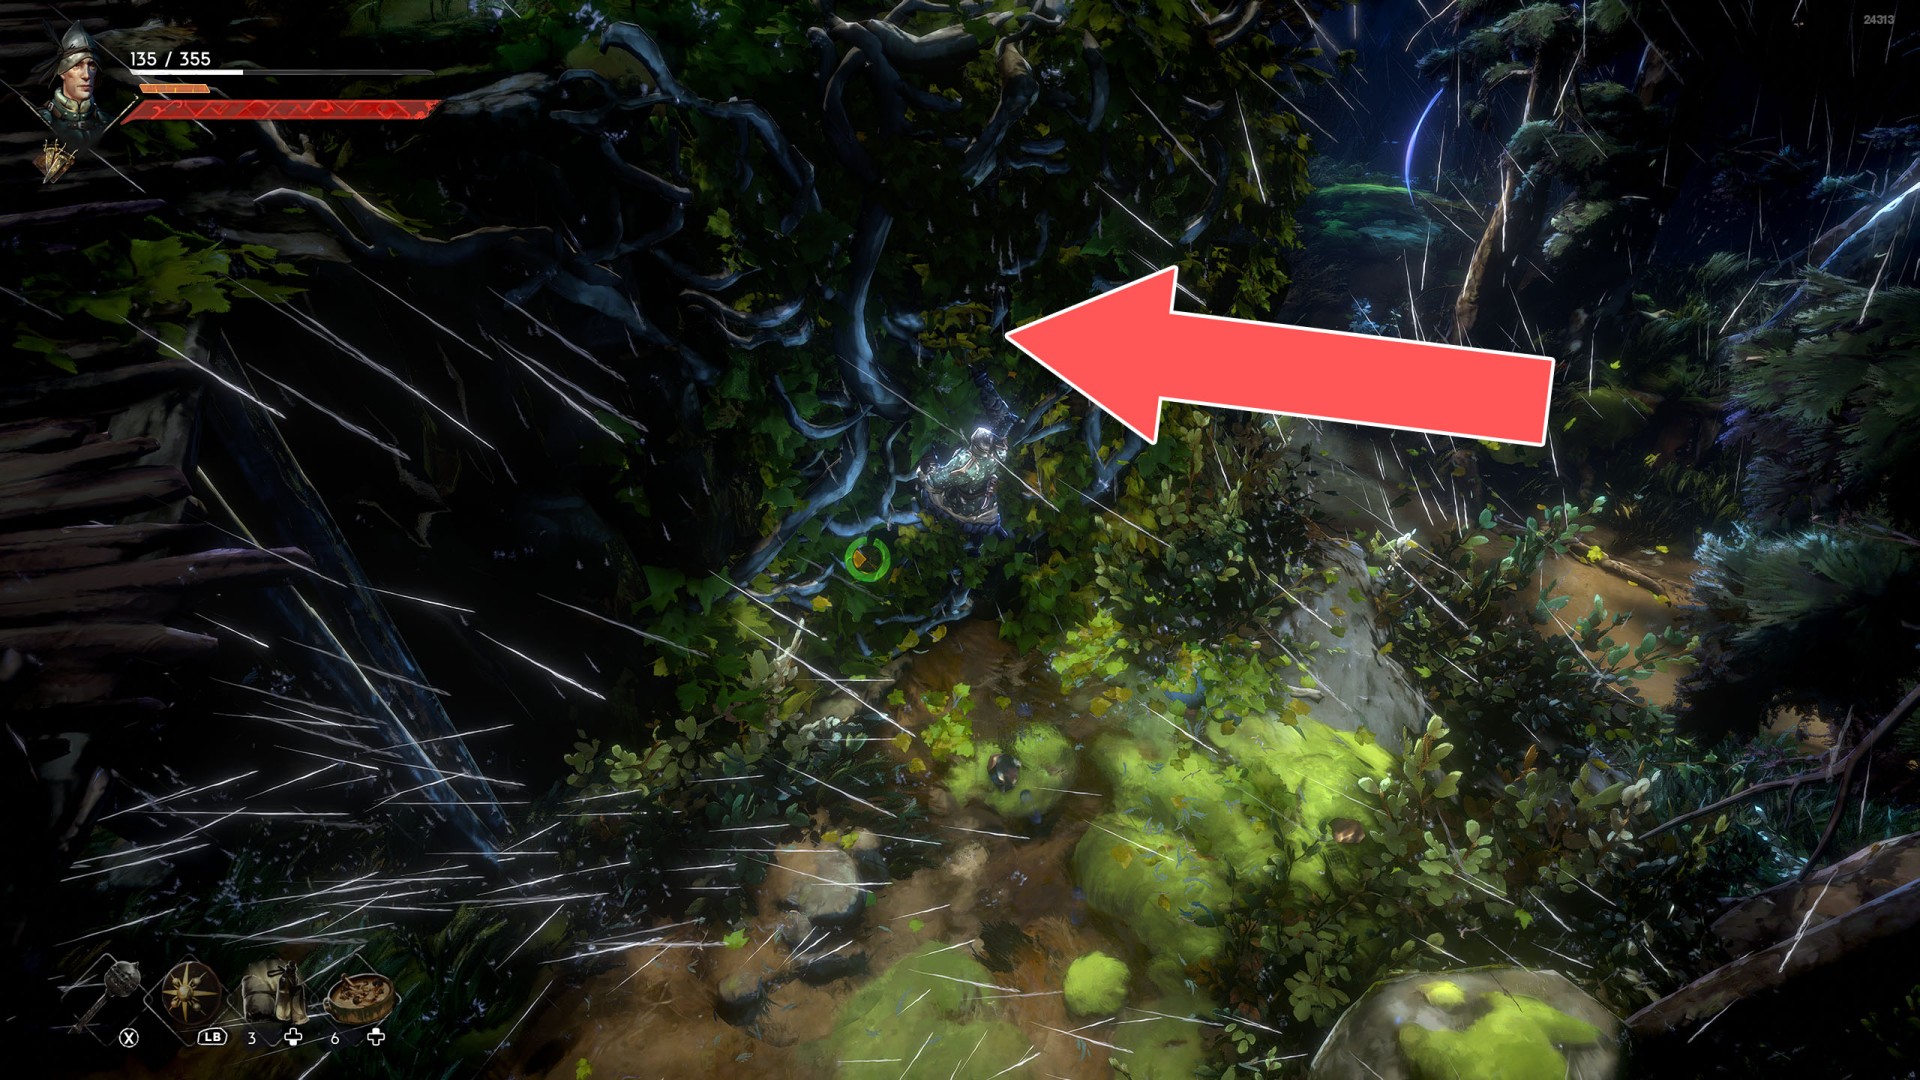
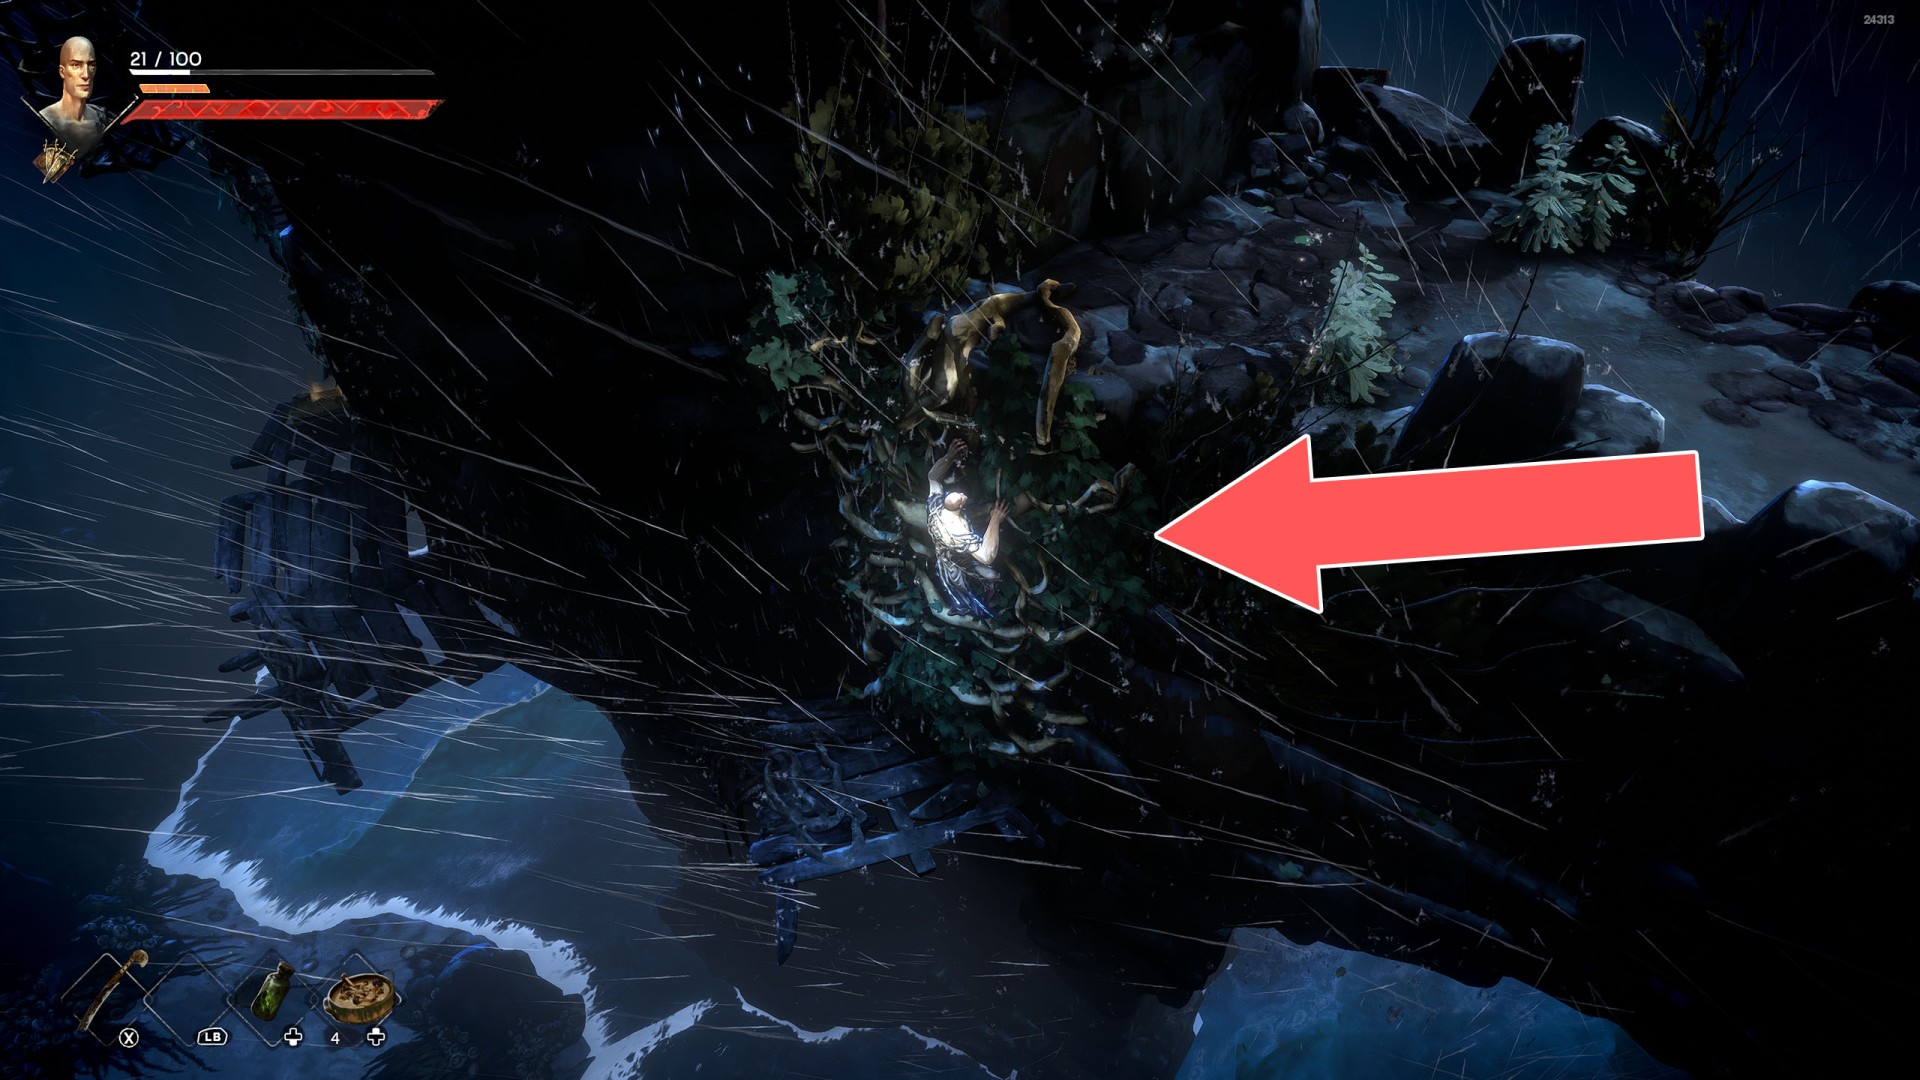
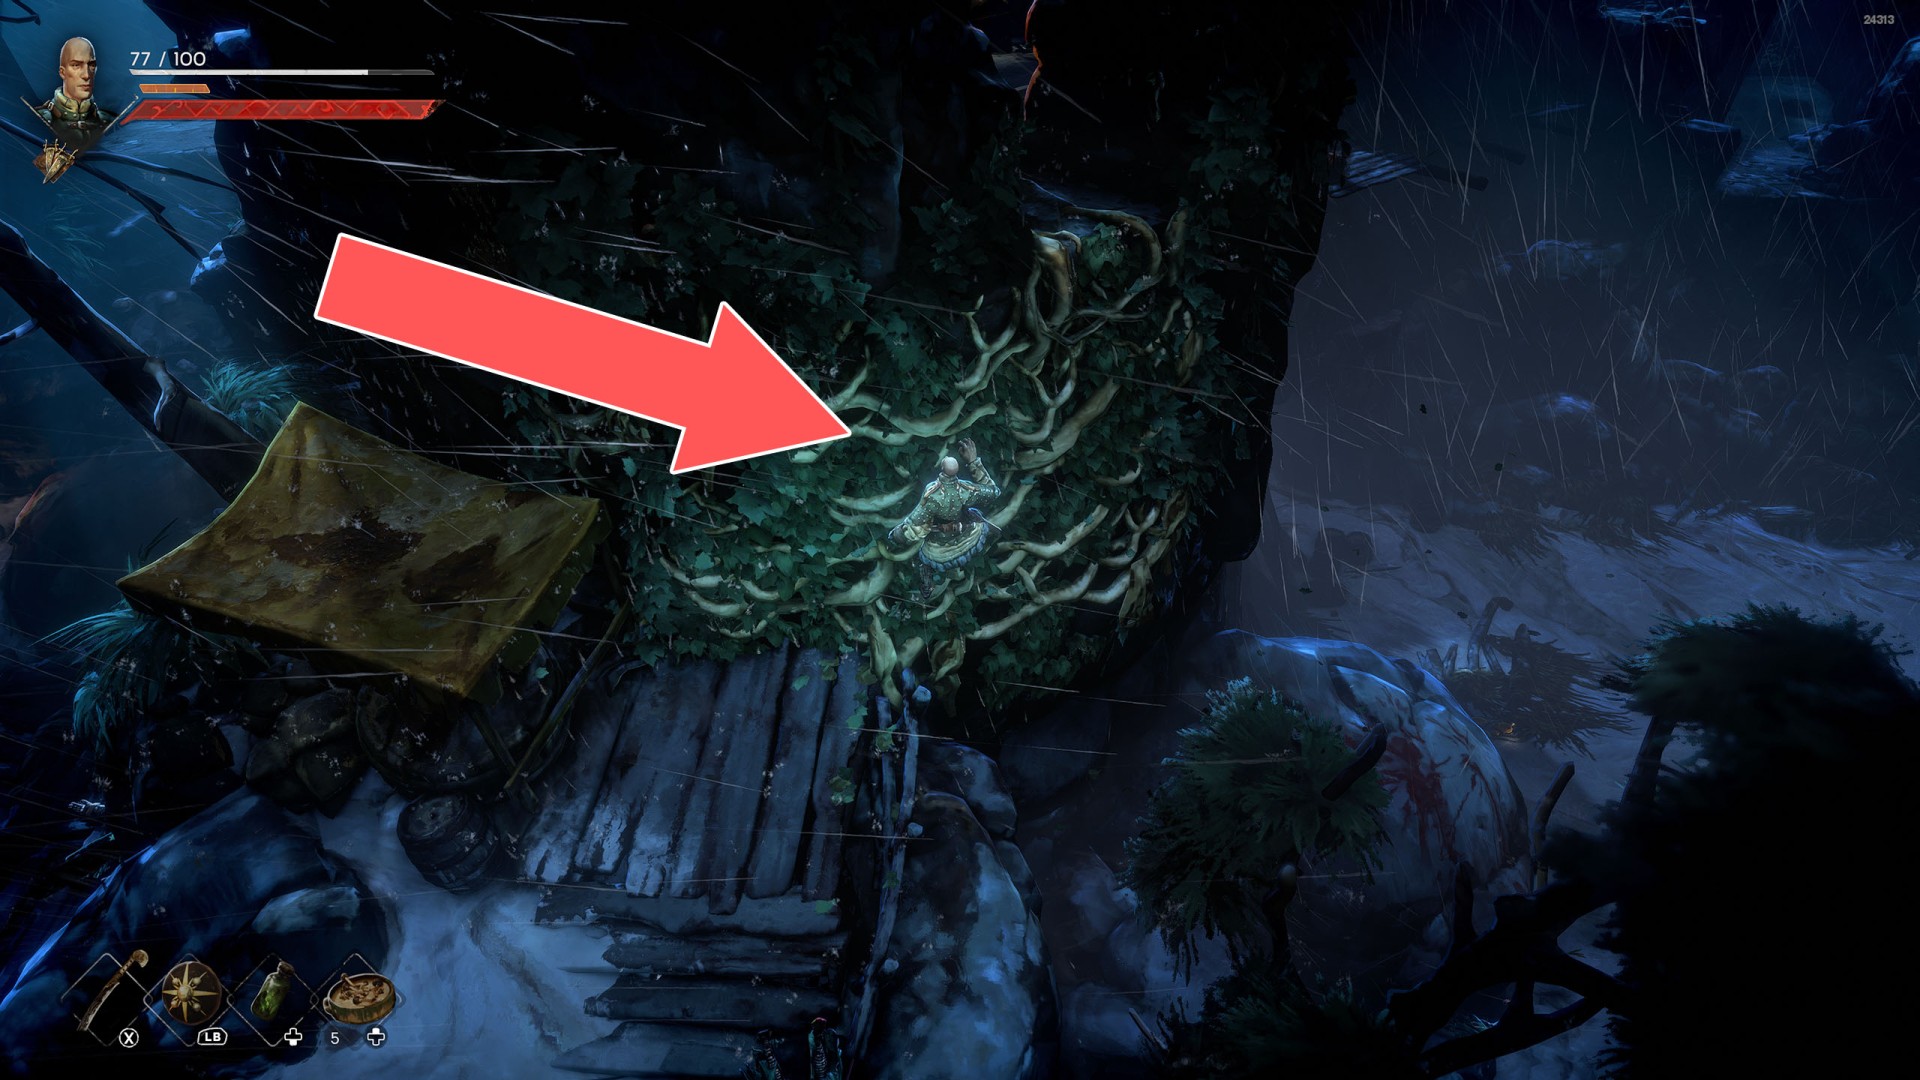
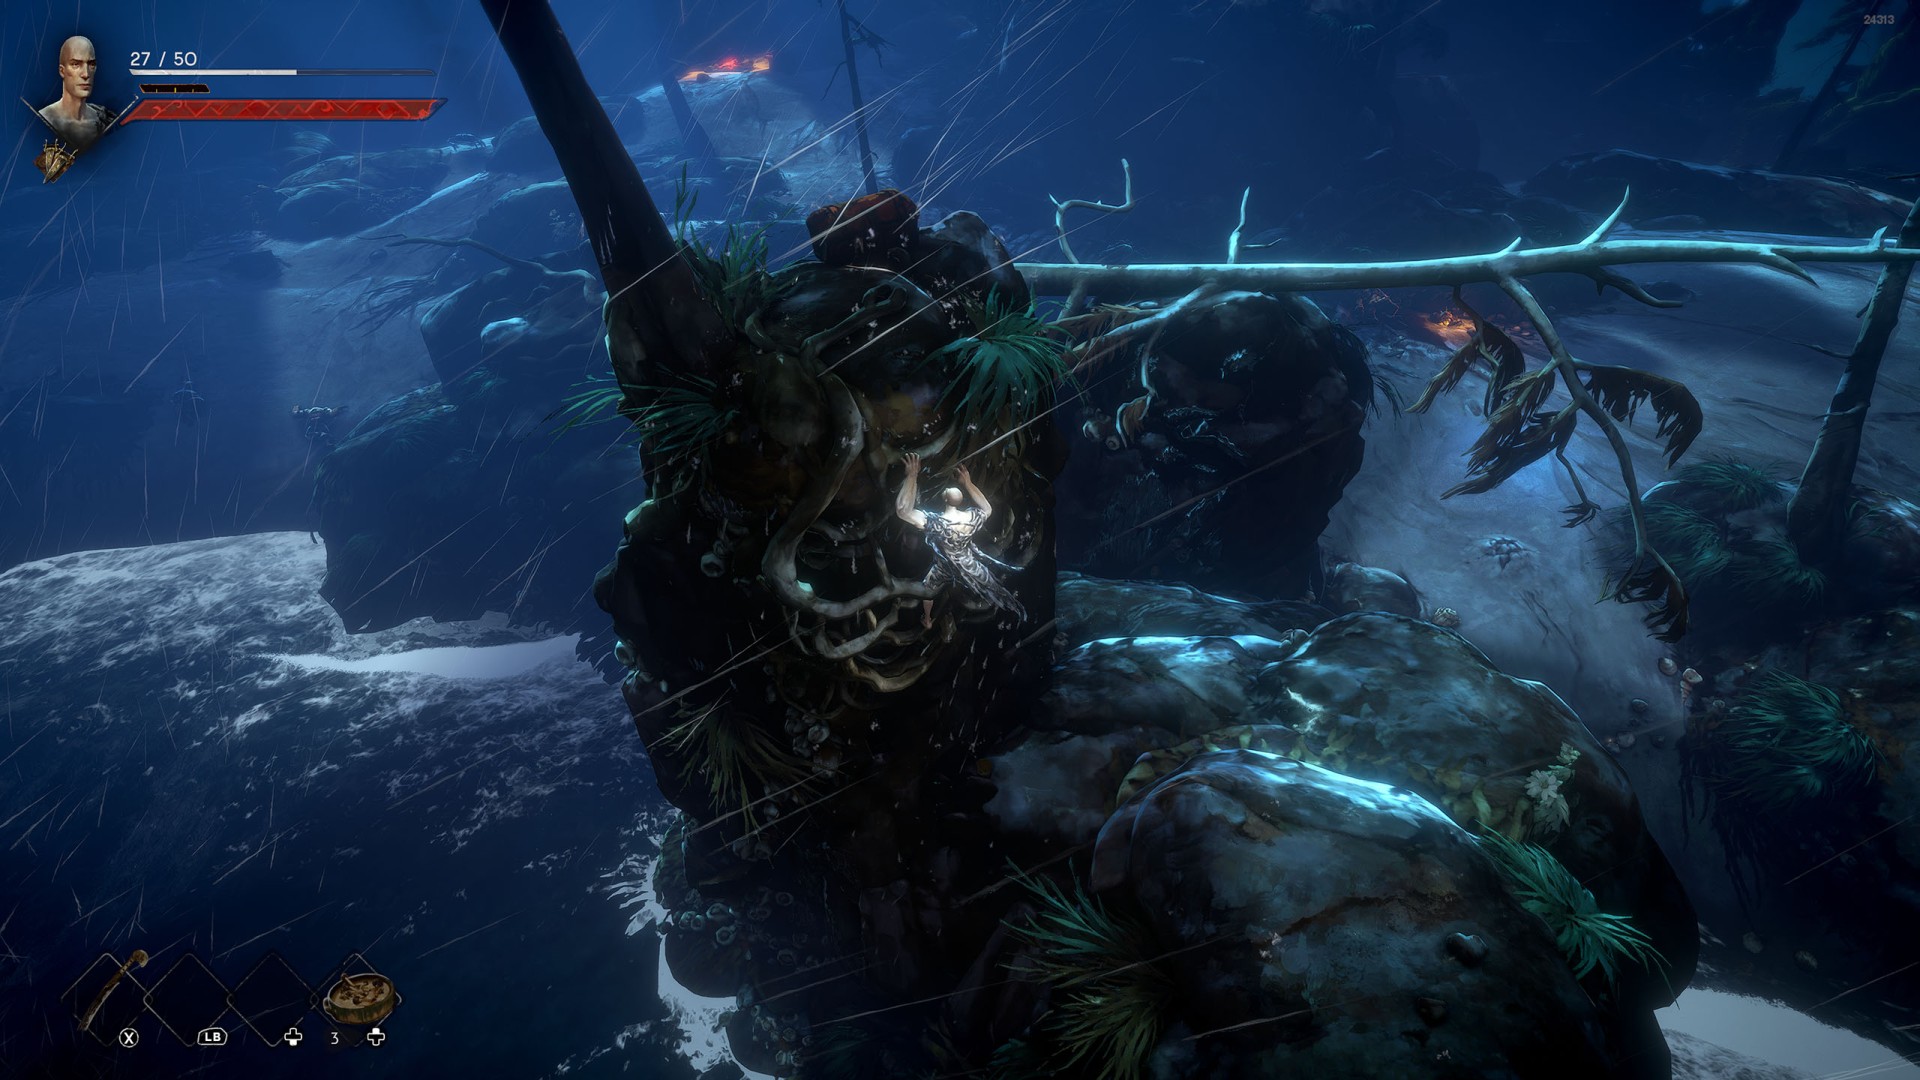
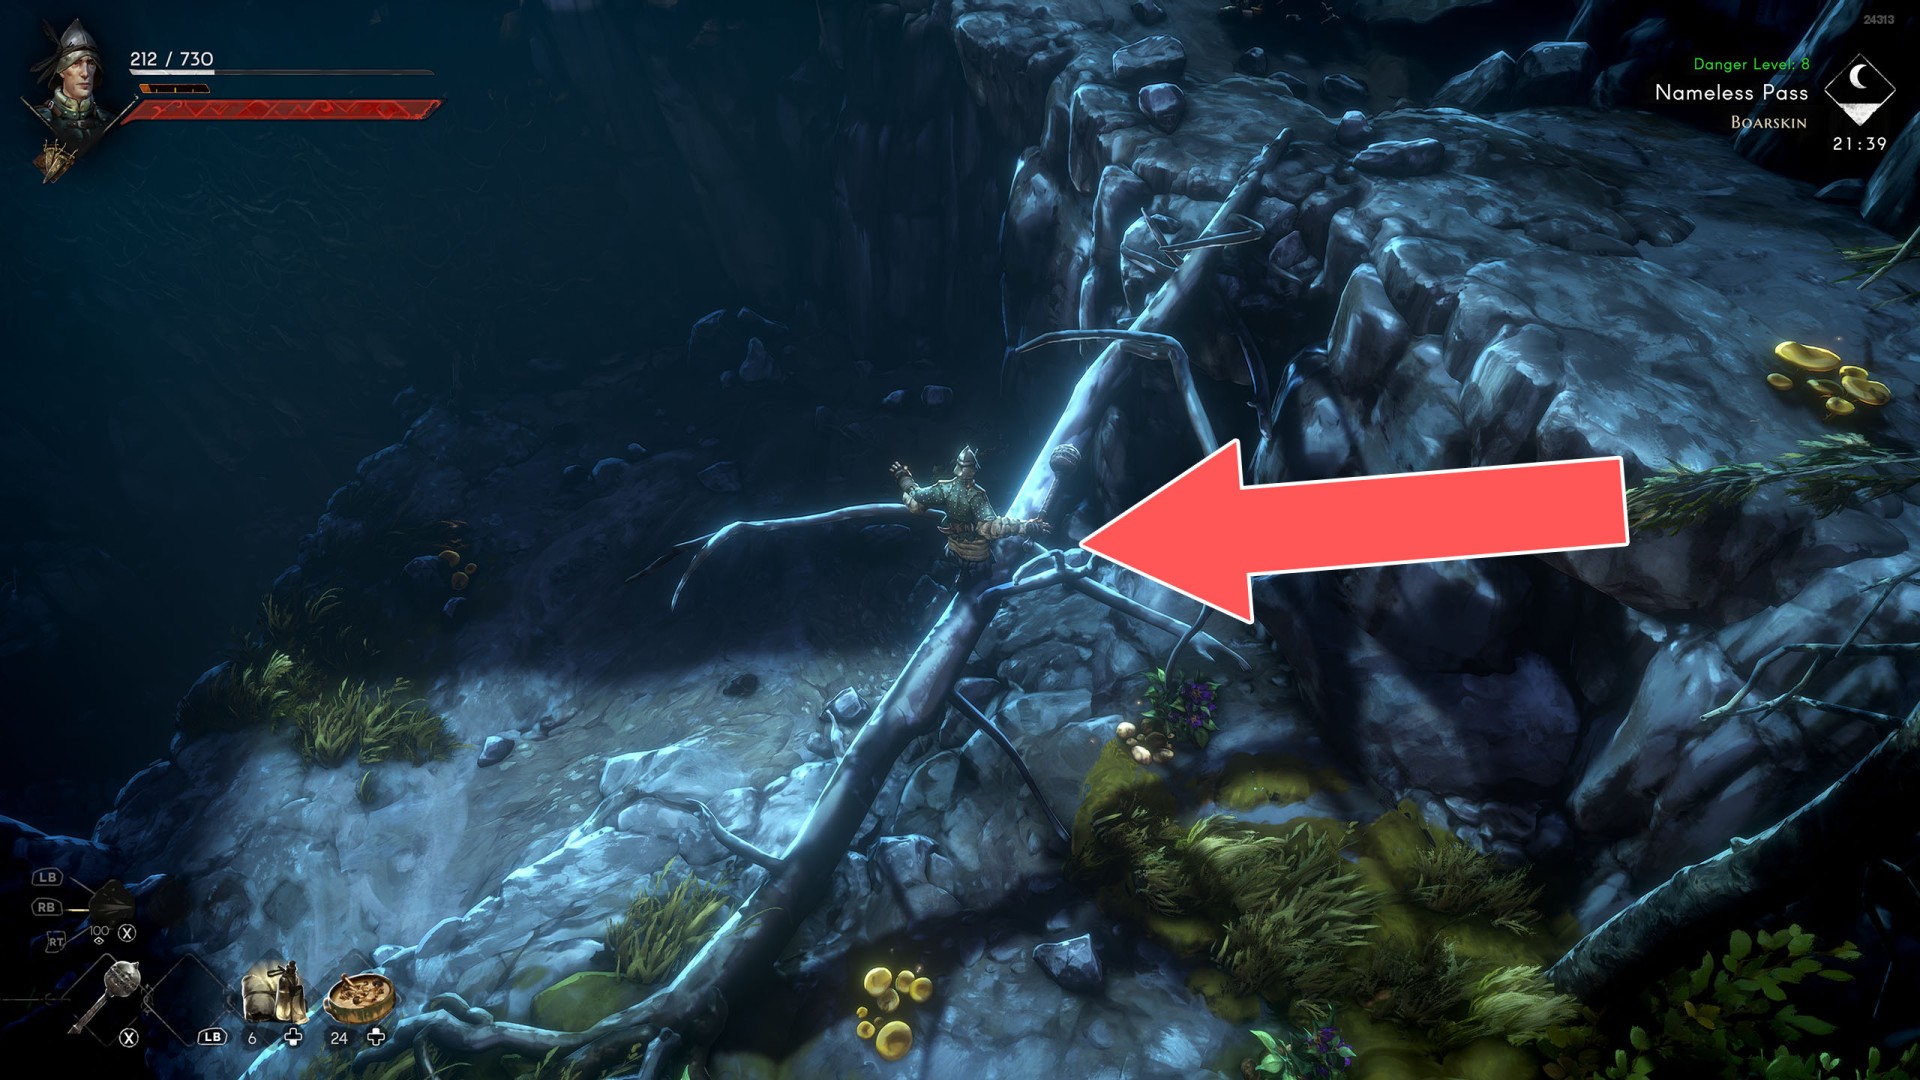
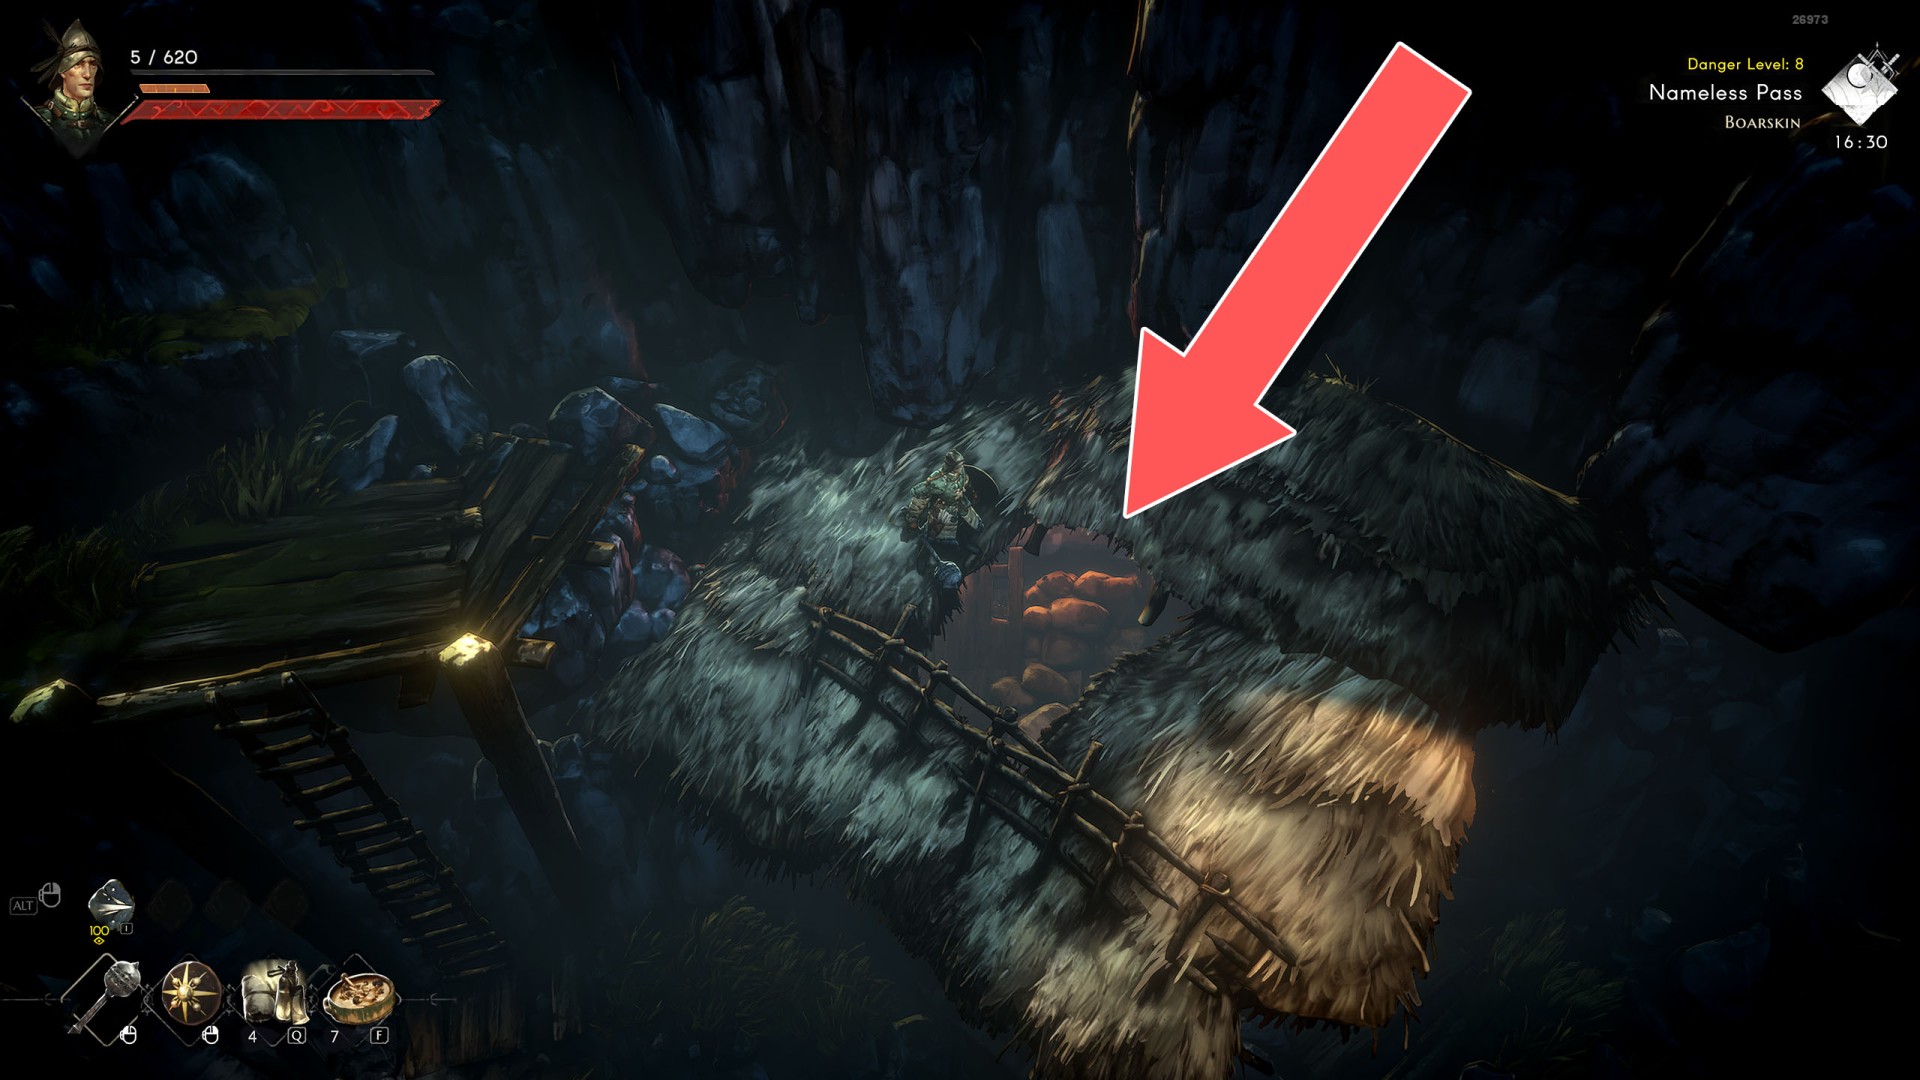
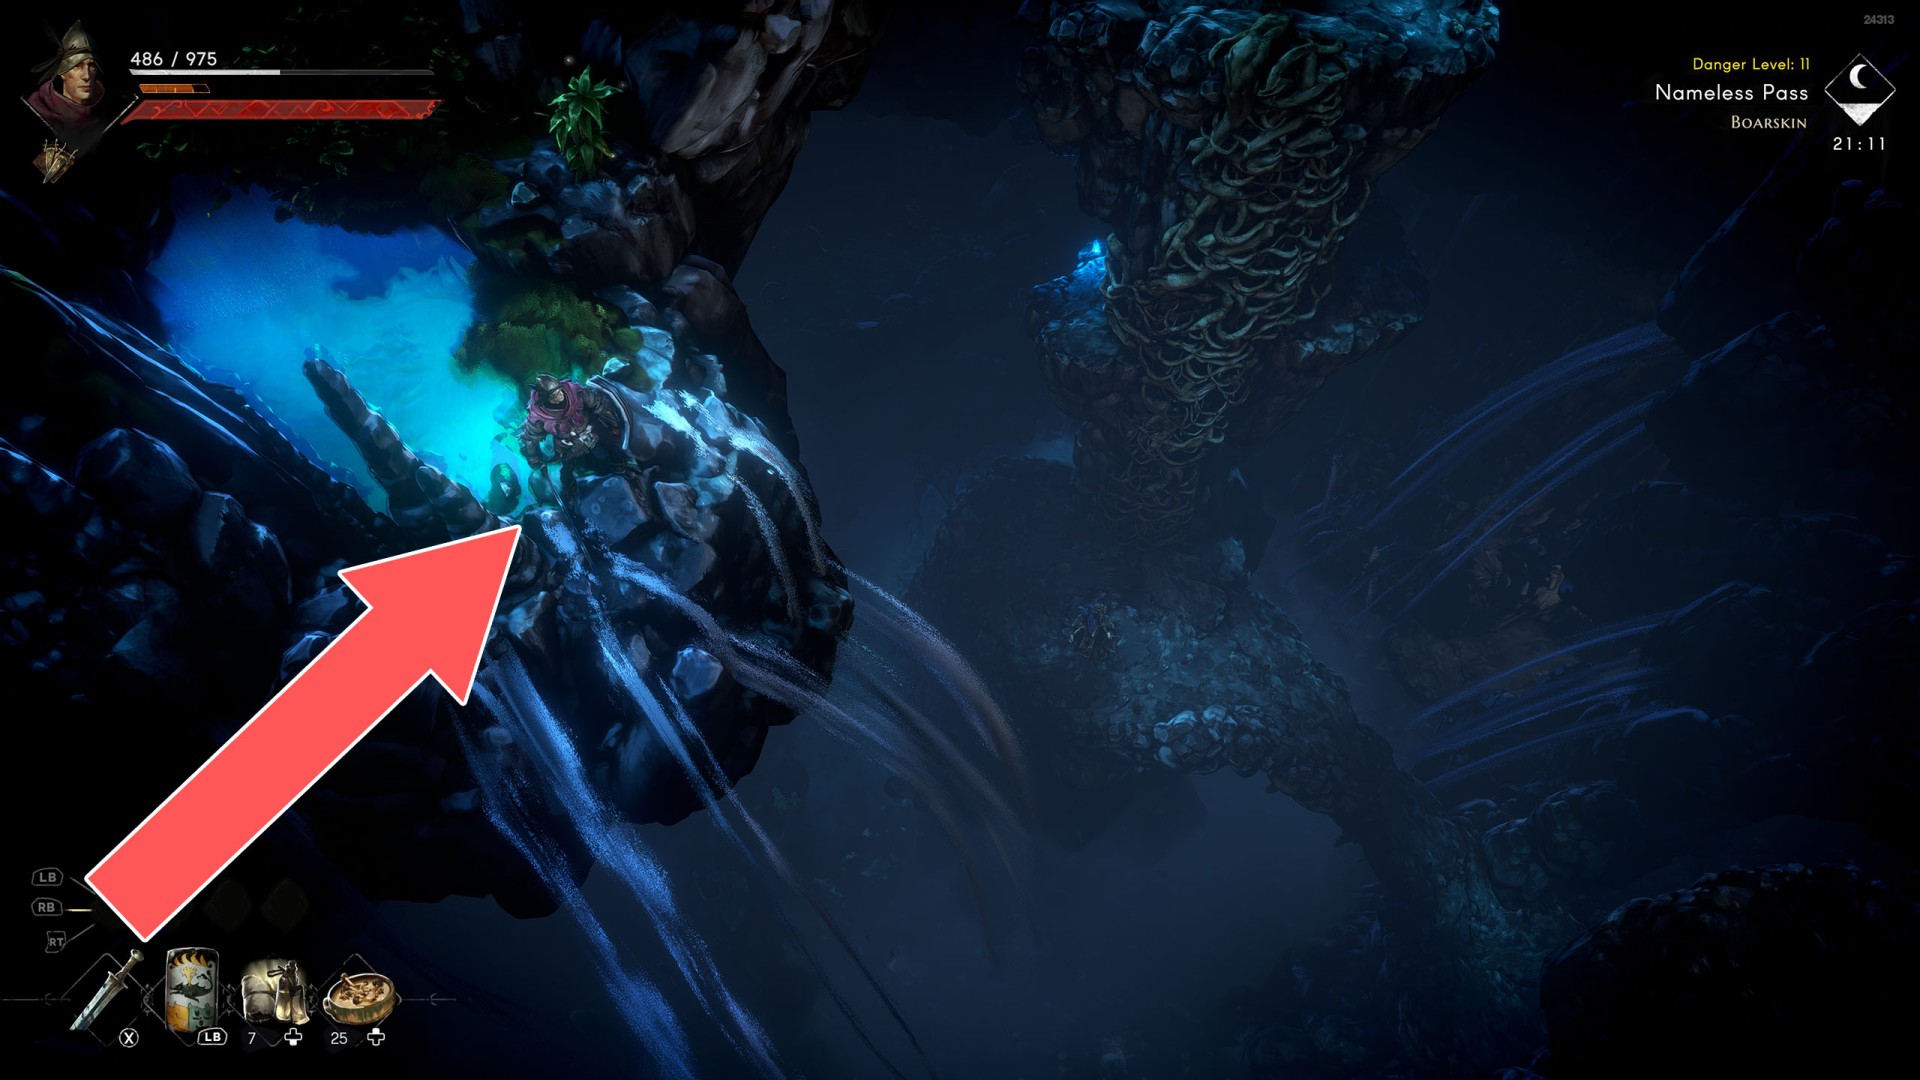
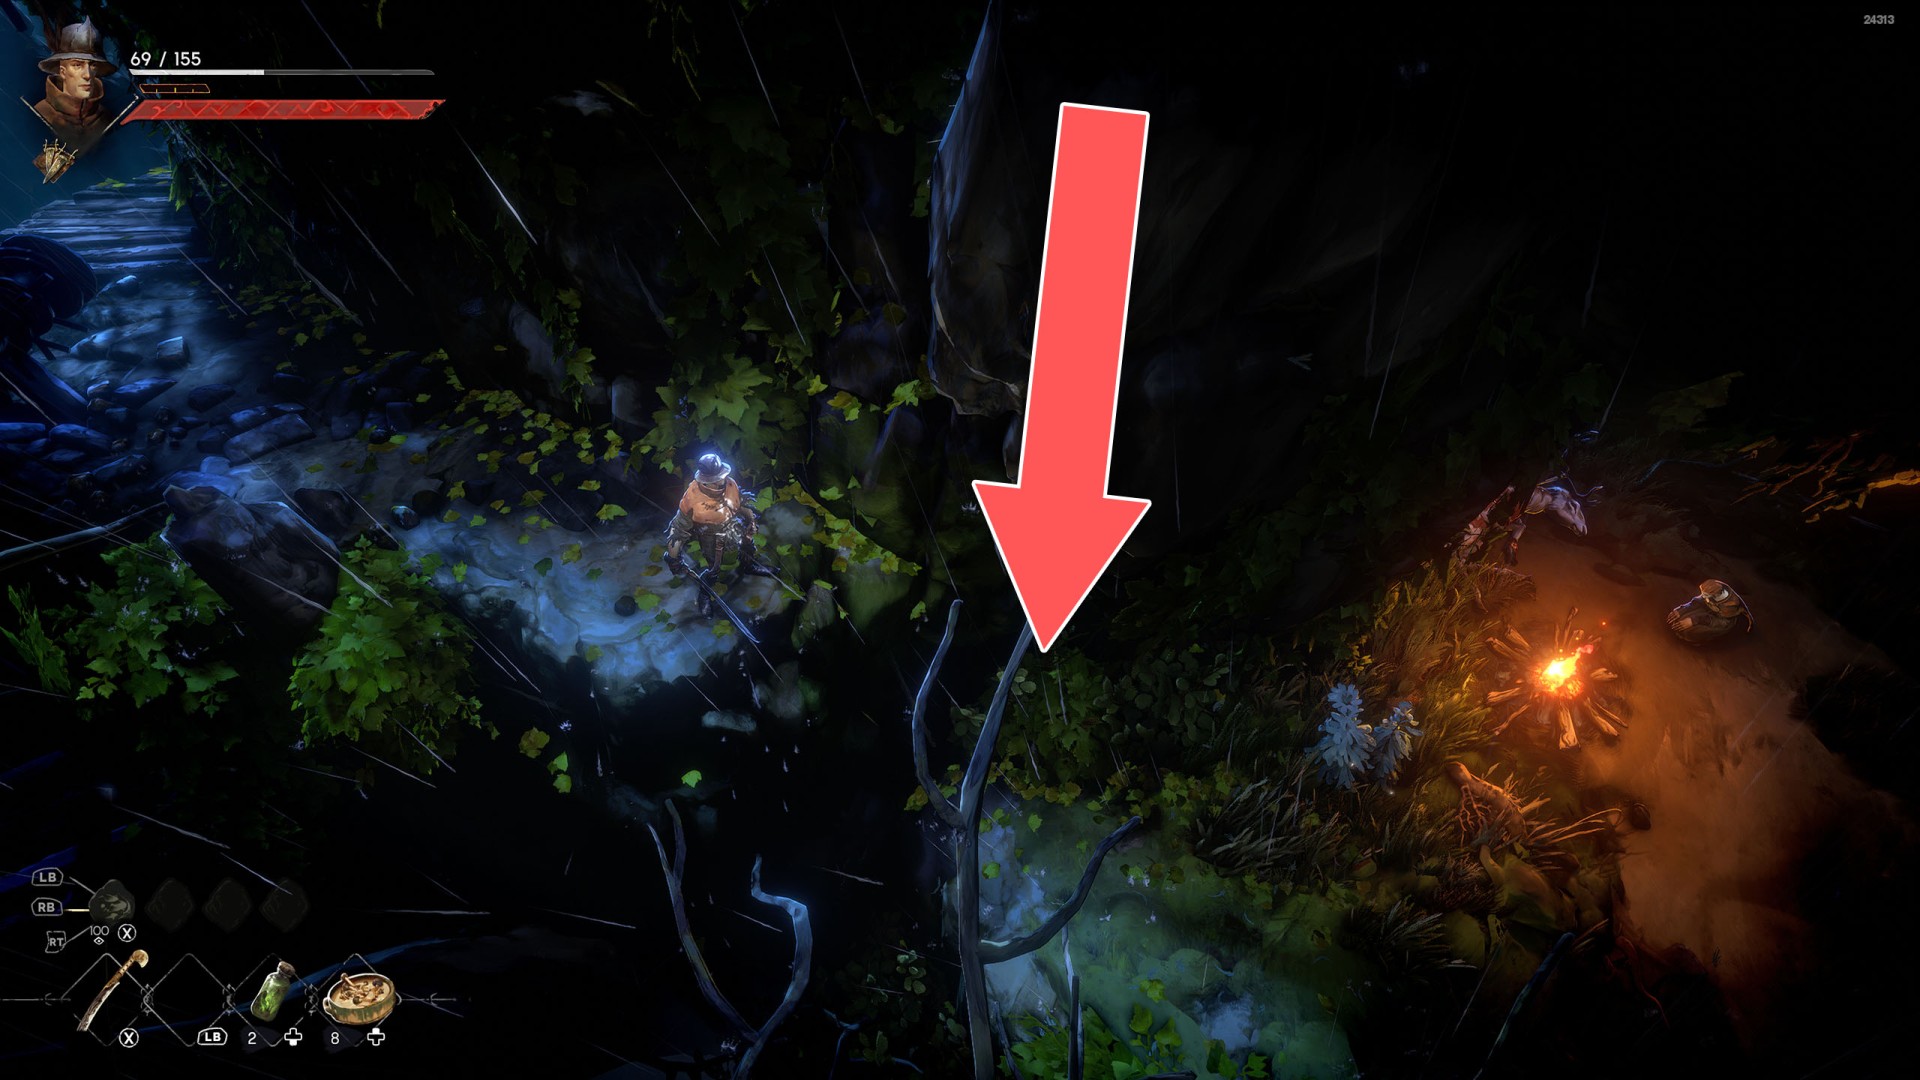
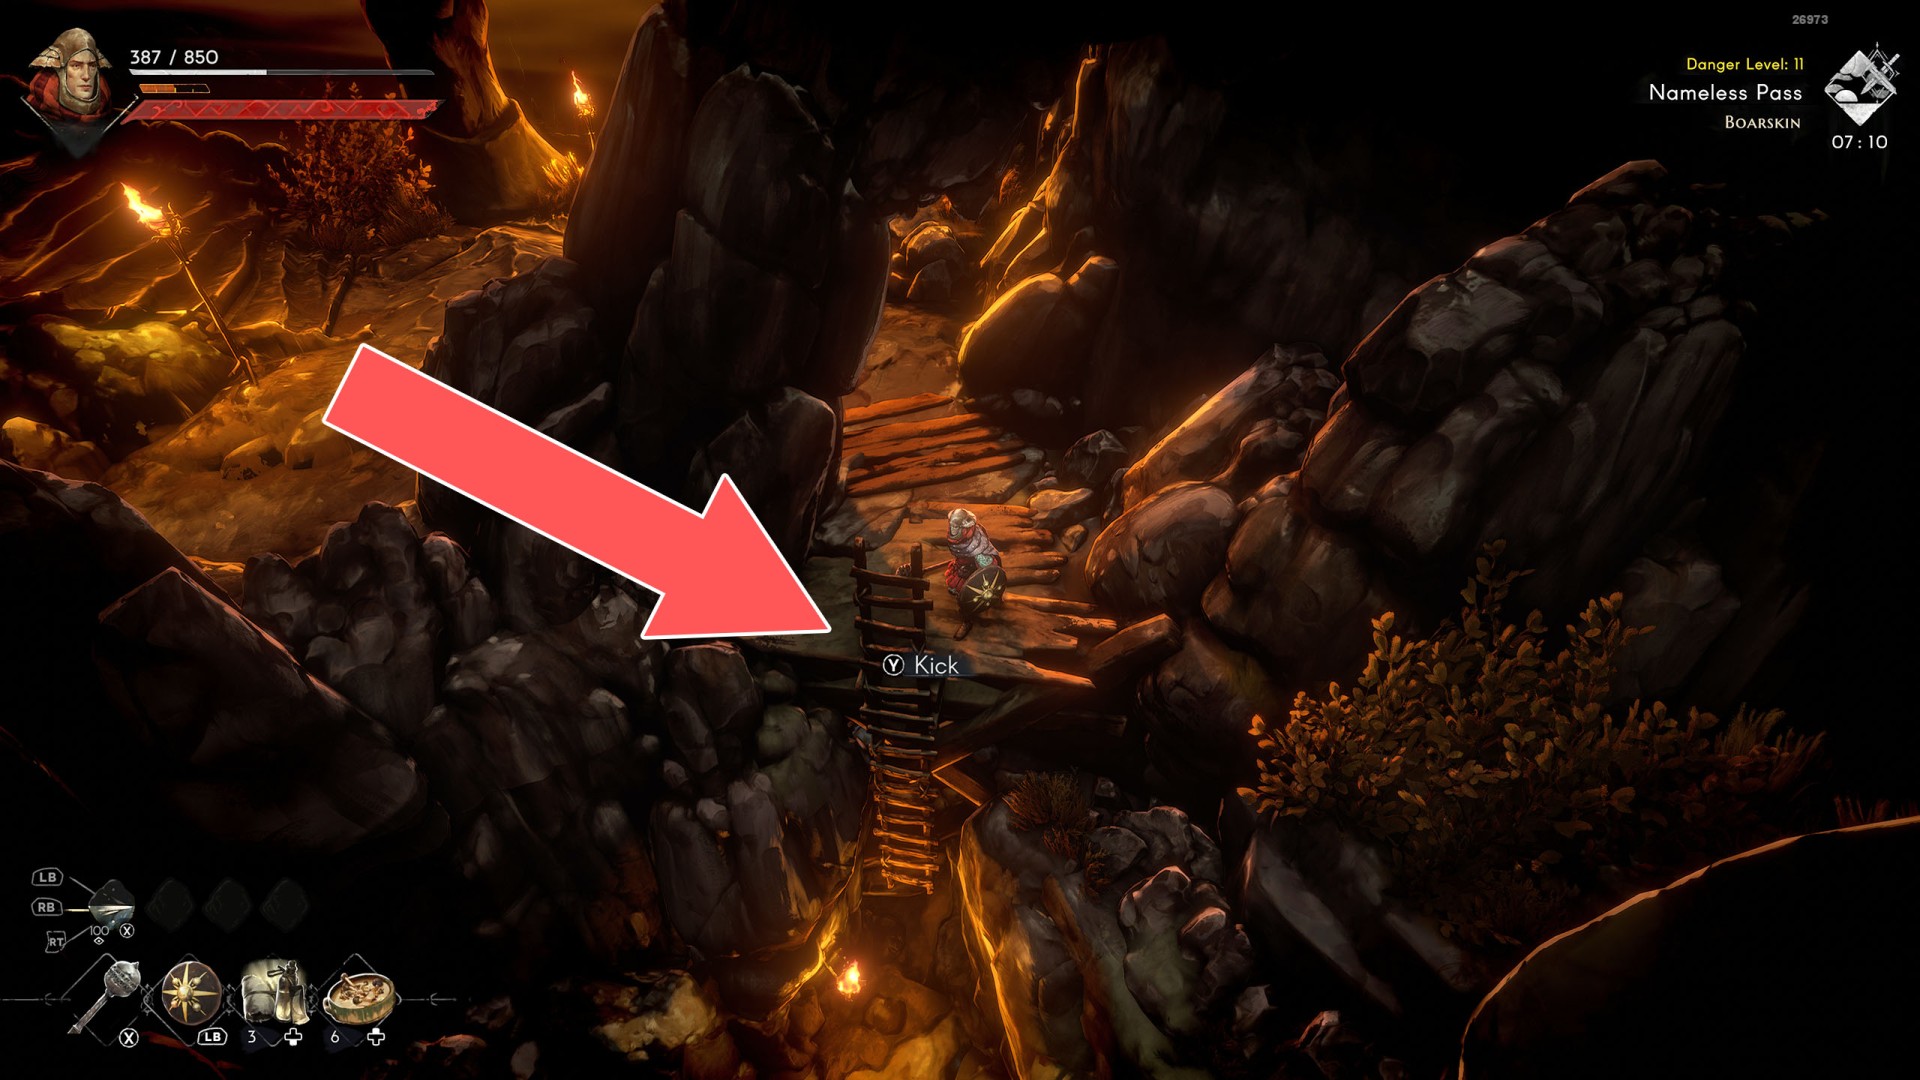
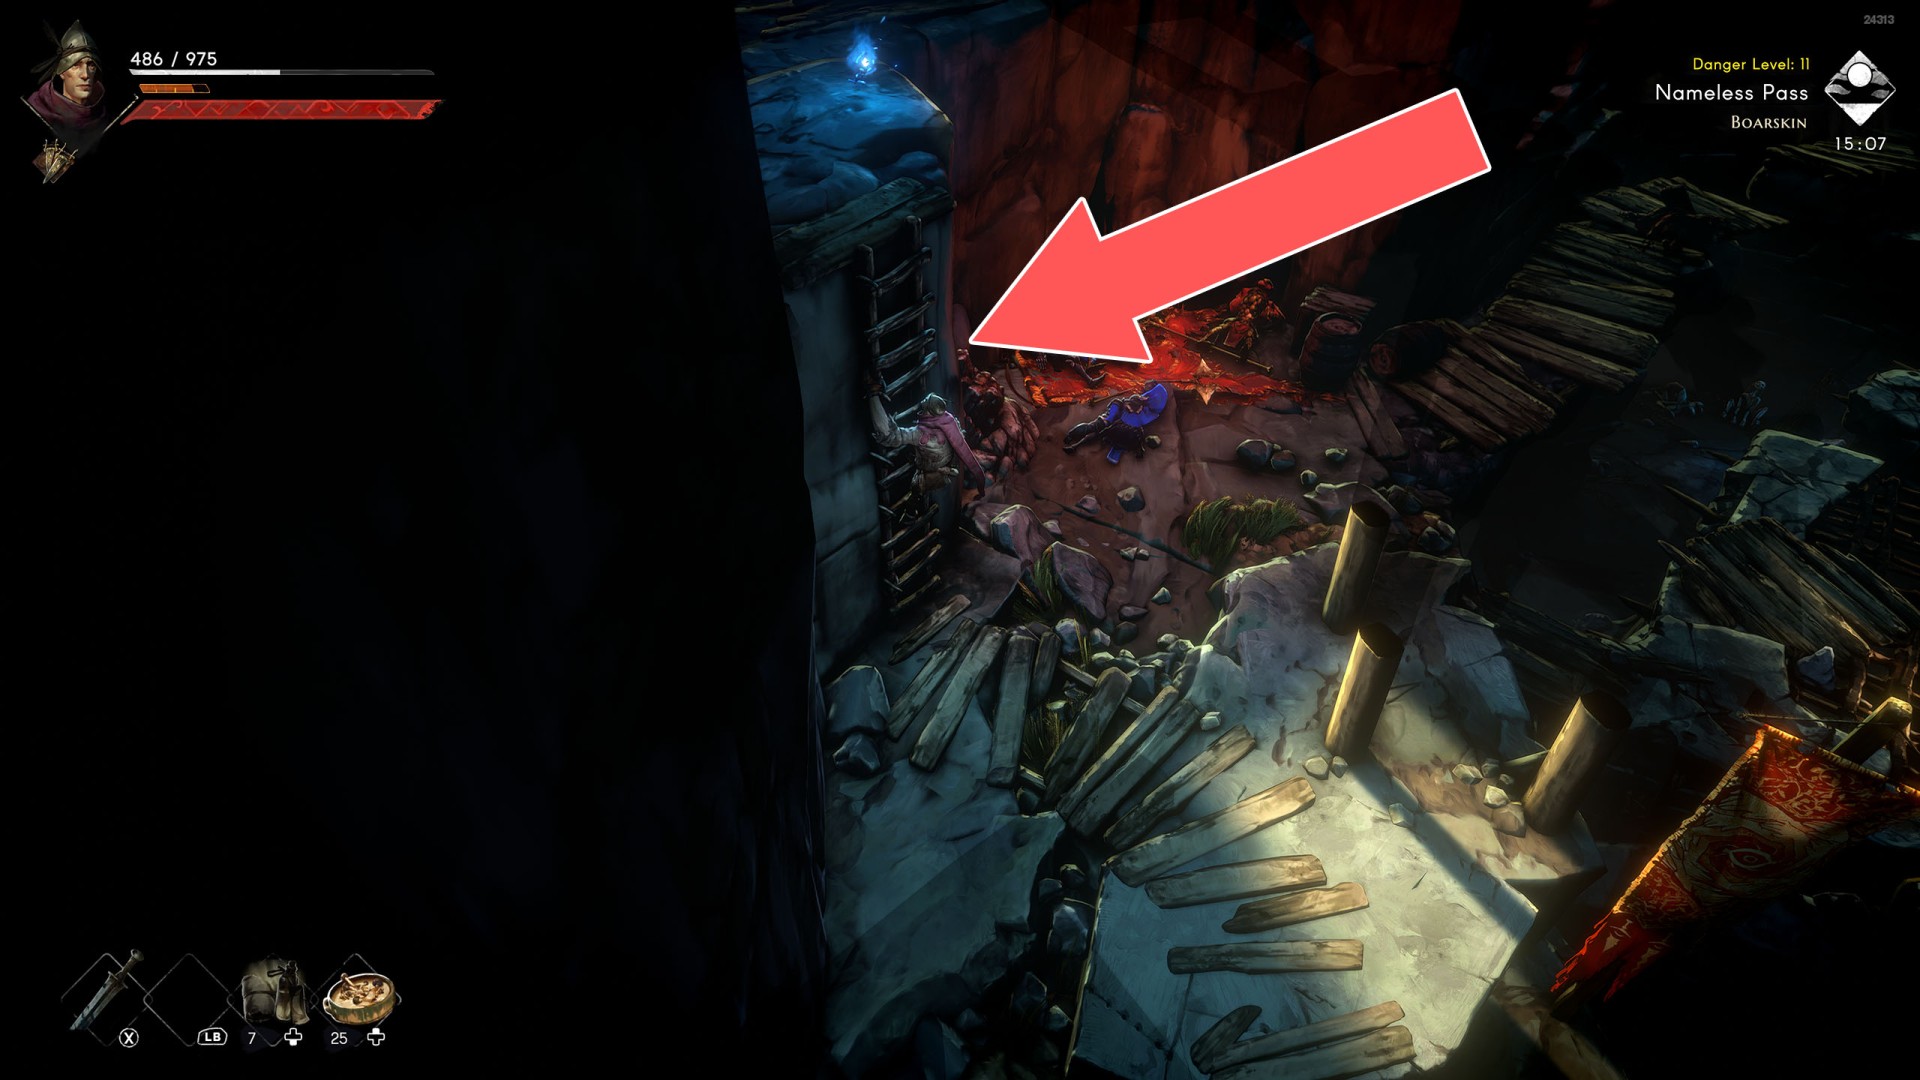
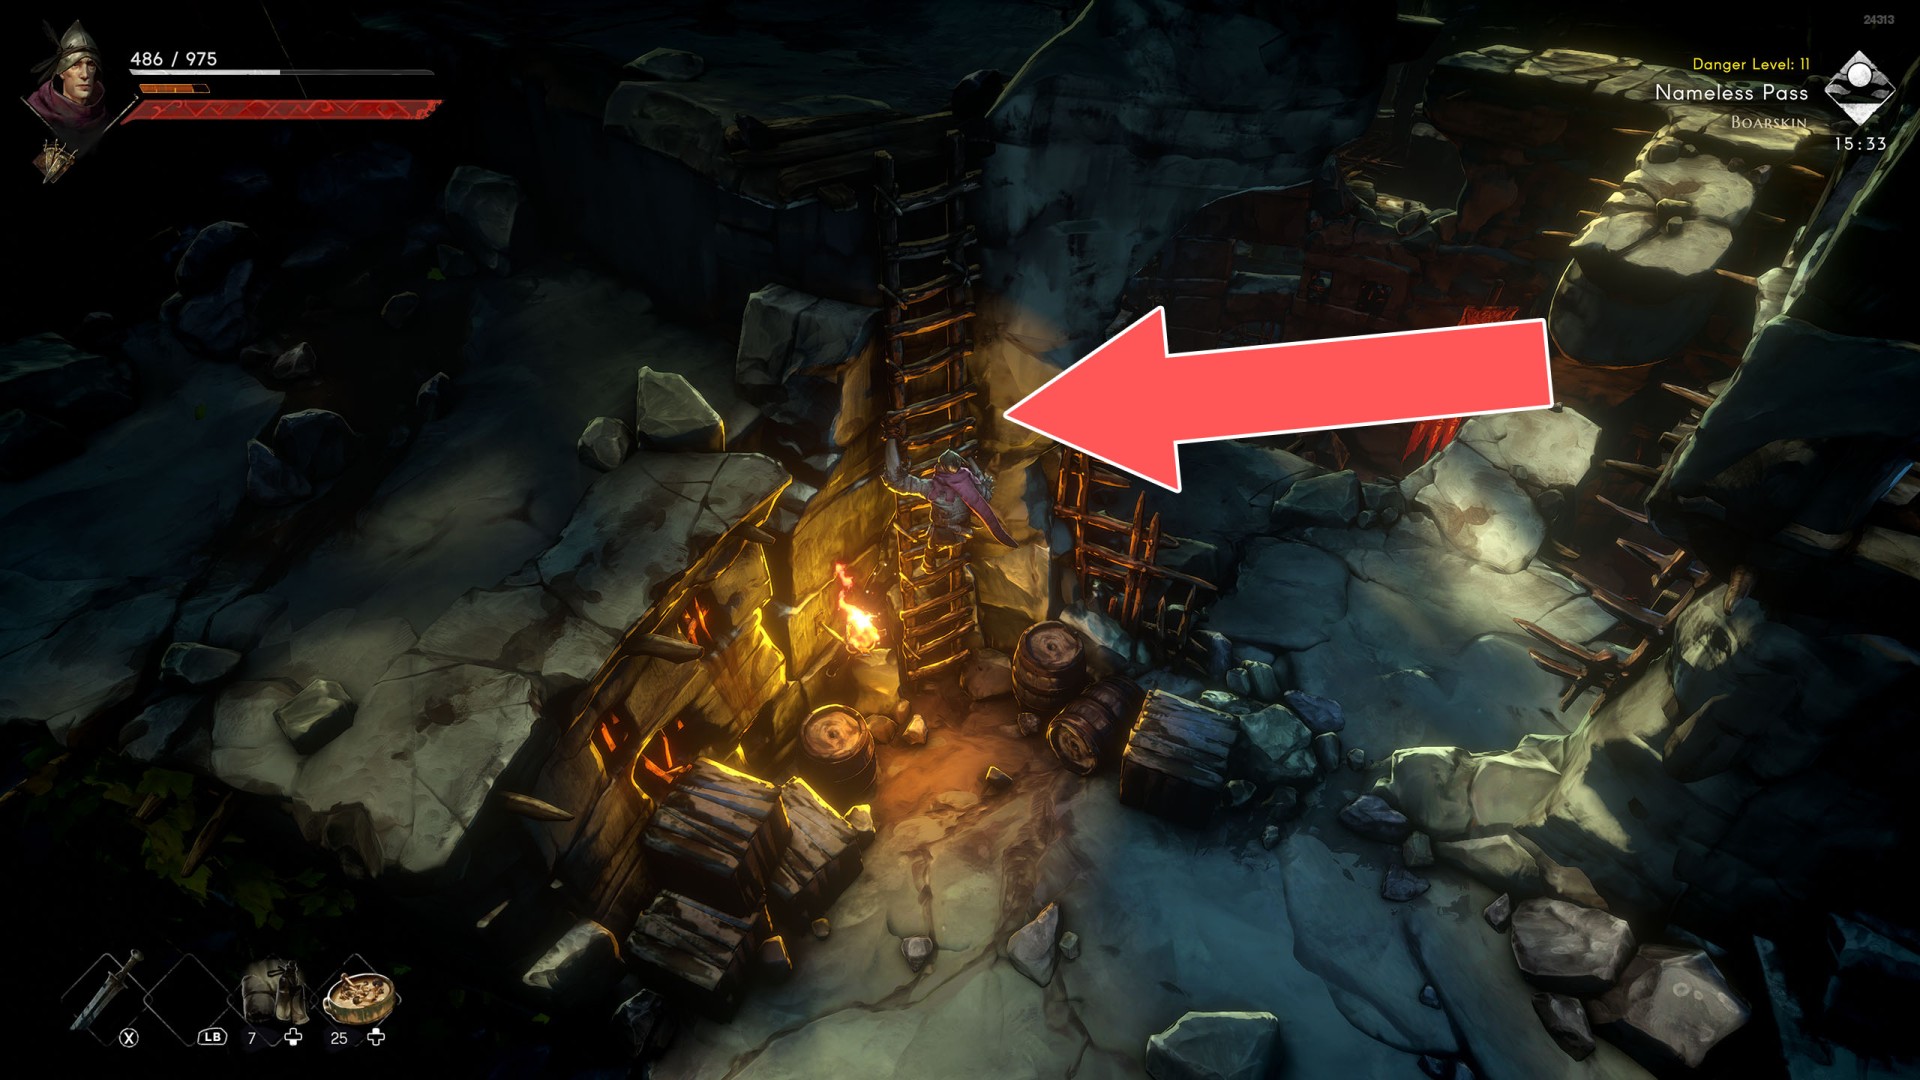
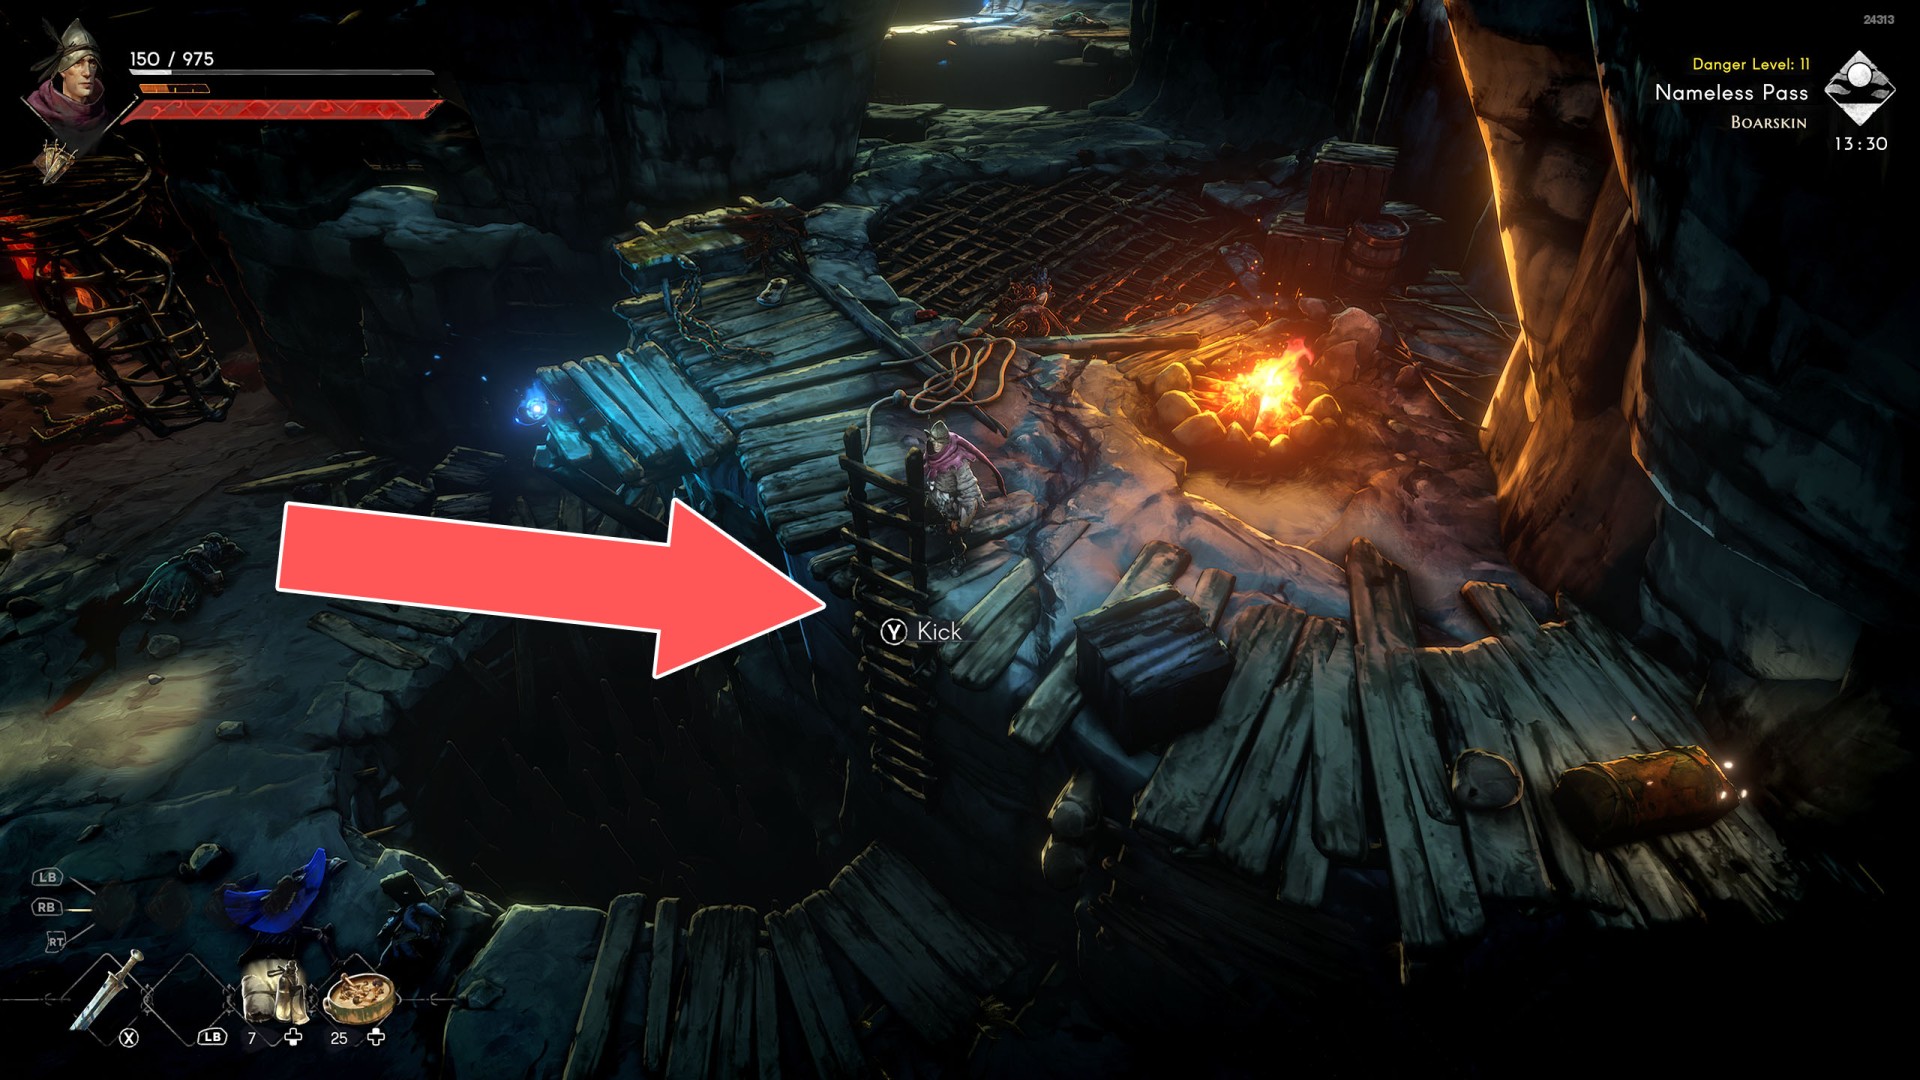
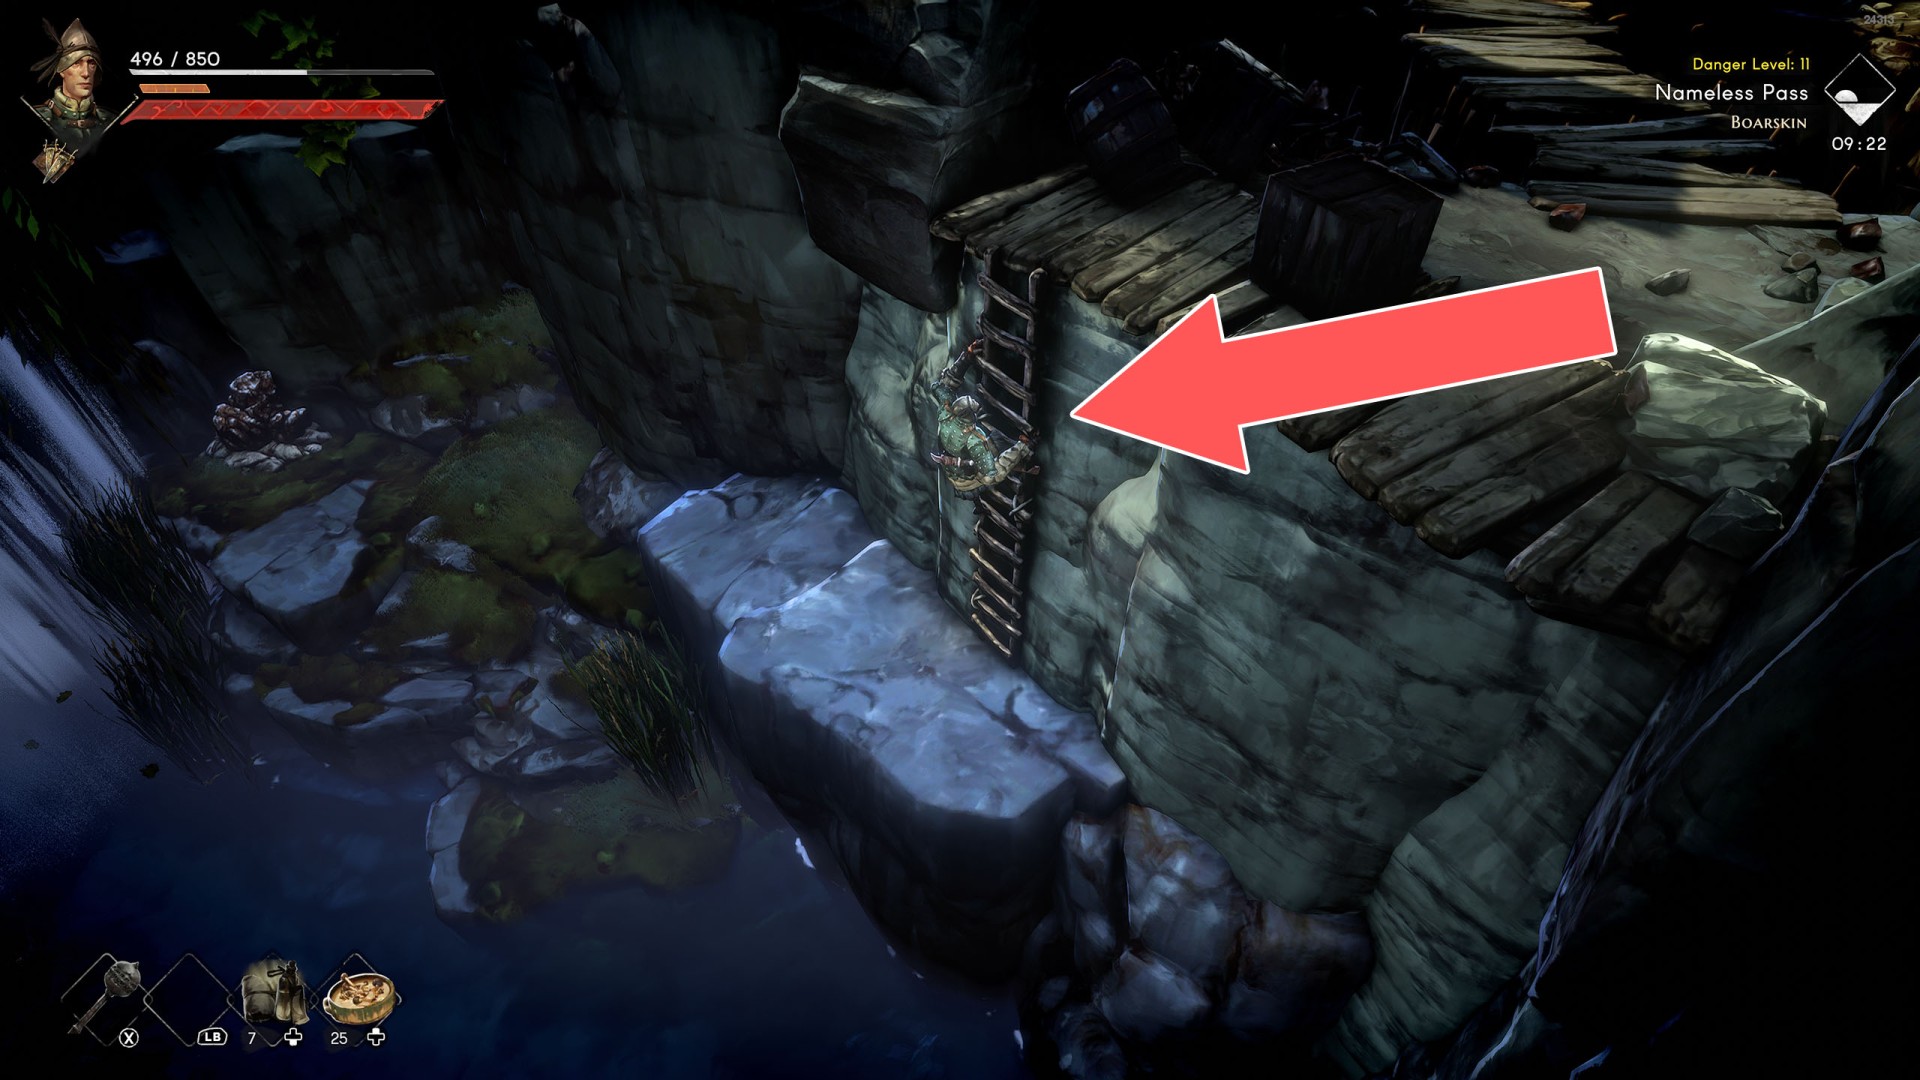
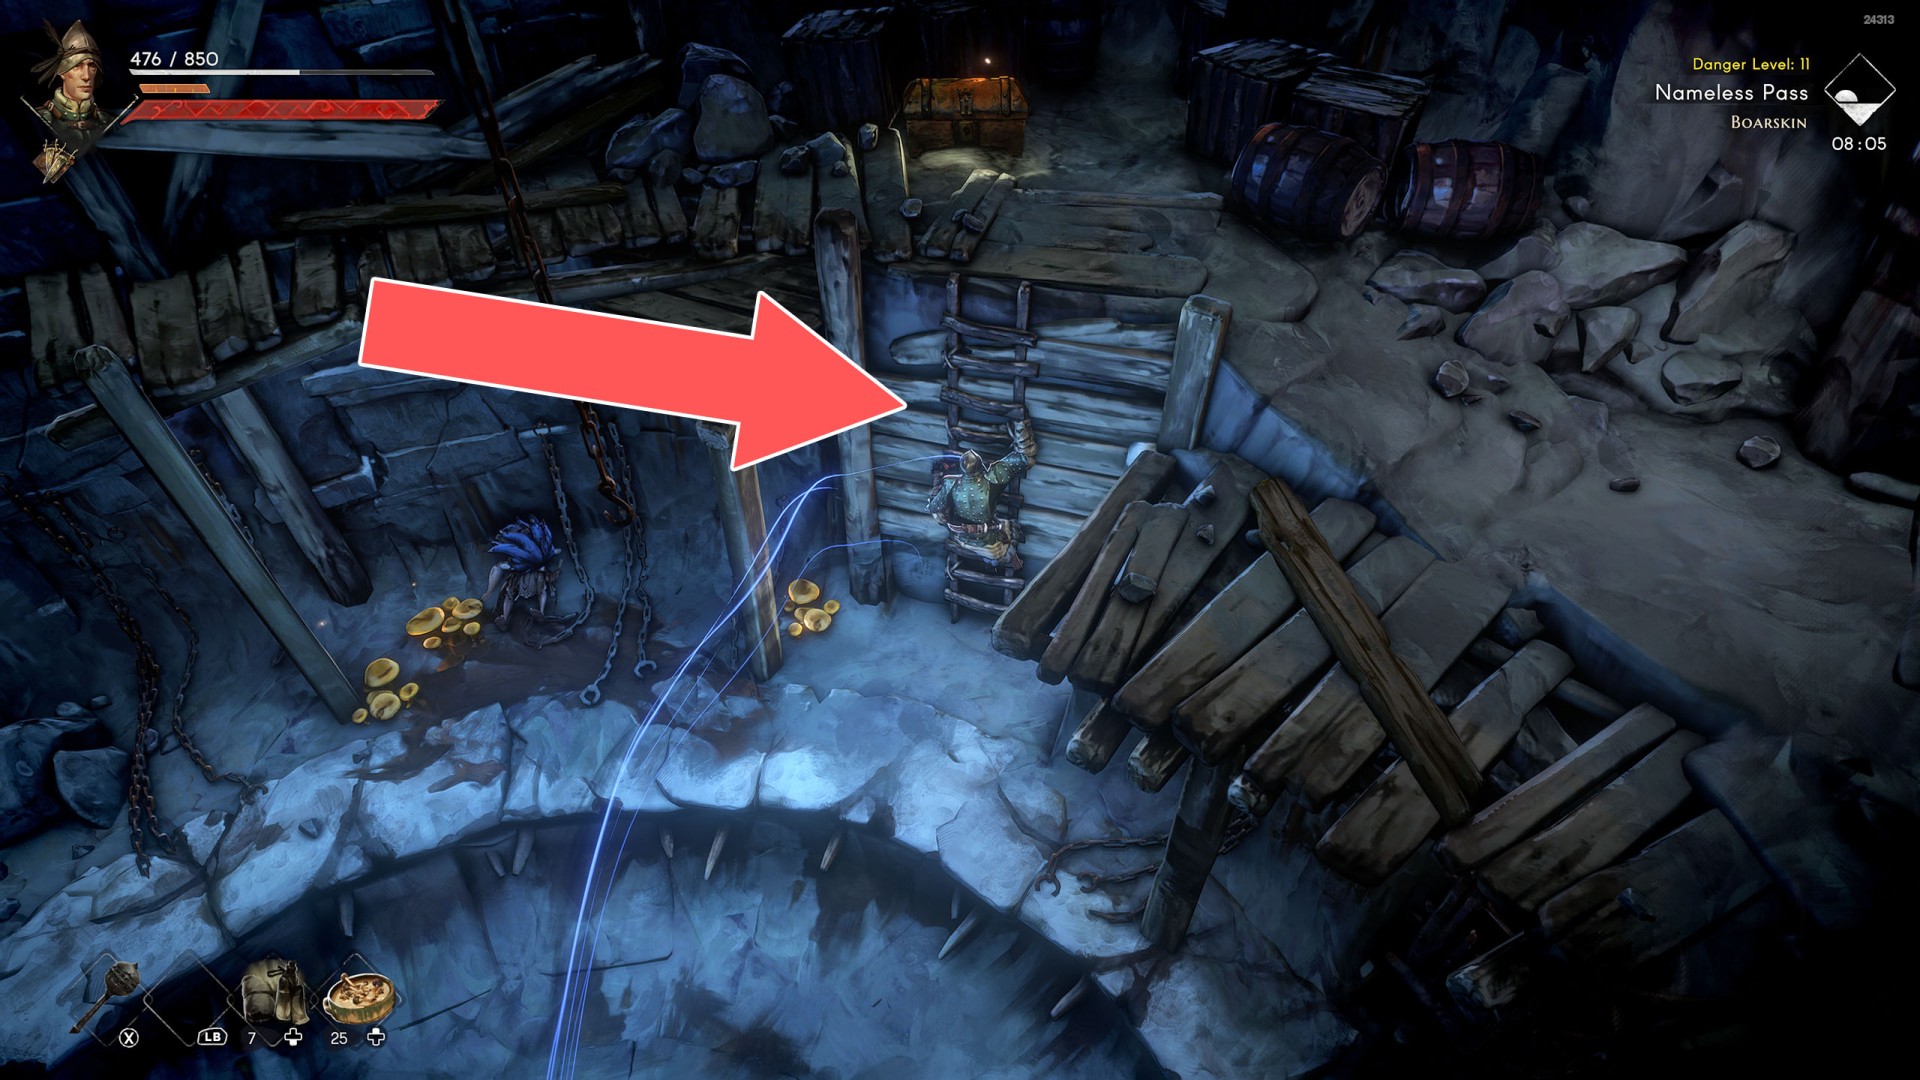
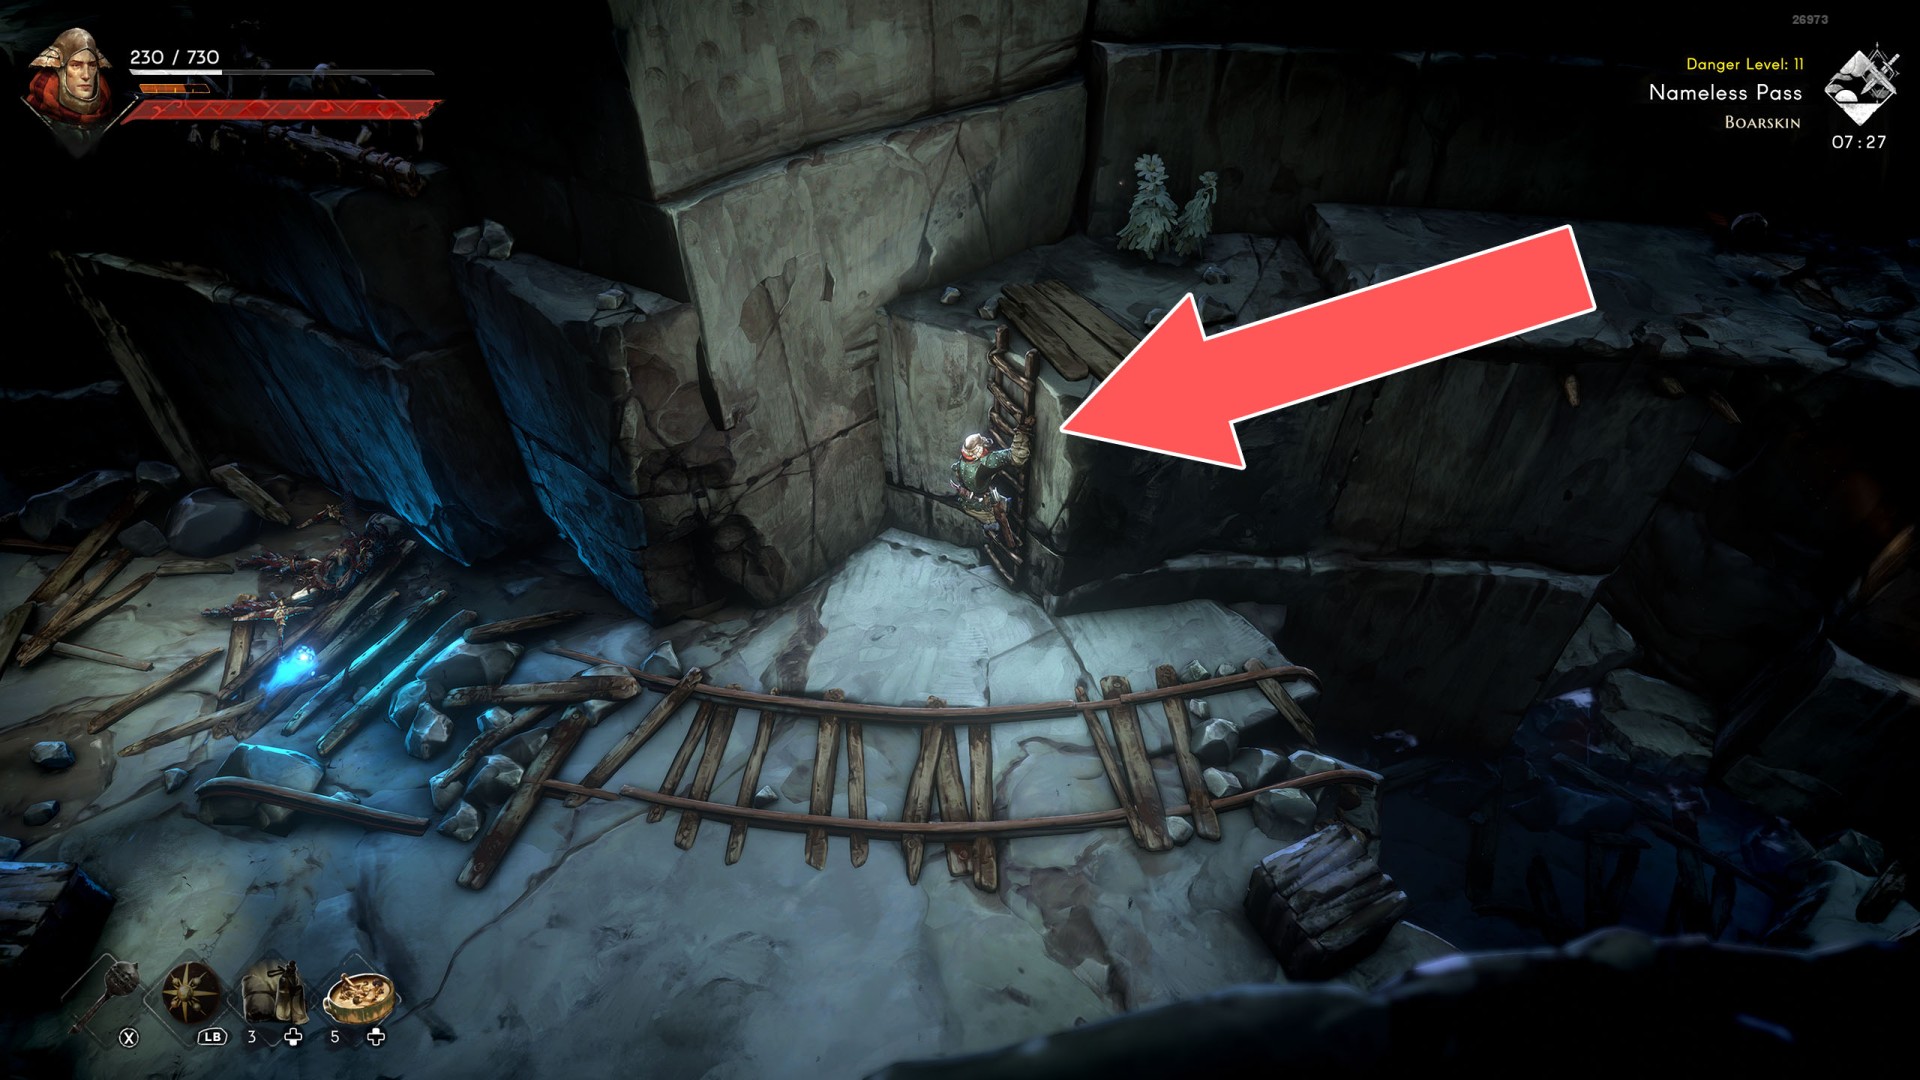
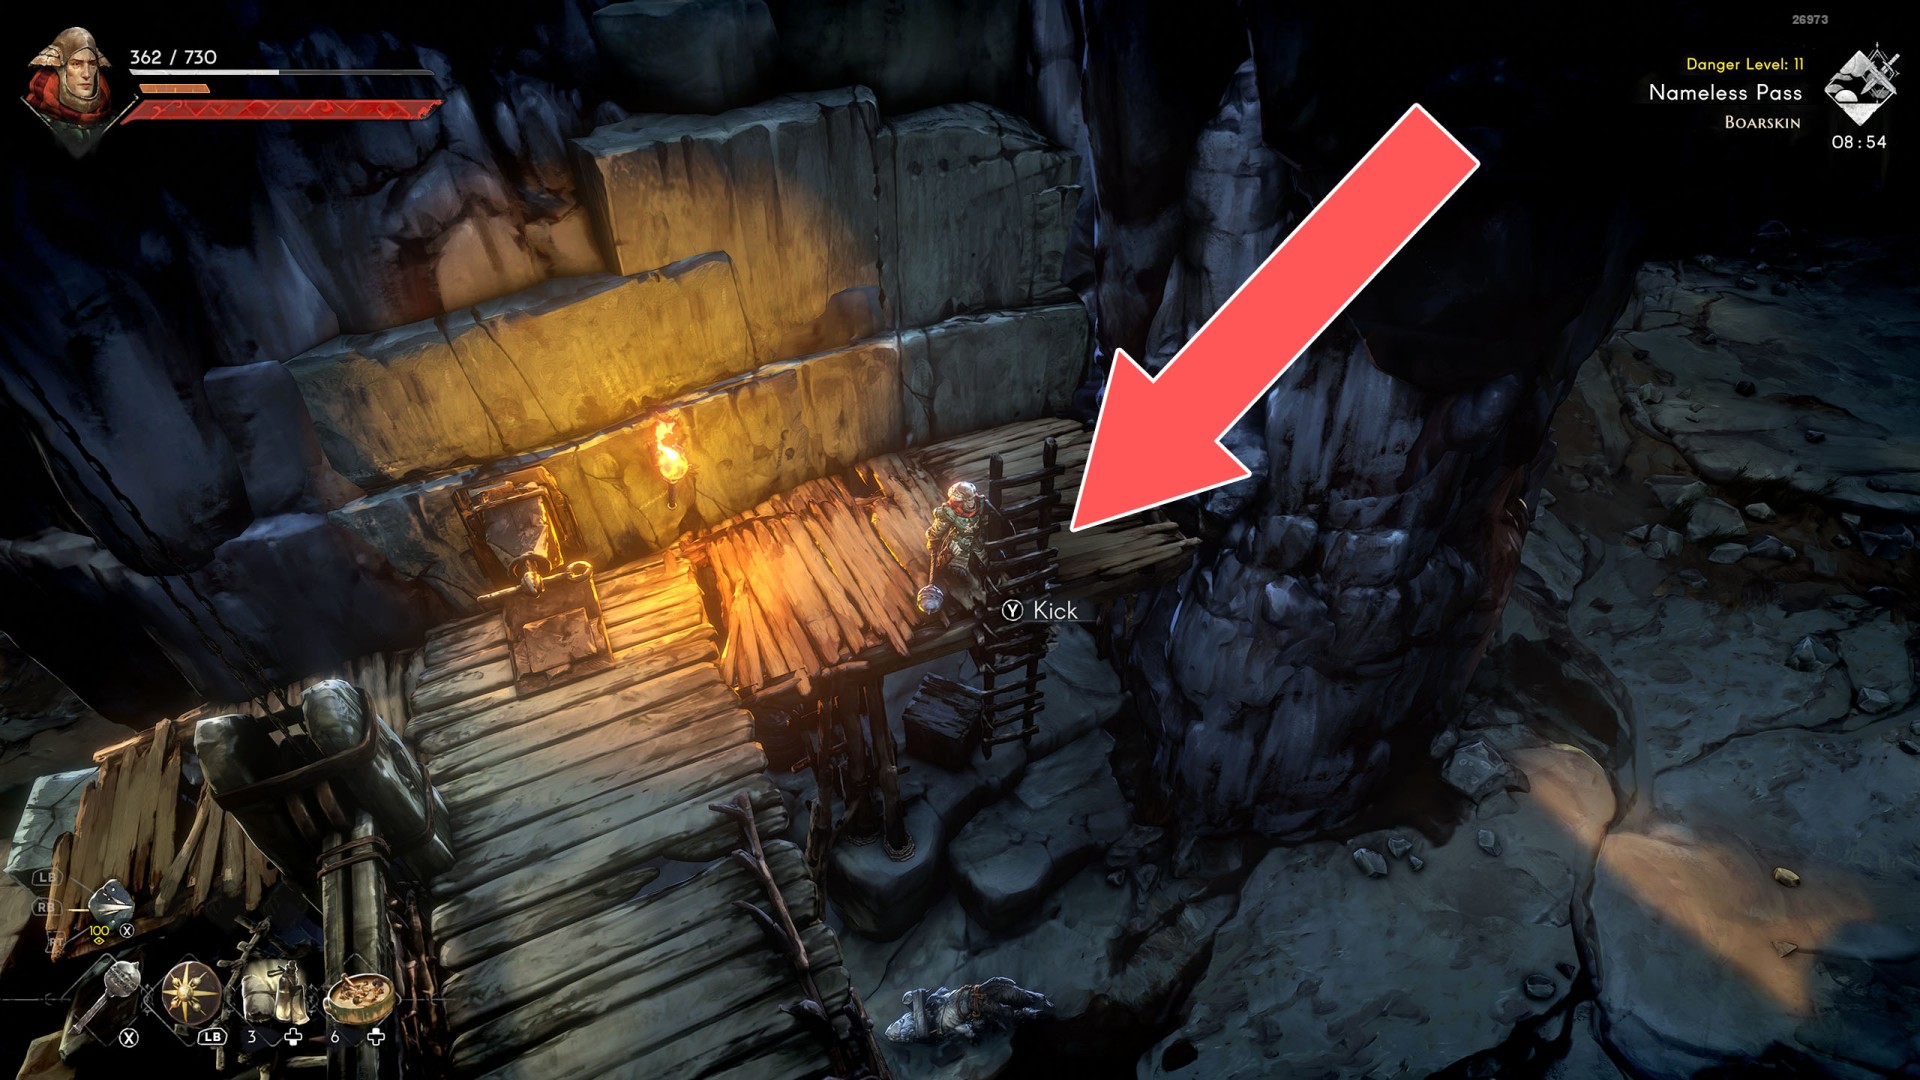
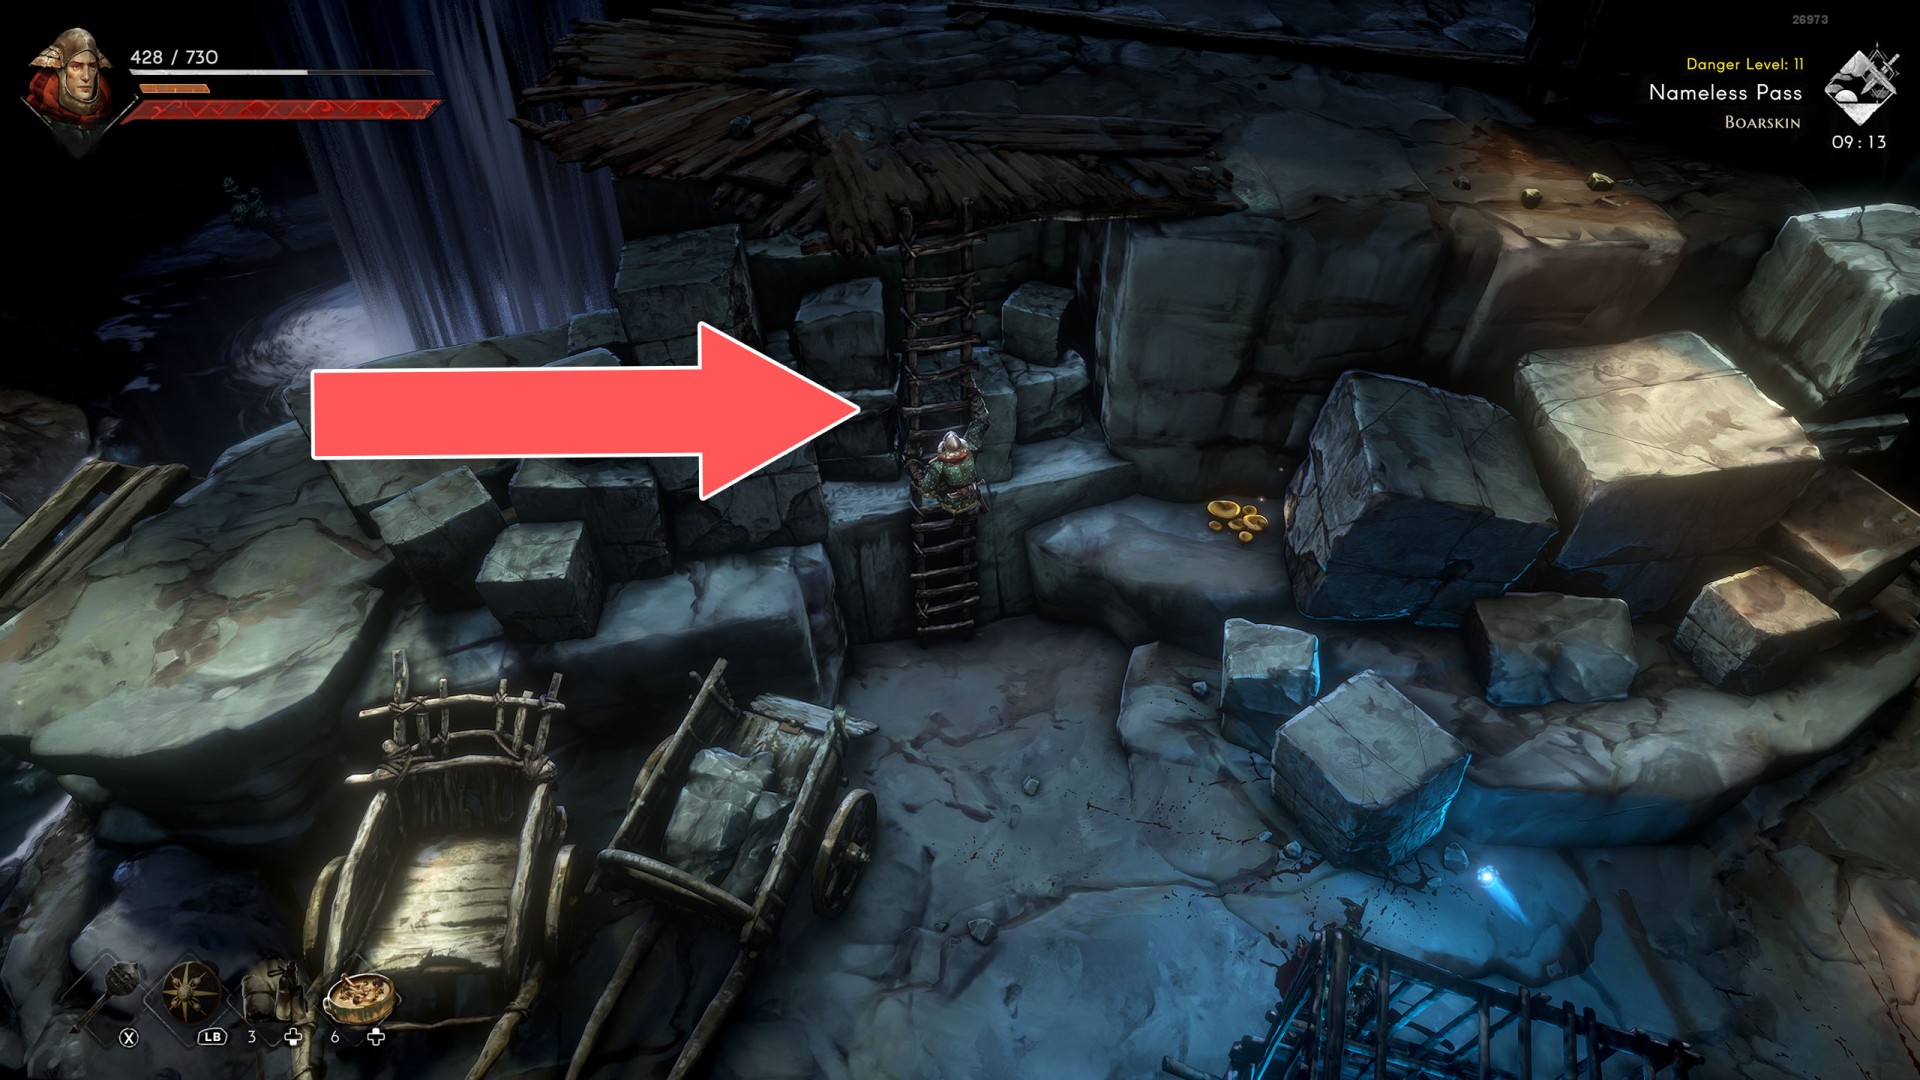
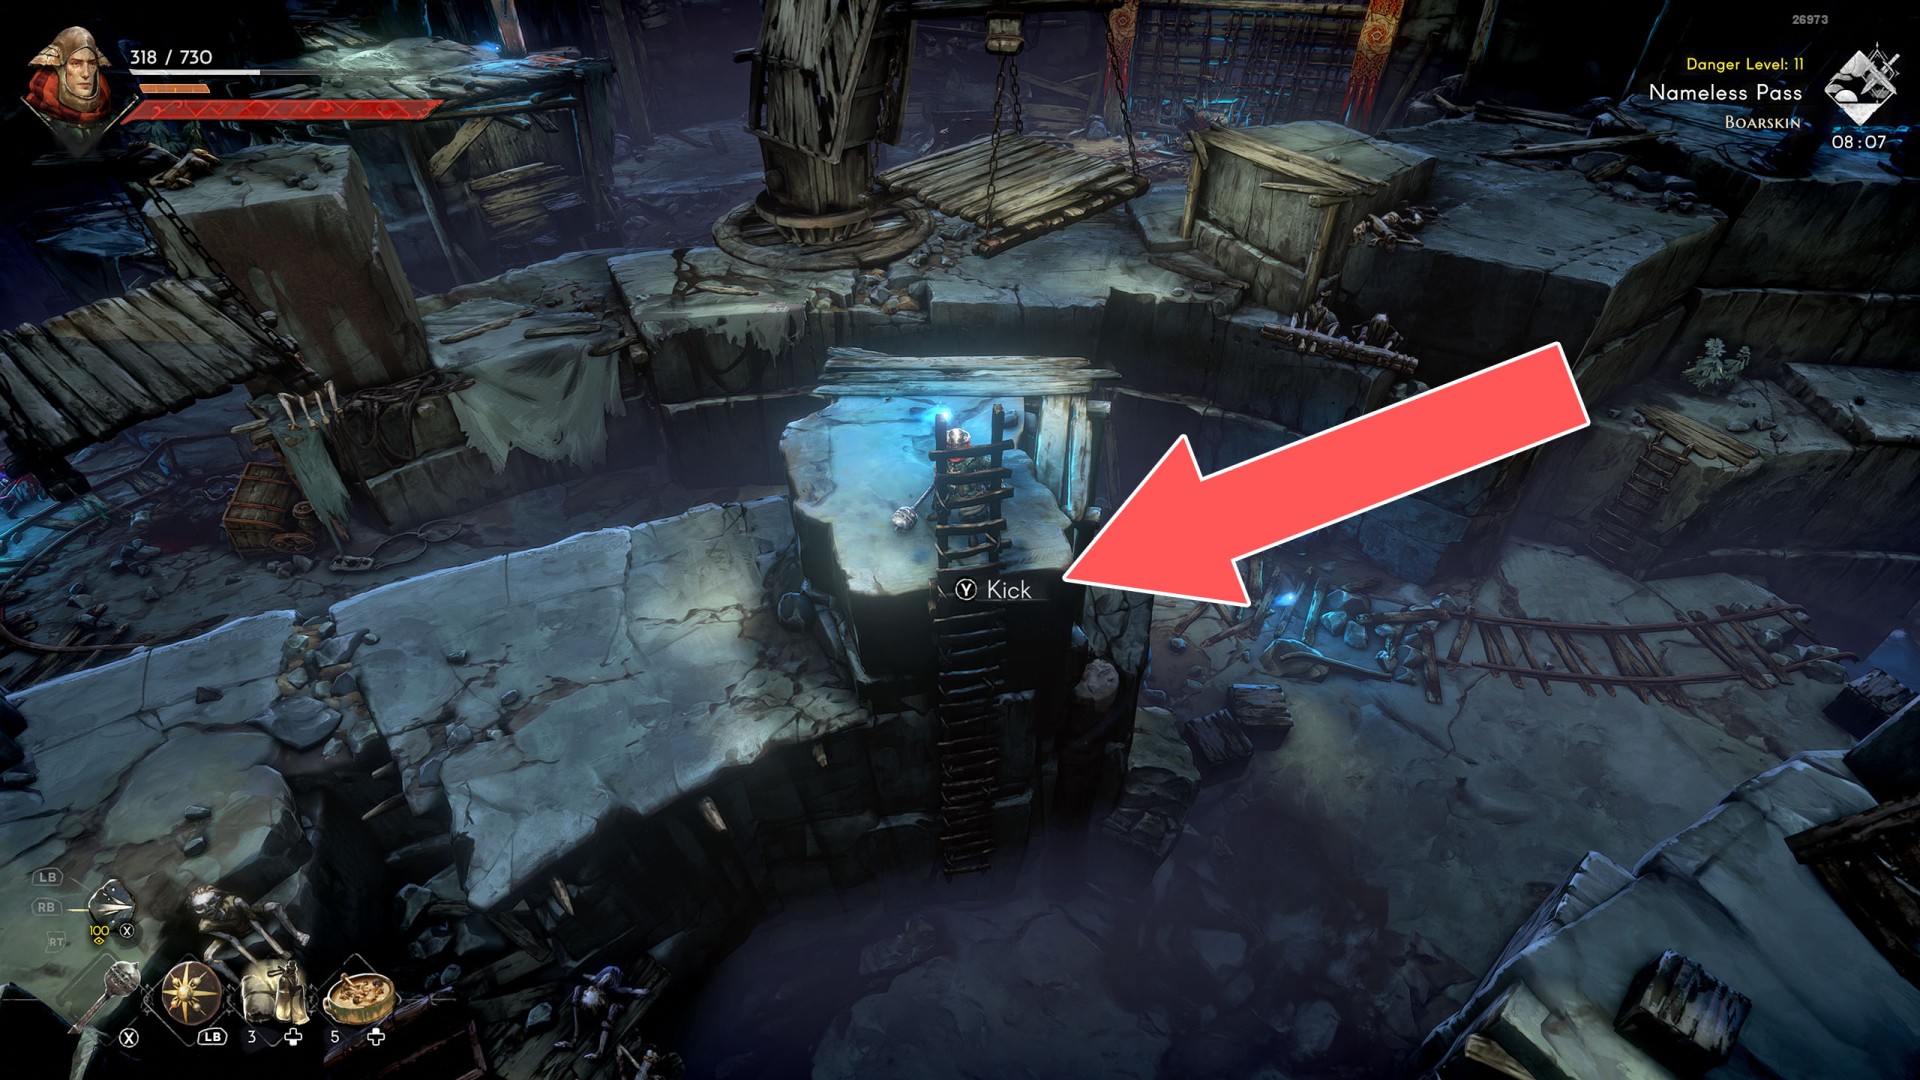
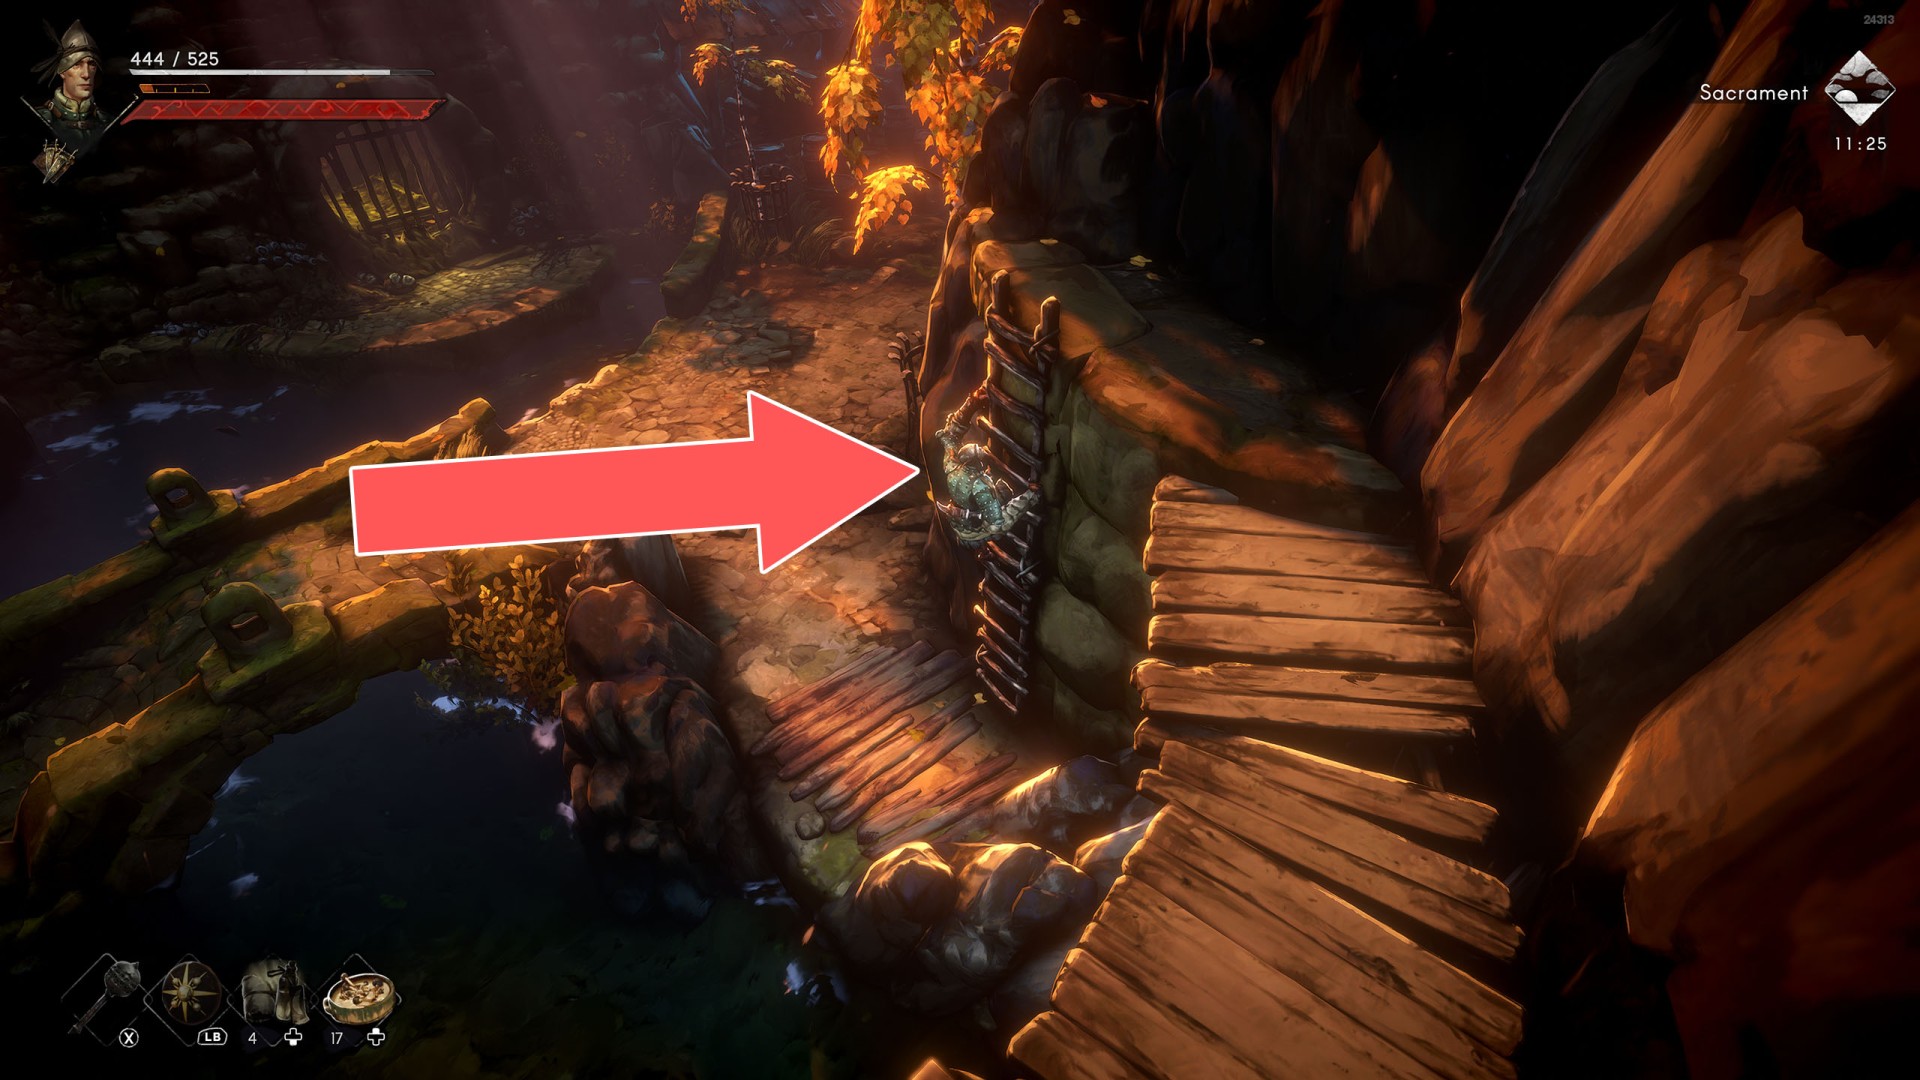
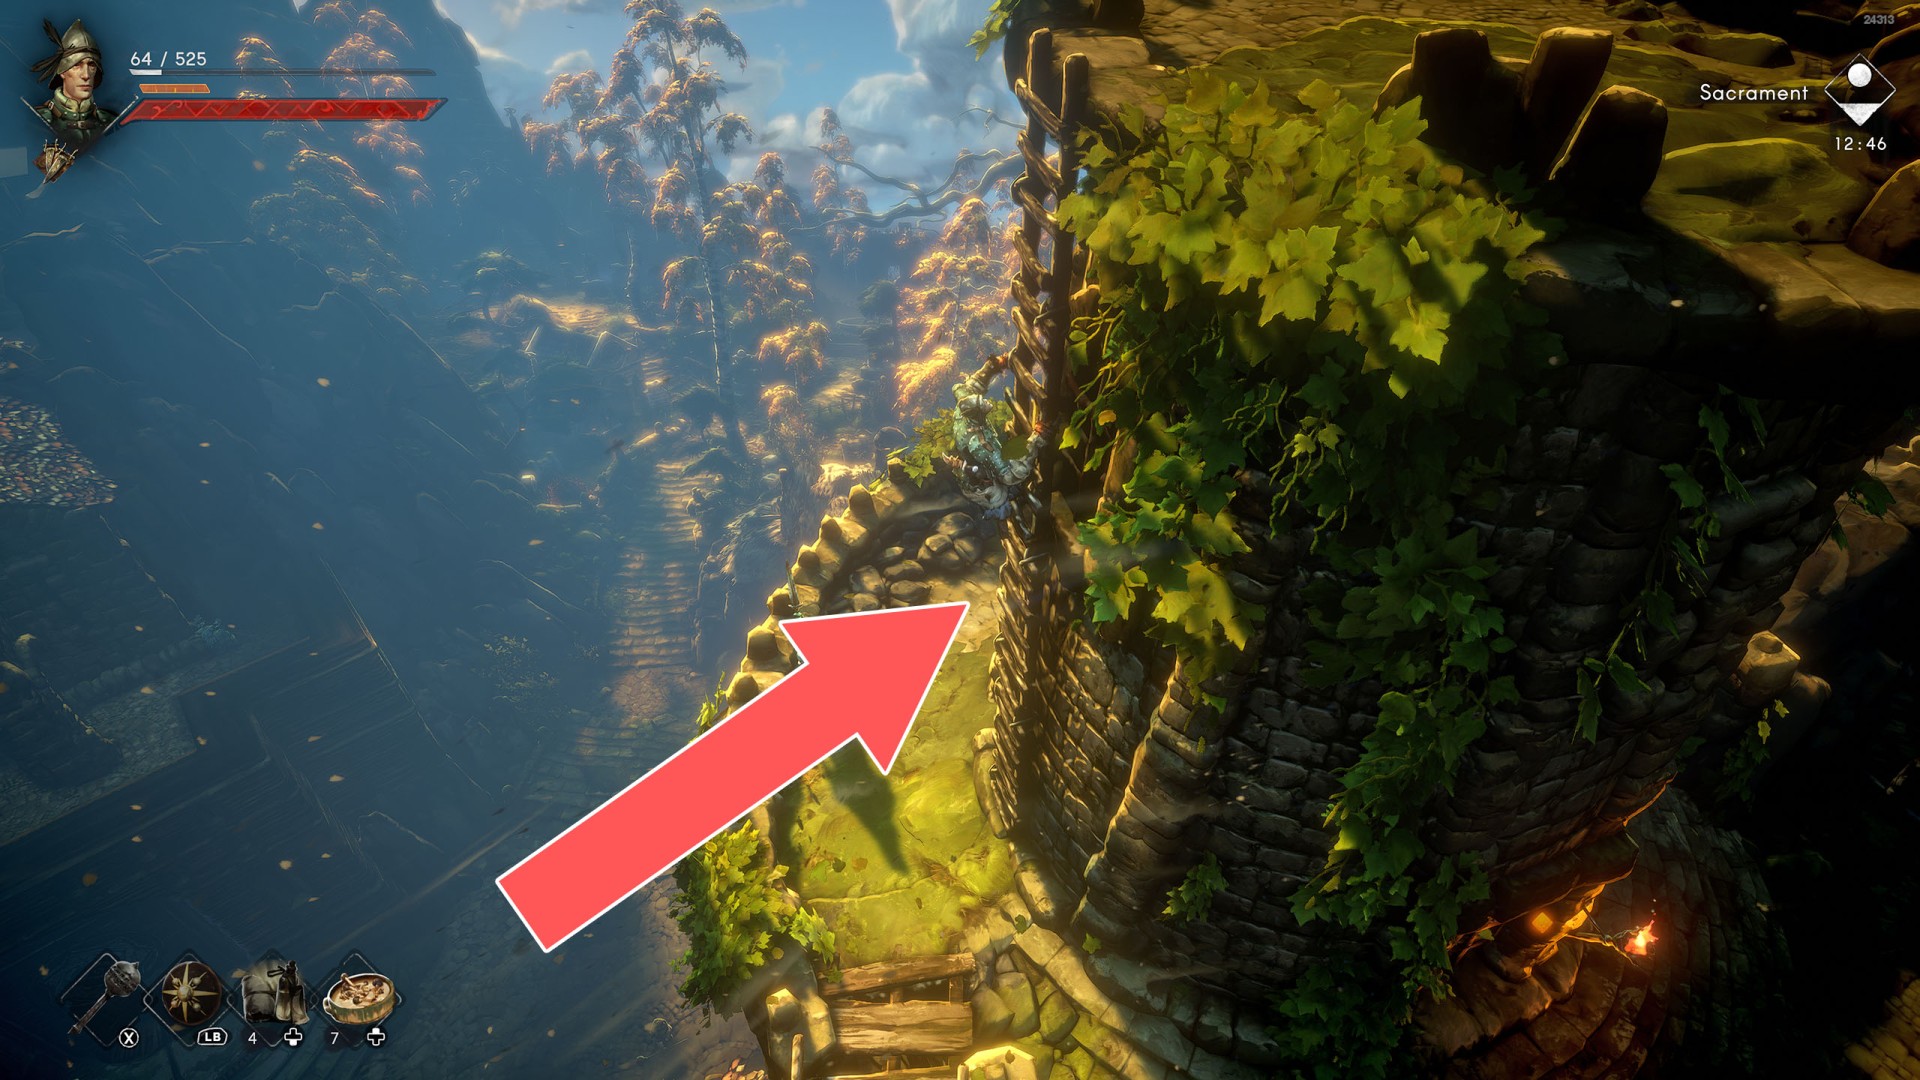
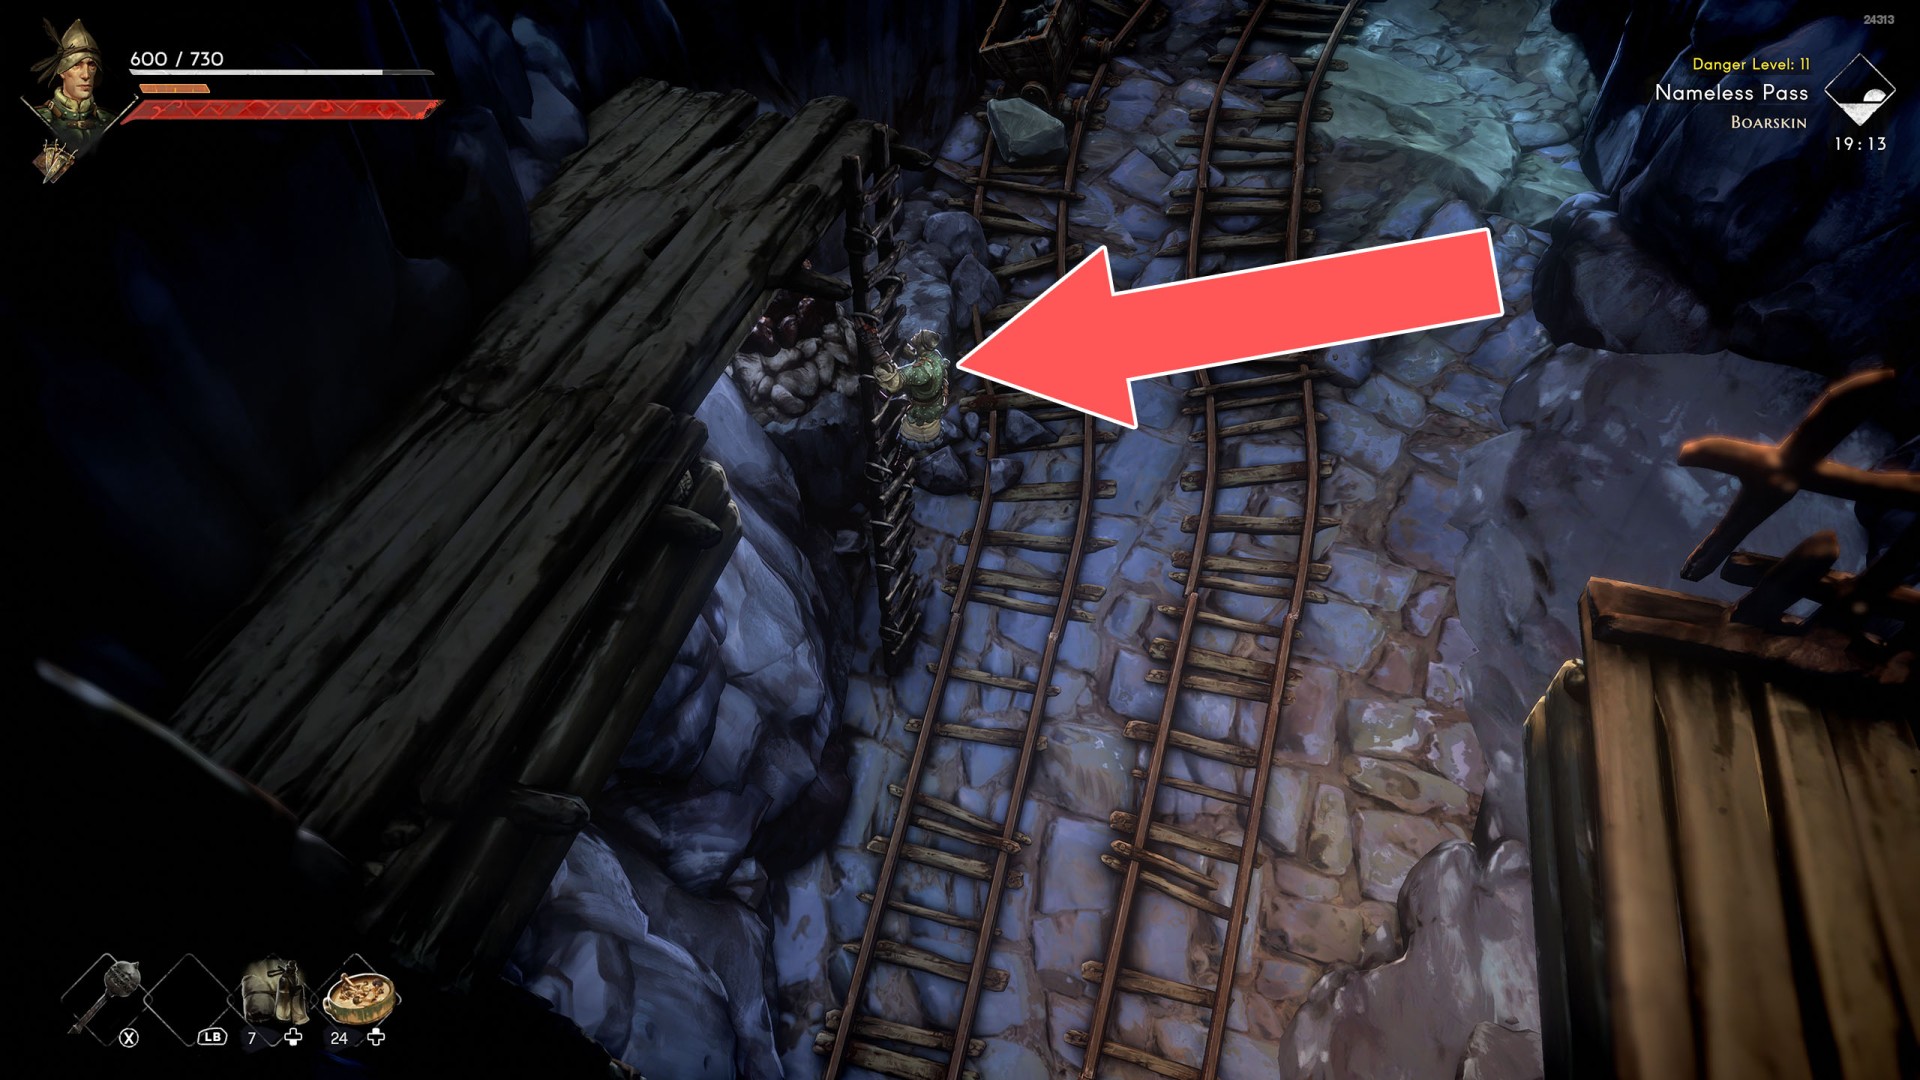
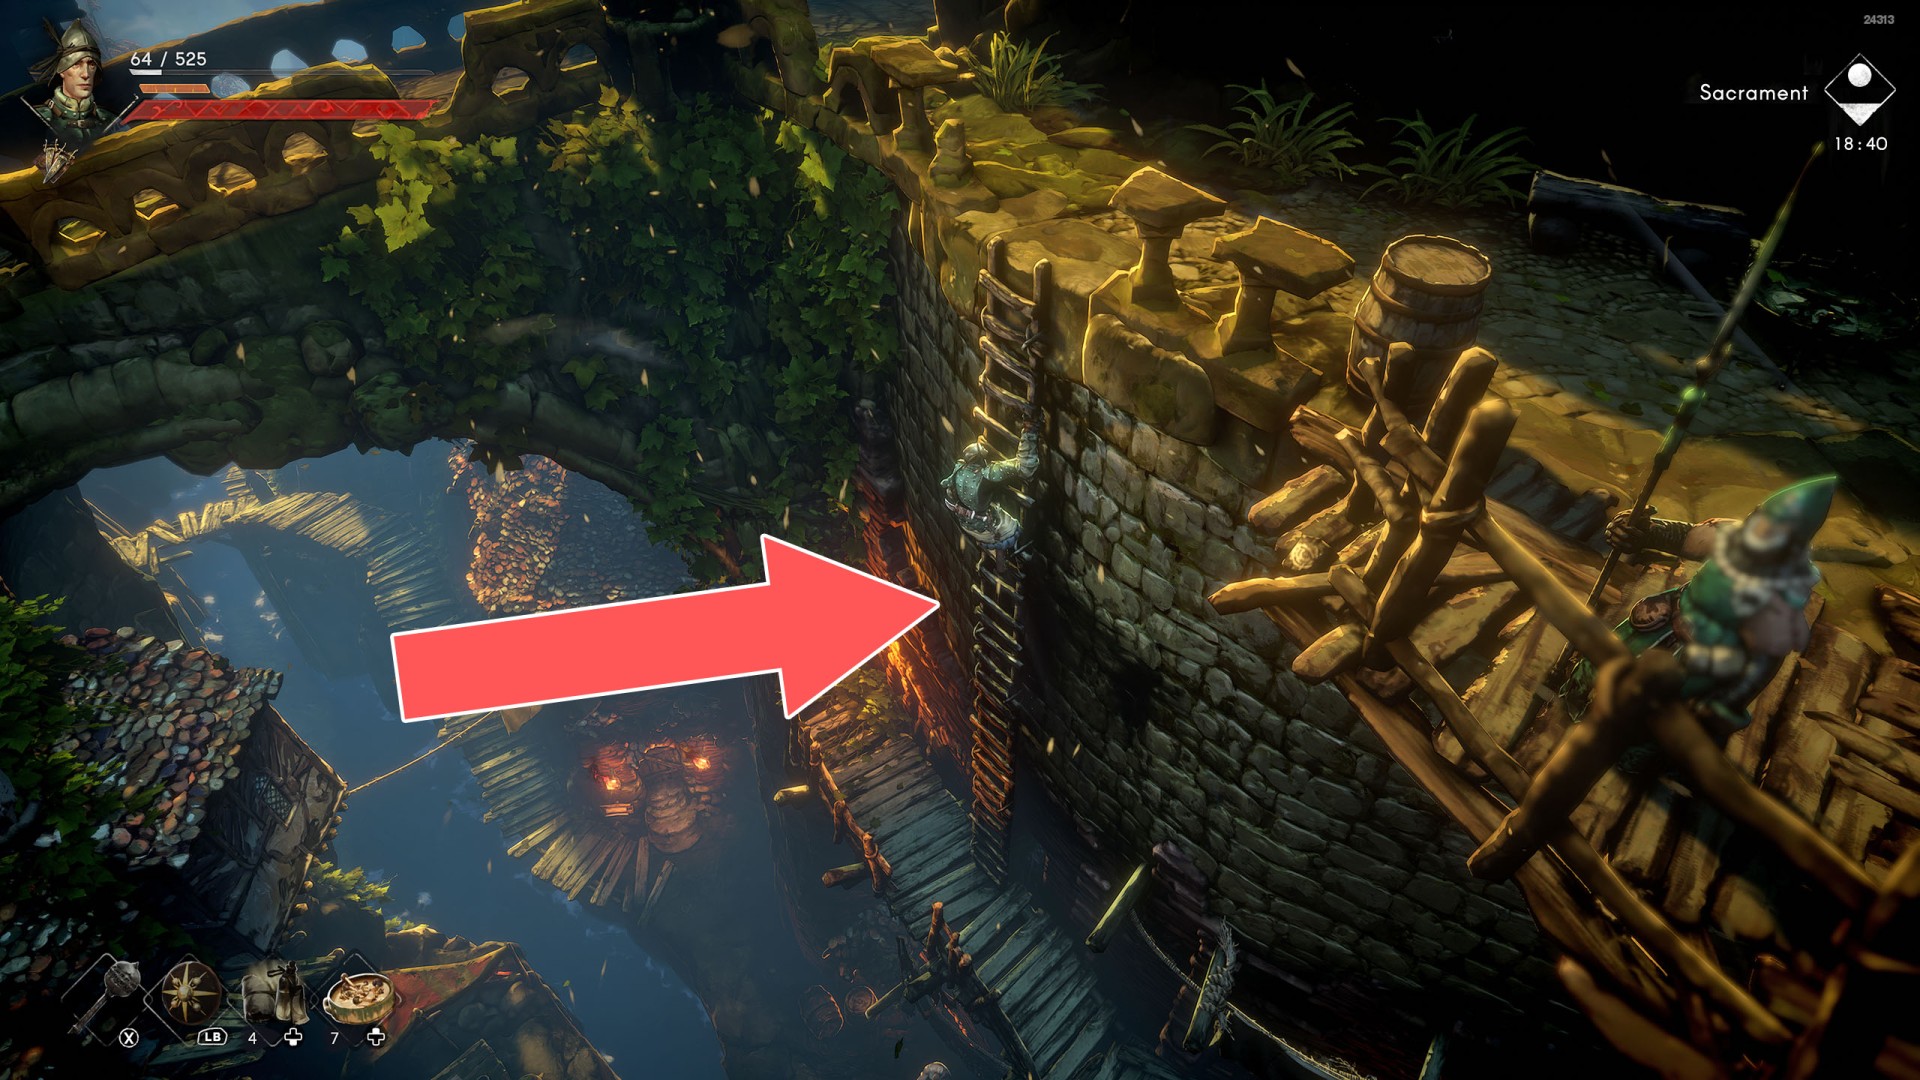
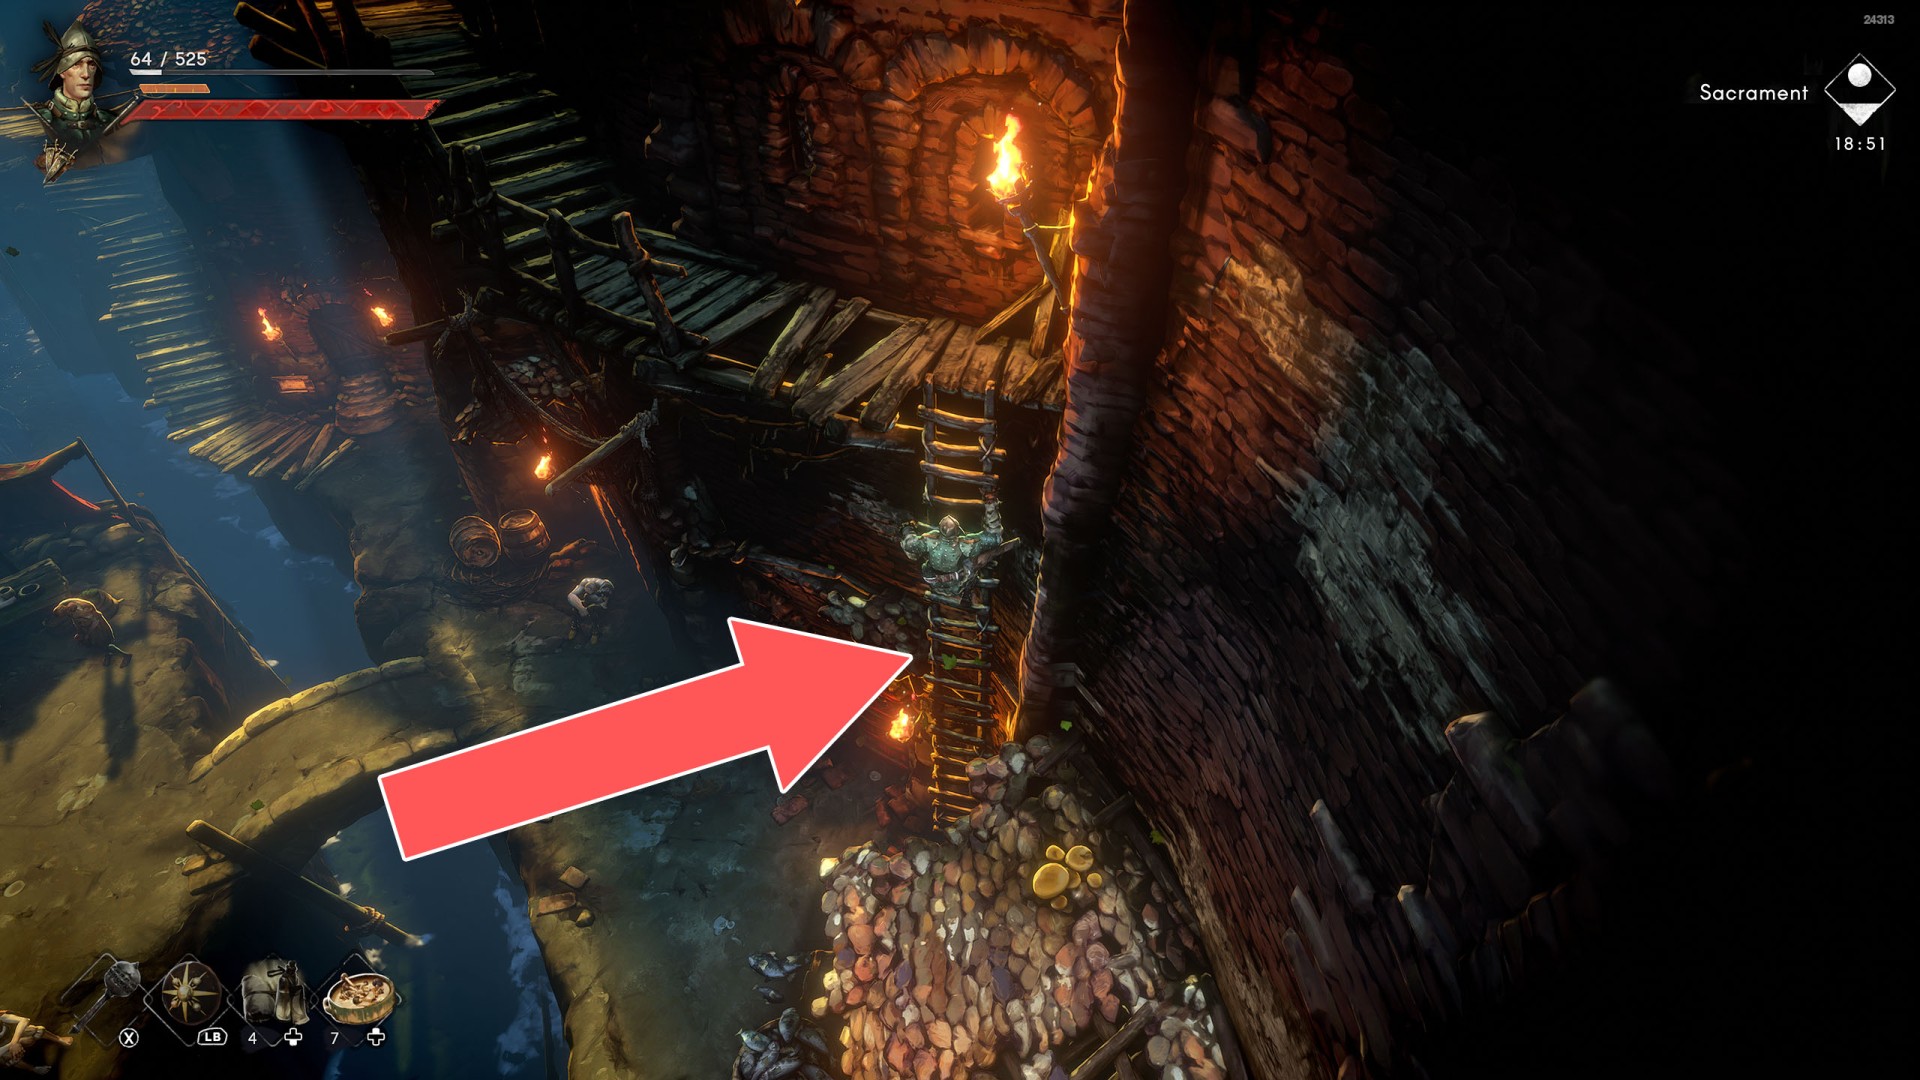
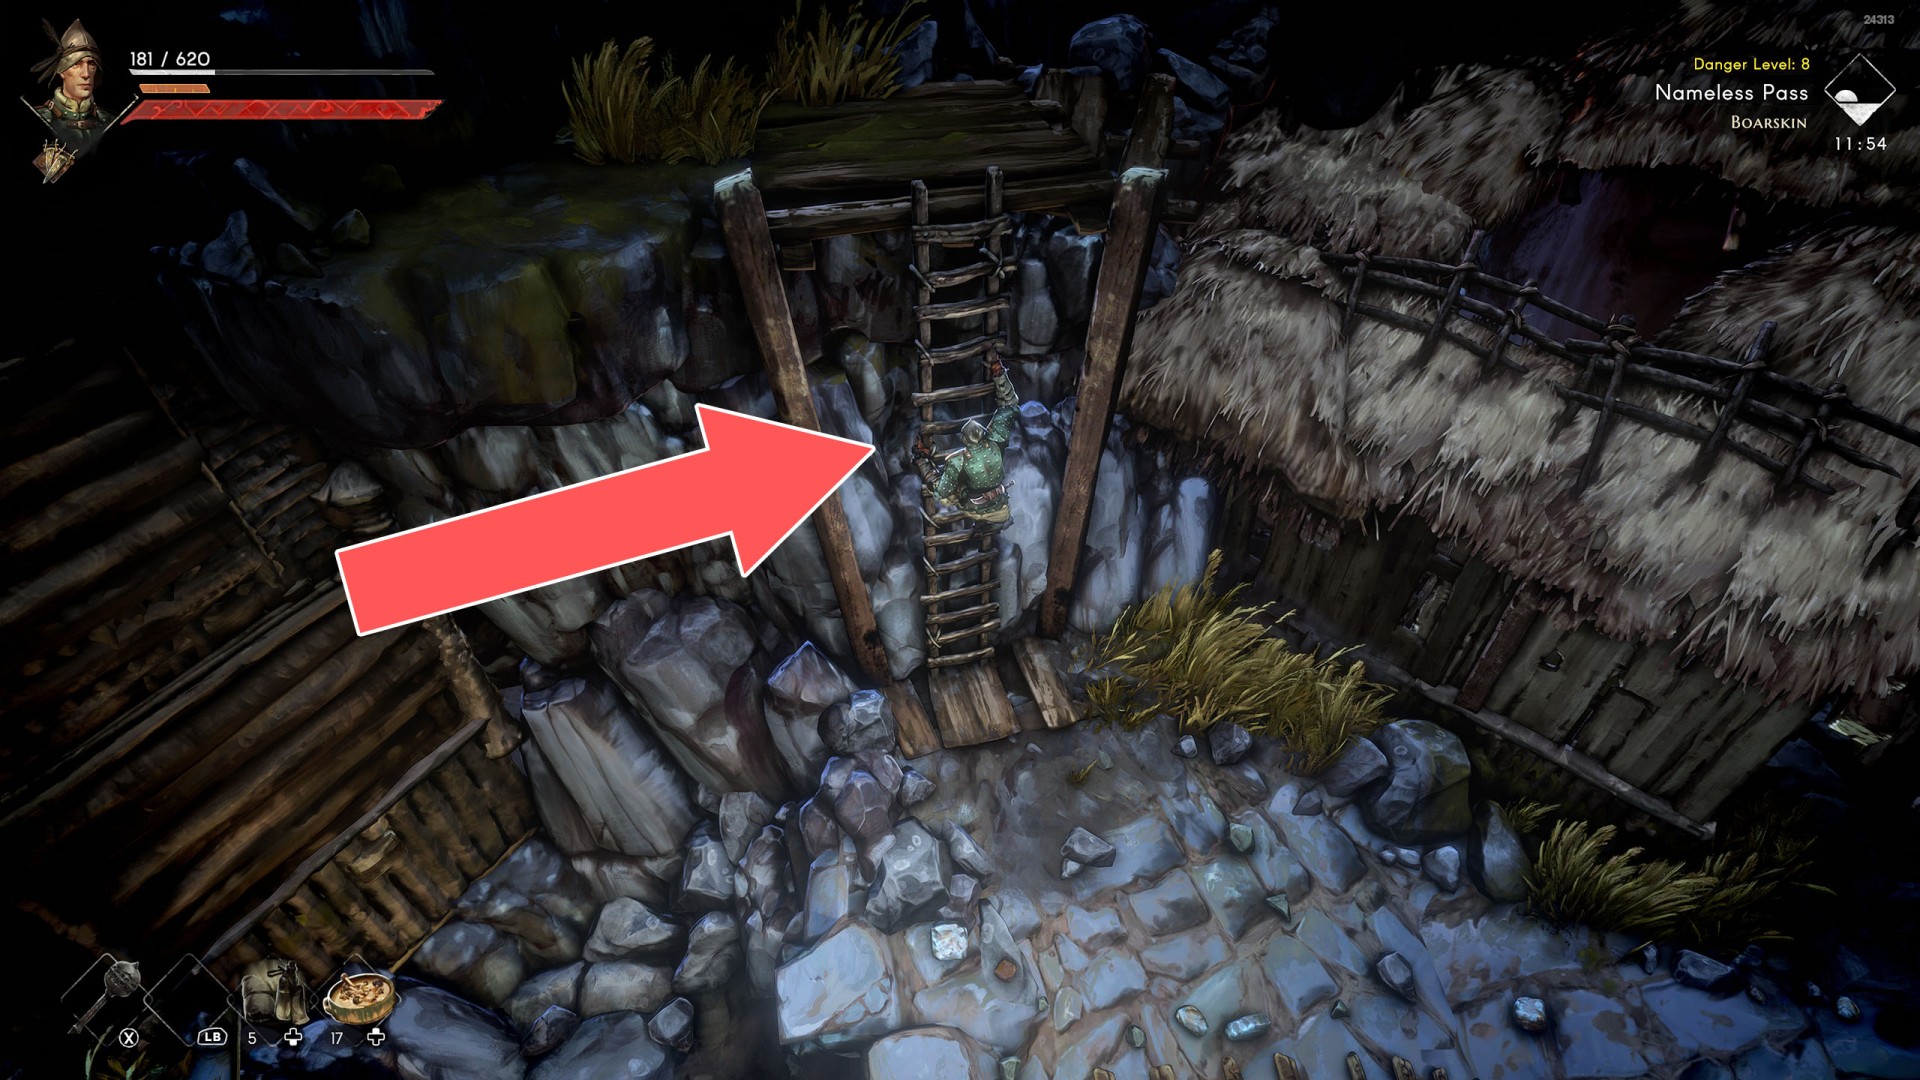
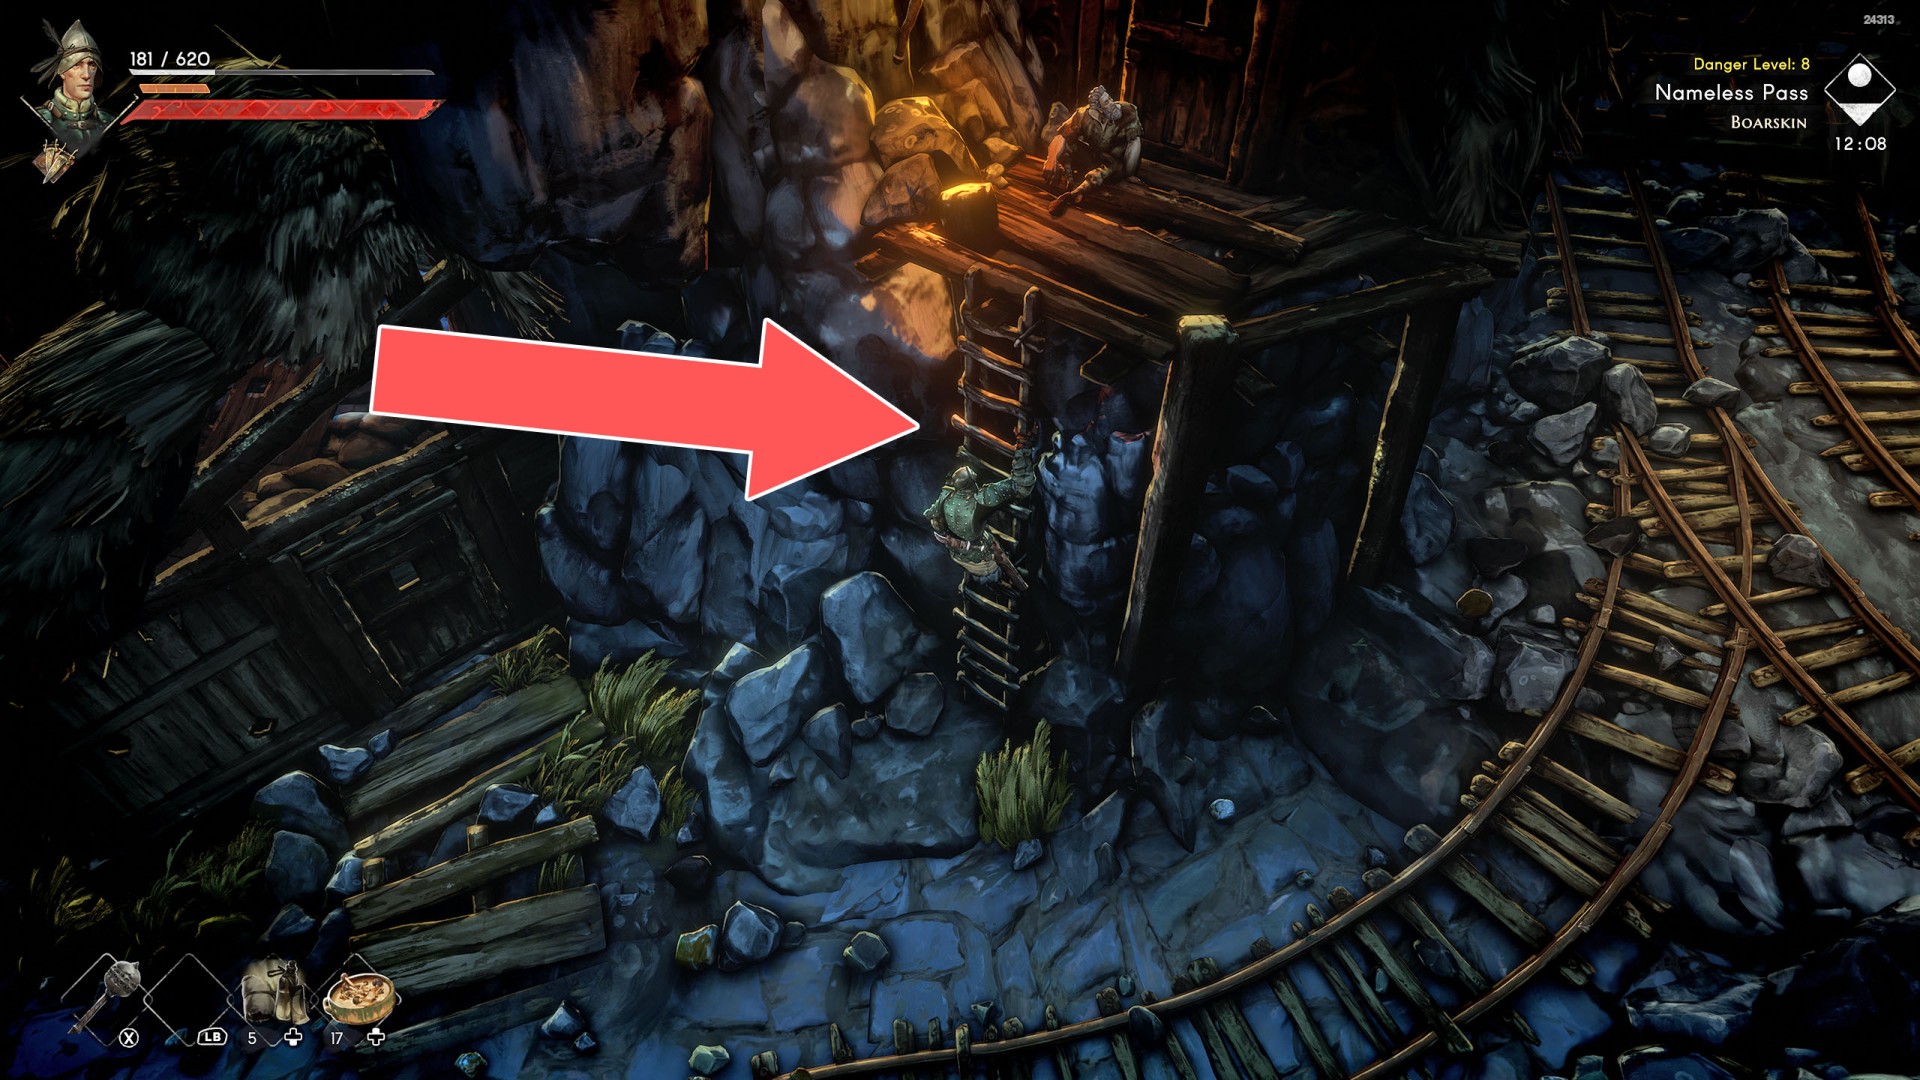
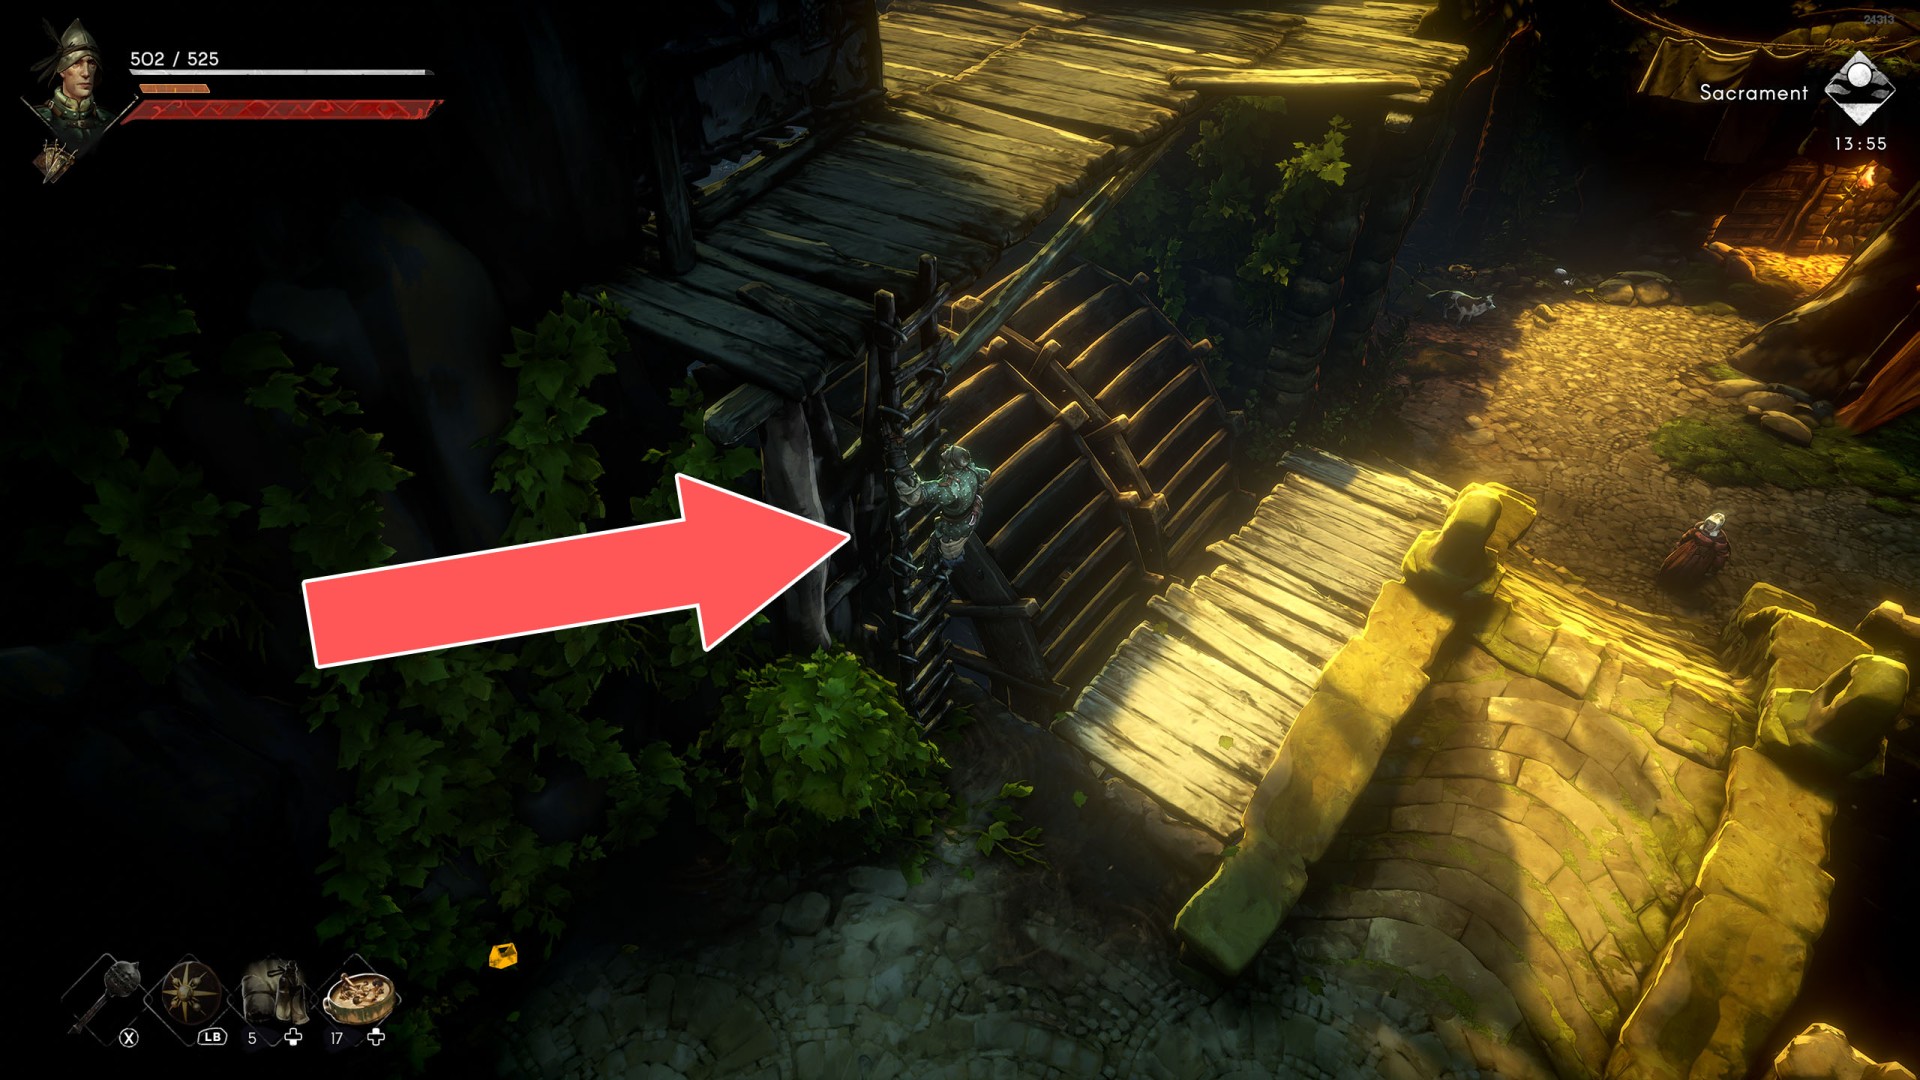
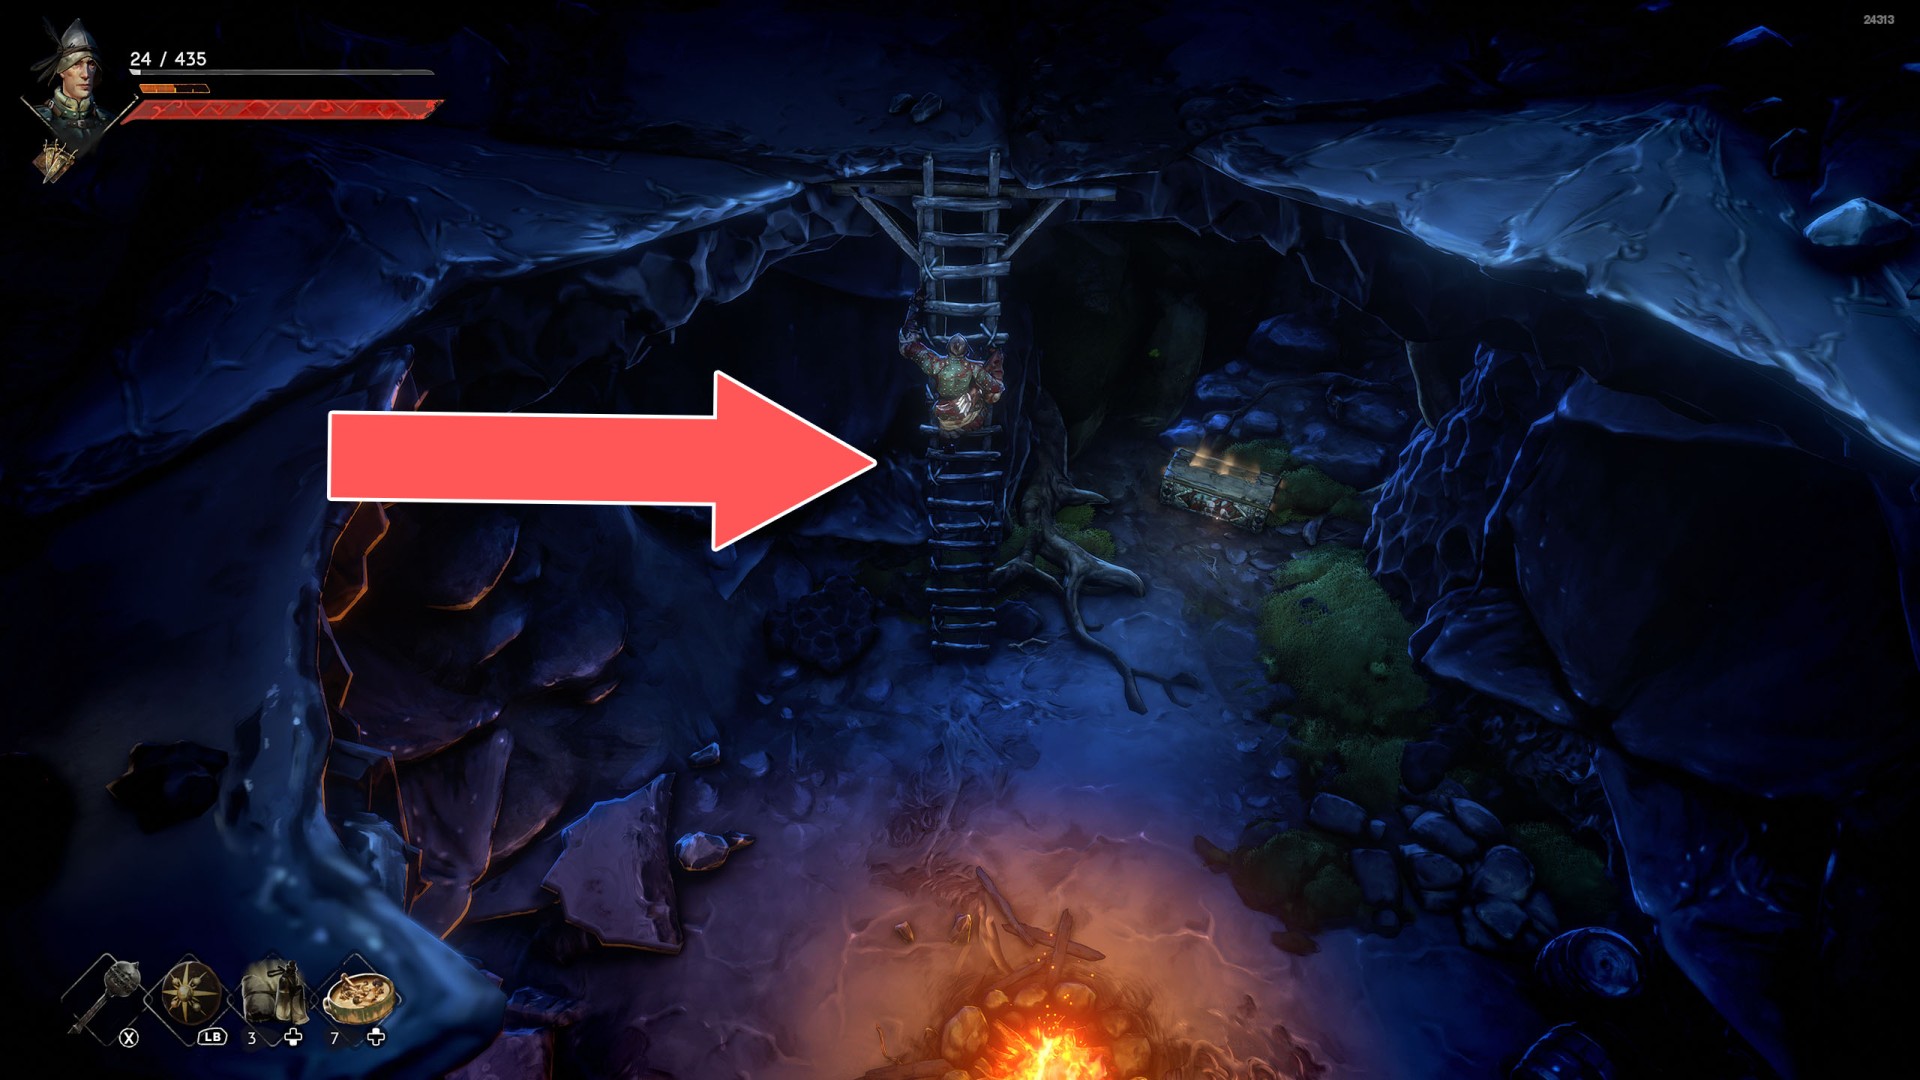
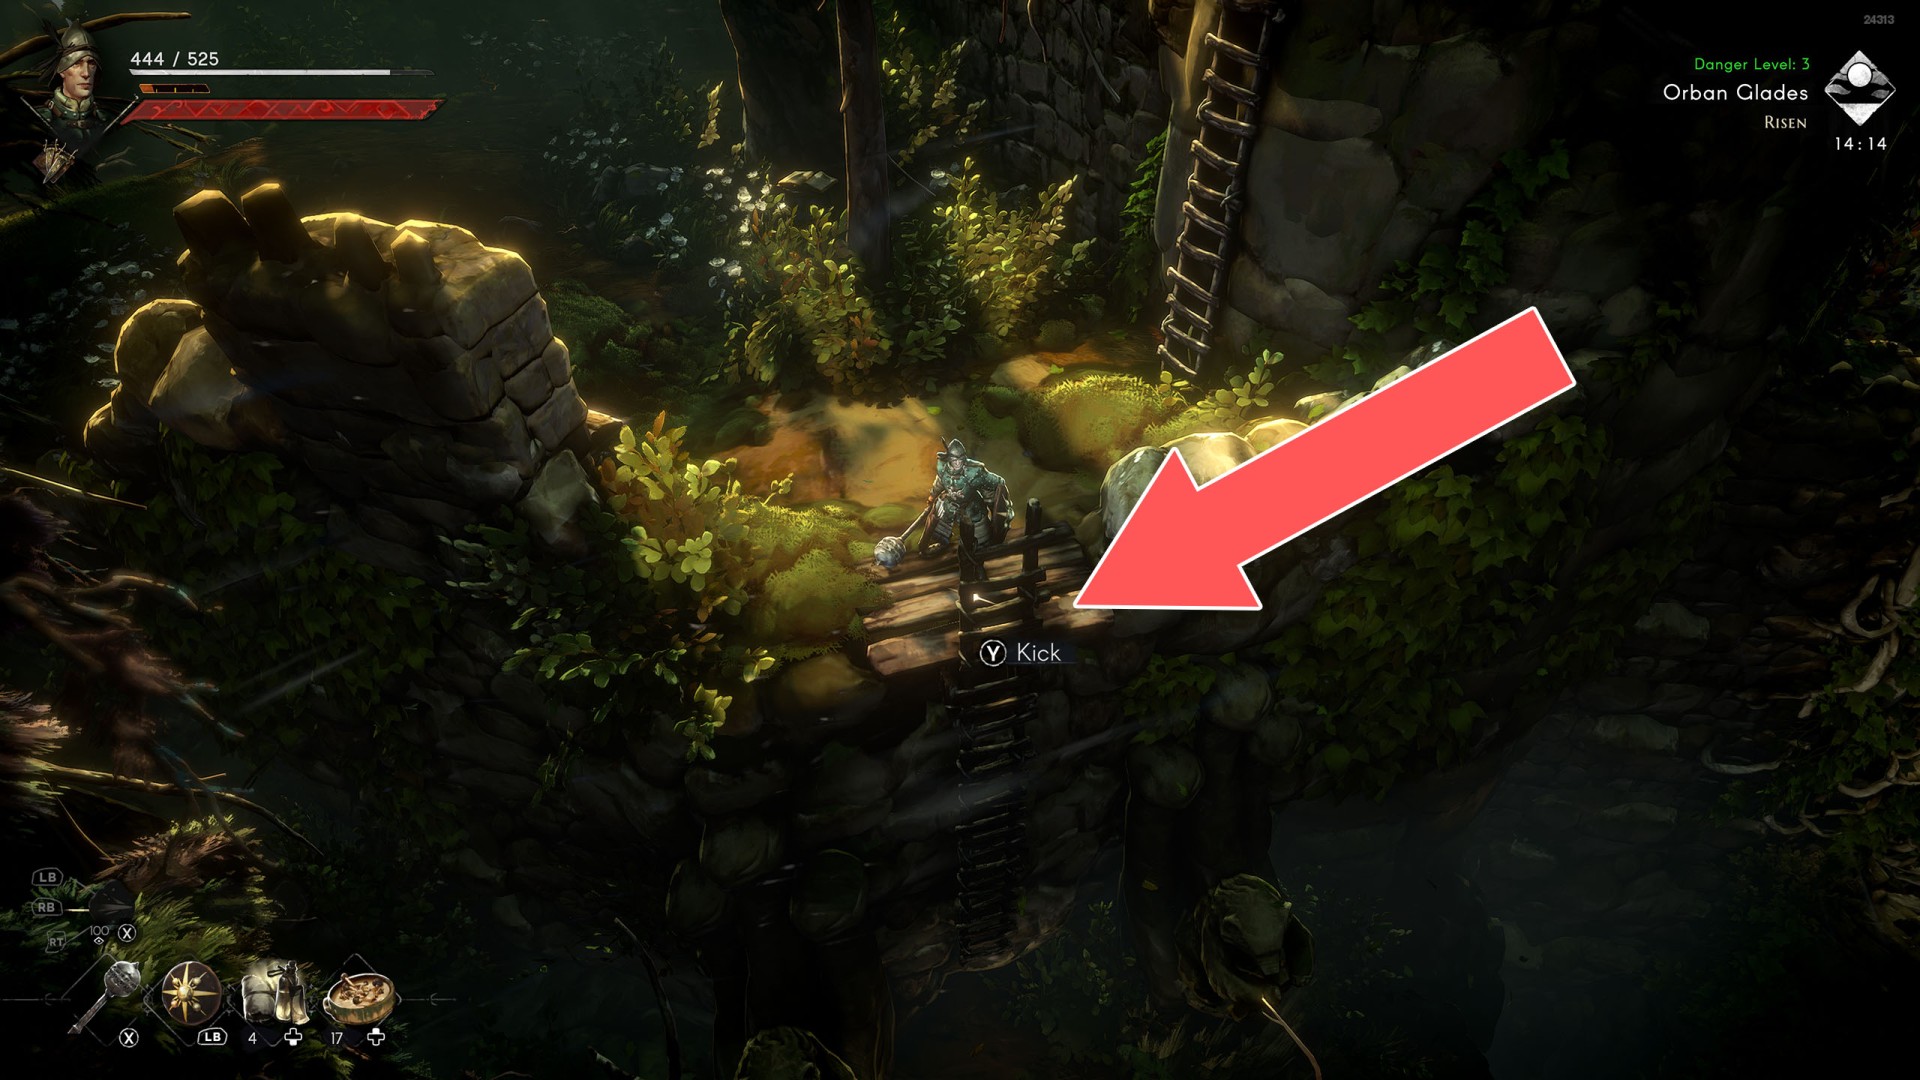
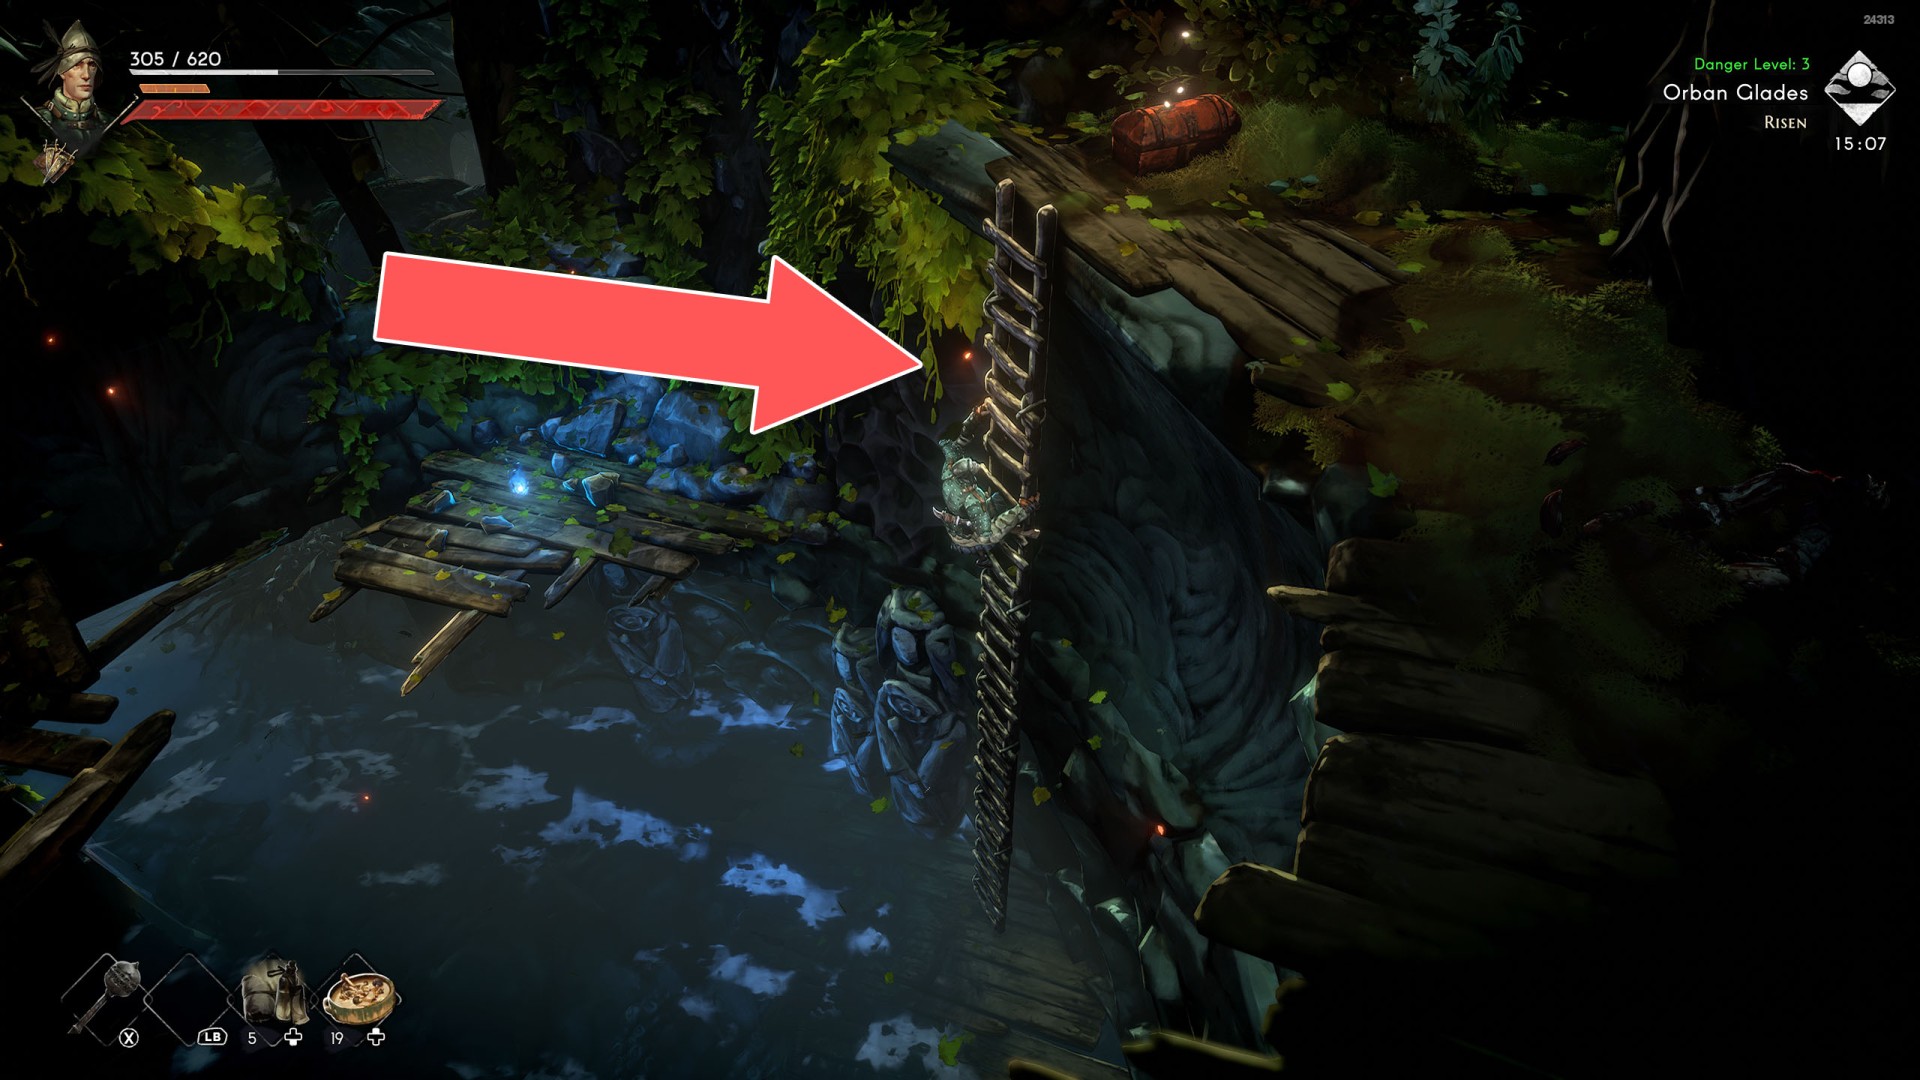
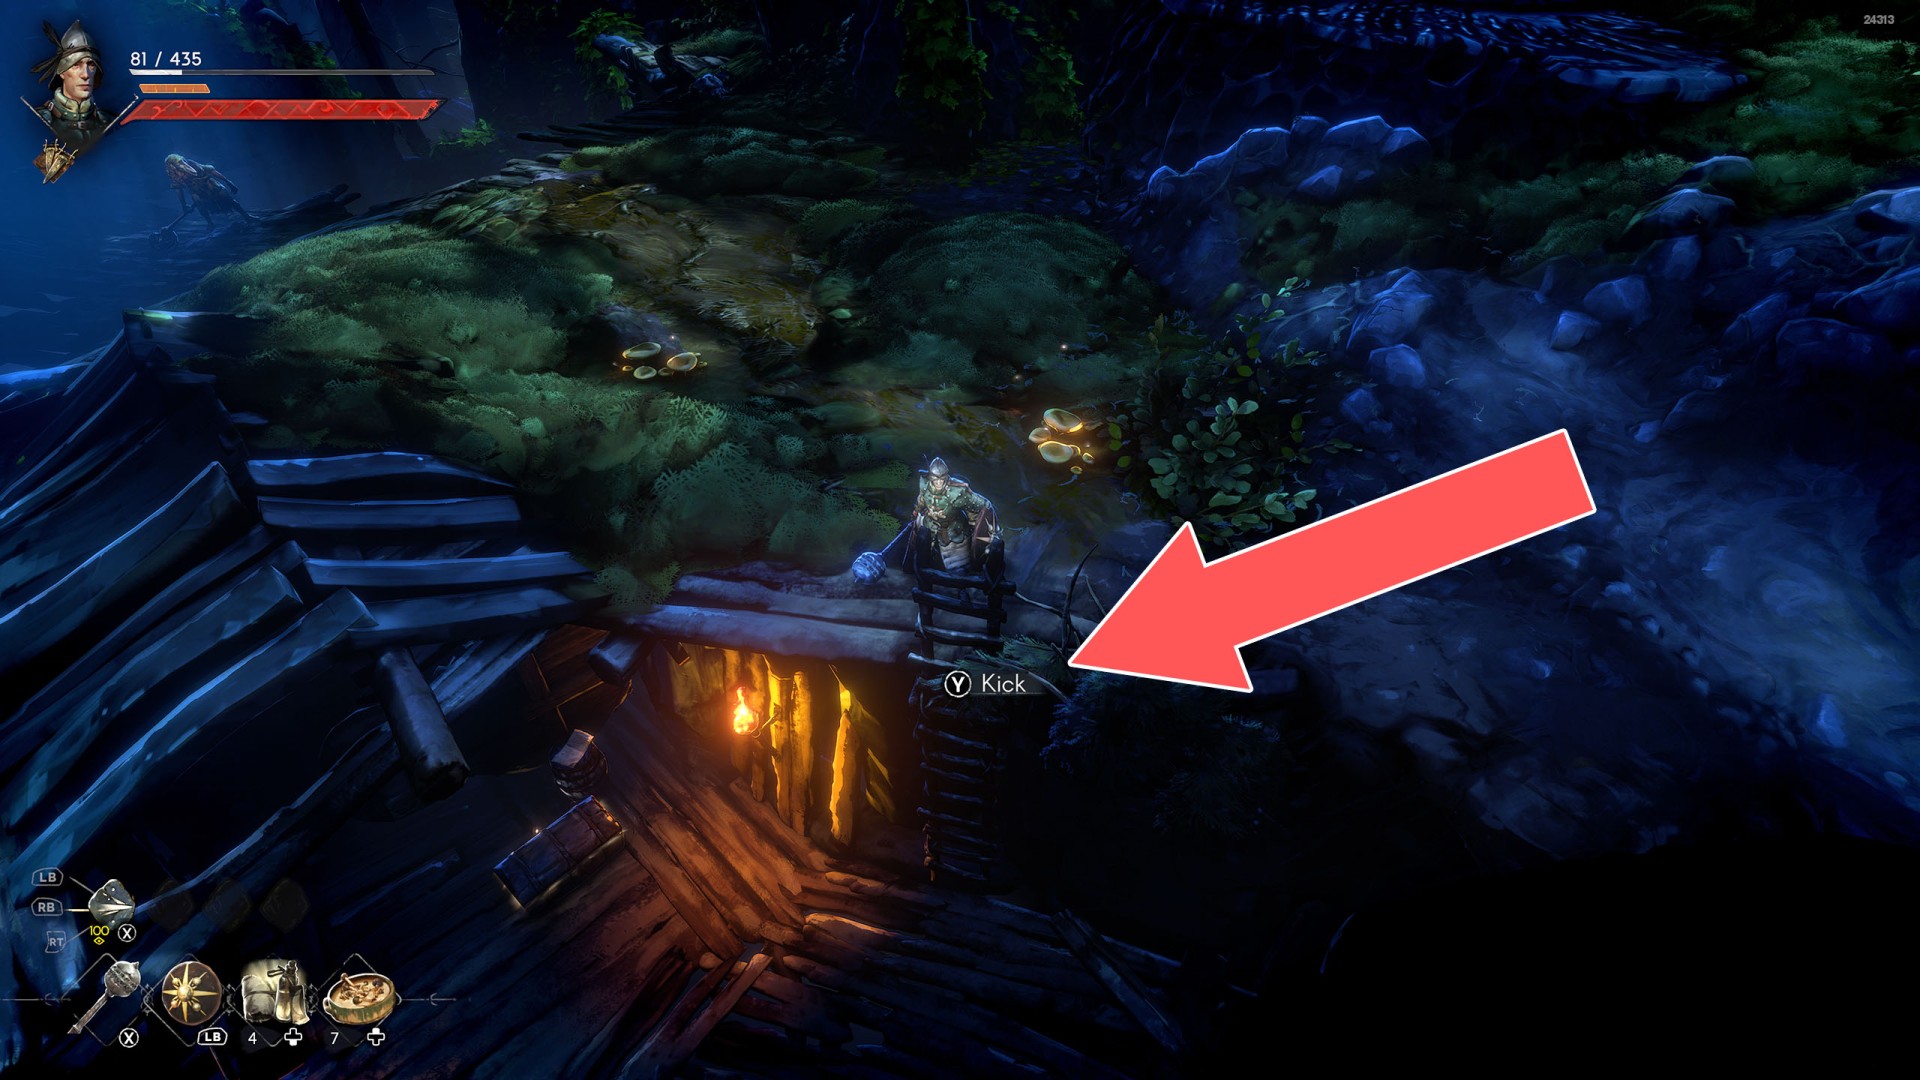
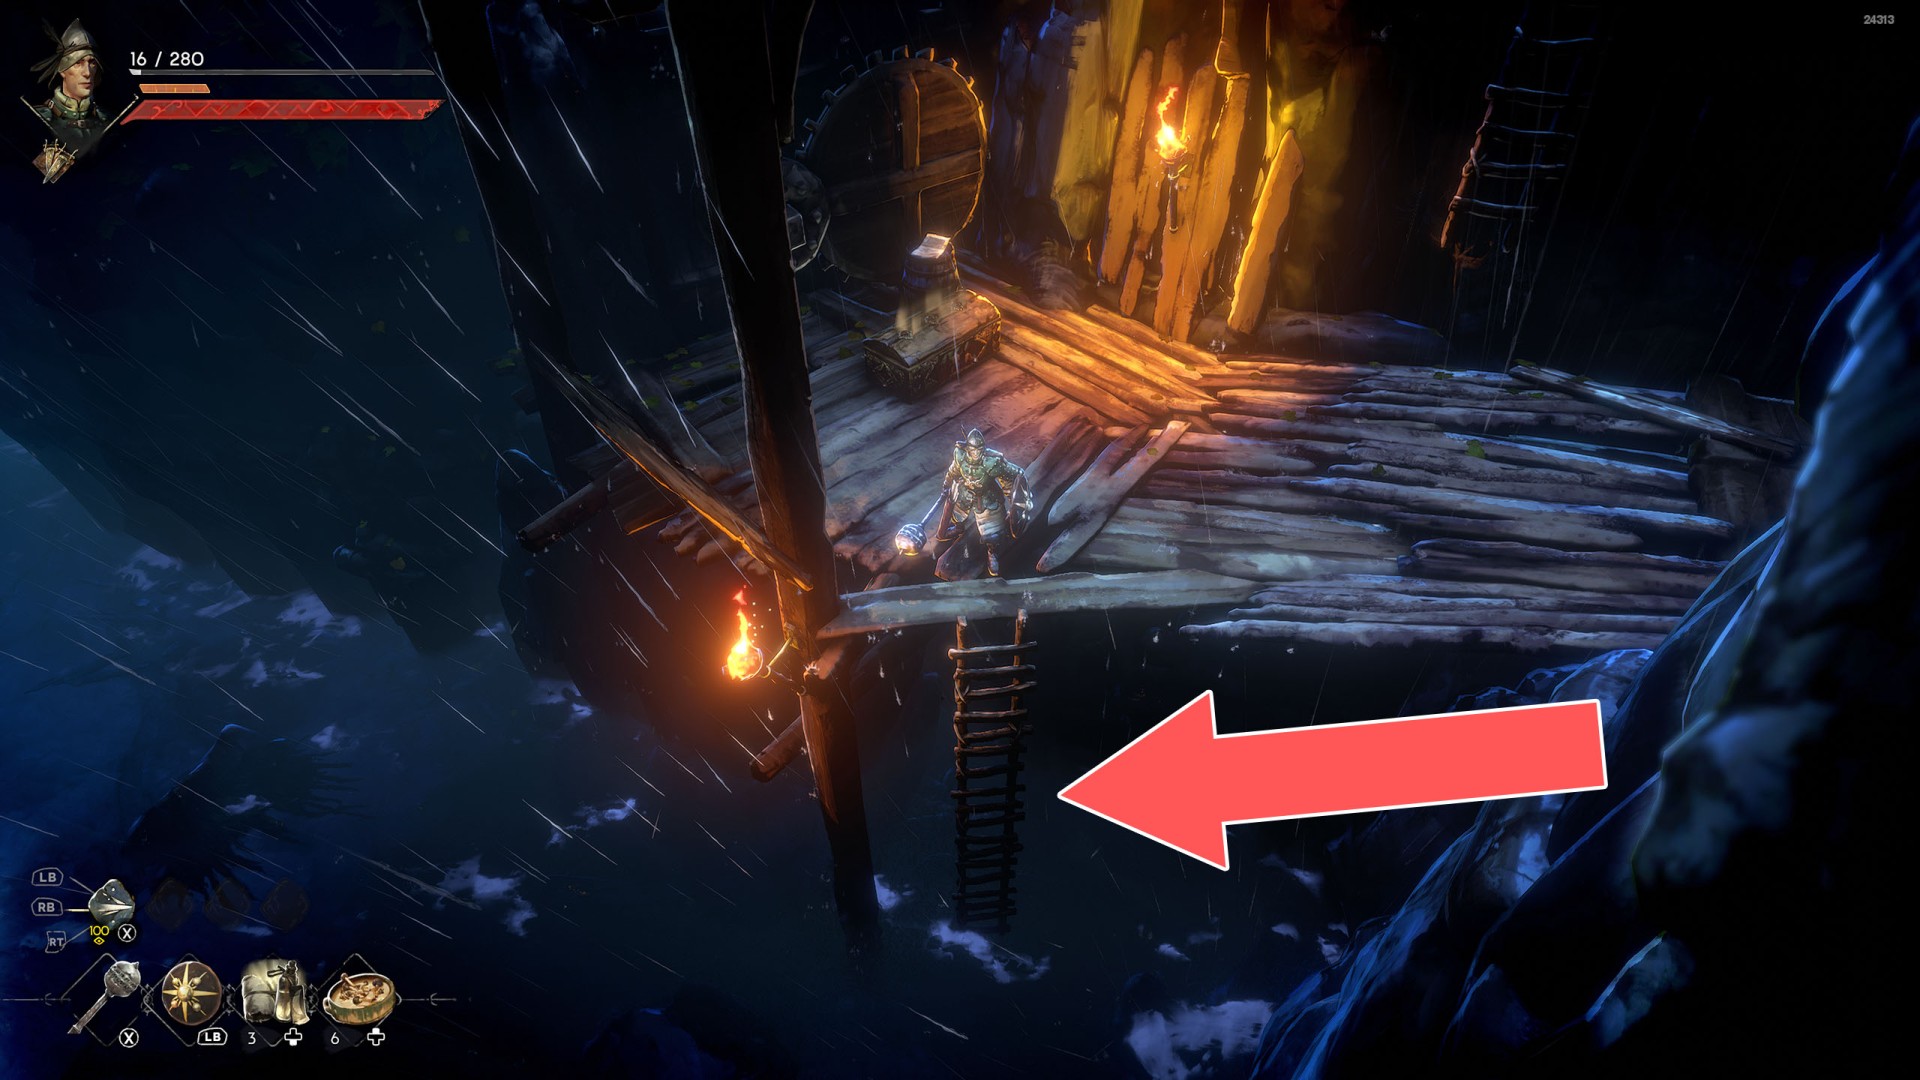
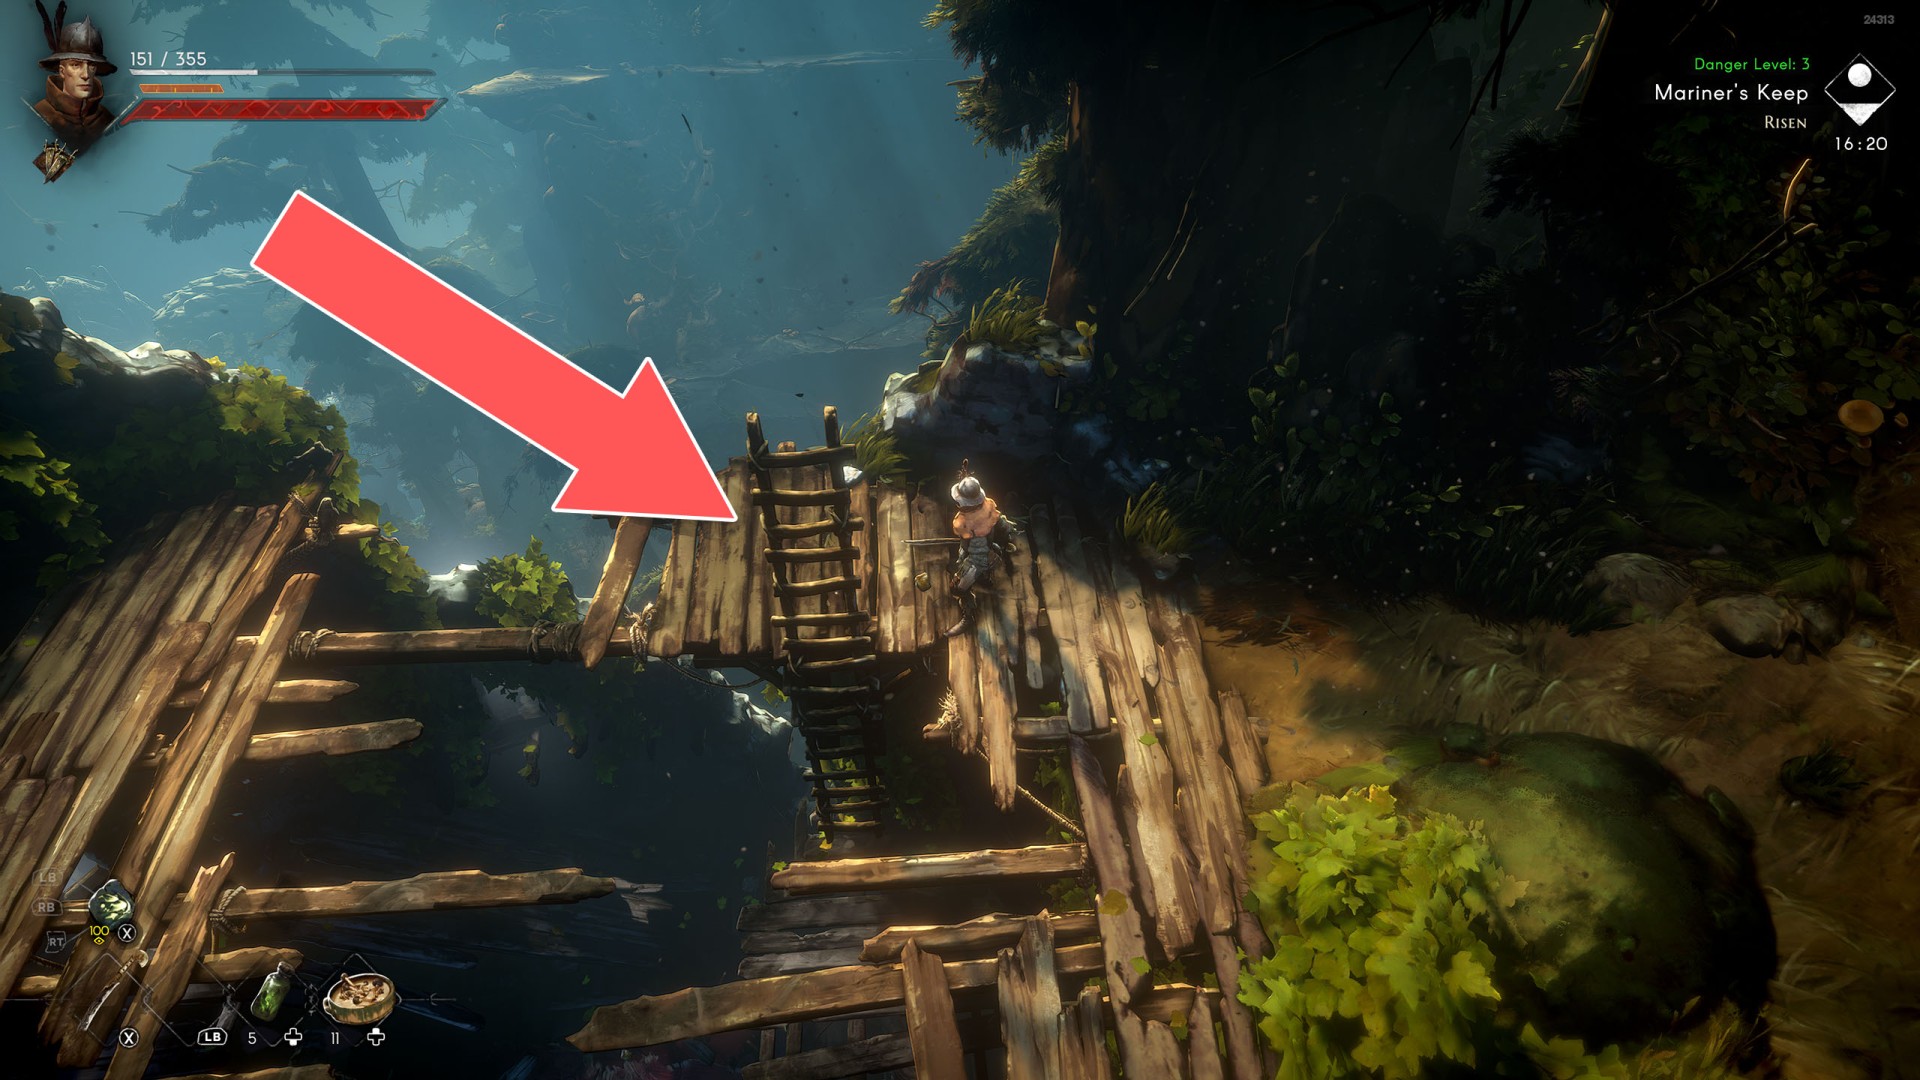
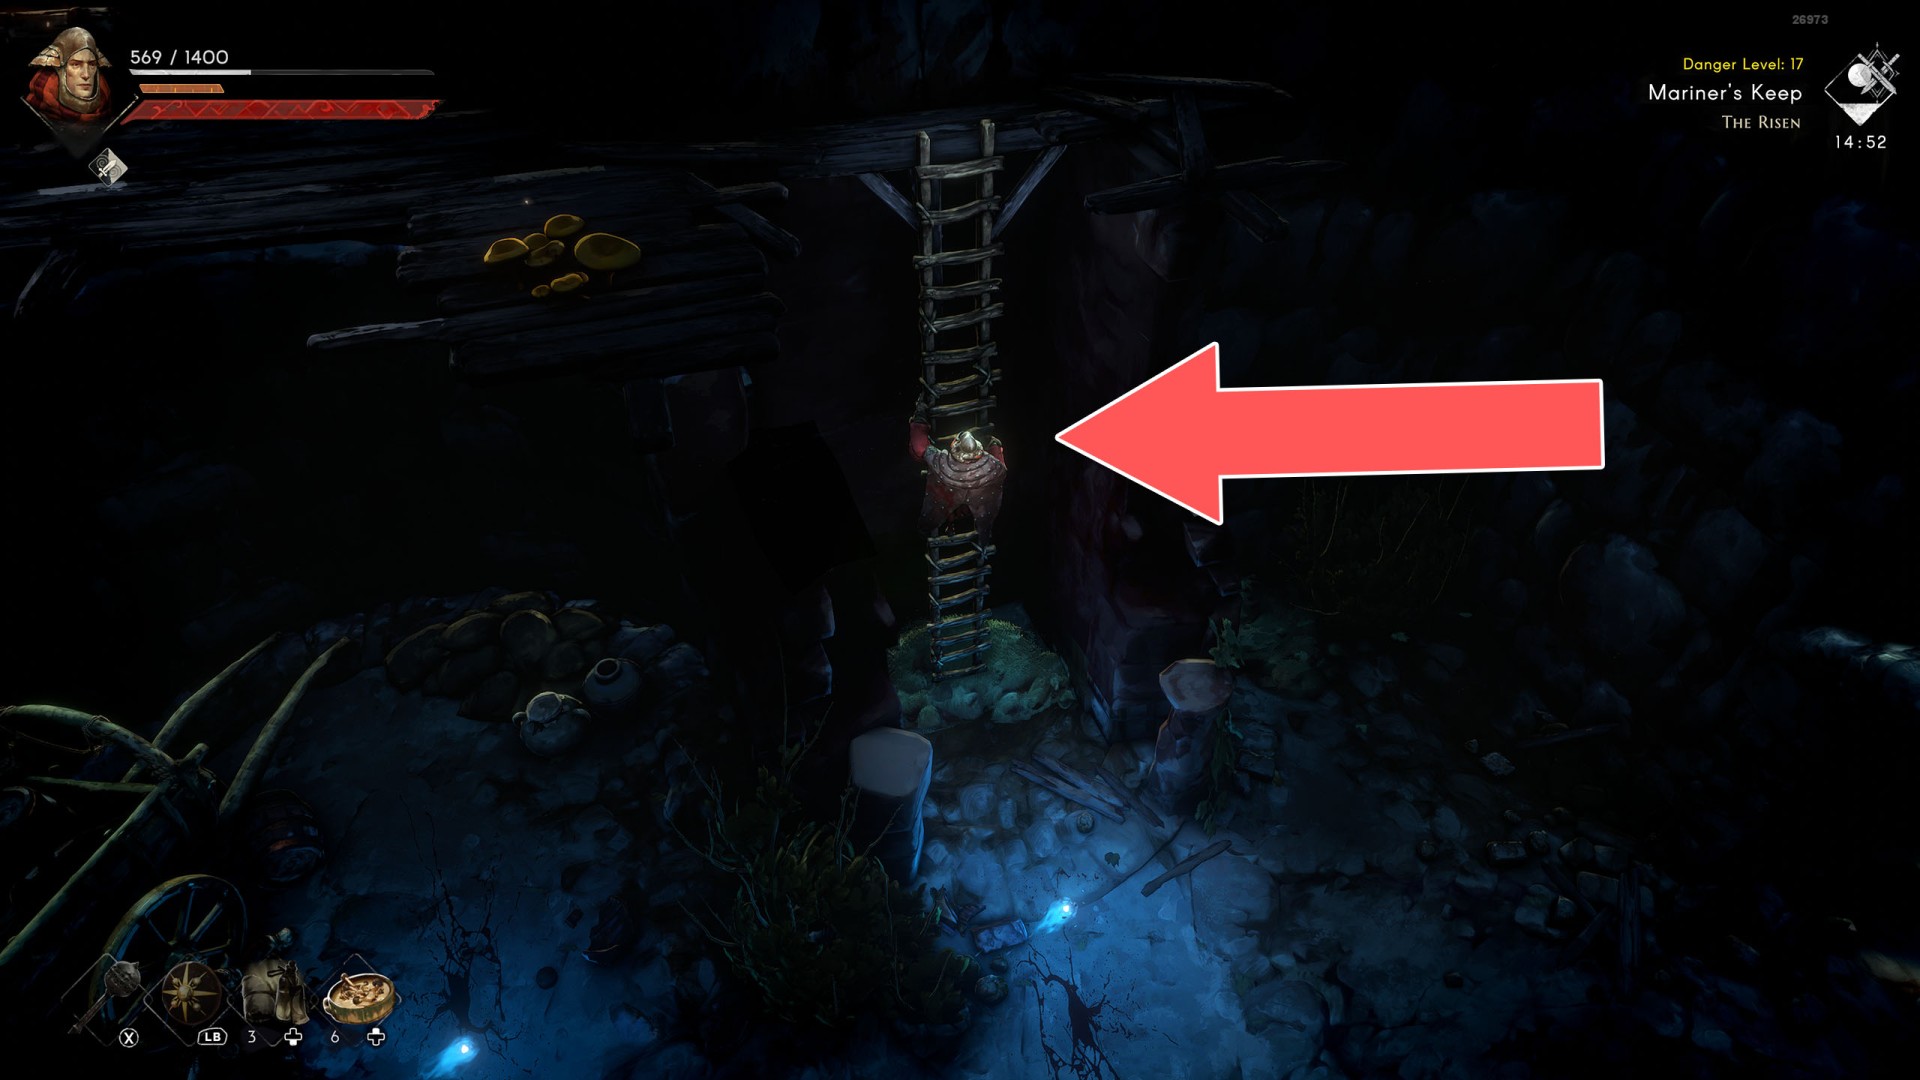
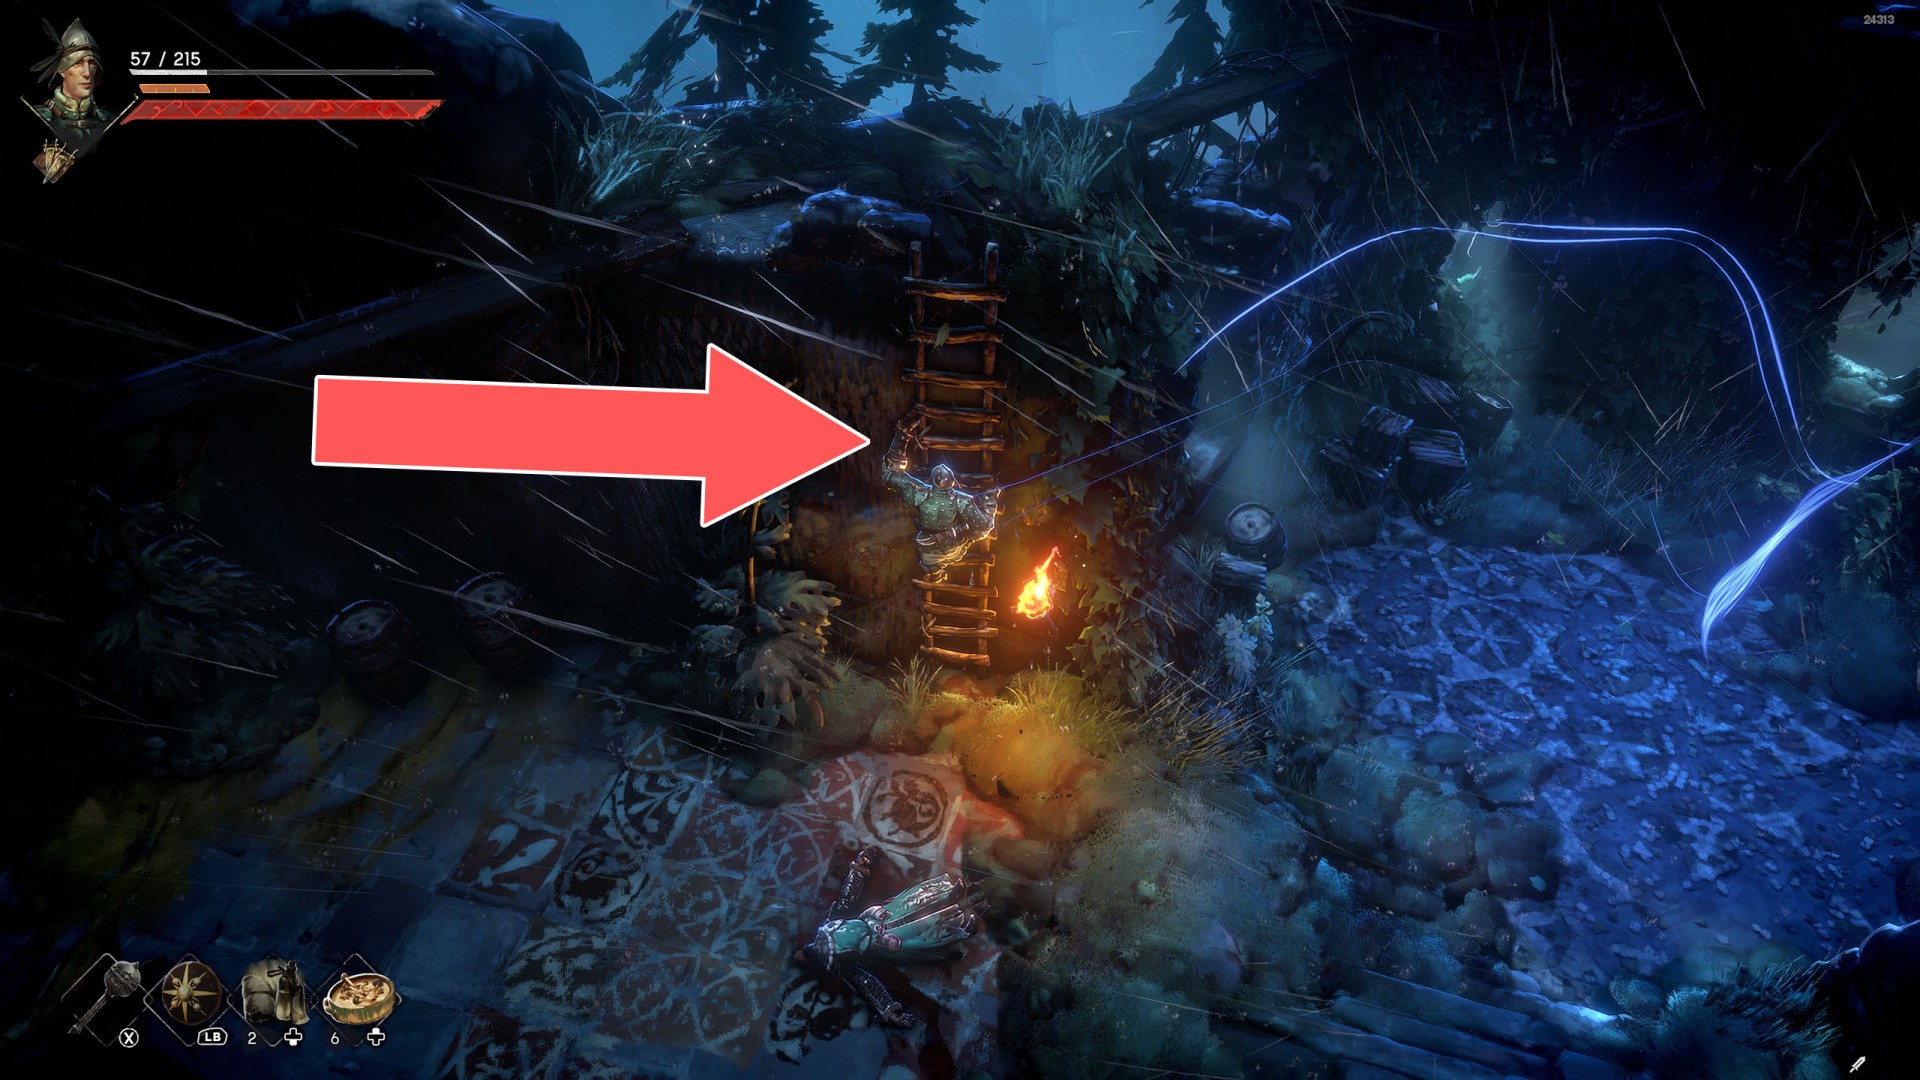
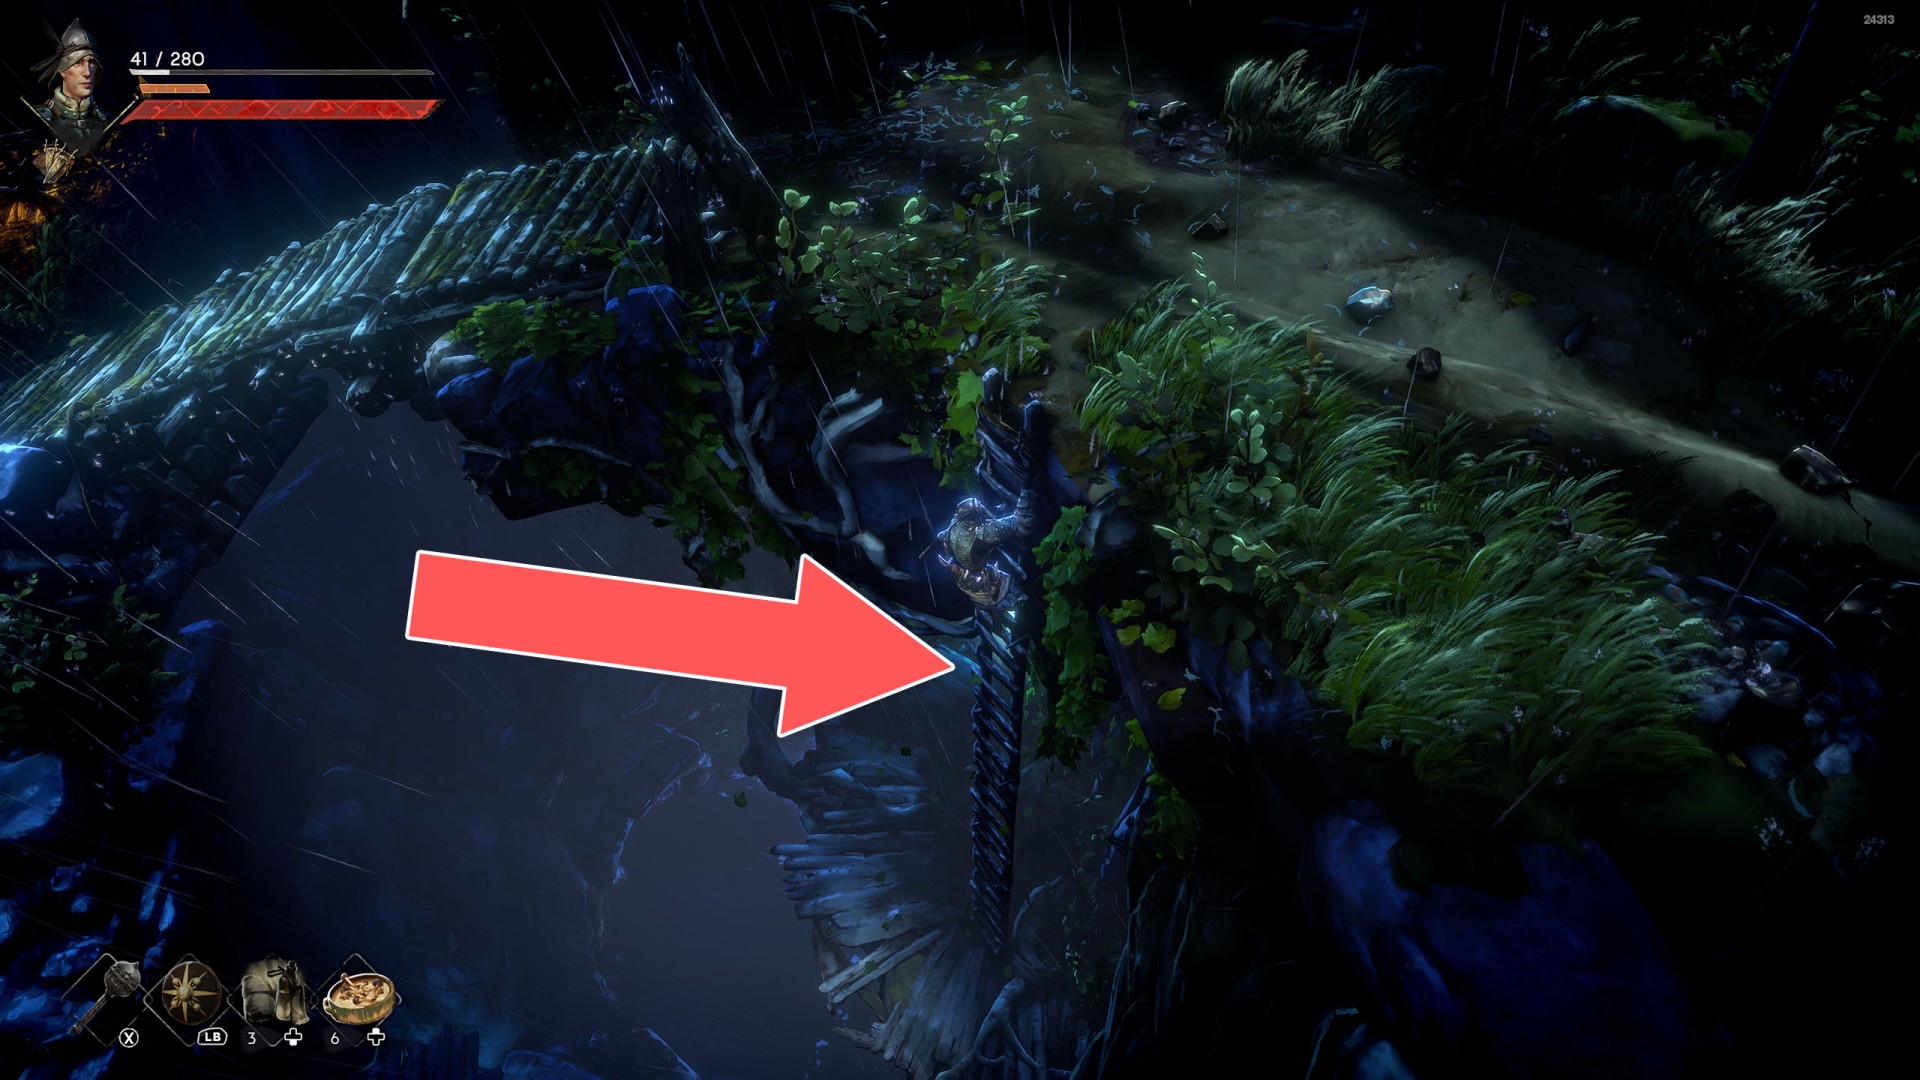
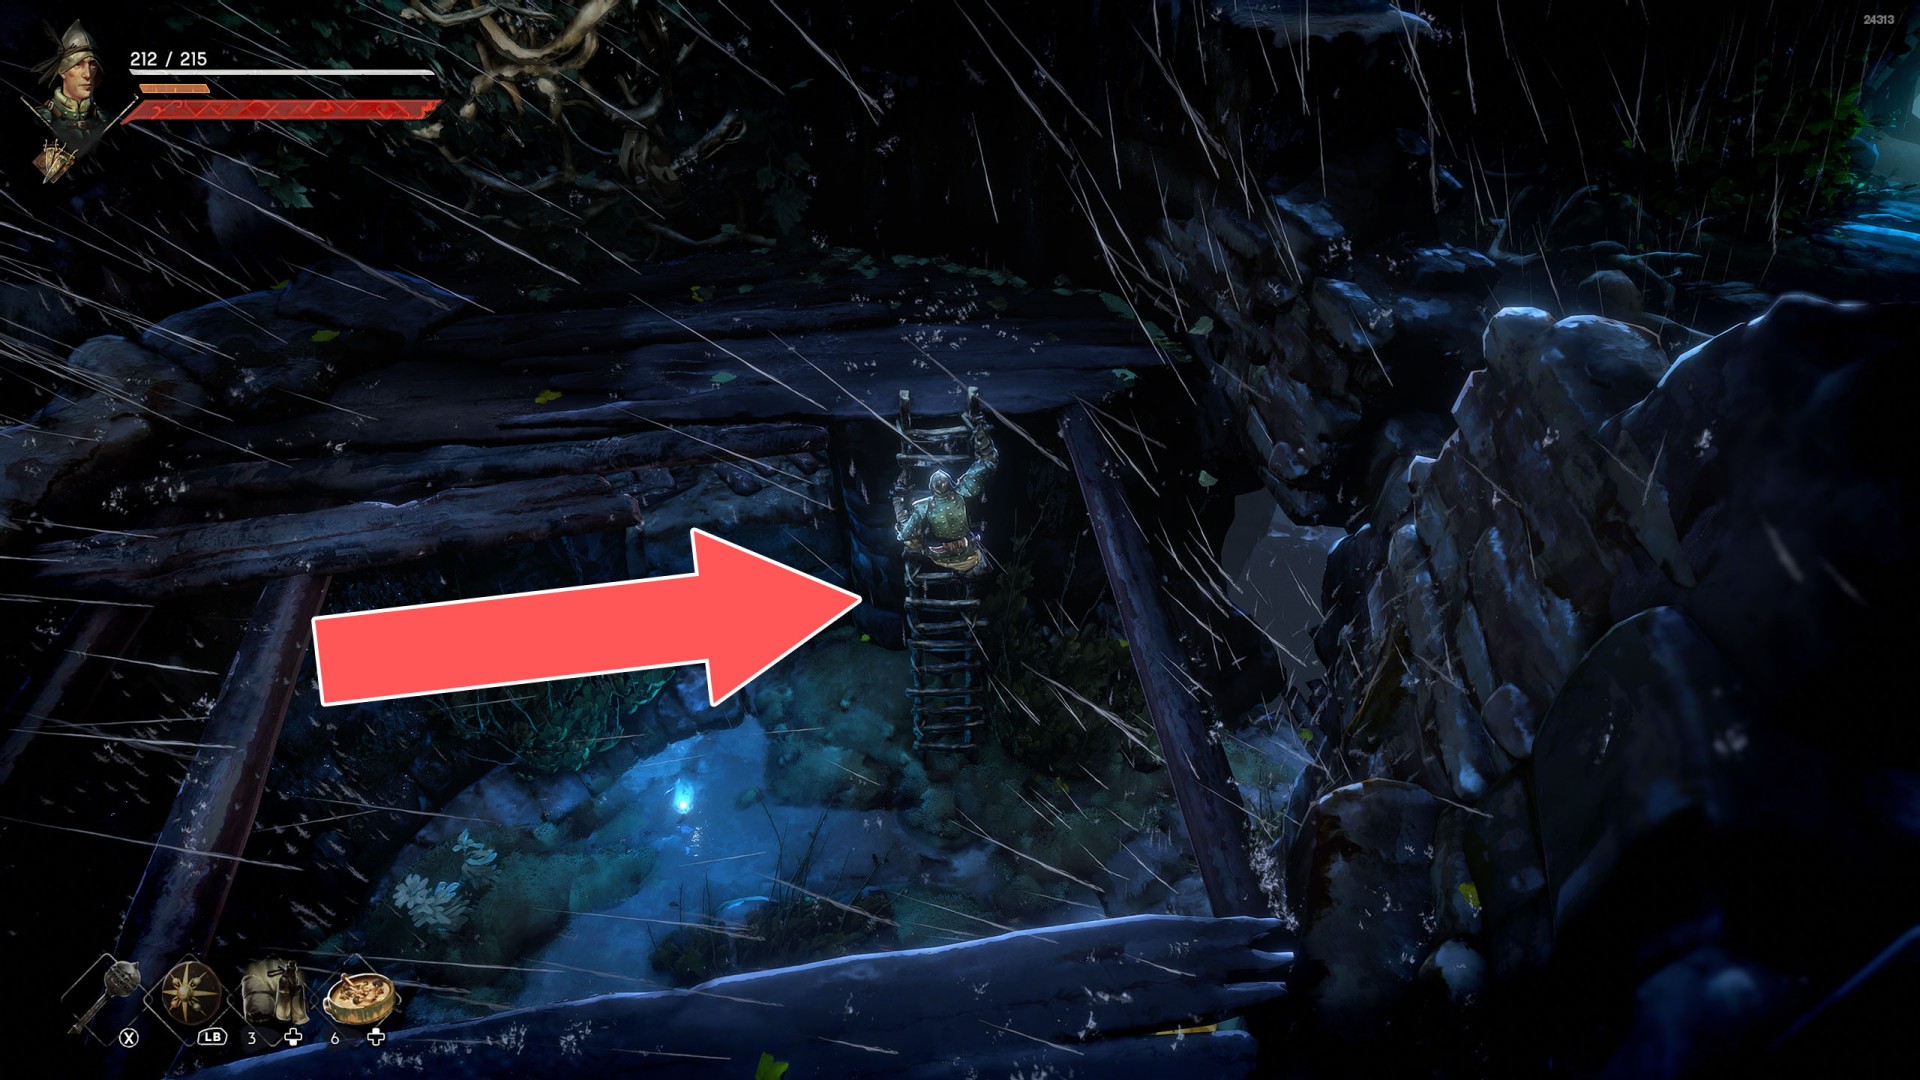
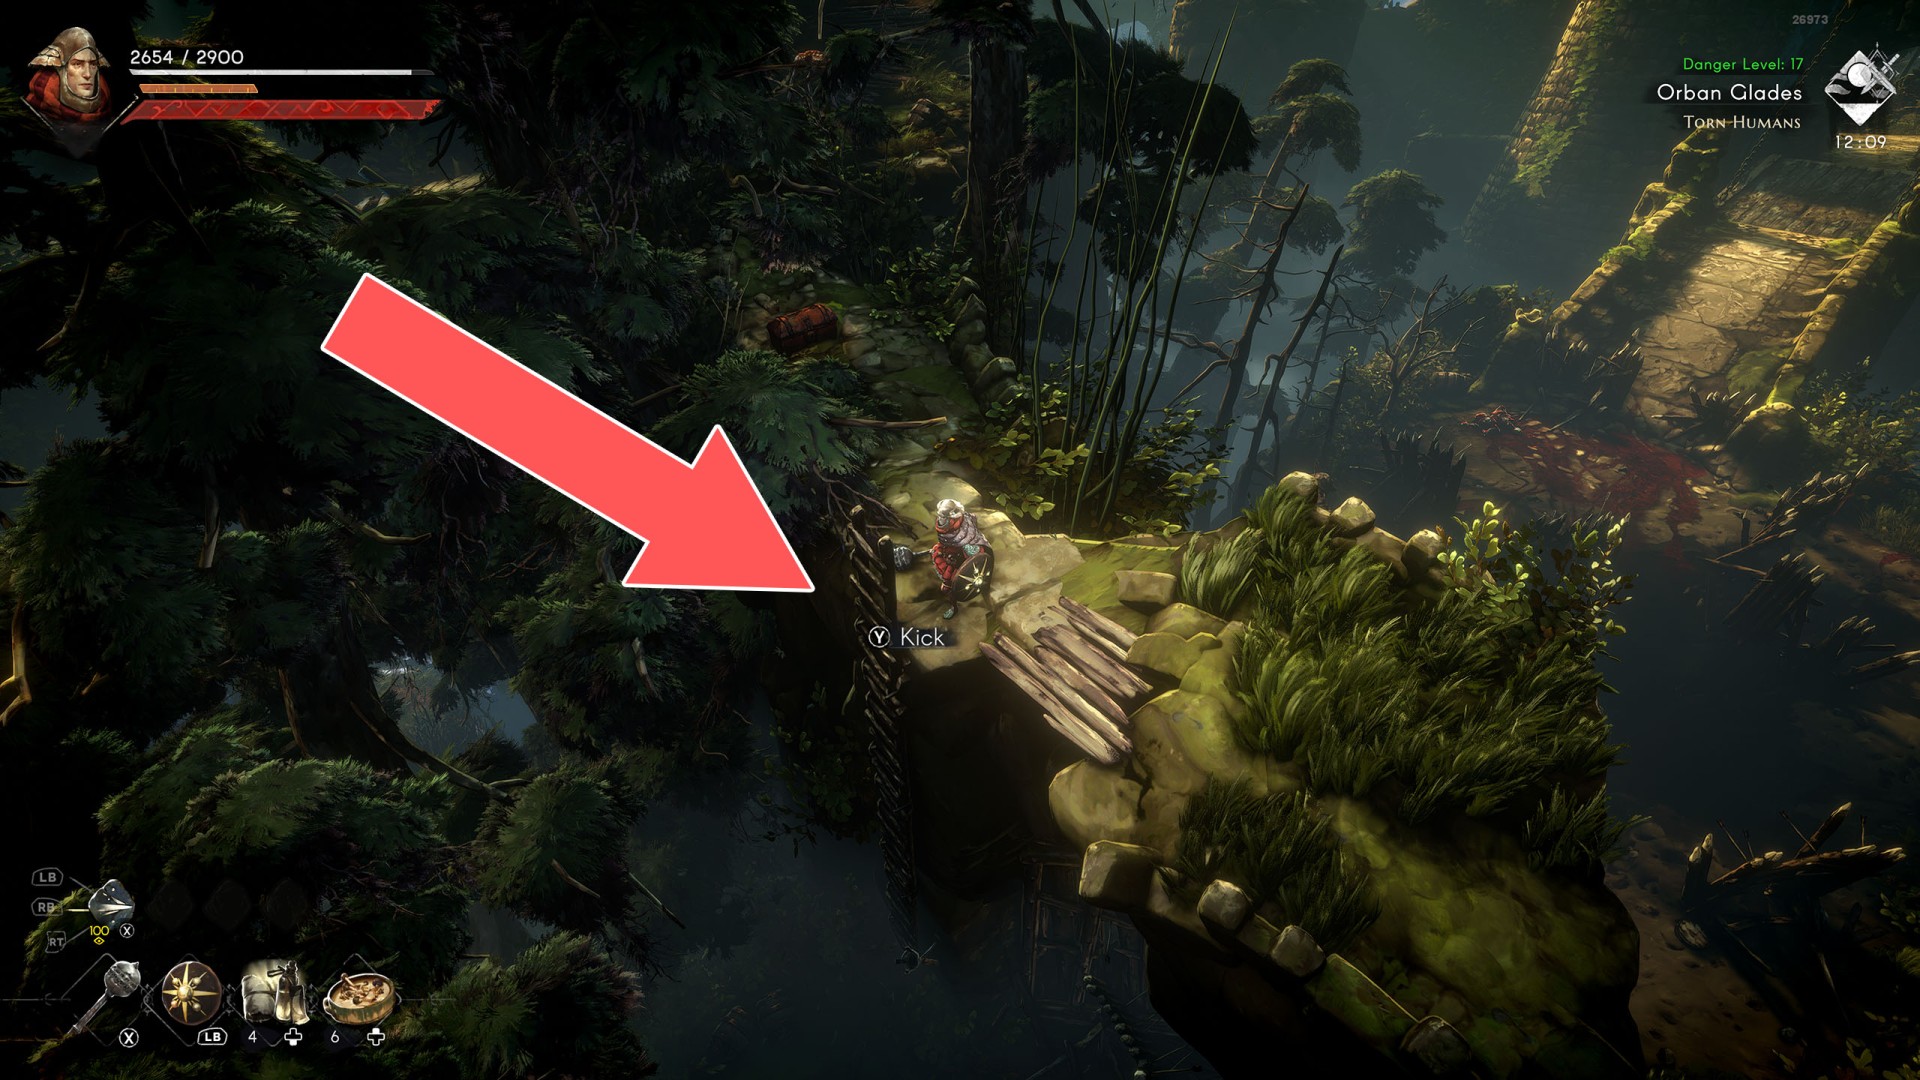
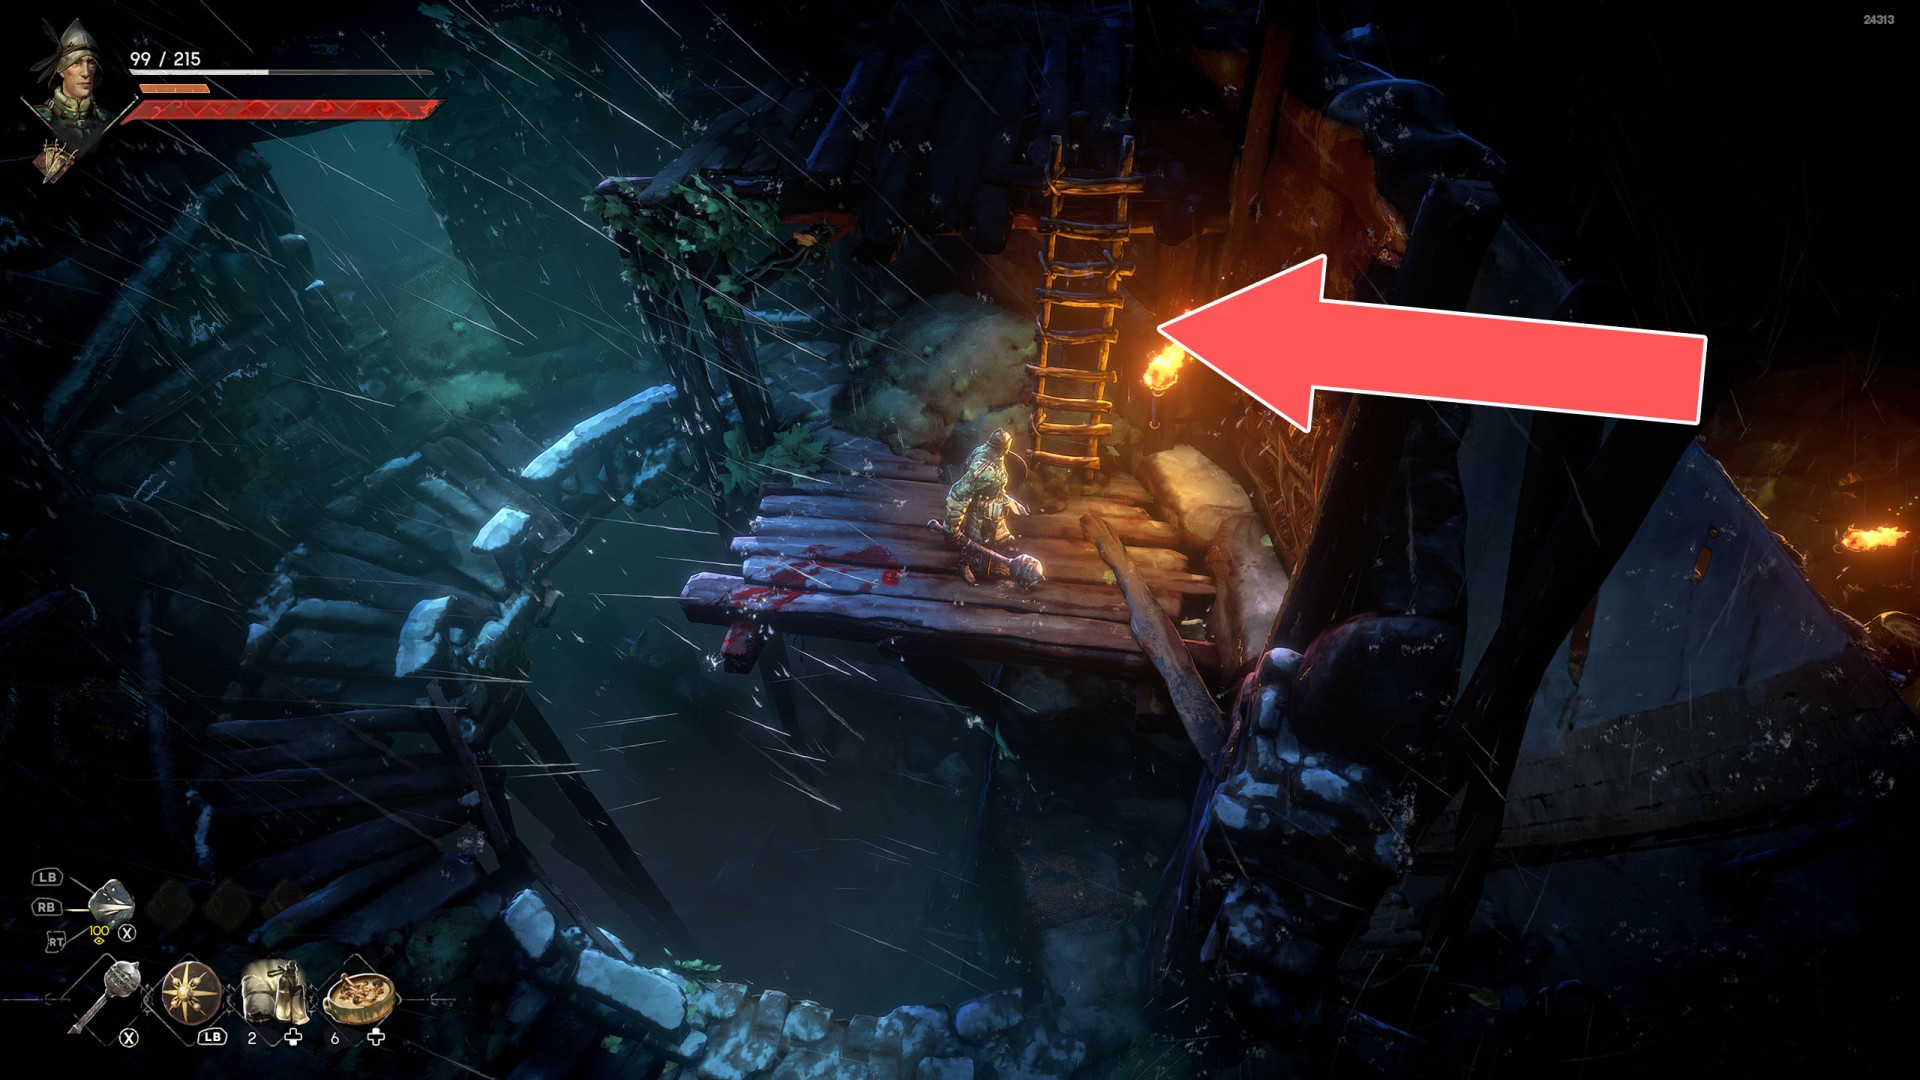
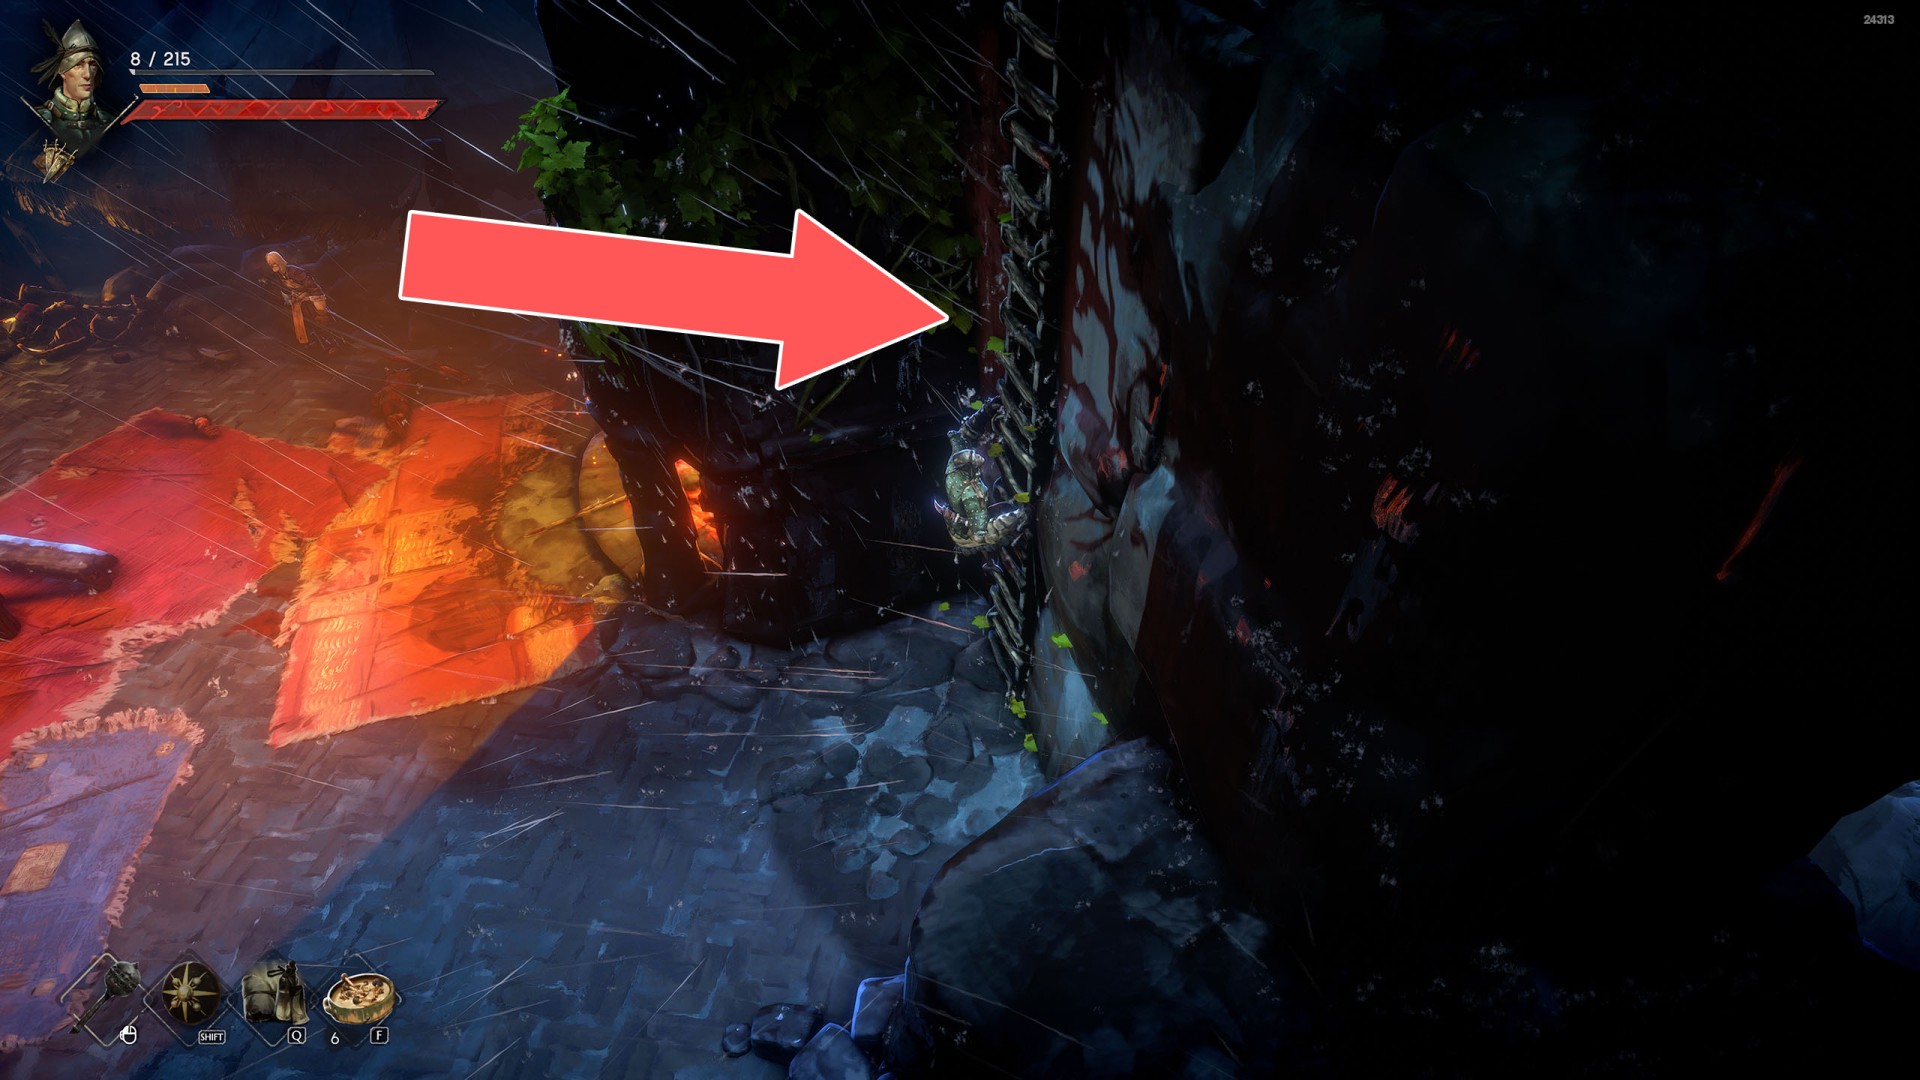
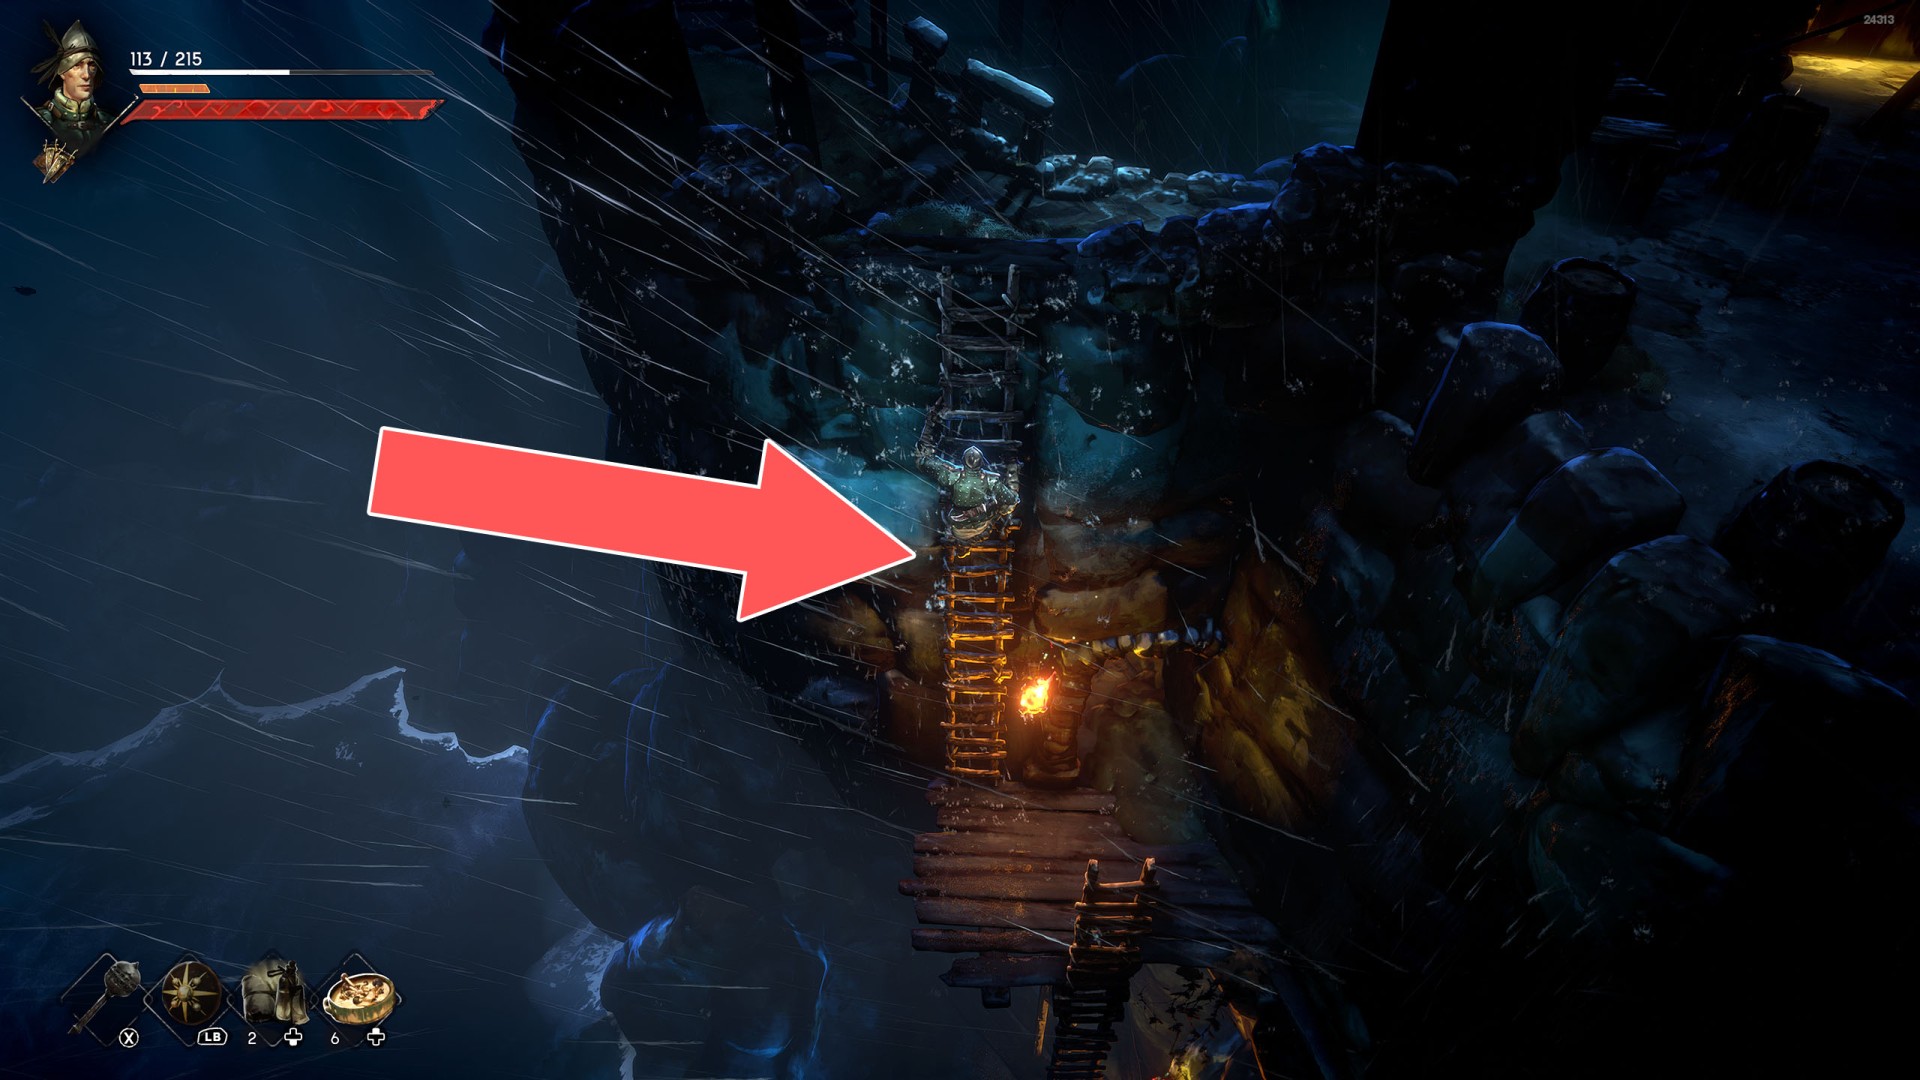
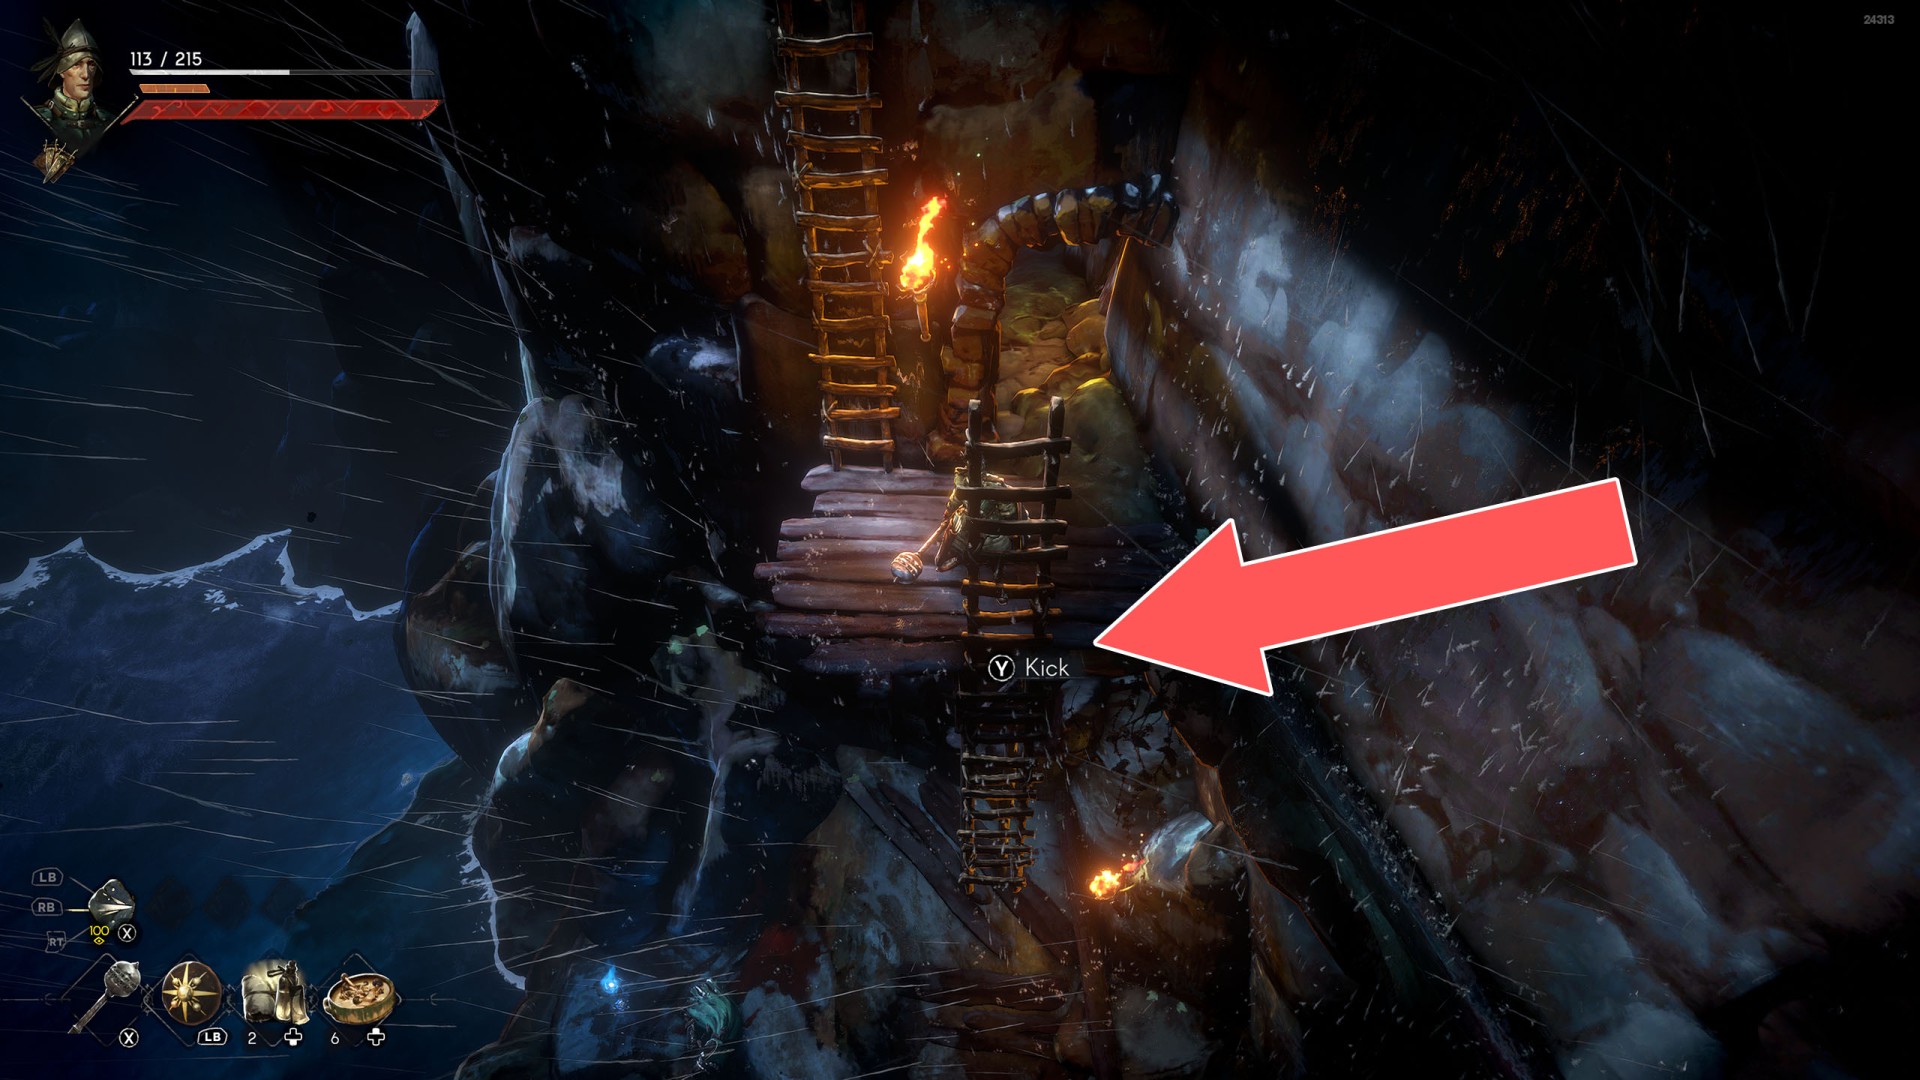
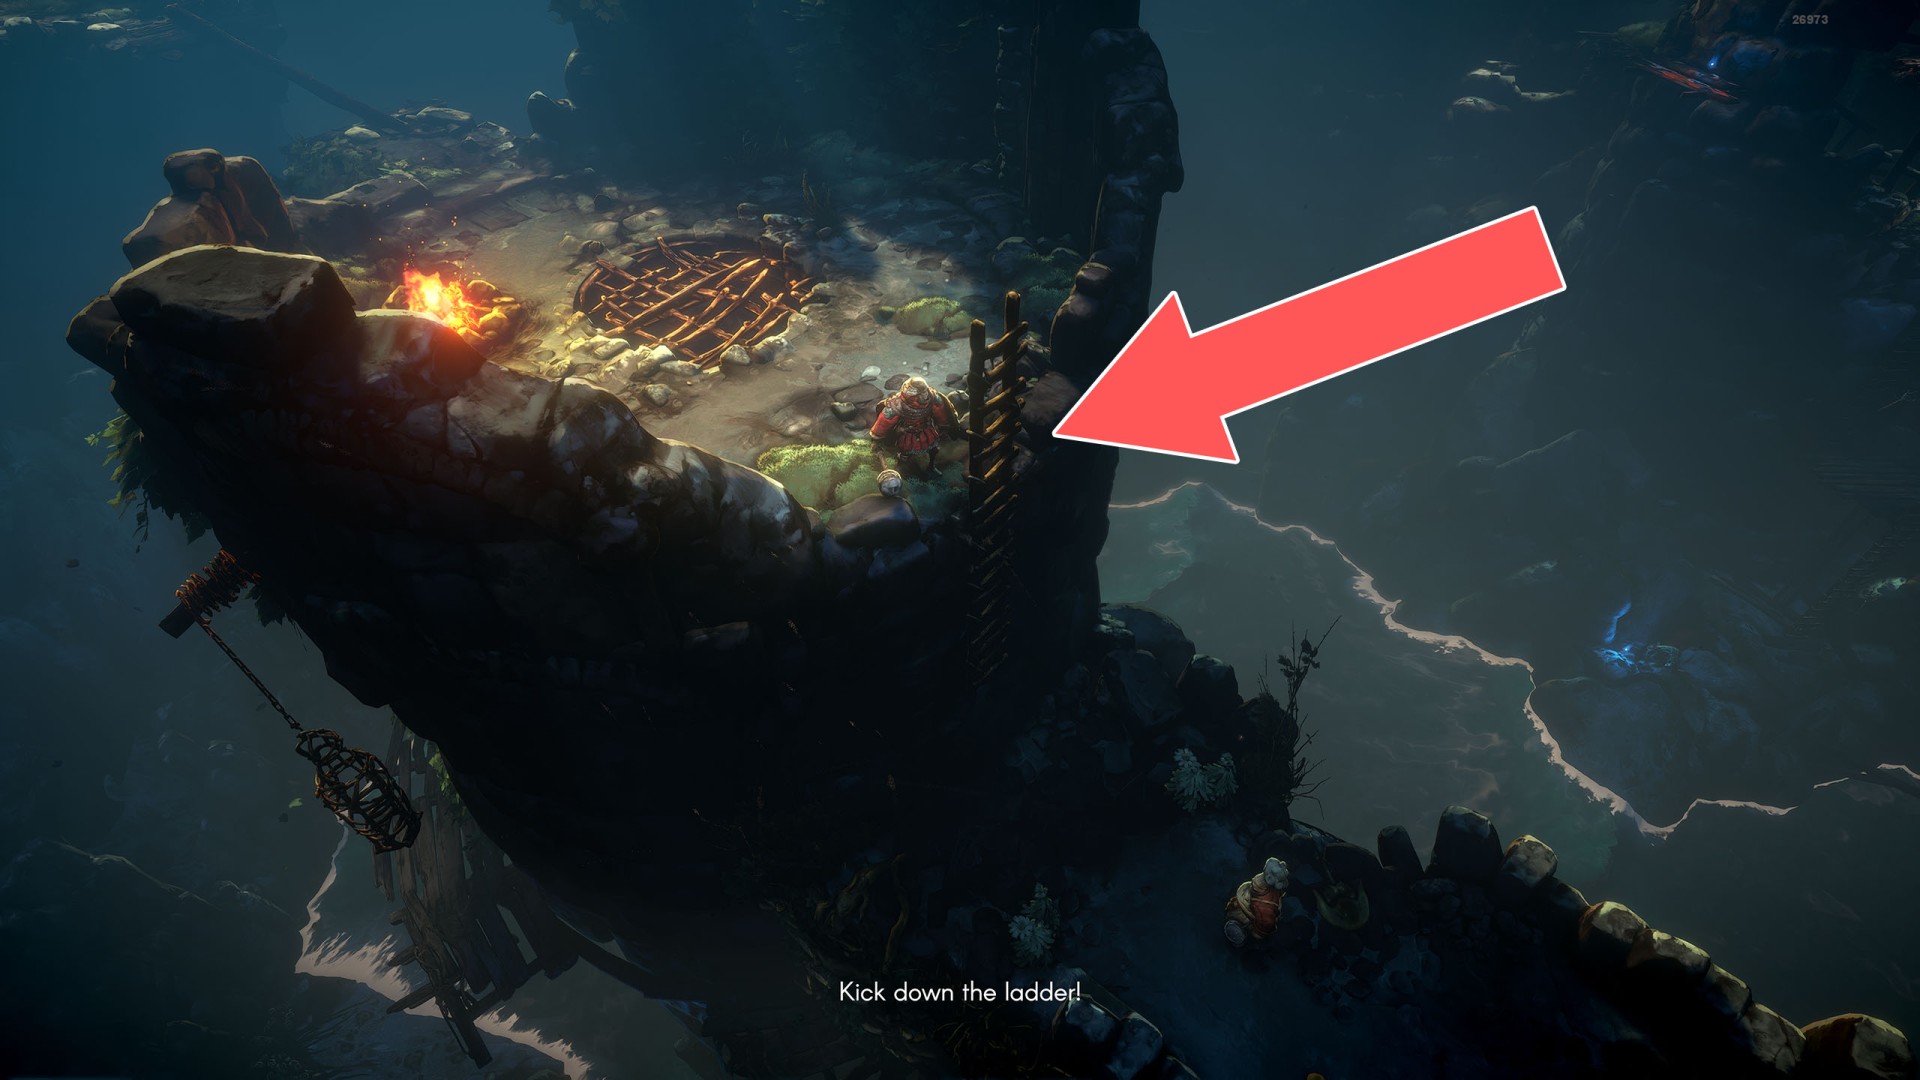
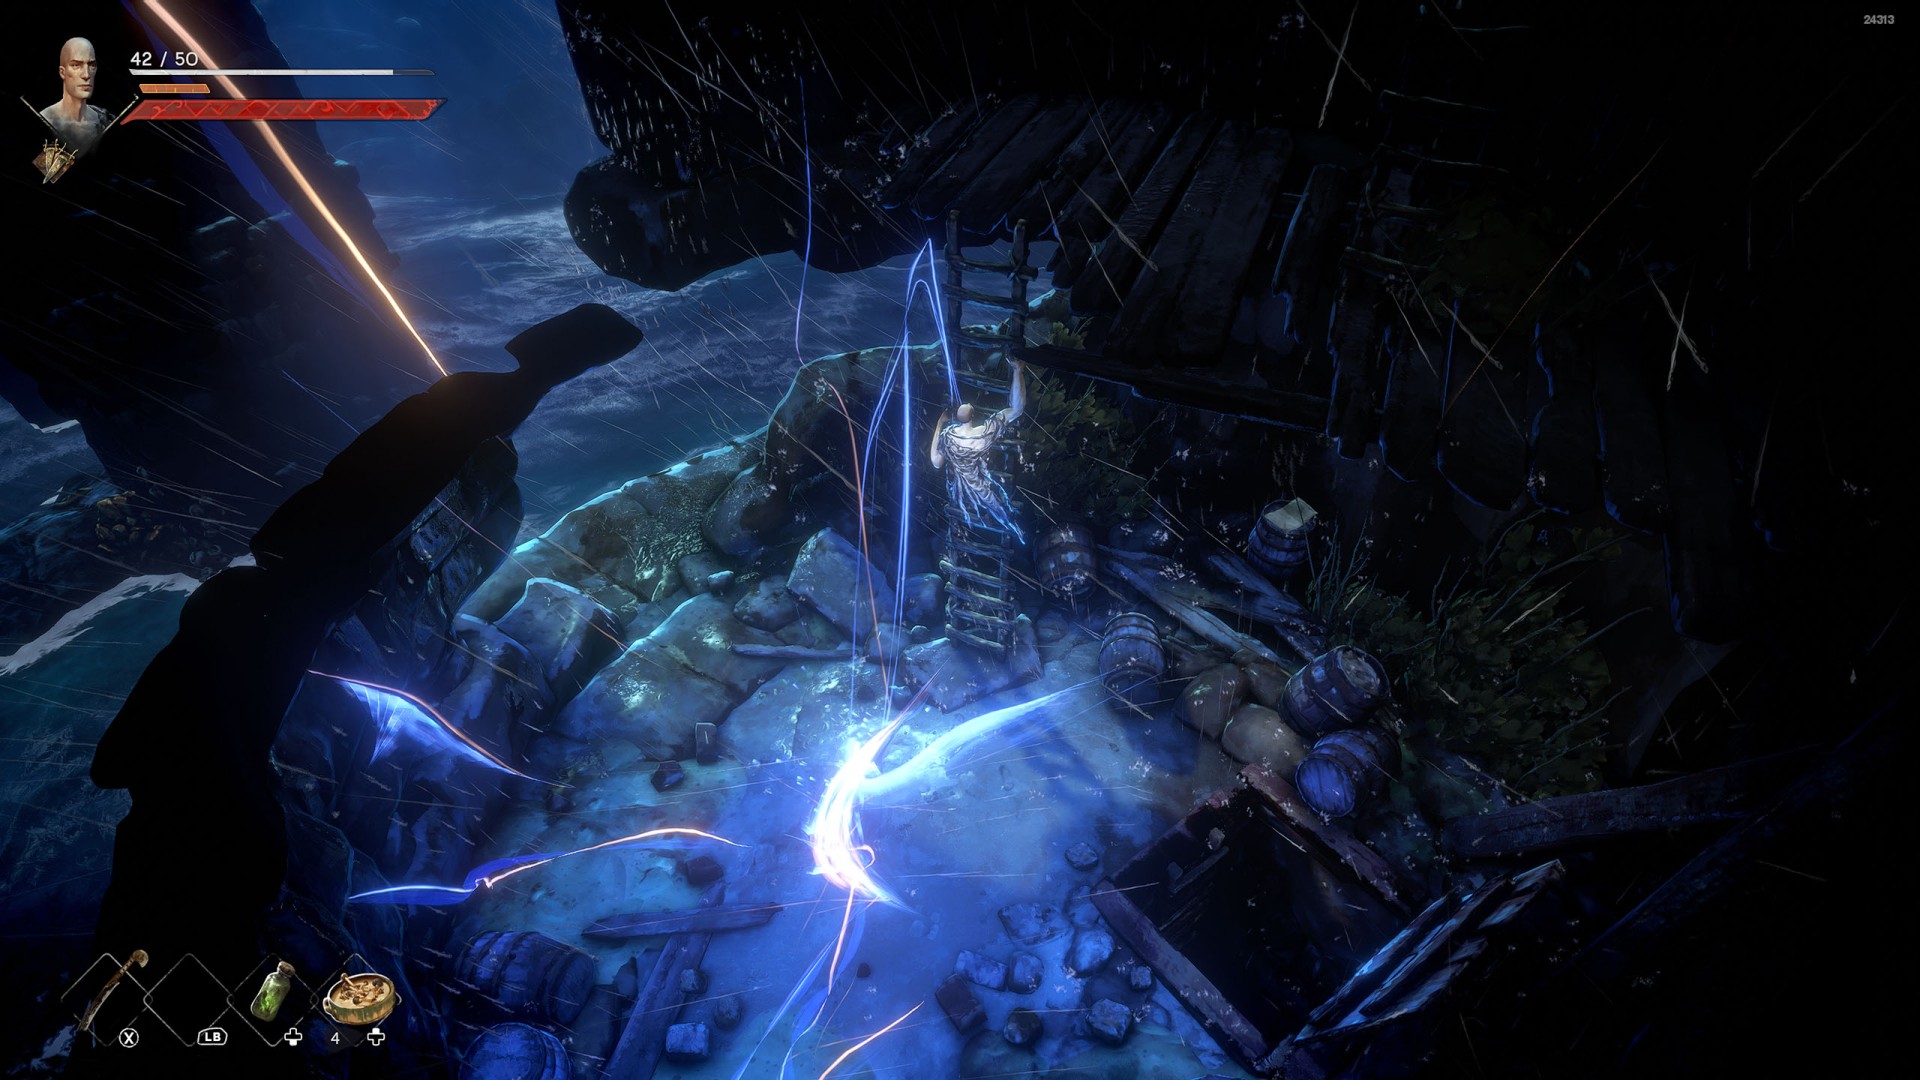
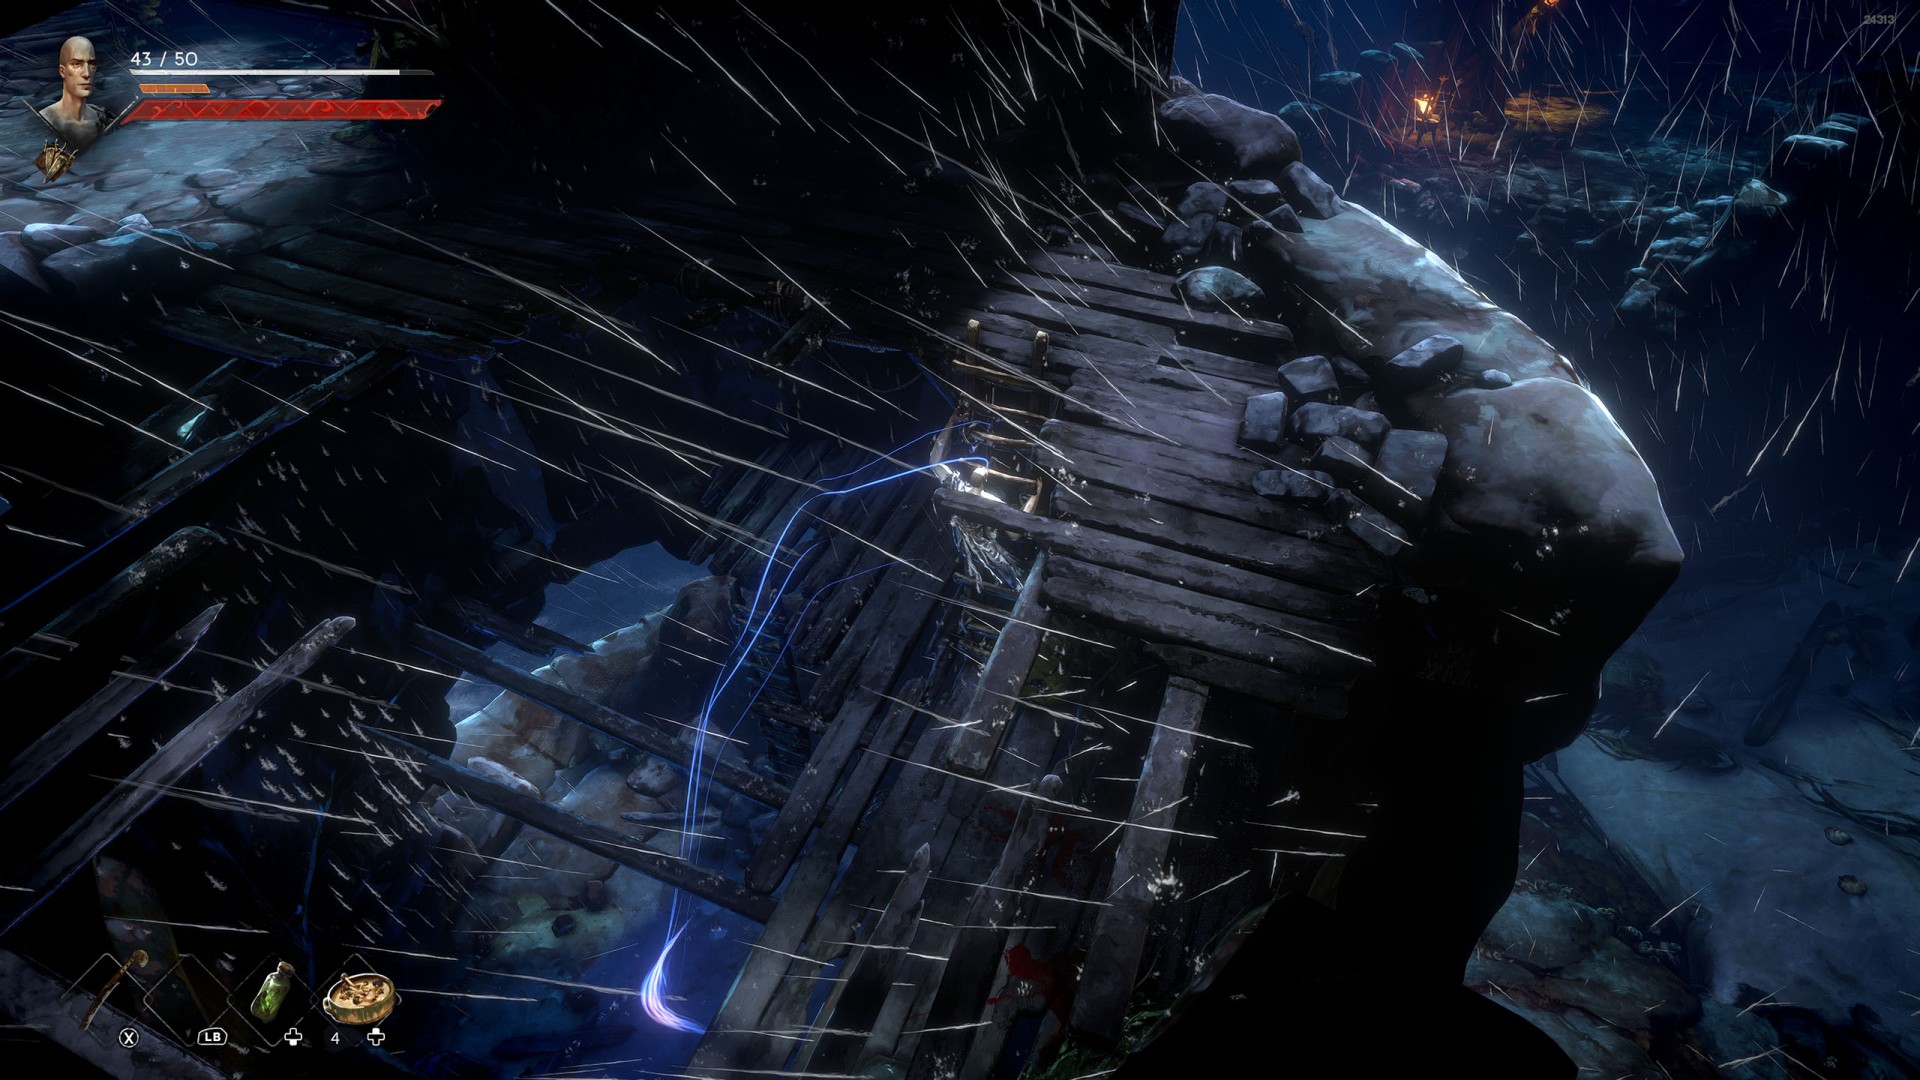
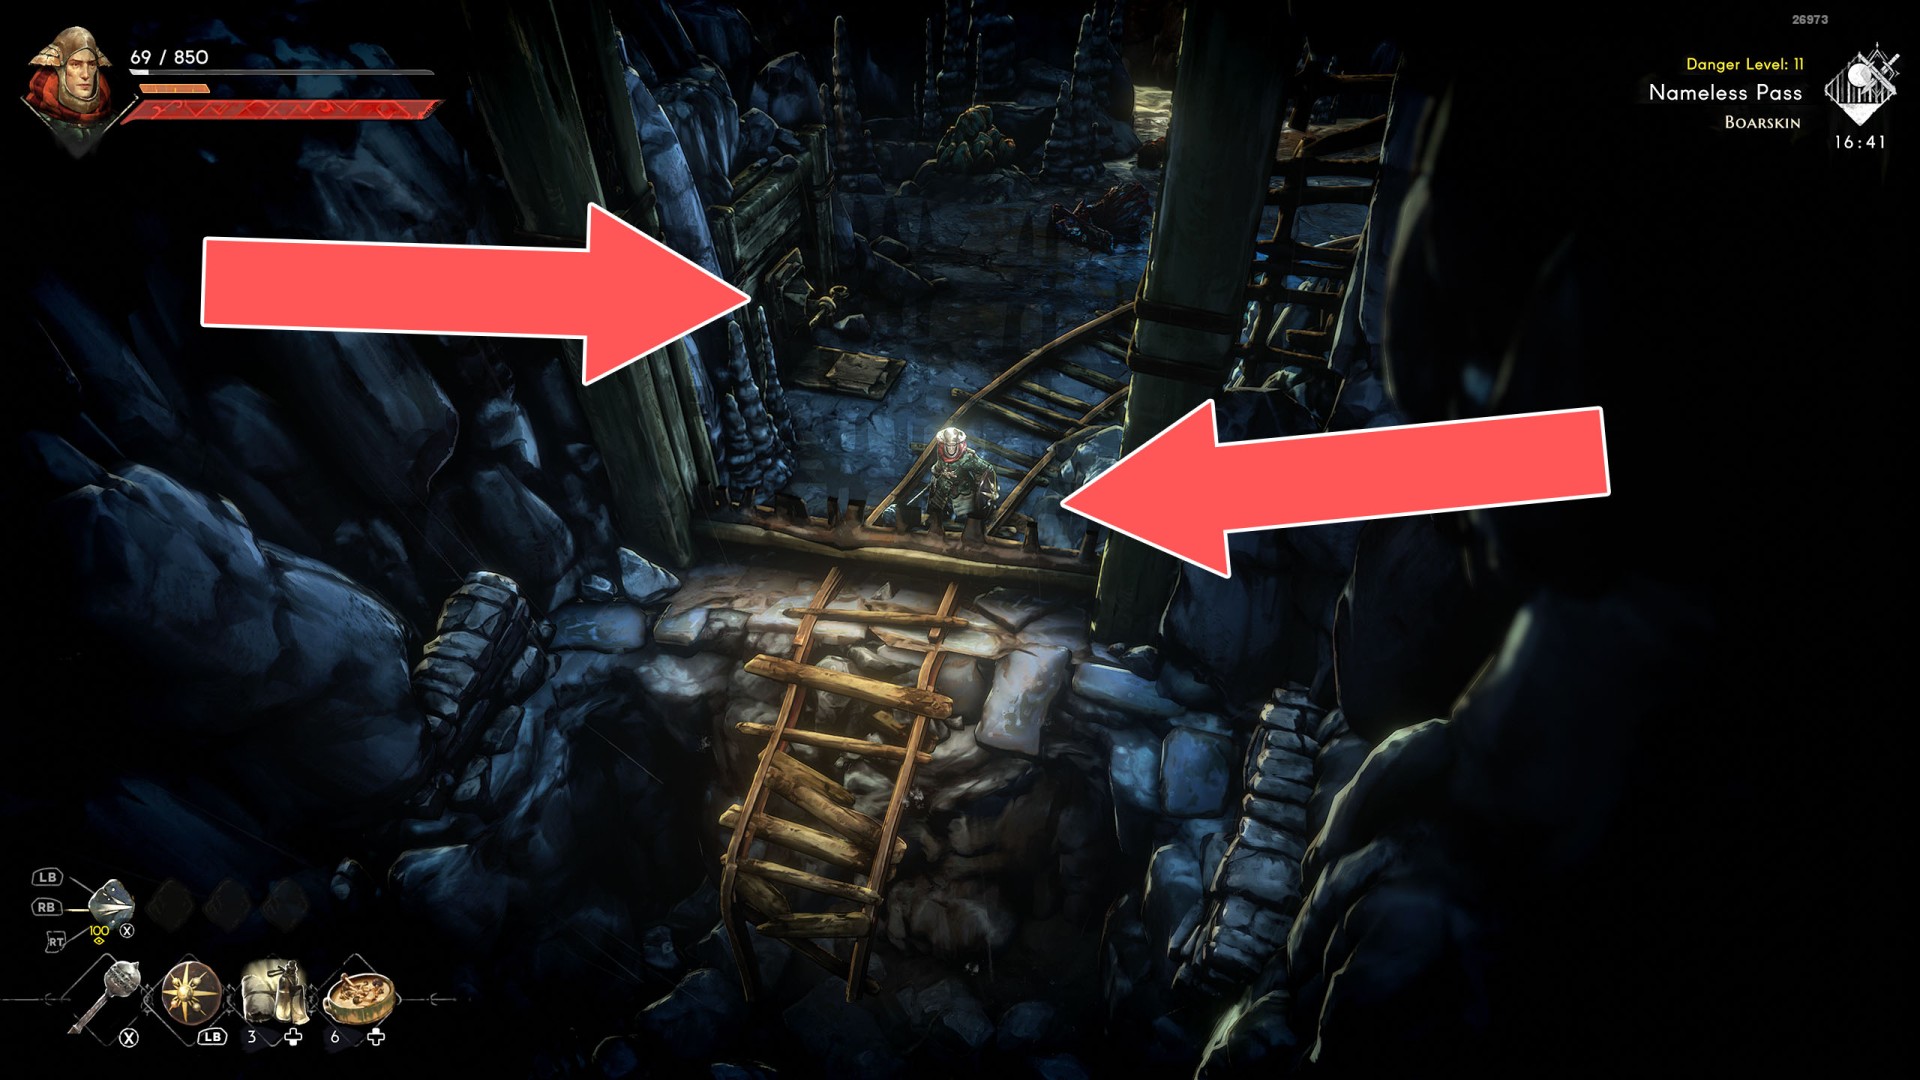
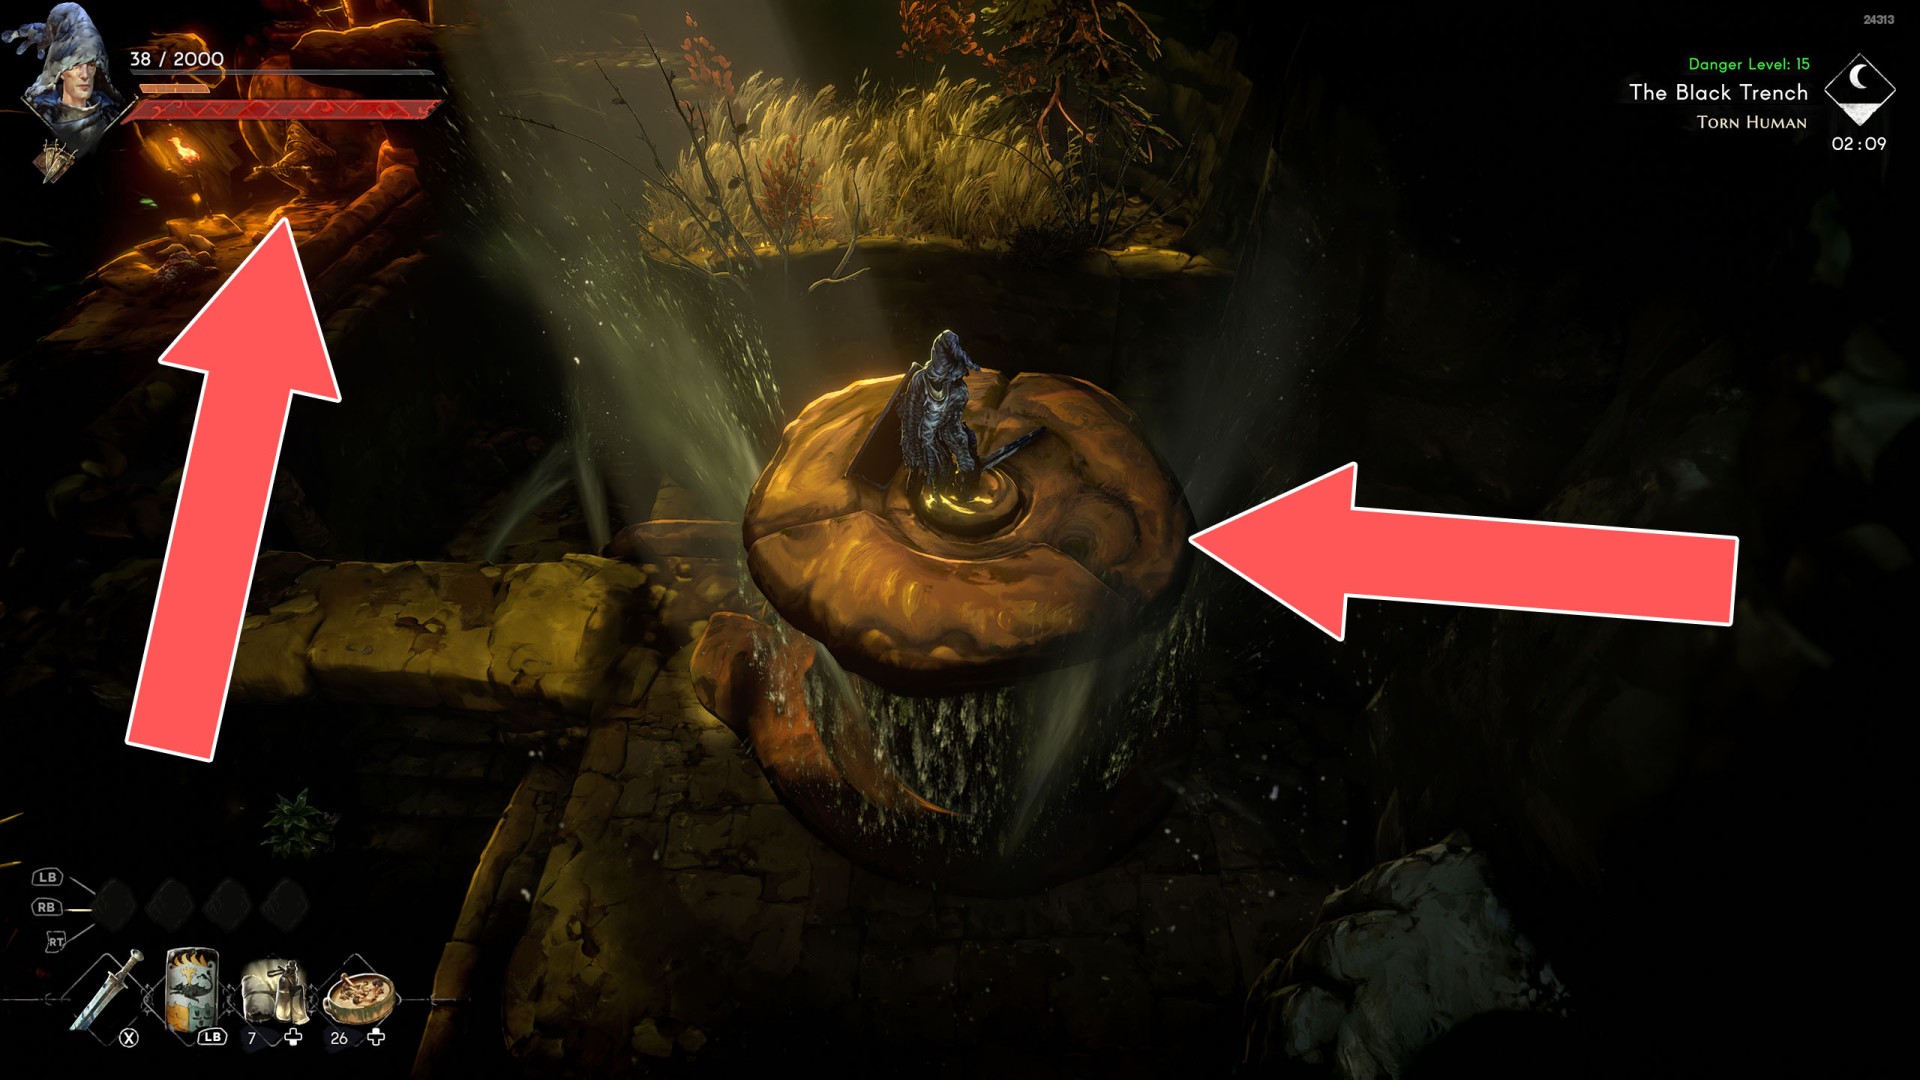
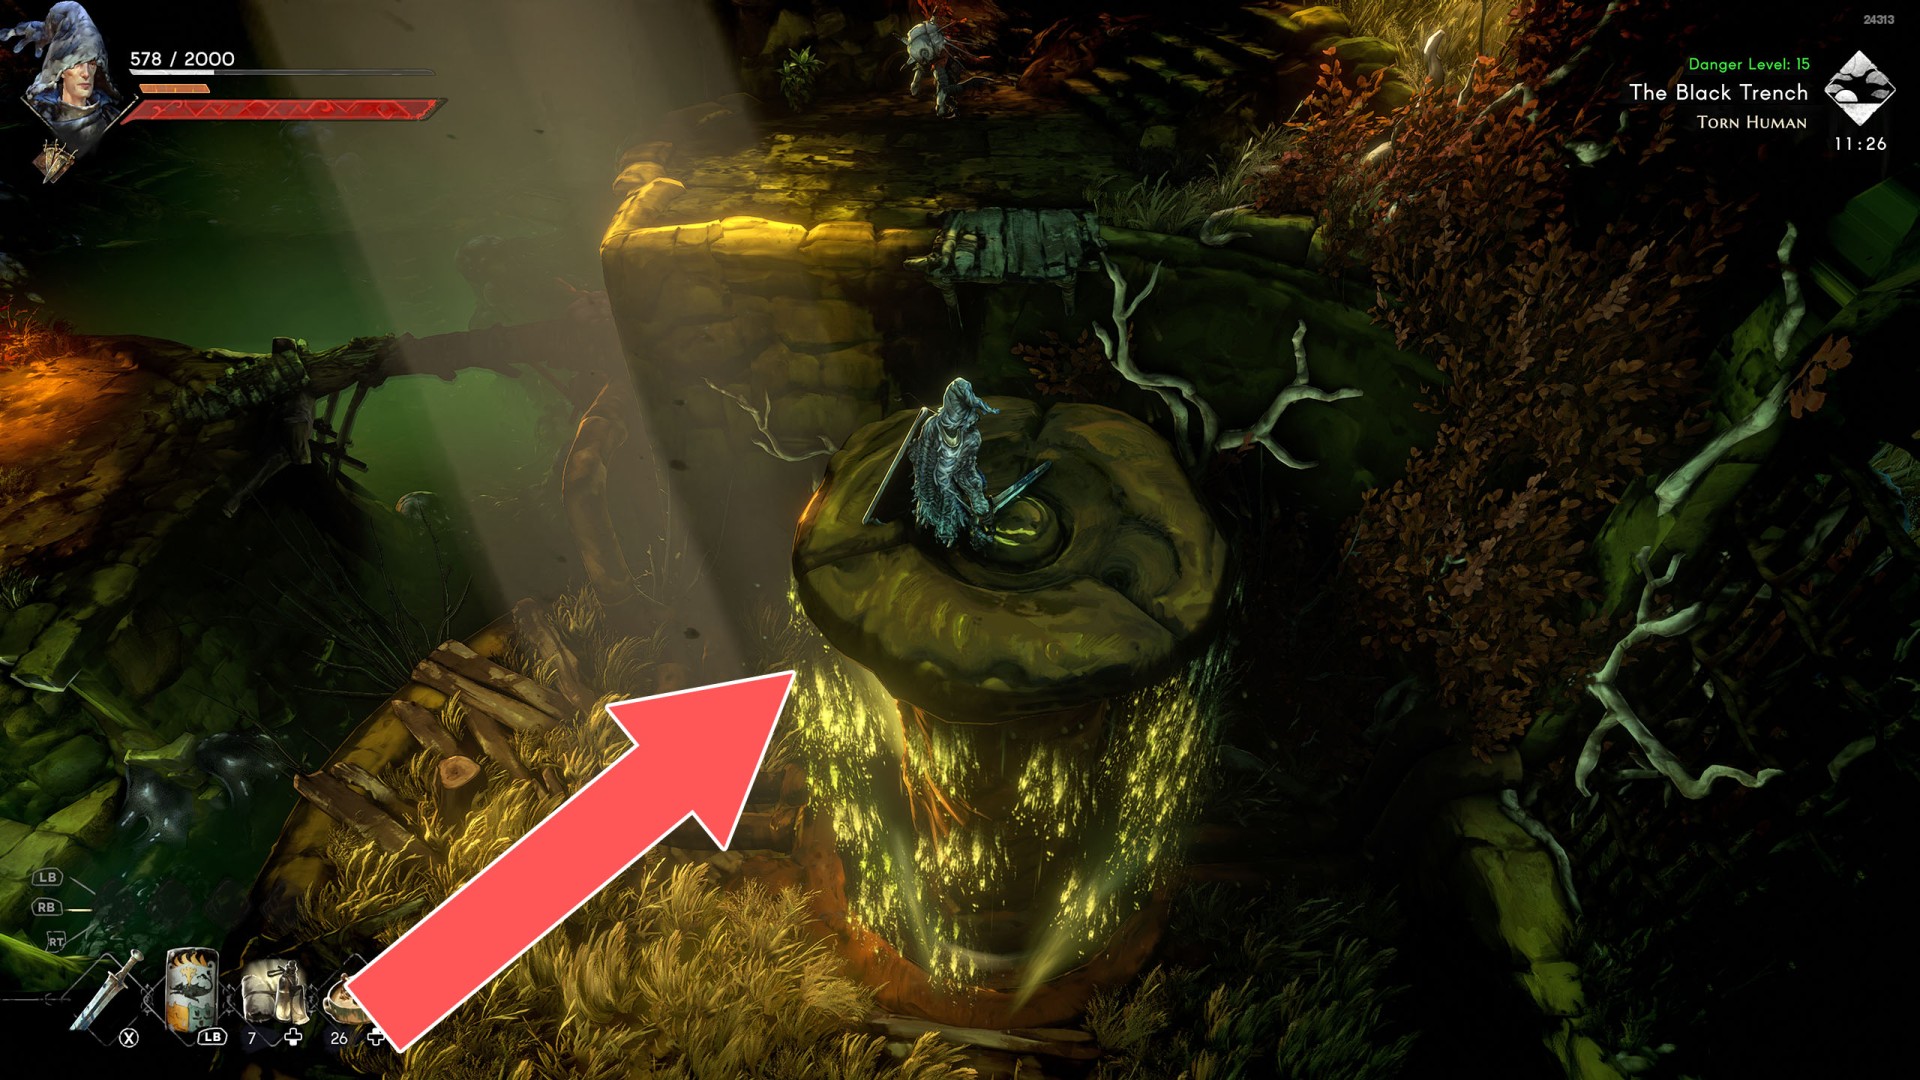
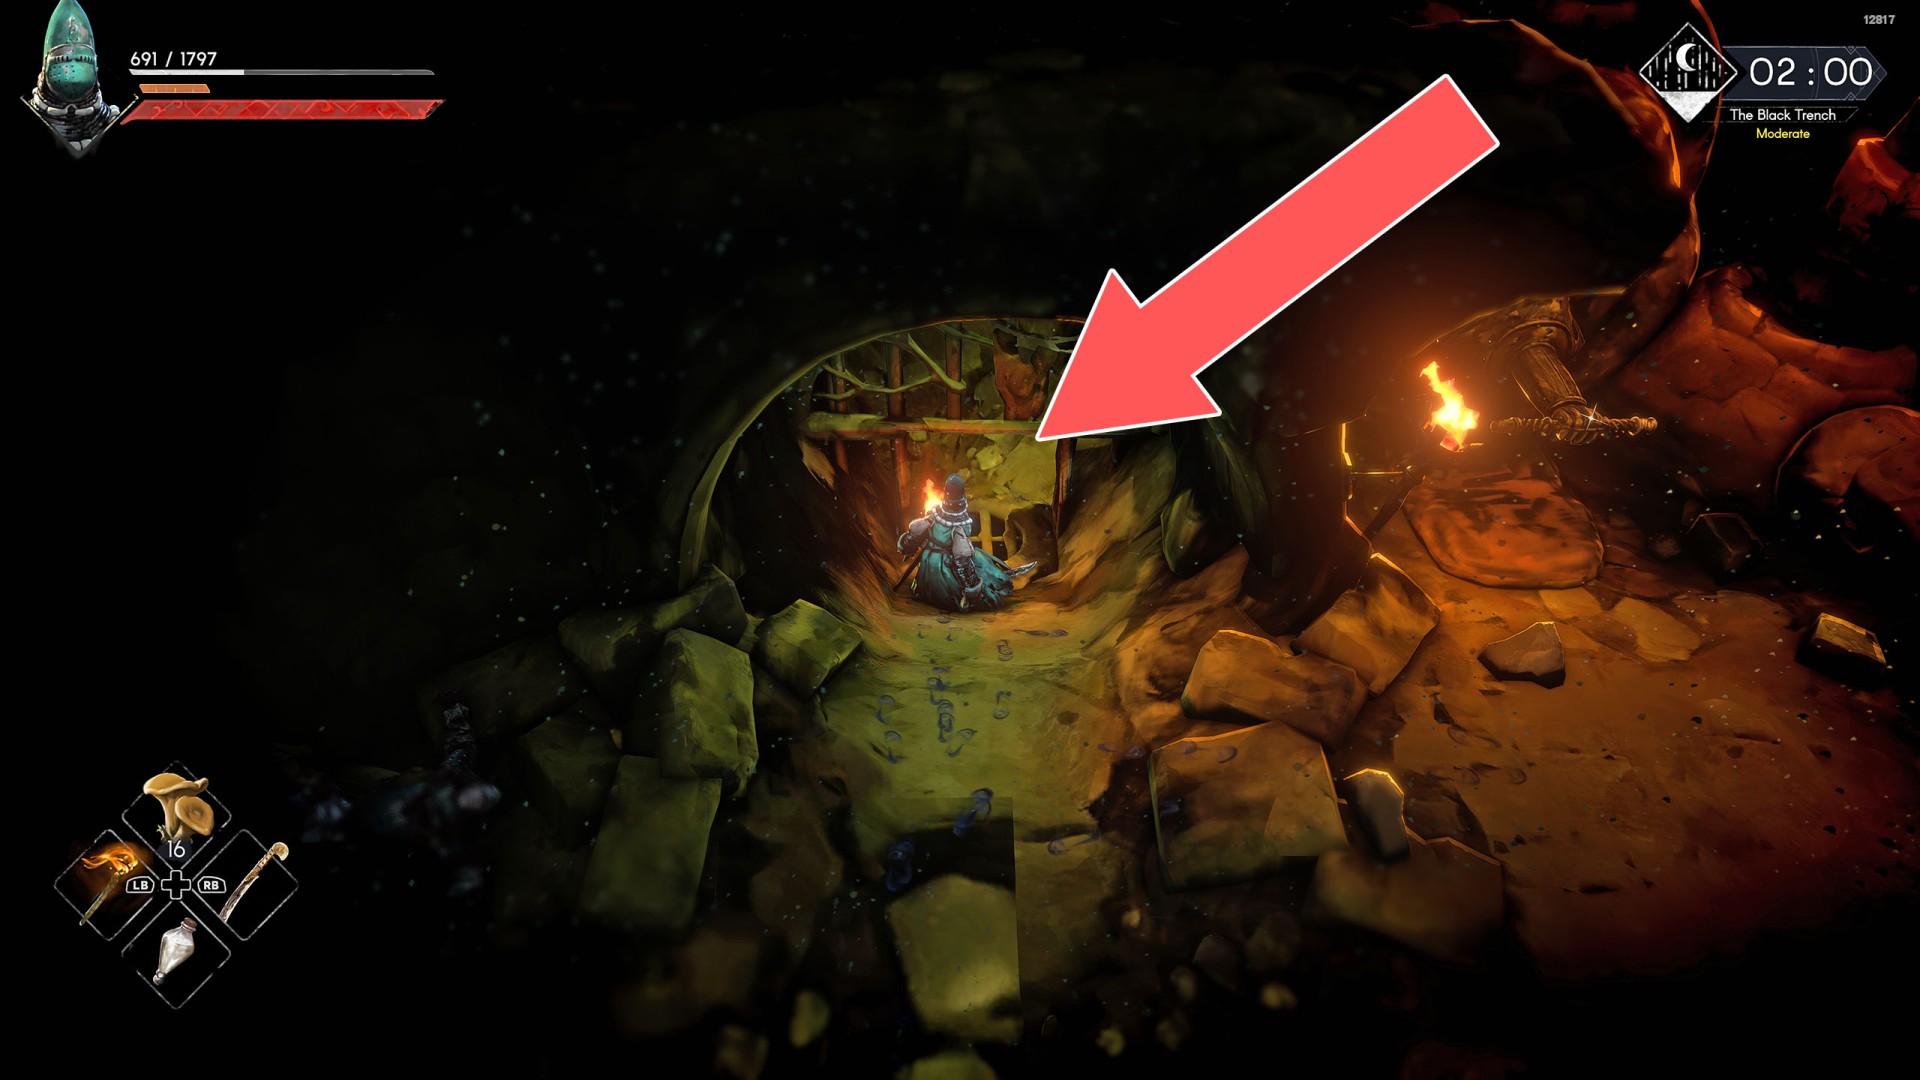
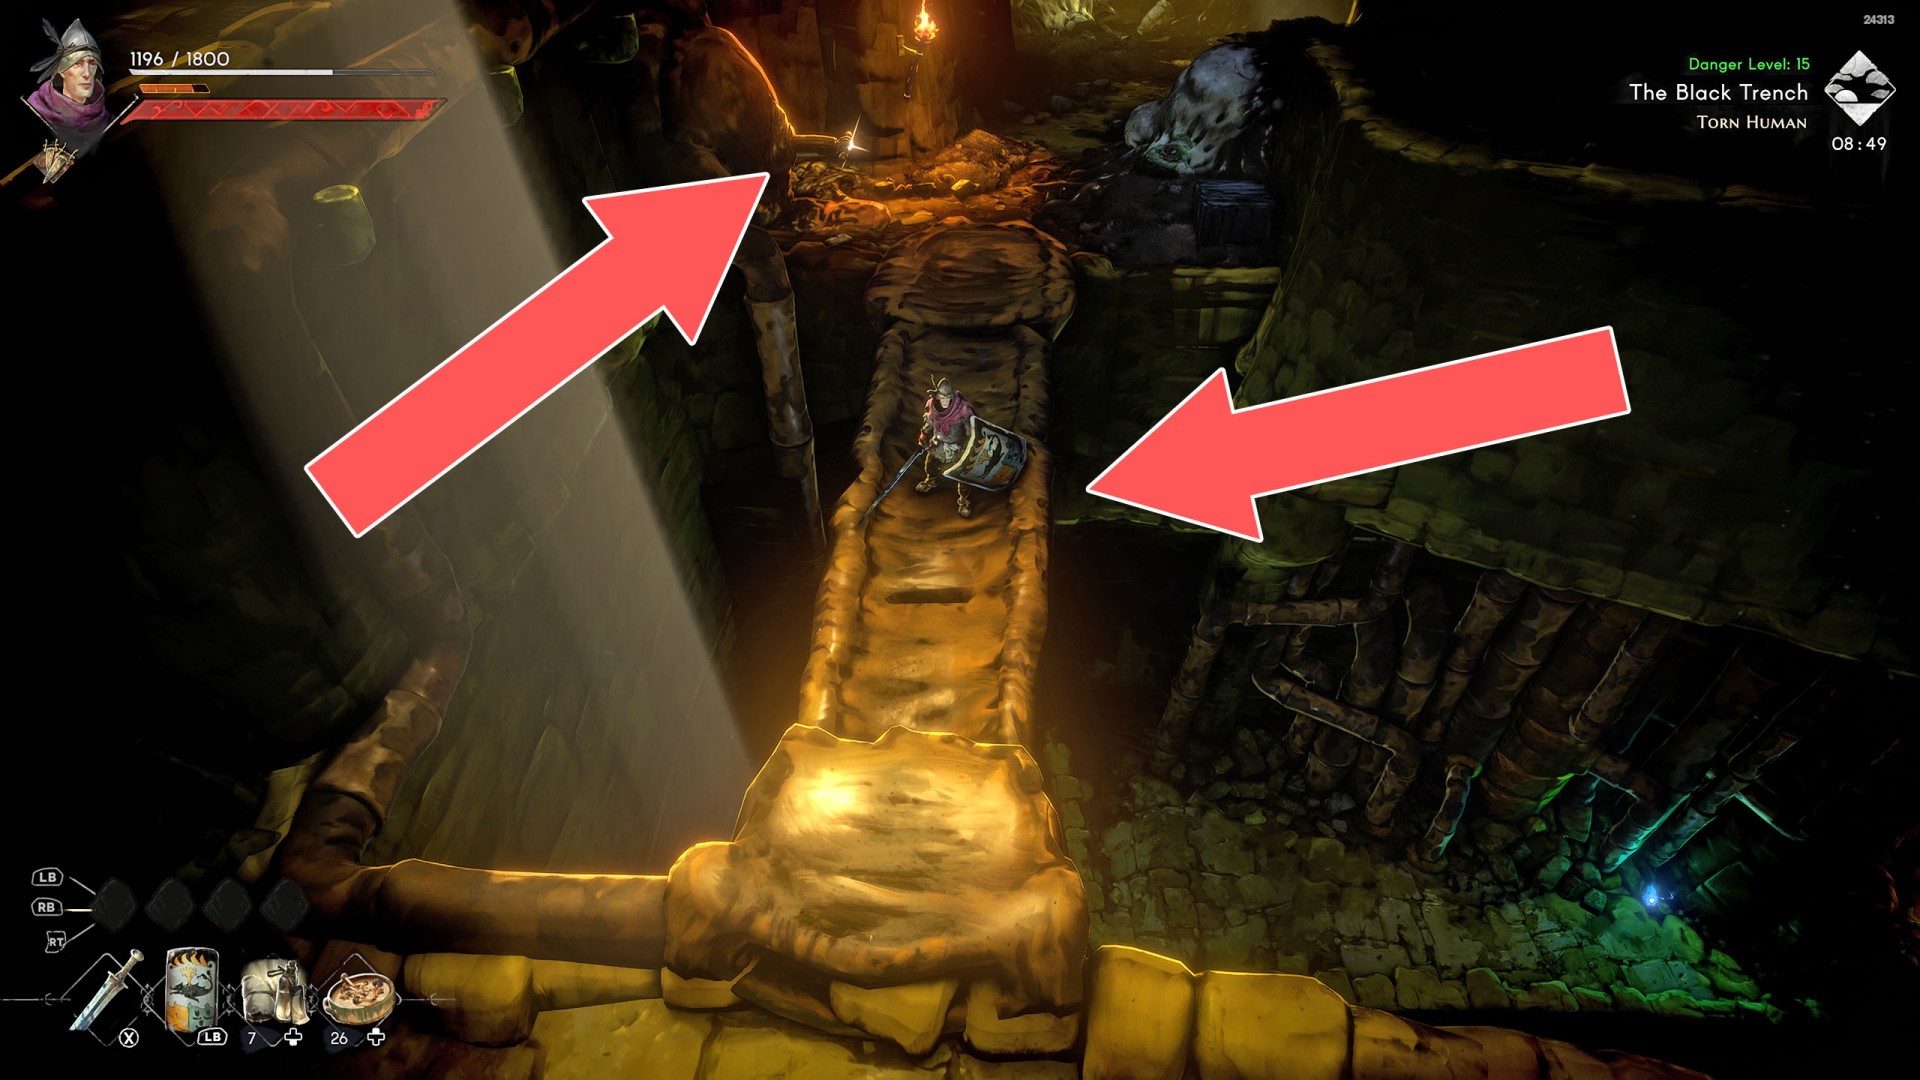
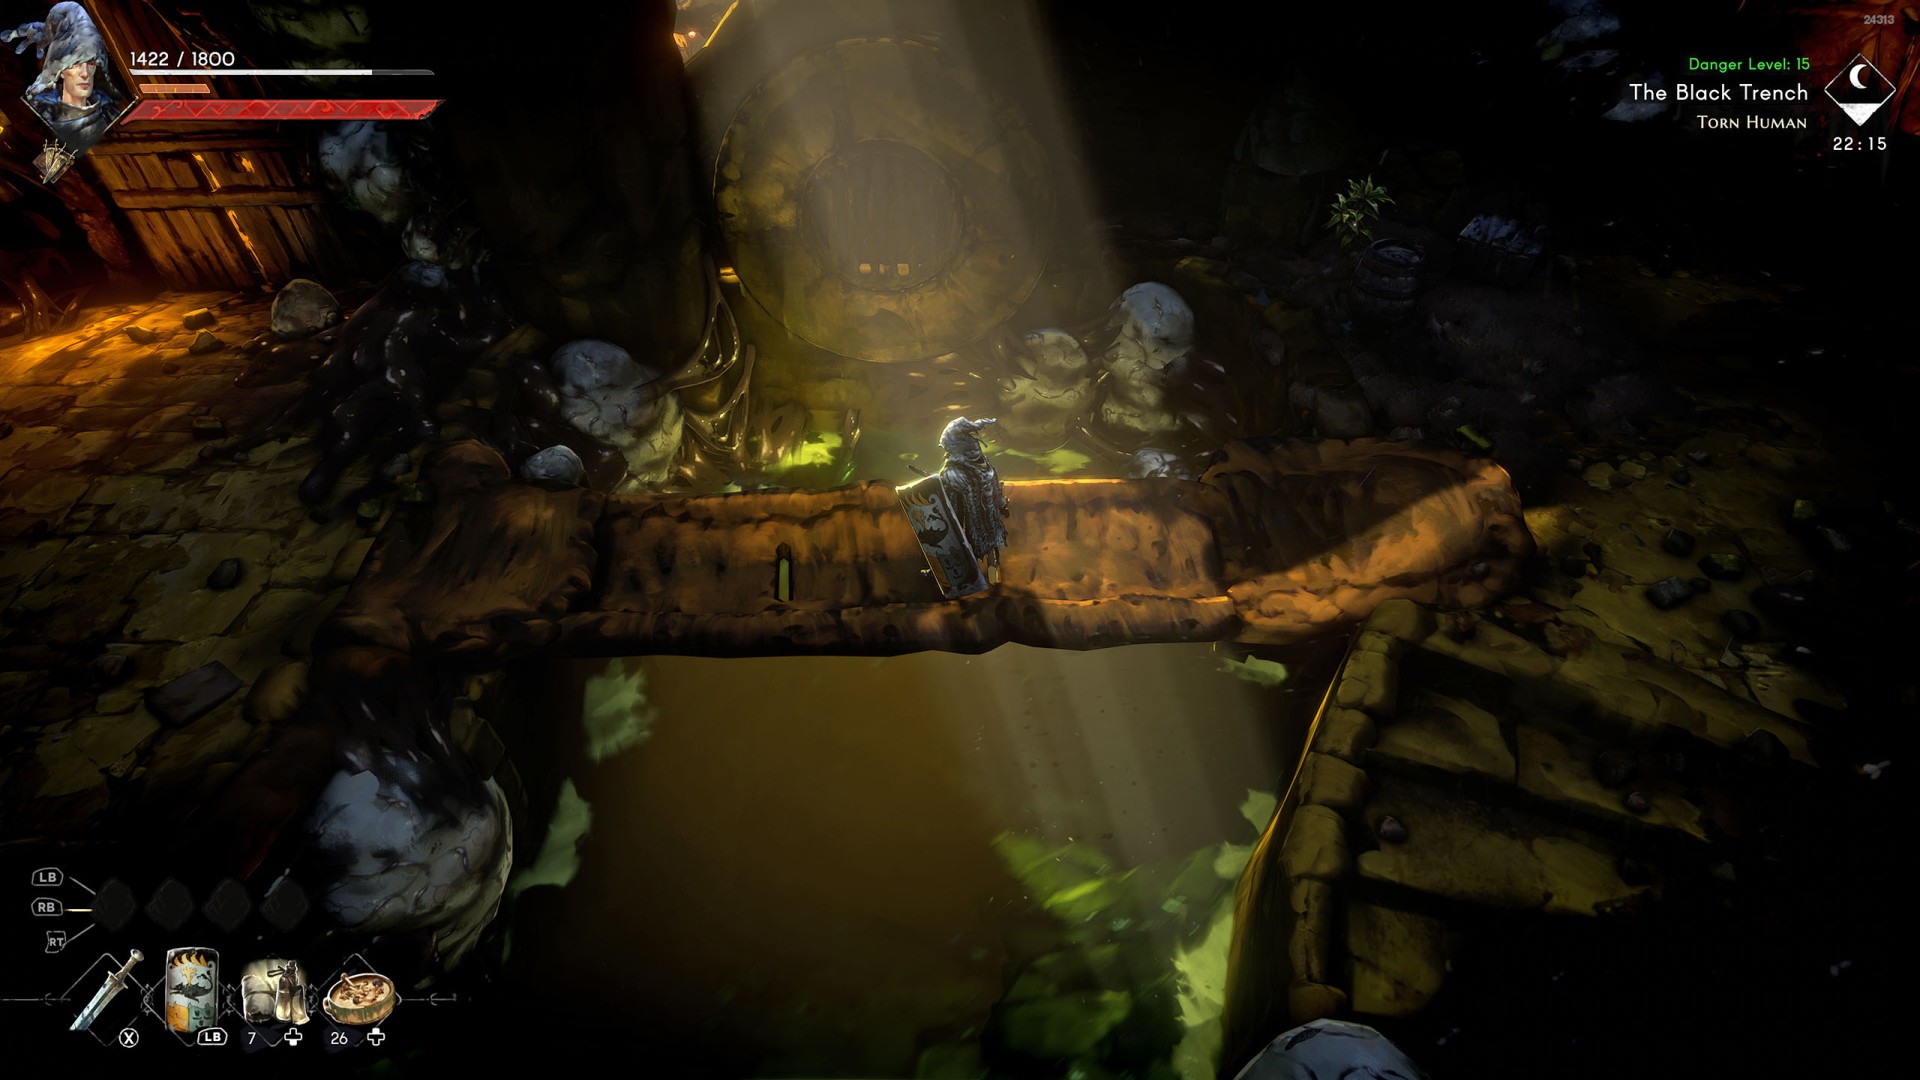
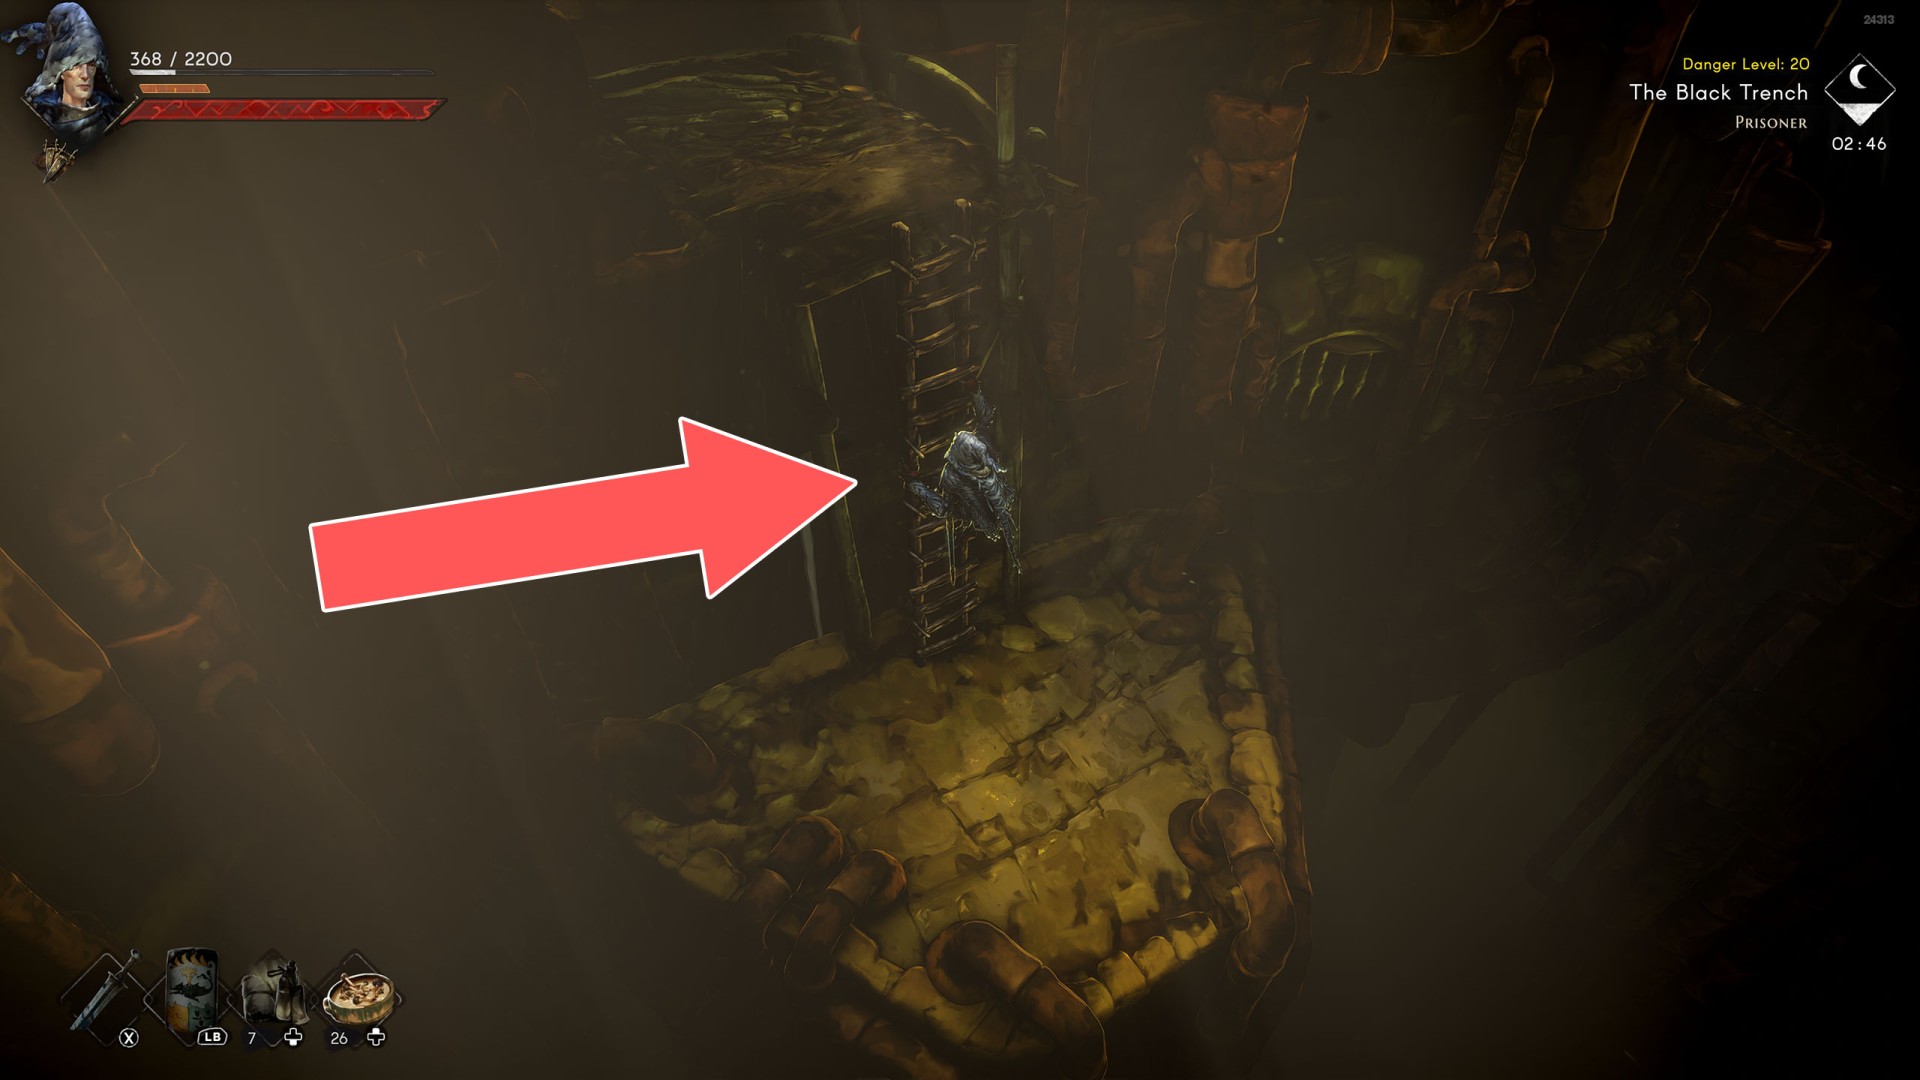
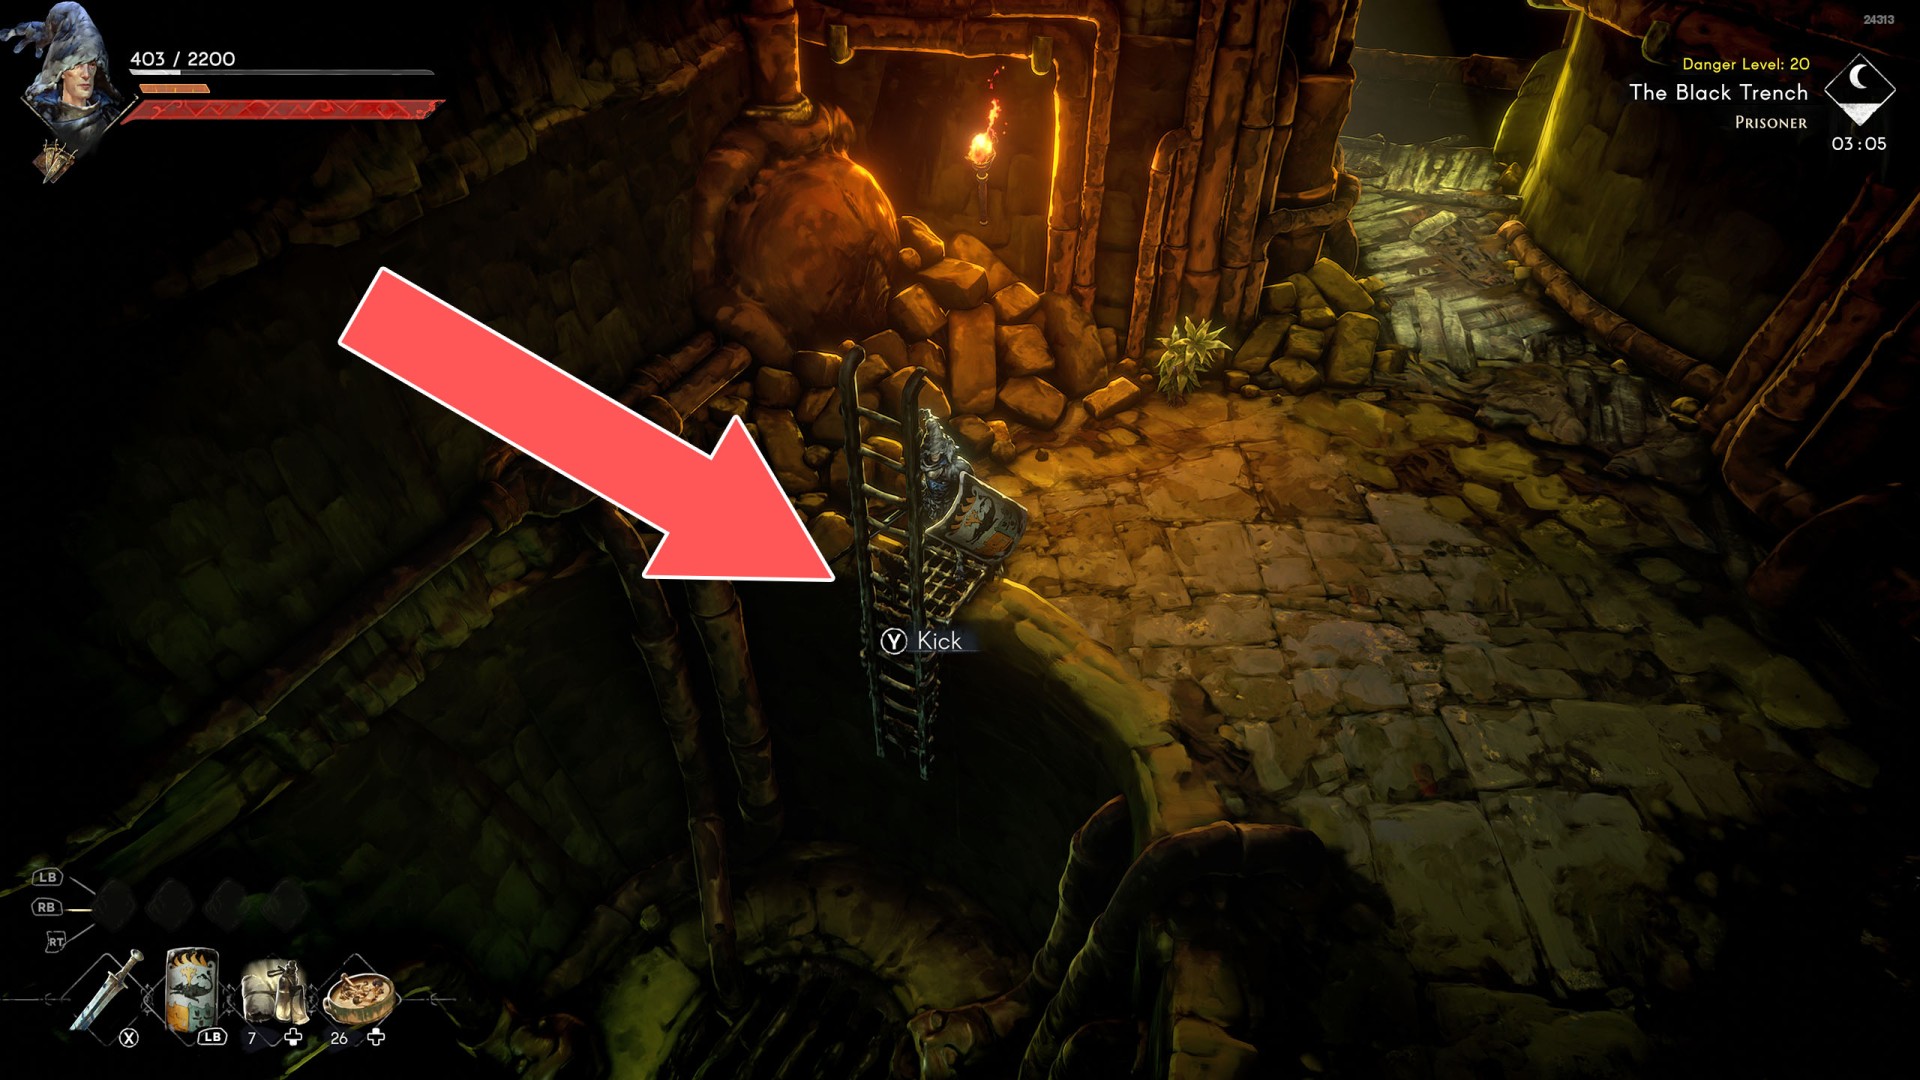
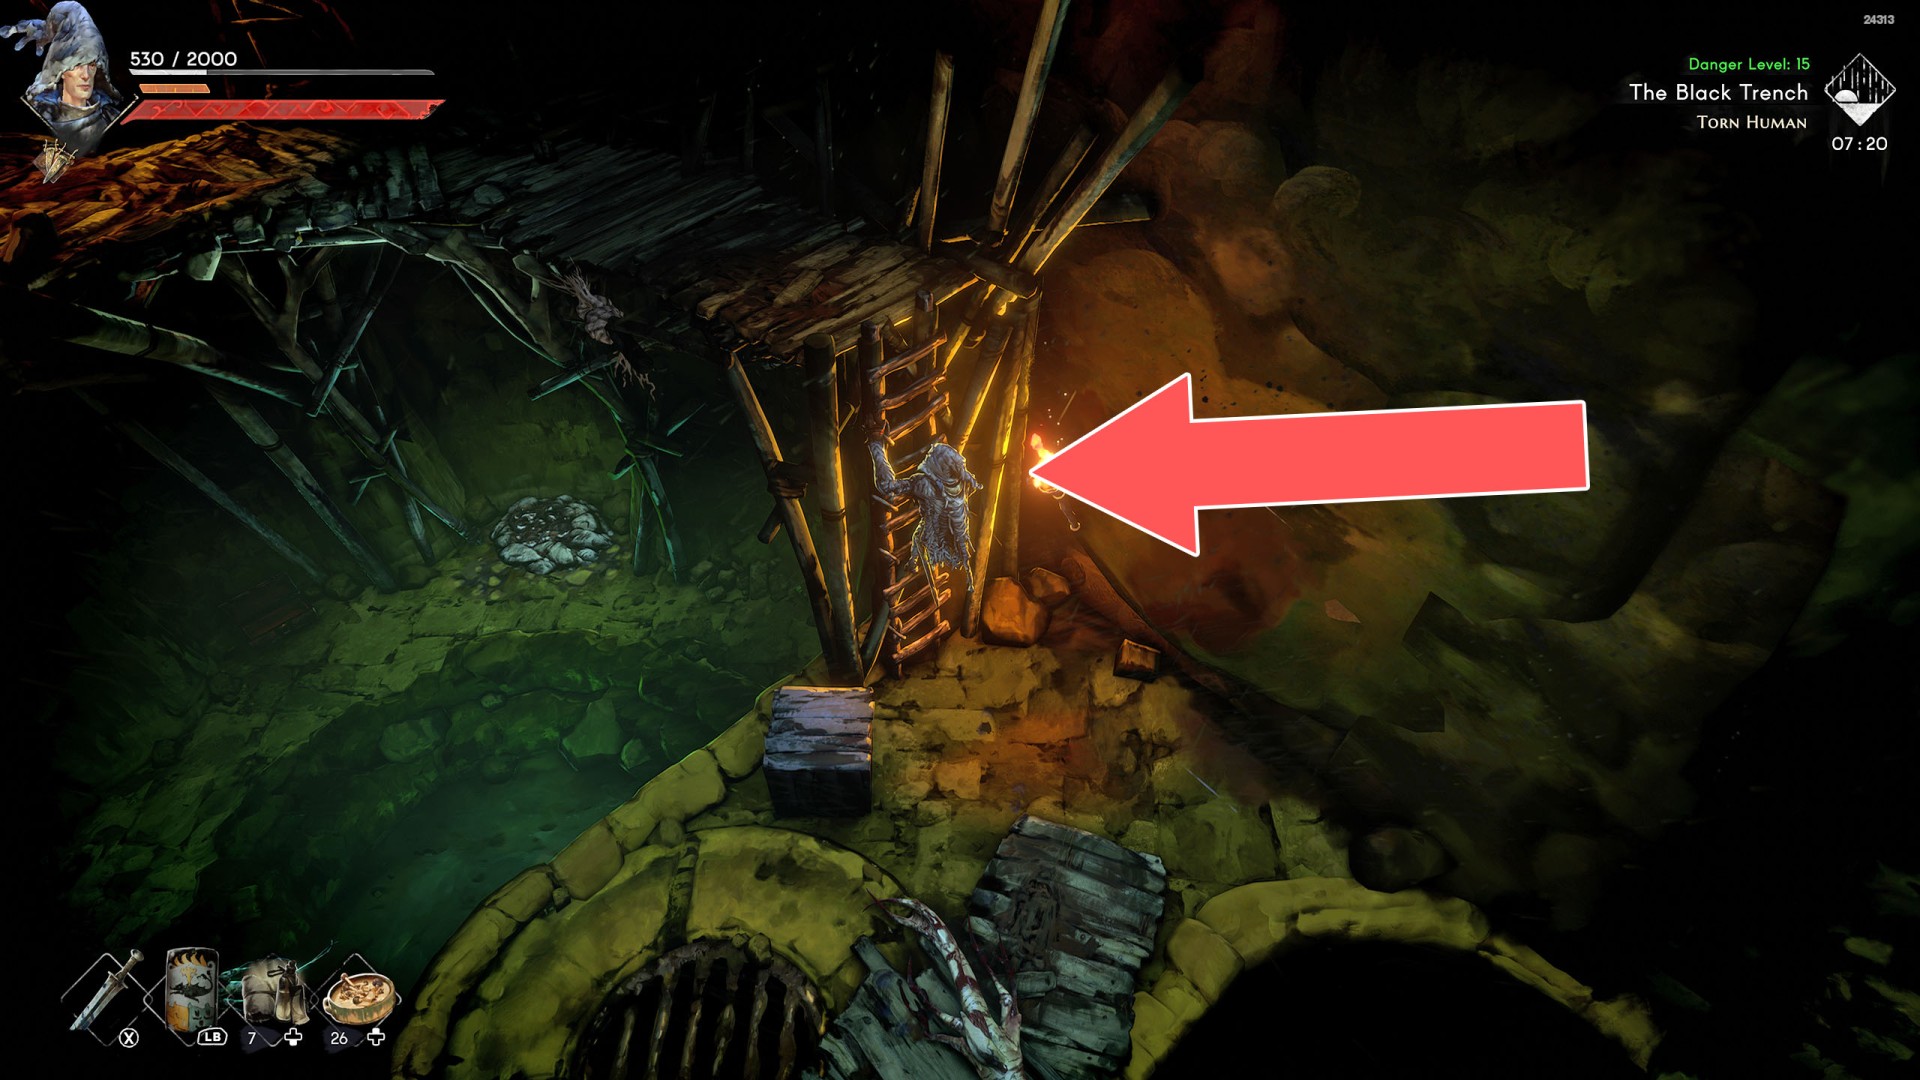
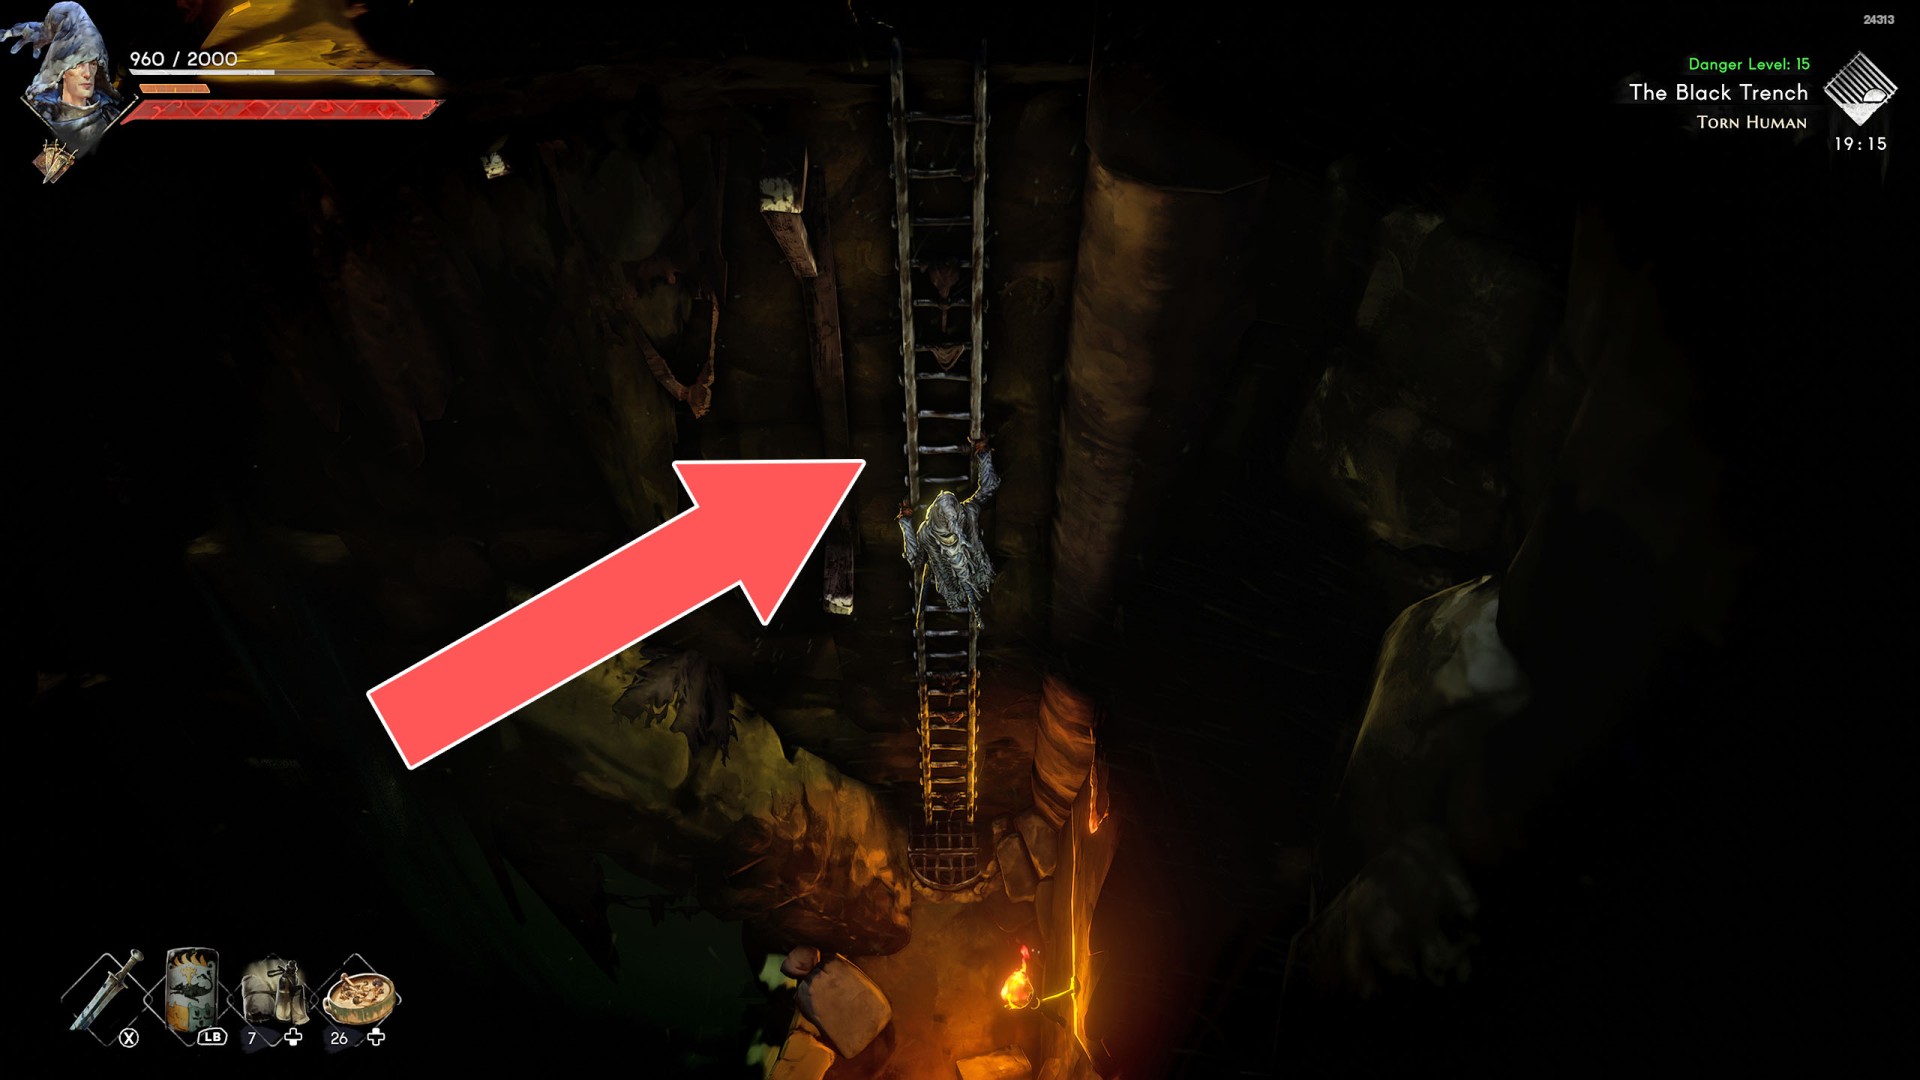
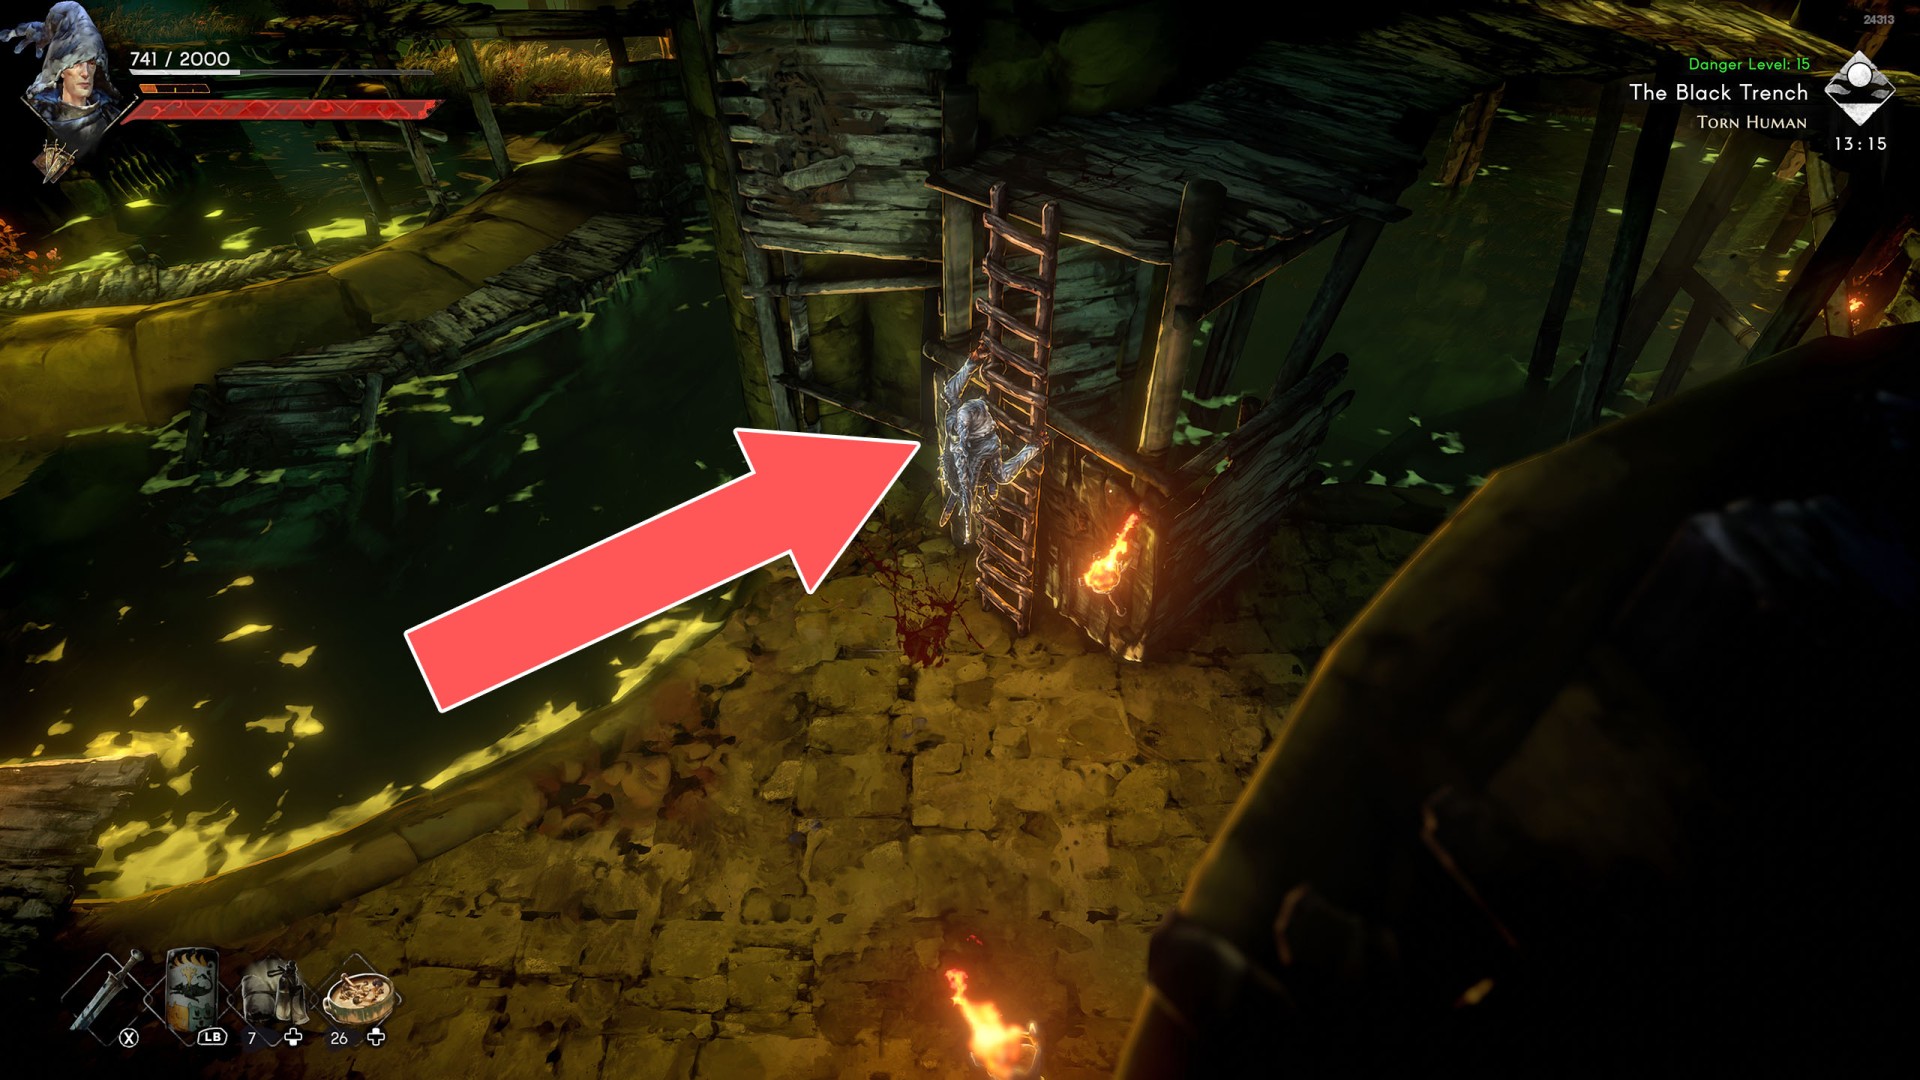
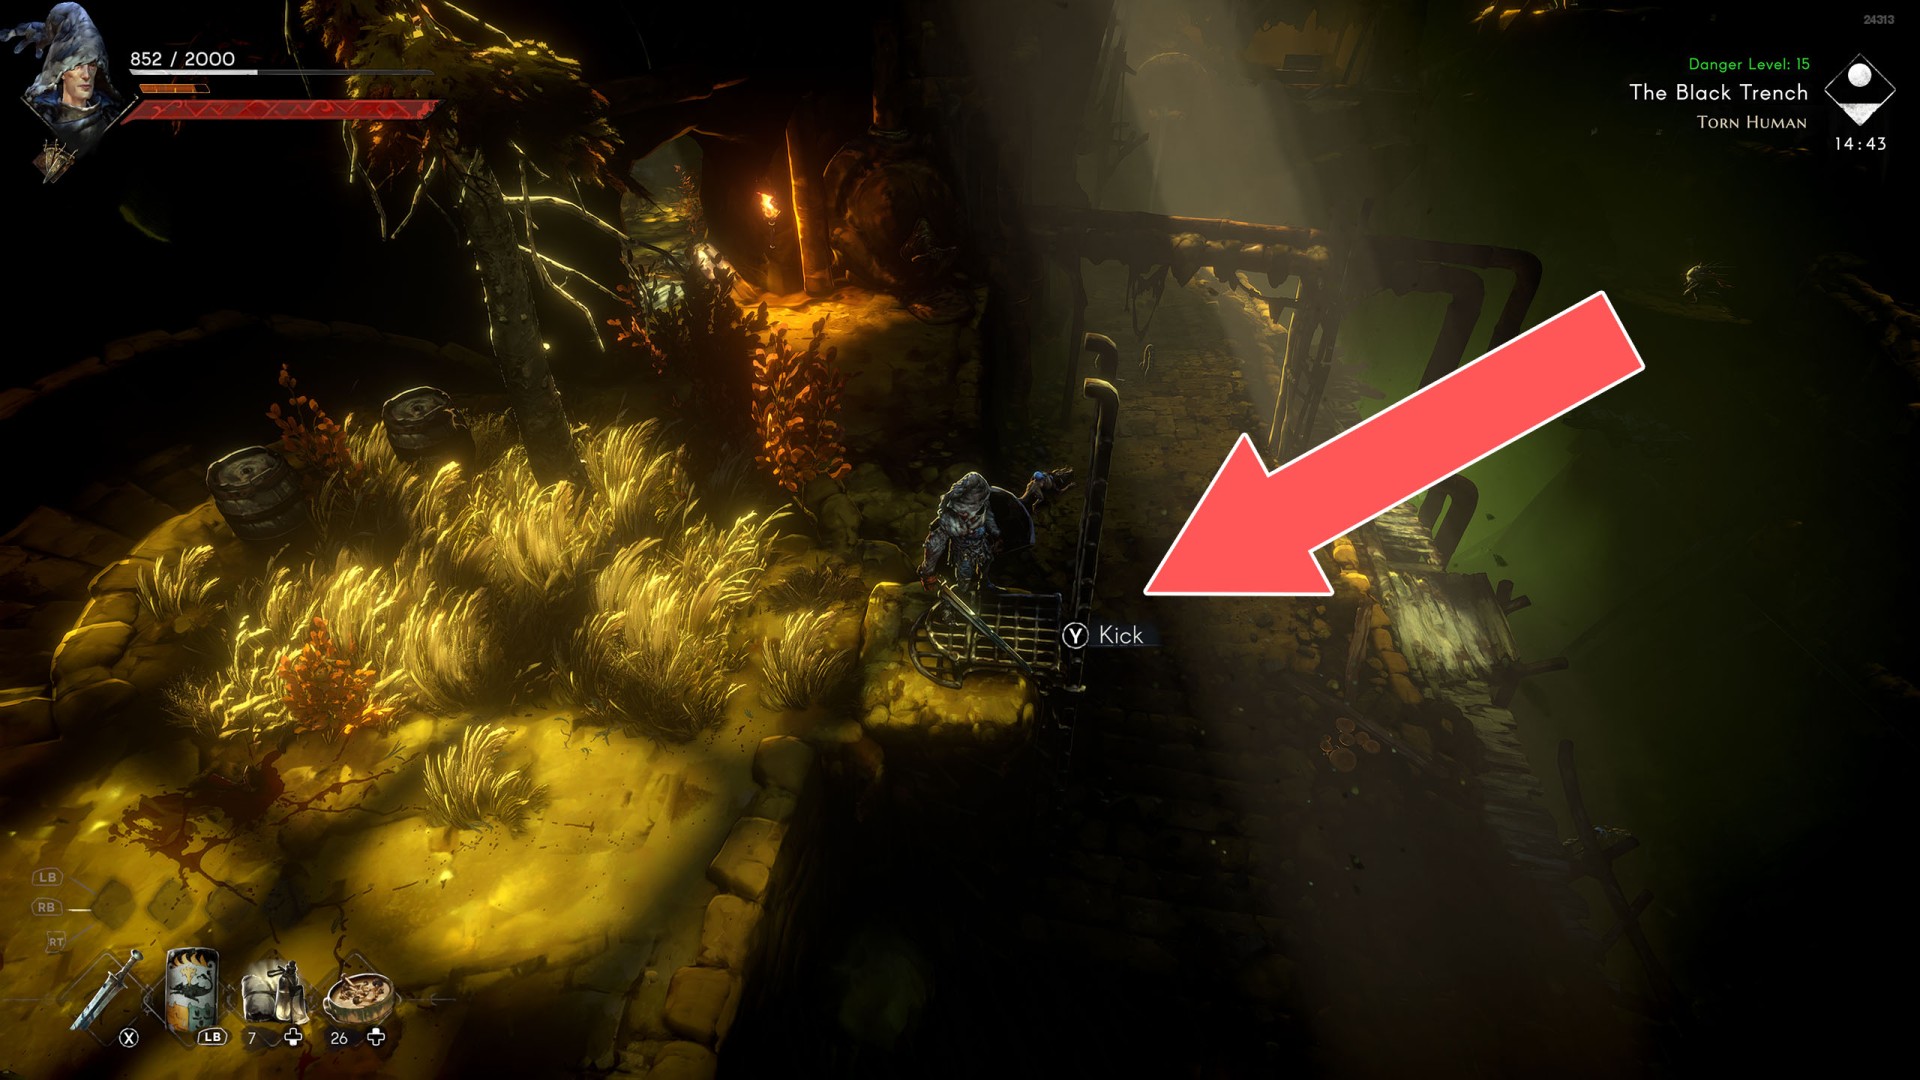
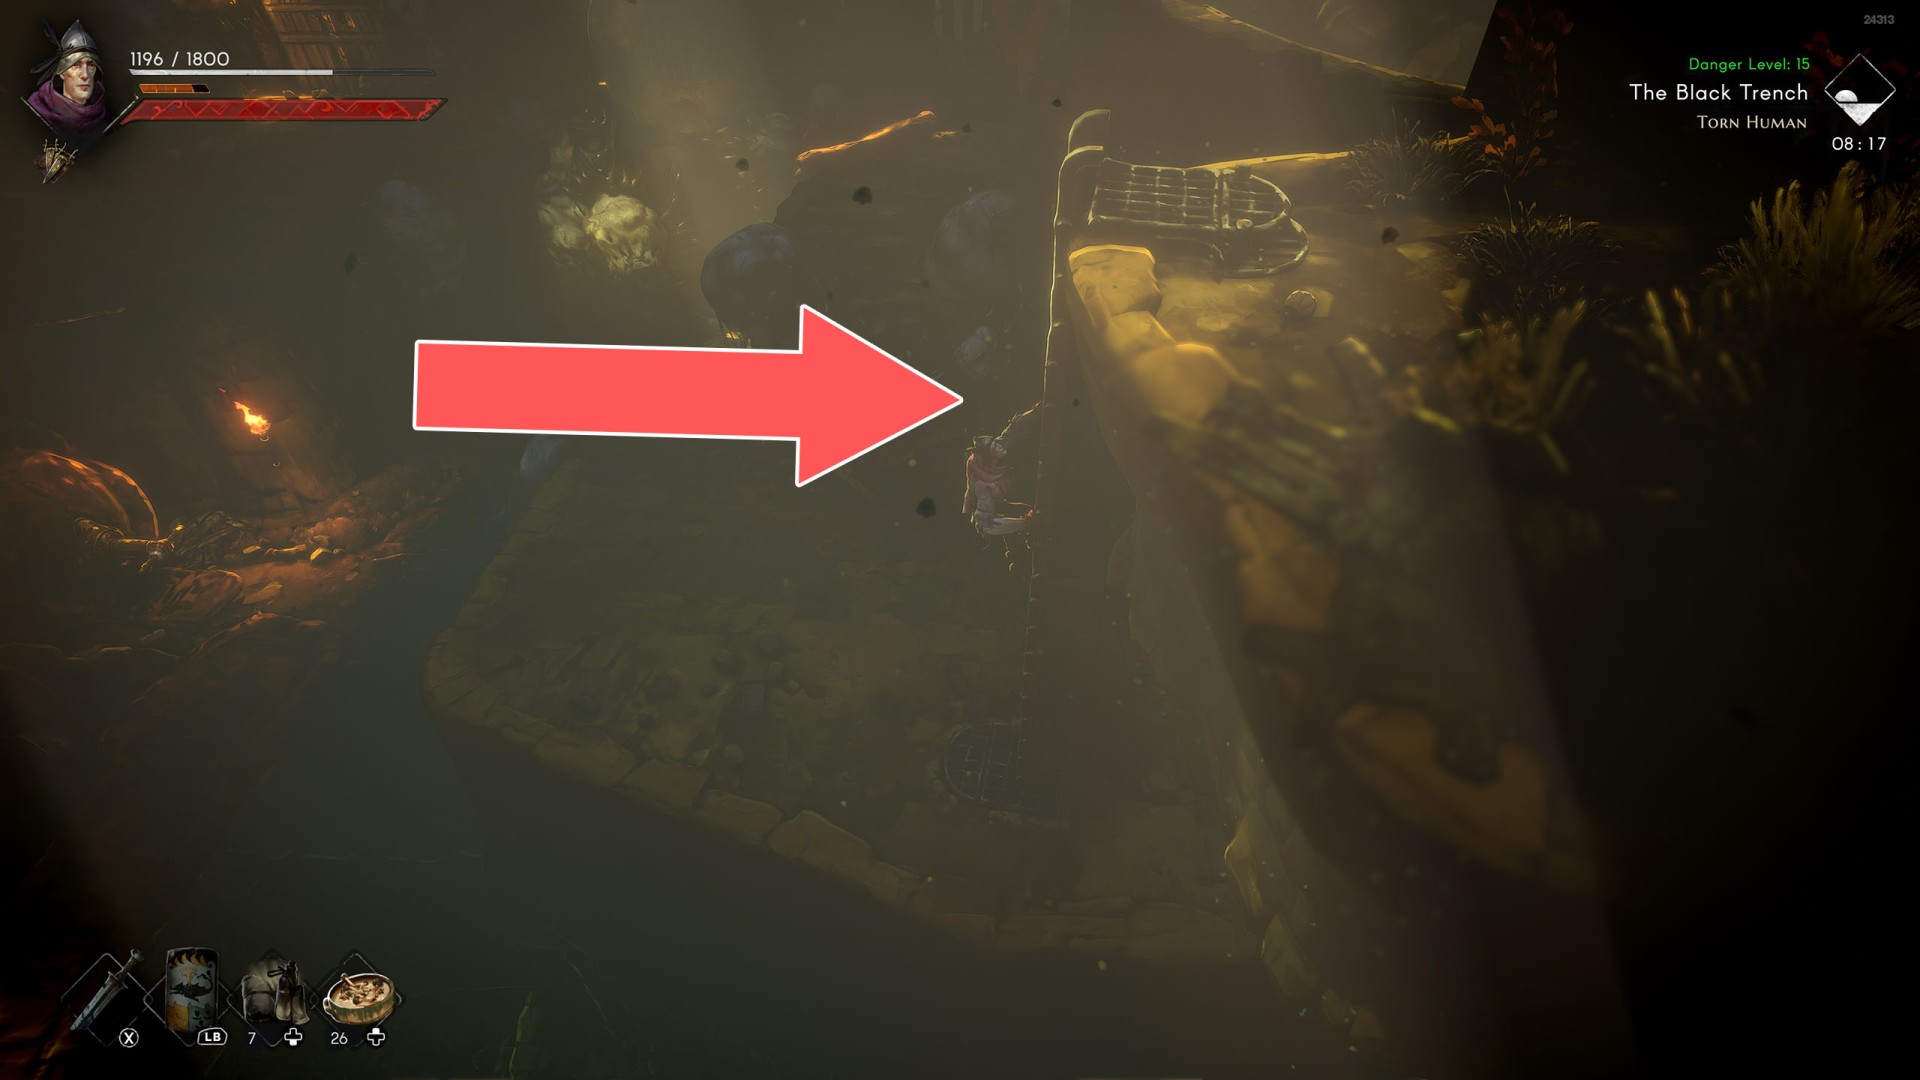
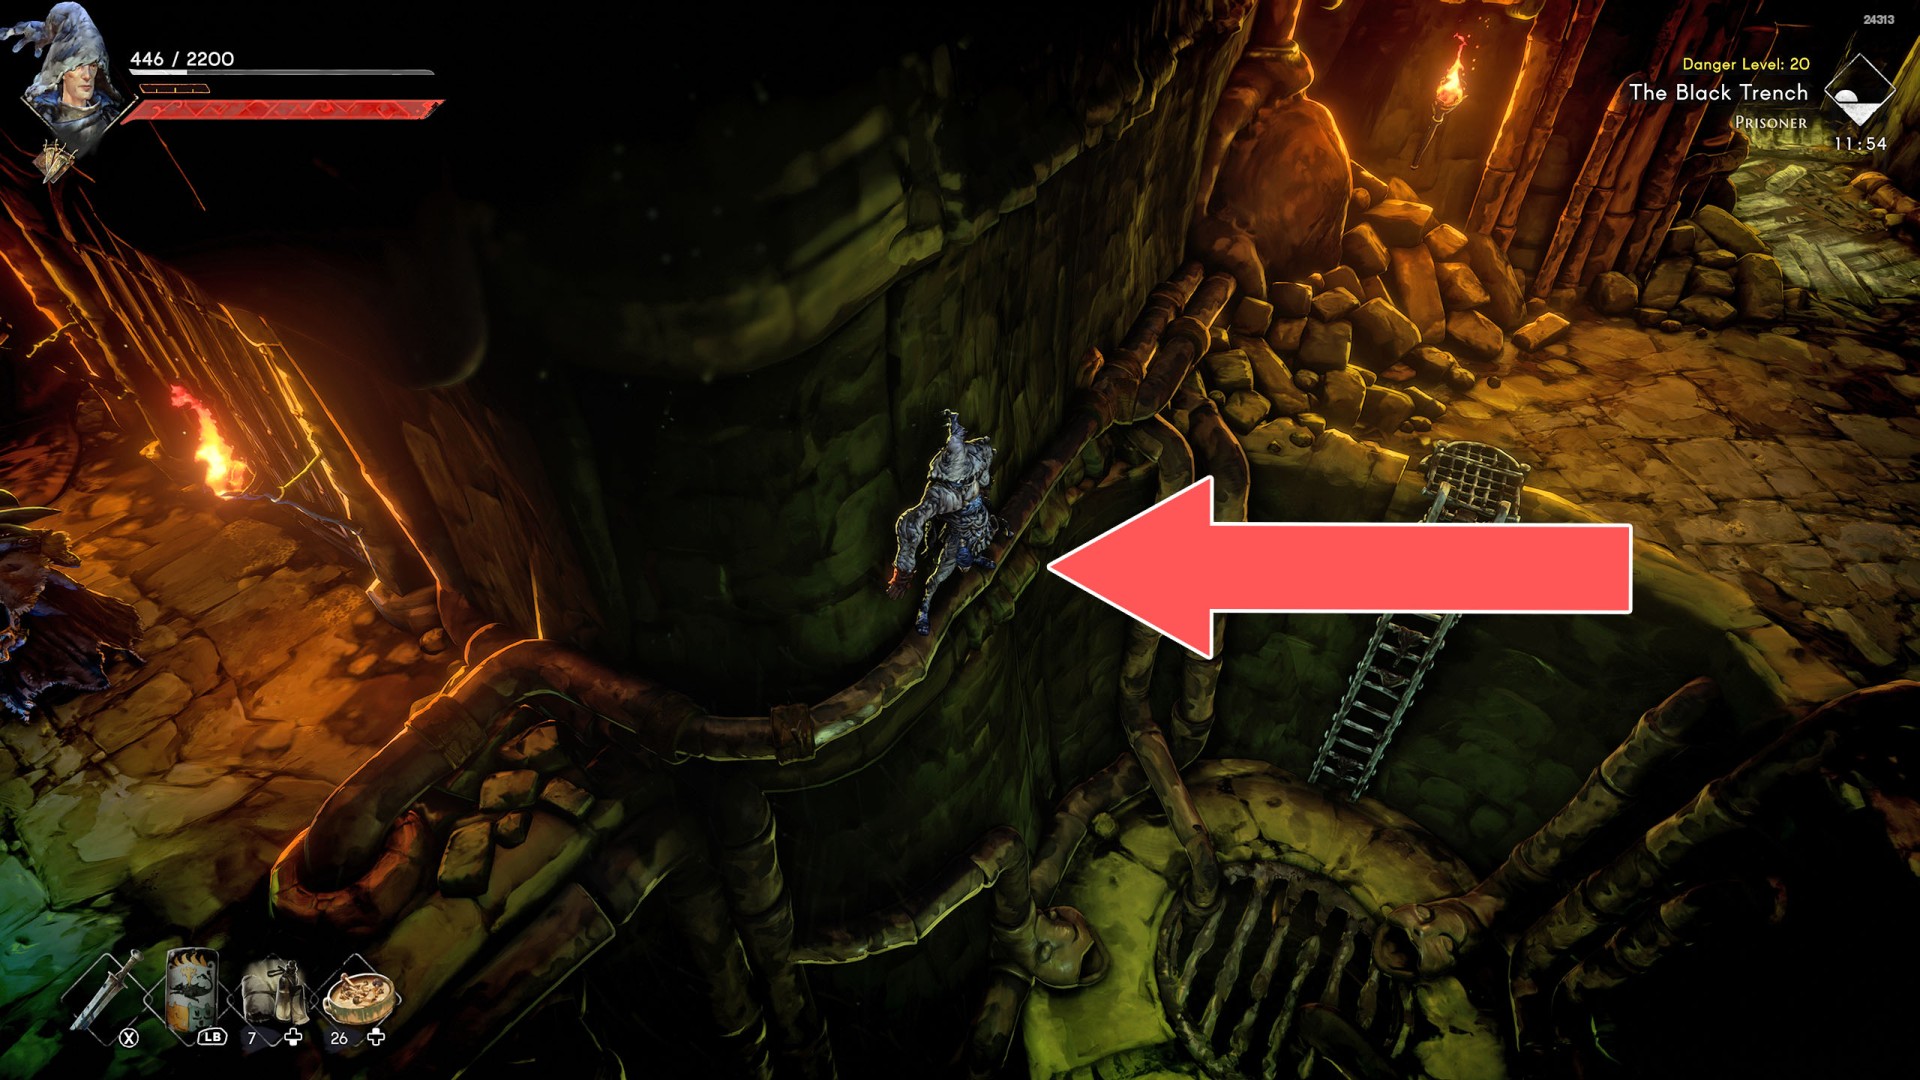
Ladders, creepers and other such objects on which the player can climb to a higher or lower level, sometimes also horizontally. Some of the ladders are raised, so in this case you will need to lower them first. To do this, you need to find a way to approach them at the top and then kick them down.

Index

The index below enables quick navigation to the desired marker / point of interest.

All known locations on the map - Isola Sacra

PassageBeak Door

Show the map

PassageBreakable Door

Breakable Door

Show the map

PassageBreakable Gate

Show the map

PassageBreakable Gate

Breakable Gate

Show the map

PassageBreakable Wall

Show the map

PassageBreakable Wall

Breakable Wall

Show the map

PassageBreakable Wall

Show the map

PassageCable Car

Show the map

PassageCave Entrance

Cave Entrance

Show the map

PassageCreepers

Show the map

PassageCreepers

Show the map

PassageCreepers

Show the map

PassageCreepers

Show the map

PassageCreepers

Show the map

PassageCreepers

Creepers

Show the map

PassageCreepers

Show the map

PassageCreepers

Show the map

PassageCreepers

Show the map

PassageCreepers

Show the map

PassageCreepers

Show the map

PassageCreepers

Show the map

PassageCreepers

Creepers

Show the map

PassageCreepers

Show the map

PassageCreepers

Show the map

PassageCreepers

Creepers

Show the map

PassageCreepers

Show the map

PassageCreepers

Show the map

PassageCreepers

Show the map

PassageCreepers

Show the map

PassageCreepers

Show the map

PassageCreepers

Show the map

PassageCreepers

Show the map

PassageCreepers

Show the map

PassageCreepers

Show the map

PassageCreepers

Creepers

Show the map

PassageCreepers

Creepers

Show the map

PassageCreepers

Creepers

Show the map

PassageCreepers

Show the map

PassageCreepers

Creepers

Show the map

PassageCreepers

Creepers

Show the map

PassageCreepers

Creepers

Show the map

PassageCreepers

Creepers

Show the map

PassageCreepers

Creepers

Show the map

PassageCreepers

Creepers

Show the map

PassageCreepers

Show the map

PassageCreepers

Creepers

Show the map

PassageCreepers

Creepers

Show the map

PassageCreepers

Creepers

Show the map

PassageCreepers

Creepers

Show the map

PassageCreepers

Creepers

Show the map

PassageCreepers

Show the map

PassageCreepers

Show the map

PassageCreepers

Show the map

PassageCreepers

Creepers

Show the map

PassageCreepers

Show the map

PassageCreepers

Show the map

PassageCreepers

Show the map

PassageCreepers

Show the map

PassageCreepers

Creepers

Show the map

PassageCreepers

Show the map

PassageCreepers

Show the map

PassageCreepers

Show the map

PassageCreepers

Show the map

PassageEastern Gate of the Fortress

To open this gate, you need to obtain the Gate Lever Handle and use it on the Gate Opening Lever (Mariner's Keep).

Eastern Gate of the Fortress

Show the map

PassageElevator

Show the map

PassageElevator

Related quest: Faith And Flame.

Show the map

PassageElevator

Elevator

Show the map

PassageElevator

The elevator has two platforms. To change them, pull the lever and quickly step off the elevator, the elevator will move and you will be able to enter the second platform. This way you will be able to get from the middle level to the higher level as well as to the lower level.

Elevator

Show the map

PassageFallen Tree Trunk

Fallen Tree Trunk

Show the map

PassageGate

Show the map

PassageGate

Show the map

PassageHole in the Roof

This is how you can get inside the hut for the first time.

Hole in the Roof

Show the map

PassageJump

At this location, you can jump down to the lake below.

Jump

Show the map

PassageJump

Jump down here to get to the east side of the drawbridge.

Jump

Show the map

PassageJump

Waterfall

Show the map

PassageLadder

Kick

Show the map

PassageLadder

Show the map

PassageLadder

Kick

Show the map

PassageLadder

Show the map

PassageLadder

Show the map

PassageLadder

Show the map

PassageLadder

Show the map

PassageLadder

Kick

Show the map

PassageLadder

Kick

Show the map

PassageLadder

Kick

Show the map

PassageLadder

To be able to use this ladder you must first kick it down.

Ladder

Show the map

PassageLadder

Ladder

Show the map

PassageLadder

Show the map

PassageLadder

Ladder

Show the map

PassageLadder

To be able to use this ladder you must first kick it down.

Ladder

Show the map

PassageLadder

Show the map

PassageLadder

Show the map

PassageLadder

Ladder

Show the map

PassageLadder

Kick

Show the map

PassageLadder

Kick

Show the map

PassageLadder

Show the map

PassageLadder

Ladder

Show the map

PassageLadder

Ladder

Show the map

PassageLadder

To be able to use this ladder you must first kick it down.

Ladder

Show the map

PassageLadder

Ladder

Show the map

PassageLadder

To be able to use this ladder you must first kick it down.

Ladder

Show the map

PassageLadder

Ladder

Show the map

PassageLadder

Show the map

PassageLadder

To be able to use this ladder you must first kick it down.

Ladder

Show the map

PassageLadder

Climb it to reach the top of the tower.

Ladder

Show the map

PassageLadder

Ladder

Show the map

PassageLadder

To be able to use this ladder you must first kick it down.

Ladder

Show the map

PassageLadder

Ladder

Show the map

PassageLadder

Ladder

Show the map

PassageLadder

Ladder

Show the map

PassageLadder

Ladder

Show the map

PassageLadder

Ladder

Show the map

PassageLadder

Ladder

Show the map

PassageLadder

Ladder

Show the map

PassageLadder

To be able to use this ladder you must first kick it down.

Ladder

Show the map

PassageLadder

To be able to use this ladder you must first kick it down.

Ladder

Show the map

PassageLadder

Ladder

Show the map

PassageLadder

To be able to use this ladder you must first kick it down.

Ladder

Show the map

PassageLadder

Ladder

Show the map

PassageLadder

To be able to use this ladder you must first kick it down.

Ladder

Show the map

PassageLadder

Ladder

Show the map

PassageLadder

Ladder

Show the map

PassageLadder

Use this ladder to get to the Iona's Cavern.

Ladder

Show the map

PassageLadder

Ladder

Show the map

PassageLadder

To be able to use this ladder you must first kick it down.

Ladder

Show the map

PassageLadder

To be able to use this ladder you must first kick it down.

Ladder

Show the map

PassageLadder

Ladder

Show the map

PassageLadder

Ladder

Show the map

PassageLadder

Ladder

Show the map

PassageLadder

To be able to use this ladder you must first kick it down.

Ladder

Show the map

PassageLadder

To be able to use this ladder you must first kick it down.

Ladder

Show the map

PassageLadder

Ladder

Show the map

PassageLadder

Ladder

Show the map

PassageLadder

Show the map

PassageLadder

Show the map

PassageLadder

Show the map

PassageLadder

Show the map

PassageLadder

Show the map

PassageLadder

Show the map

PassageLadder

Show the map

PassageLadder

Show the map

PassageLadder

Show the map

PassageLocked Door

From inside the house

Show the map

PassageLocked Door

They can be unlocked from inside the hut.

Locked Door

Show the map

PassageLocked Gate

The gate can be opened by pulling the lever located on its north side.

Locked Gate

Show the map

PassageLocked Gate

Show the map

PassageMess Hall Entrance

You need the Mess Hall Key to unlock this door.

Mess Hall Entrance

Show the map

PassageOld Cottage Entrance

You need an Old Cottage Key to unlock this door.

Old Cottage Entrance

Show the map

PassageOld Lookout Tower

Related quest: The Weeping Sisters.

Show the map

PassagePassage

Show the map

PassagePassage

Kick

Show the map

PassageQuarry Prison Door

You need a Quarry Guard Key to unlock this door.

Quarry Prison Door

Show the map

PassageRock Rubble

You can climb here to the walls above the prison cells.

Rock Rubble

Show the map

PassageRookery Entrance

Through this door you can enter the tower for the first time.

Rookery Entrance

Show the map

PassageStalagmites

Show the map

PassageStone Block Elevator

You can use the nearby lever to lower this stone block. The block will descend into the fire below, so before it reaches the bottom, jump off it onto the nearby wooden bridge.

Show the map

PassageStorage Room Entrance

ou need the Storage Room Key to unlock this door.

Storage Room Entrance

Show the map

PassageTunnel Entrance

Tunnel Entrance

Show the map

PassageWall Breach

Here you can climb to the walls above the prison cells.

Wall Breach

Show the map

PassageWestern Bridge Door

You need the Western Bridge Key to open this door. Related quest: The Innkeeper's Husband.

Western Bridge Door

Show the map

PassageWestern Gate

Western Gate

Show the map

PassageWindmill Door

Required key: Windmill Key.

Windmill Door

Show the map

PassageWooden Barrier

Show the map

PassageWooden Blockade

It can be destroyed.

Wooden Blockade

Show the map

PassageWooden Wall

It can be destroyed. Just hit it a few times with the weapon you have and you will make a passage.

Wooden Wall

Show the map

PassageWooden Wall

It can be destroyed. Just hit it a few times with the weapon you have and you will make a passage into the cave.

Wooden Wall

Show the map

All known locations on the map - The Black Trench

PassageDrainage Cellars Entrance

To open this door, you need the Drainage Cellars Key.

Drainage Cellars Entrance

Show the map

PassageElevator #1

The platform will begin to move up shortly after you pull the Elevator Lever #1.

Elevator #1

Show the map

PassageElevator #2

This elevator is controlled by the Elevator Lever #2.

Elevator #2

Show the map

PassageFlooded Passage

In order to go this way, you must pull the Water Level Lever #2, causing the water to drain away.

Flooded Passage

Show the map

PassageFootbridge #1

Use the Footbridge Lever #1 to extend this footbridge.

Footbridge #1

Show the map

PassageFootbridge #2

Use the Footbridge Lever #2 to extend this footbridge.

Footbridge #2

Show the map

PassageFootbridge #3

Use the Footbridge Lever #3 to extend this footbridge.

Footbridge #3

Show the map

PassageFootbridge #4

Use the Footbridge Lever #4 to extend this footbridge.

Footbridge #4

Show the map

PassageFootbridge #5

Use the Footbridge Lever #5 to extend this footbridge.

Footbridge #5

Show the map

PassageJump

Here, you can safely jump into the water reservoir below.

Jump

Show the map

PassageLadder

Ladder

Show the map

PassageLadder

Ladder

Show the map

PassageLadder

To be able to use this ladder you must first kick it down.

Ladder

Show the map

PassageLadder

Ladder

Show the map

PassageLadder

Ladder

Show the map

PassageLadder

Ladder

Show the map

PassageLadder

To be able to use this ladder you must first kick it down.

Ladder

Show the map

PassageLadder

Ladder

Show the map

PassagePipe

Stick to the wall and walk along the pipe.

Pipe

Show the map

PassageWater Channel Entrance

You need the Water Channel Key to unlock this door.

Water Channel Entrance

Show the map