Stone Eagles are Dead-eye targets that you simply have to destroy with an accurate shot. You need to destroy 21 of them in the campaign to unlock the "Spread Your Wings" achievement / trophy.
All Stone Eagle Locations - Sniper Elite: Resistance
Locations on Campaign Maps
1 Stone Eagle #1
Dead Drop Stone Eagle 1/3. On the chimney of the building.

2Stone Eagle #2
Dead Drop Stone Eagle 2/3. At the top of the tower.
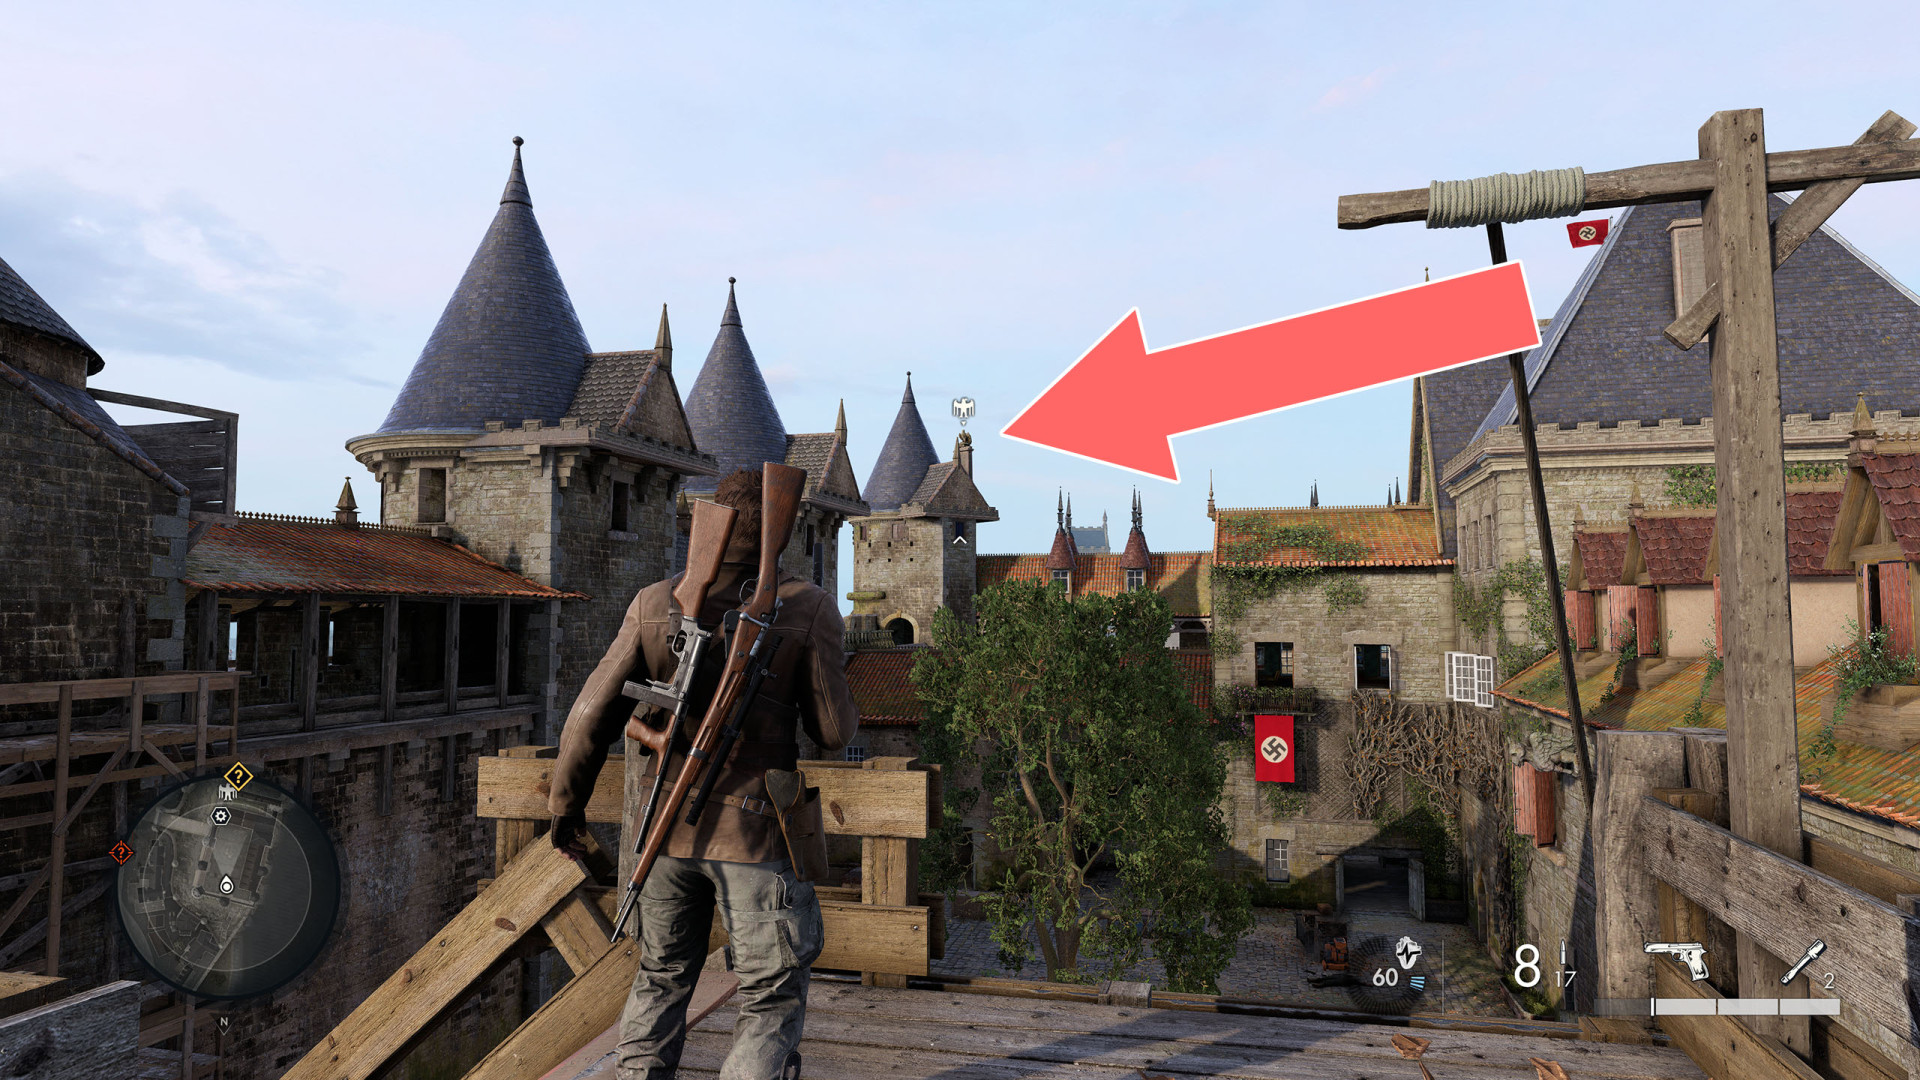
3Stone Eagle #3
Dead Drop Stone Eagle 3/3. On the chimney of the building.

4Stone Eagle #4
Sonderzüge Sabotage Stone Eagle 1/3. At the base of the mansion's roof.

5Stone Eagle #5
Sonderzüge Sabotage Stone Eagle 2/3. Atop a building with a dome-shaped roof.

6Stone Eagle #6
Sonderzüge Sabotage Stone Eagle 3/3. On the west side of the railroad station's roof.

7Stone Eagle #7
Collision Course Stone Eagle 1/3. At the bottom of the metal framework.

8Stone Eagle #8
Collision Course Stone Eagle 2/3. Atop a stone tower.

9Stone Eagle #9
Collision Course Stone Eagle 3/3. At the top of a pointy rock.

10Stone Eagle #10
Devil's Cauldron Stone Eagle 1/3. On top of the lighthouse.
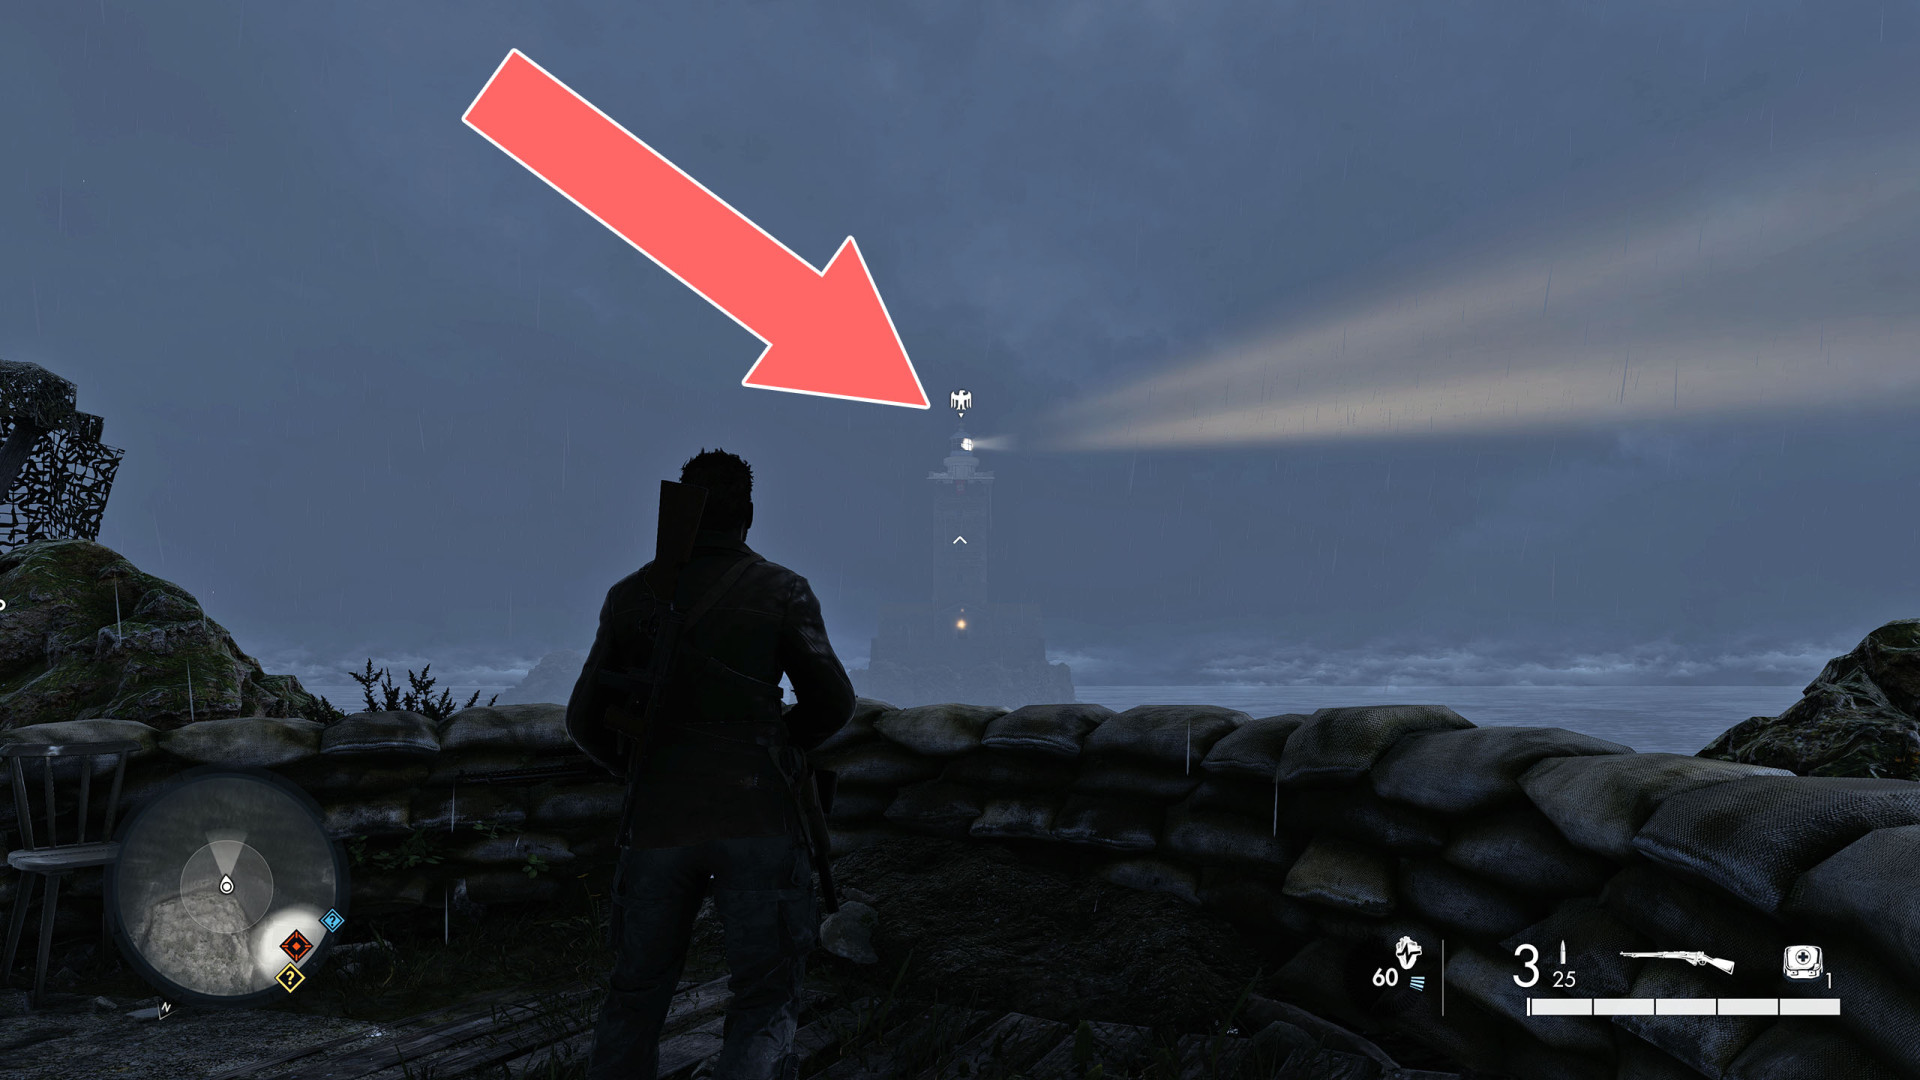
11Stone Eagle #11
Devil's Cauldron Stone Eagle 2/3. Above the entrance to the railroad tunnel.
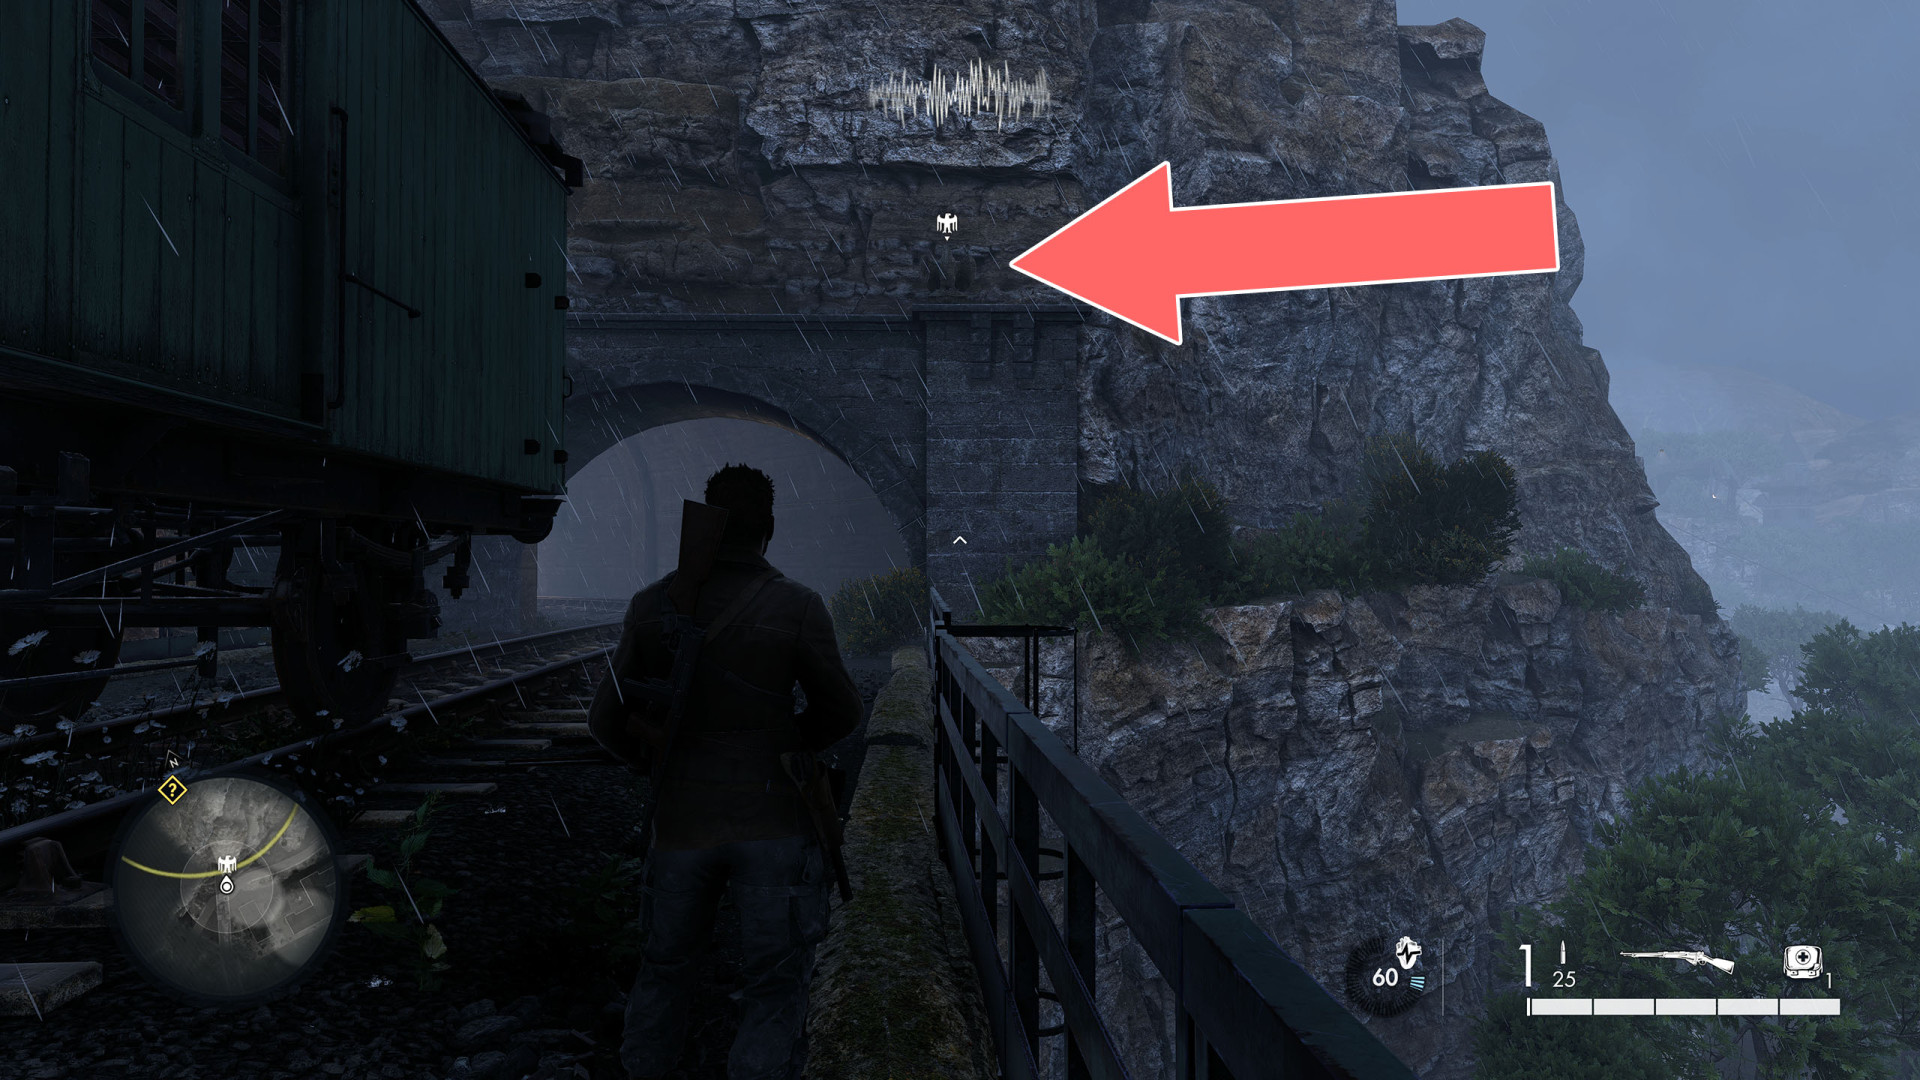
12Stone Eagle #12
Devil's Cauldron Stone Eagle 3/3. At the top of the crane.
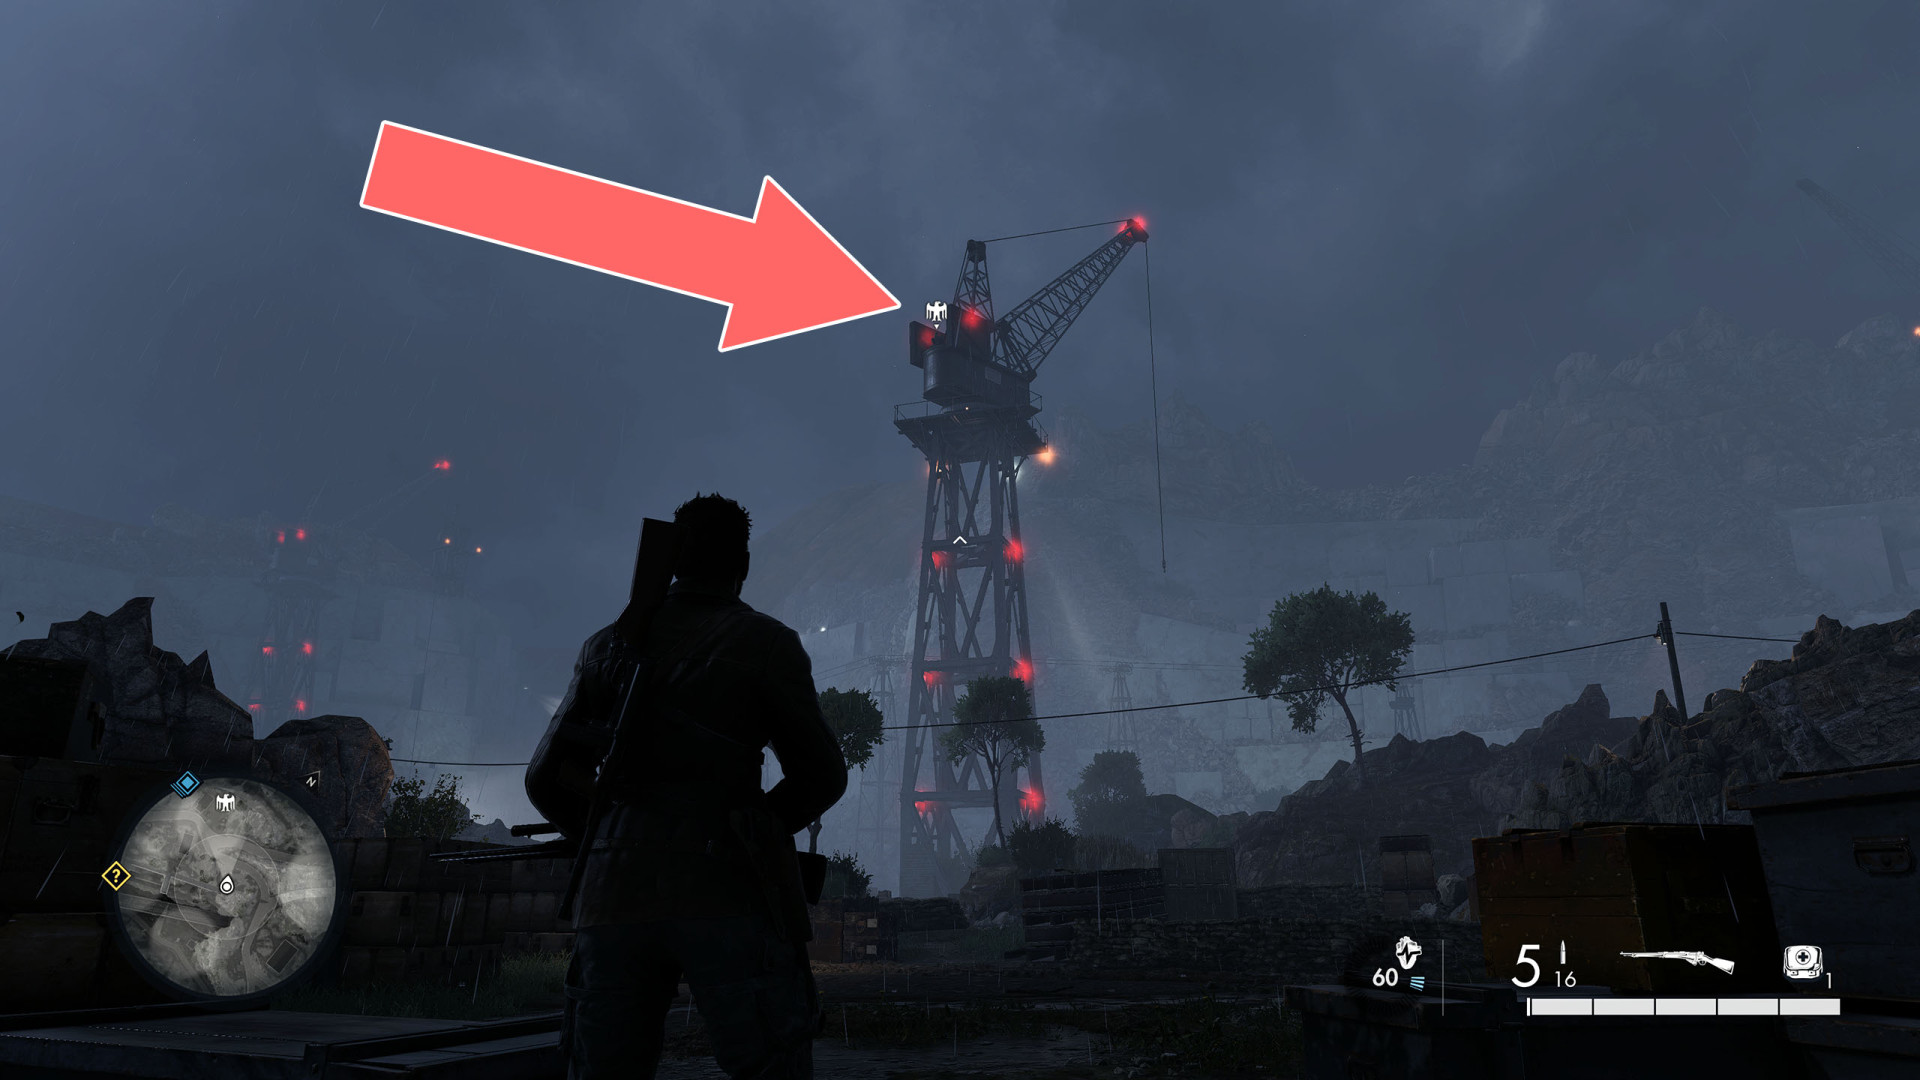
13Stone Eagle #13
Assault on Fort Rouge Stone Eagle 1/3.

14Stone Eagle #14
Assault on Fort Rouge Stone Eagle 2/3.

15Stone Eagle #15
Assault on Fort Rouge Stone Eagle 3/3.
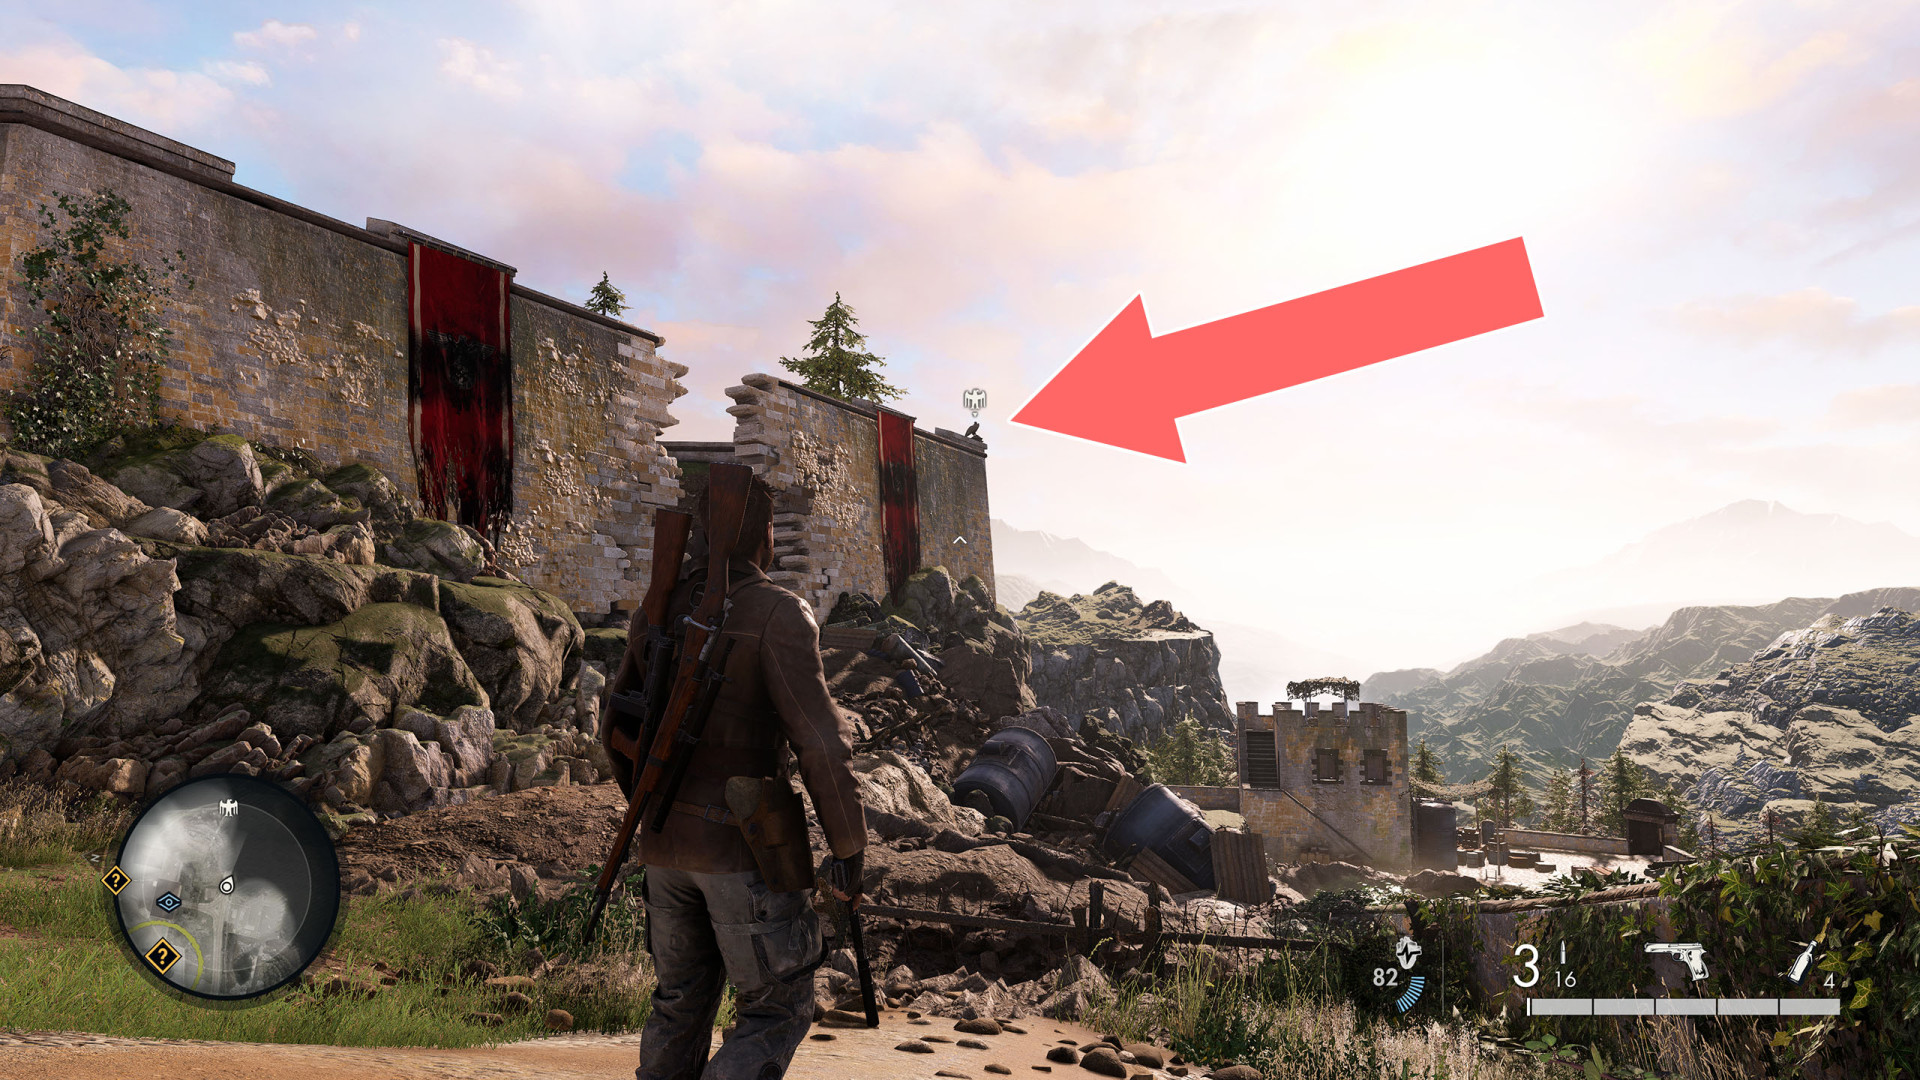
16Stone Eagle #16
Lock, Stock and Barrels Stone Eagle 1/3.
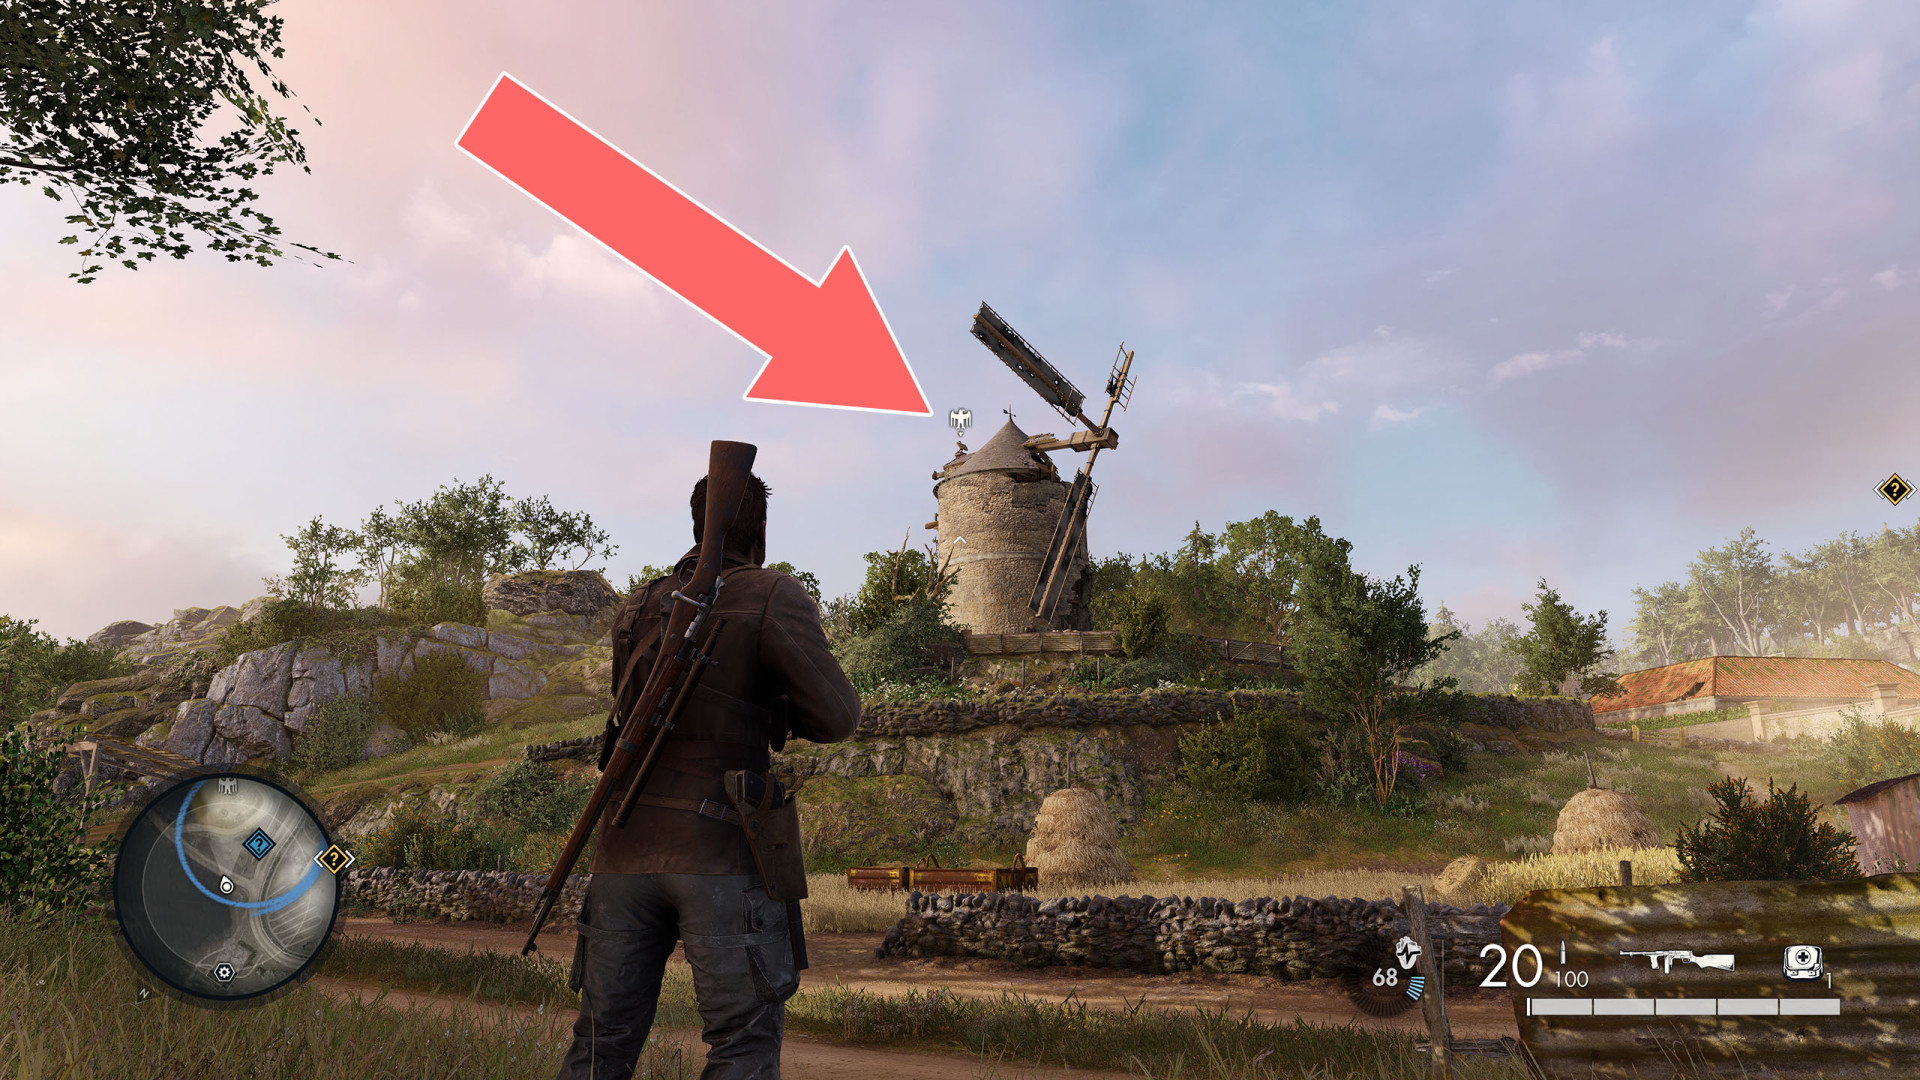
17Stone Eagle #17
Lock, Stock and Barrels Stone Eagle 2/3.
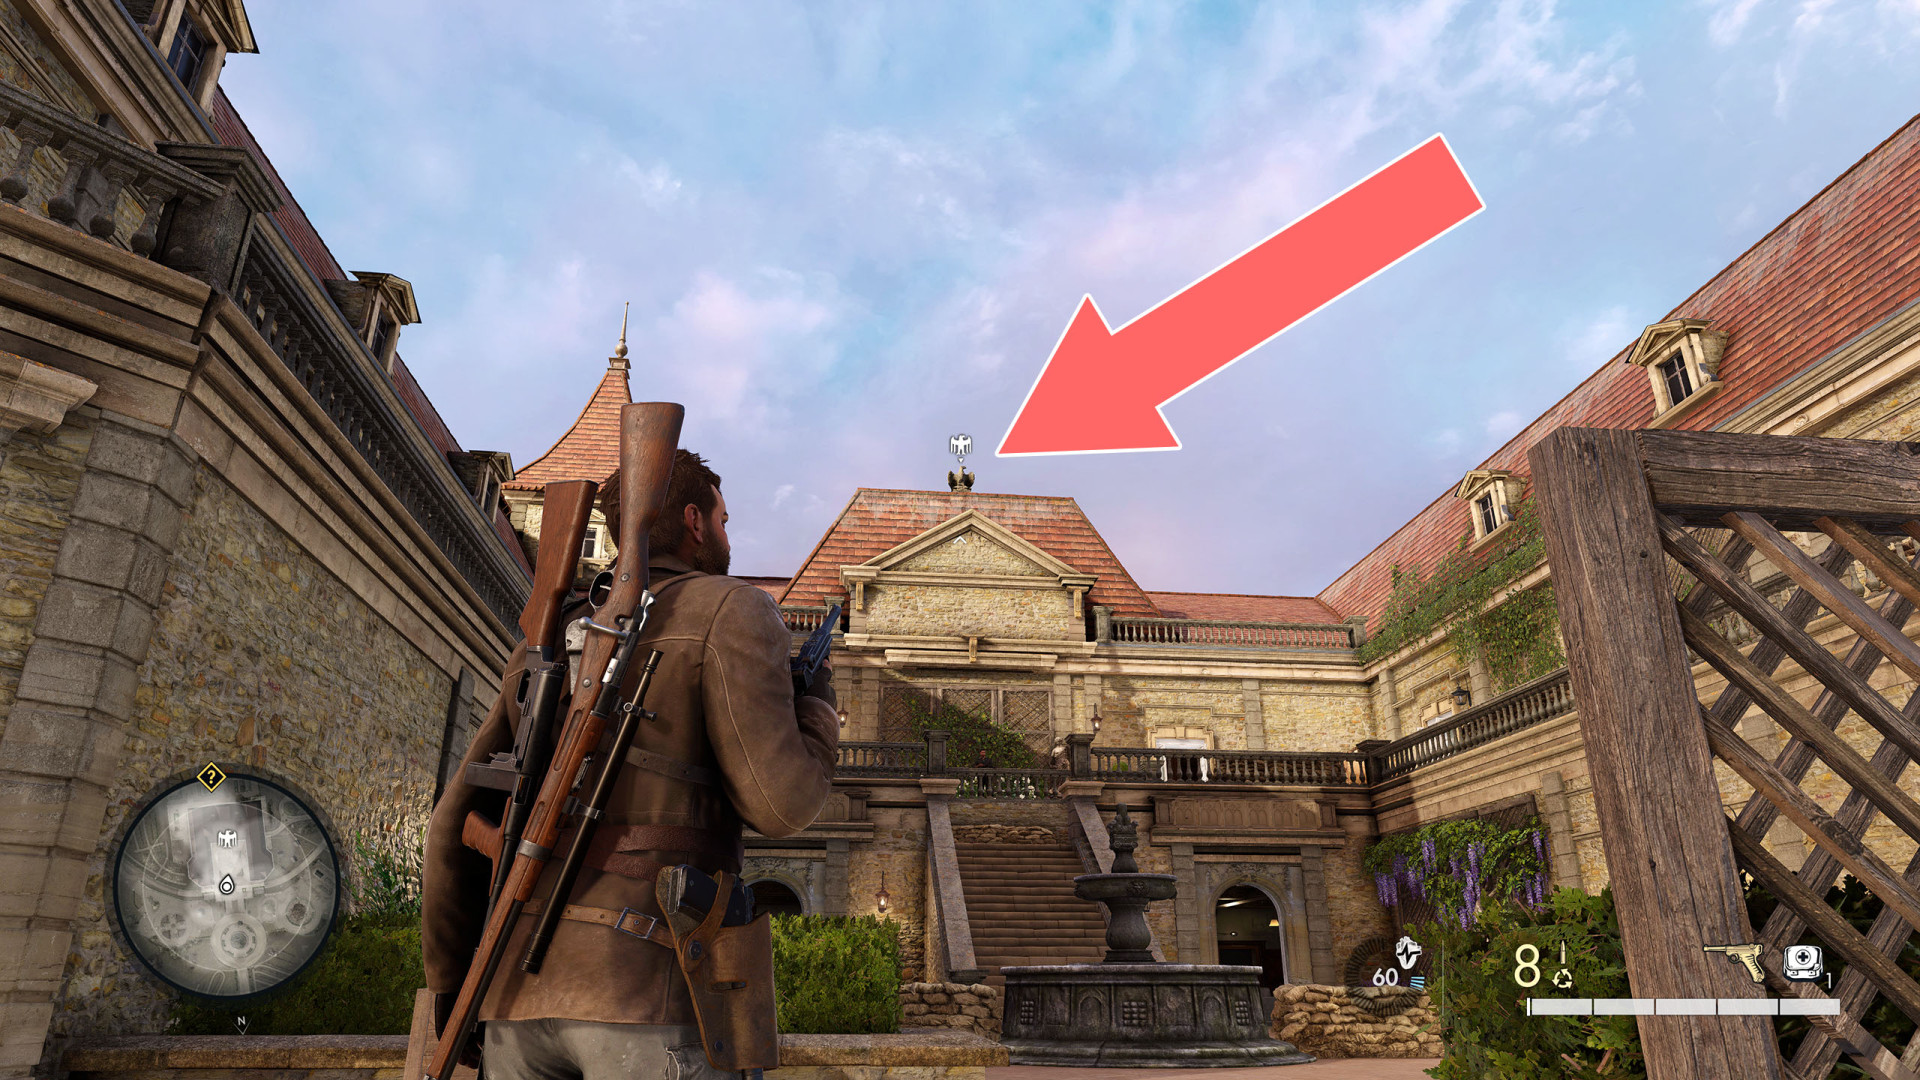
18Stone Eagle #18
Lock, Stock and Barrels Stone Eagle 3/3.

19Stone Eagle #19
End of the Line Stone Eagle 1/3.

20Stone Eagle #20
End of the Line Stone Eagle 2/3.
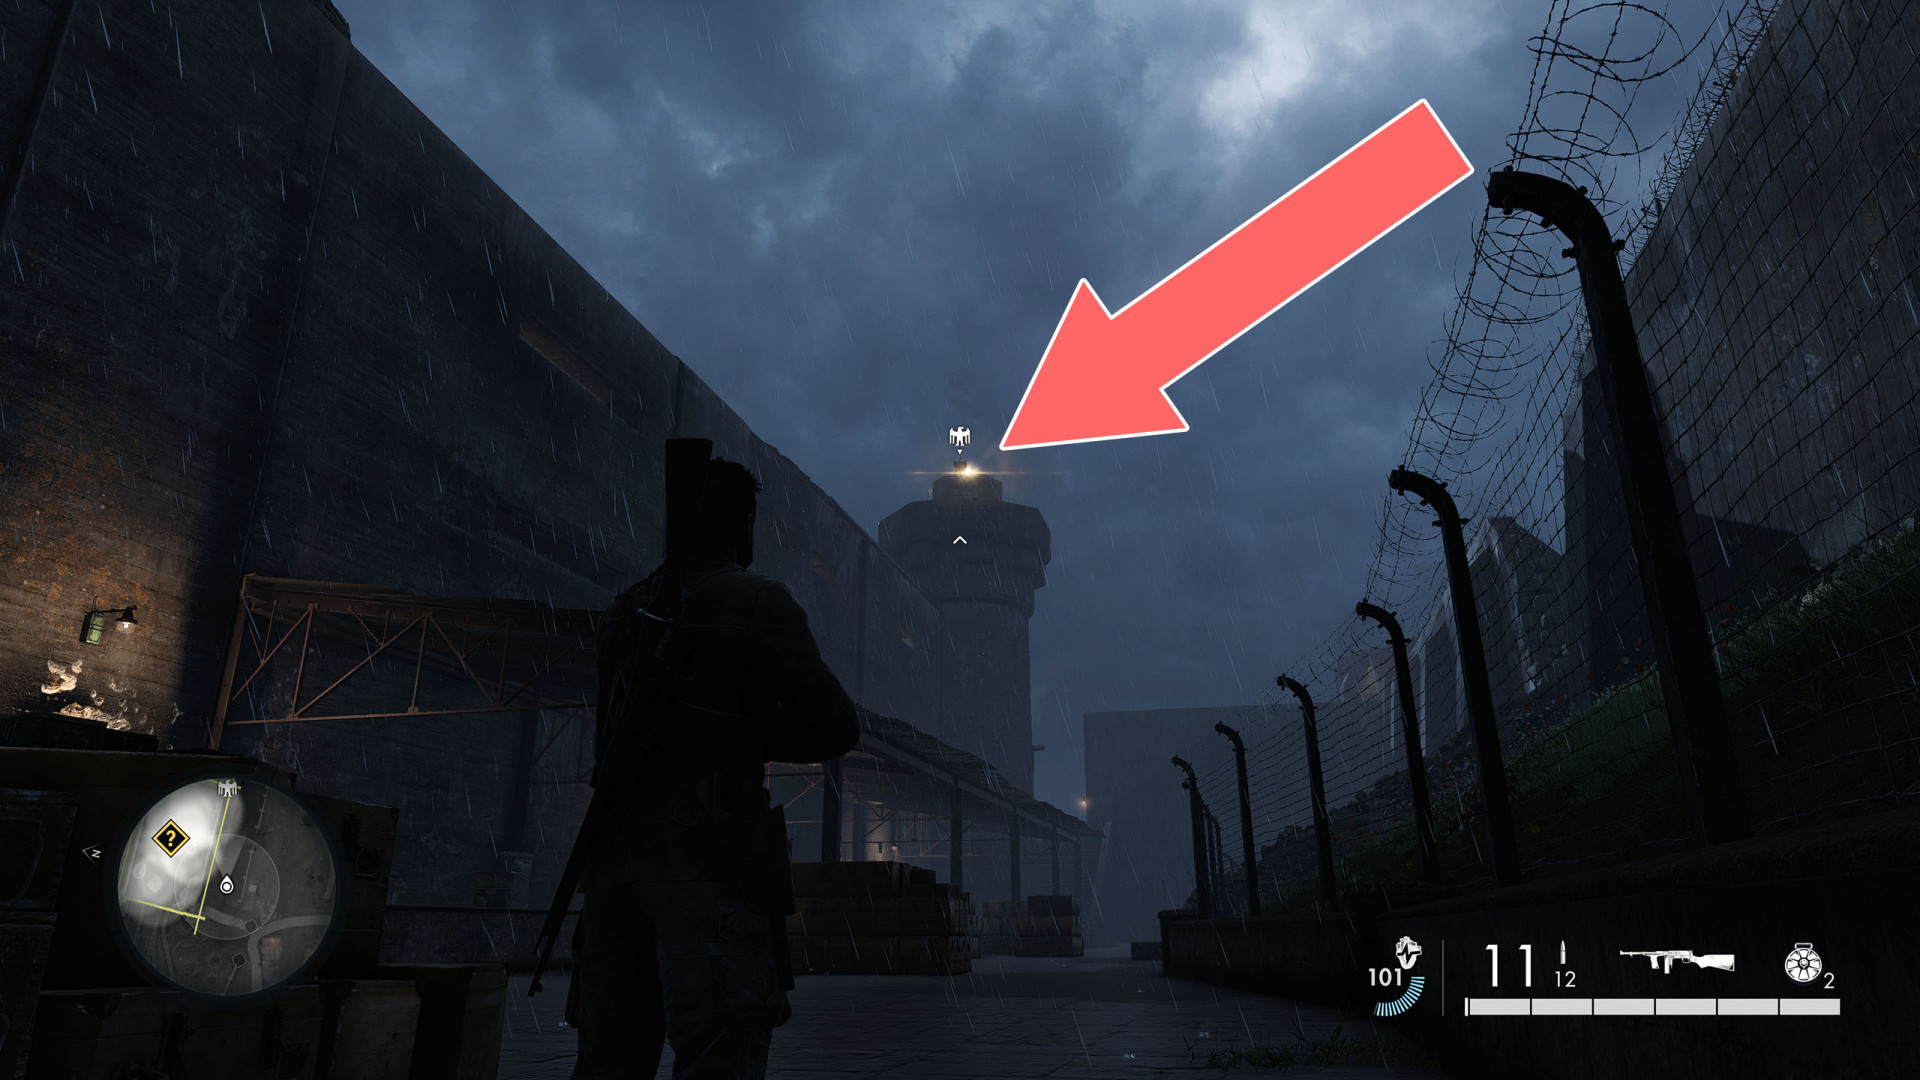
21Stone Eagle #21
End of the Line Stone Eagle 3/3.

Locations on Lights, Camera, Achtung!
22Stone Eagle #22
Lights, Camera, Achtung! Stone Eagle 1/3.
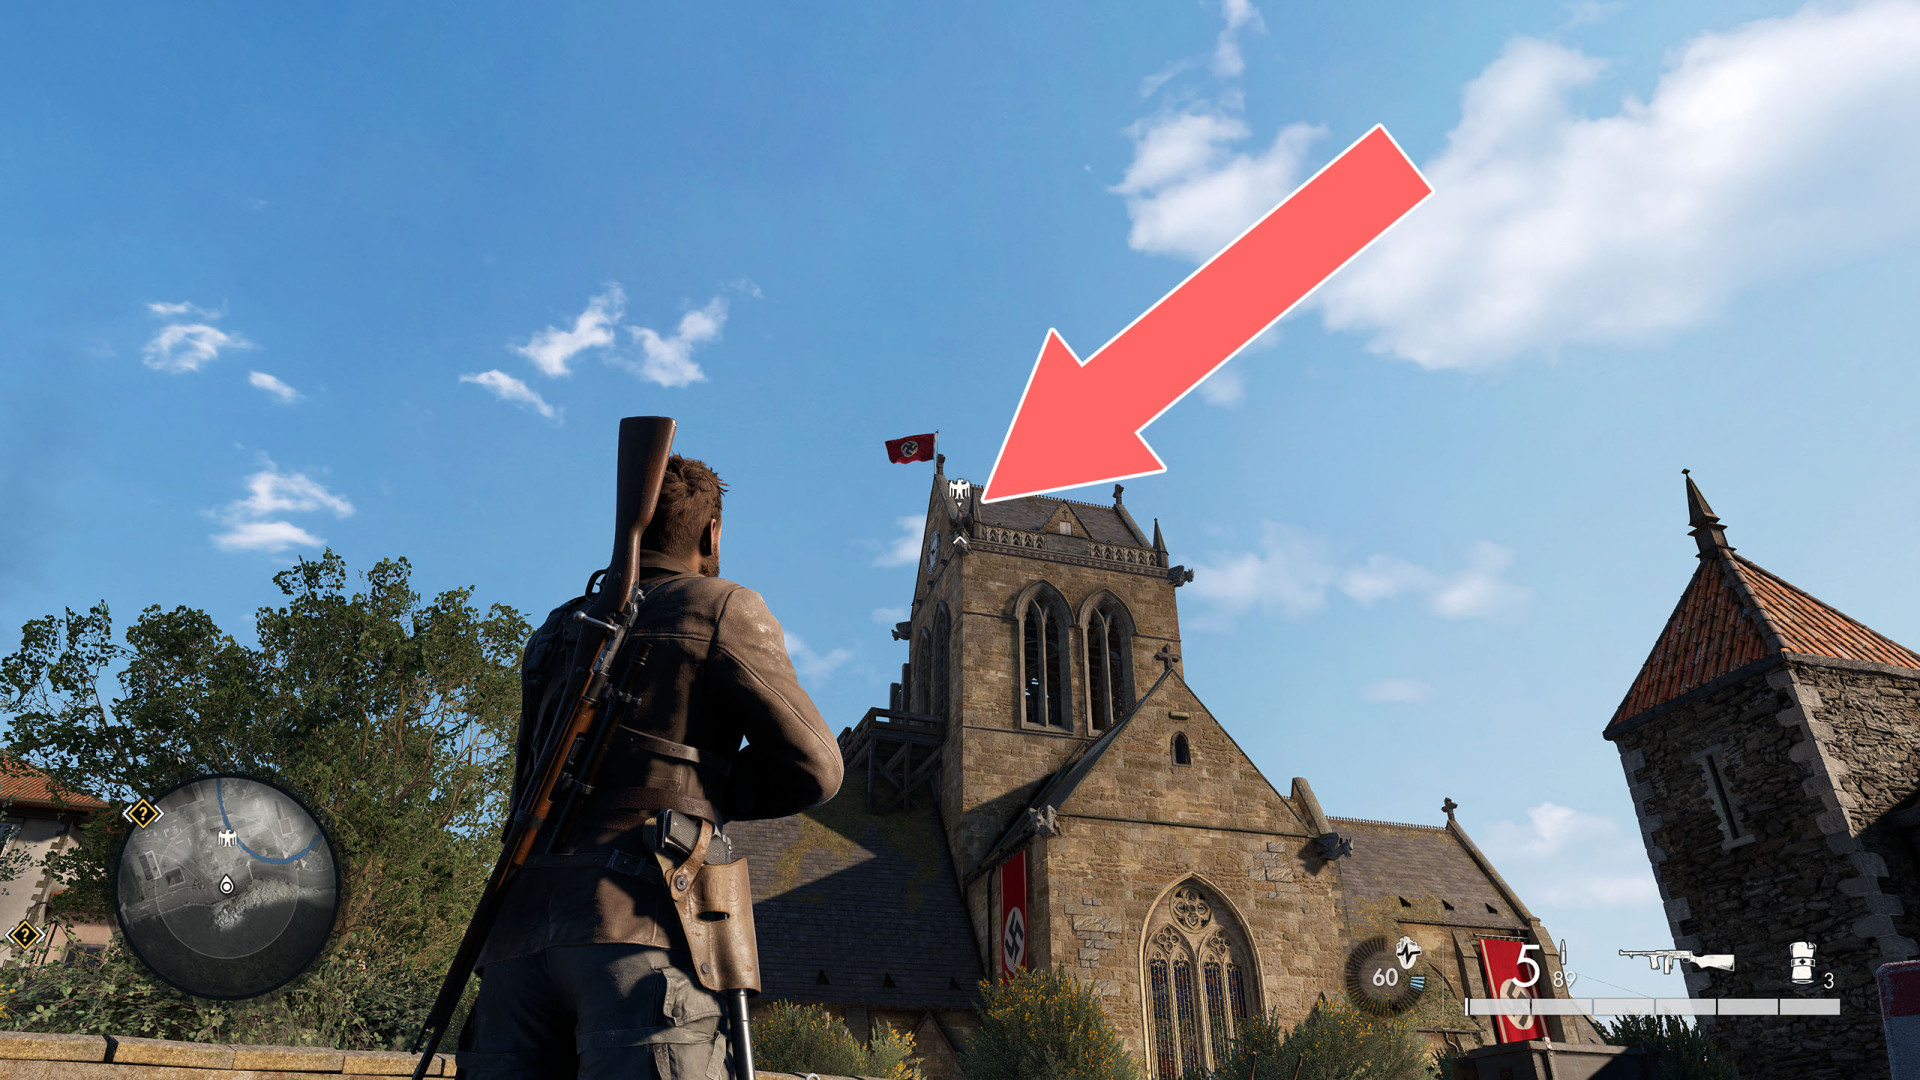
23Stone Eagle #23
Lights, Camera, Achtung! Stone Eagle 2/3.
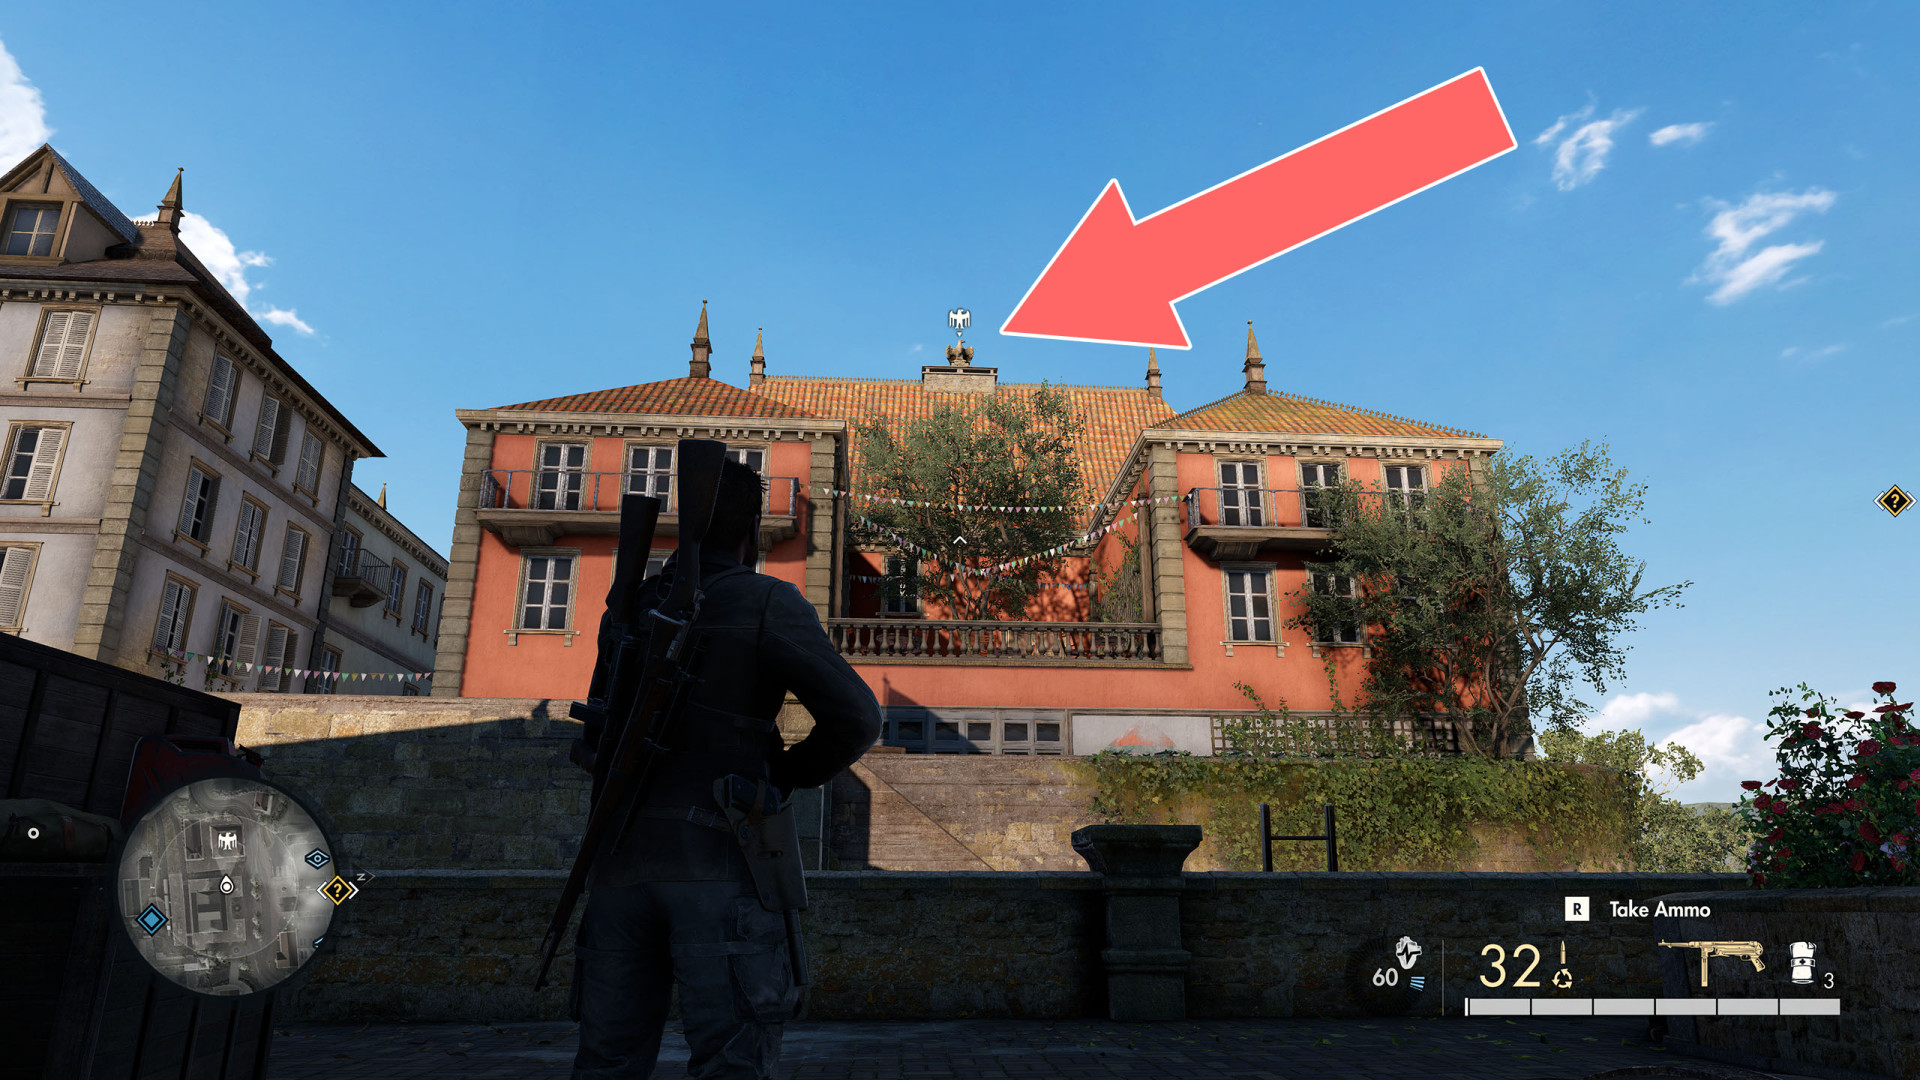
24Stone Eagle #24
Lights, Camera, Achtung! Stone Eagle 3/3.
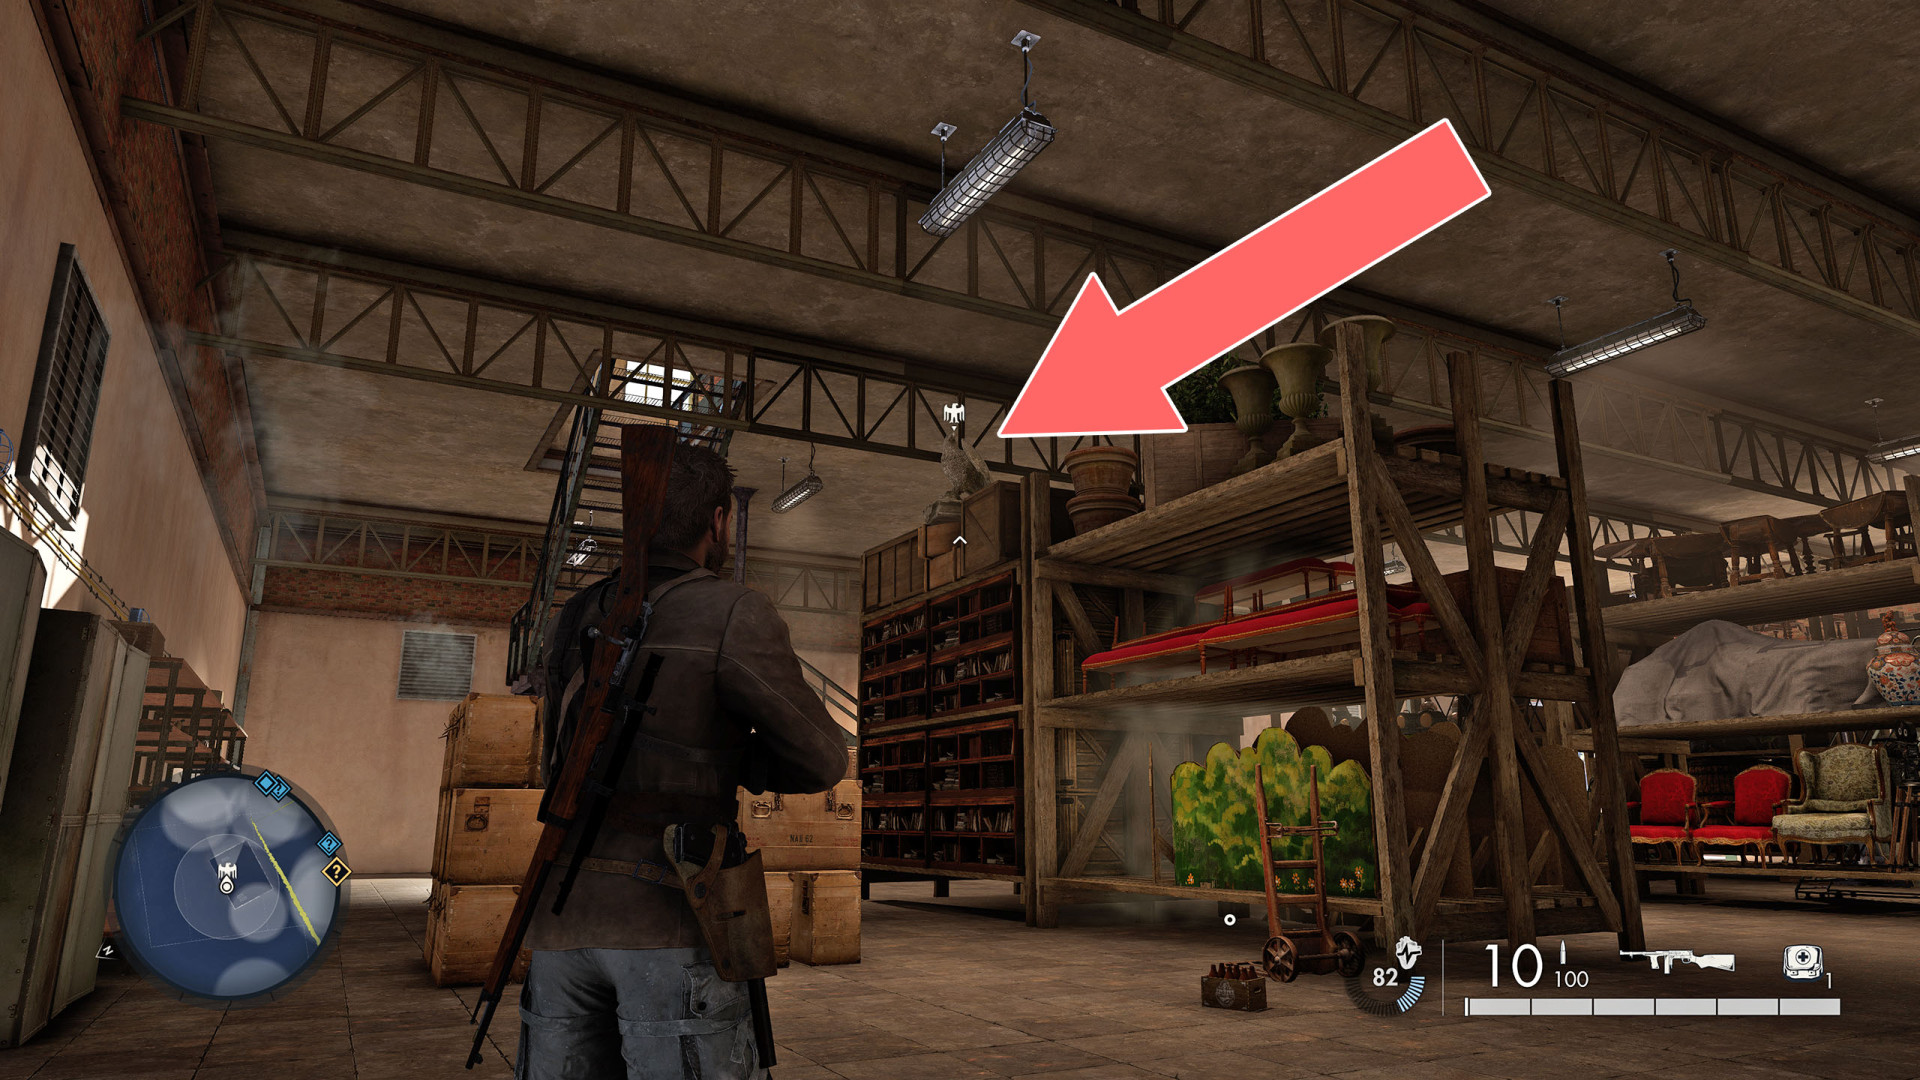
Locations on Vercors Vendetta
25Stone Eagle #25
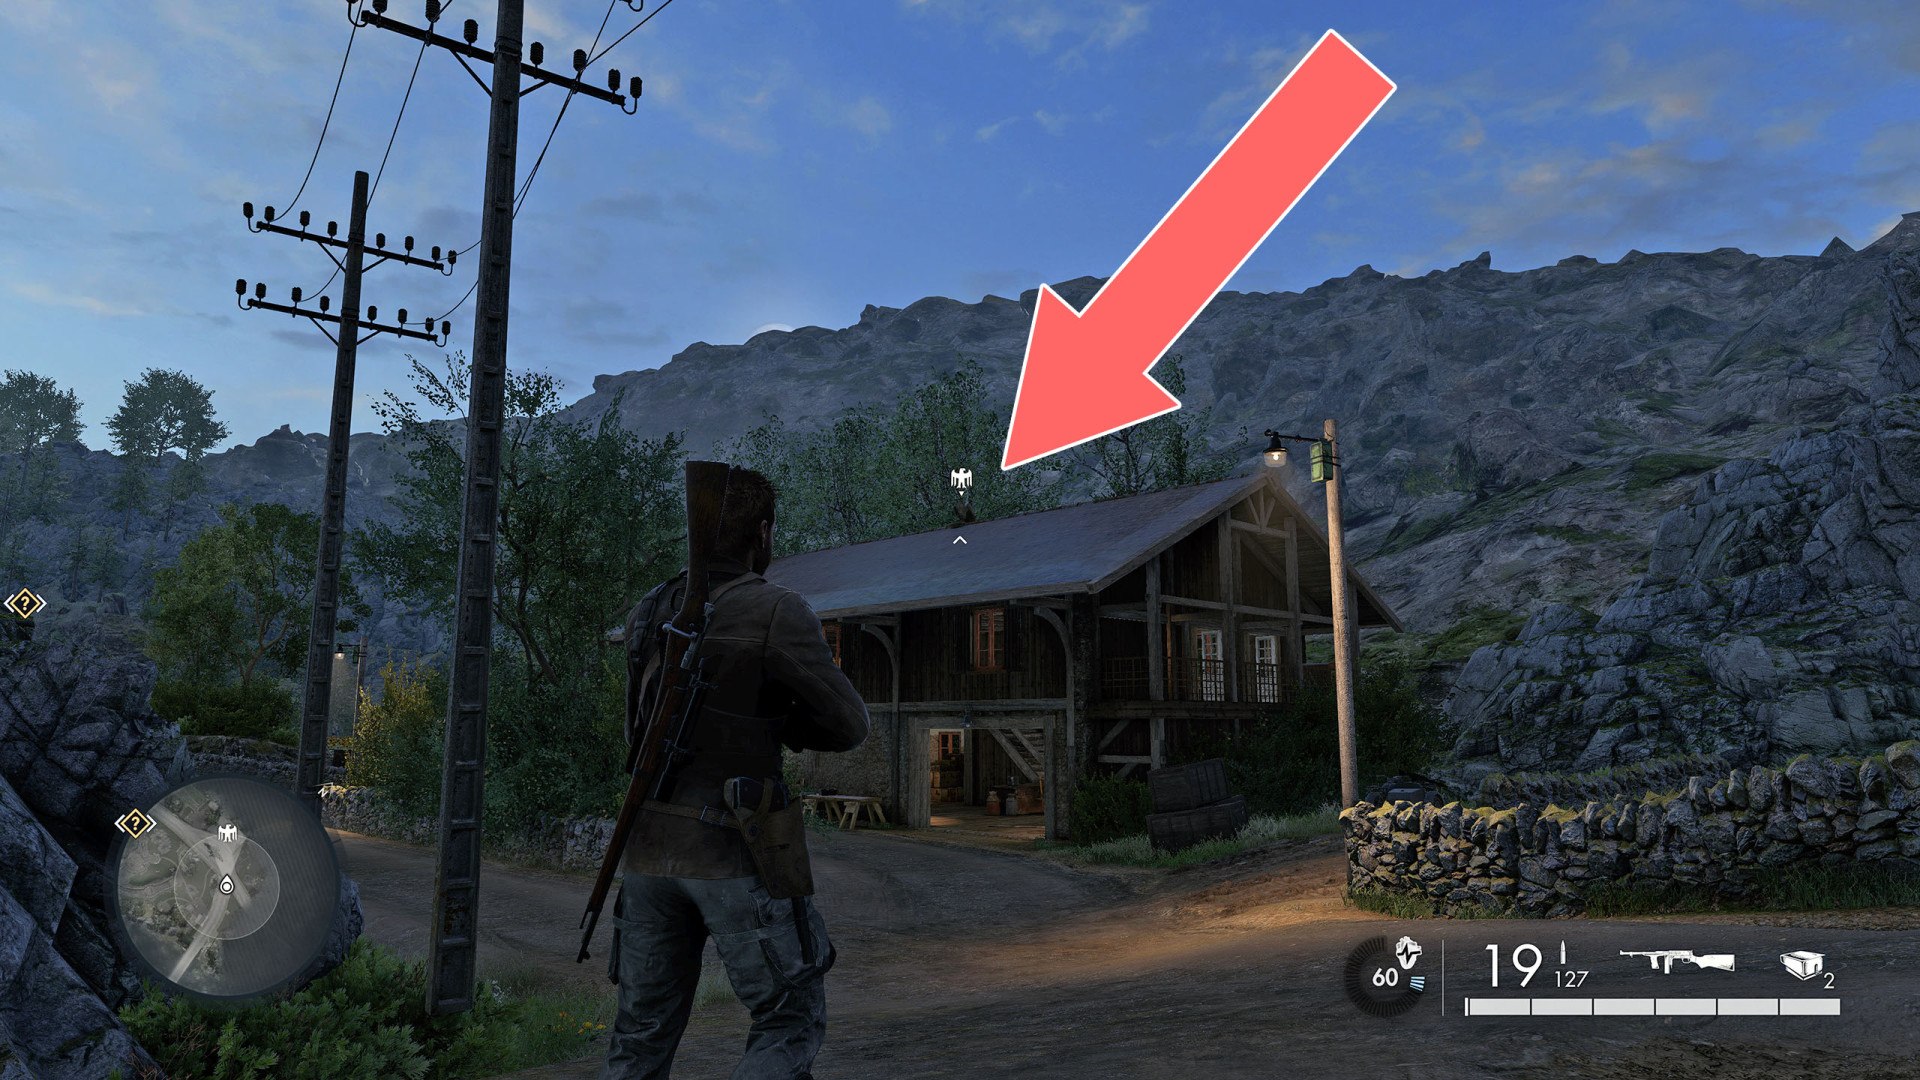
Vercors Vendetta Stone Eagle 1/3. On top of a building on a hill.
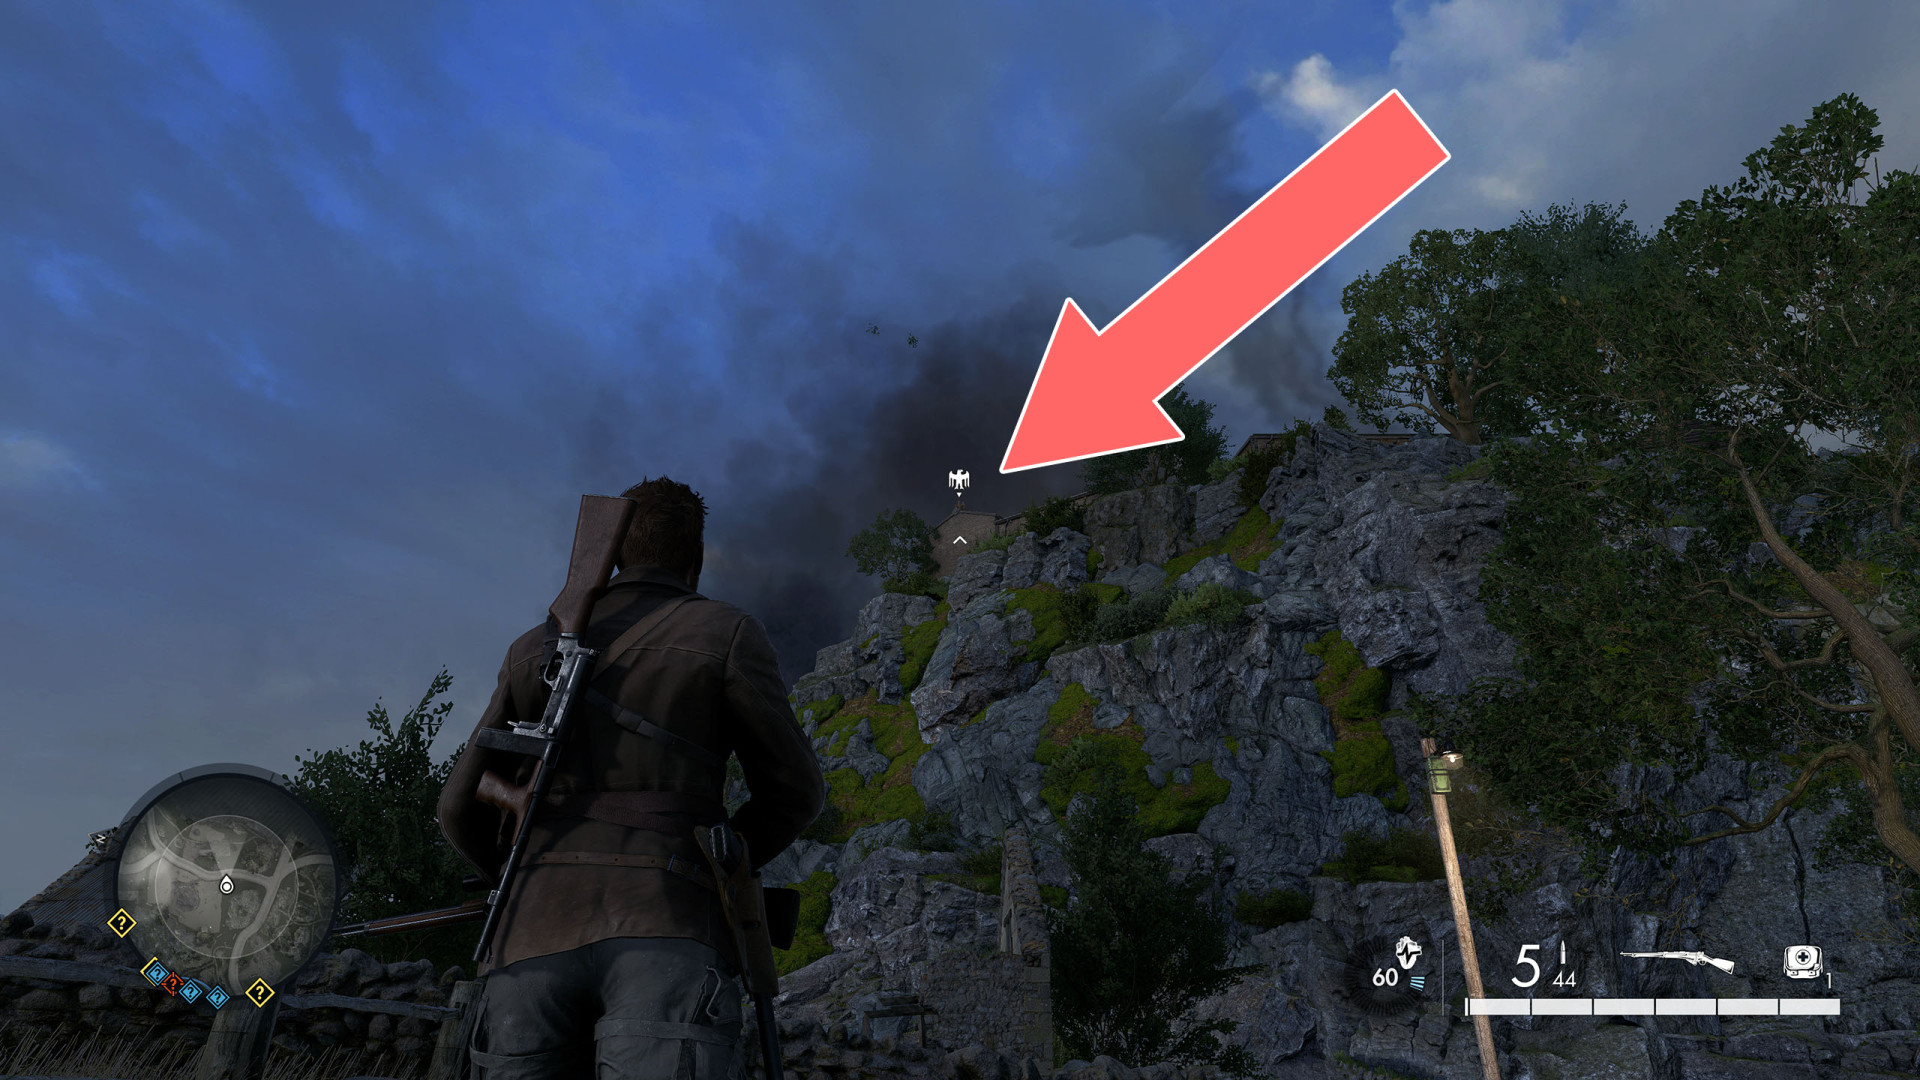
26Stone Eagle #26
Vercors Vendetta Stone Eagle 2/3.
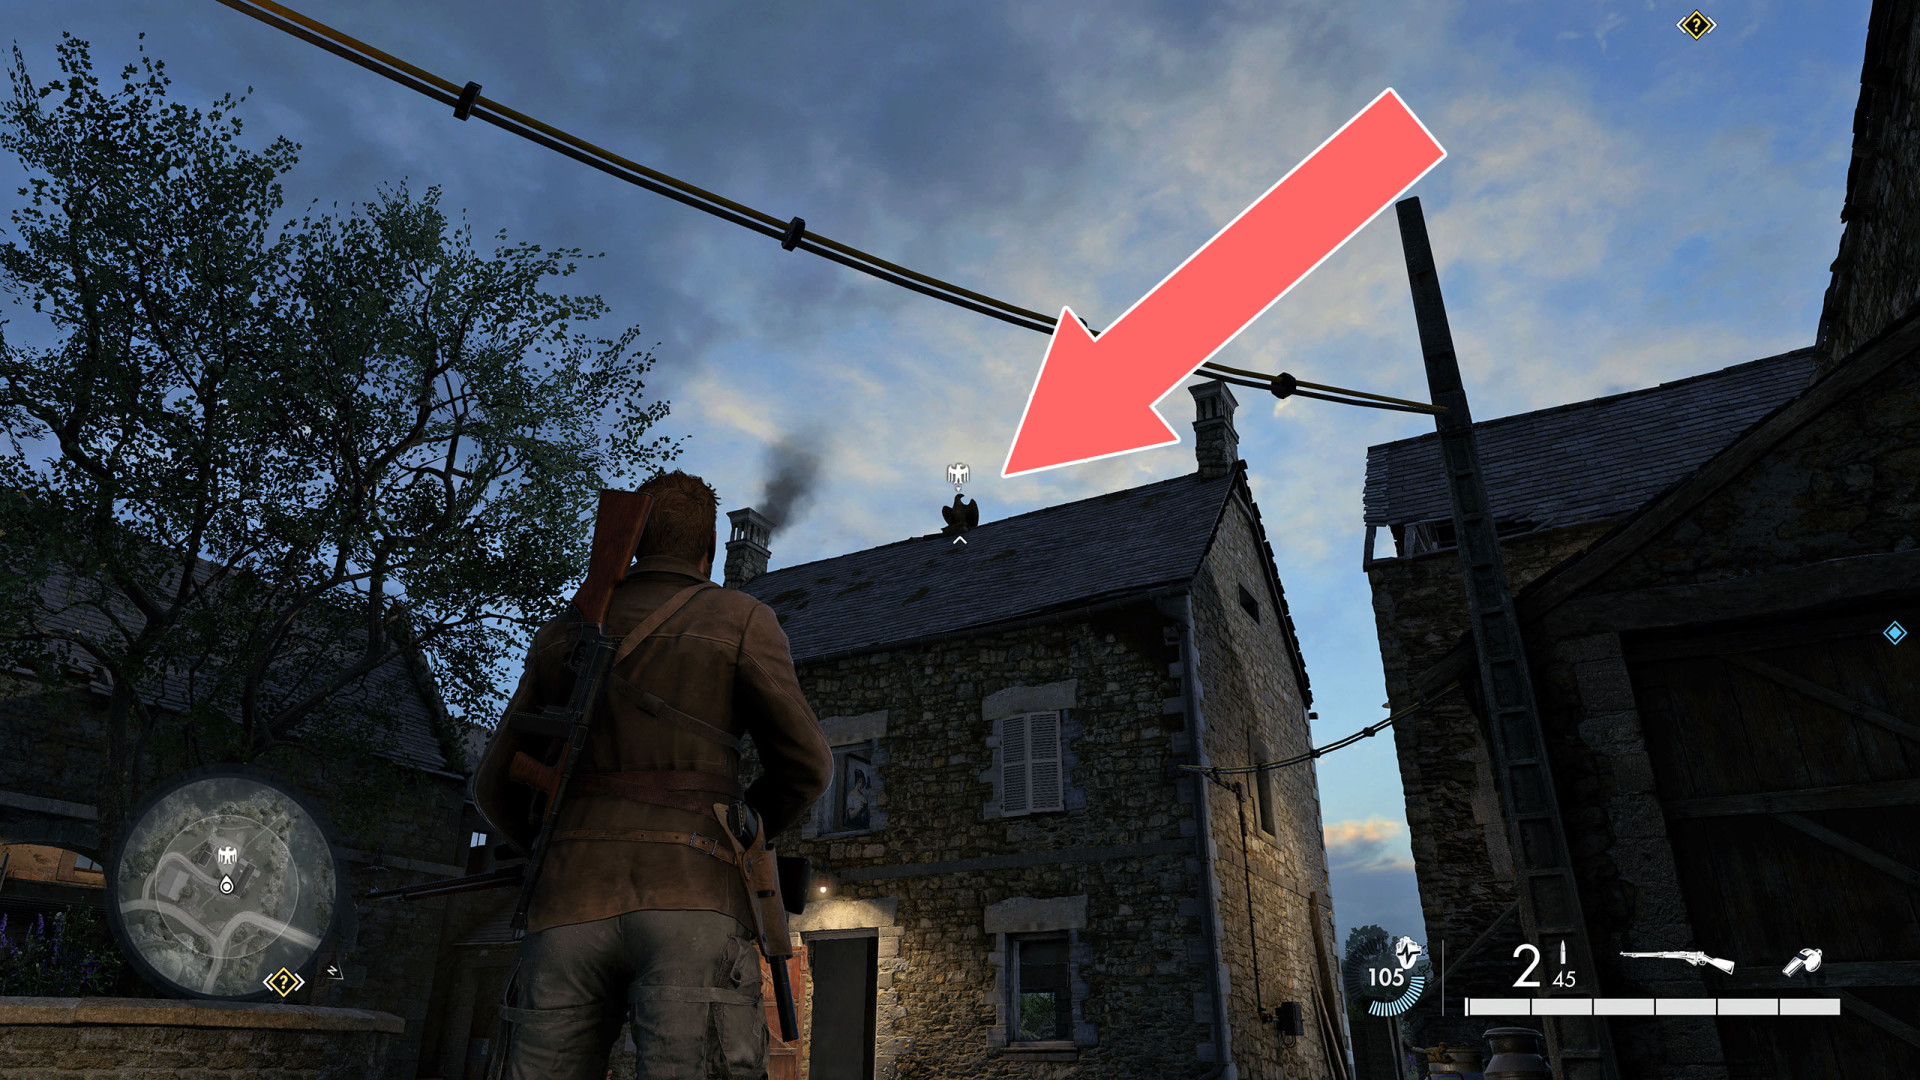
27Stone Eagle #27
Vercors Vendetta Stone Eagle 3/3.
Locations on Striking Range
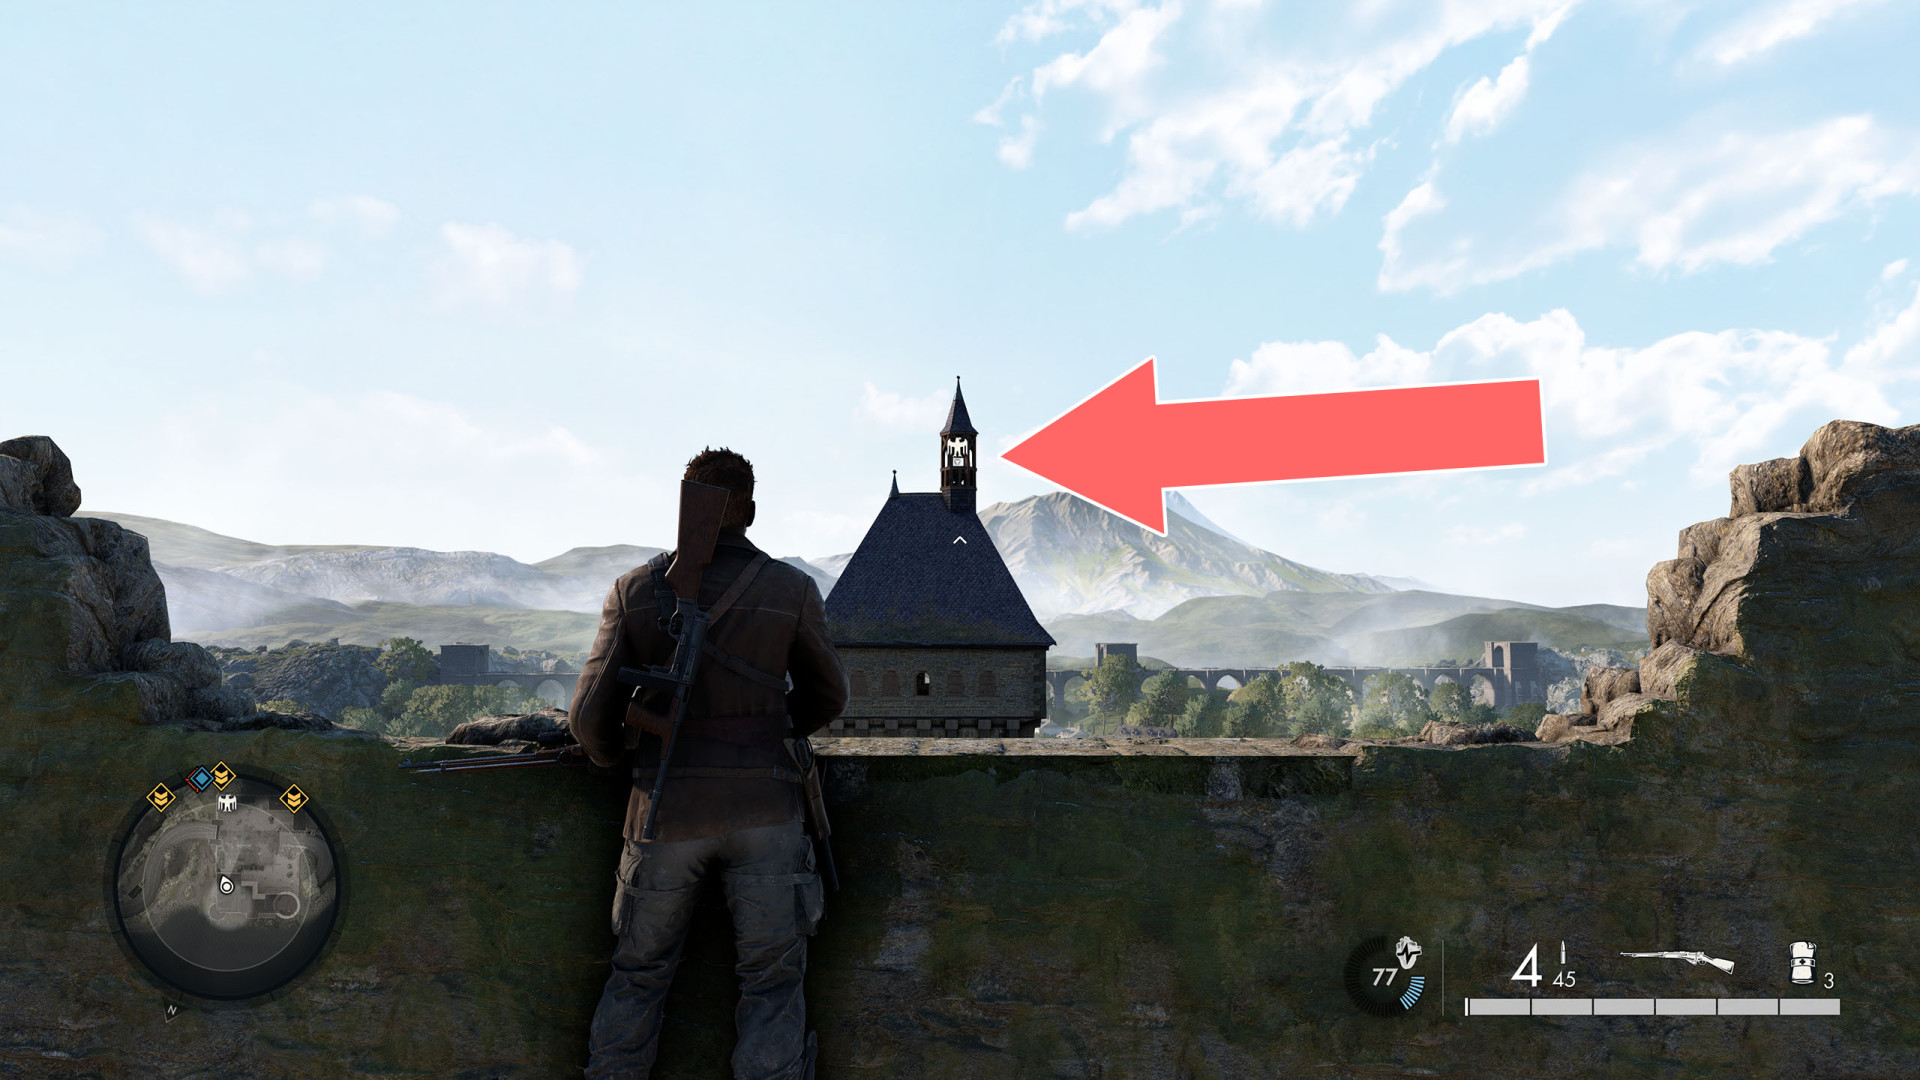
28Stone Eagle #28
Striking Range Stone Eagle 1/3.
29Stone Eagle #29
Striking Range Stone Eagle 2/3.

30Stone Eagle #30
Striking Range Stone Eagle 3/3.

Locations on Mud and Thunder
31Stone Eagle #31
Mud and Thunder Stone Eagle 1/3. On the chimney of the building.

32Stone Eagle #32
Mud and Thunder Stone Eagle 2/3. At the top of the small ruins.
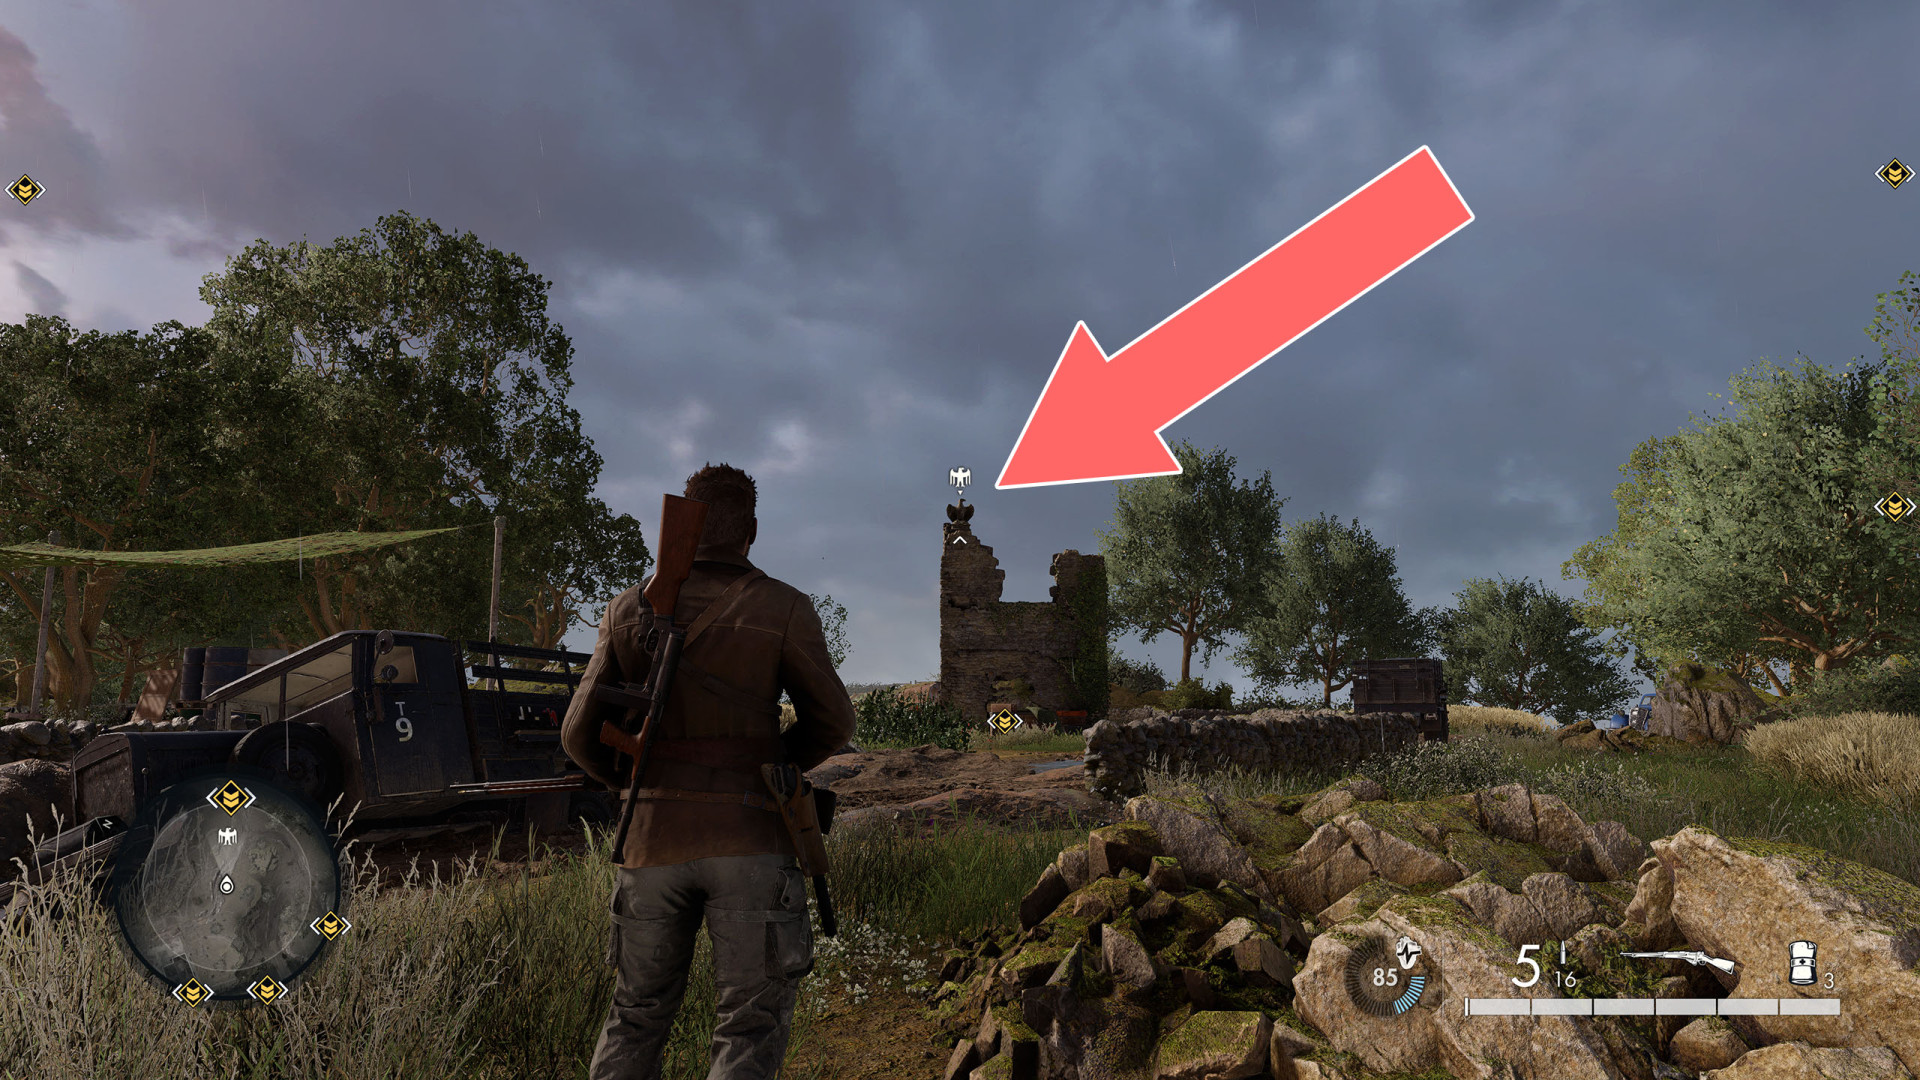
33Stone Eagle #33
Mud and Thunder Stone Eagle 3/3. Above the entrance to the bunker.
