Welcome to guides4gamers.com

Dressrosa, One Piece Odyssey Map

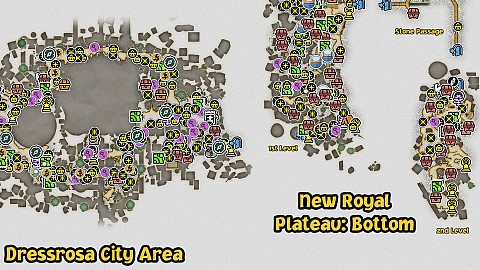
An interactive map of Dressrosa, one of the regions we visit in the game One Piece Odyssey. Maps of Dressrosa City Area, New Royal Plateau: Bottom & Top, Stone Passage, Dressrosa Sewer.

Dressrosa

Dressrosa - Map Markers Summary

Guide Stands x8, Cube Fragments x119, Locked Treasure Chests x4, Treasure Chests x53, Side Stories x7, Memory Links x3, Quest-related x1, Nami Items x12, Sanji Items x12, Yaya Cubes x33, Bounty Hunt Posters x1, Bounty Hunt Targets x10, Camp x1, Shop x1, Shops x2, Tavern x1, Bridges x5, Memoria Cube x1, Save Points x15, Usable Items x19, Miscellaneous Loot x65, Shiny Spots x133, Entrances & Exits x7, Transitions x2

Legend / Points of interest

The following legend of Dressrosa interactive game map defines the points of interest / markers displayed on the map. Each marker corresponds to a specific element to facilitate efficient navigation and interaction with the map.

Guide Stands

Guide Stands are used for fast travel within the region you are in. You will unlock the ability to use them when you reach the Sandy Oasis in Alabasta.

Icon of Guide Stand Coliseum Path
Icon of Guide Stand Dressrosa City East
Icon of Guide Stand Dressrosa City South
Icon of Guide Stand N.R.P. 1F Camp
Icon of Guide Stand N.R.P. 2F Entrance
Icon of Guide Stand N.R.P. 3F Entrance
Icon of Guide Stand N.R.P. Sunflower Field
Icon of Guide Stand Square, At Fountain

Cube Fragments

Cube Fragments are fragments of lost experience. To use, open the Skill Up screen from the Crew screen, and power up a skill by placing a fragment into an open skill box. Fragments can be swapped at any time.

Locked Treasure Chests

There are a total of 22 Locked Treasure Chests, 4 of which are located in Dressrosa. To open these chests you need a special key which you will get when you complete all side stories involving the "Zoners".

Icon of Locked Treasure Chest Dressrosa City Area Locked Treasure Chest Contains: Fire Element Jewelry - A cube fragment that adds fire to your attacks. Only effective when the type added is a weakness.
Icon of Locked Treasure Chest Dressrosa City Area Locked Treasure Chest Contains: Wild One's Crown - A cube fragment containing concentrated power extracted from various wild monsters (ATK +1400)
Icon of Locked Treasure Chest Dressrosa City Area Locked Treasure Chest Contains: Freeze Element Jewelry - A cube fragment that adds freeze to your attacks. Only effective when the type added is a weakness.
Icon of Locked Treasure Chest New Royal Plateau: Bottom Locked Treasure Chest Contains: Evasion +20 Jewelry - Increases evasion rate (Lucky Evade +20%).

Treasure Chests

Treasure Chests can contain various items, such as equipment, usable items, materials or some berries.

Side Stories

-= Work in Progress =-

Icon of Side Story God Usopp 1 Talk to Blacksmith Garill. Objectives: Reform the violent gladiators. Rewards: Fairy Pumpkin Gazpacho, 37,000 Berries.
Icon of Side Story Grand Line Quiz Mister Level 1 / 2 / 3 This side story will become available afte you complete the "Grand Line Quiz Madam Level 1 / 2 / 3" side story. Objectives: Answer Zoner's quiz correctly then find the kidnapped Zoner. Rewards: (1) Merchant Gelato, 37,000 Berries, (2) Fruit Gator Punch, 49,000 Berries, (3) Treasure Chest Key, Luffy's Cube Fragment x 3, 74,000 Berries.
Icon of Side Story My Dearest Violet Talk to Ellio, Man Searching for Paper. Objectives: Find the Autographed Paper. Rewards: Gifted Ring, Sanji's Cube Fragment x 3, 74, 000 Berries.
Icon of Side Story Rebuilding Dressrosa Talk to Ship Carpenter Tohbo. Objectives: Talk to the old Tohbo. Rewards: General Store Gift, Zoro's Cube Fragment x 3, 74,000 Berries.
Icon of Side Story Respected Elder Talk to Barto Club Apprentice. Objectives: Make a special Trick Ball. Rewards: Barto Blub Badge, 74,000 Berries.
Icon of Side Story Someone I Must Meet Talk to Sorrowful Poppy. Objectives: Find Neline. Rewards: Nostalgic Necklace, Sanji's Cube Fragment x 3, 37,000 Berries.
Icon of Side Story Taken by Tontattas Talk to Ribbon Searcher Dahlia. Objectives: Find the Tontattas. Rewards: Toy Ring, Nami's Cube Fragment x 3, 500 Berries.

Memory Links

Touch the Memory Links and particular characters will enter a space called Hysteria. Once they return safely from the Frayed Memory, your bond with the chosen character will deepen, unlocking the ability to use a powerful attack.

Icon of Memory Link Toy Chivalry Members: Usopp, Chopper, Franky. Rewards: Usopp, Chopper, and Franky's Bond Art, TP Regen Jewelry.
Icon of Memory Link Violin of Memories - Part 1 Members: Nami, Franky, Brook.
Icon of Memory Link Violin of Memories - Part 2 First, you need to complete the "Violin of Memories - Part 1" memory link. Members: Nami, Franky, Brook. Rewards: Nami, Franky, and Brook's Bond Art, Death's Edge Power Jewelry.

Quest-related

Icon of Quest Related Kidnapped Zoner Finding her is one of the objectives of the "Grand Line Quiz Mister Level 1 / 2 / 3" side story.

Nami Items

Nami Items are hidden caches of Berries (money) that only Nami can see. To be able to pick up these items you must be switched to Nami.

Icon of Nami Item 220,000 Berries (Nami)
Icon of Nami Item 230,000 Berries (Nami)
Icon of Nami Item 235,000 Berries (Nami)
Icon of Nami Item 240,000 Berries (Nami)
Icon of Nami Item 250,000 Berries (Nami)
Icon of Nami Item 725,000 Berries (Nami)
Icon of Nami Item 735,000 Berries (Nami)
Icon of Nami Item 740,000 Berries (Nami)
Icon of Nami Item 750,000 Berries (Nami)

Sanji Items

Icon of Sanji Item Dress-Shrimp x 5 (Sanji)
Icon of Sanji Item Fairy Pumpkin x 5 (Sanji)
Icon of Sanji Item Gator Melon x 5 (Sanji)
Icon of Sanji Item Gator Strawberry x 5 (Sanji)
Icon of Sanji Item Gator Watermelon x 5 (Sanji)
Icon of Sanji Item Rose Squid Ink x 5 (Sanji)
Icon of Sanji Item Rose Squid Meat x 5 (Sanji)
Icon of Sanji Item Smoke Scale x 5 (Sanji)

Yaya Cubes

Yaya Cubes are collectible items that can be found throughout the worlds of Memoria. They are usually hidden in barrels, crates, iron boxes or pots that you must destroy to be able to pick them up. You have to collect 99 of them to complete Yaya Cube Collector 1 - 18 side stories.

Bounty Hunt Posters

Icon of Bounty Hunt Dressrosa Bulletin Board Targets: Ultimate Evil Bulbro (200,000), Devil Marin the Witch (480,000), Anarchy Pirate Zenran (600,000), Dicing Vence (400,000), Weapon Maniac Ganot (420,000), Deathless Biezom (300,000), Fickle Milena (780,000), Power Trainer Maite (2,000,000), Insect Master Insk (1,500,000), True Evil Bulbro (4,000,000).

Bounty Hunt Targets

Icon of Bounty Hunt Anarchy Pirate Zenran Reward: 600,000 Berries, Franky's Cube Fragment x 3.
Icon of Bounty Hunt Deathless Biezom Reward: 300,000 Berries.
Icon of Bounty Hunt Devil Marin the Witch Reward: 480,000 Berries, Luffy's Cube Fragment x 3.
Icon of Bounty Hunt Dicing Vence Reward: 400,000 Berries.
Icon of Bounty Hunt Fickle Milena Reward: 780,000 Berries.
Icon of Bounty Hunt Insect Master Insk Reward: 1,500,000 Berries.
Icon of Bounty Hunt Power Trainer Maite Reward: 2,000,000 Berries, Usopp's Cube Fragment x 3.
Icon of Bounty Hunt True Evil Bulbro Reward: 4,000,000 Berries.
Icon of Bounty Hunt Ultimate Evil Bulbro Reward: 200,000 Berries.
Icon of Bounty Hunt Weapon Maniac Ganot Reward: 420,000 Berries, Zoro's Cube Fragment.

Camps

Icon of Camp New Royal Plateau: Bottom Camp

Shops

Icon of Shop General Store Familia
Icon of Shop Yoisa Shop

Taverns

Icon of Tavern Tavern - Ariepa

Bridges

To build the Bridges it is necessary for Franky to rejoin the team. This will happen at a relatively late stage of the game's main storyline. You will also need to collect the right amount of materials such as screws (Steel Bolts, Carbon Bolts, or Wootz Steel Bolts) and junk.

Icon of Bridge Dressrosa Bridge #1 Required items: Carbon Bolt x 3, Junk x 15.
Icon of Bridge Dressrosa Bridge #2 Required items: Steel Bolt x 1, Junk x 2.
Icon of Bridge Dressrosa Bridge #3 Required items: Steel Bolt x 2, Junk x 3.
Icon of Bridge Dressrosa Bridge #4 Required items: Steel Bolt x 3, Junk x 4.
Icon of Bridge Dressrosa Bridge #5 Required items: Carbon Bolt x 4, Junk x 15.

Memoria Cubes

Using the Memoria Cubes you find at the beginning of each Memoria, you can return to the Strange Place and then travel to another available region. The cubes can be used after completing the Memoria in which they are located.

Icon of Memoria Cube Dressrosa Memoria Cube

Save Points

Save points will record your progress and restore your health. If everyone gets knocked out, you will start over from your last save point.