All Photo Rally Location in Like a Dragon: Infinite Wealth
A total of 110 Photo Rally Locations are available in Like a Dragon: Infinite Wealth. The Photo Rally is first unlocked through the main storyline-related substory (32. Tropical Photo Rally) which occurs during Chapter 5.
The locations to be photographed are both in Hawaii (Honolulu) and Japan (Isezaki Ijincho). They have been categorized into several groups, depending on the city district in which they are located. Photographing all the locations in the group will allow you to collect an assigned reward. The current progress can be checked using the app that will be added to your cellphone.
Once you take 30 photos, the "Photo Hunter" achievement / trophy will be unlocked.
Index
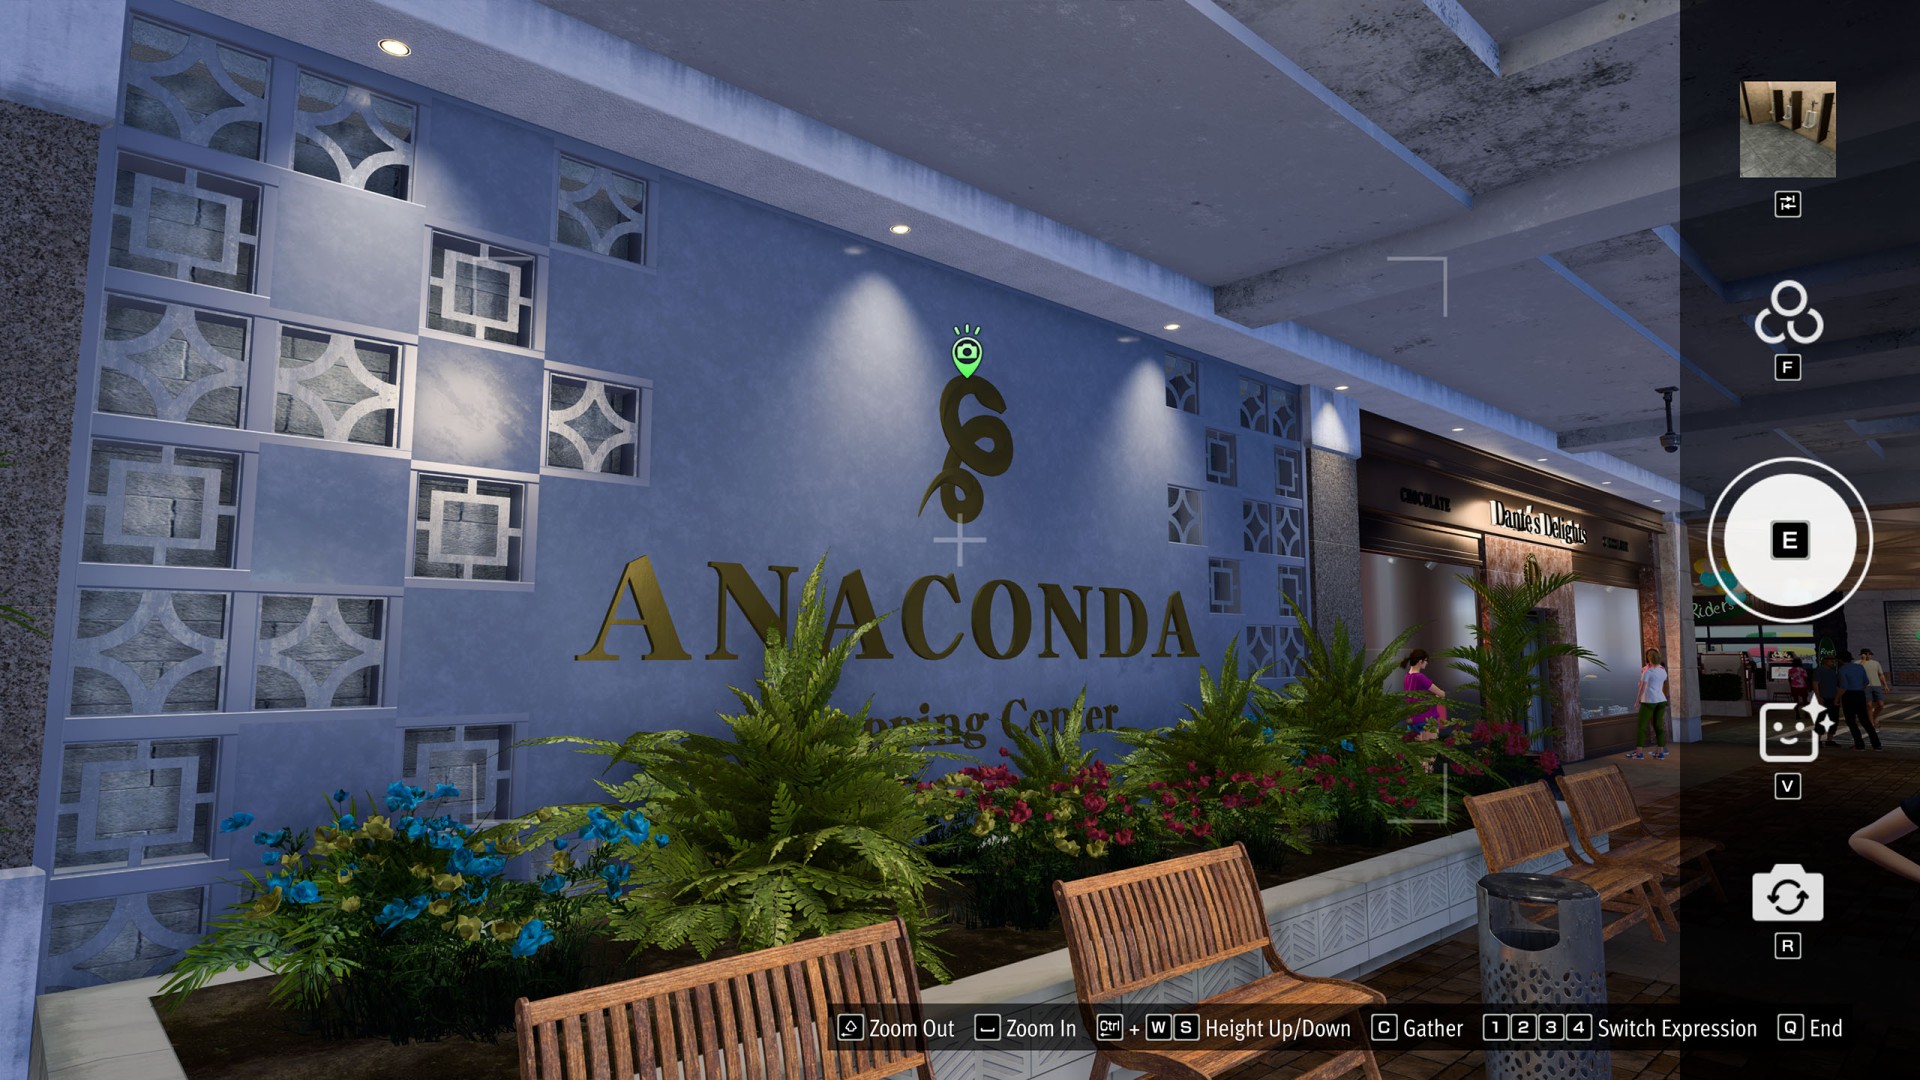
- Anaconda #1 (Anaconda Parking Lot)
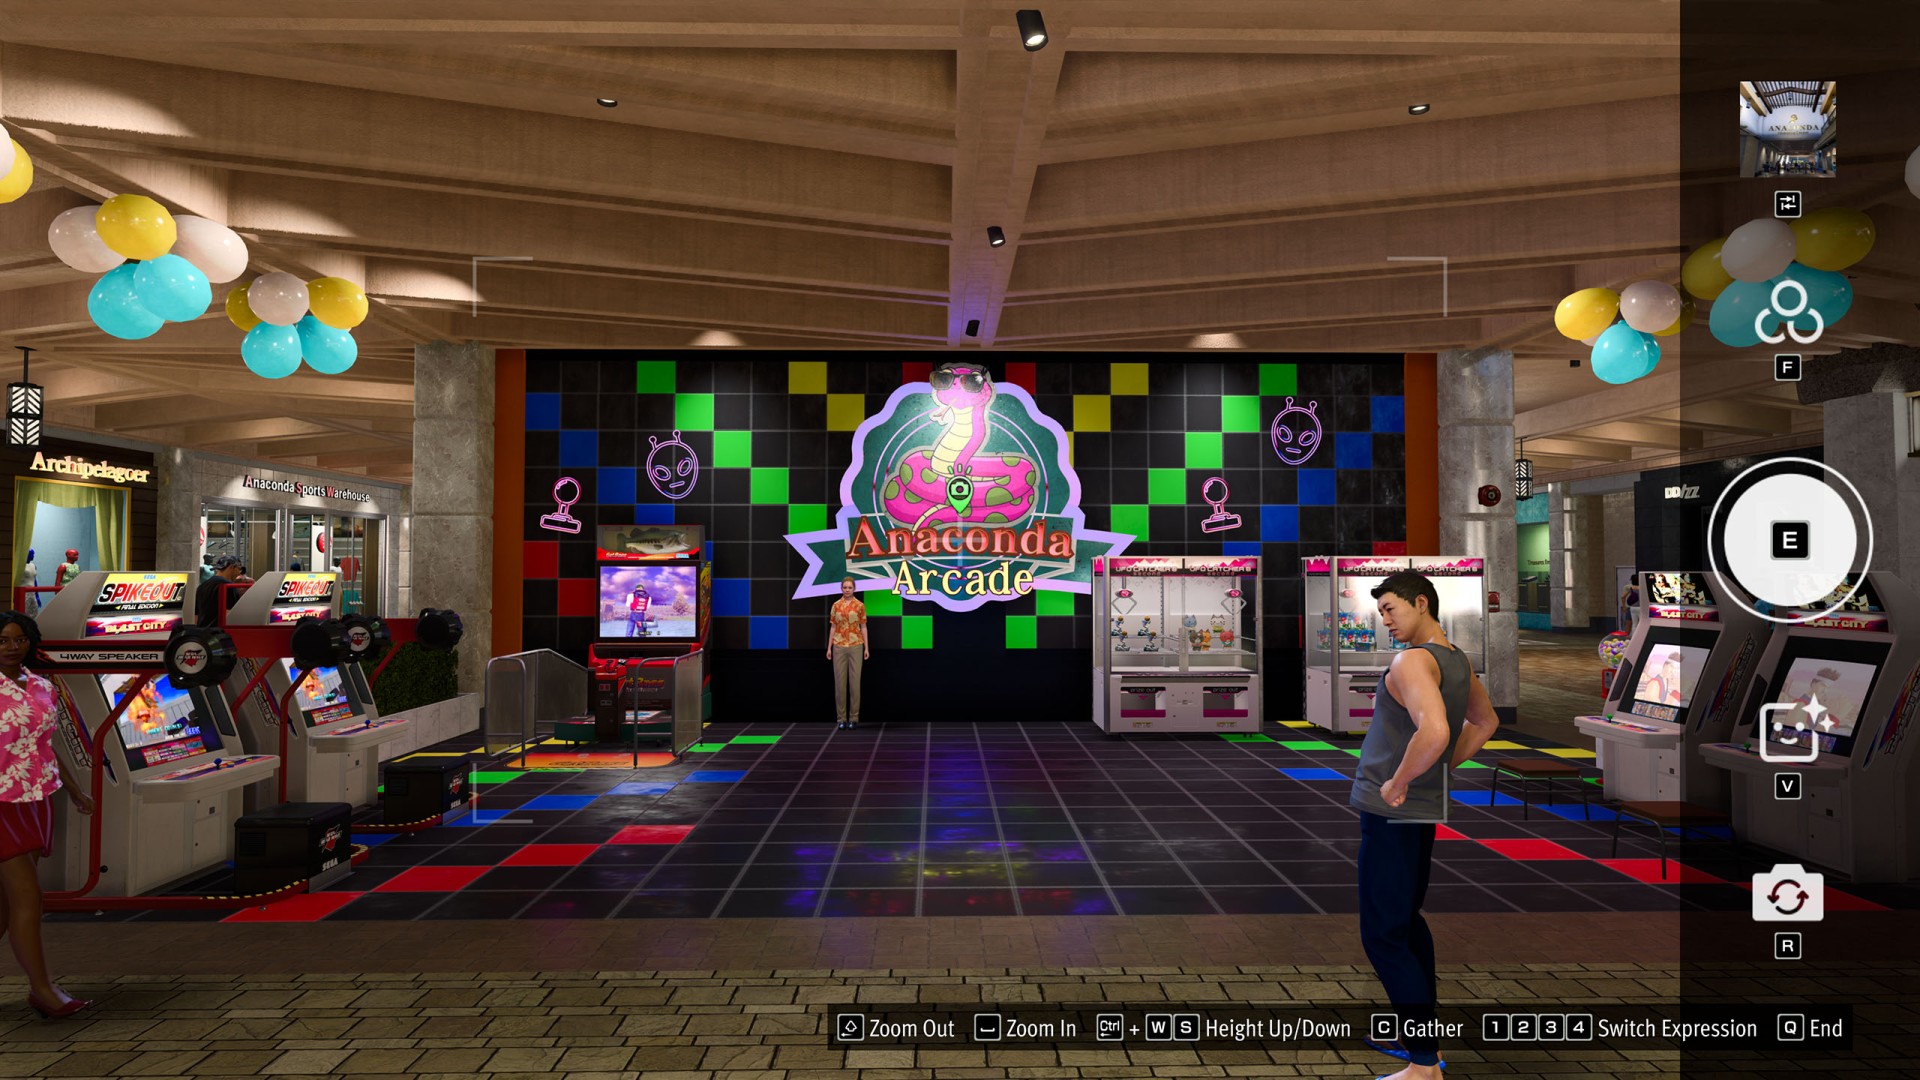
- Anaconda #2 (Anaconda Arcade)
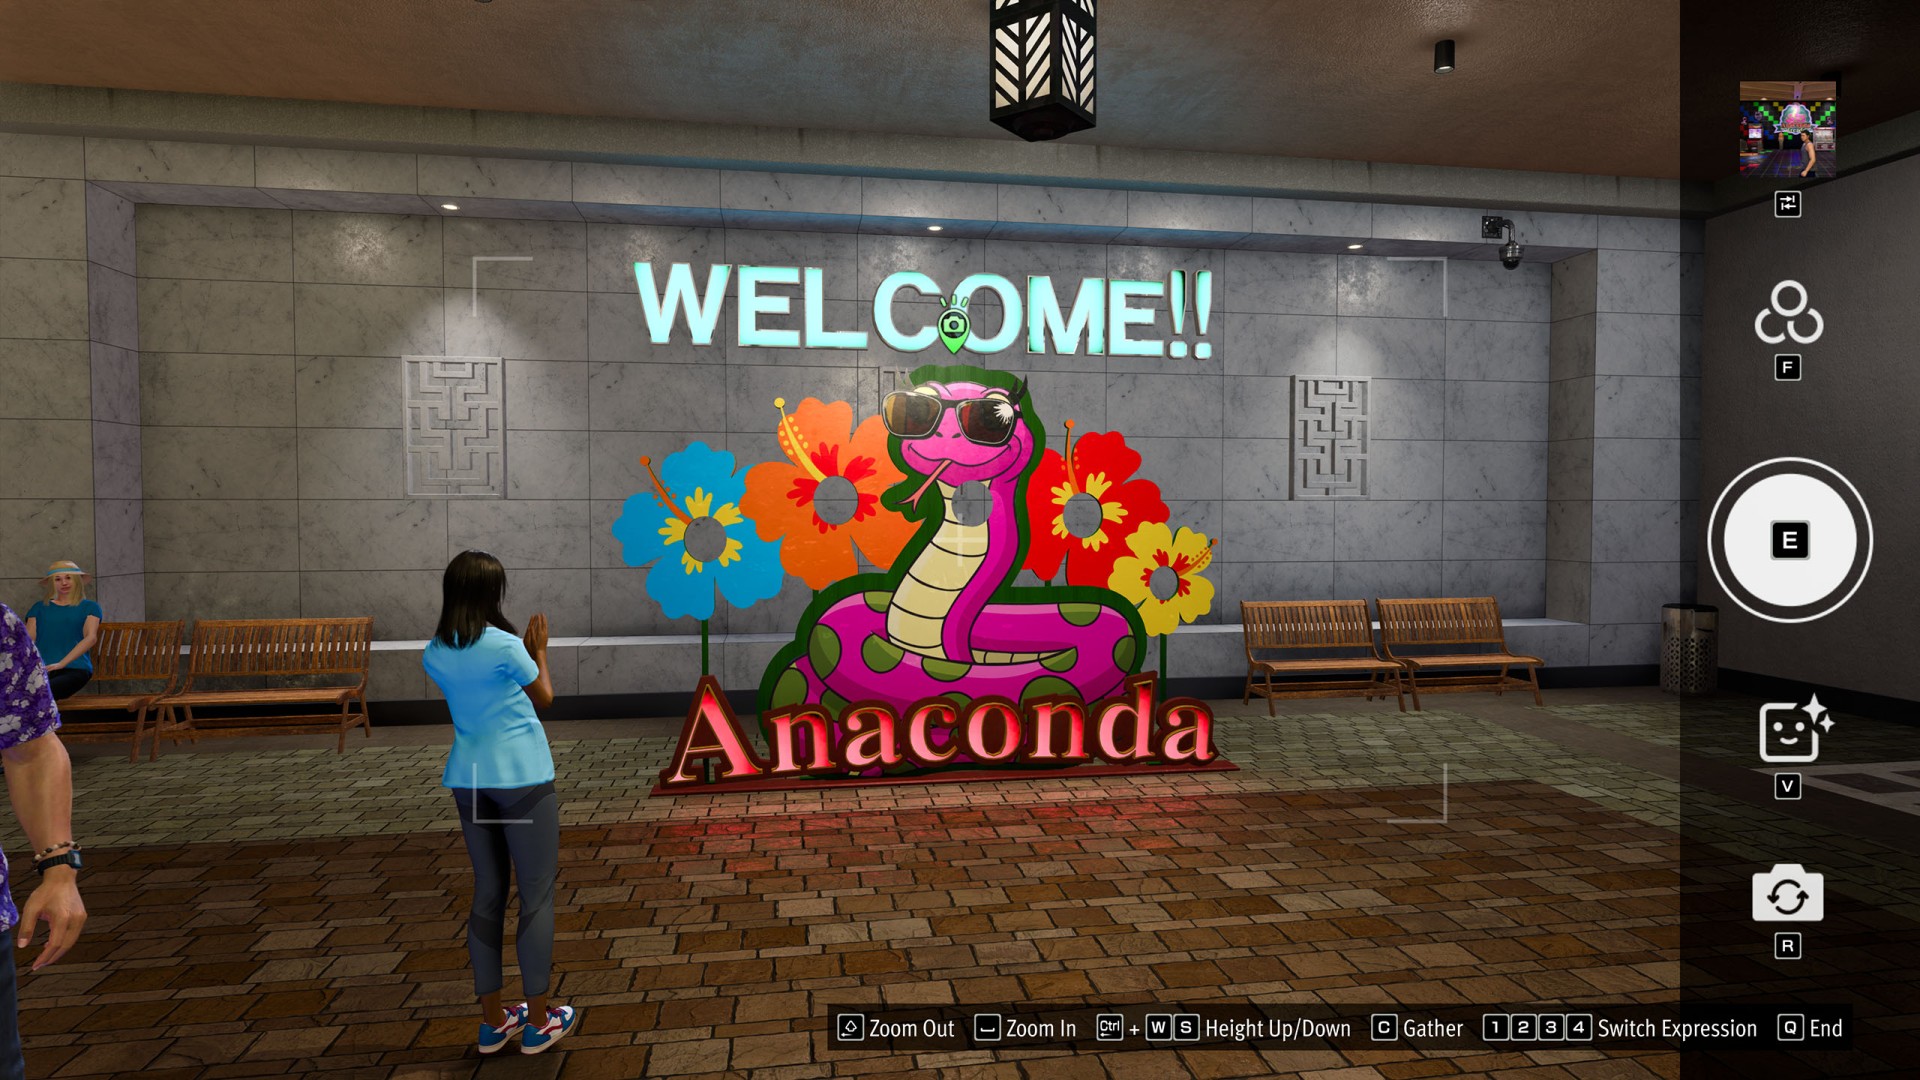
- Anaconda #3 (Face Cutout Board)
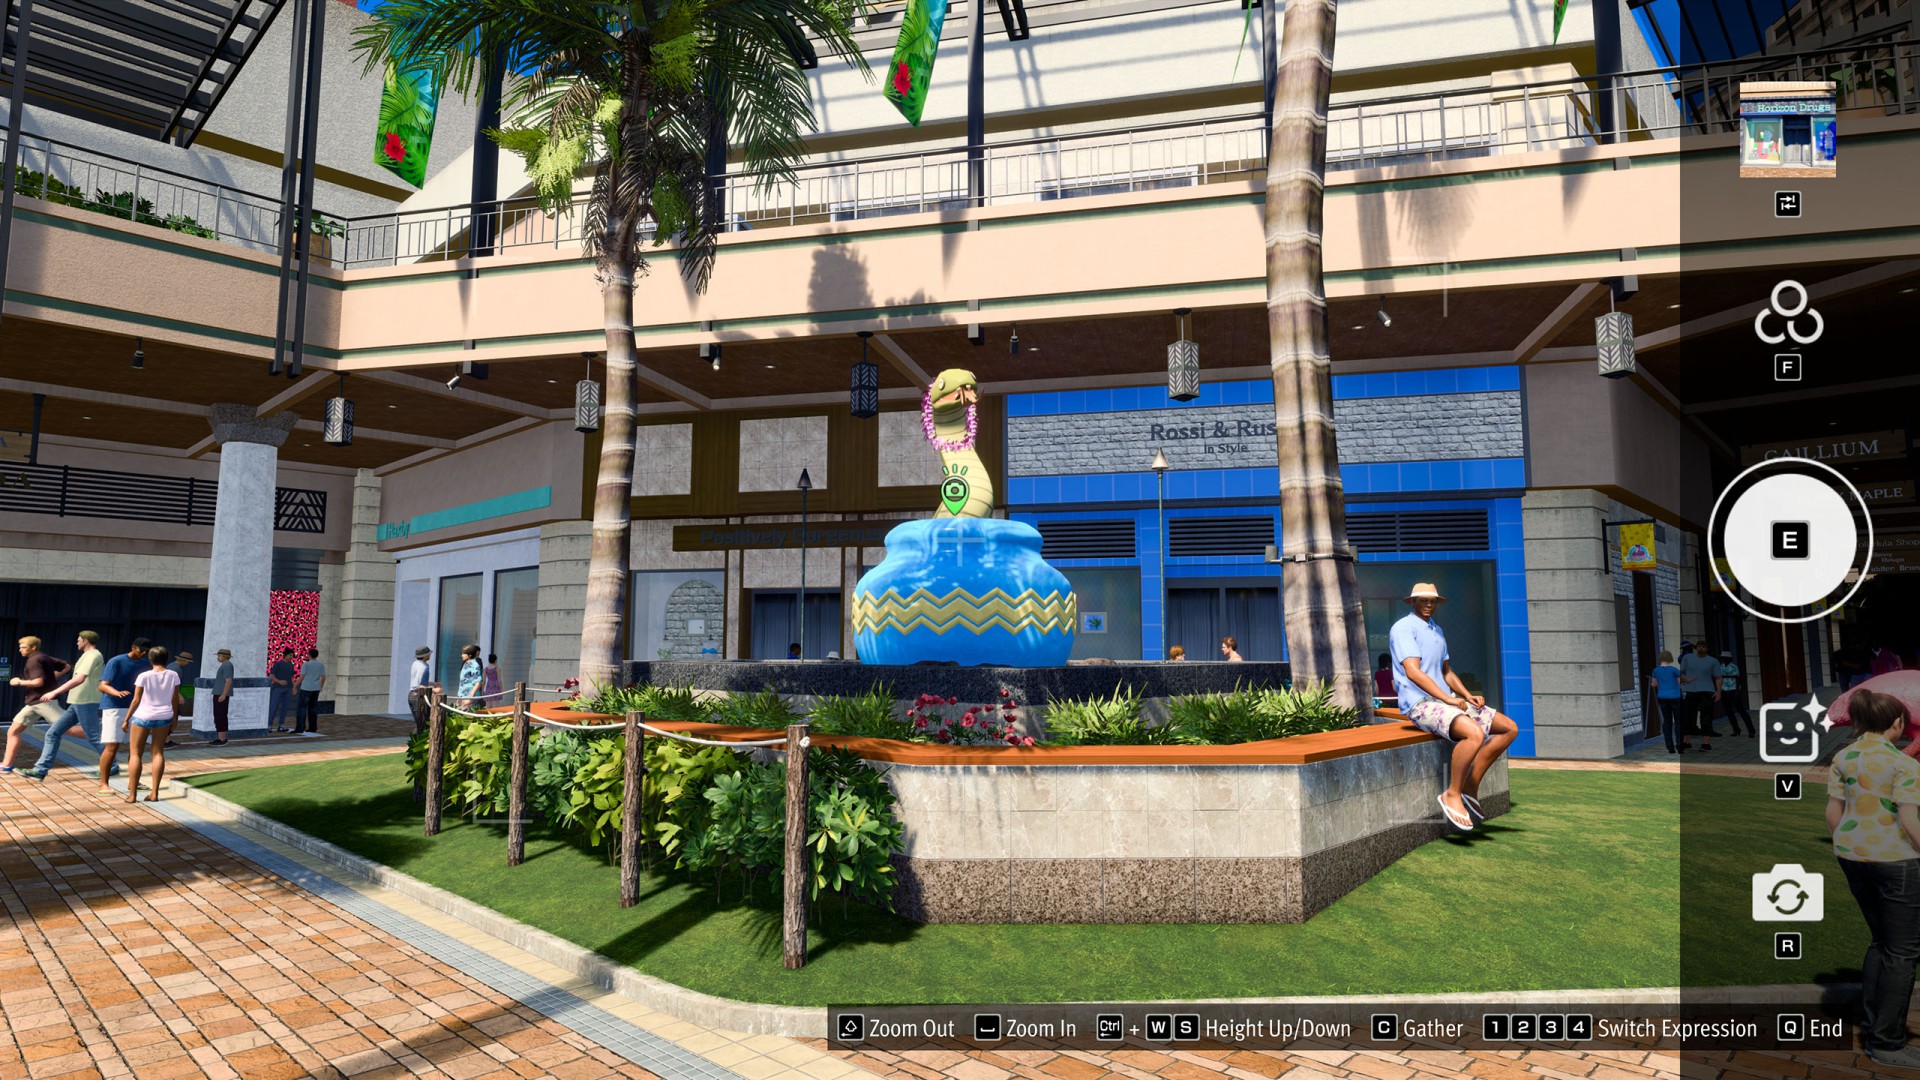
- Anaconda #4 (Snake Jar)
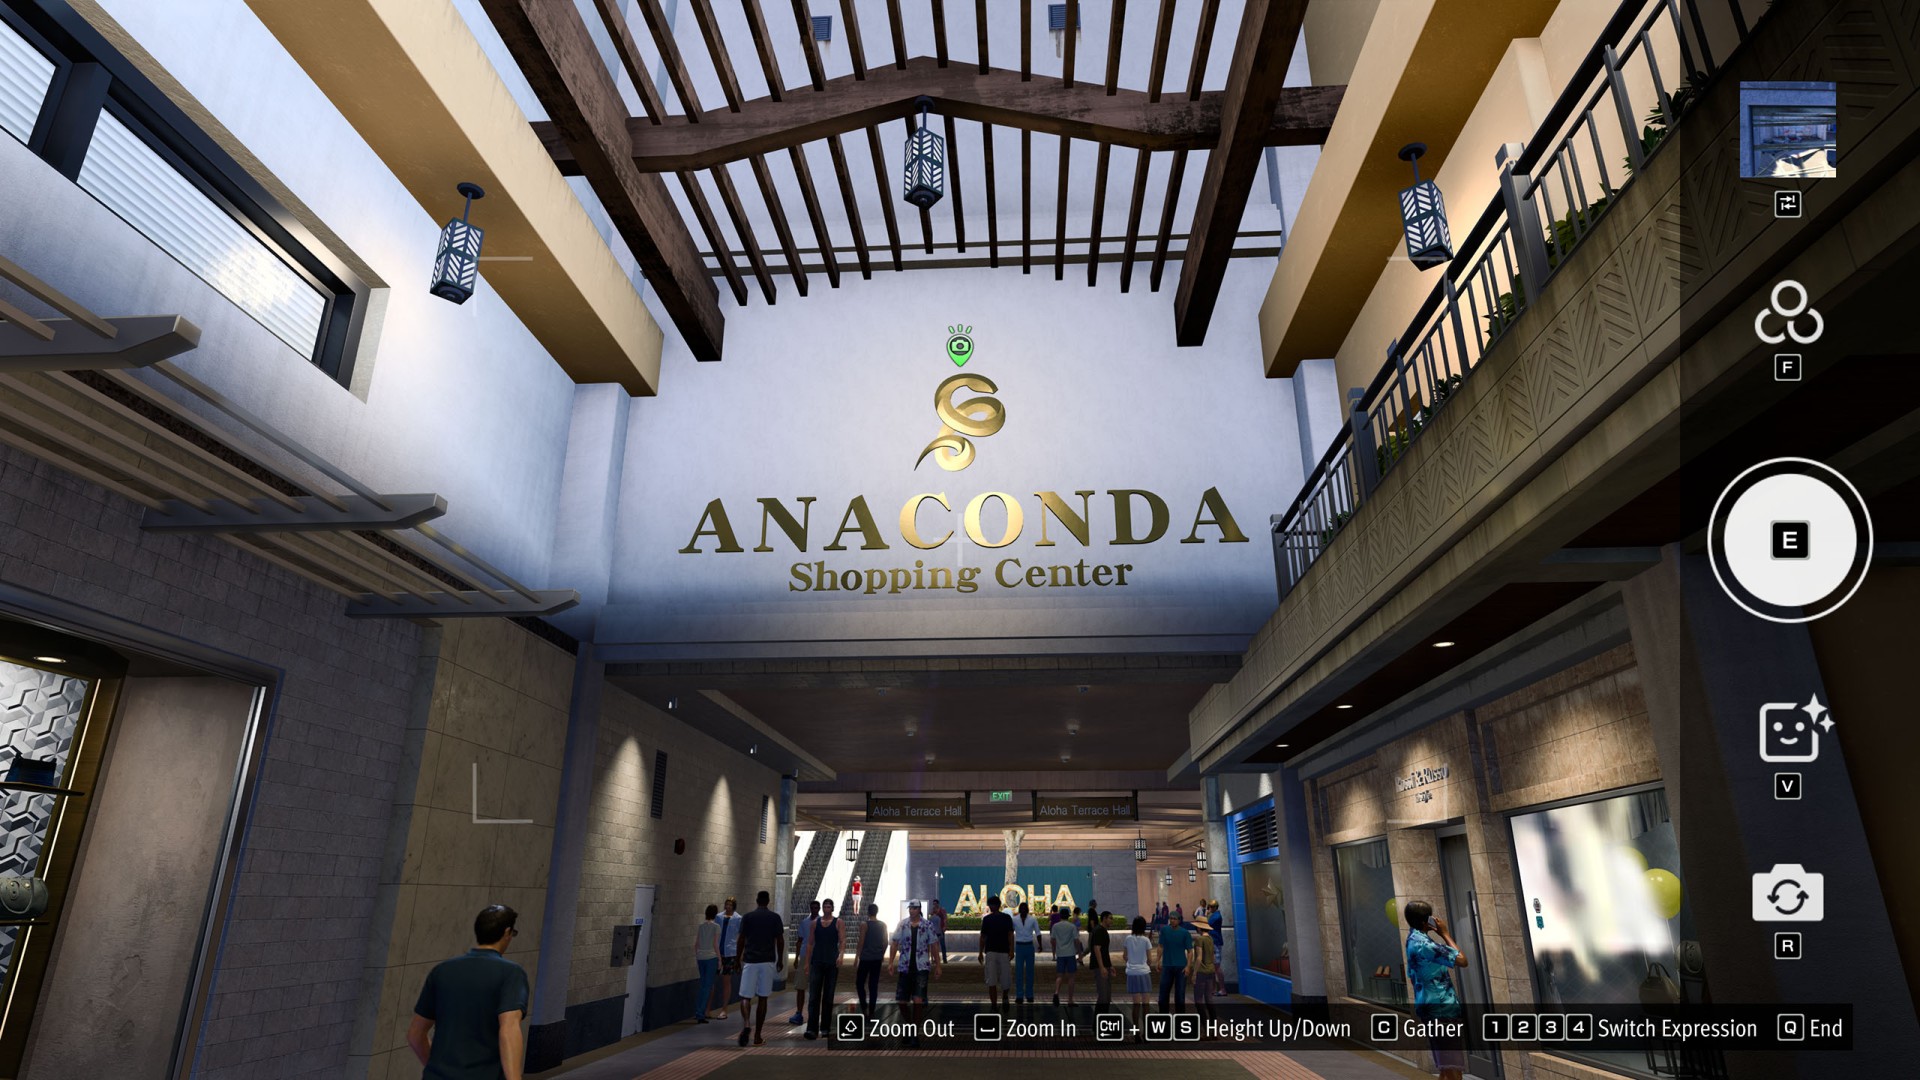
- Anaconda #5 (Anaconda North Entrance)
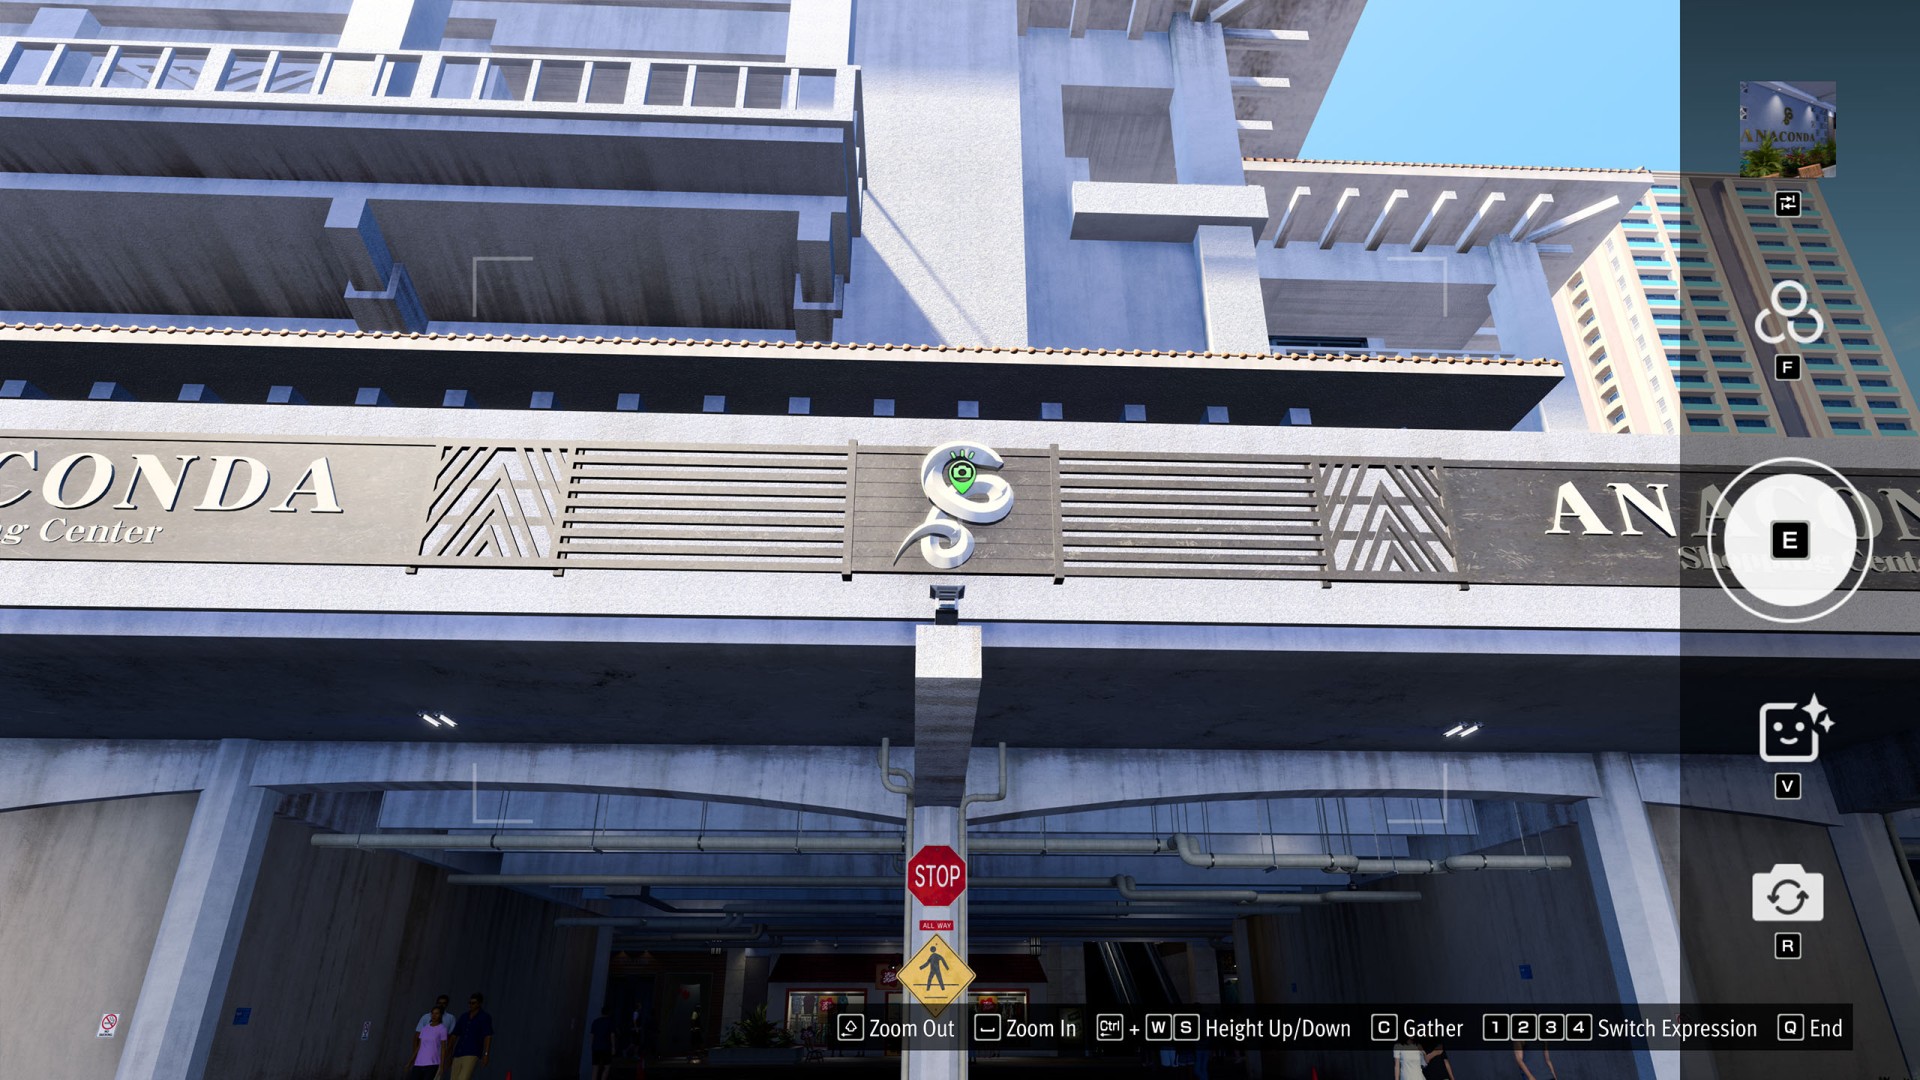
- Anaconda #6 (Anaconda South Entrance)
- Anaconda #7 (Anaconda West Entrance)
- Anaconda #8 (Hidden Anaconda: Shrubbery)
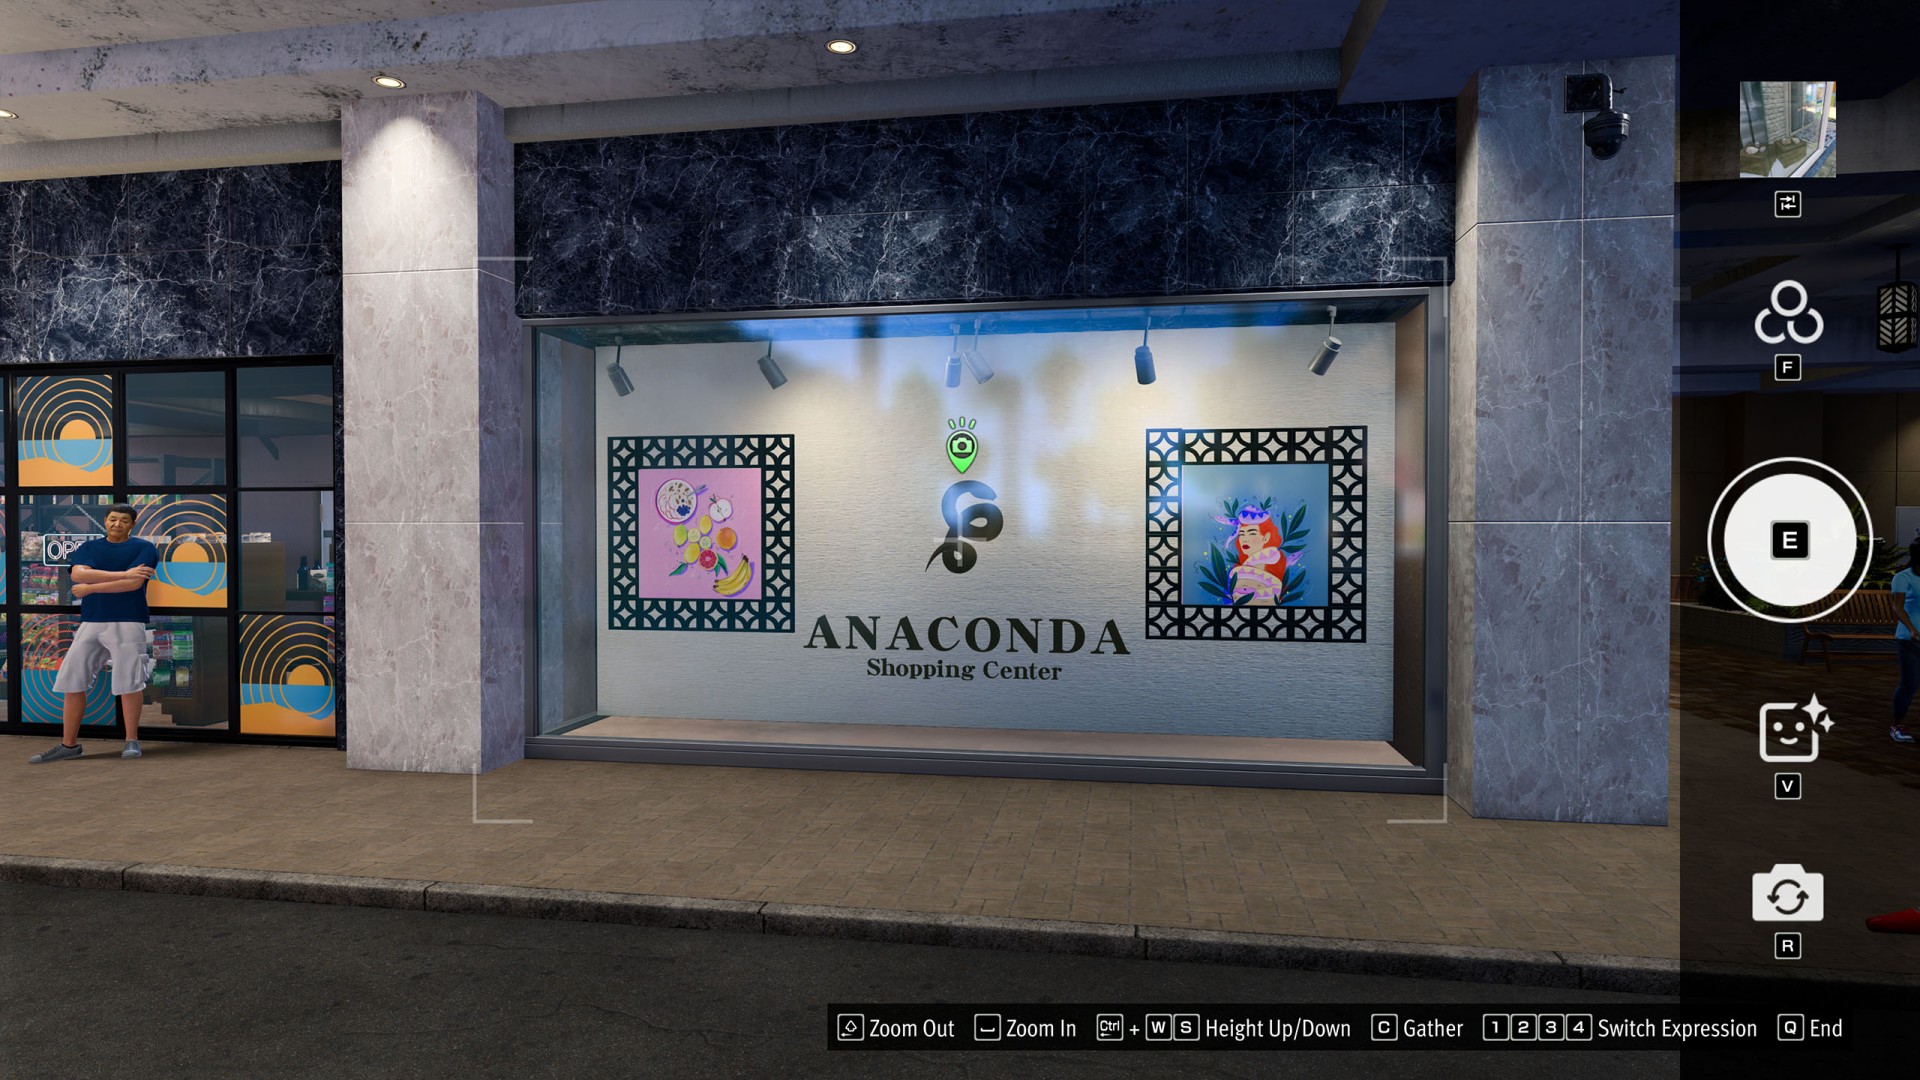
- Anaconda #9 (Hidden Anaconda: Window Display)
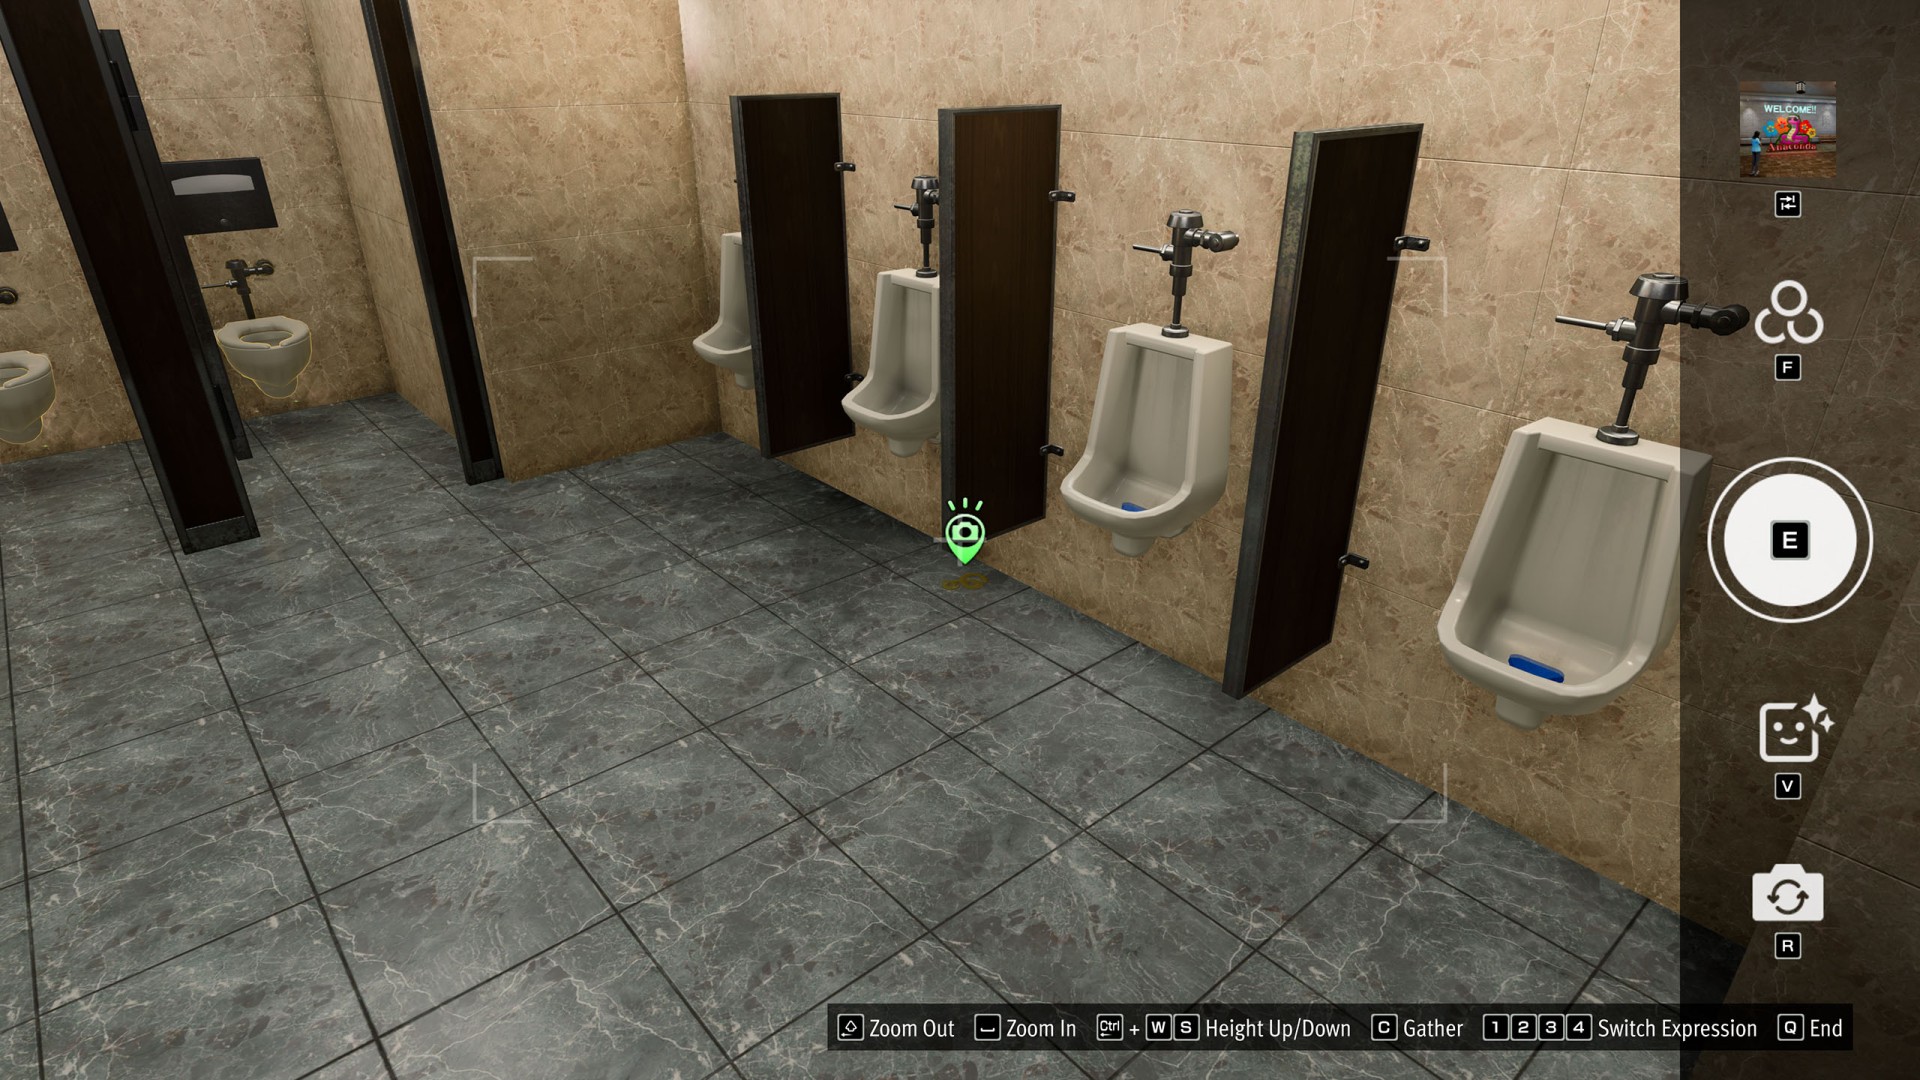
- Anaconda #10 (Hidden Anaconda: Restroom)
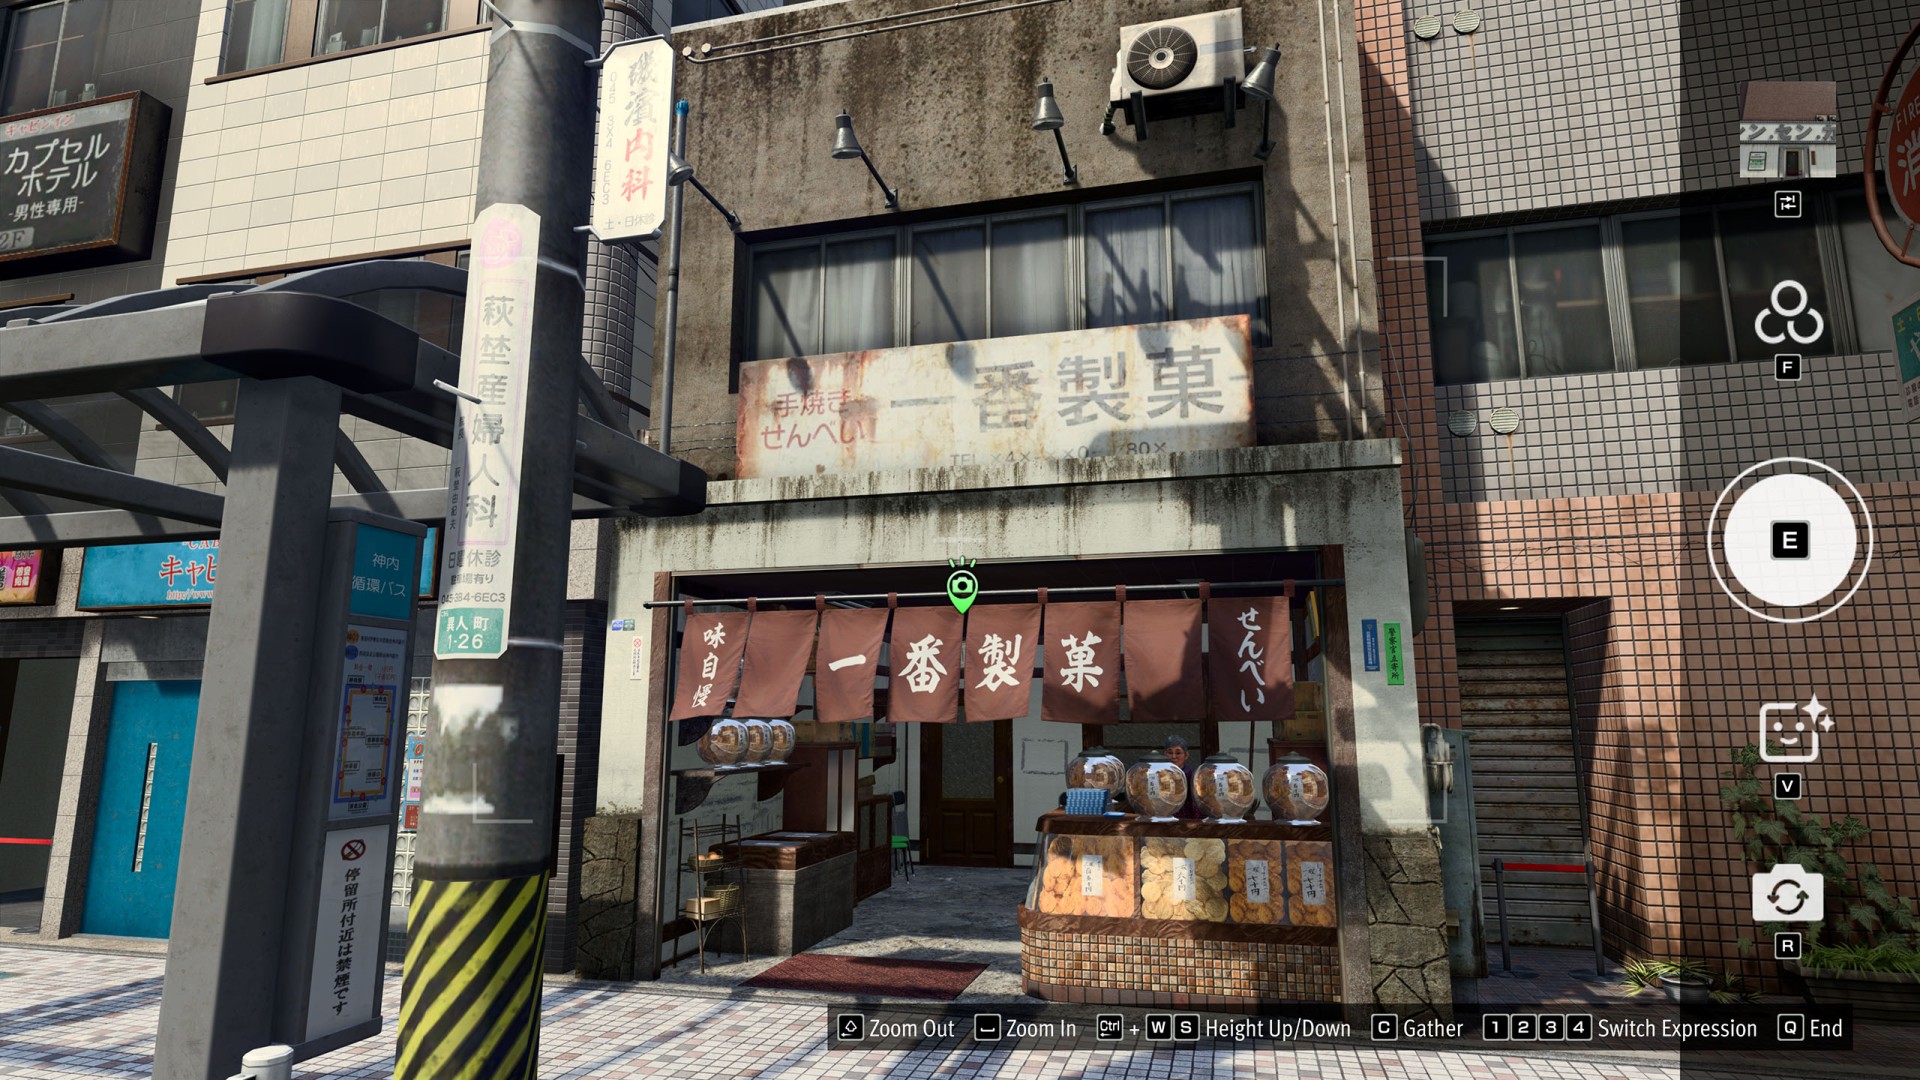
- Bar District #1 (Ichiban Confections)
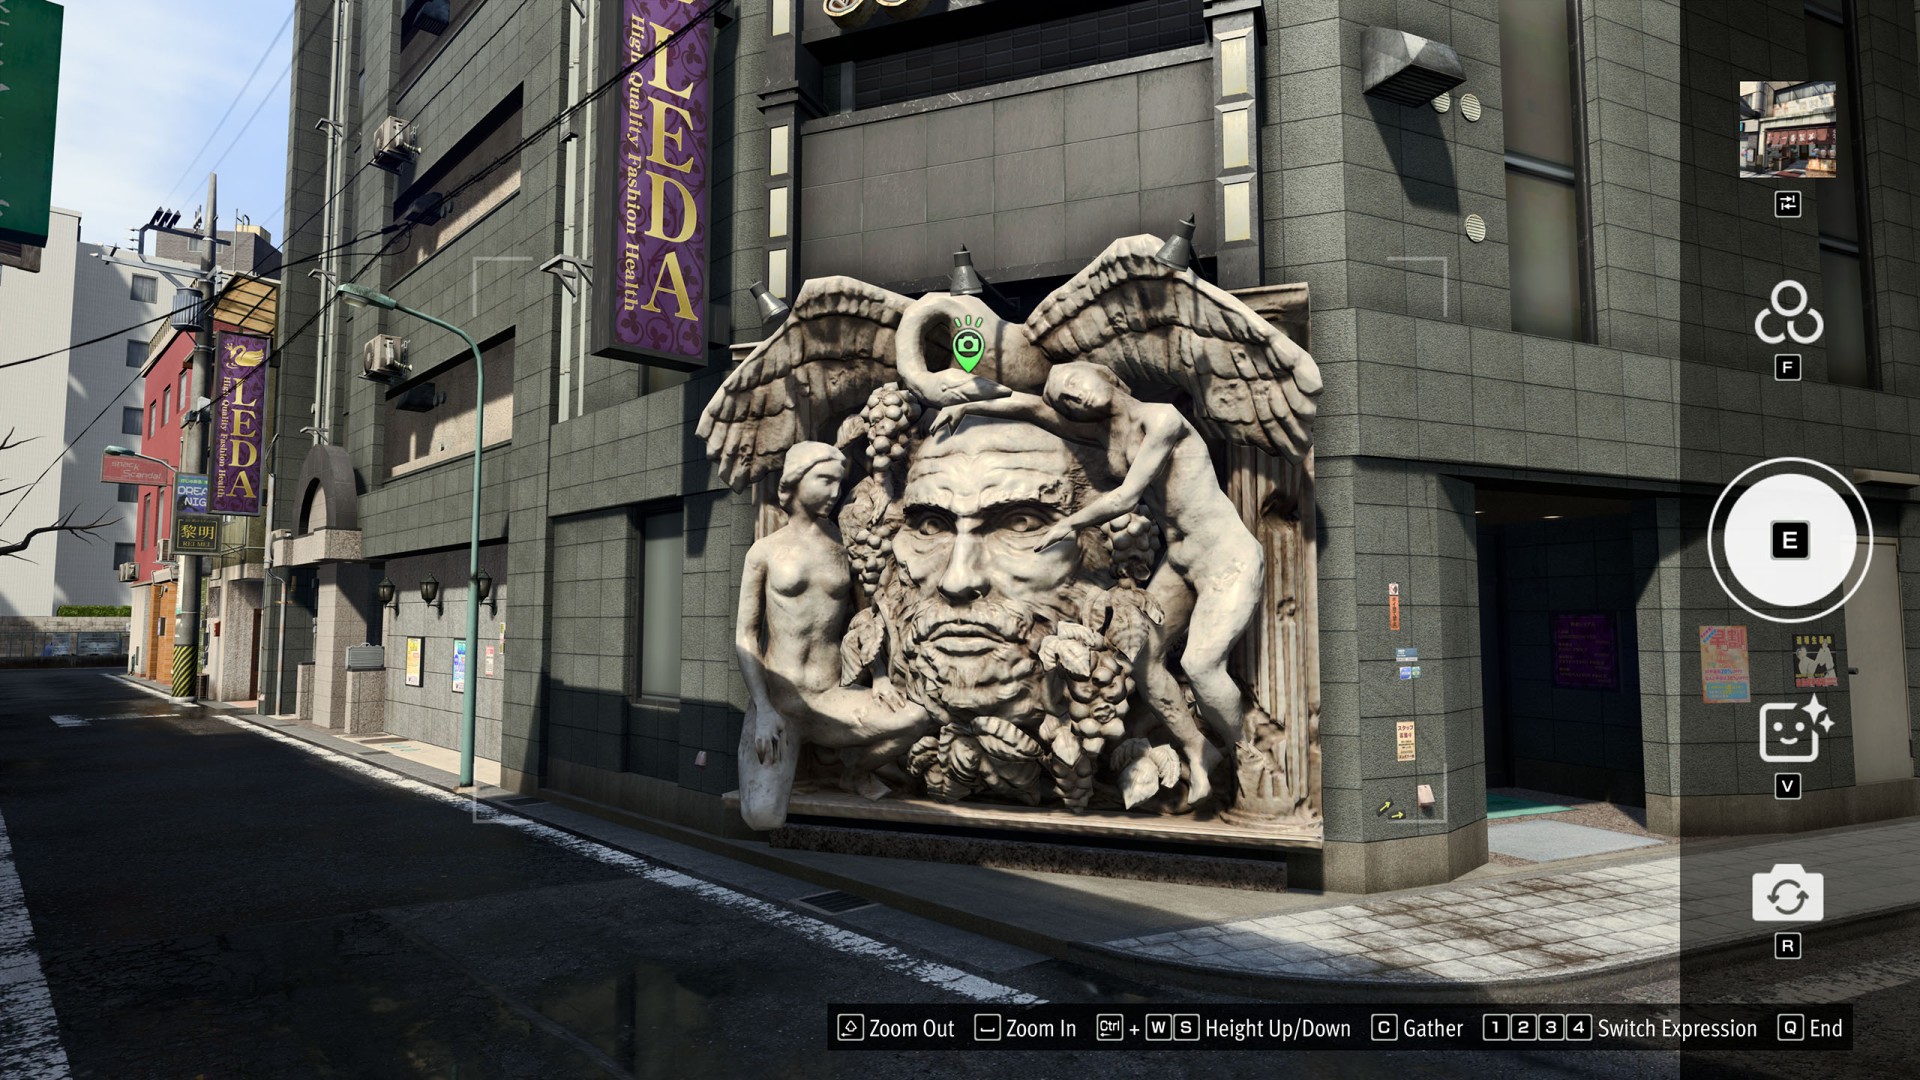
- Bar District #2 (Leda)
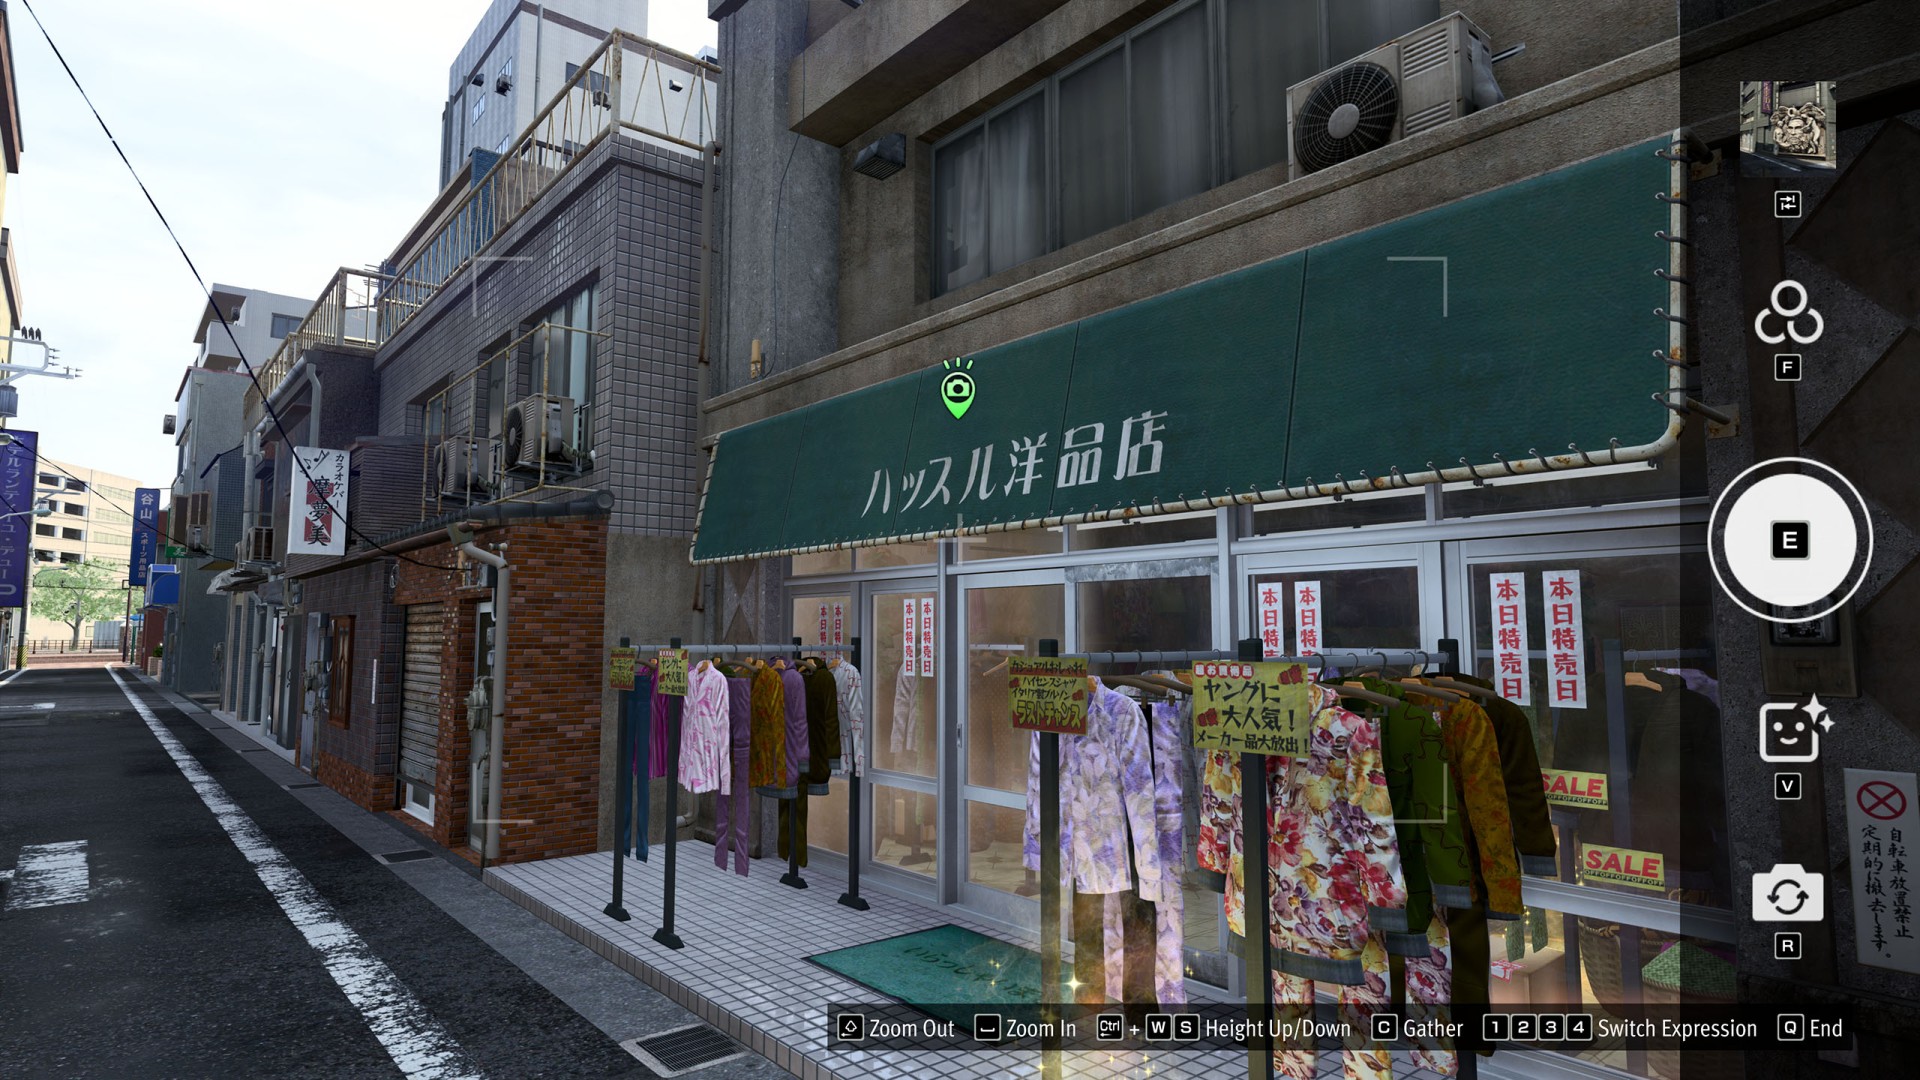
- Bar District #3 (Hustle Boutique)
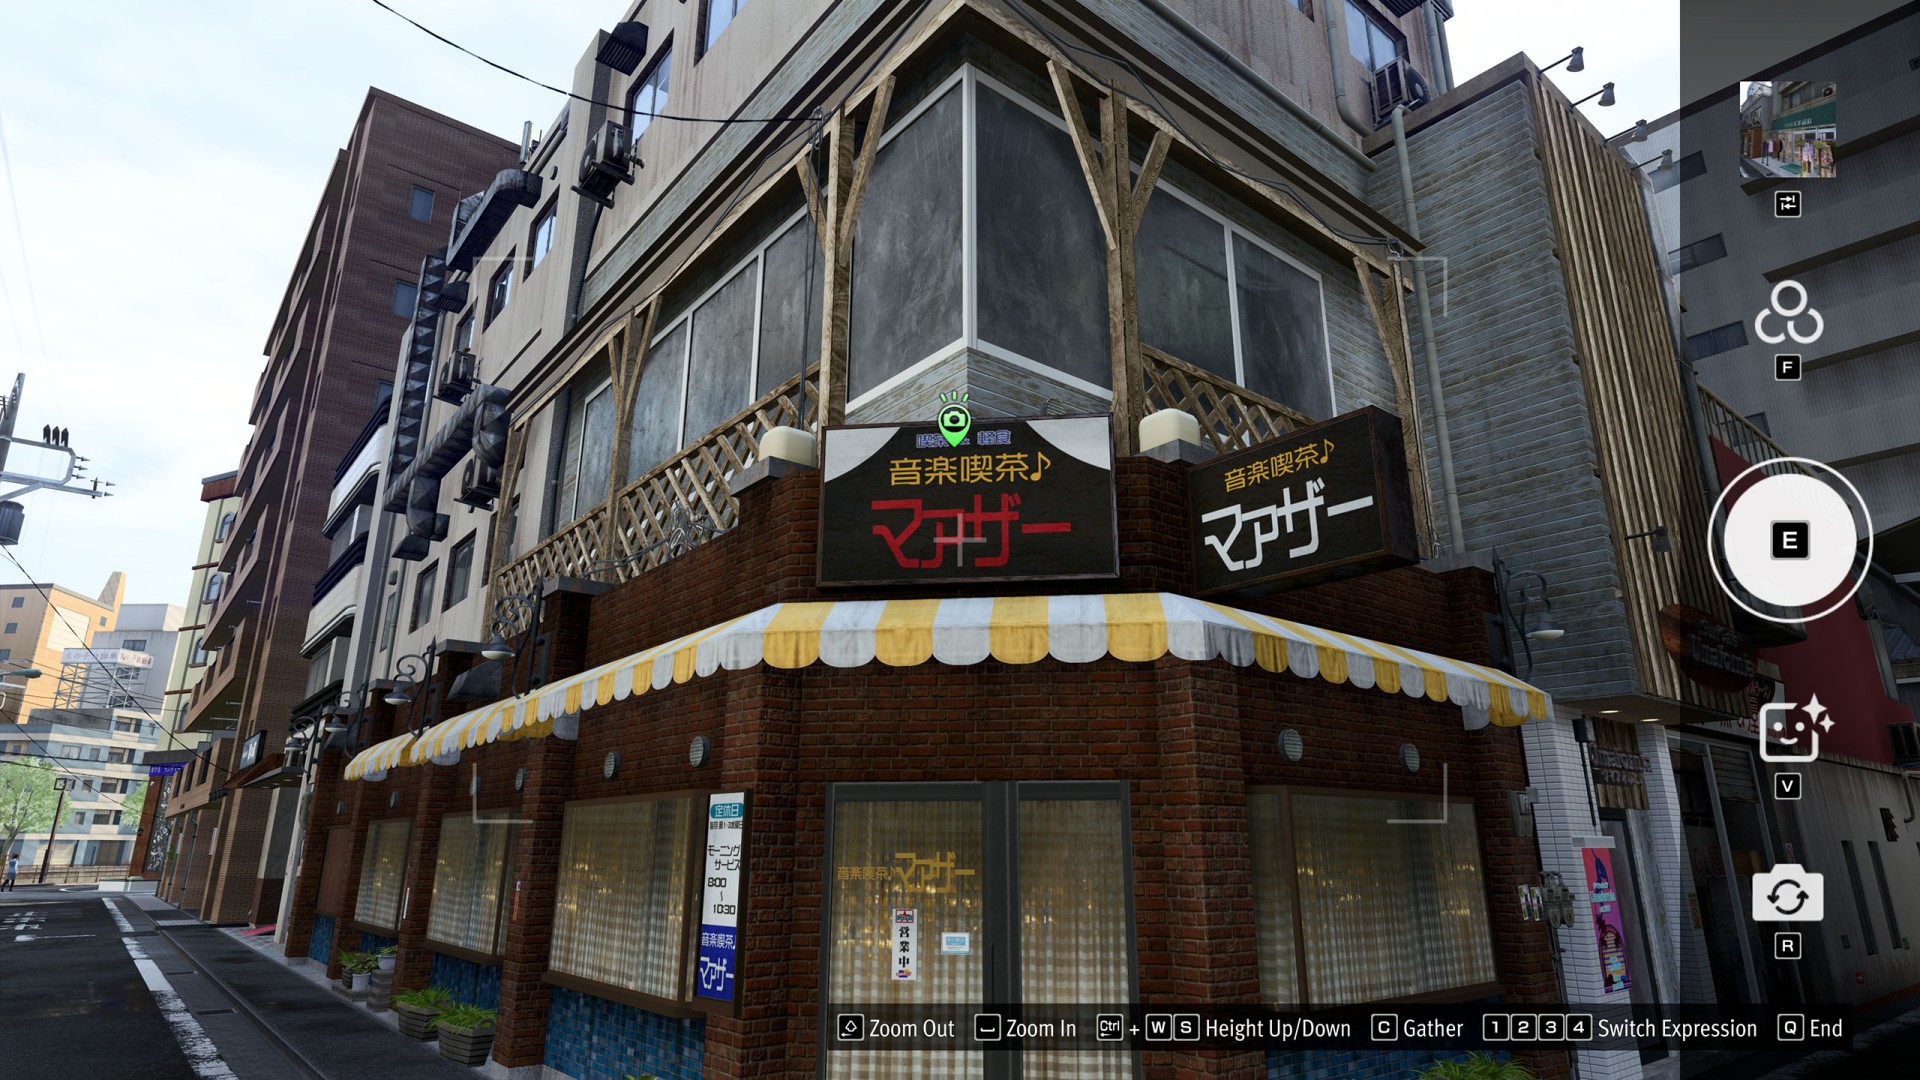
- Bar District #4 (Music Café Mother)
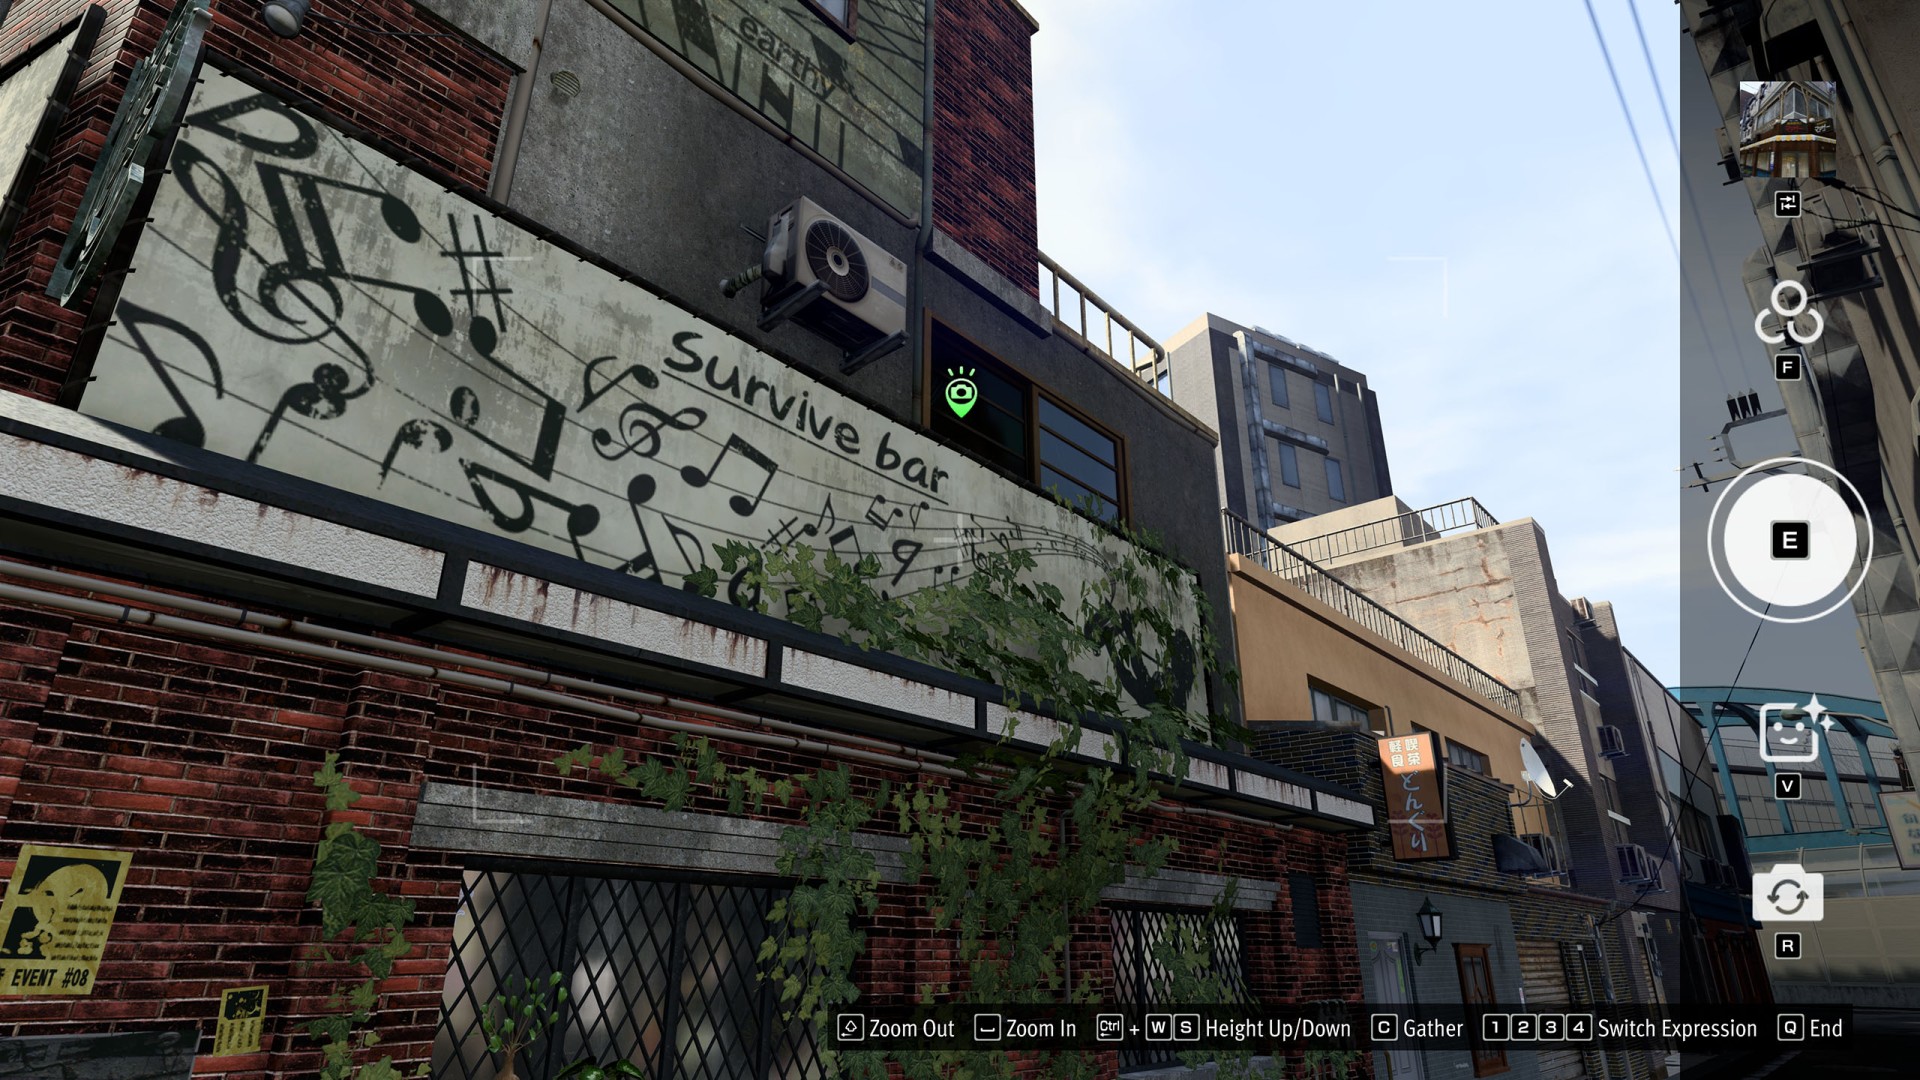
- Bar District #5 (Survive Bar)
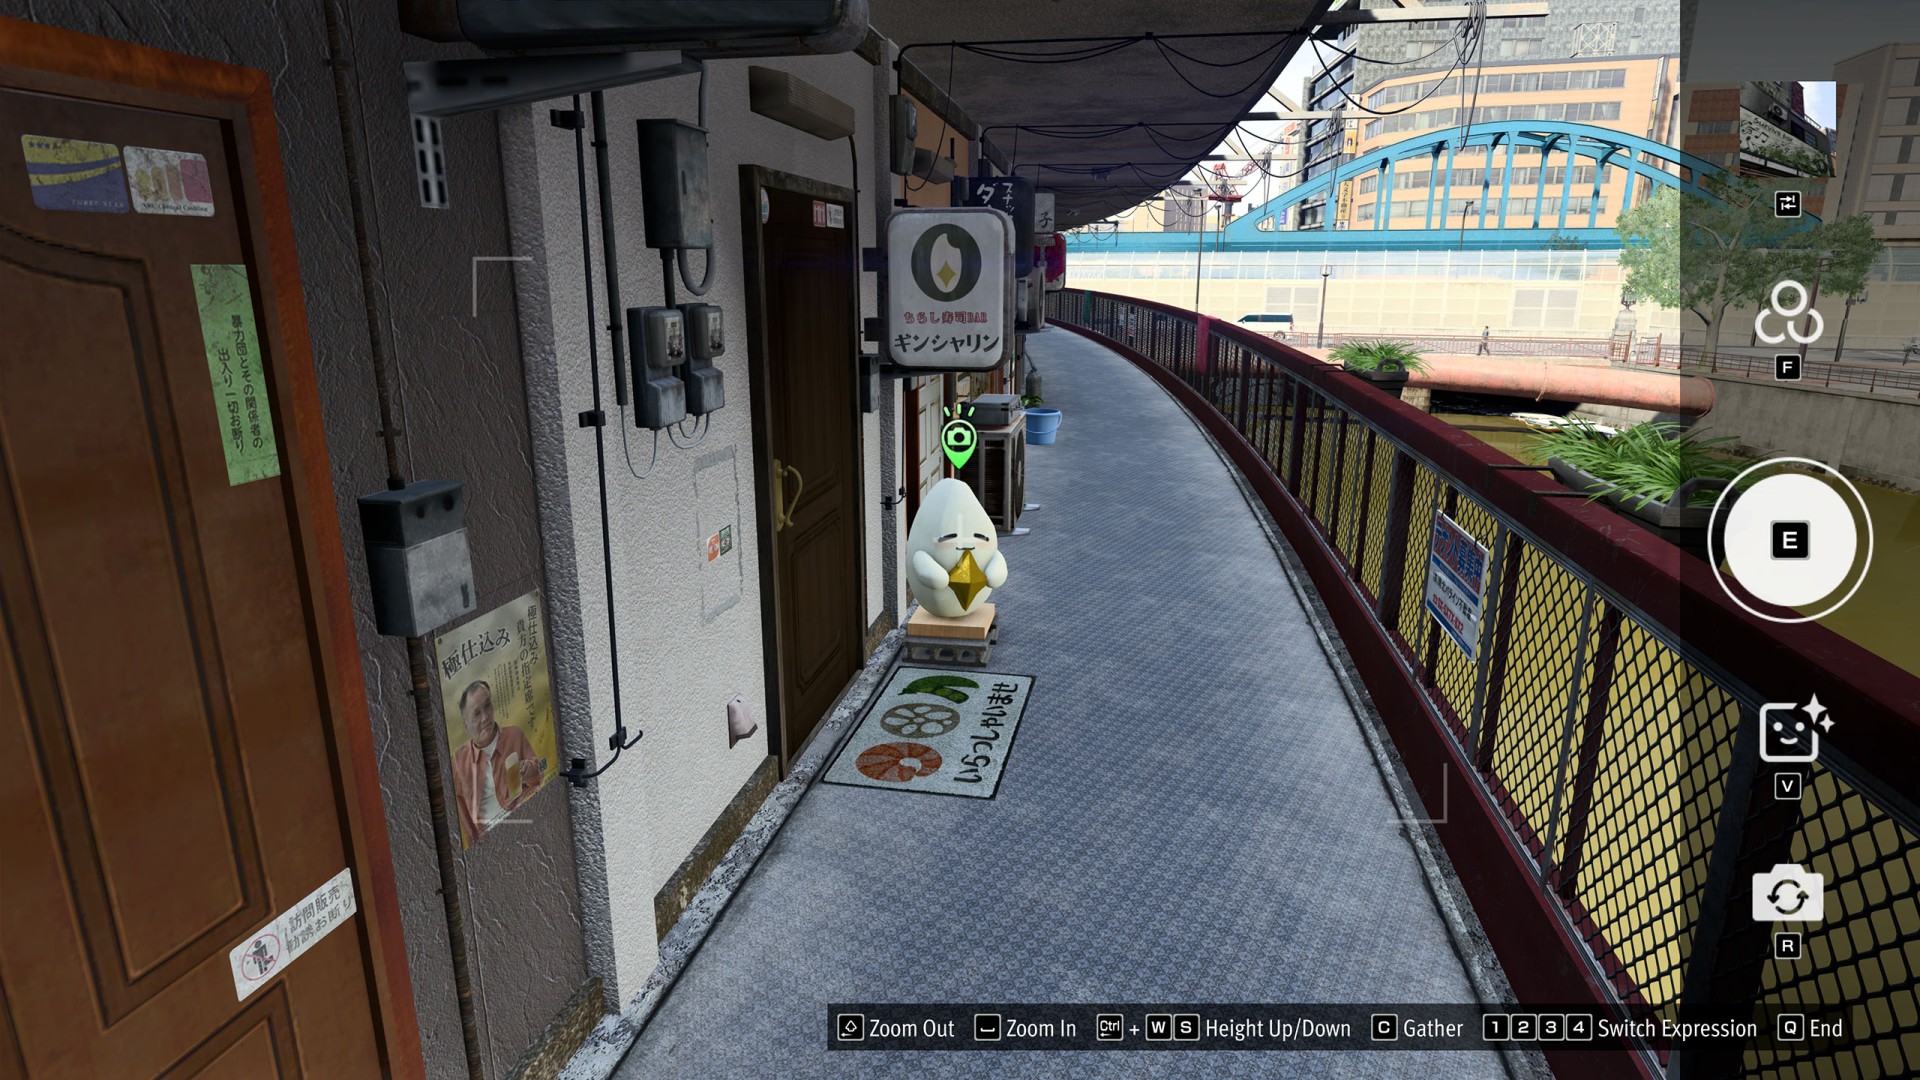
- Bar District #6 (Ginsharin)
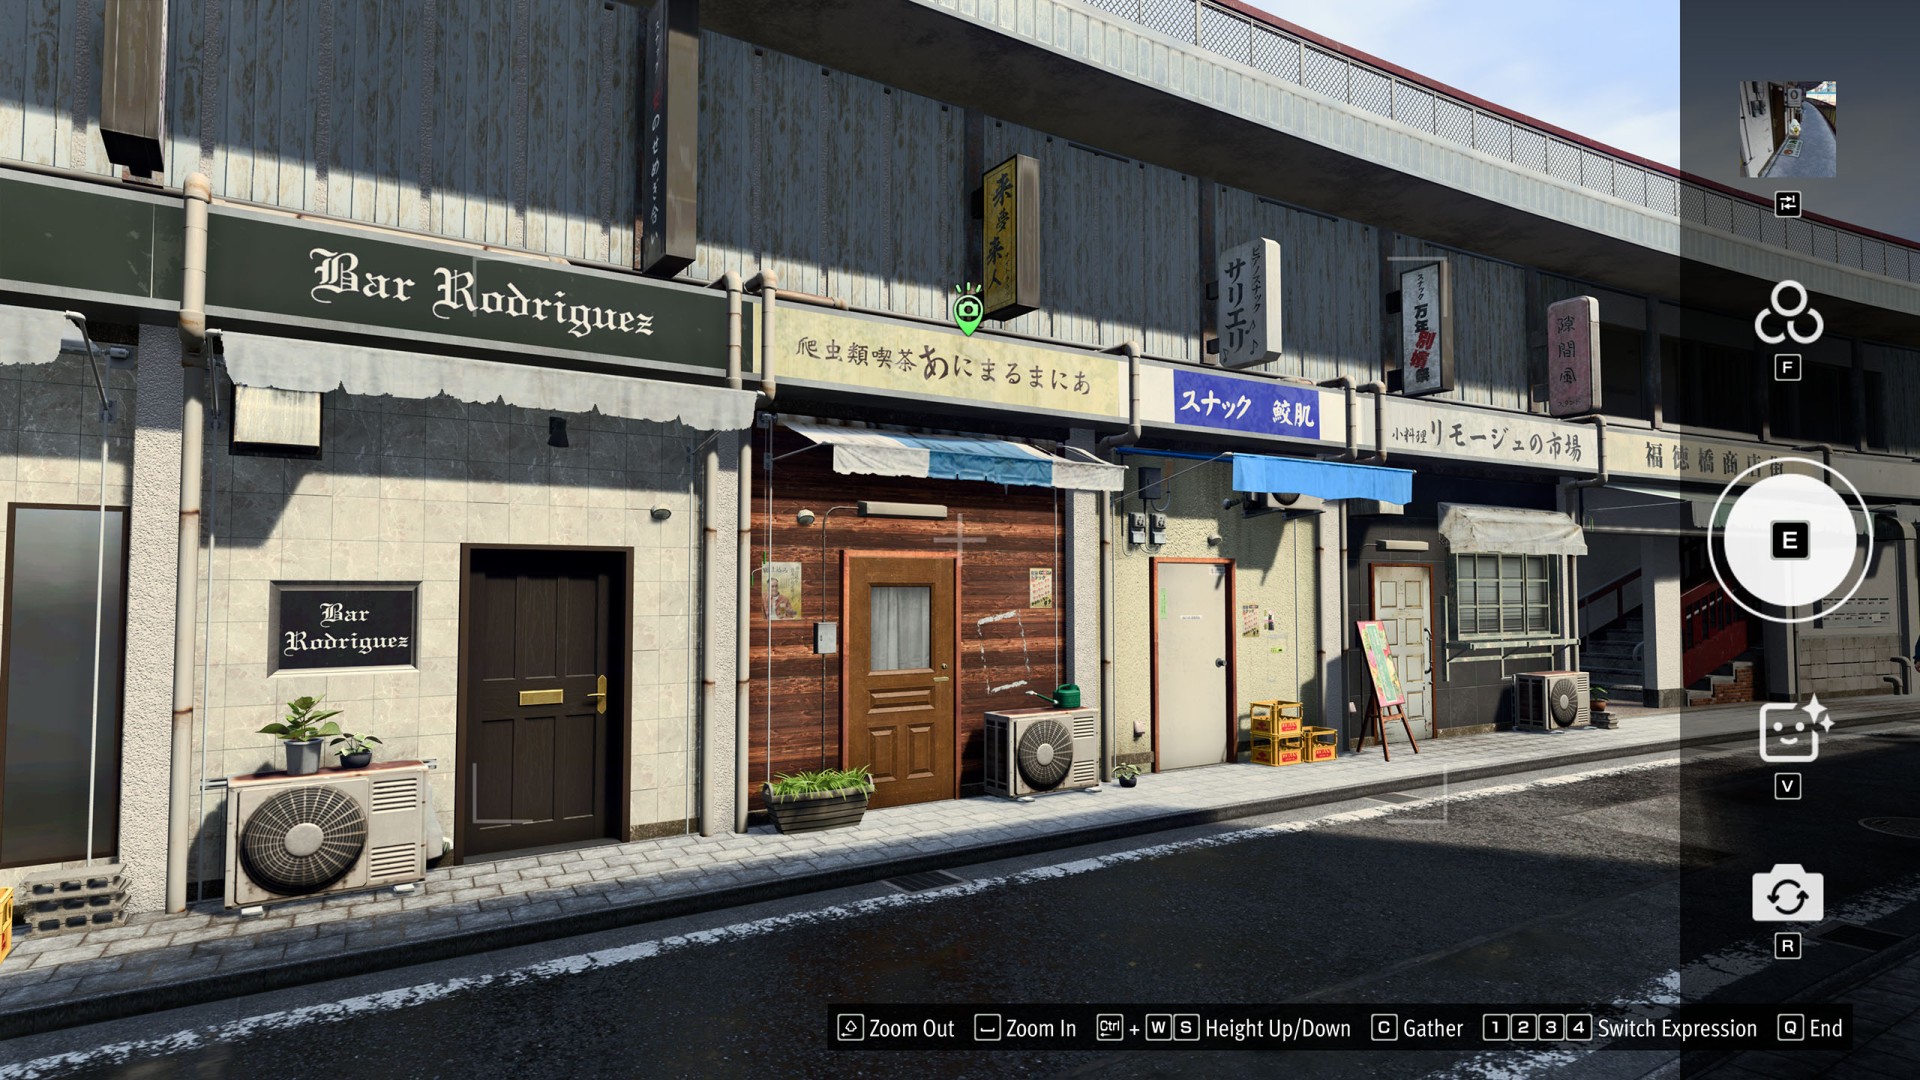
- Bar District #7 (Animal Mania)
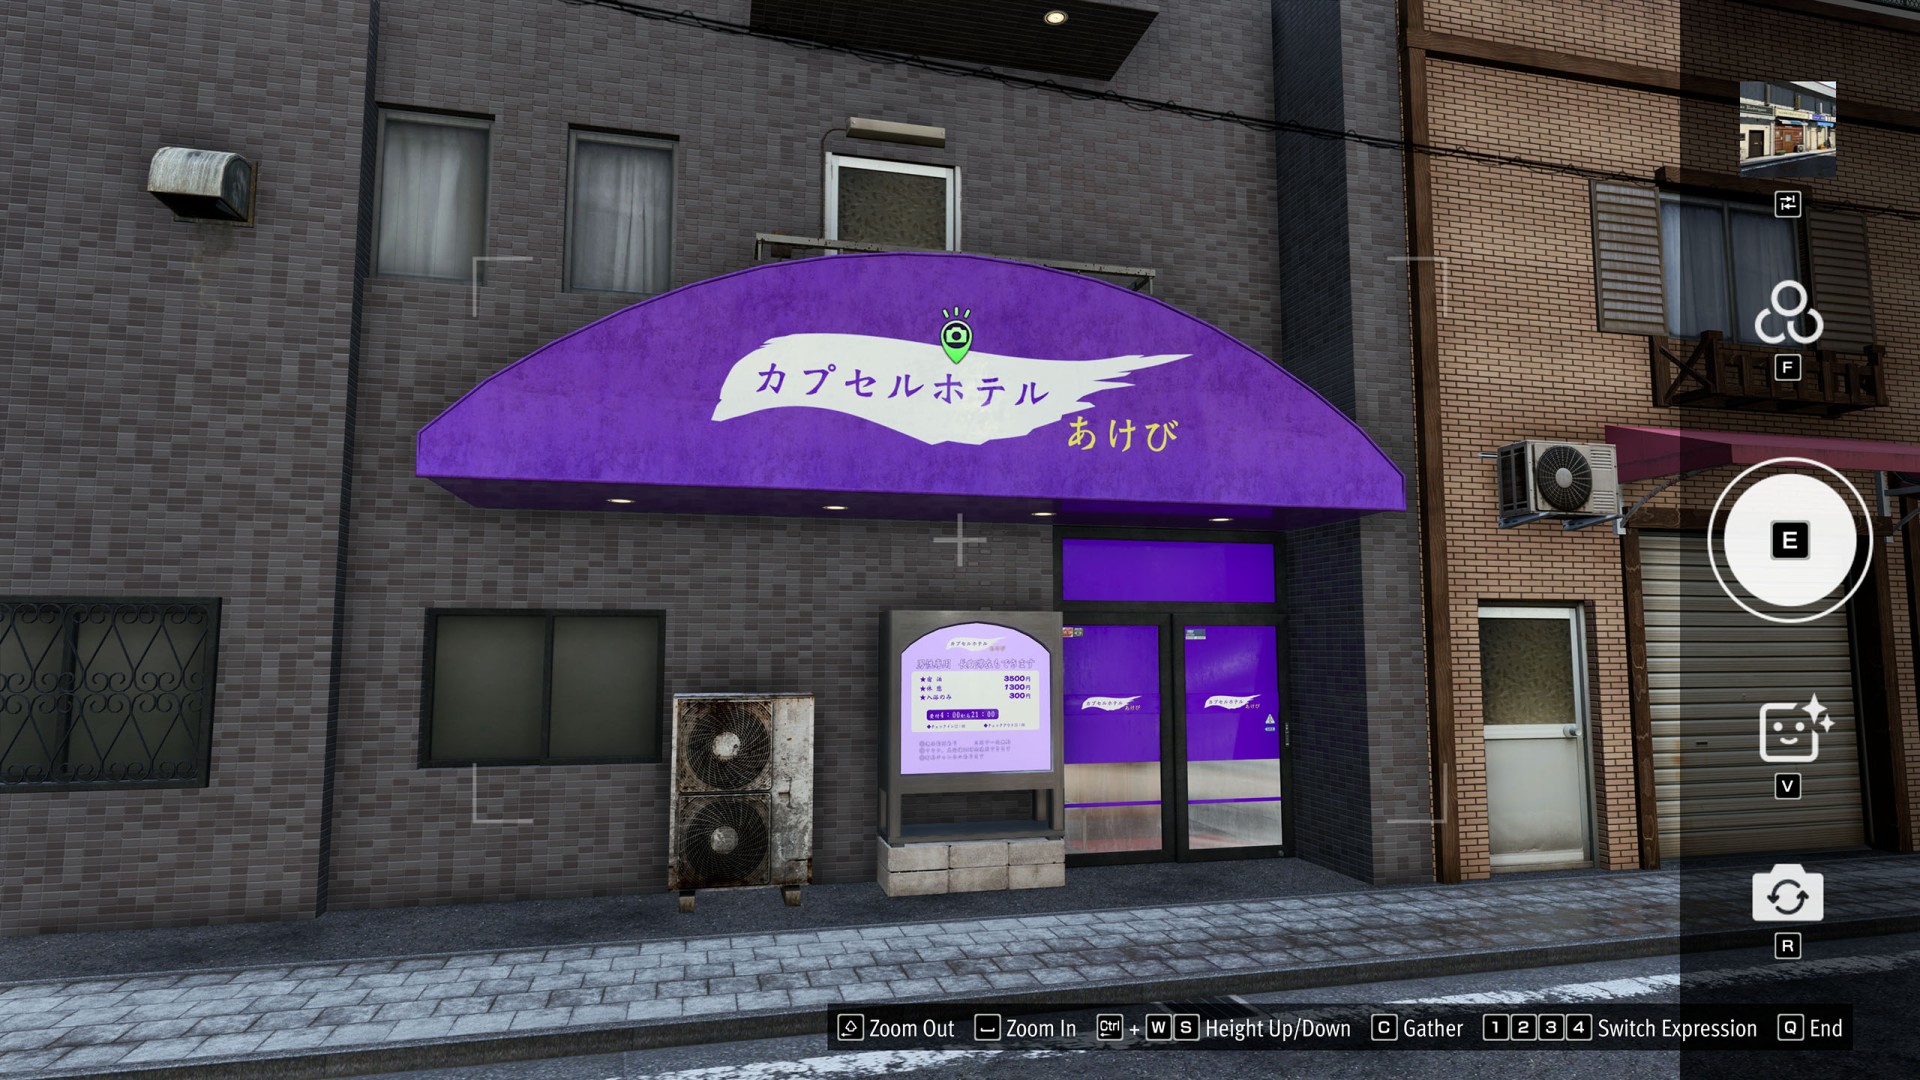
- Bar District #8 (Akebi Capsule Hotel)
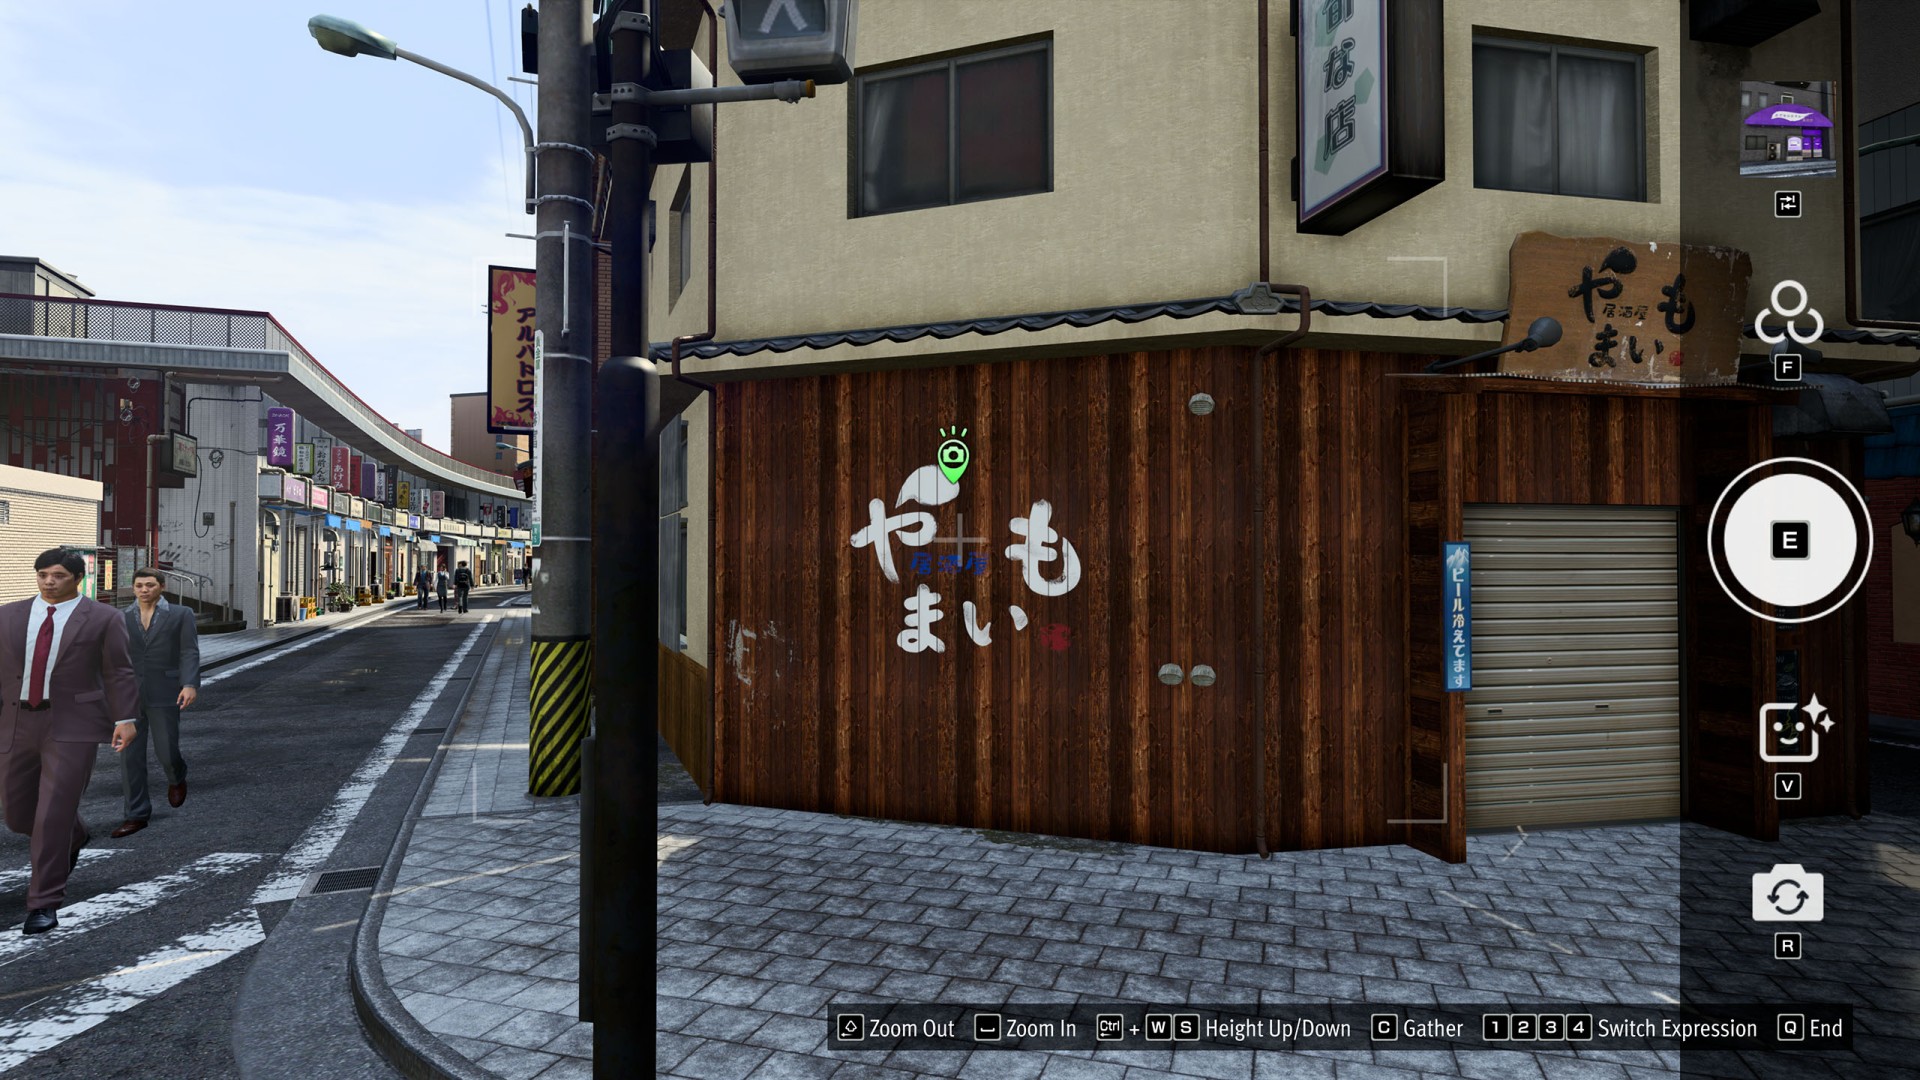
- Bar District #9 (Izakaya Yamaimo)
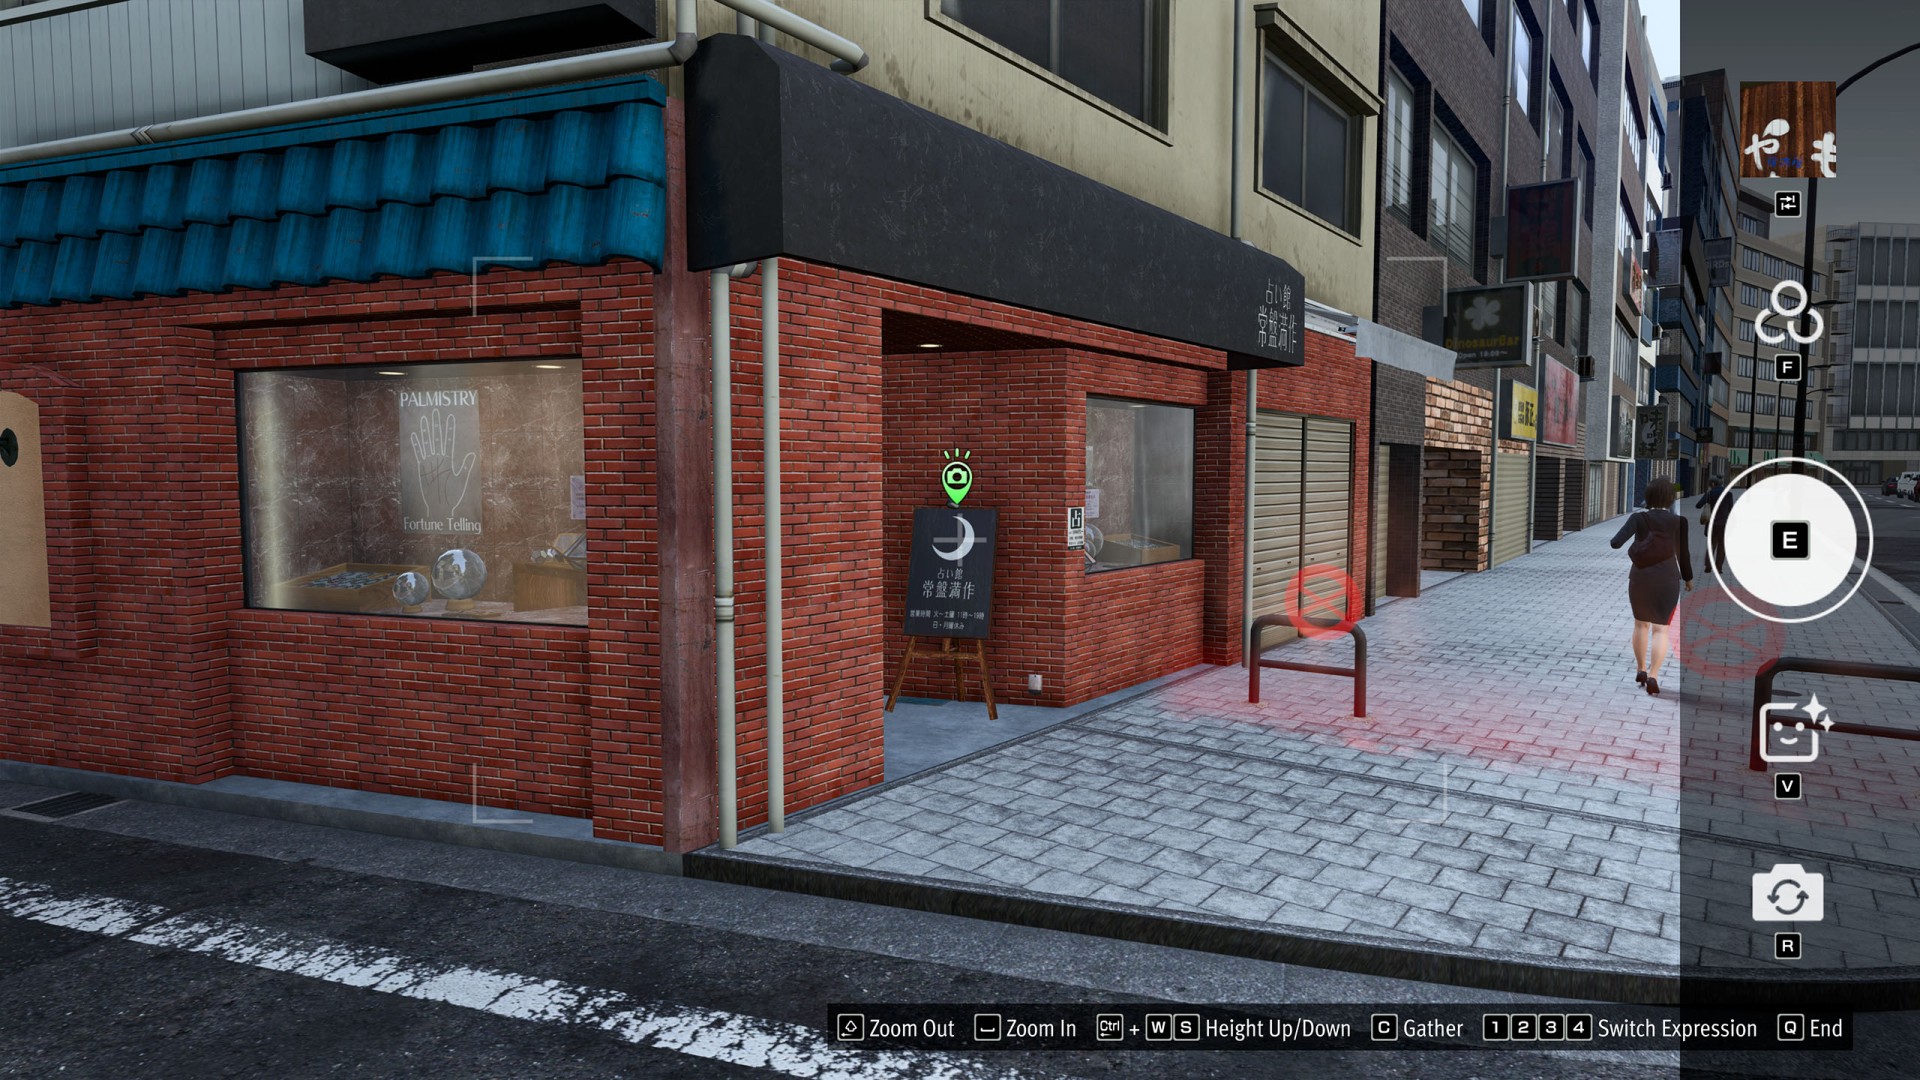
- Bar District #10 (Mansaku Tokiwa Fortunetelling)
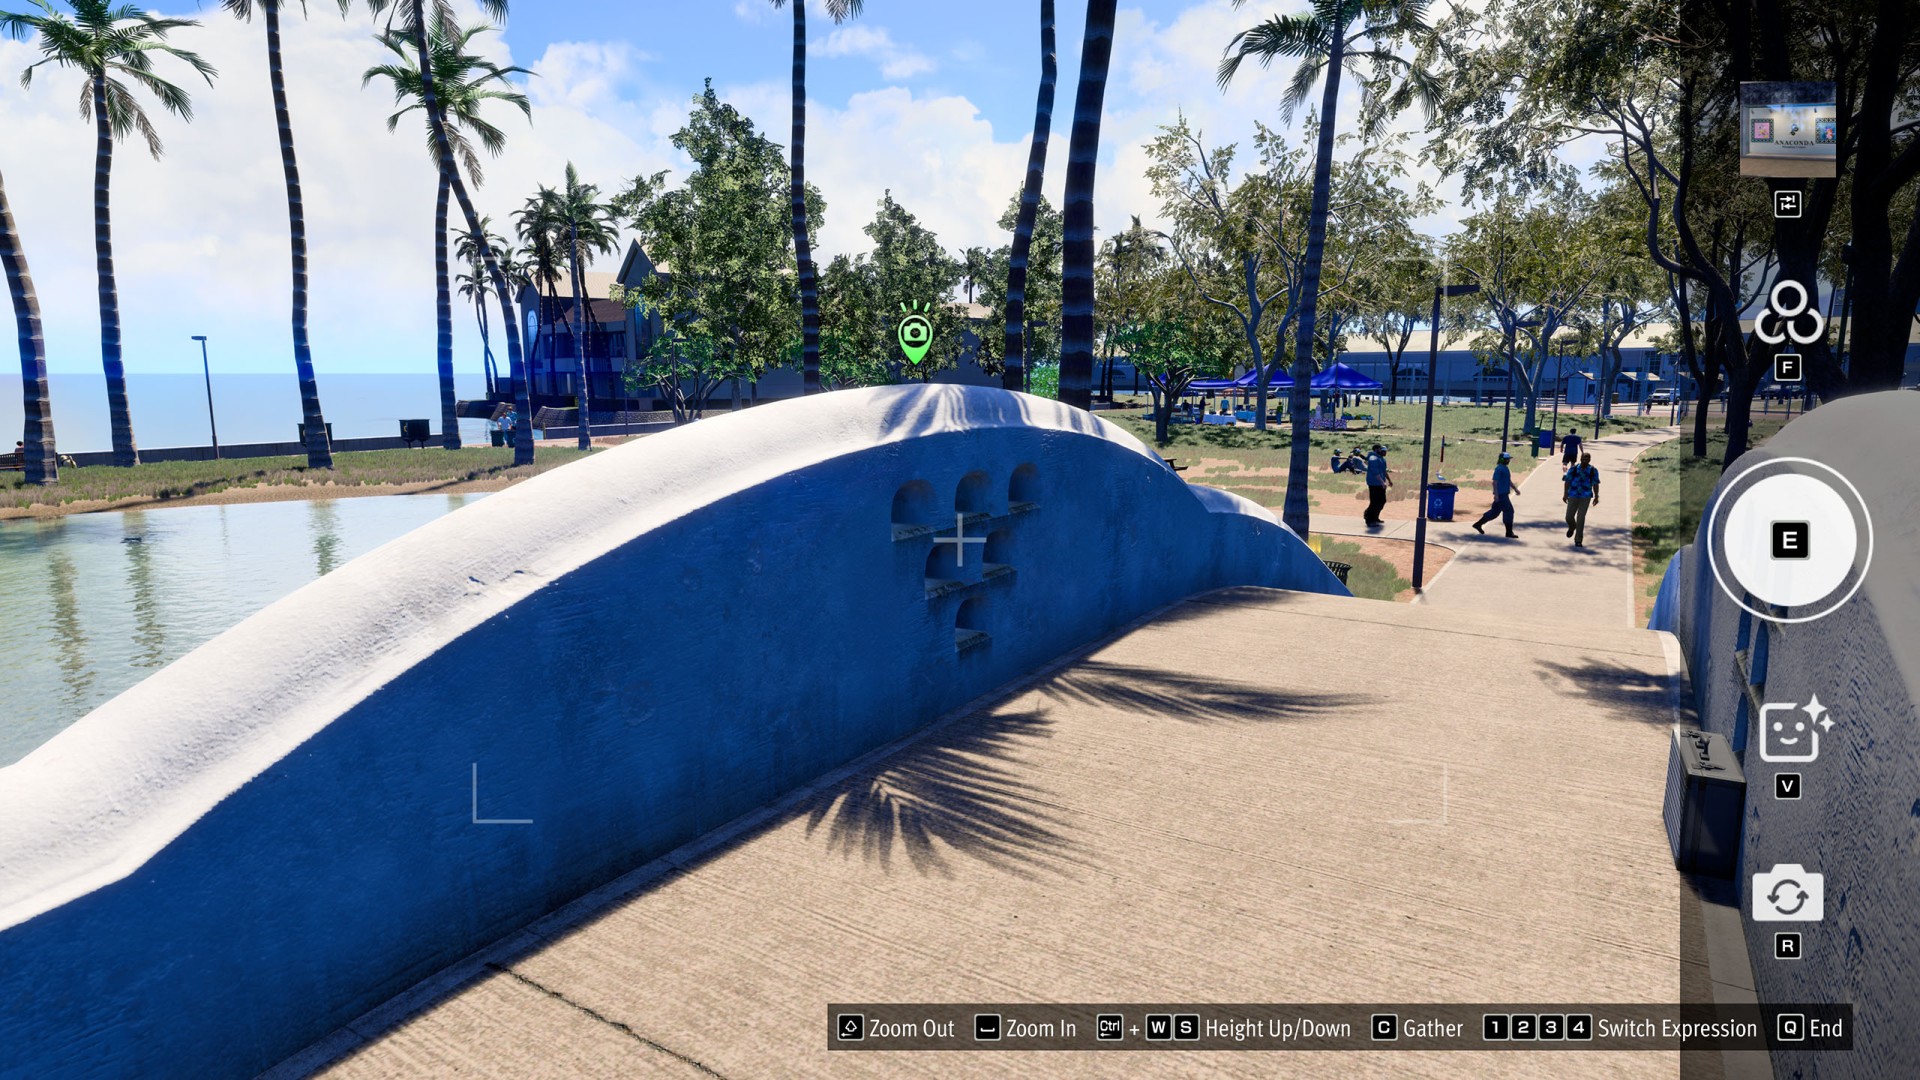
- Cultural District / Harbor Park #1 (Anaconda Harbor Park)
- Cultural District / Harbor Park #2 (Honolulu City Marina)
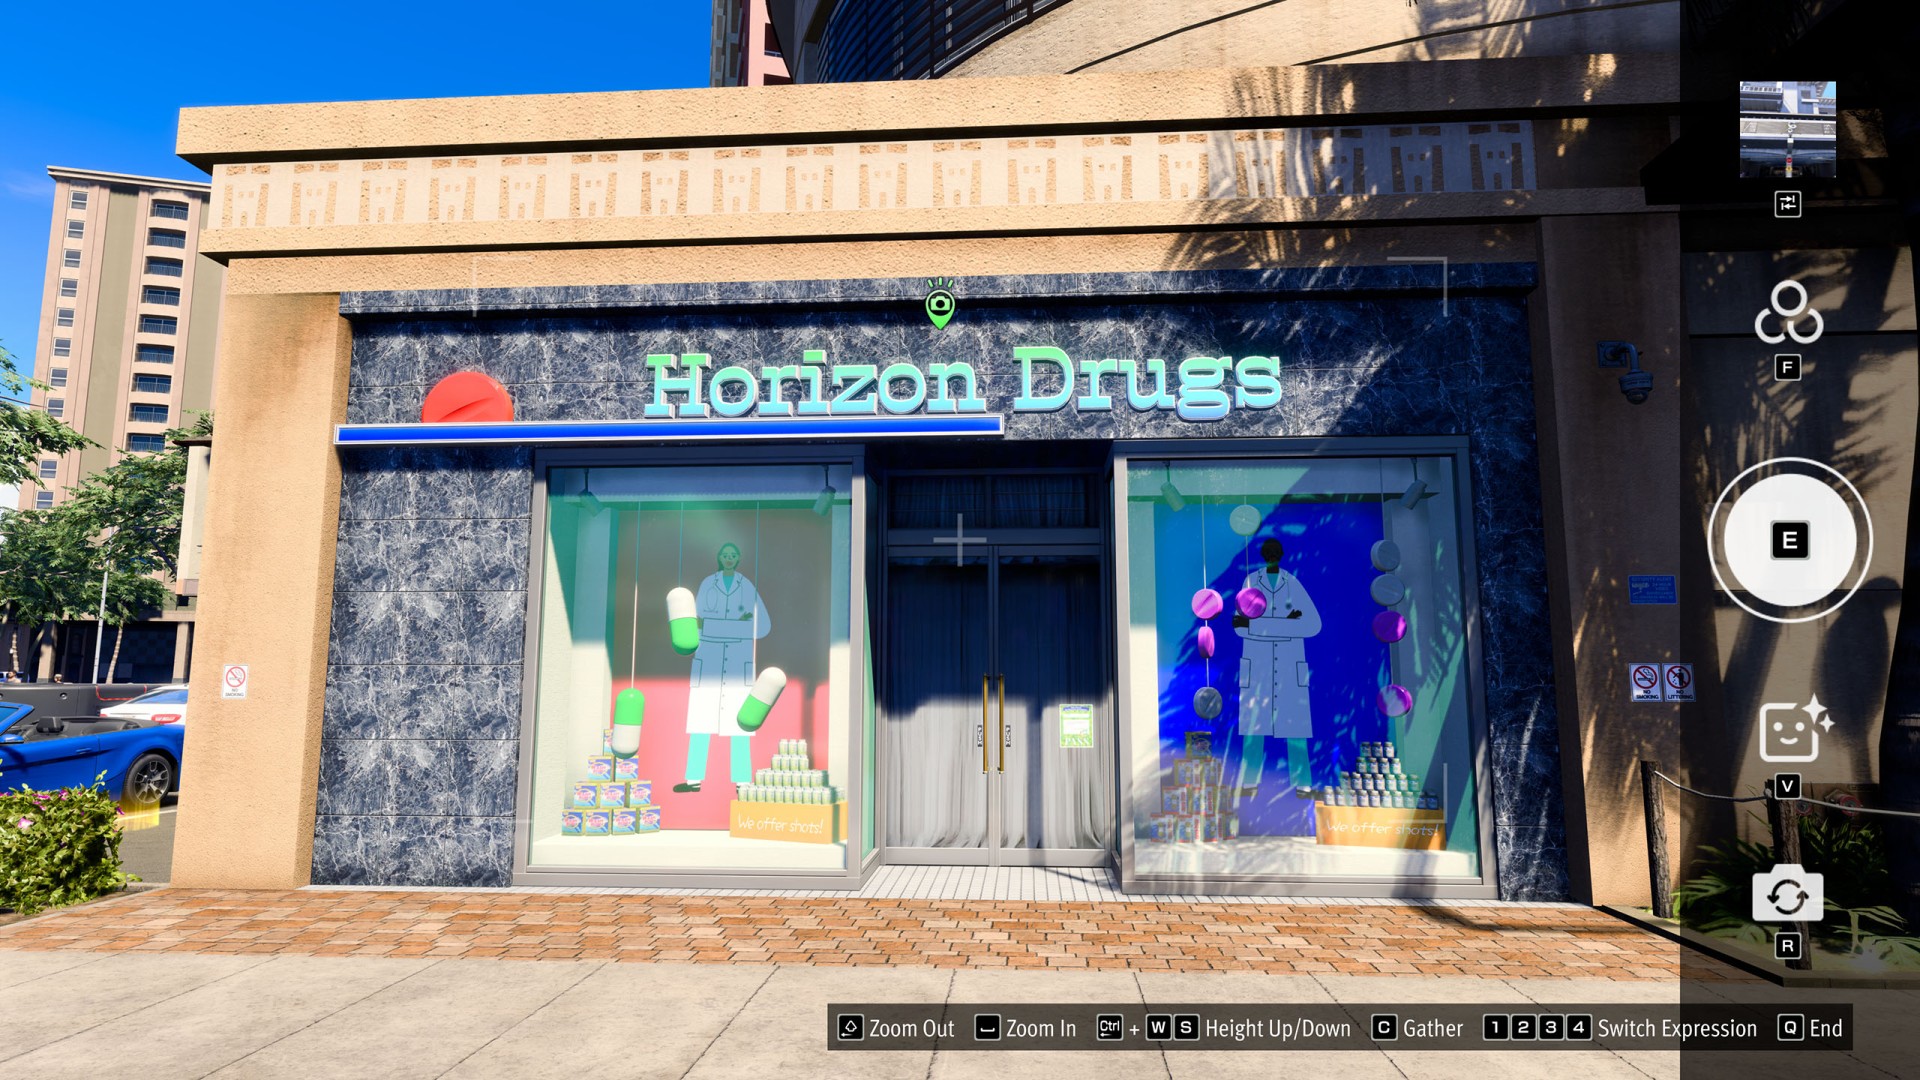
- Cultural District / Harbor Park #3 (Horizon Drugs)
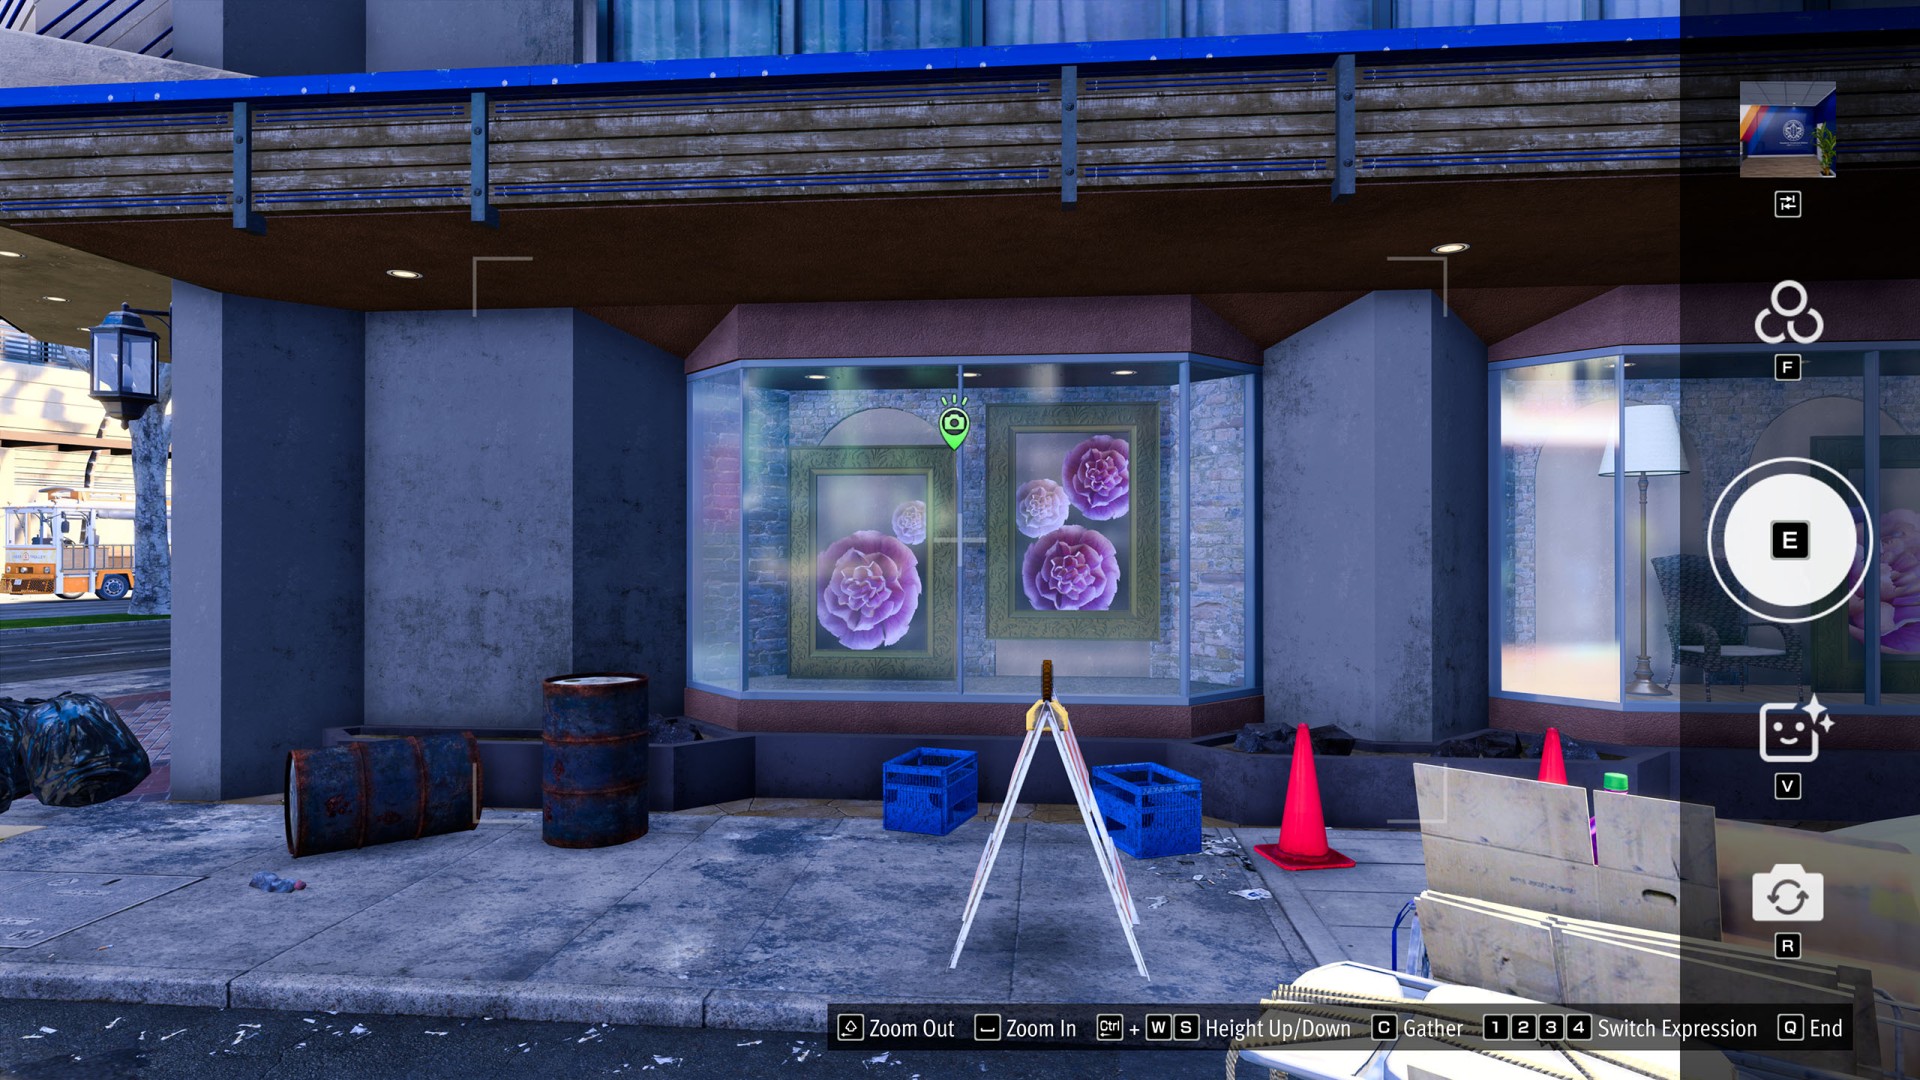
- Cultural District / Harbor Park #4 (Flower Display)
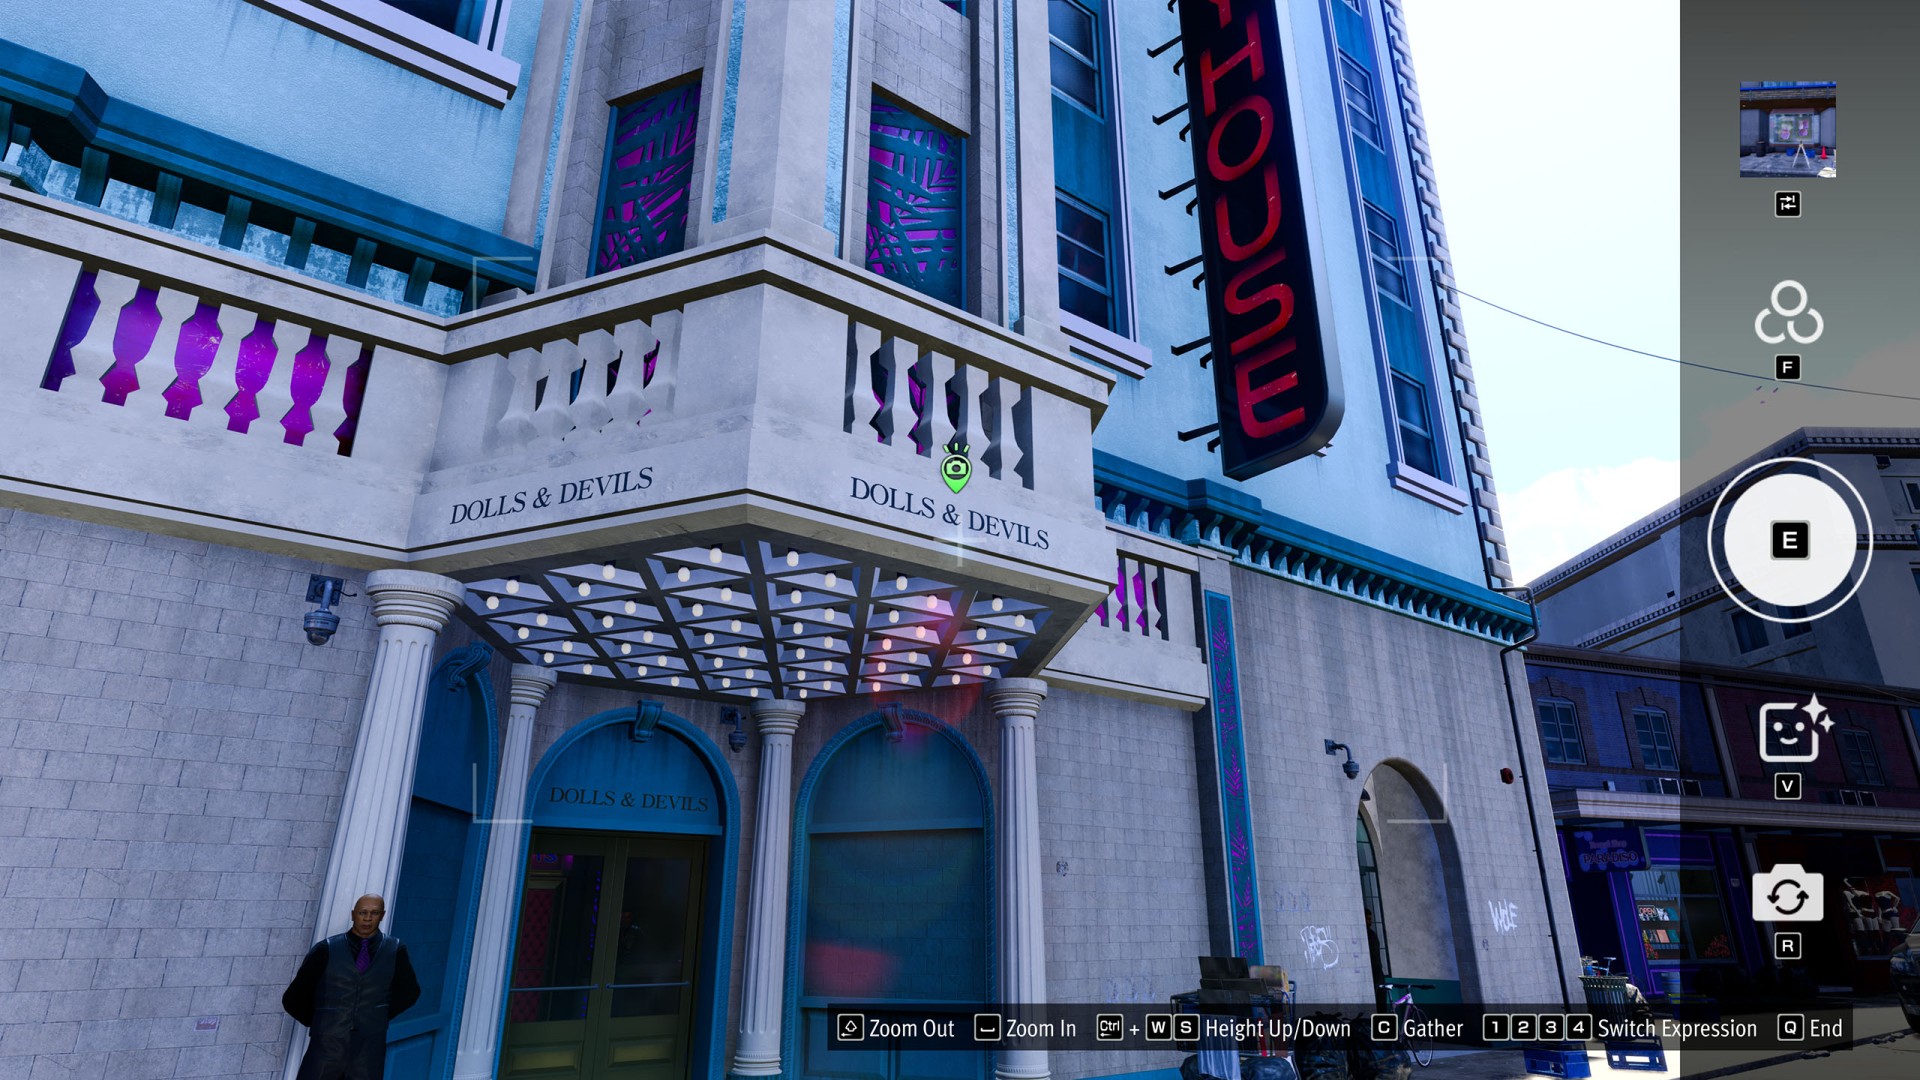
- Cultural District / Harbor Park #5 (Dolls & Devils)
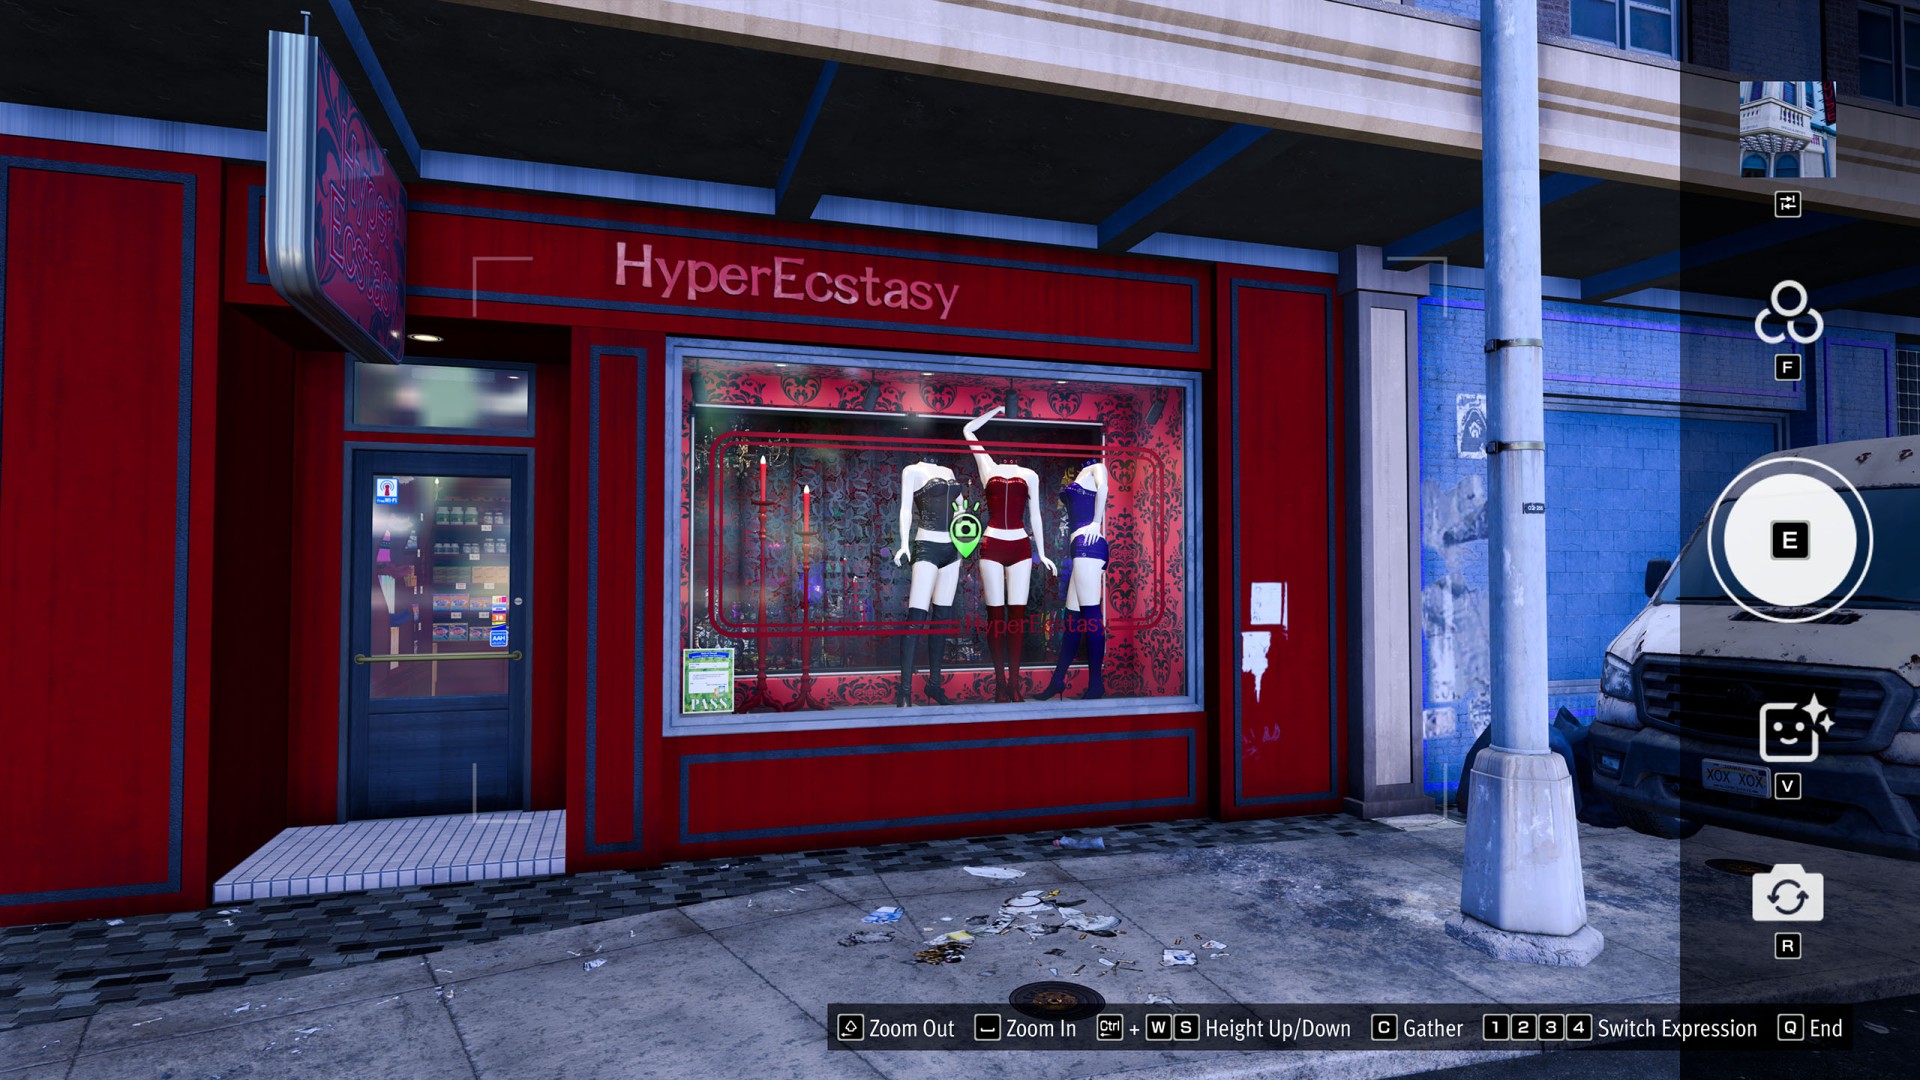
- Cultural District / Harbor Park #6 (Hyper Ecstasy)
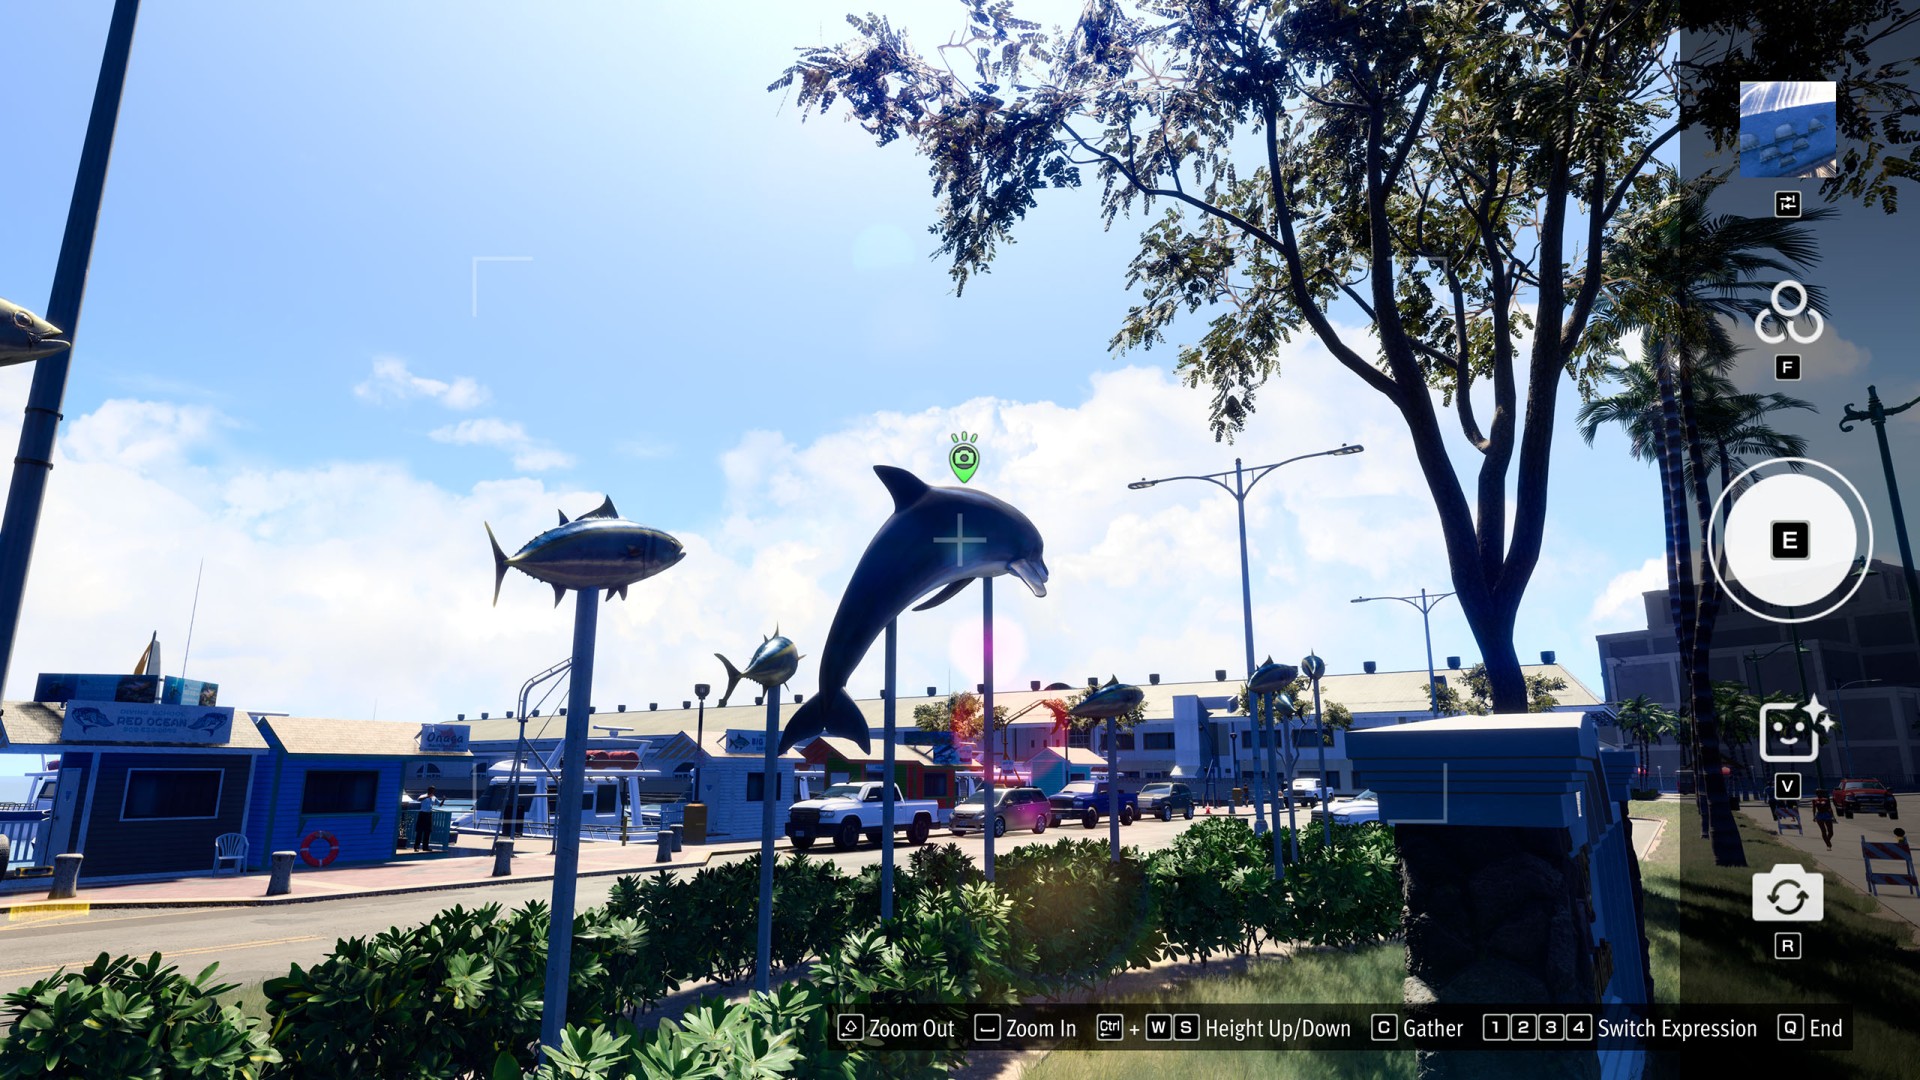
- Cultural District / Harbor Park #7 (Hip Hop Shrimp)
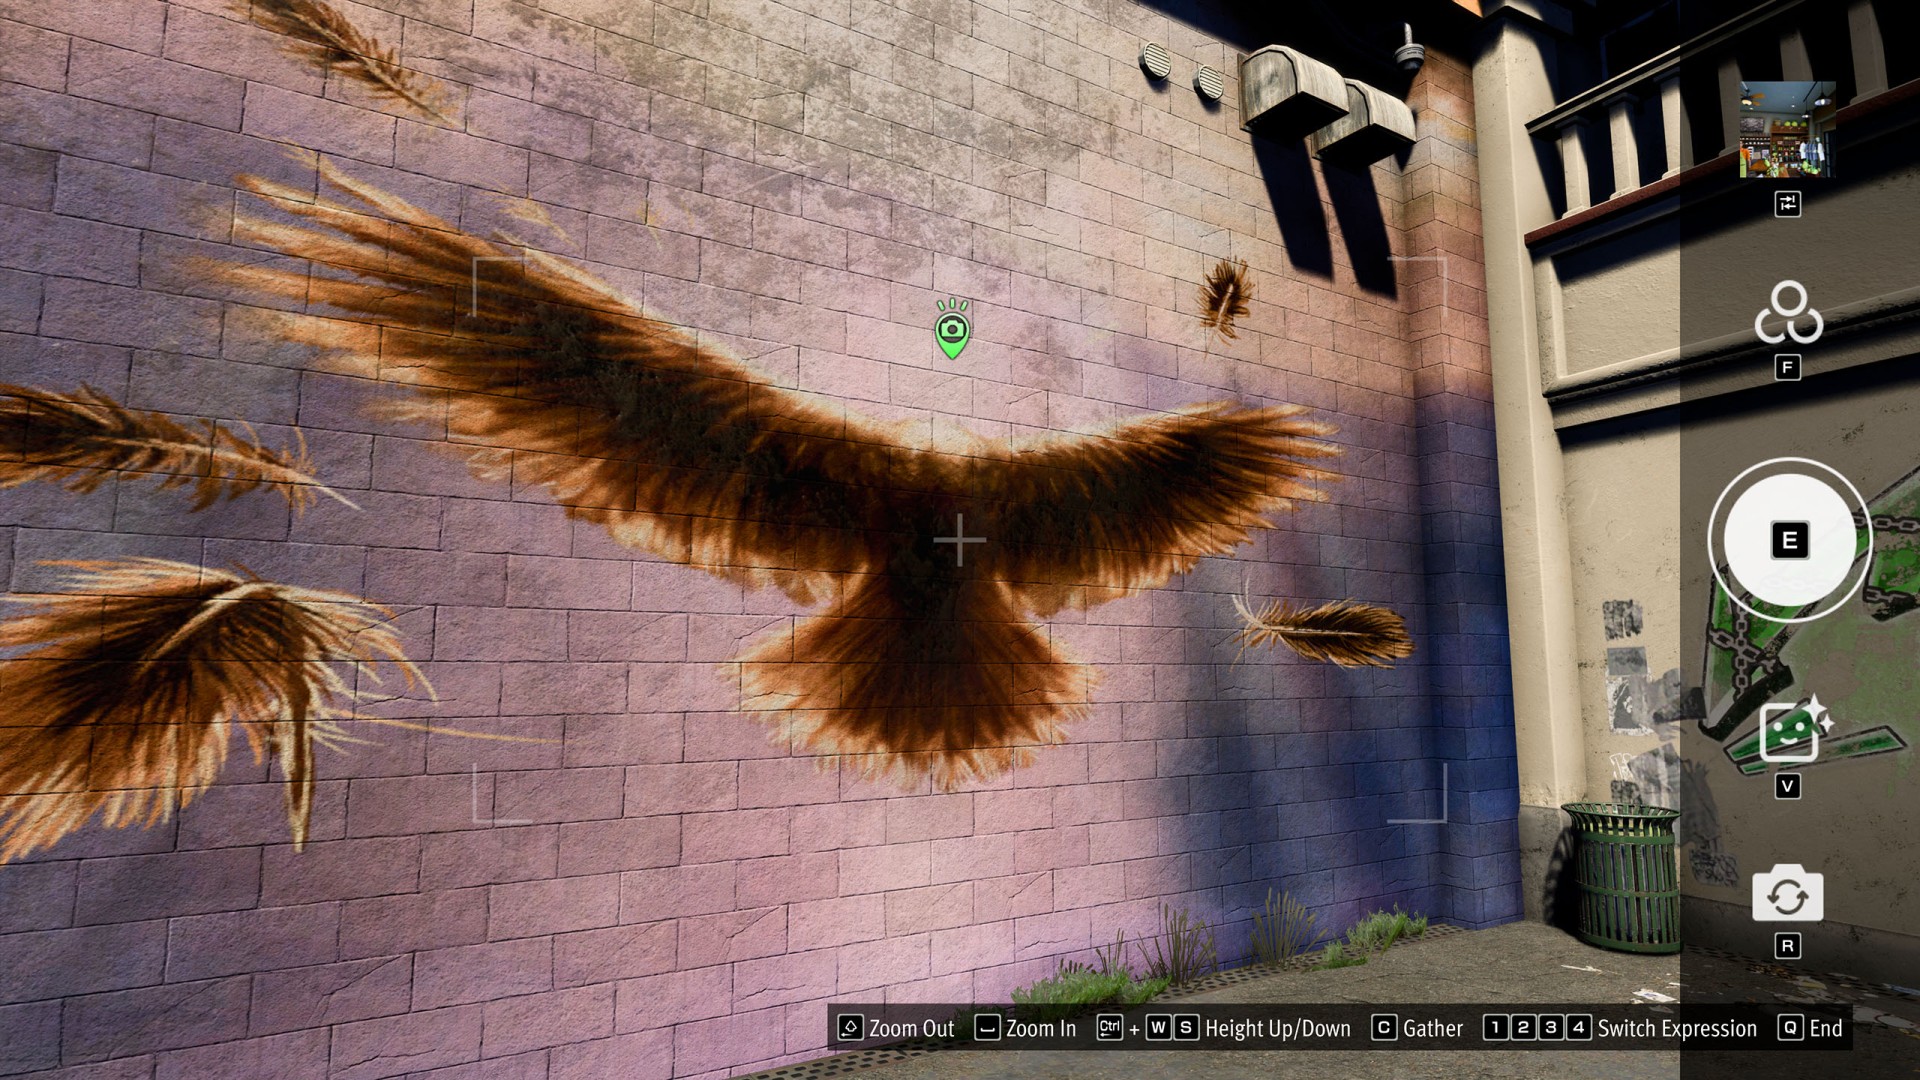
- Cultural District / Harbor Park #8 (Wall Art: Birds)
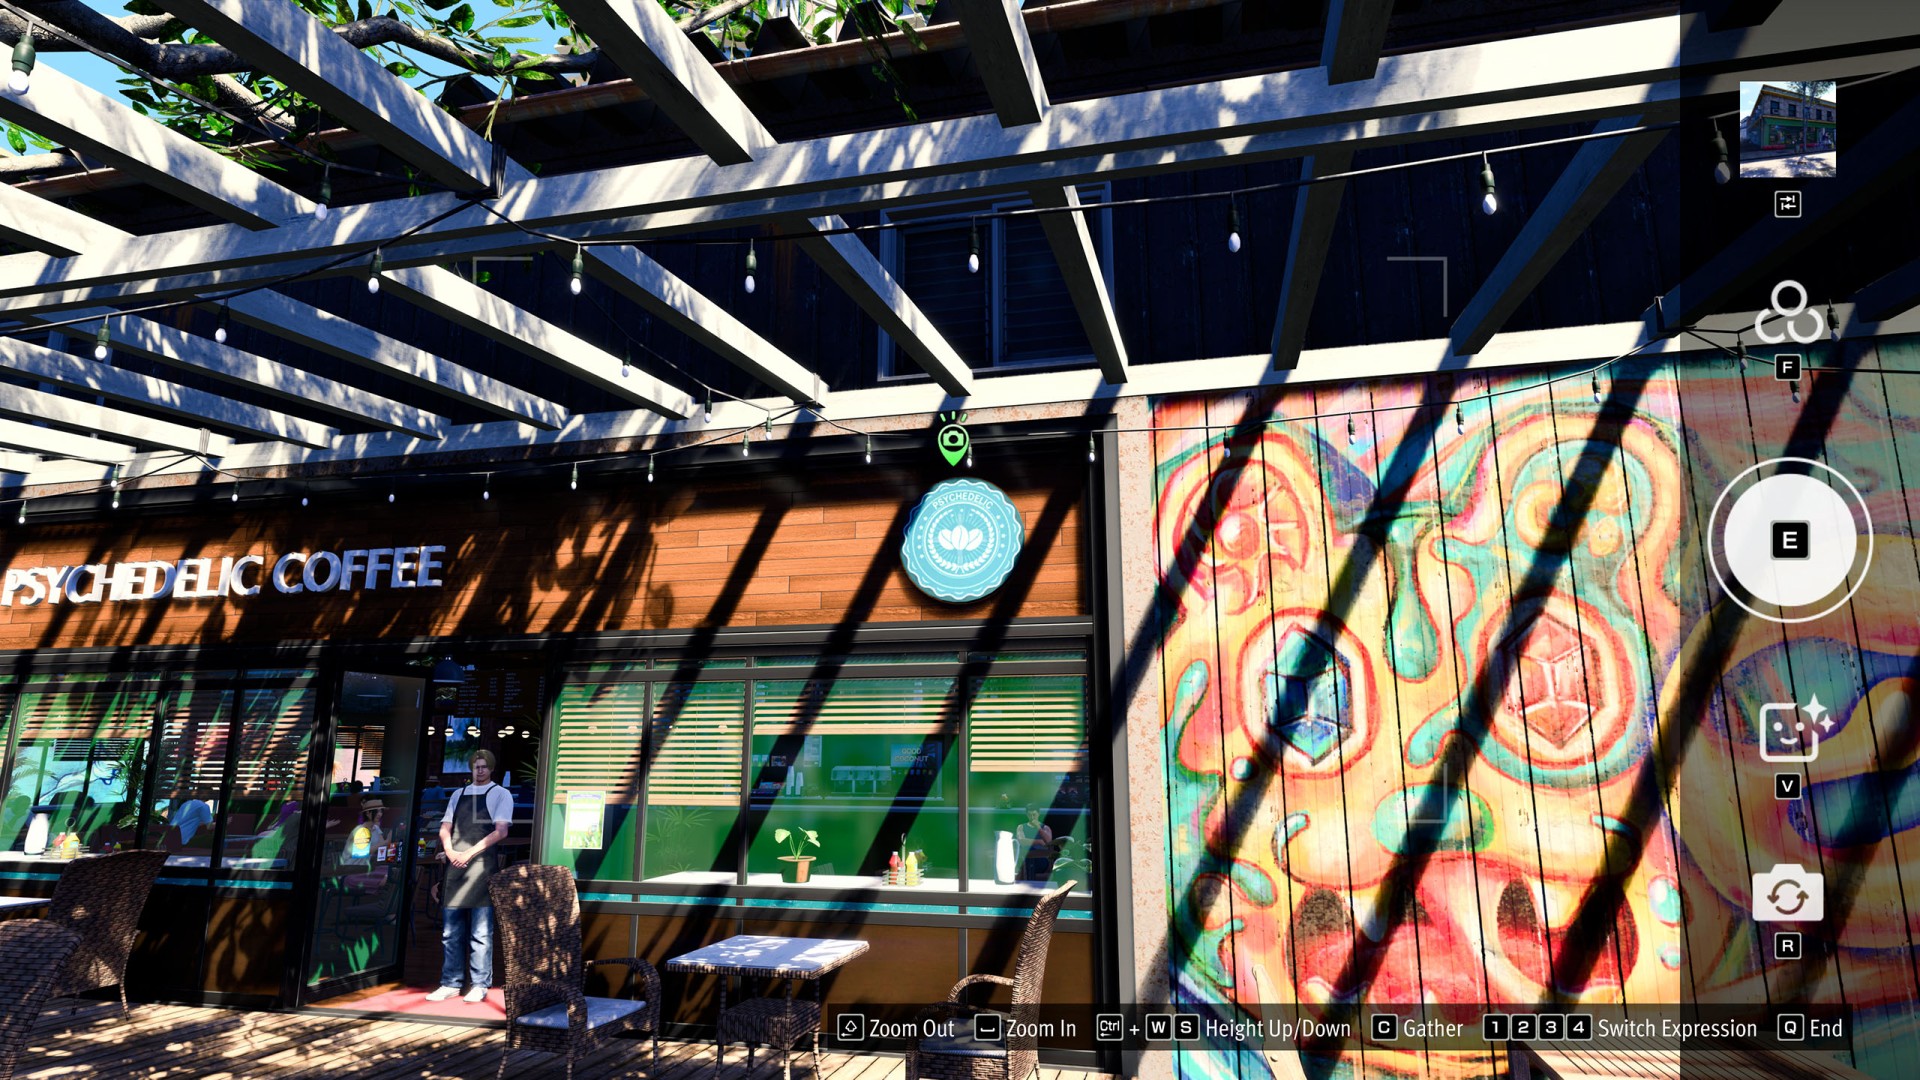
- Cultural District / Harbor Park #9 (Psychedelic Coffee)
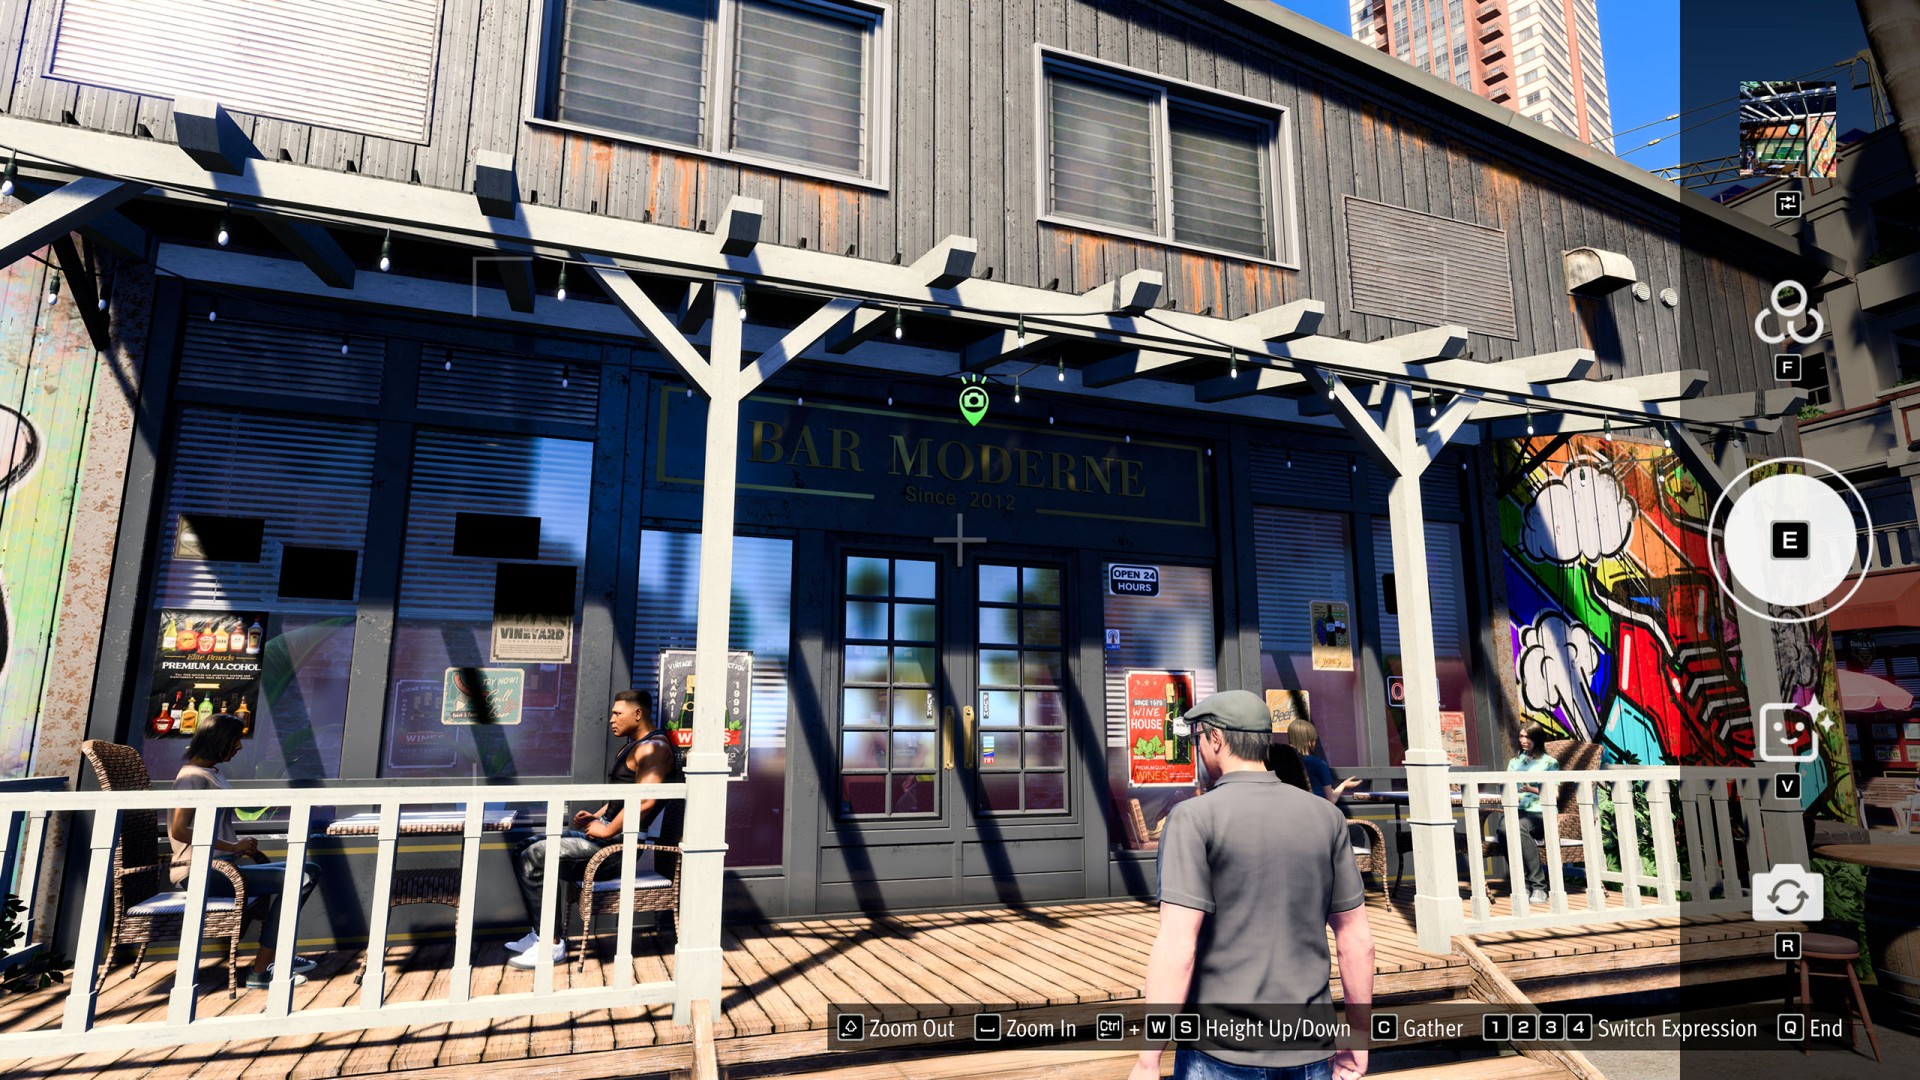
- Cultural District / Harbor Park #10 (Bar Moderne)
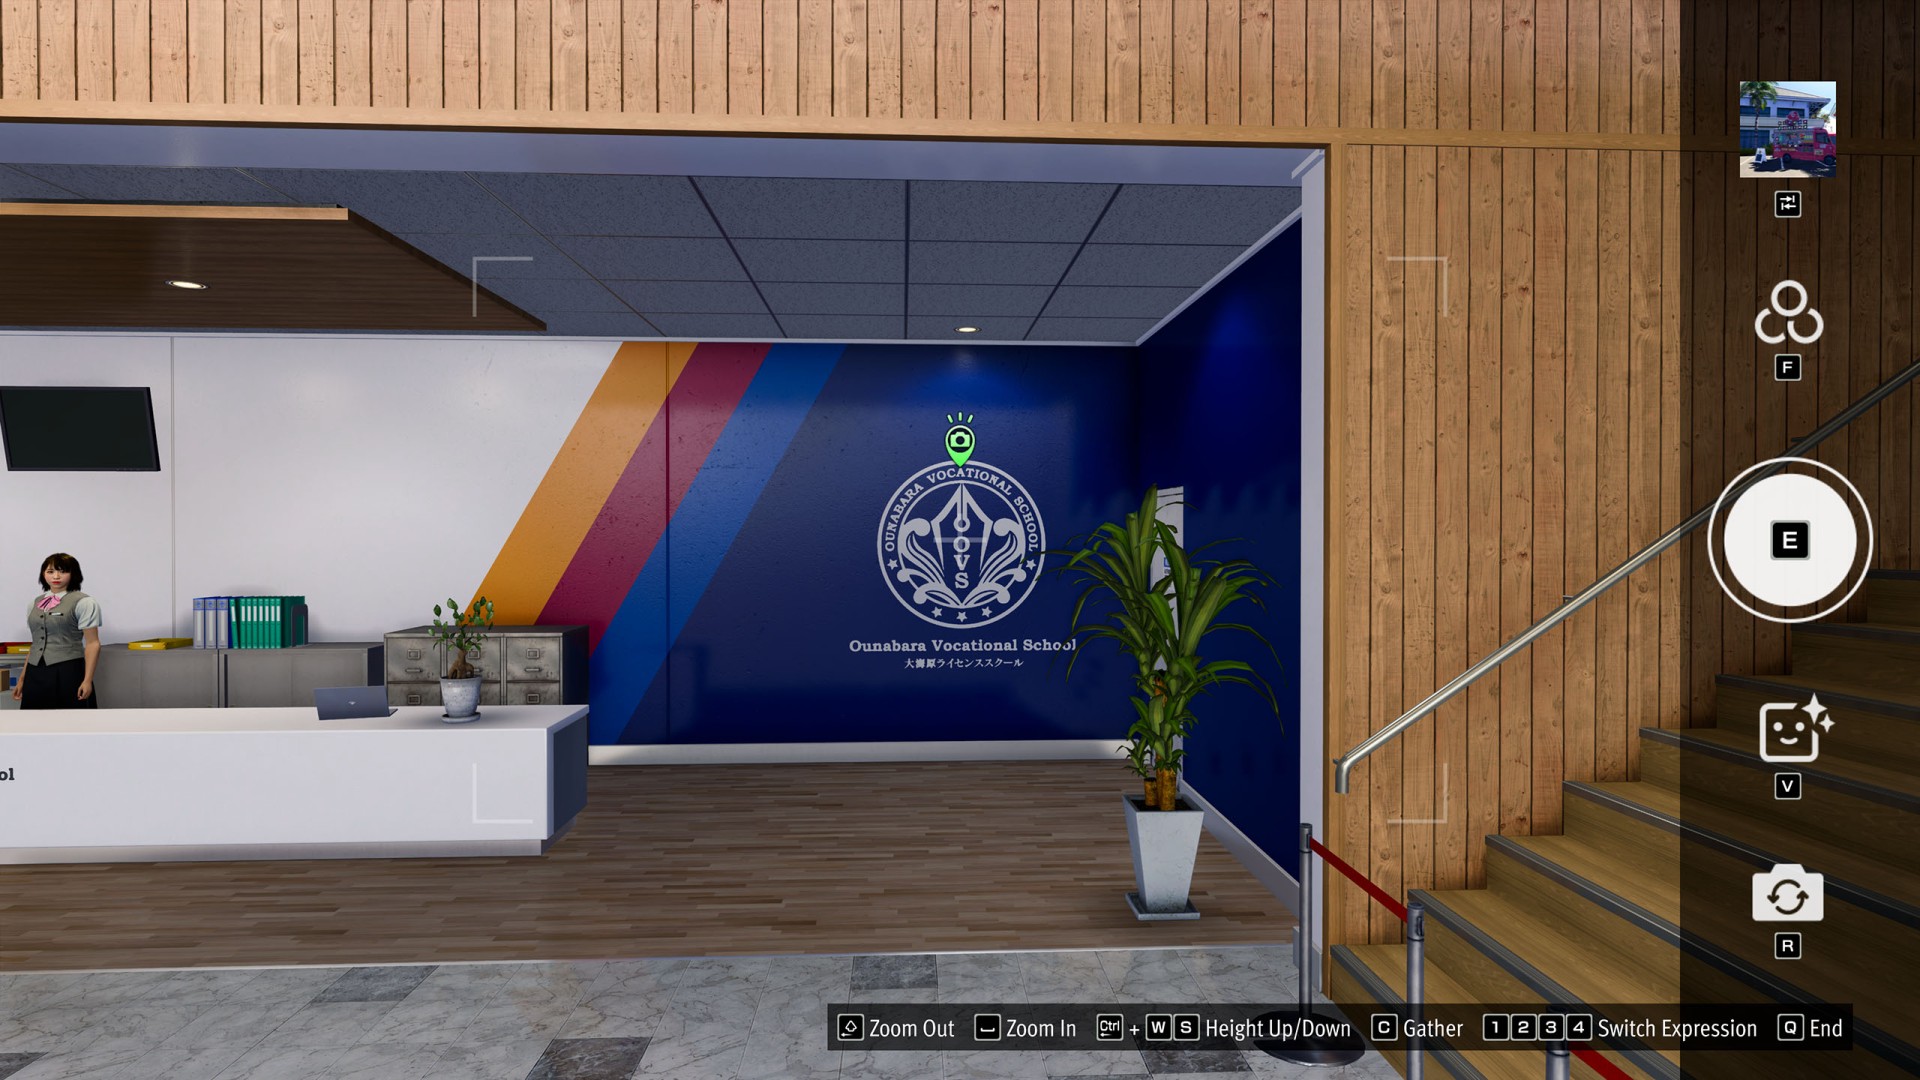
- Cultural District / Harbor Park #11 (Ounabara Vocational School)
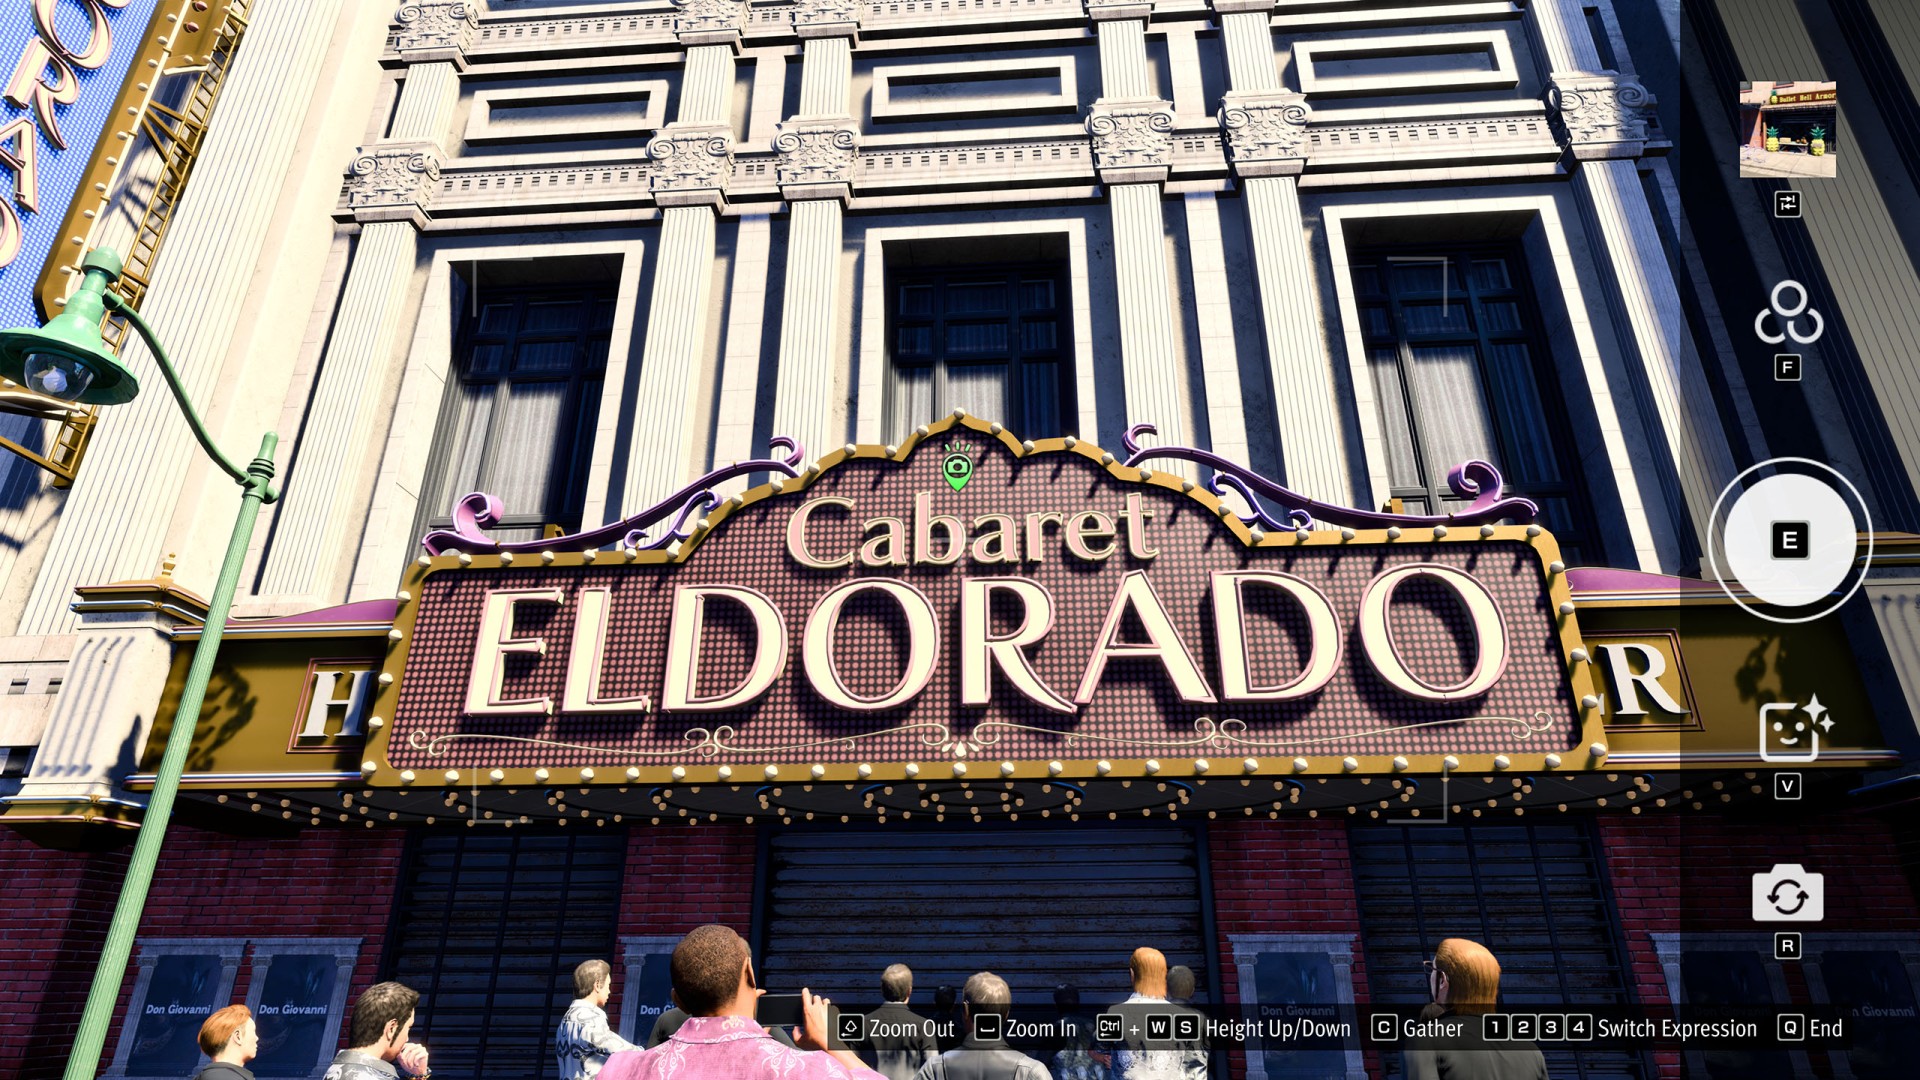
- Cultural District / Harbor Park #12 (Cabaret El Dorado)
- Cultural District / Harbor Park #13 (Bullet Hell Armory)
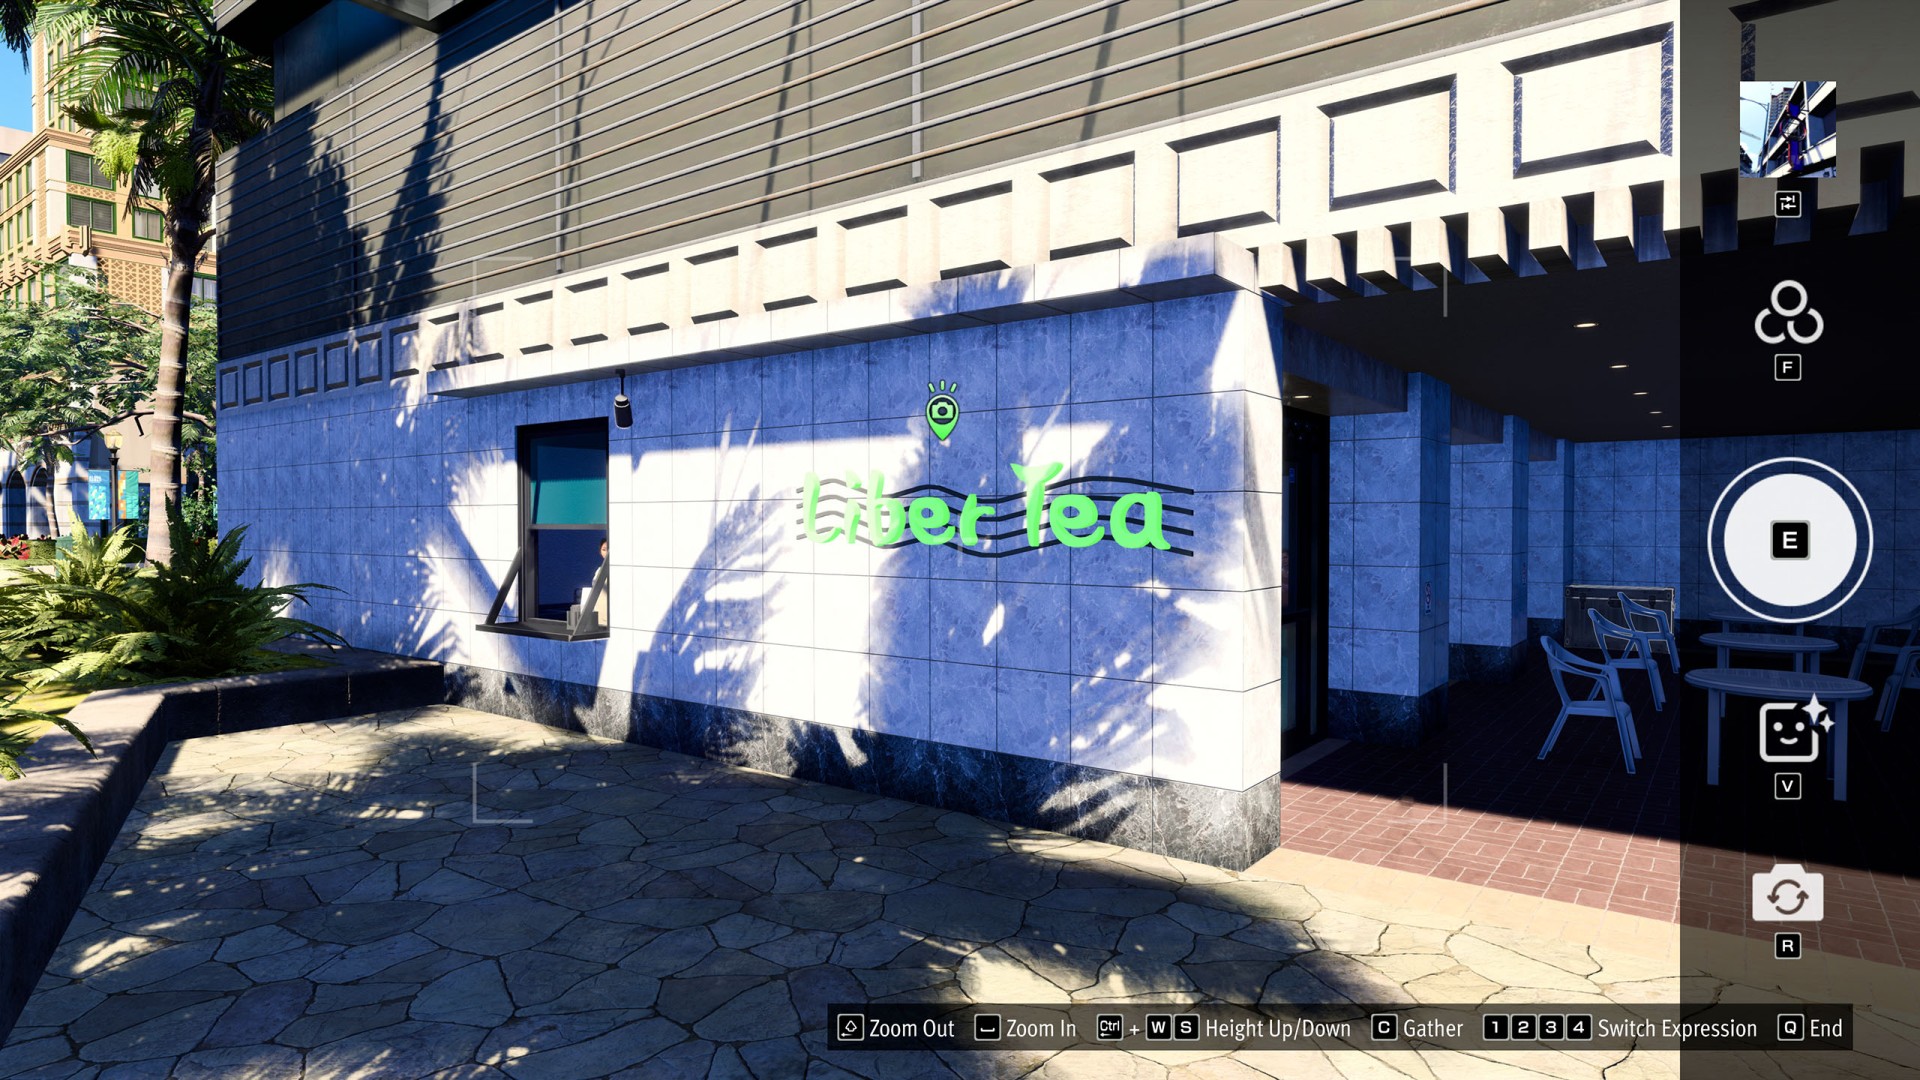
- Cultural District / Harbor Park #14 (LiberTea)
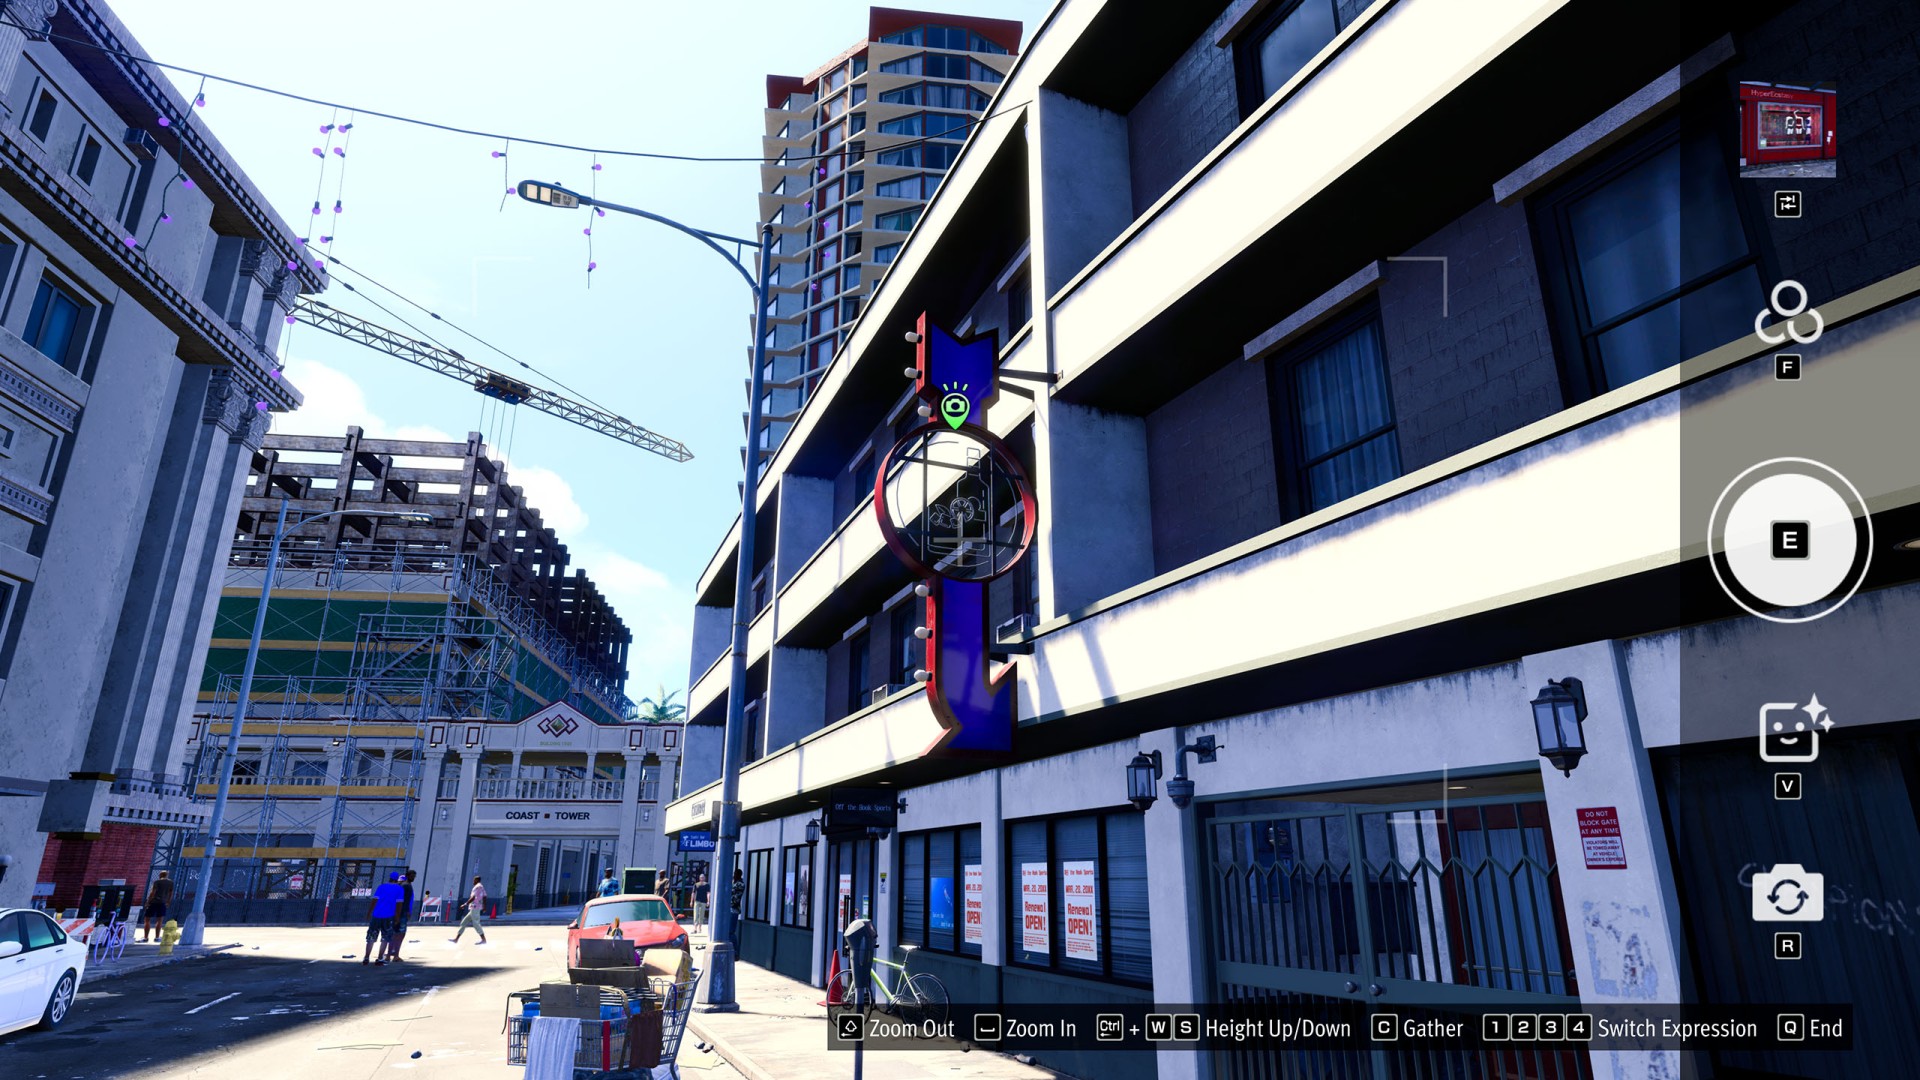
- Cultural District / Harbor Park #15 (Bar Sign)
- Downtown #1 (Private Sauna Shin Sen Kan)
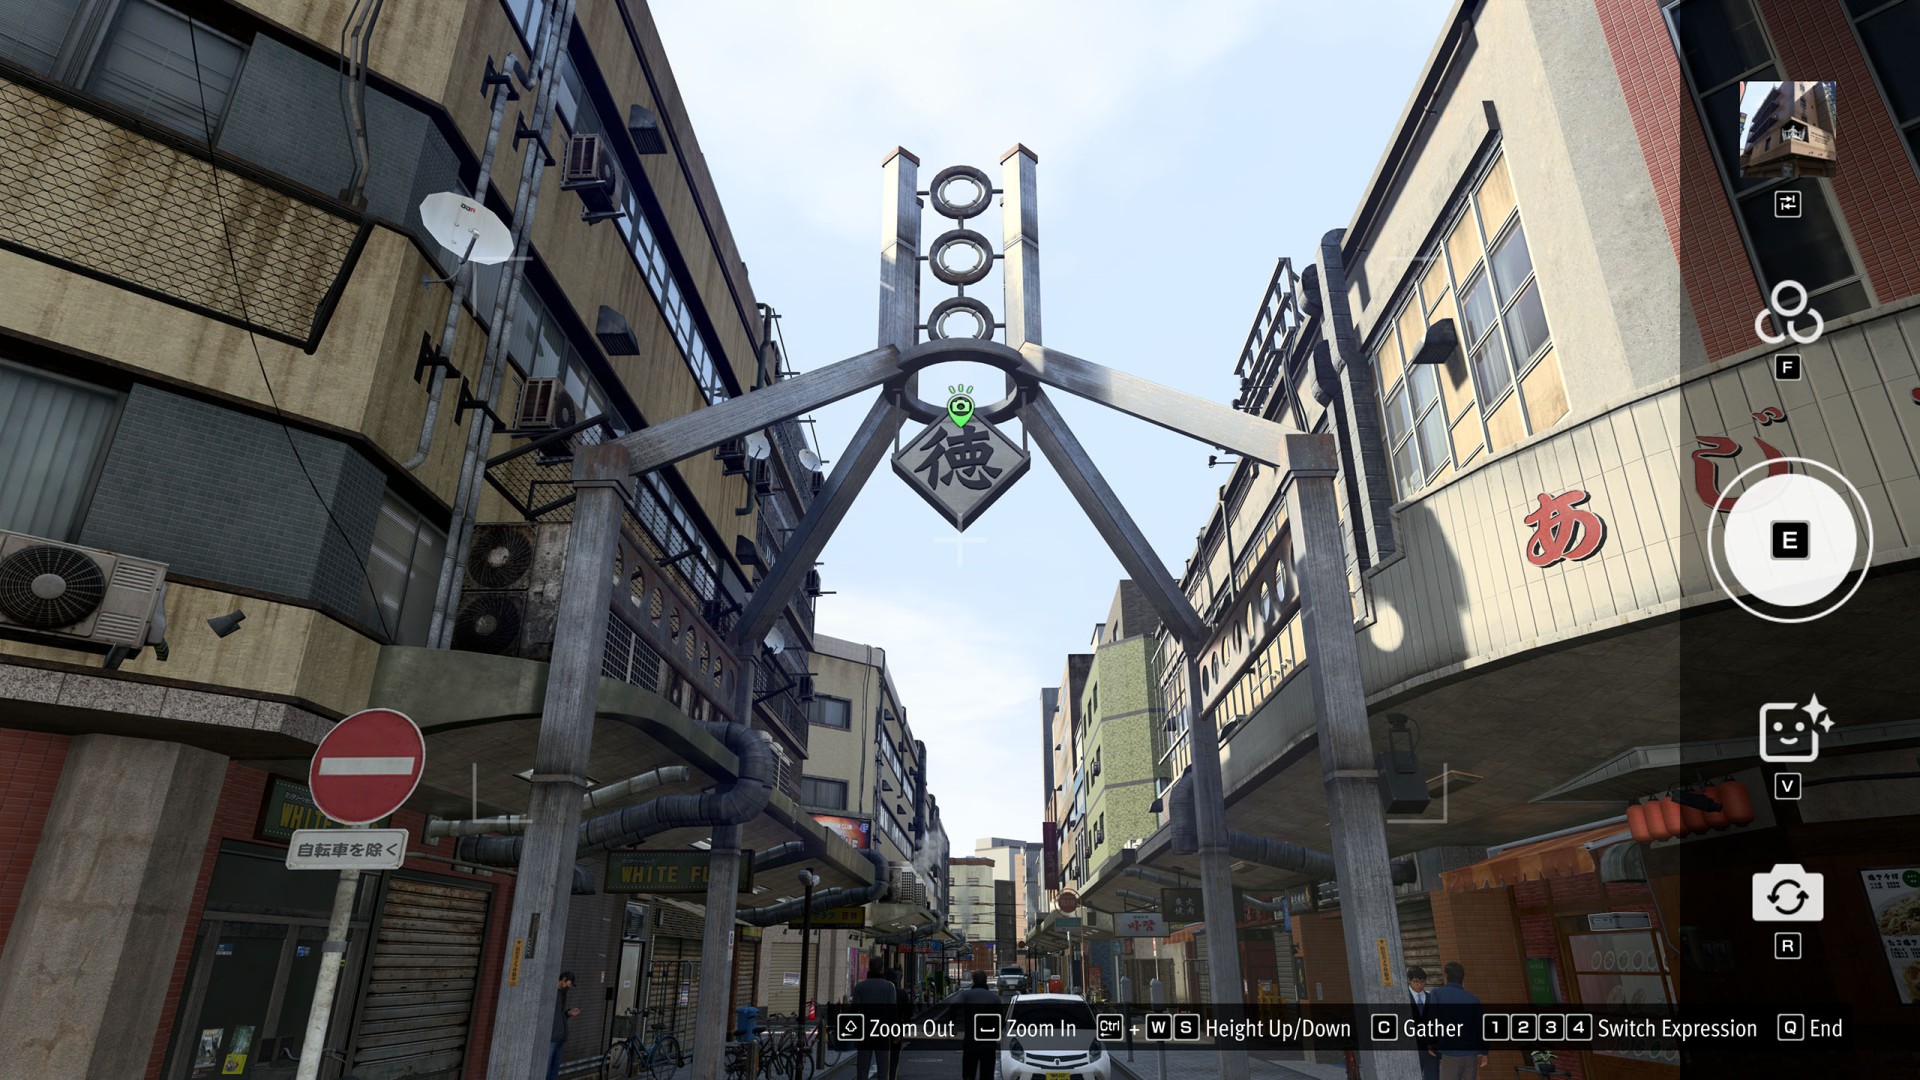
- Downtown #2 (Toku)
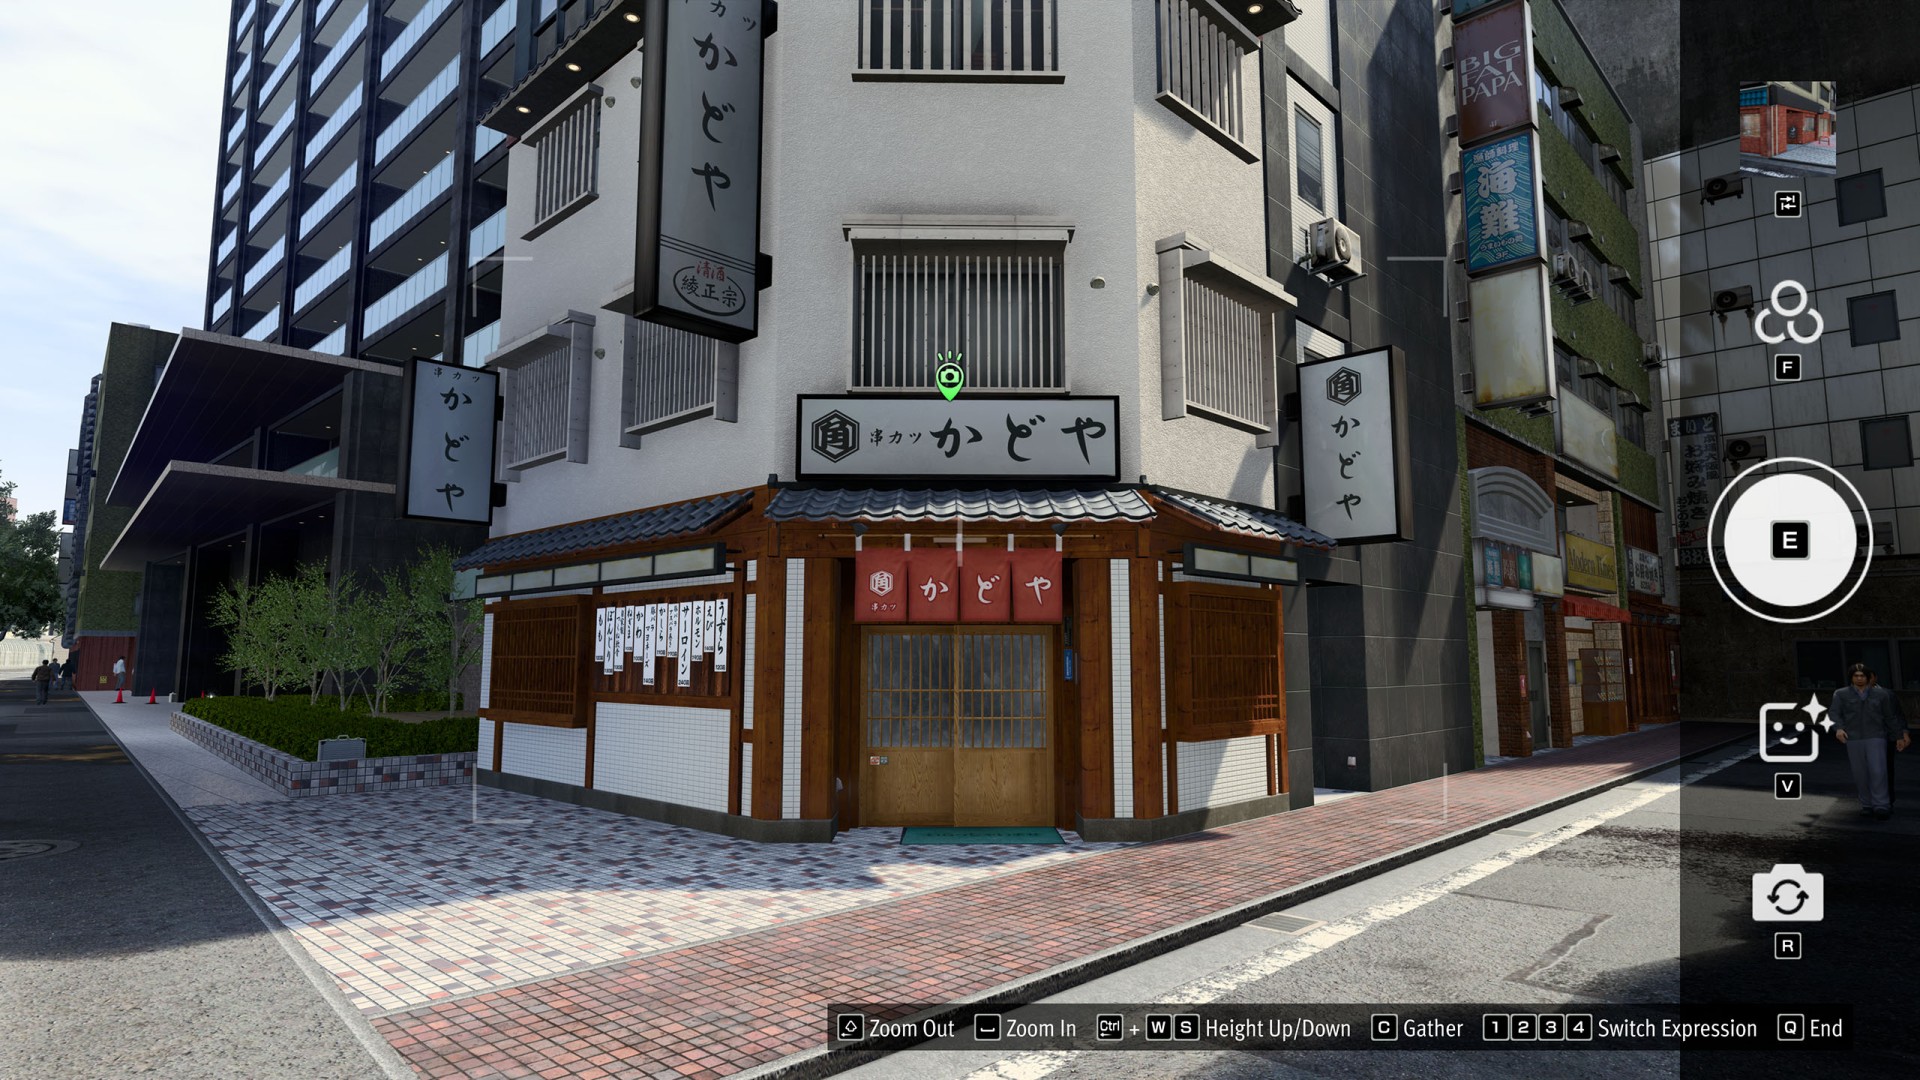
- Downtown #3 (Kushikatsu Kadoya)
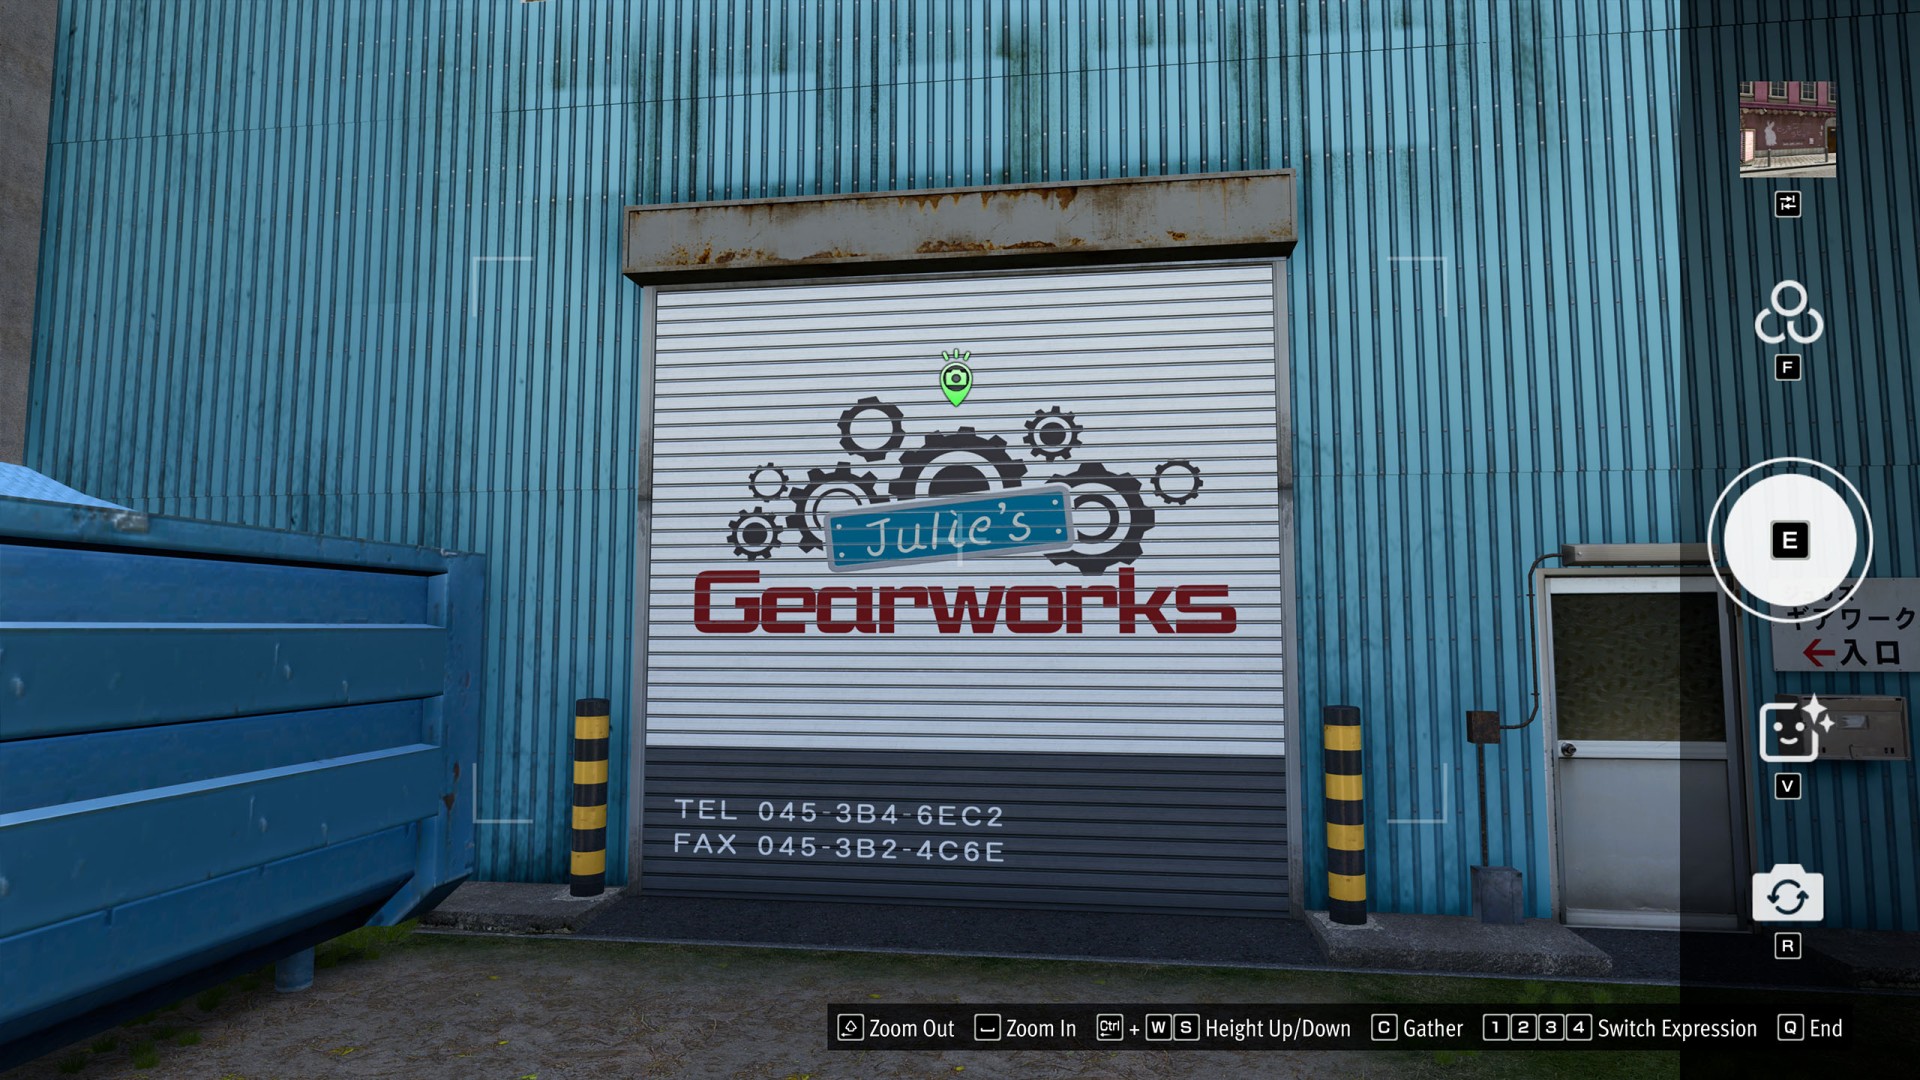
- Downtown #4 (Julie's Gearworks (Japan))
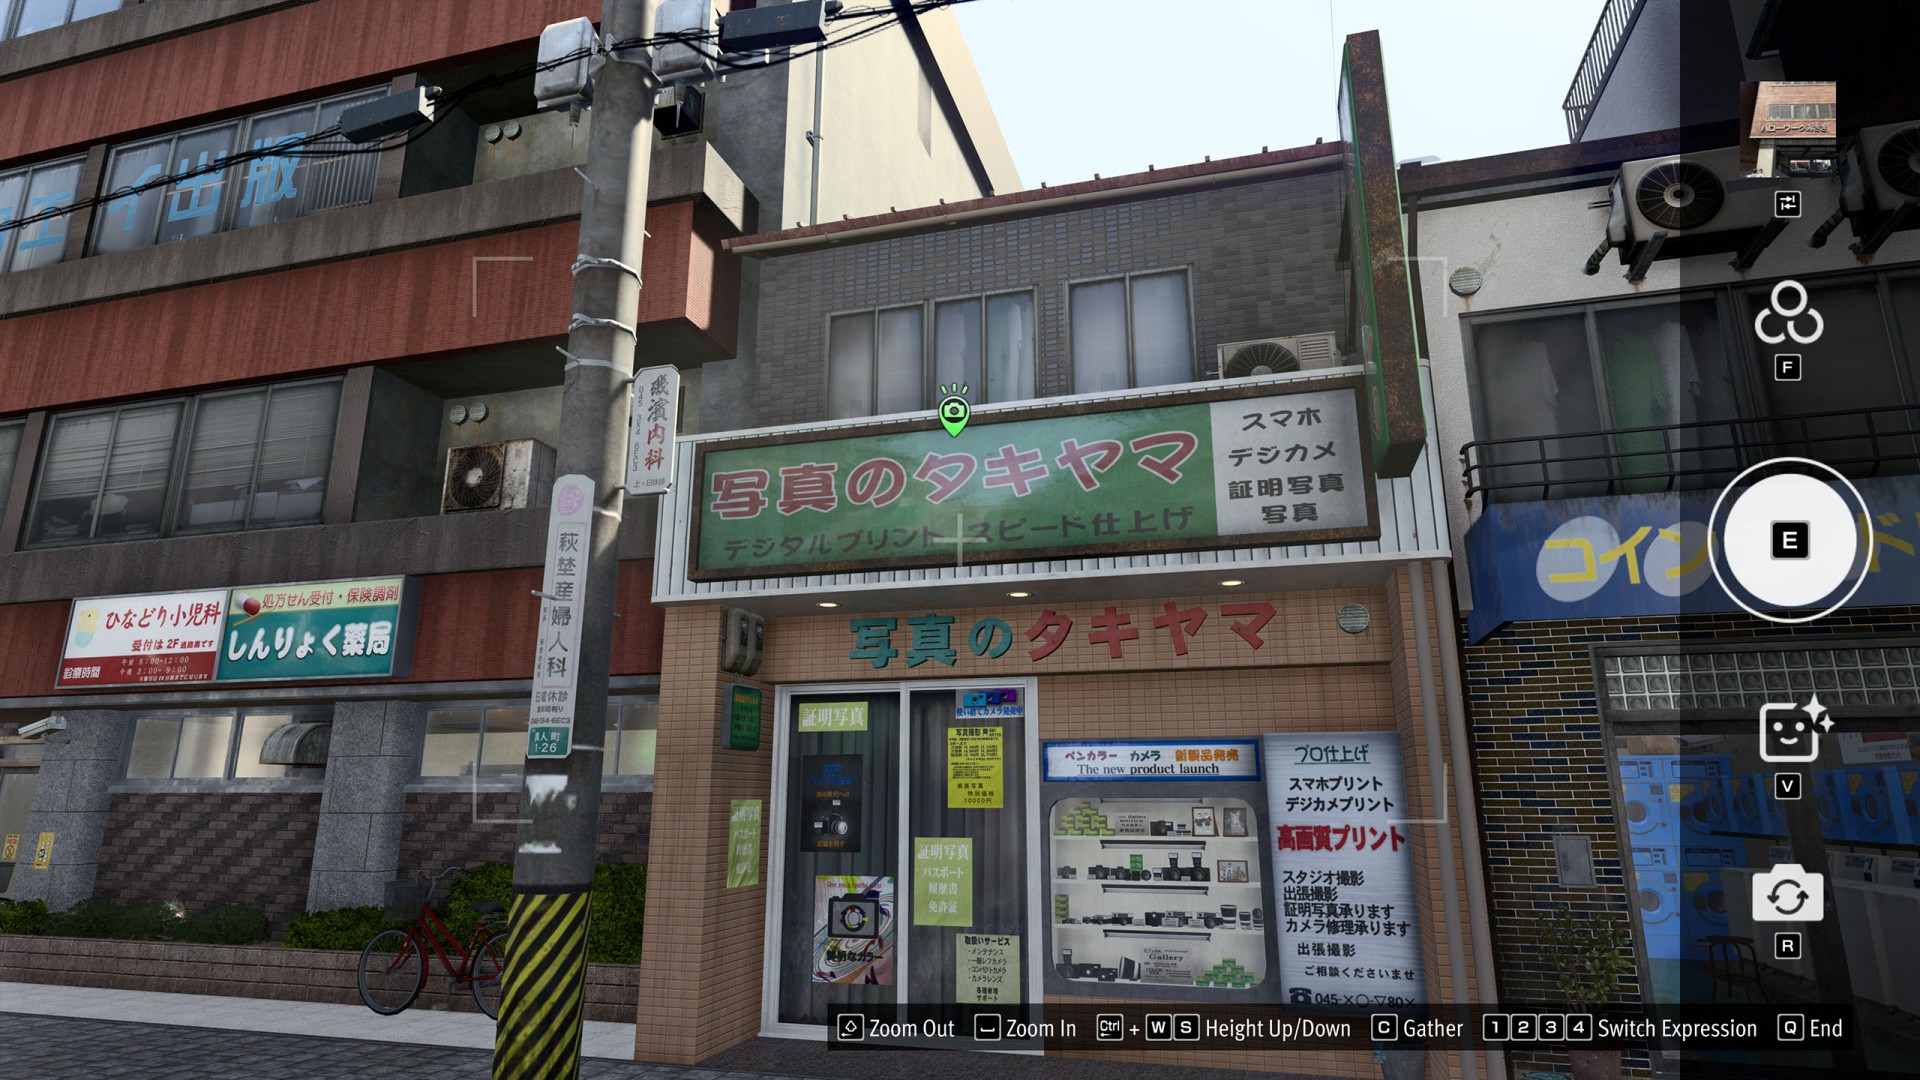
- Downtown #5 (Takiyama's Photos)
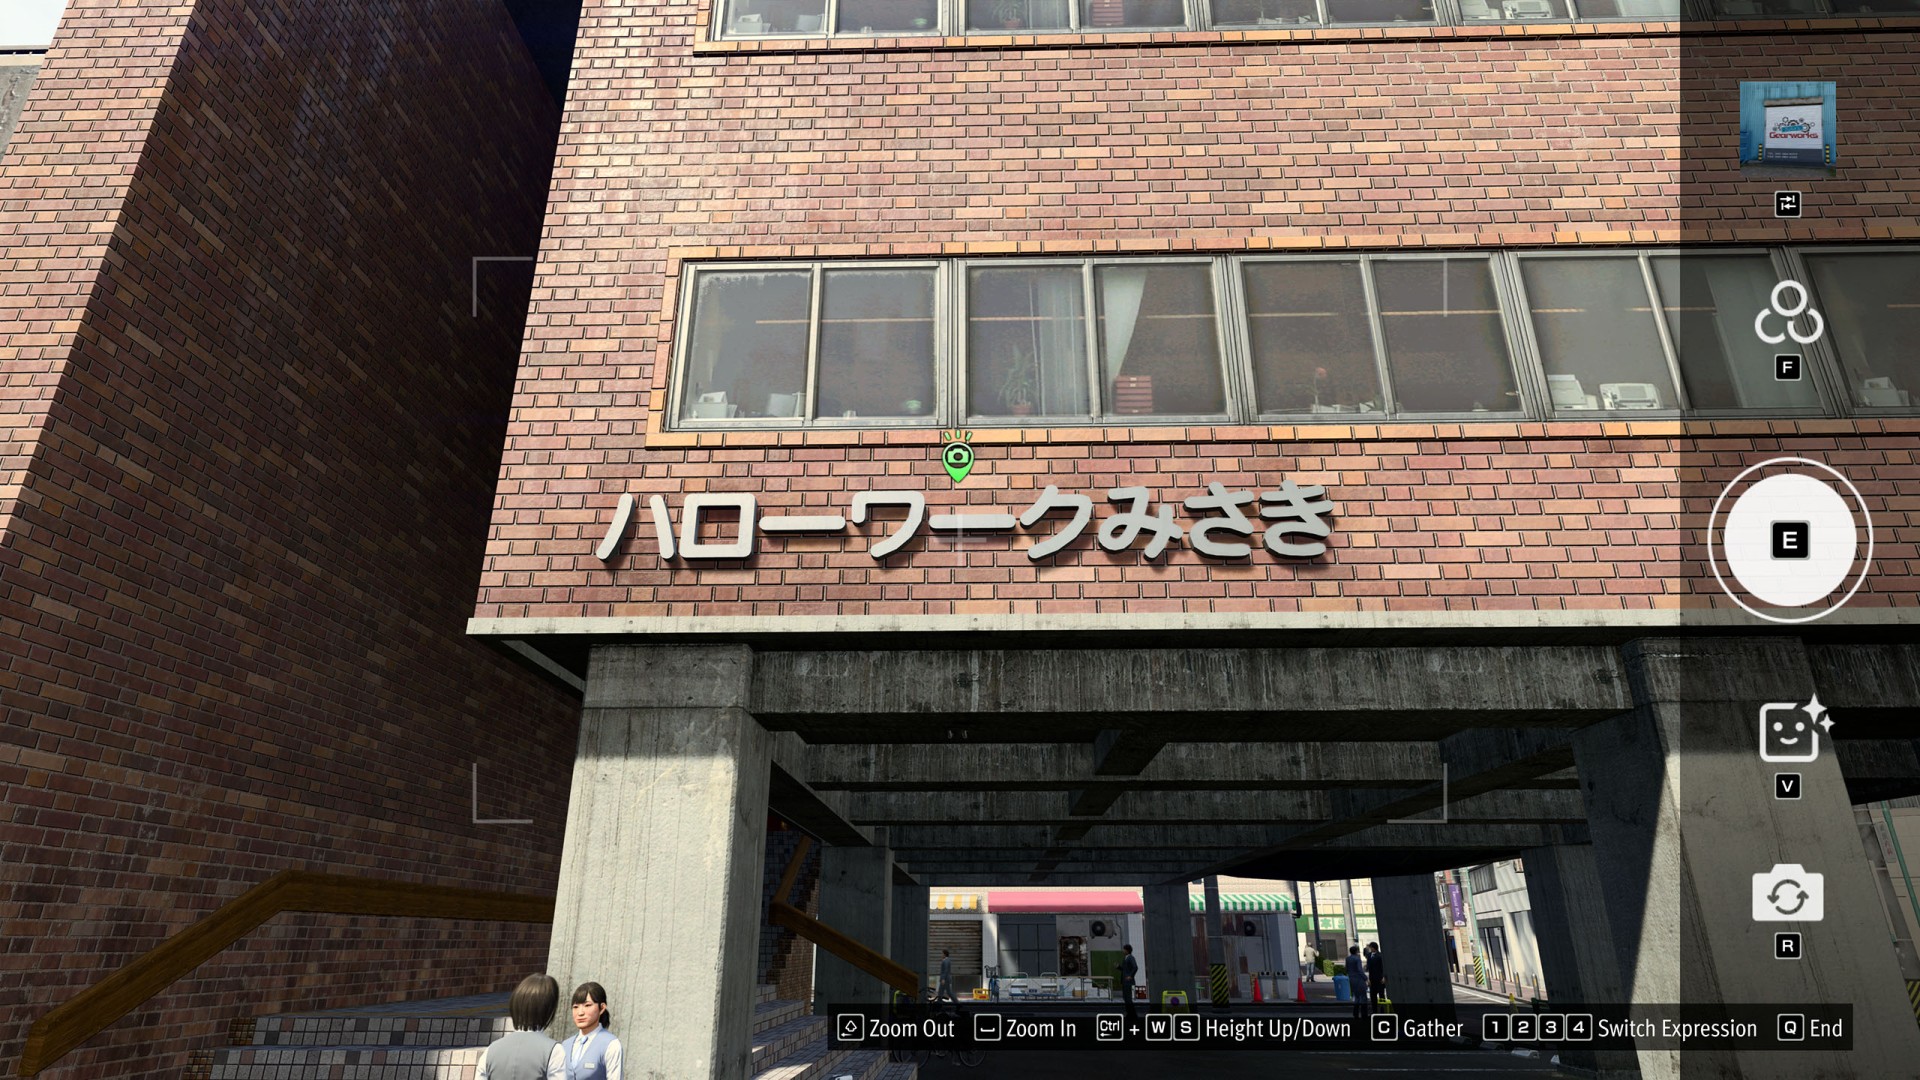
- Downtown #6 (Hello Work)
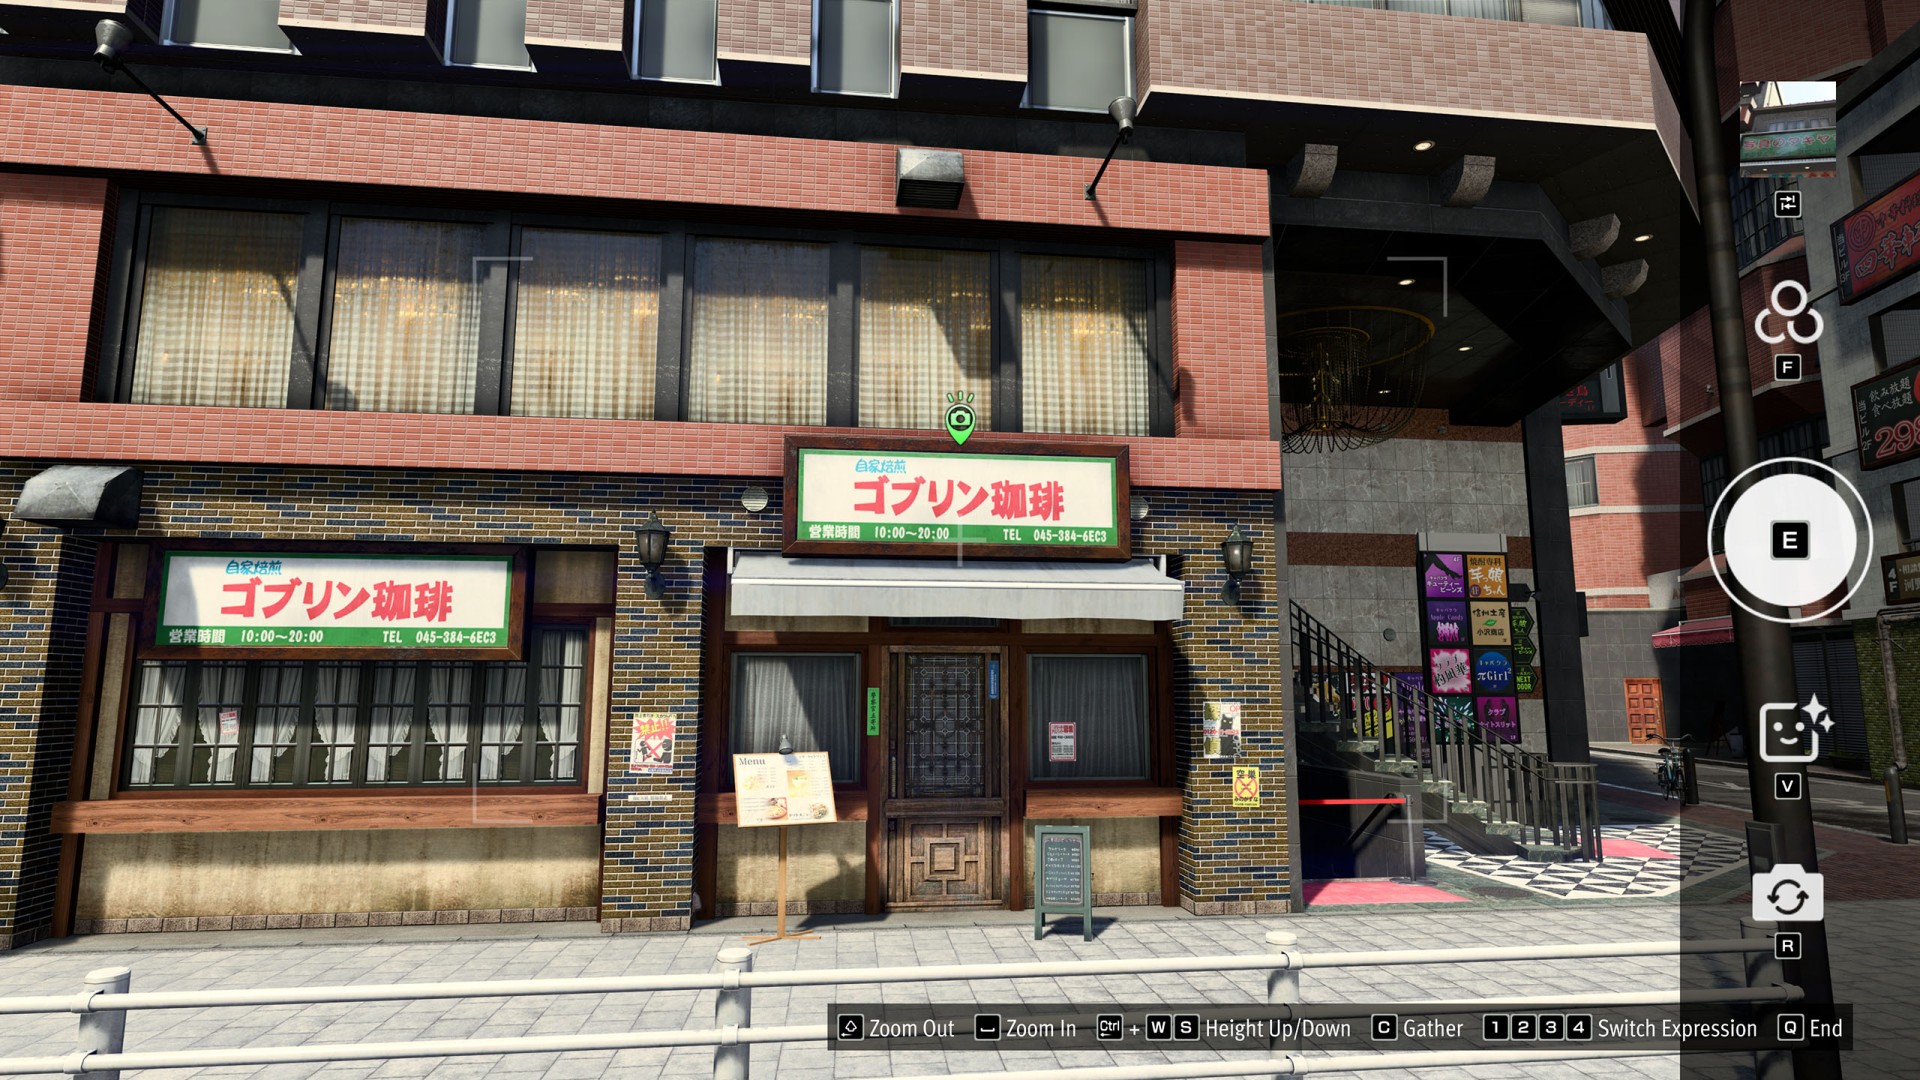
- Downtown #7 (Goblin Coffee)
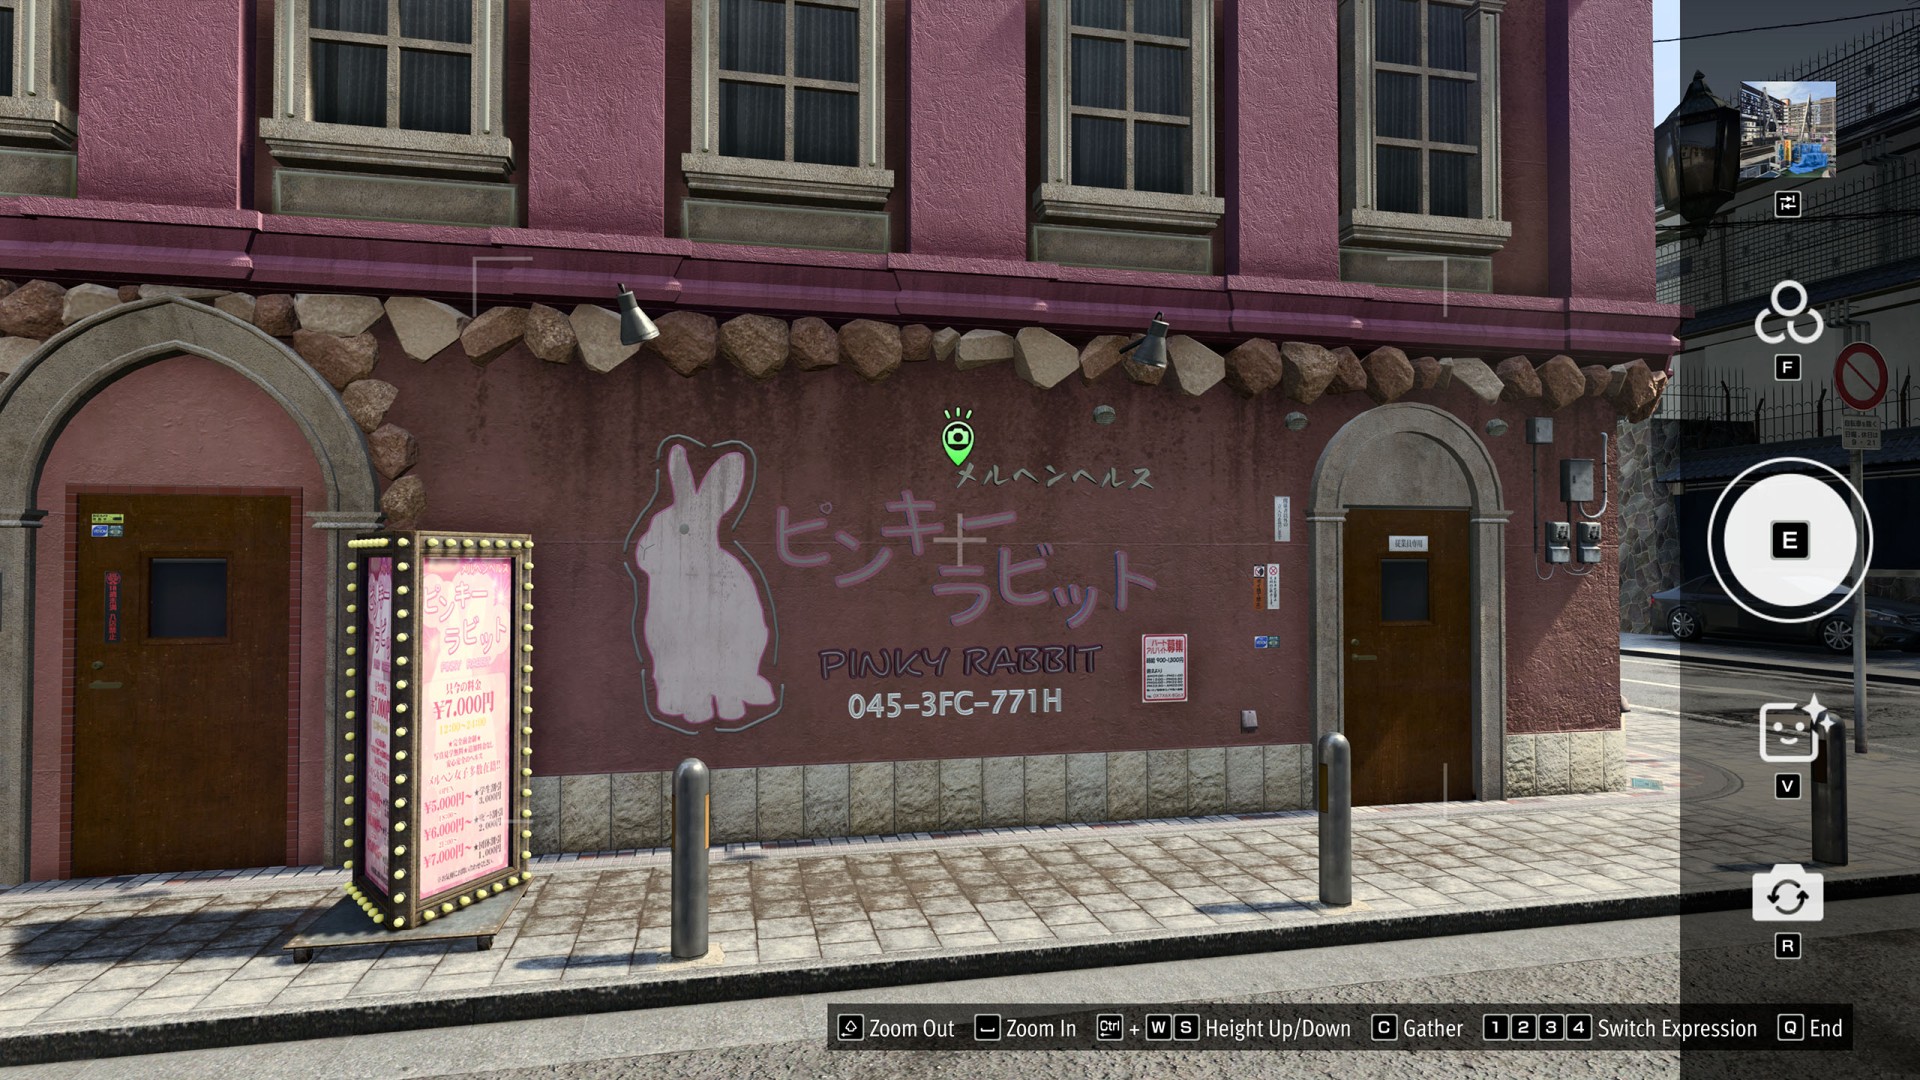
- Downtown #8 (Fairytale Pink Rabbit)
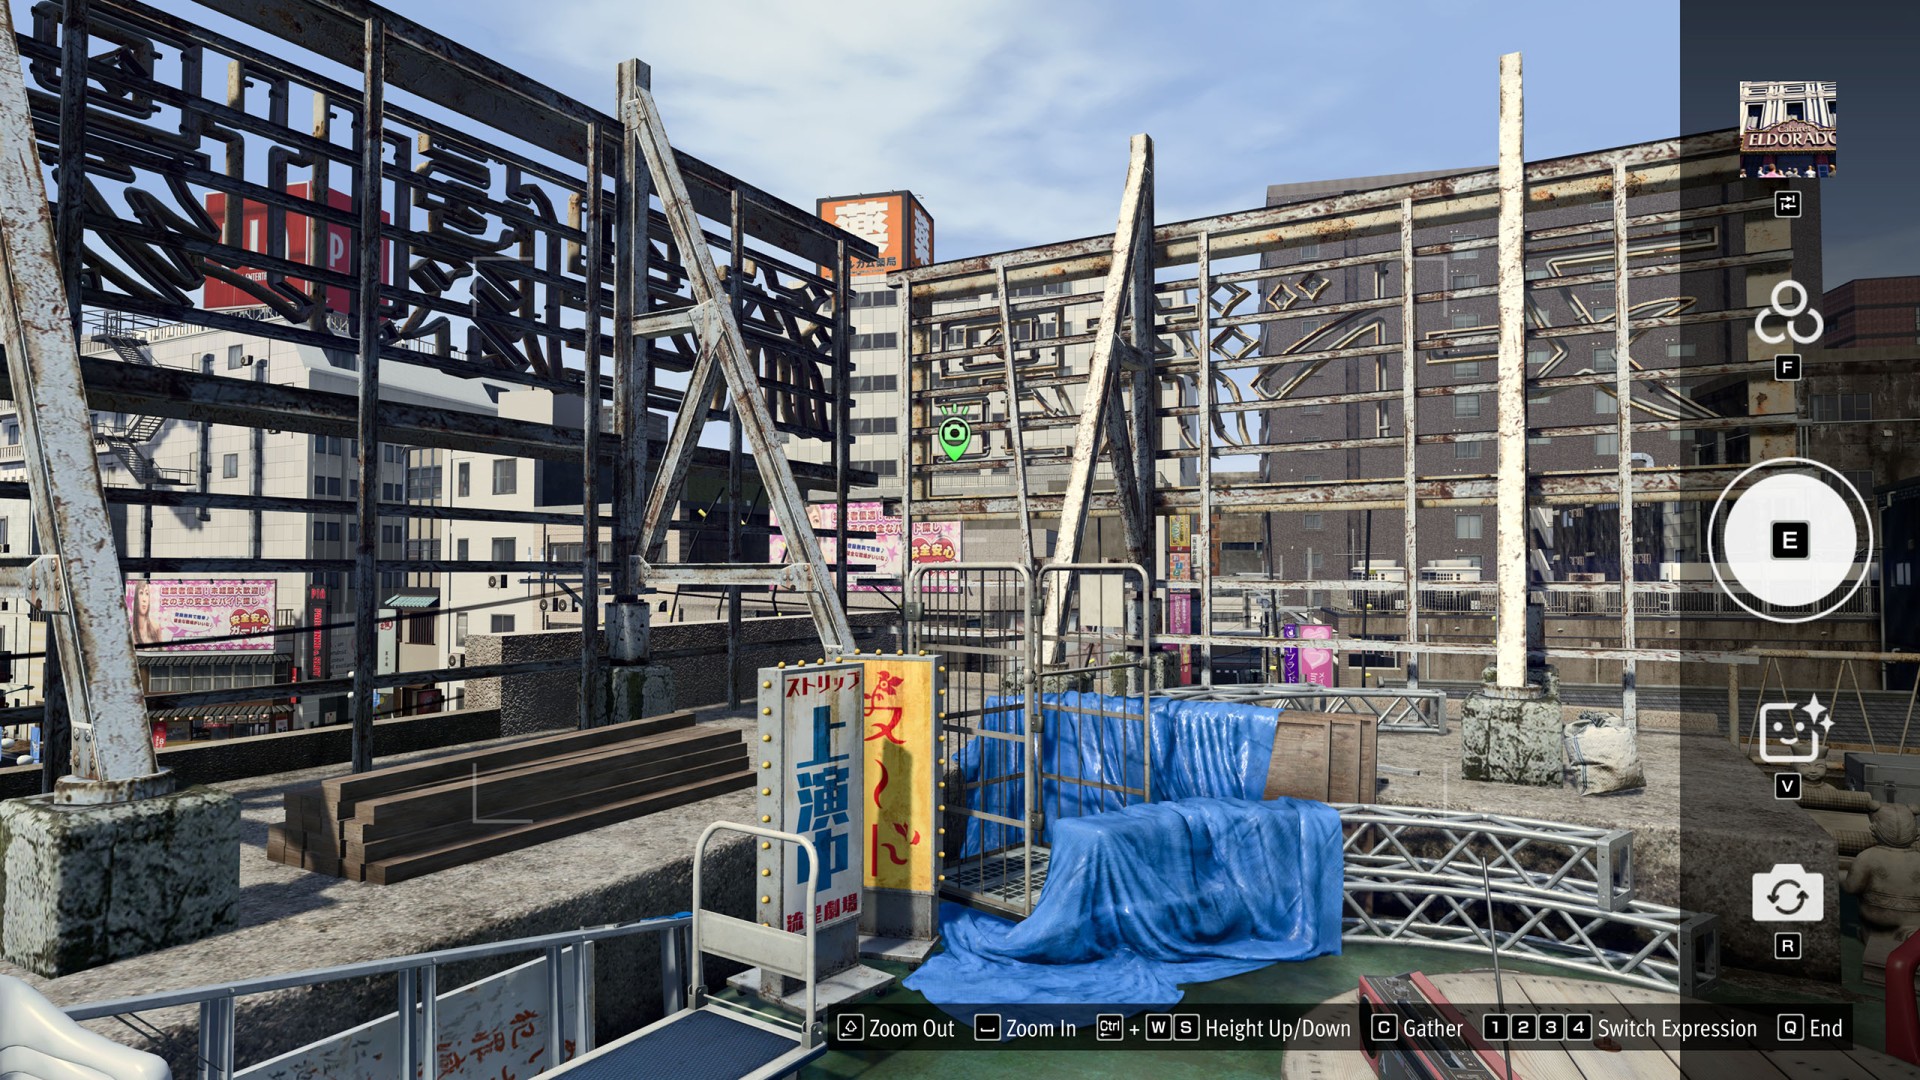
- Downtown #9 (Ryusei Stage Theater Rooftop)
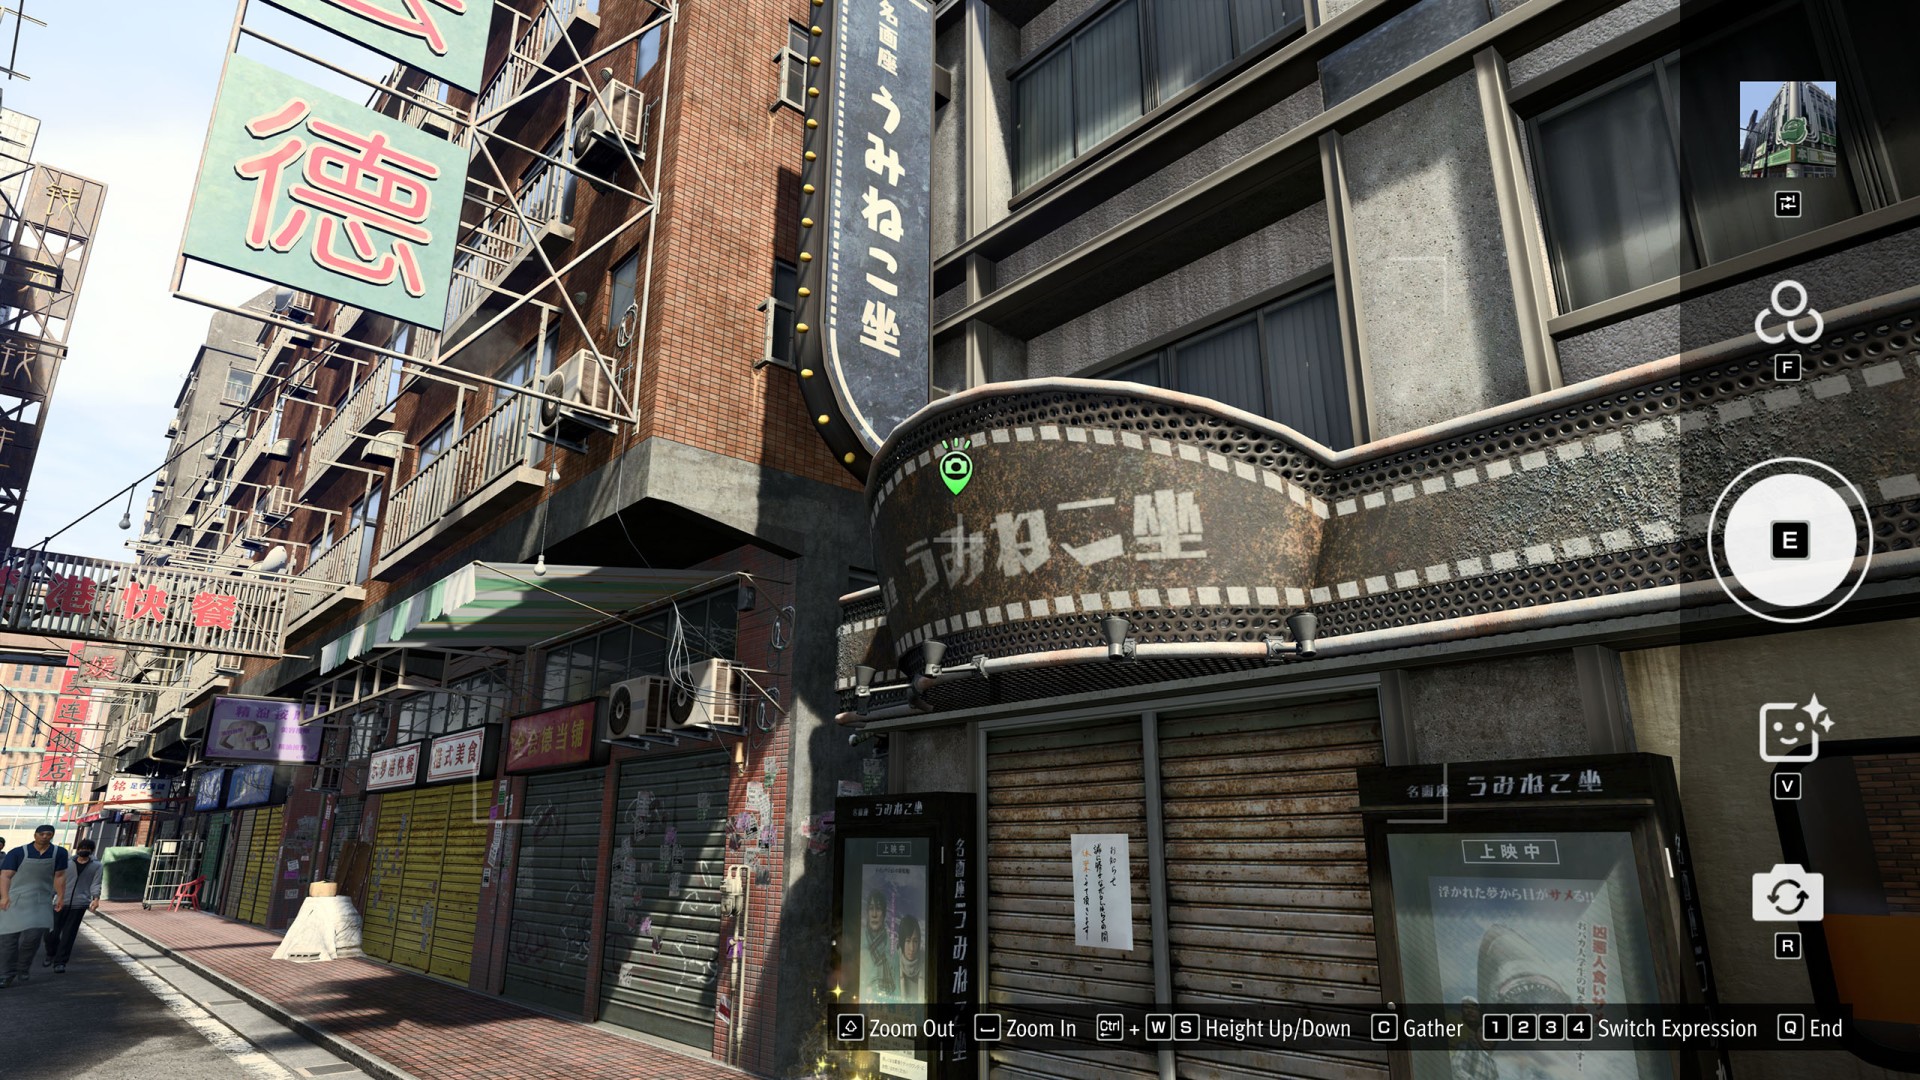
- Downtown #10 (Seagull Cinema)
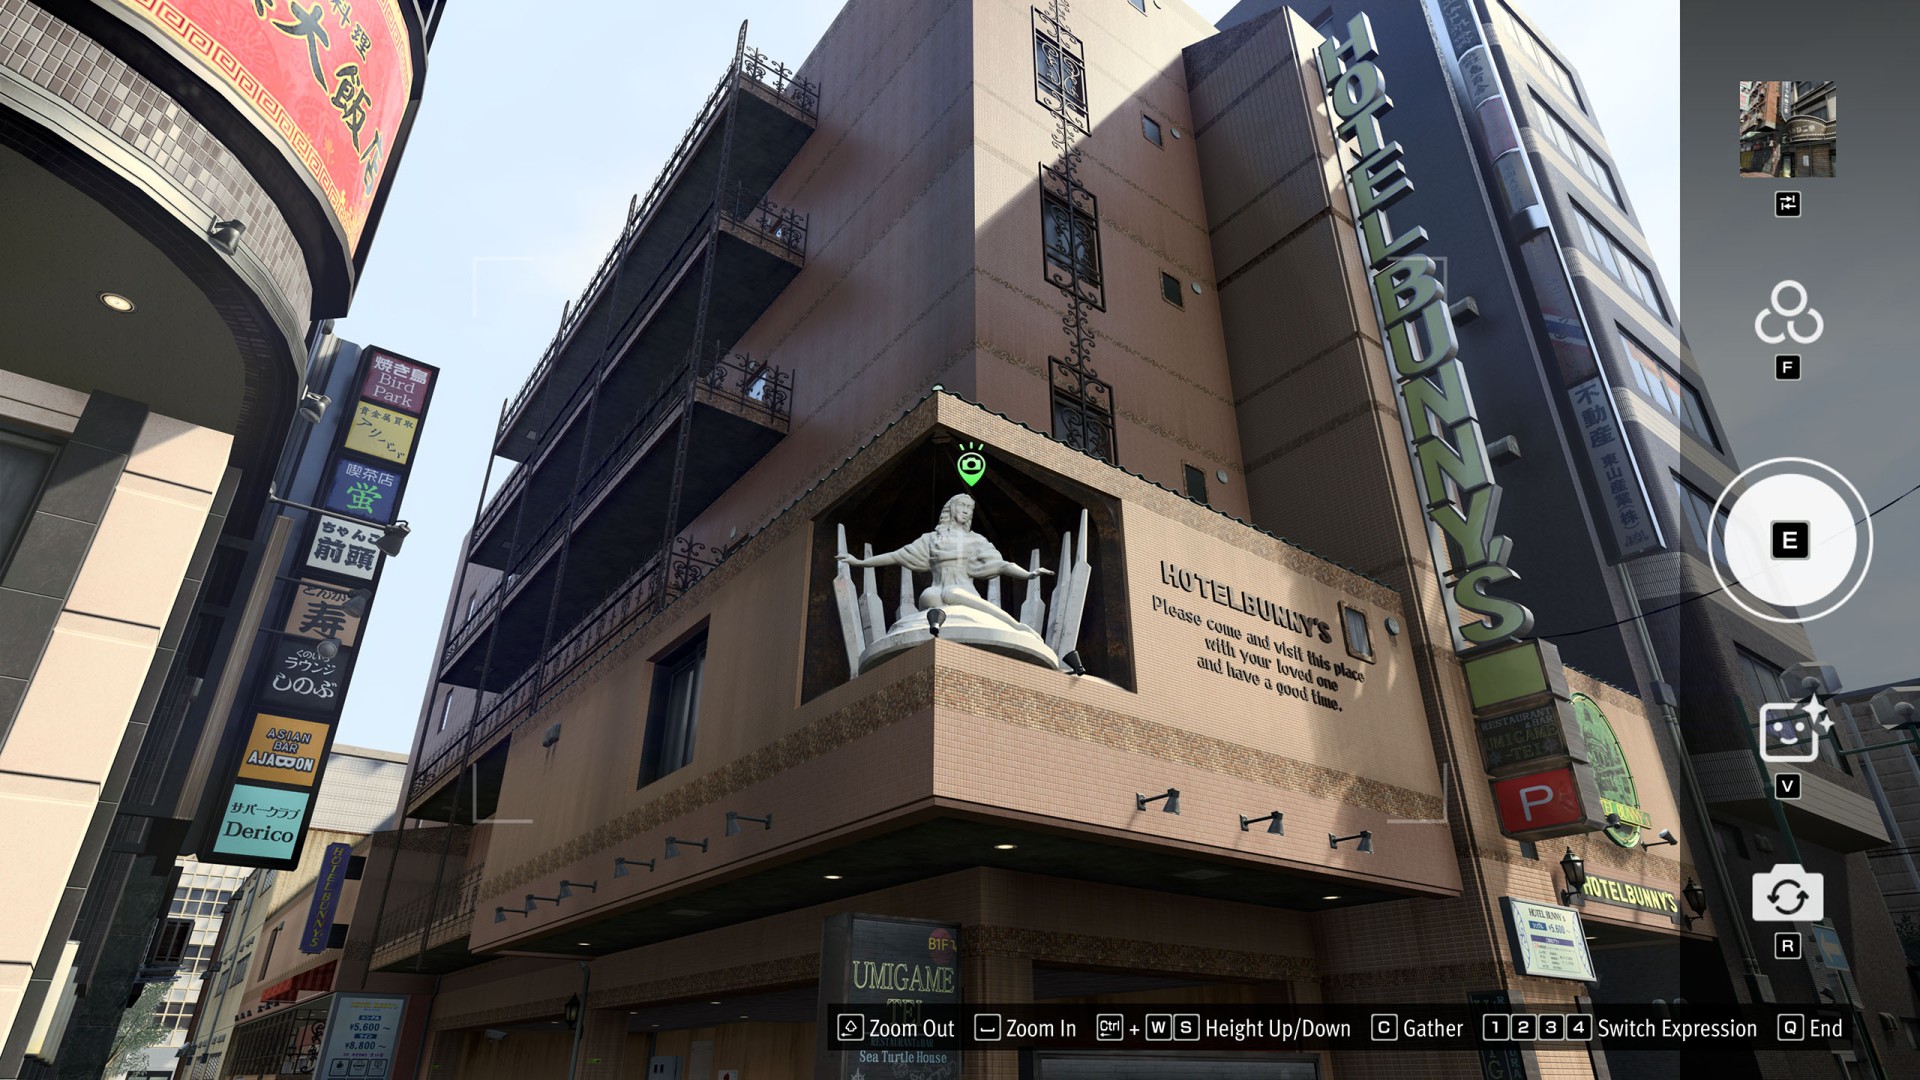
- Downtown #11 (Hotel Bunny's)
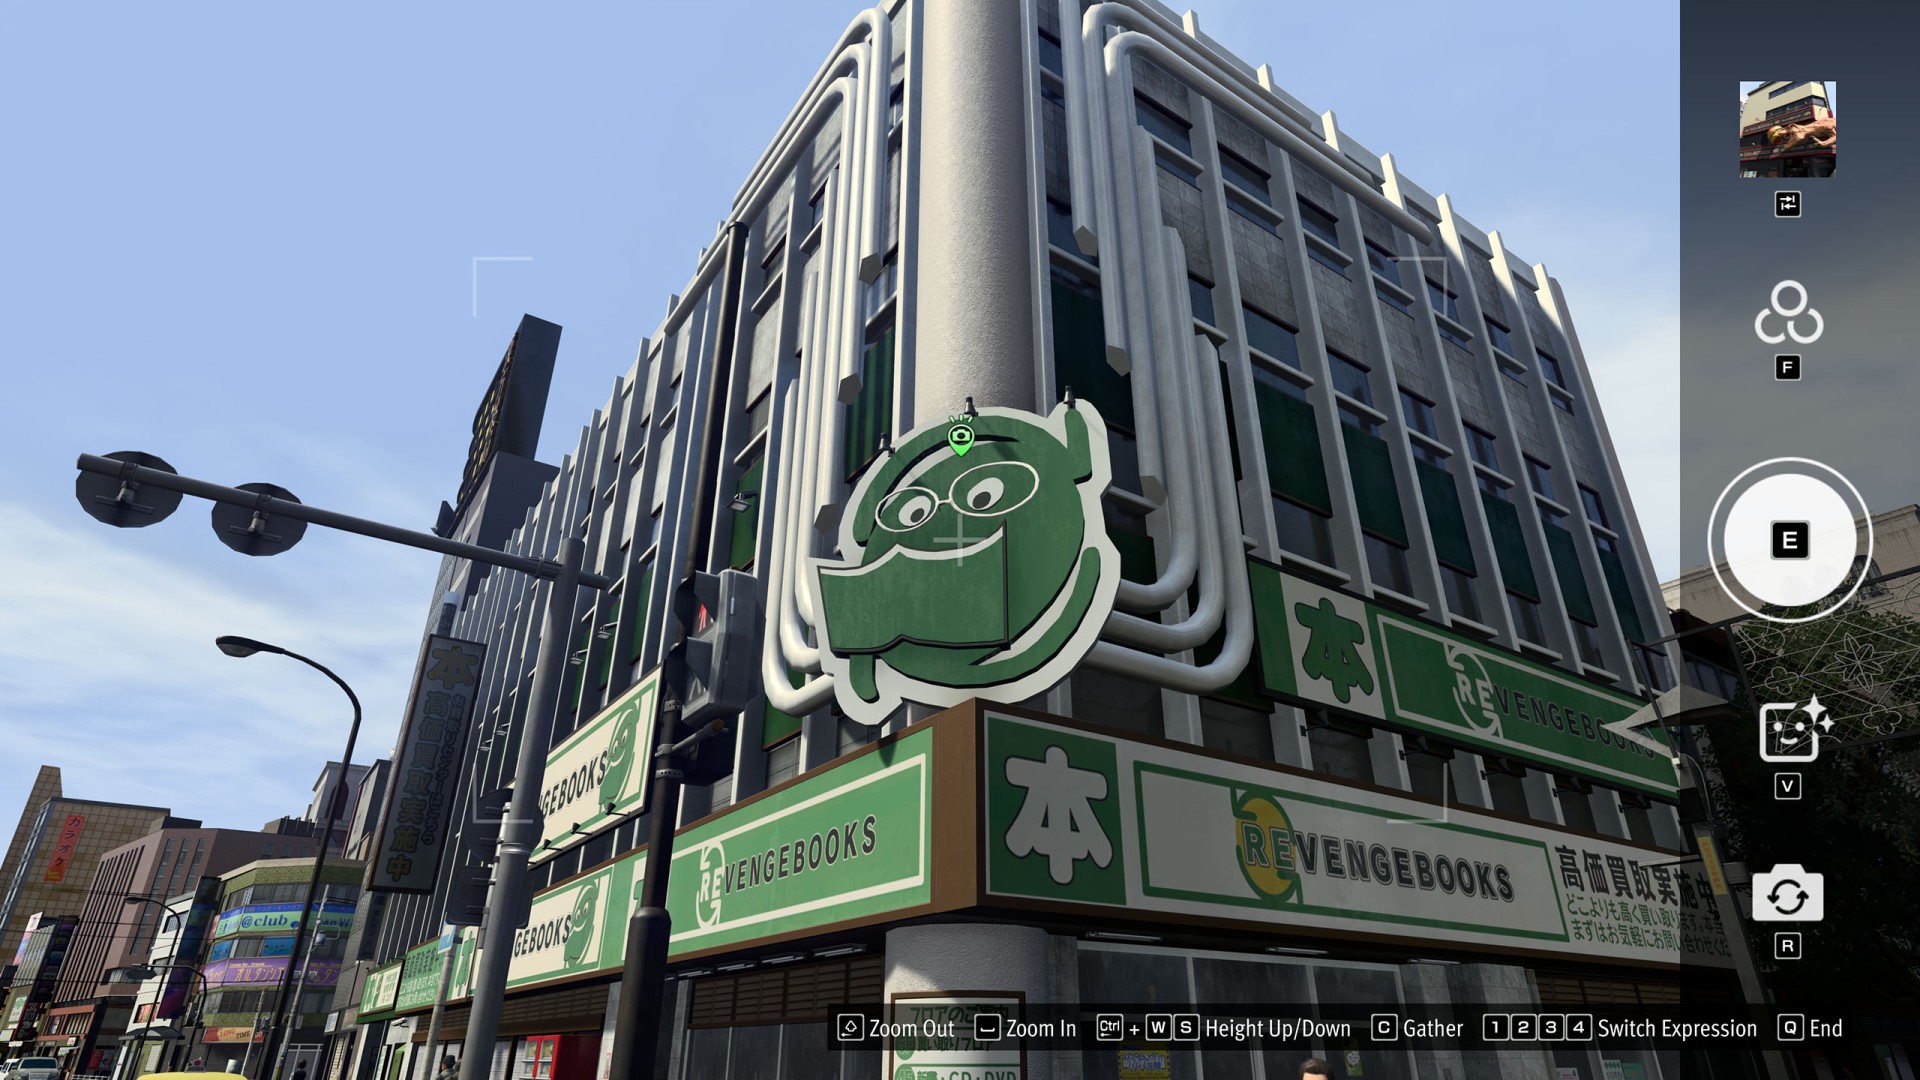
- Downtown #12 (Revenge Books)
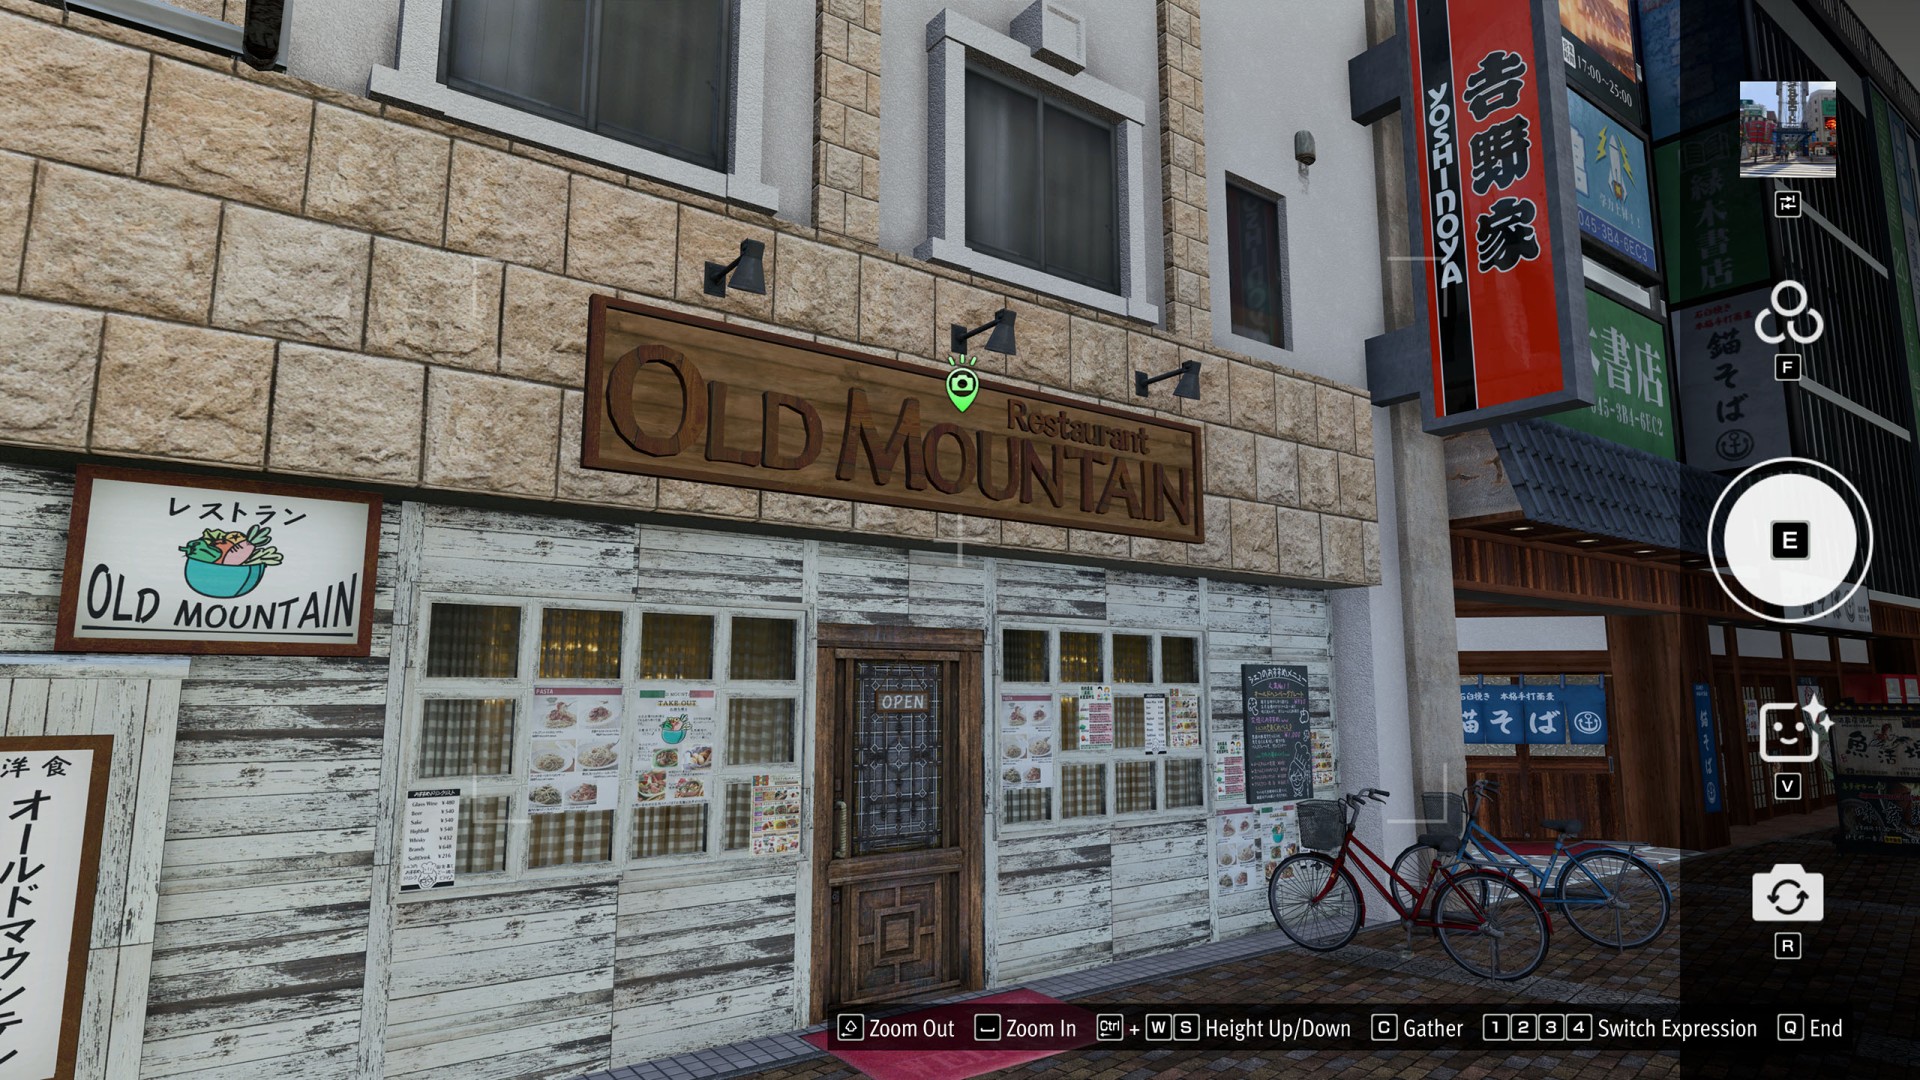
- Downtown #13 (Old Mountain)
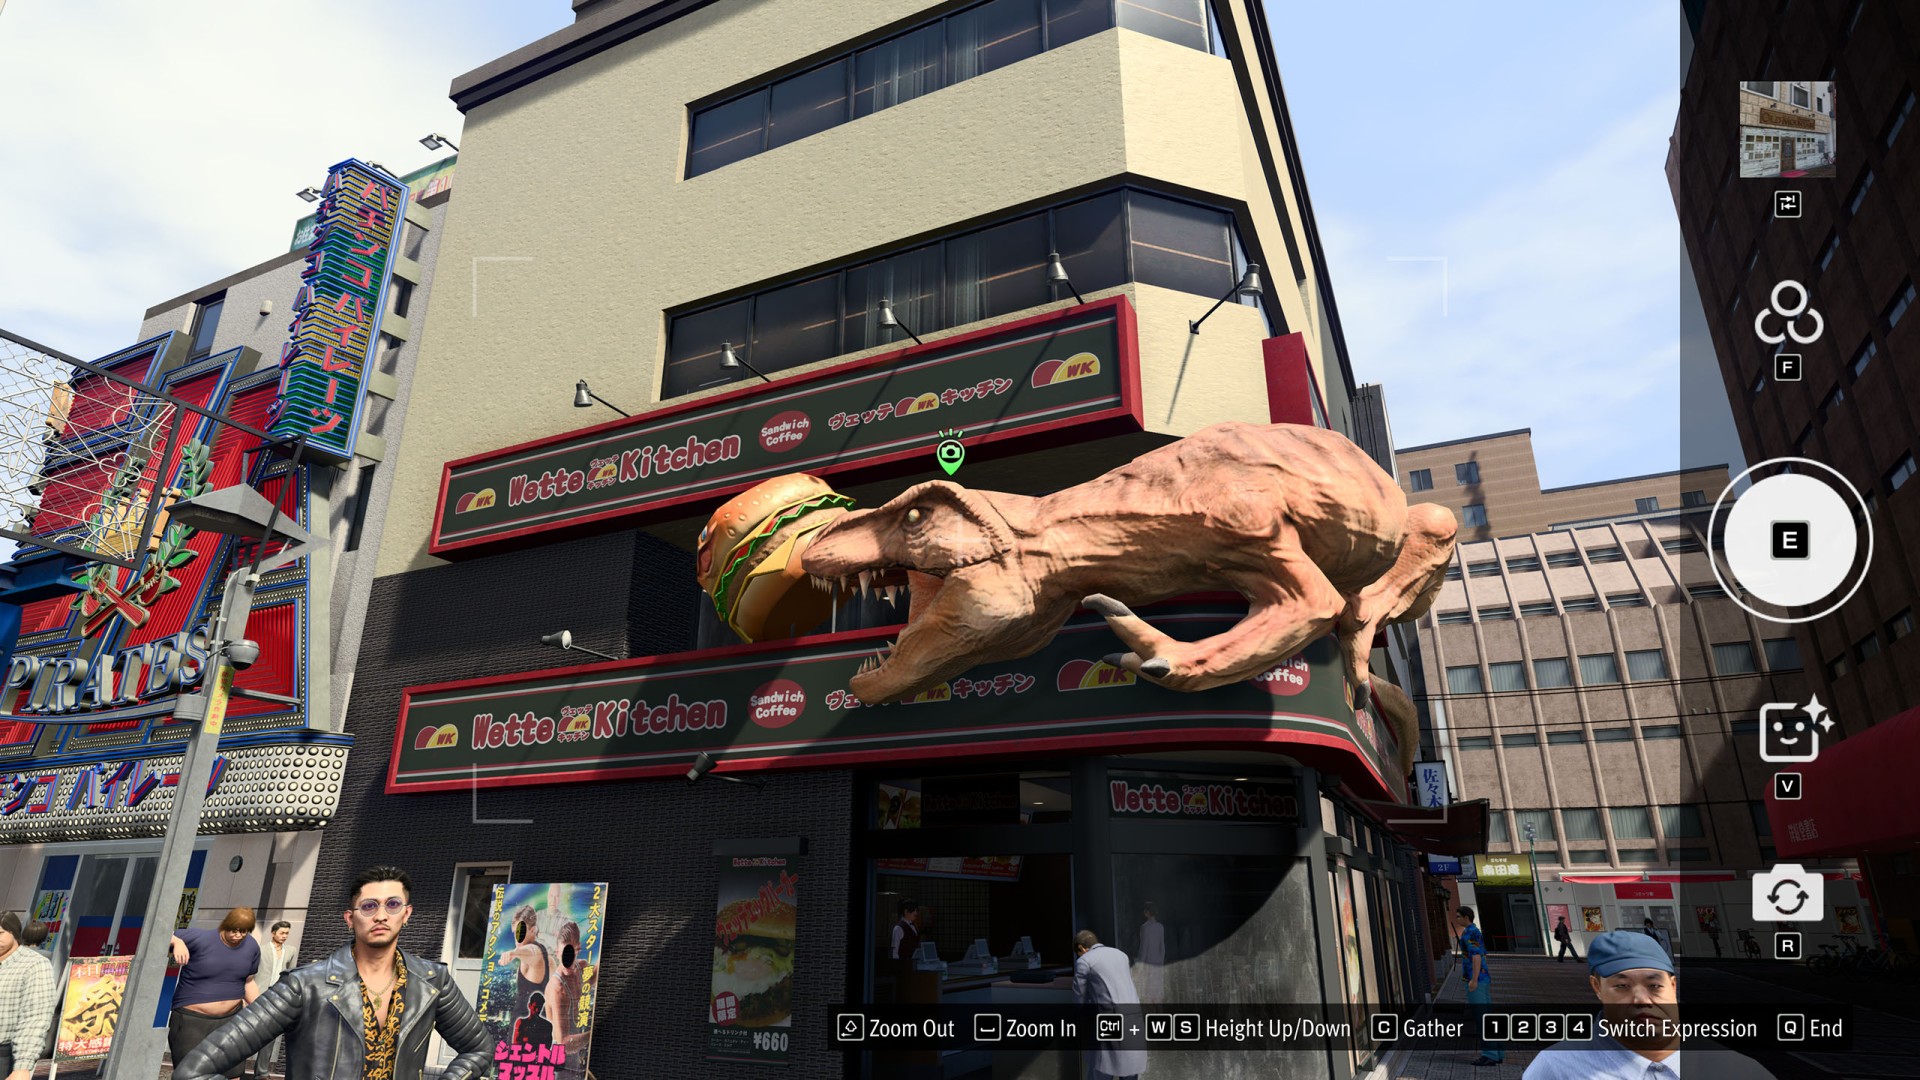
- Downtown #14 (Wette Kitchen Dinosaur)
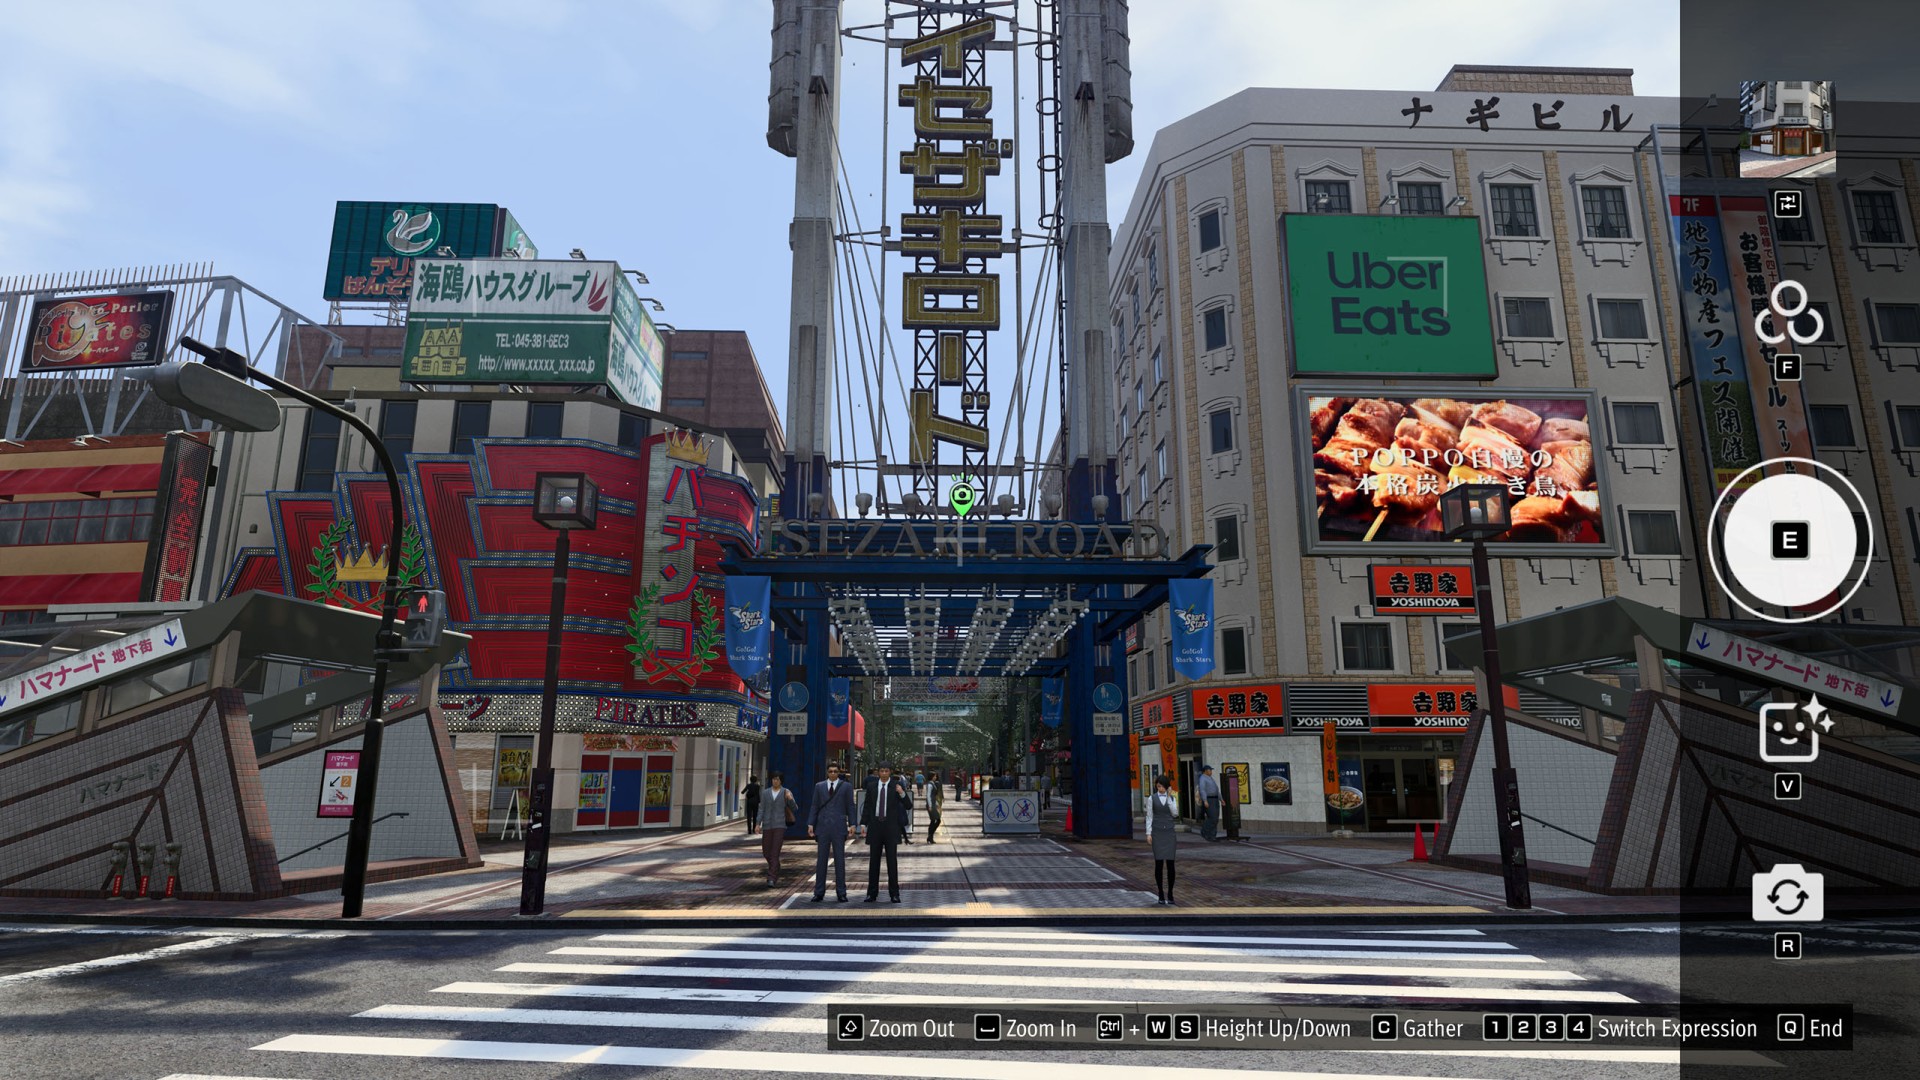
- Downtown #15 (Isezaki Road)
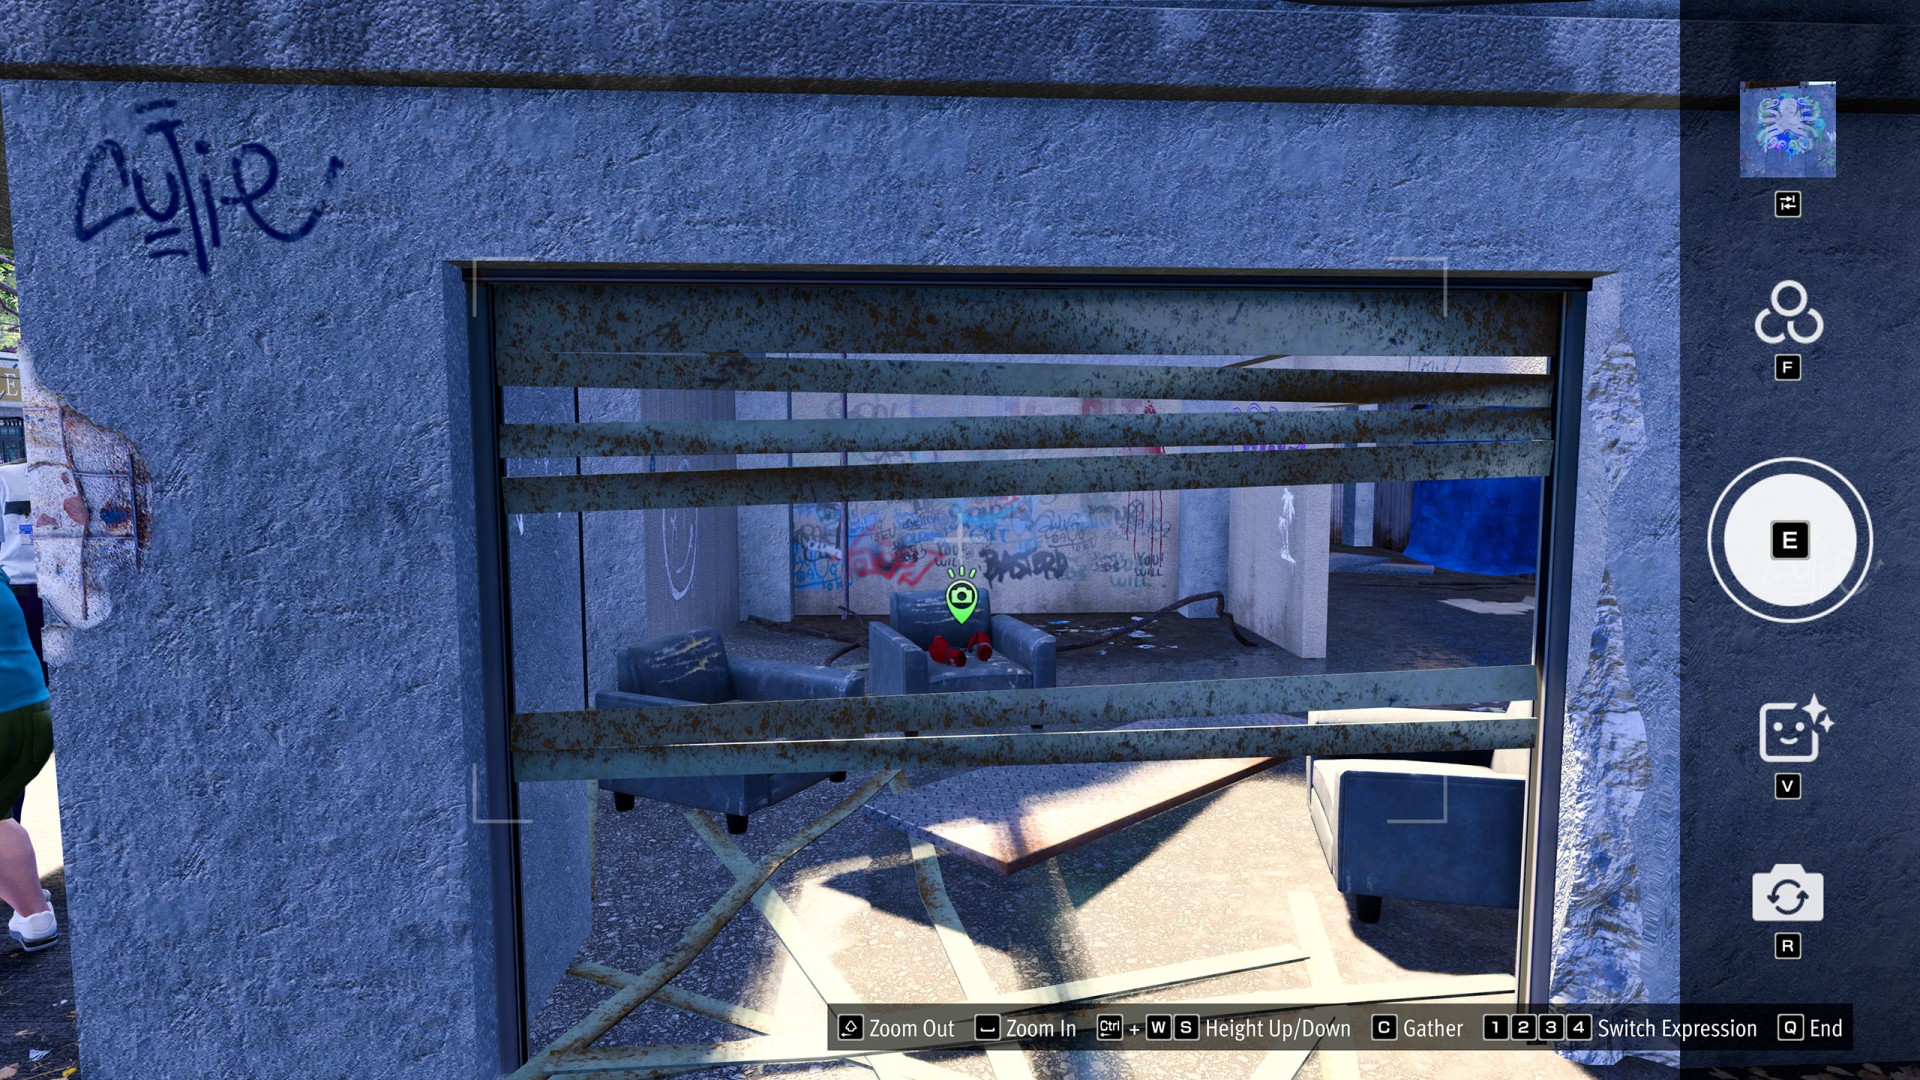
- Downtown / Chinatown / District Five #1 (Wall Art: Octopus)
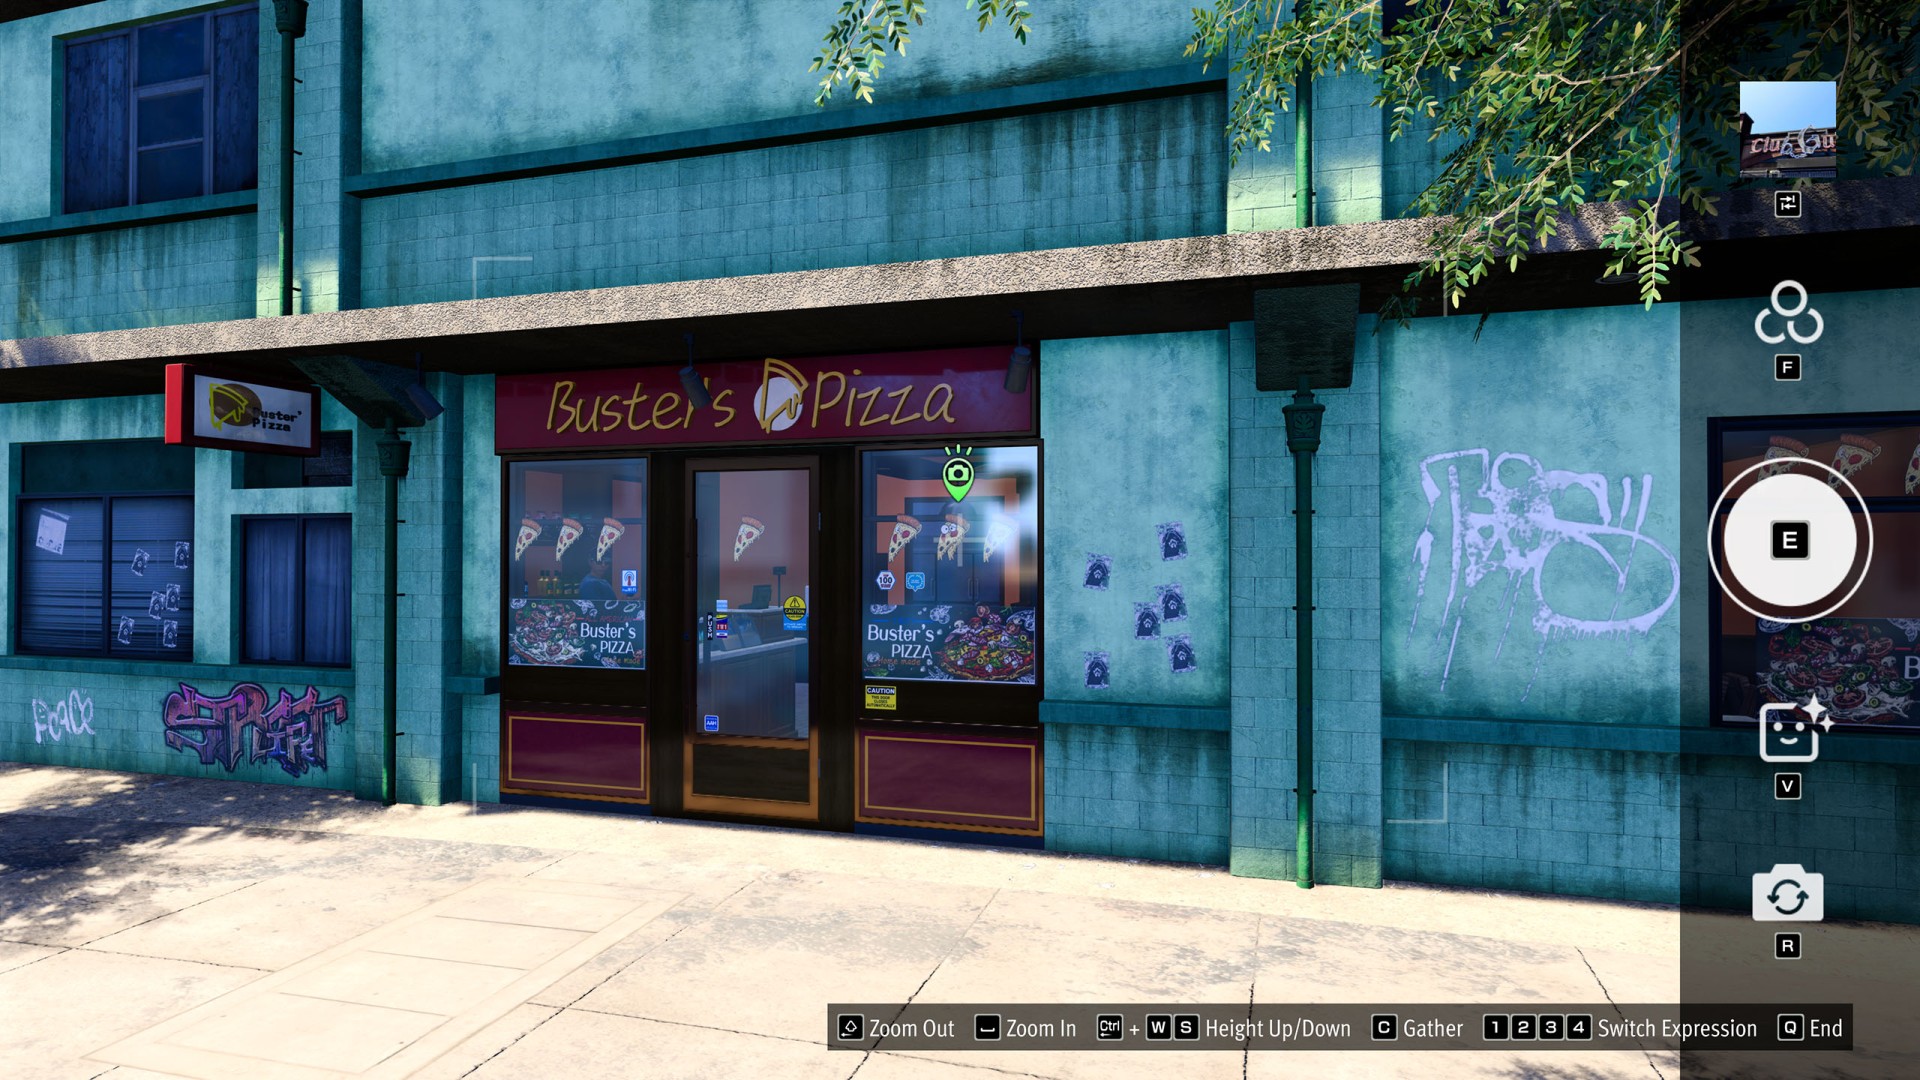
- Downtown / Chinatown / District Five #2 (Buster's Pizza)
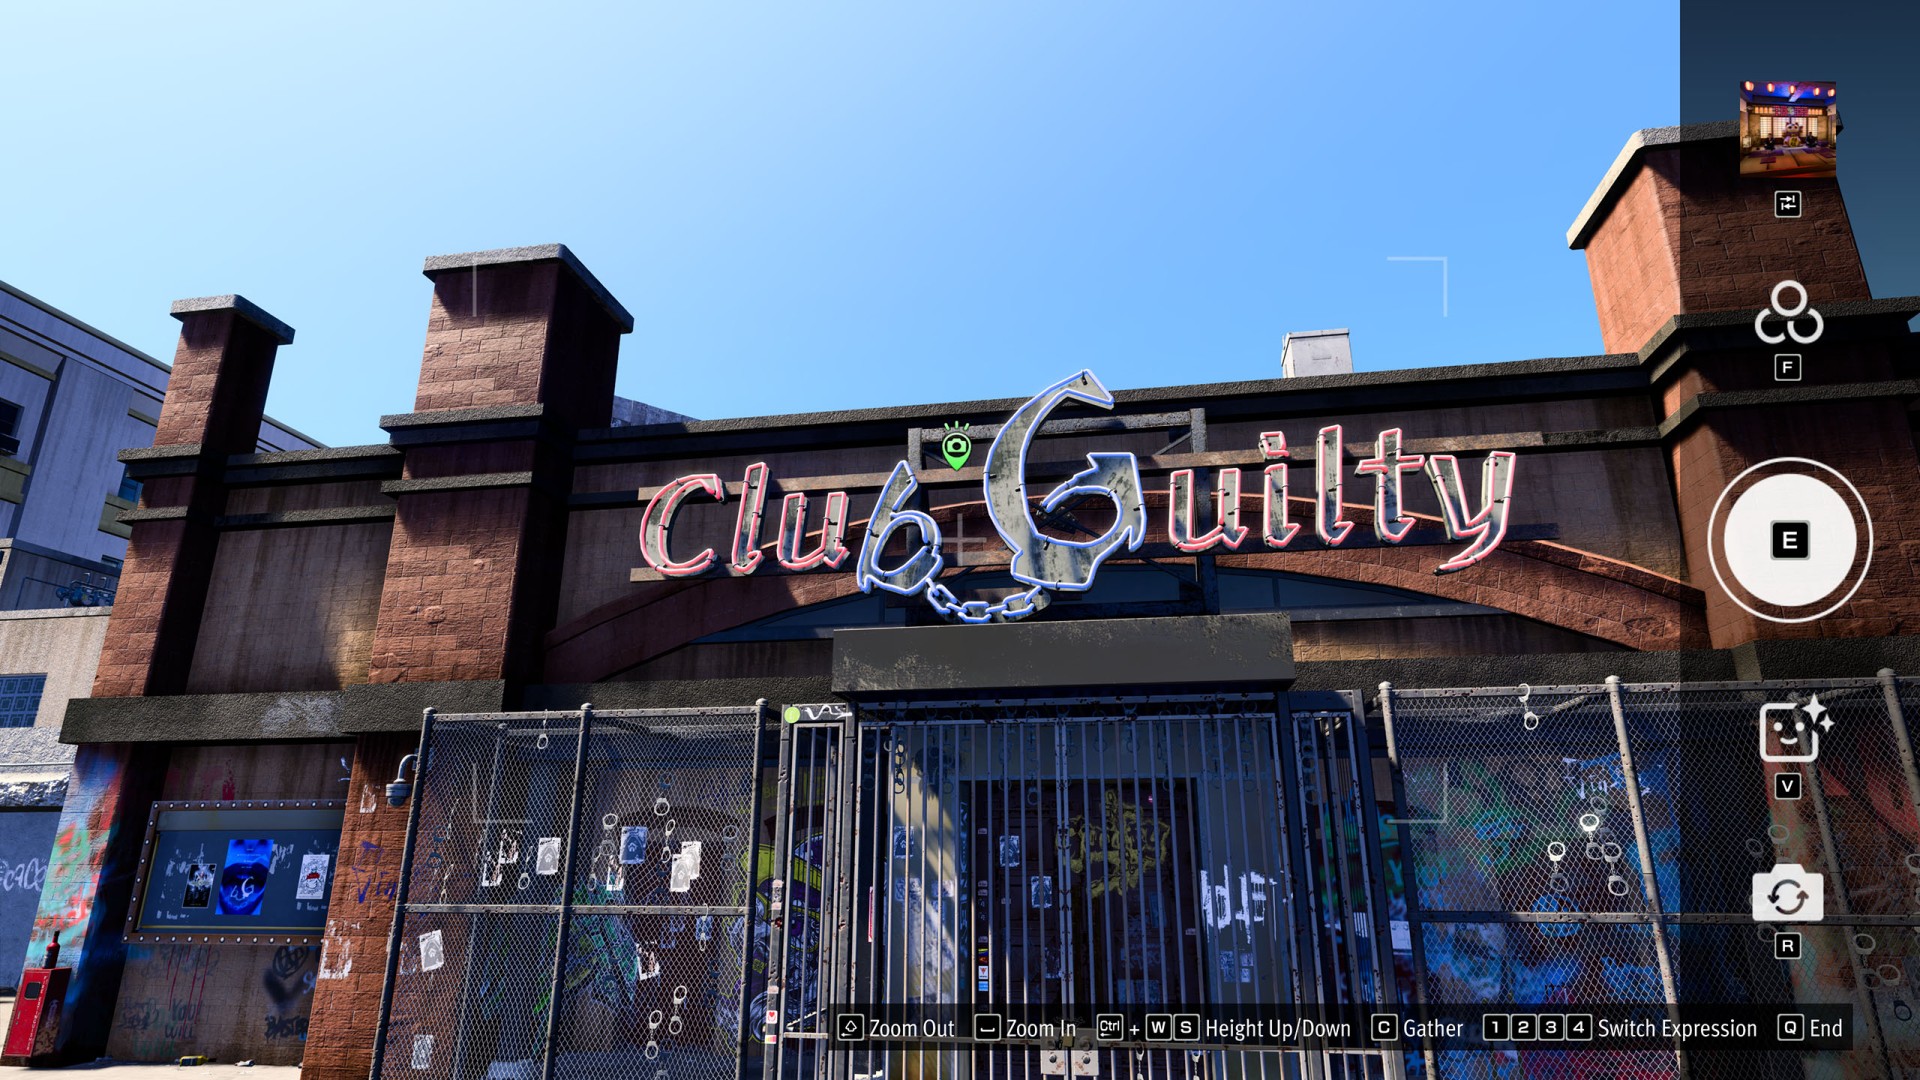
- Downtown / Chinatown / District Five #3 (Club Guilty)
- Downtown / Chinatown / District Five #4 (Handcuffs & Gloves)
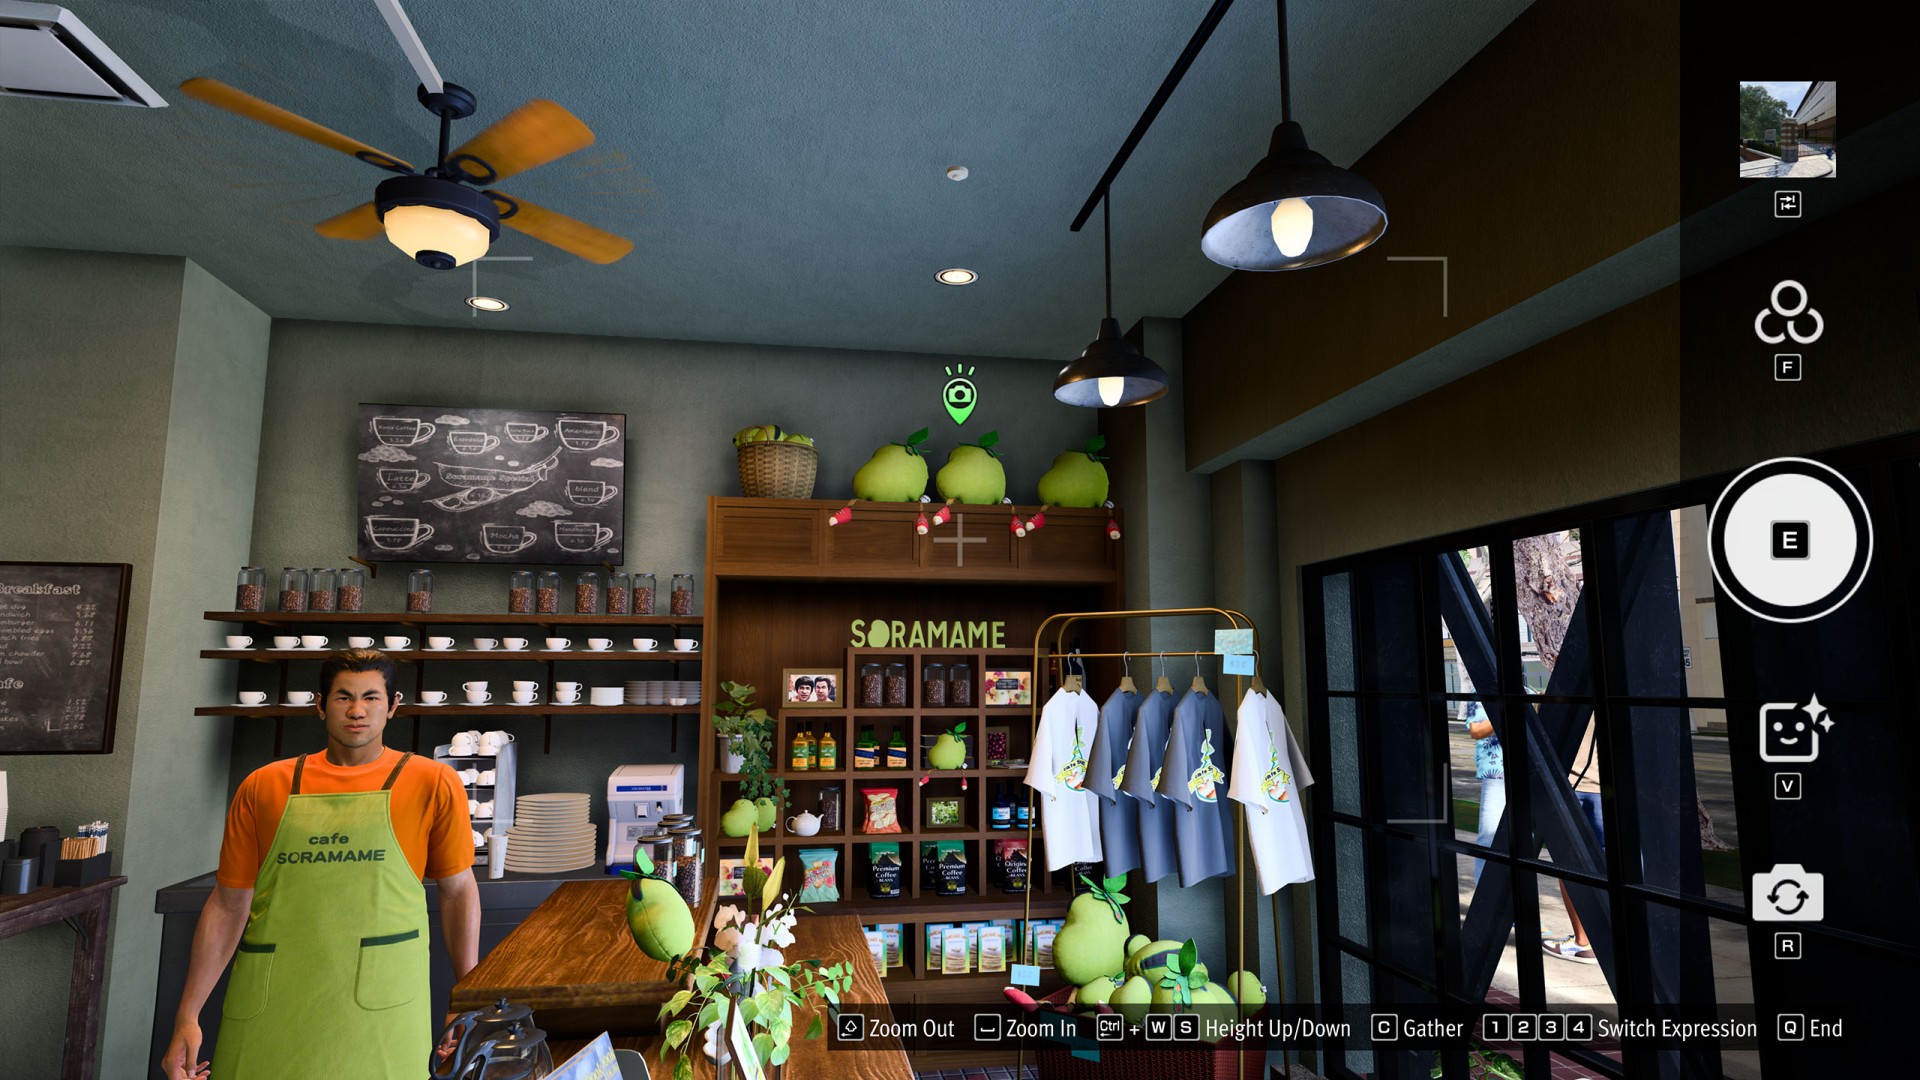
- Downtown / Chinatown / District Five #5 (Soramame's Beans)
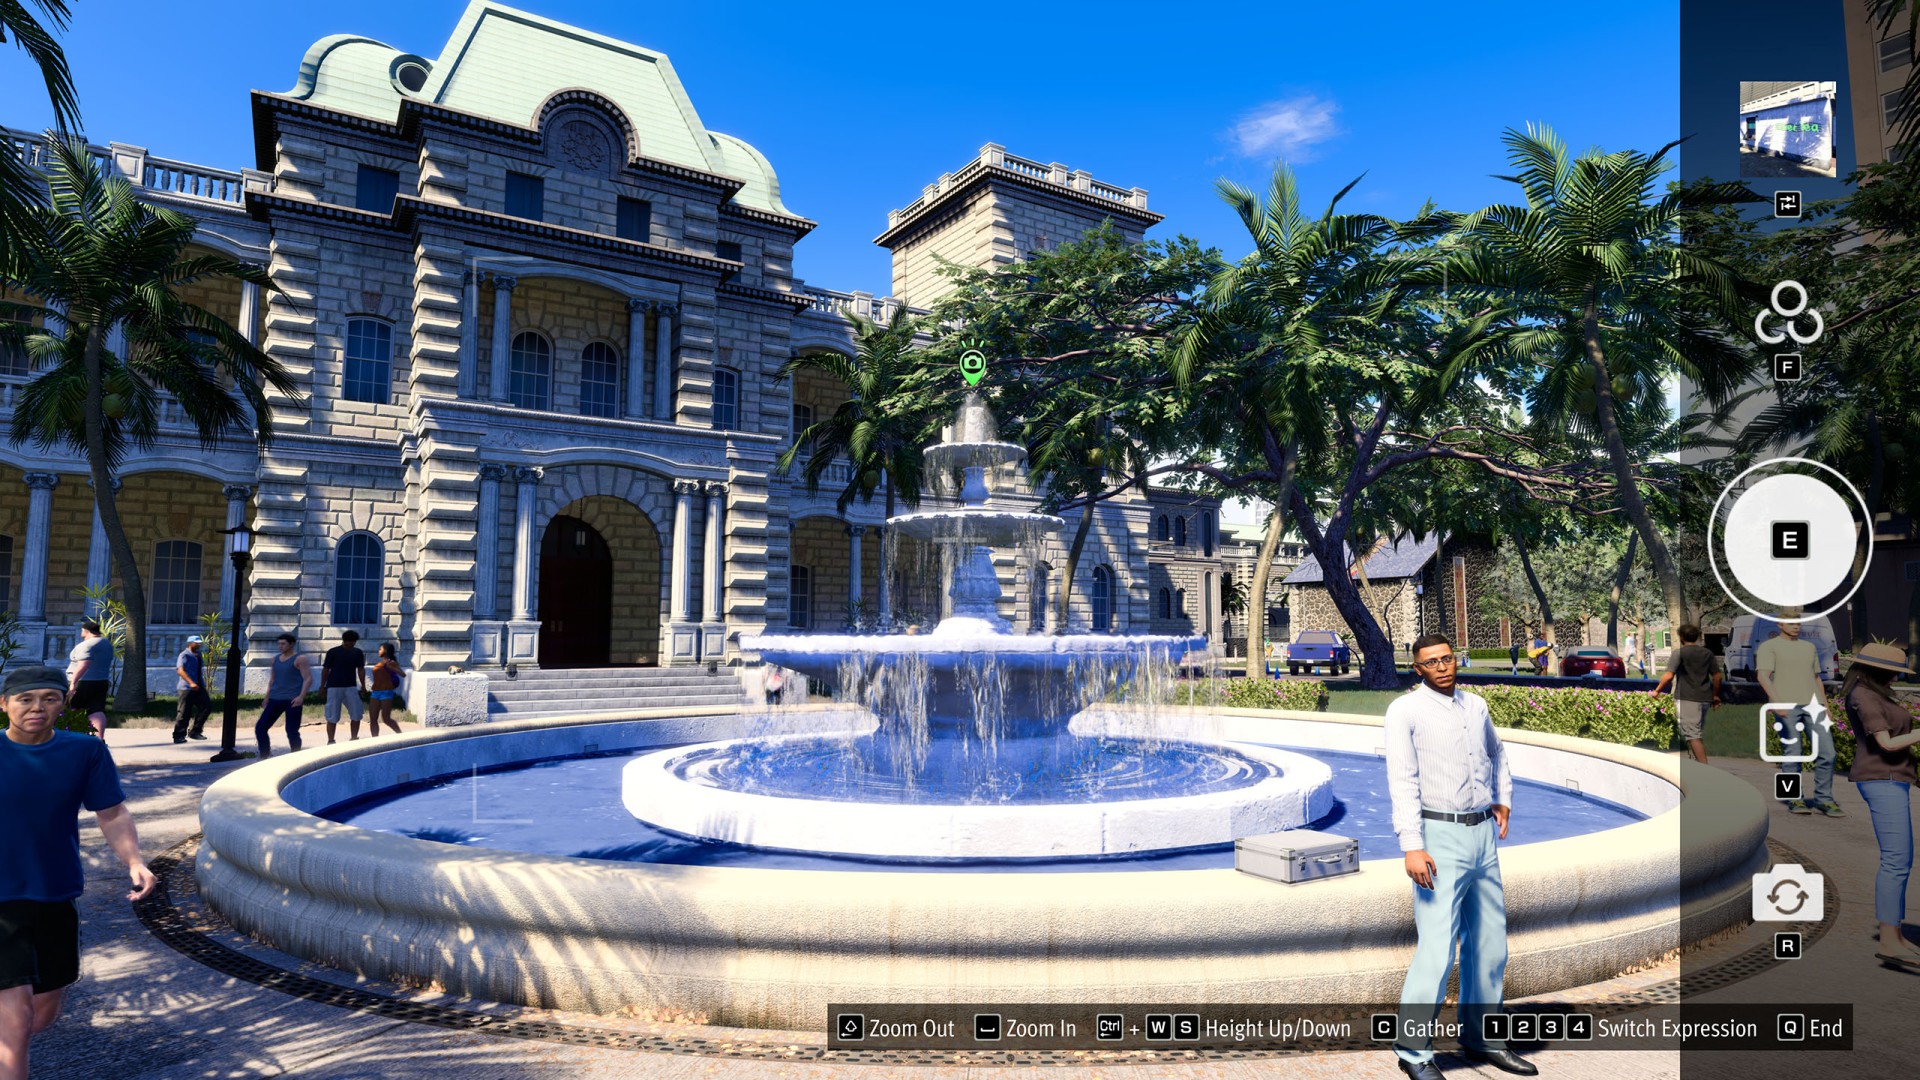
- Downtown / Chinatown / District Five #6 (Downtown Fountain Square)
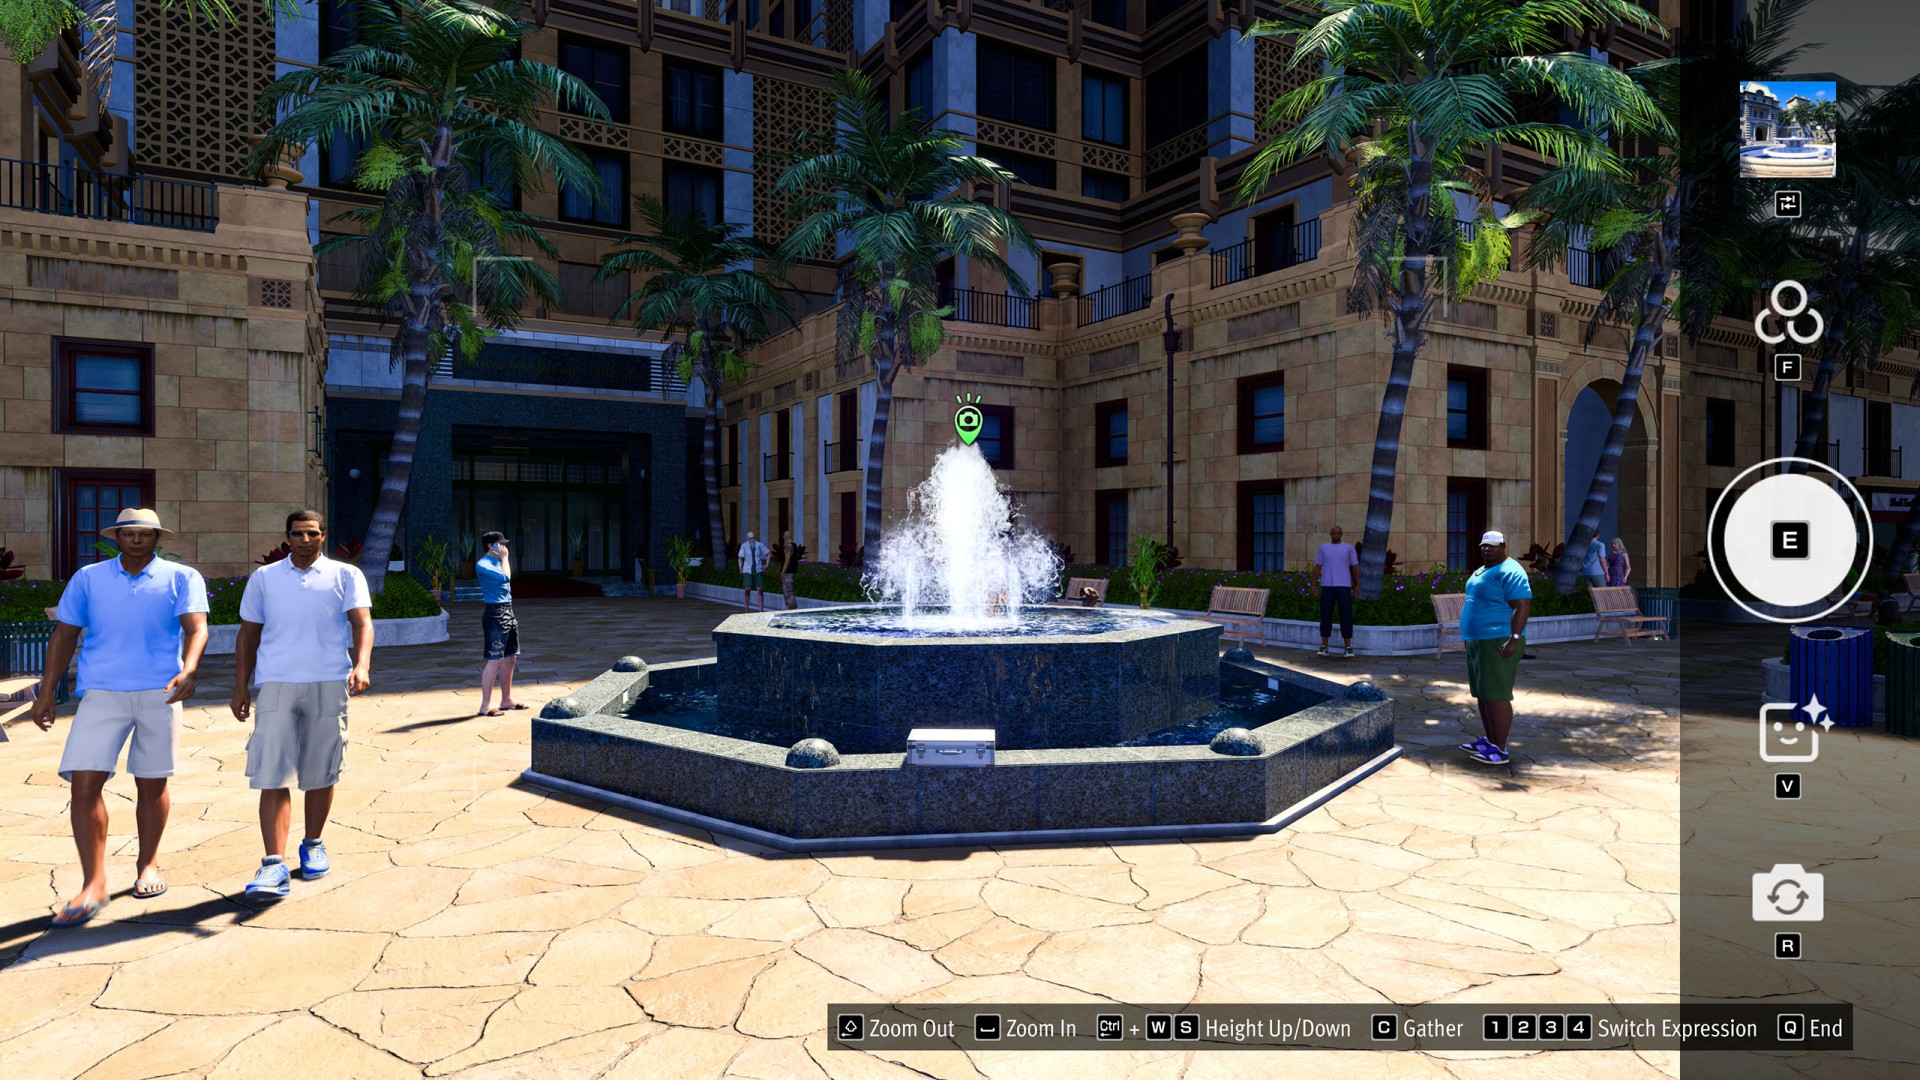
- Downtown / Chinatown / District Five #7 (Spa Fountain Square)
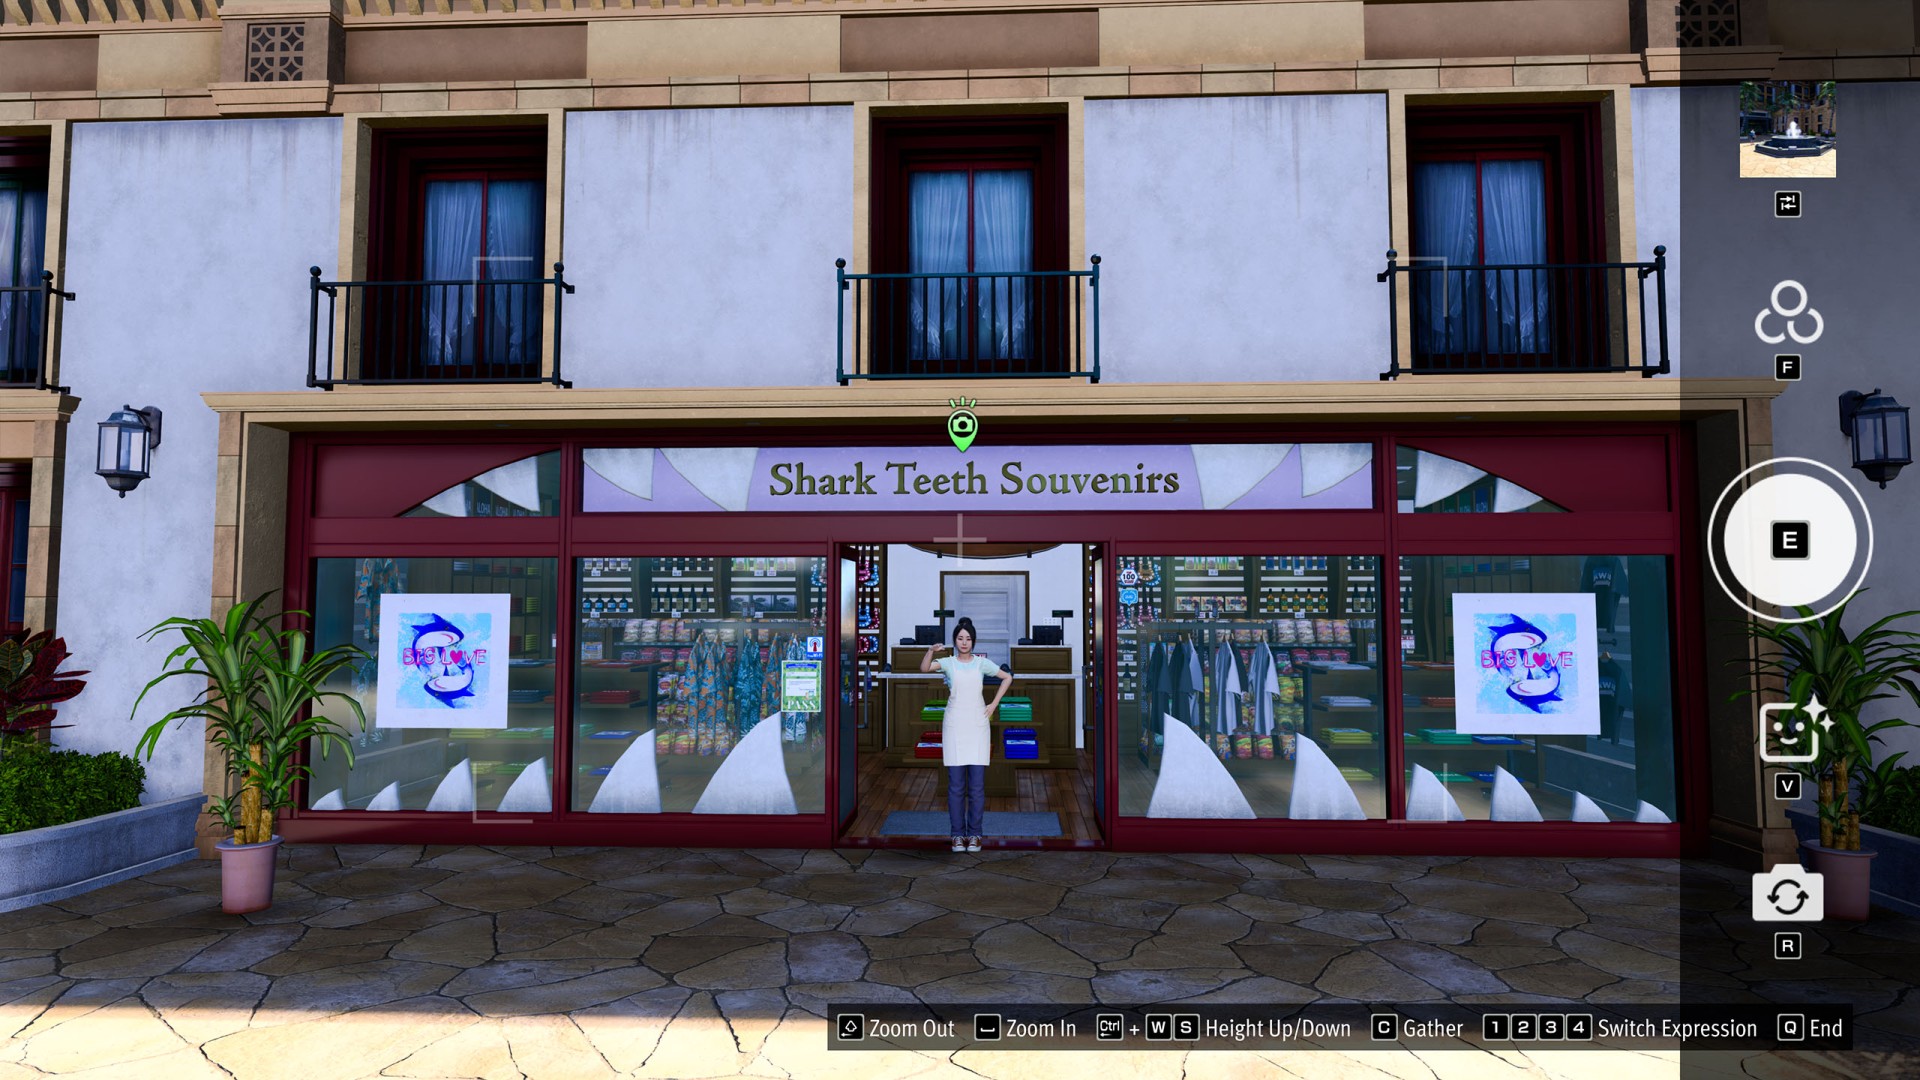
- Downtown / Chinatown / District Five #8 (Shark Teeth Souvenirs)
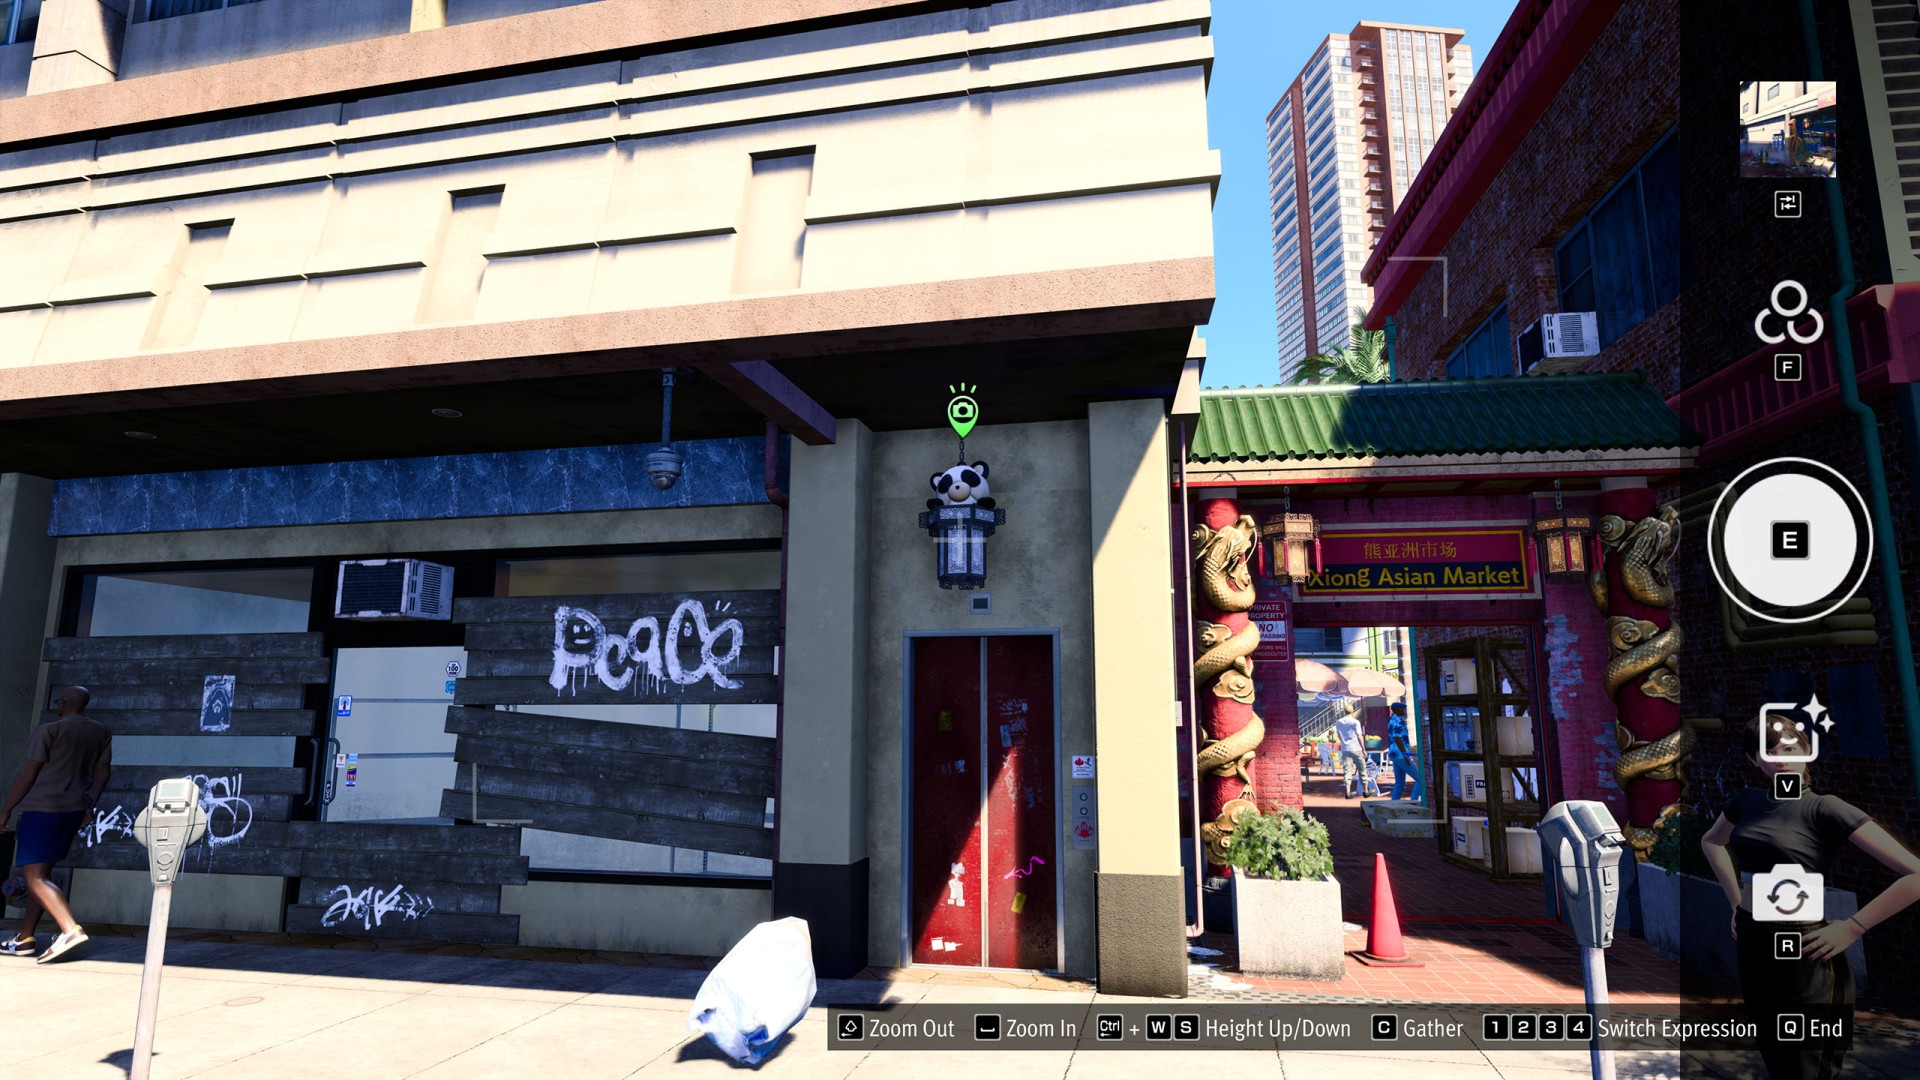
- Downtown / Chinatown / District Five #9 (Panda Pads)
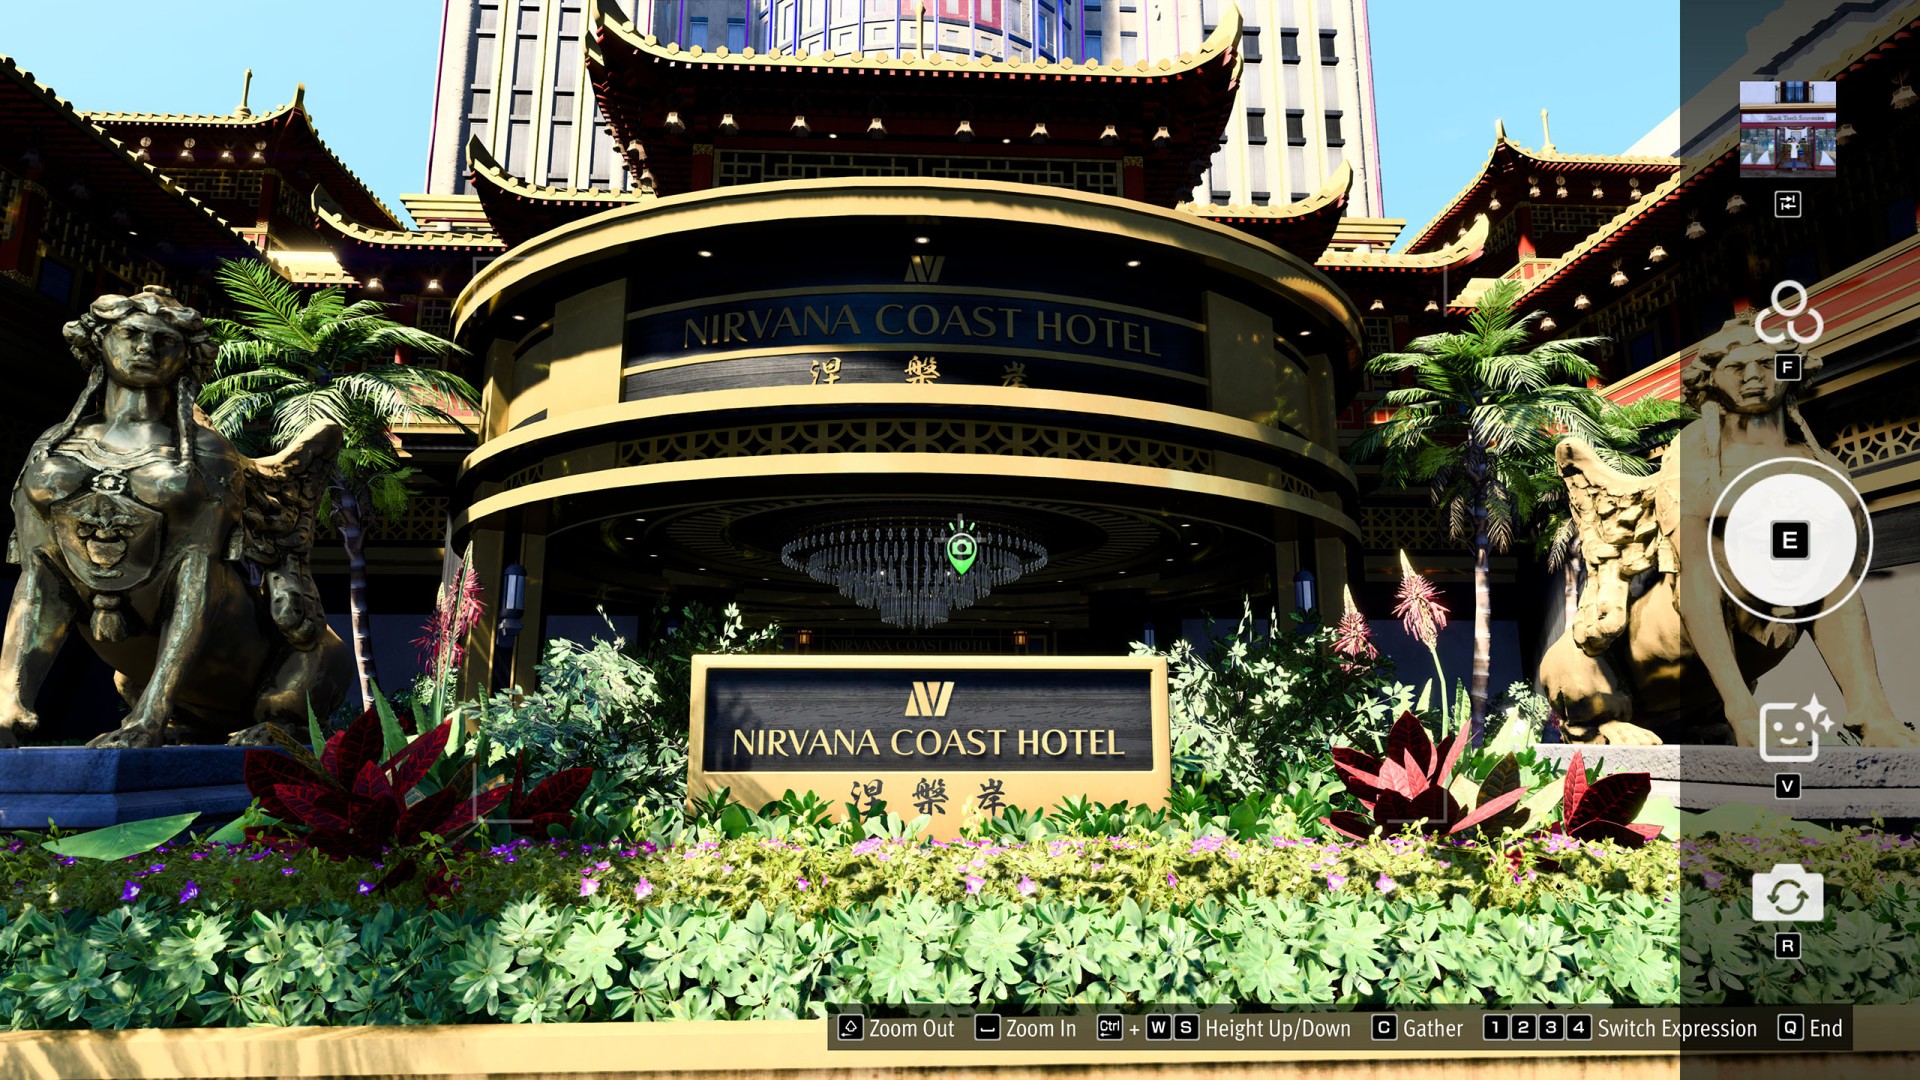
- Downtown / Chinatown / District Five #10 (Nirvana Hotel)
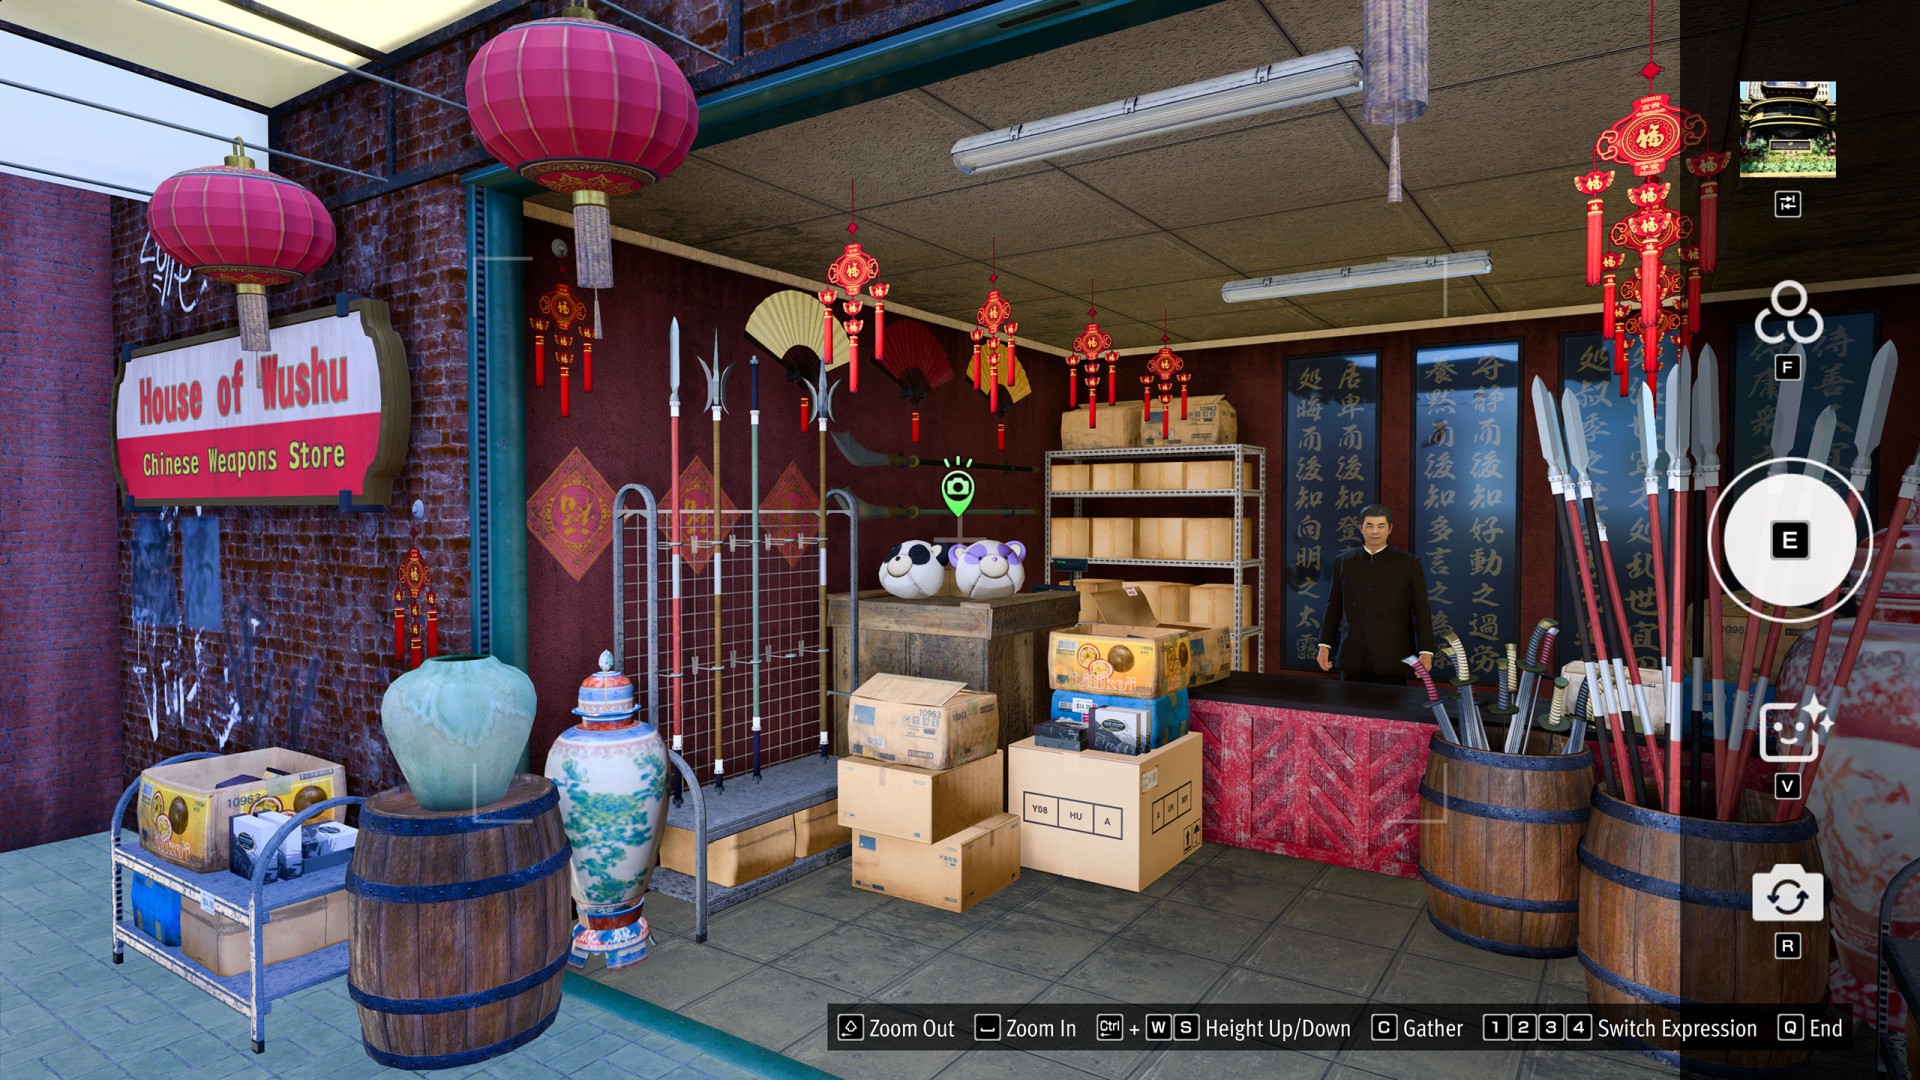
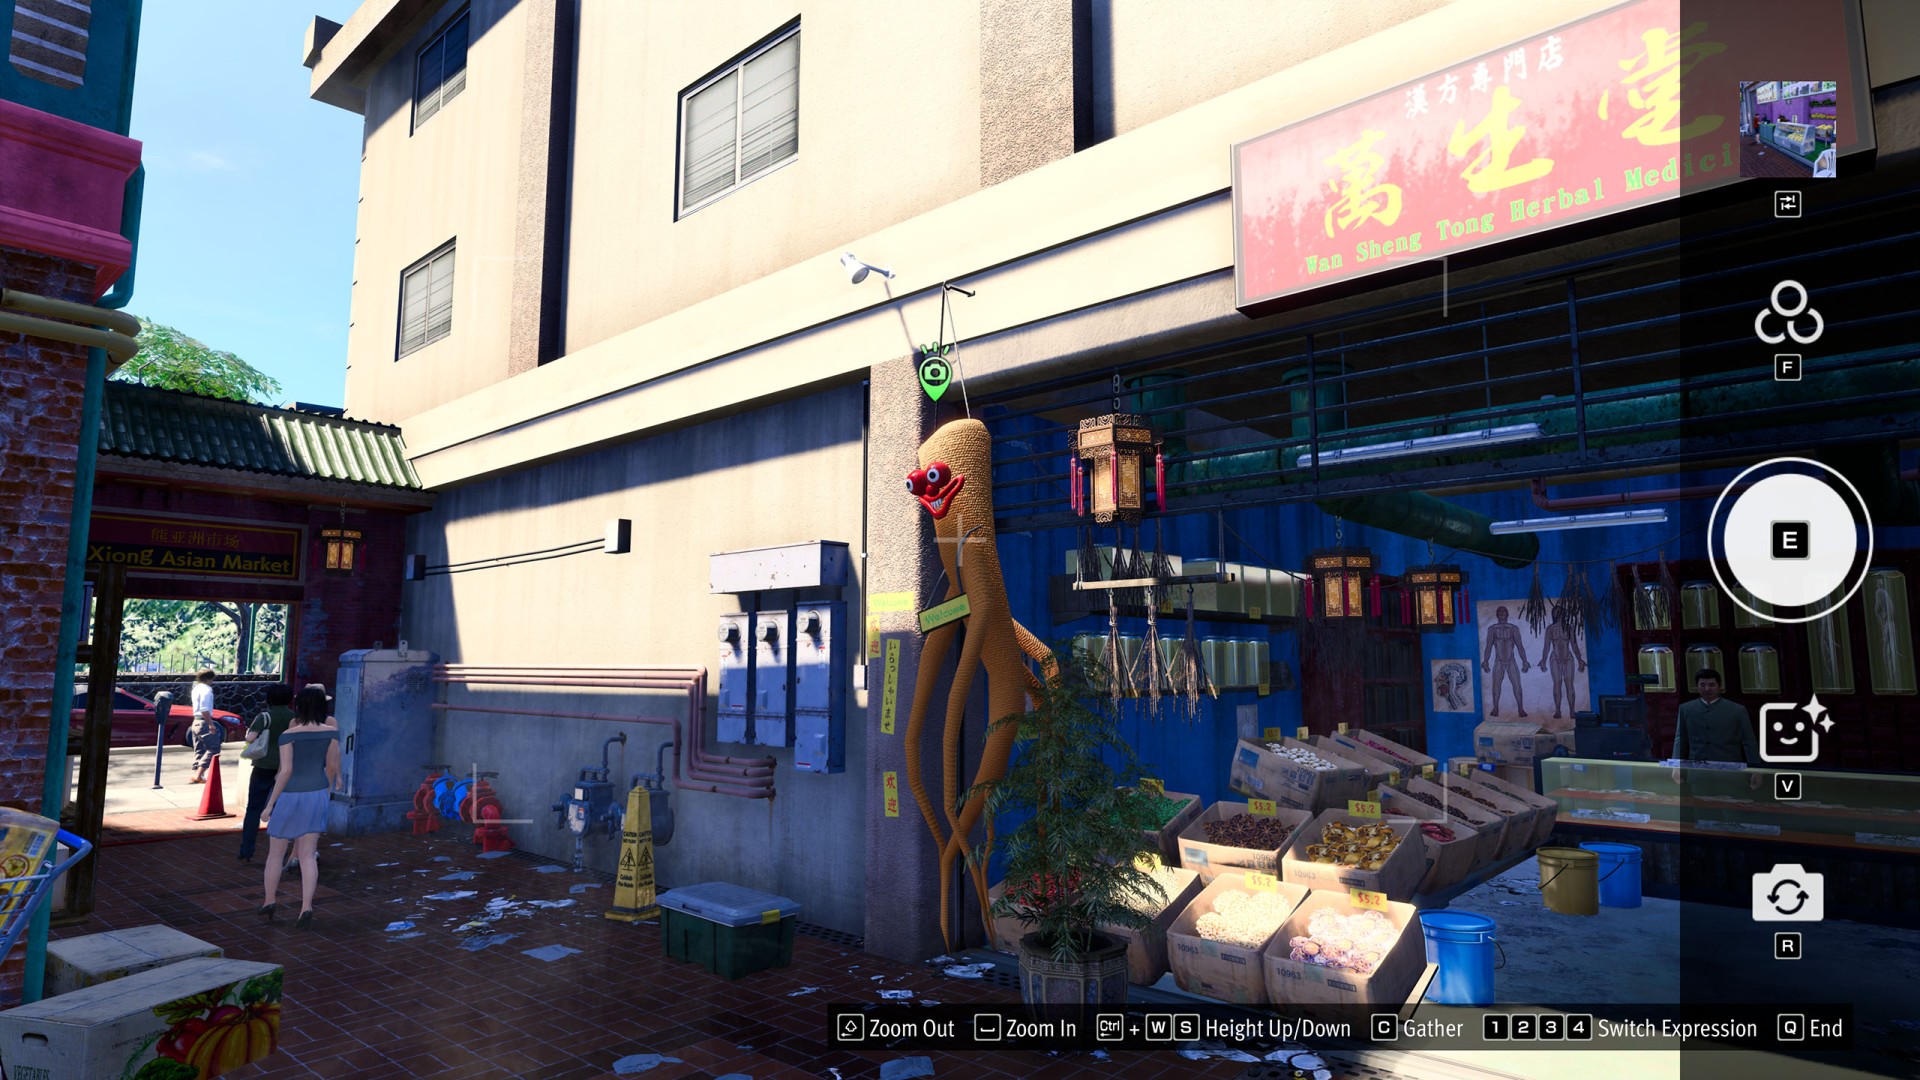
- Downtown / Chinatown / District Five #11 (Miss Ginseng)
- Downtown / Chinatown / District Five #12 (Mahjong Parlor Entrance)
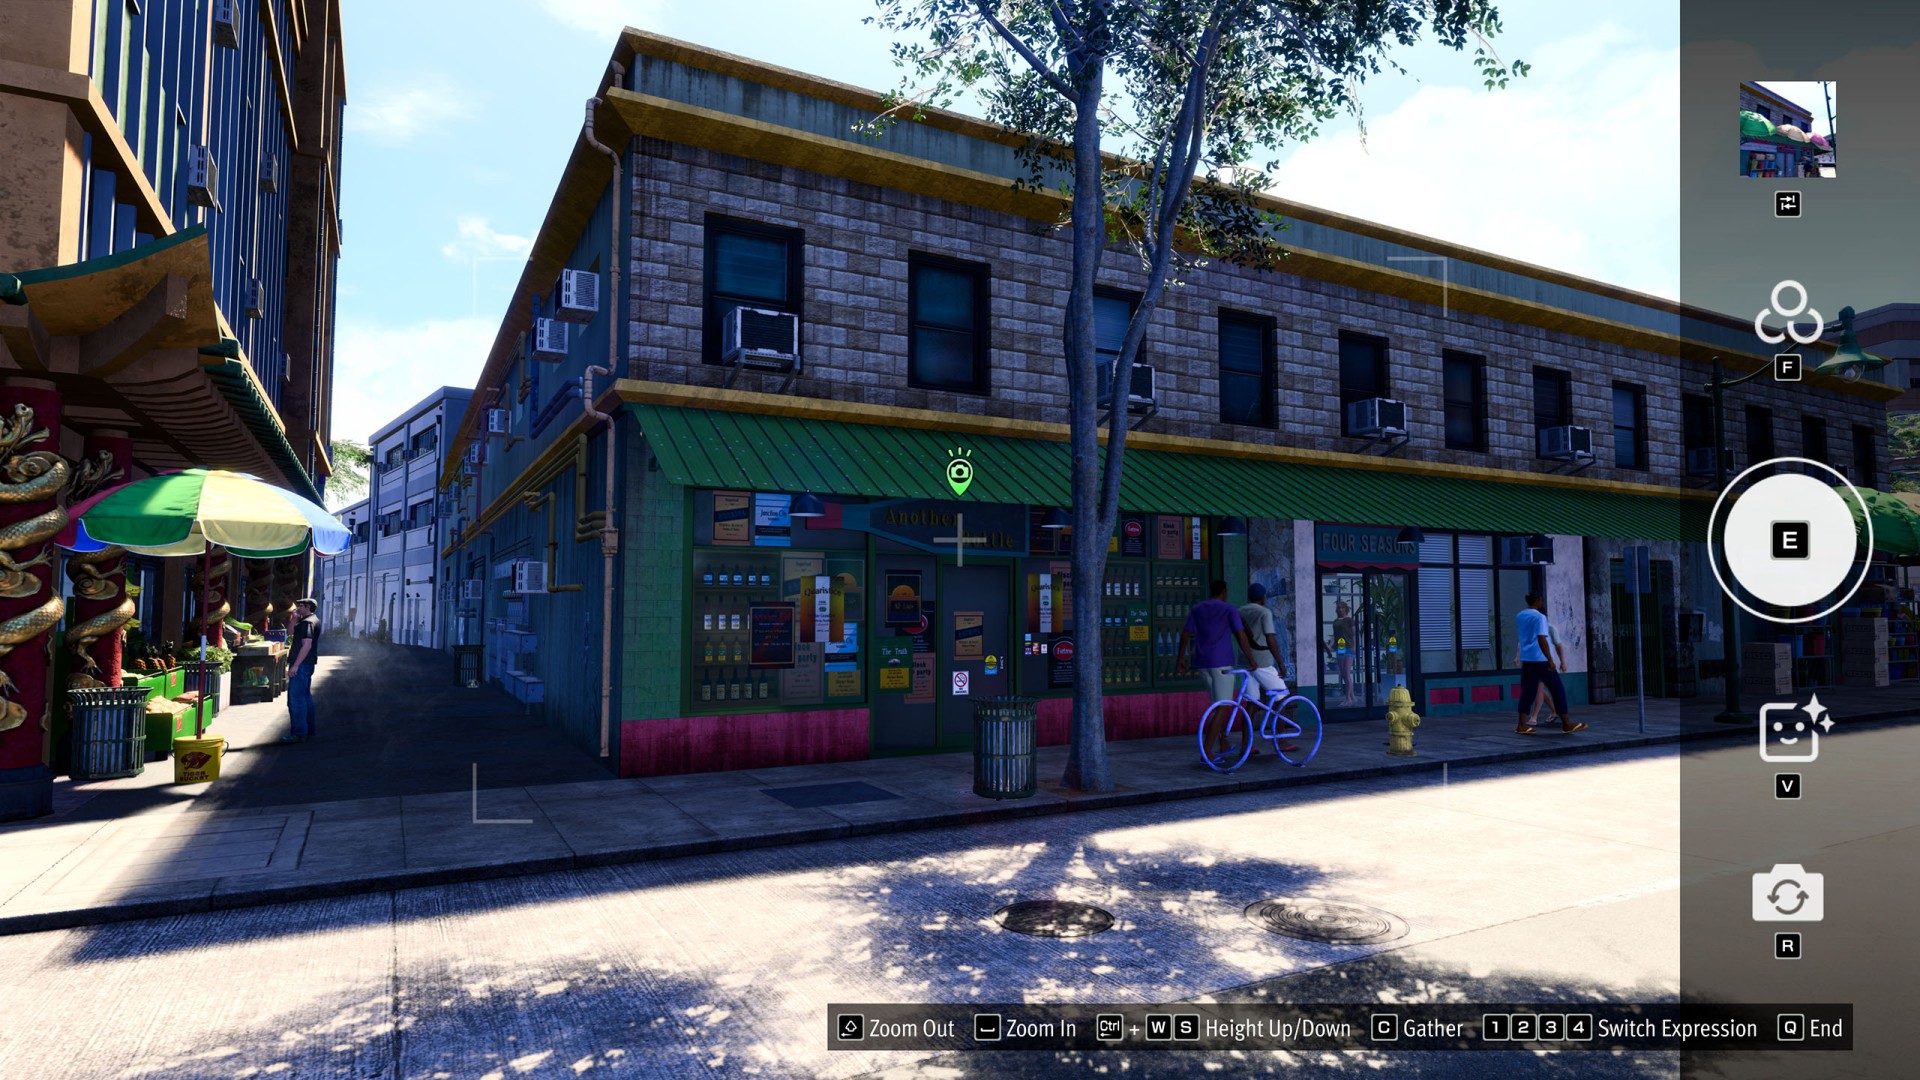
- Downtown / Chinatown / District Five #13 (Another Bottle)
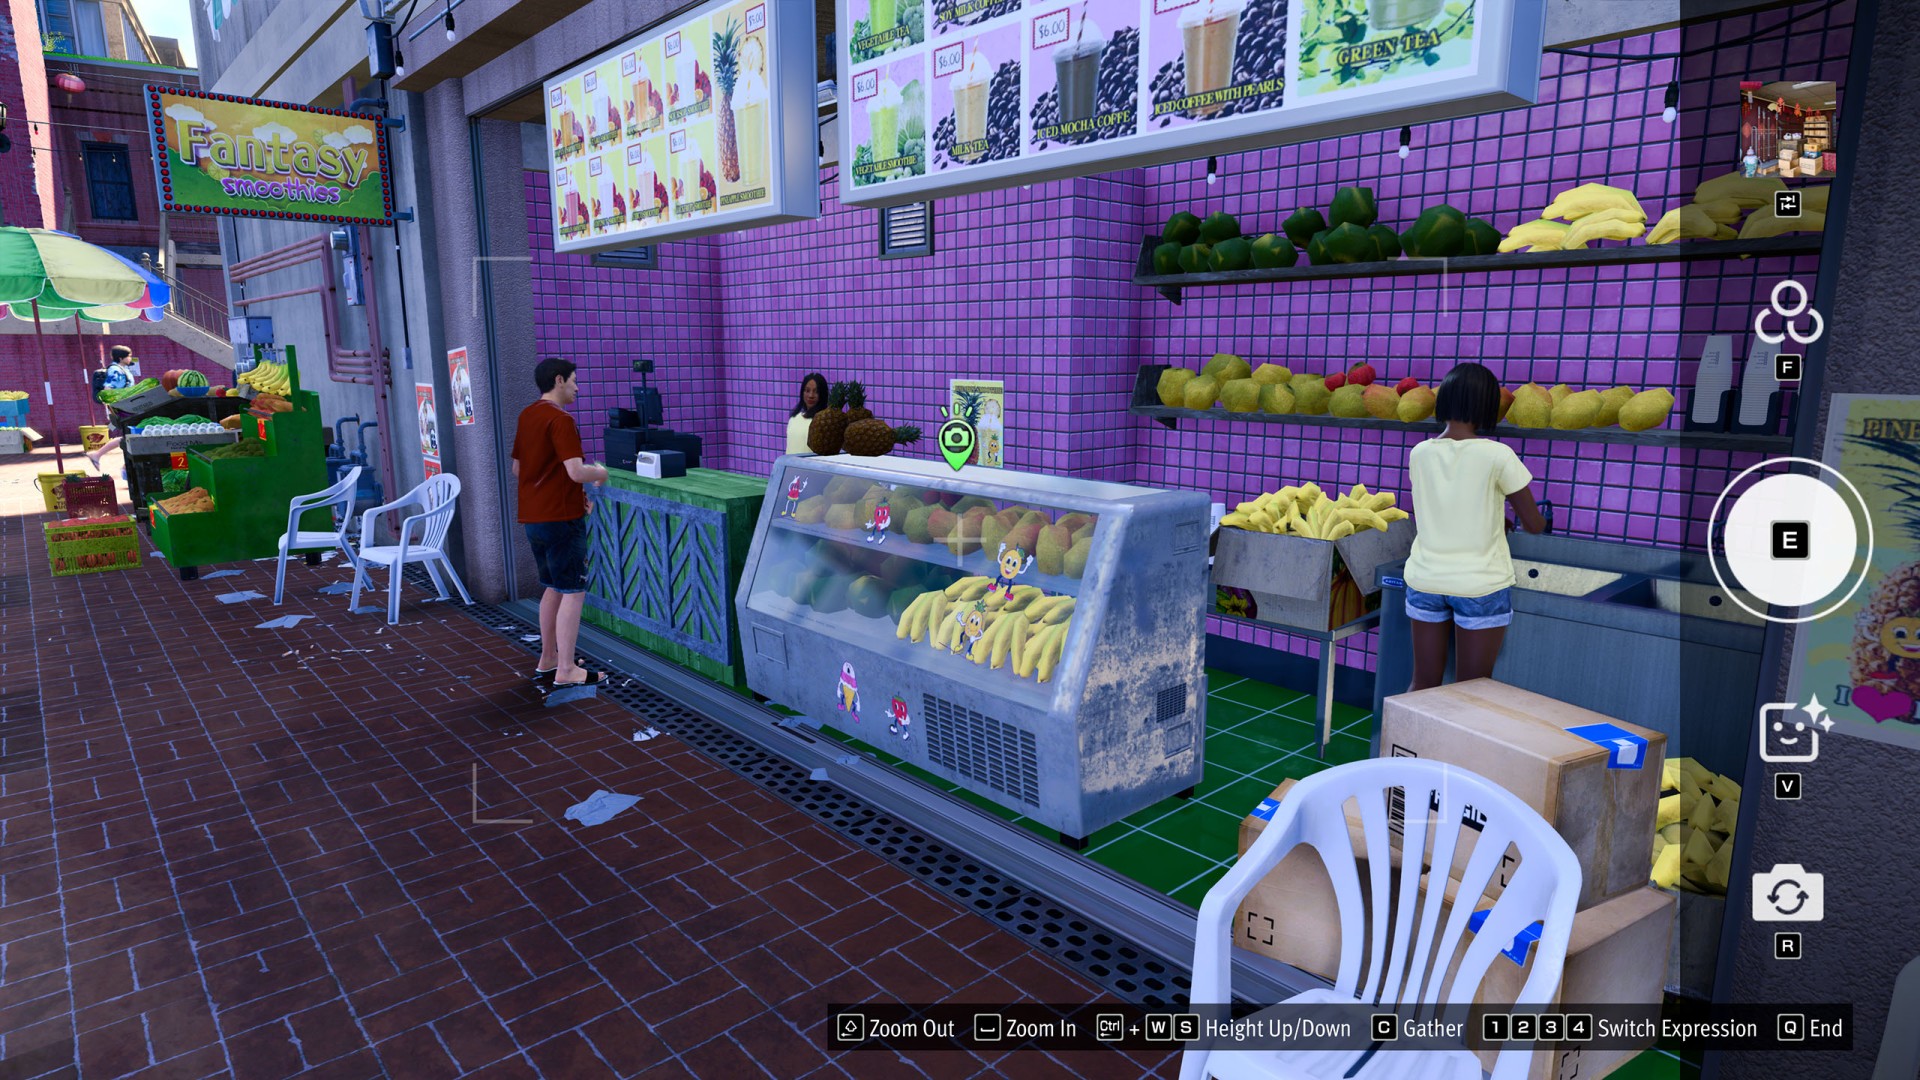
- Downtown / Chinatown / District Five #14 (Fantasy Smoothies)
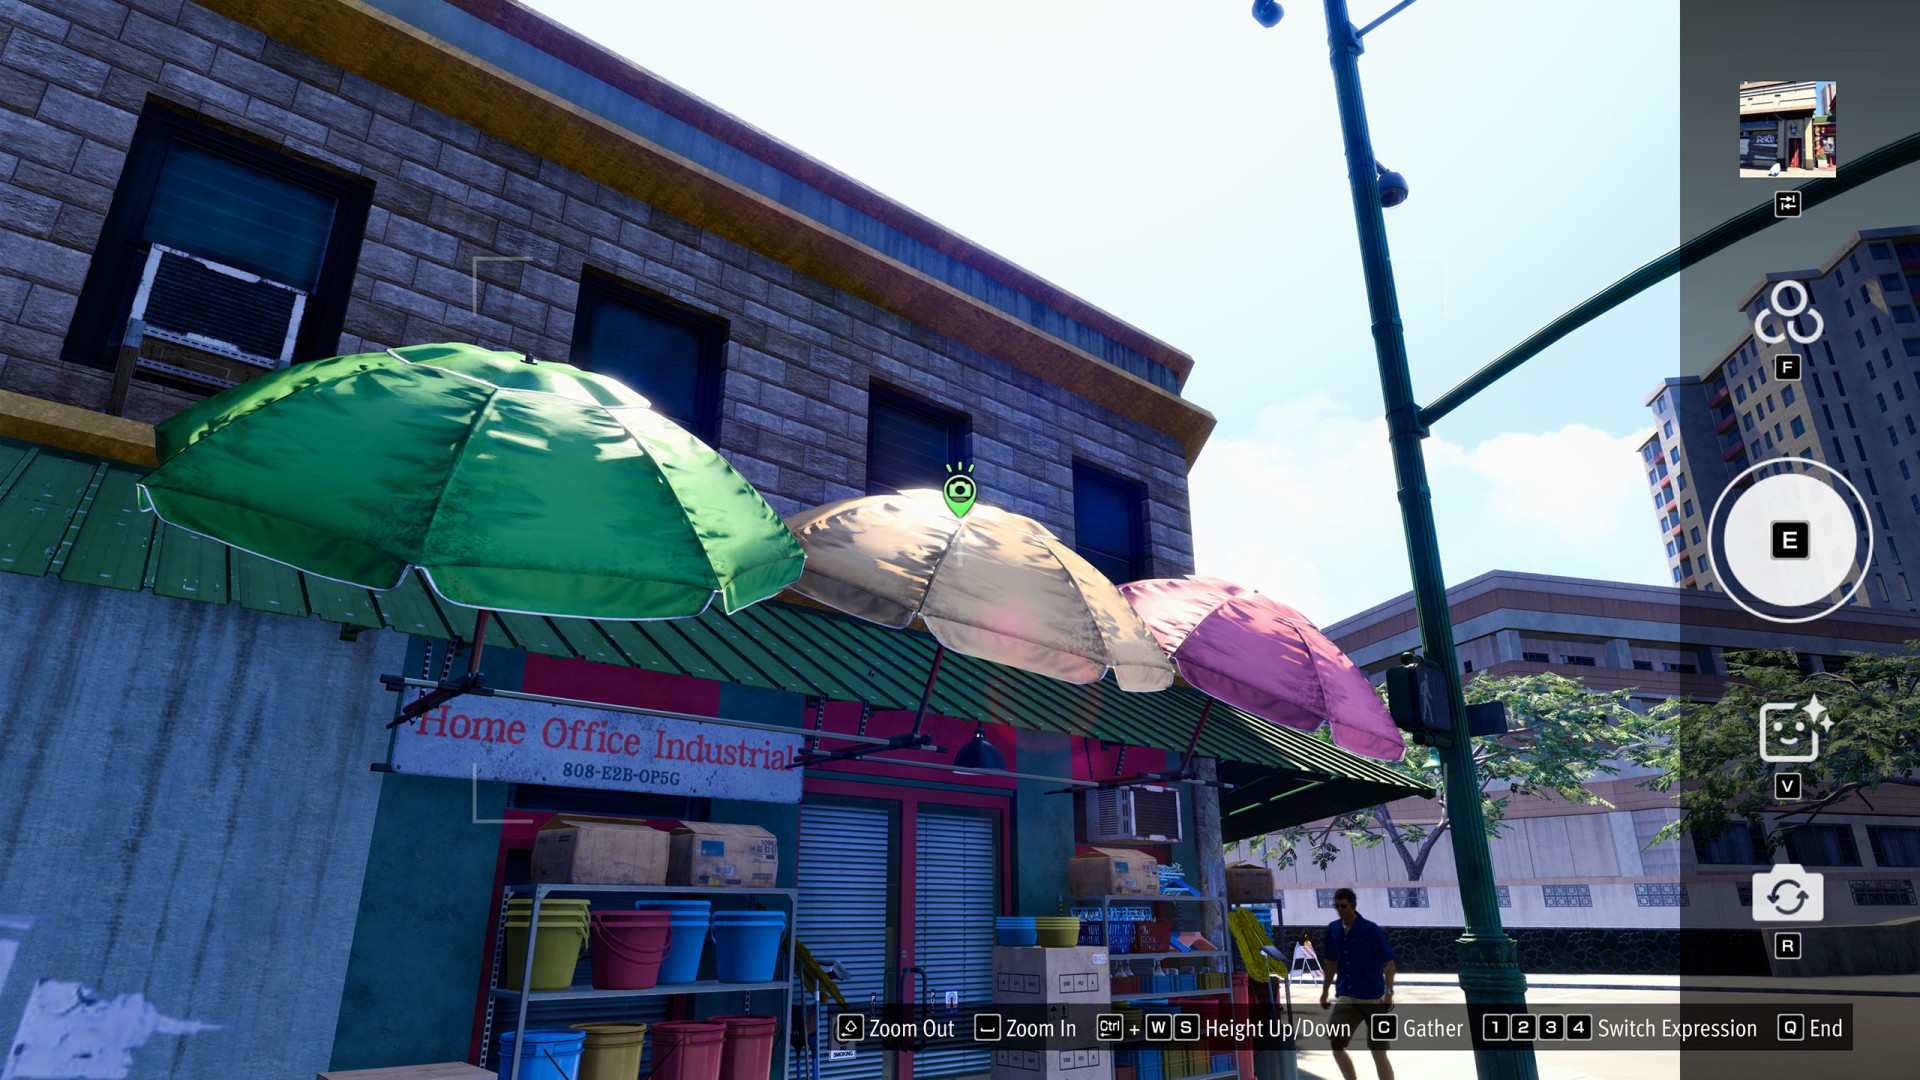
- Downtown / Chinatown / District Five #15 (Clean-Clean Household Supplies)
- Little Japan #1 (Kametaro)
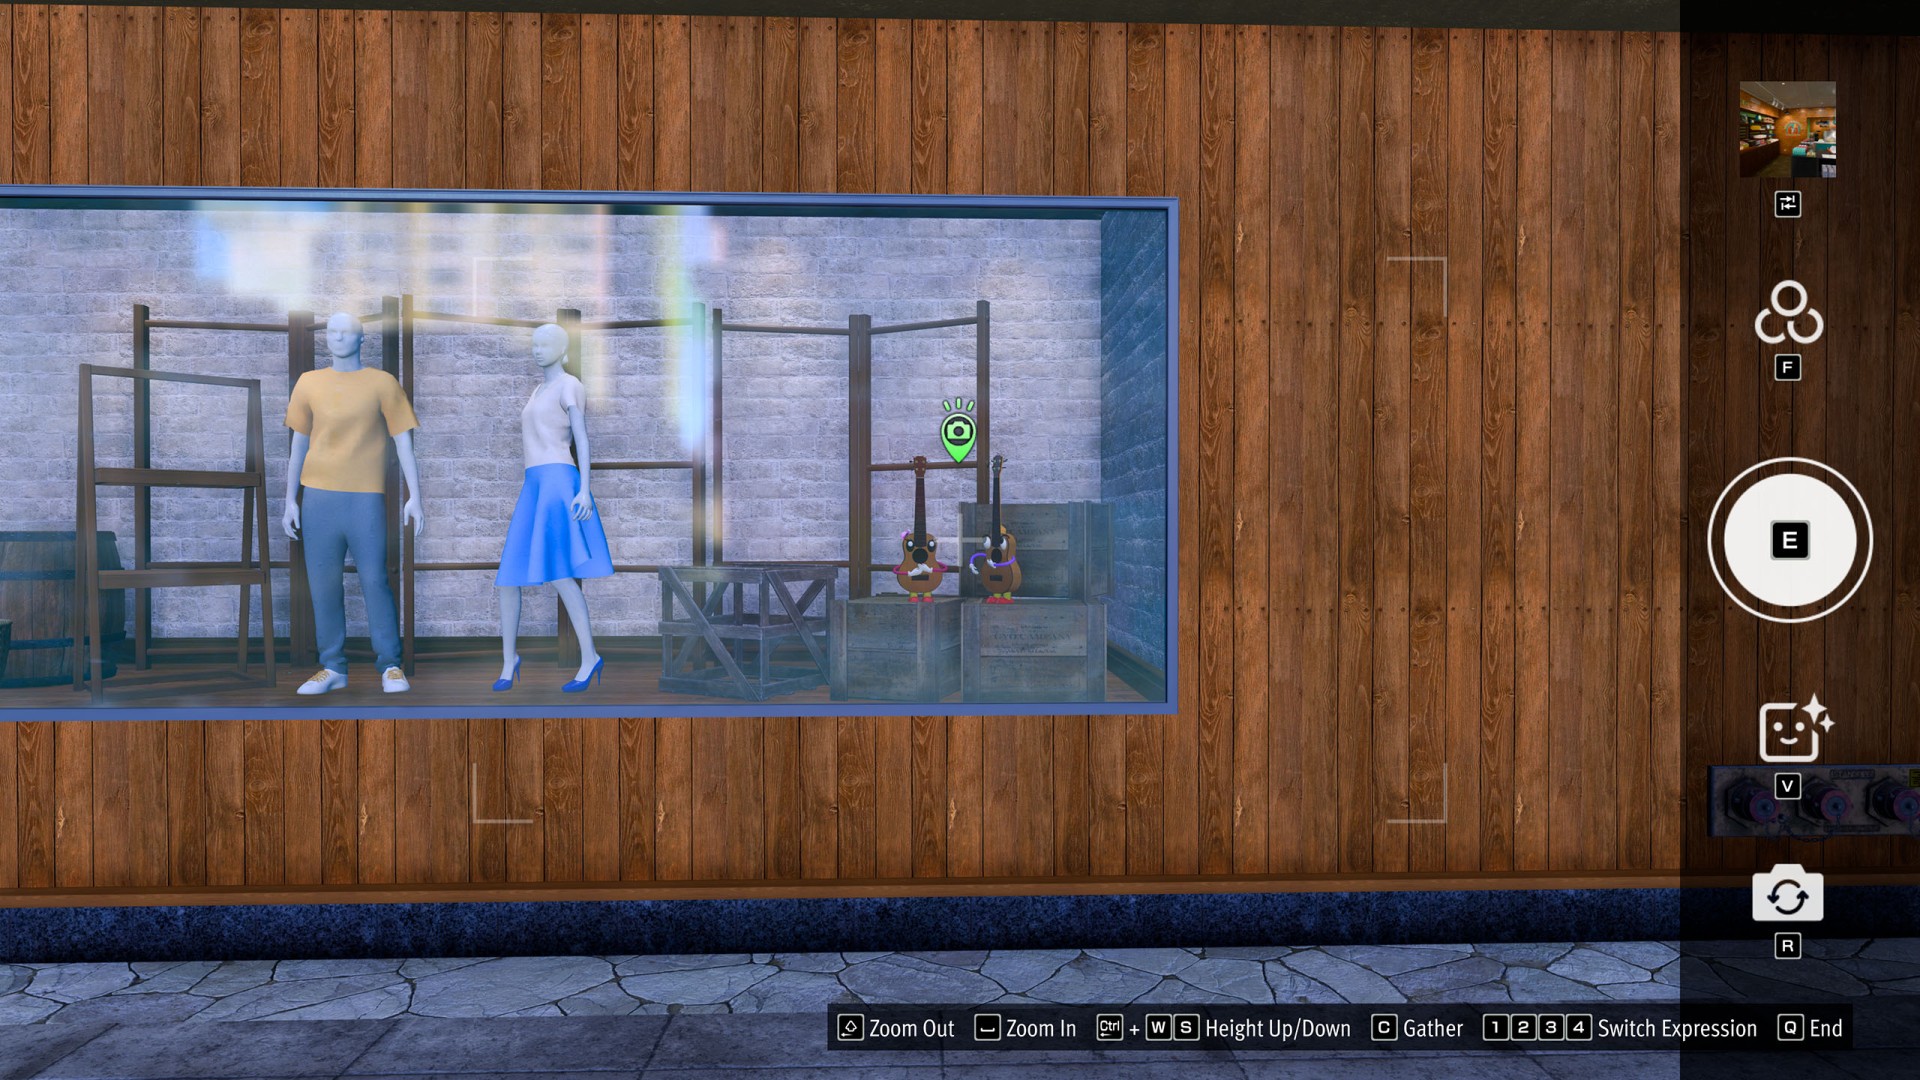
- Little Japan #2 (Ukelele Boy and Ukelele Girl)
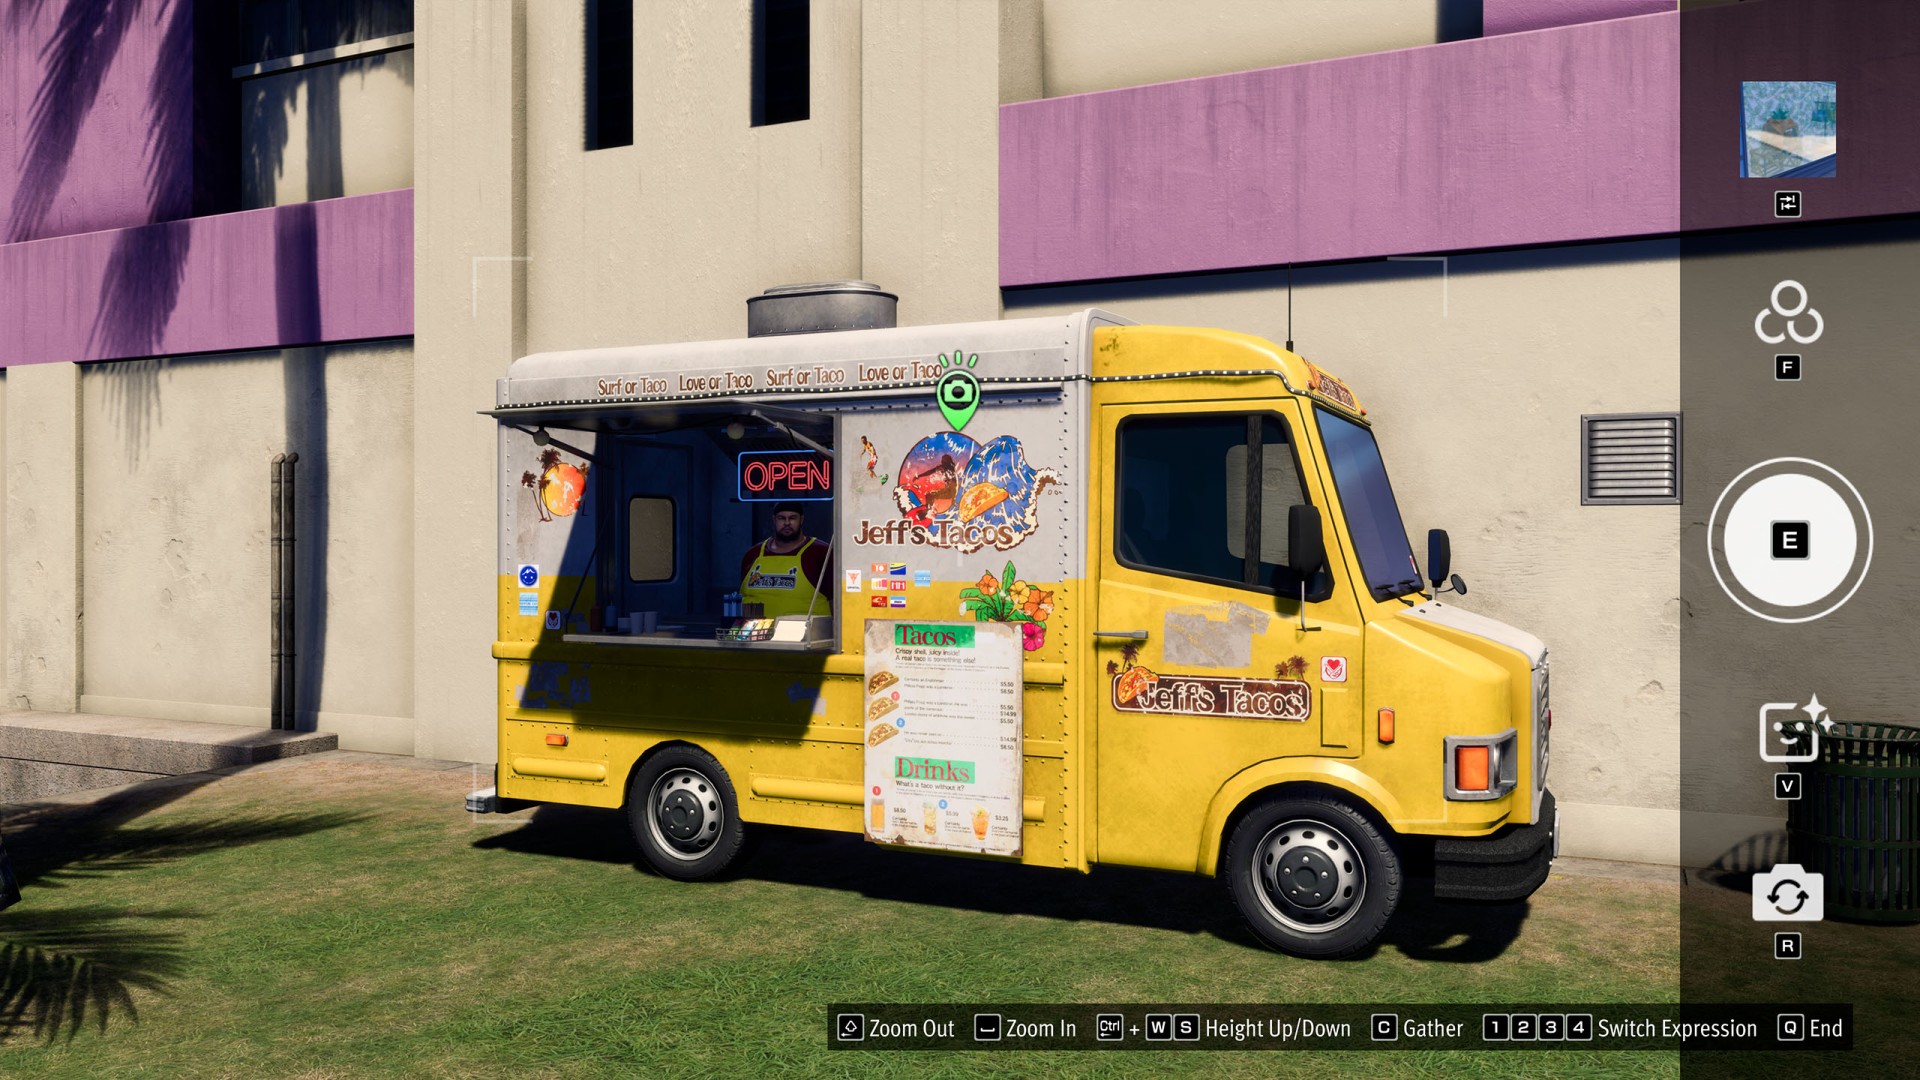
- Little Japan #3 (Jeff's Taco Truck)
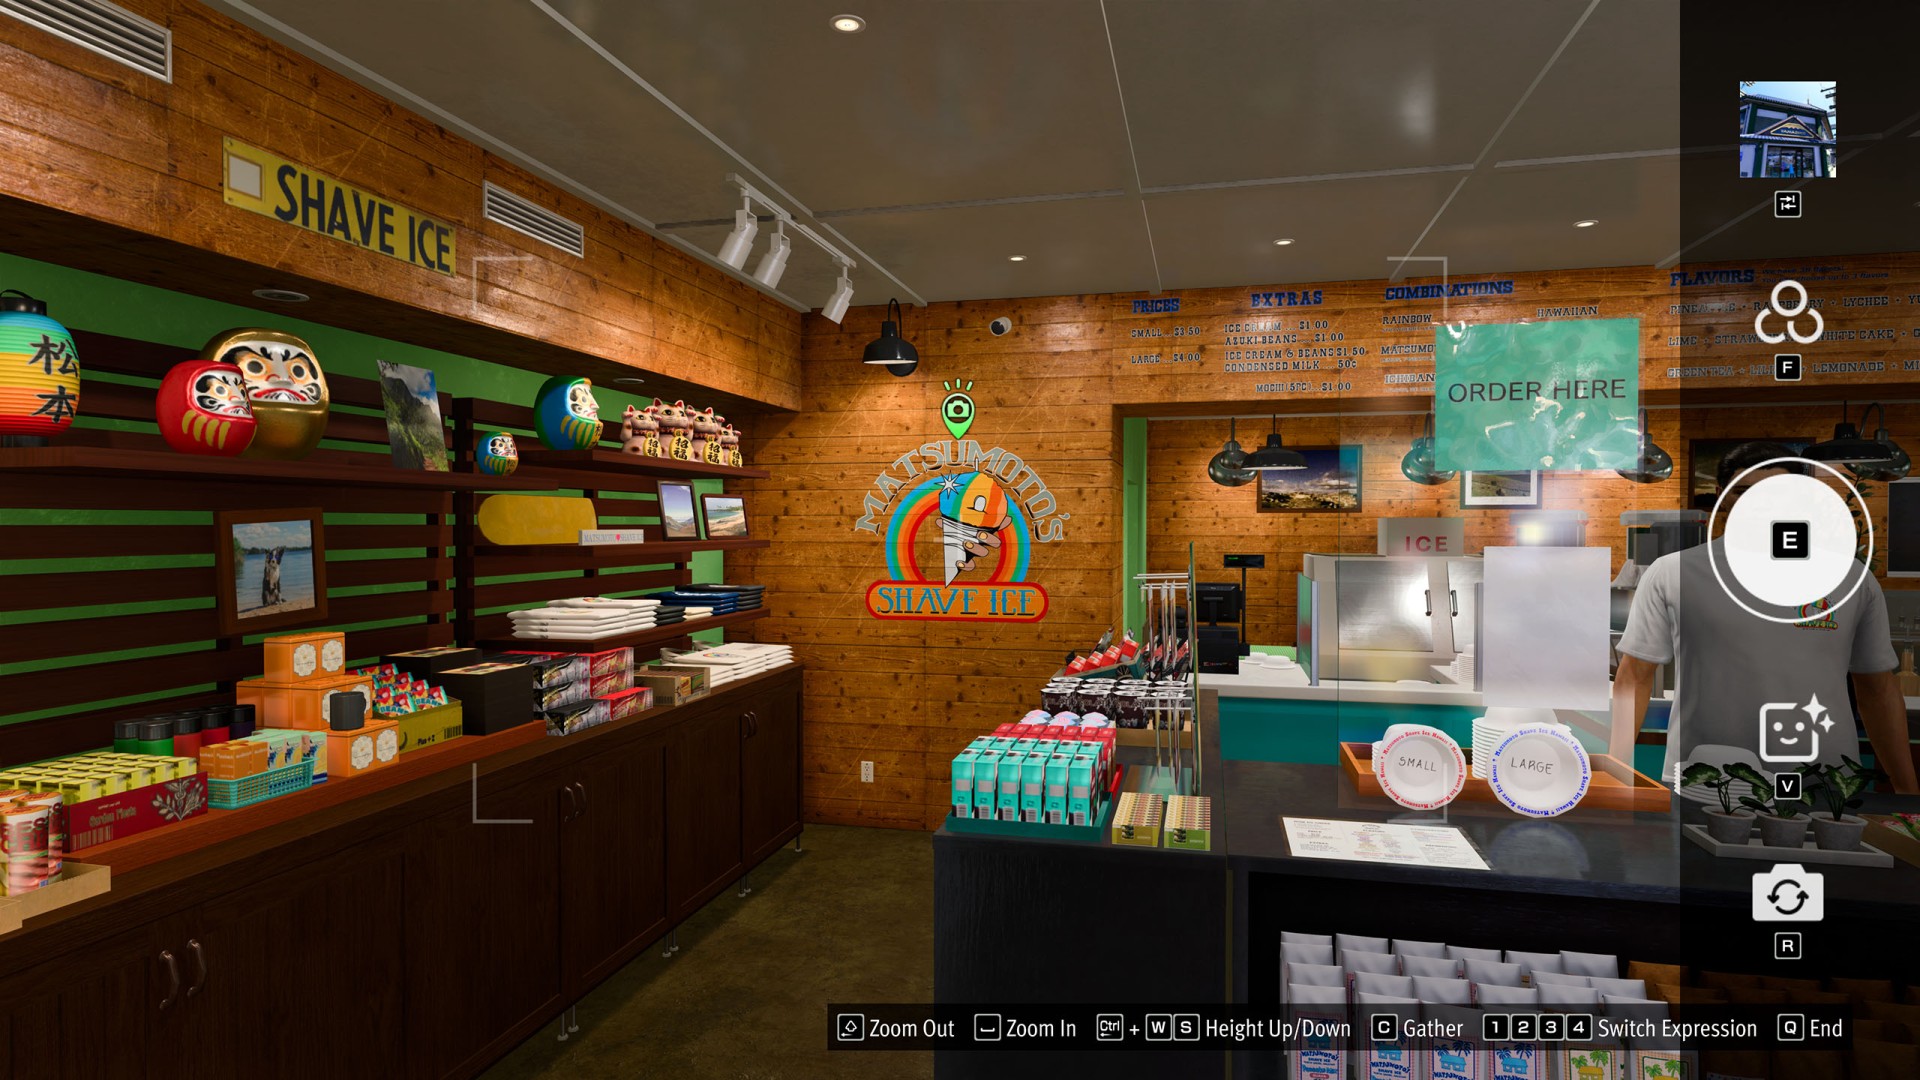
- Little Japan #4 (Matsumoto Shave Ice)
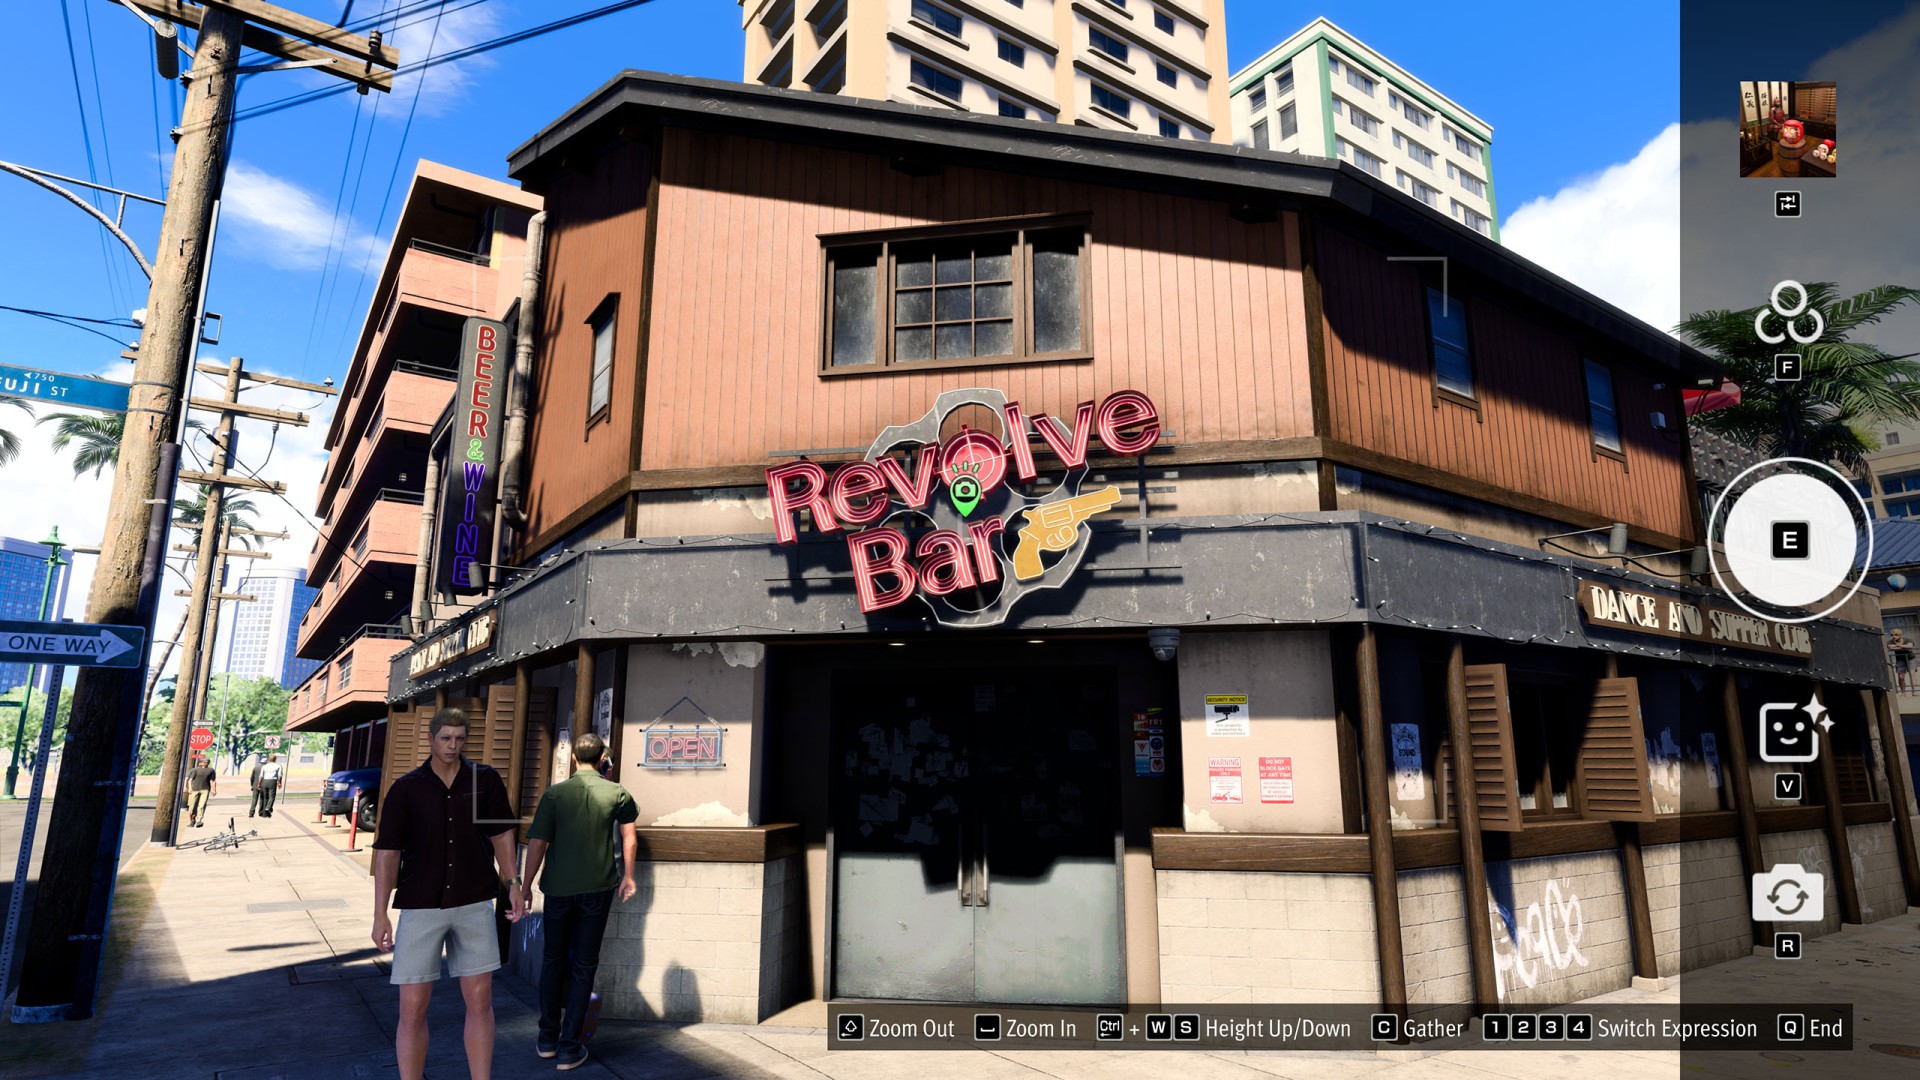
- Little Japan #5 (Revolve Bar)
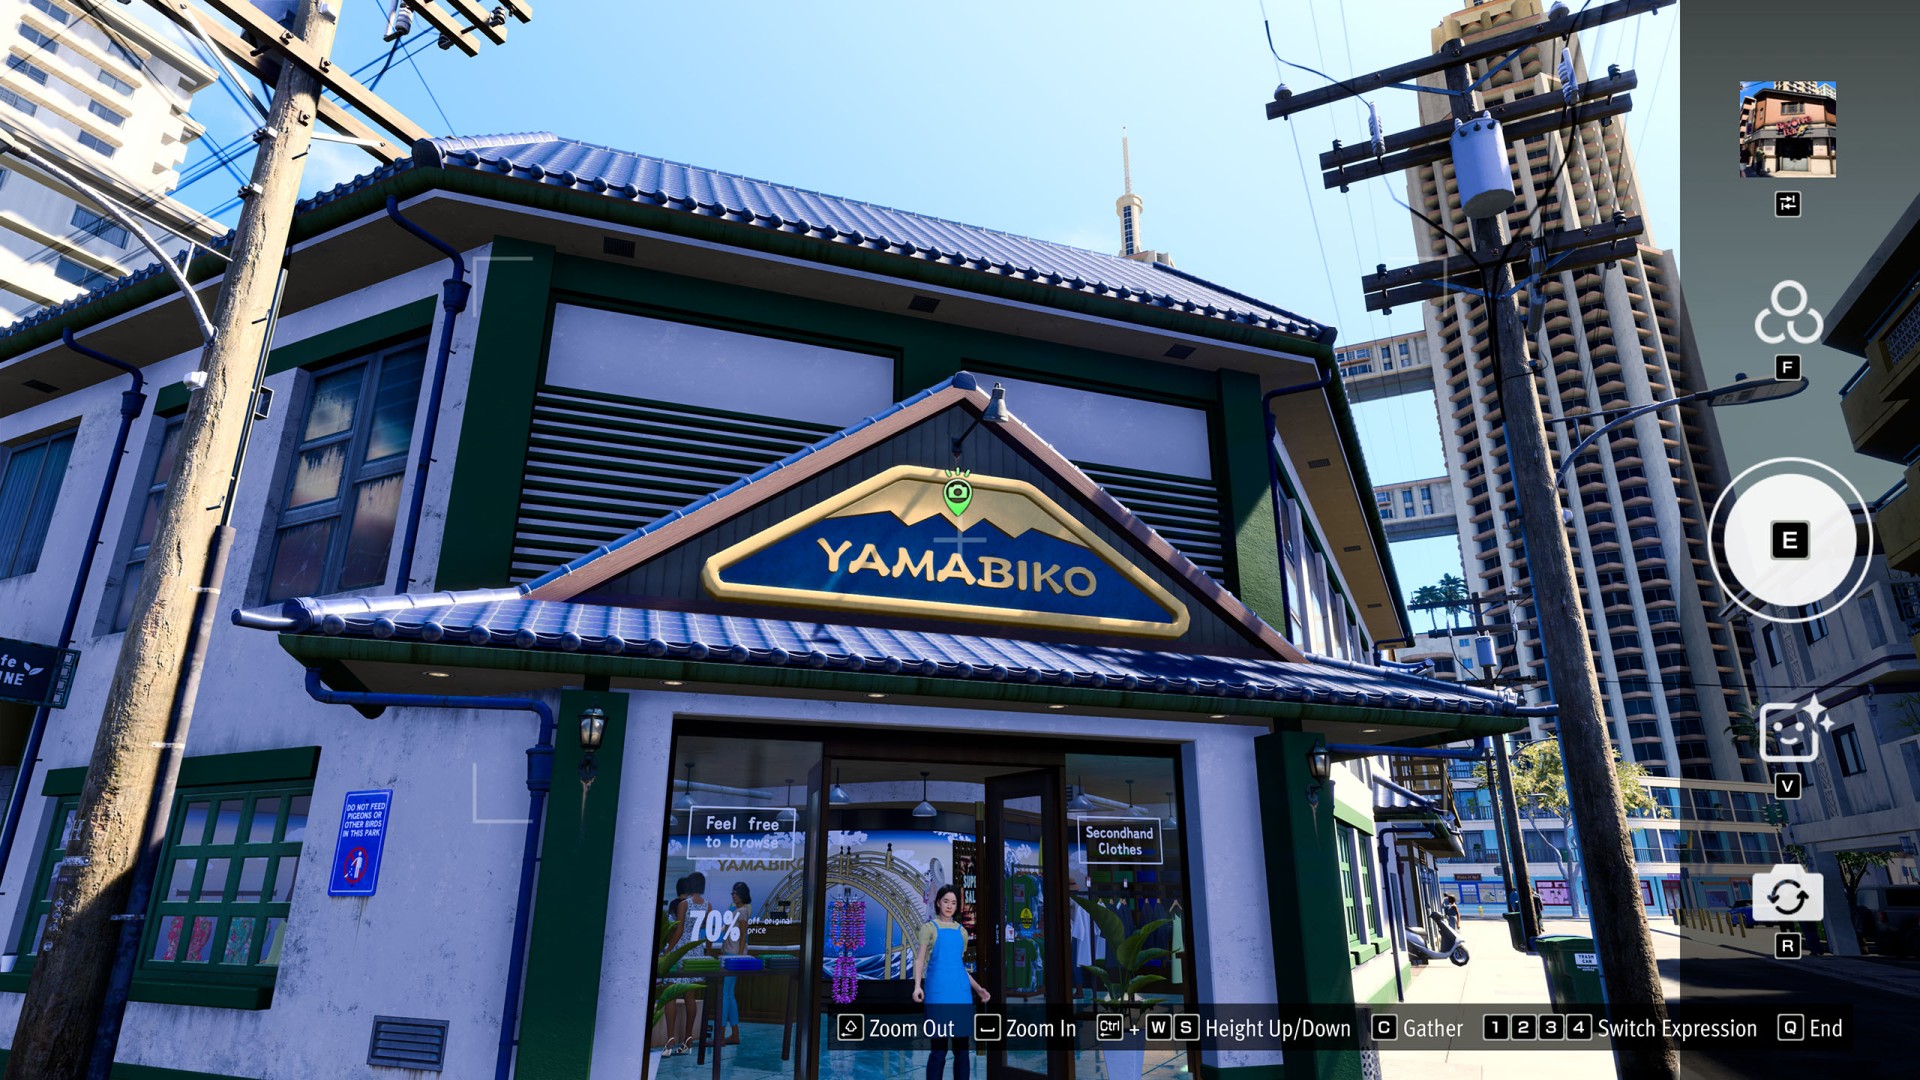
- Little Japan #6 (Yamabiko)
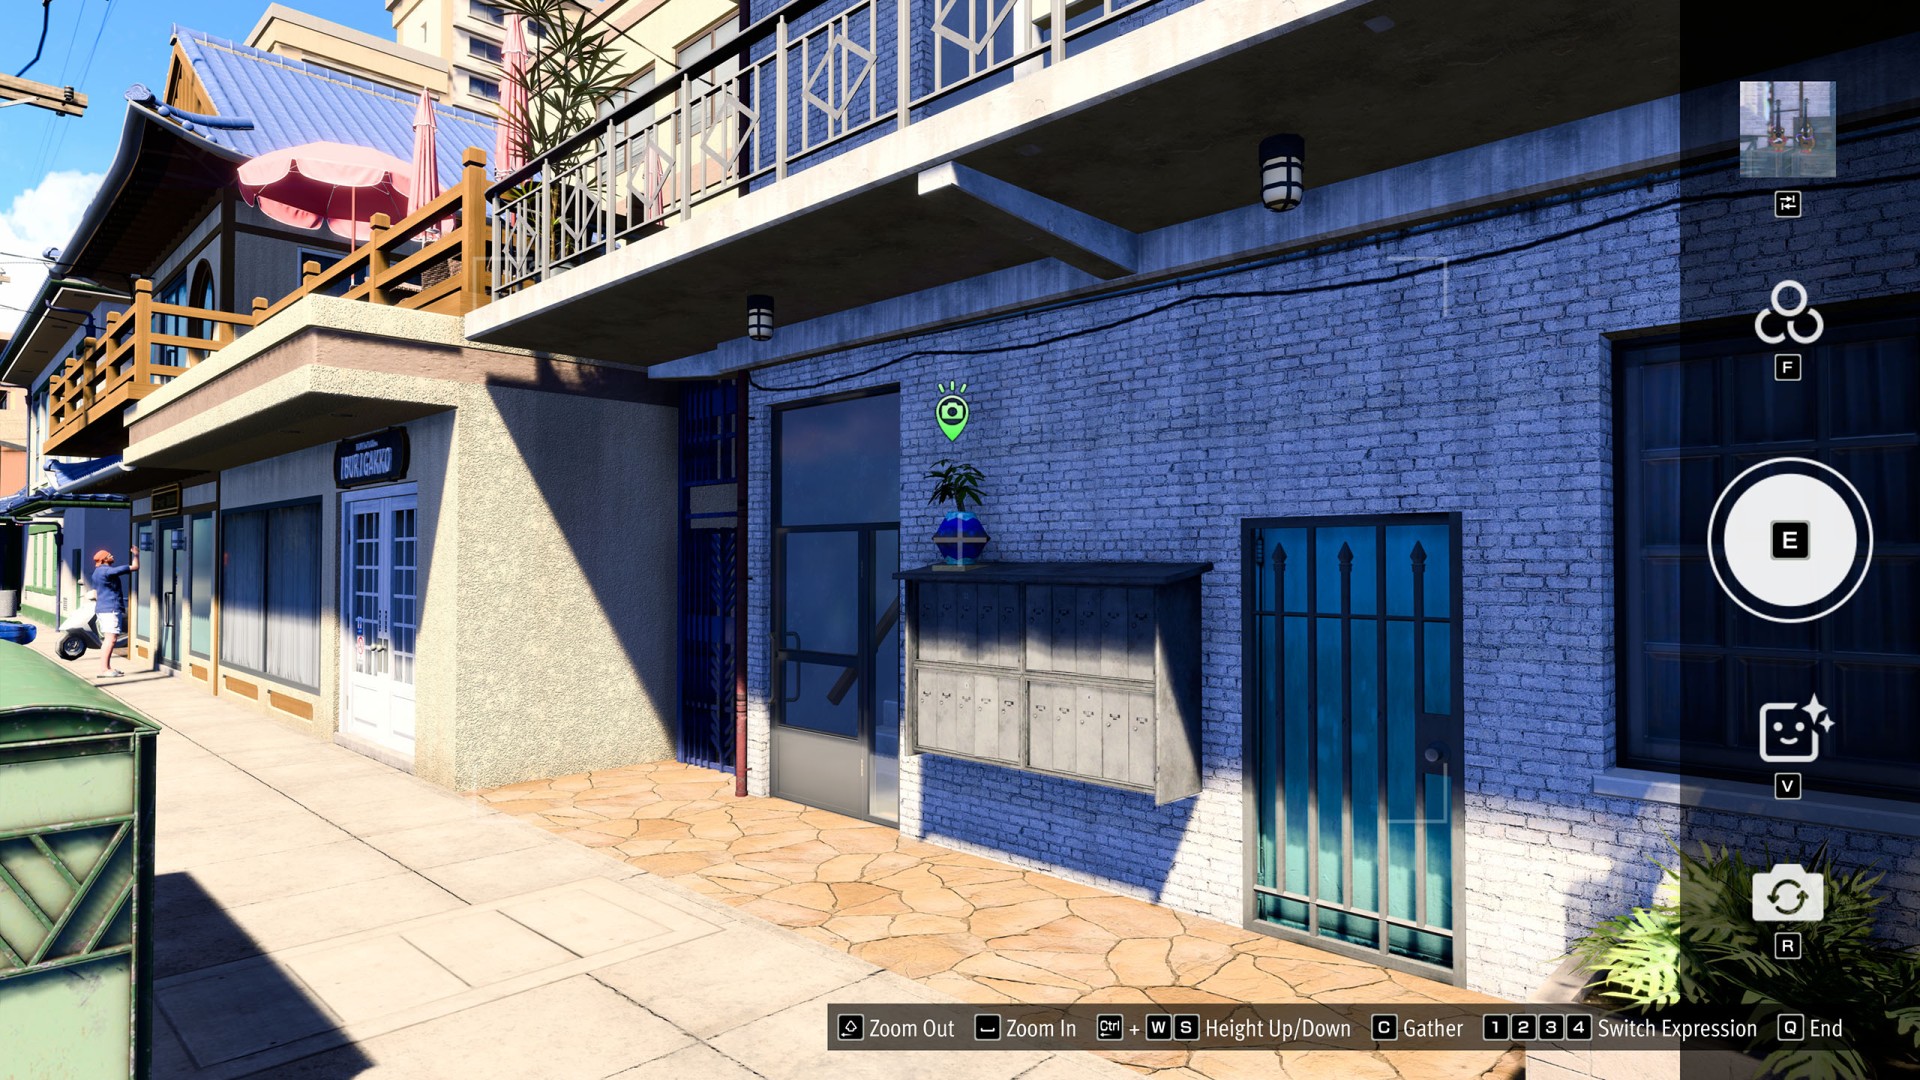
- Little Japan #7 (Mt. Fuji Planter)
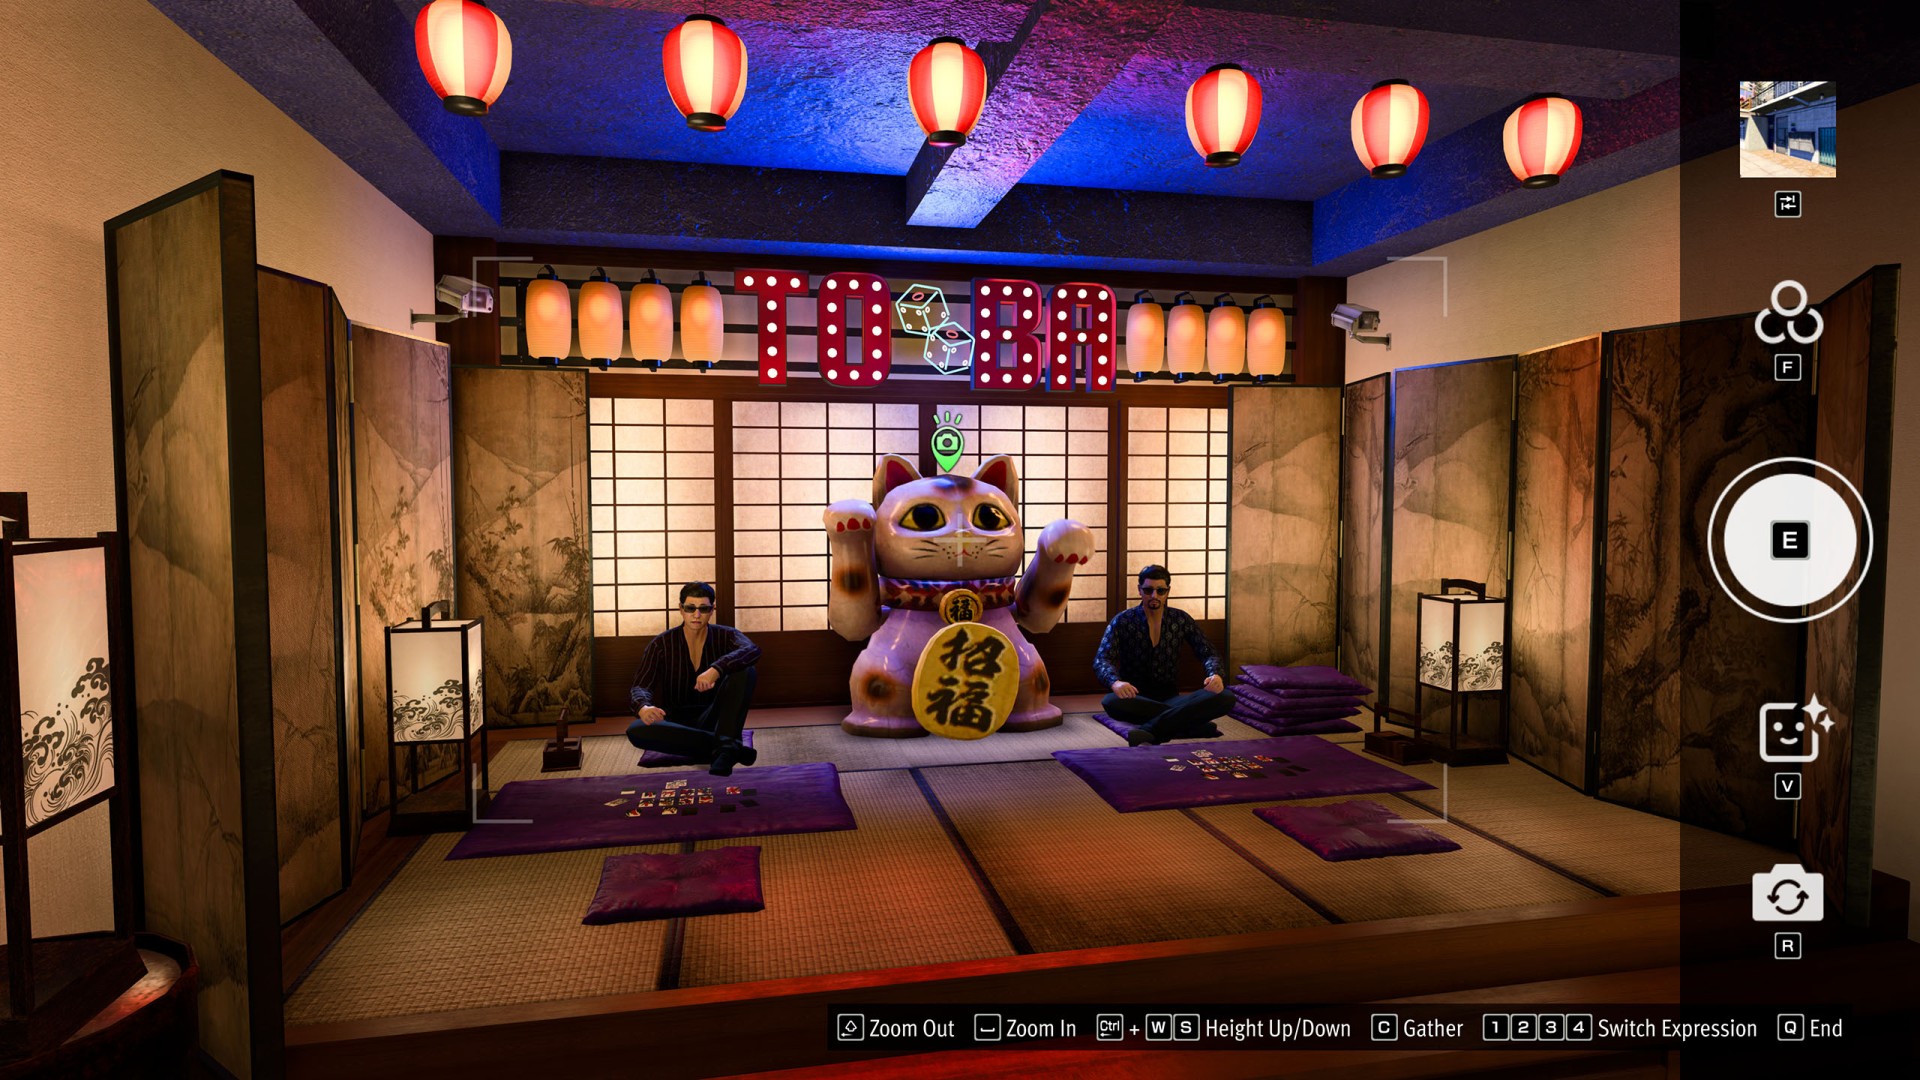
- Little Japan #8 (Toba)
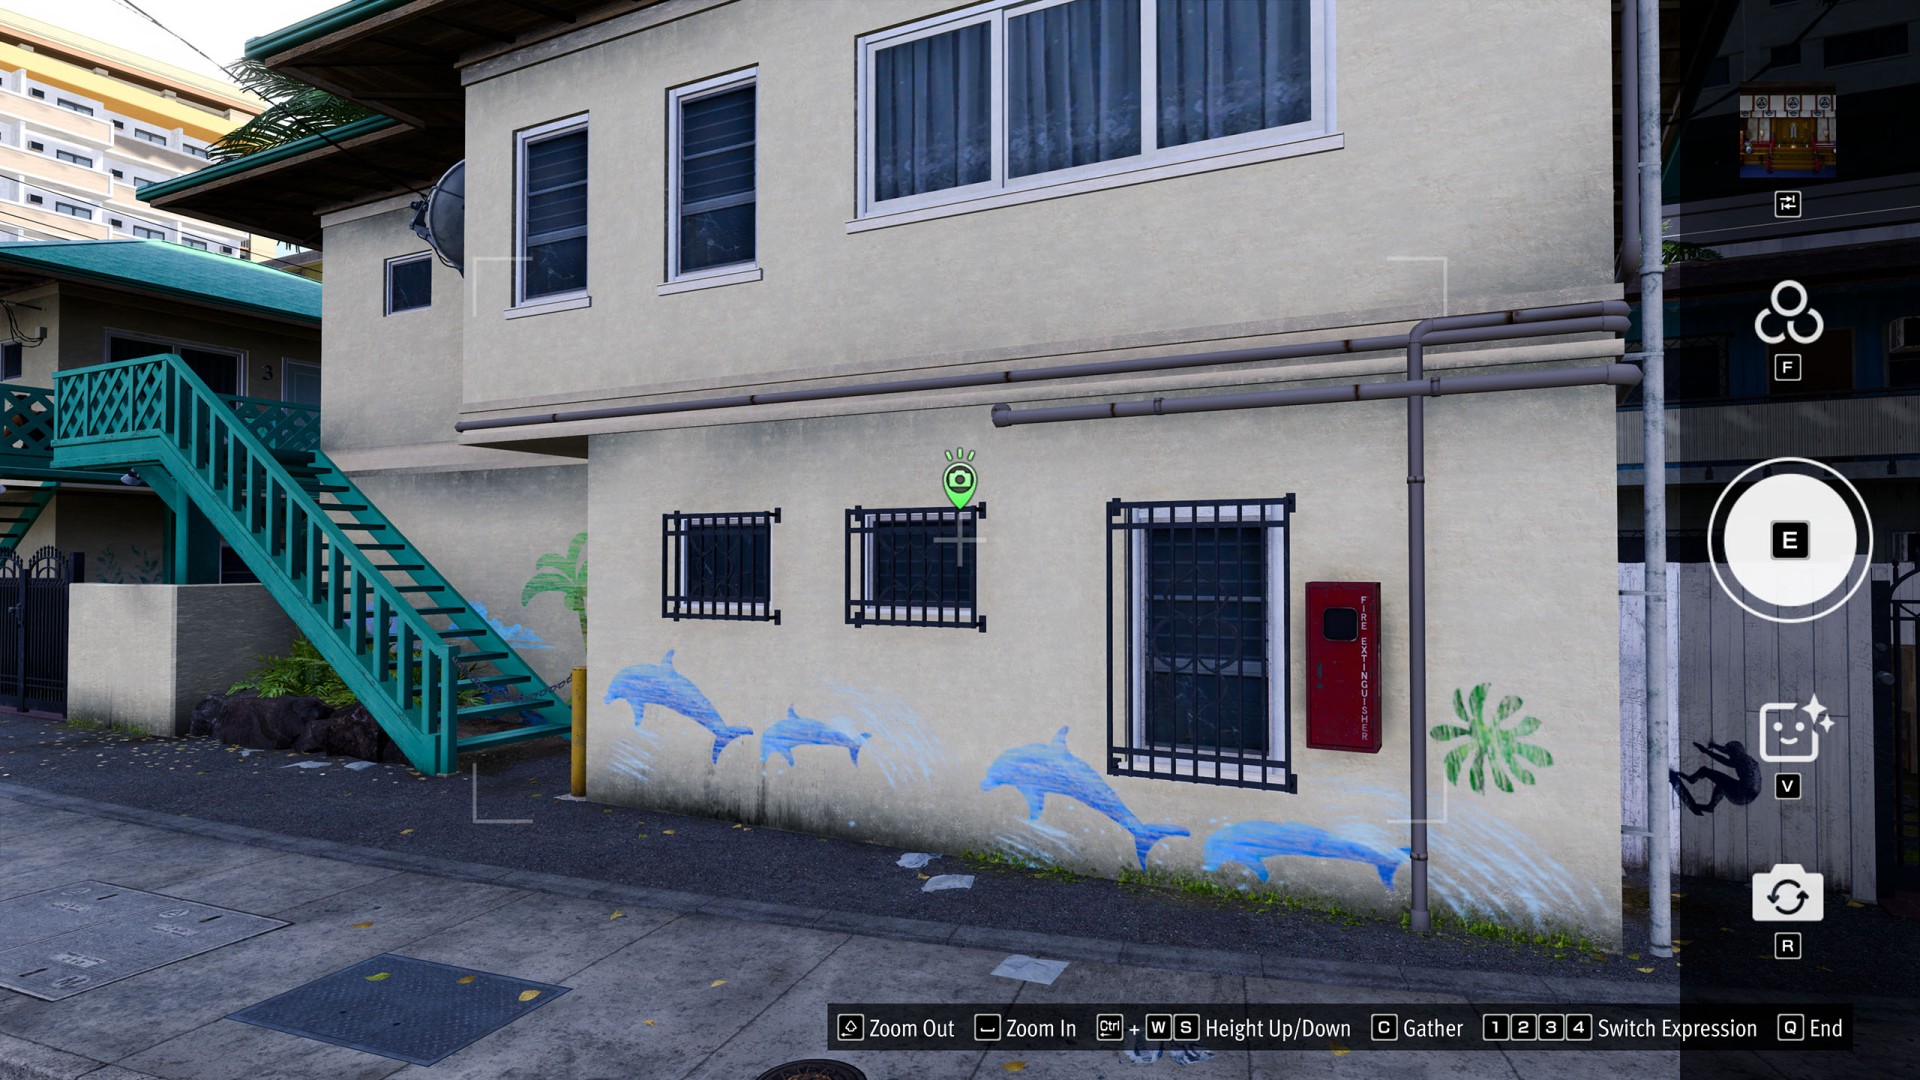
- Little Japan #9 (Dolphin Mural)
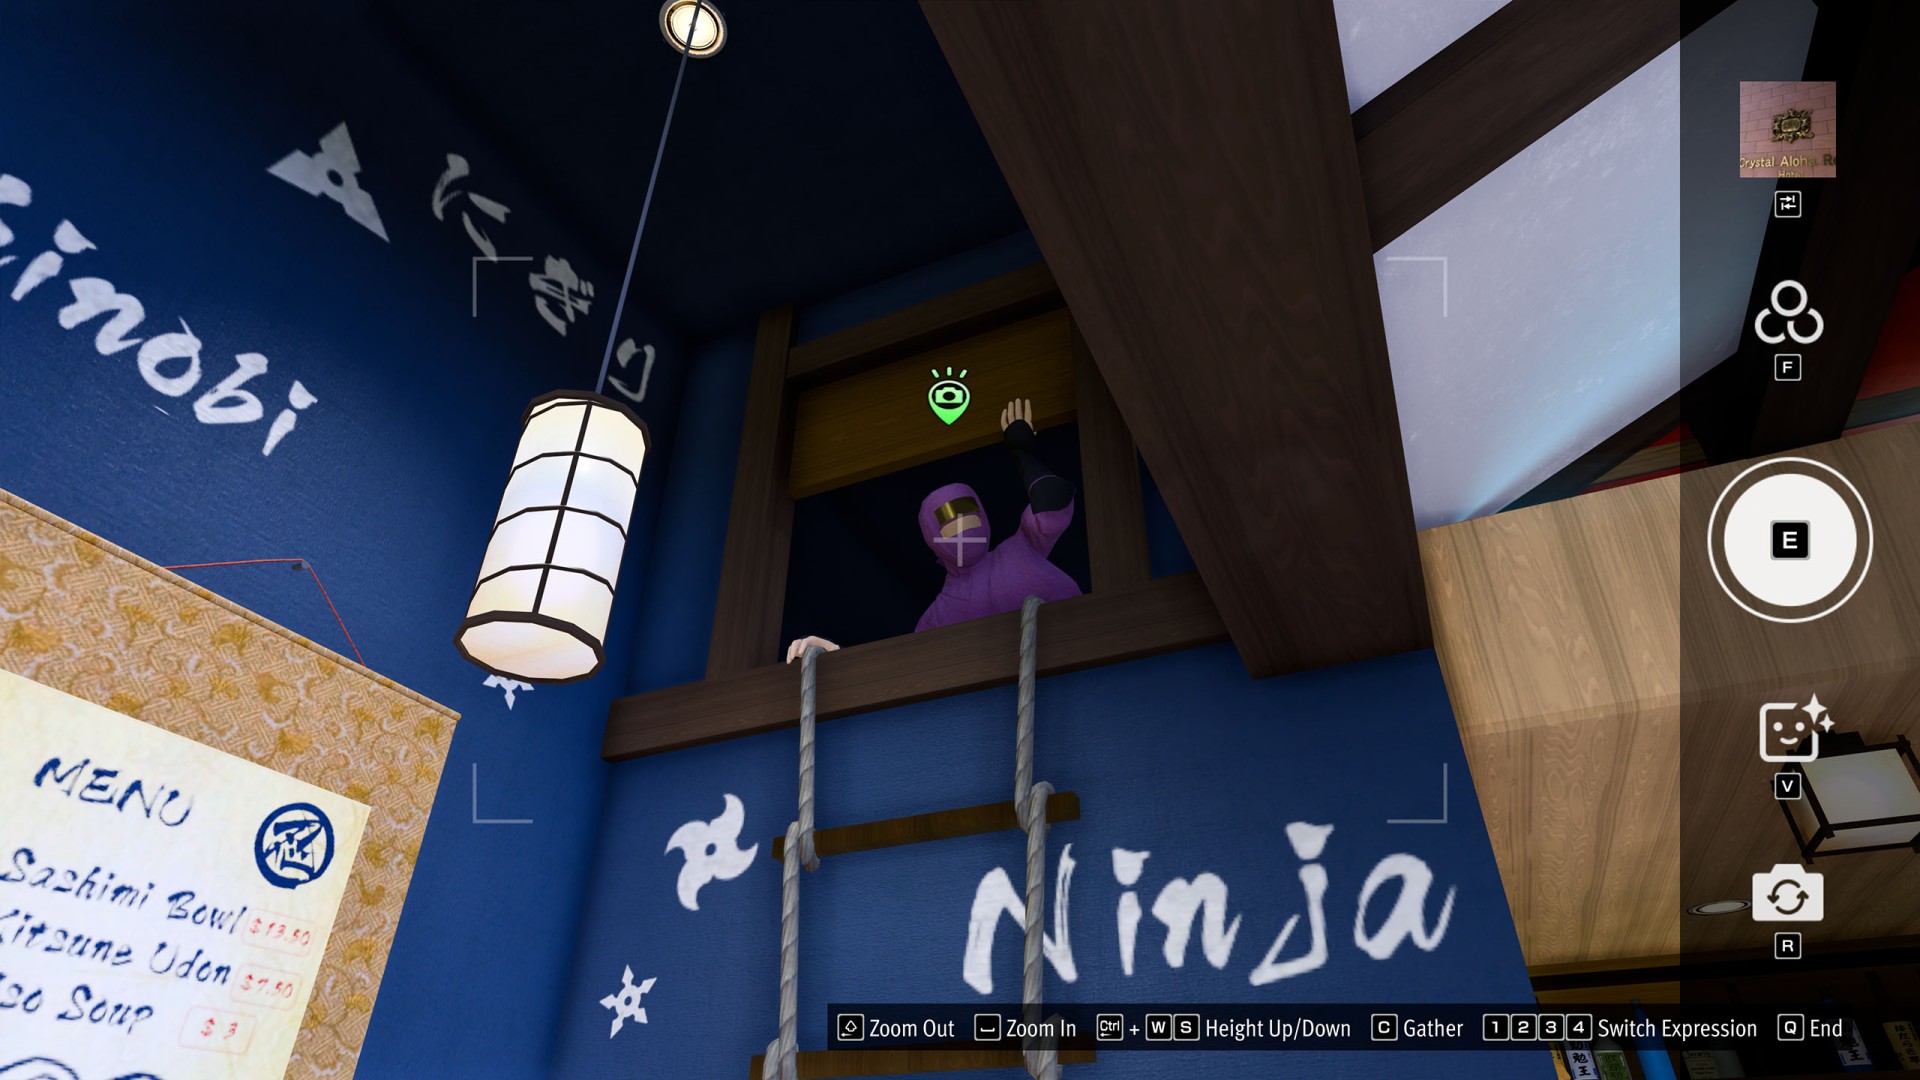
- Little Japan #10 (Shinobi Sushi)
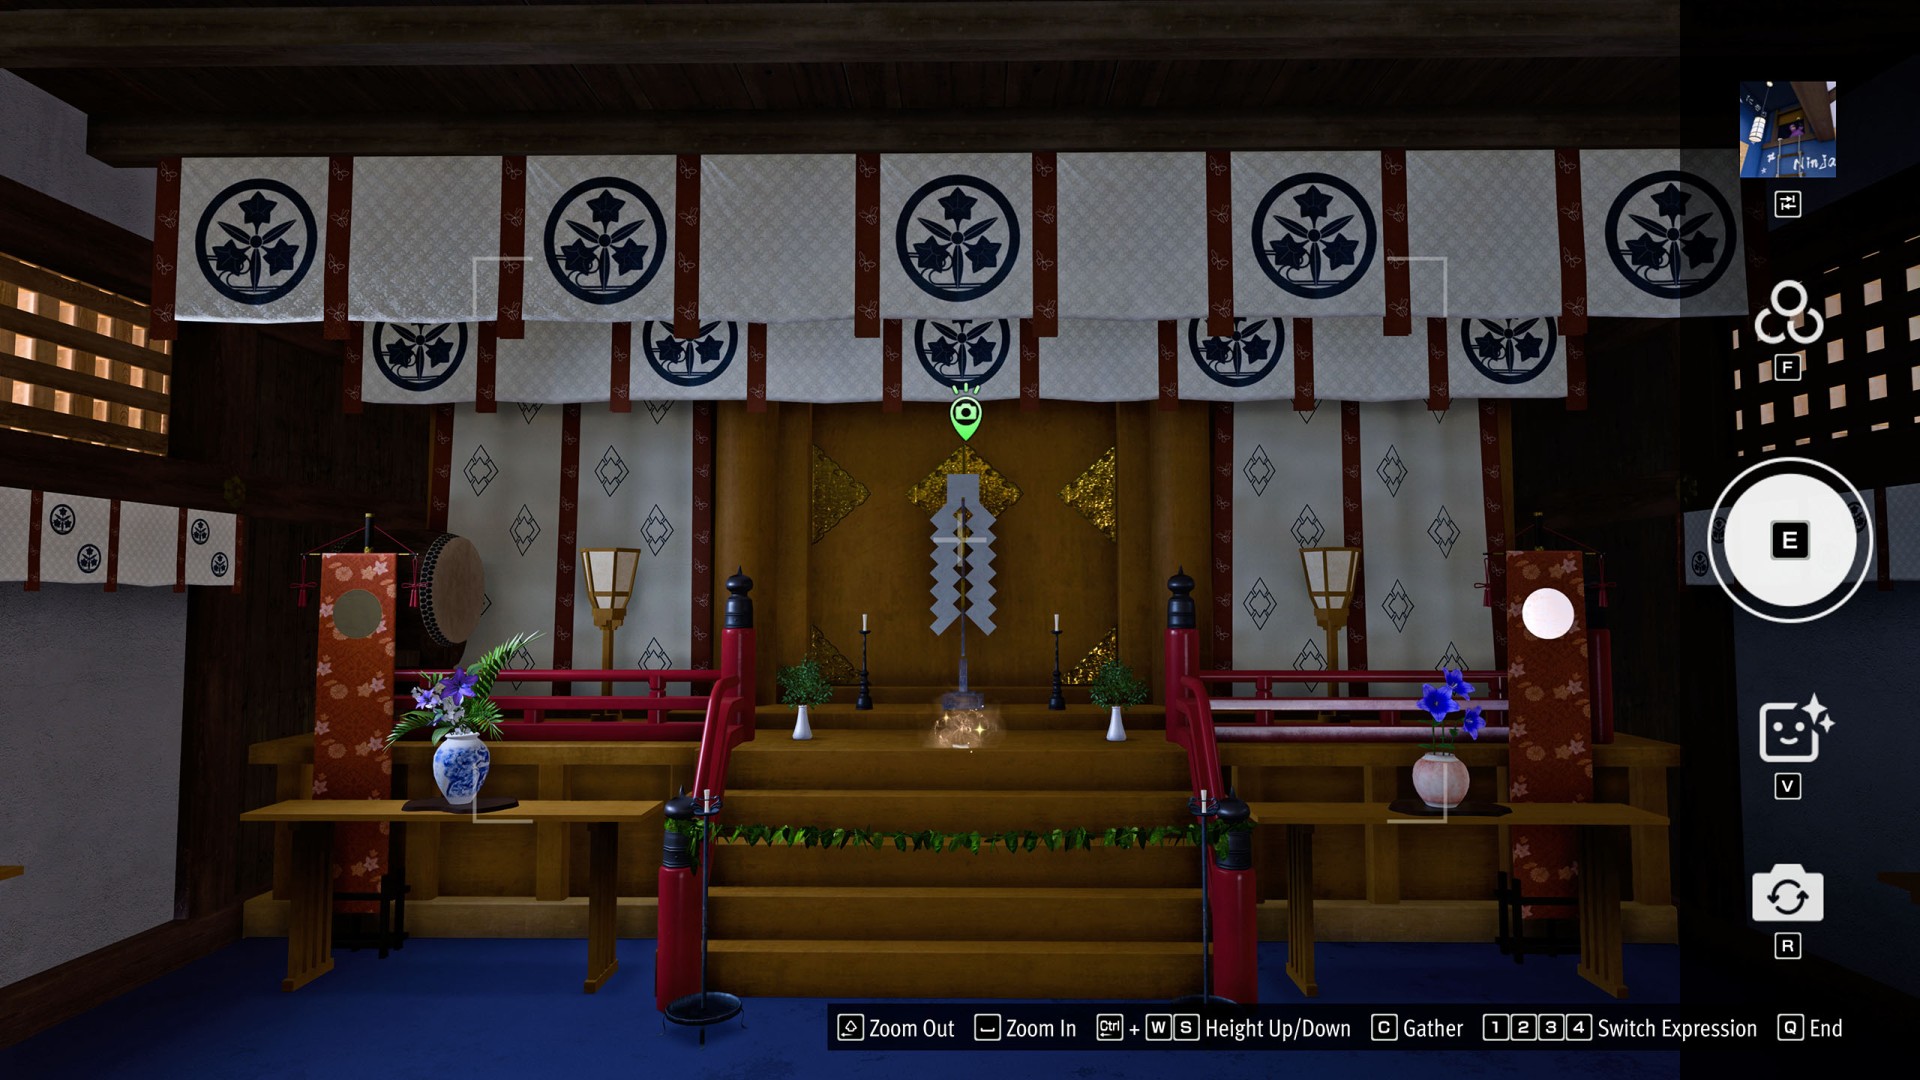
- Little Japan #11 (Ryukai Shrine)
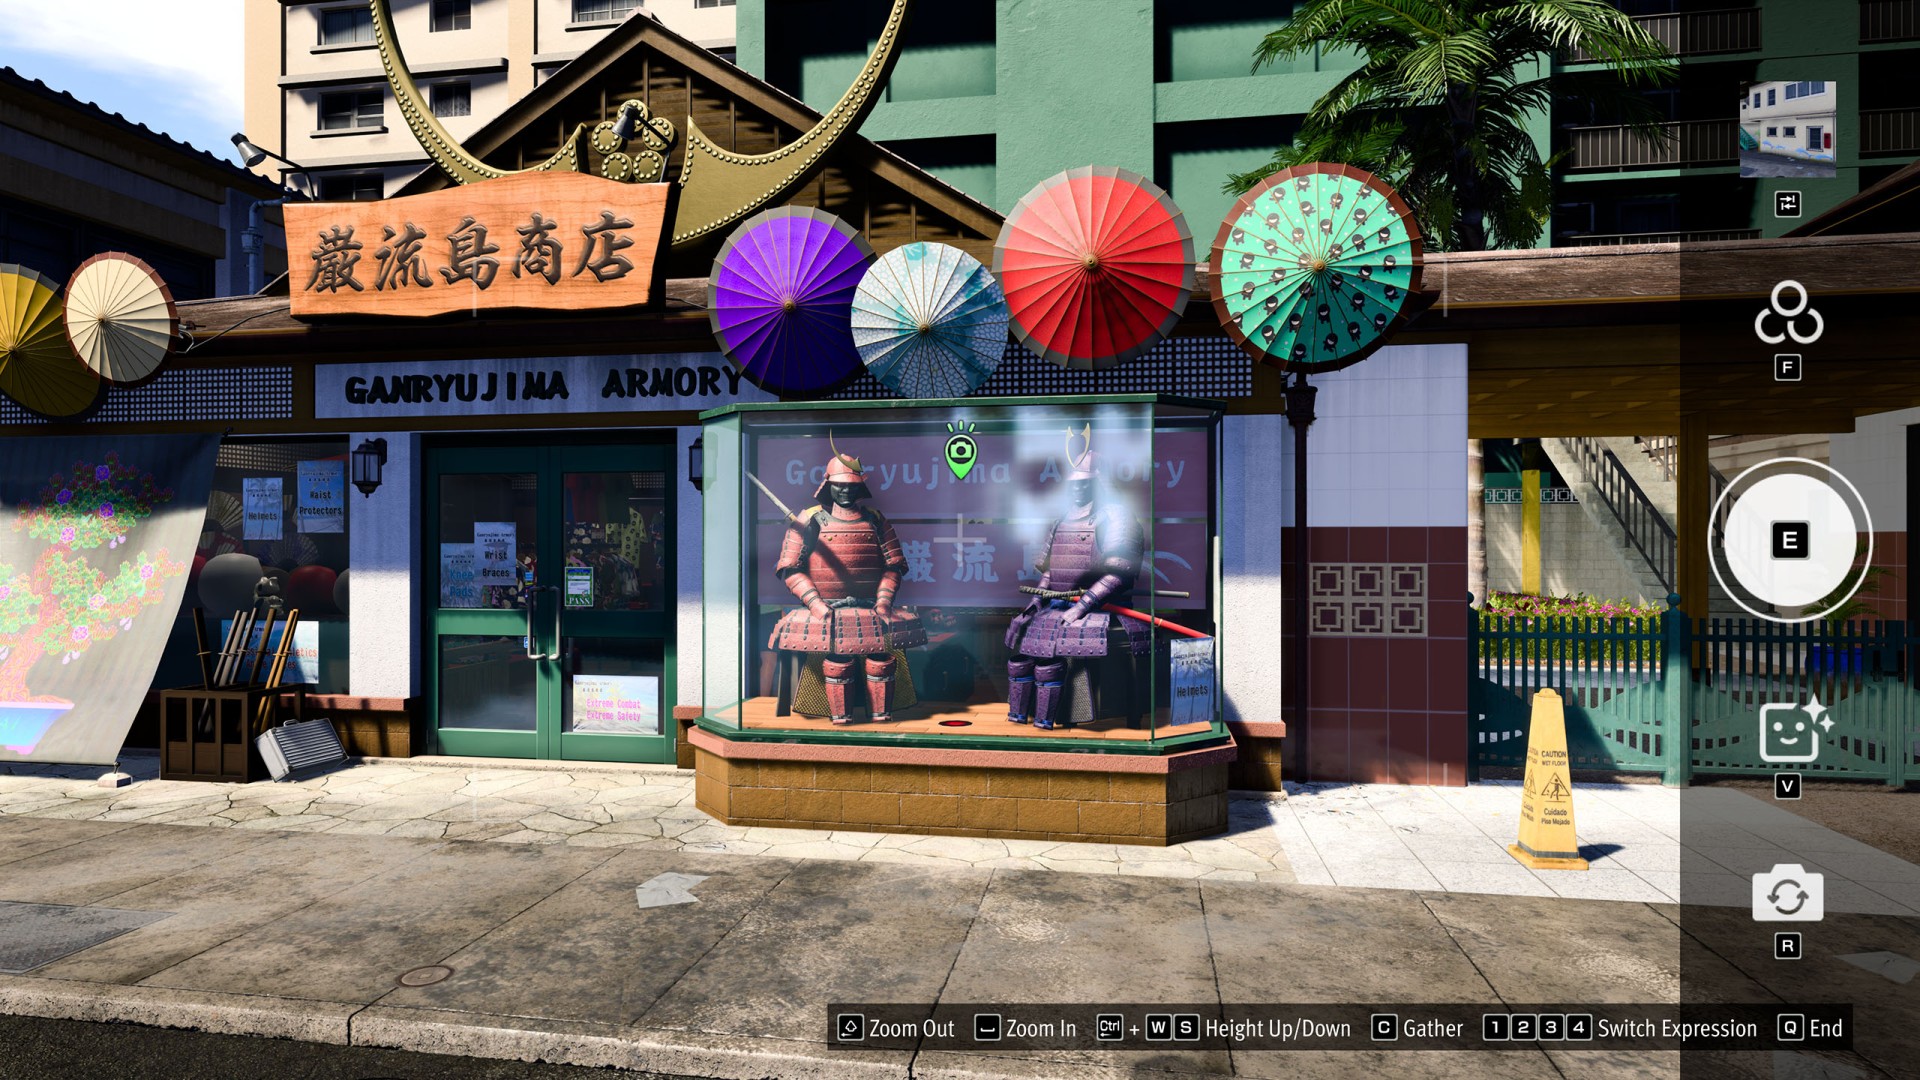
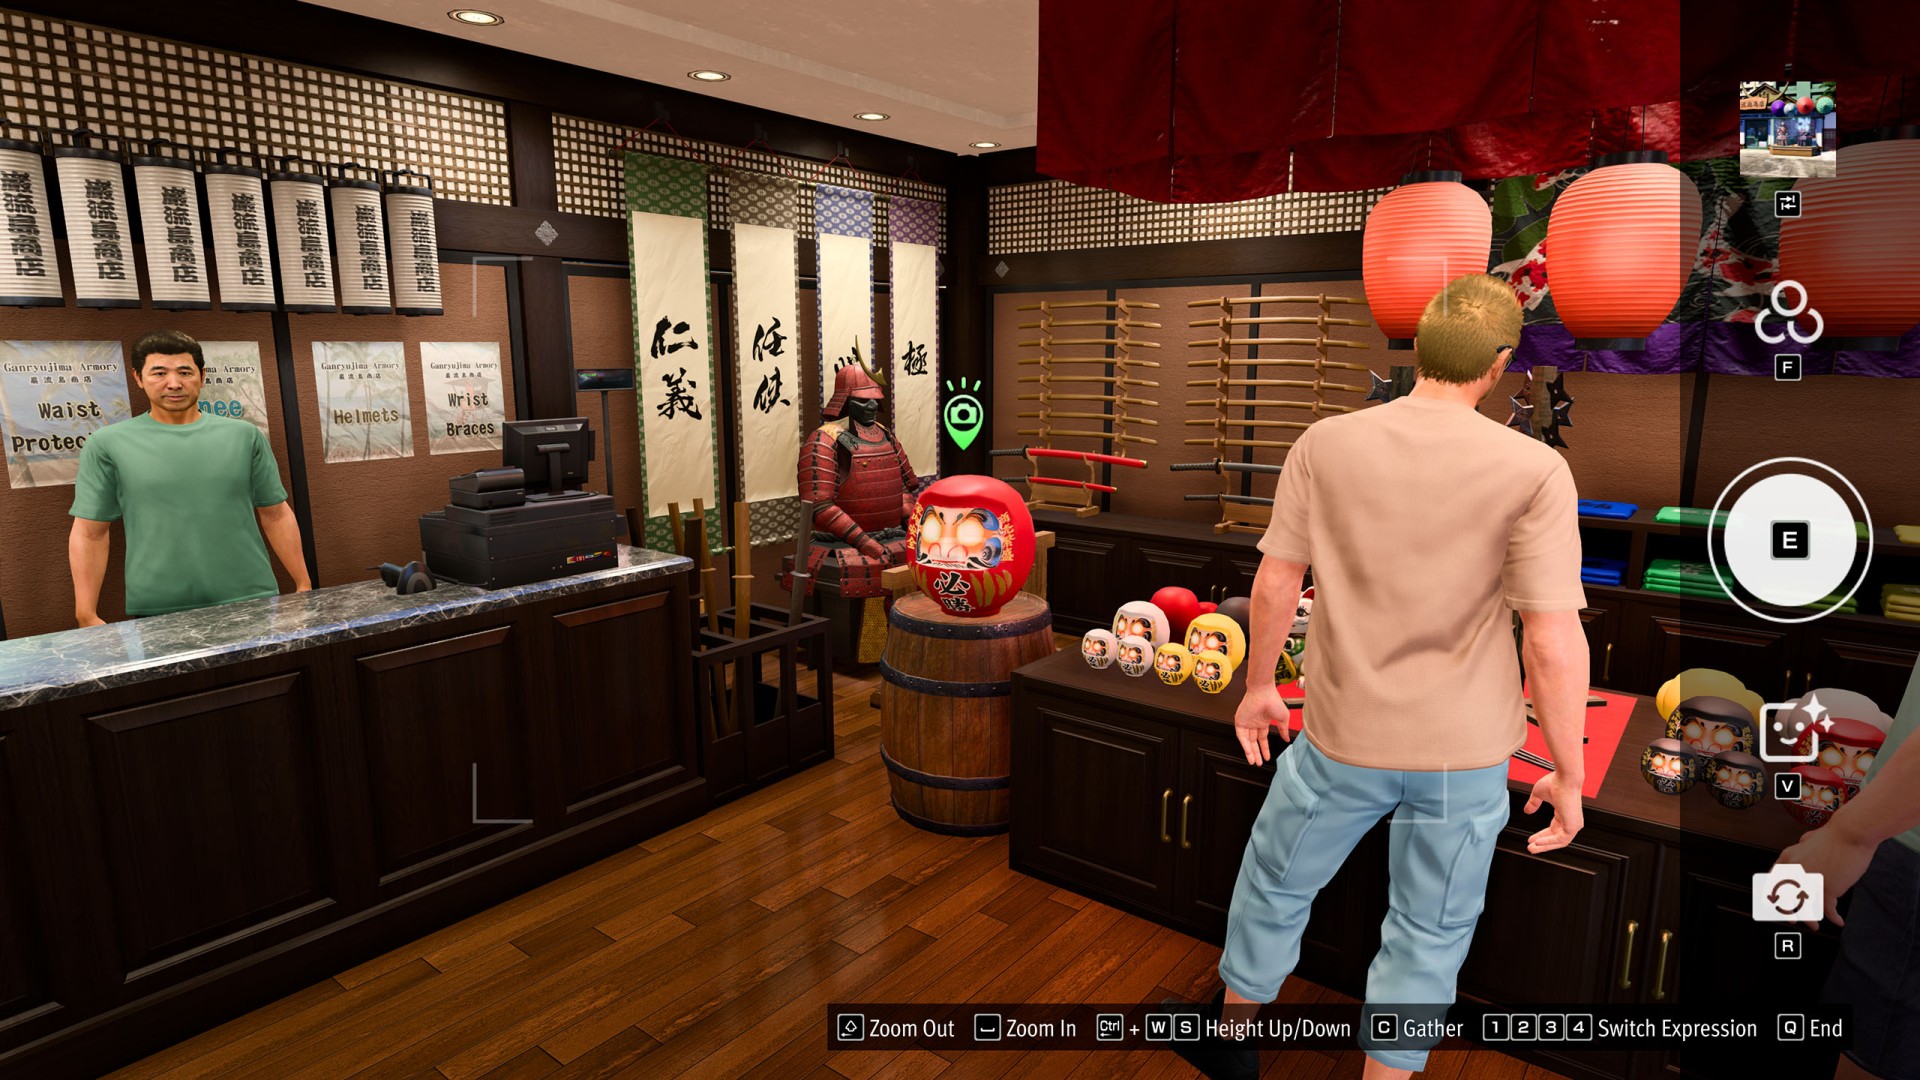
- Little Japan #12 (Ganryujima Armory)
- Little Japan #13 (Ganryujima Dharma)
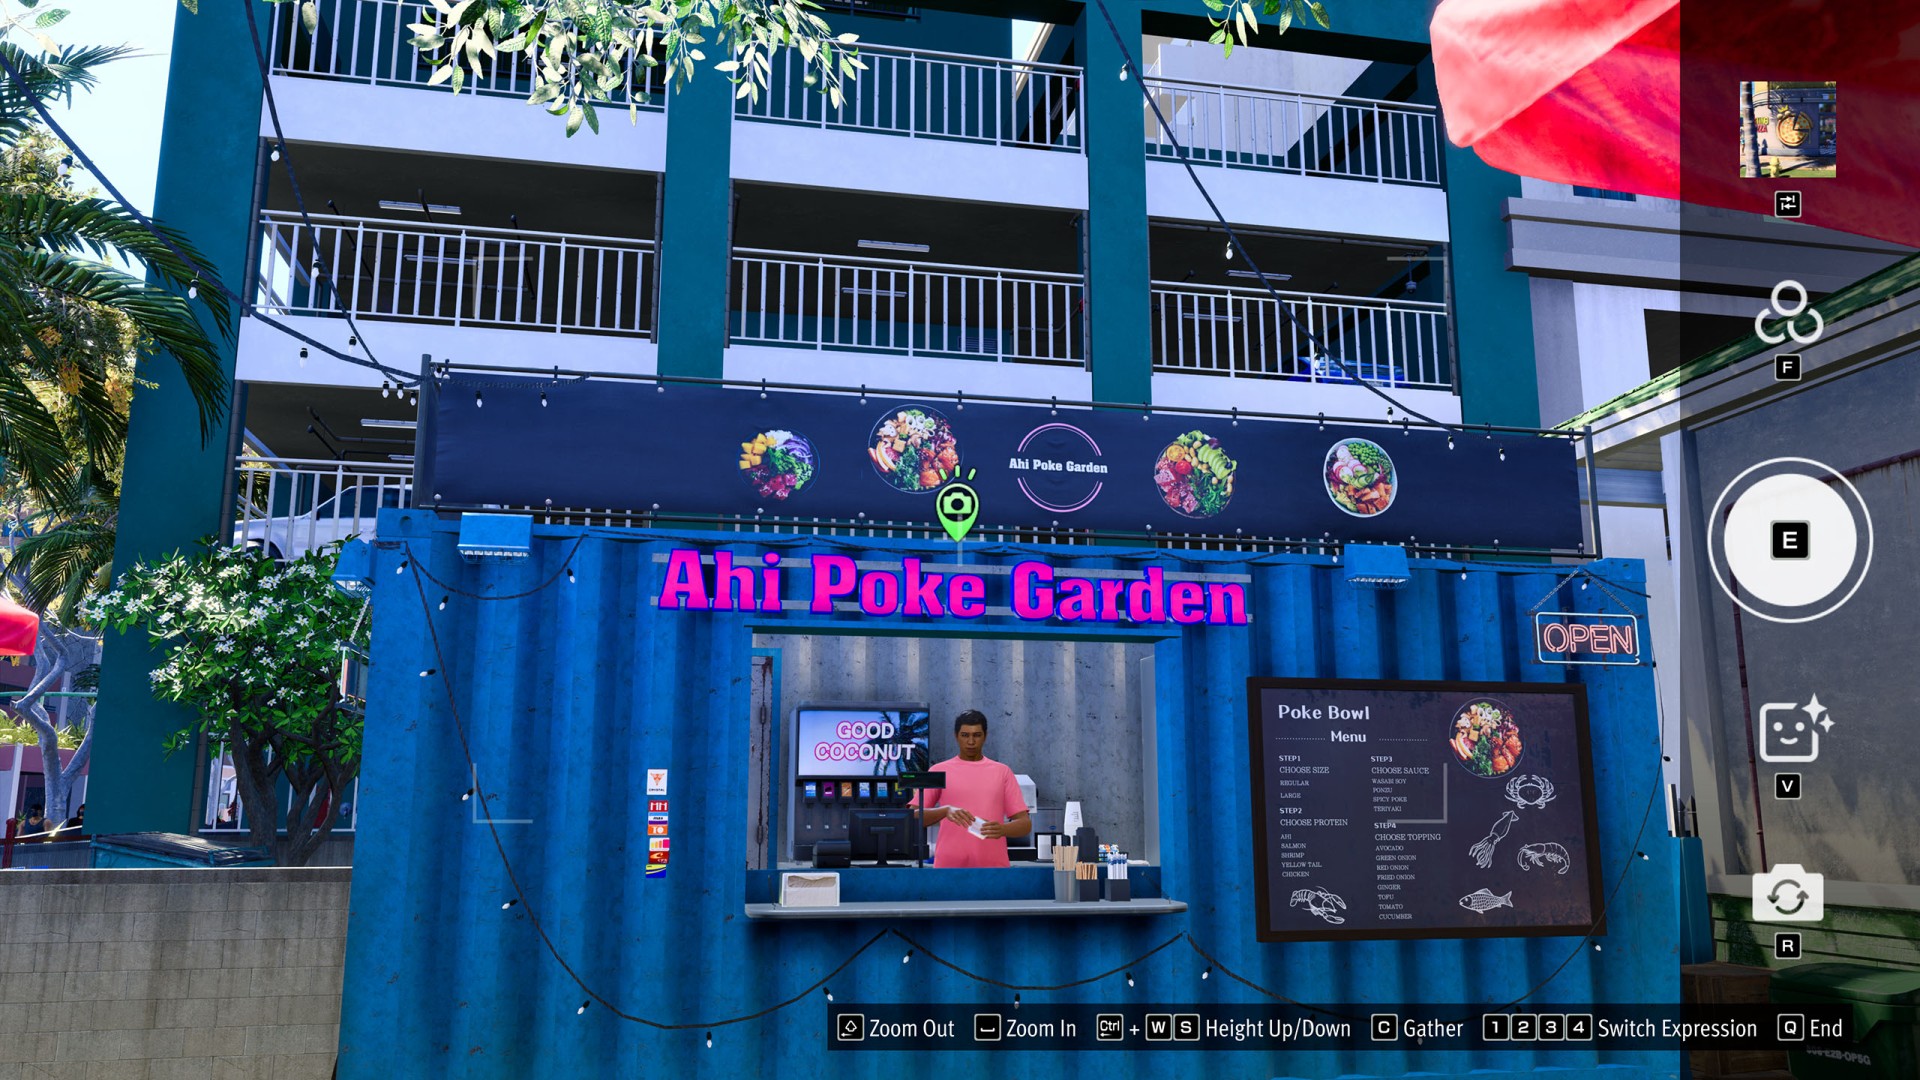
- Little Japan #14 (Ahi Poke Garden)
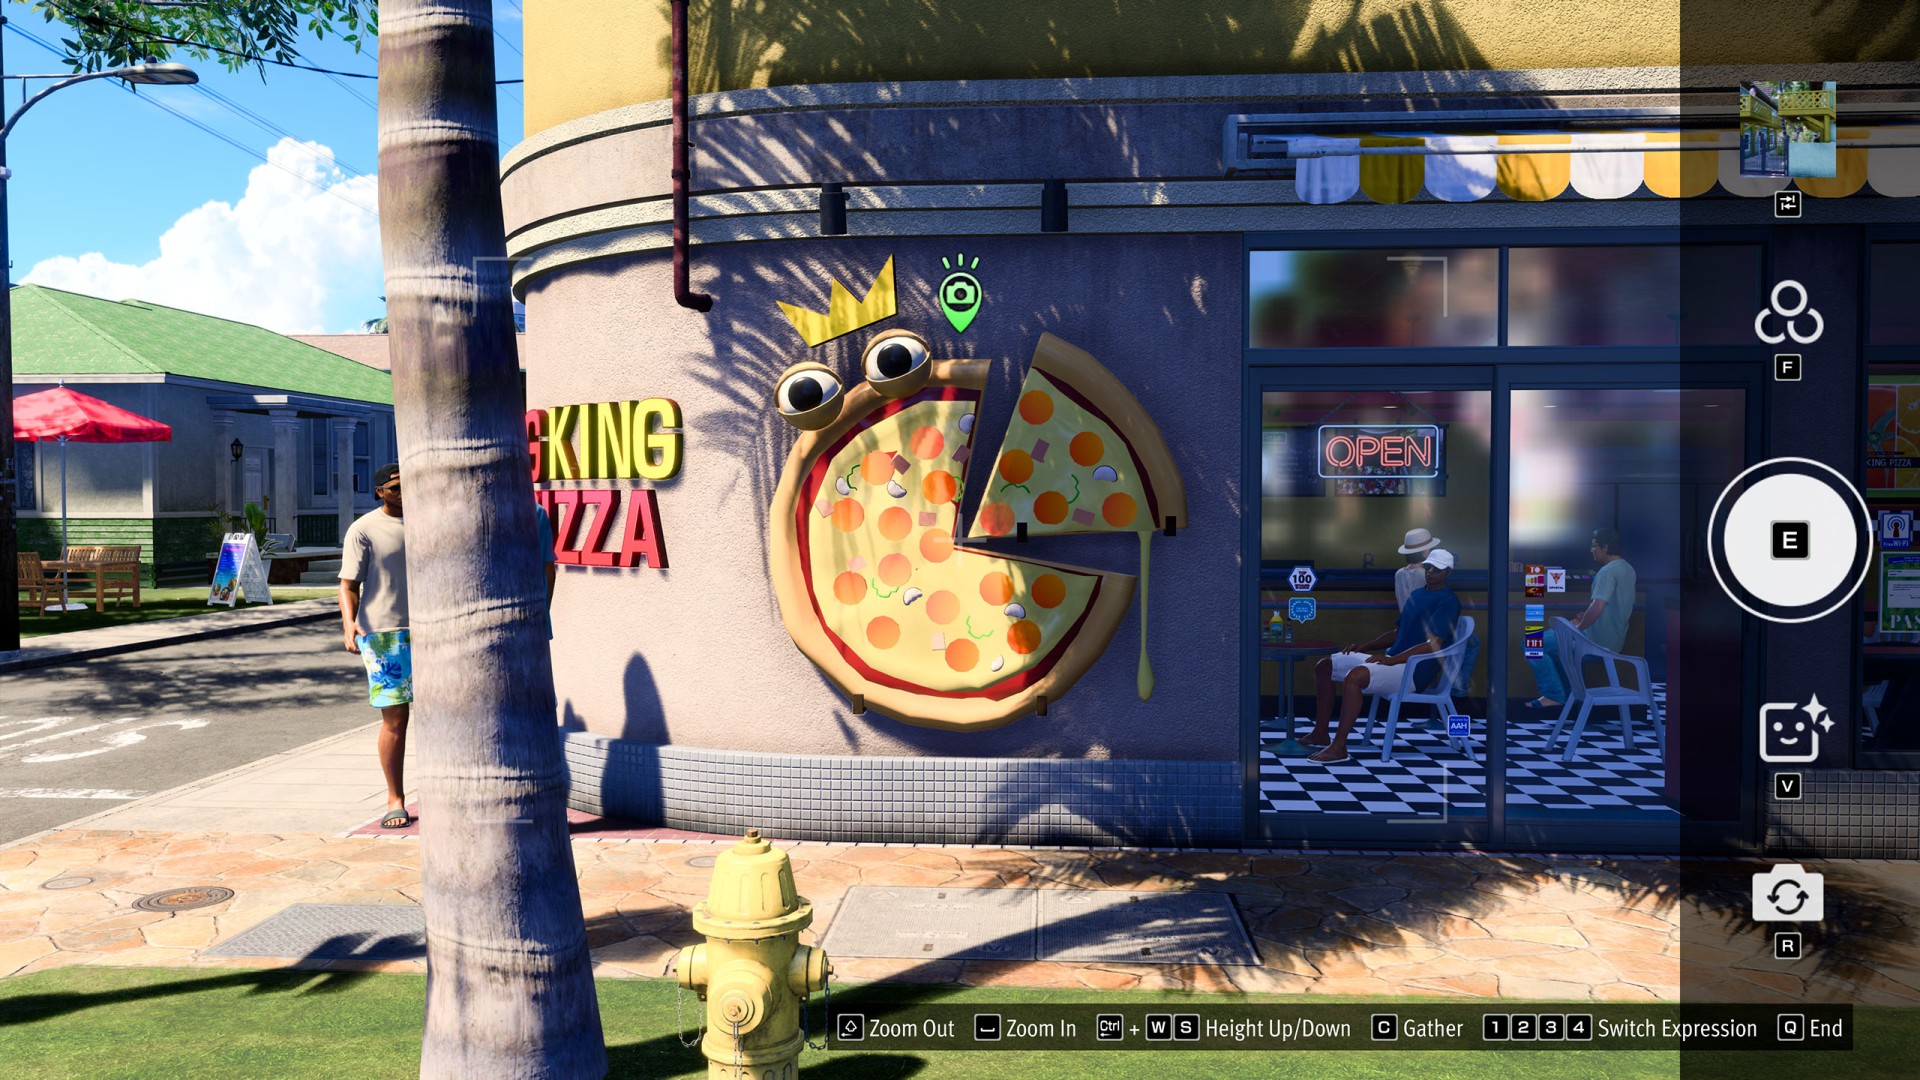
- Little Japan #15 (Big King Pizza)
- Uptown #1 (Seiryo High School Gates)
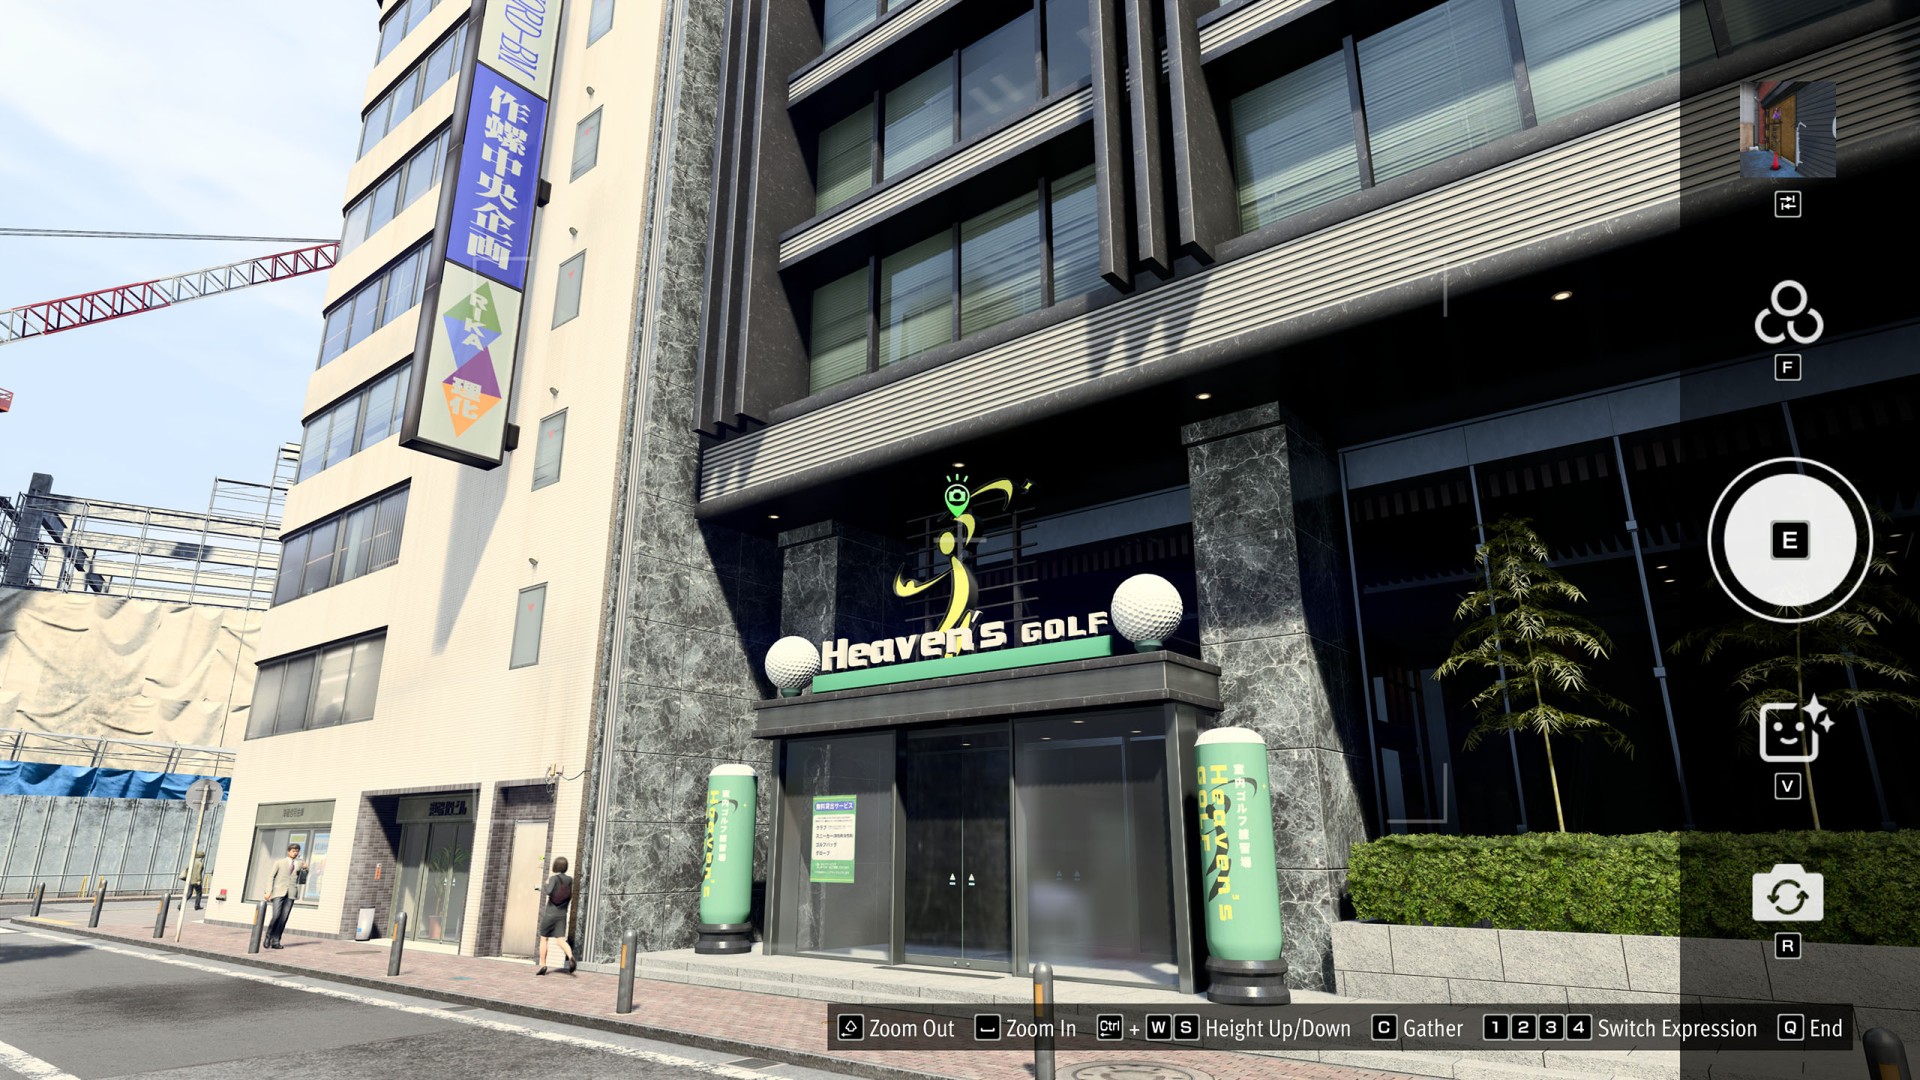
- Uptown #2 (Heaven's Golf)
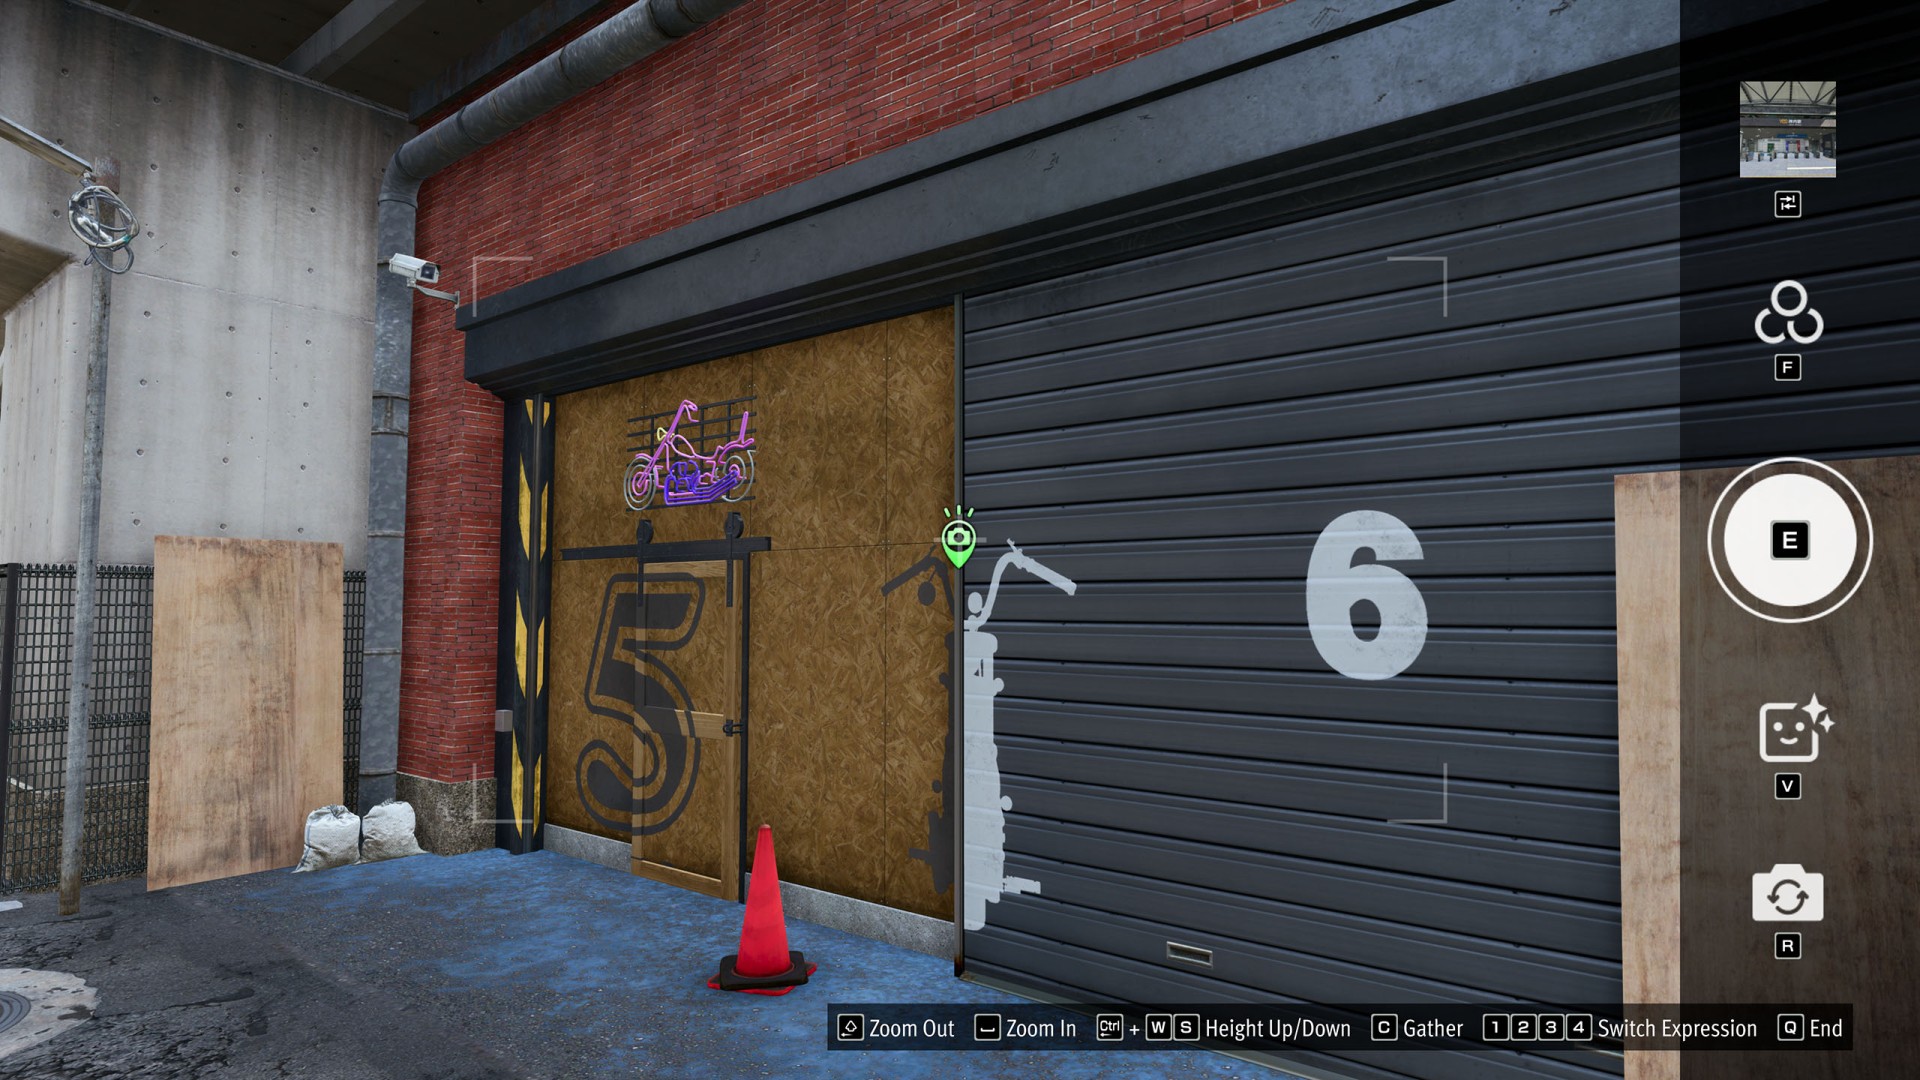
- Uptown #3 (5-6 Motorcycles)
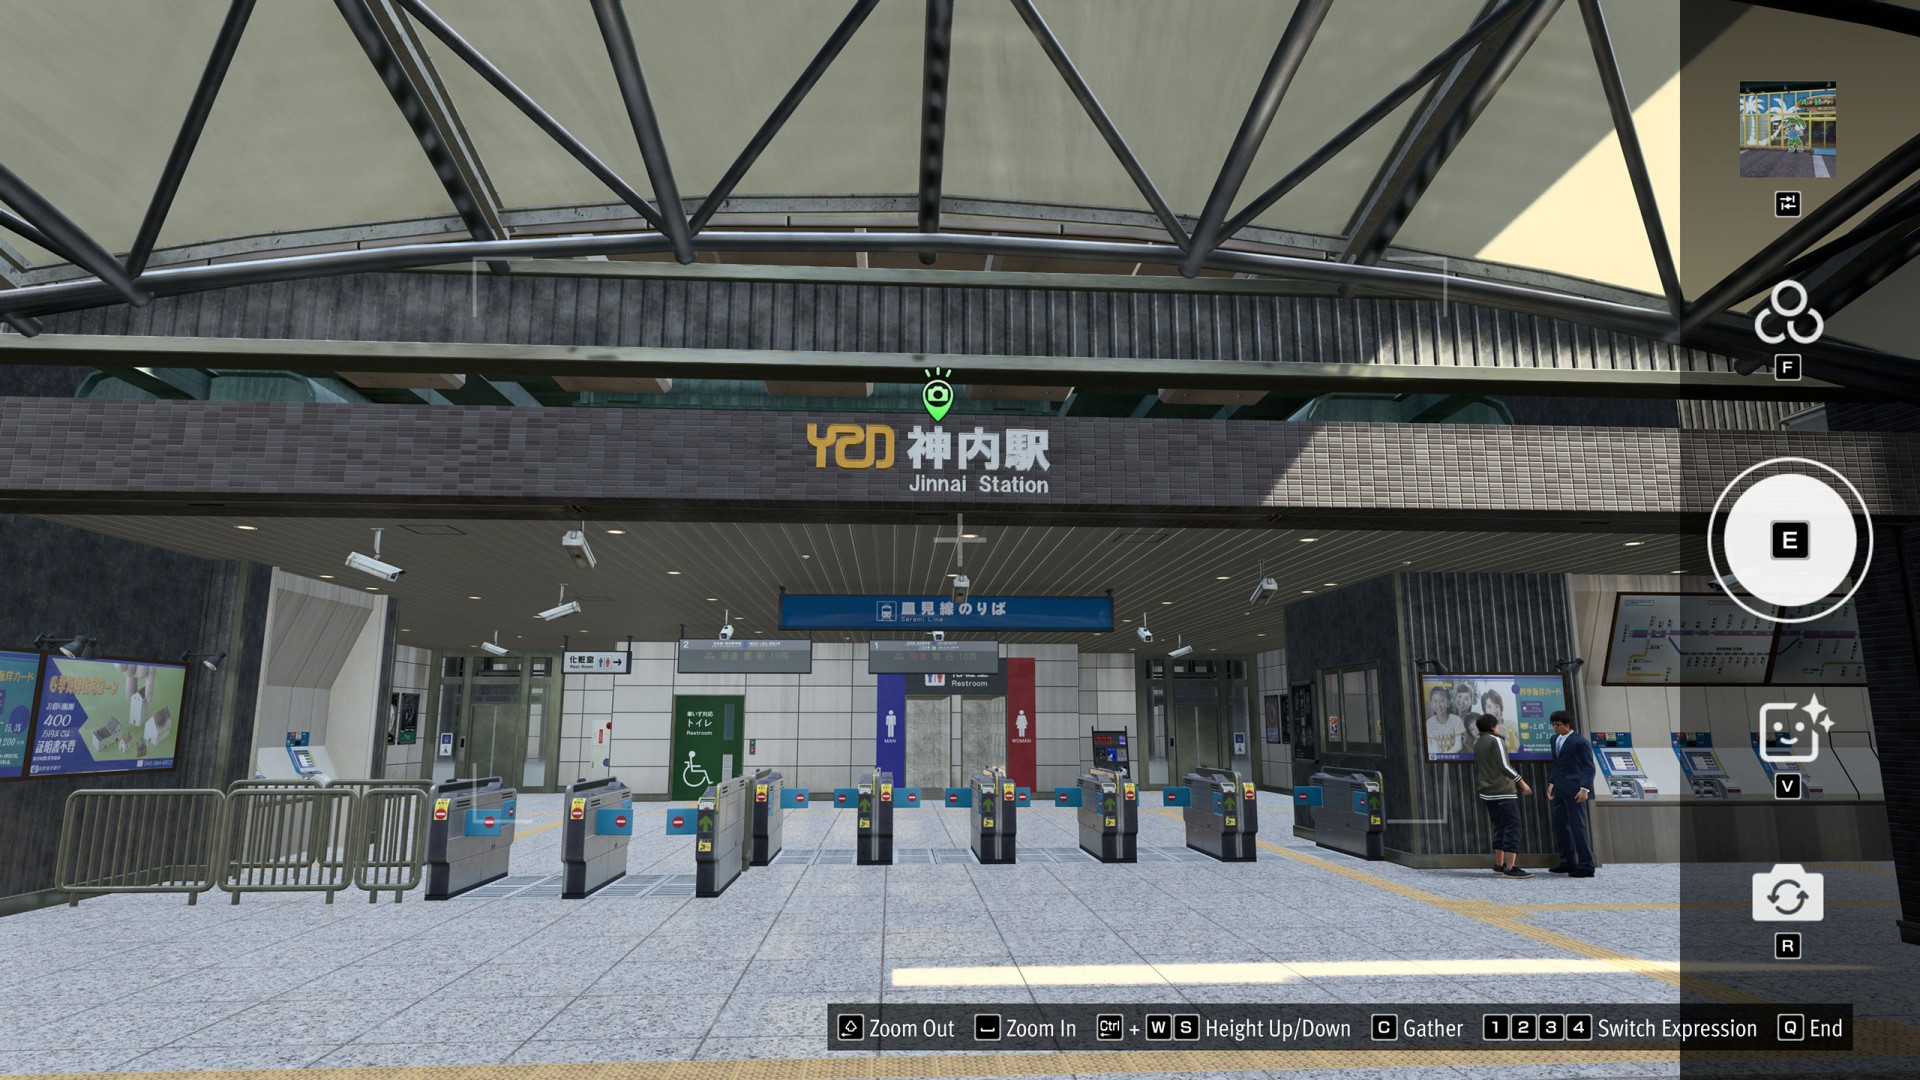
- Uptown #4 (Jinnai Station)
- Uptown #5 (Alo-Happy Yokohama)
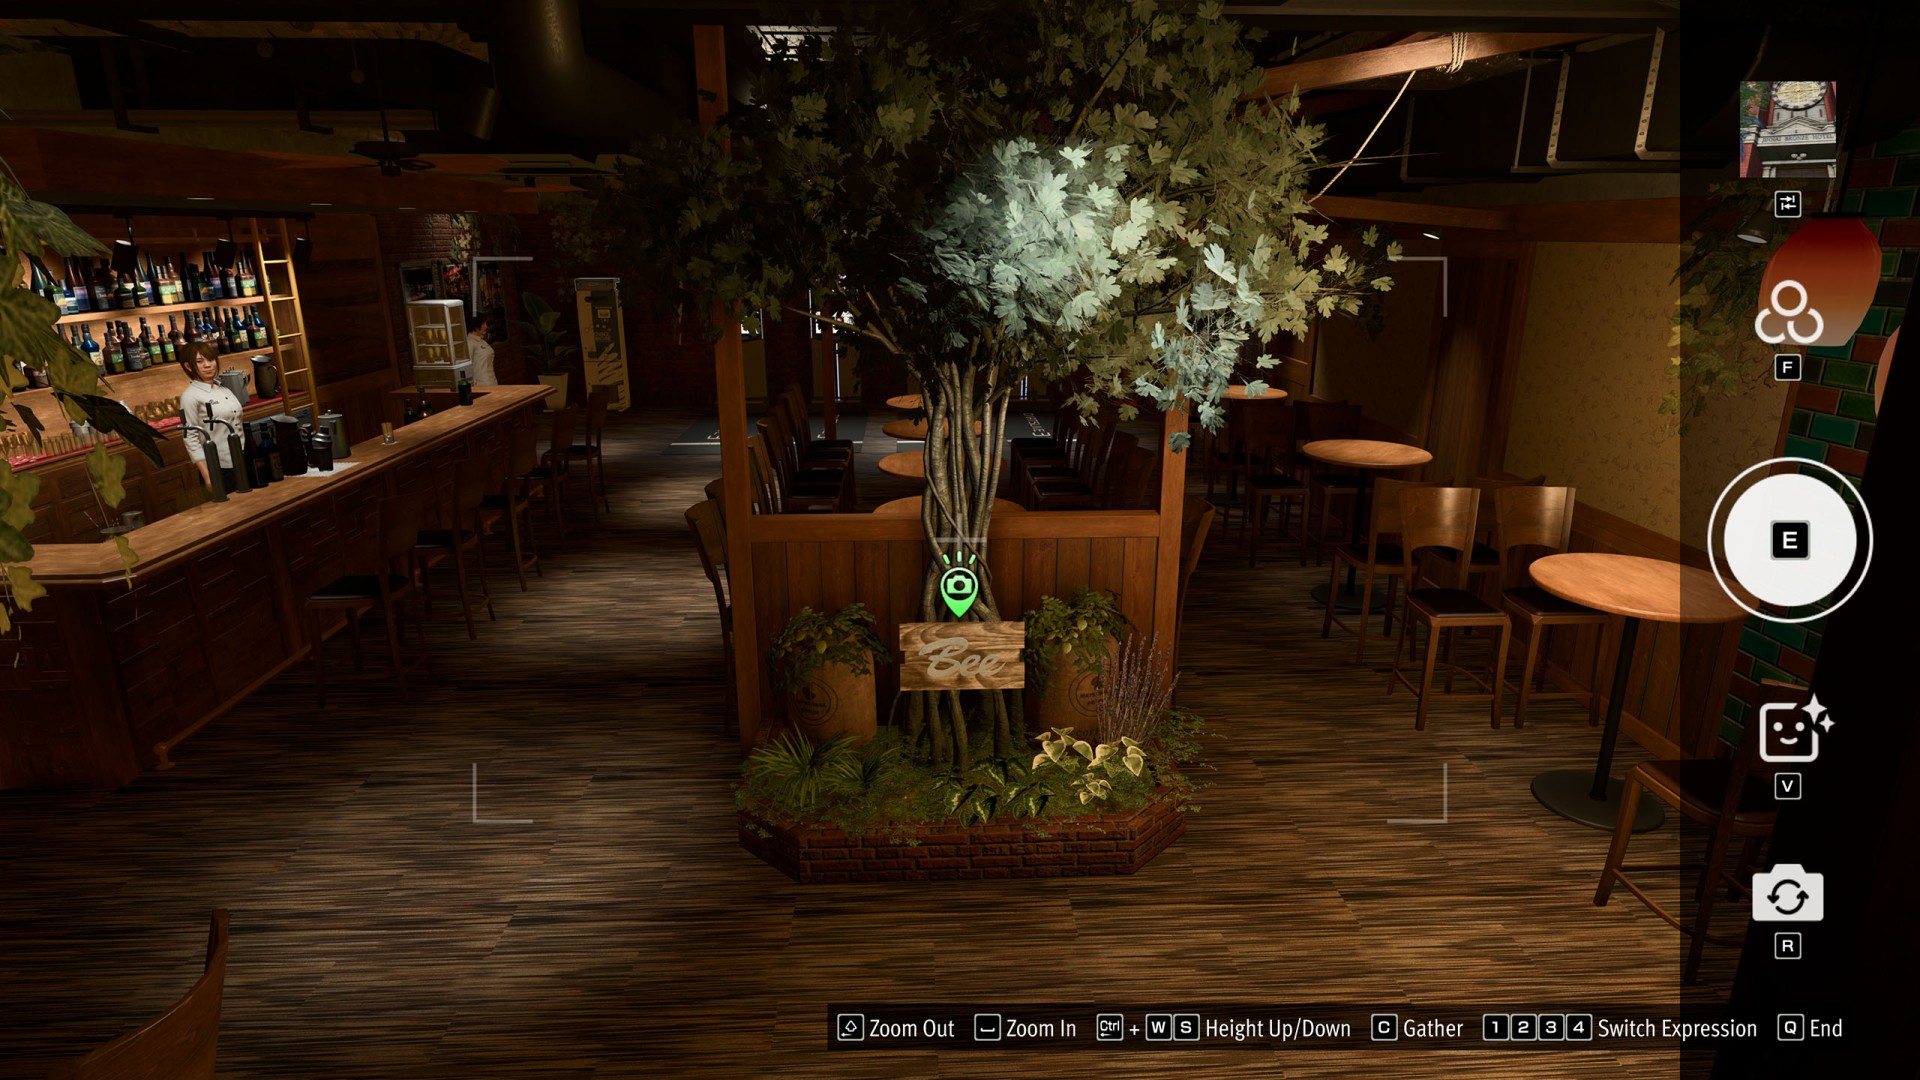
- Uptown #6 (The Bee)
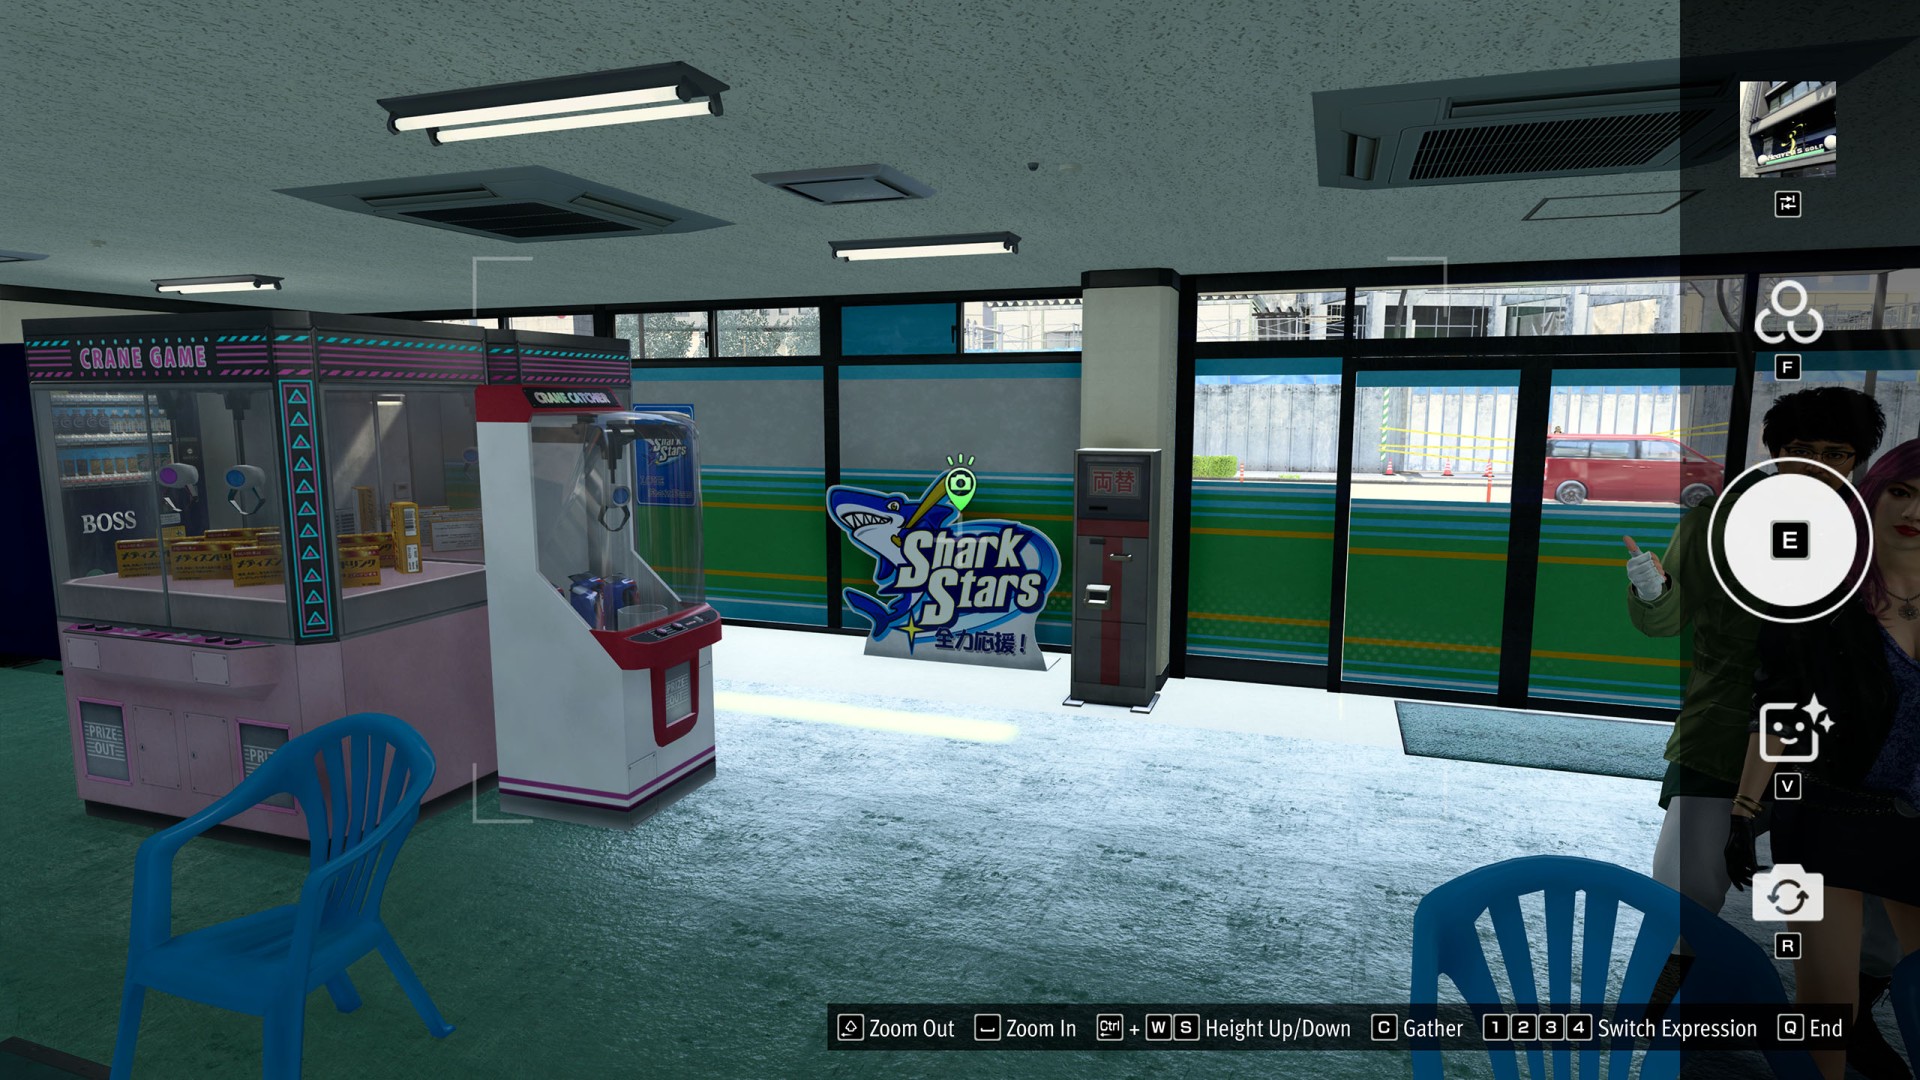
- Uptown #7 (Shark Stars)
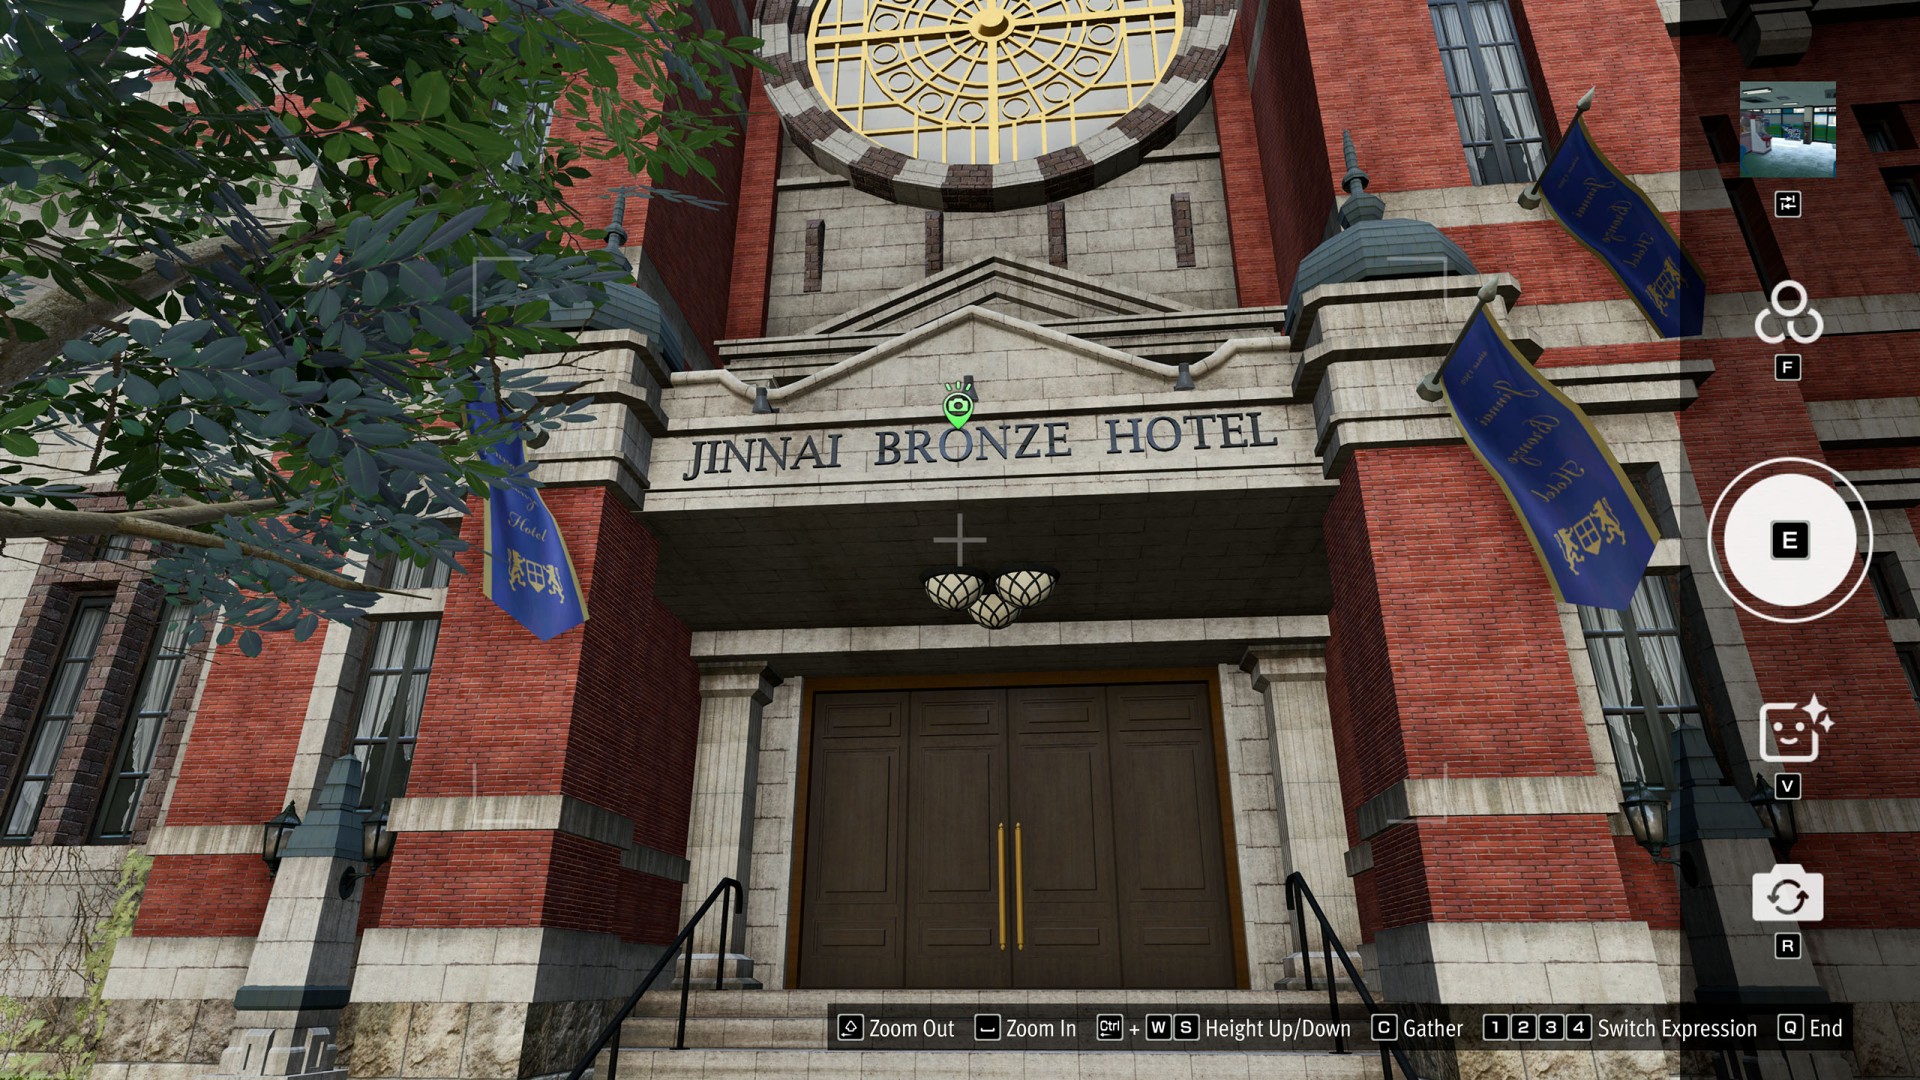
- Uptown #8 (Jinnai Bronze Hotel)
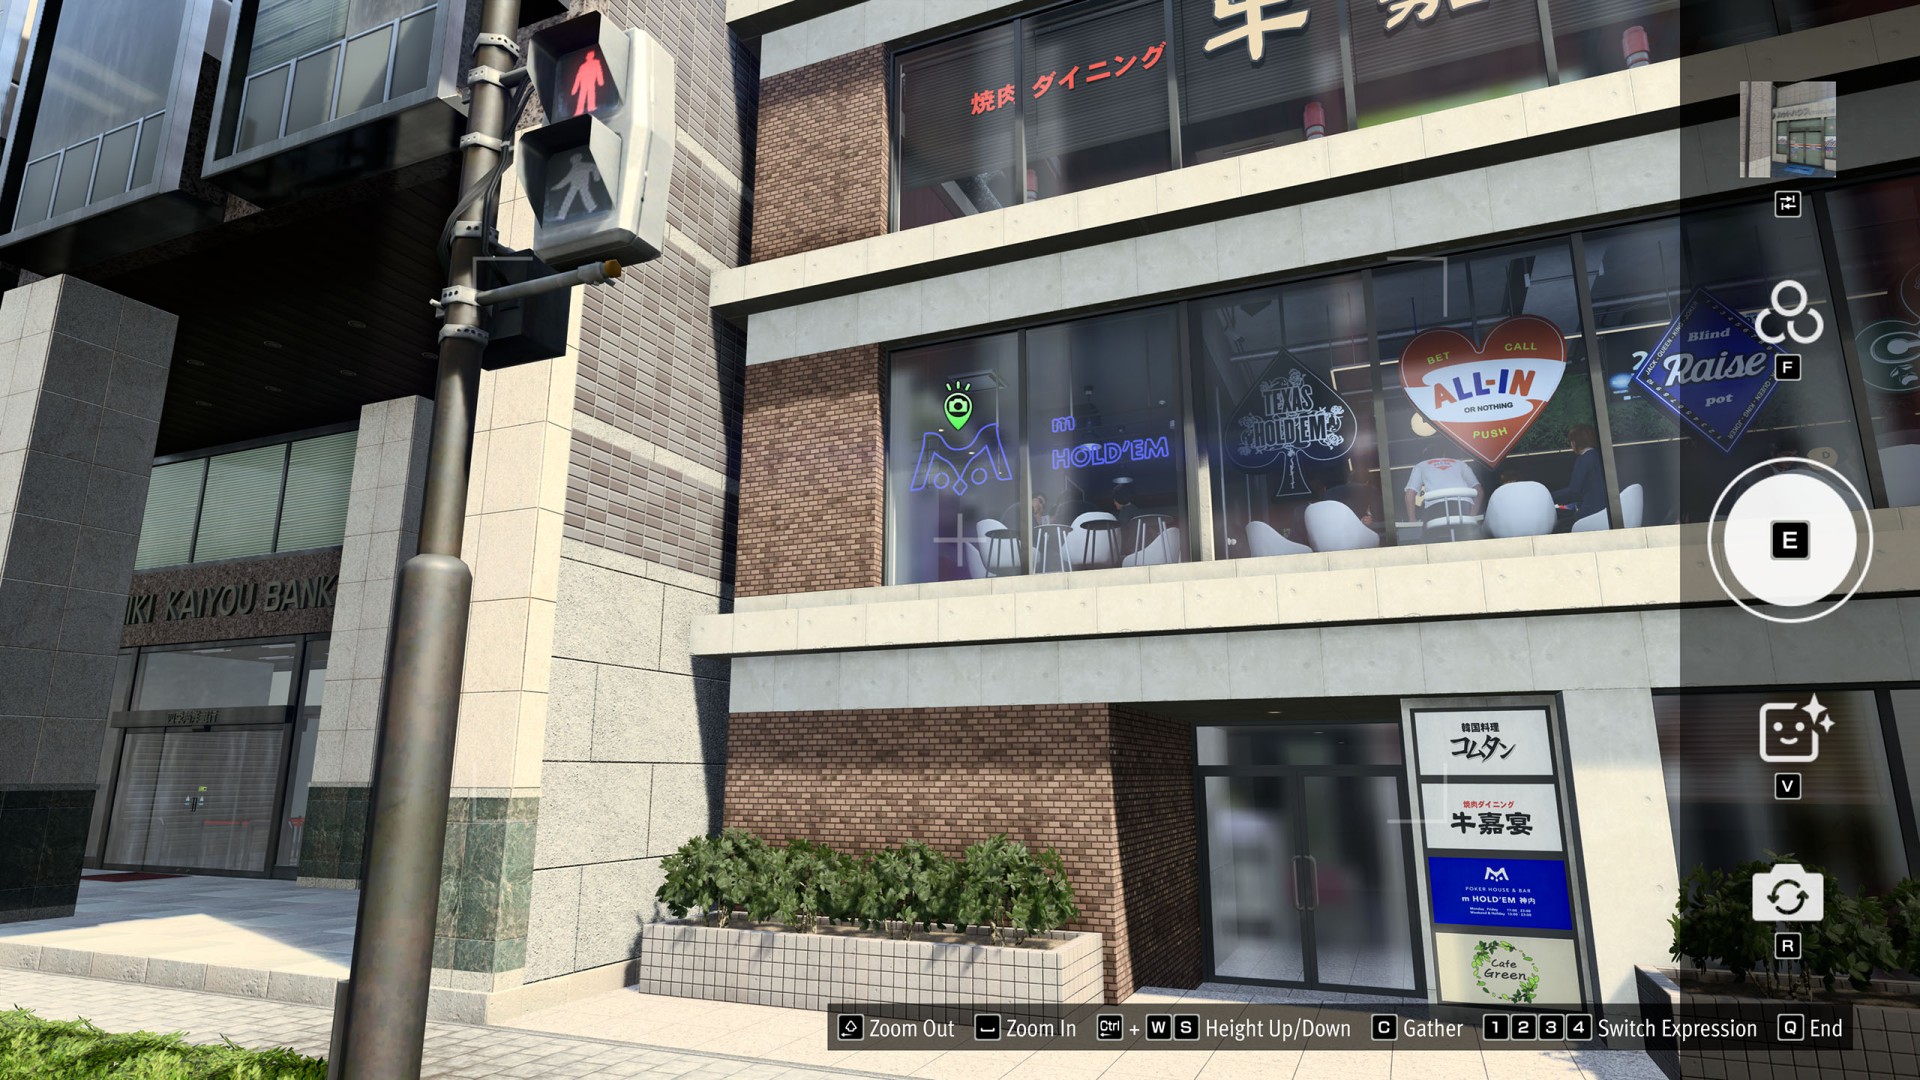
- Uptown #9 (m HOLD'EM (Jinnai))
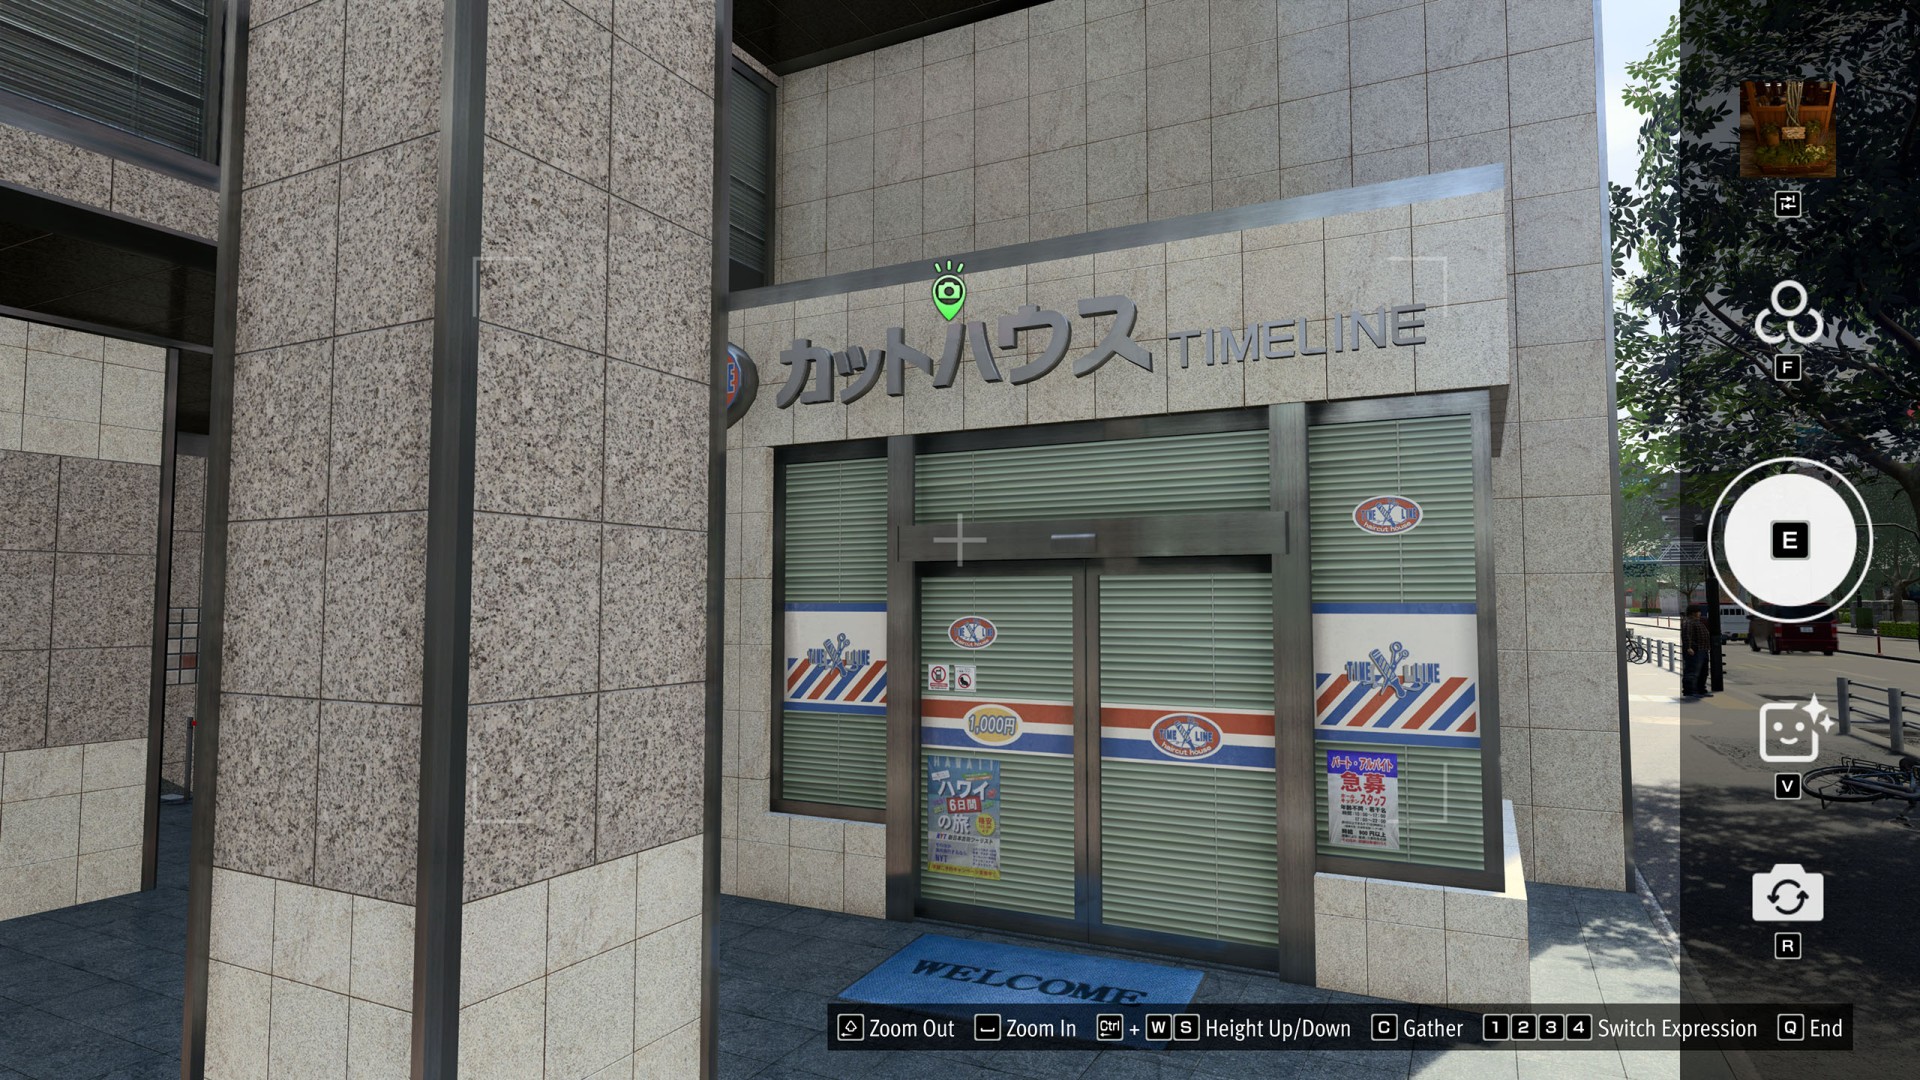
- Uptown #10 (Cut House Timeline)
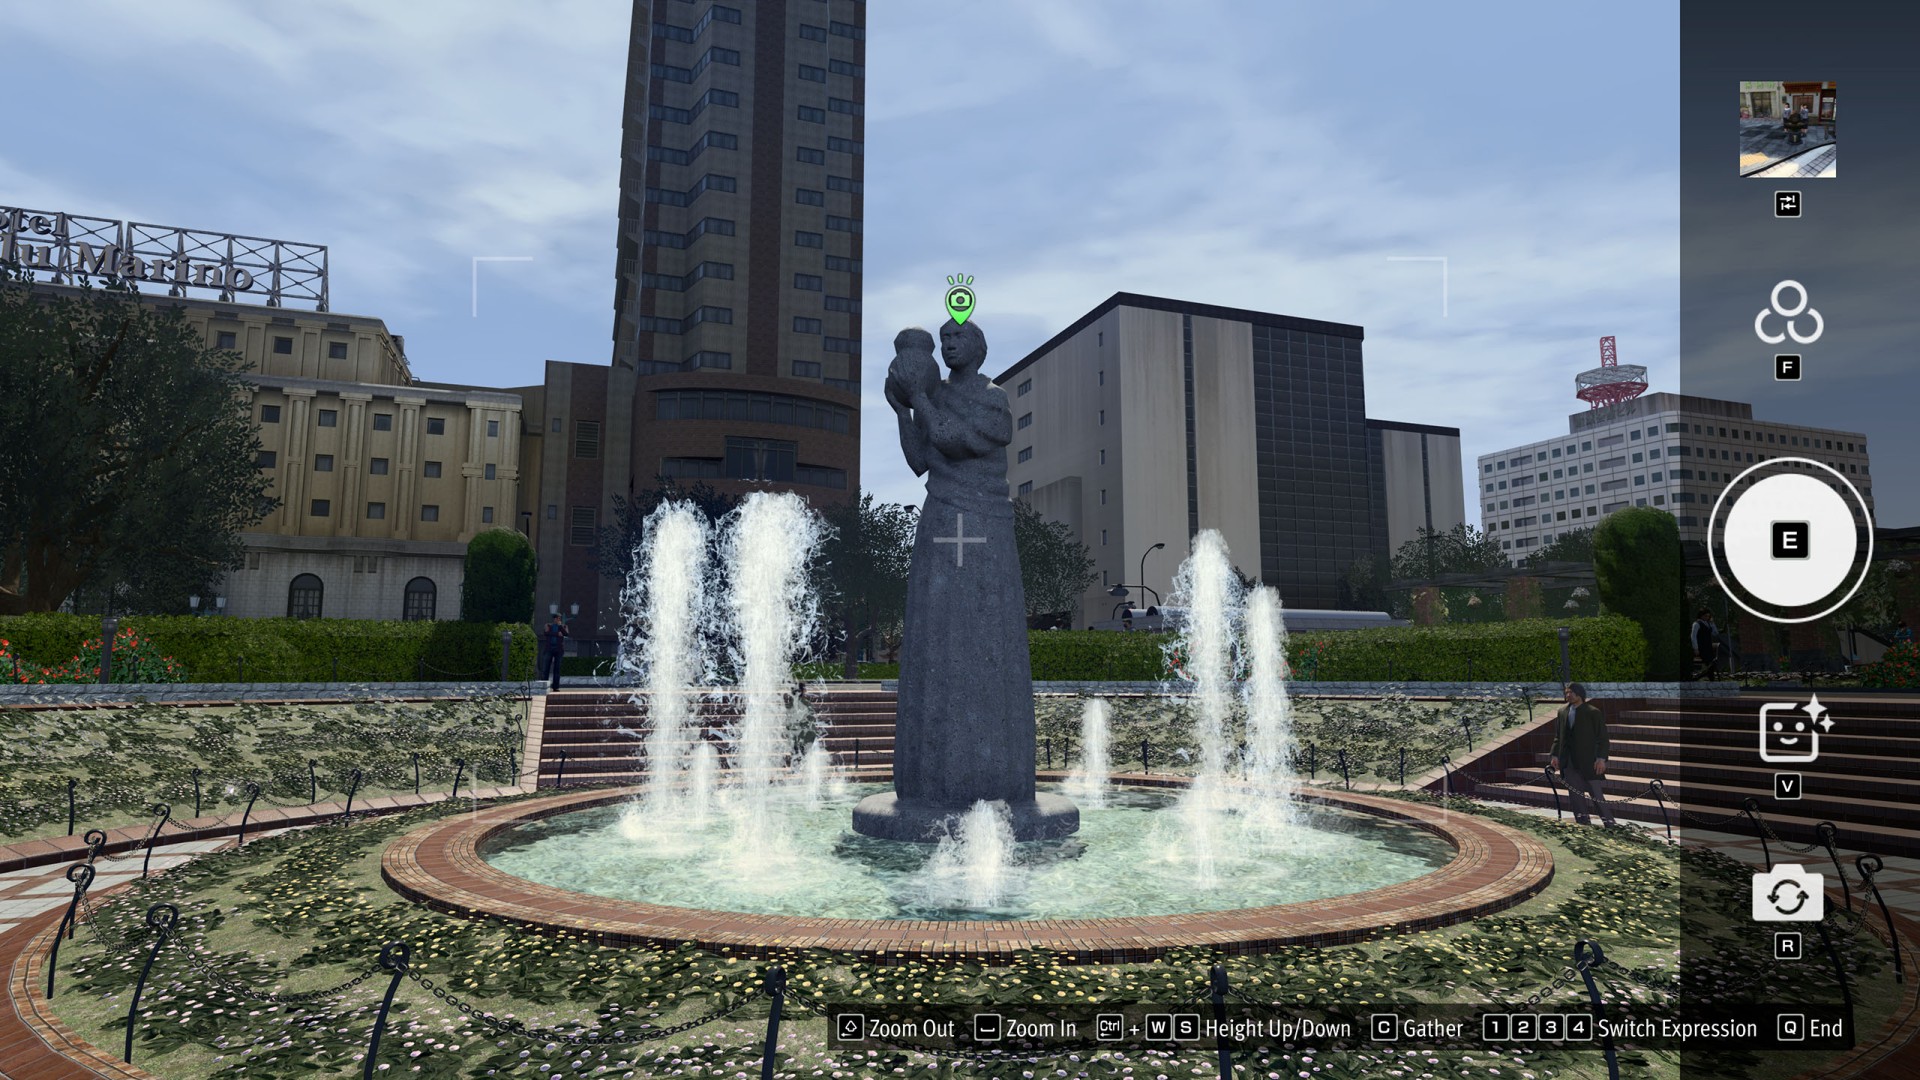
- Uptown #11 (Hamakita Park Fountain)
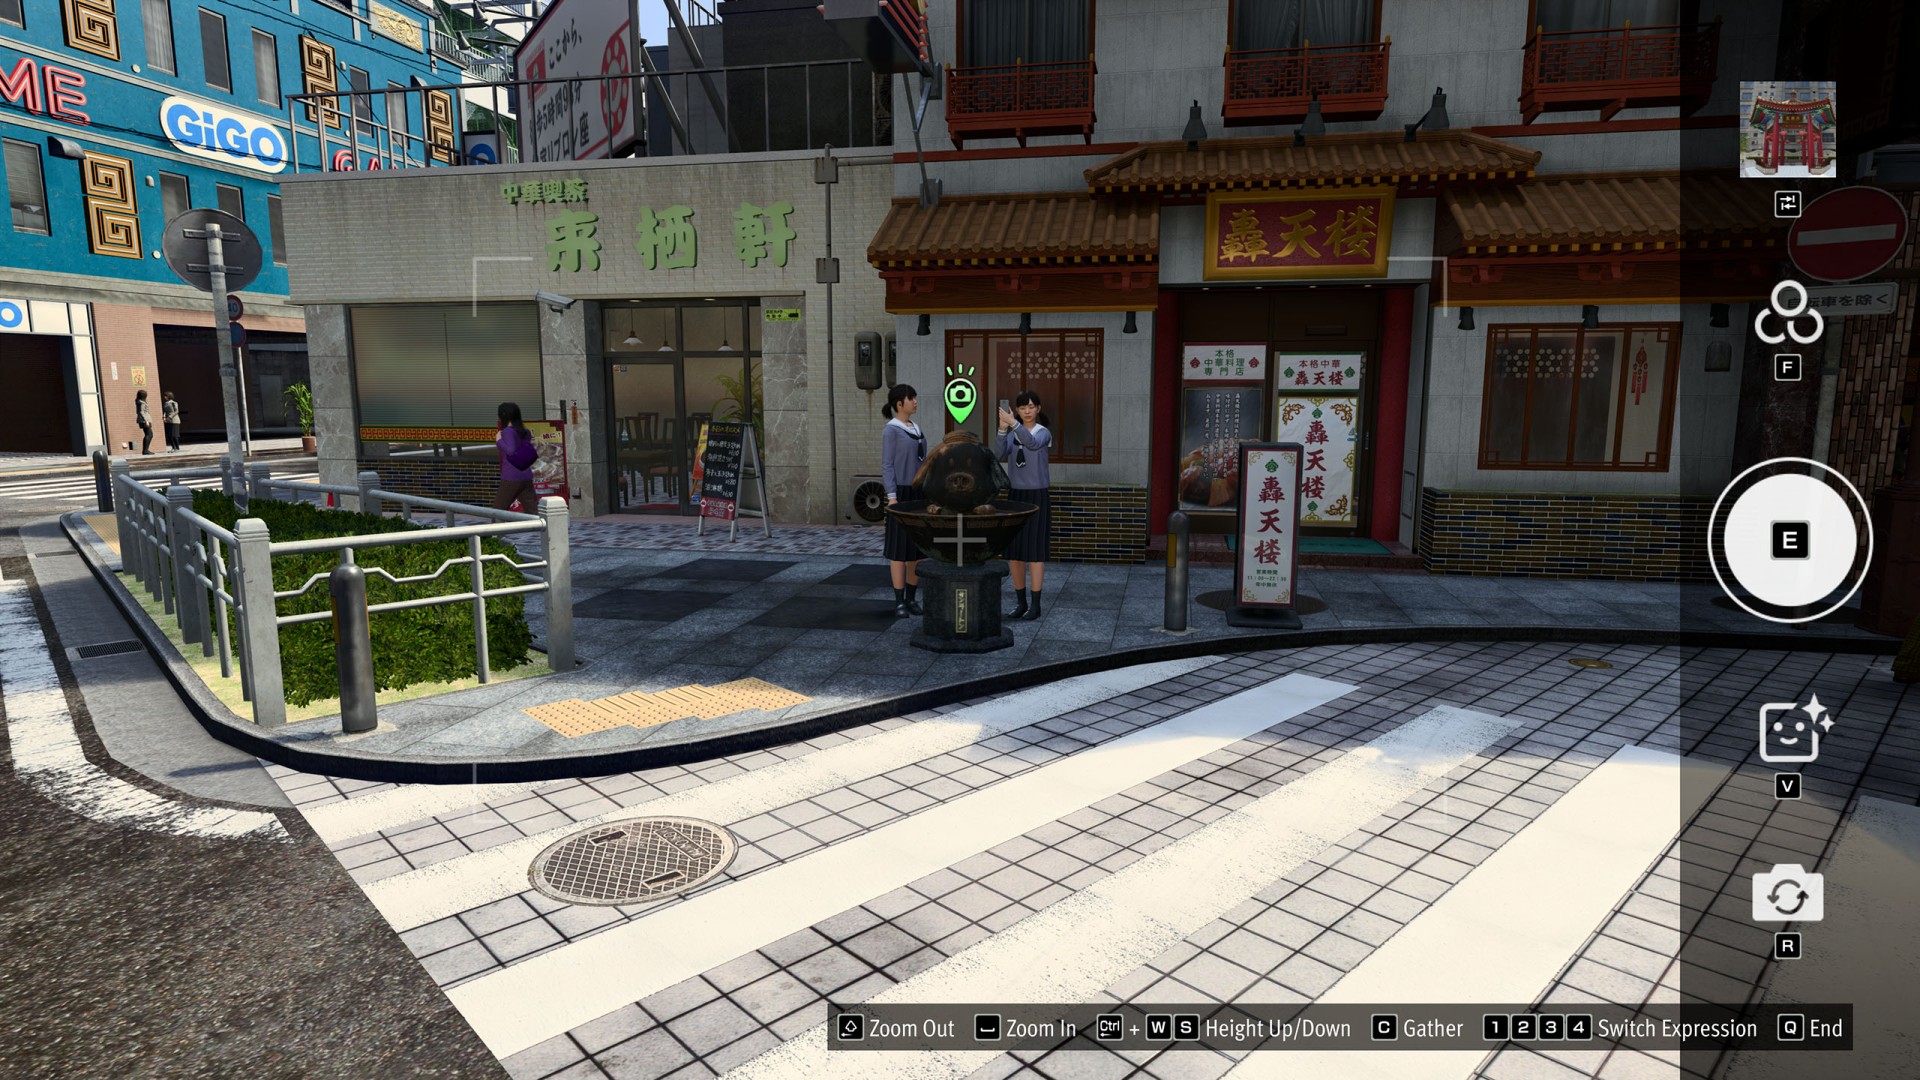
- Uptown #12 (Swine La Tang)
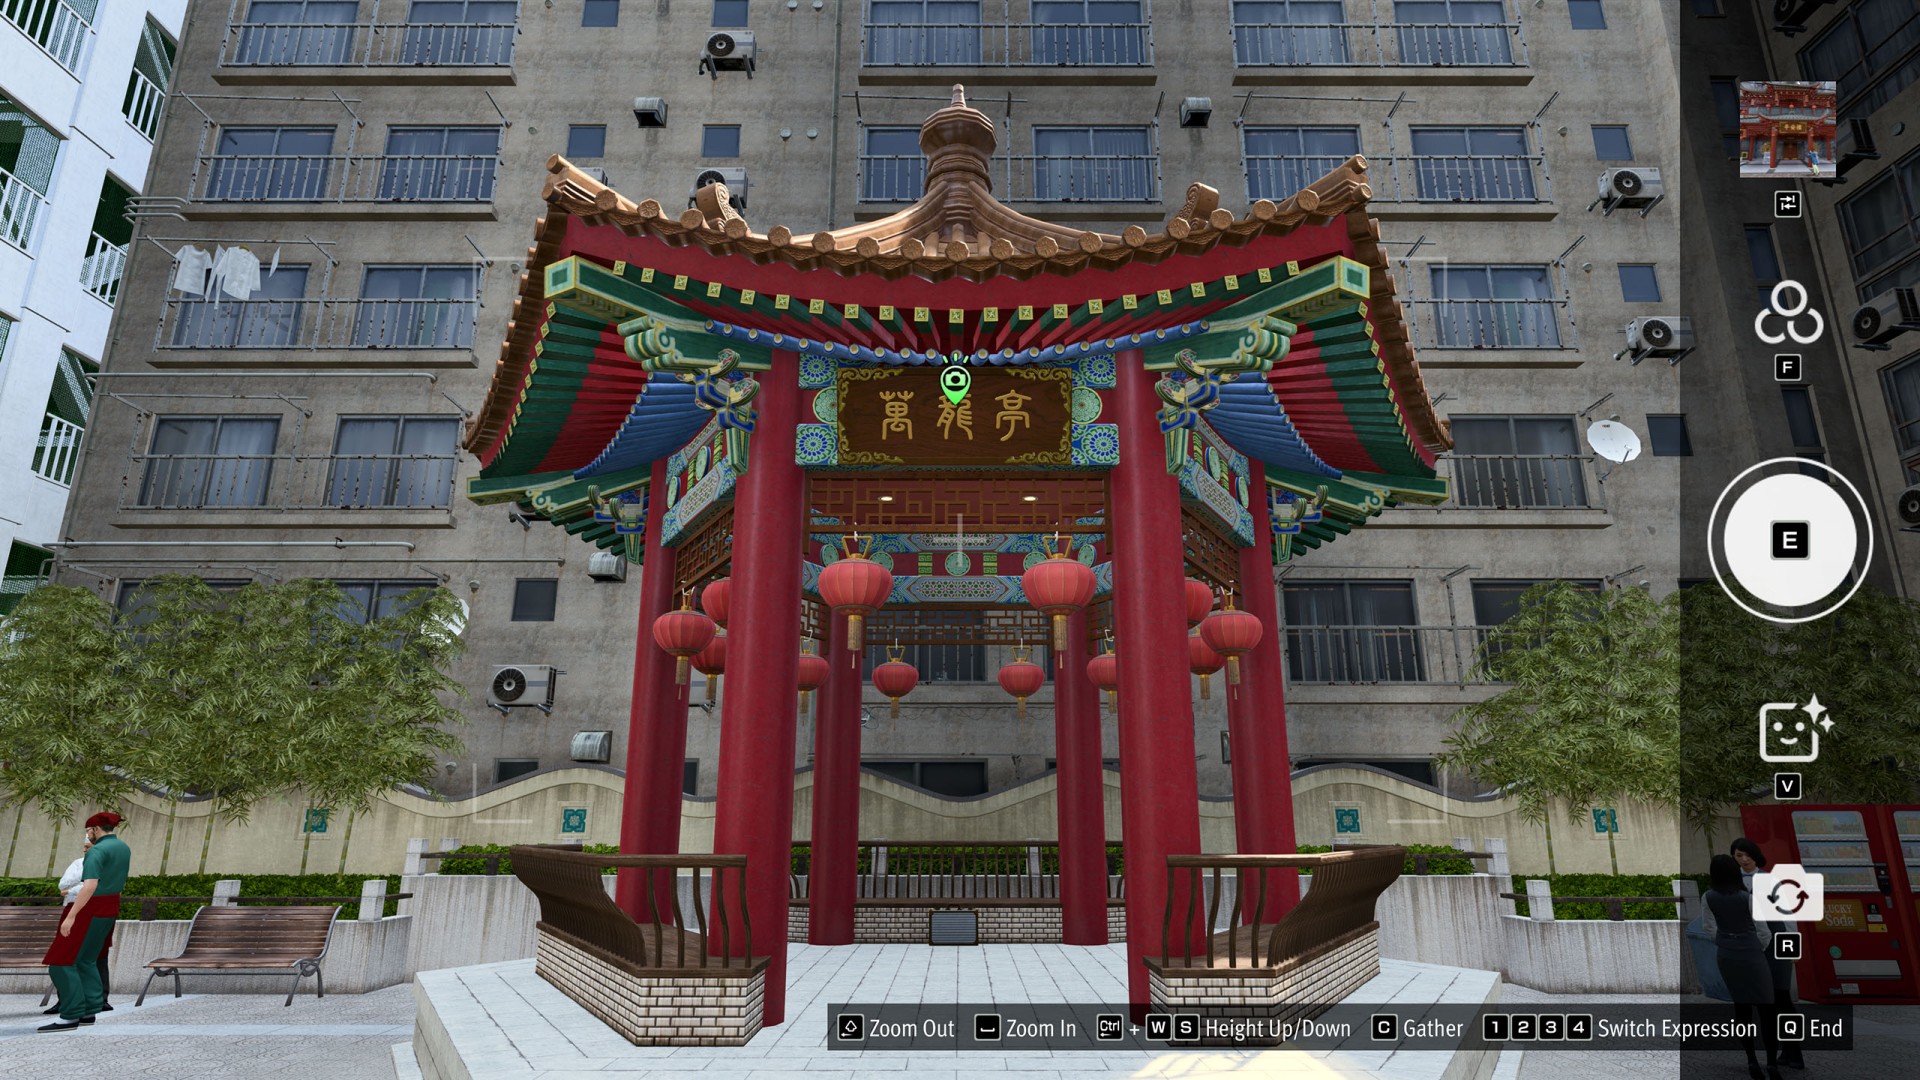
- Uptown #13 (Chinese Pavilion)
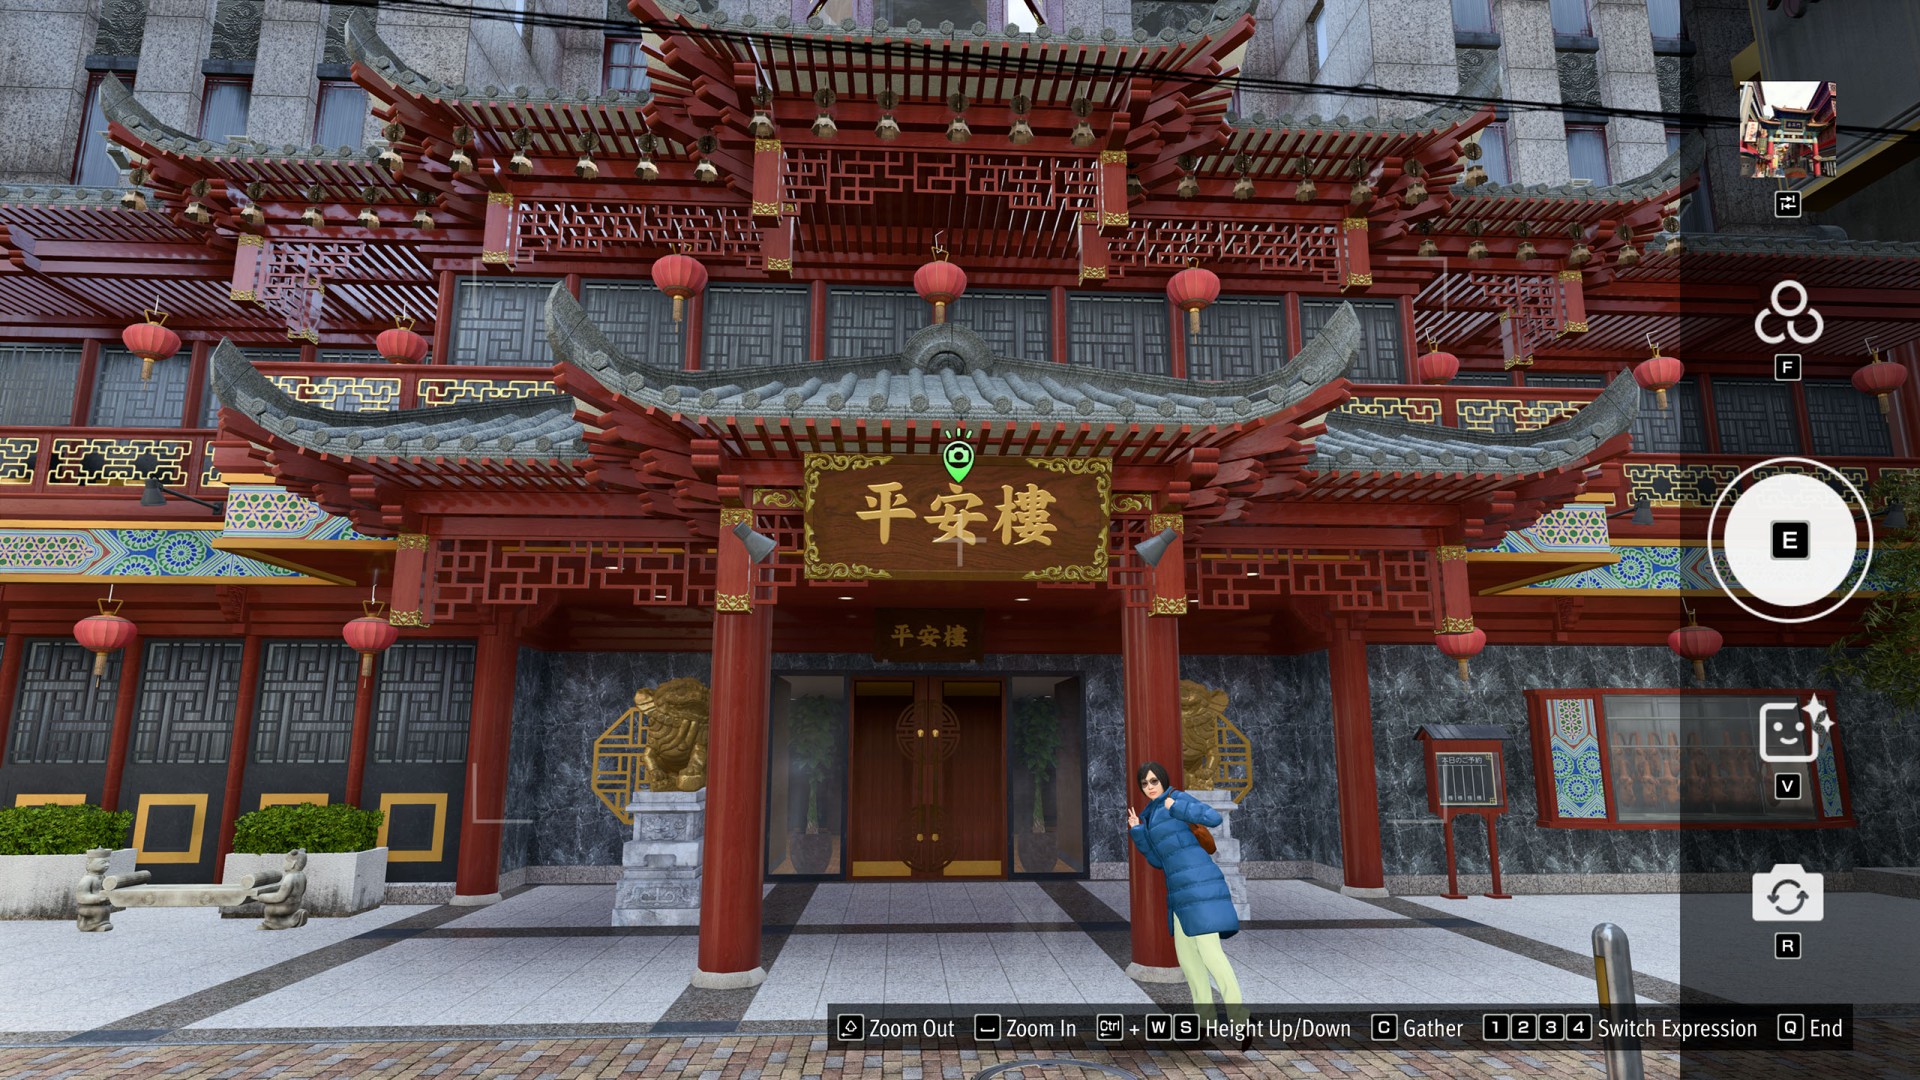
- Uptown #14 (Heian Tower)
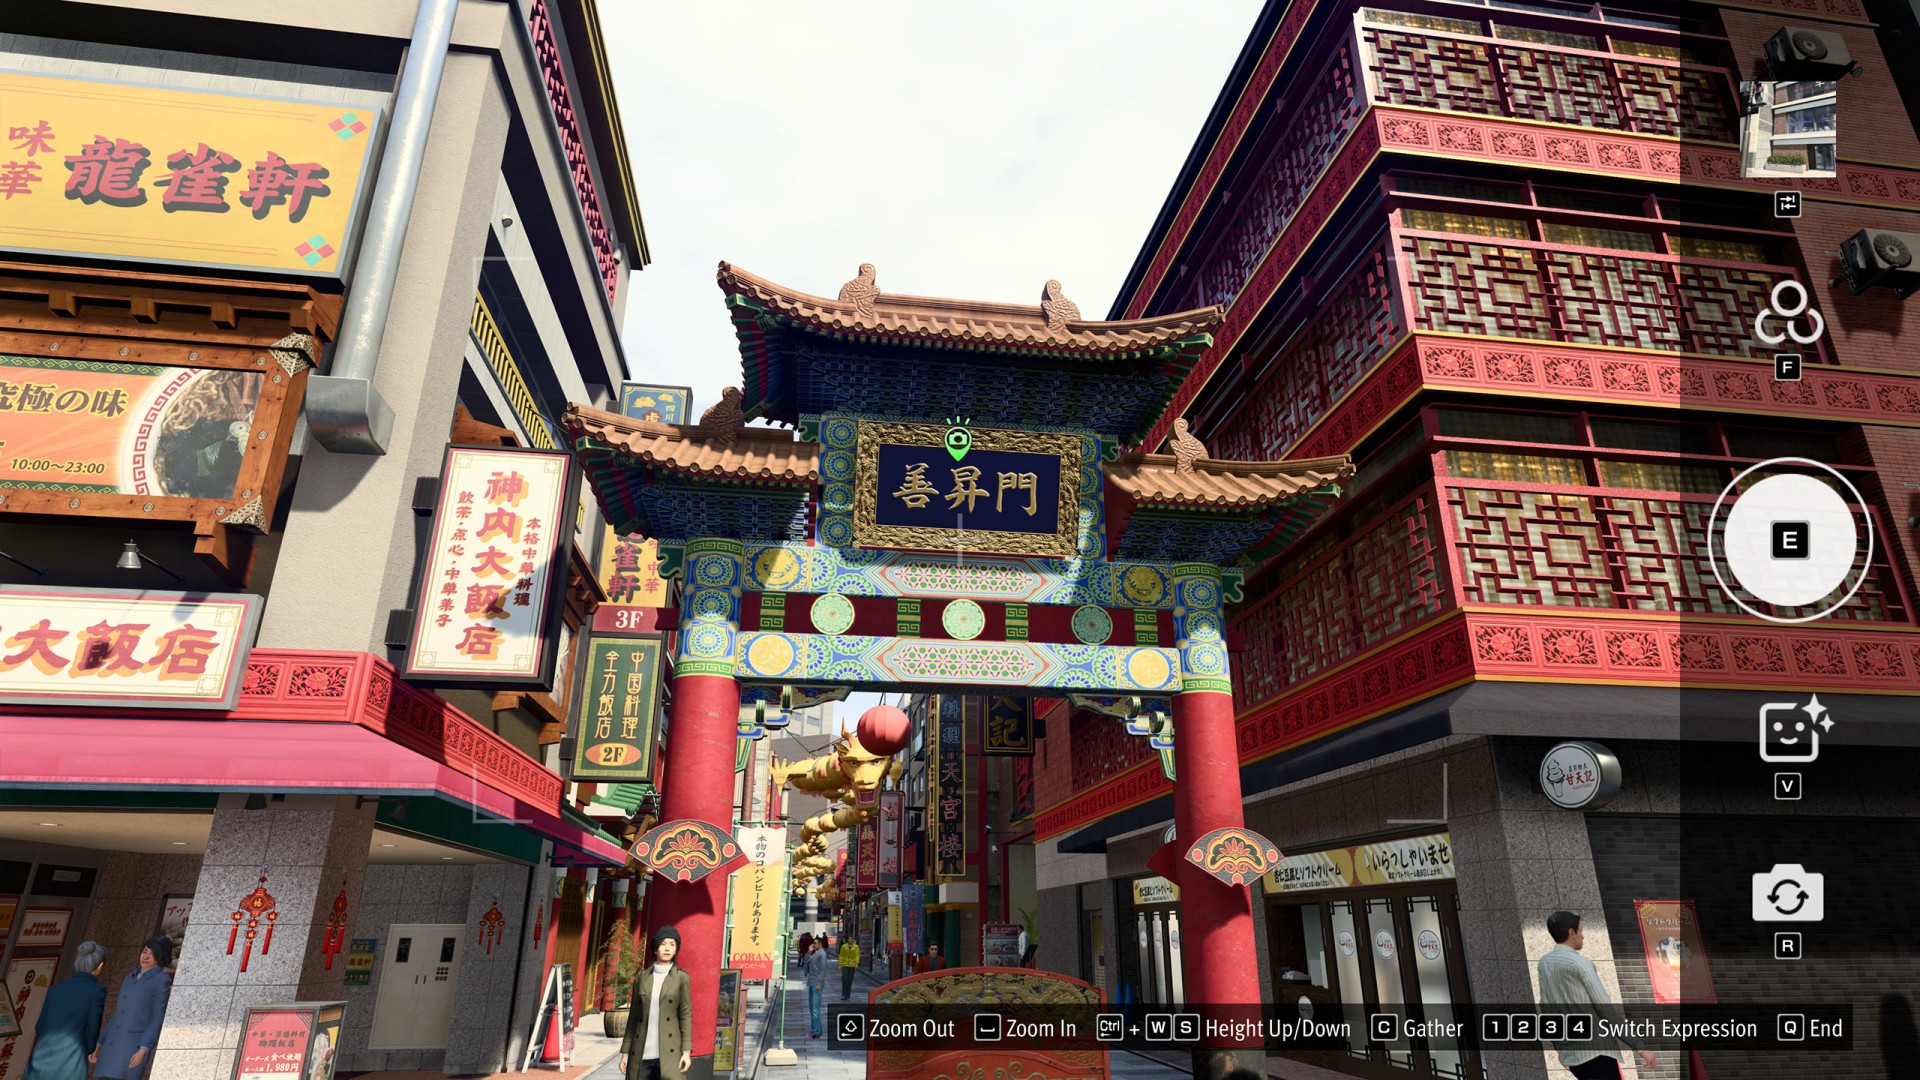
- Uptown #15 (Zenshomon)
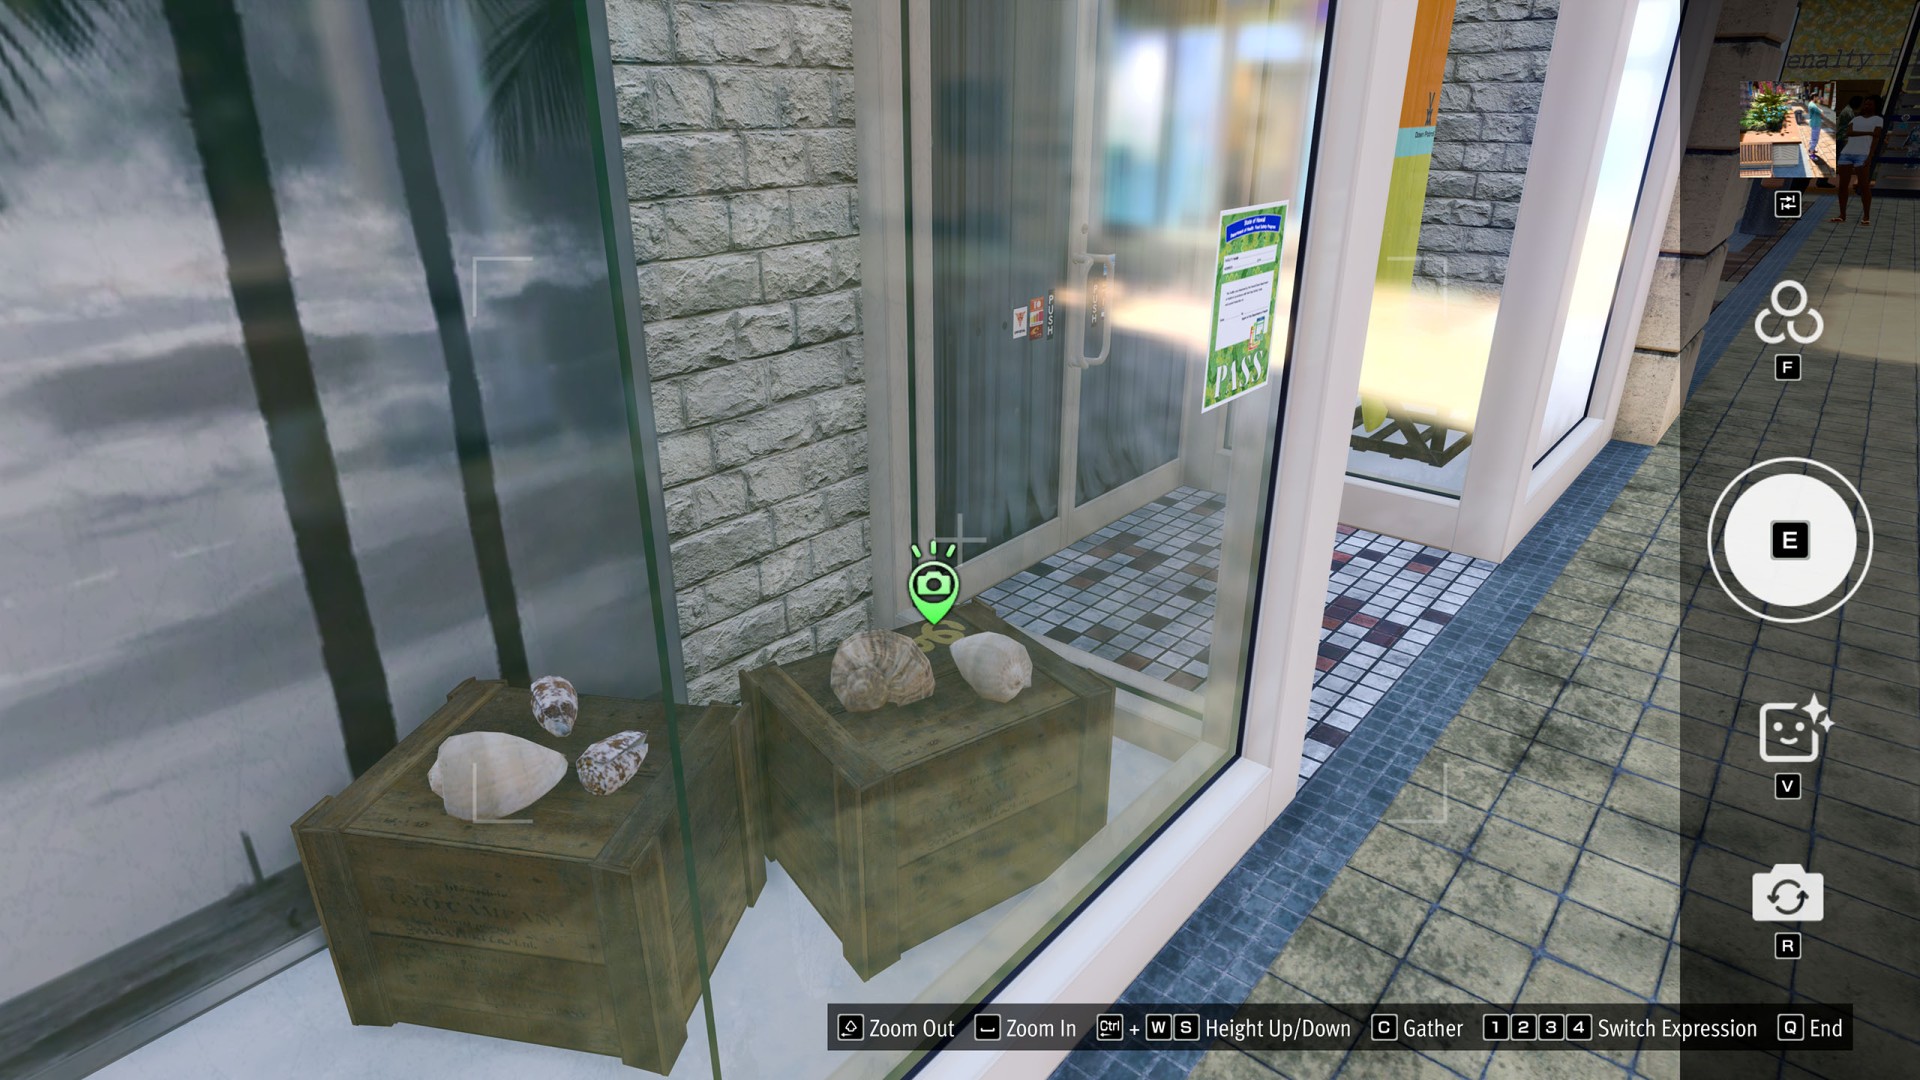
- Waikīki #1 (Seaworthy Treasures)
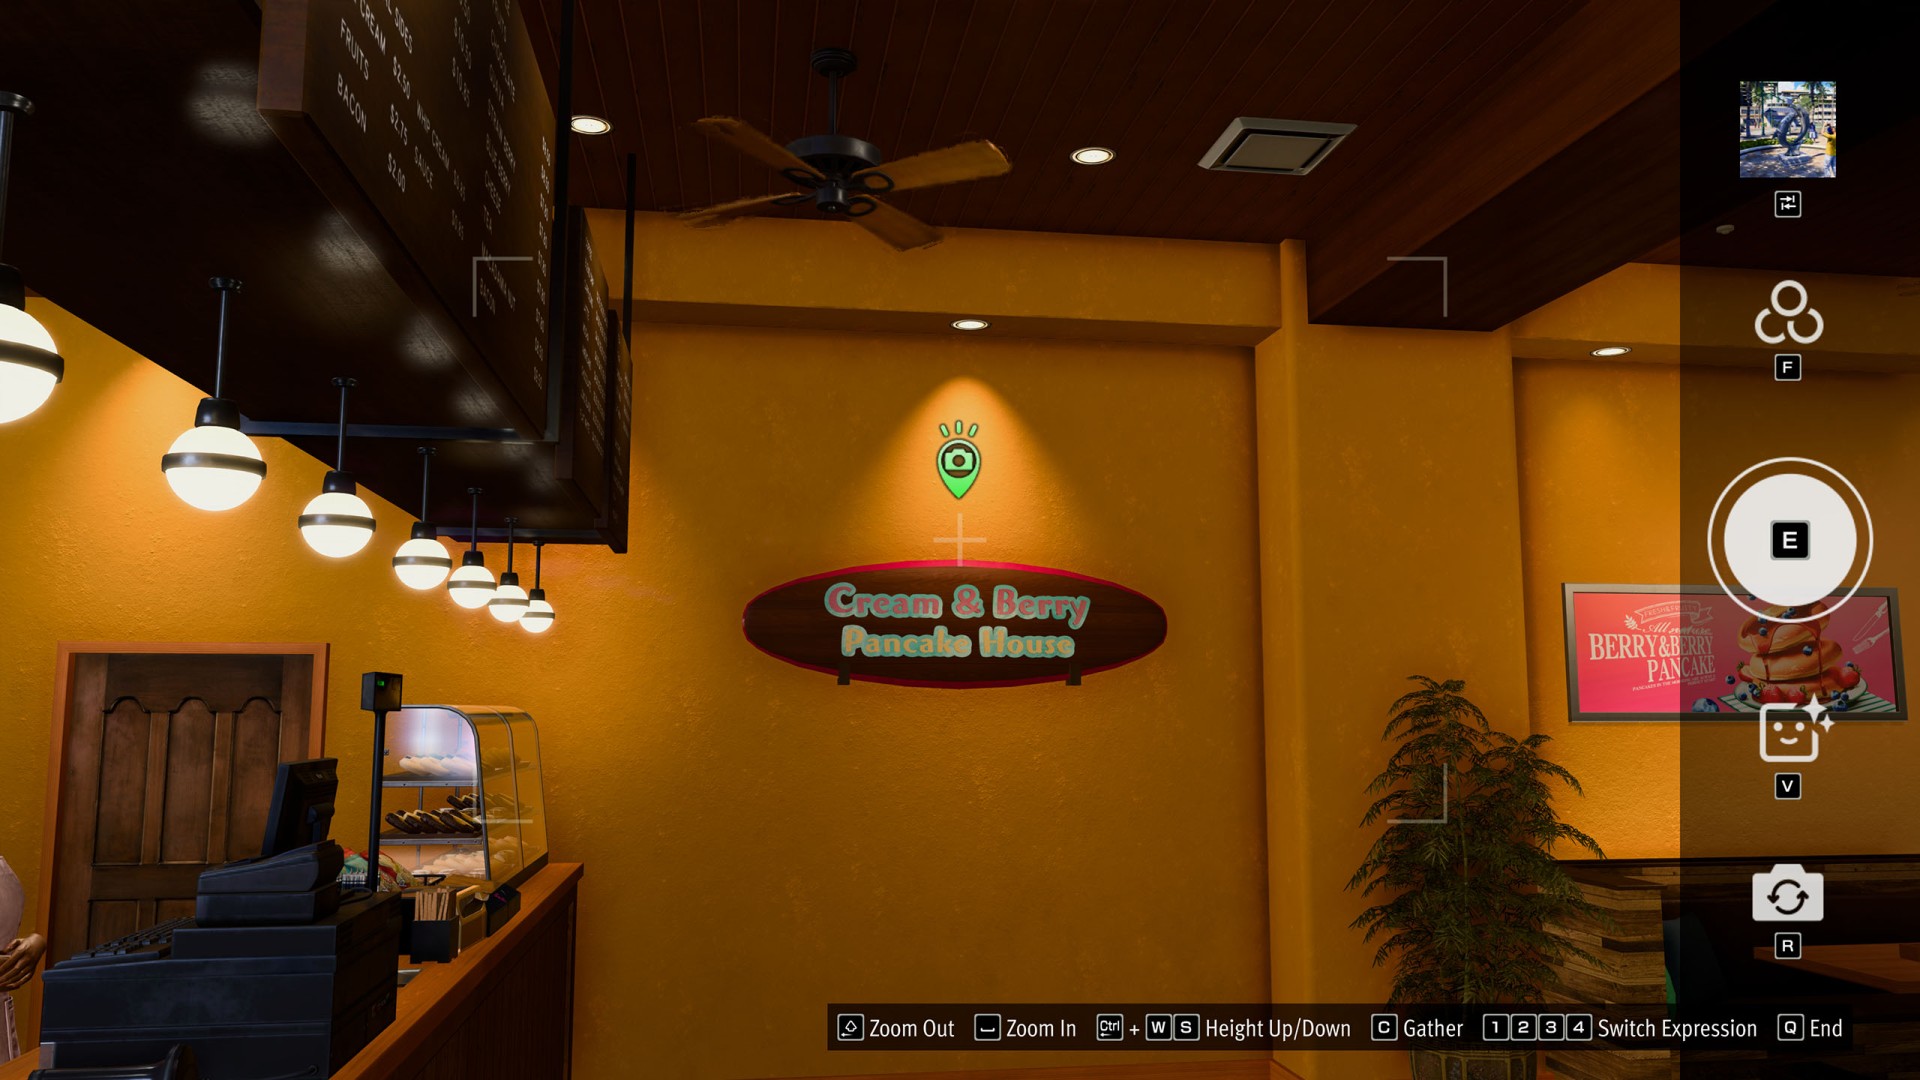
- Waikīki #2 (Cream & Berry)
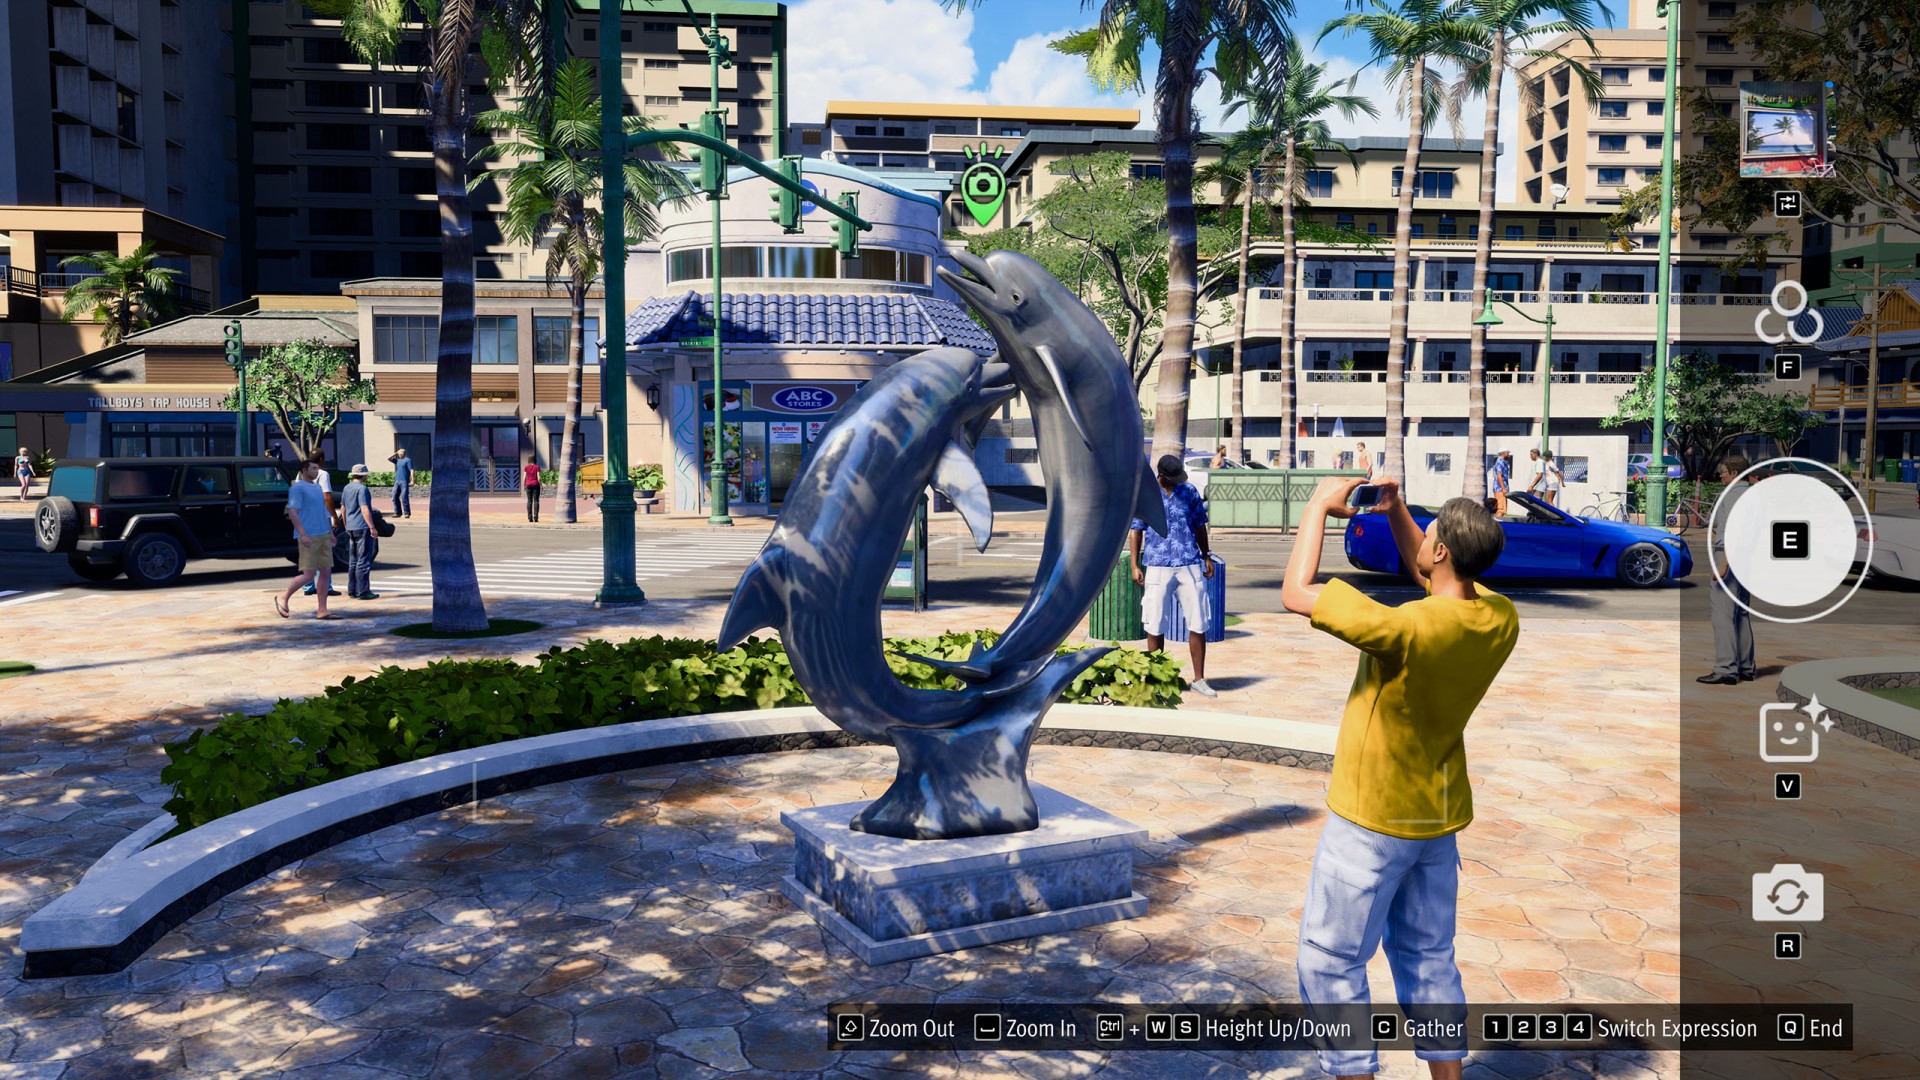
- Waikīki #3 (Dolphin Statue)
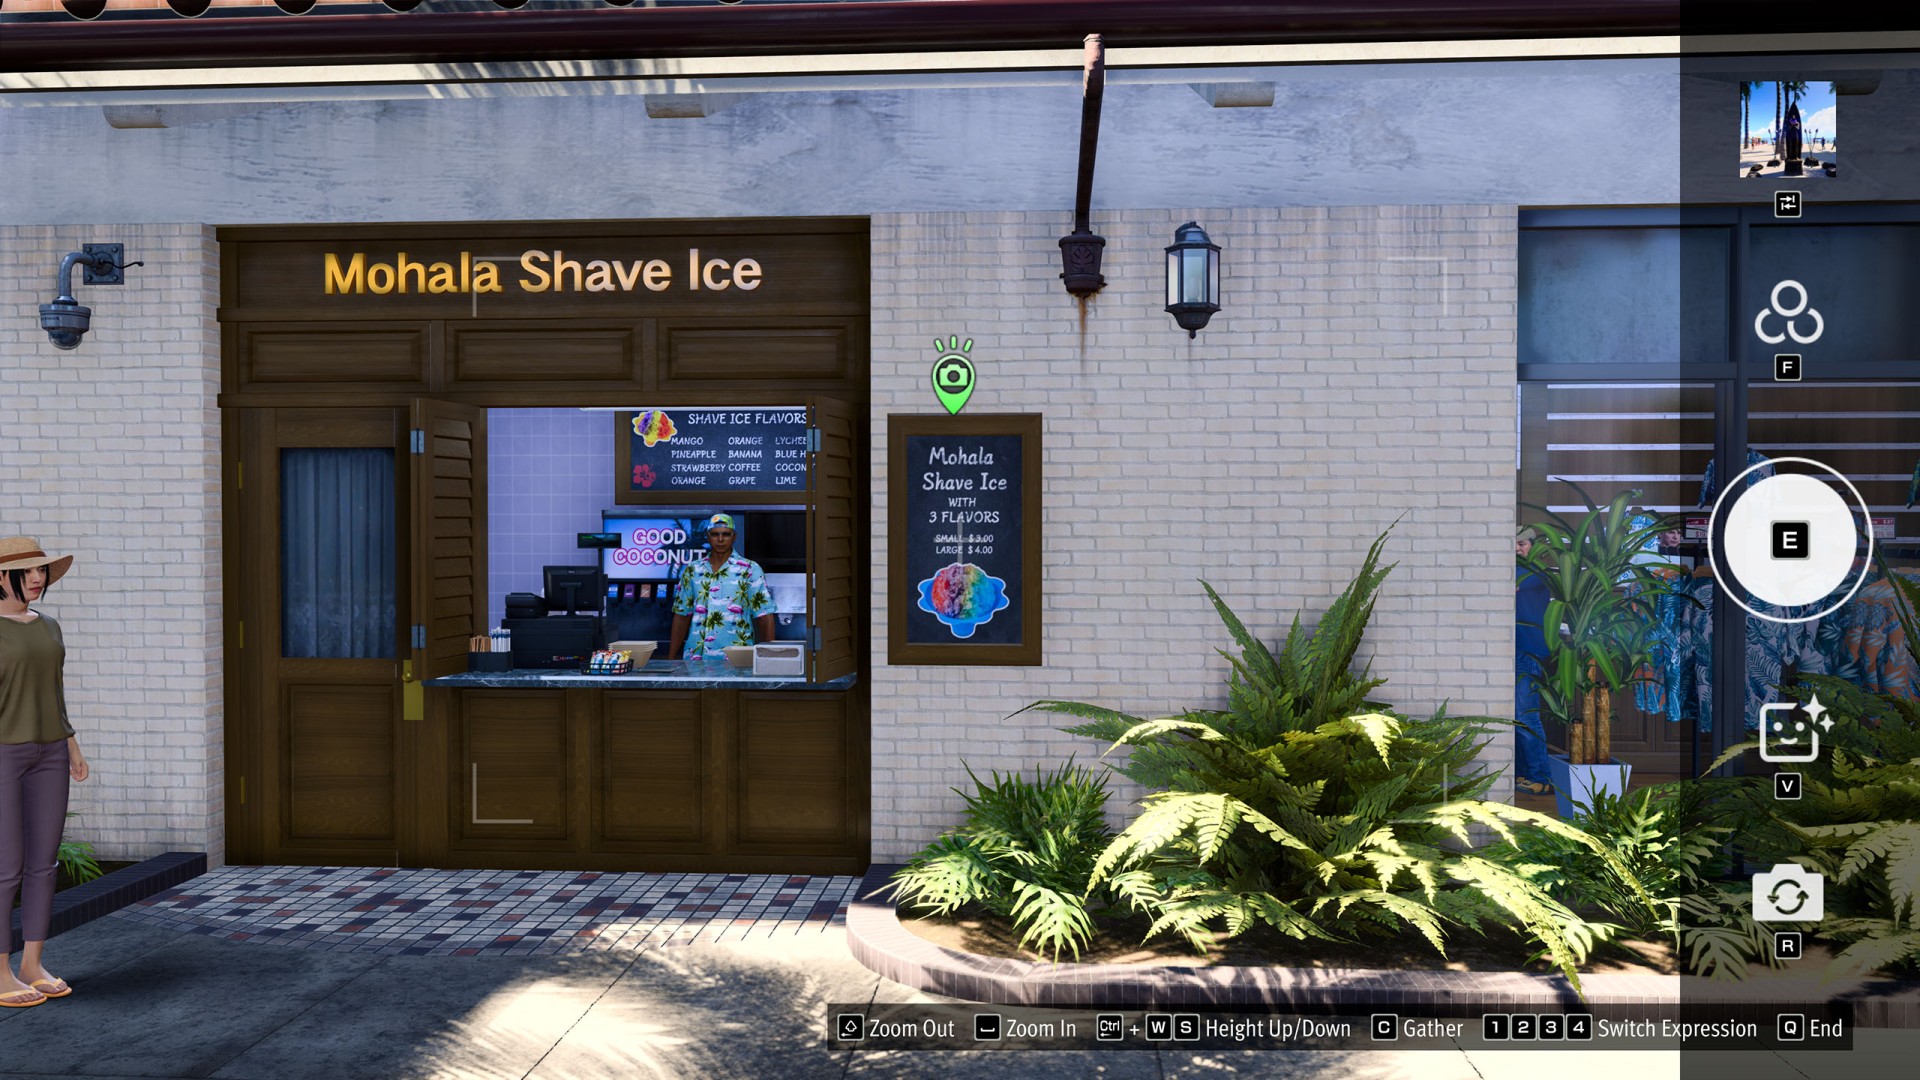
- Waikīkī #4 (Mohala Shave Ice)
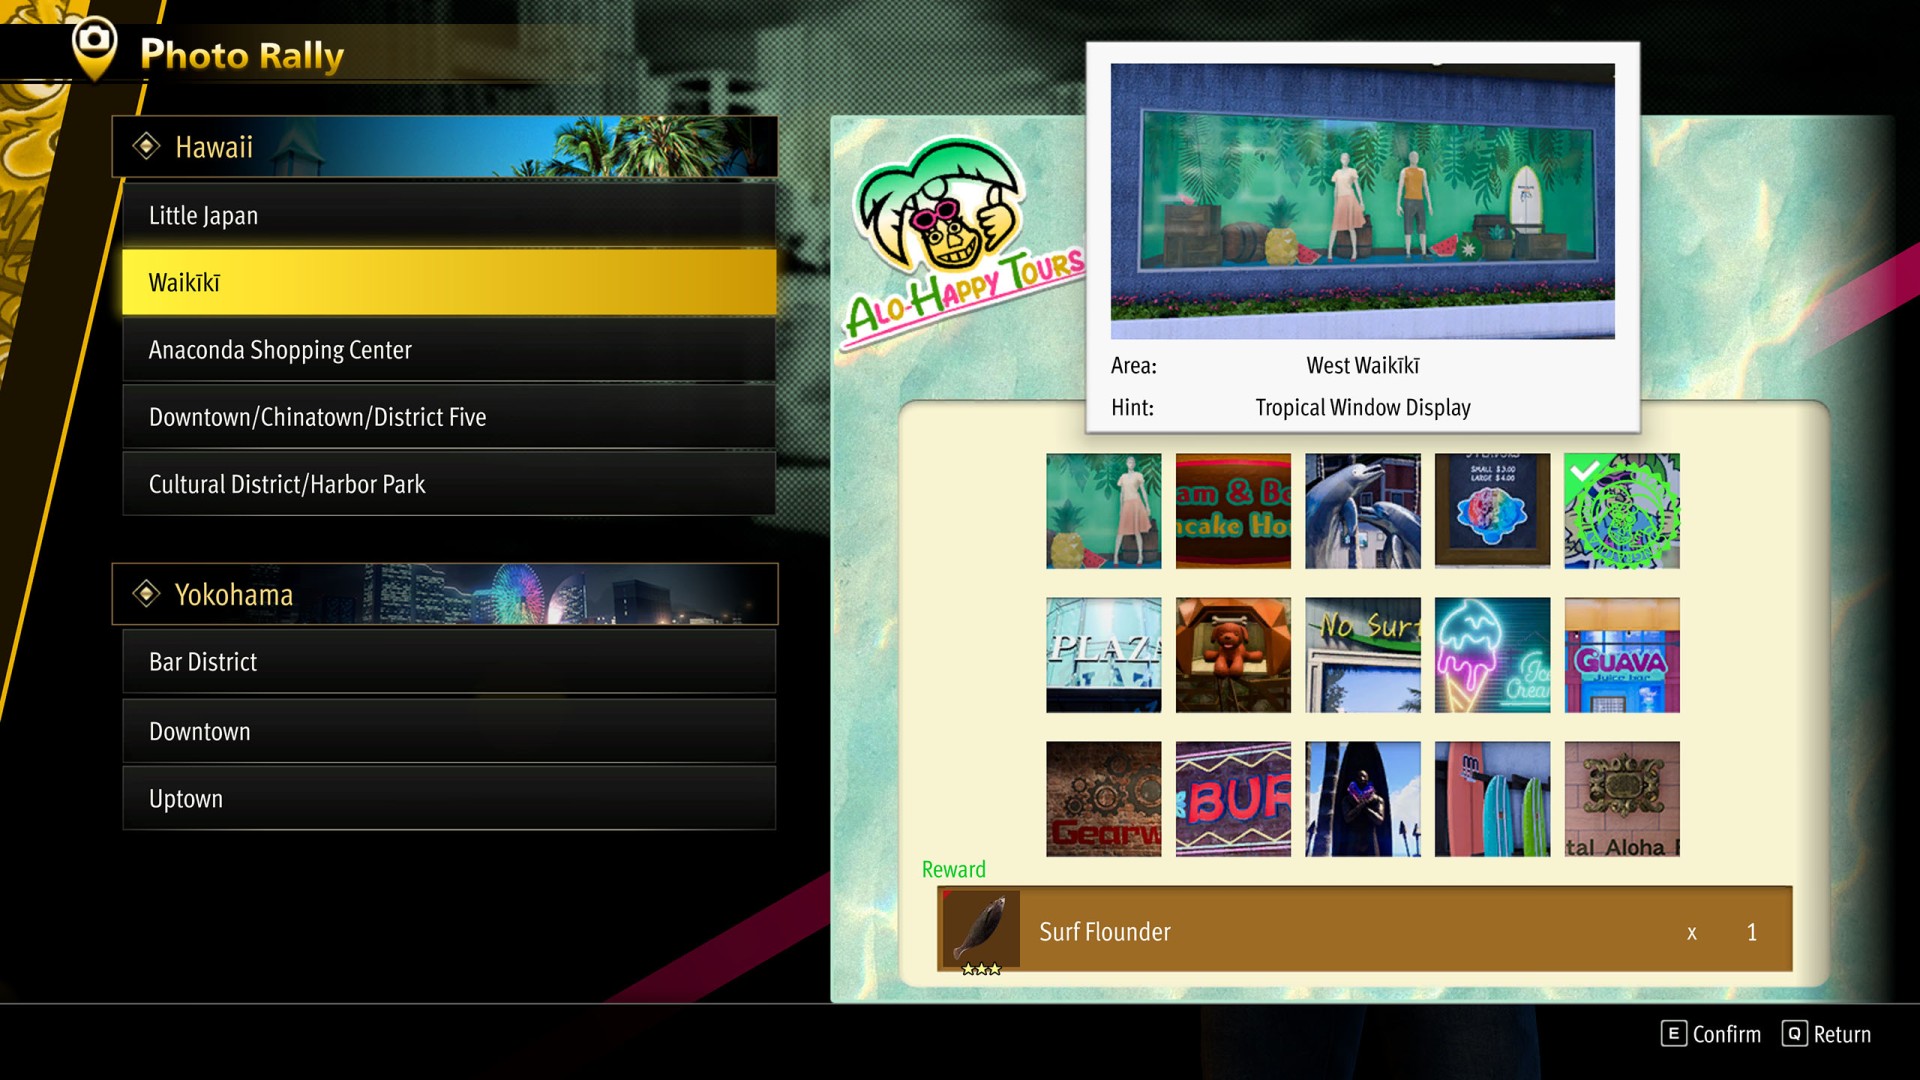
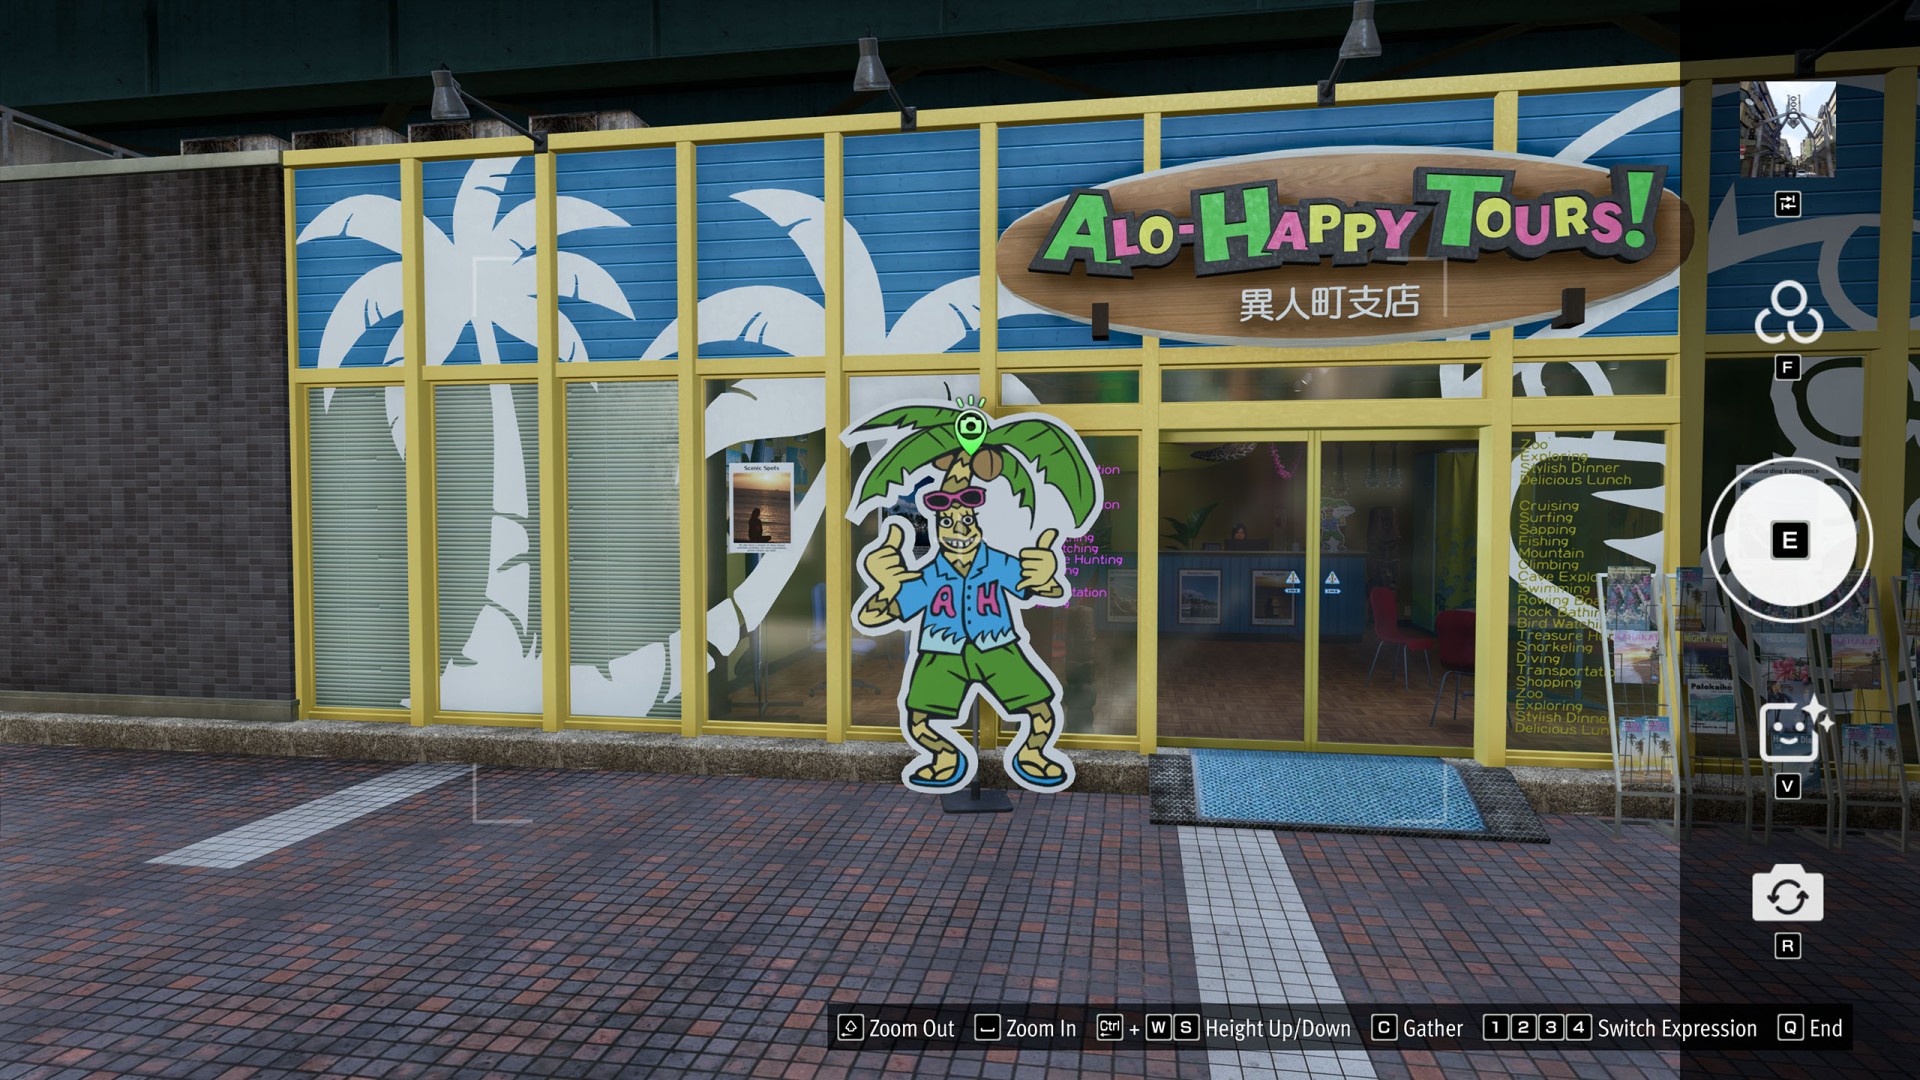
- Waikīkī #5 (Alo-Happy Tours)
- Waikīkī #6 (Hawaii Plaza)
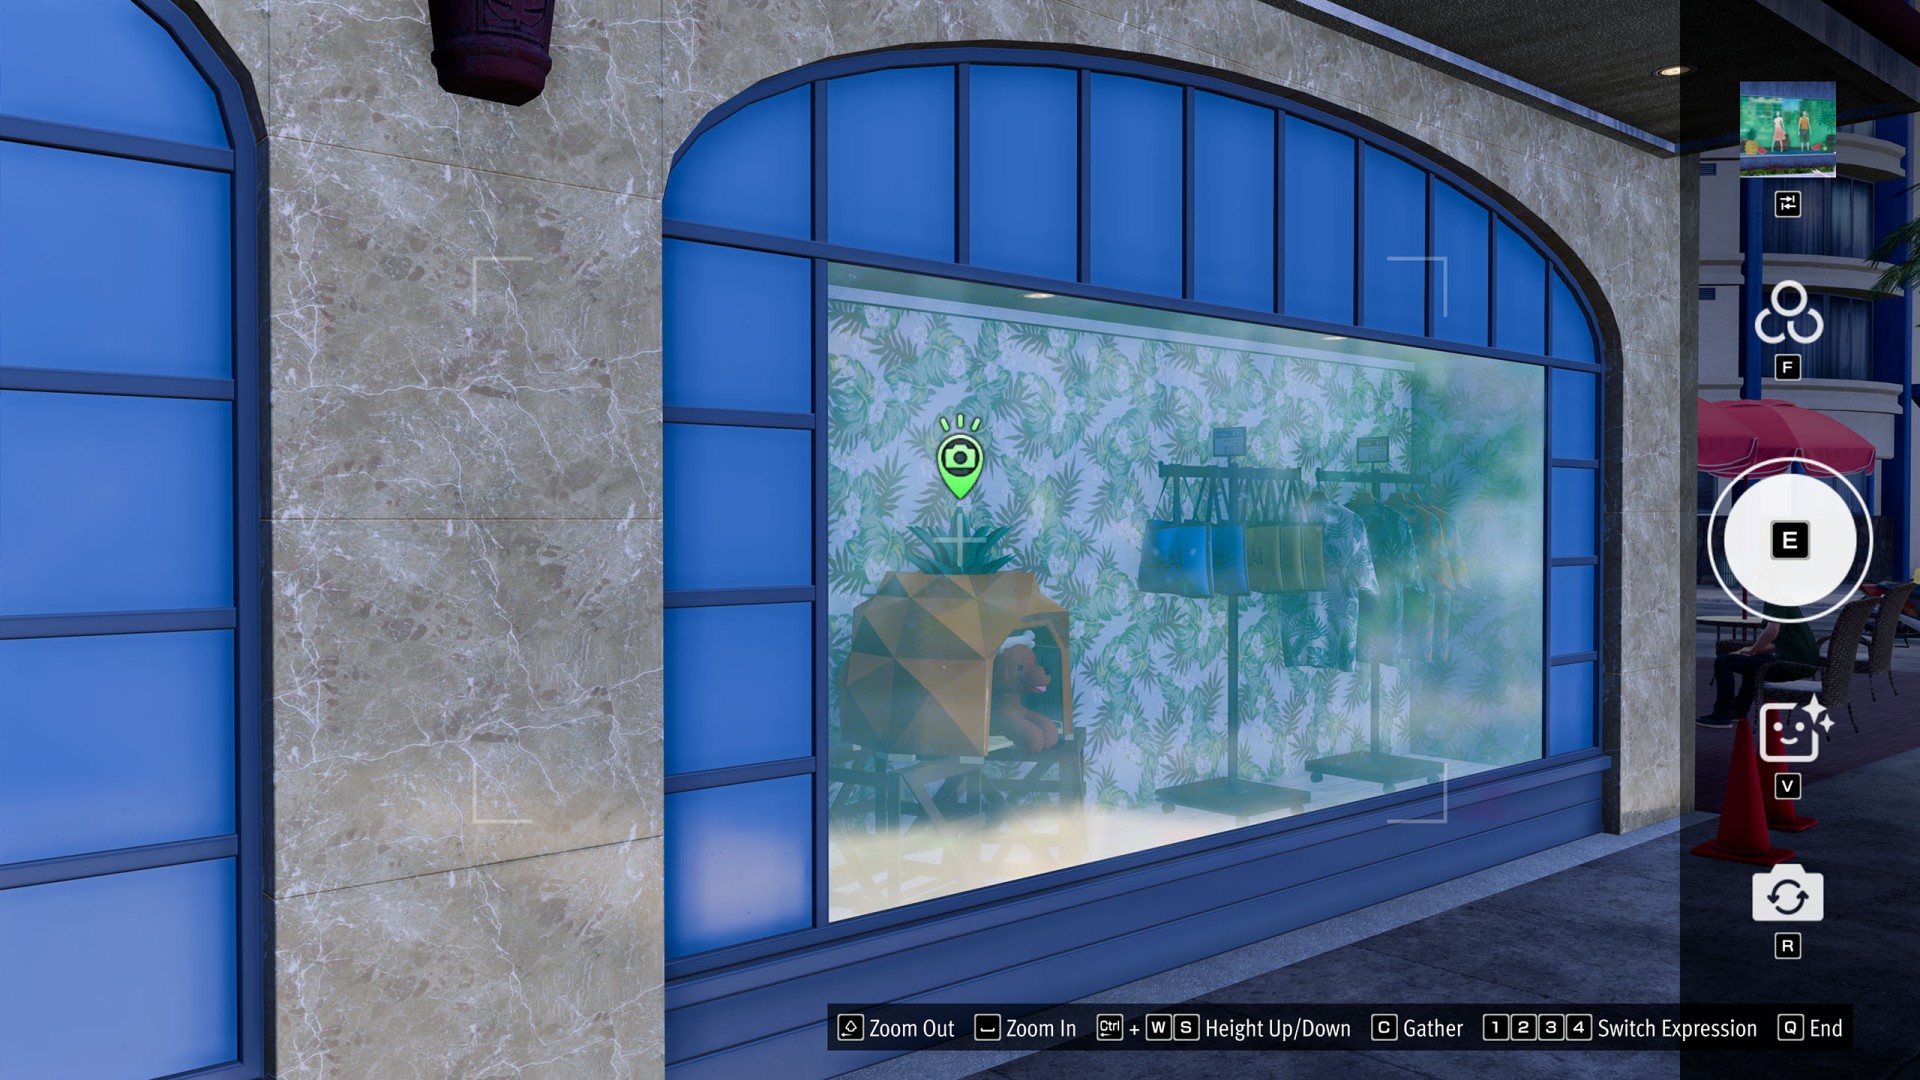
- Waikīki #7 (Pineapple Dog House)
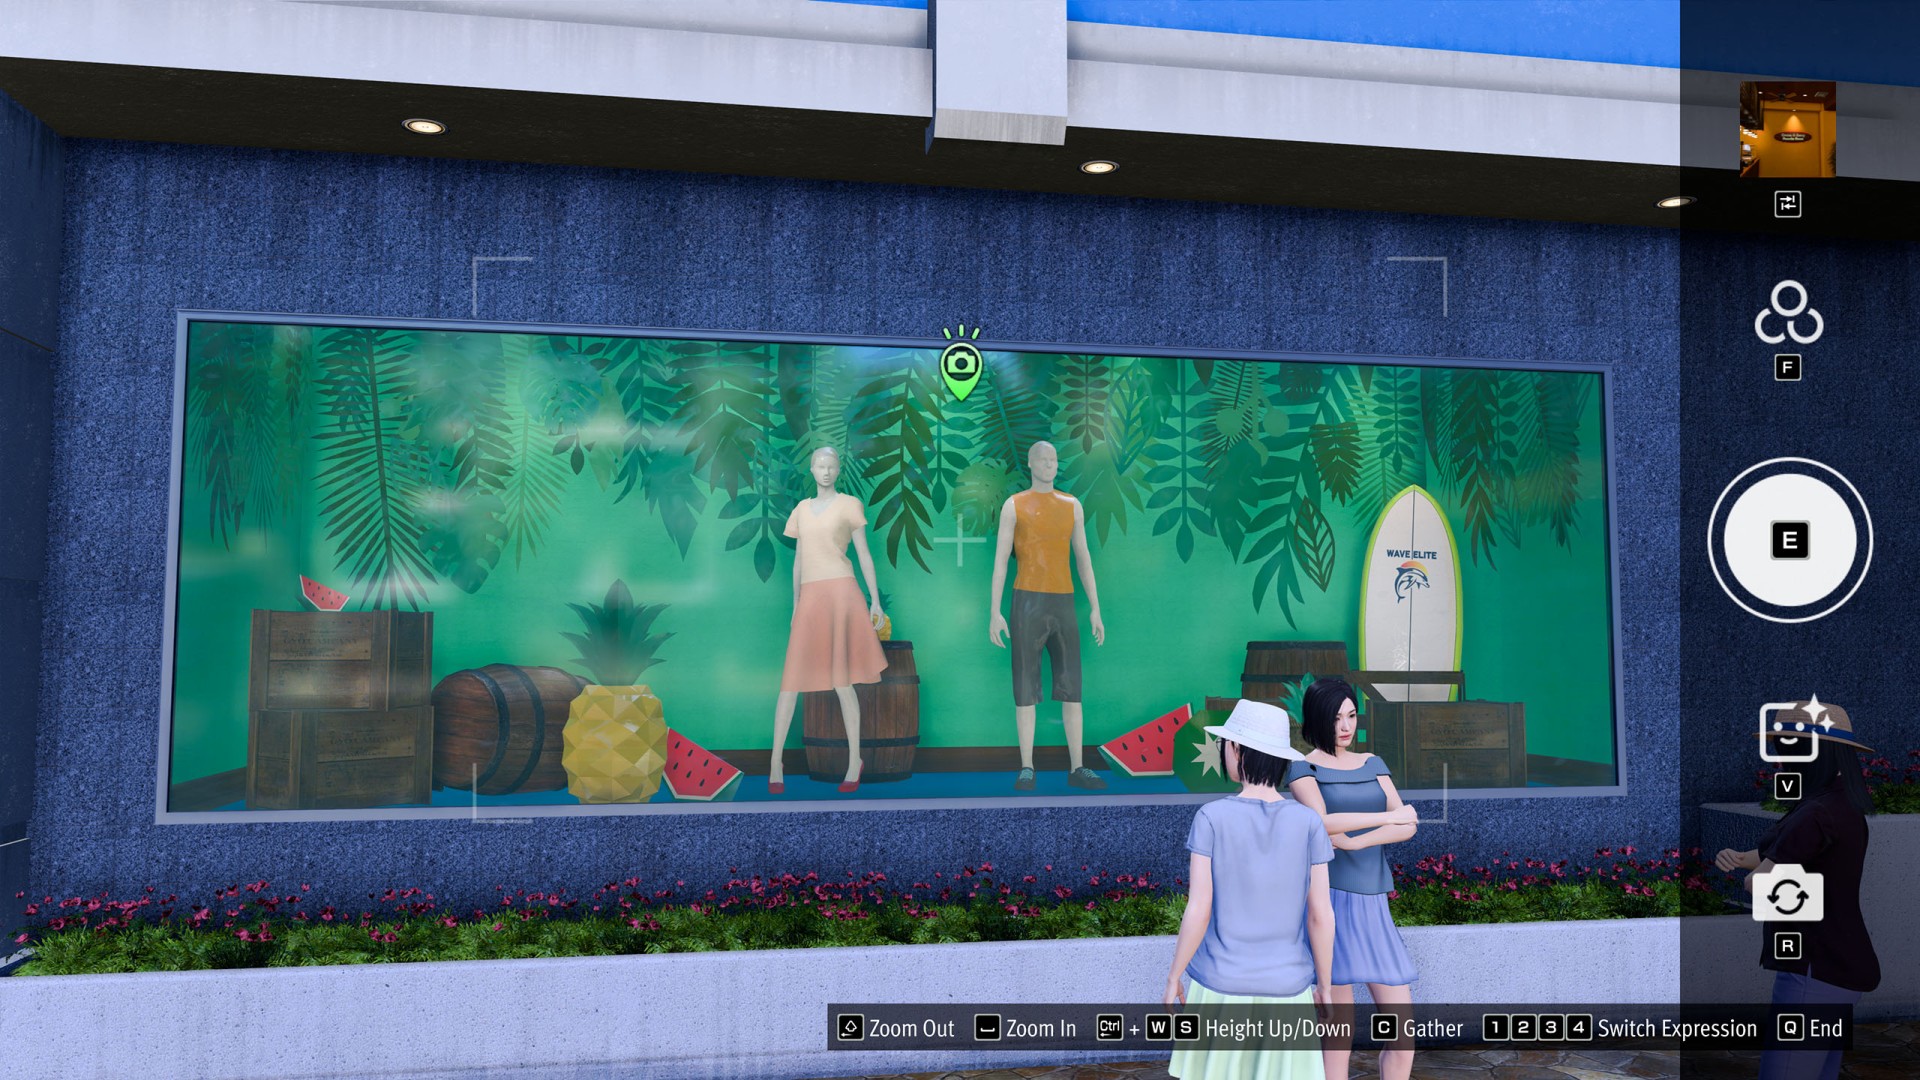
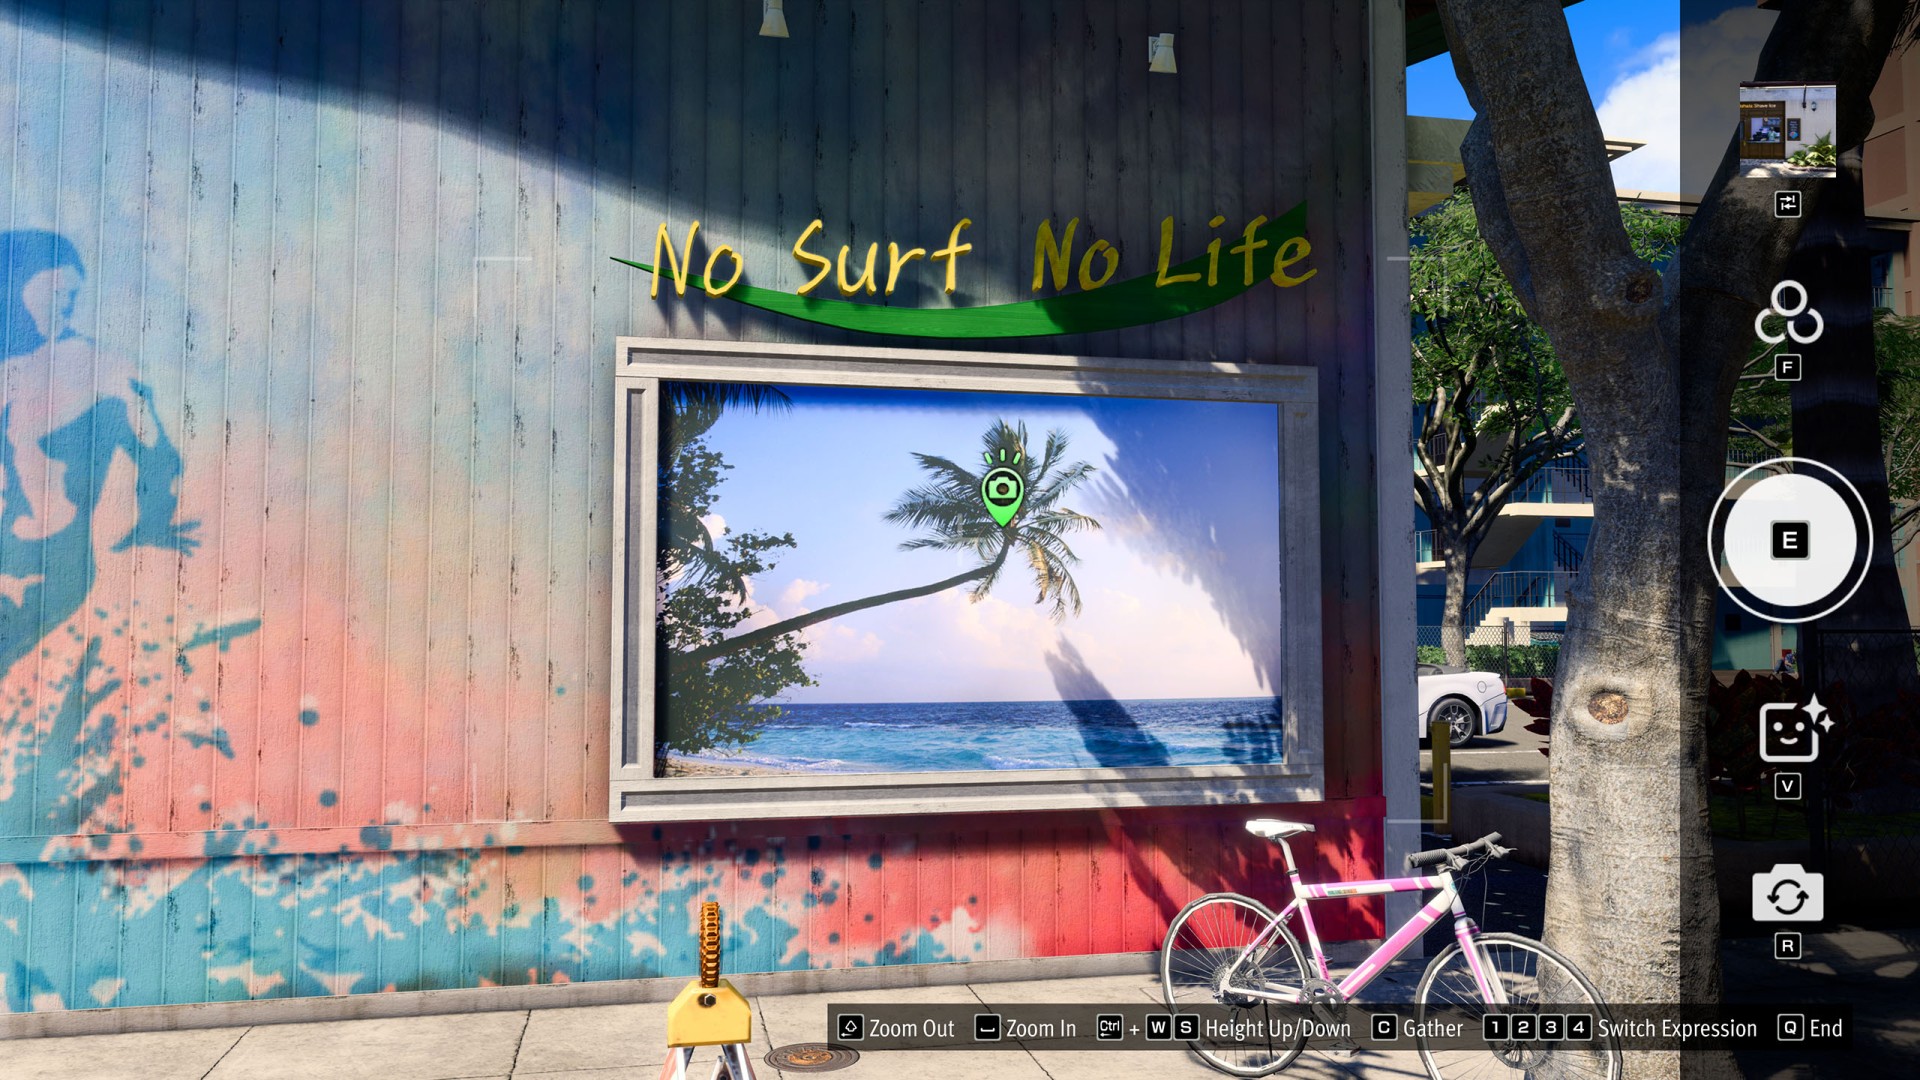
- Waikīkī #8 (No Surf No Life)
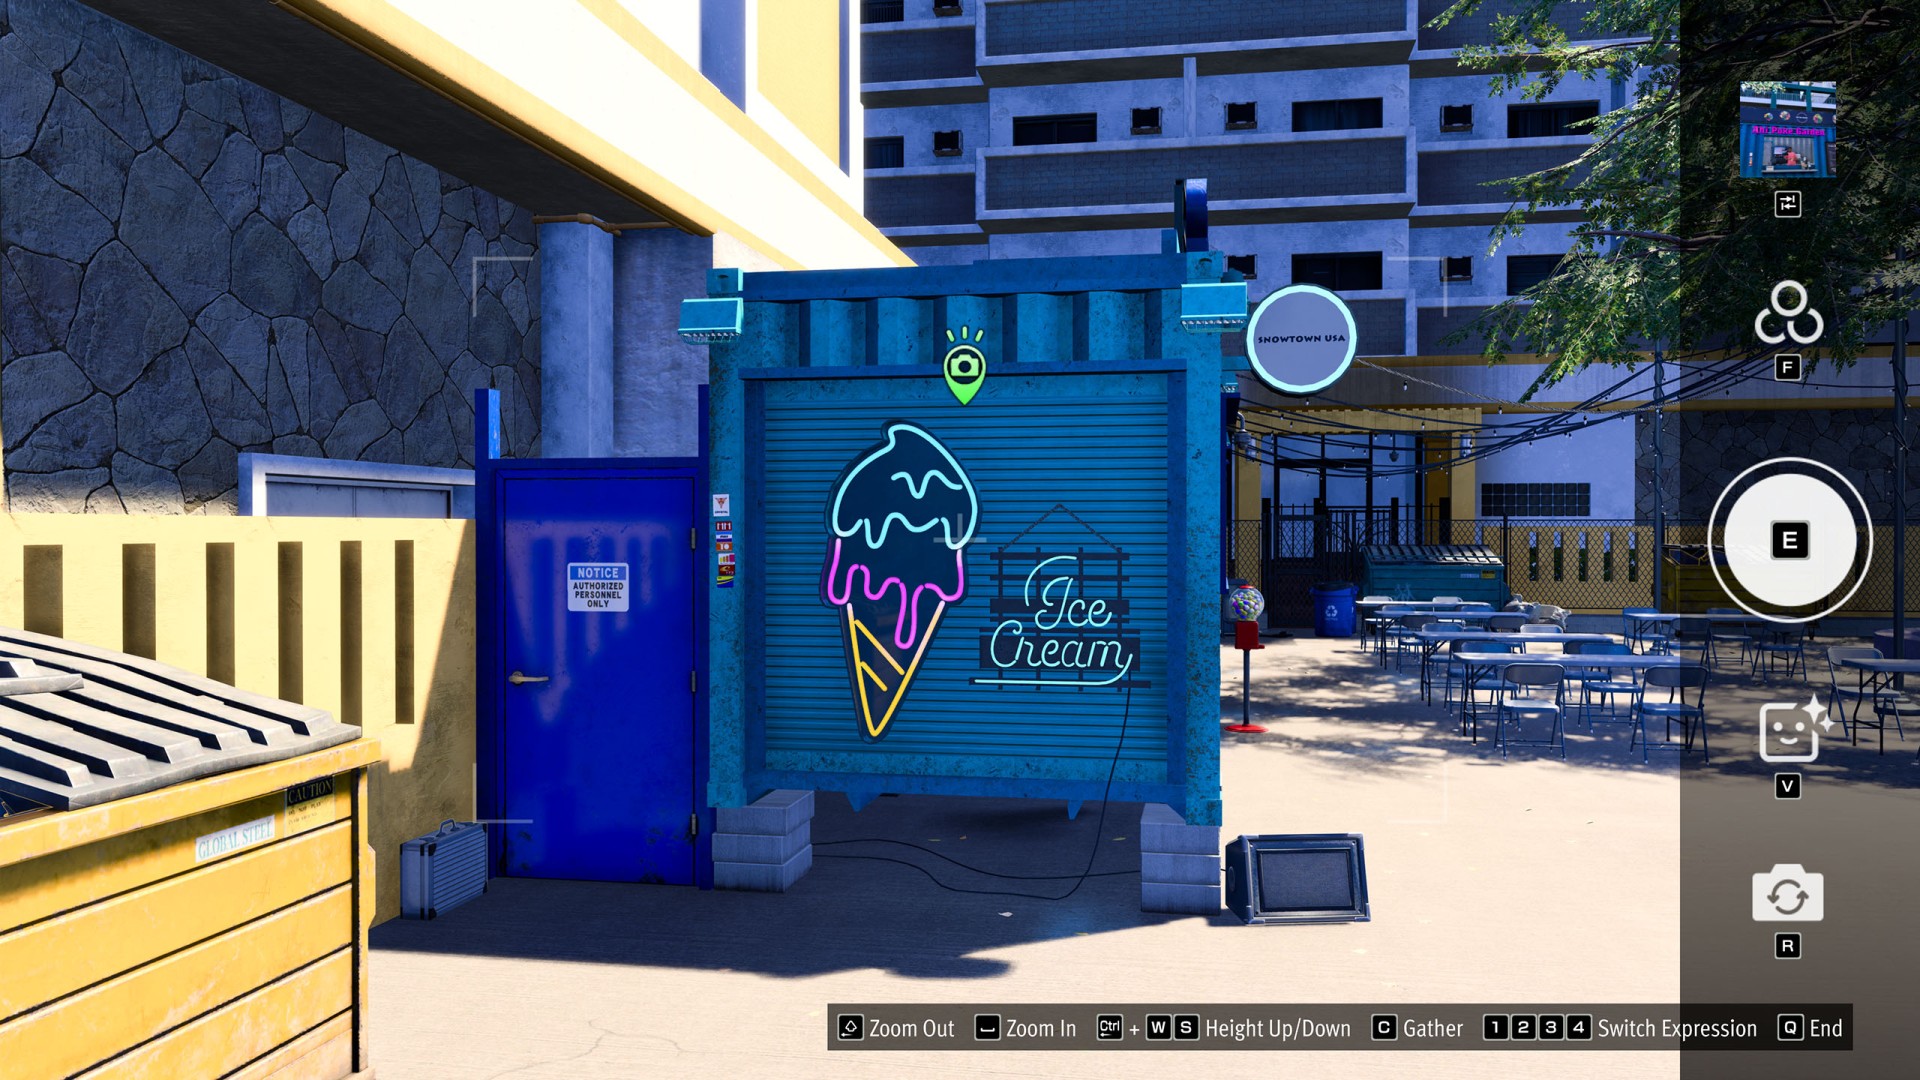
- Waikīkī #9 (Snowtown USA)
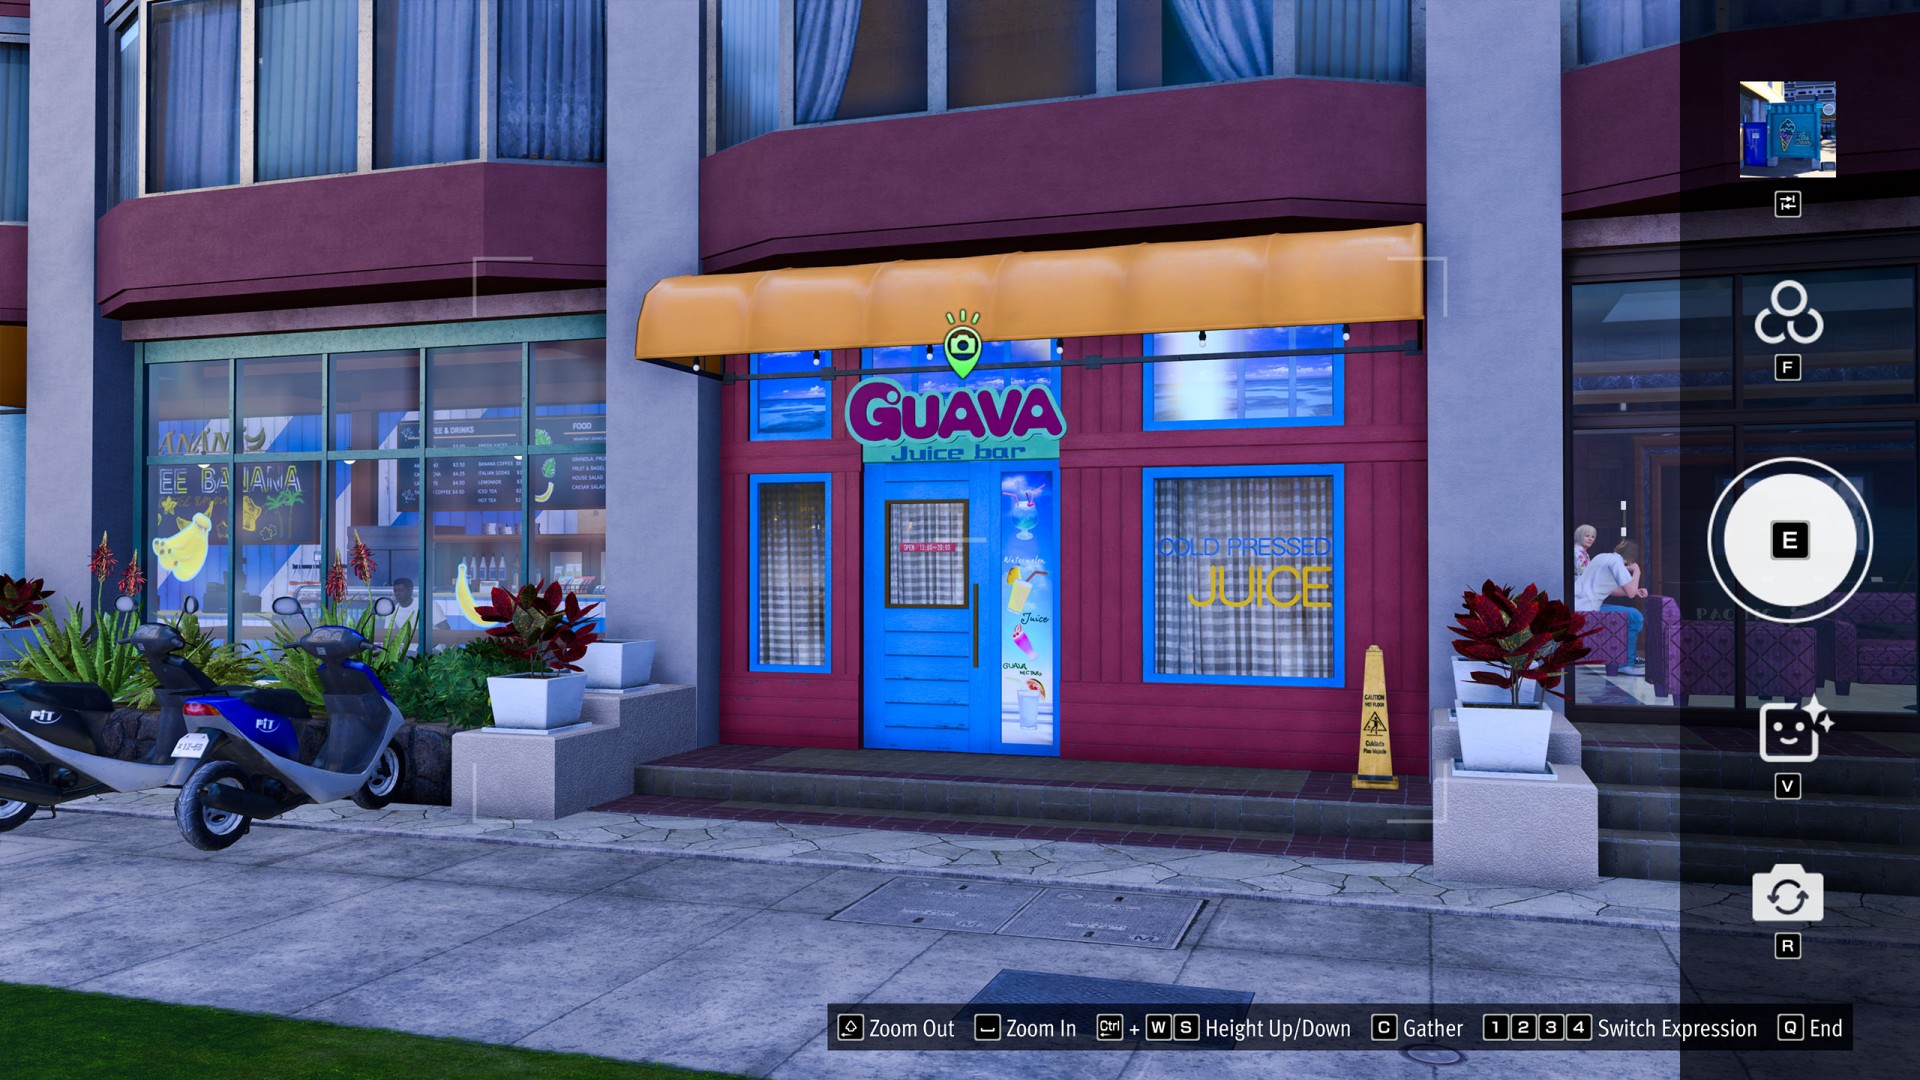
- Waikīkī #10 (Guava Juice Bar)
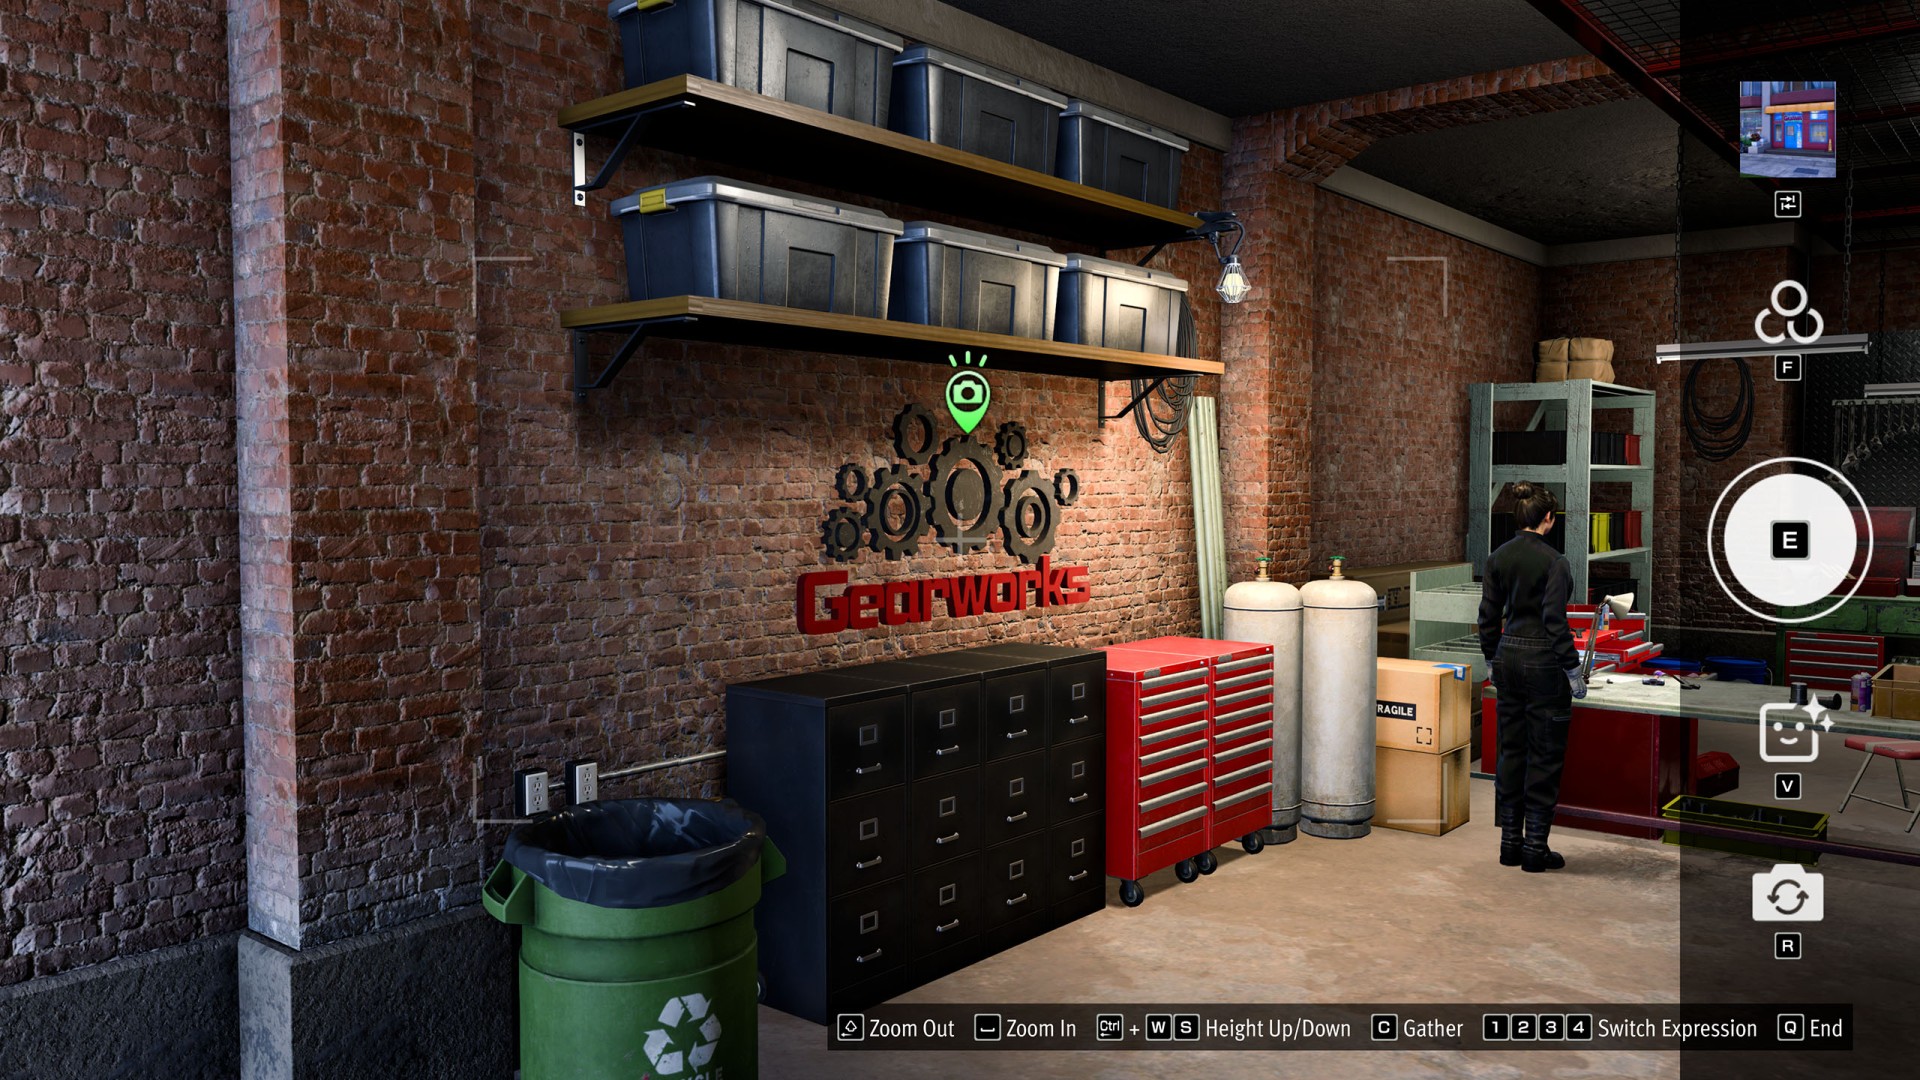
- Waikīkī #11 (Julie's Gearworks)
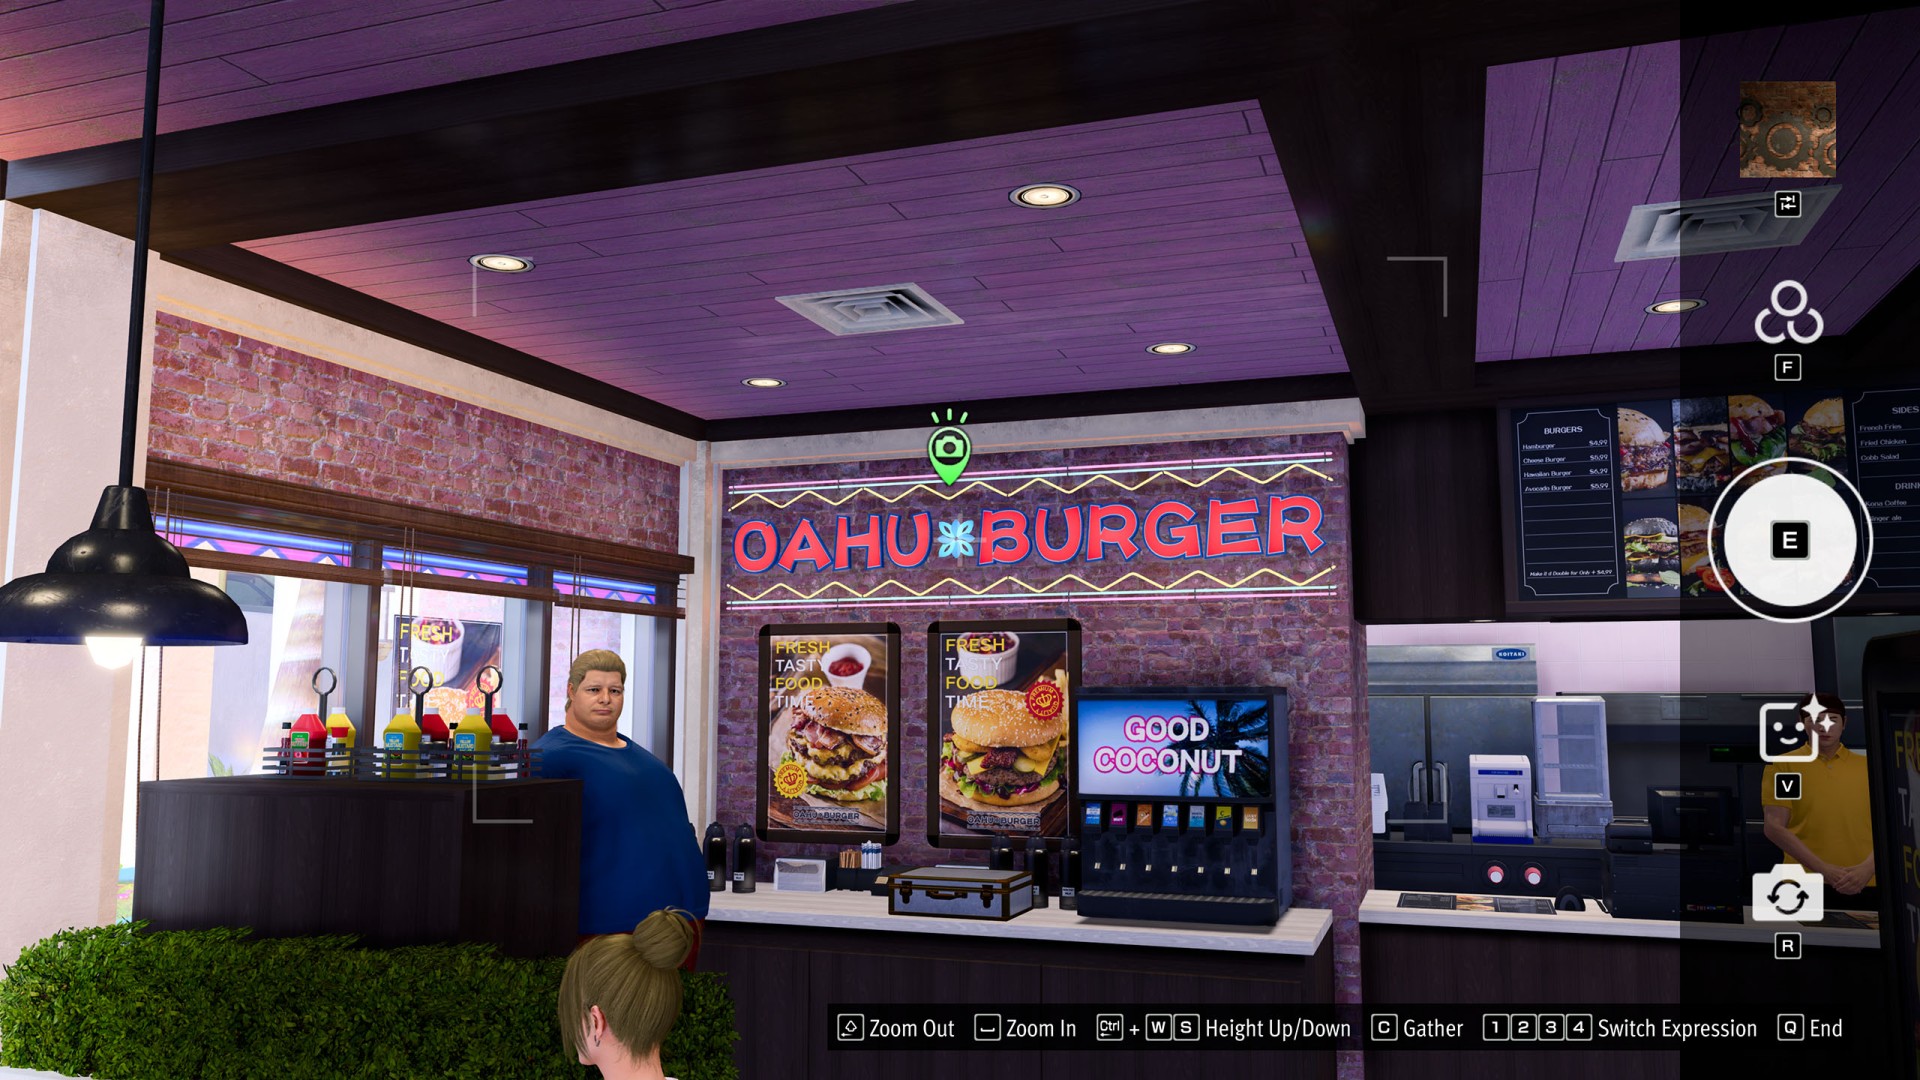
- Waikīkī #12 (Oahu Burger)
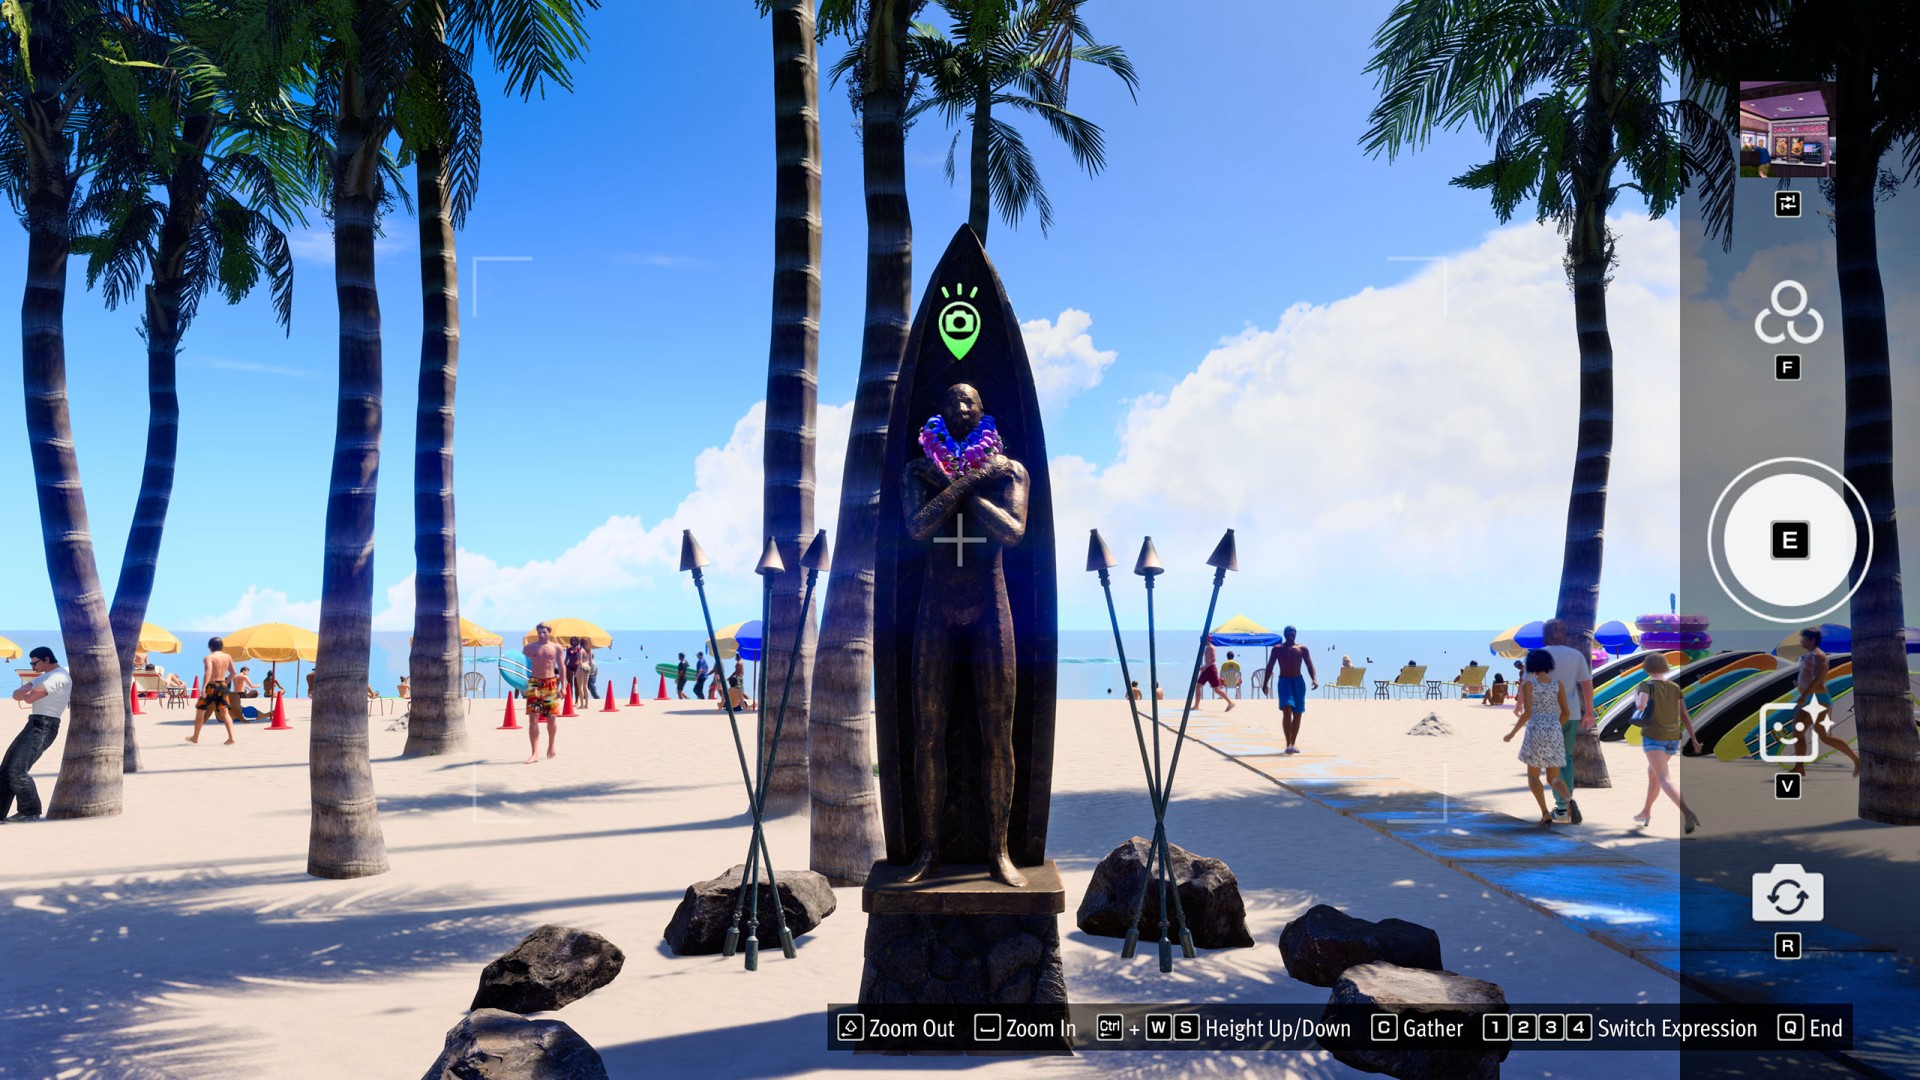
- Waikīkī #13 (Aloha Beach Statue)
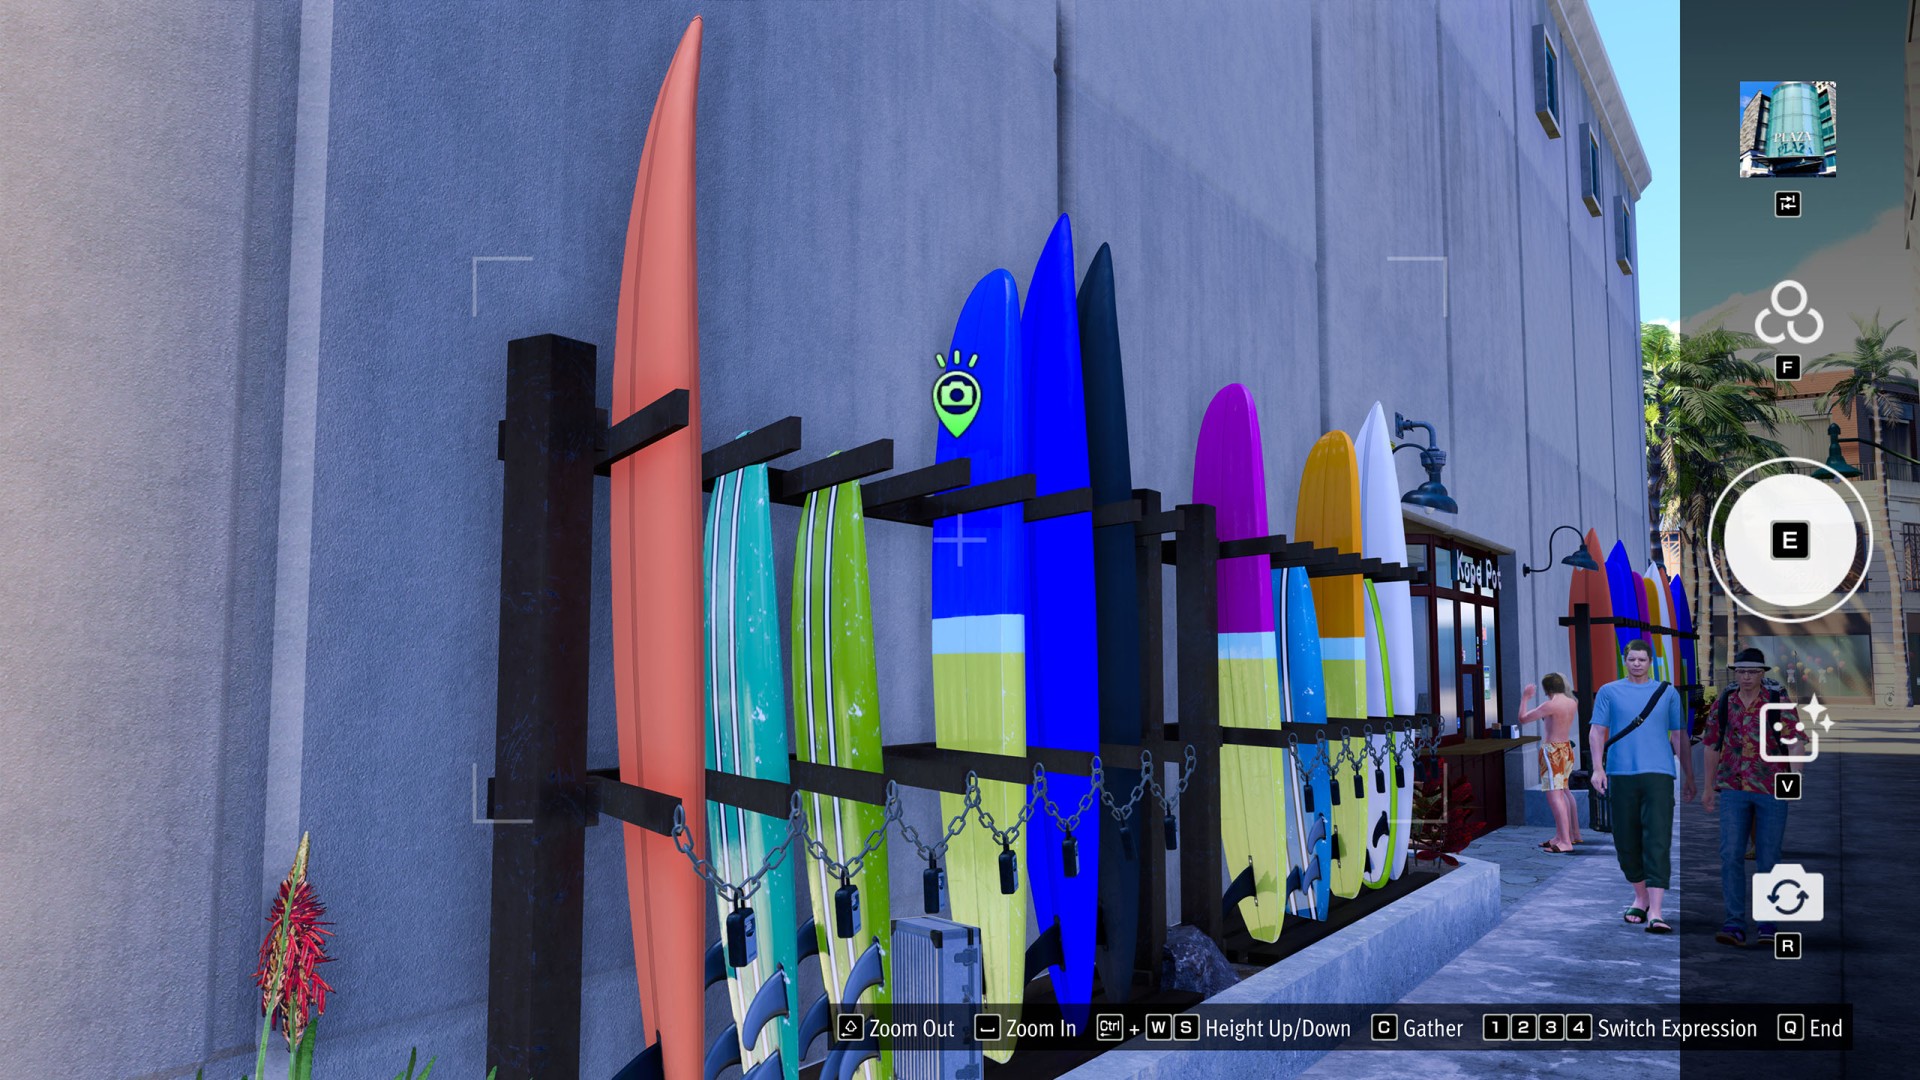
- Waikīkī #14 (Surf Shop Kope Pot)
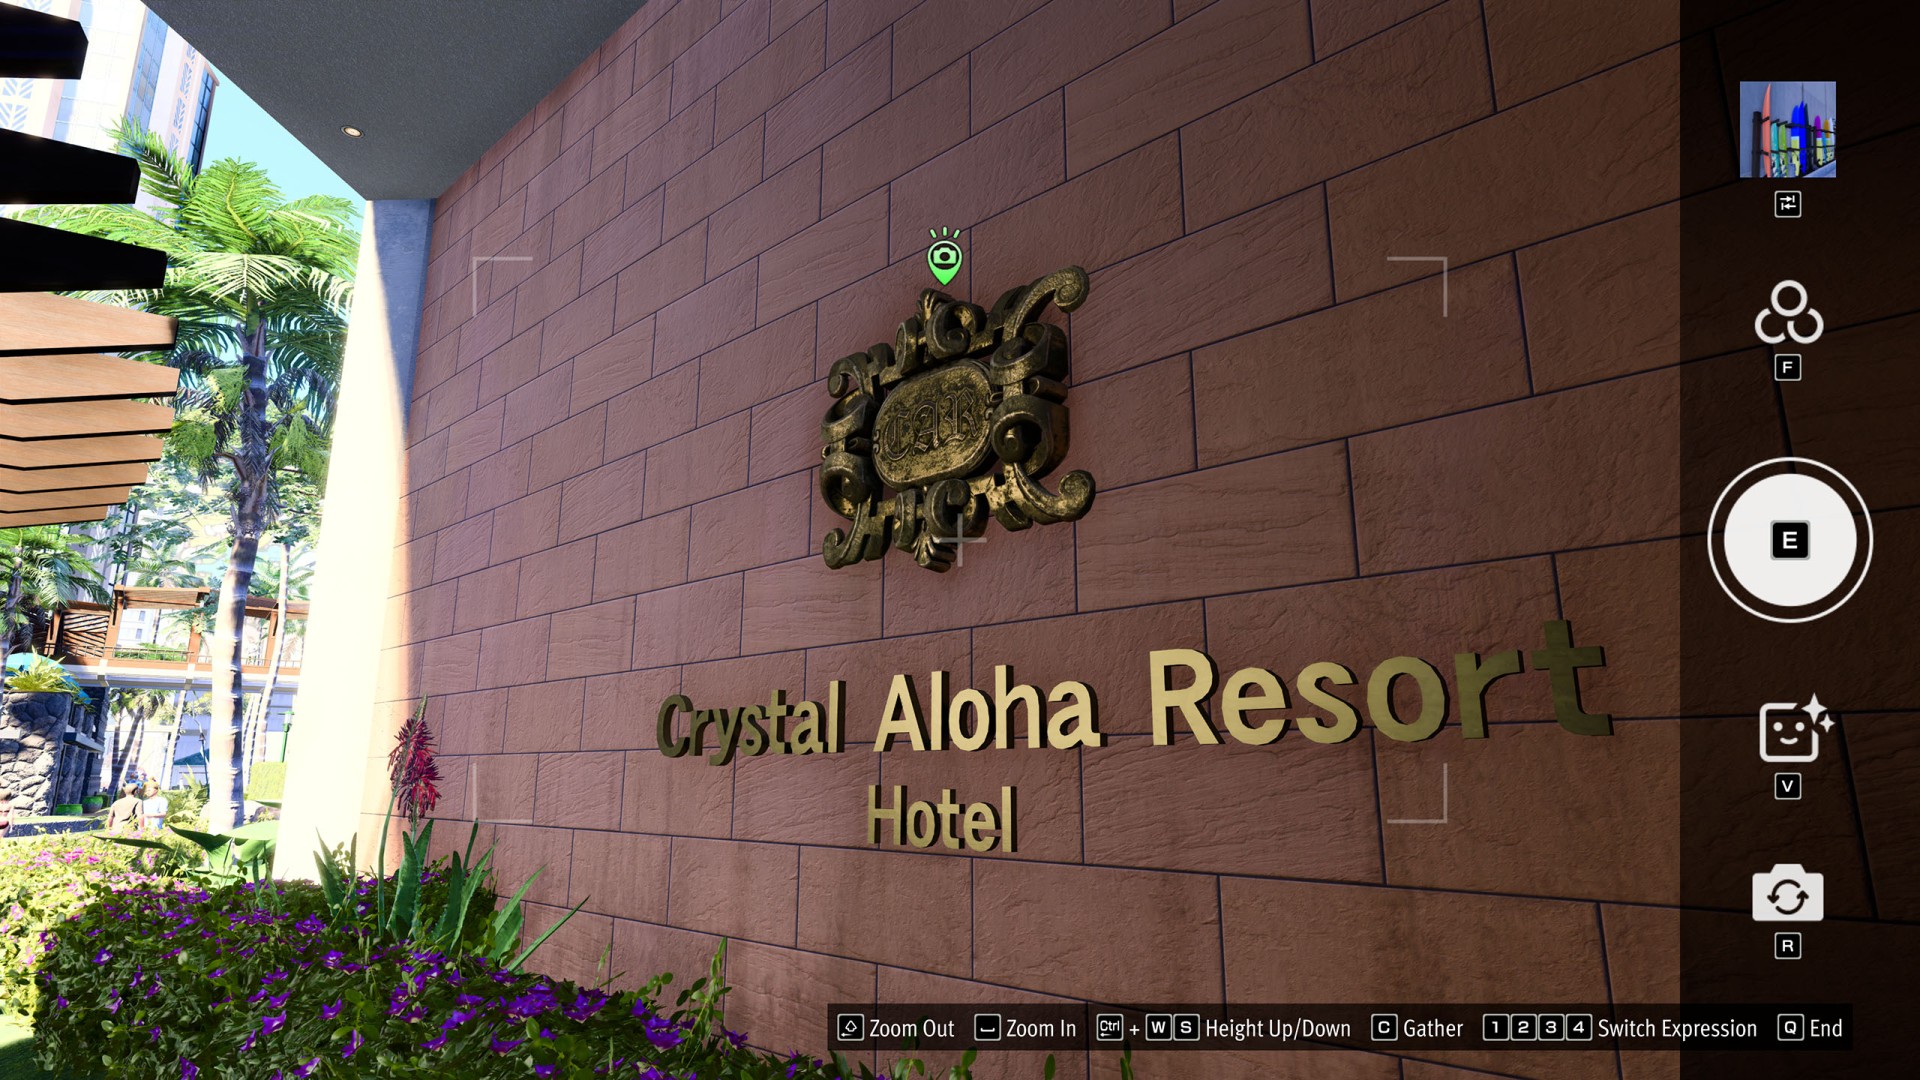
- Waikīkī #15 (Crystal Aloha Resort)
All known locations on the map Isezaki Ijincho
 Bar District #1 (Ichiban Confections)▶ show the map ◀
Bar District #2 (Leda)▶ show the map ◀
Bar District #3 (Hustle Boutique)▶ show the map ◀
Bar District #4 (Music Café Mother)▶ show the map ◀
Bar District #5 (Survive Bar)▶ show the map ◀
Bar District #6 (Ginsharin)▶ show the map ◀
Bar District #7 (Animal Mania)▶ show the map ◀
Bar District #8 (Akebi Capsule Hotel)▶ show the map ◀
Bar District #9 (Izakaya Yamaimo)▶ show the map ◀
Bar District #10 (Mansaku Tokiwa Fortunetelling)▶ show the map ◀
Downtown #1 (Private Sauna Shin Sen Kan)▶ show the map ◀

Downtown #2 (Toku)▶ show the map ◀
Downtown #3 (Kushikatsu Kadoya)▶ show the map ◀
Downtown #4 (Julie's Gearworks (Japan))▶ show the map ◀
Downtown #5 (Takiyama's Photos)▶ show the map ◀
Downtown #6 (Hello Work)▶ show the map ◀
Downtown #7 (Goblin Coffee)▶ show the map ◀
Downtown #8 (Fairytale Pink Rabbit)▶ show the map ◀
Downtown #9 (Ryusei Stage Theater Rooftop)▶ show the map ◀
Downtown #10 (Seagull Cinema)▶ show the map ◀
Downtown #11 (Hotel Bunny's)▶ show the map ◀
Downtown #12 (Revenge Books)▶ show the map ◀
Downtown #13 (Old Mountain)▶ show the map ◀
Downtown #14 (Wette Kitchen Dinosaur)▶ show the map ◀
Downtown #15 (Isezaki Road)▶ show the map ◀
Uptown #1 (Seiryo High School Gates)▶ show the map ◀

Uptown #2 (Heaven's Golf)▶ show the map ◀
Uptown #3 (5-6 Motorcycles)▶ show the map ◀
Uptown #4 (Jinnai Station)▶ show the map ◀
Uptown #5 (Alo-Happy Yokohama)▶ show the map ◀
Uptown #6 (The Bee)▶ show the map ◀
Uptown #7 (Shark Stars)▶ show the map ◀
Uptown #8 (Jinnai Bronze Hotel)▶ show the map ◀
Uptown #9 (m HOLD'EM (Jinnai))▶ show the map ◀
Uptown #10 (Cut House Timeline)▶ show the map ◀
Uptown #11 (Hamakita Park Fountain)▶ show the map ◀
Uptown #12 (Swine La Tang)▶ show the map ◀
Uptown #13 (Chinese Pavilion)▶ show the map ◀
Uptown #14 (Heian Tower)▶ show the map ◀
Uptown #15 (Zenshomon)▶ show the map ◀
All known locations on the map Honolulu
Anaconda #1 (Anaconda Parking Lot)▶ show the map ◀
Anaconda #2 (Anaconda Arcade)▶ show the map ◀
Anaconda #3 (Face Cutout Board)▶ show the map ◀
Anaconda #4 (Snake Jar)▶ show the map ◀
Anaconda #5 (Anaconda North Entrance)▶ show the map ◀
Anaconda #6 (Anaconda South Entrance)▶ show the map ◀
Anaconda #7 (Anaconda West Entrance)▶ show the map ◀
Anaconda #8 (Hidden Anaconda: Shrubbery)▶ show the map ◀

Anaconda #9 (Hidden Anaconda: Window Display)▶ show the map ◀
Anaconda #10 (Hidden Anaconda: Restroom)▶ show the map ◀
Cultural District / Harbor Park #1 (Anaconda Harbor Park)▶ show the map ◀
Cultural District / Harbor Park #2 (Honolulu City Marina)▶ show the map ◀
Cultural District / Harbor Park #3 (Horizon Drugs)▶ show the map ◀
Cultural District / Harbor Park #4 (Flower Display)▶ show the map ◀
Cultural District / Harbor Park #5 (Dolls & Devils)▶ show the map ◀
Cultural District / Harbor Park #6 (Hyper Ecstasy)▶ show the map ◀
Cultural District / Harbor Park #7 (Hip Hop Shrimp)▶ show the map ◀

Cultural District / Harbor Park #8 (Wall Art: Birds)▶ show the map ◀
Cultural District / Harbor Park #9 (Psychedelic Coffee)▶ show the map ◀
Cultural District / Harbor Park #10 (Bar Moderne)▶ show the map ◀
Cultural District / Harbor Park #11 (Ounabara Vocational School)▶ show the map ◀
Cultural District / Harbor Park #12 (Cabaret El Dorado)▶ show the map ◀
Cultural District / Harbor Park #13 (Bullet Hell Armory)▶ show the map ◀

Cultural District / Harbor Park #14 (LiberTea)▶ show the map ◀
Cultural District / Harbor Park #15 (Bar Sign)▶ show the map ◀
Downtown / Chinatown / District Five #1 (Wall Art: Octopus)▶ show the map ◀

Downtown / Chinatown / District Five #2 (Buster's Pizza)▶ show the map ◀
Downtown / Chinatown / District Five #3 (Club Guilty)▶ show the map ◀
Downtown / Chinatown / District Five #4 (Handcuffs & Gloves)▶ show the map ◀
Downtown / Chinatown / District Five #5 (Soramame's Beans)▶ show the map ◀
Downtown / Chinatown / District Five #6 (Downtown Fountain Square)▶ show the map ◀
Downtown / Chinatown / District Five #7 (Spa Fountain Square)▶ show the map ◀
Downtown / Chinatown / District Five #8 (Shark Teeth Souvenirs)▶ show the map ◀
Downtown / Chinatown / District Five #9 (Panda Pads)▶ show the map ◀
Downtown / Chinatown / District Five #10 (Nirvana Hotel)▶ show the map ◀
Downtown / Chinatown / District Five #11 (Miss Ginseng)▶ show the map ◀
Downtown / Chinatown / District Five #12 (Mahjong Parlor Entrance)▶ show the map ◀
Downtown / Chinatown / District Five #13 (Another Bottle)▶ show the map ◀
Downtown / Chinatown / District Five #14 (Fantasy Smoothies)▶ show the map ◀
Downtown / Chinatown / District Five #15 (Clean-Clean Household Supplies)▶ show the map ◀
Little Japan #1 (Kametaro)▶ show the map ◀
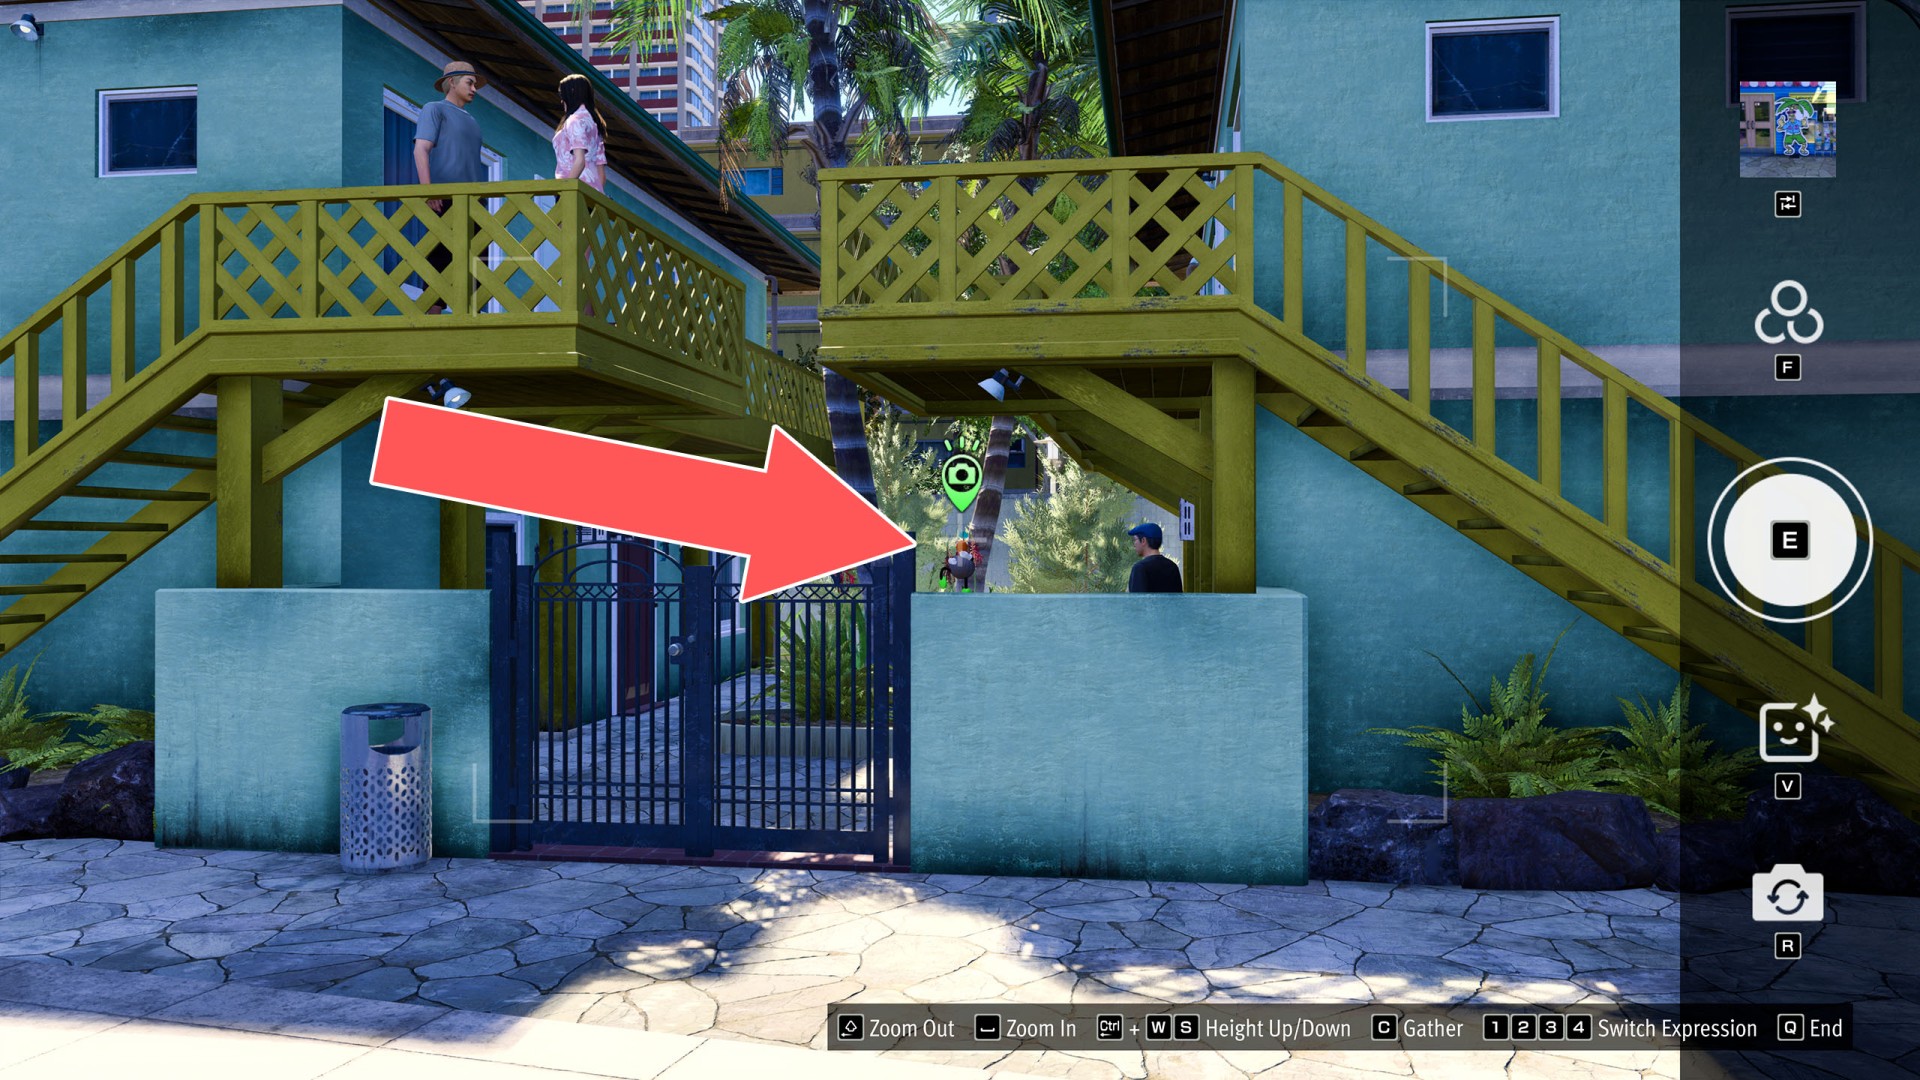
Little Japan #2 (Ukelele Boy and Ukelele Girl)▶ show the map ◀
Little Japan #3 (Jeff's Taco Truck)▶ show the map ◀
Little Japan #4 (Matsumoto Shave Ice)▶ show the map ◀
Little Japan #5 (Revolve Bar)▶ show the map ◀
Little Japan #6 (Yamabiko)▶ show the map ◀
Little Japan #7 (Mt. Fuji Planter)▶ show the map ◀
Little Japan #8 (Toba)▶ show the map ◀
Little Japan #9 (Dolphin Mural)▶ show the map ◀
Little Japan #10 (Shinobi Sushi)▶ show the map ◀
Little Japan #11 (Ryukai Shrine)▶ show the map ◀
Little Japan #12 (Ganryujima Armory)▶ show the map ◀
Little Japan #13 (Ganryujima Dharma)▶ show the map ◀
Little Japan #14 (Ahi Poke Garden)▶ show the map ◀
Little Japan #15 (Big King Pizza)▶ show the map ◀
Waikīki #1 (Seaworthy Treasures)▶ show the map ◀
Waikīki #2 (Cream & Berry)▶ show the map ◀
Waikīki #3 (Dolphin Statue)▶ show the map ◀
Waikīkī #4 (Mohala Shave Ice)▶ show the map ◀
Waikīkī #5 (Alo-Happy Tours)▶ show the map ◀

Waikīkī #6 (Hawaii Plaza)▶ show the map ◀

Waikīki #7 (Pineapple Dog House)▶ show the map ◀
Waikīkī #8 (No Surf No Life)▶ show the map ◀
Waikīkī #9 (Snowtown USA)▶ show the map ◀
Waikīkī #10 (Guava Juice Bar)▶ show the map ◀
Waikīkī #11 (Julie's Gearworks)▶ show the map ◀
Waikīkī #12 (Oahu Burger)▶ show the map ◀
Waikīkī #13 (Aloha Beach Statue)▶ show the map ◀
Waikīkī #14 (Surf Shop Kope Pot)▶ show the map ◀
Waikīkī #15 (Crystal Aloha Resort)▶ show the map ◀