Welcome to guides4gamers.com

Wakestones, Dragon's Dogma 2 Points of interest

This collection includes every marker from the Wakestones category of points of interest in Dragon's Dogma 2, all placed on interactive maps created specifically for the game.

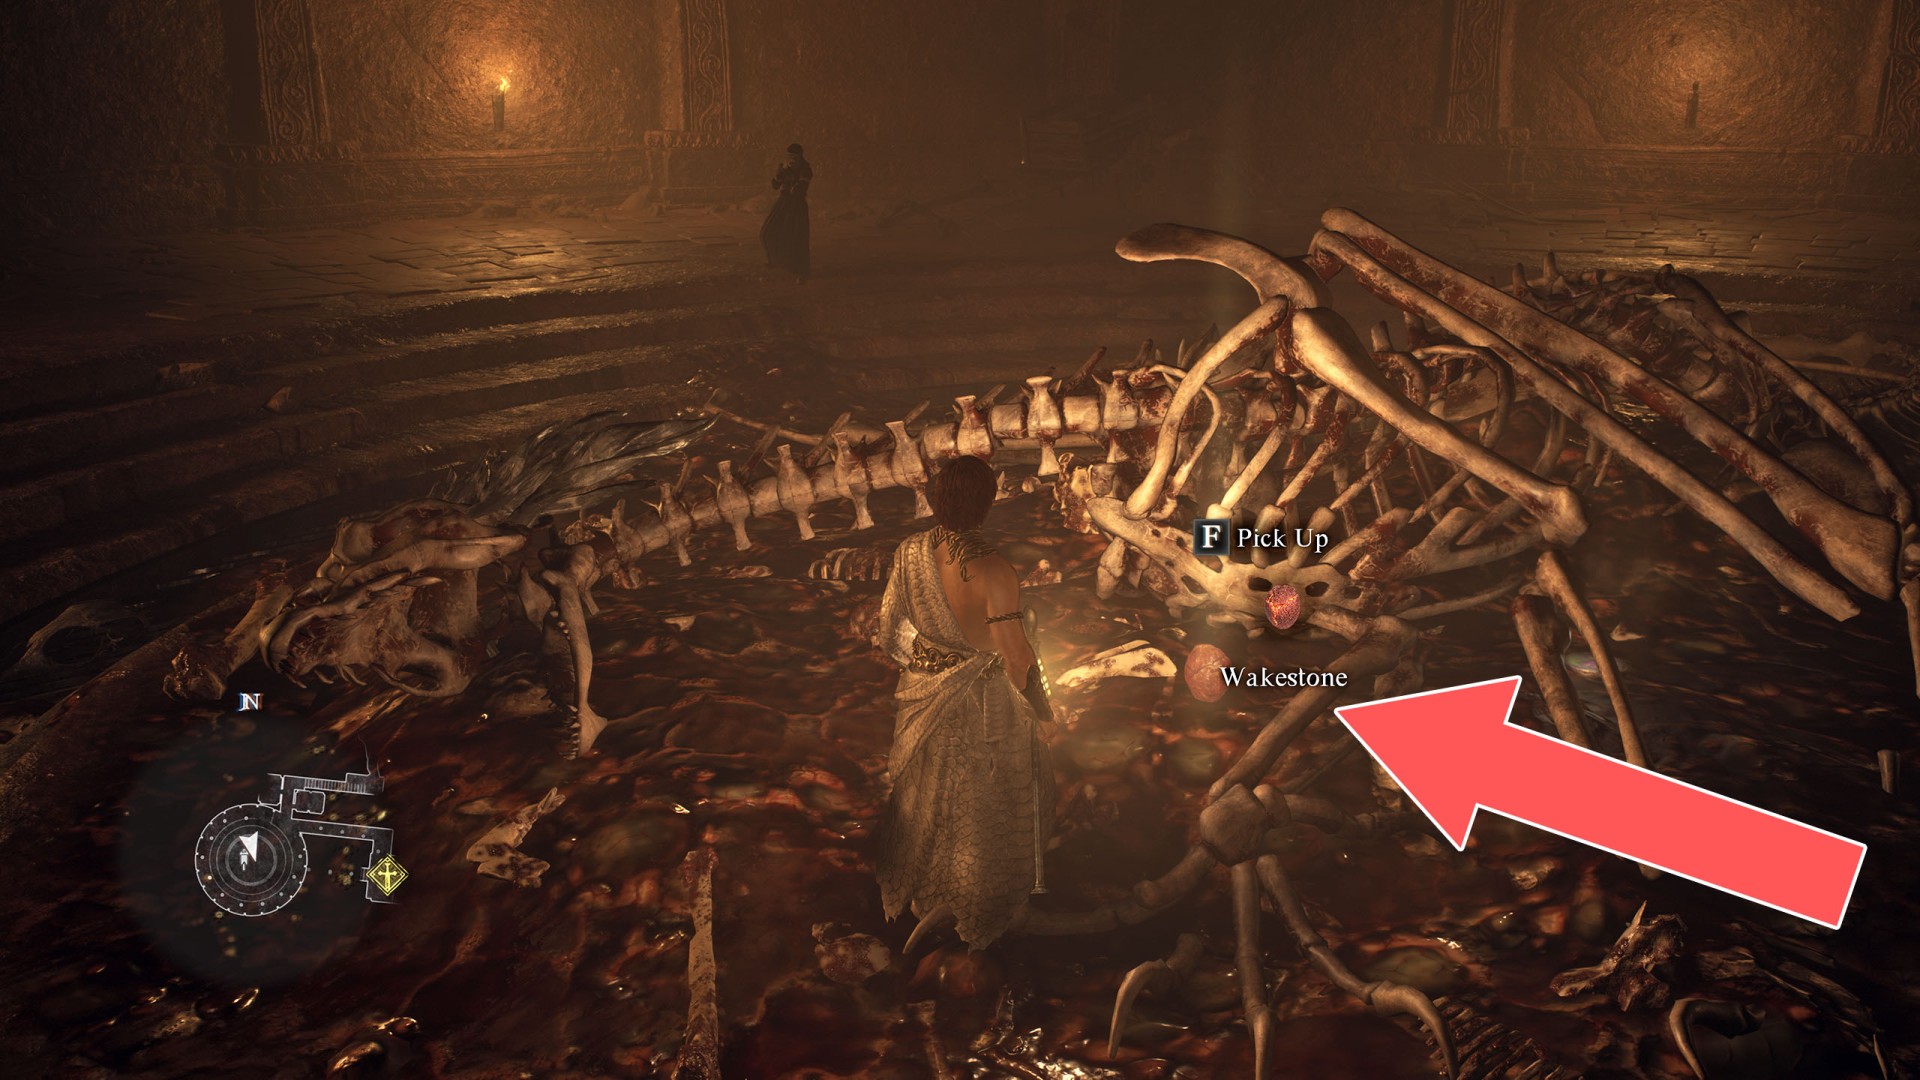
Wakestones are special items that can only be used by the Arisen. They have the power to restore life to the fallen, and may be used to revive the Arisen or another of their choice.

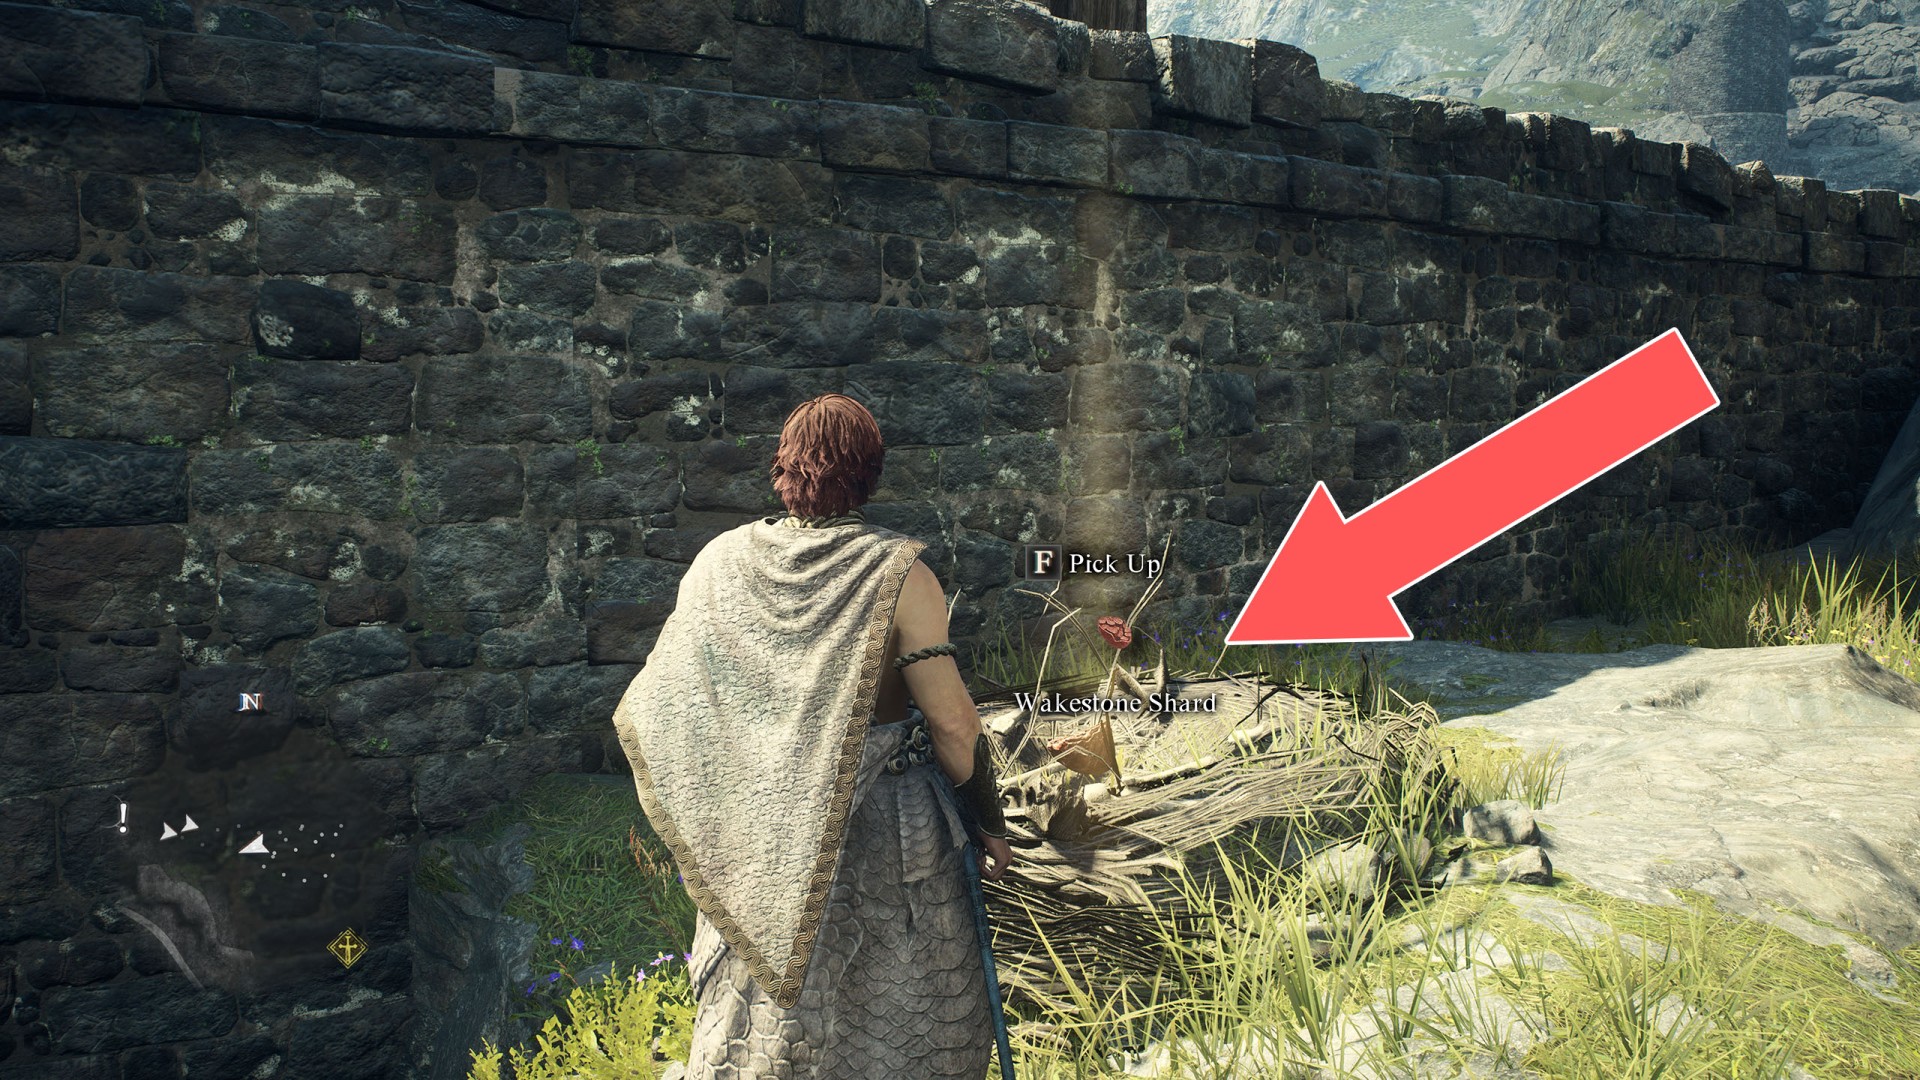
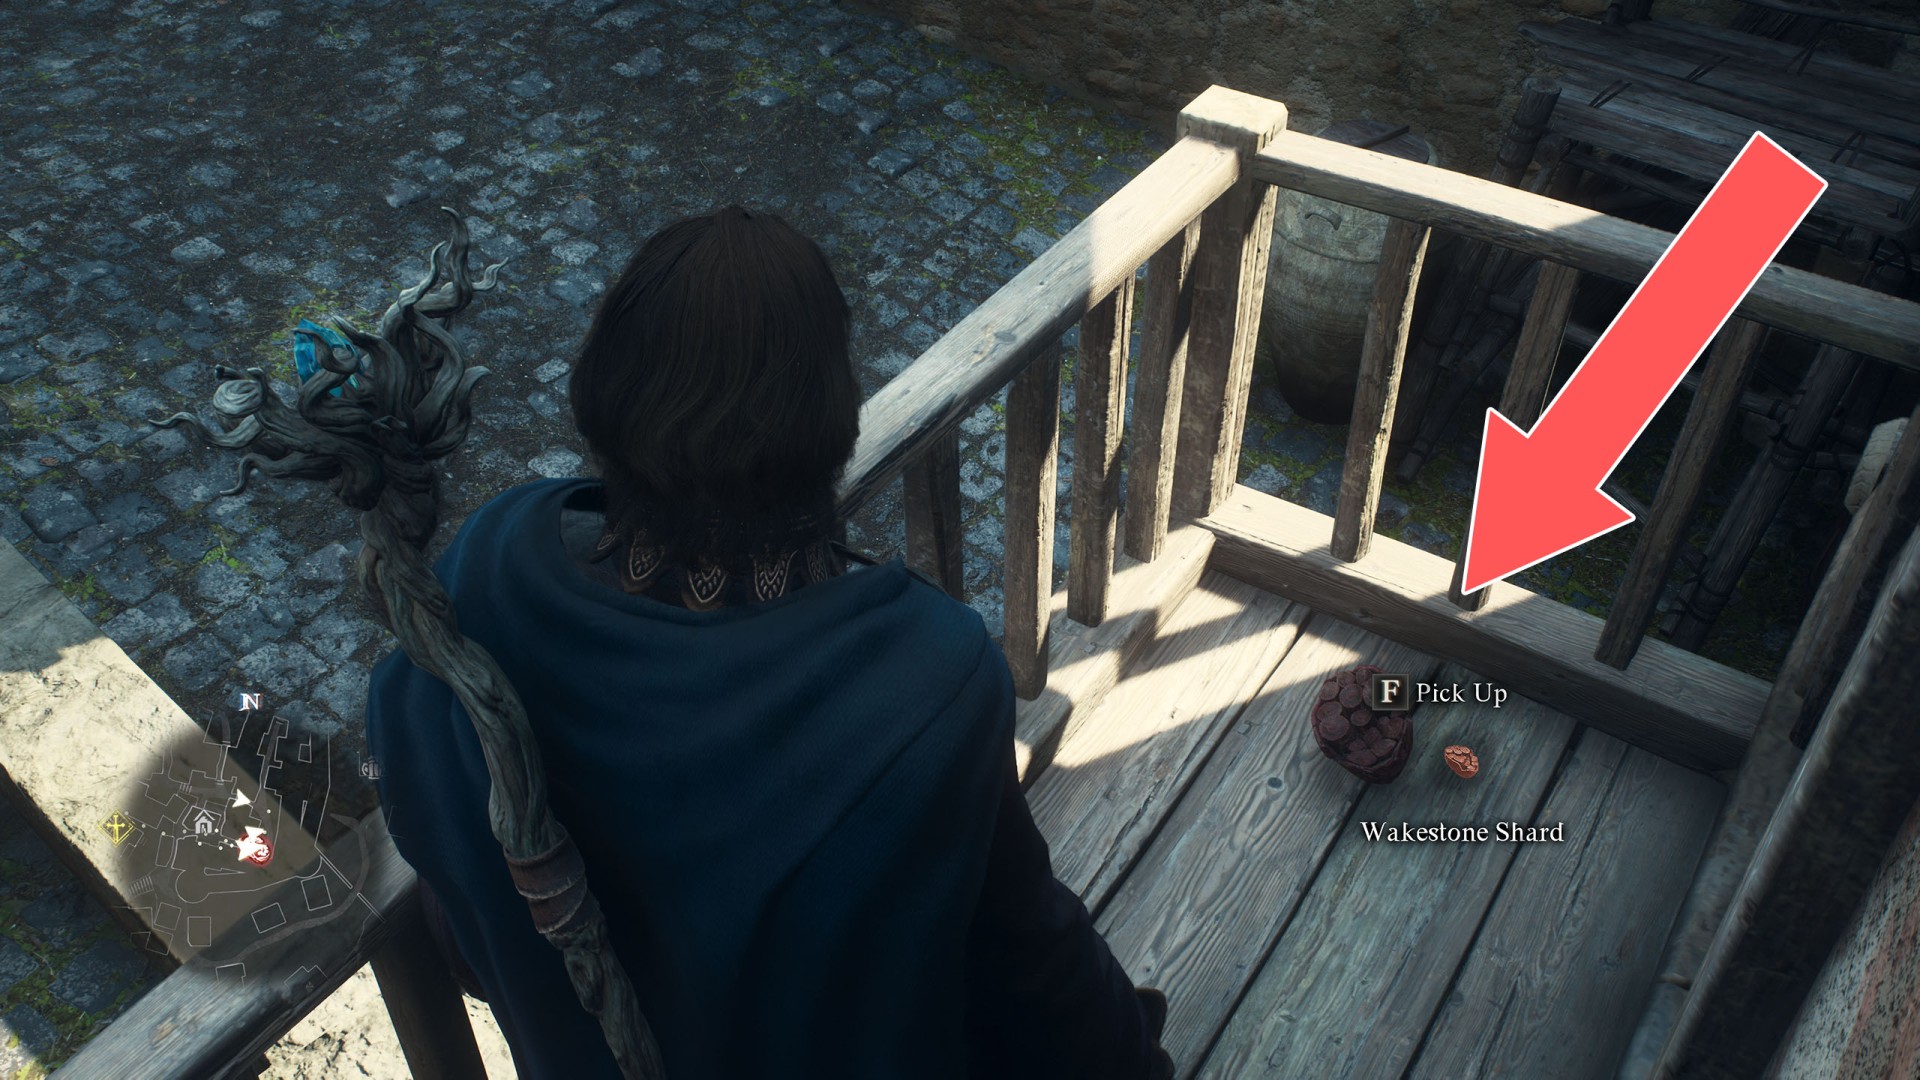
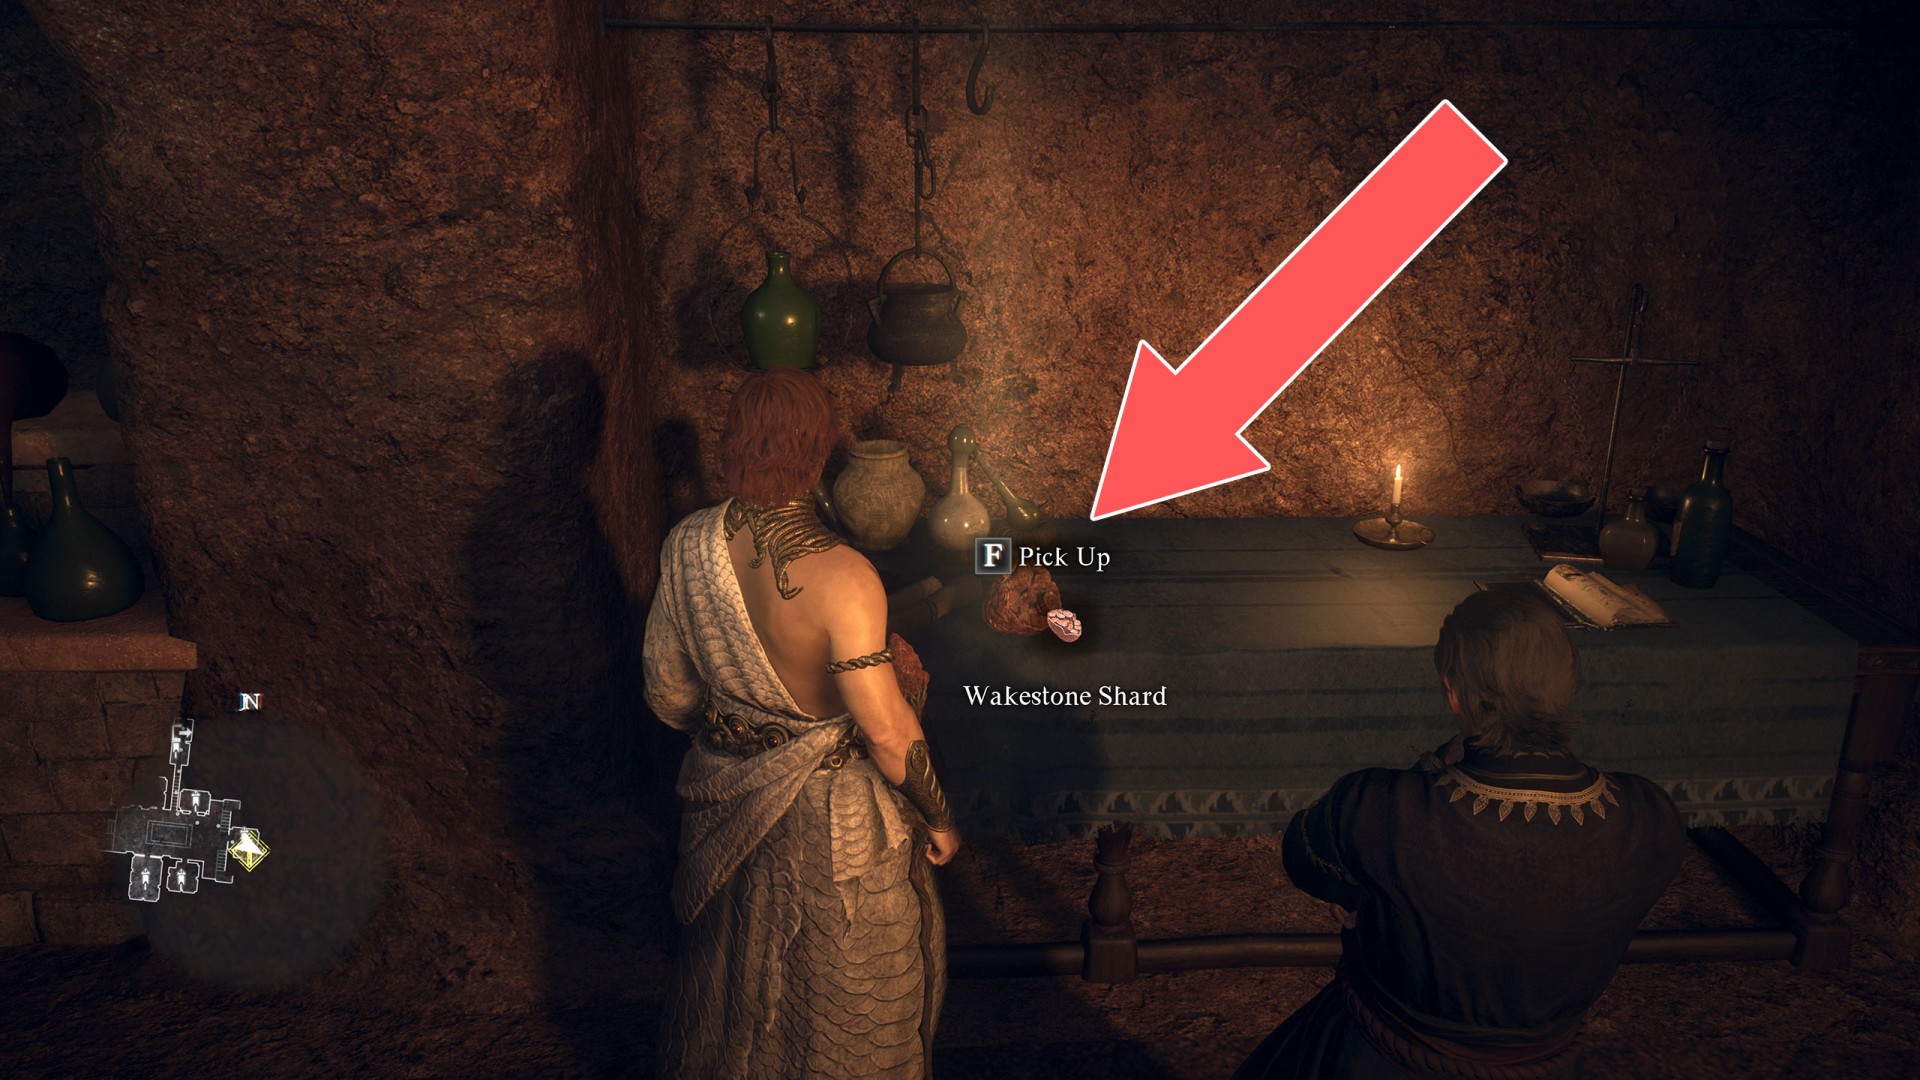
Wakestone Shards possess no reviving powers on their own, but gather three of them and they will automatically combine to form a Wakestone.

Index

The index below enables quick navigation to the desired marker / point of interest.

All known locations on the map - World Map

WakestoneWakestone

Wakestone

Show the map

WakestoneWakestone

Use a Harpysnare Smoke Beacon to get here.

Wakestone

Show the map

WakestoneWakestone

Wakestone

Show the map

WakestoneWakestone

Wakestone

Show the map

WakestoneWakestone

Wakestone

Show the map

WakestoneWakestone

Wakestone

Show the map

WakestoneWakestone

Wakestone

Show the map

WakestoneWakestone

Wakestone

Show the map

WakestoneWakestone Shard

Wakestone Shard

Show the map

WakestoneWakestone Shard

Wakestone Shard

Show the map

WakestoneWakestone Shard

Wakestone Shard

Show the map

WakestoneWakestone Shard

Wakestone Shard

Show the map

WakestoneWakestone Shard

Wakestone Shard

Show the map

WakestoneWakestone Shard

Wakestone Shard

Show the map

WakestoneWakestone Shard

Wakestone Shard

Show the map

WakestoneWakestone Shard

Wakestone Shard

Show the map

WakestoneWakestone Shard

Wakestone Shard

Show the map

WakestoneWakestone Shard

Wakestone Shard

Show the map

WakestoneWakestone Shard

Wakestone Shard

Show the map

WakestoneWakestone Shard

Wakestone Shard

Show the map

WakestoneWakestone Shard

Wakestone Shard

Show the map

WakestoneWakestone Shard

Wakestone Shard

Show the map

WakestoneWakestone Shard

Wakestone Shard

Show the map

WakestoneWakestone Shard

Wakestone Shard

Show the map

WakestoneWakestone Shard

This chest is at the B1F (the lowest) floor.

Wakestone Shard

Show the map

WakestoneWakestone Shard

Wakestone Shard

Show the map

WakestoneWakestone Shard

Wakestone Shard

Show the map

WakestoneWakestone Shard

Wakestone Shard

Show the map

WakestoneWakestone Shard

Wakestone Shard

Show the map

WakestoneWakestone Shard

Wakestone Shard

Show the map

WakestoneWakestone Shard

Wakestone Shard

Show the map

WakestoneWakestone Shard

Wakestone Shard

Show the map

WakestoneWakestone Shard

To get into this hidden room, use the Trebuchet to destroy the rocks blocking access.

Wakestone Shard

Show the map

WakestoneWakestone Shard

Wakestone Shard

Show the map

WakestoneWakestone Shard

Wakestone Shard

Show the map

WakestoneWakestone Shard

Wakestone Shard

Show the map

WakestoneWakestone Shard

Wakestone Shard

Show the map

WakestoneWakestone Shard

Wakestone Shard

Show the map

WakestoneWakestone Shard

It sits on the balcony of one of the houses.

Wakestone Shard

Wakestone Shard

Show the map

WakestoneWakestone Shard

It's in the Vermund Charnel House.

Wakestone Shard

Show the map

WakestoneWakestone Shard

It's in the Vermund Charnel House.

Wakestone Shard

Show the map

WakestoneWakestone Shard

It's in the Vermund Charnel House.

Wakestone Shard

Show the map

WakestoneWakestone Shard

Wakestone Shard

Show the map

WakestoneWakestone Shard

Wakestone Shard

Show the map

WakestoneWakestone Shard

In the basement of the Northern Harve Ruins.

Wakestone Shard

Show the map

WakestoneWakestone Shard

Wakestone Shard

Show the map

WakestoneWakestone Shard

Wakestone Shard

Show the map

WakestoneWakestone Shard

Wakestone Shard

Show the map

WakestoneWakestone Shard

Wakestone Shard

Show the map

WakestoneWakestone Shard

Wakestone Shard

Show the map

WakestoneWakestone Shard

Wakestone Shard

Show the map

WakestoneWakestone Shard

Wakestone Shard

Show the map

WakestoneWakestone Shard

Wakestone Shard

Show the map

WakestoneWakestone Shard

Wakestone Shard

Show the map

WakestoneWakestone Shard

Wakestone Shard

Show the map

WakestoneWakestone Shard

Wakestone Shard

Show the map

WakestoneWakestone Shard

Wakestone Shard

Show the map

WakestoneWakestone Shard

Wakestone Shard

Show the map

WakestoneWakestone Shard

Wakestone Shard

Show the map

WakestoneWakestone Shard

Wakestone Shard

Show the map

WakestoneWakestone Shard

Wakestone Shard

Show the map

WakestoneWakestone Shard

Wakestone Shard

Show the map

WakestoneWakestone Shard

Wakestone Shard

Show the map

WakestoneWakestone Shard

Wakestone Shard

Show the map

WakestoneWakestone Shard

Wakestone Shard

Show the map

WakestoneWakestone Shard

Wakestone Shard

Show the map

WakestoneWakestone Shard

Wakestone Shard

Show the map

WakestoneWakestone Shard

Wakestone Shard

Show the map

WakestoneWakestone Shard

Wakestone Shard

Show the map

WakestoneWakestone Shard

Wakestone Shard

Show the map

WakestoneWakestone Shard

Wakestone Shard

Show the map