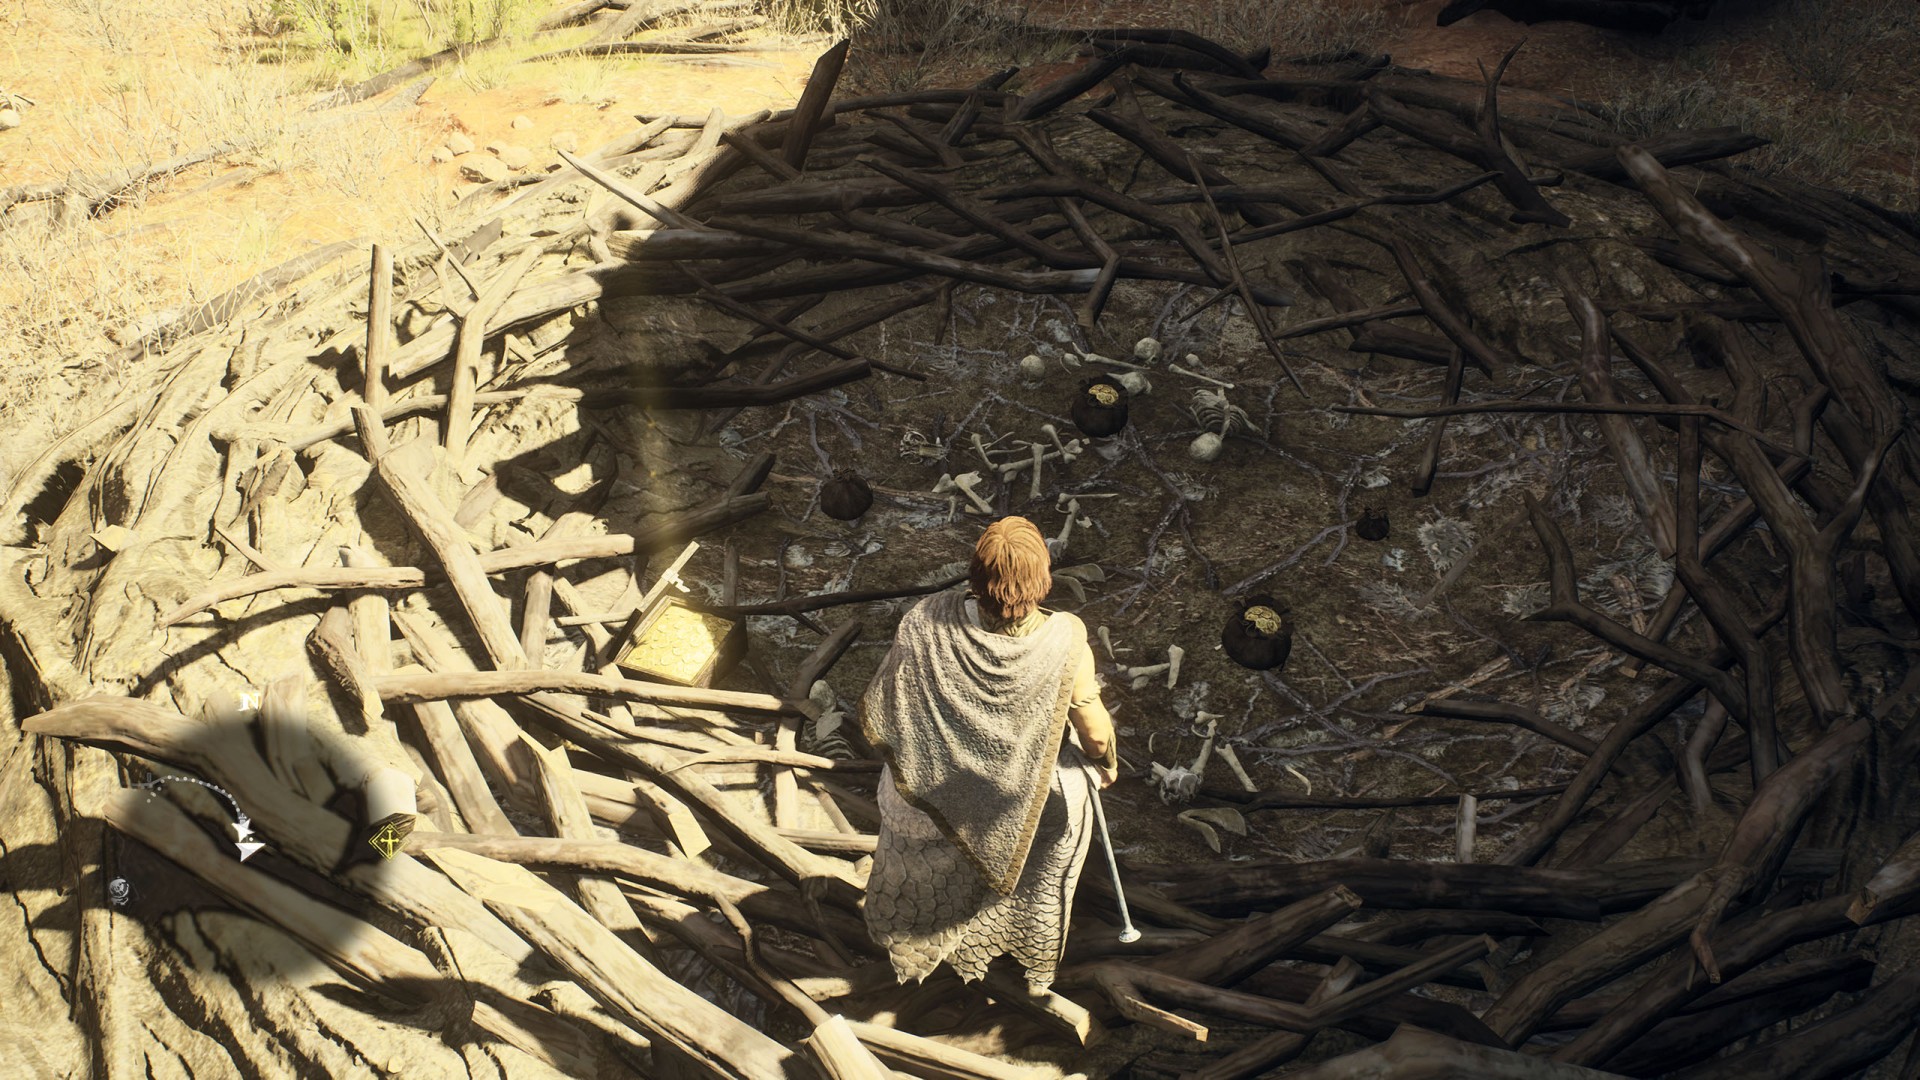
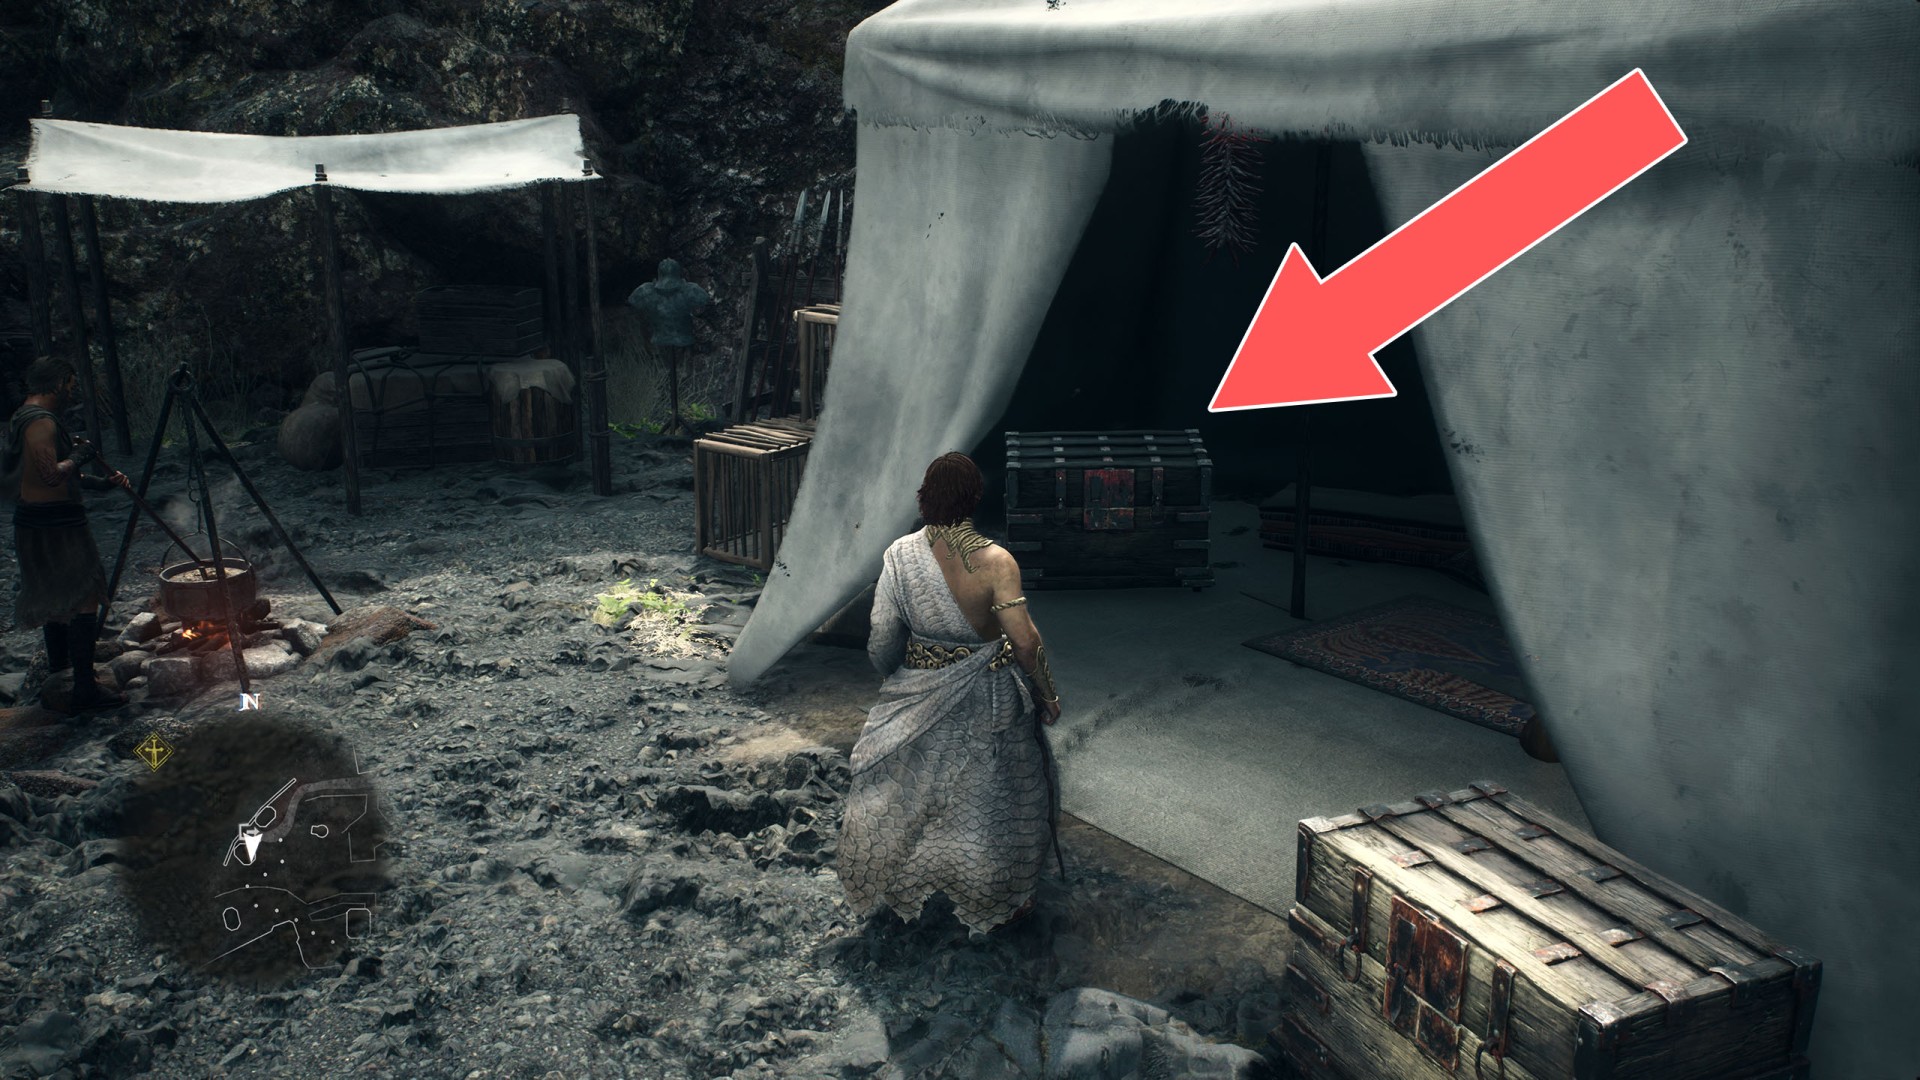
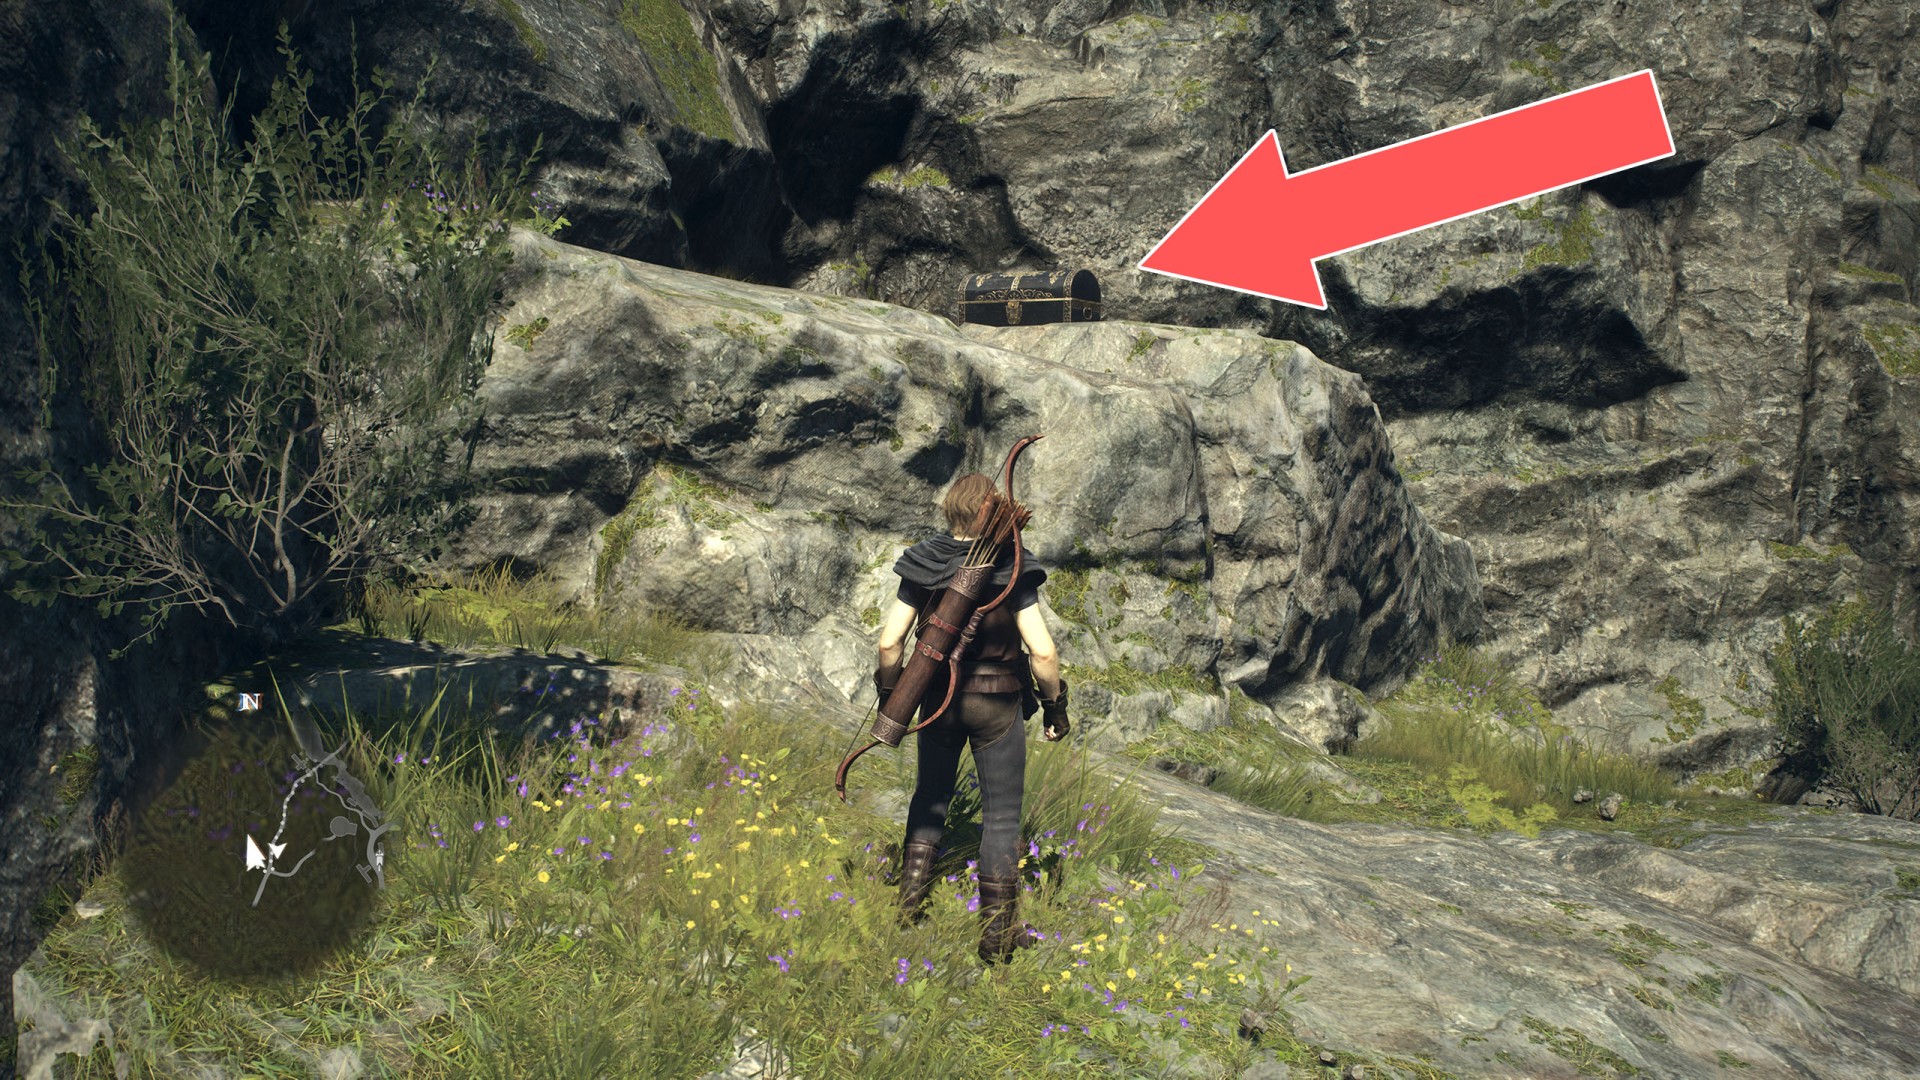
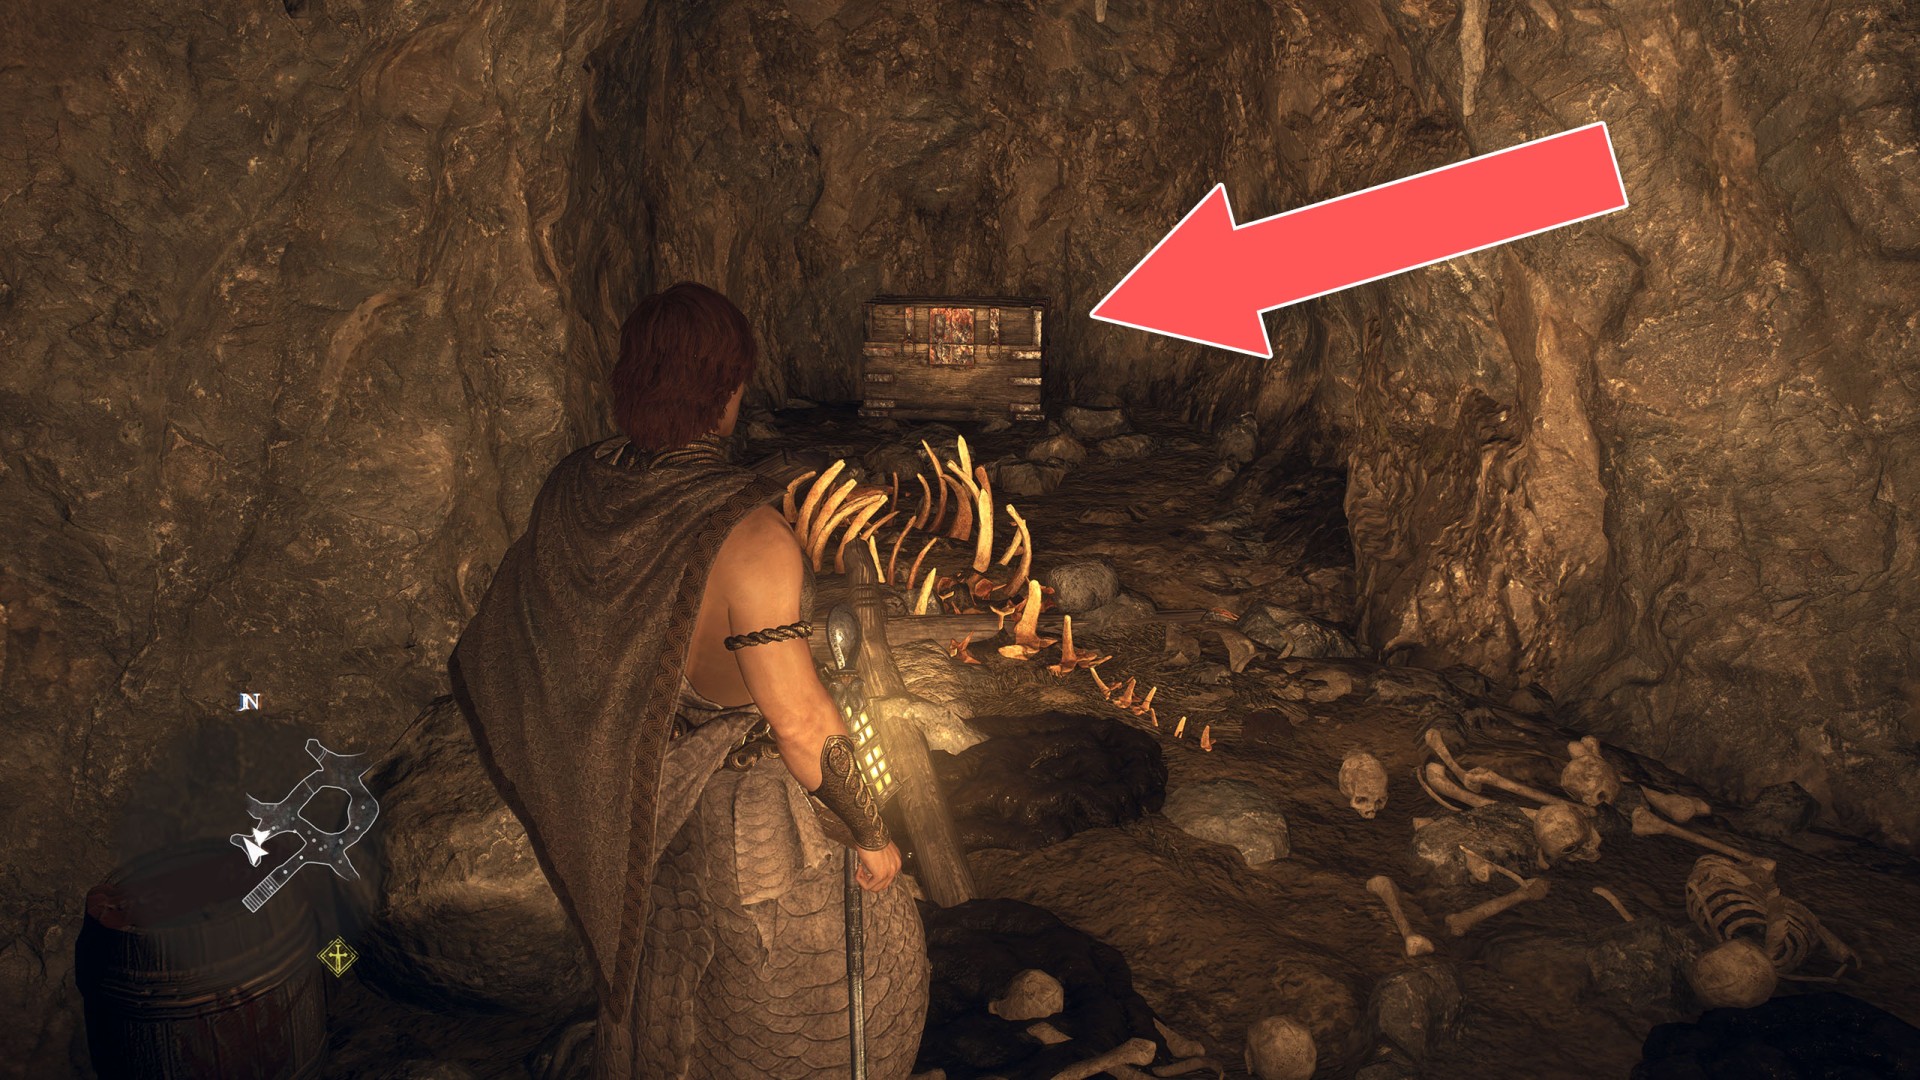
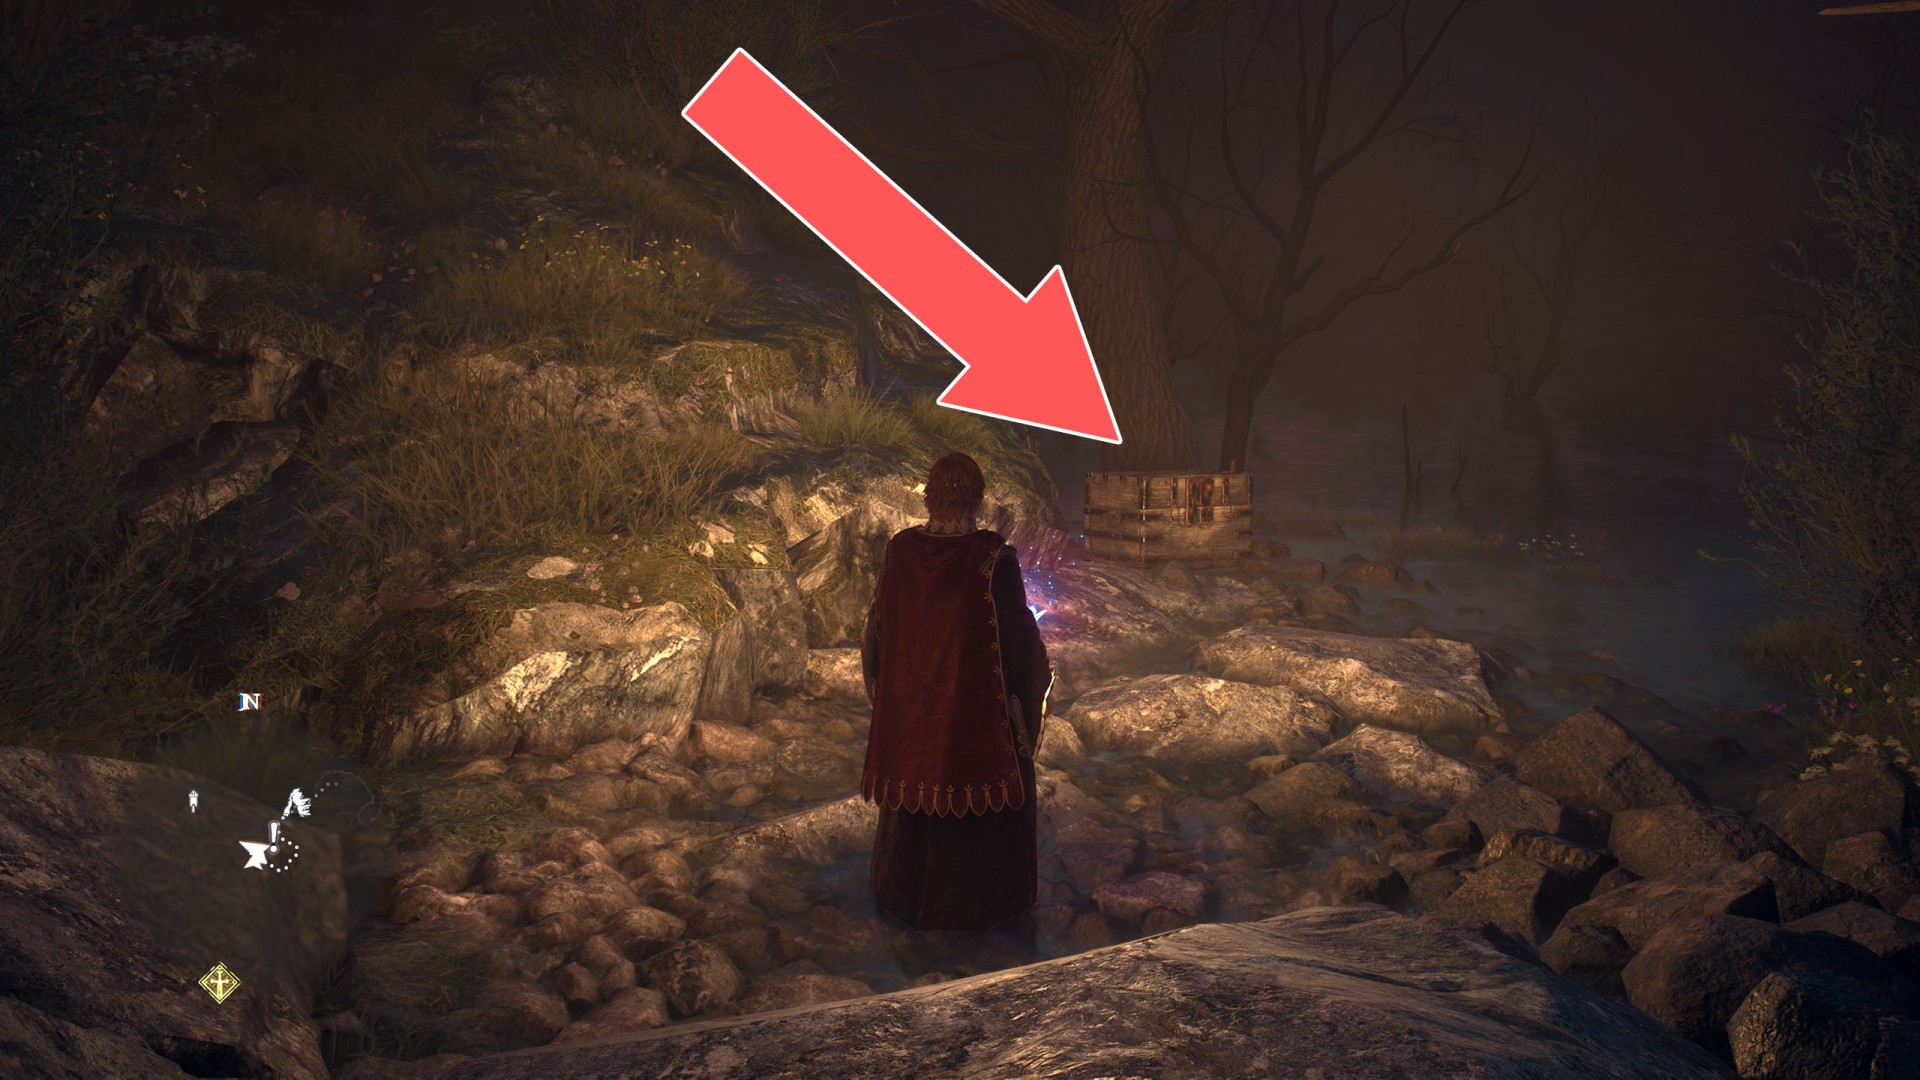
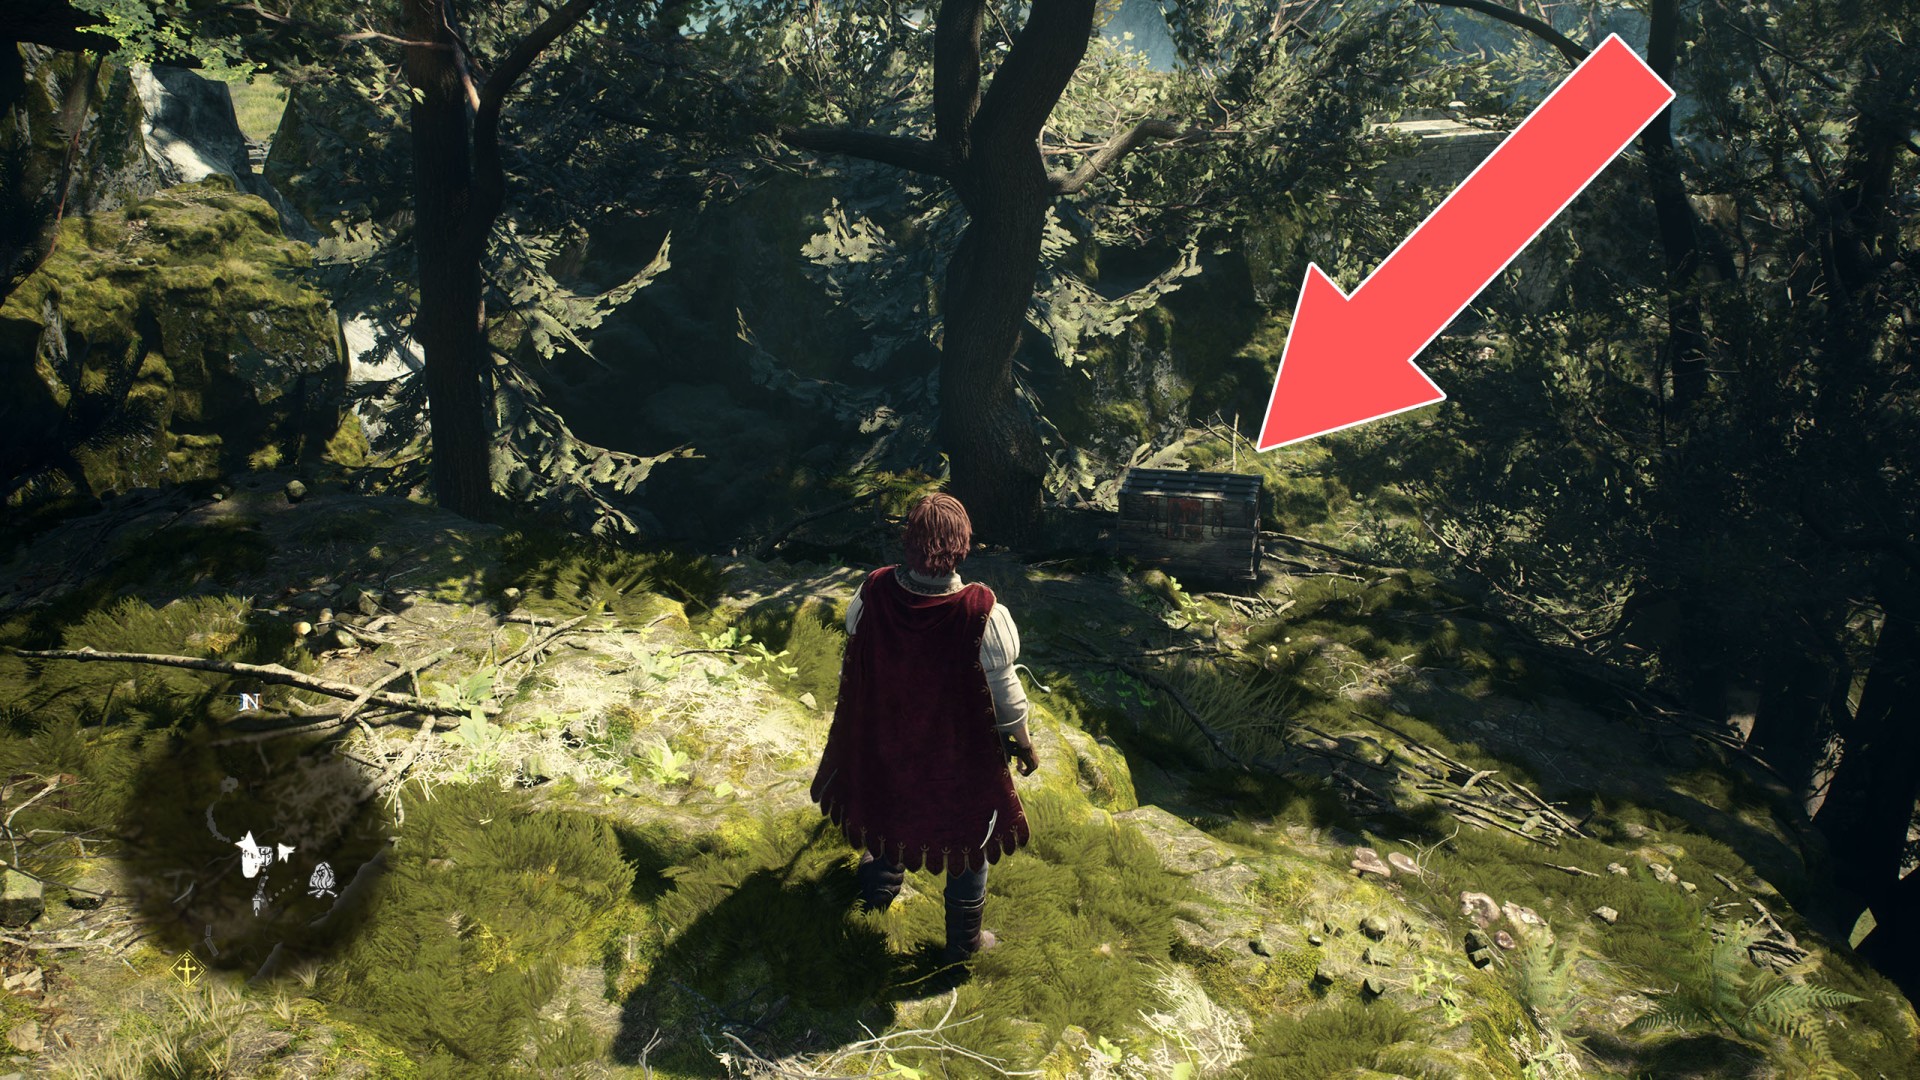
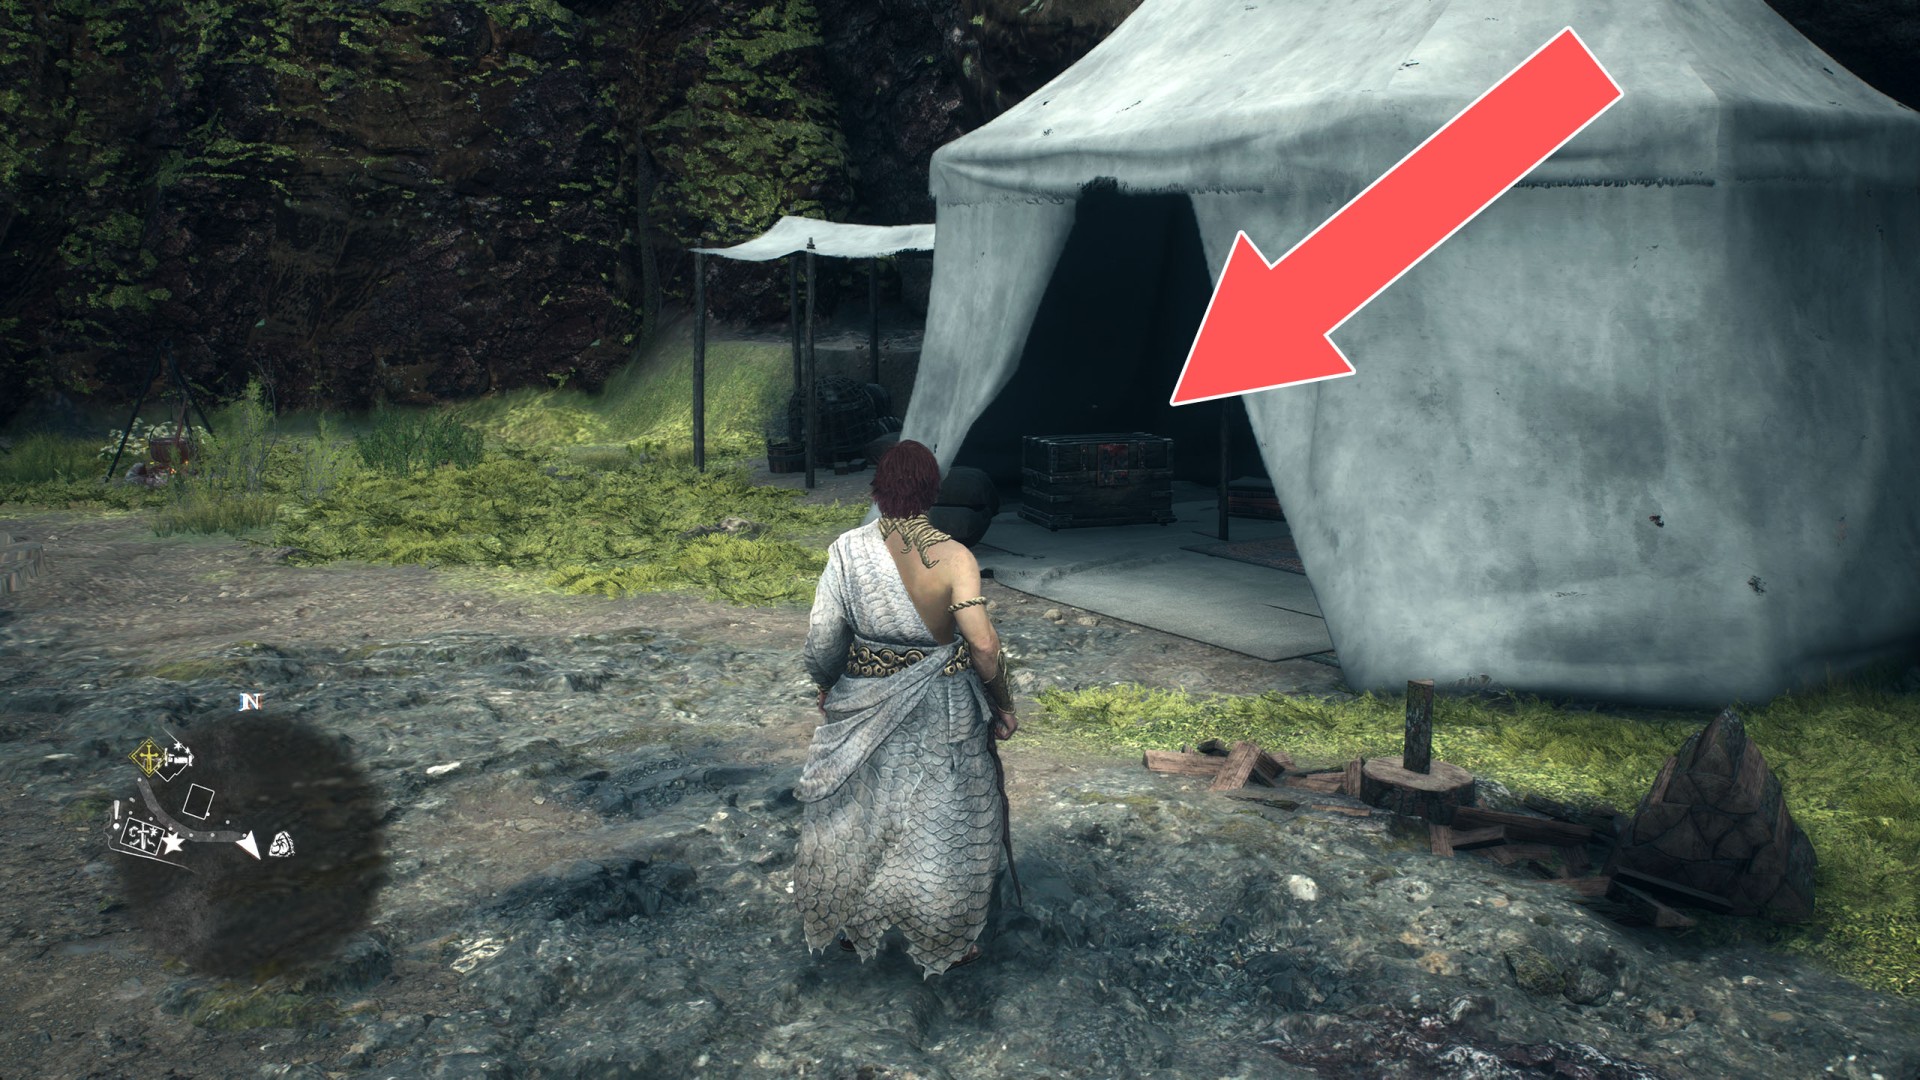
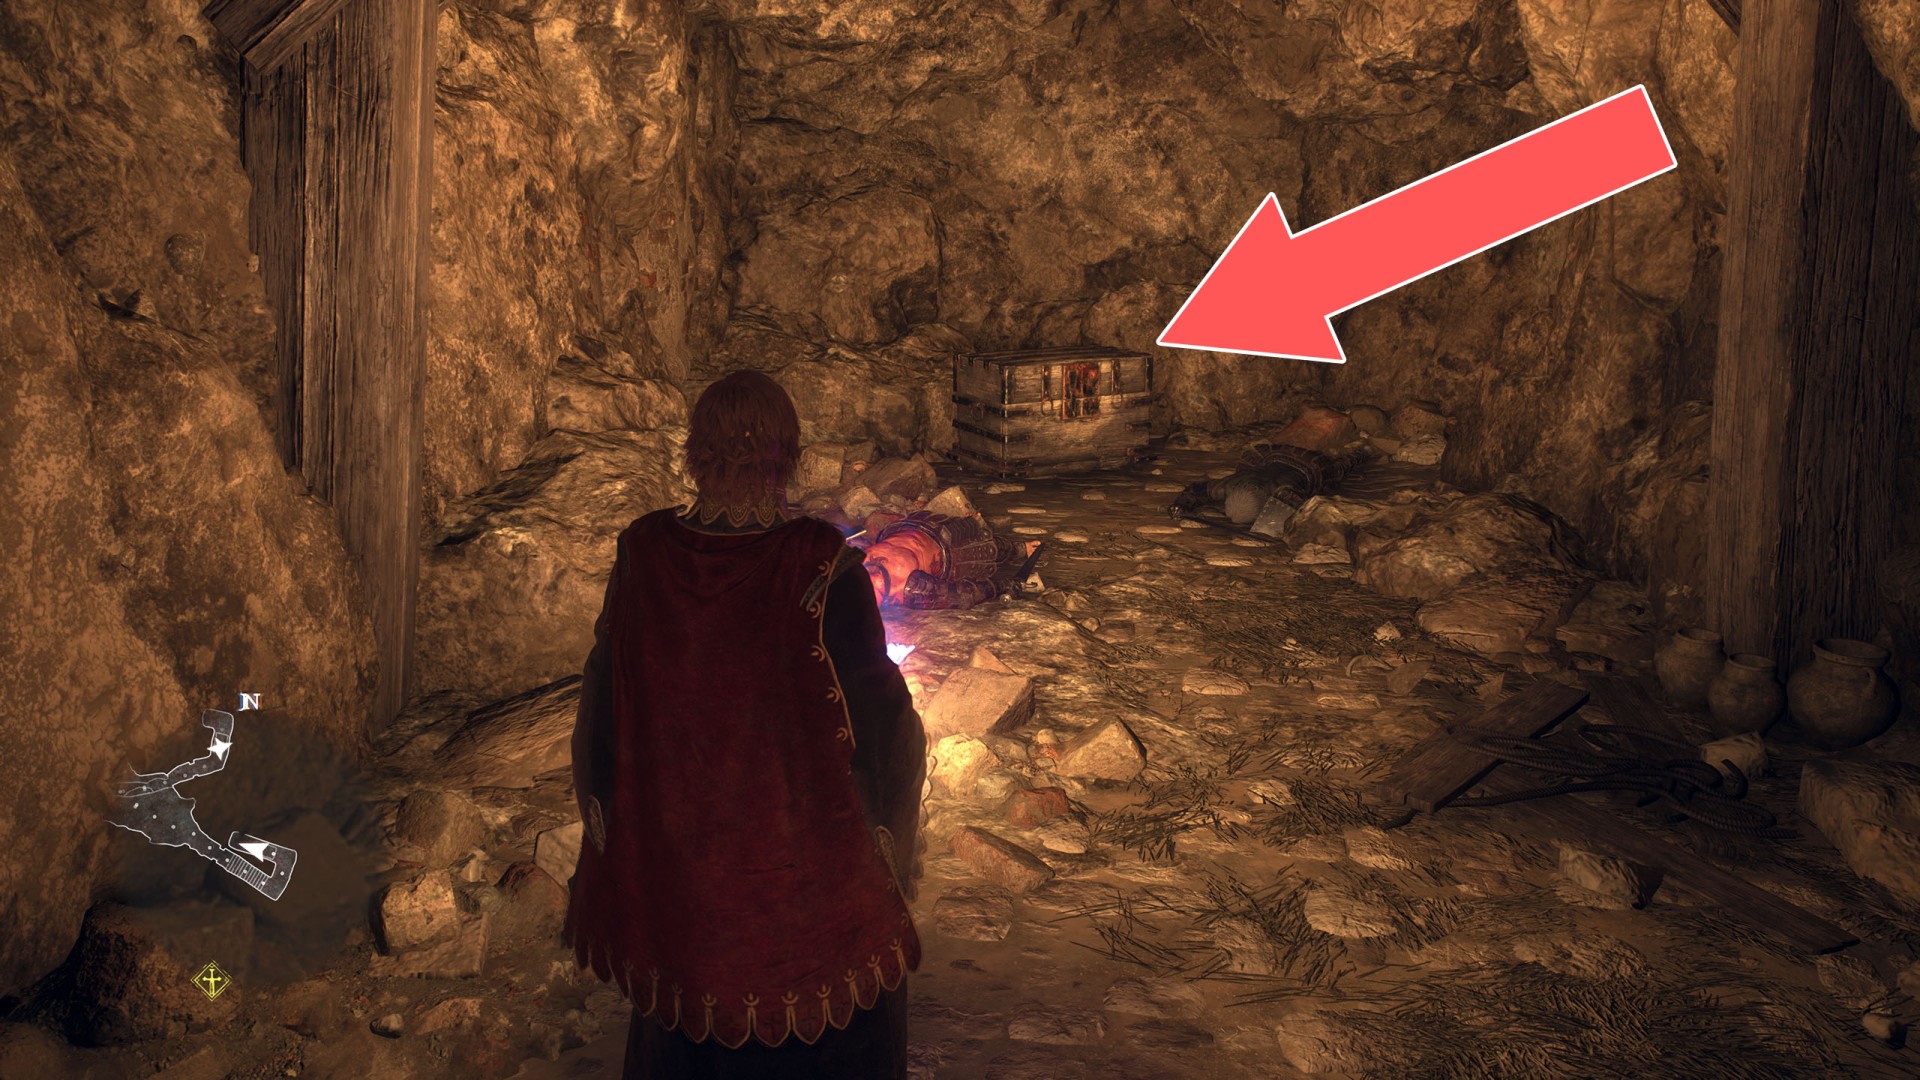
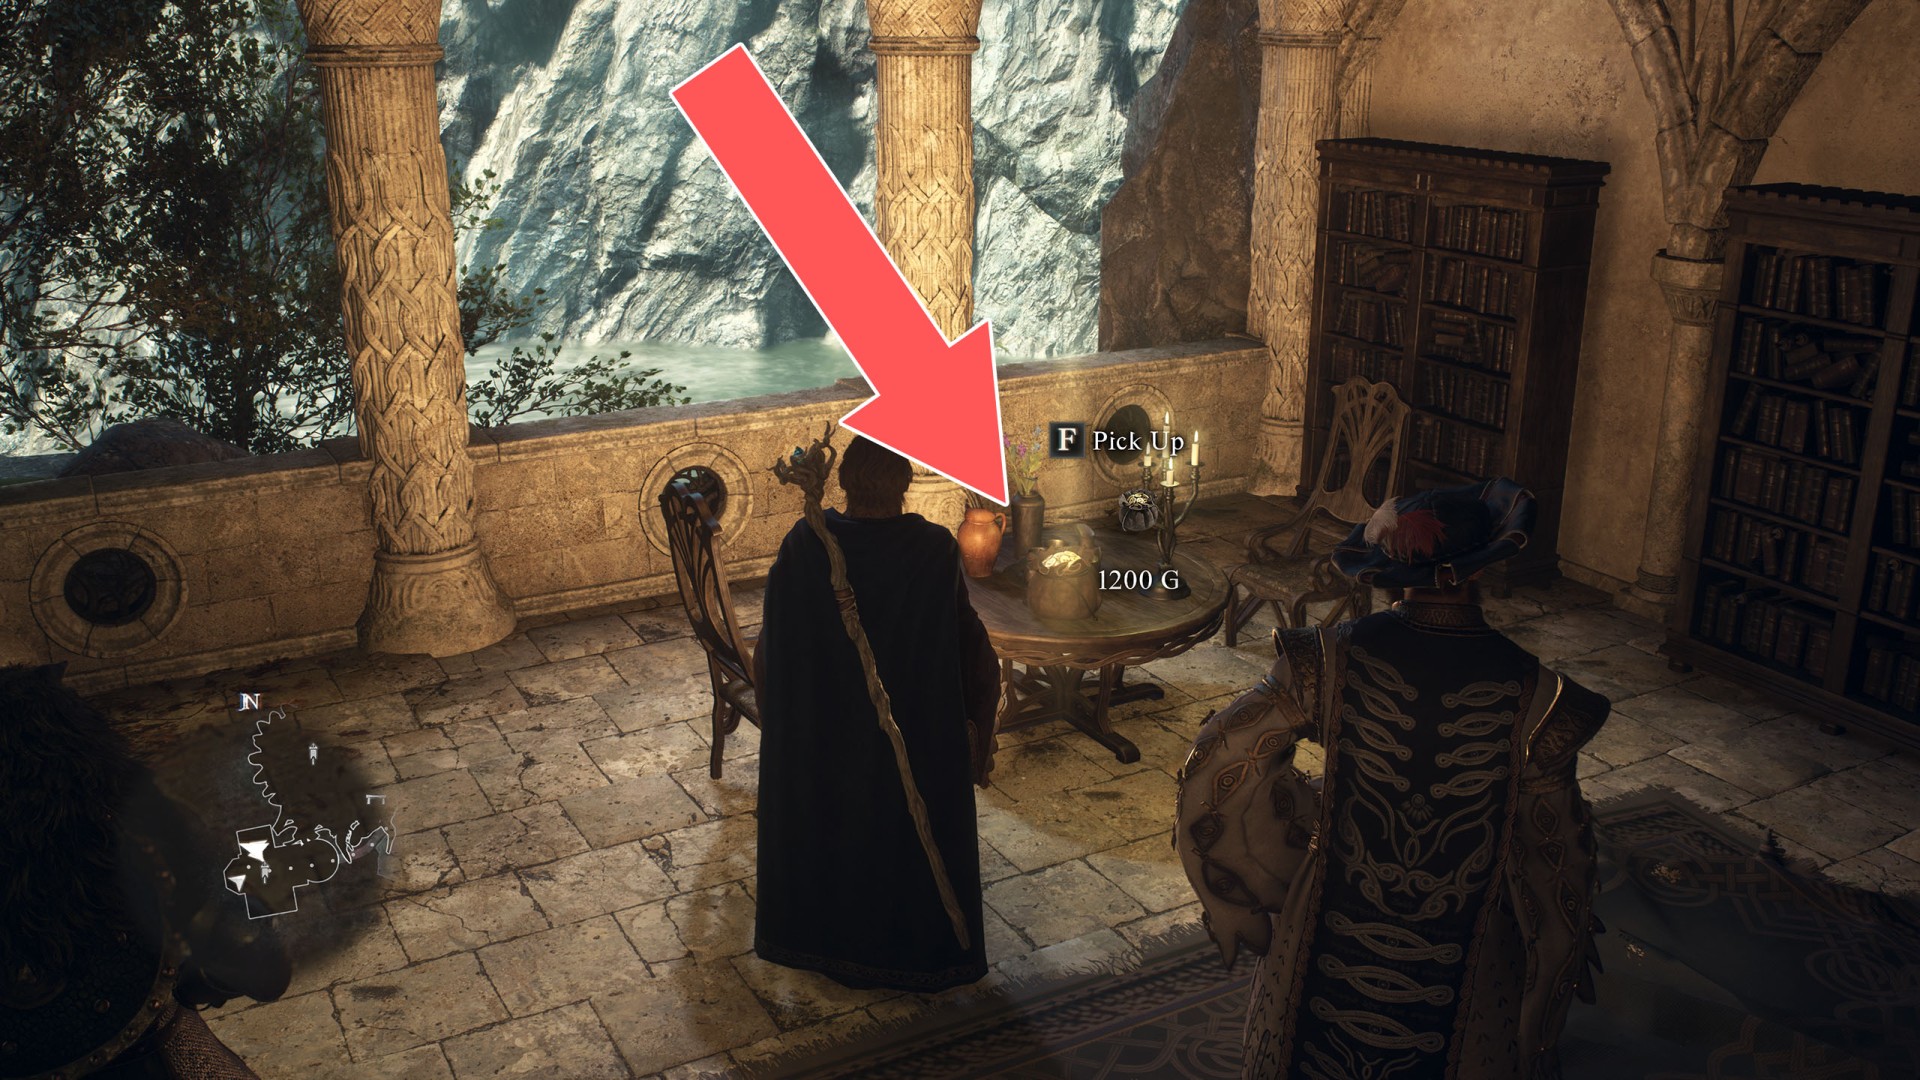
Places where you can find chests, coin pouches or boxes containing a certain amount of gold, which is the basic currency in the game.
Gold
Locations on World Map
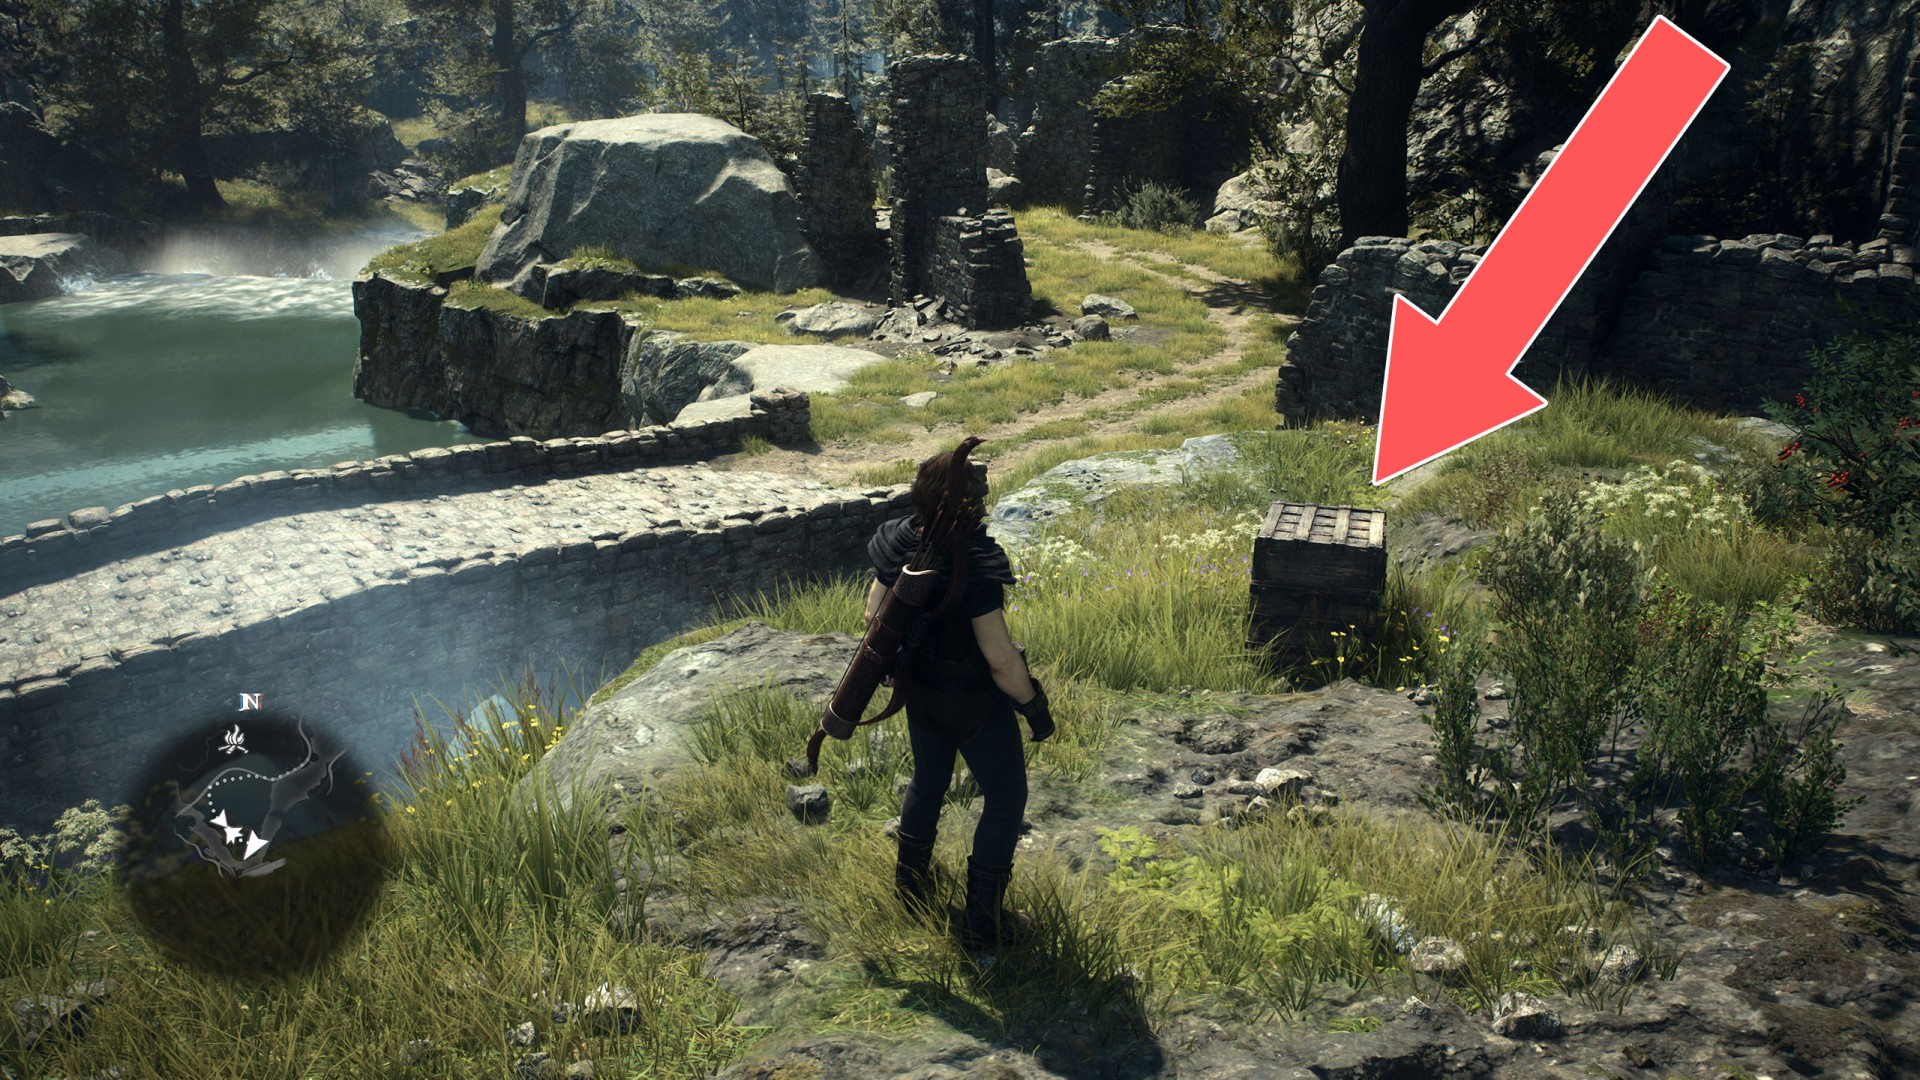
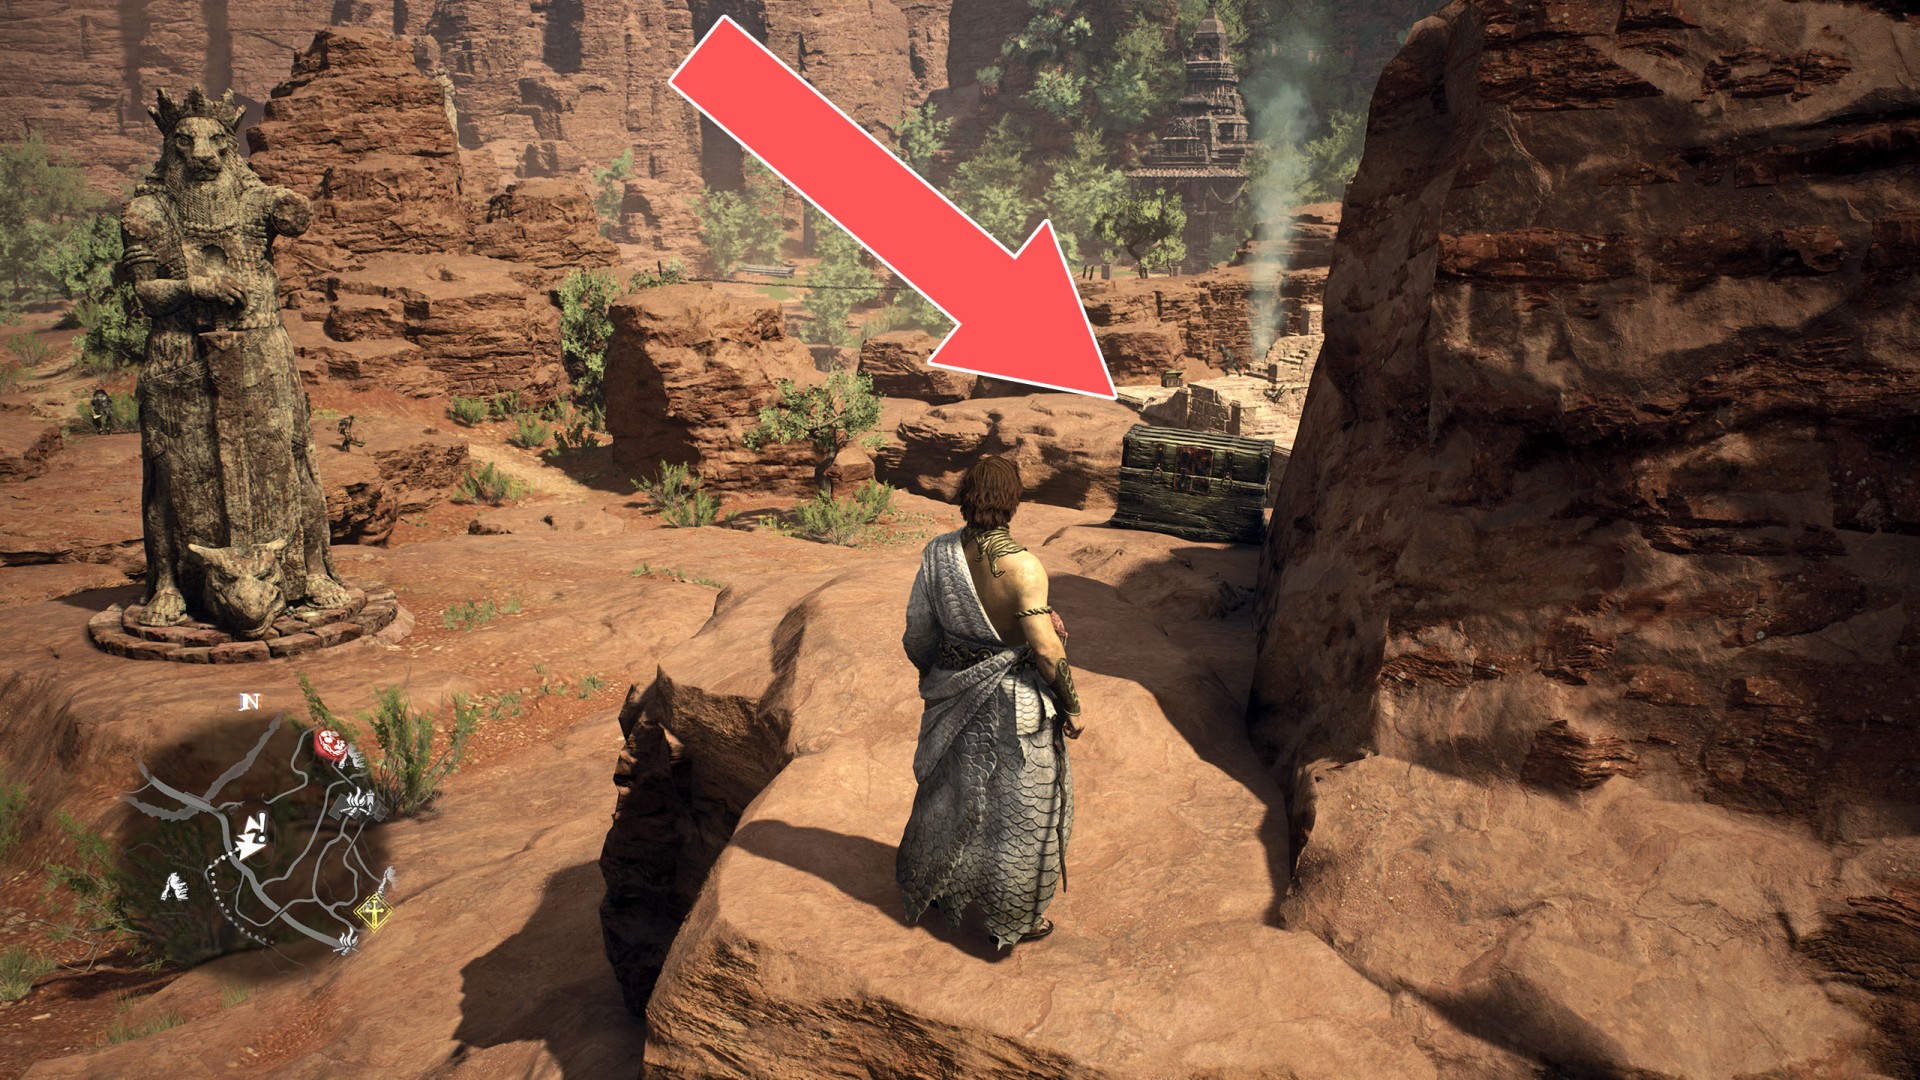
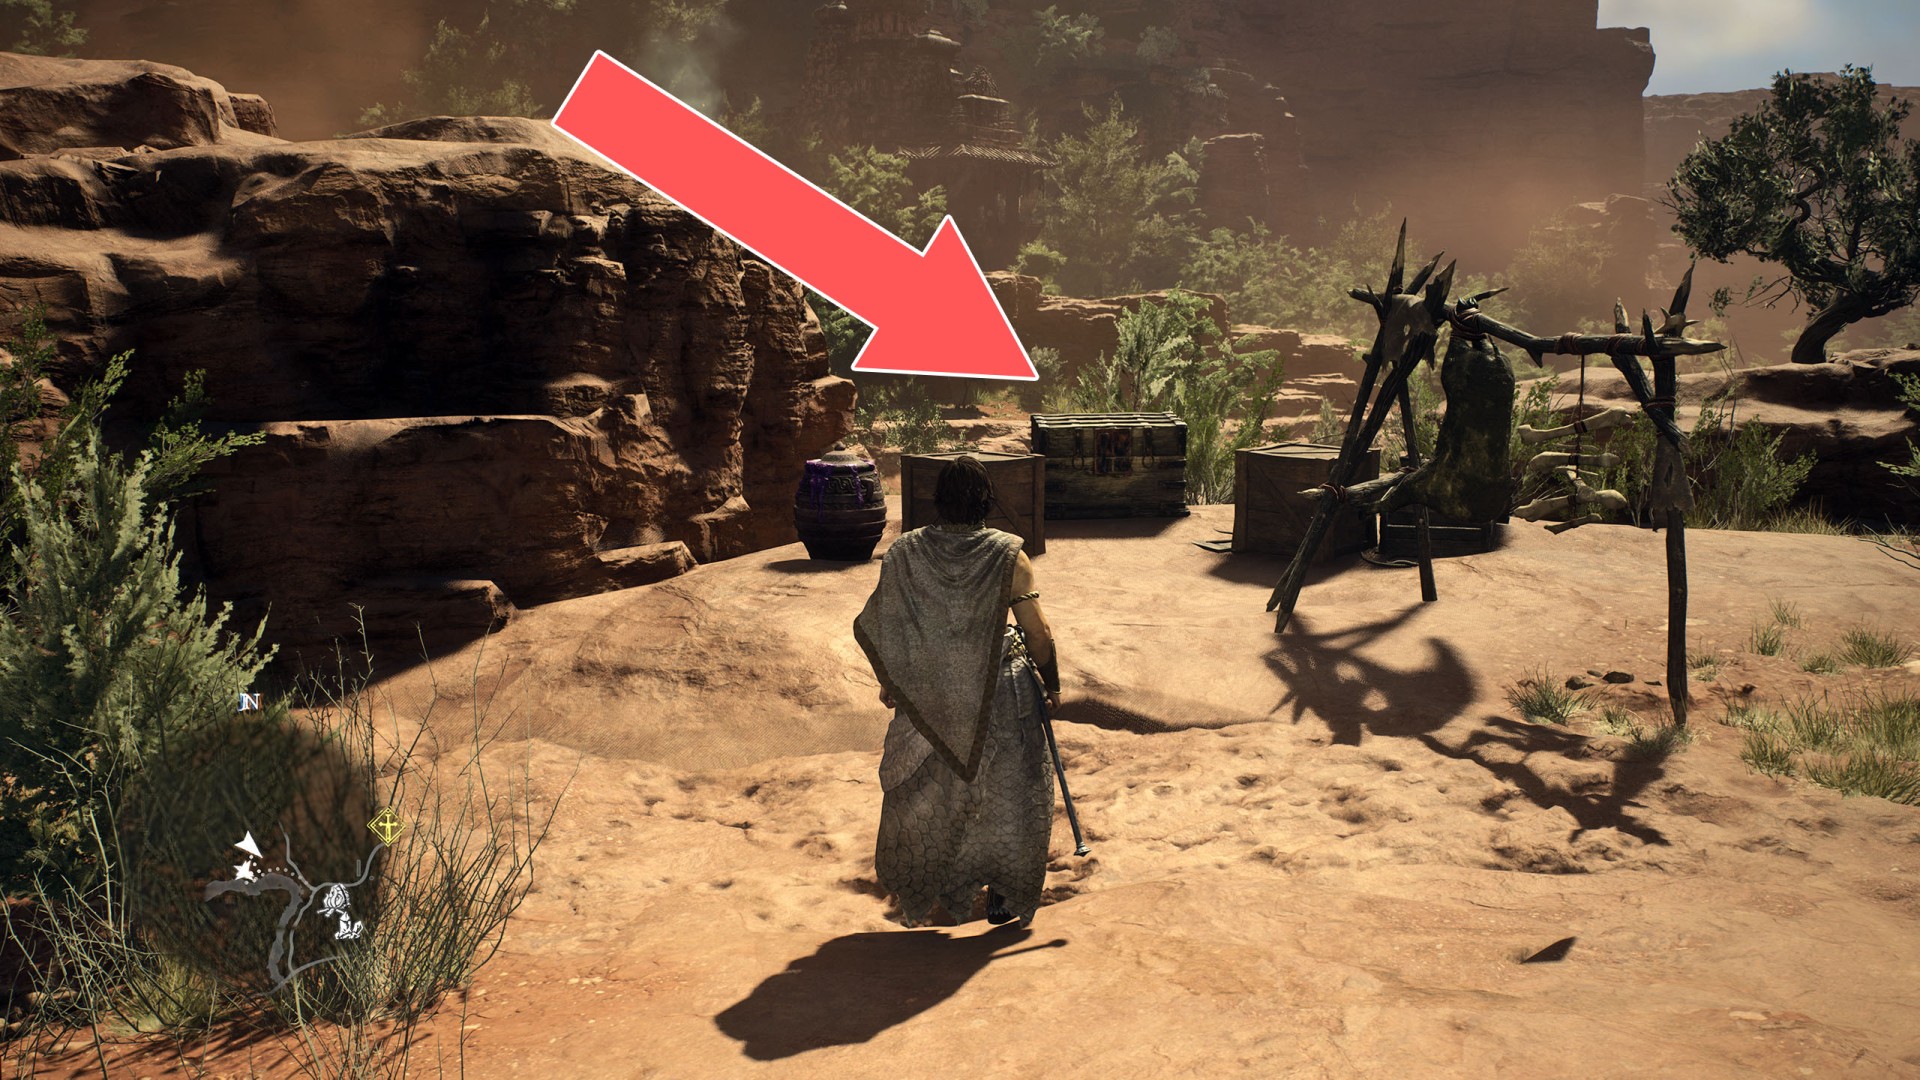
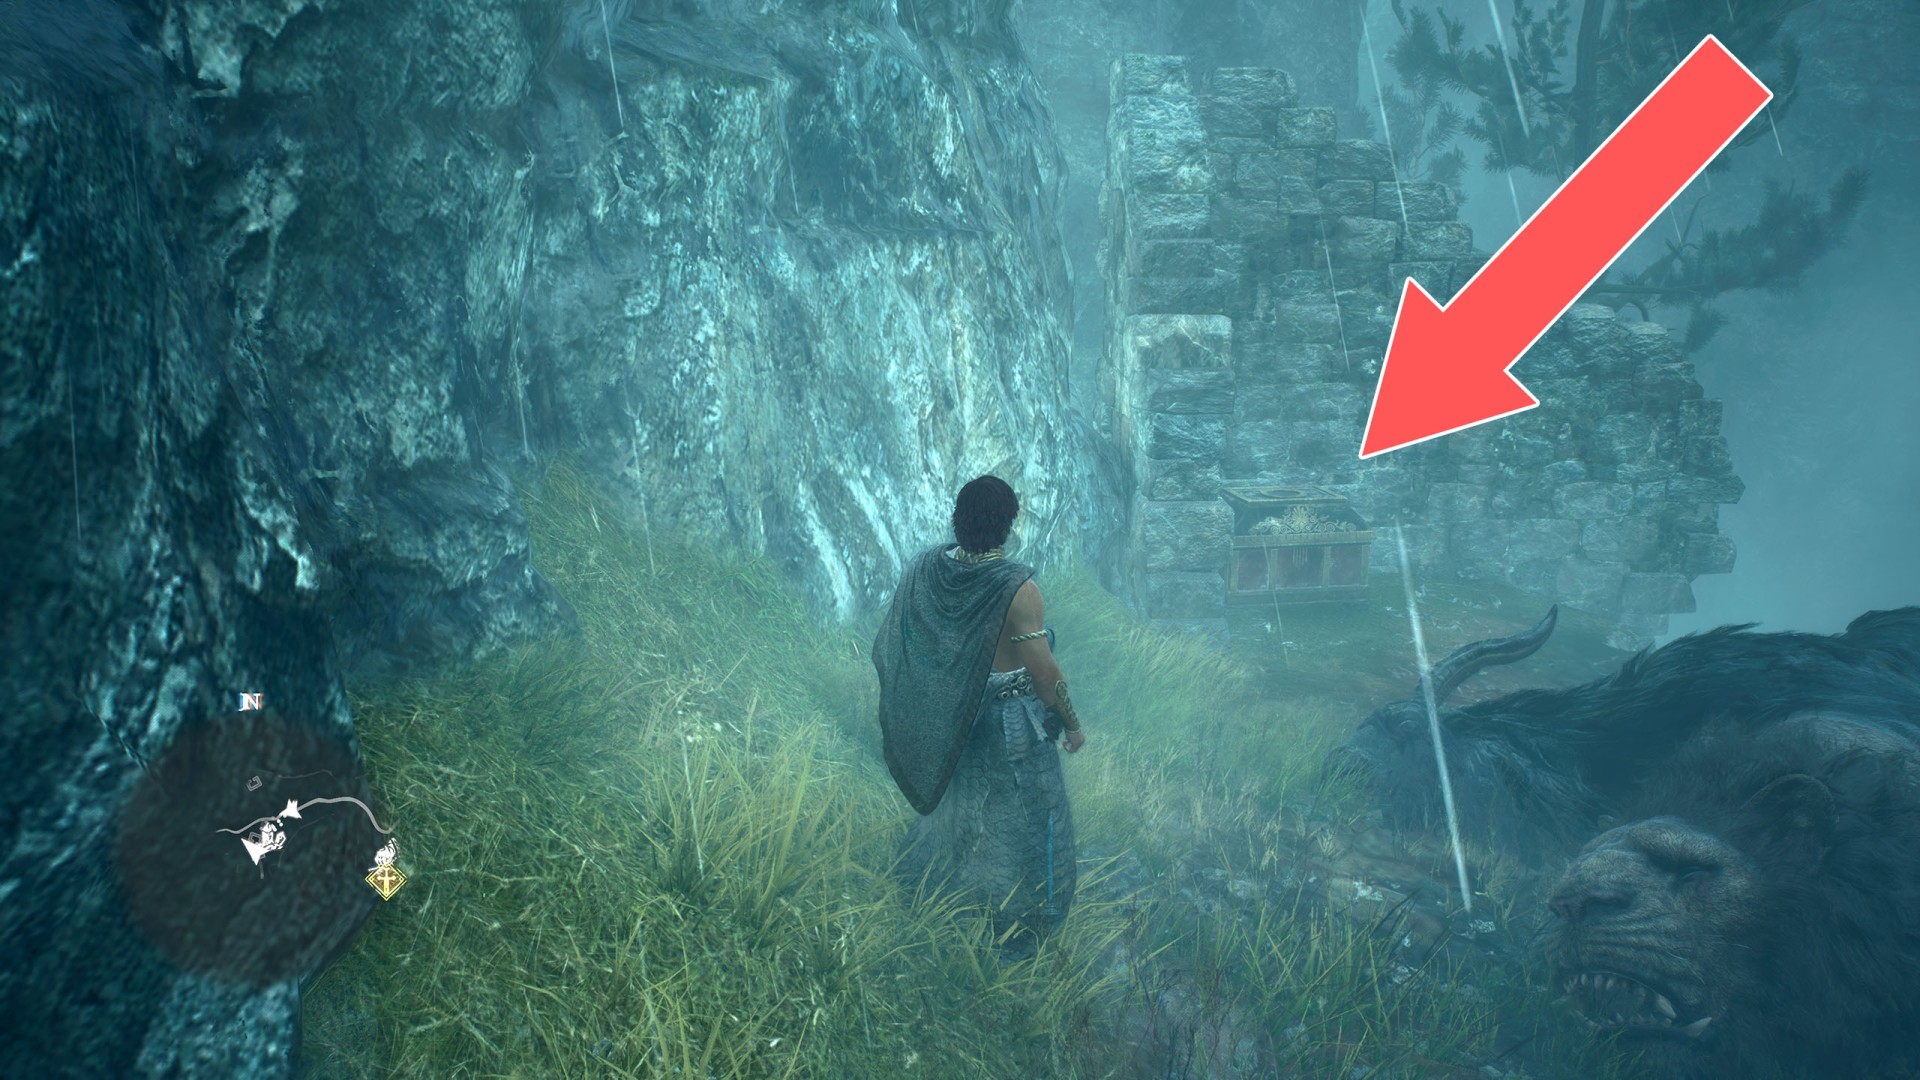
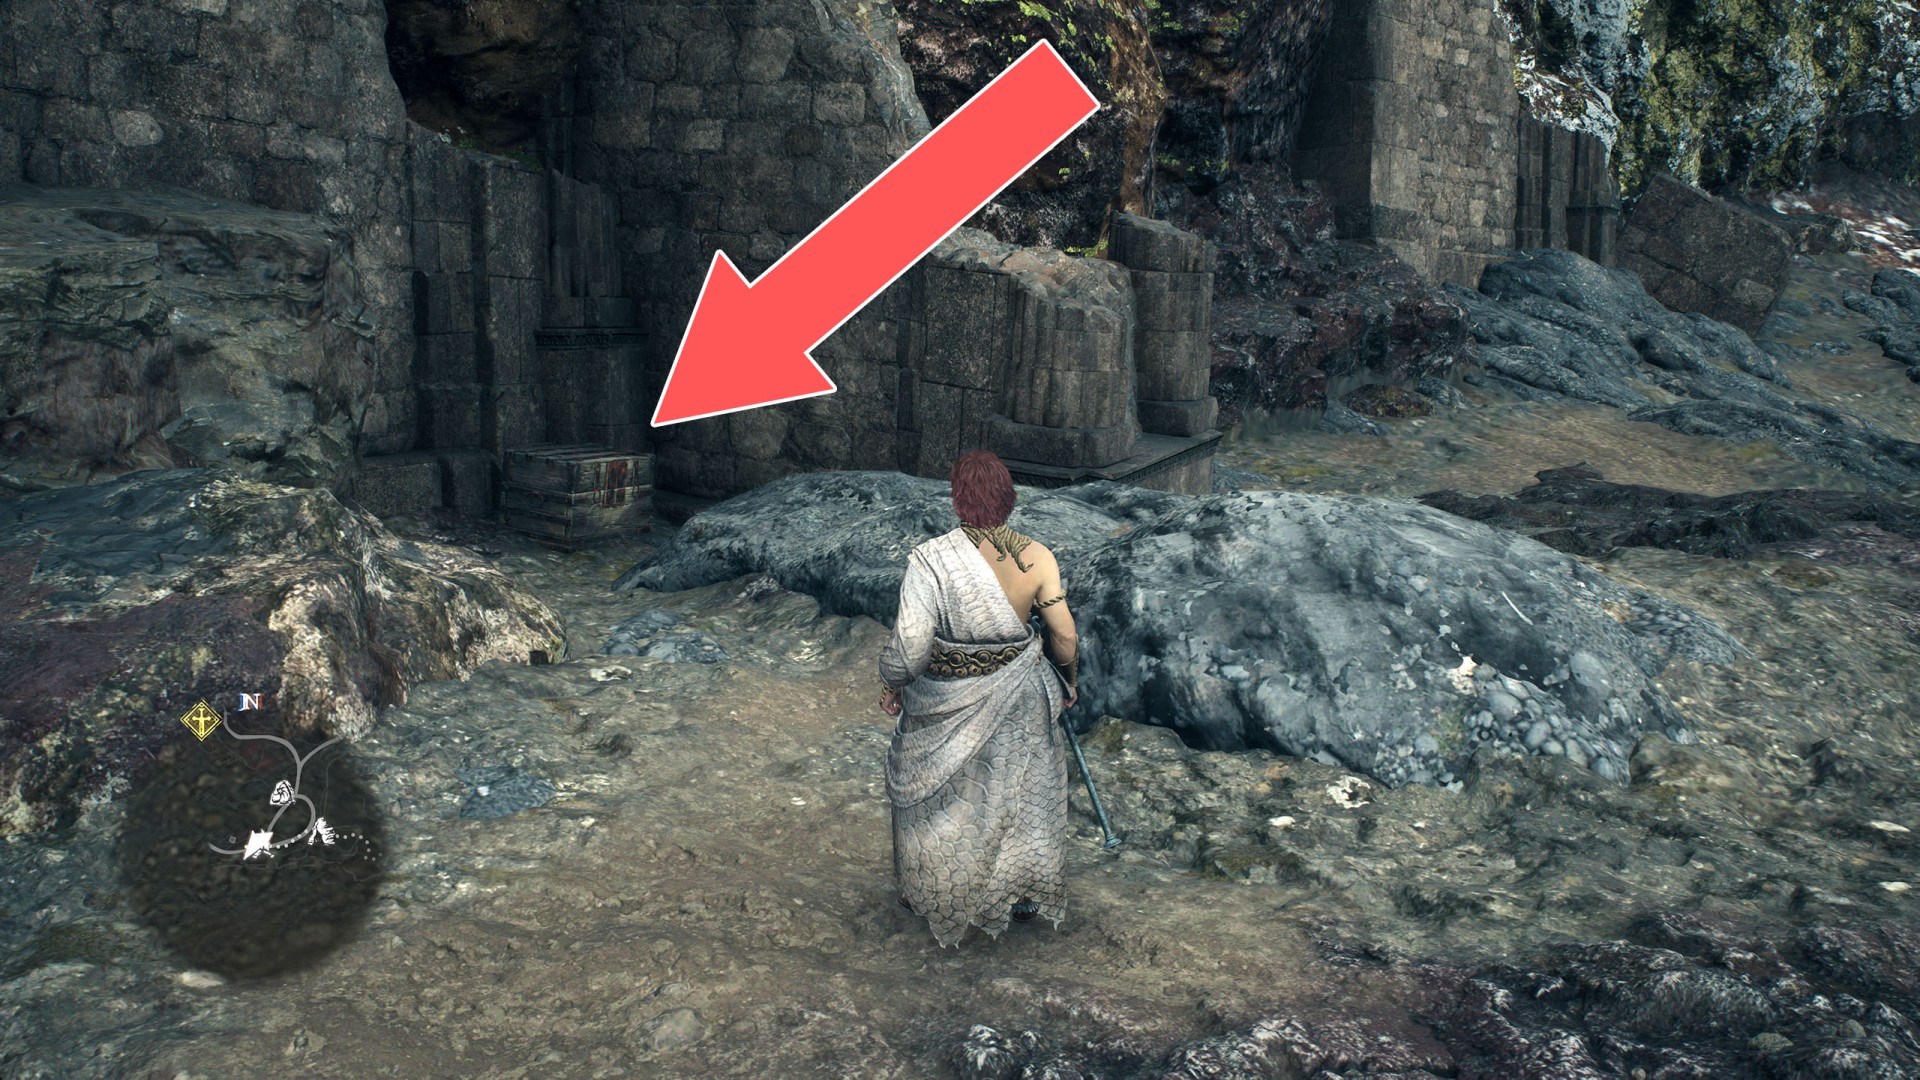
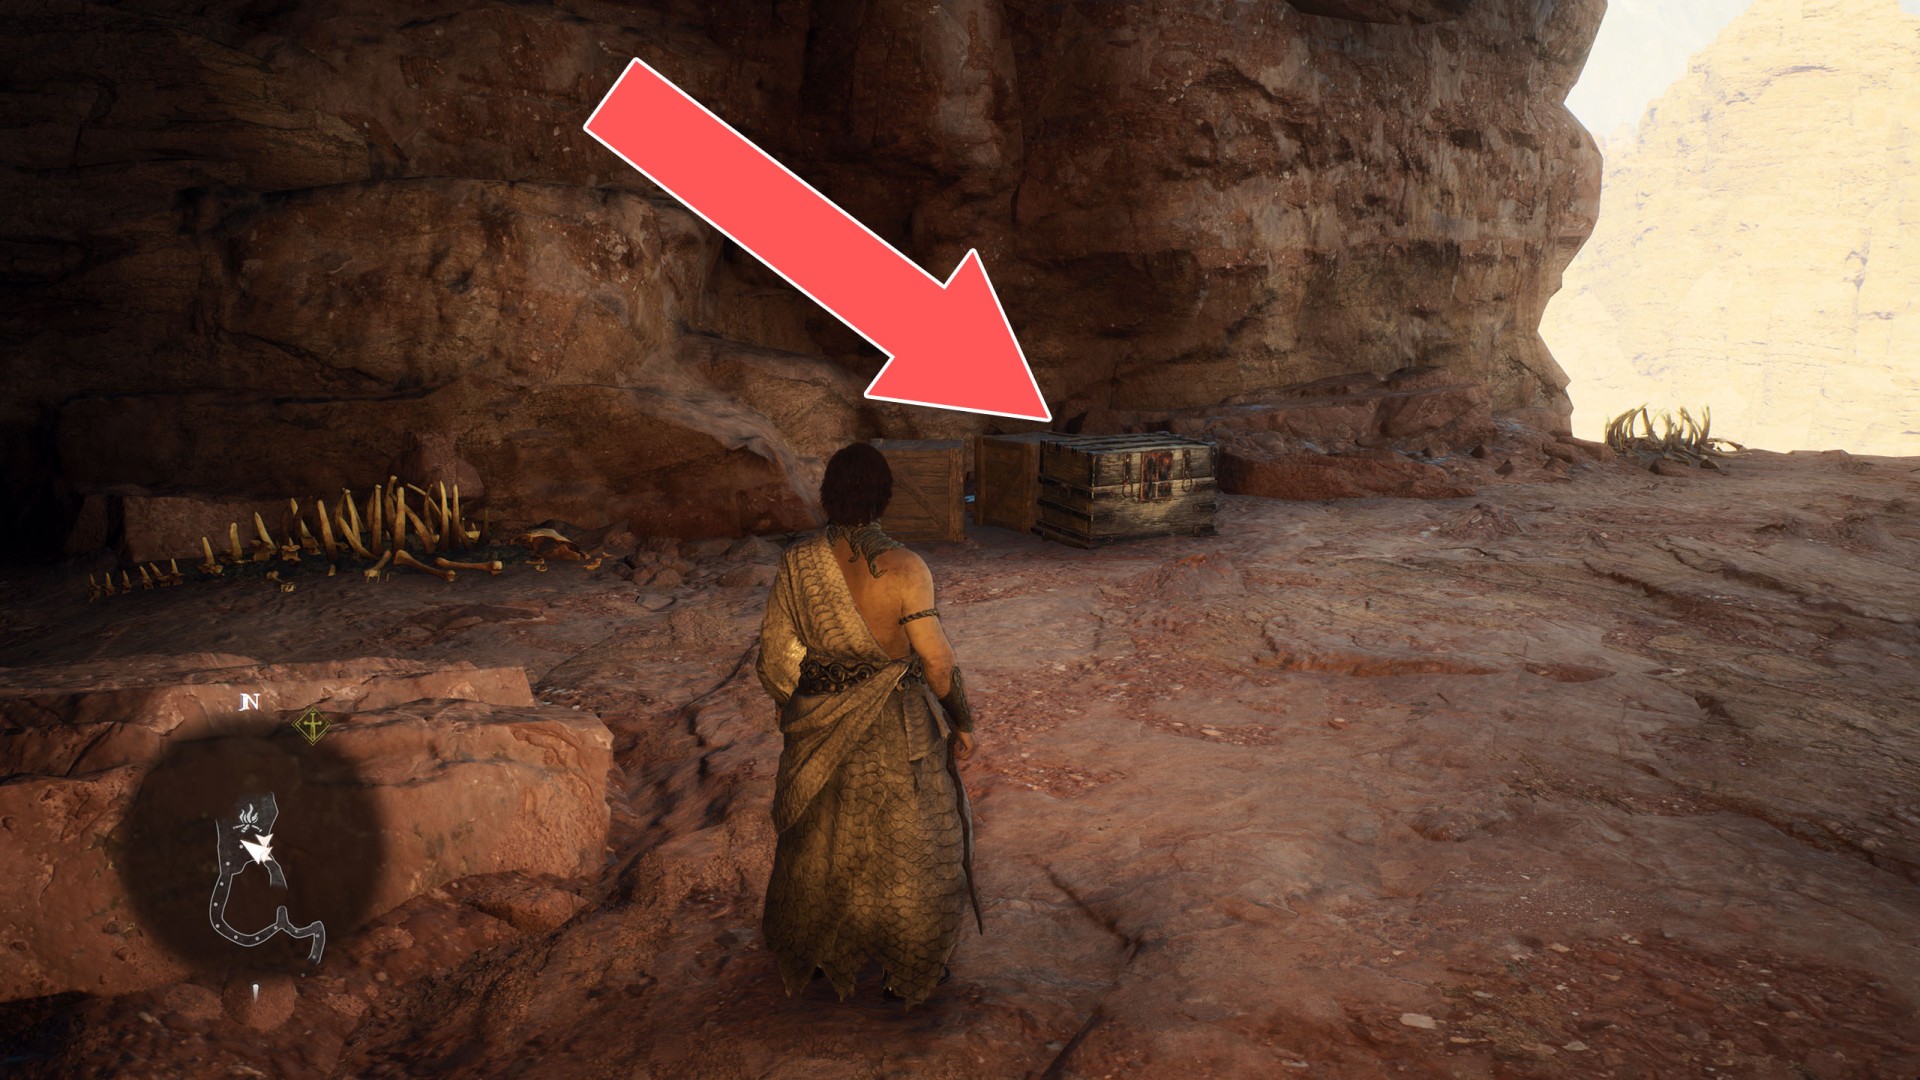
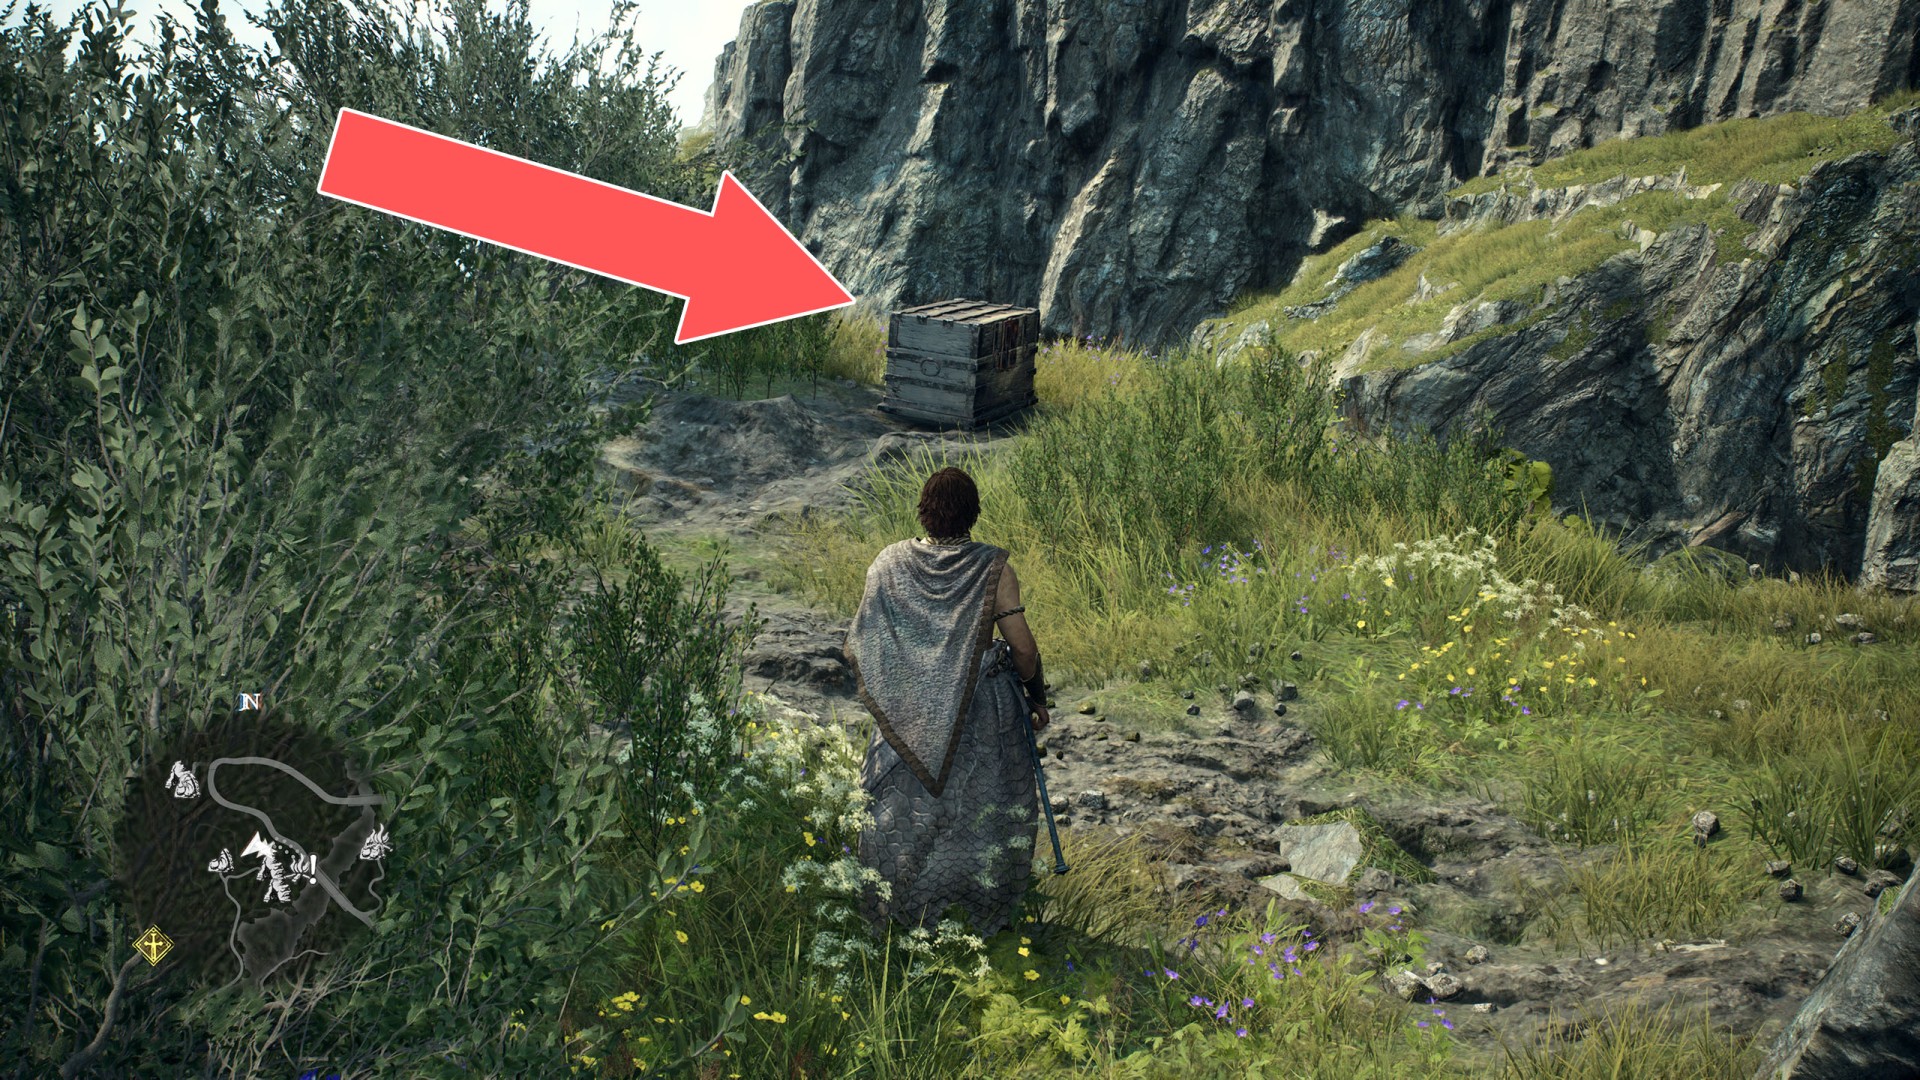
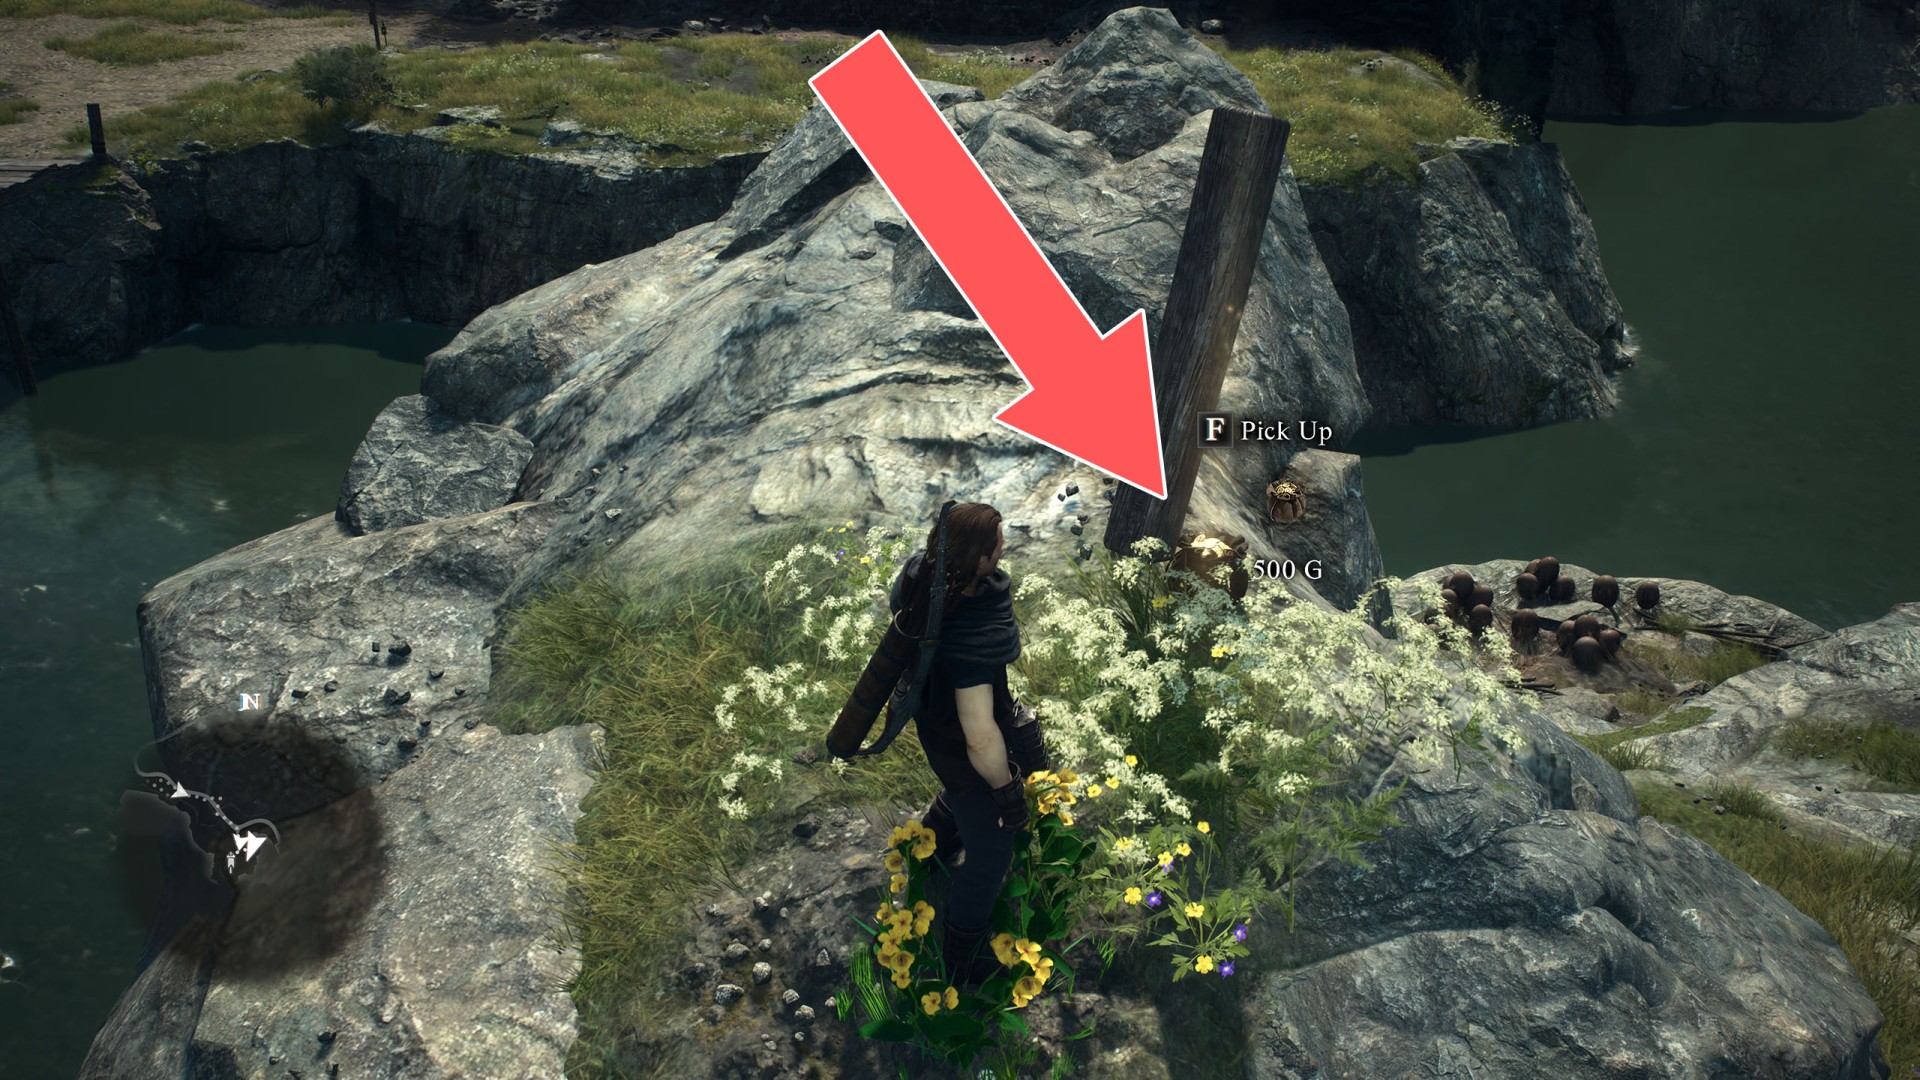
1 Box & Pouch (5,600G)
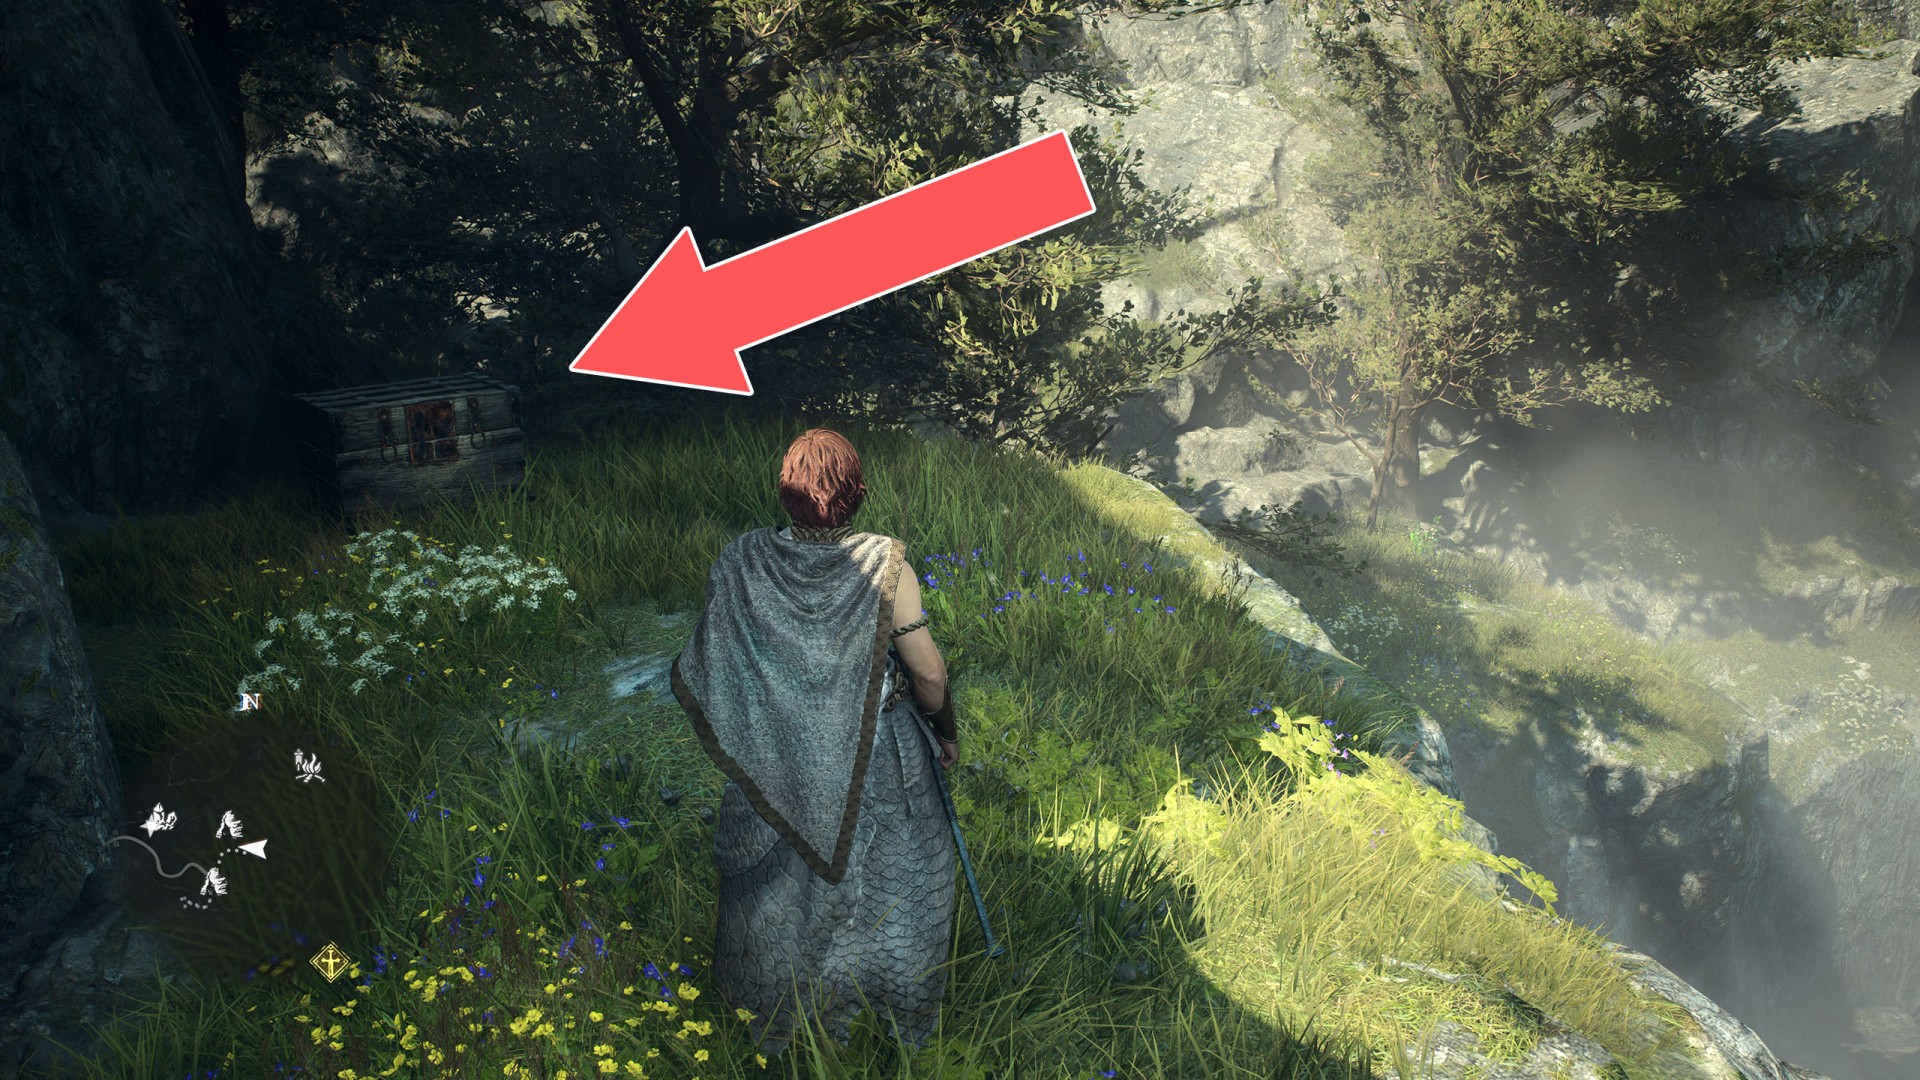
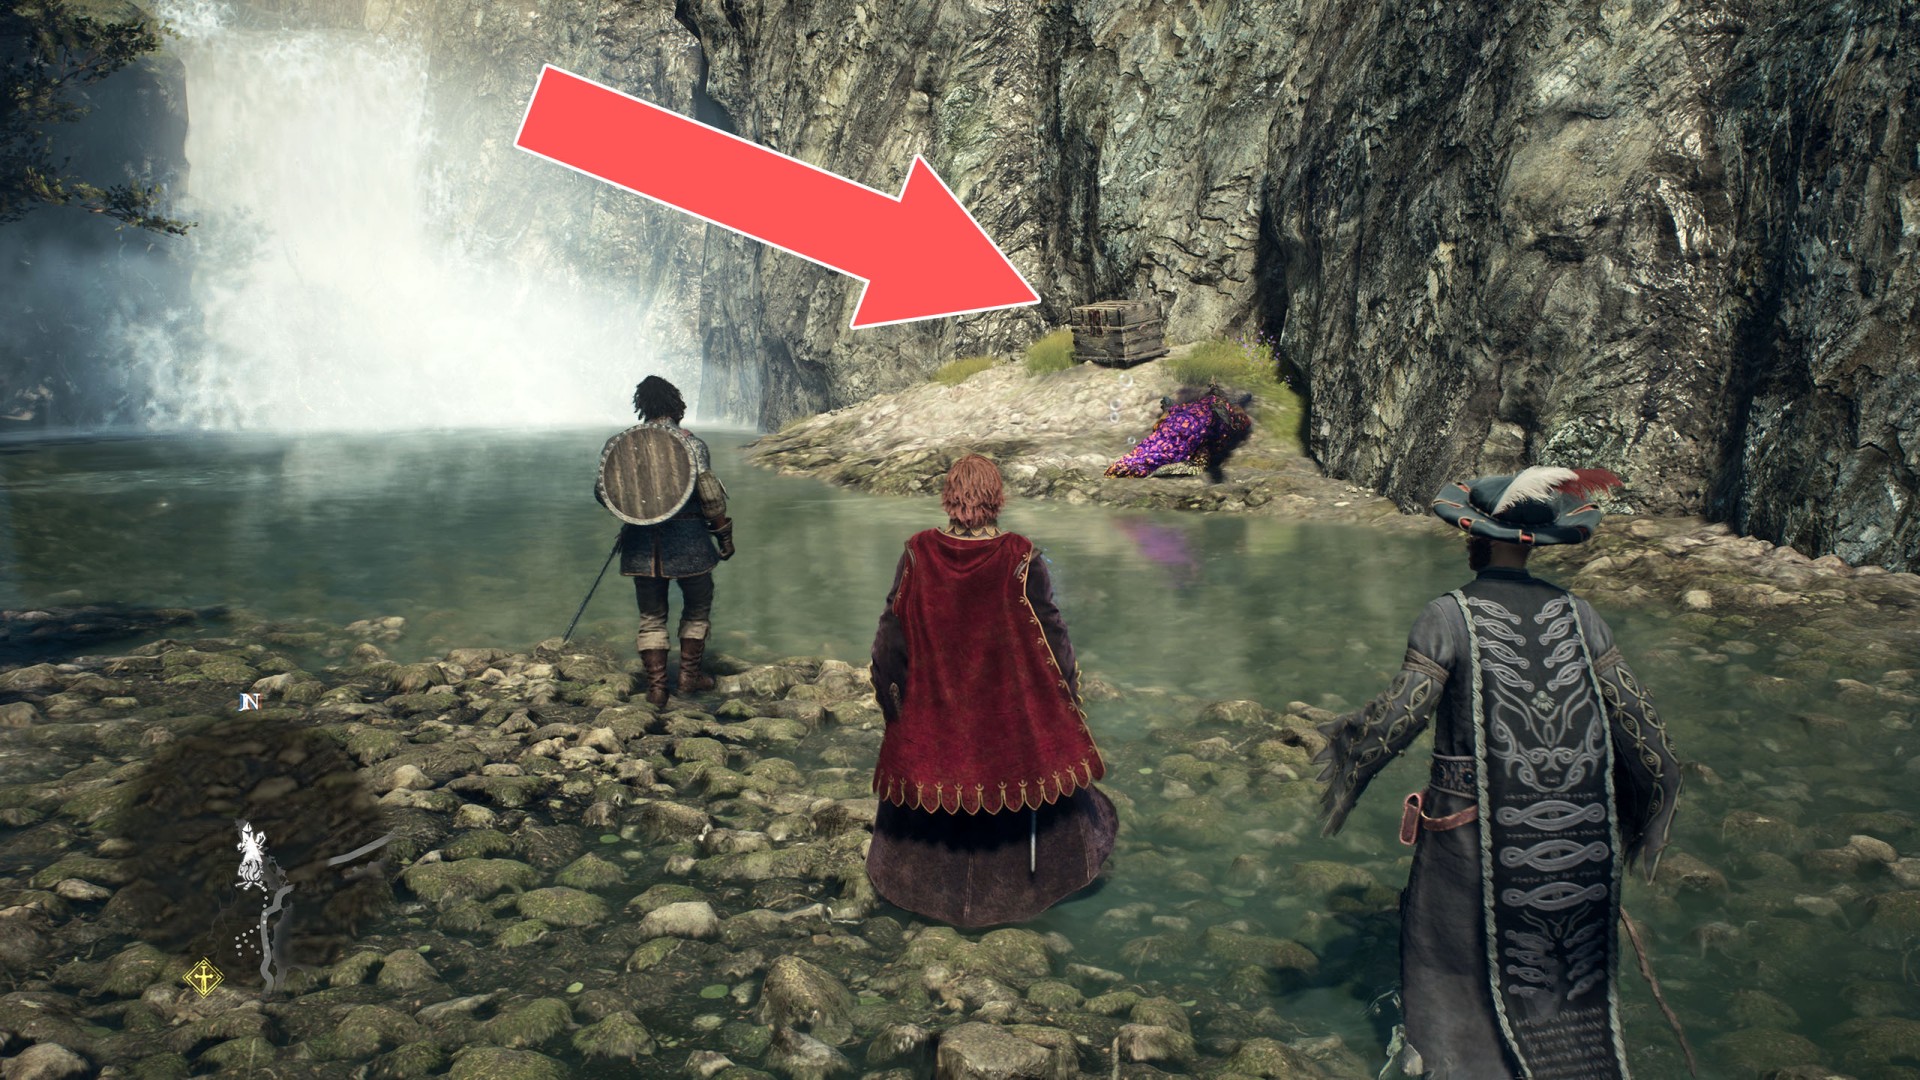
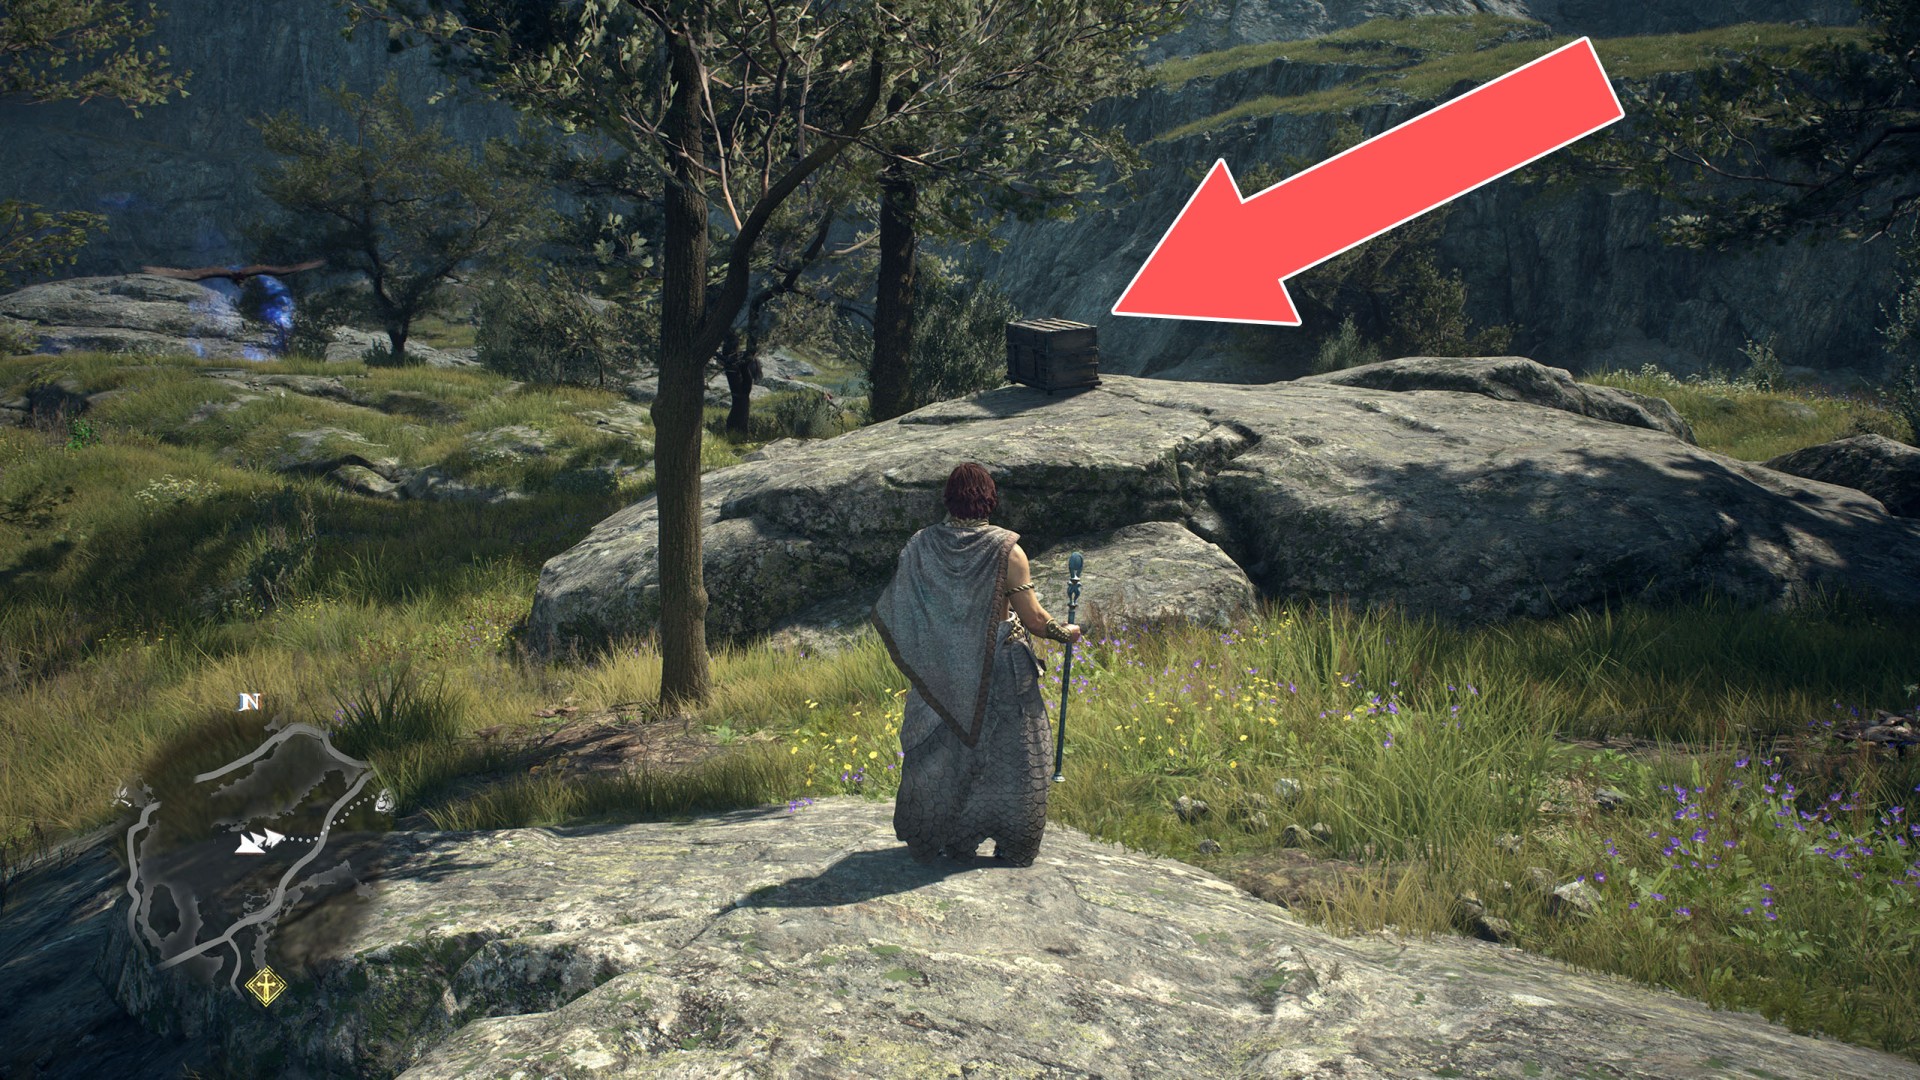
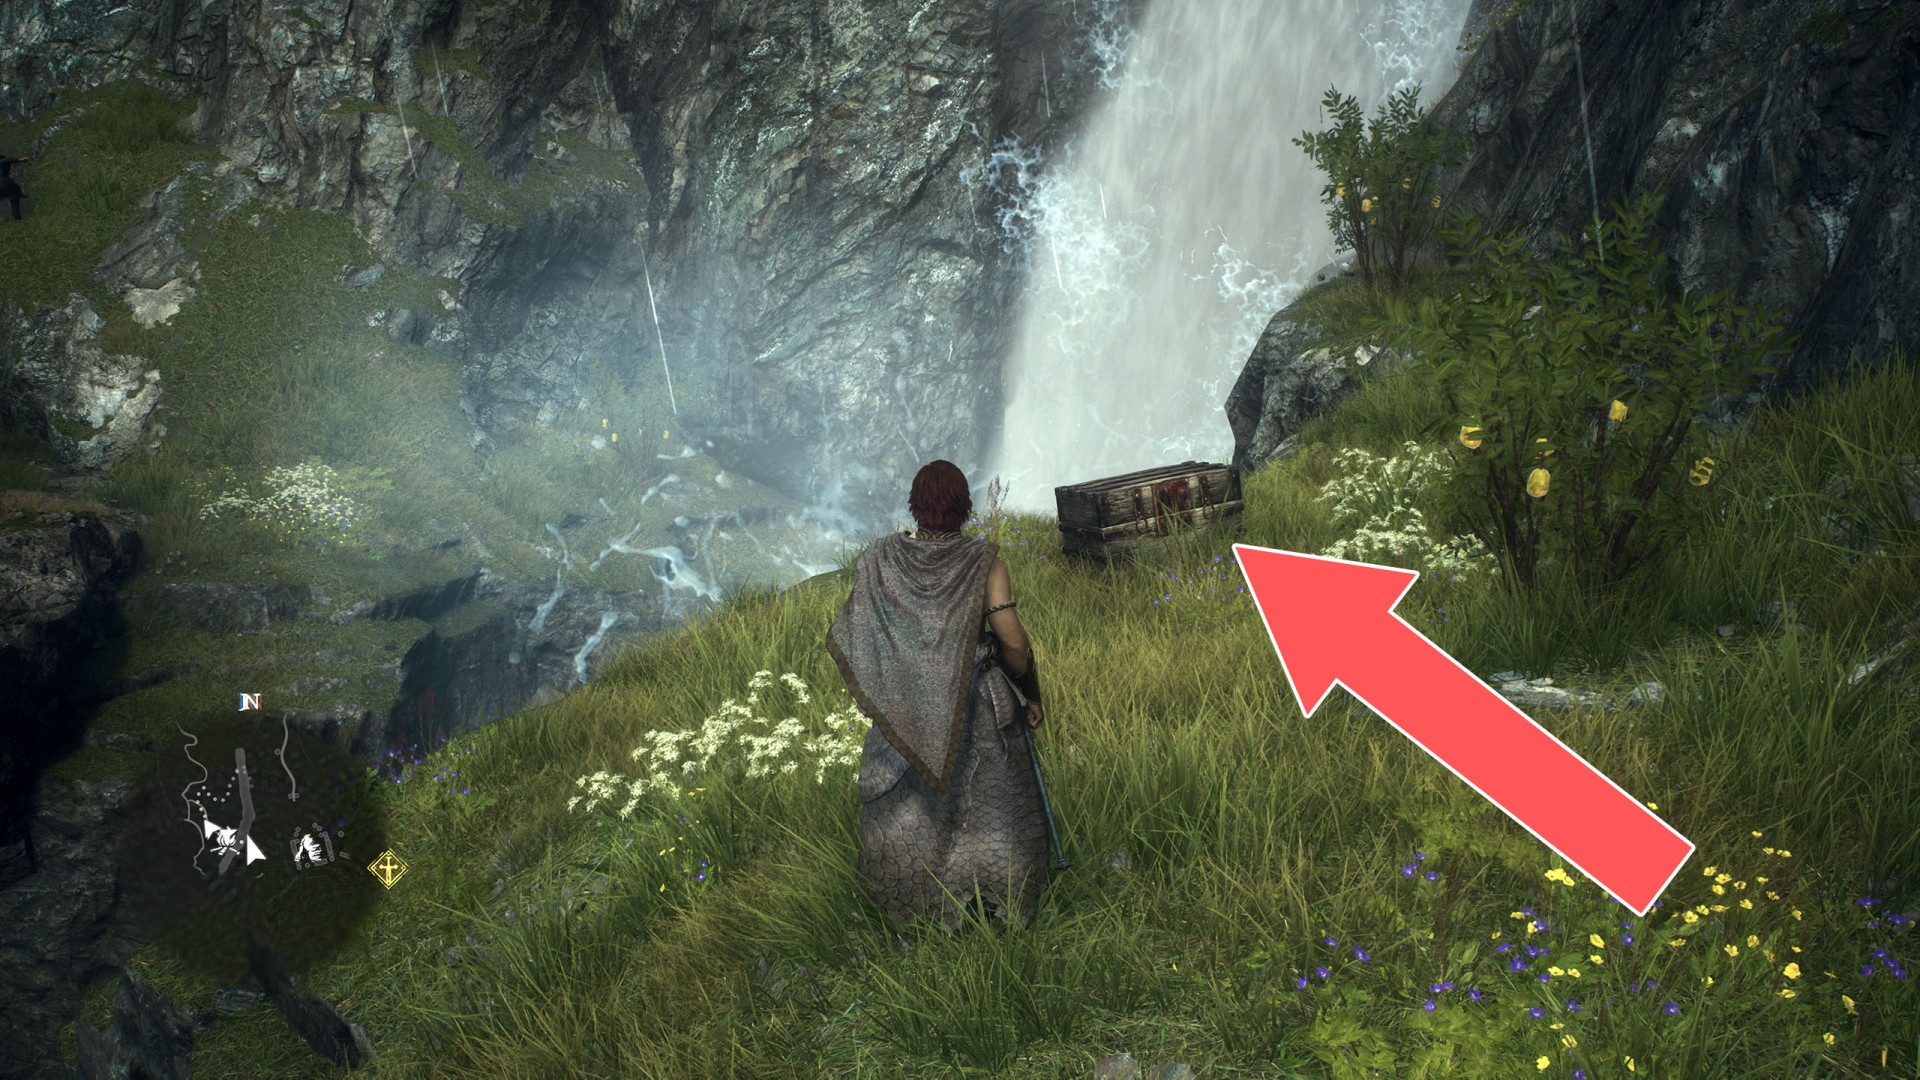
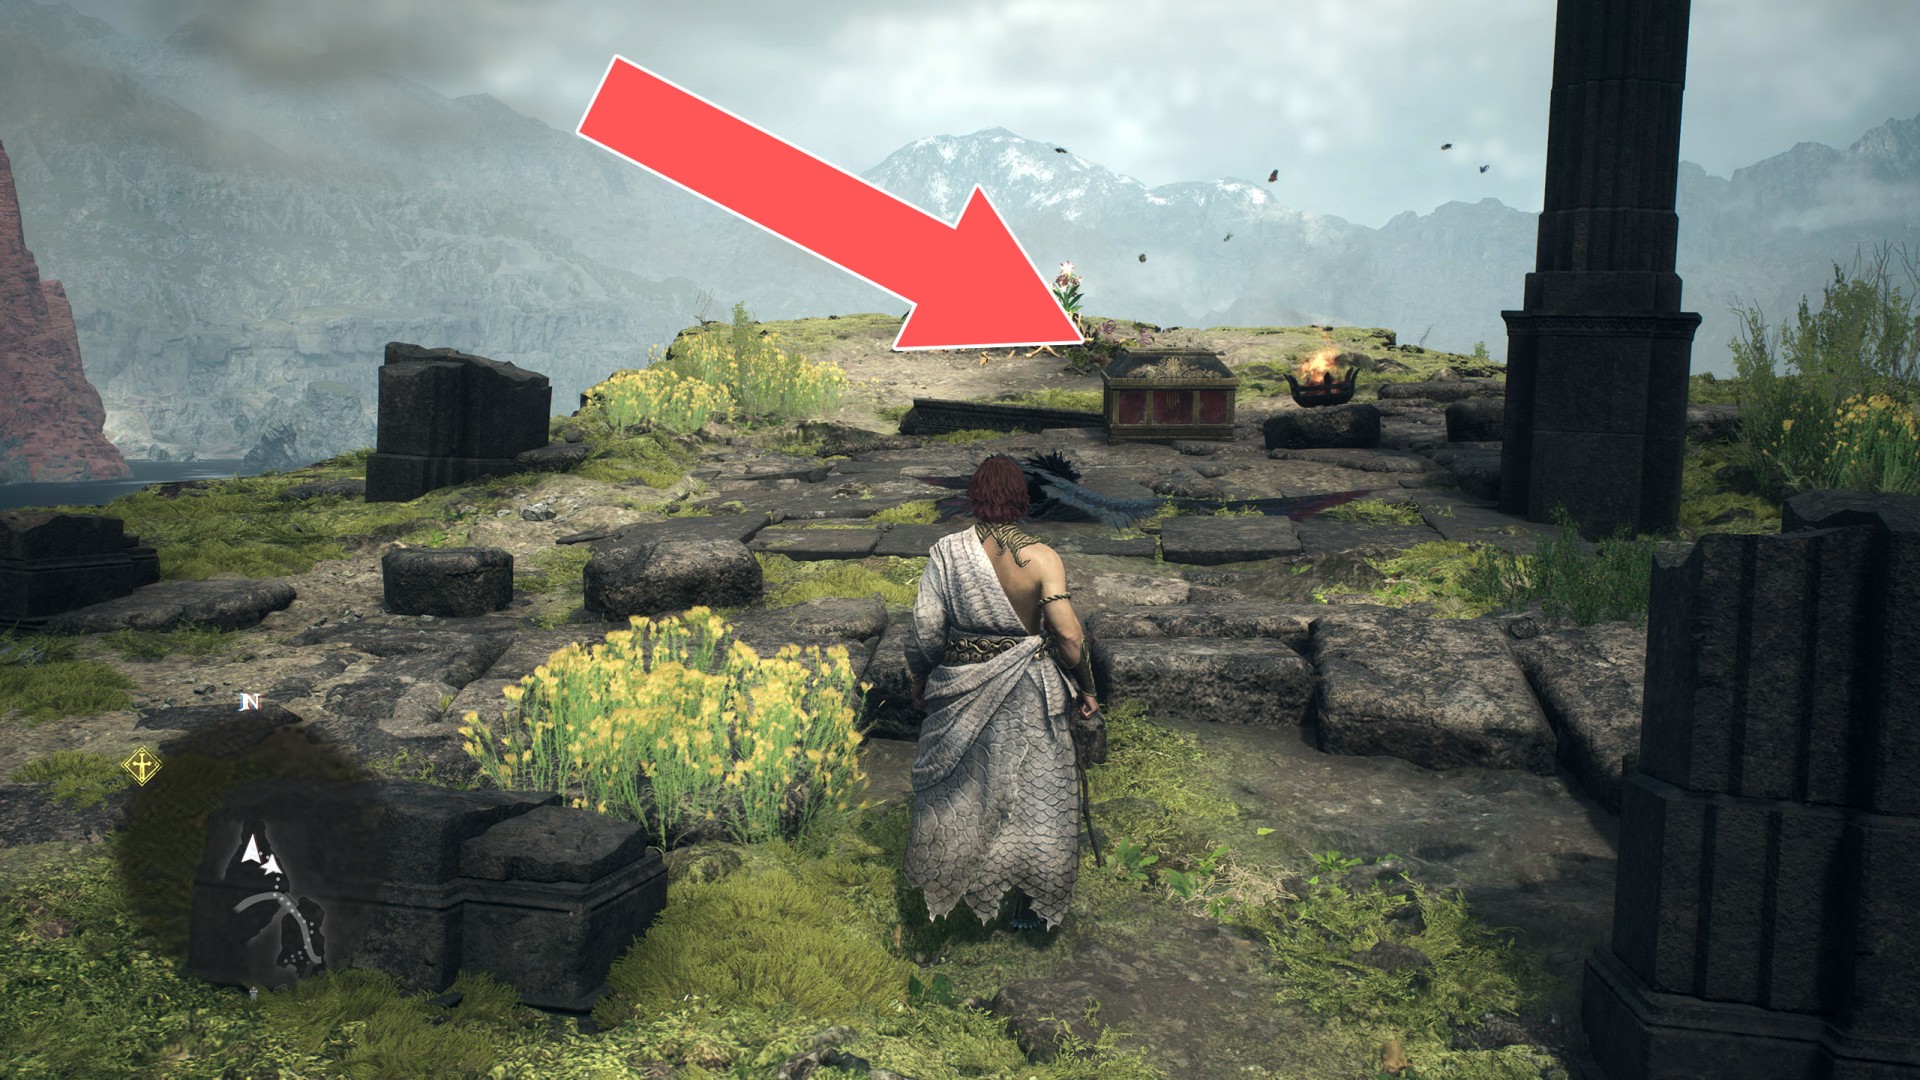
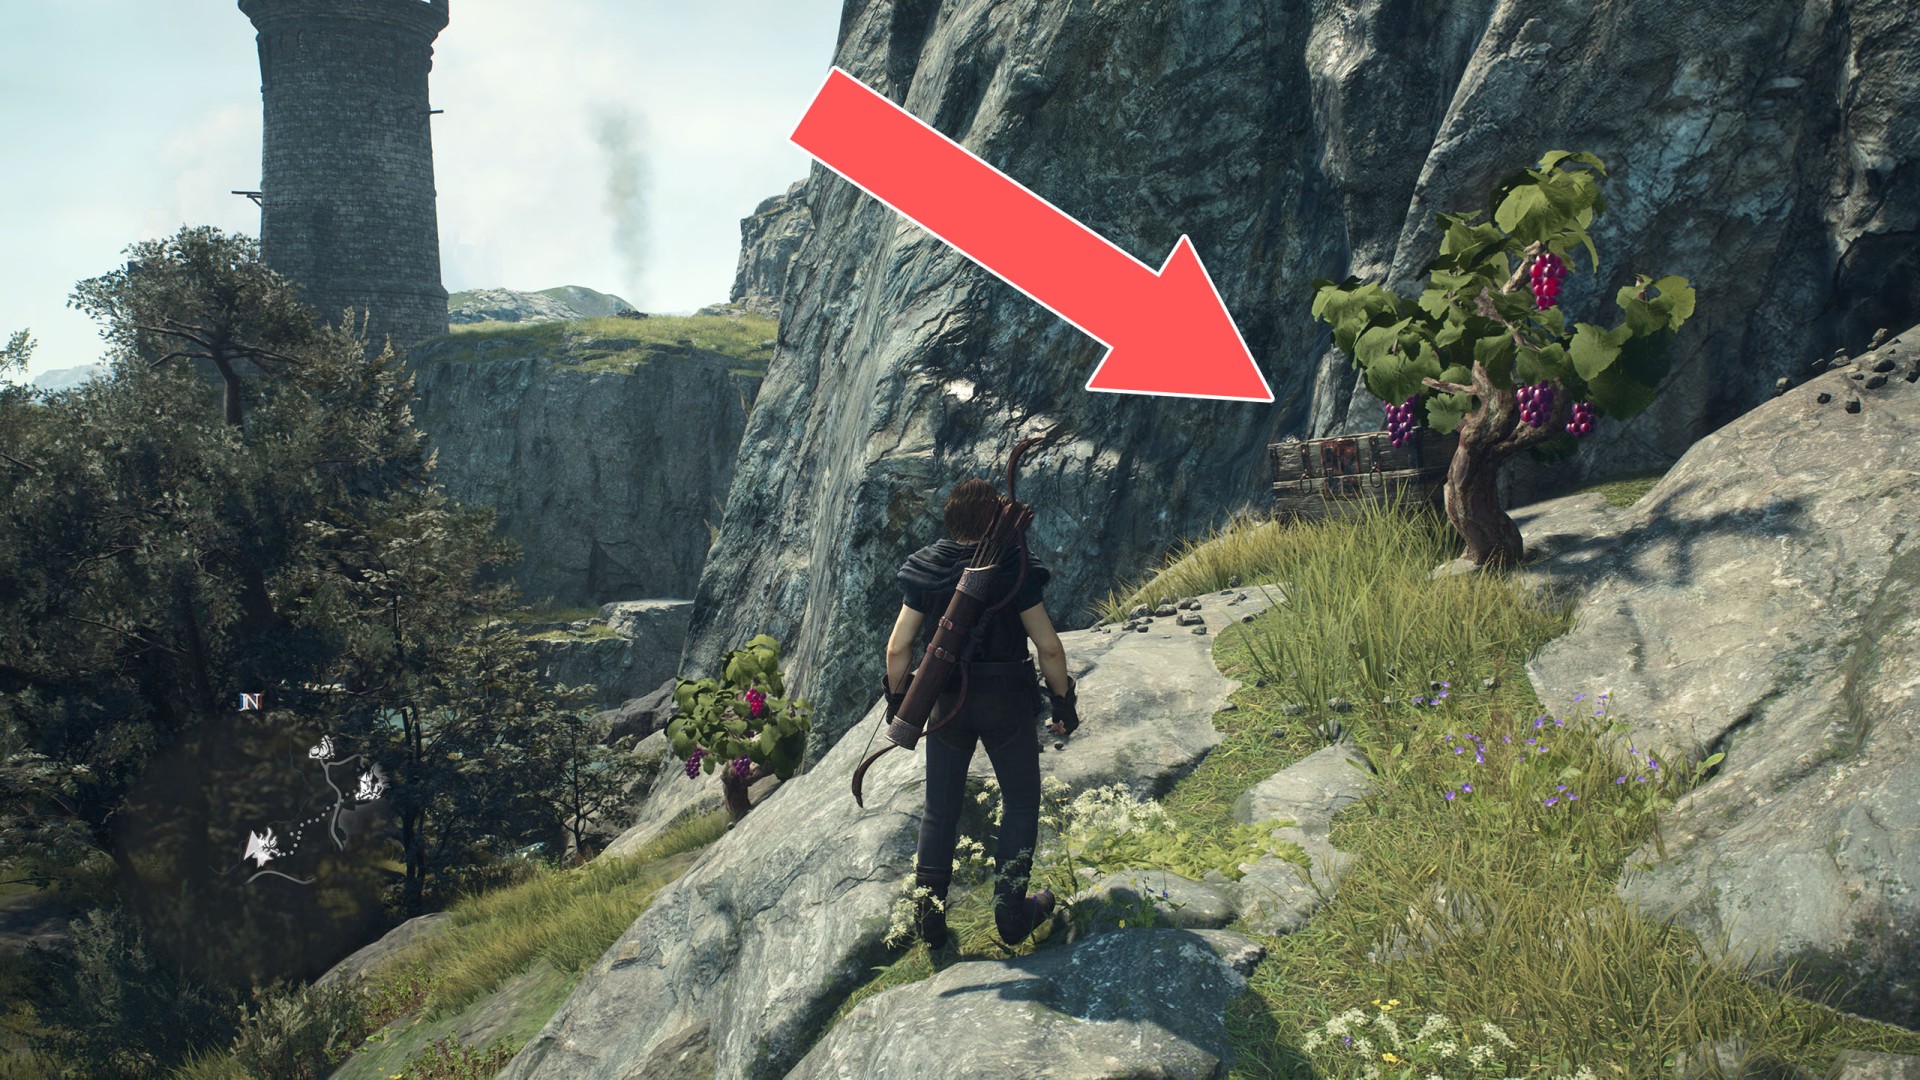
2Box & Pouch (6,490G)

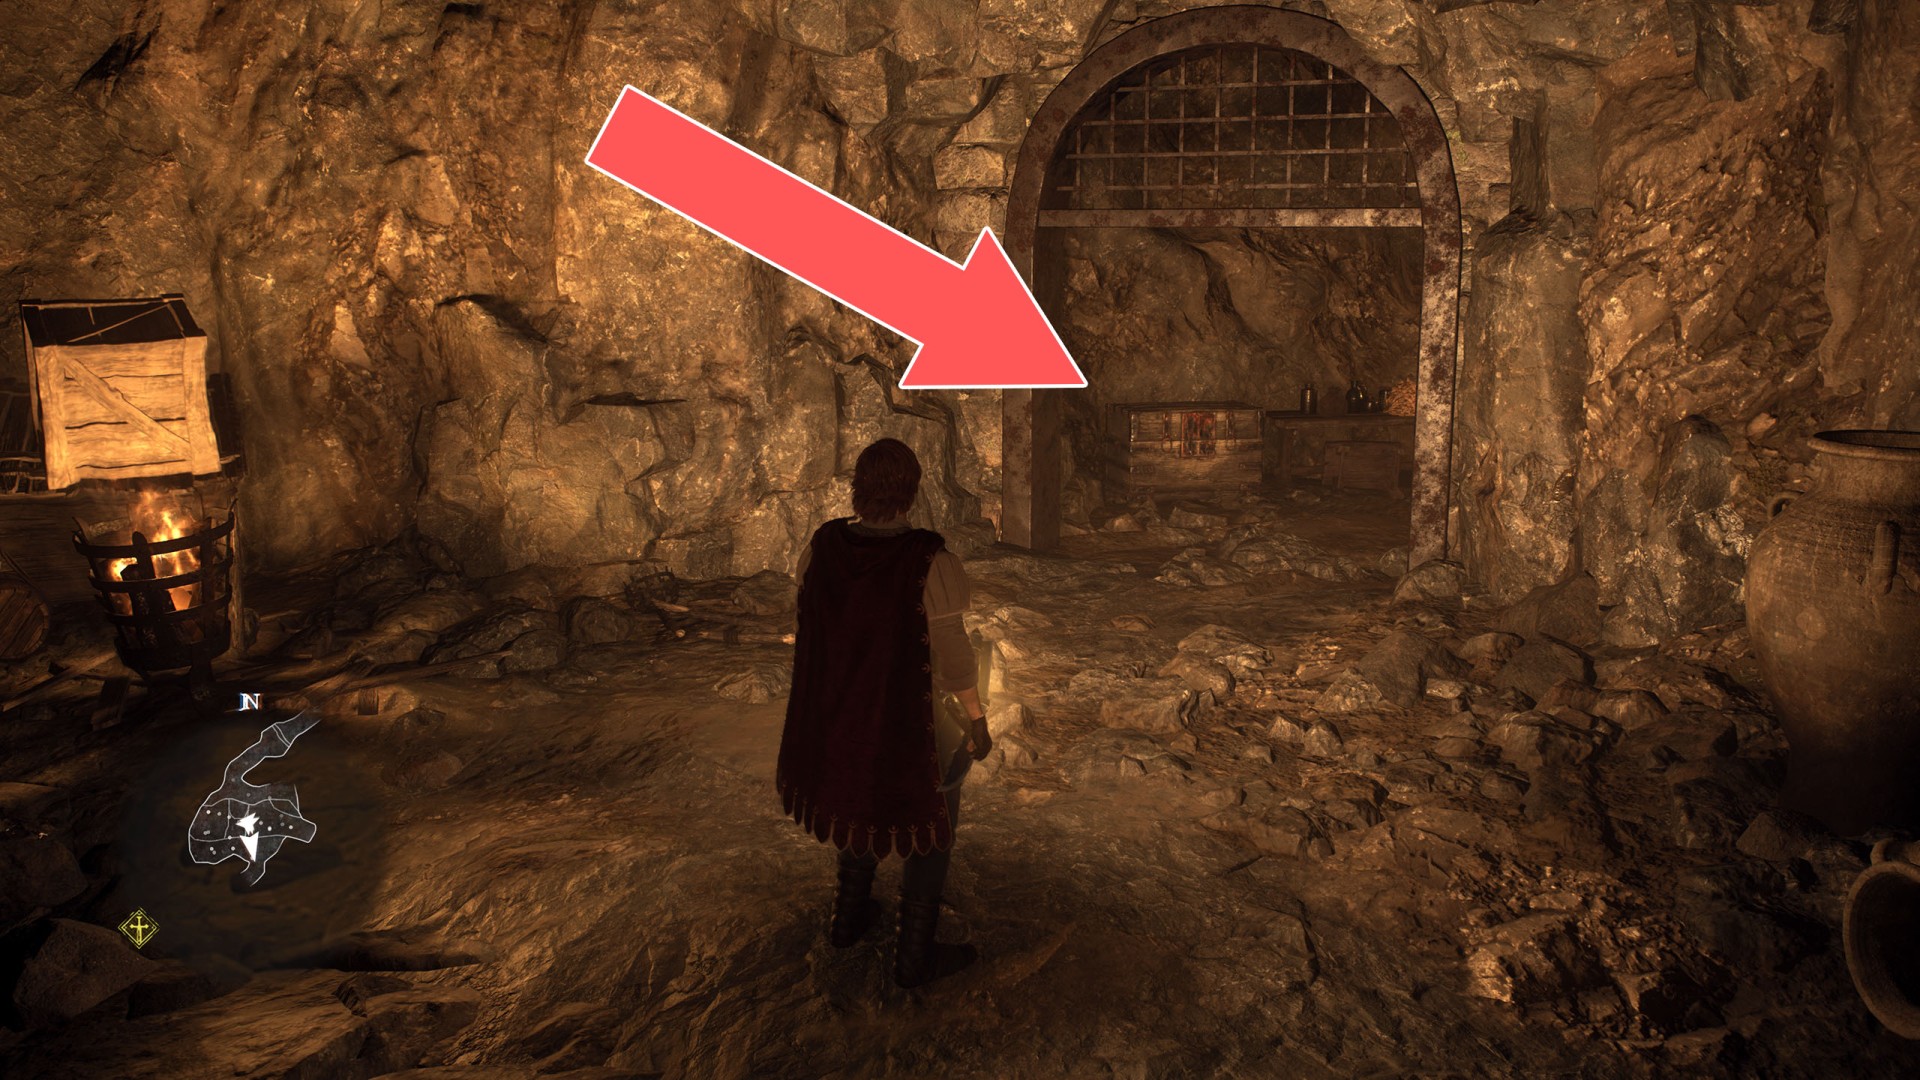
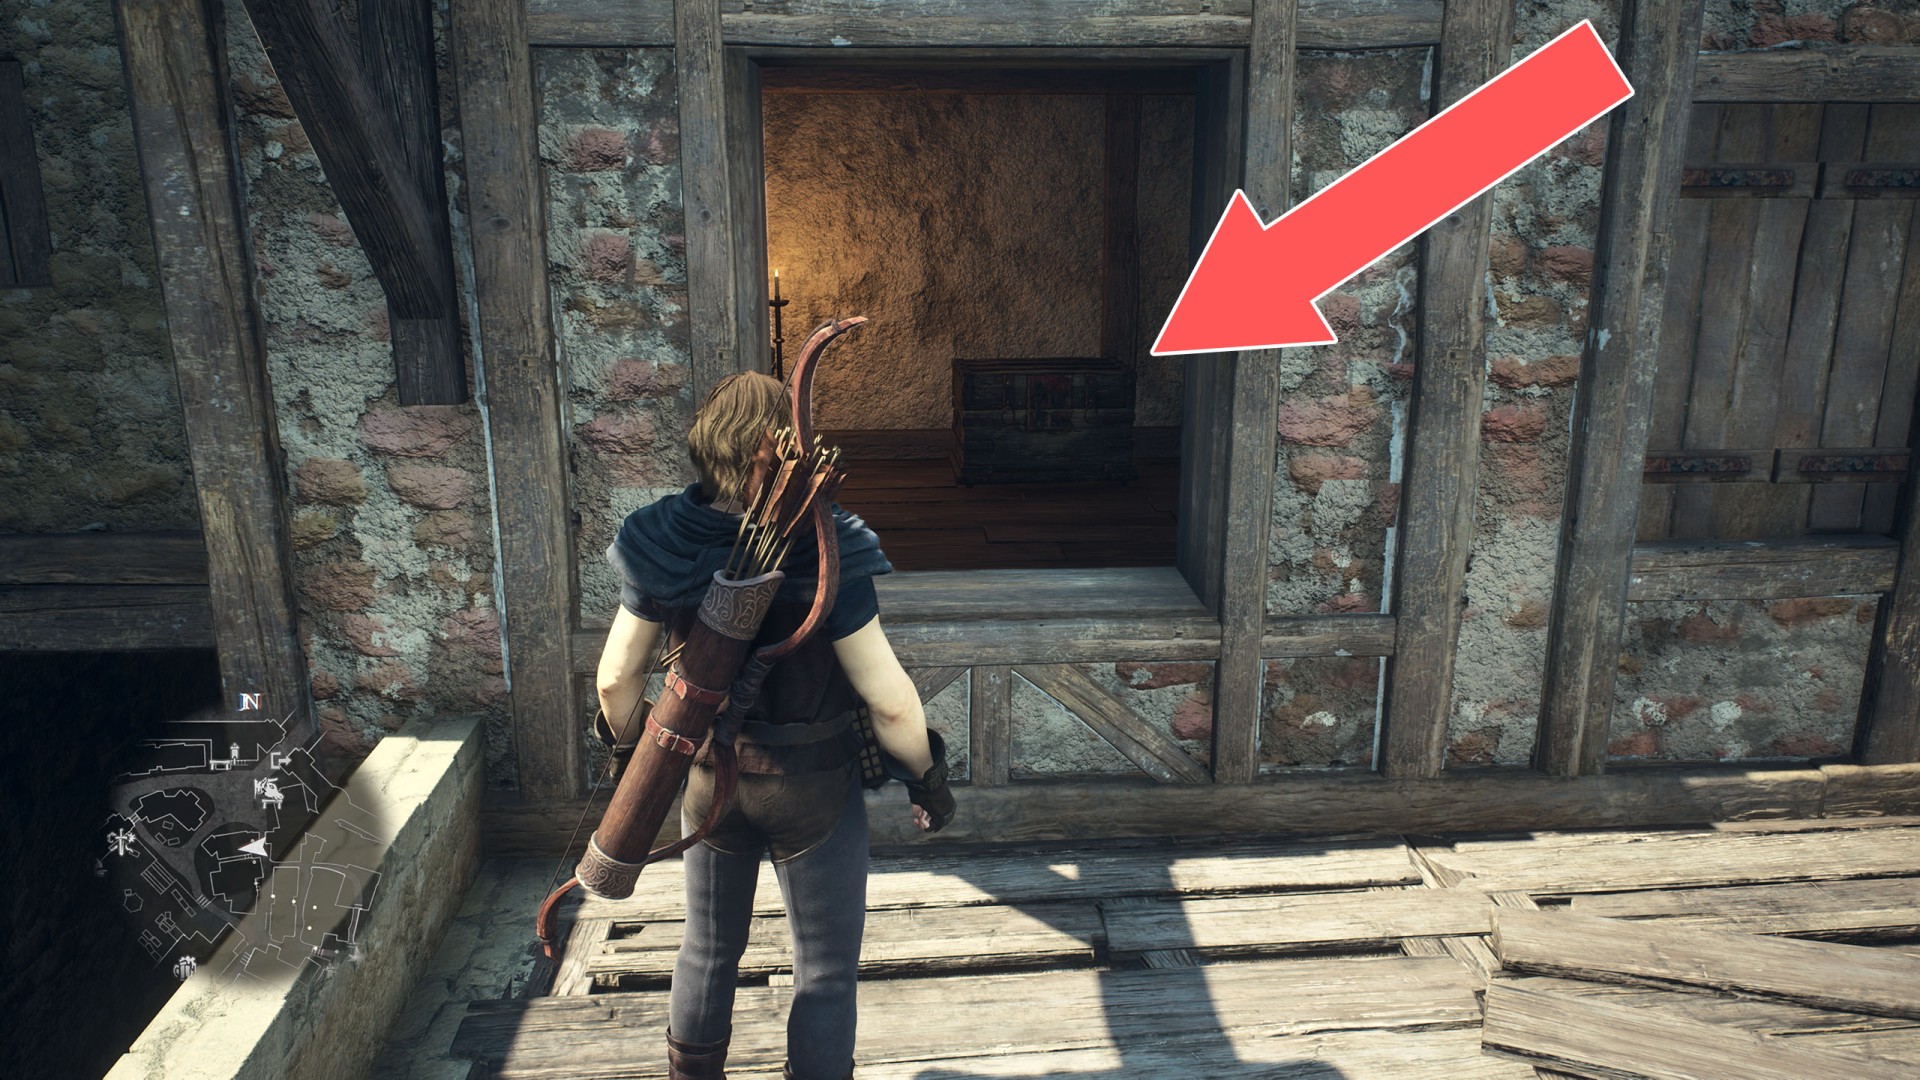
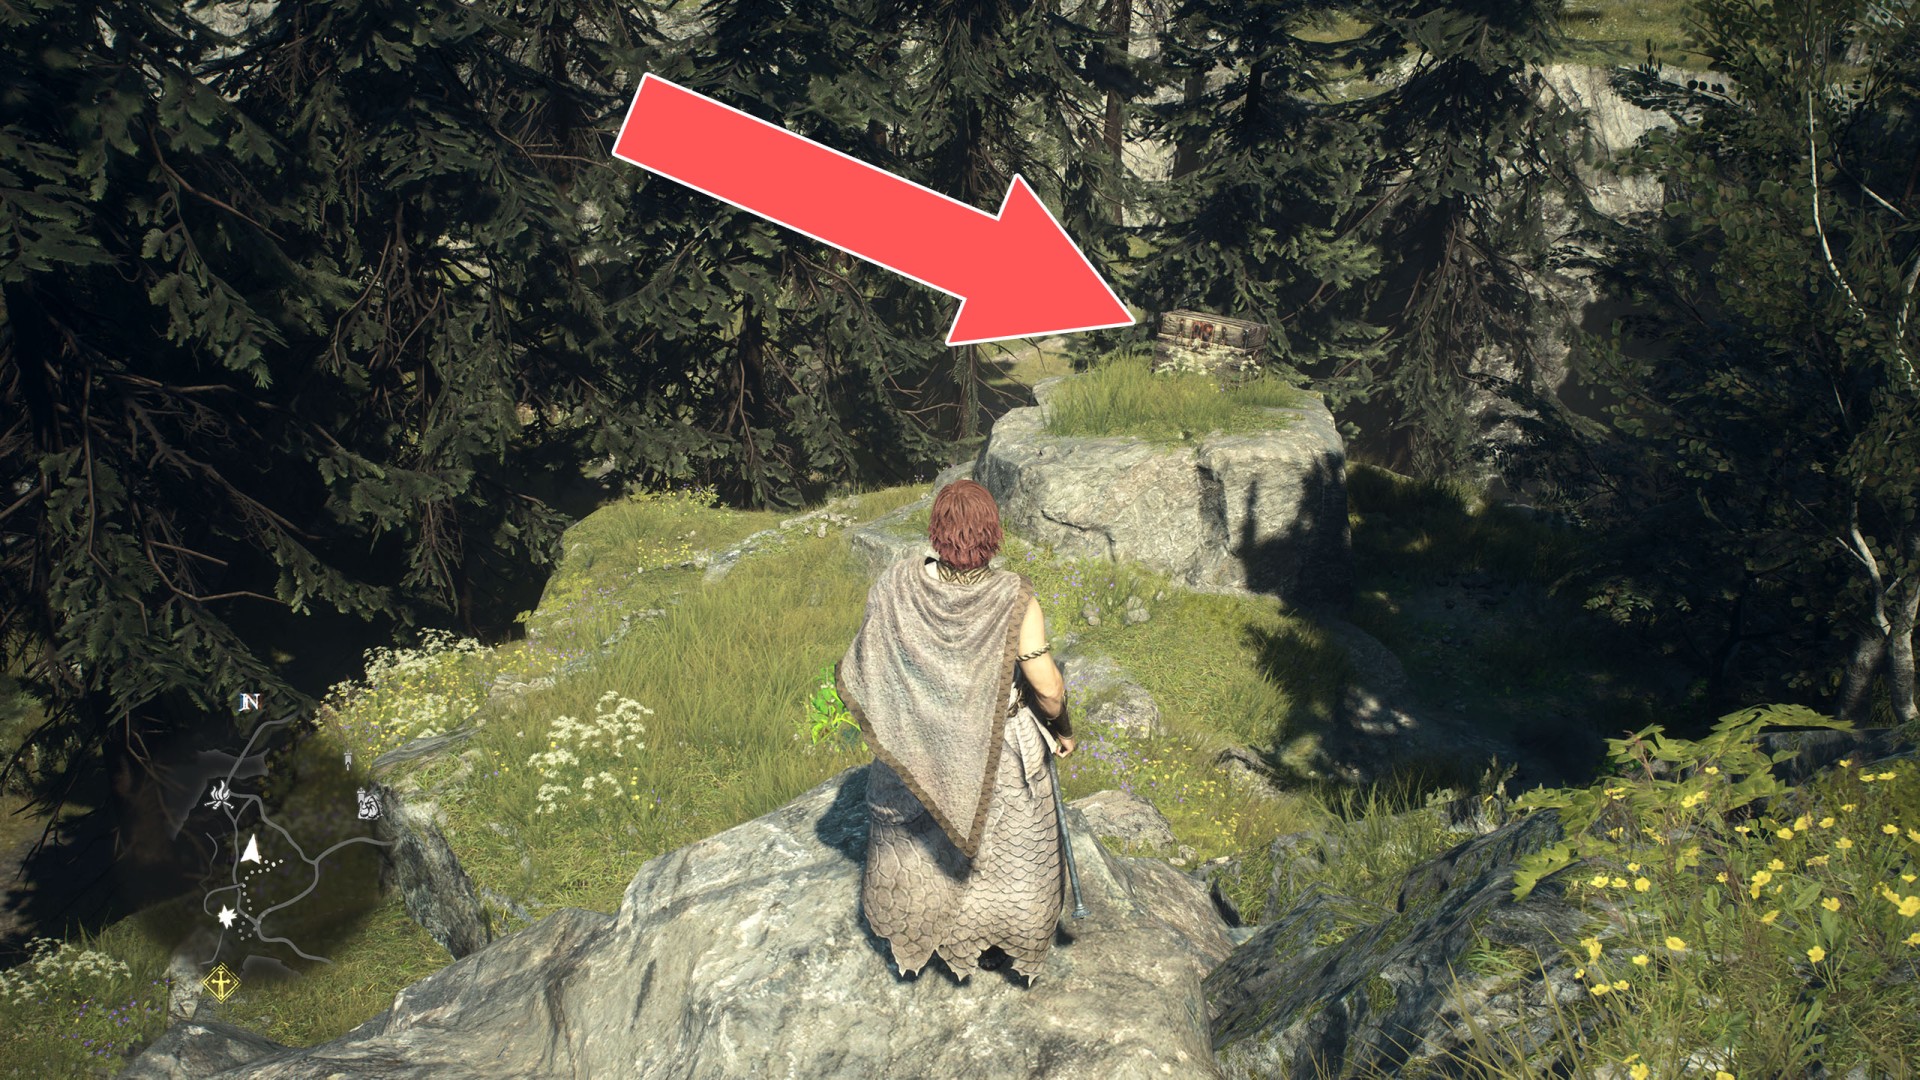
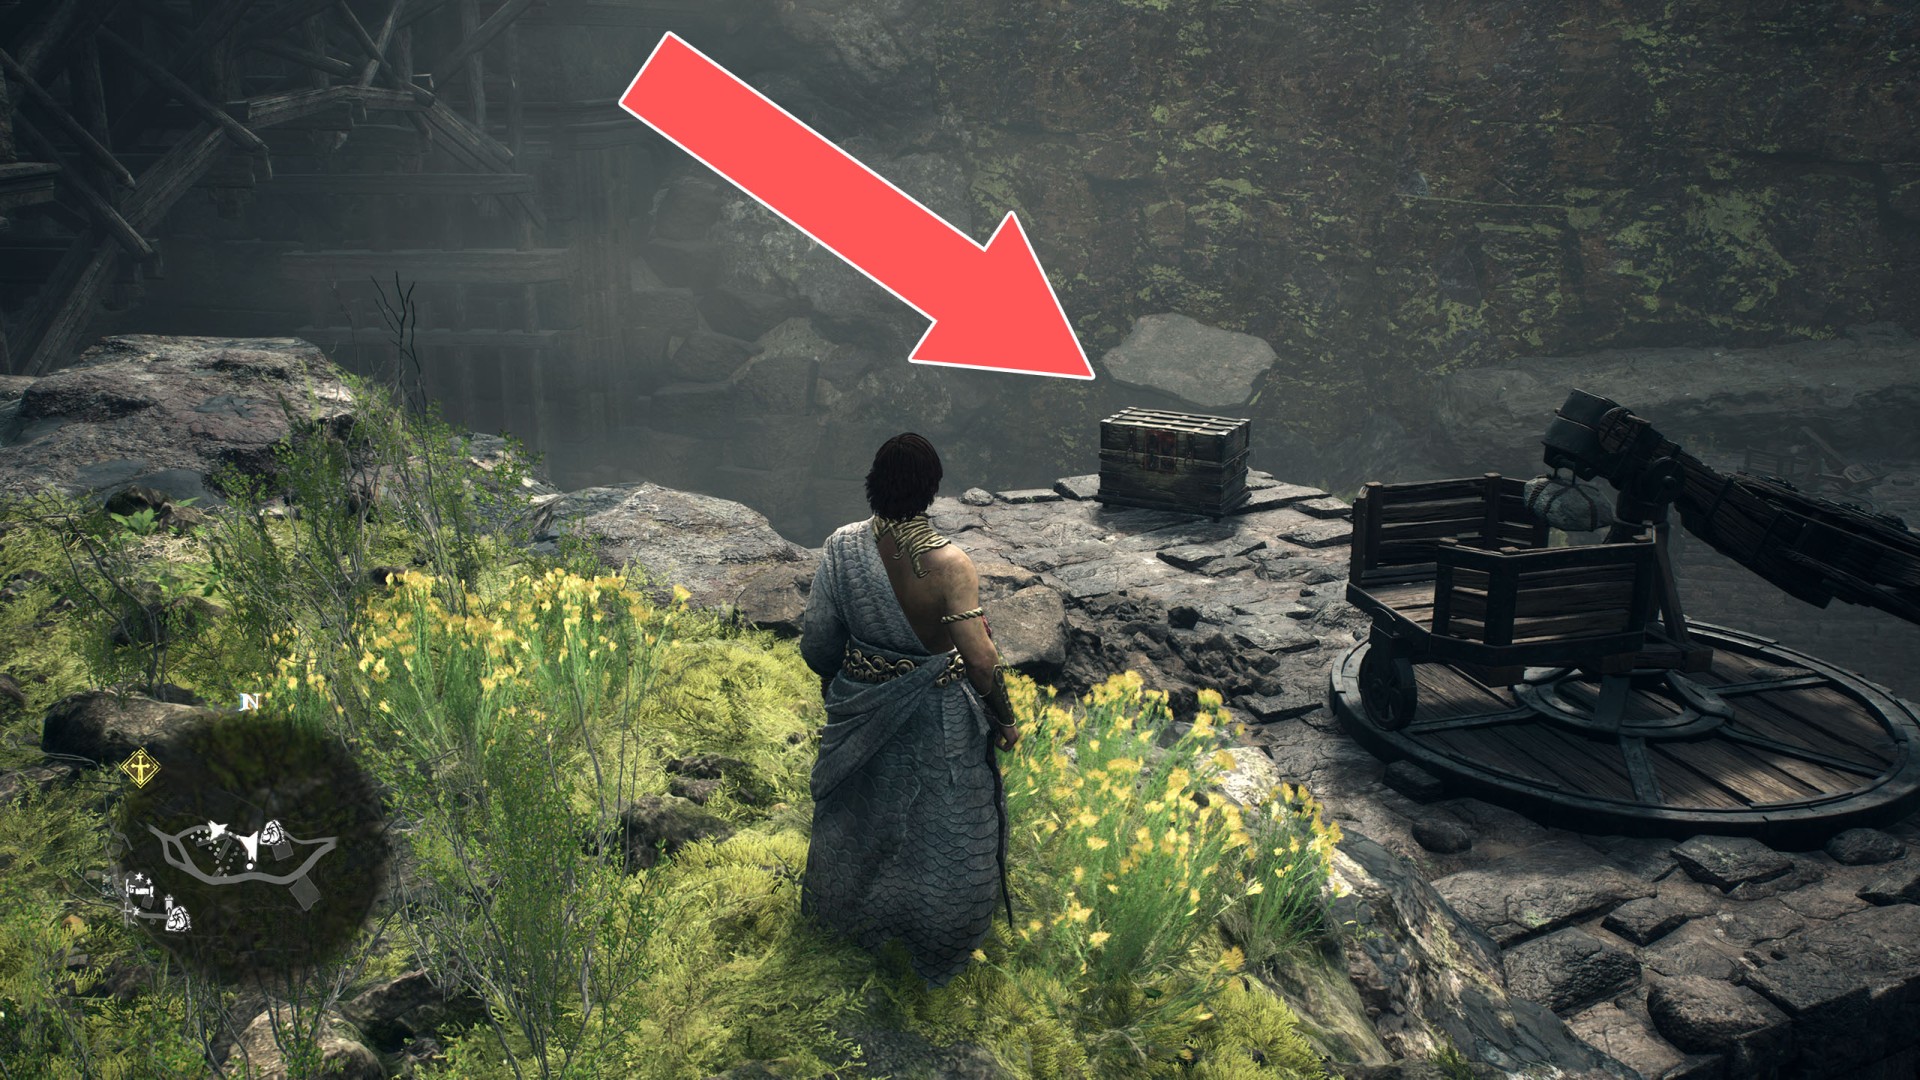
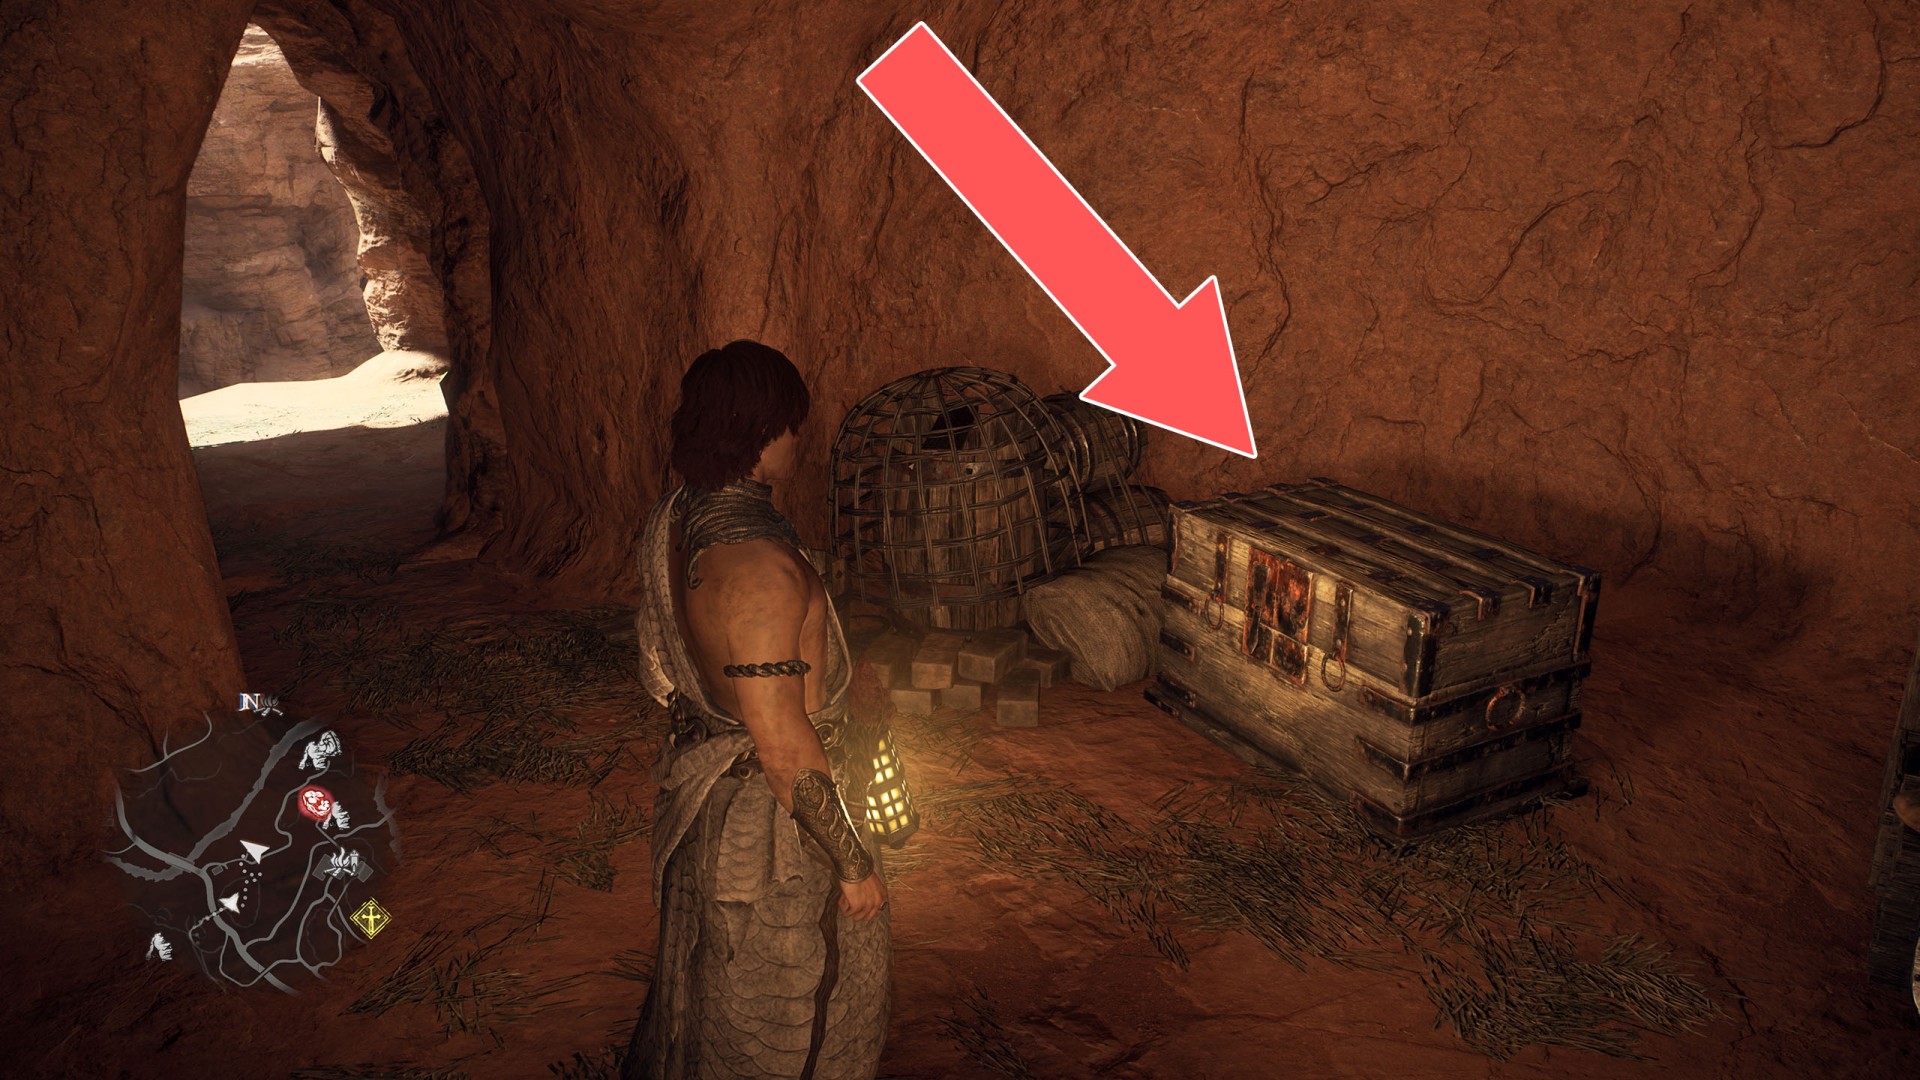
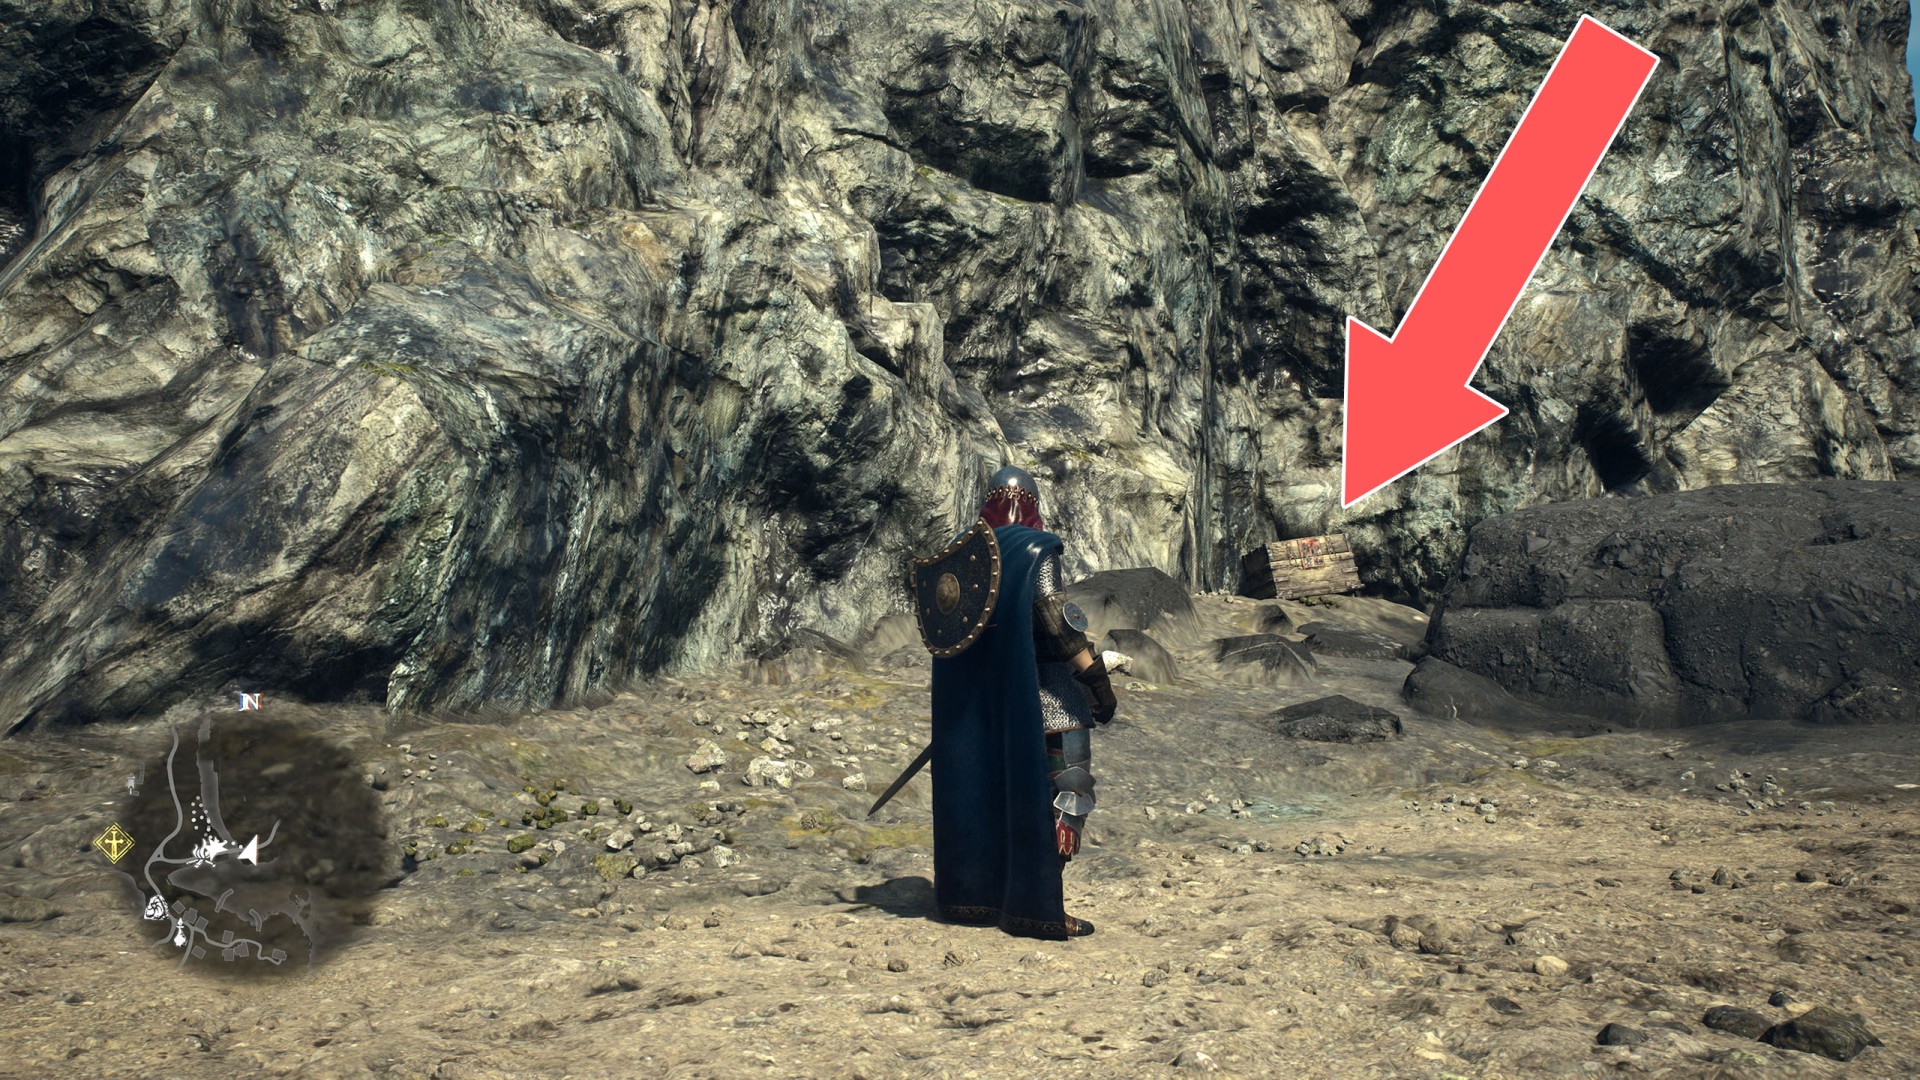
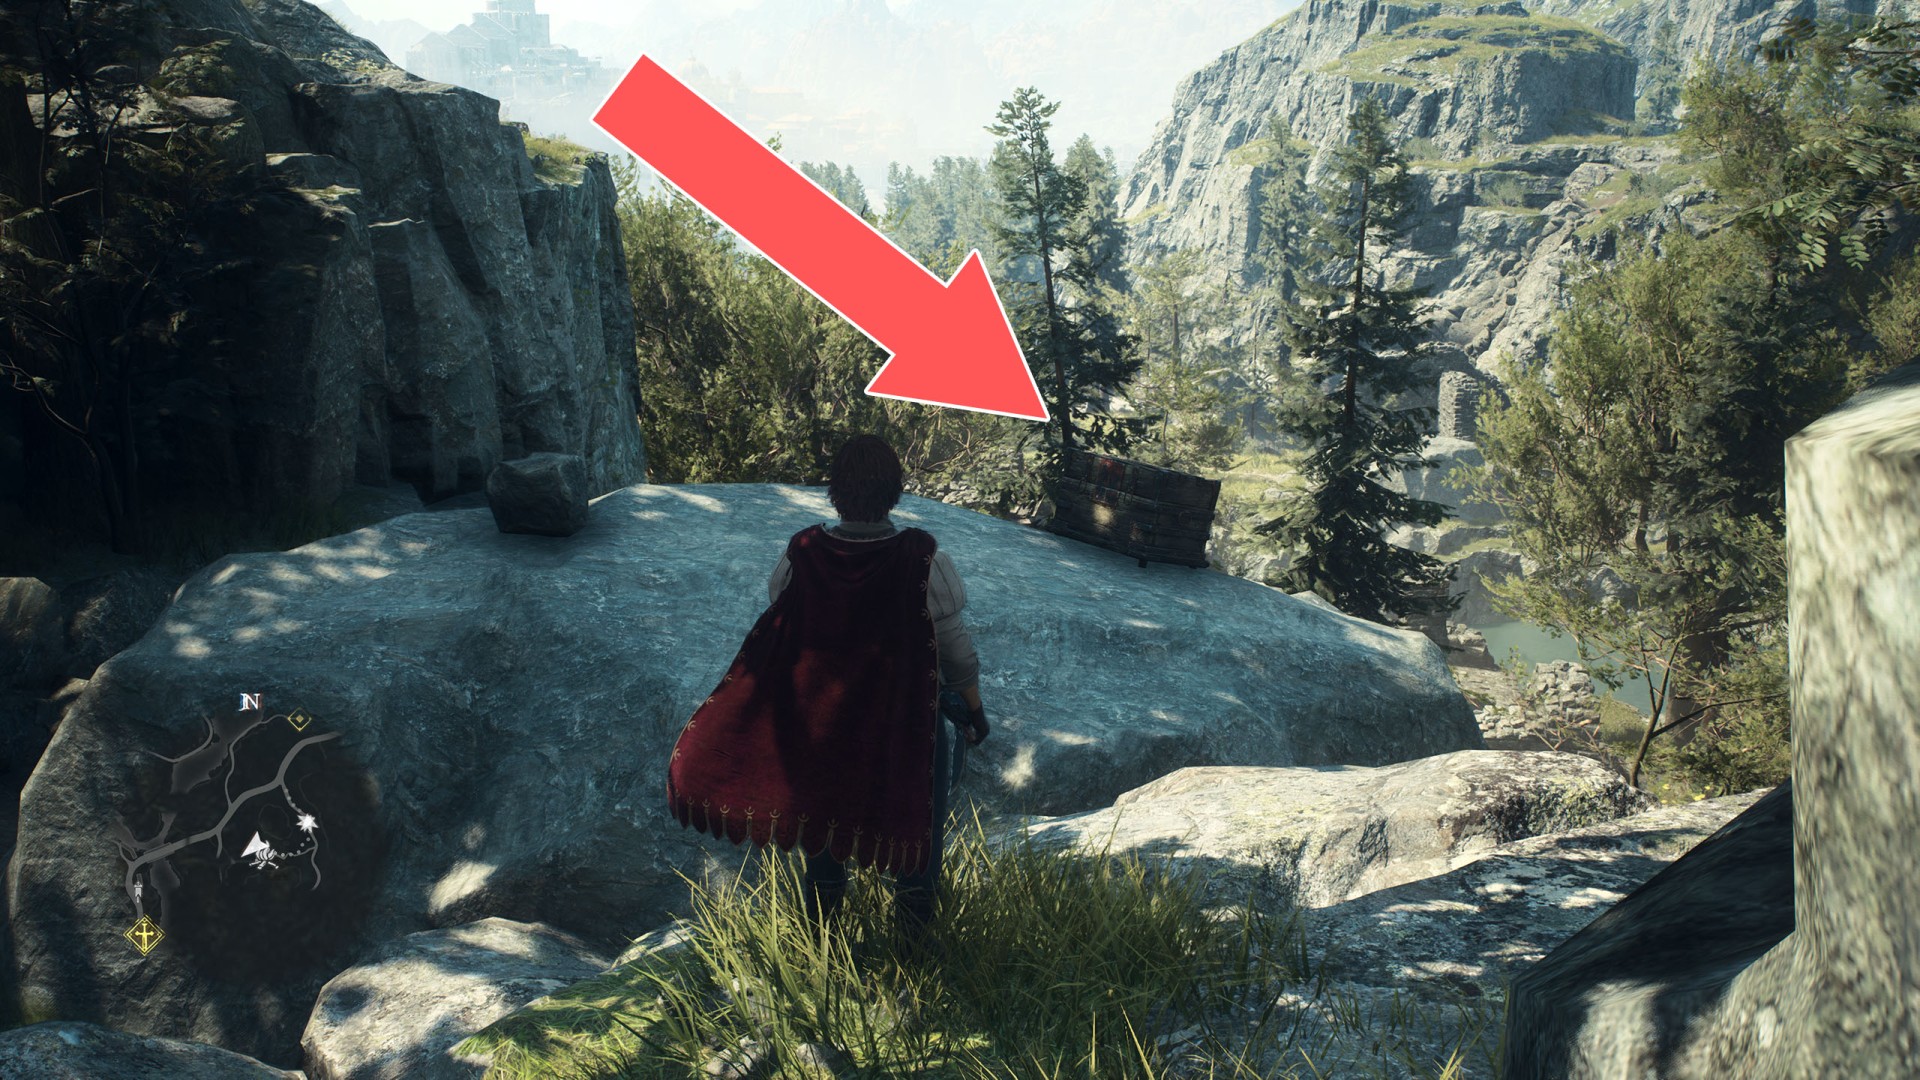
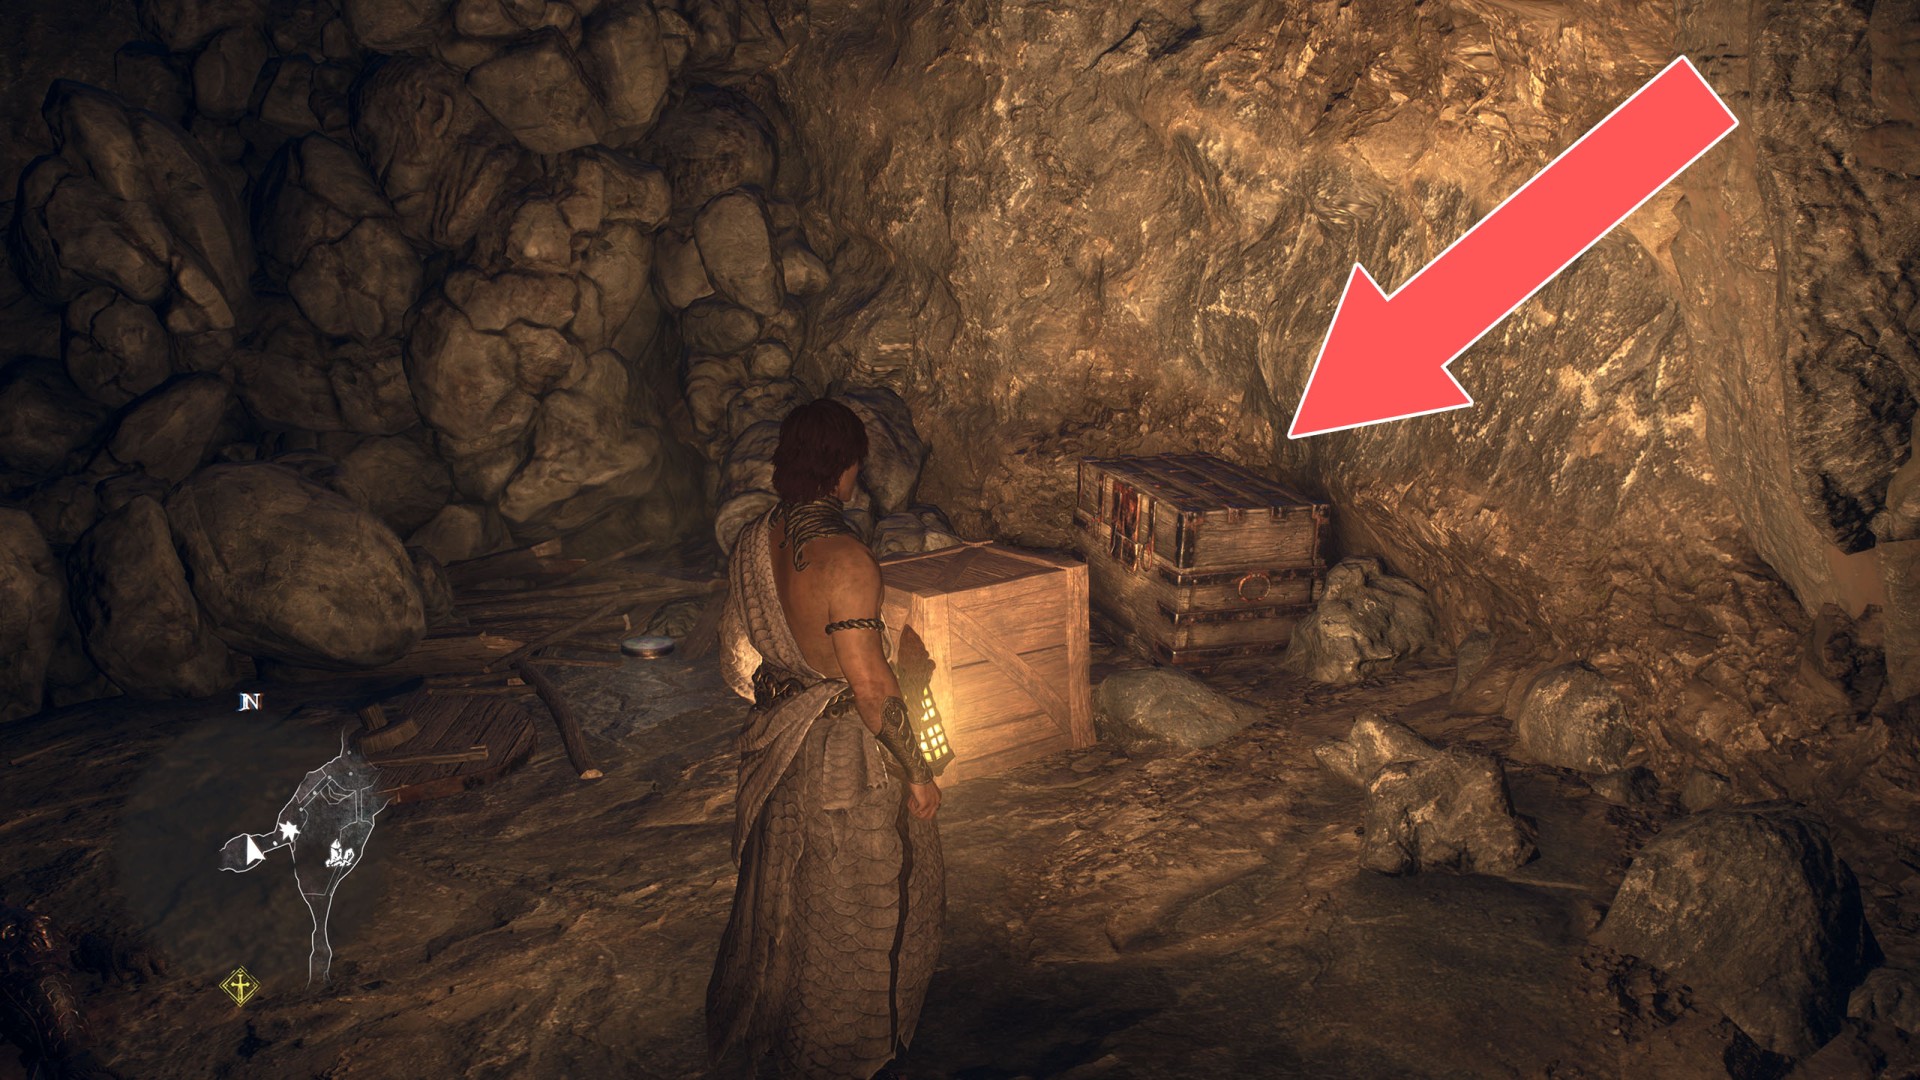
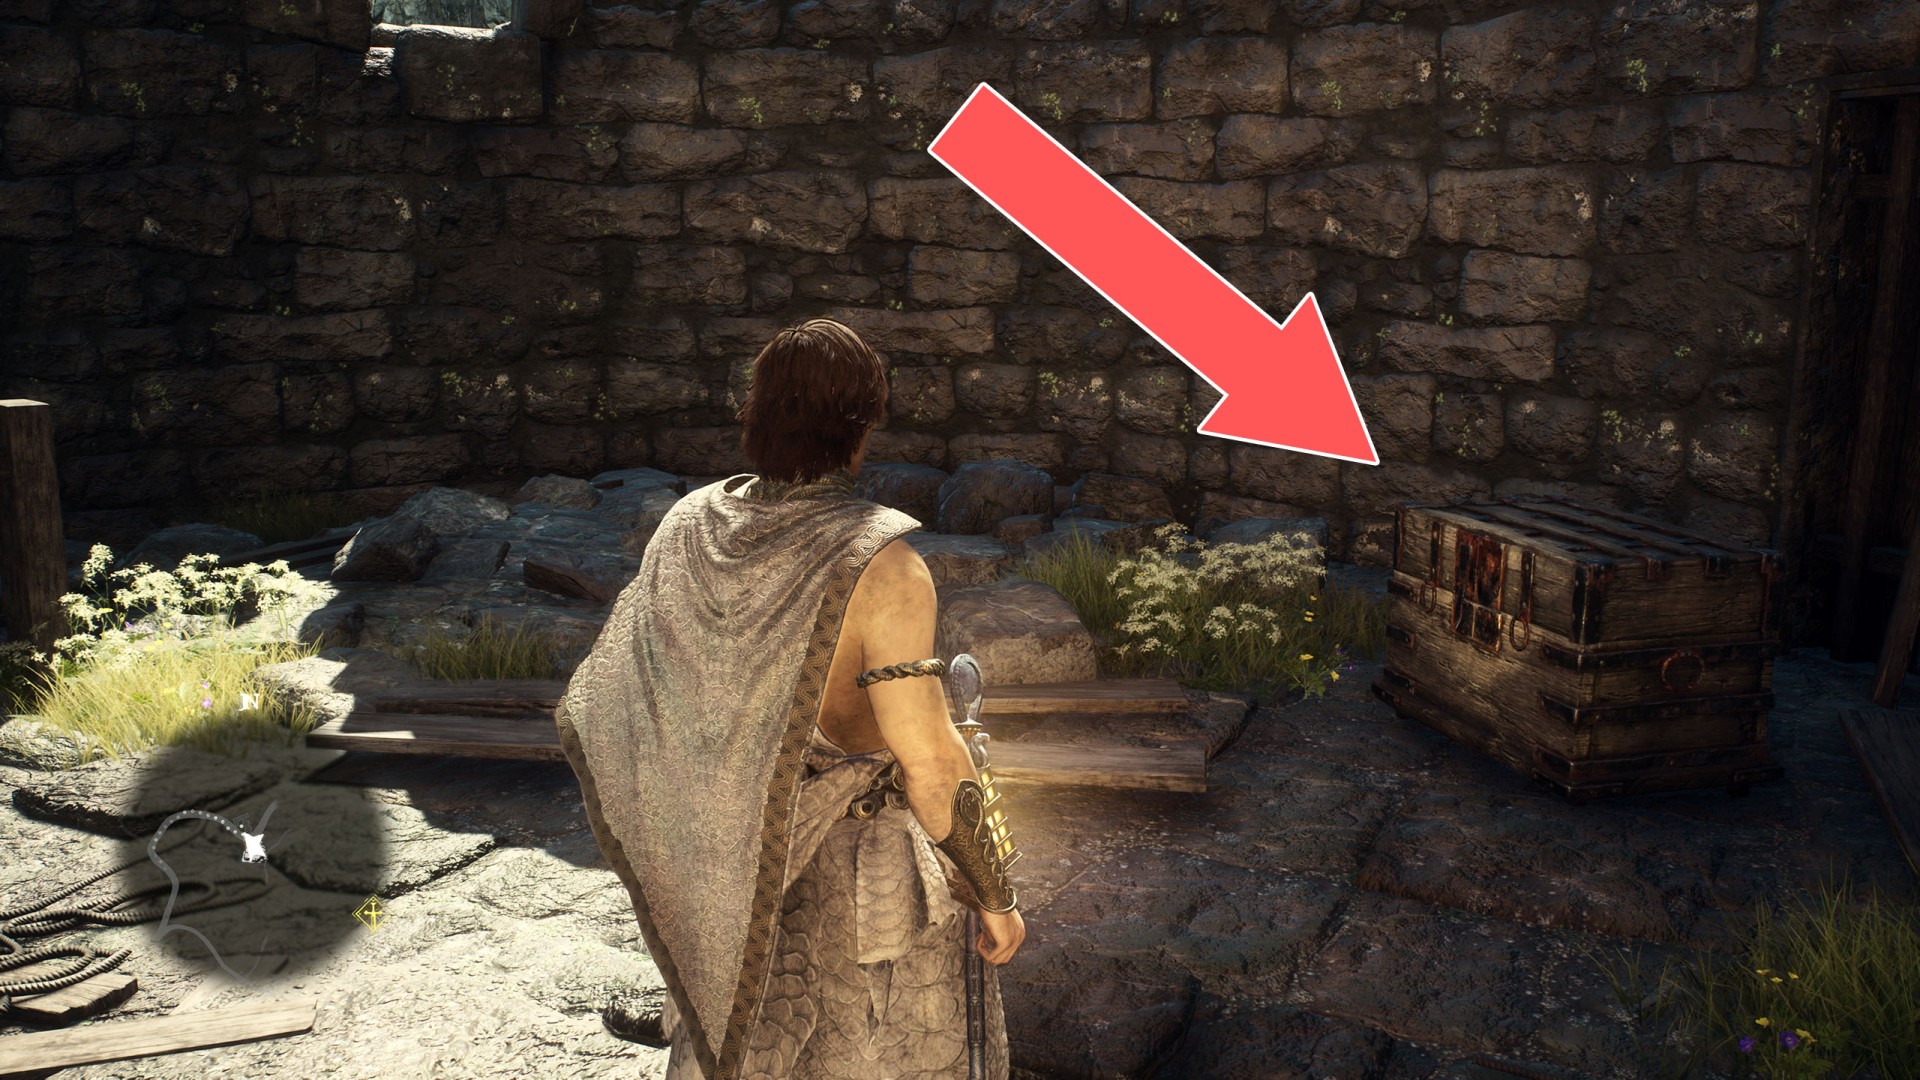
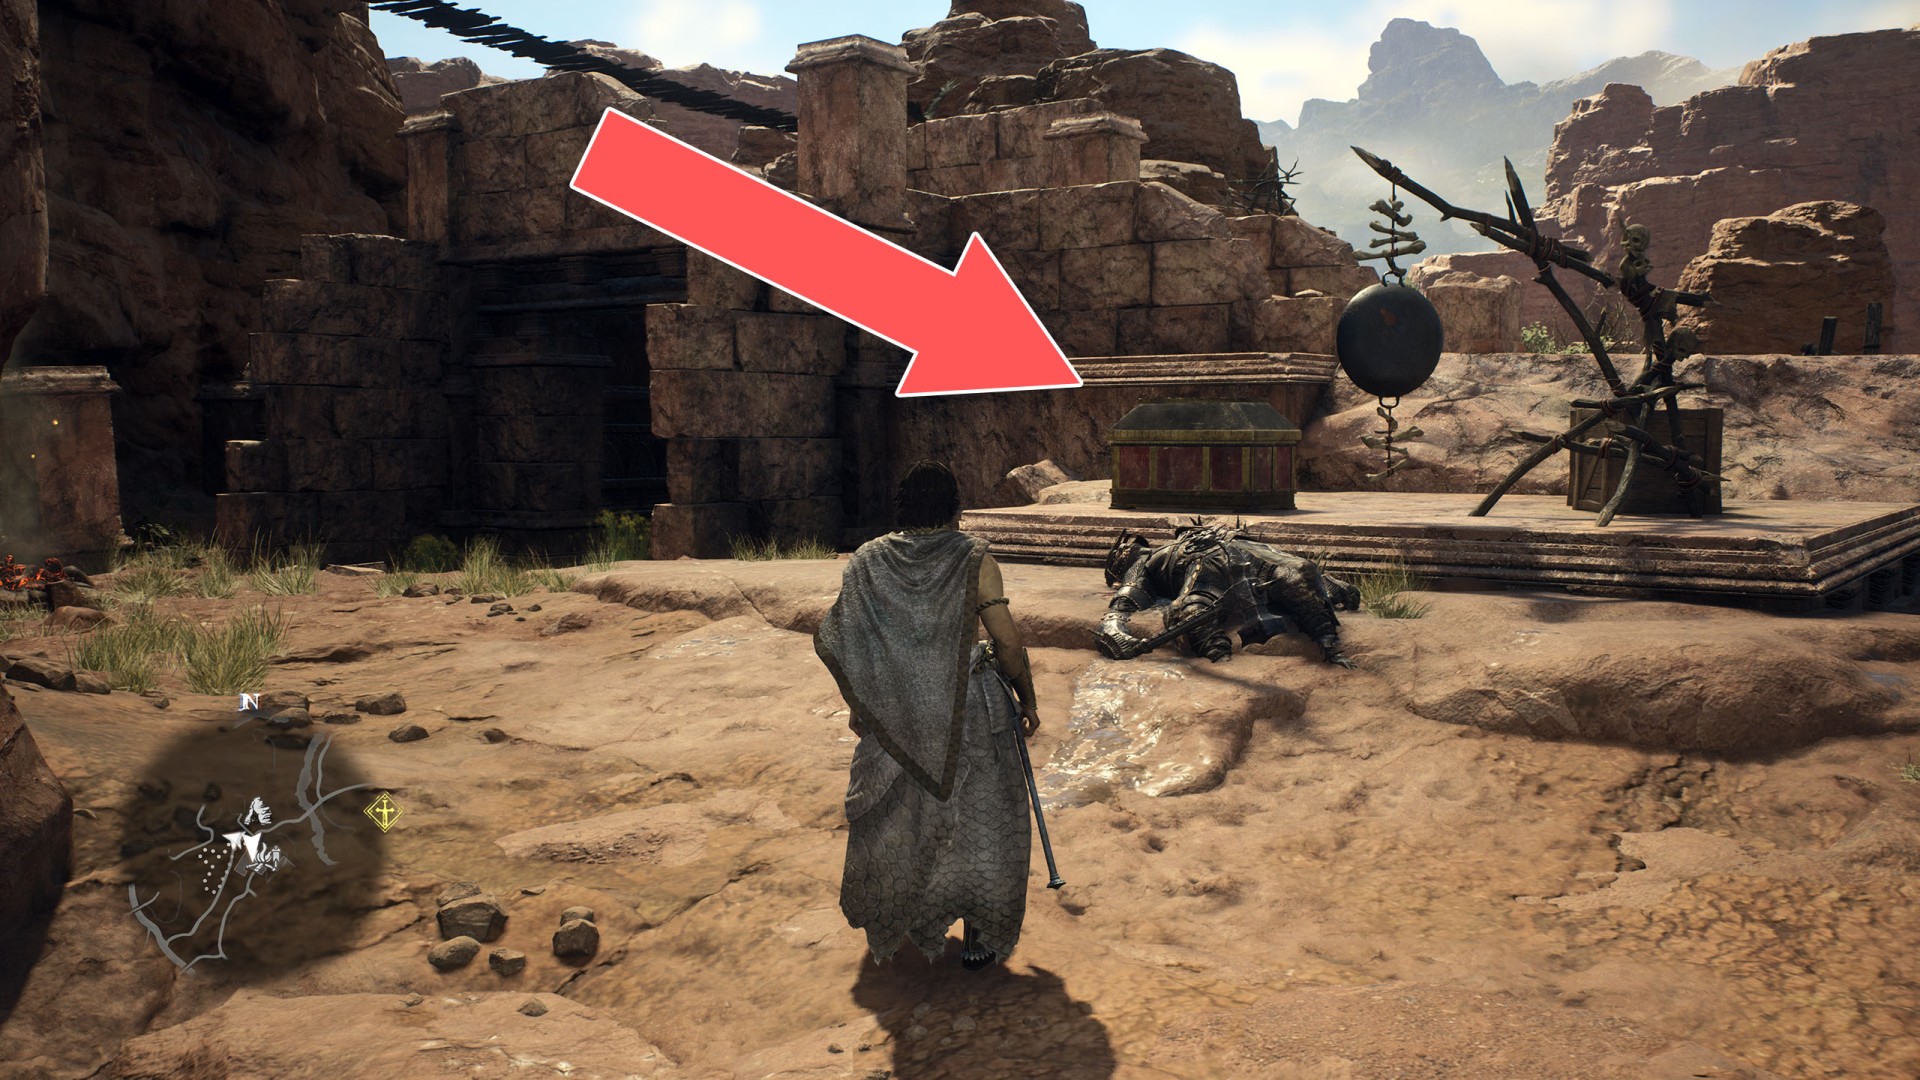
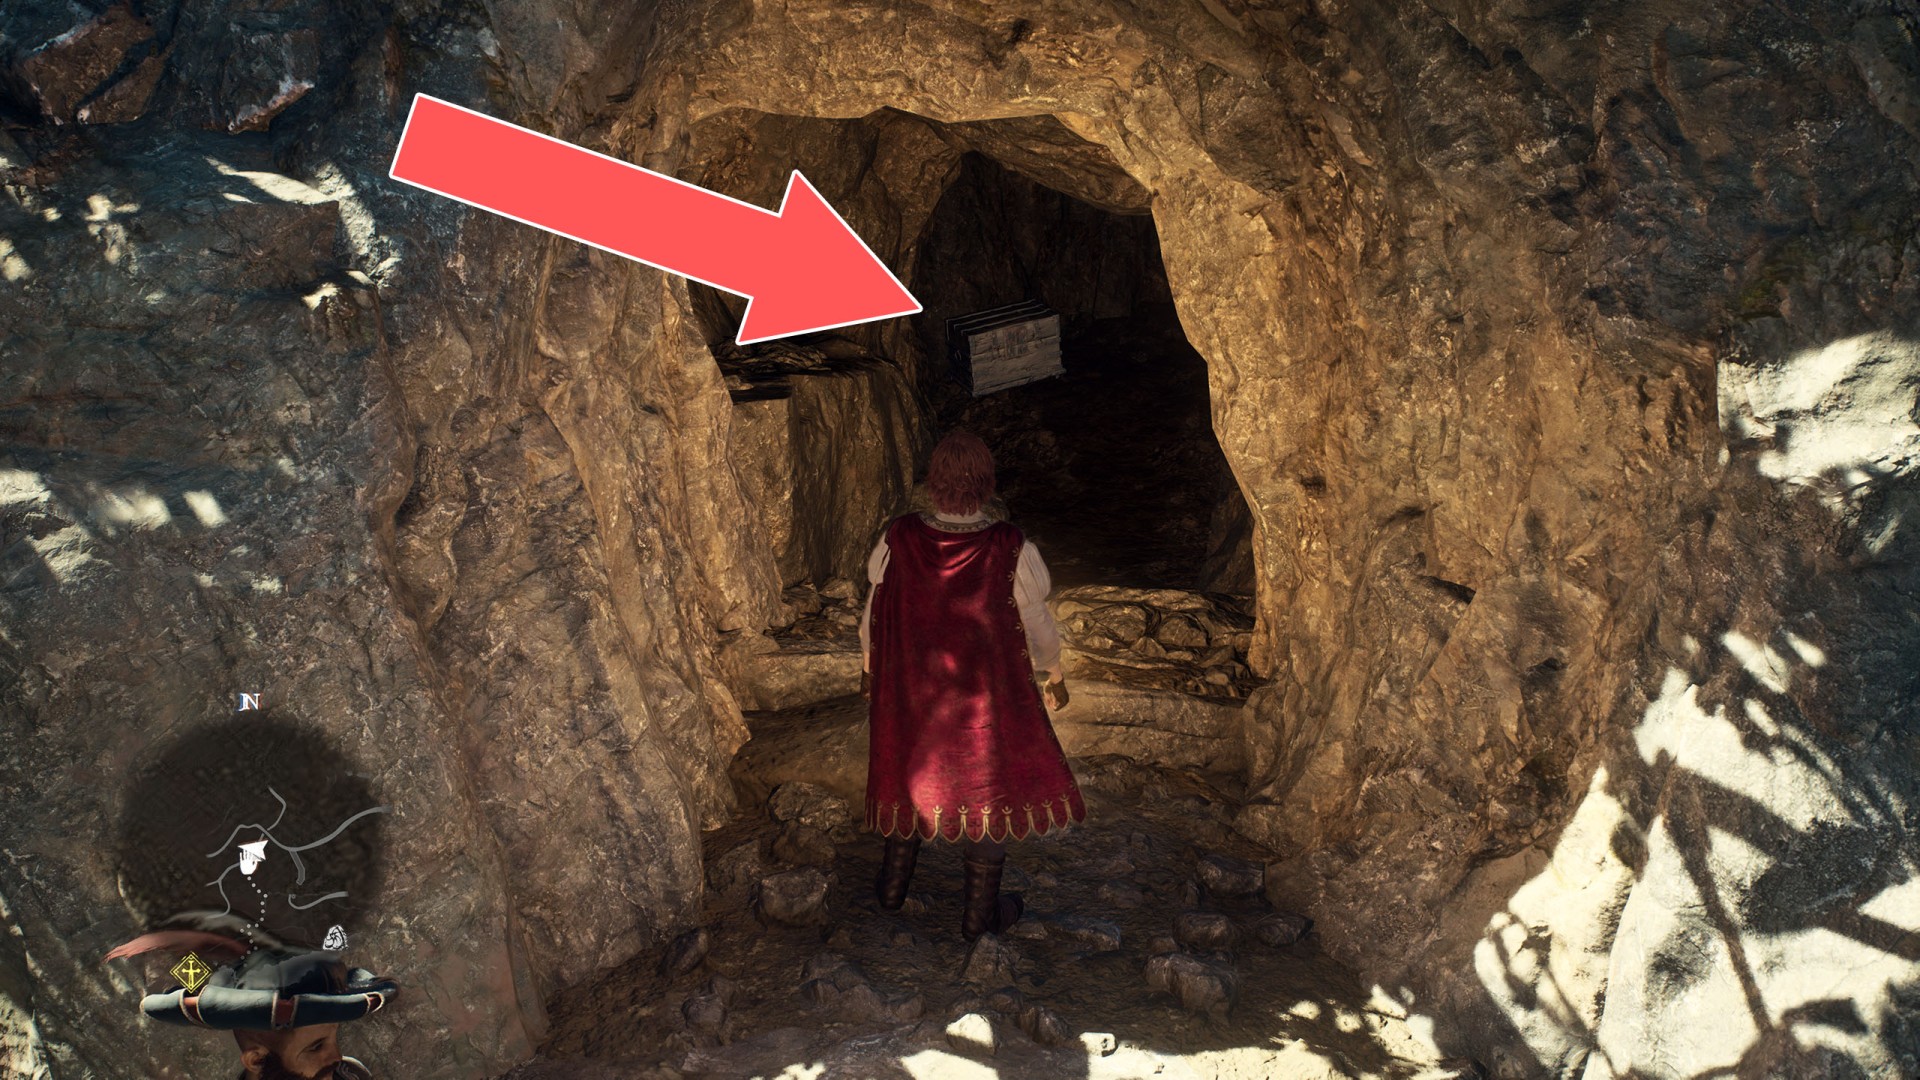
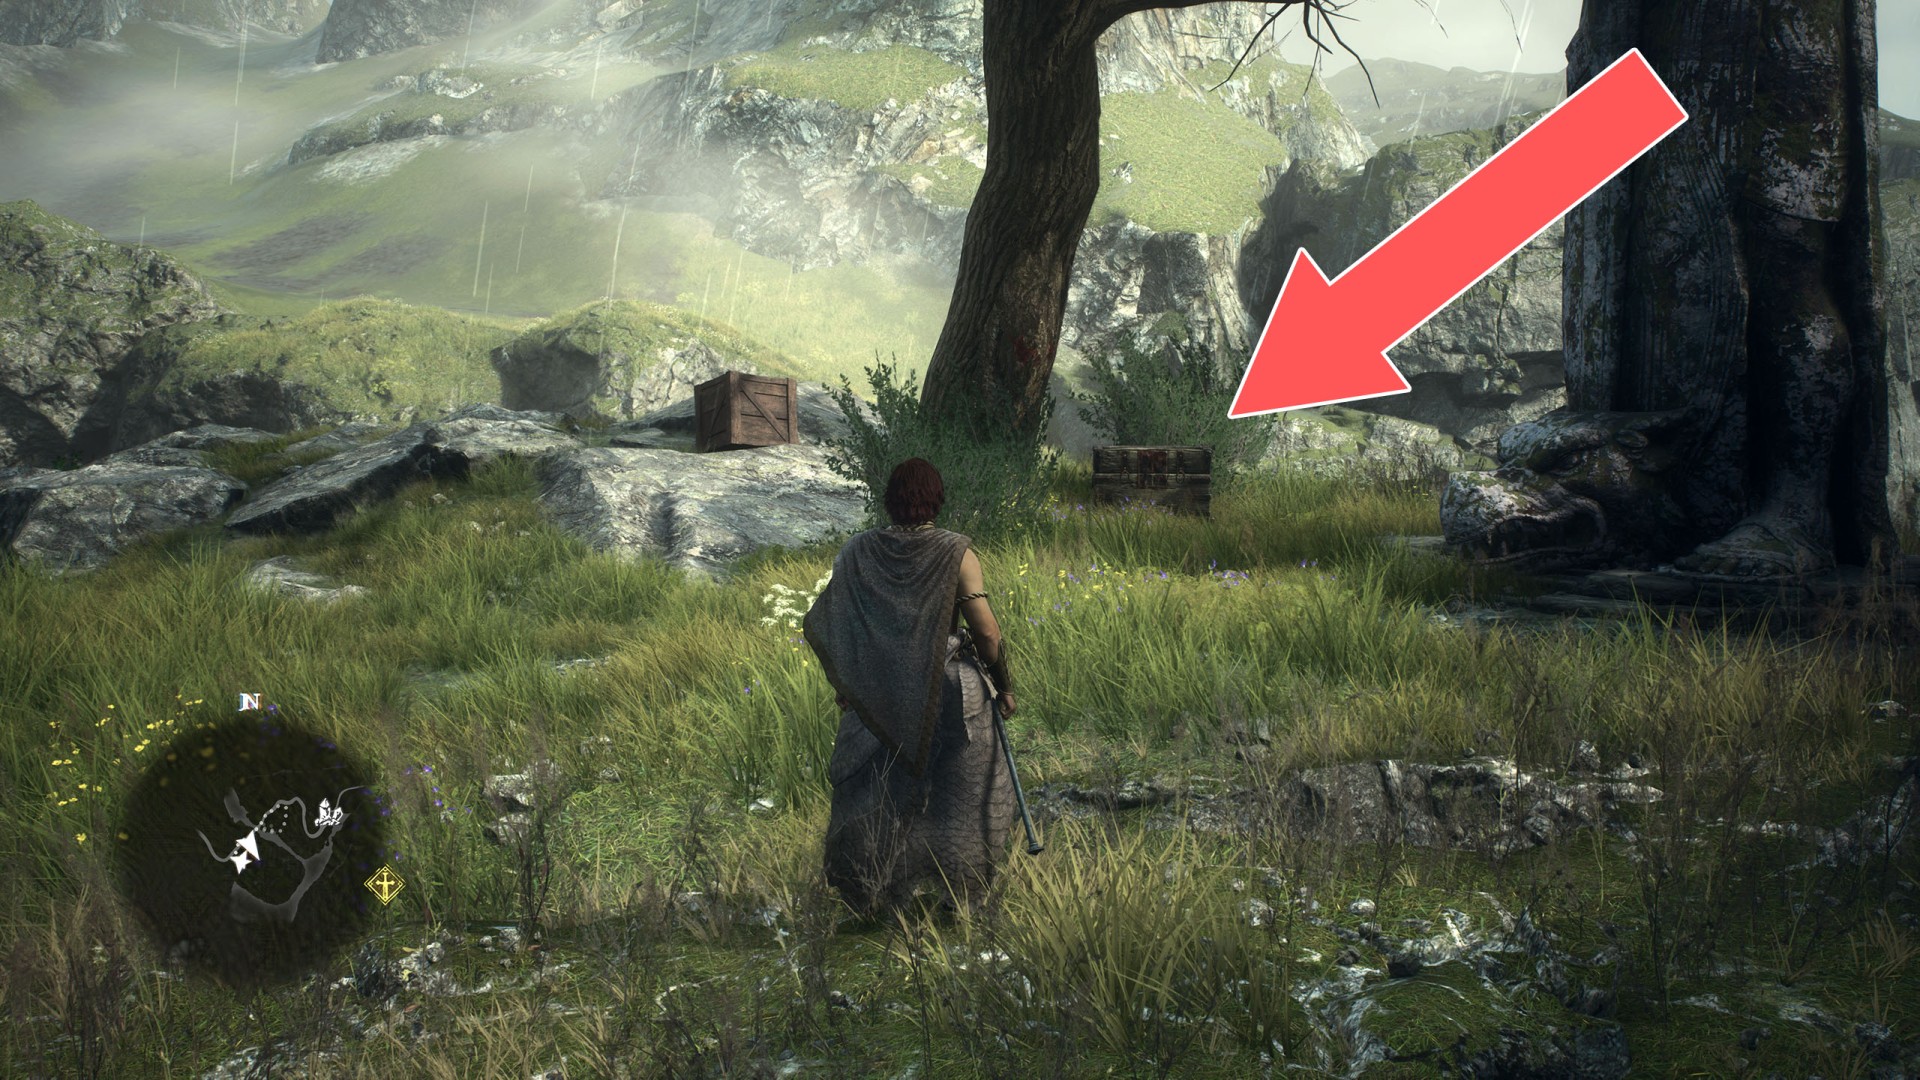
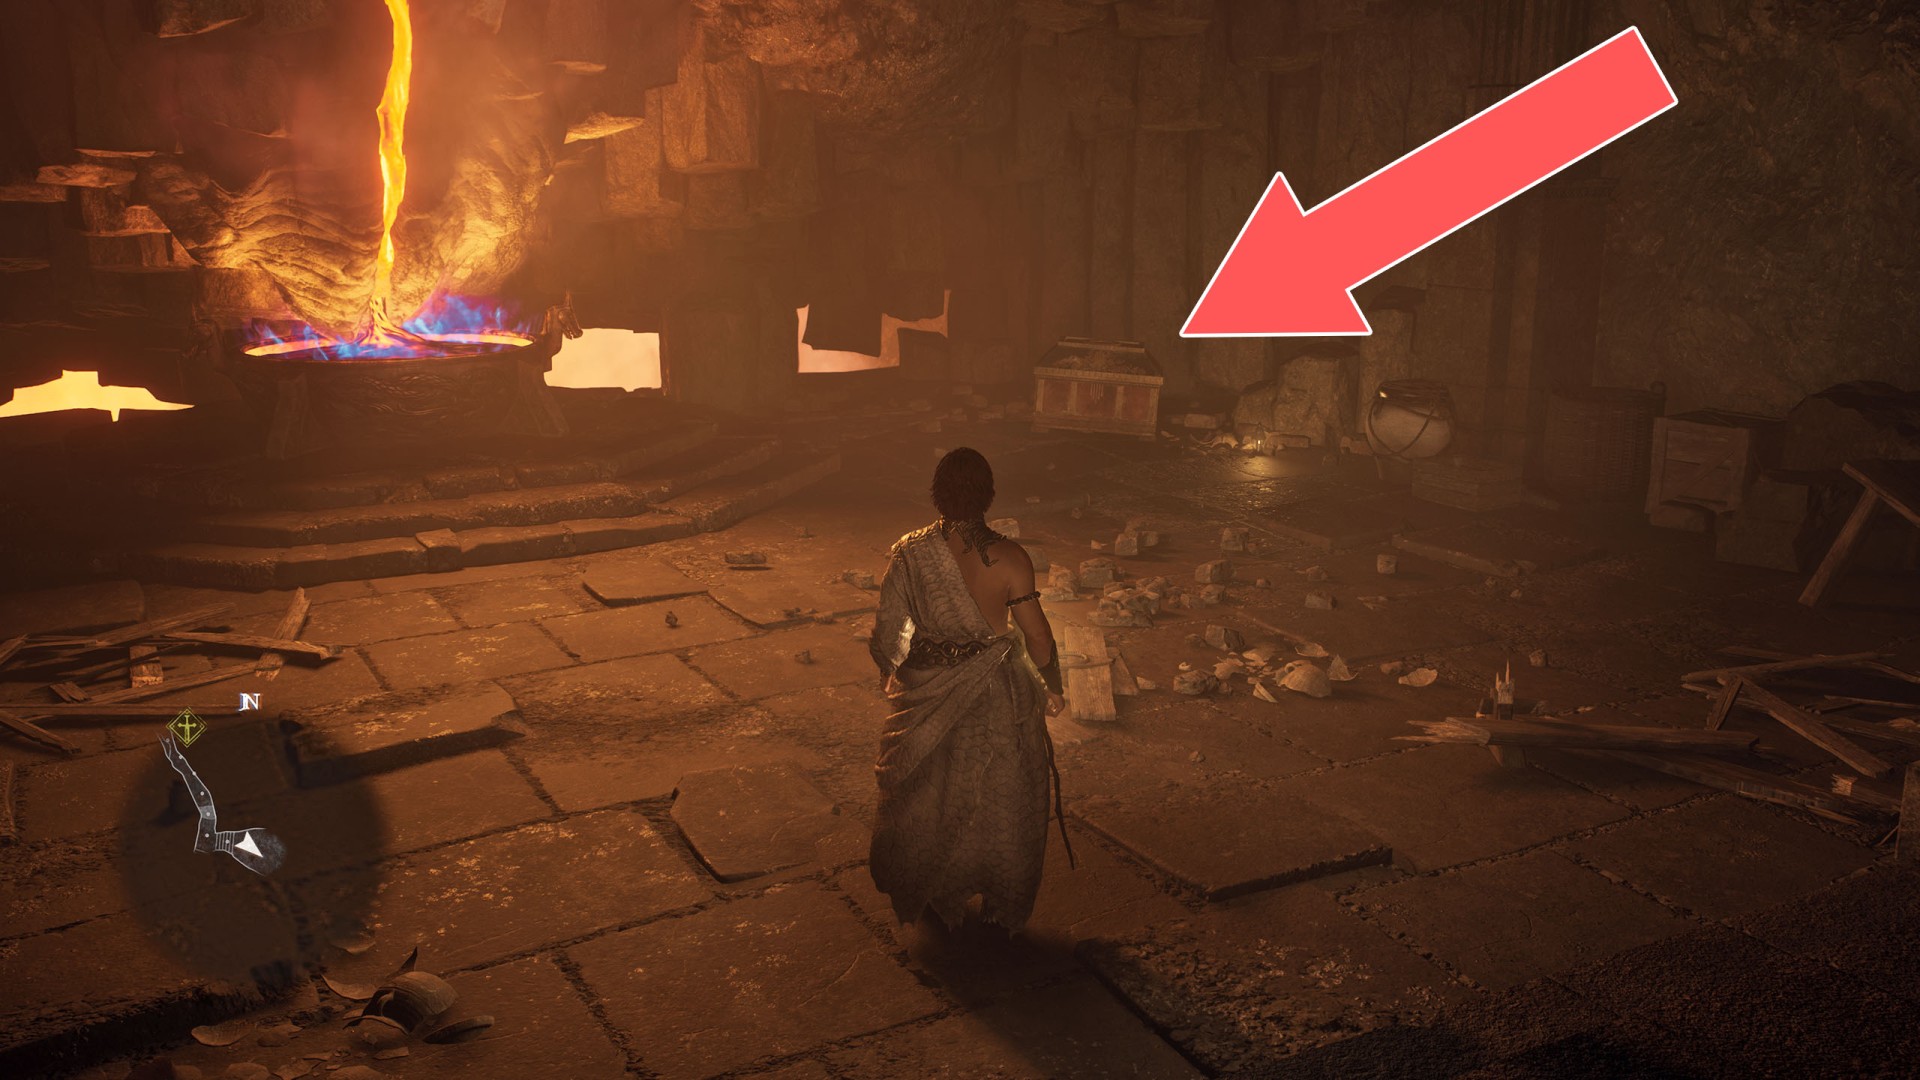
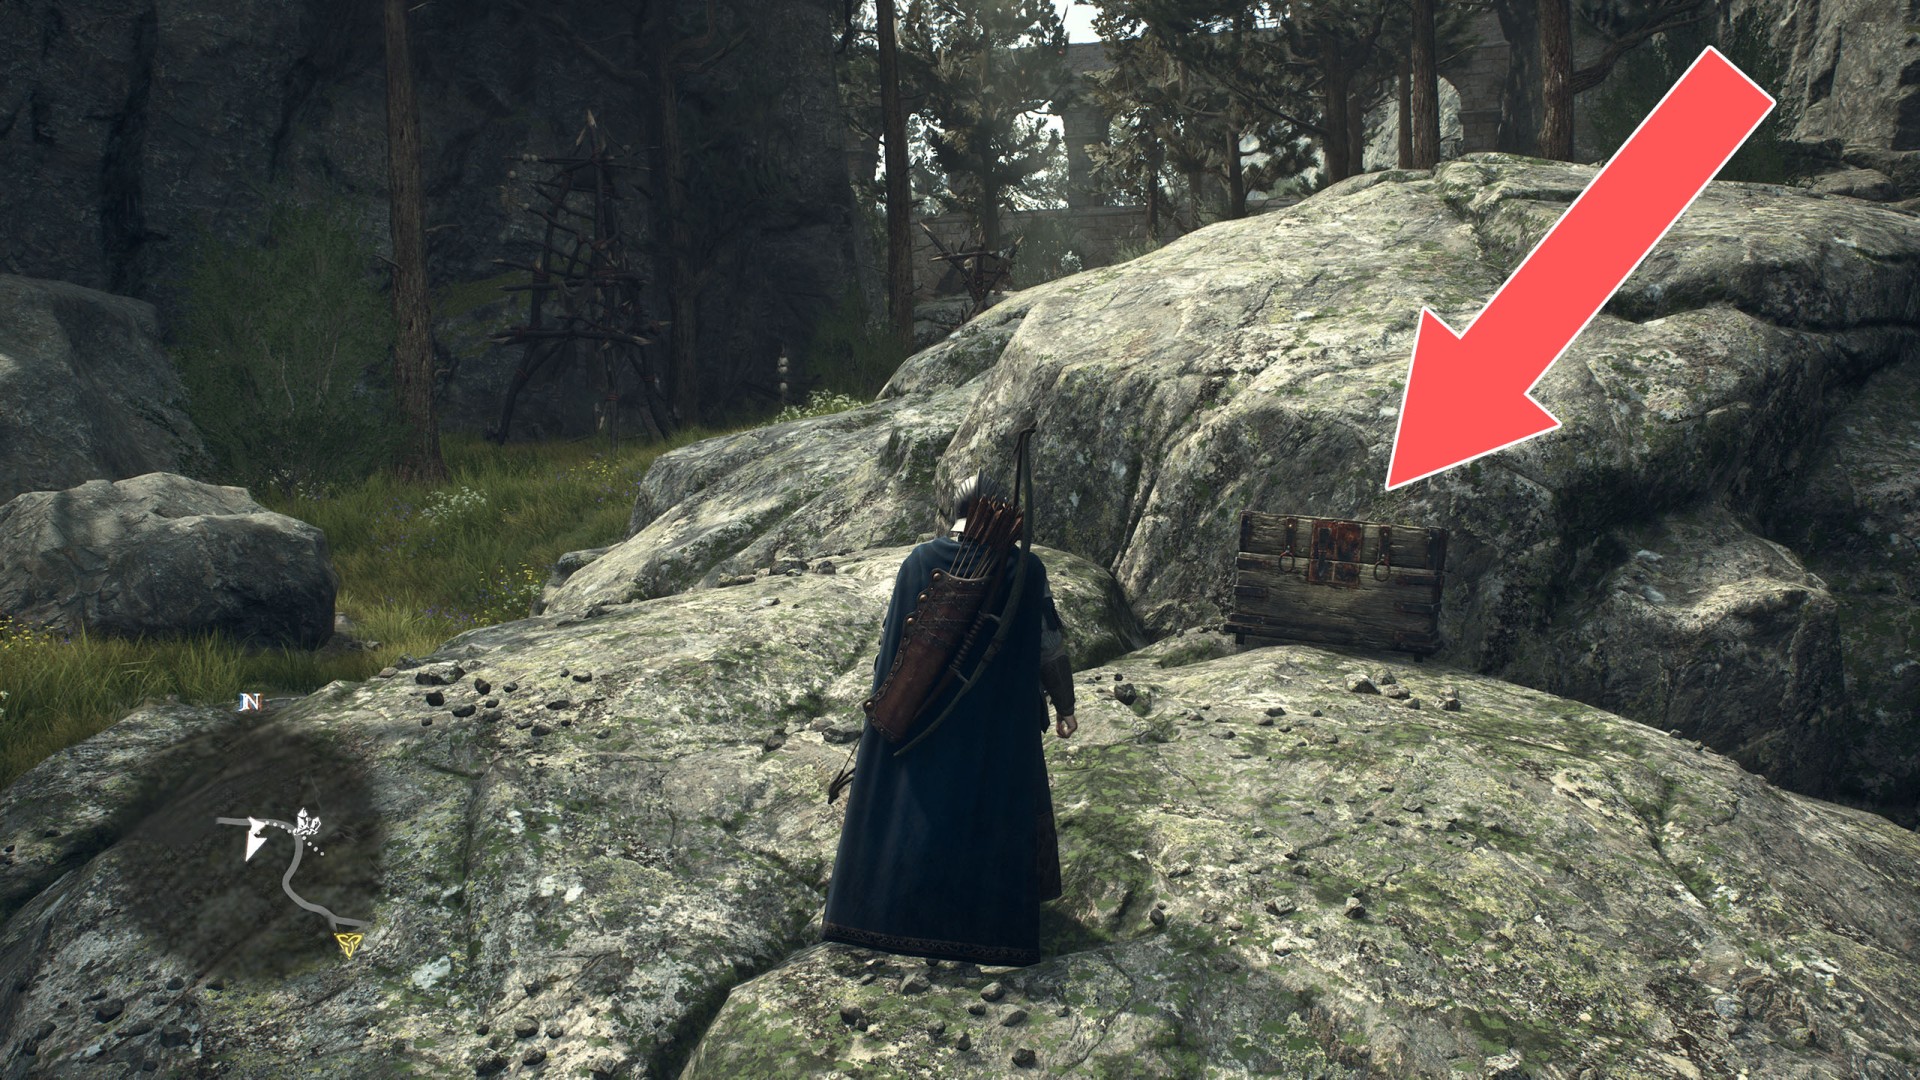
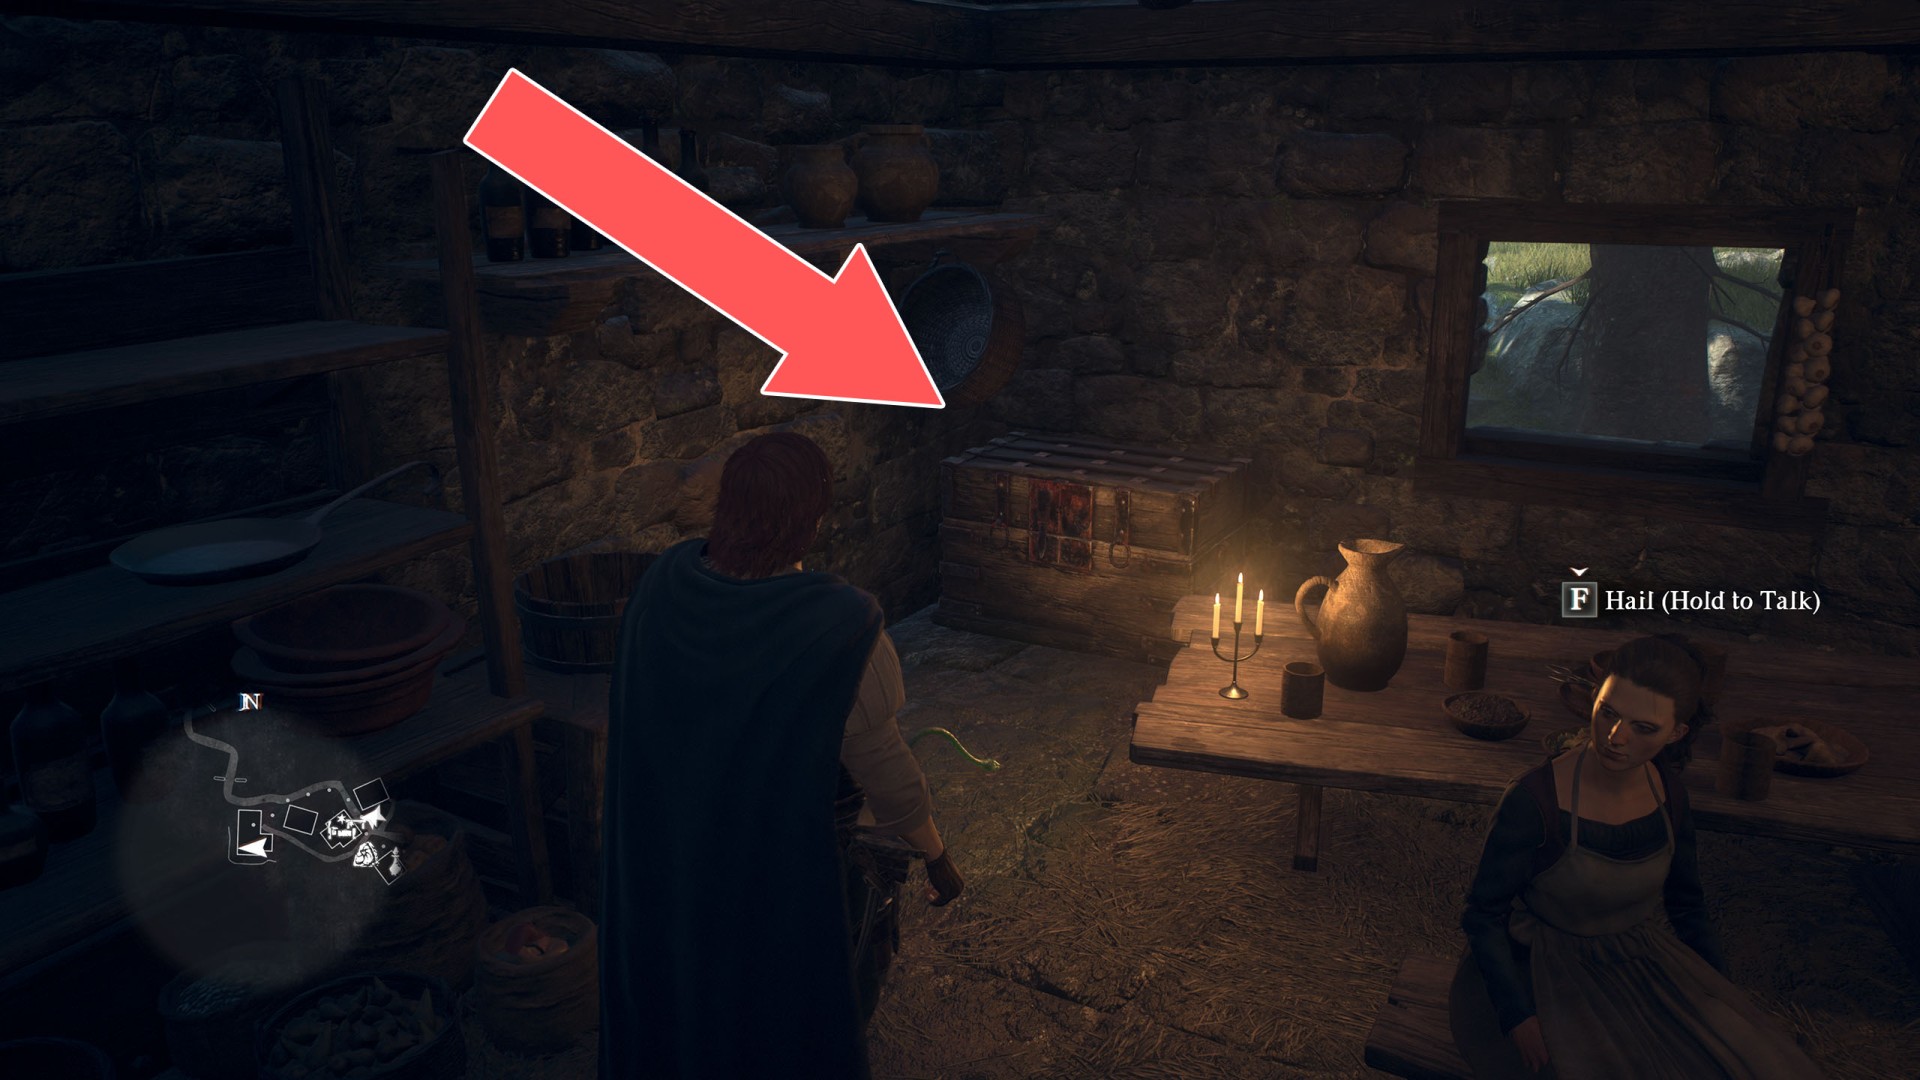
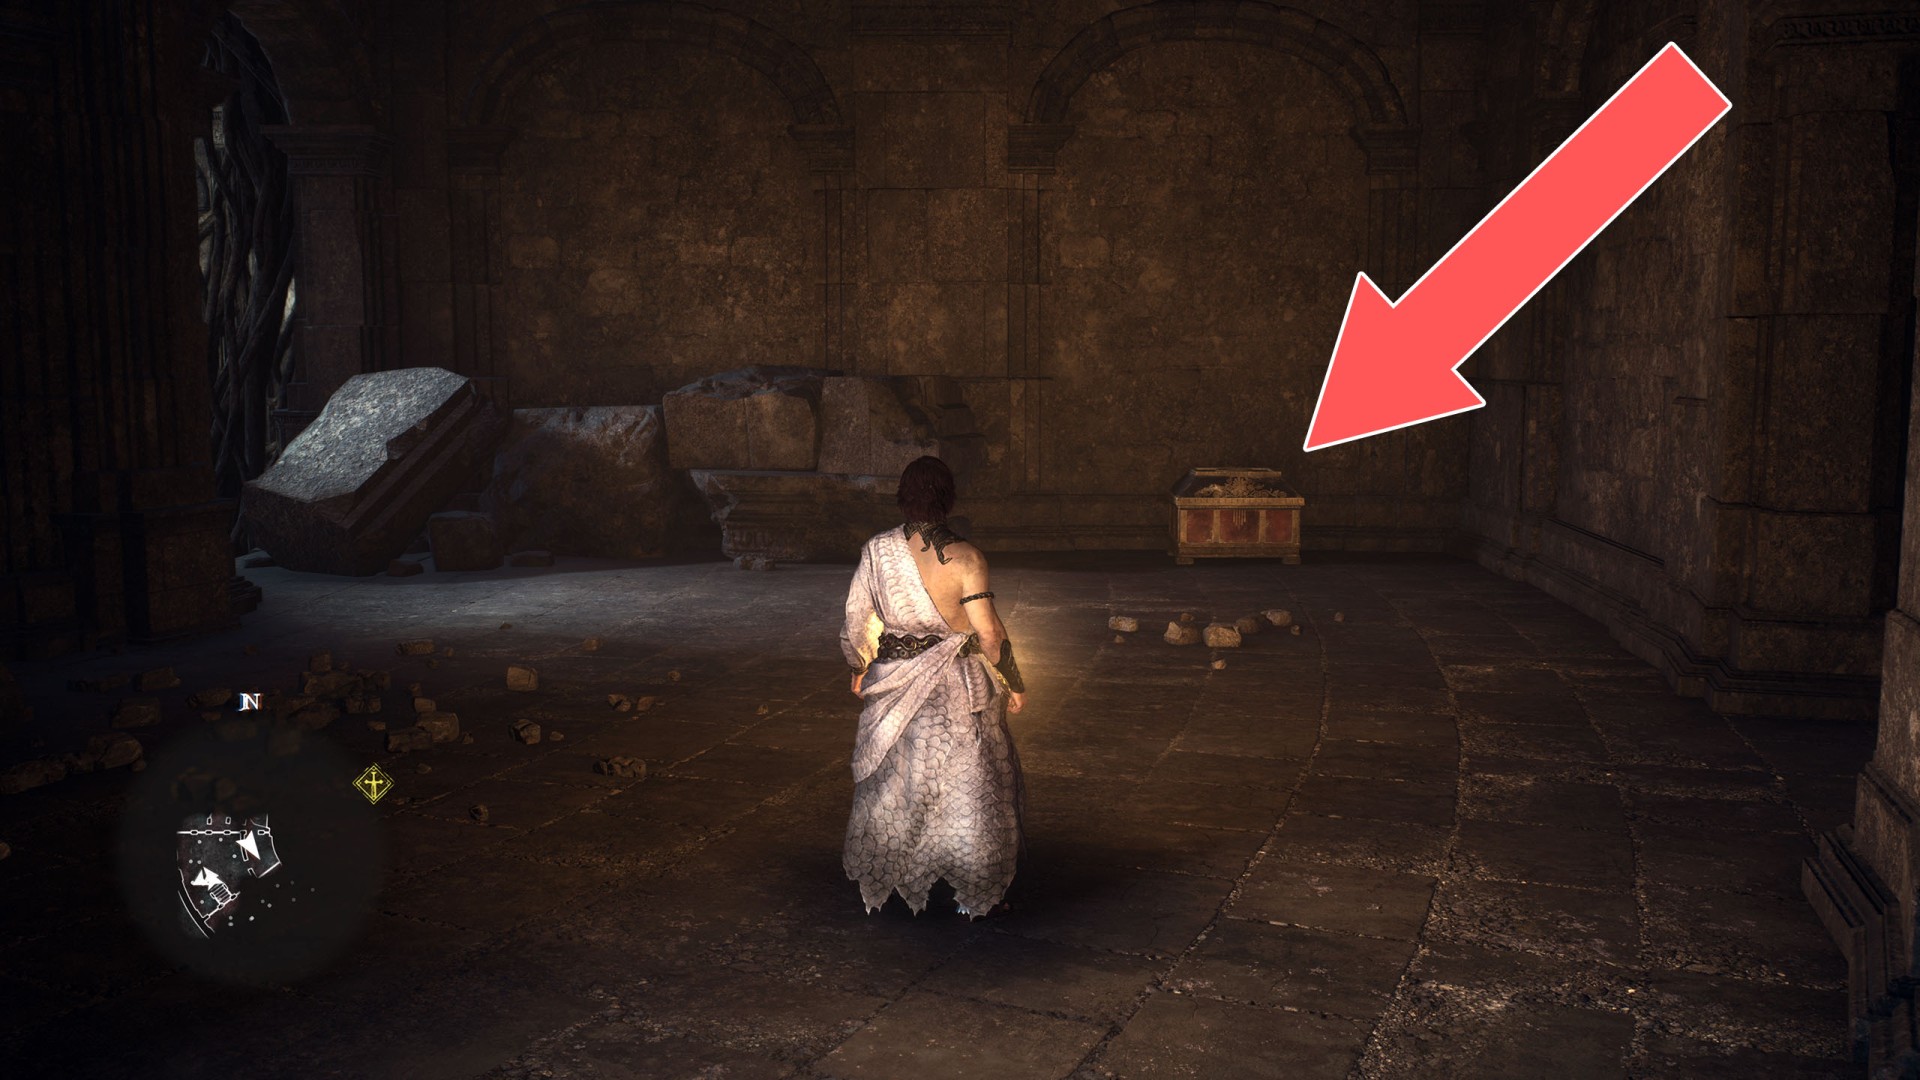
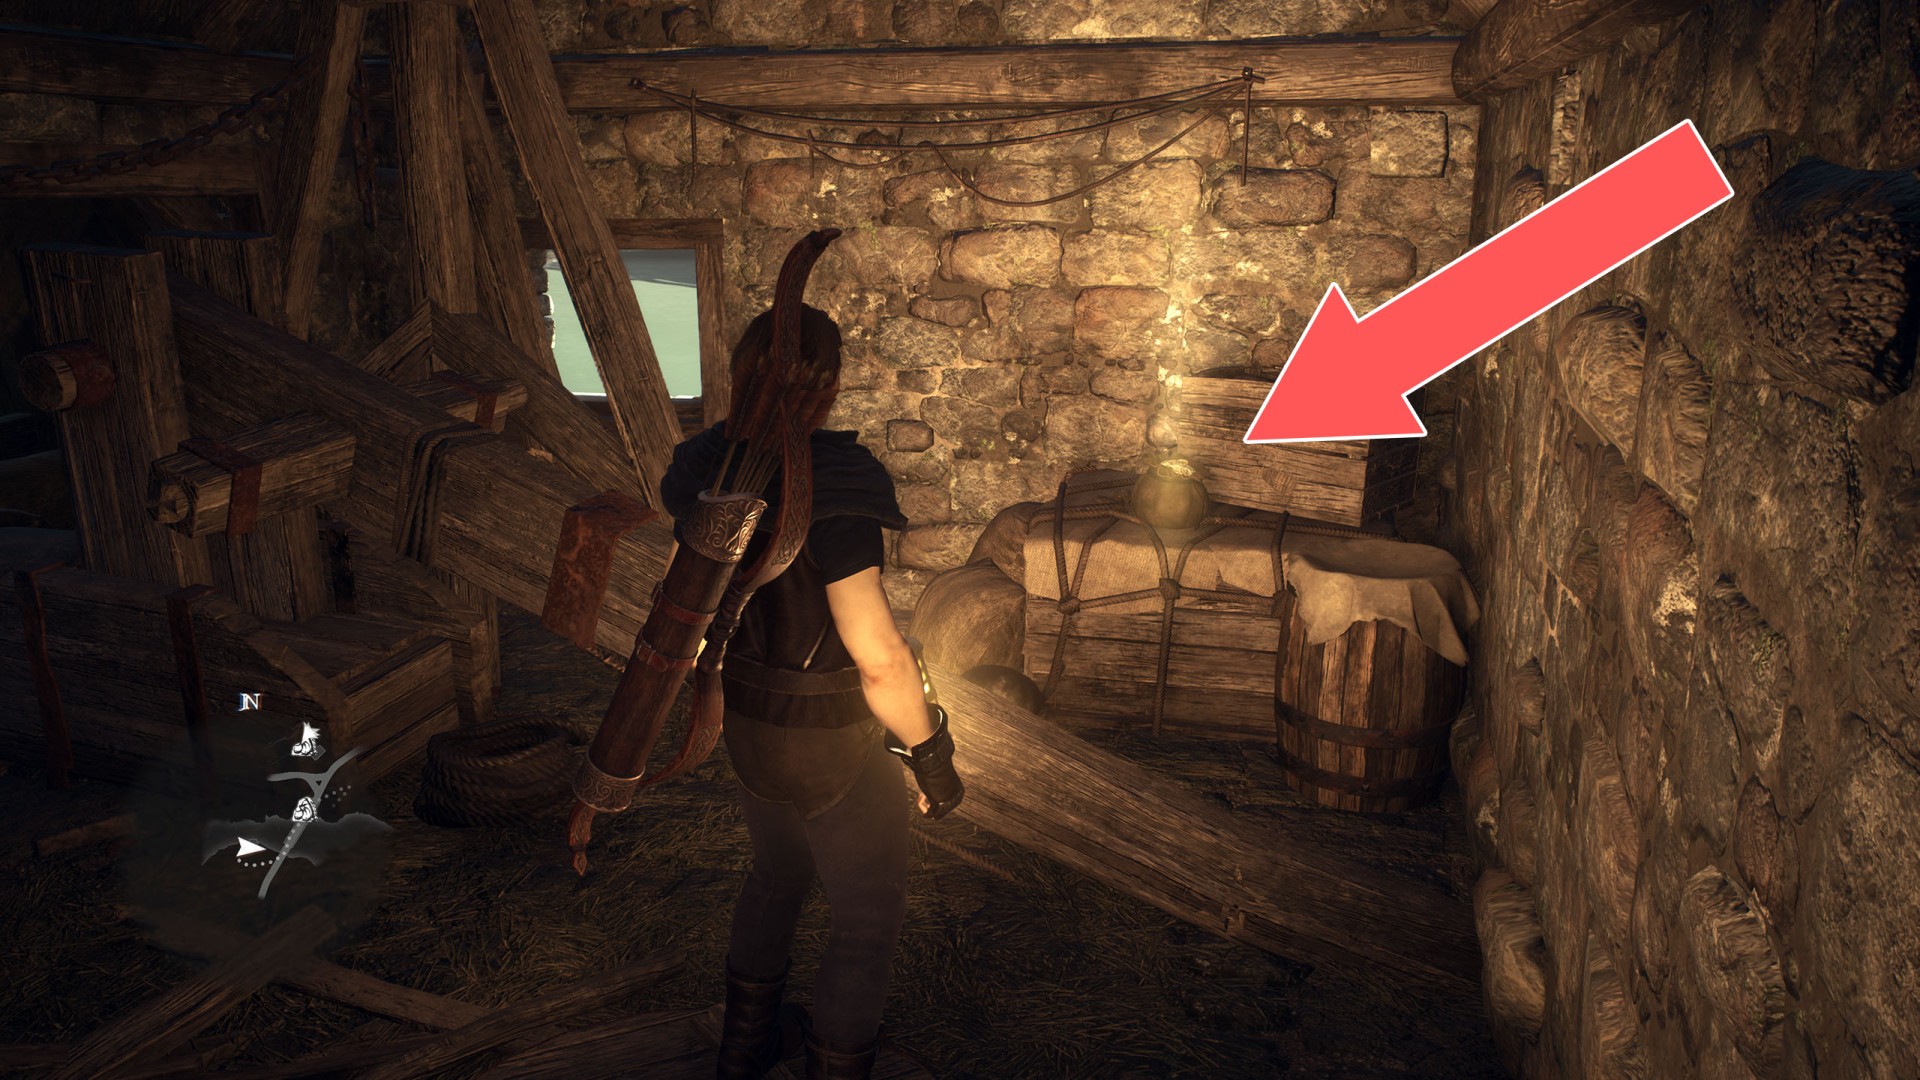
3Box (12,000G)
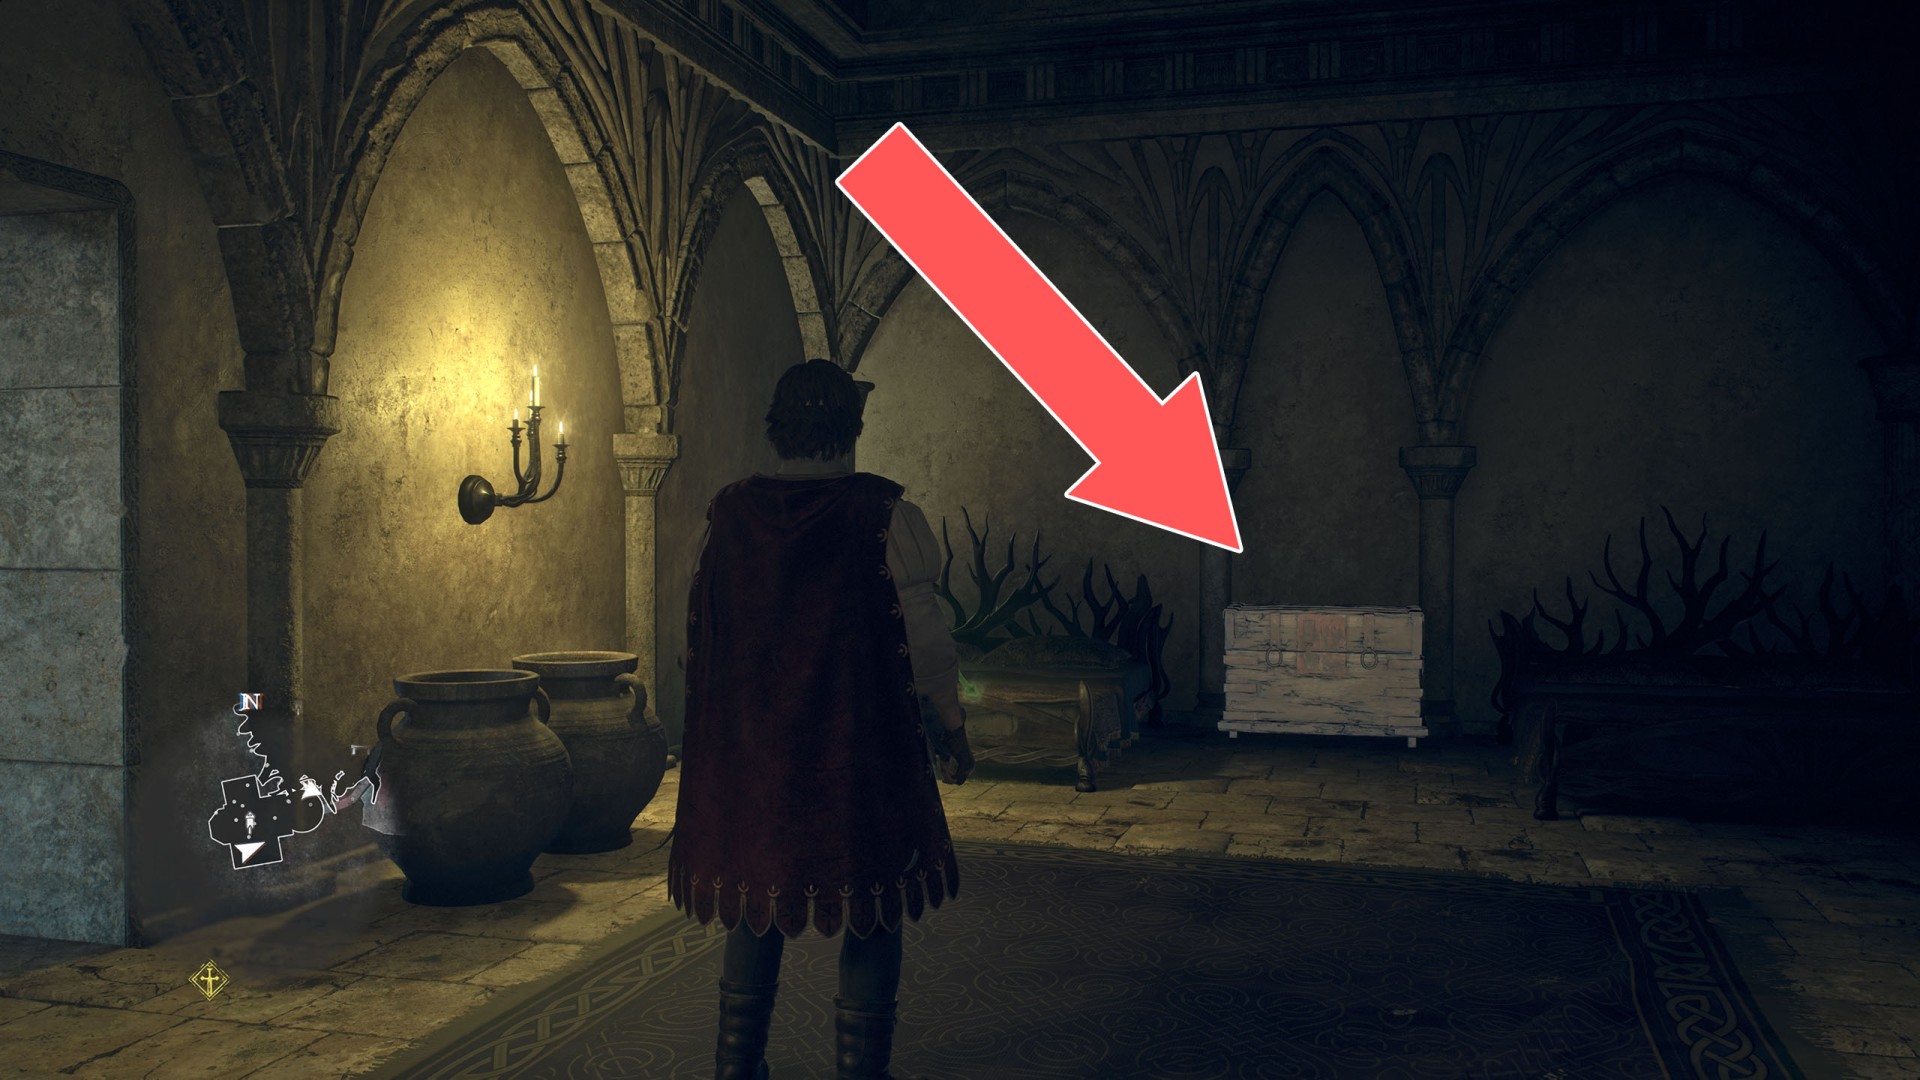
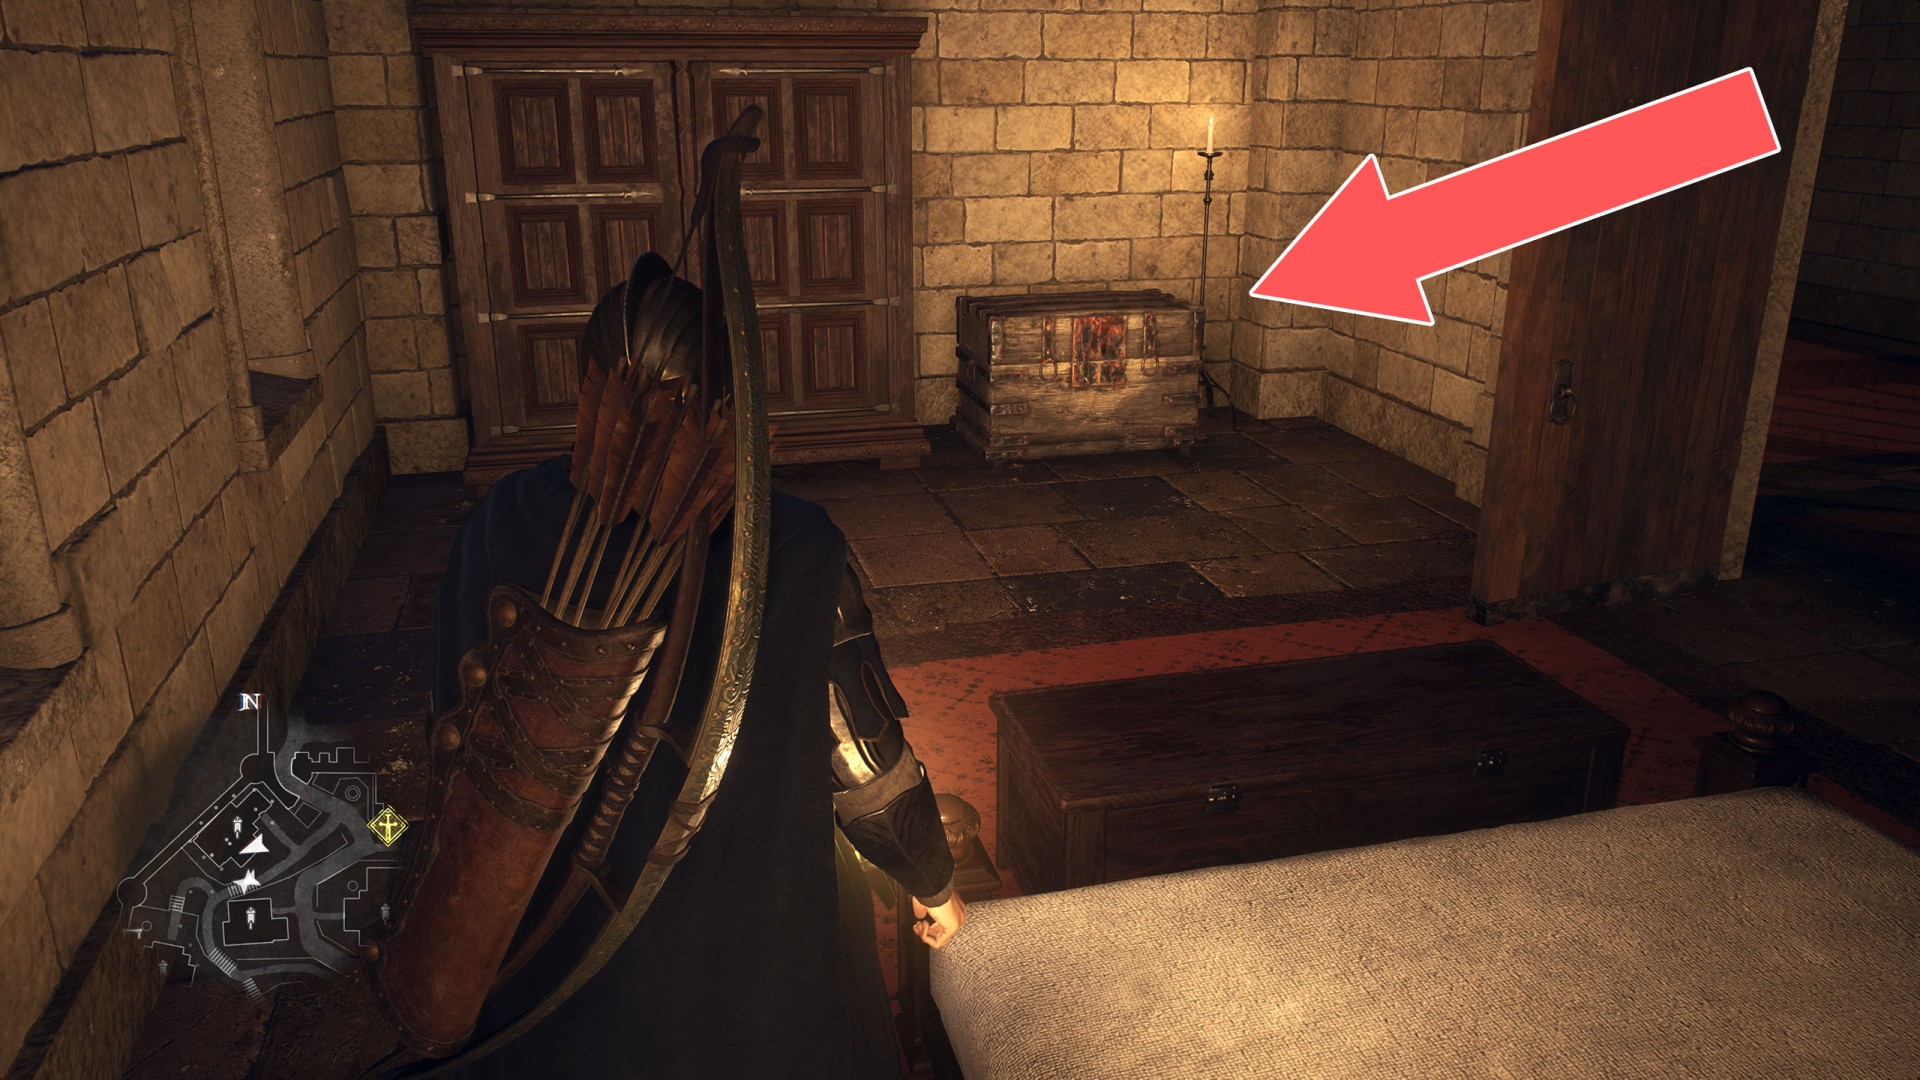
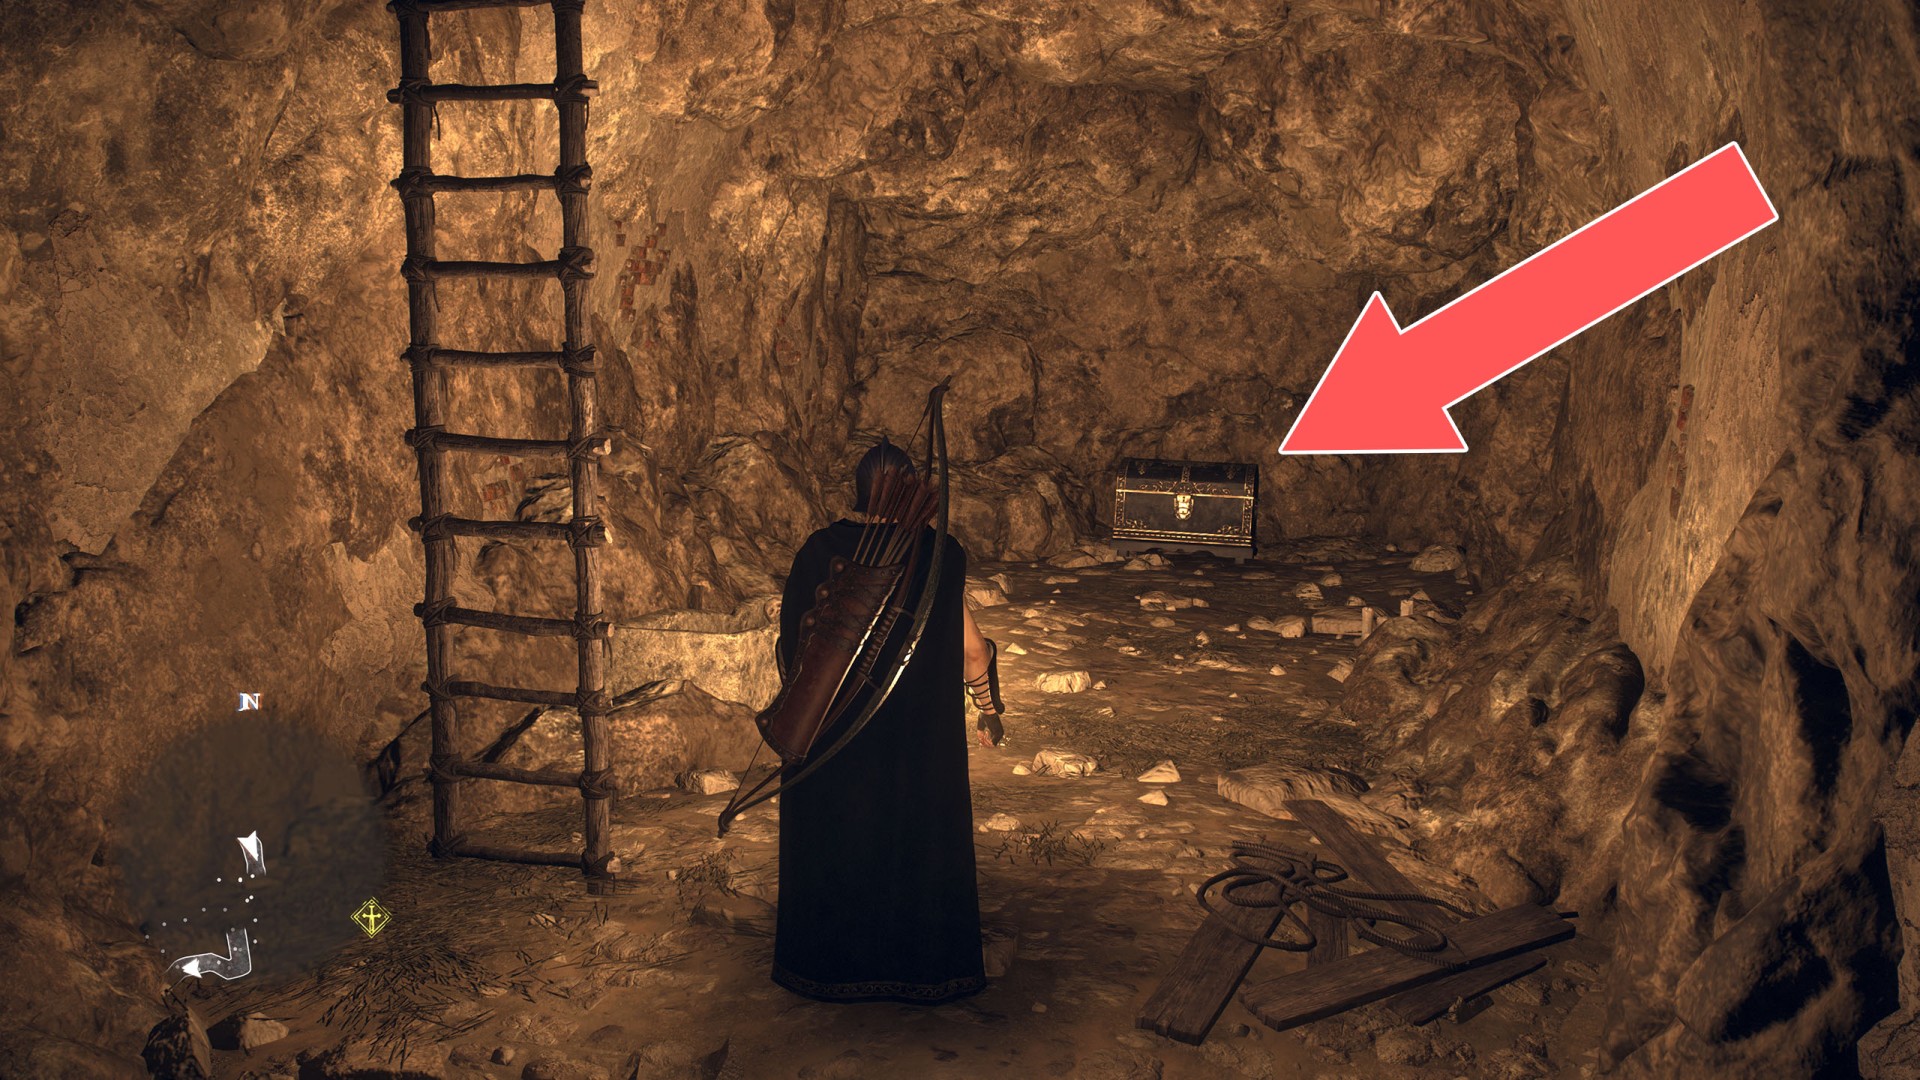
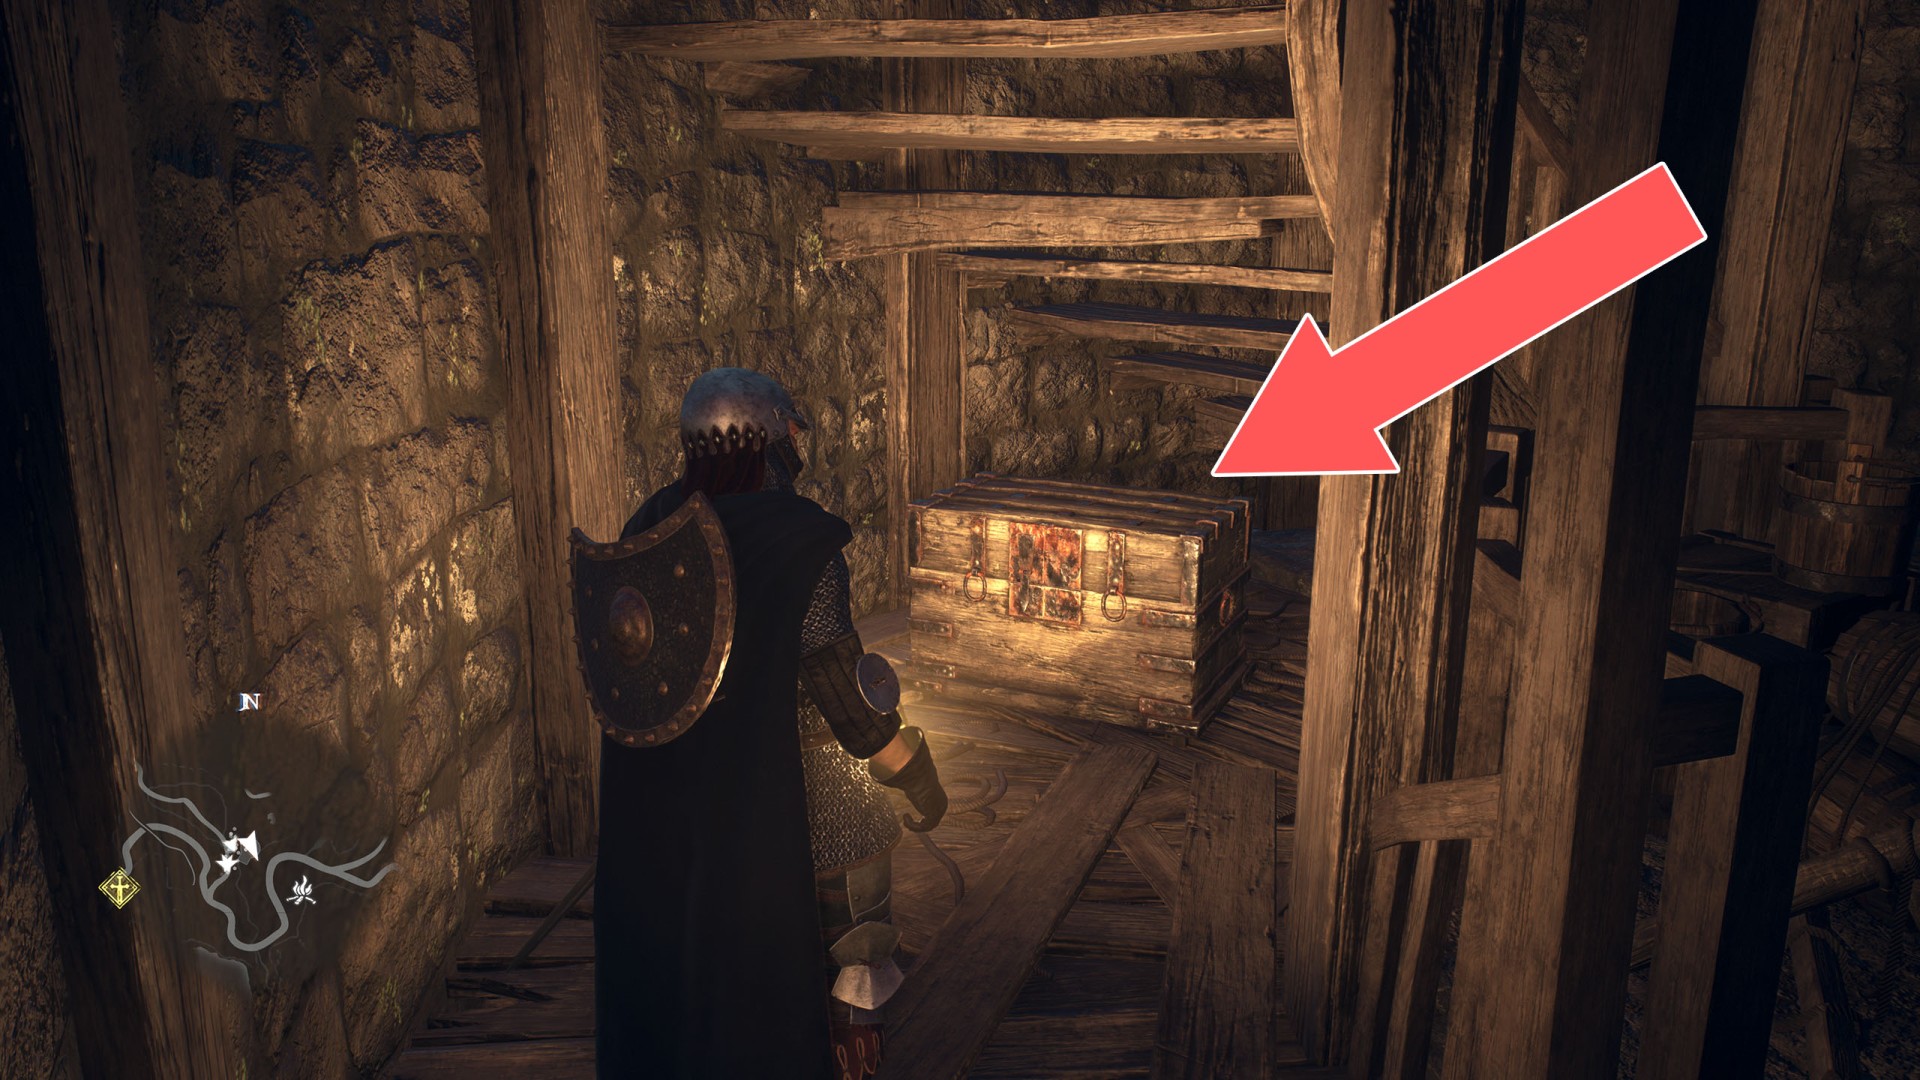
It's in the basement of the locked house. To enter this house, shoot the door lock through the window.

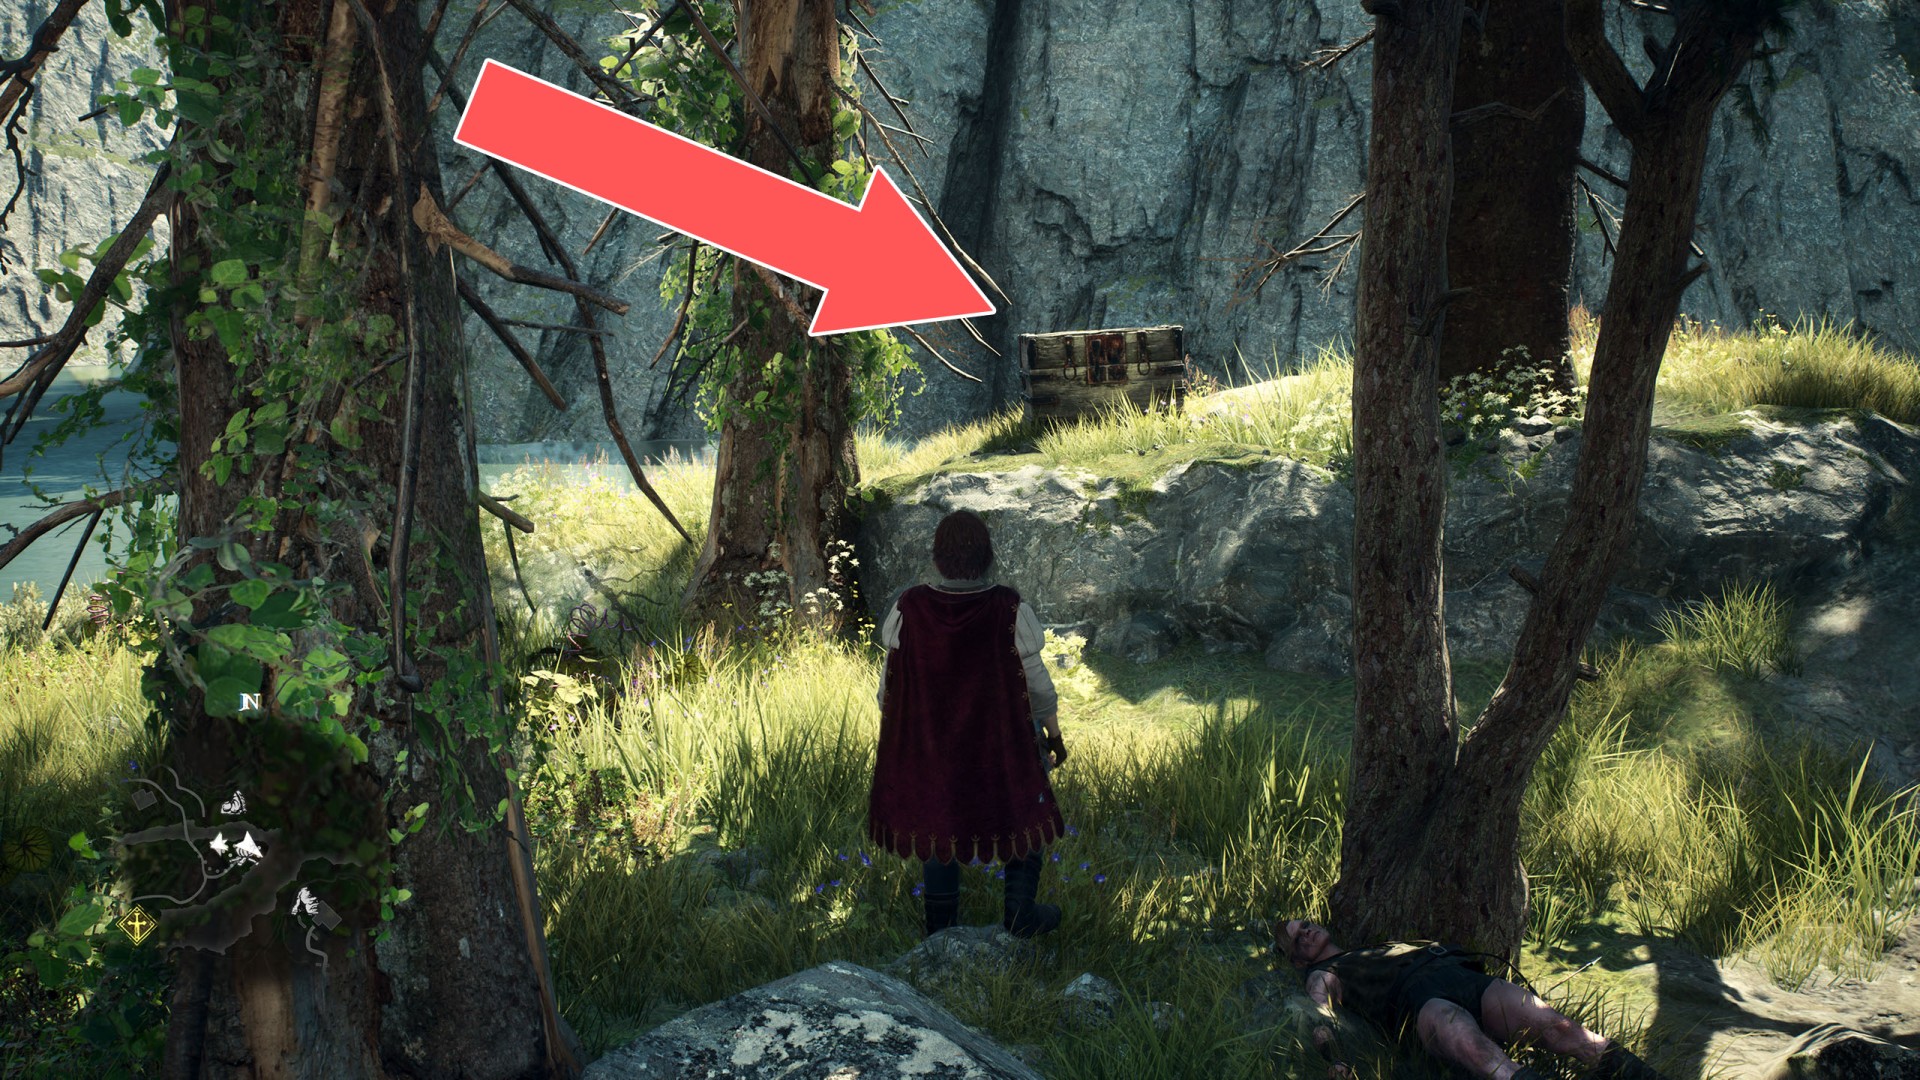
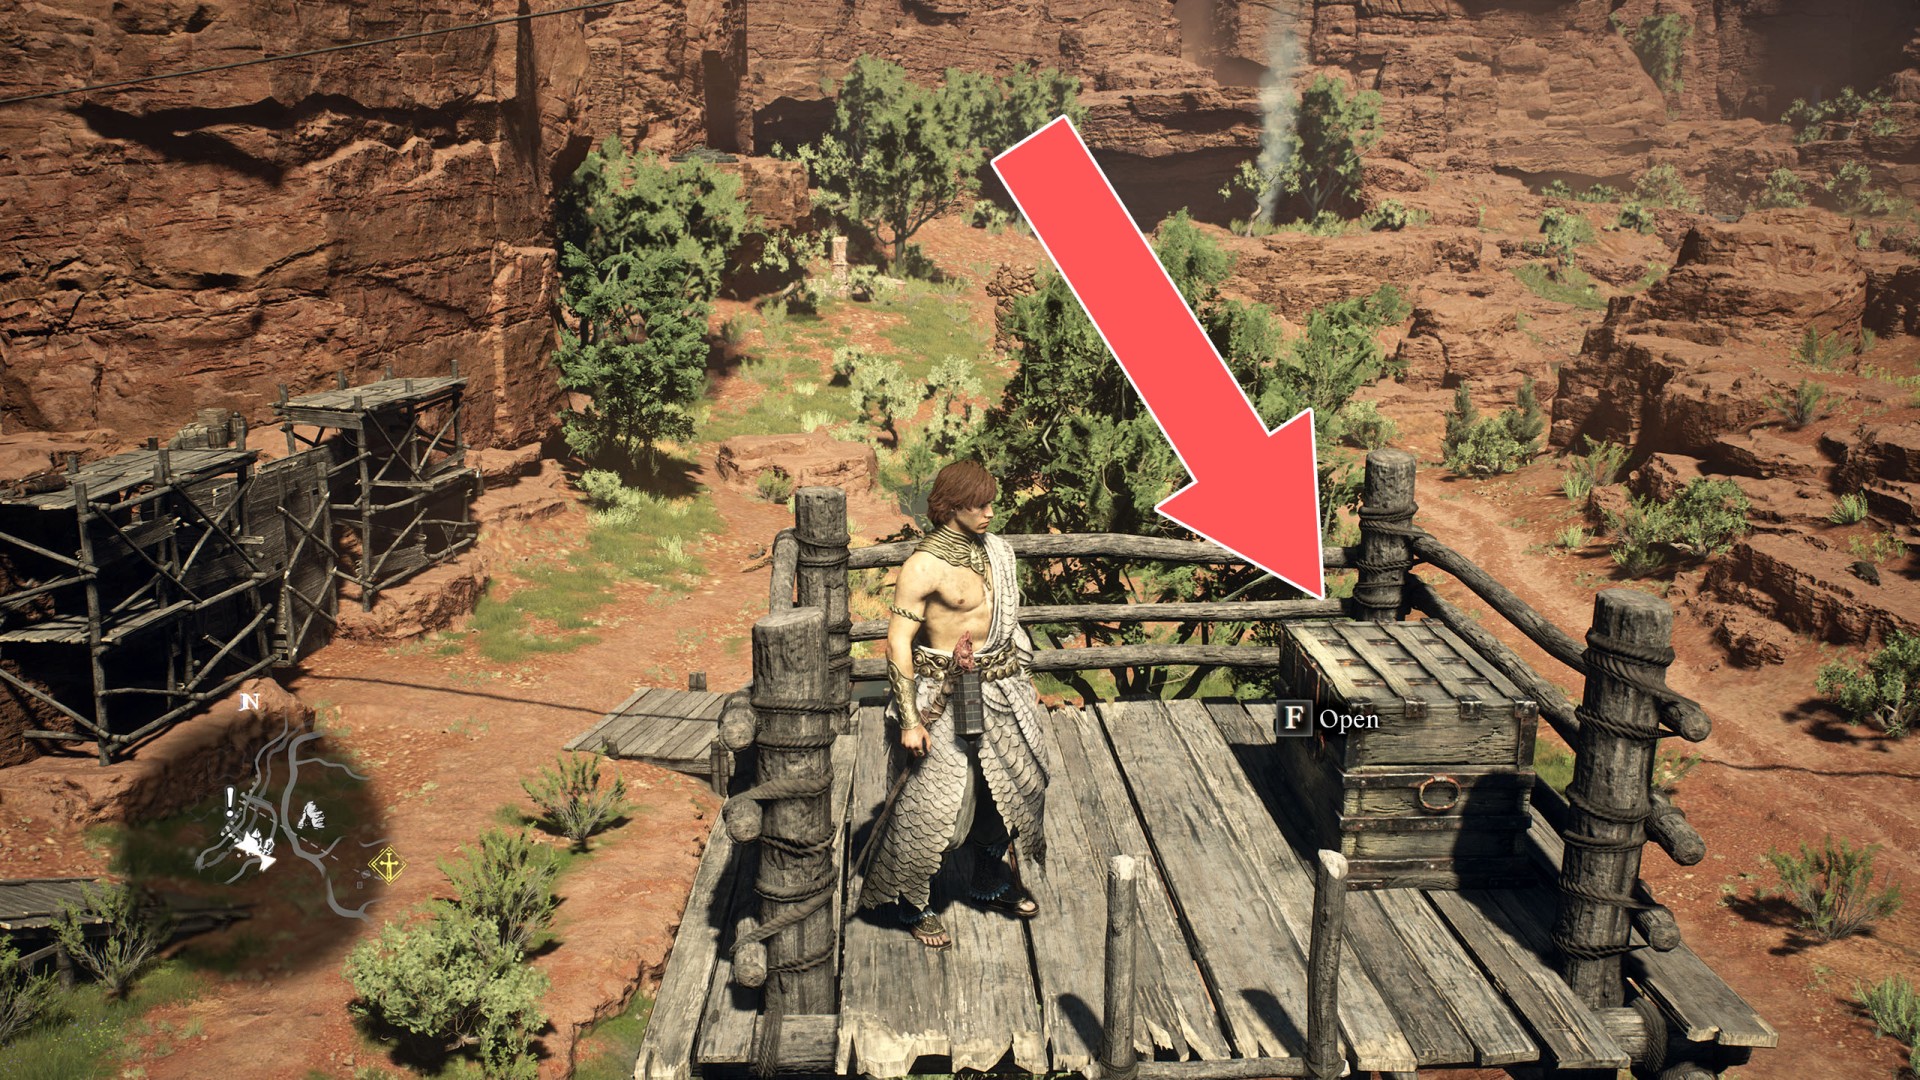
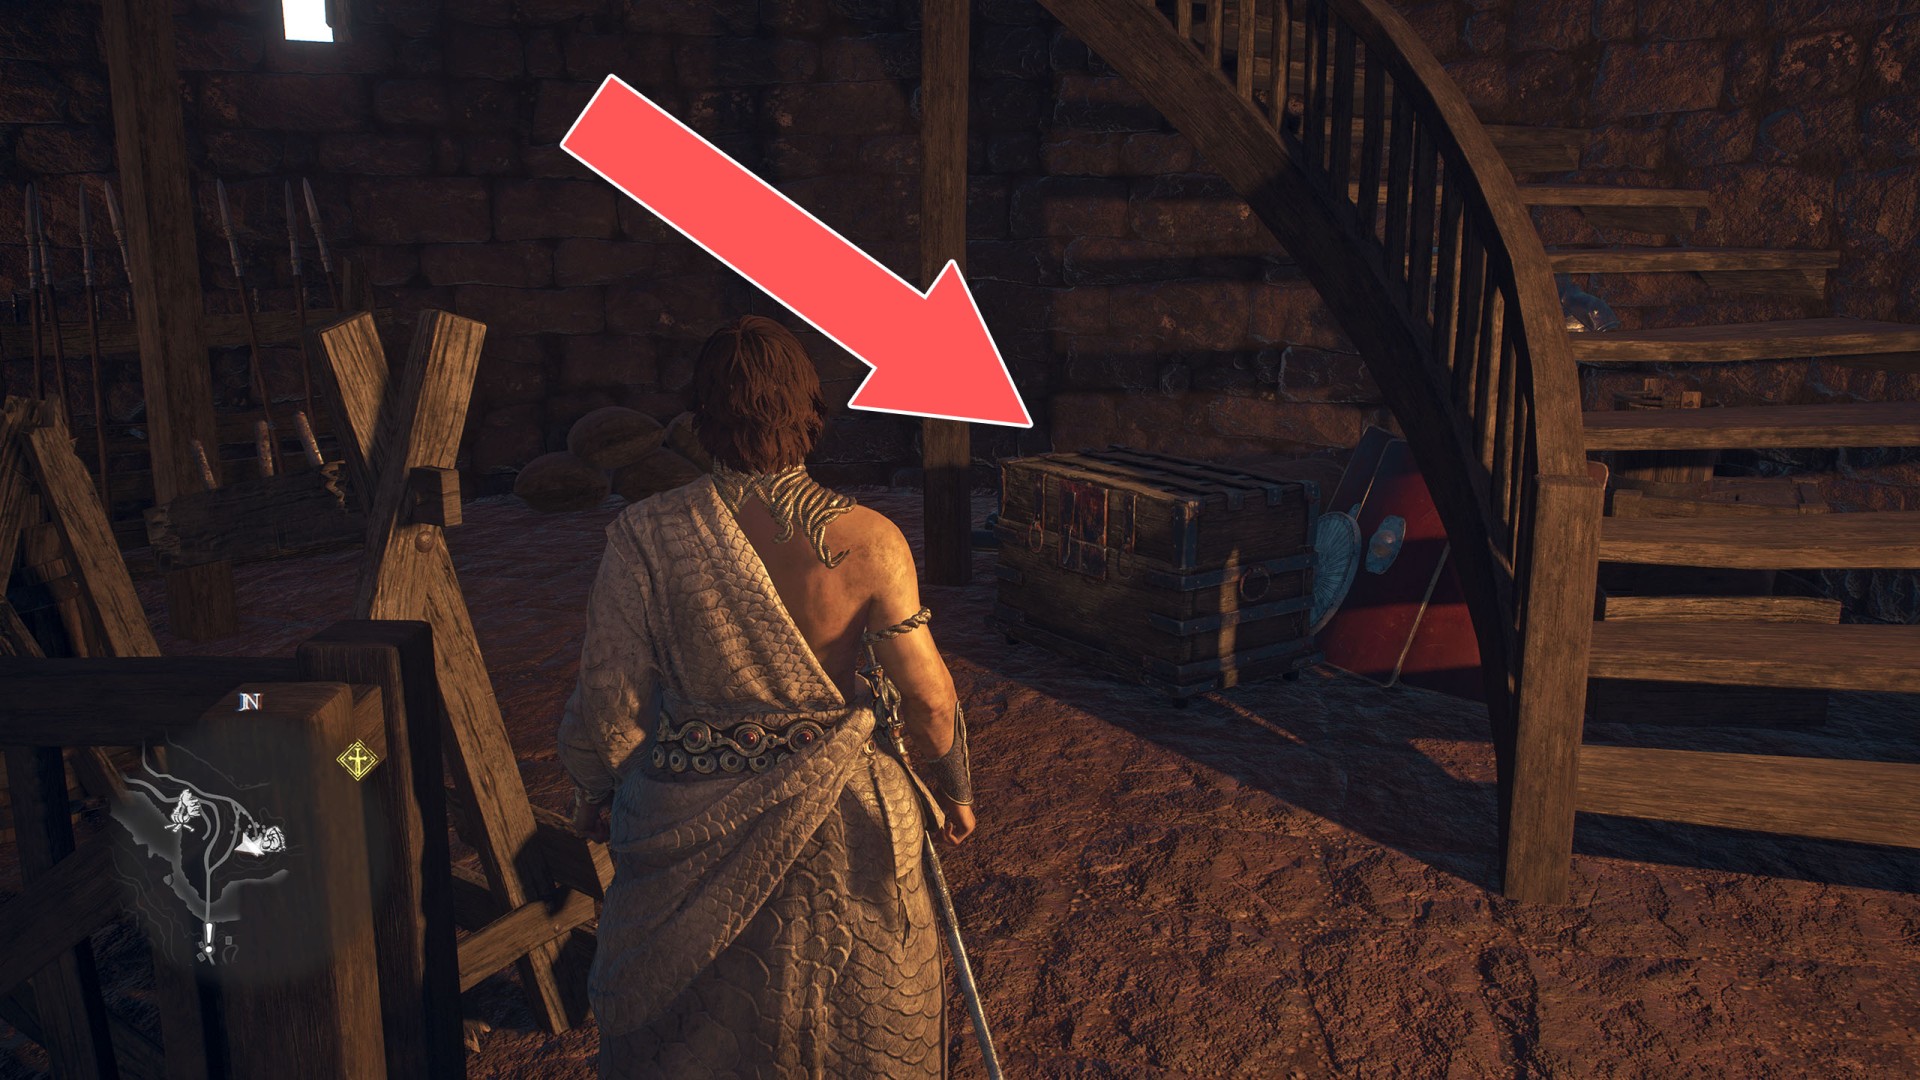
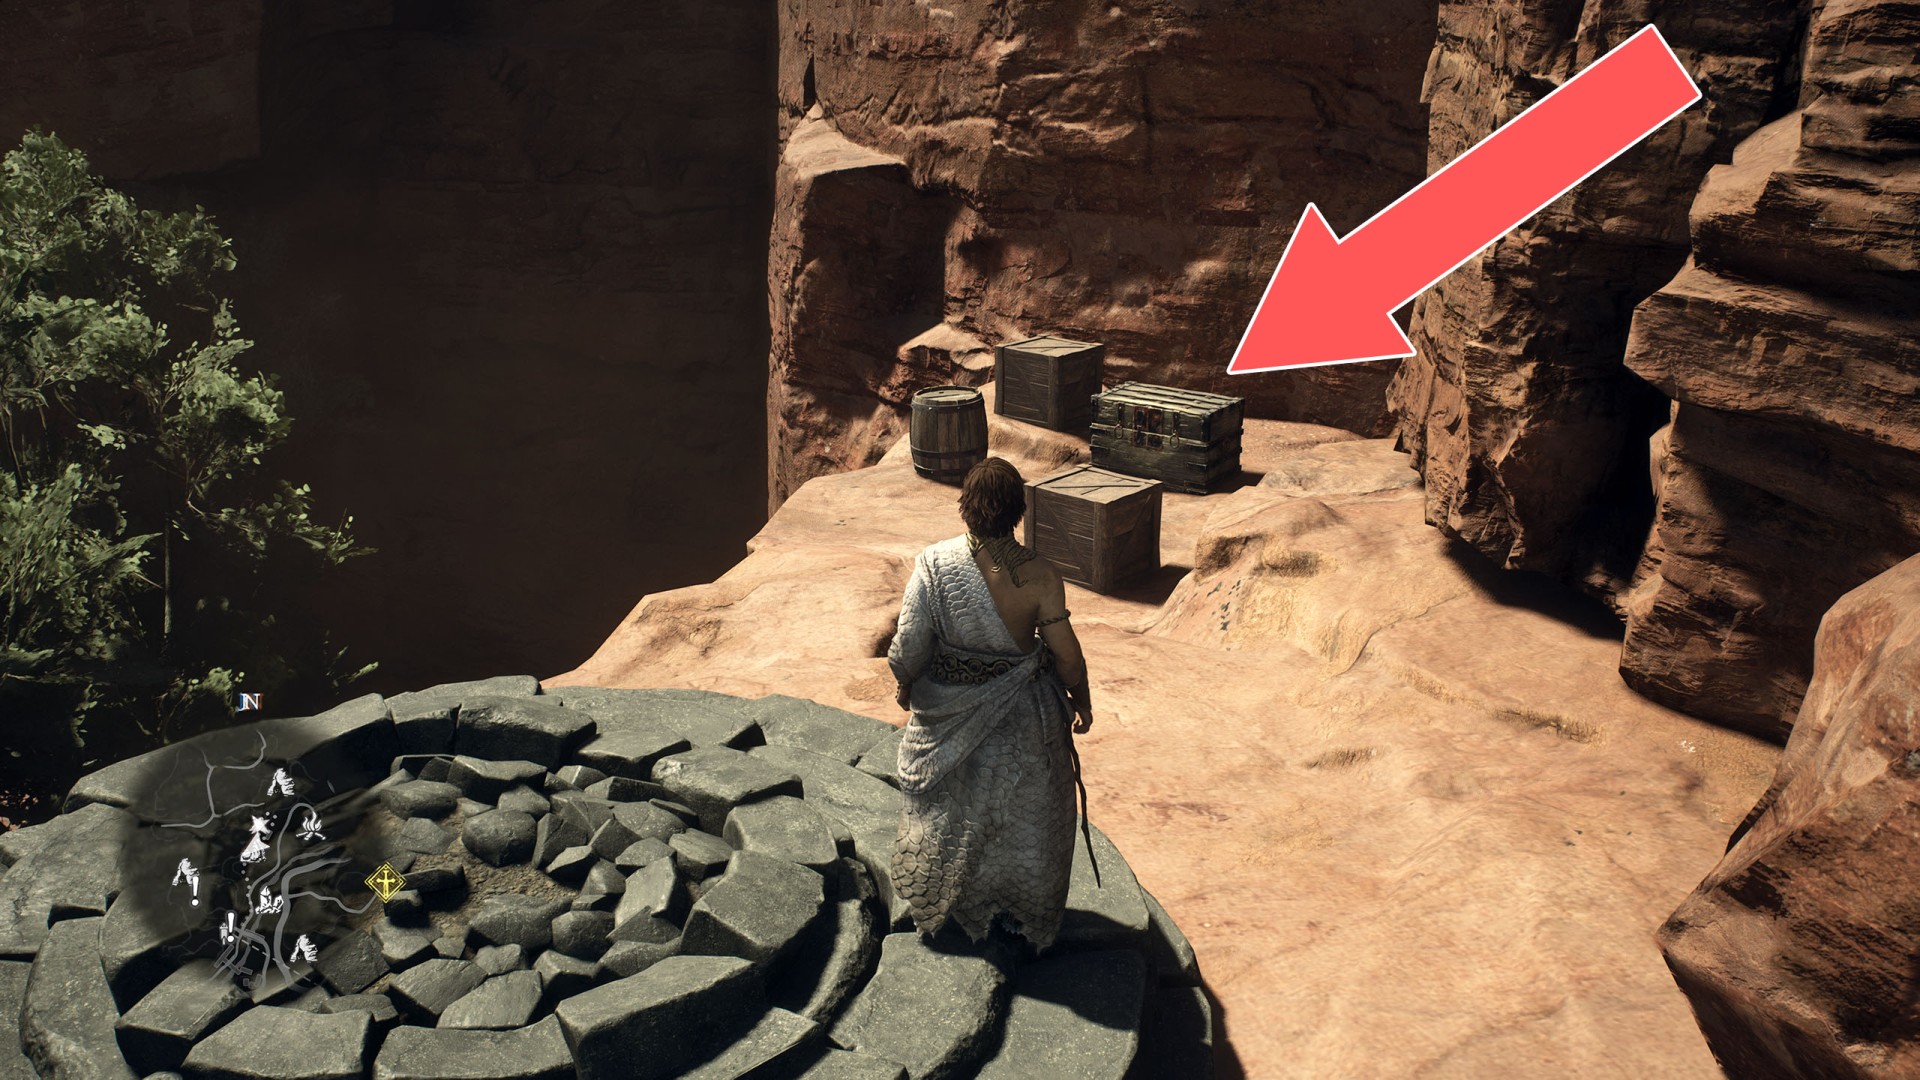
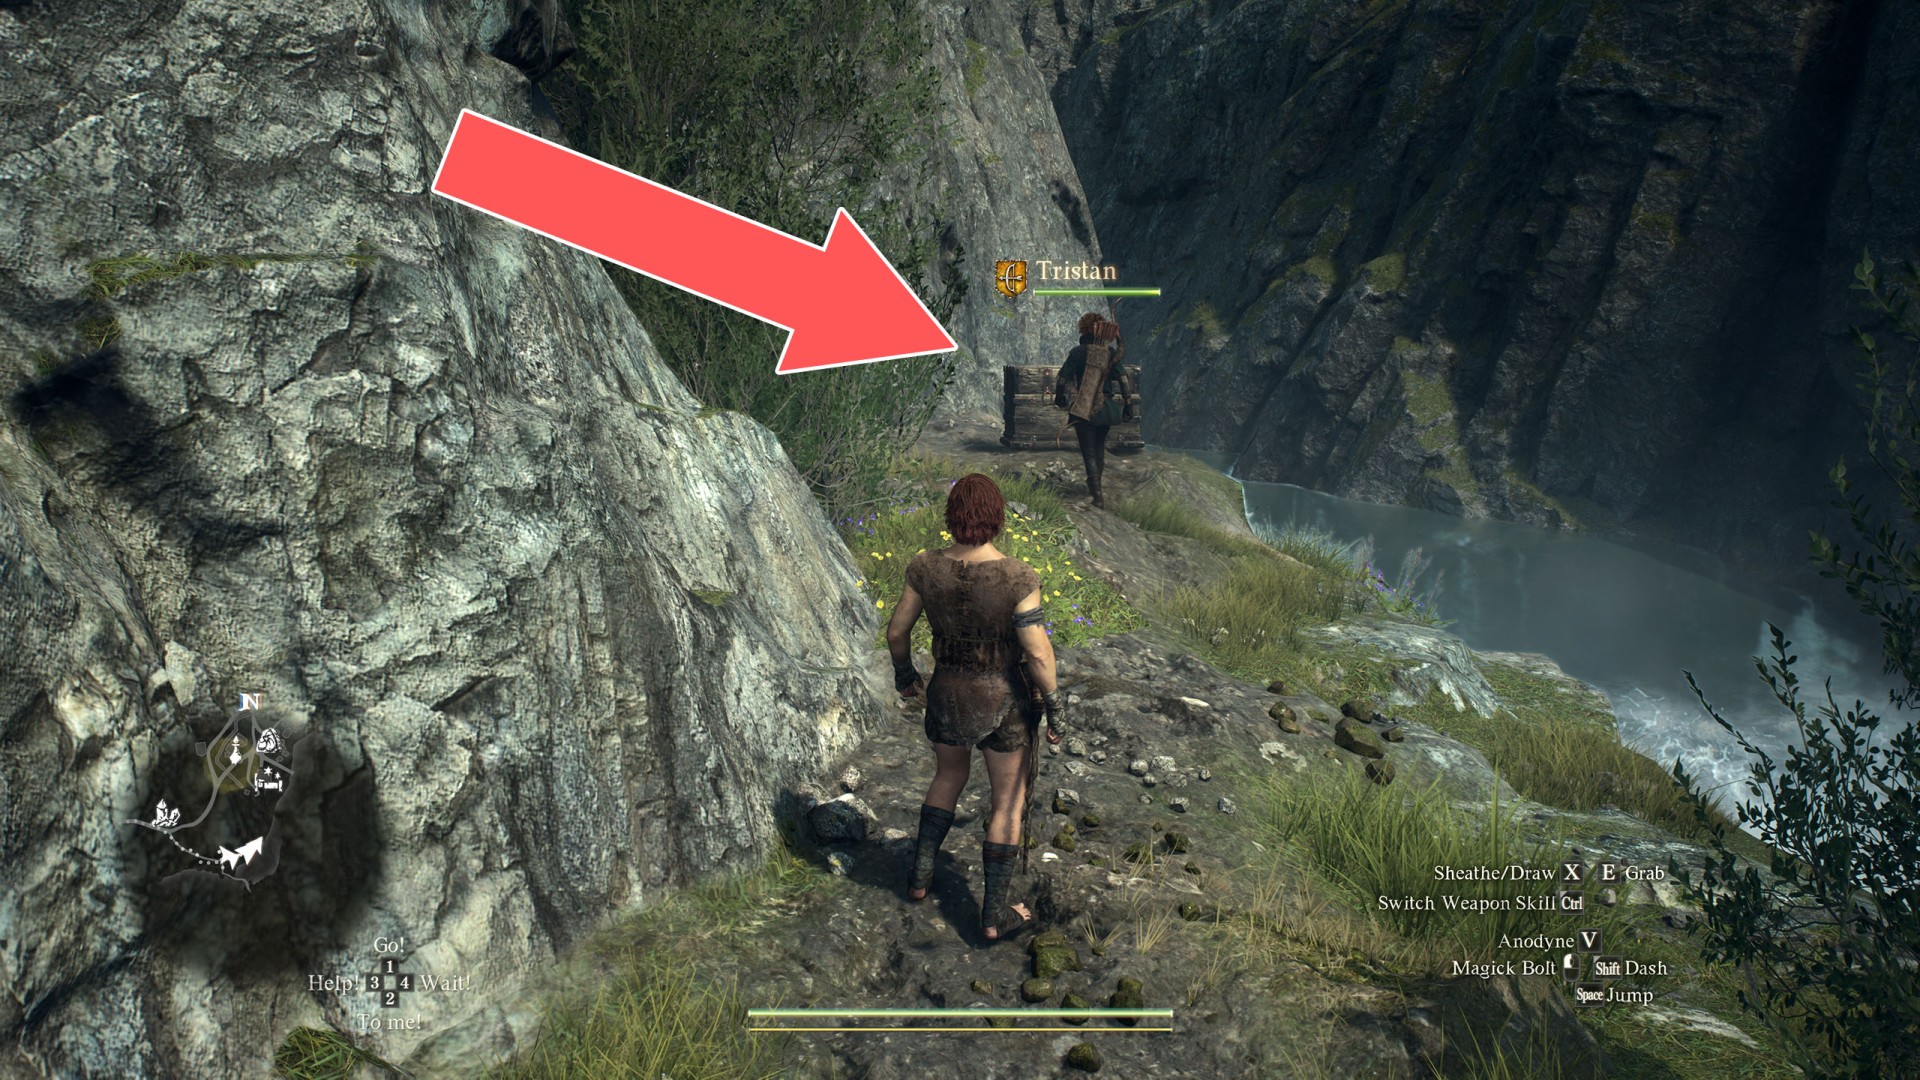
4Box (3,200G)
5Box (3,500G)

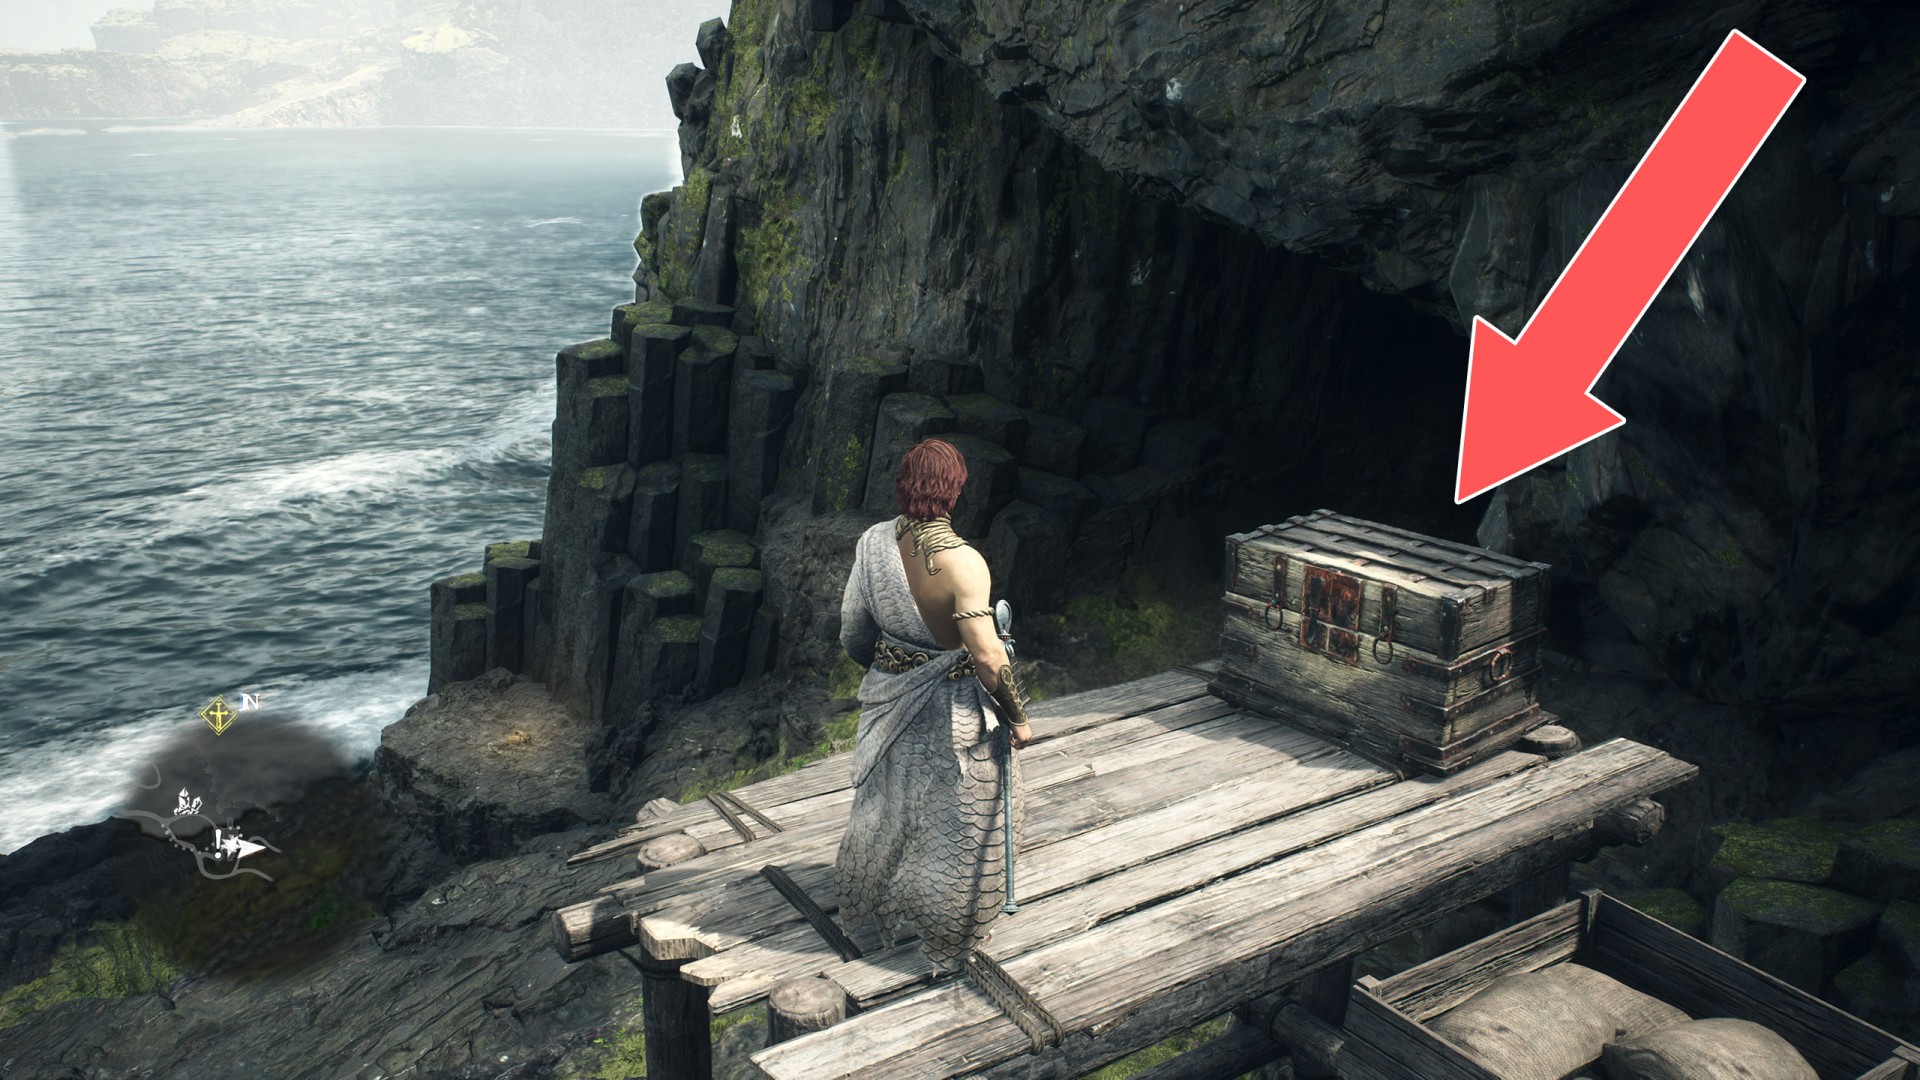
6Box (3,900G)

7Box (4,450G)
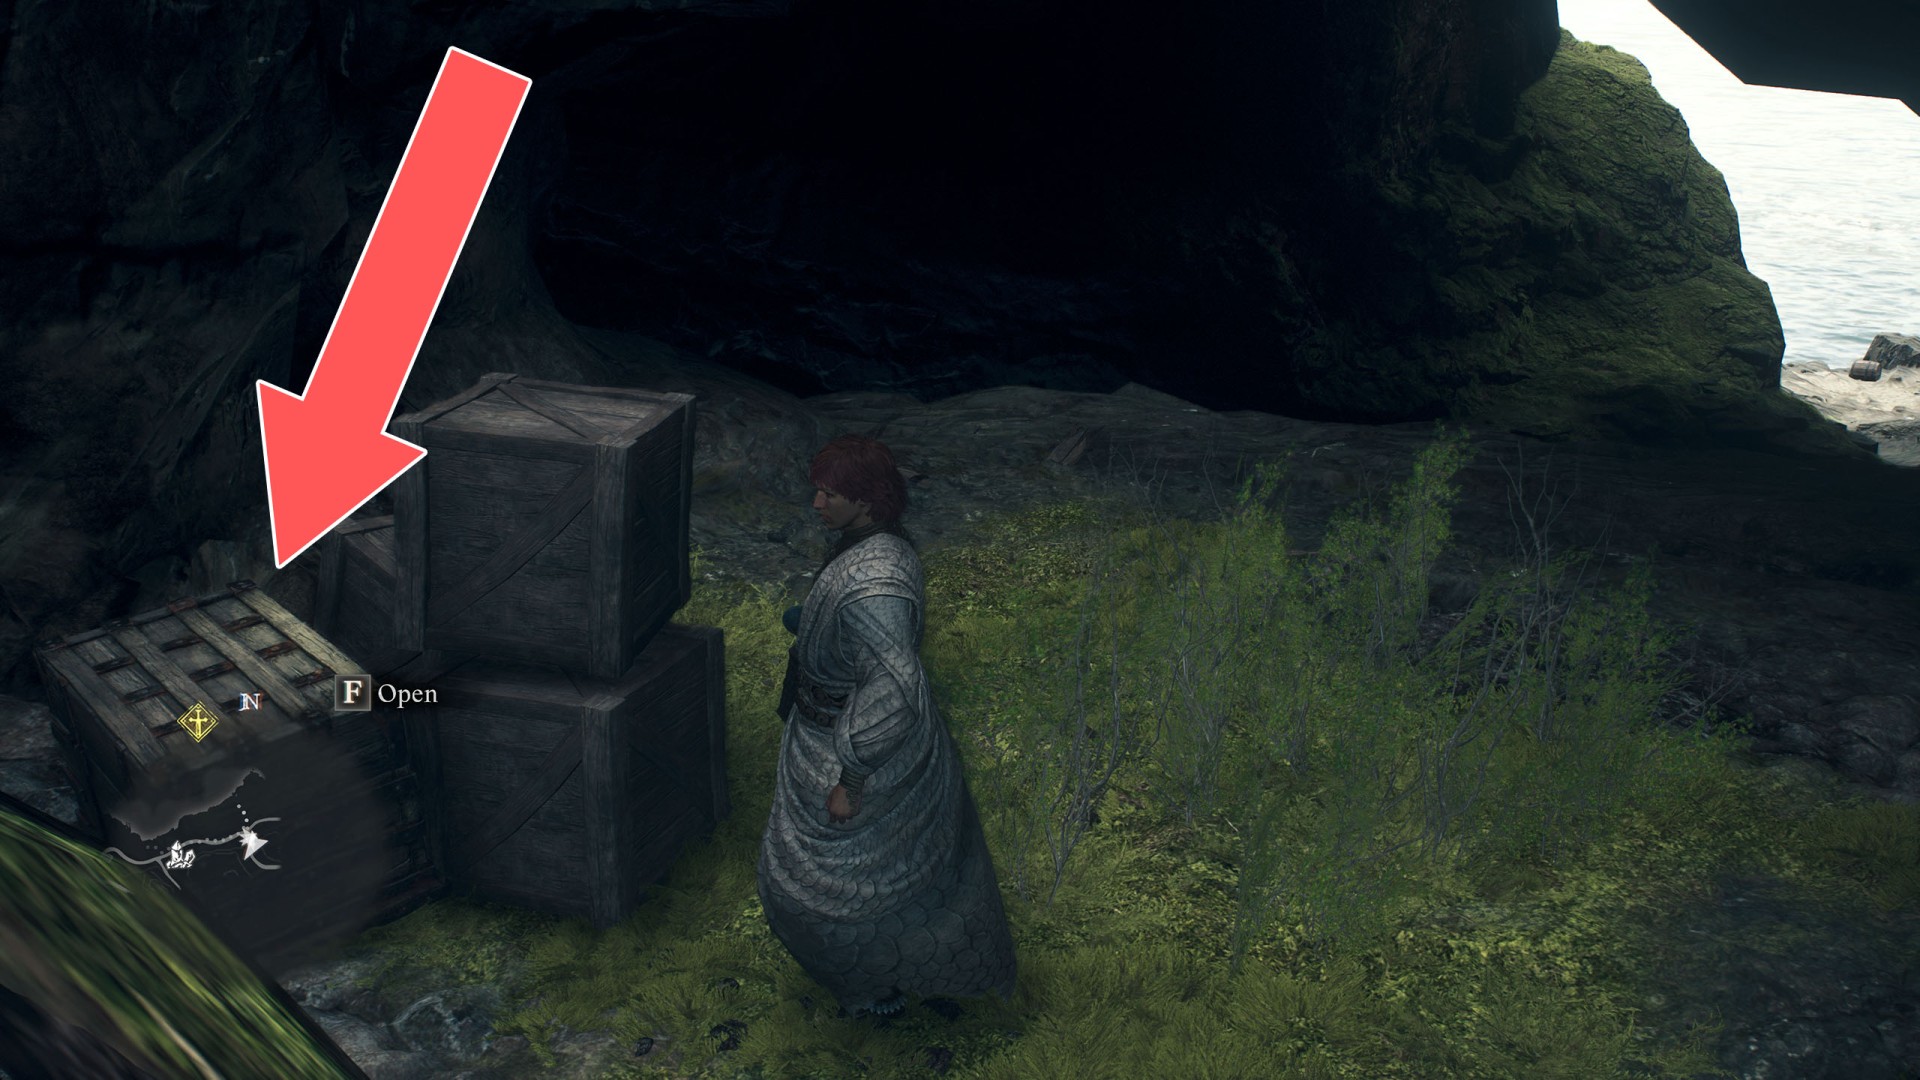
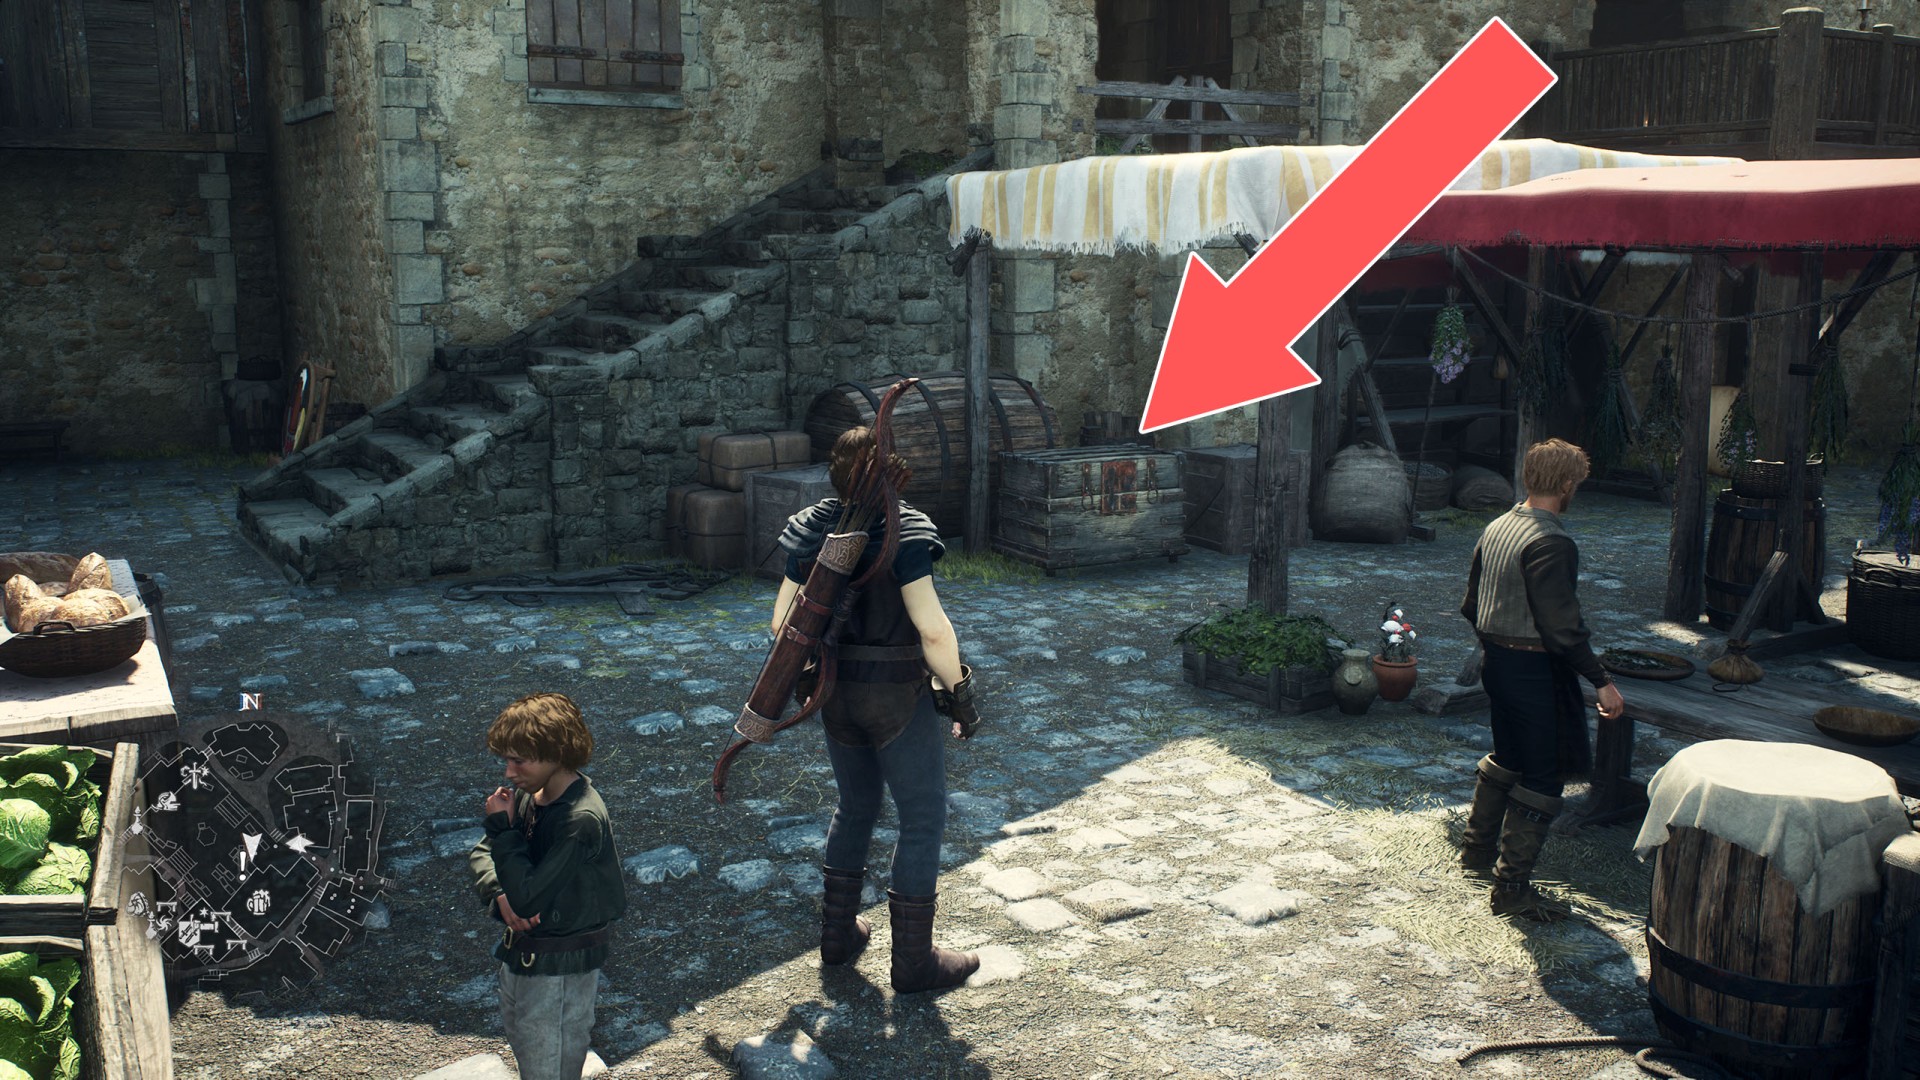
8Box + Pouch x 2 (5,350G)
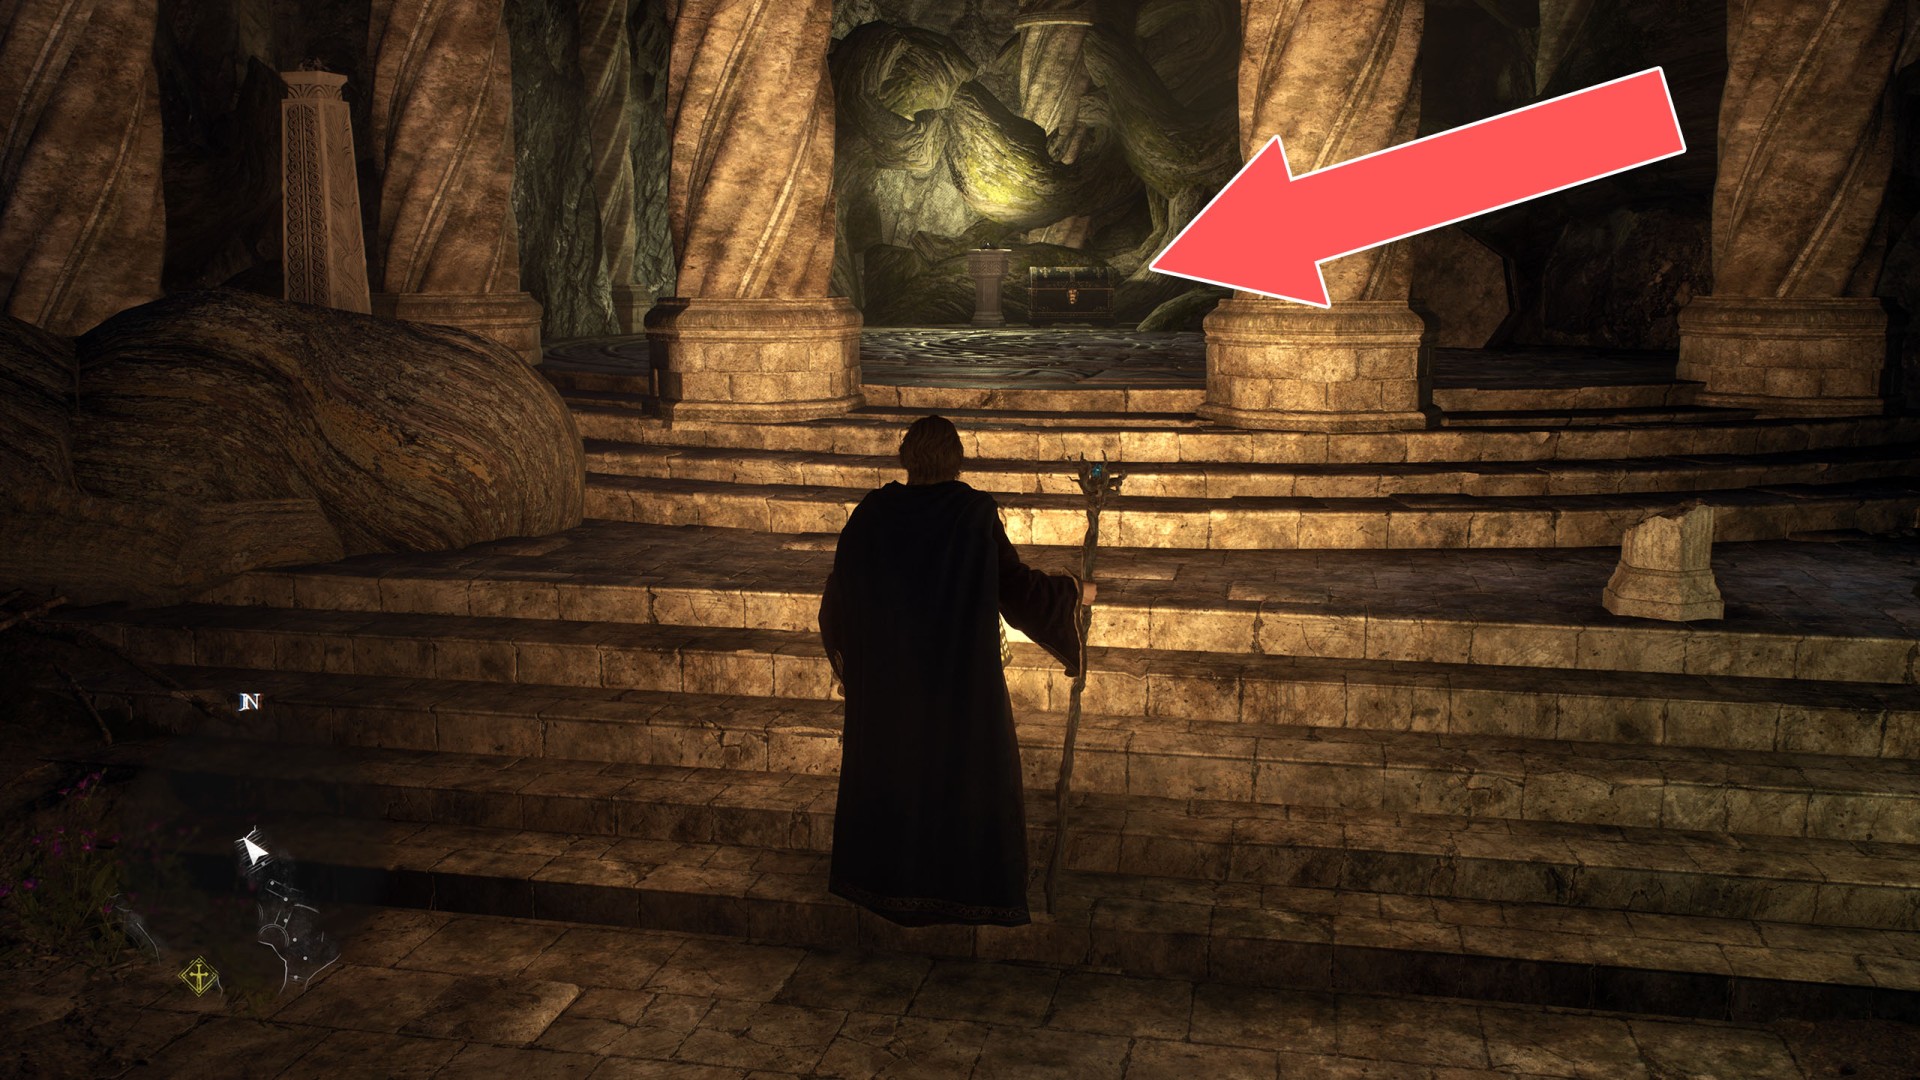
9Chest (1,000G)
10Chest (1,015G)
11Chest (1,020G)
12Chest (1,030G)
13Chest (1,050G)
14Chest (1,080G)
15Chest (1,100G)

16Chest (1,100G)
17Chest (1,100G)
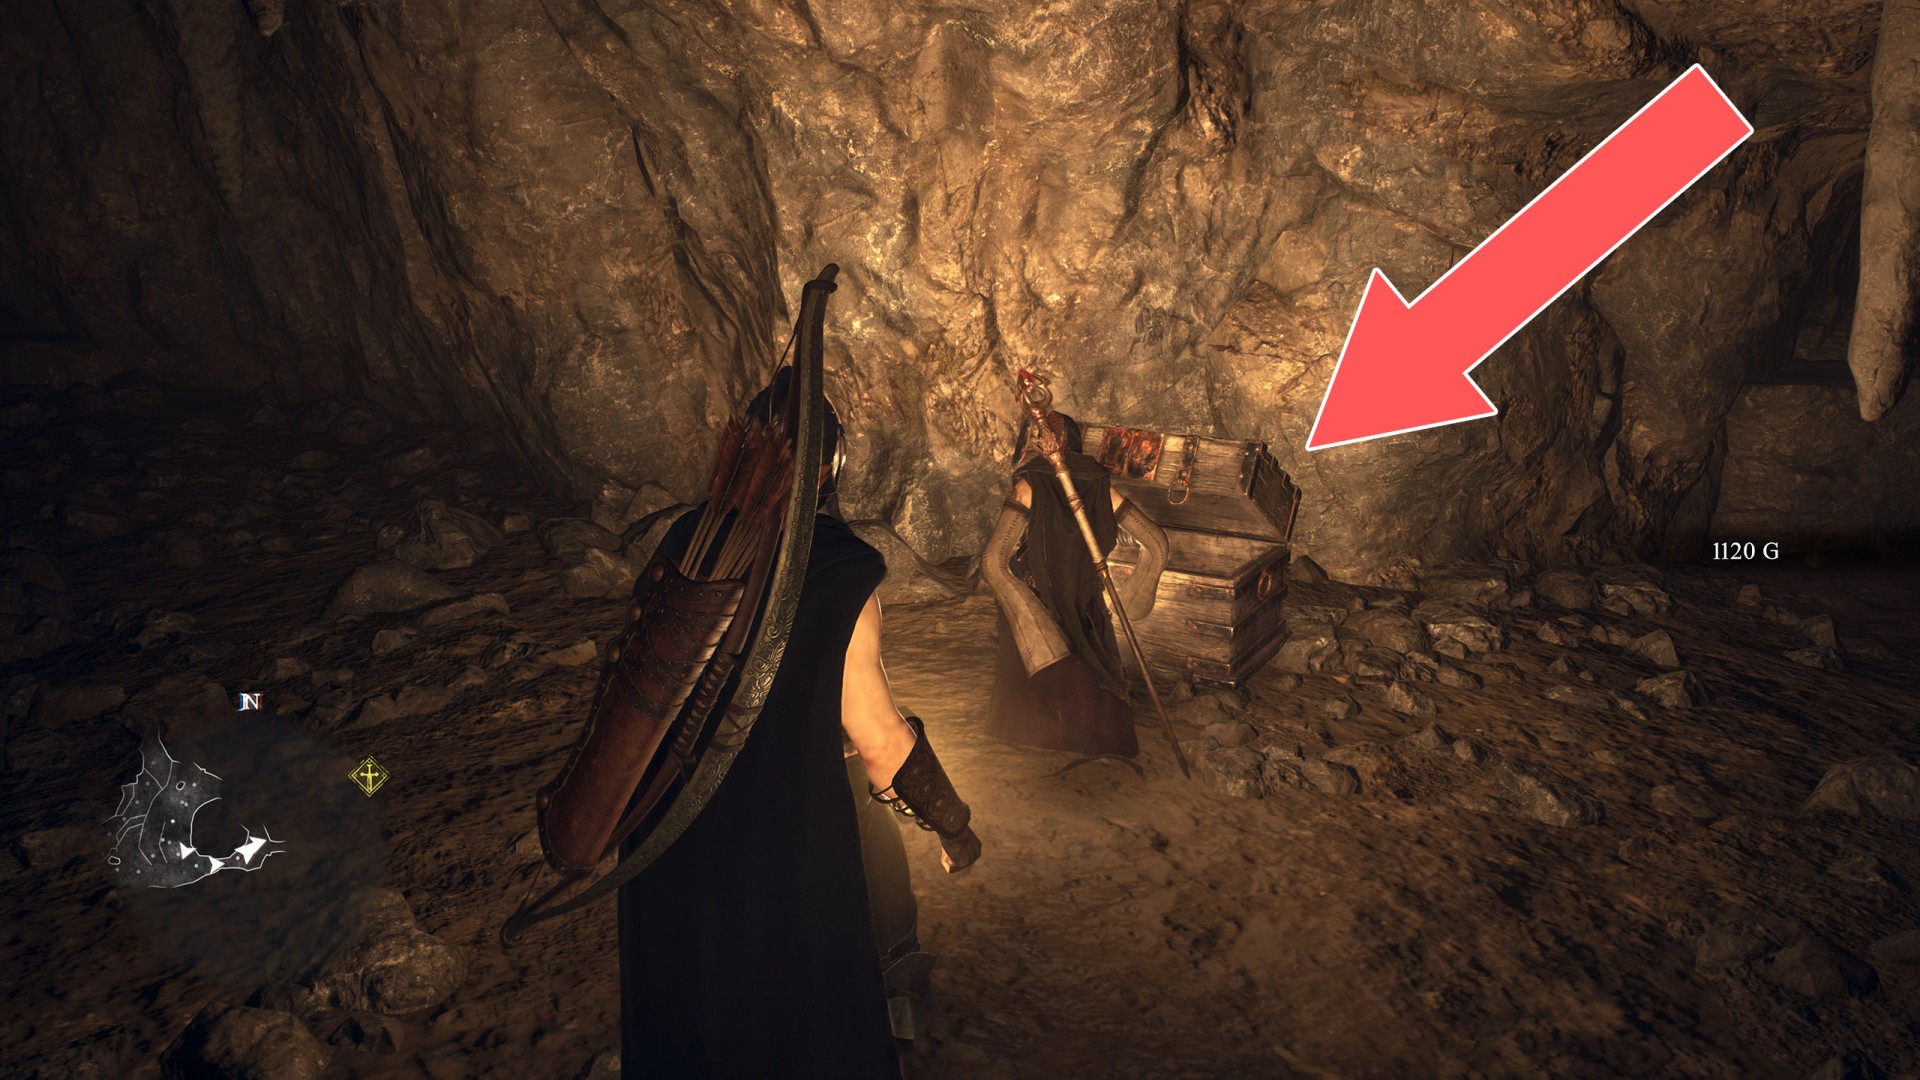
18Chest (1,120G)
19Chest (1,140G)
20Chest (1,150G)
21Chest (1,180G)
22Chest (1,190G)

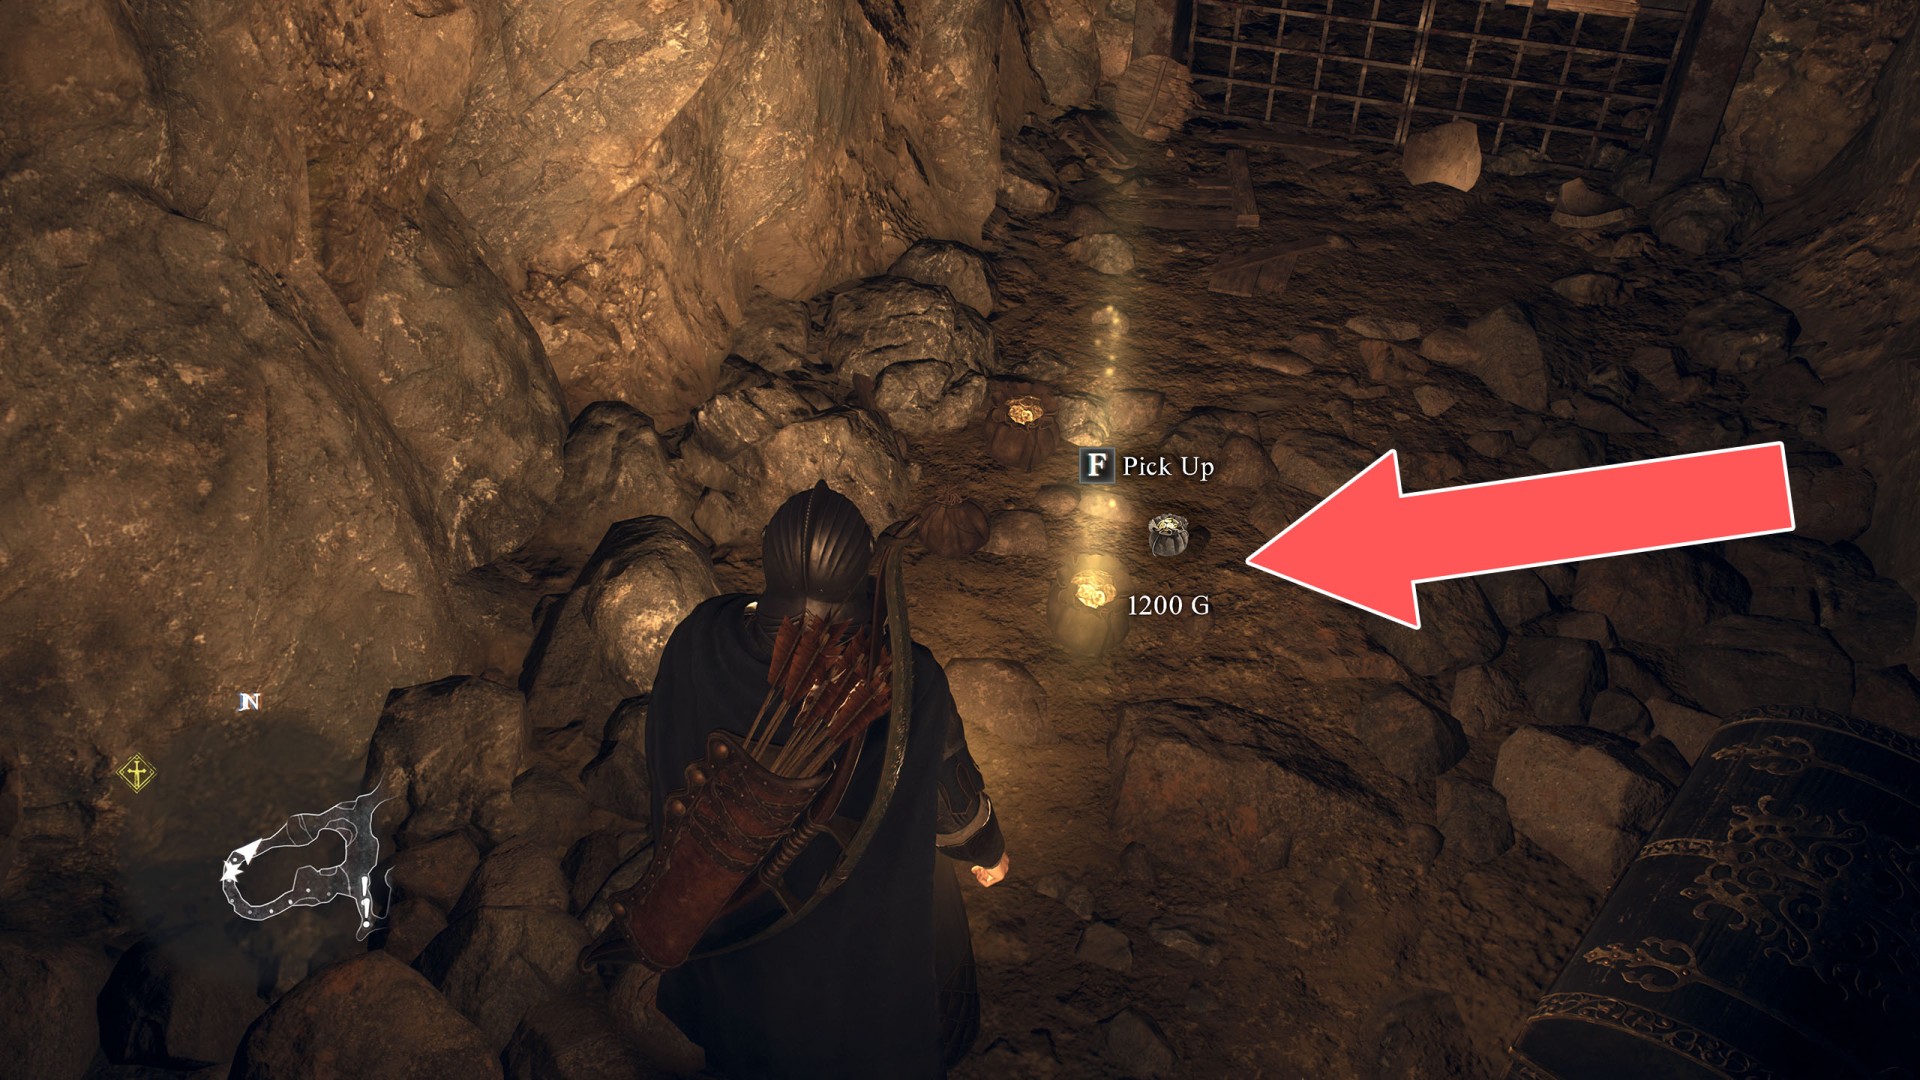
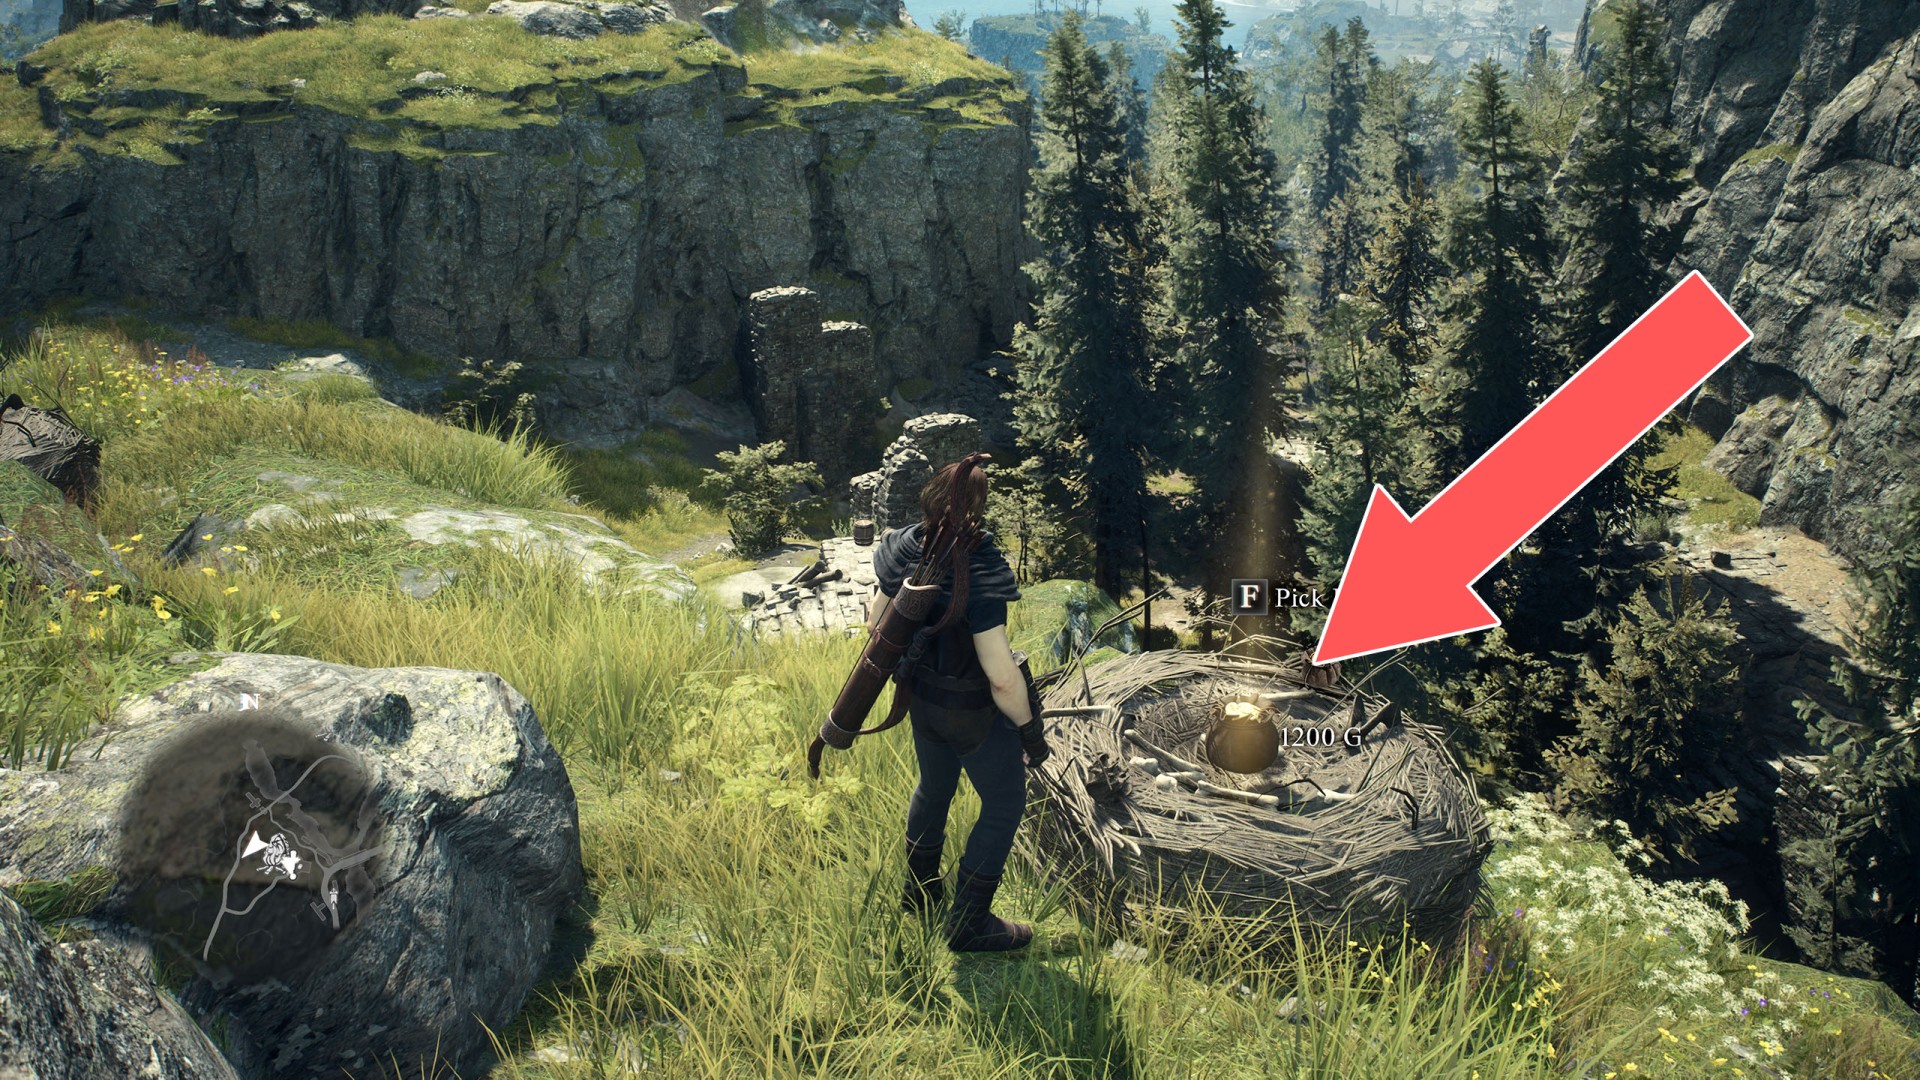
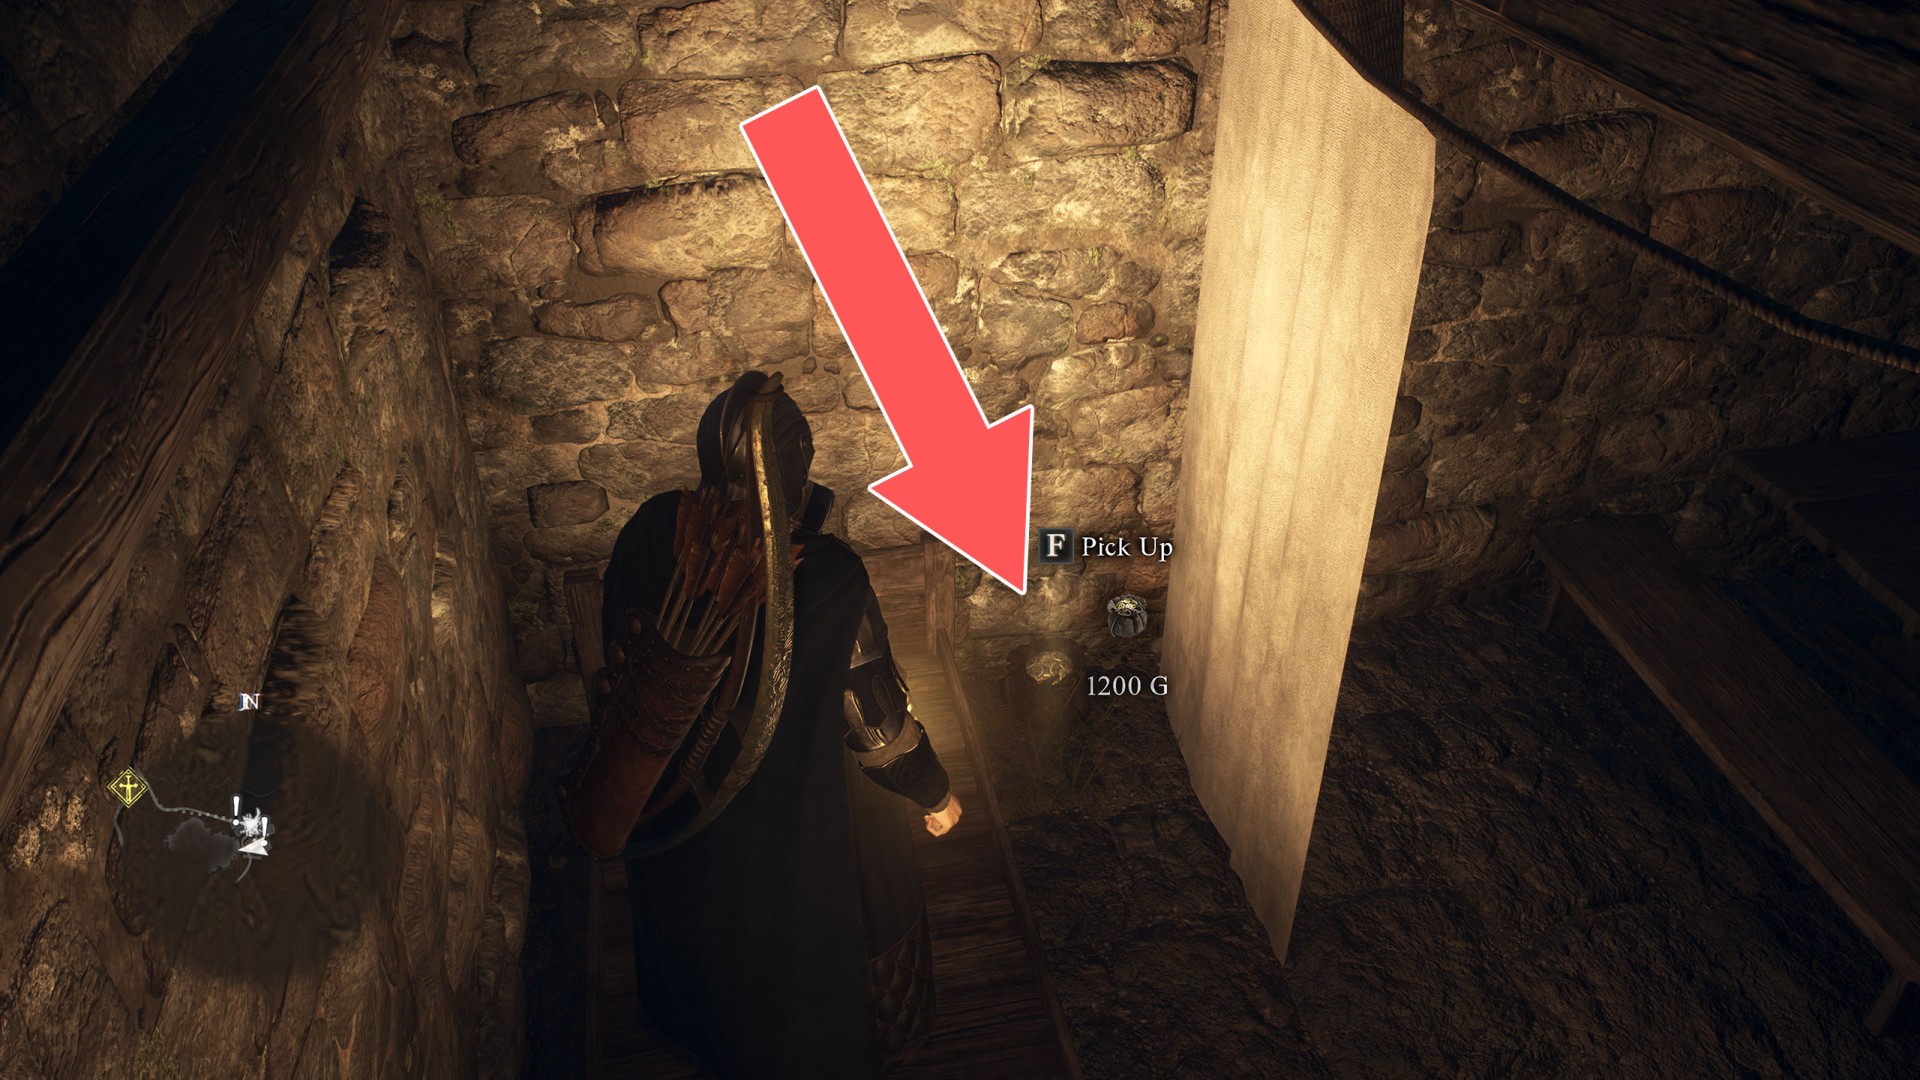
23Chest (1,200G)
24Chest (1,200G)

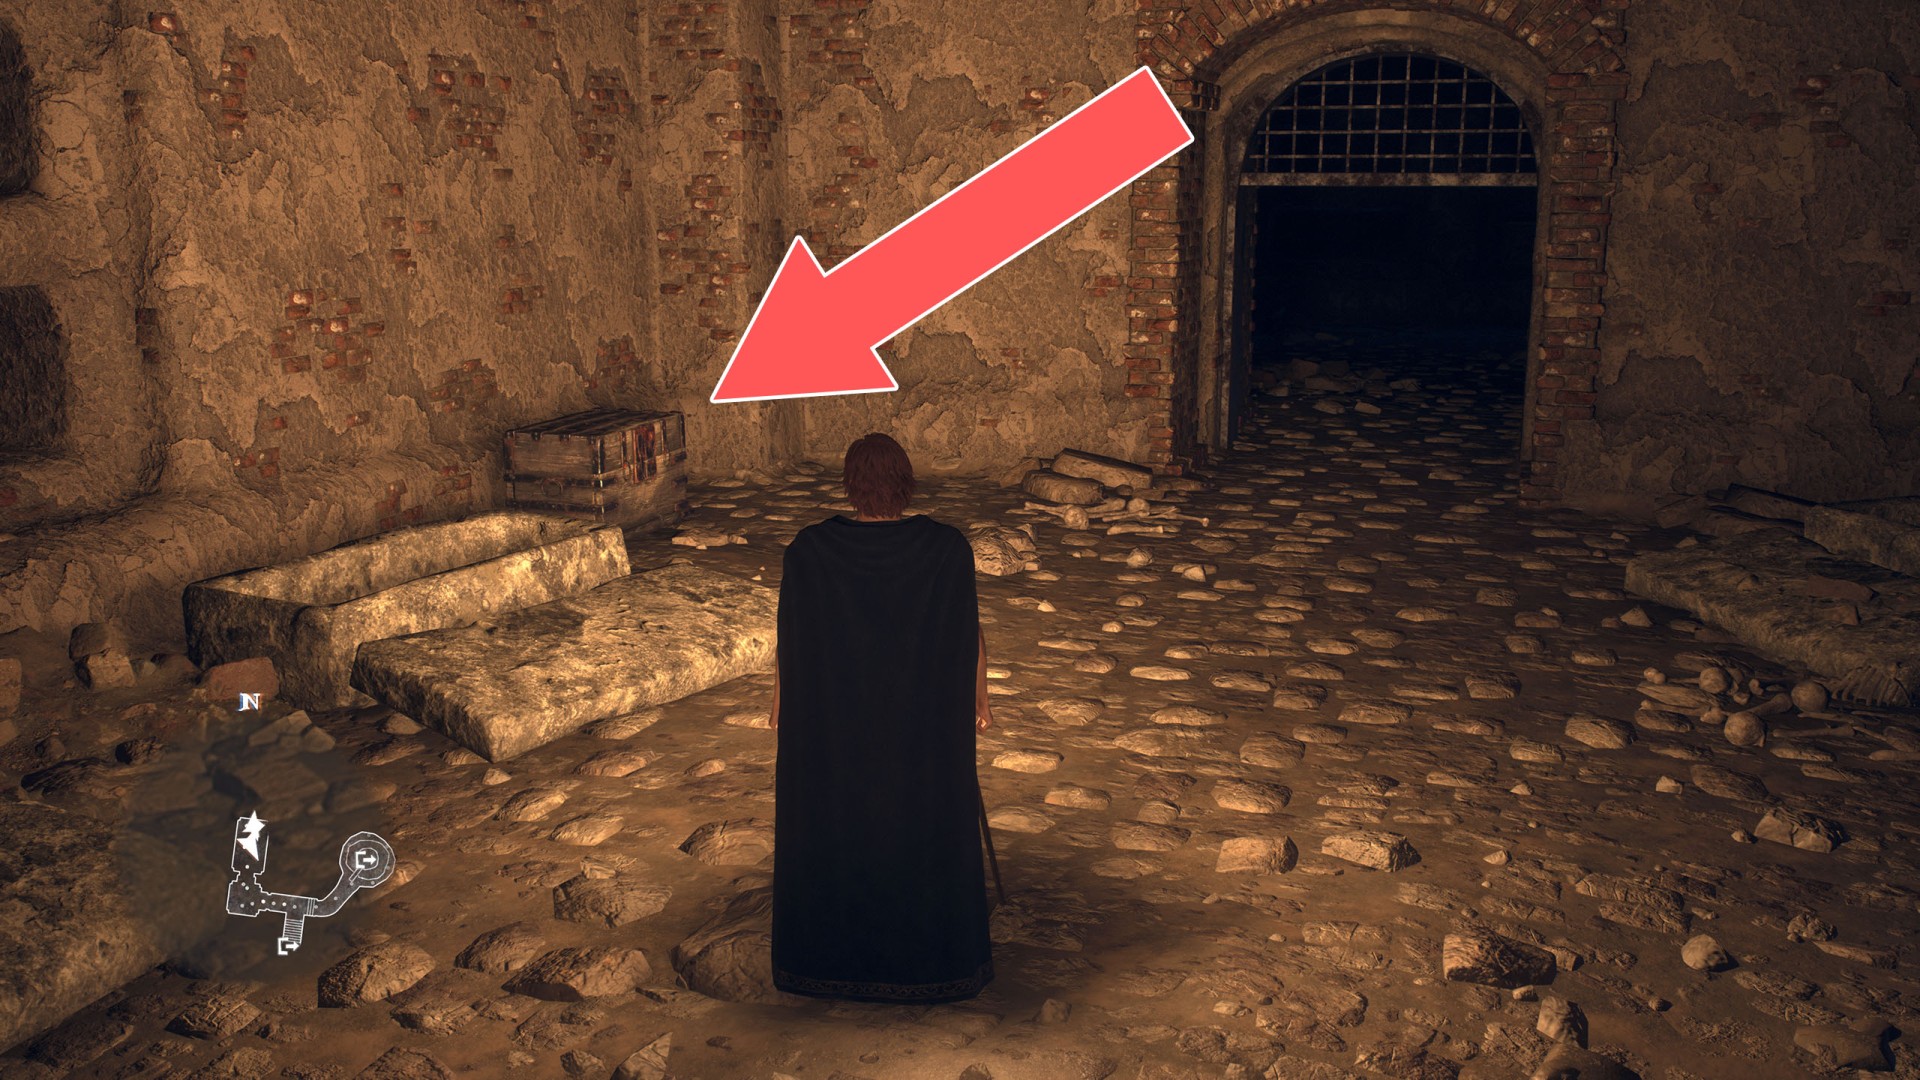
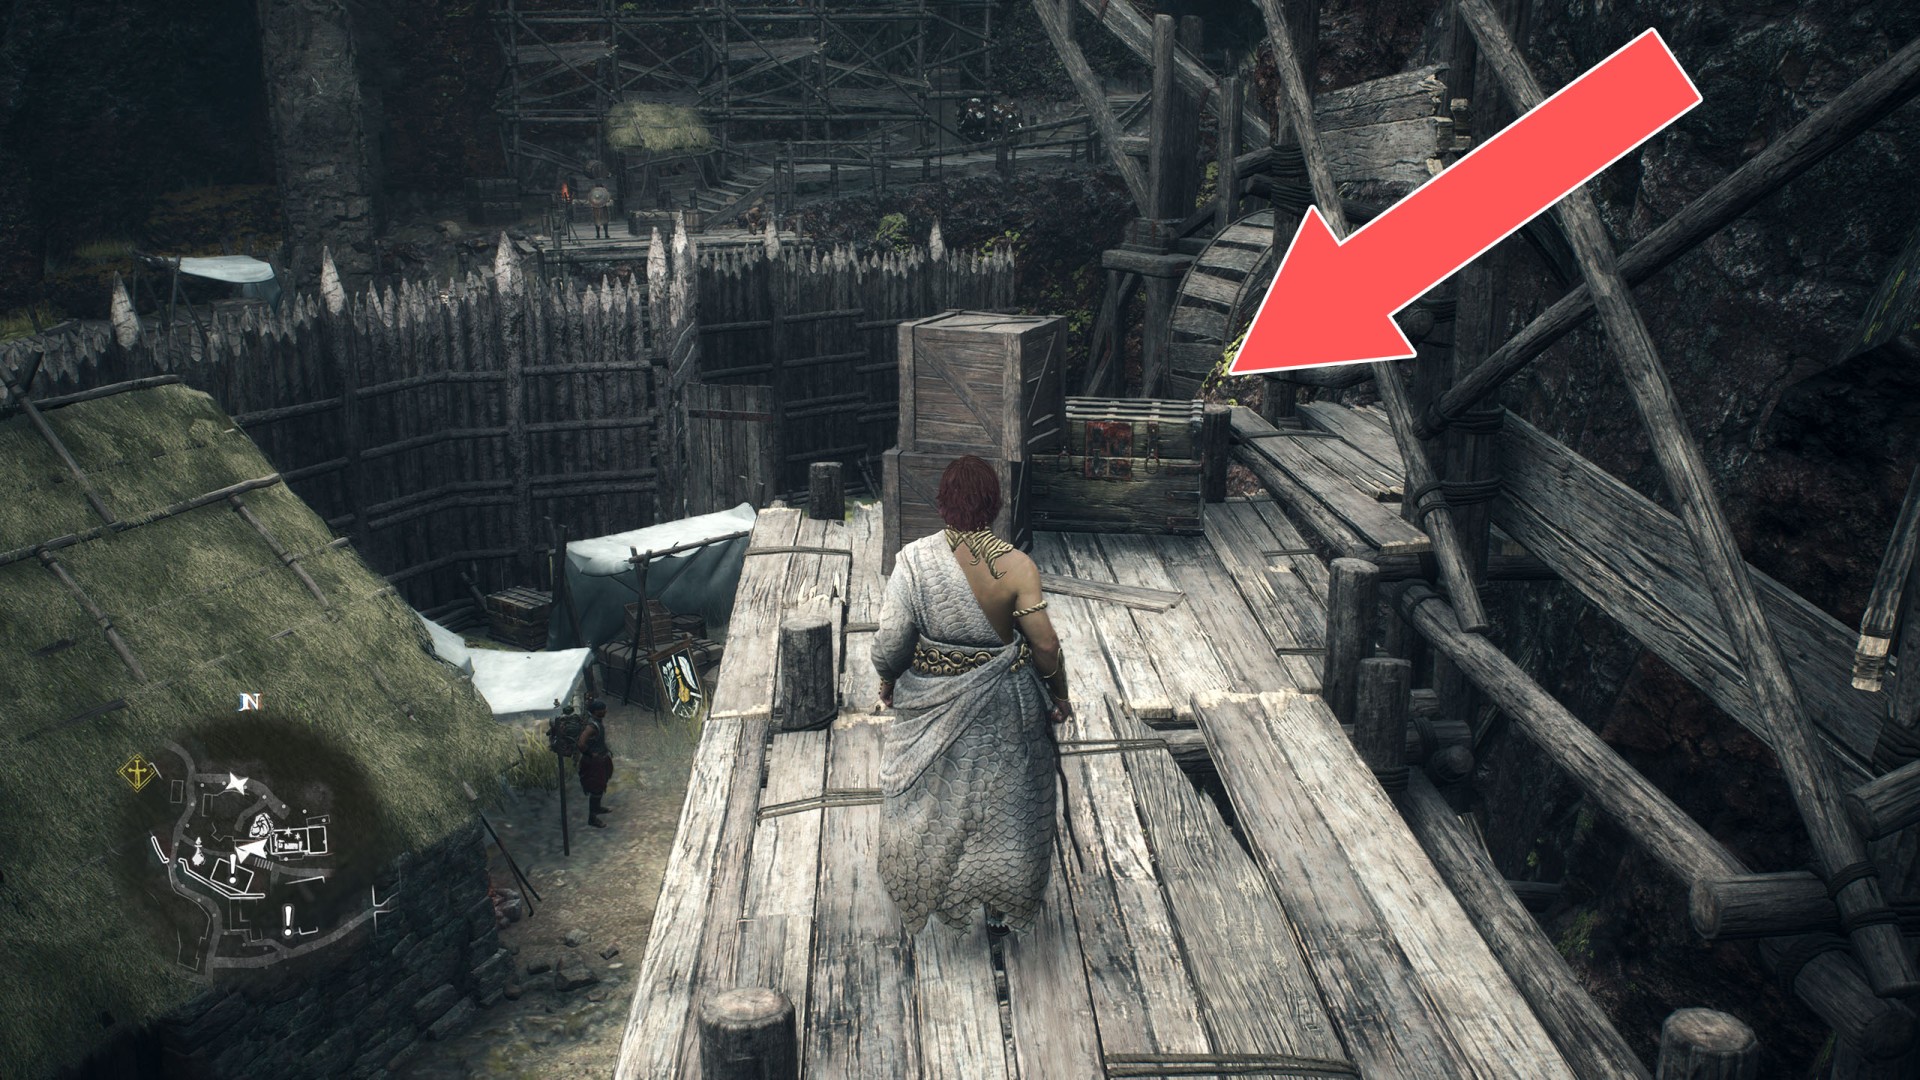
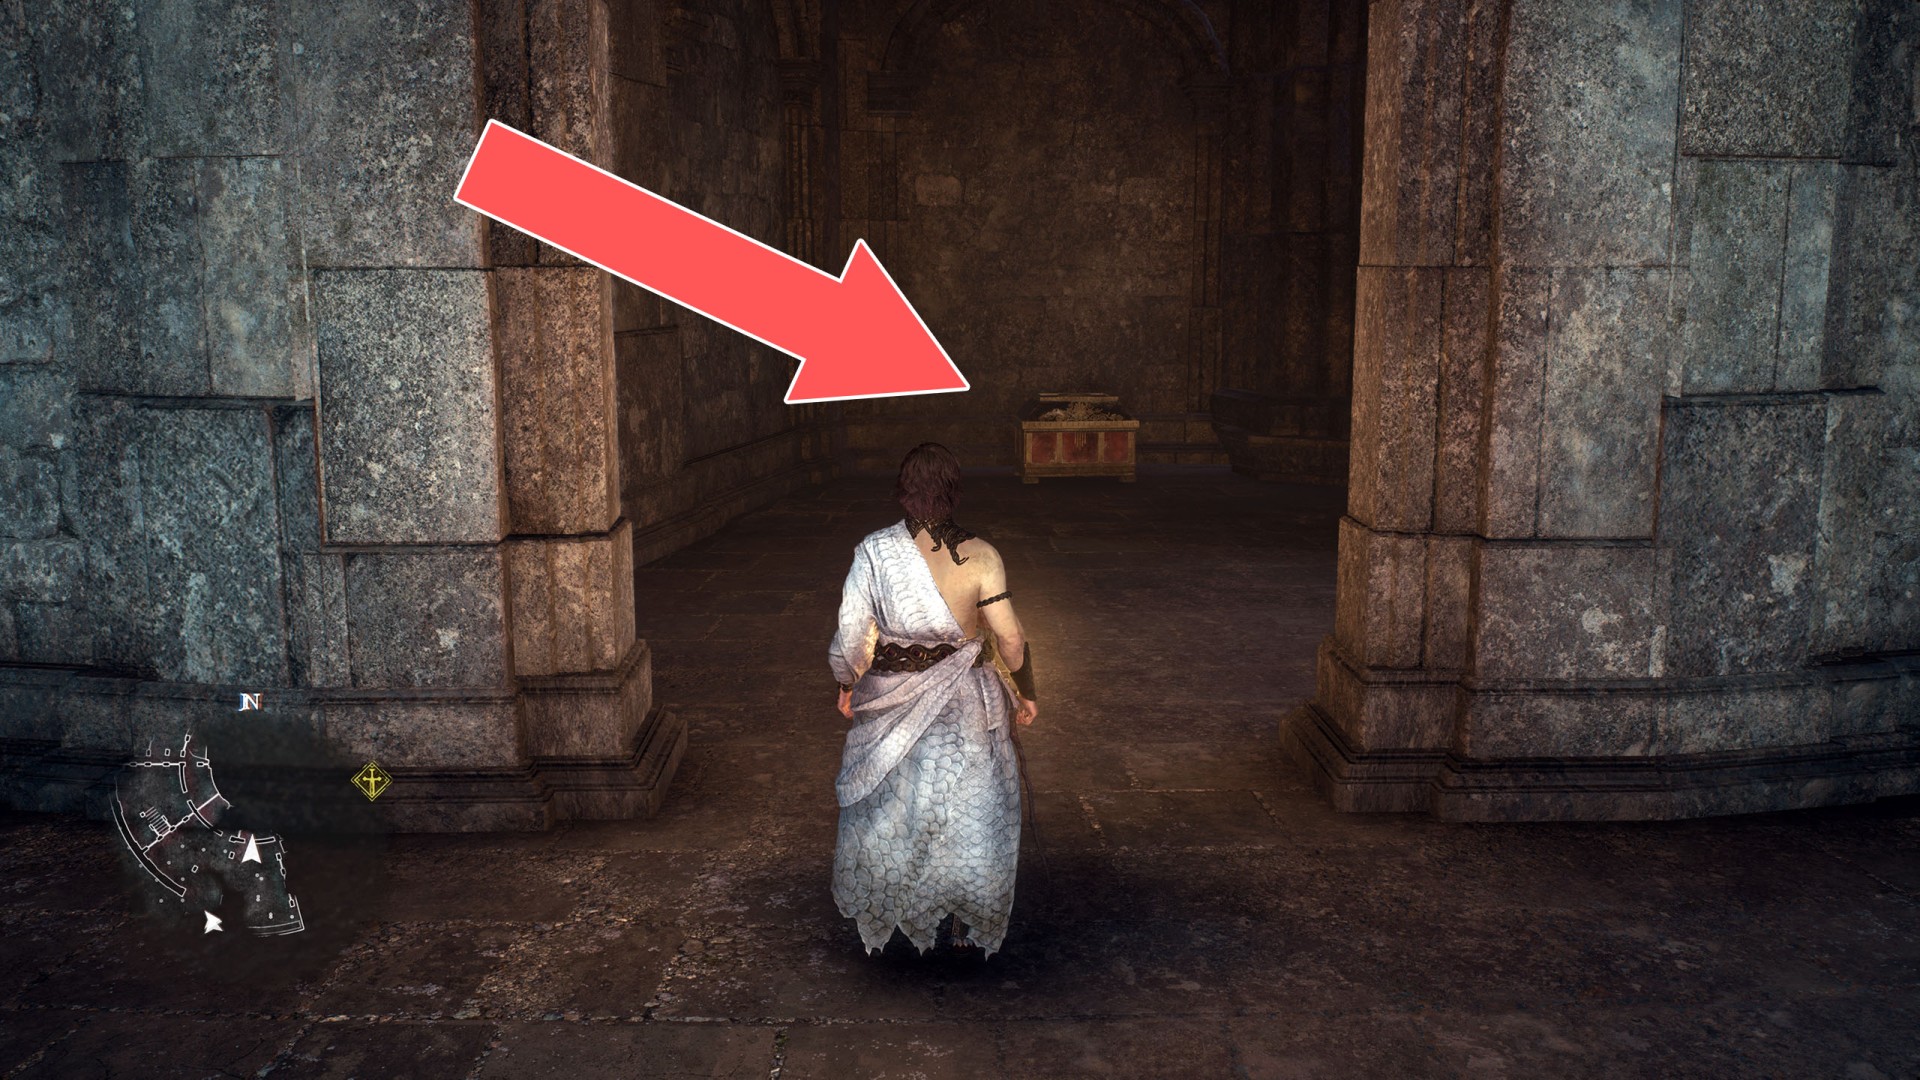
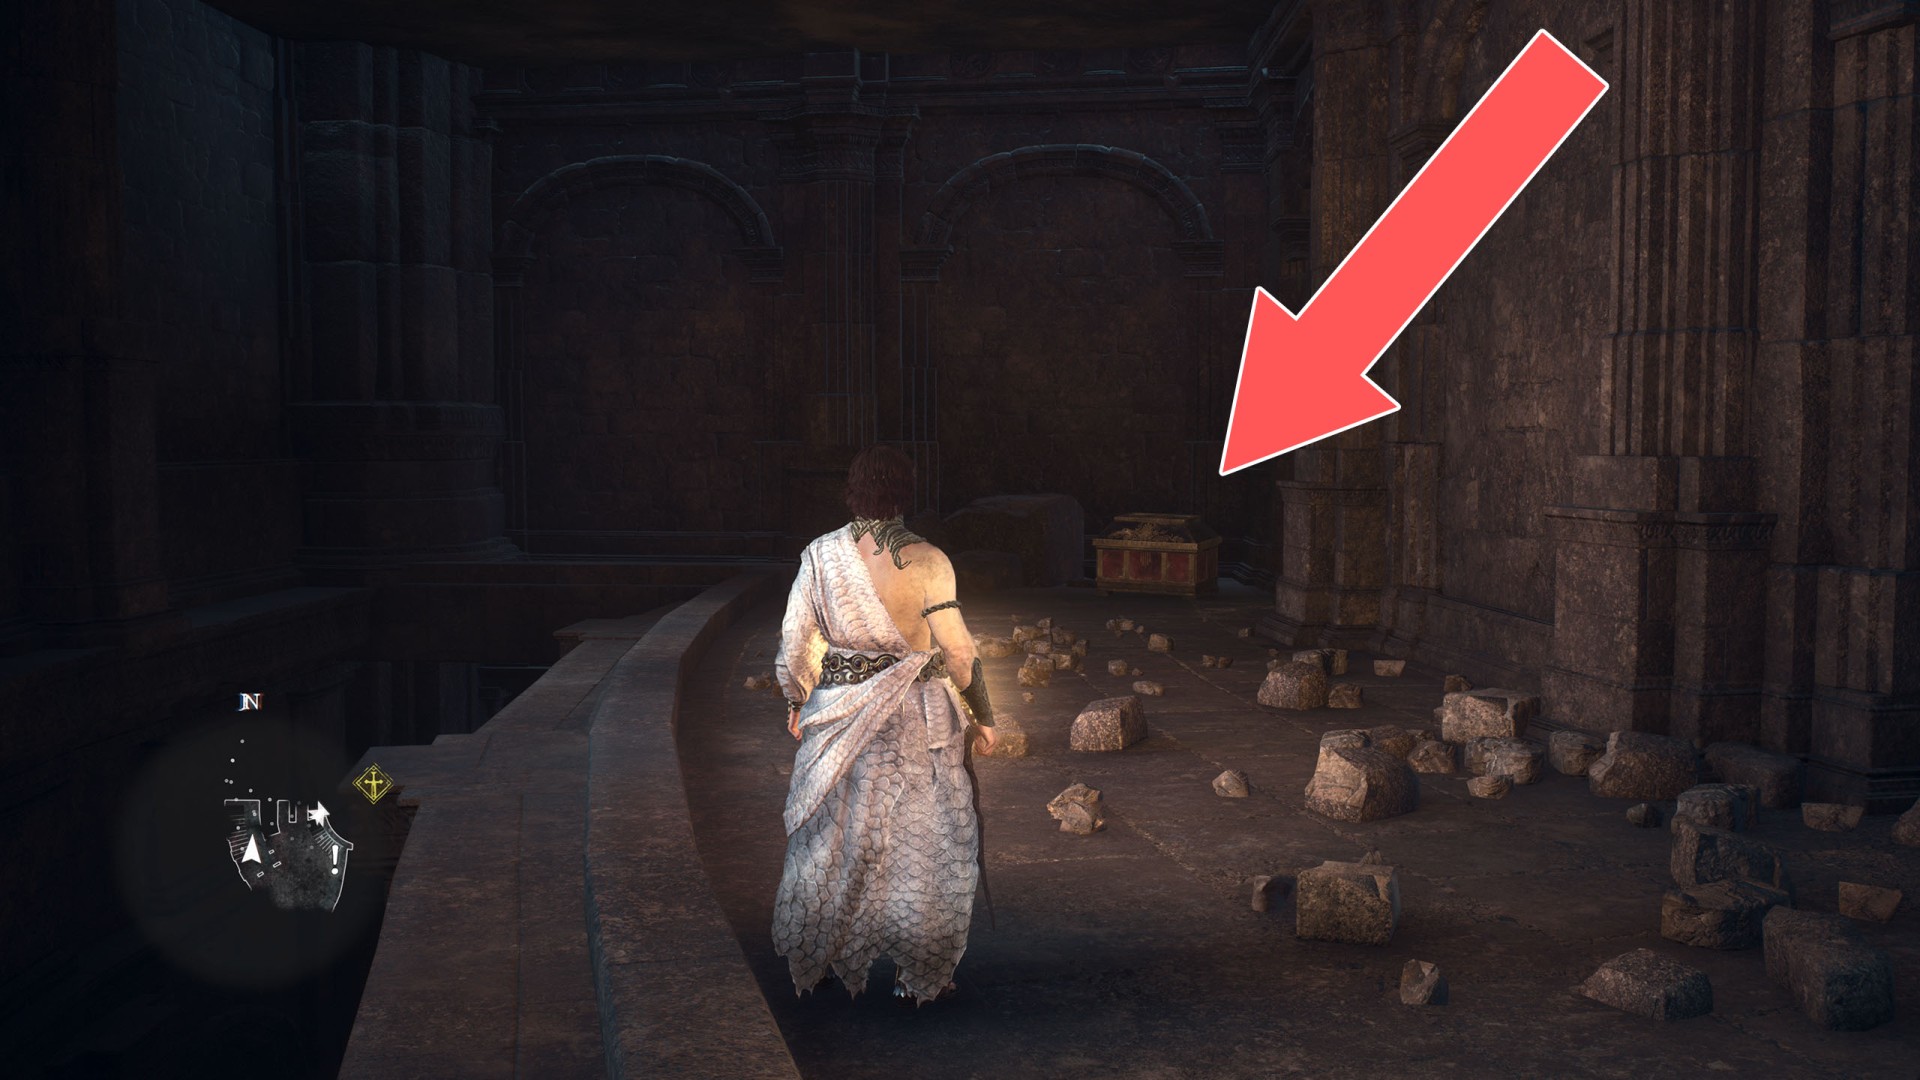
25Chest (1,200G)
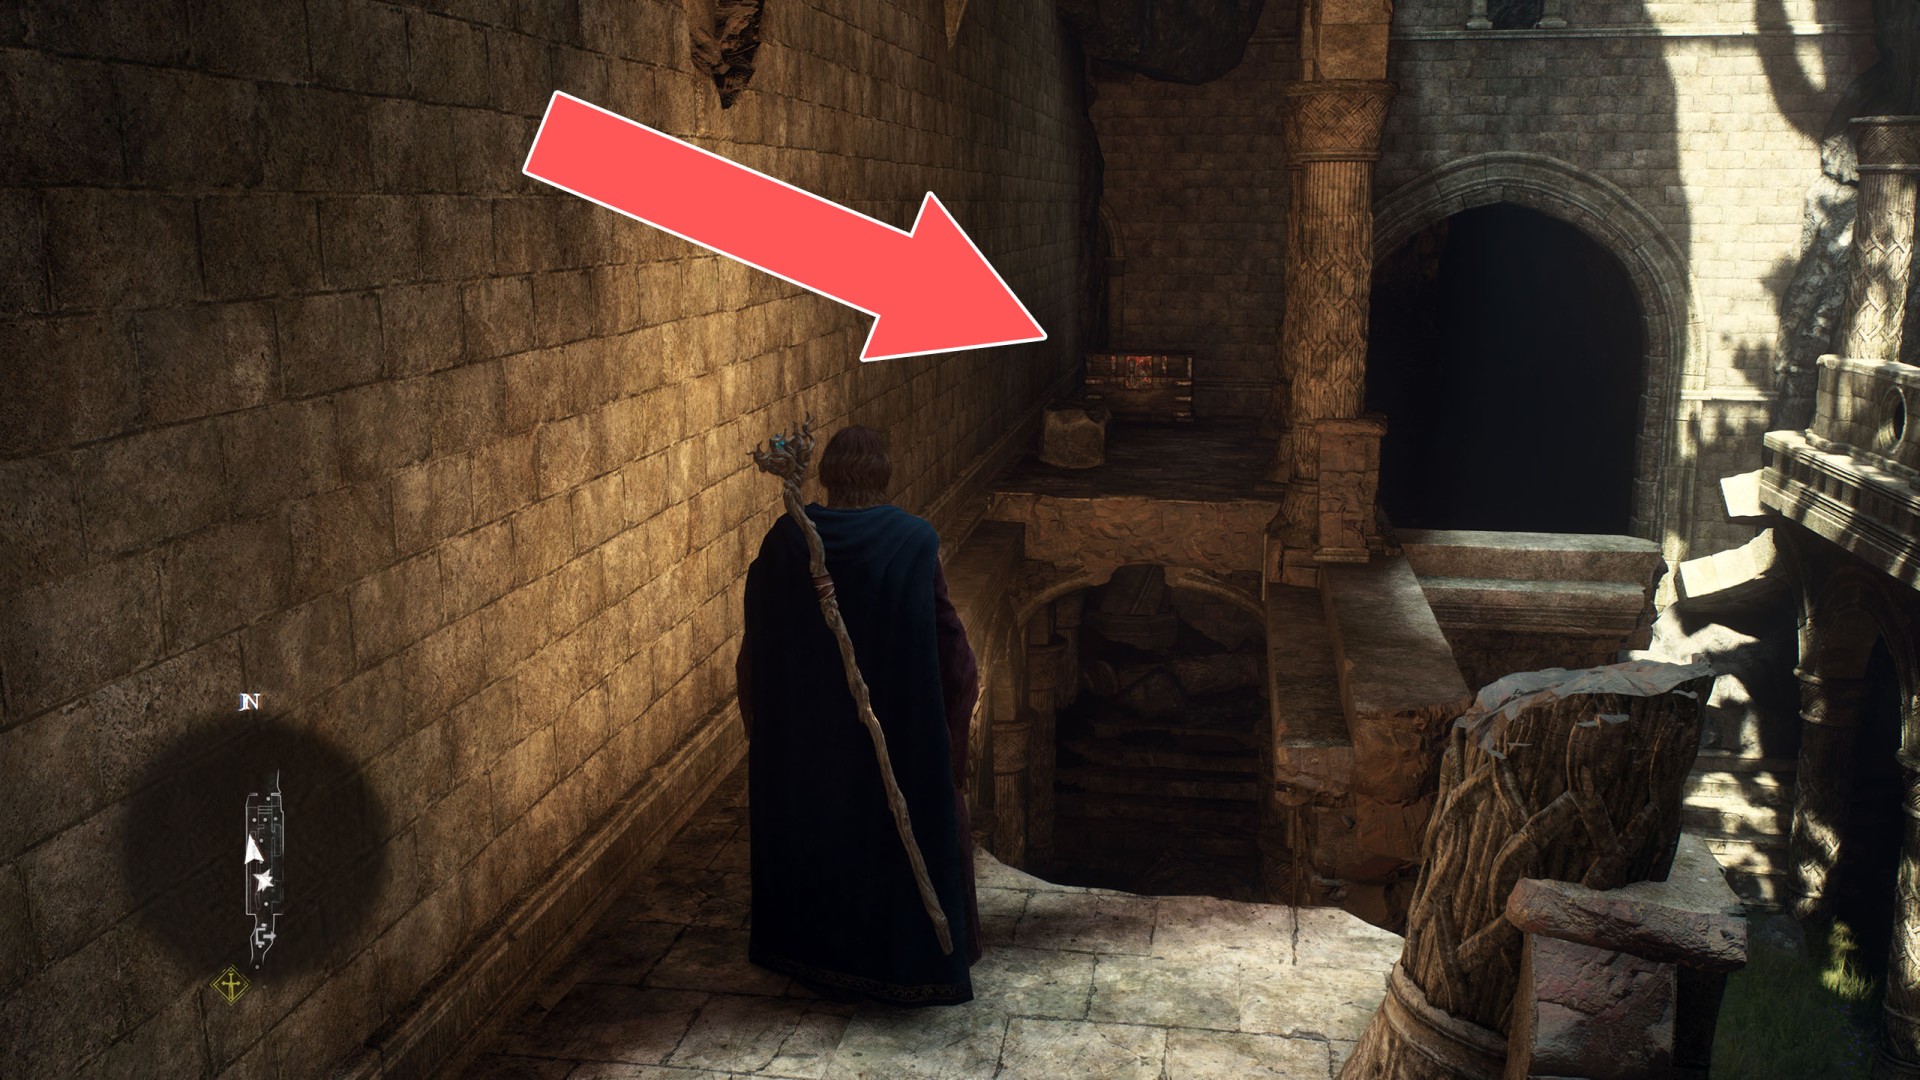
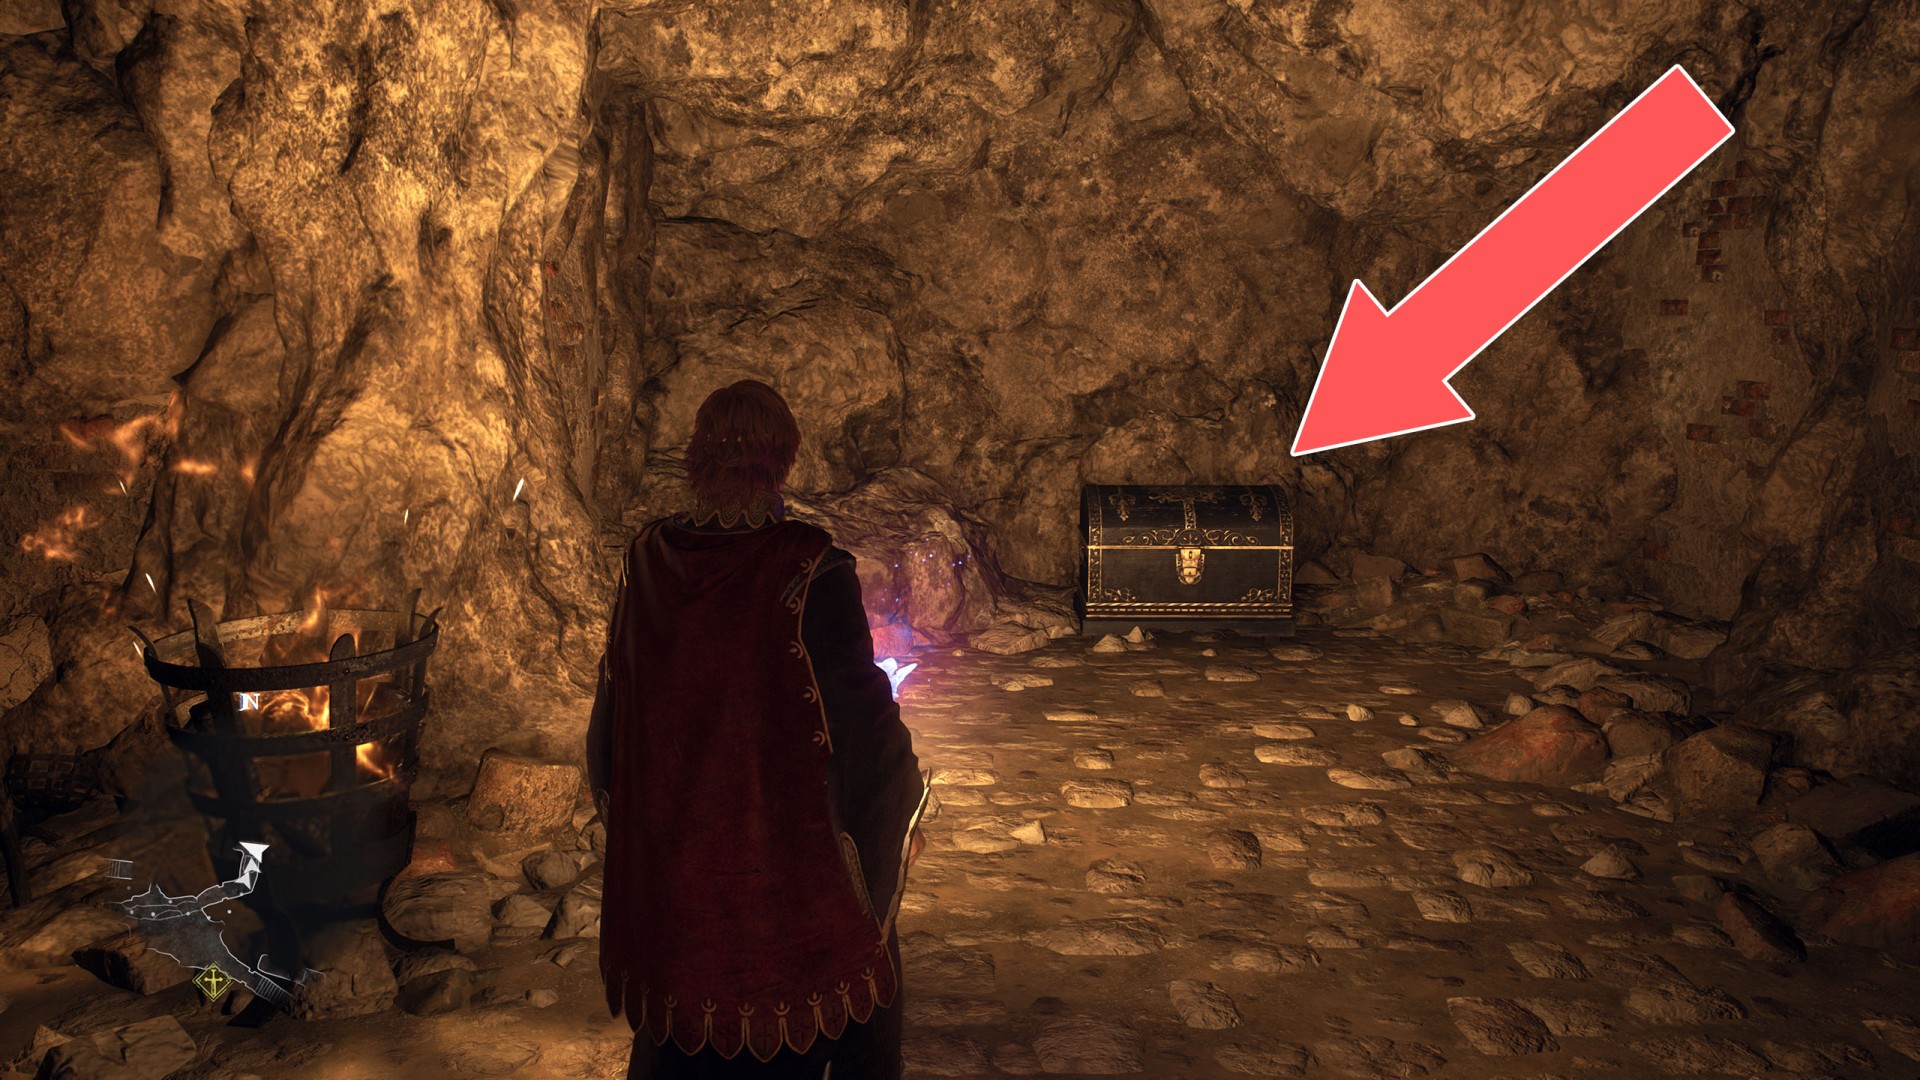
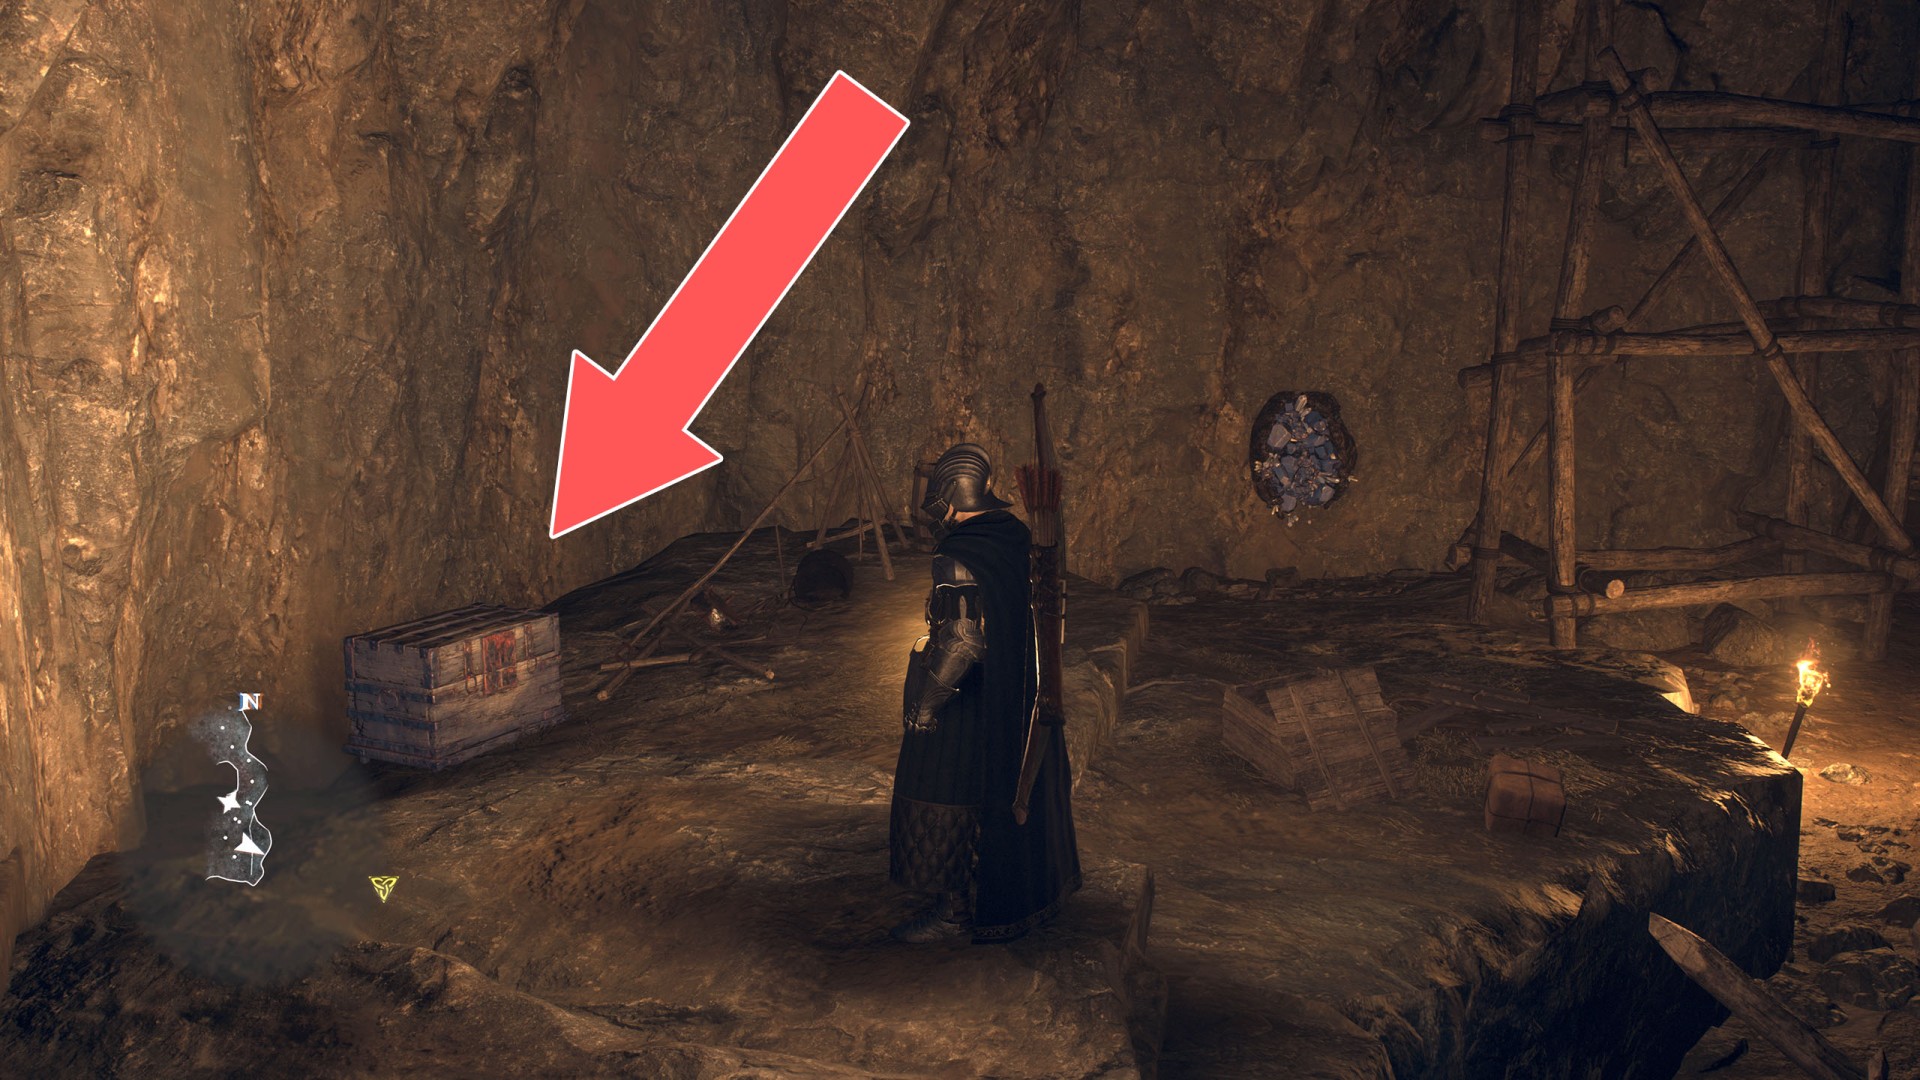
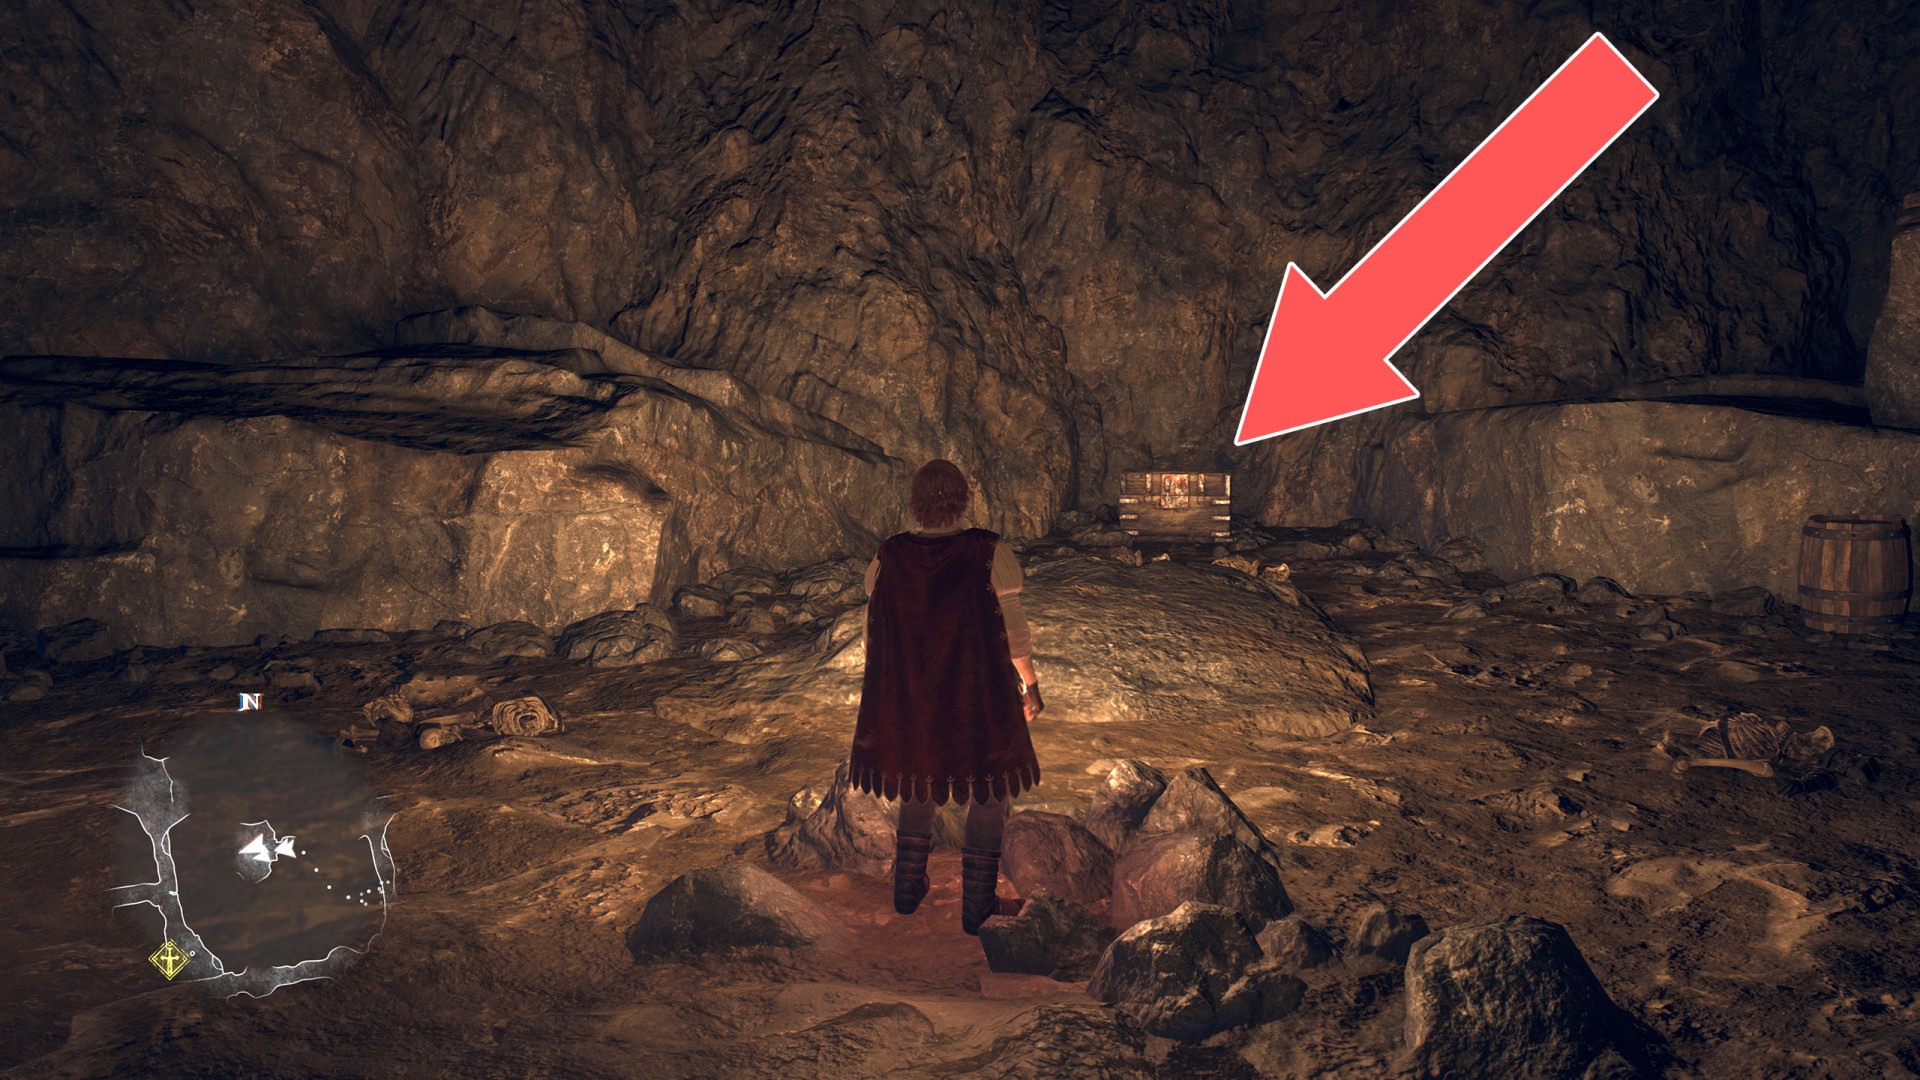
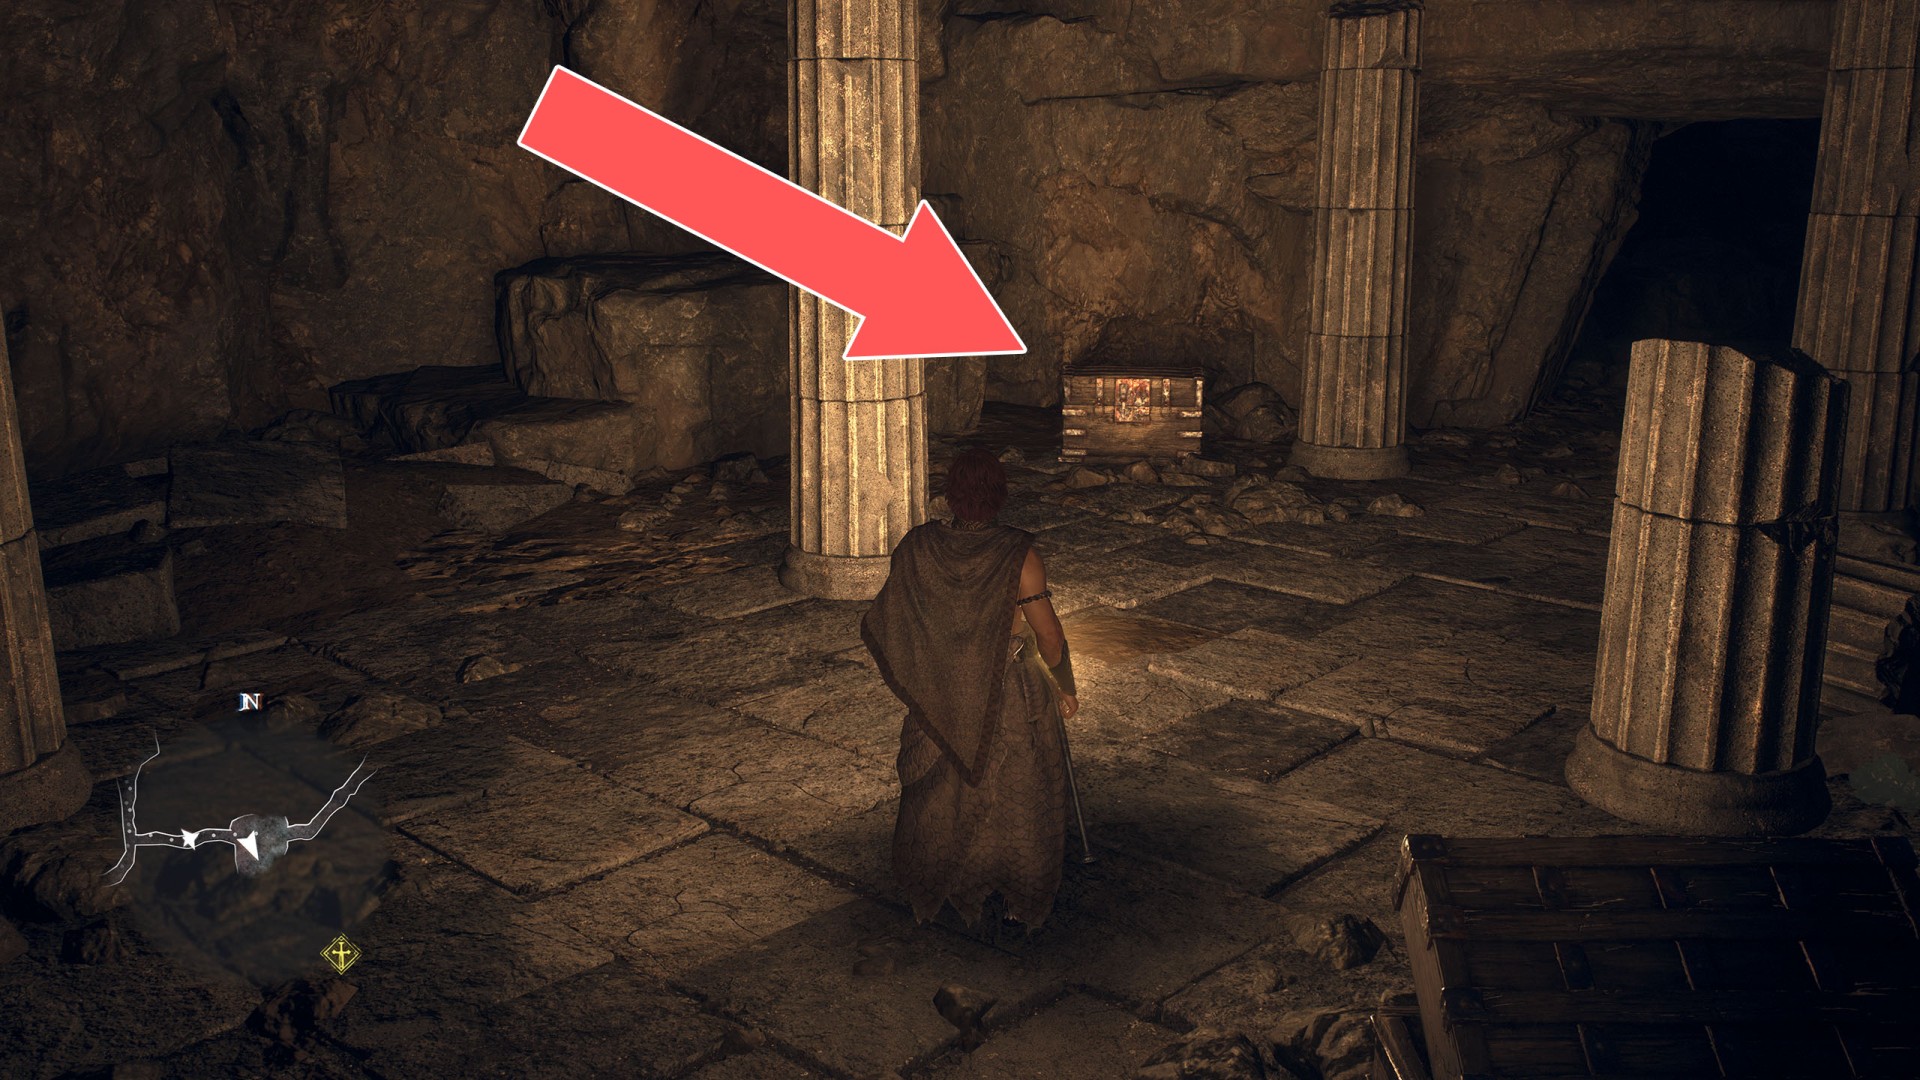
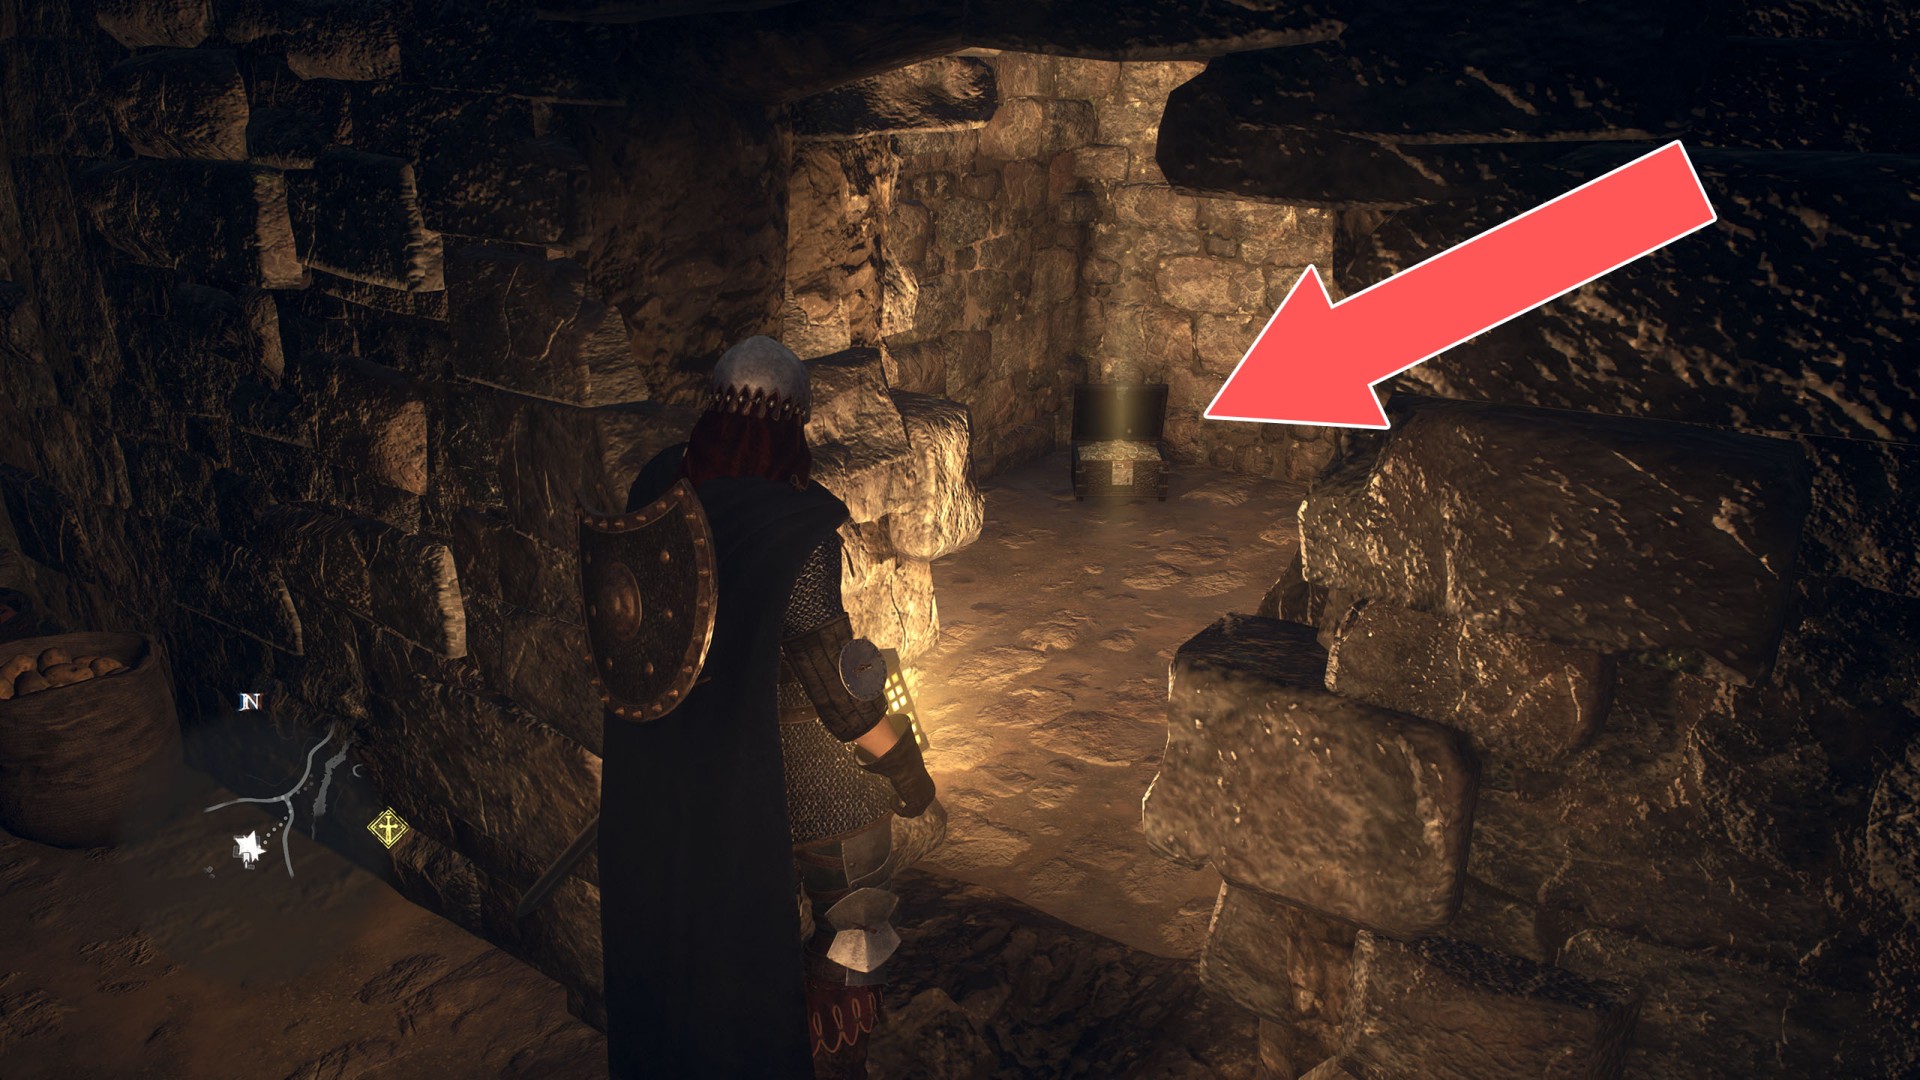
This chest is at the B1F (the lowest) floor.
26Chest (1,210G)
27Chest (1,210G)
28Chest (1,216G)
29Chest (1,300G)
30Chest (1,300G)
31Chest (1,300G)
32Chest (1,300G)

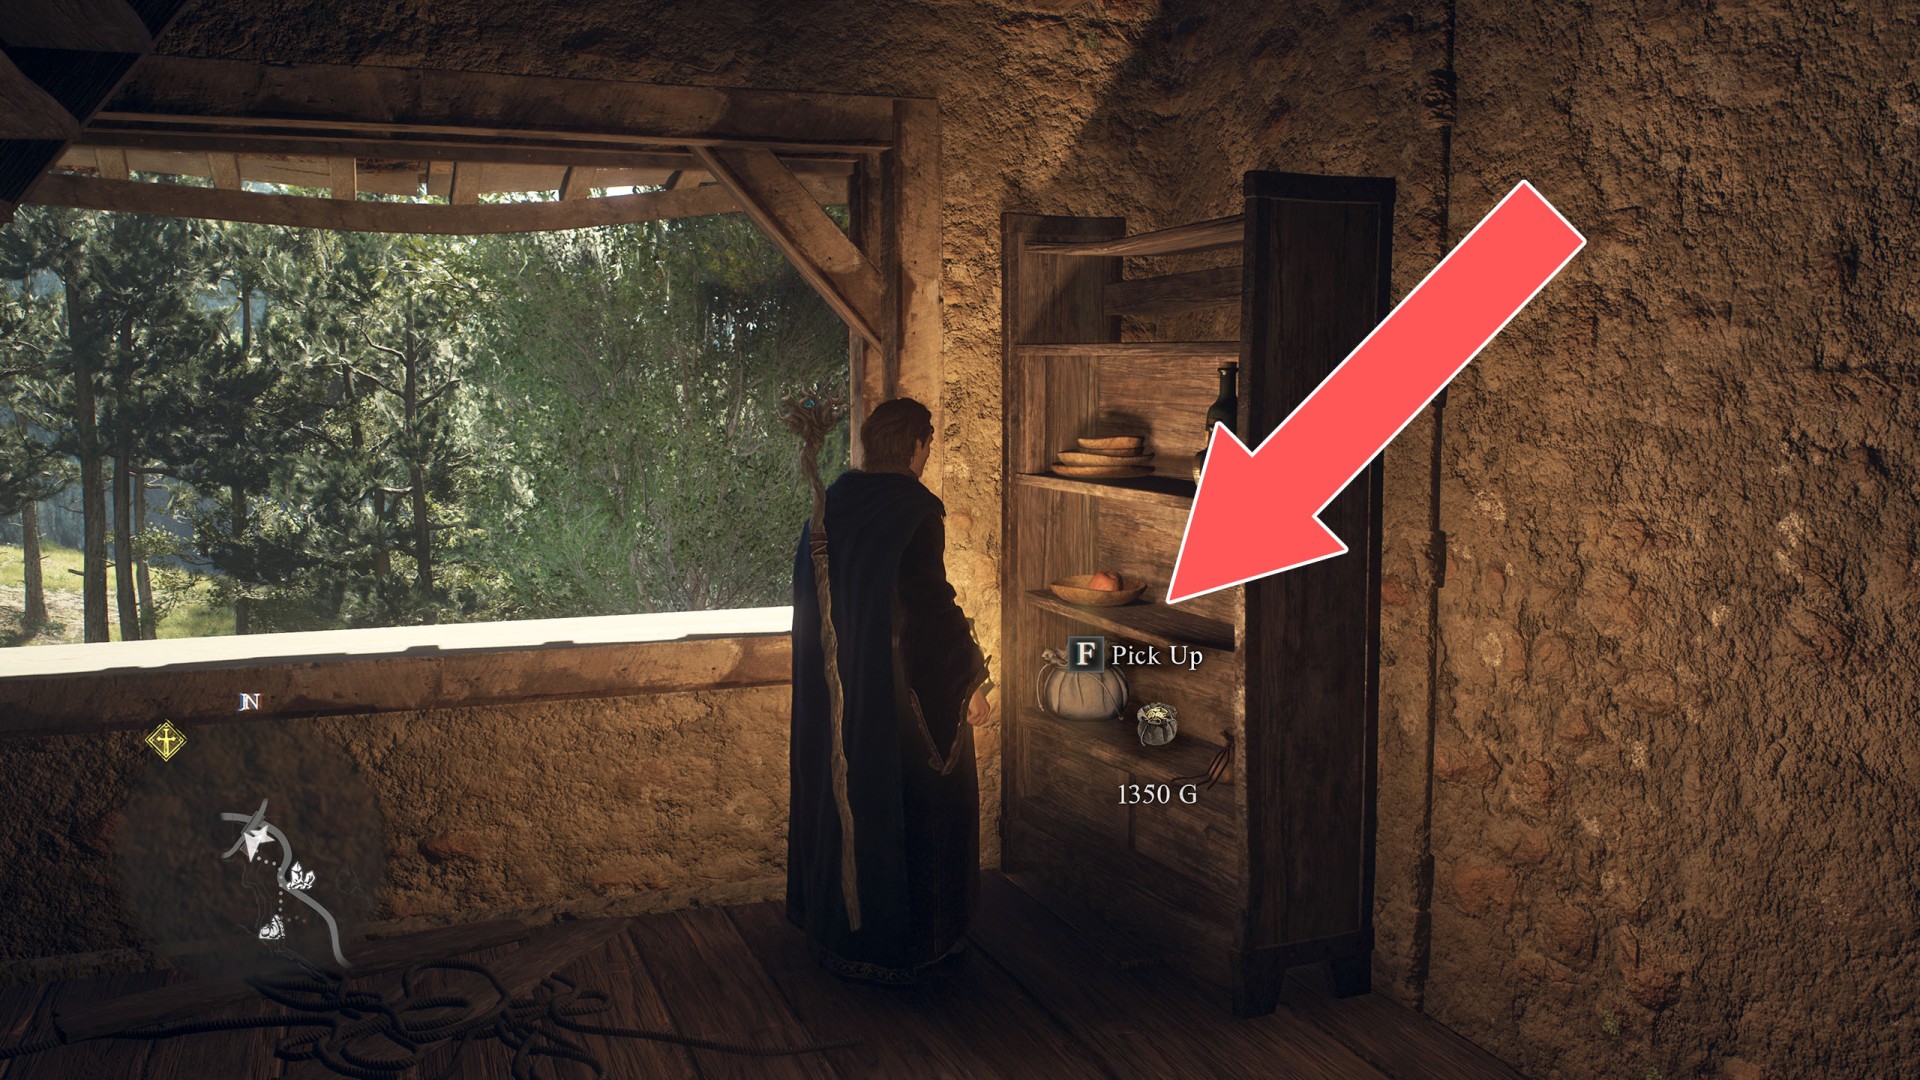
33Chest (1,340G)
34Chest (1,390G)
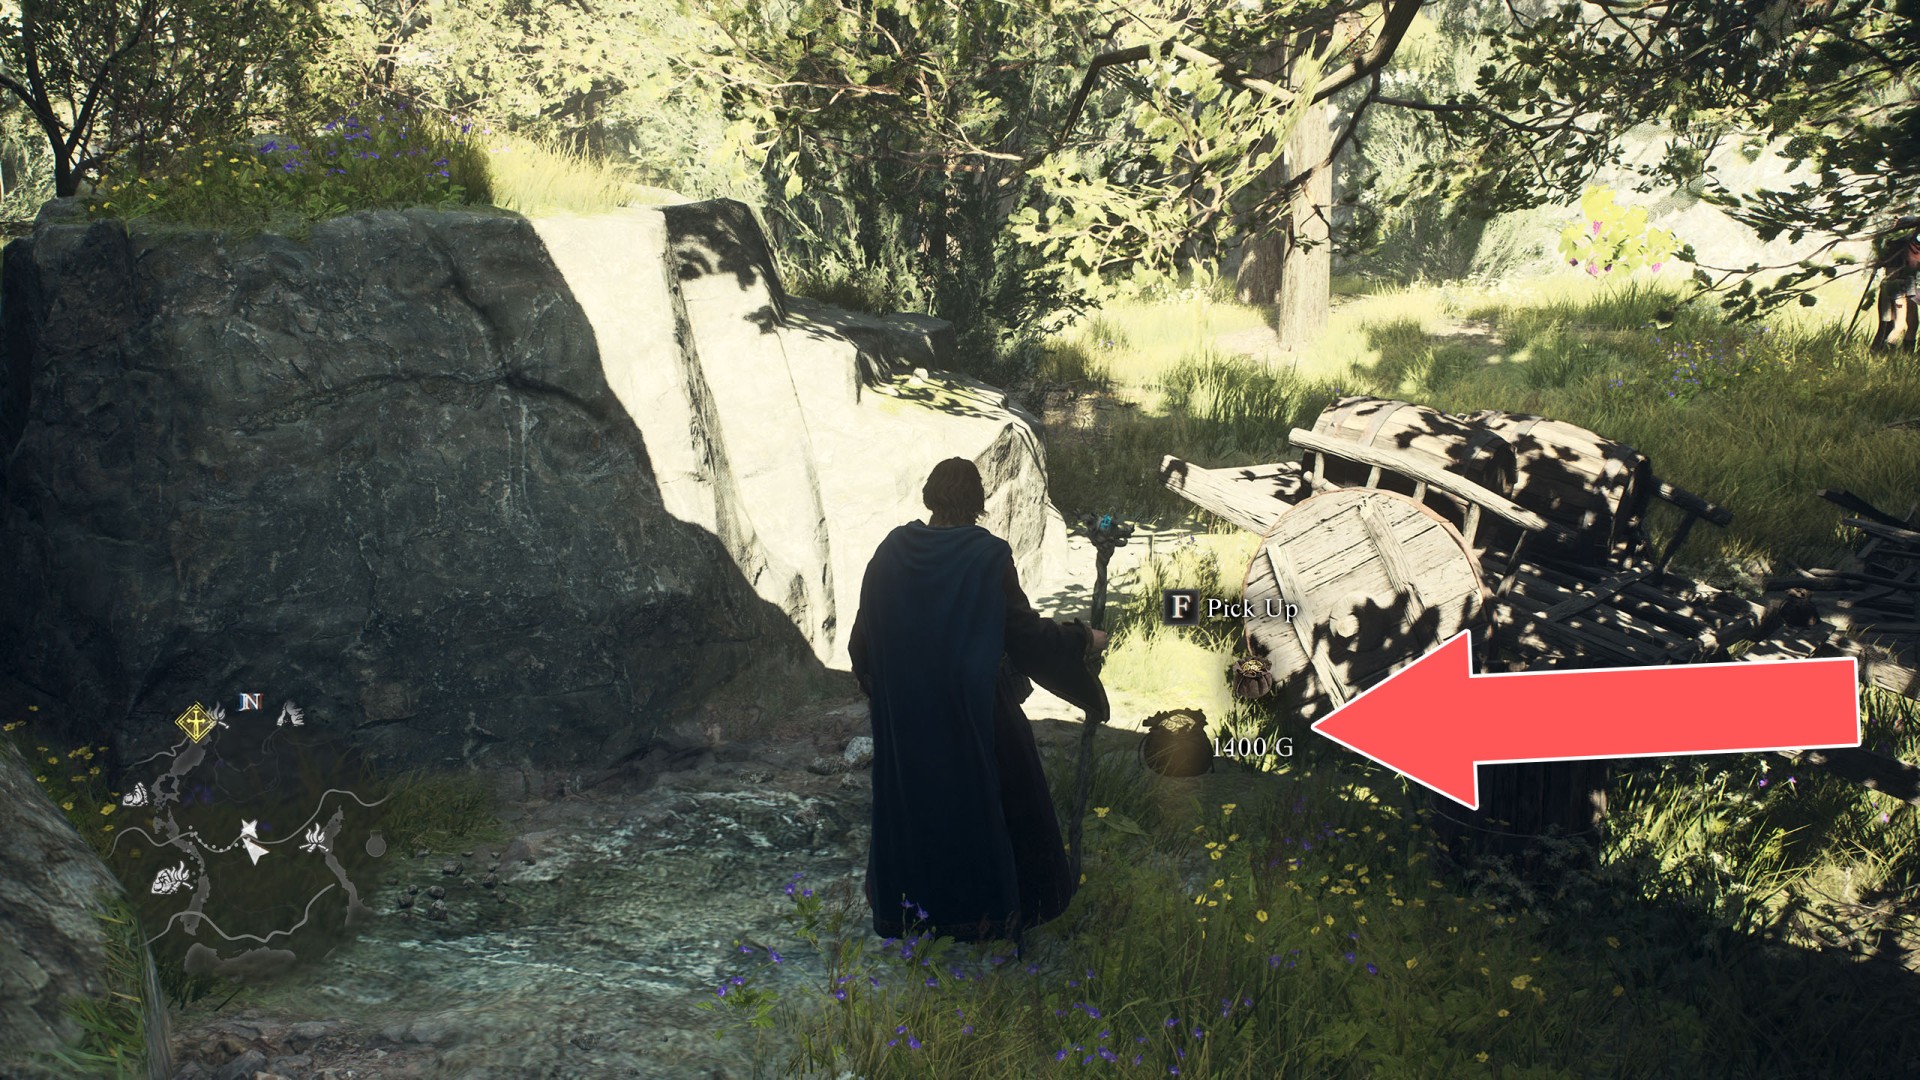
35Chest (1,400G)
36Chest (1,420G)
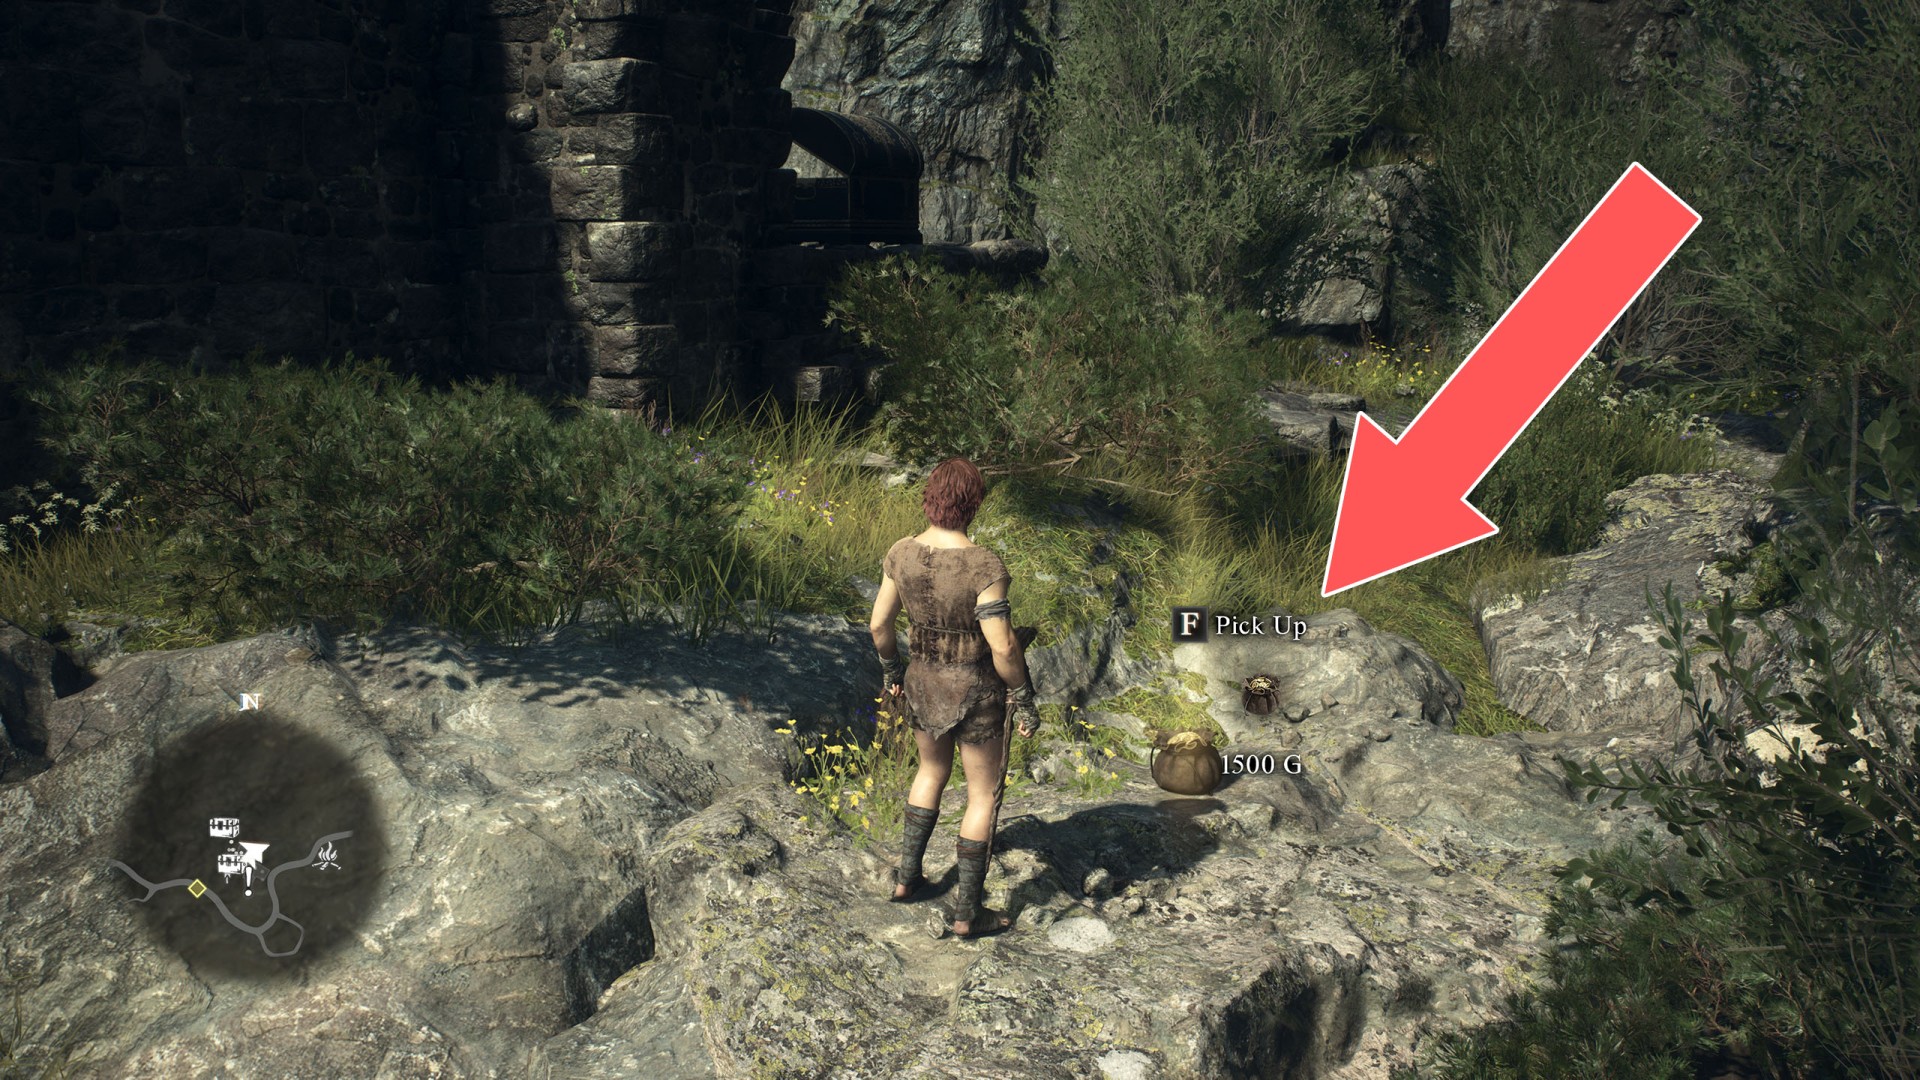
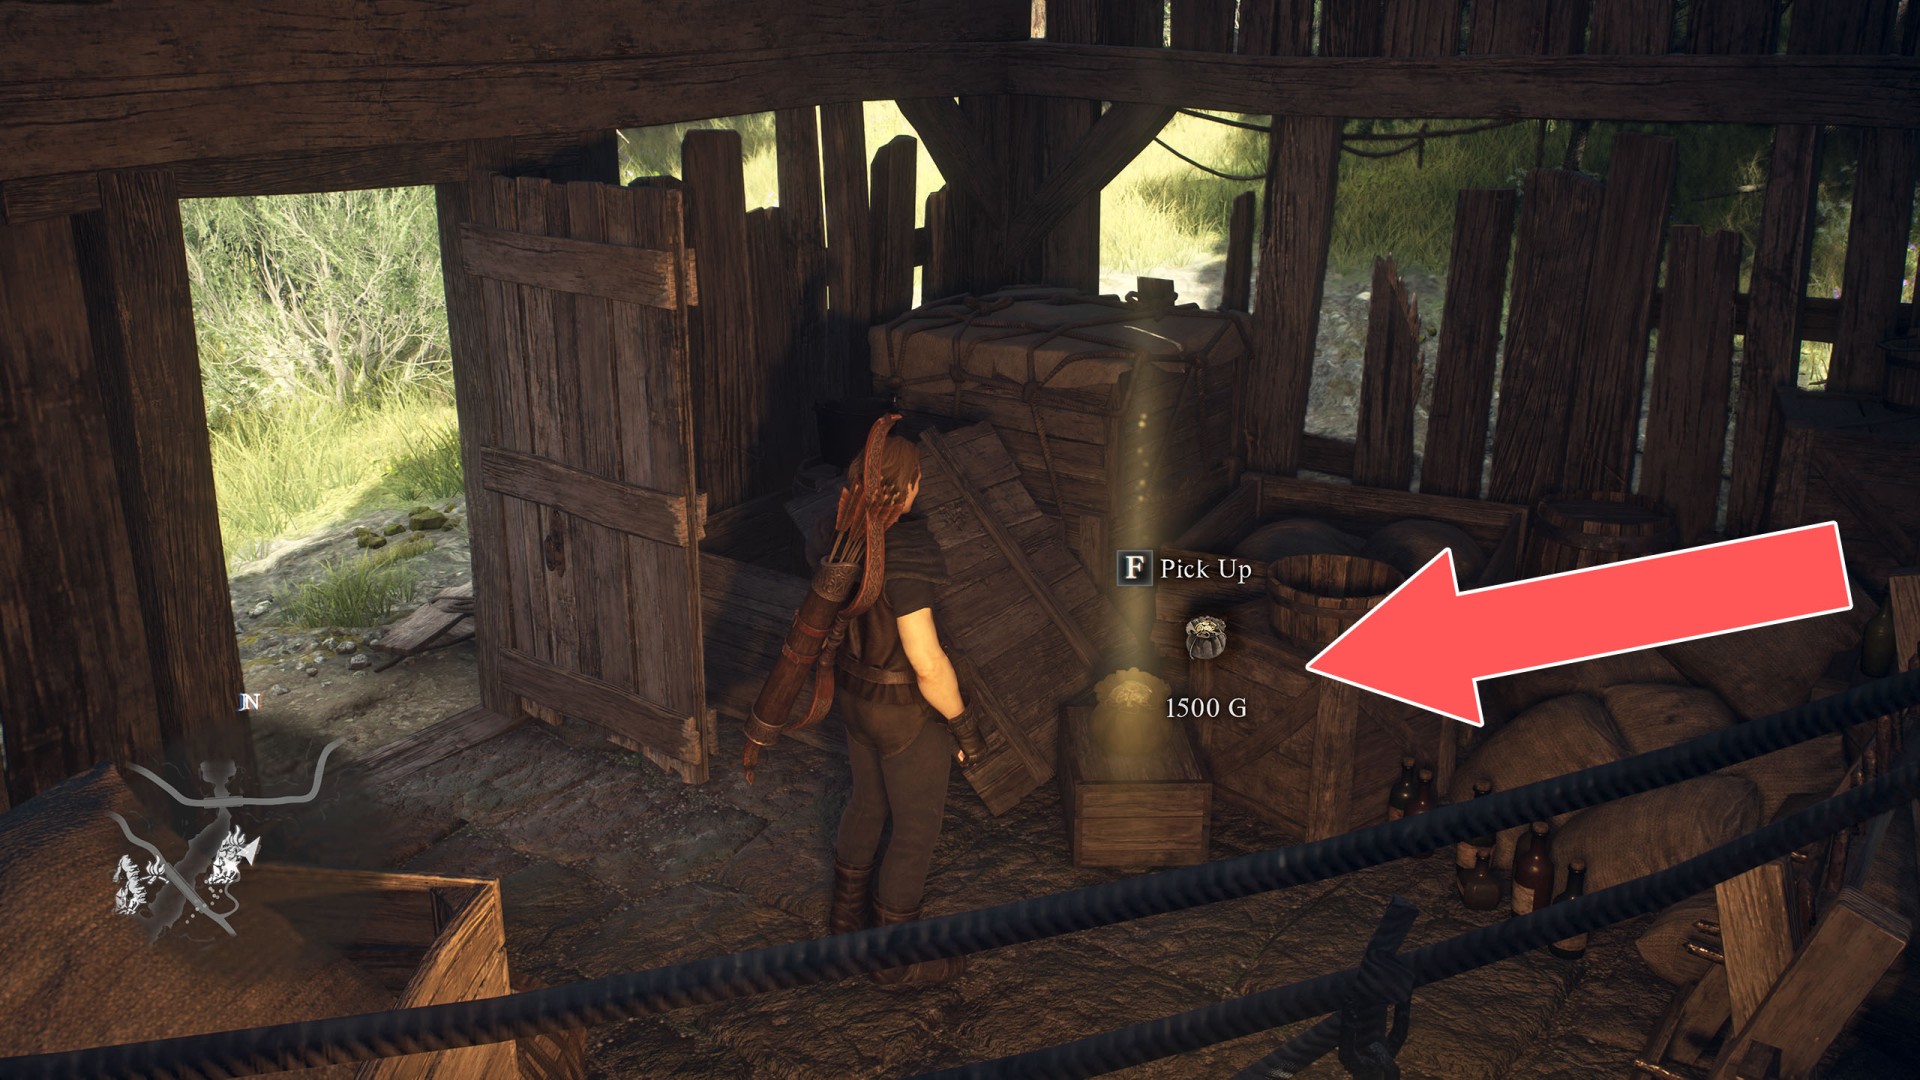
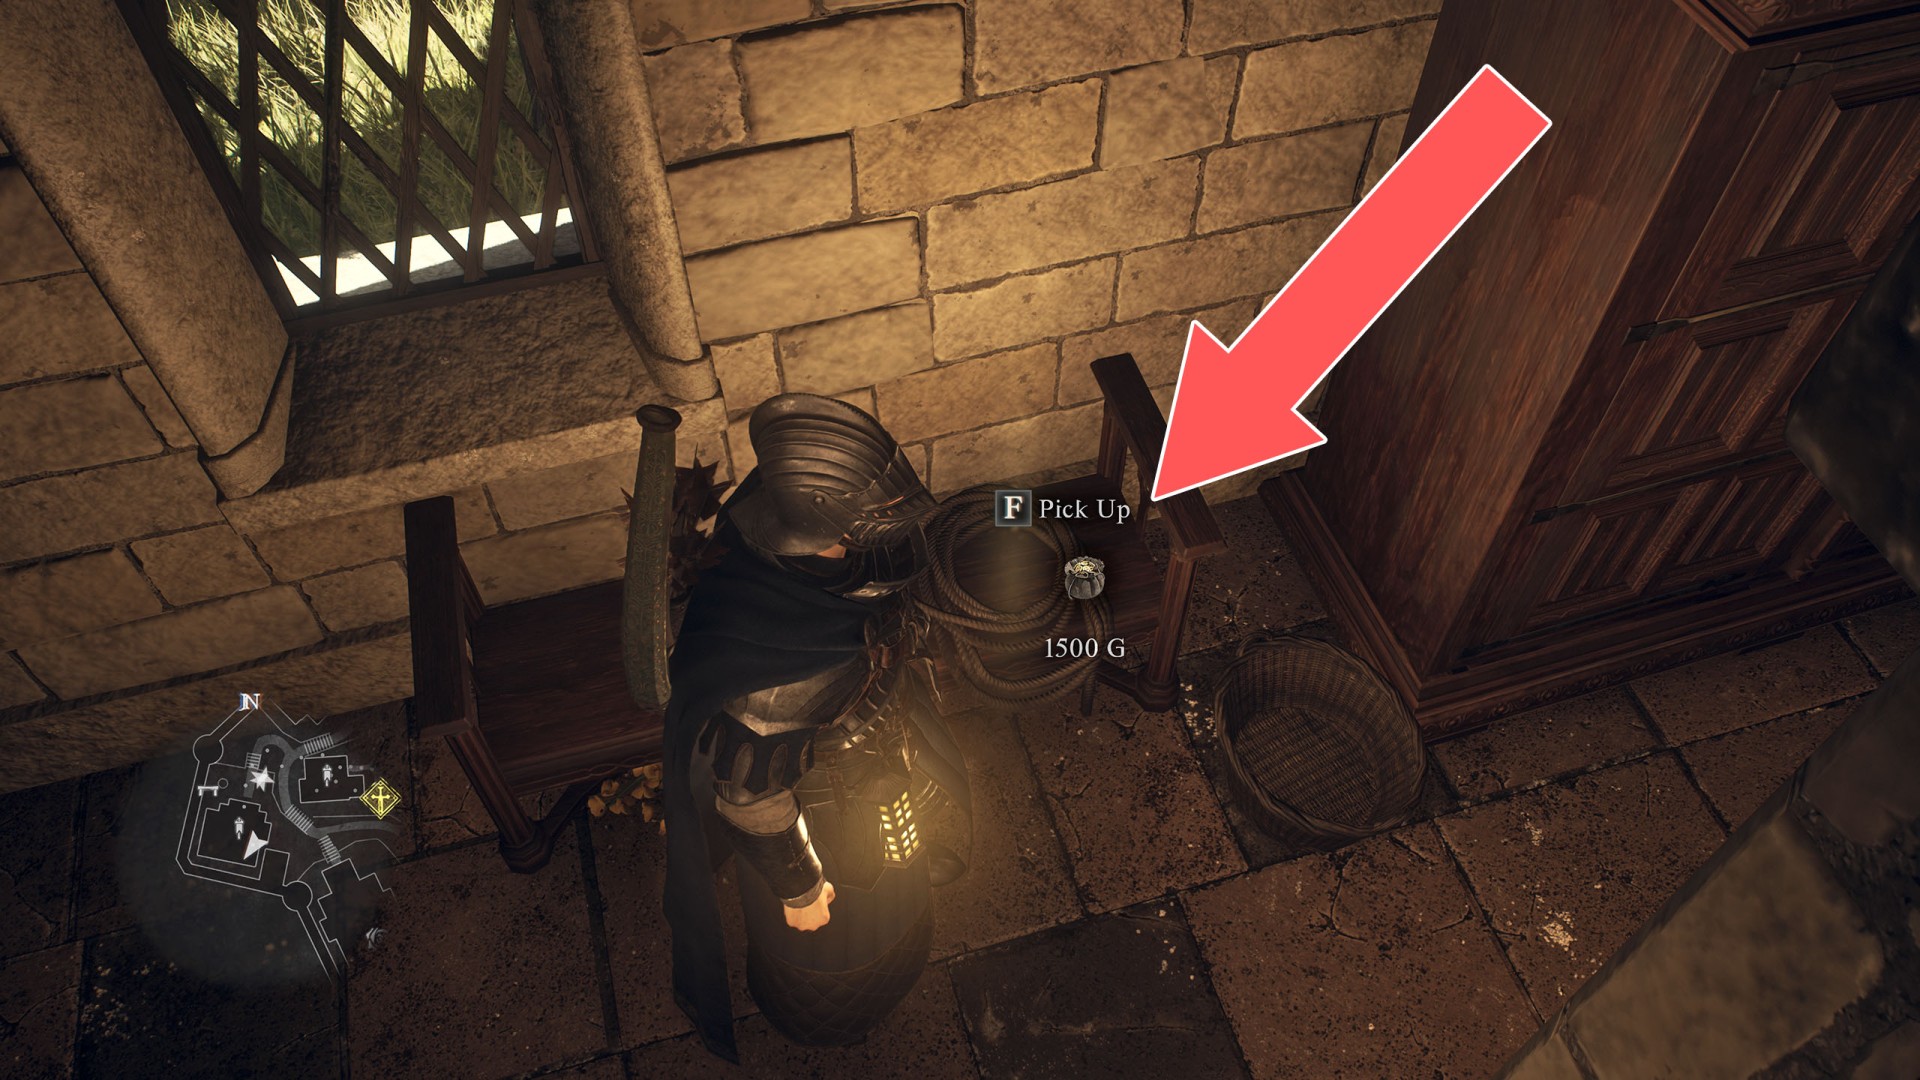
37Chest (1,500G)

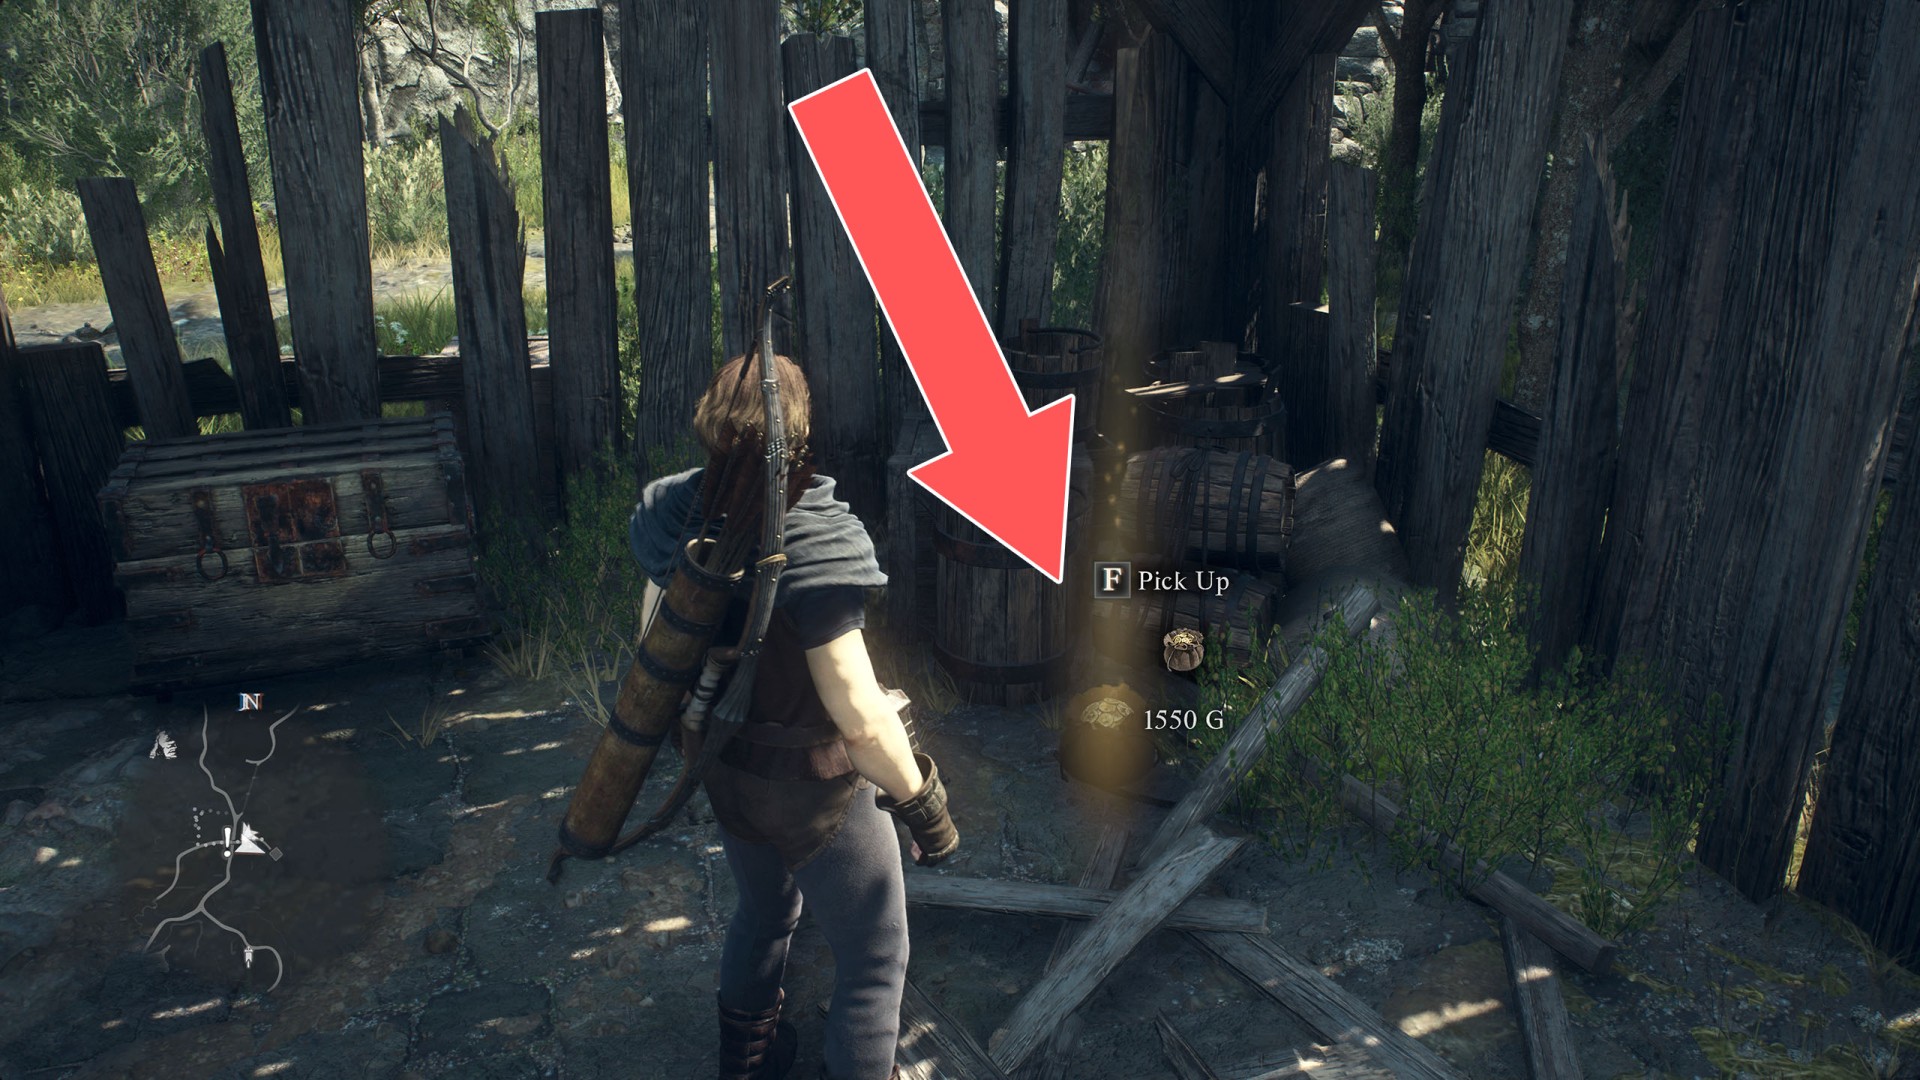
38Chest (1,500G)
39Chest (1,500G)
40Chest (1,510G)
+ Fine Harspud Roborant.
41Chest (1,730G)
42Chest (1,750G)
43Chest (1,800G)
44Chest (1,800G)
45Chest (1,800G)
46Chest (1,820G)
47Chest (1,830G)
48Chest (1,850G)
49Chest (1,900G)
50Chest (10,030G)
51Chest (10,090G)
52Chest (10,360G)
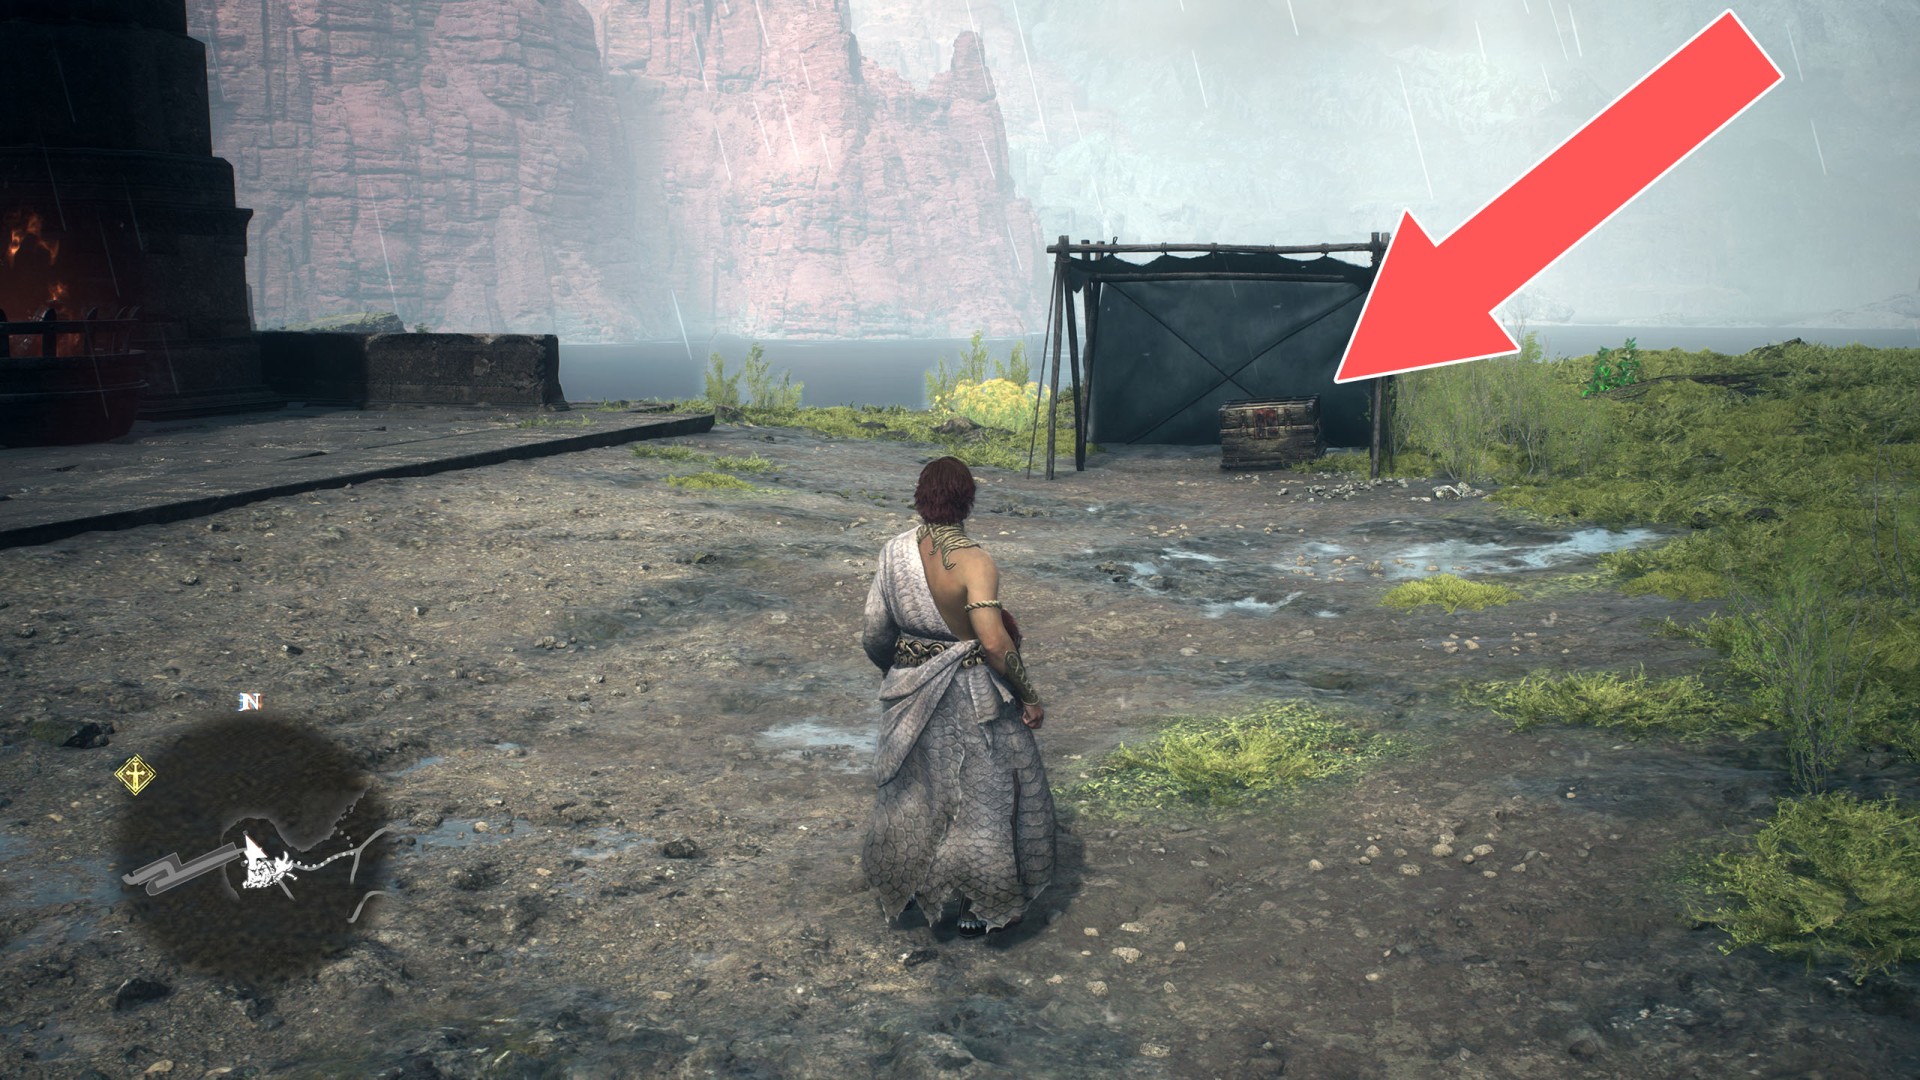
53Chest (130G)
54Chest (2,000G)
55Chest (2,070G)
56Chest (2,110G)
57Chest (2,130G)
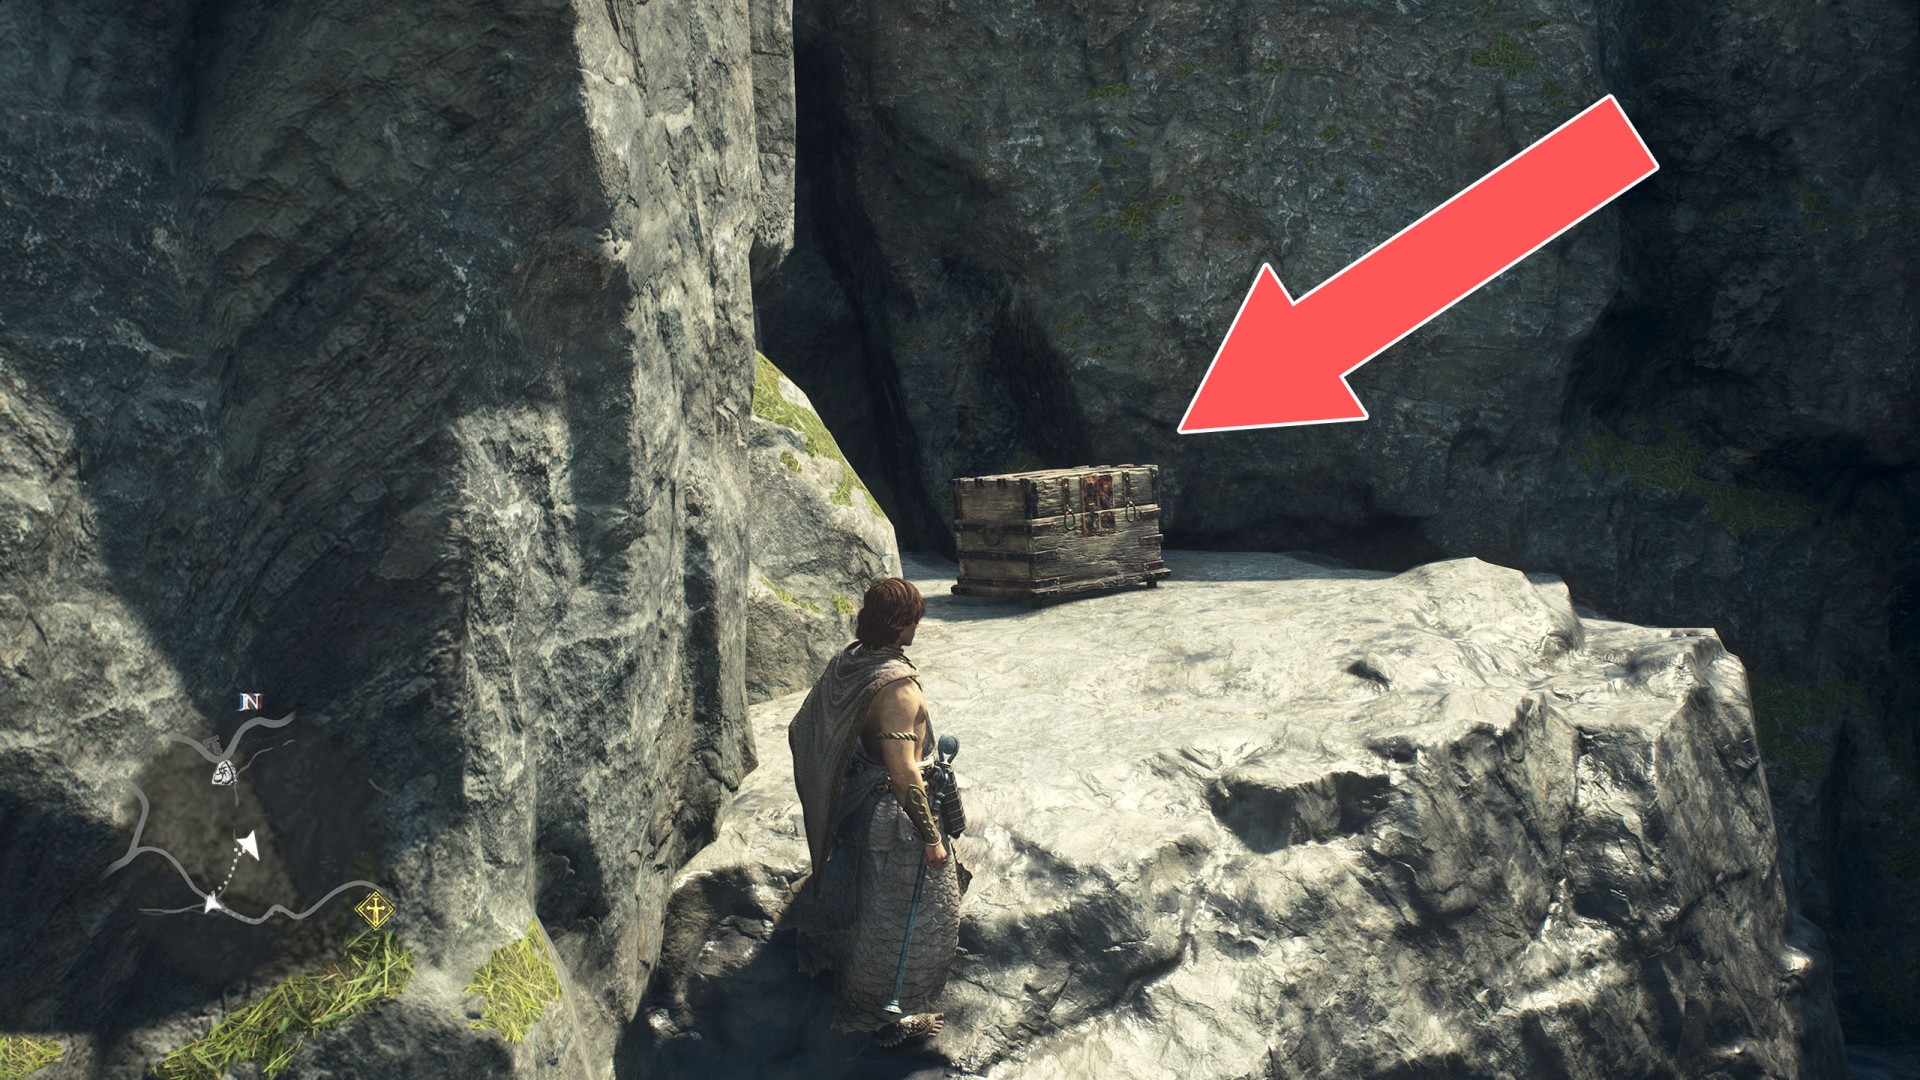
This chest is at the B1F (the lowest) floor.
58Chest (2,130G)
59Chest (2,200G)
60Chest (2,220G)
61Chest (2,250G)
62Chest (2,370G)
63Chest (2,370G)
64Chest (2,370G)
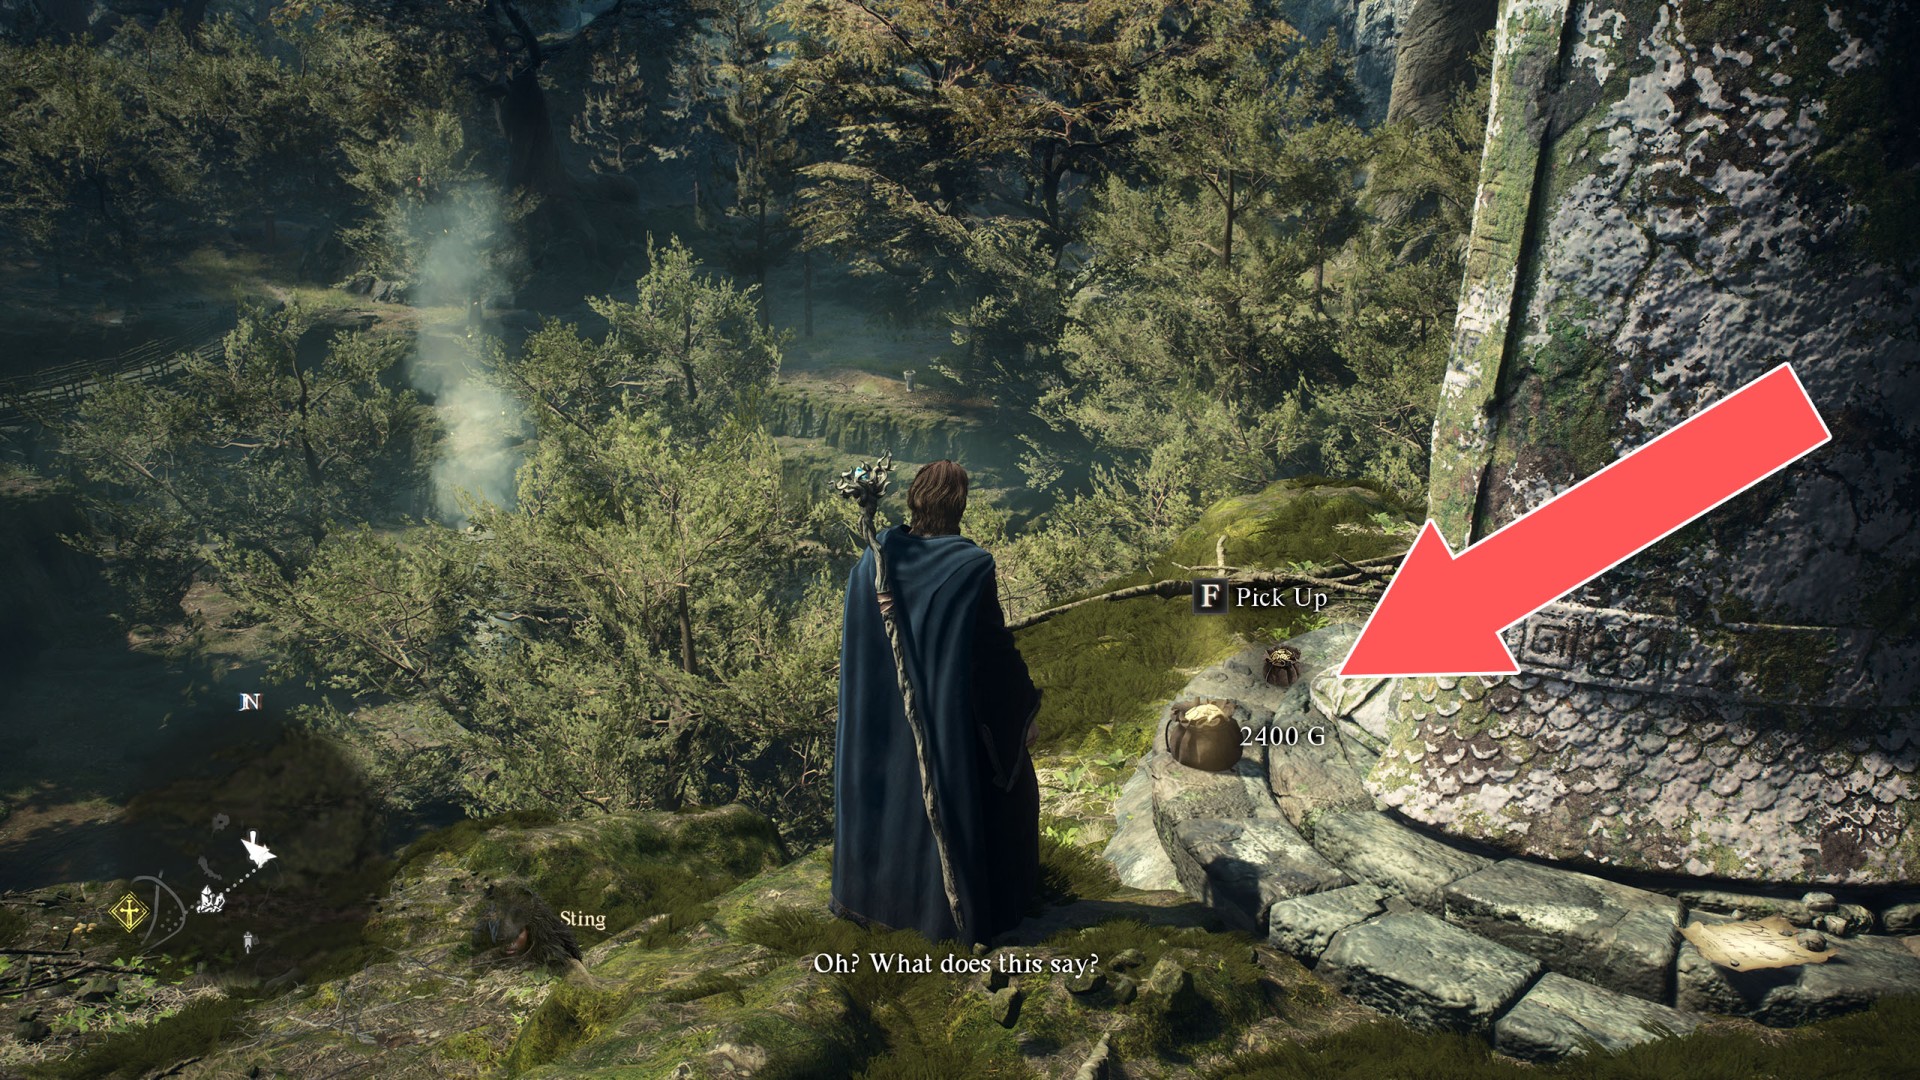
65Chest (2,400G)

66Chest (2,490G)
67Chest (2,500G)
68Chest (2,560G)
69Chest (2,570G)
70Chest (2,600G)
71Chest (2,650G)
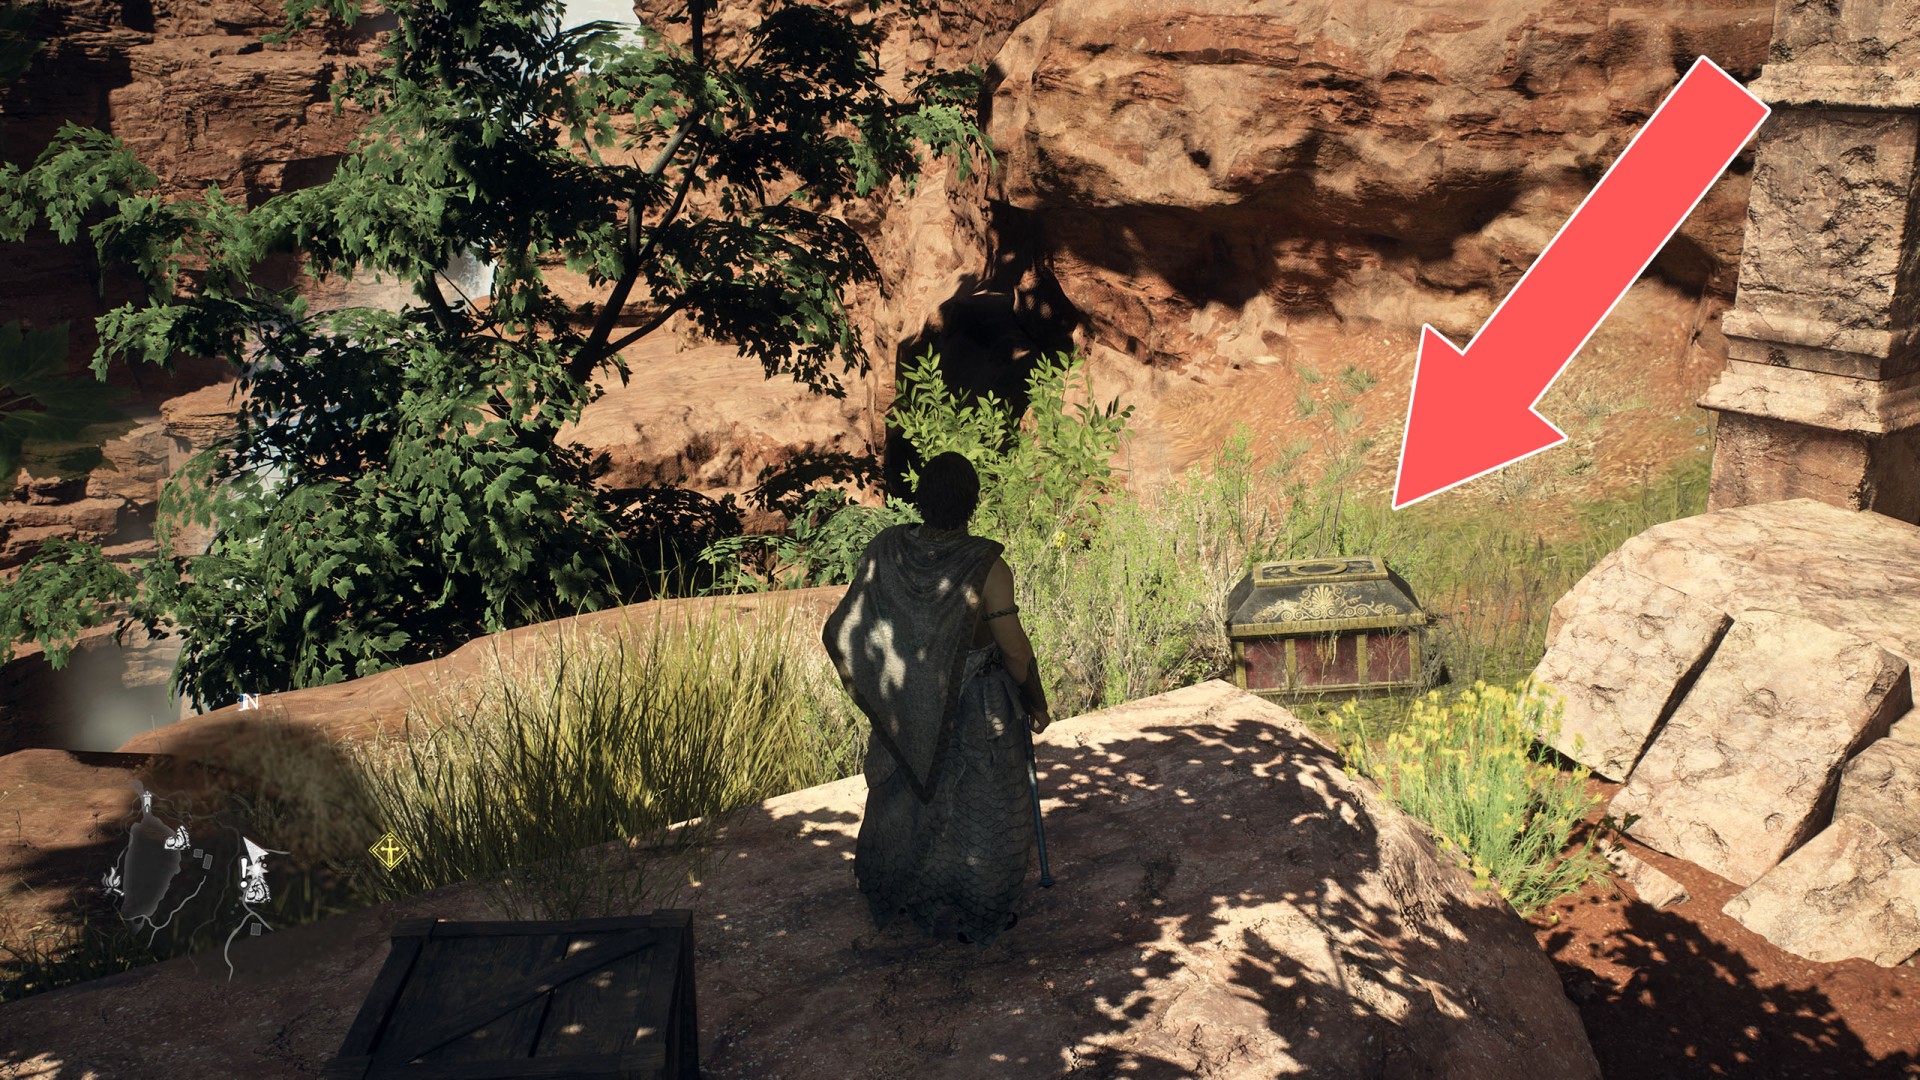
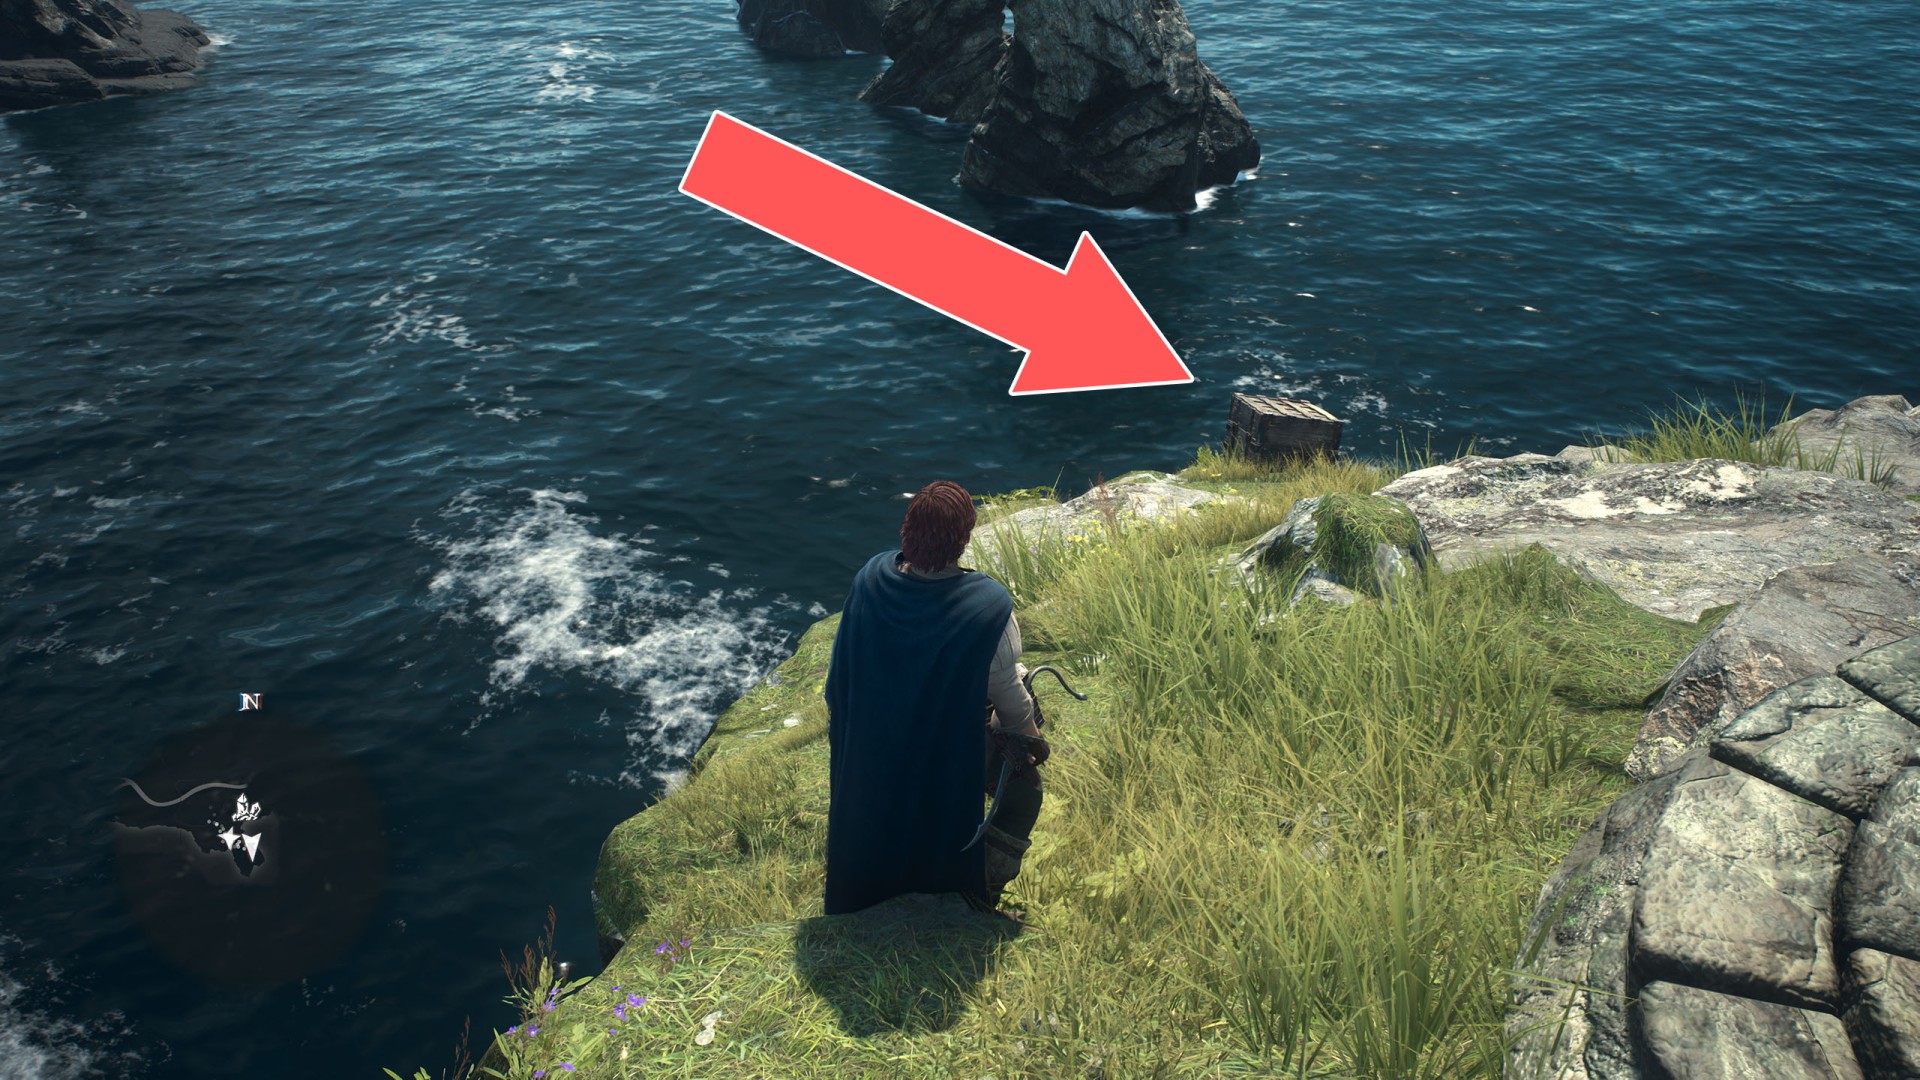
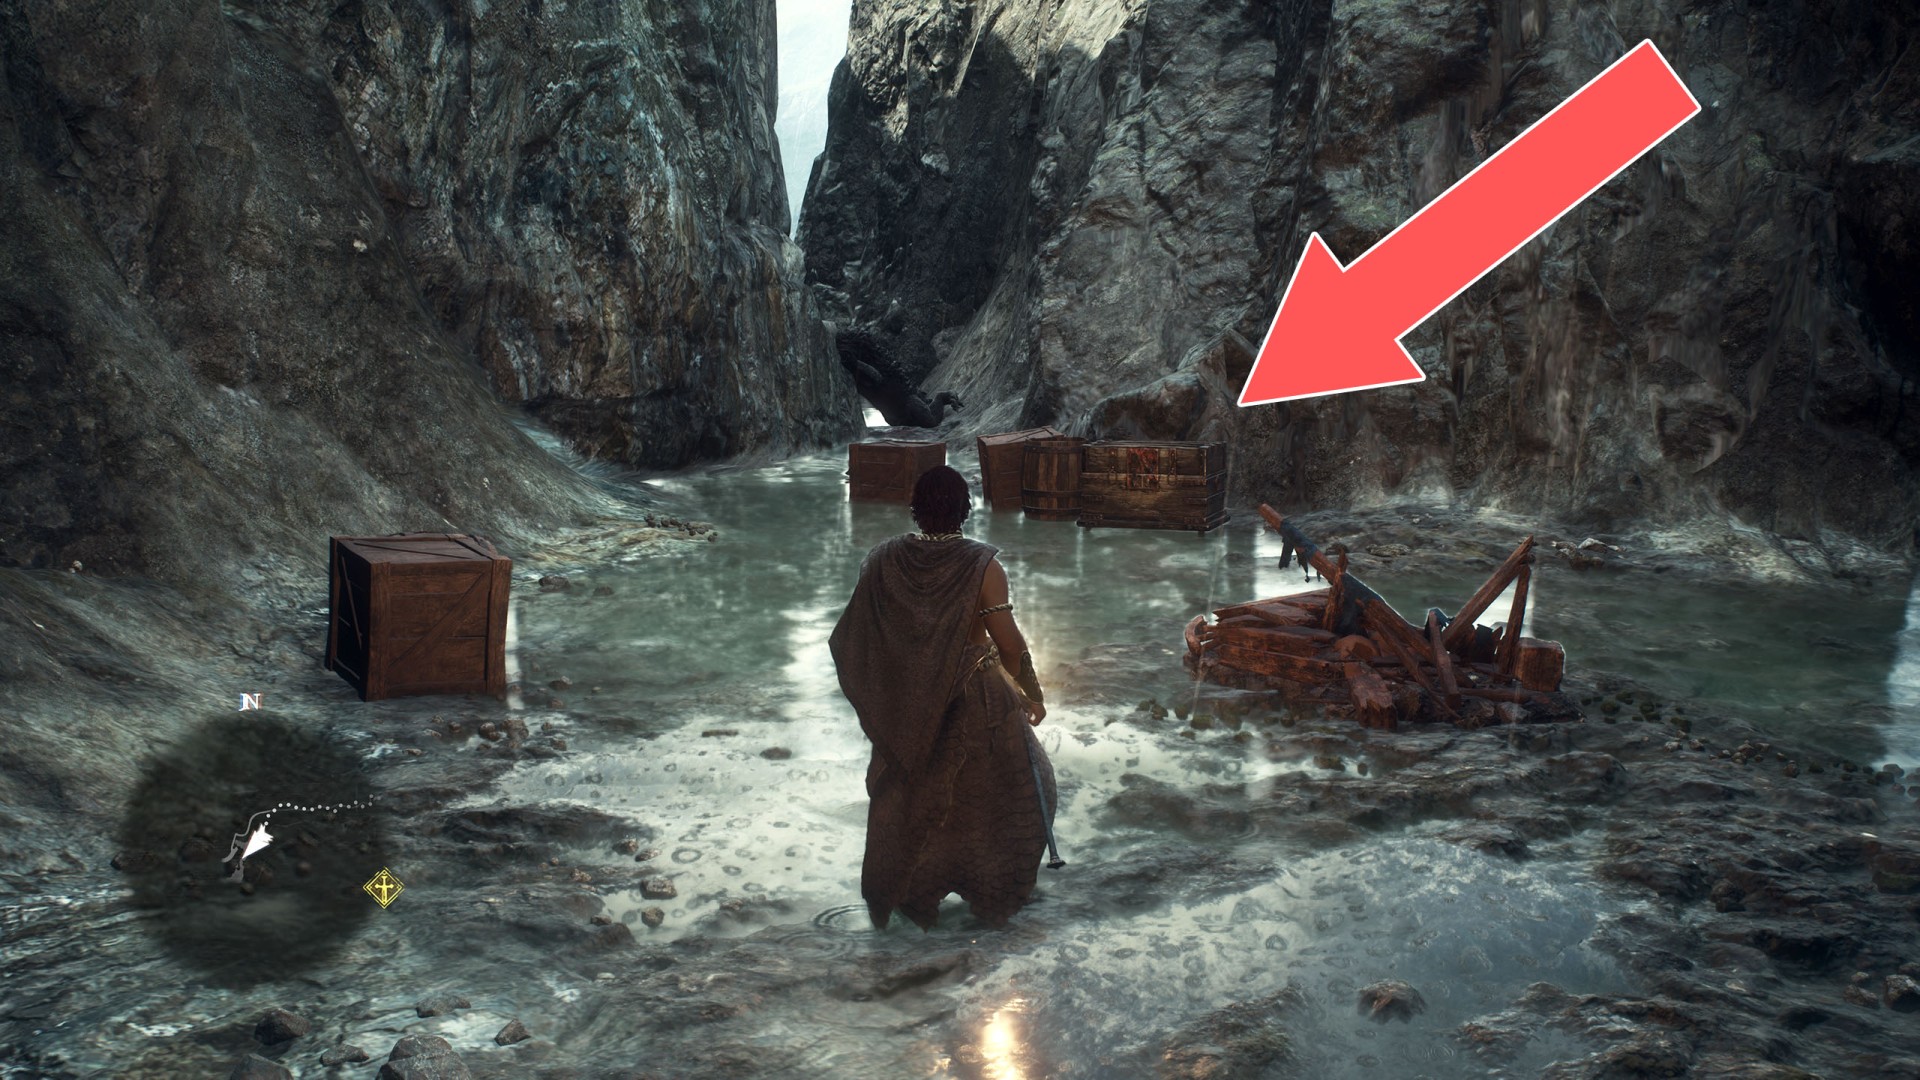
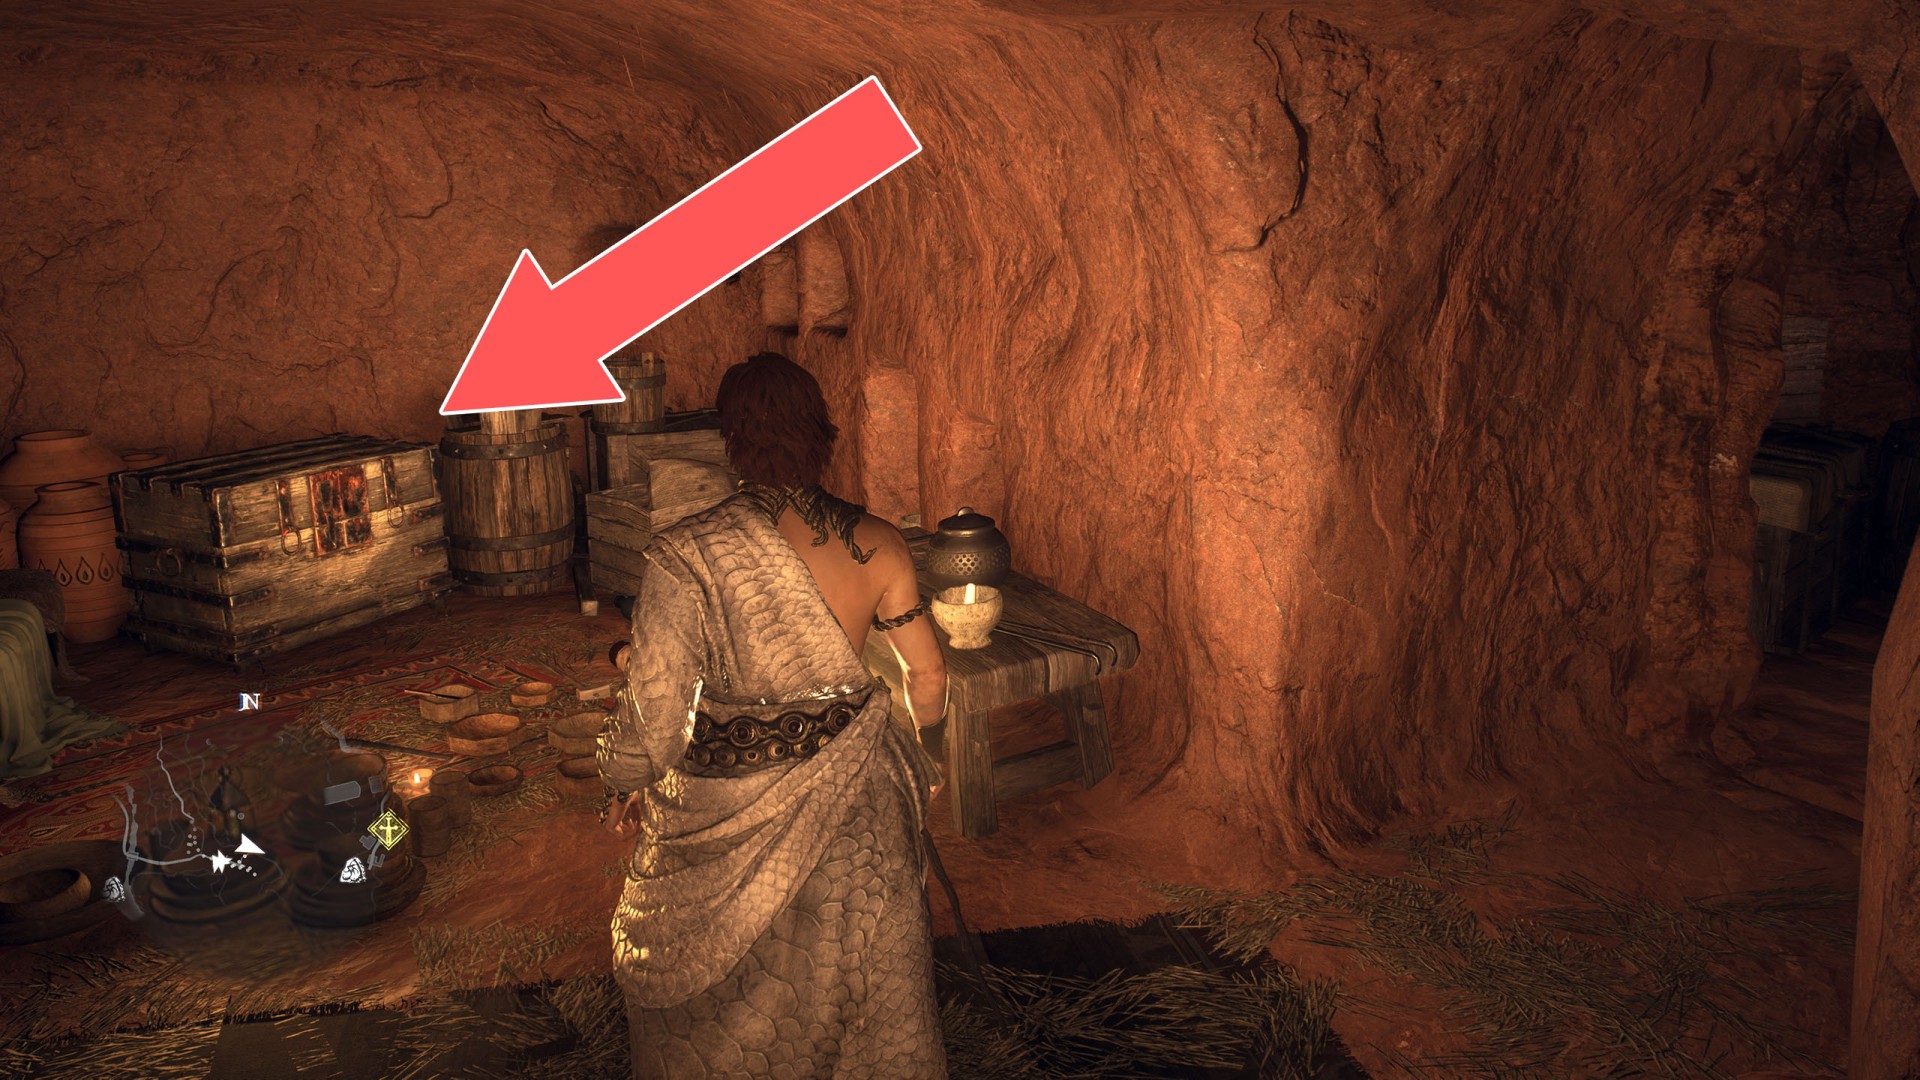
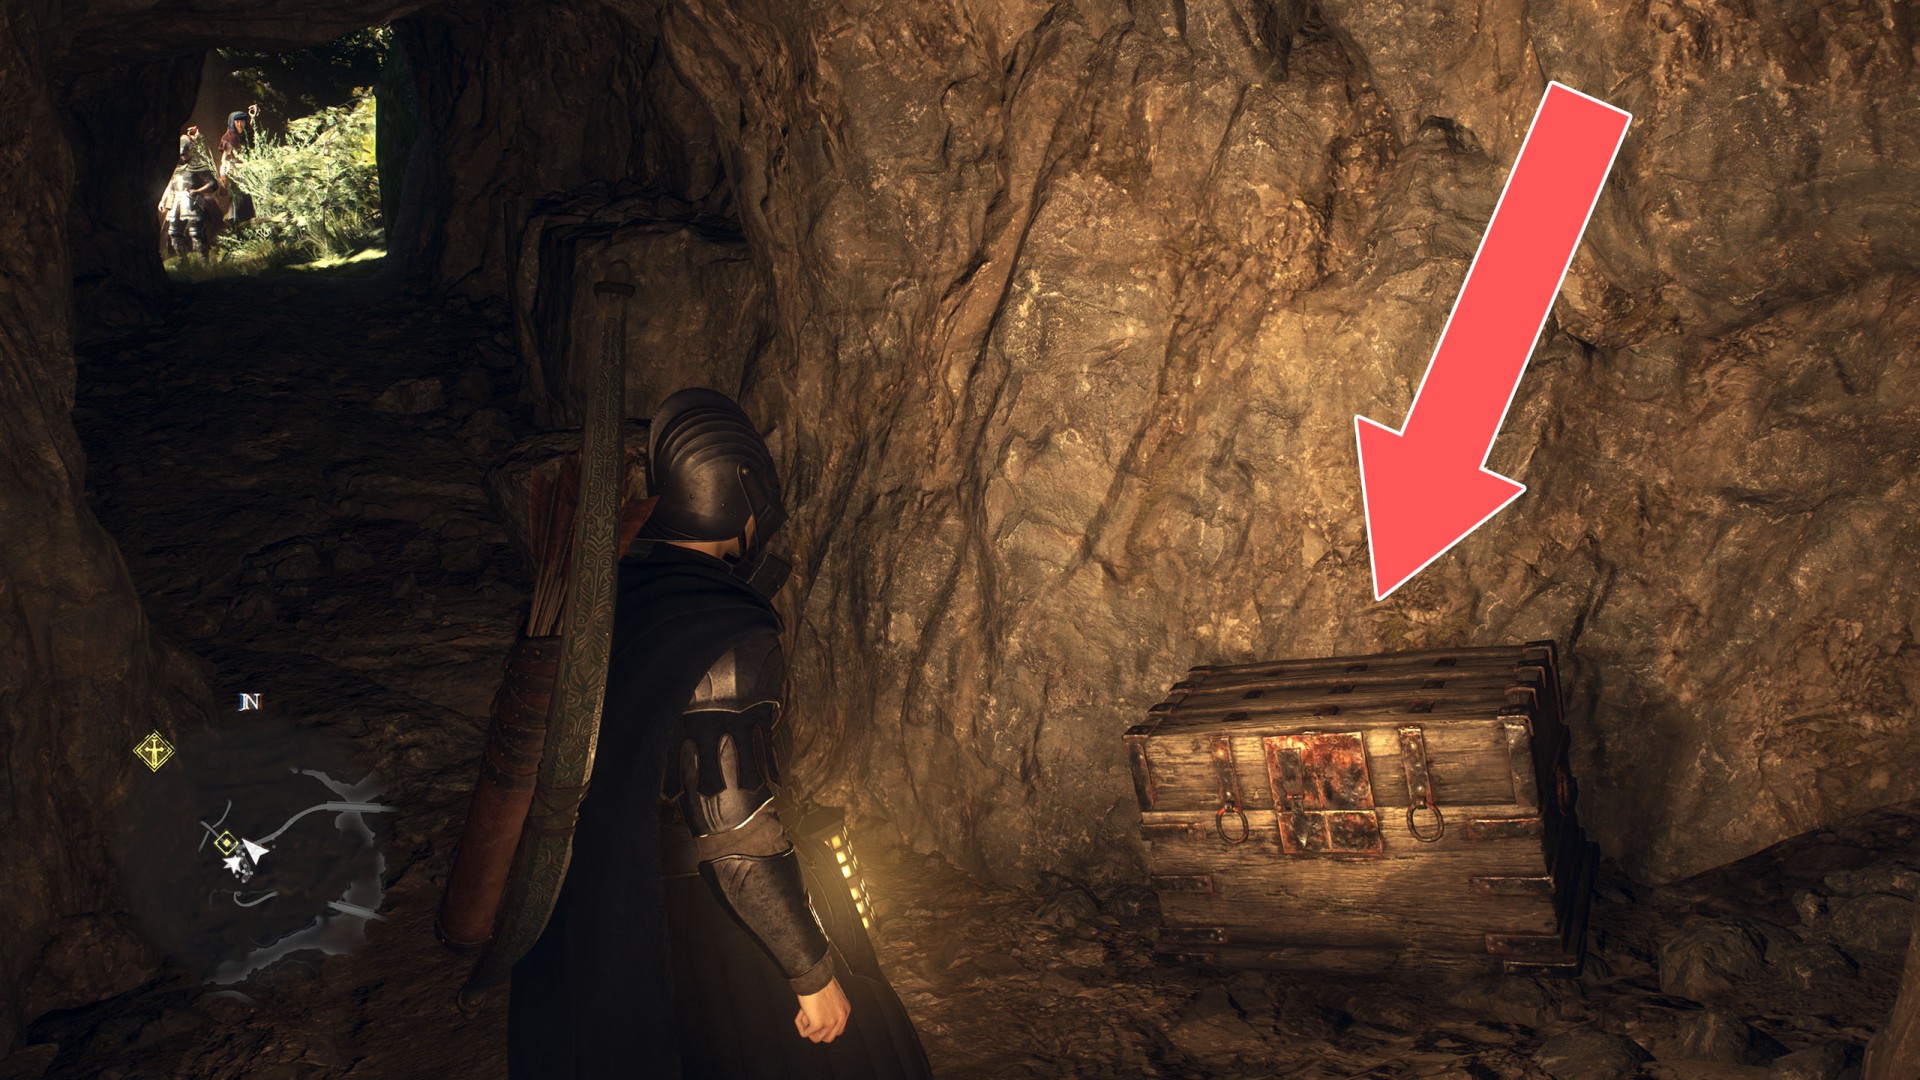
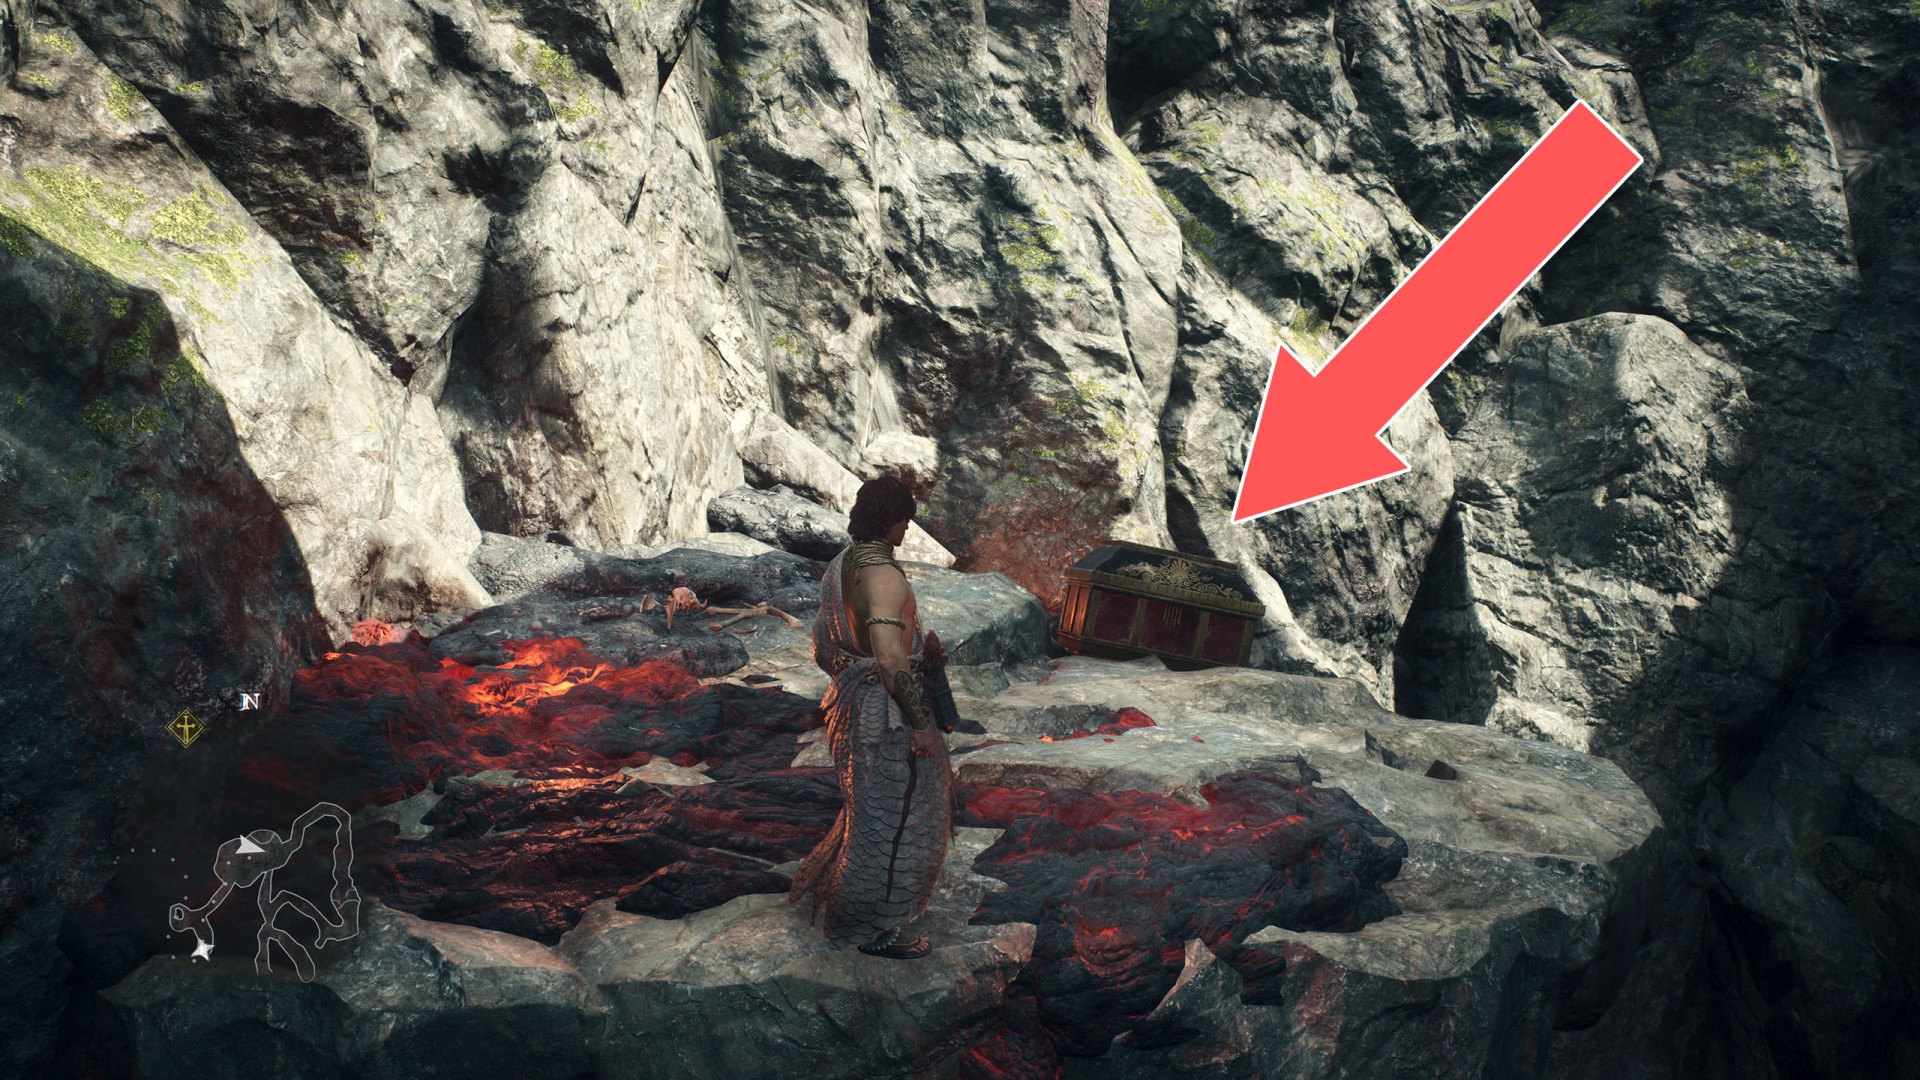
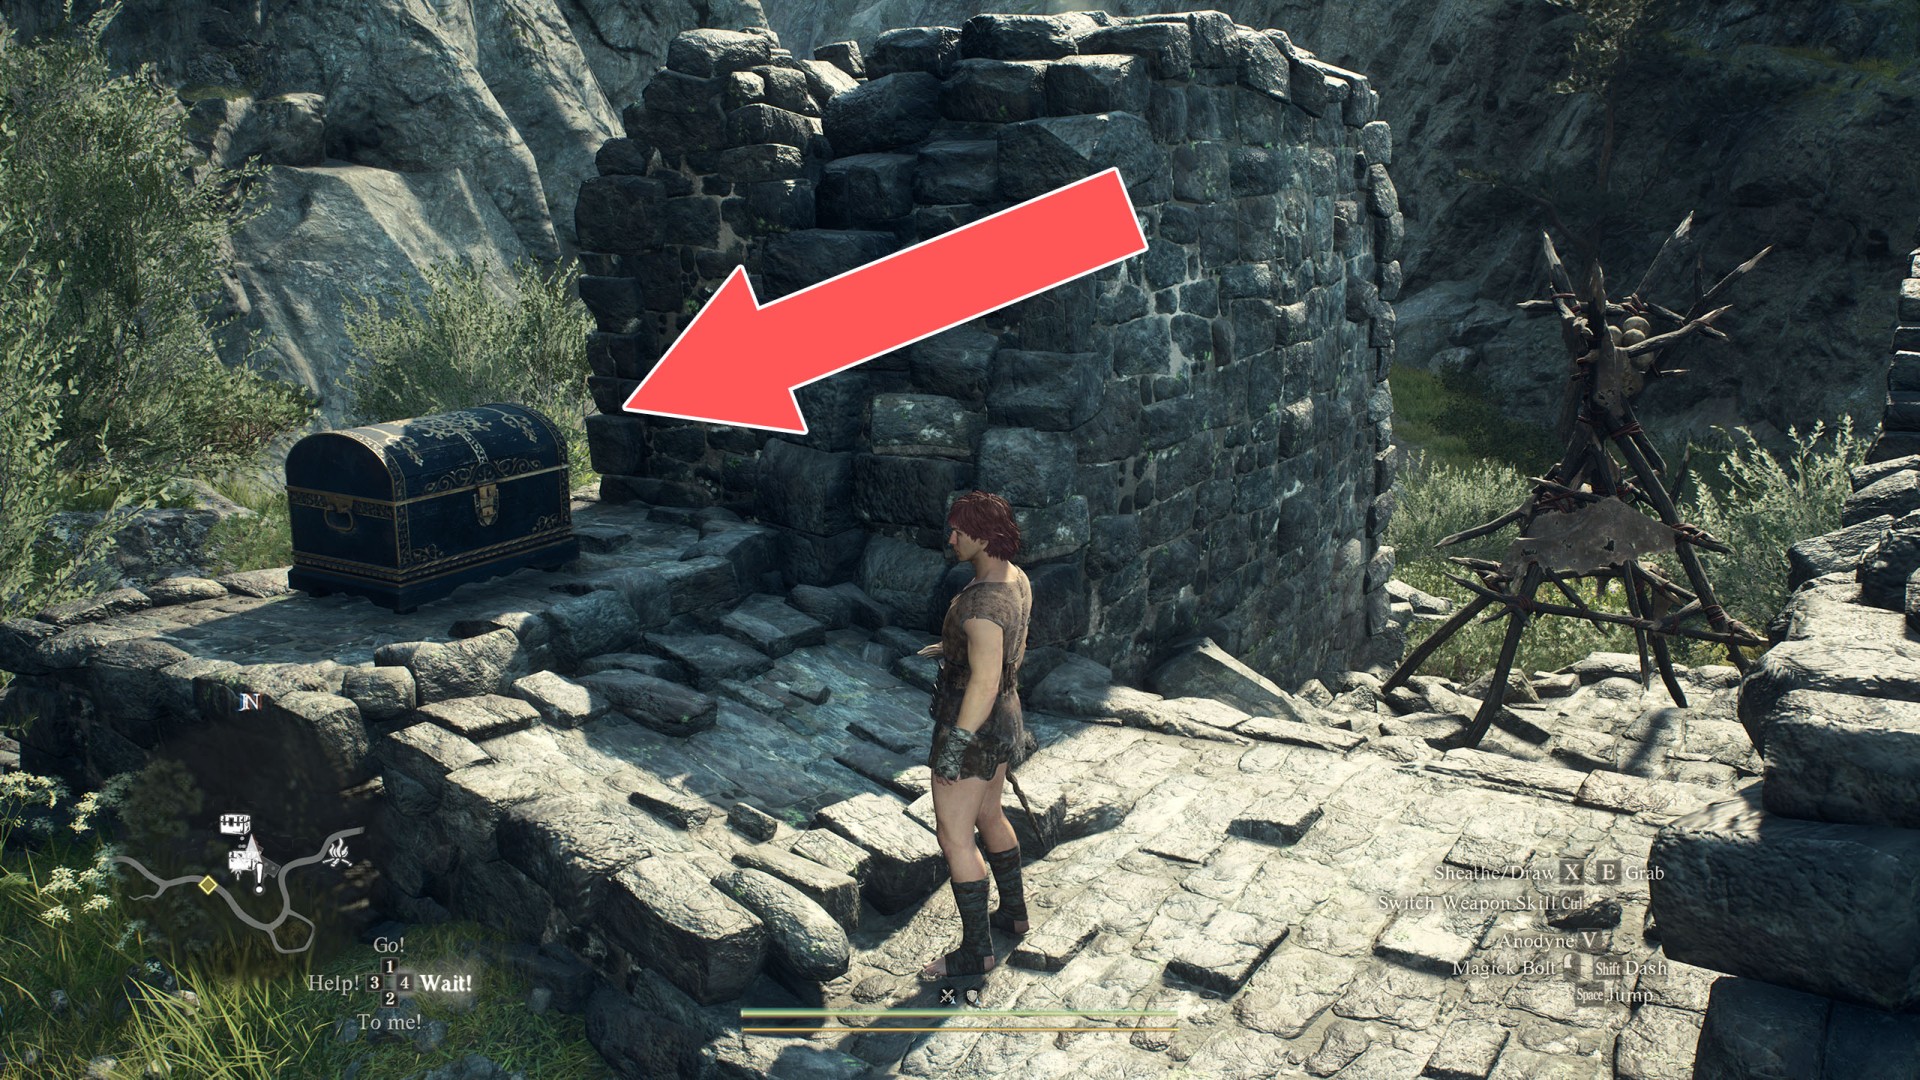
72Chest (2,800G)
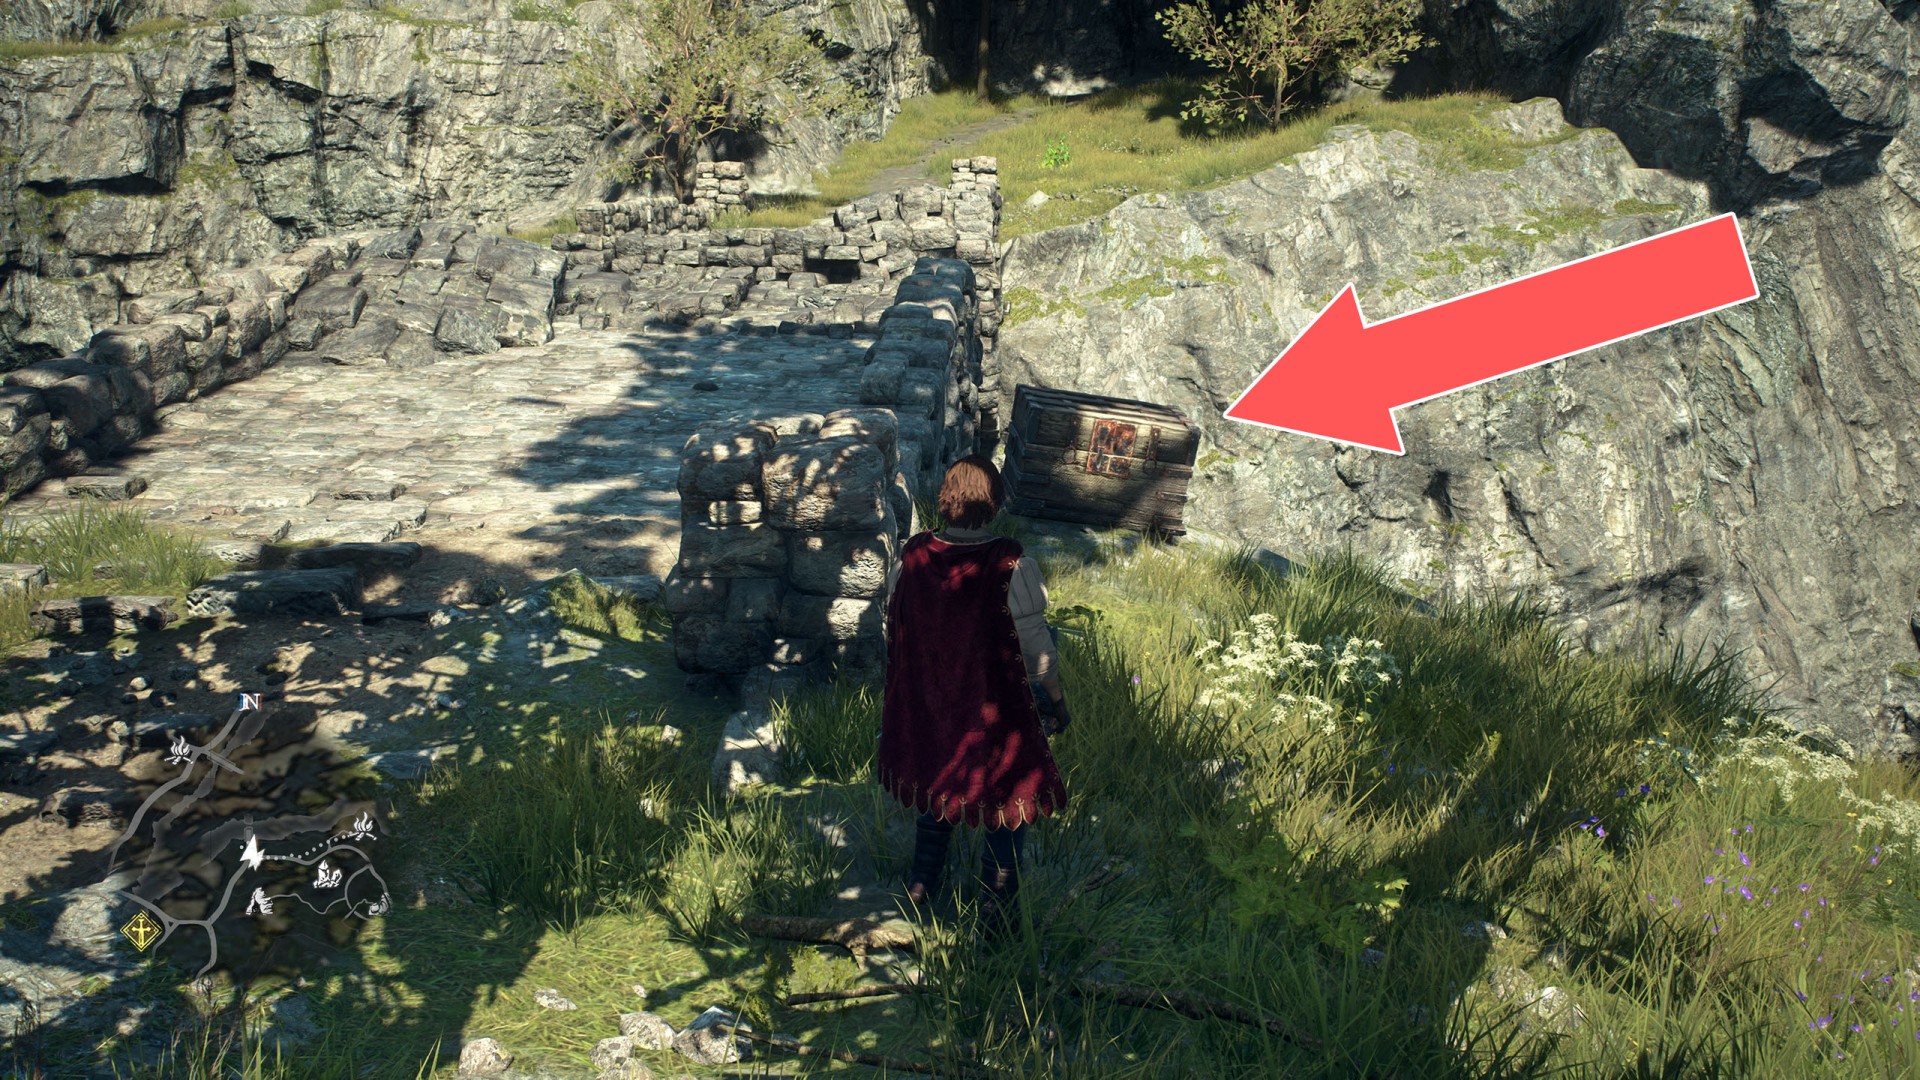
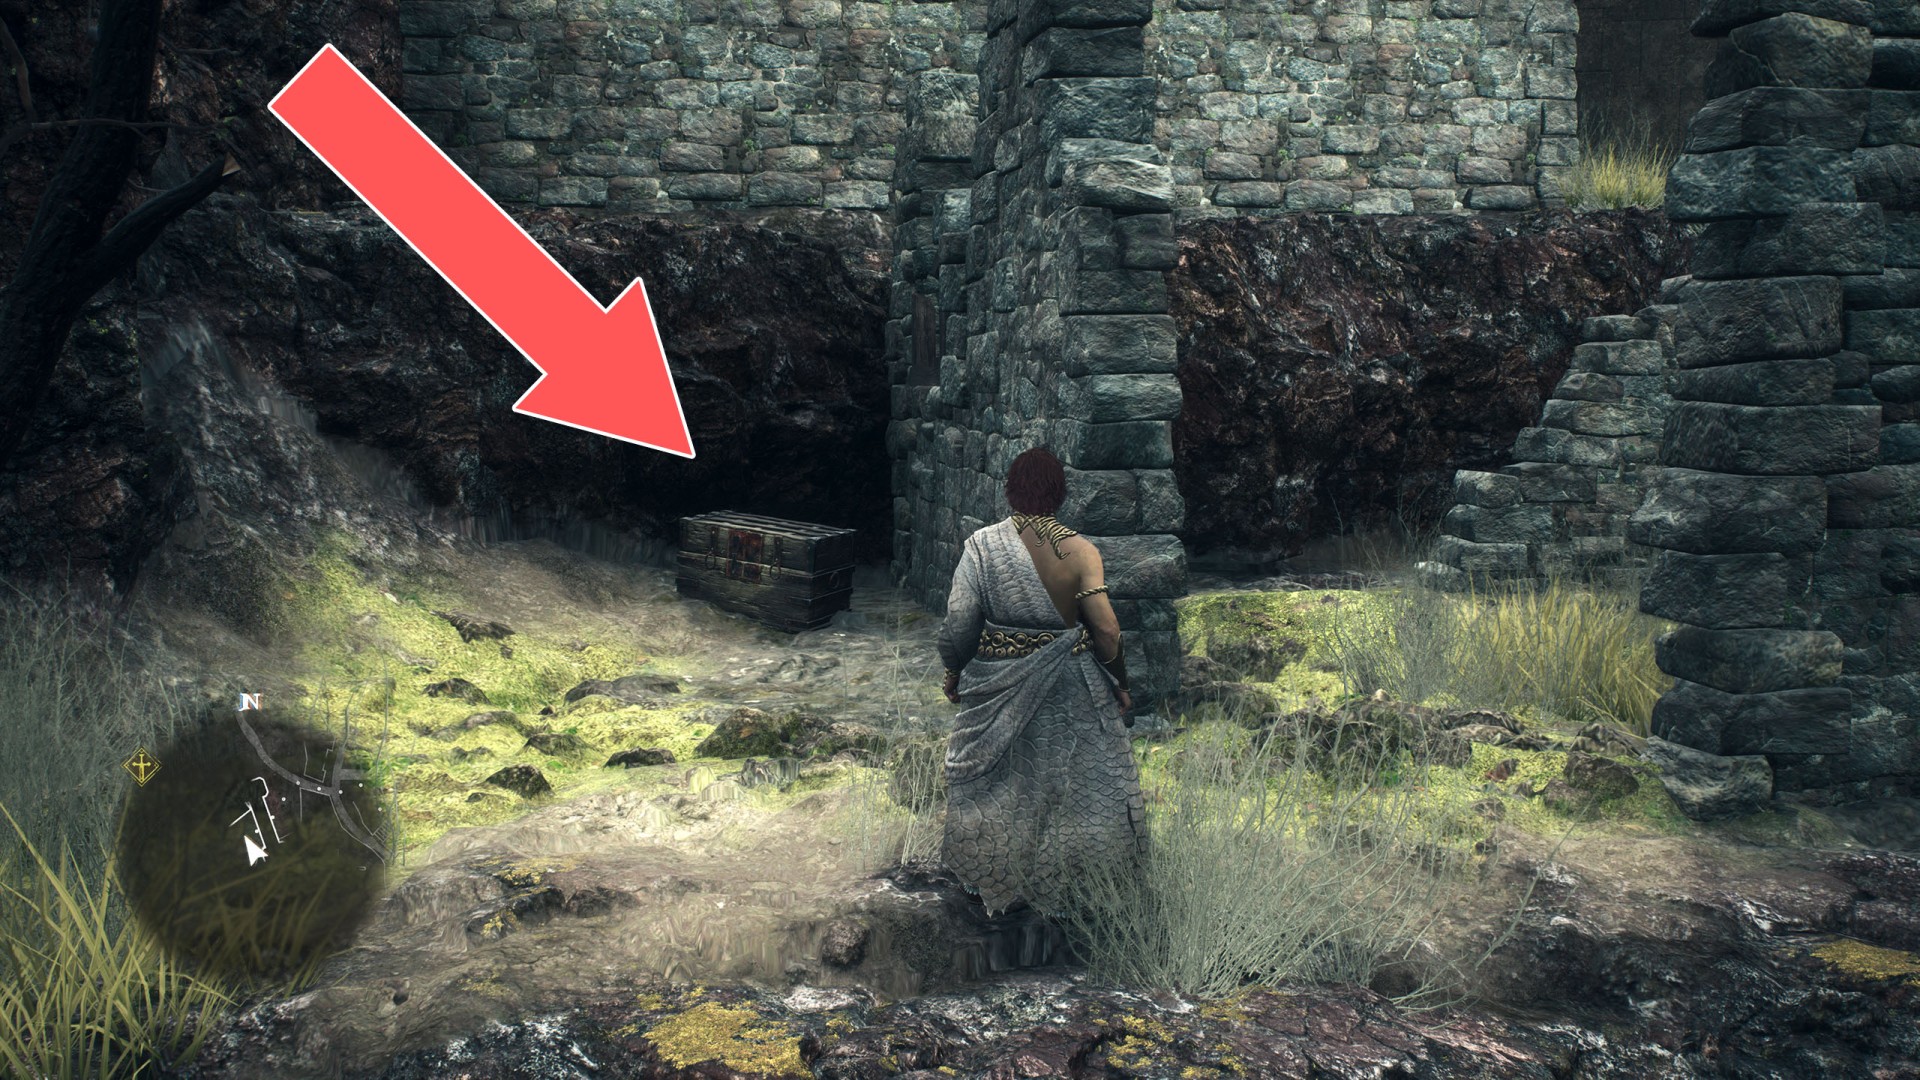
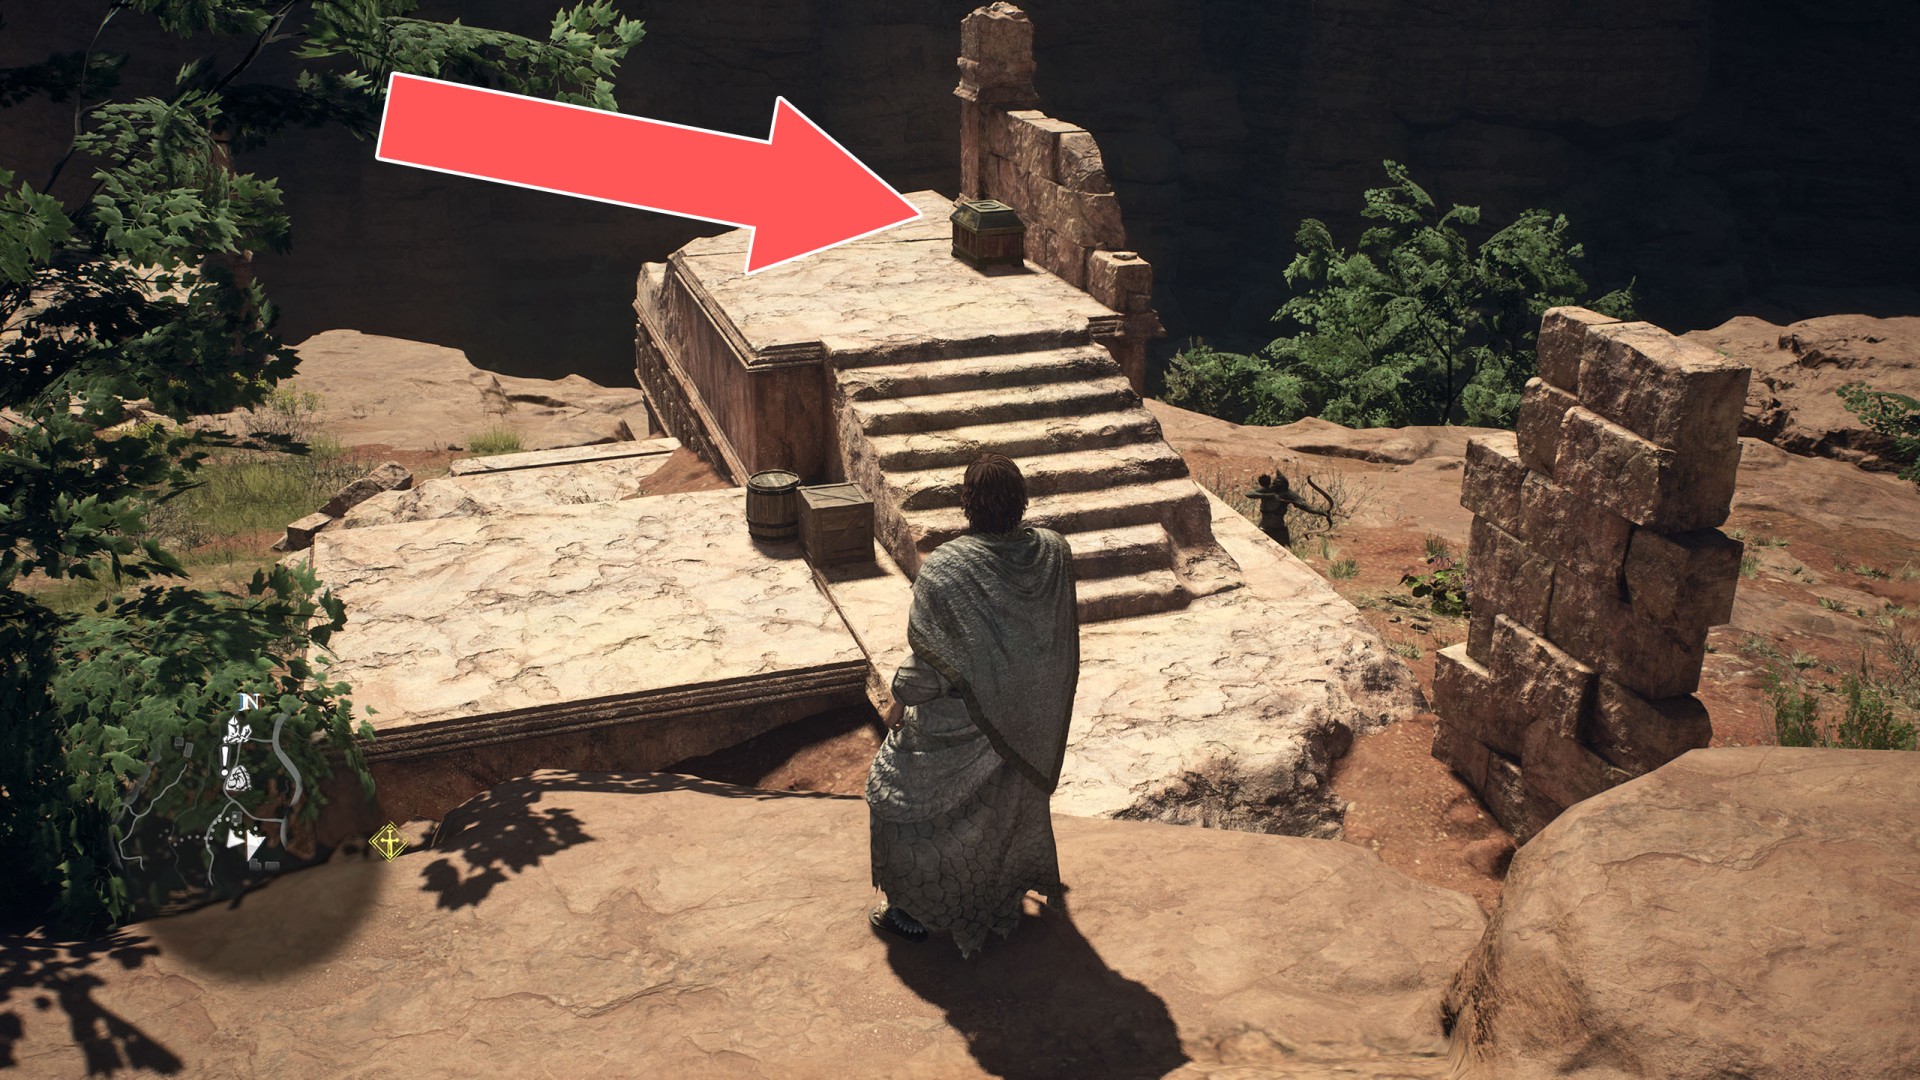
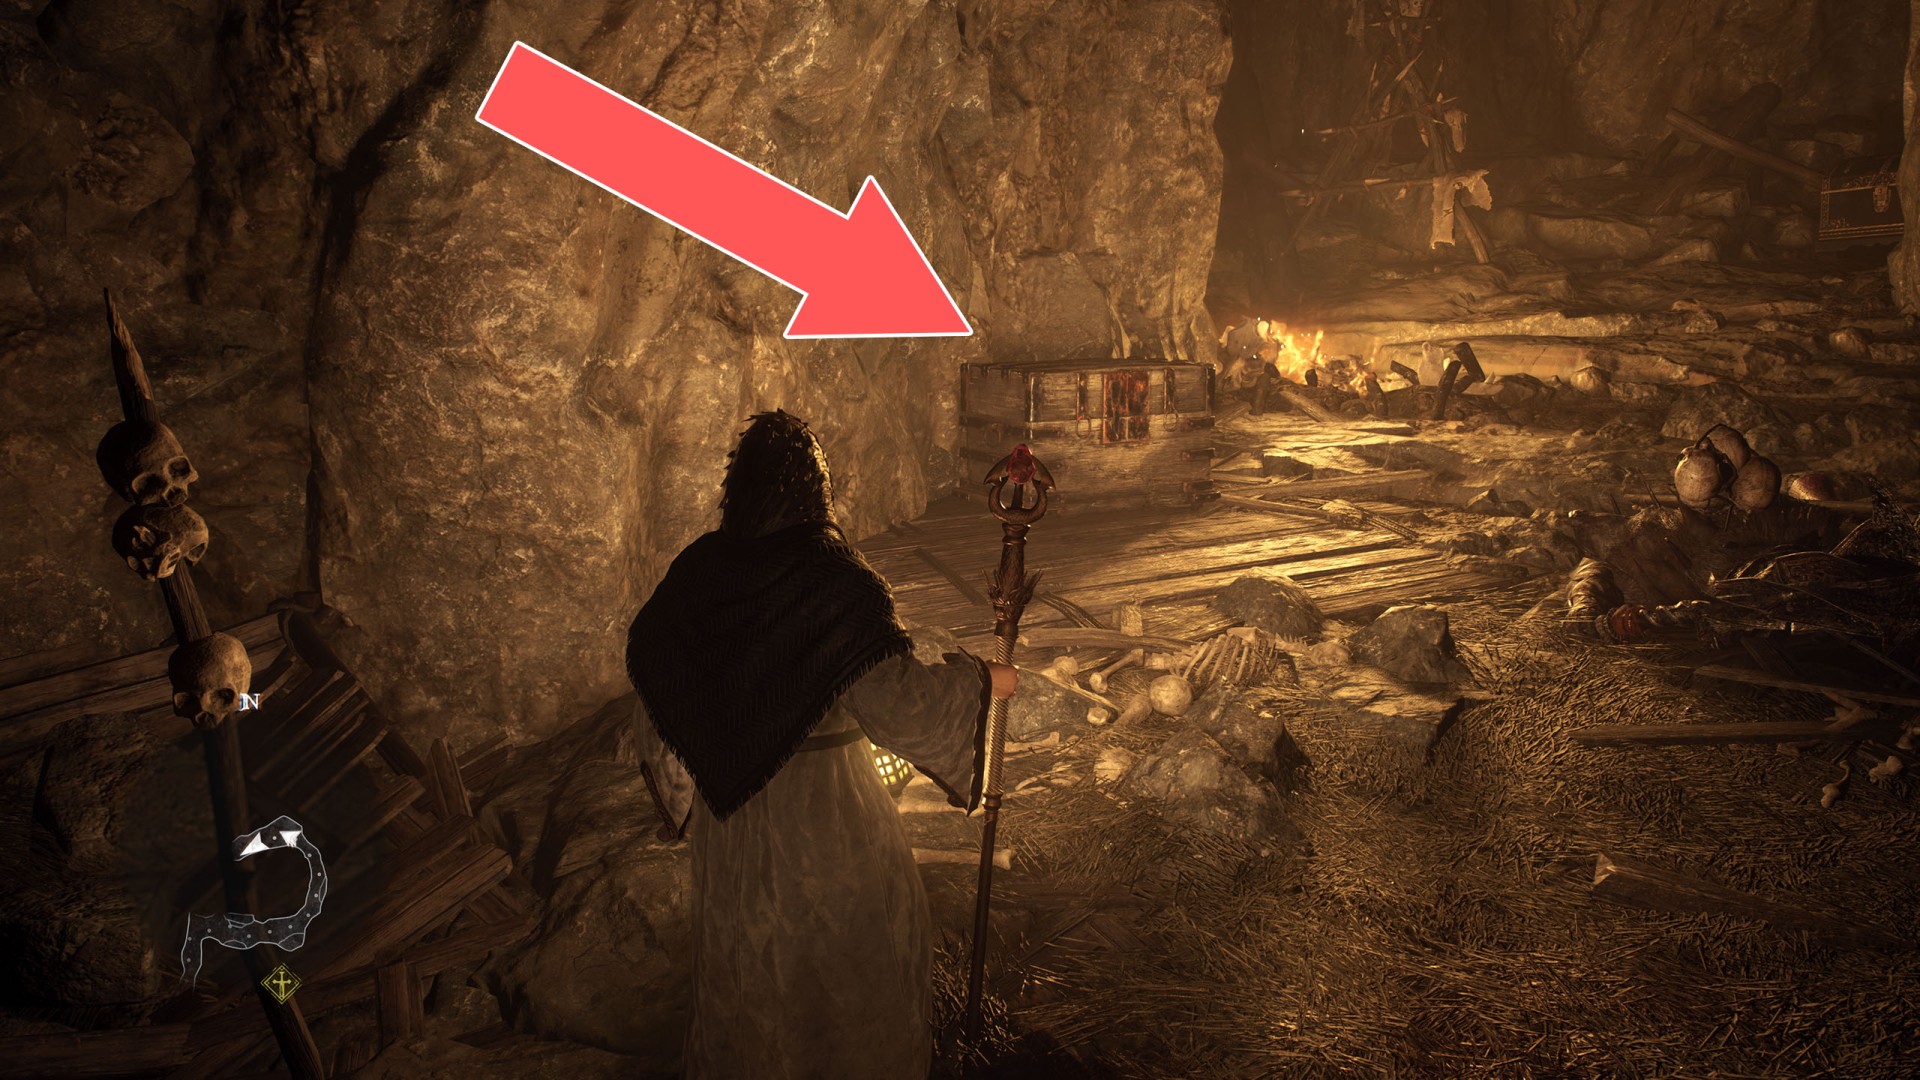
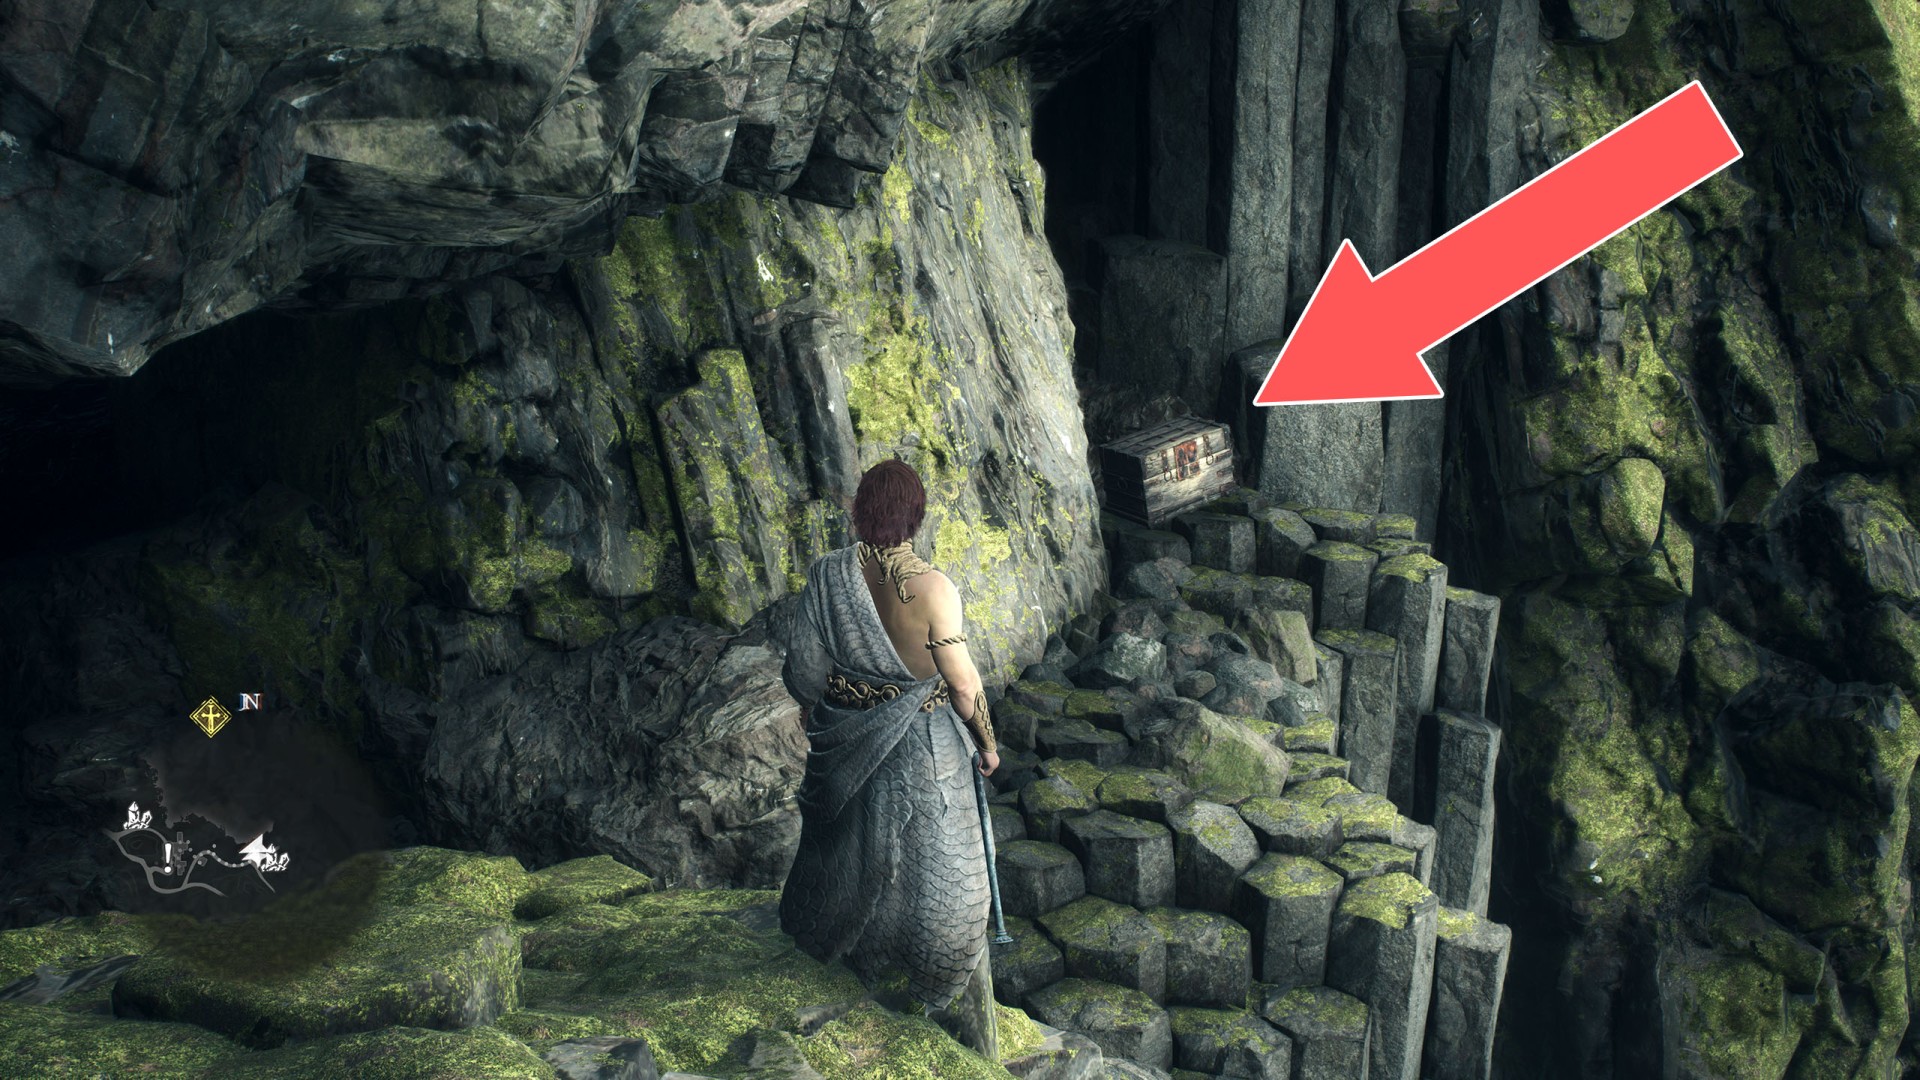
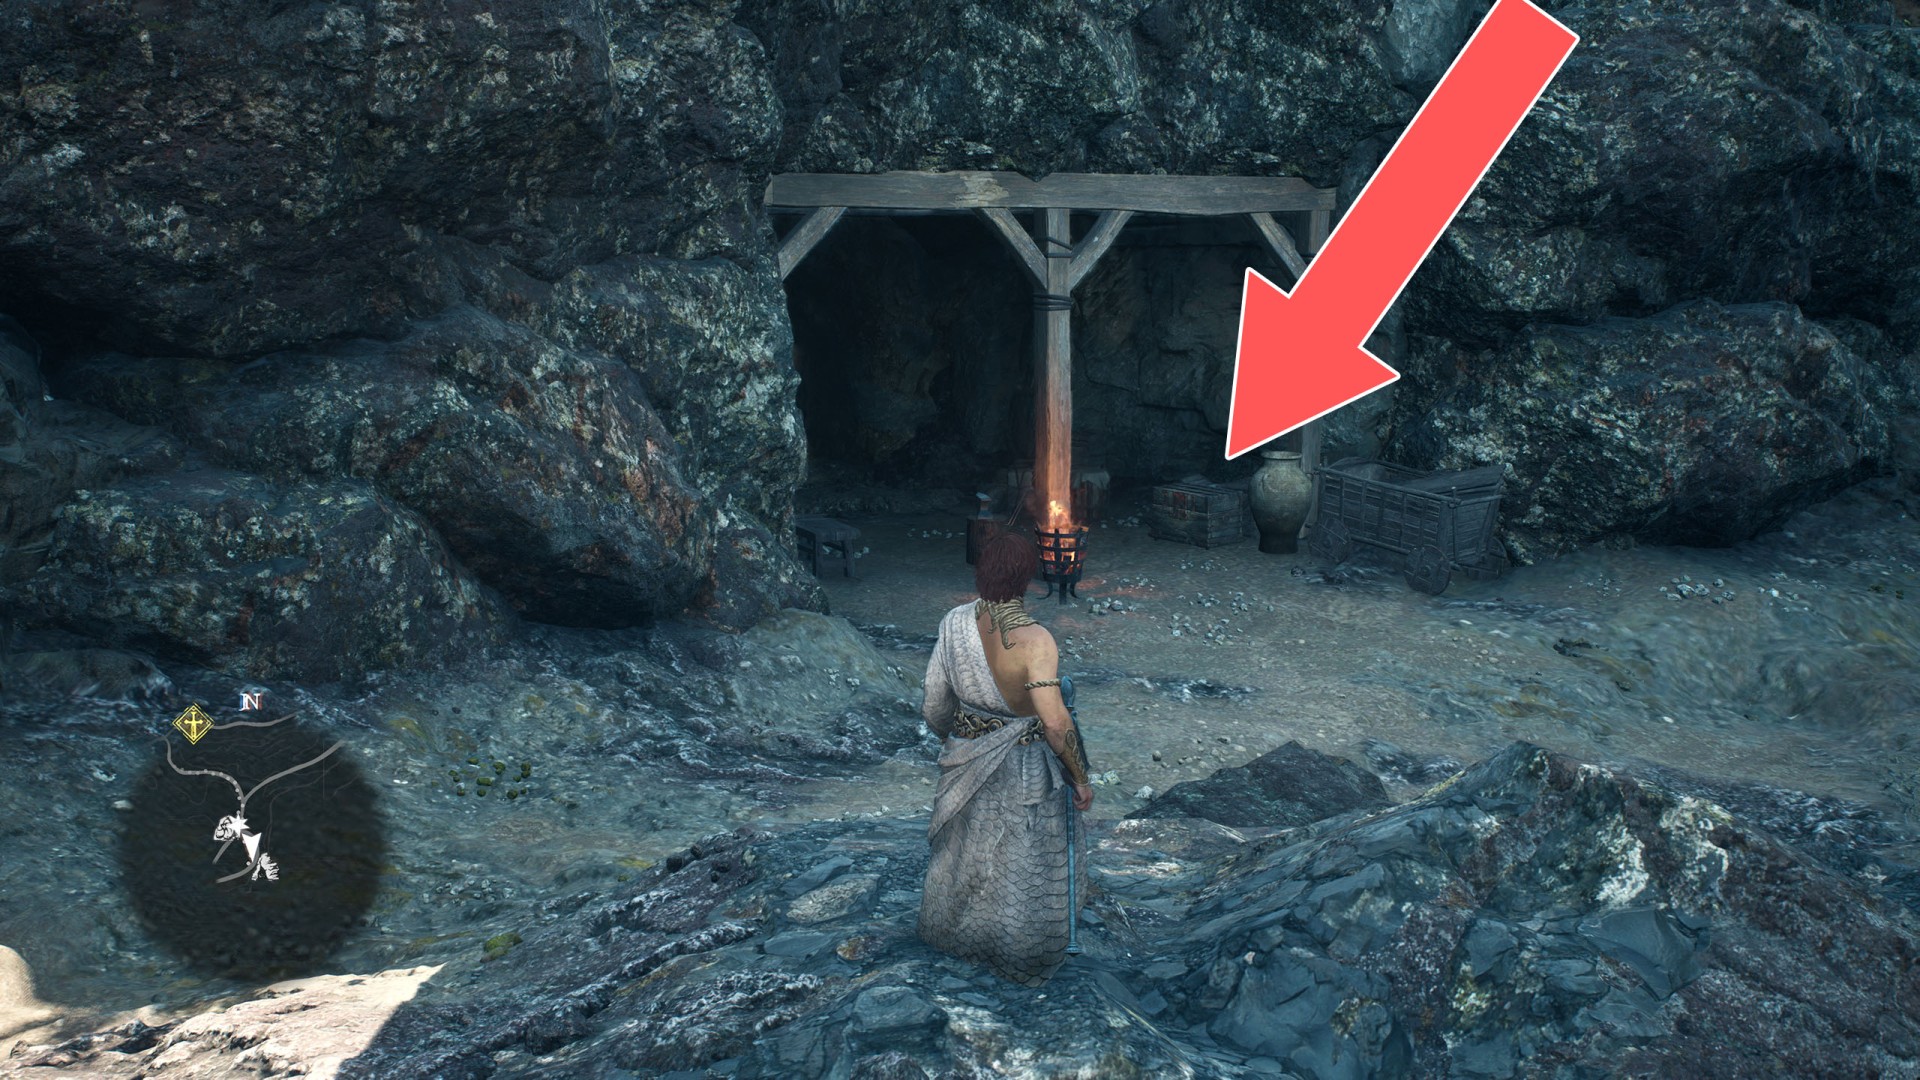
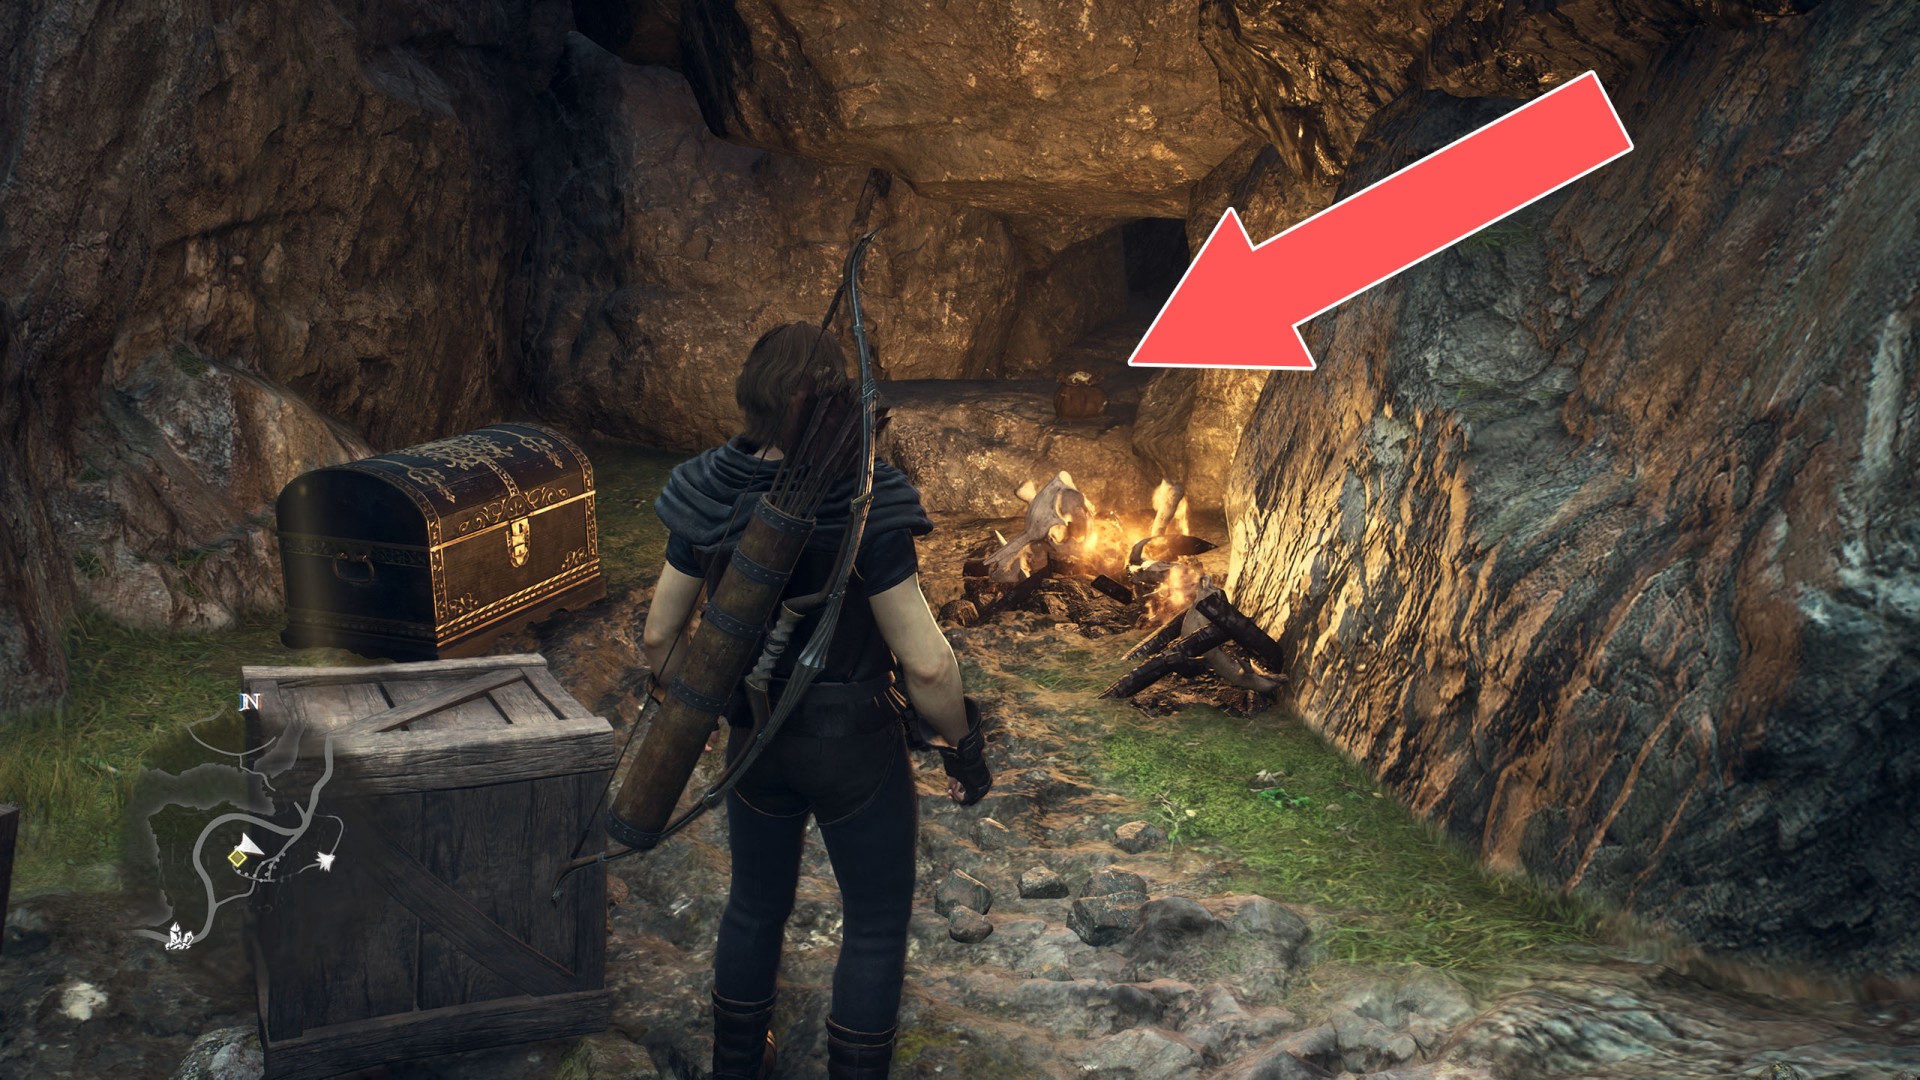
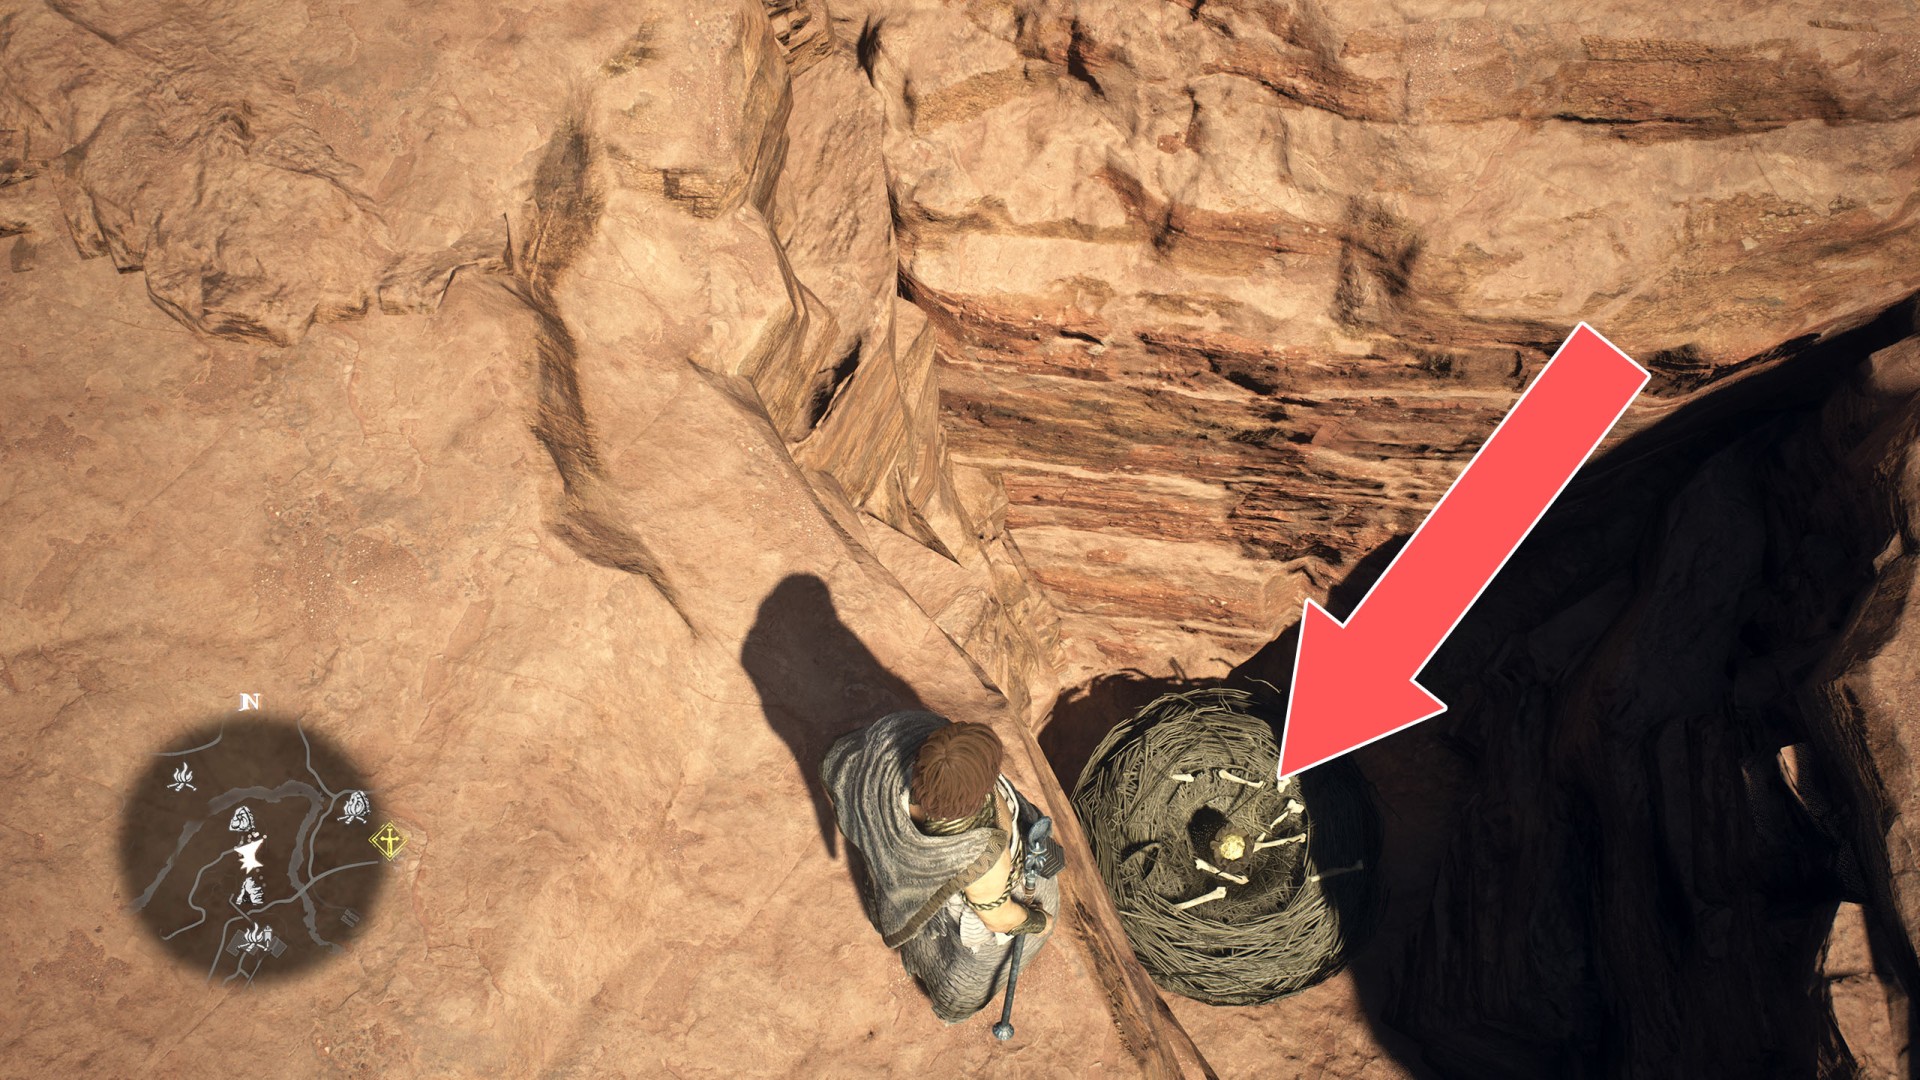
This chest is in a small cave under the stairs.
73Chest (2,800G)
74Chest (2,840G)
75Chest (2,920G)
76Chest (3,030G)

77Chest (3,080G)
78Chest (3,110G)
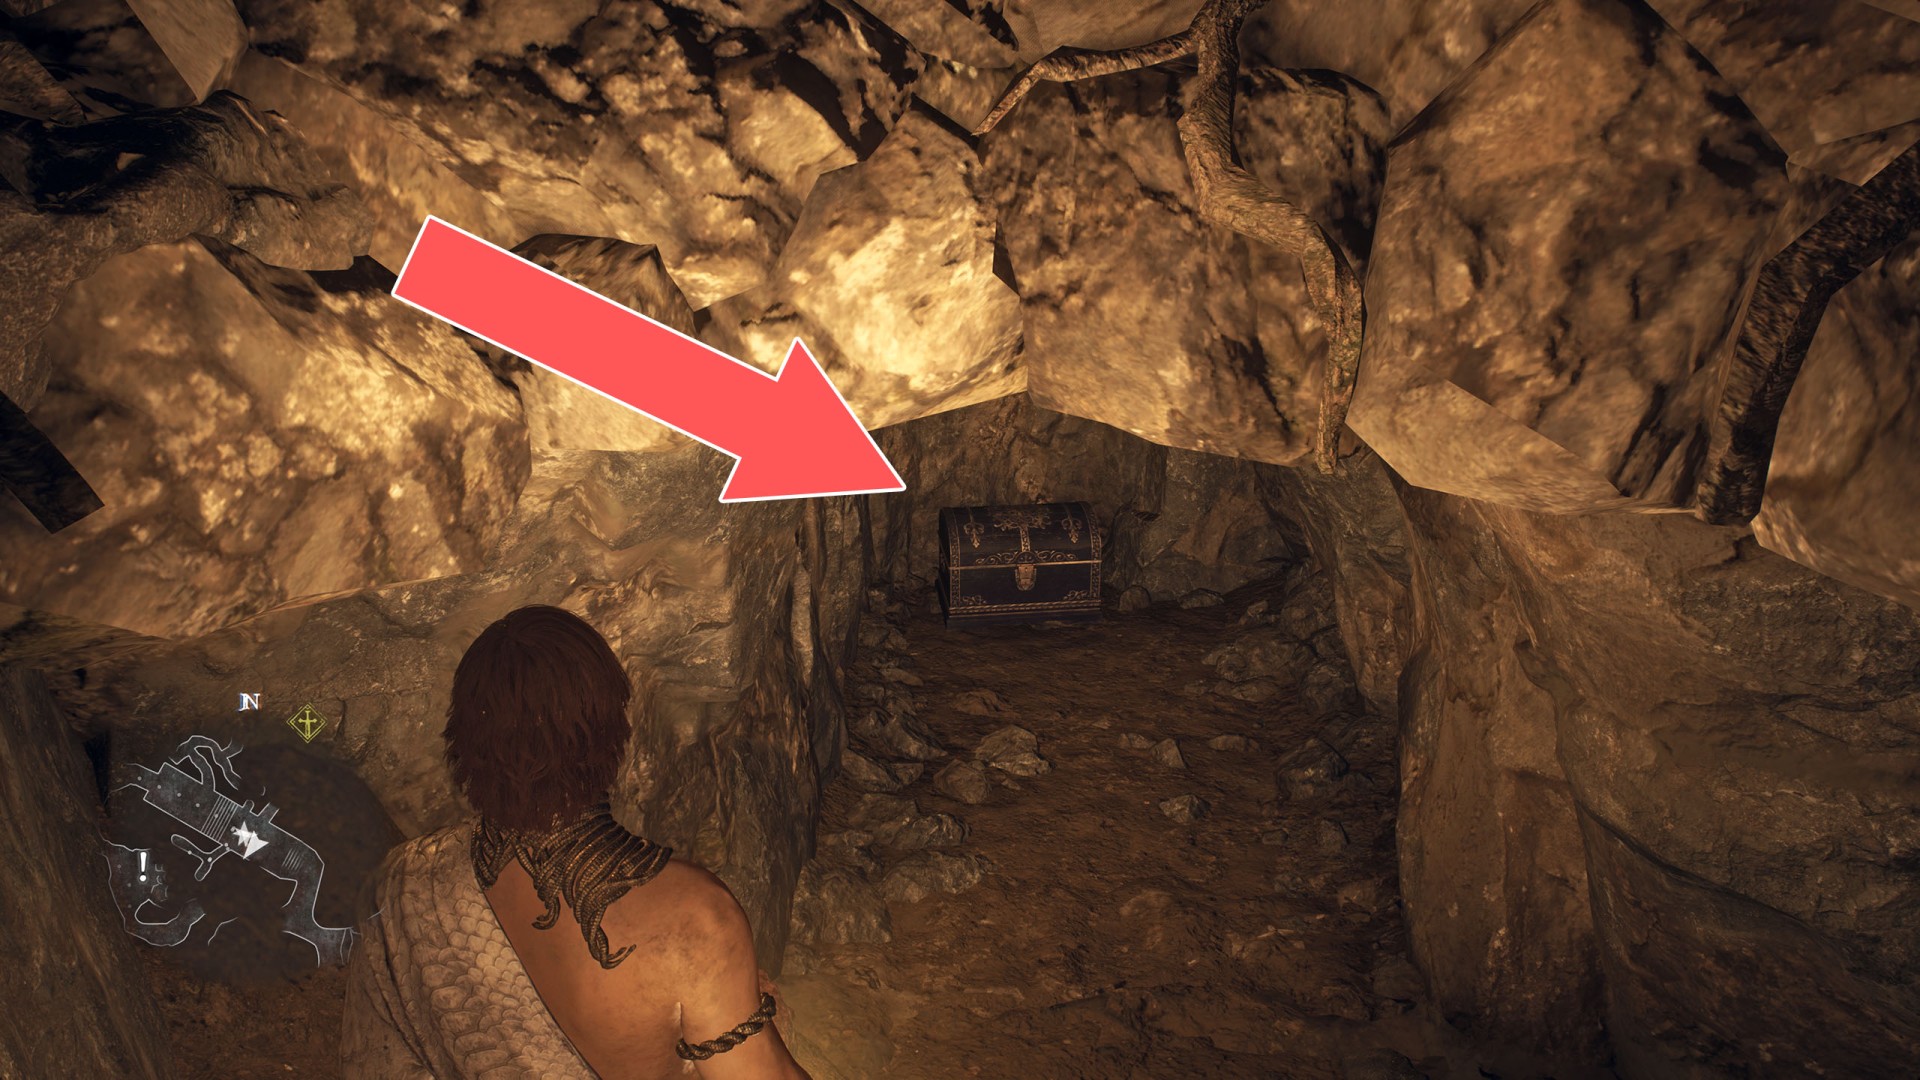
79Chest (3,120G)
80Chest (3,210G)
81Chest (3,260G)
82Chest (3,330G)

83Chest (3,450G)
84Chest (3,500G)
85Chest (3,520G)
86Chest (3,550G)
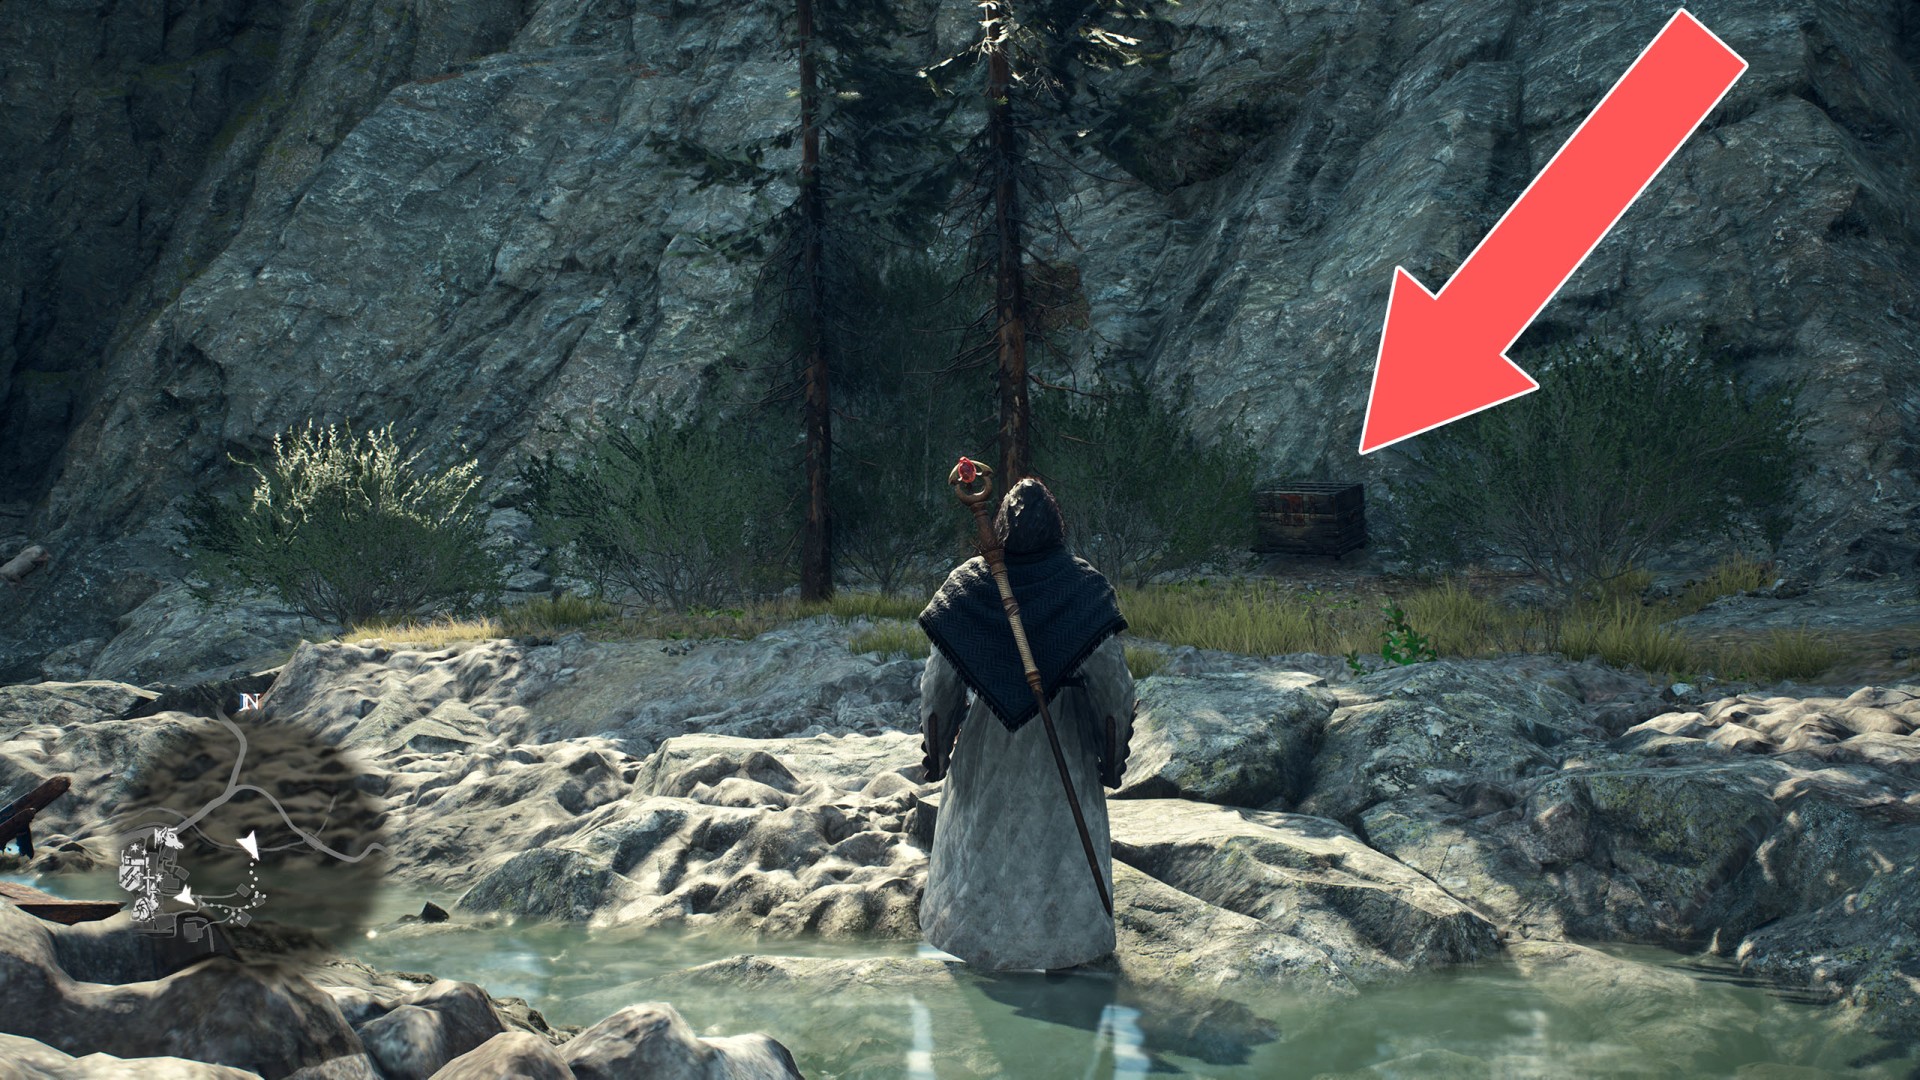
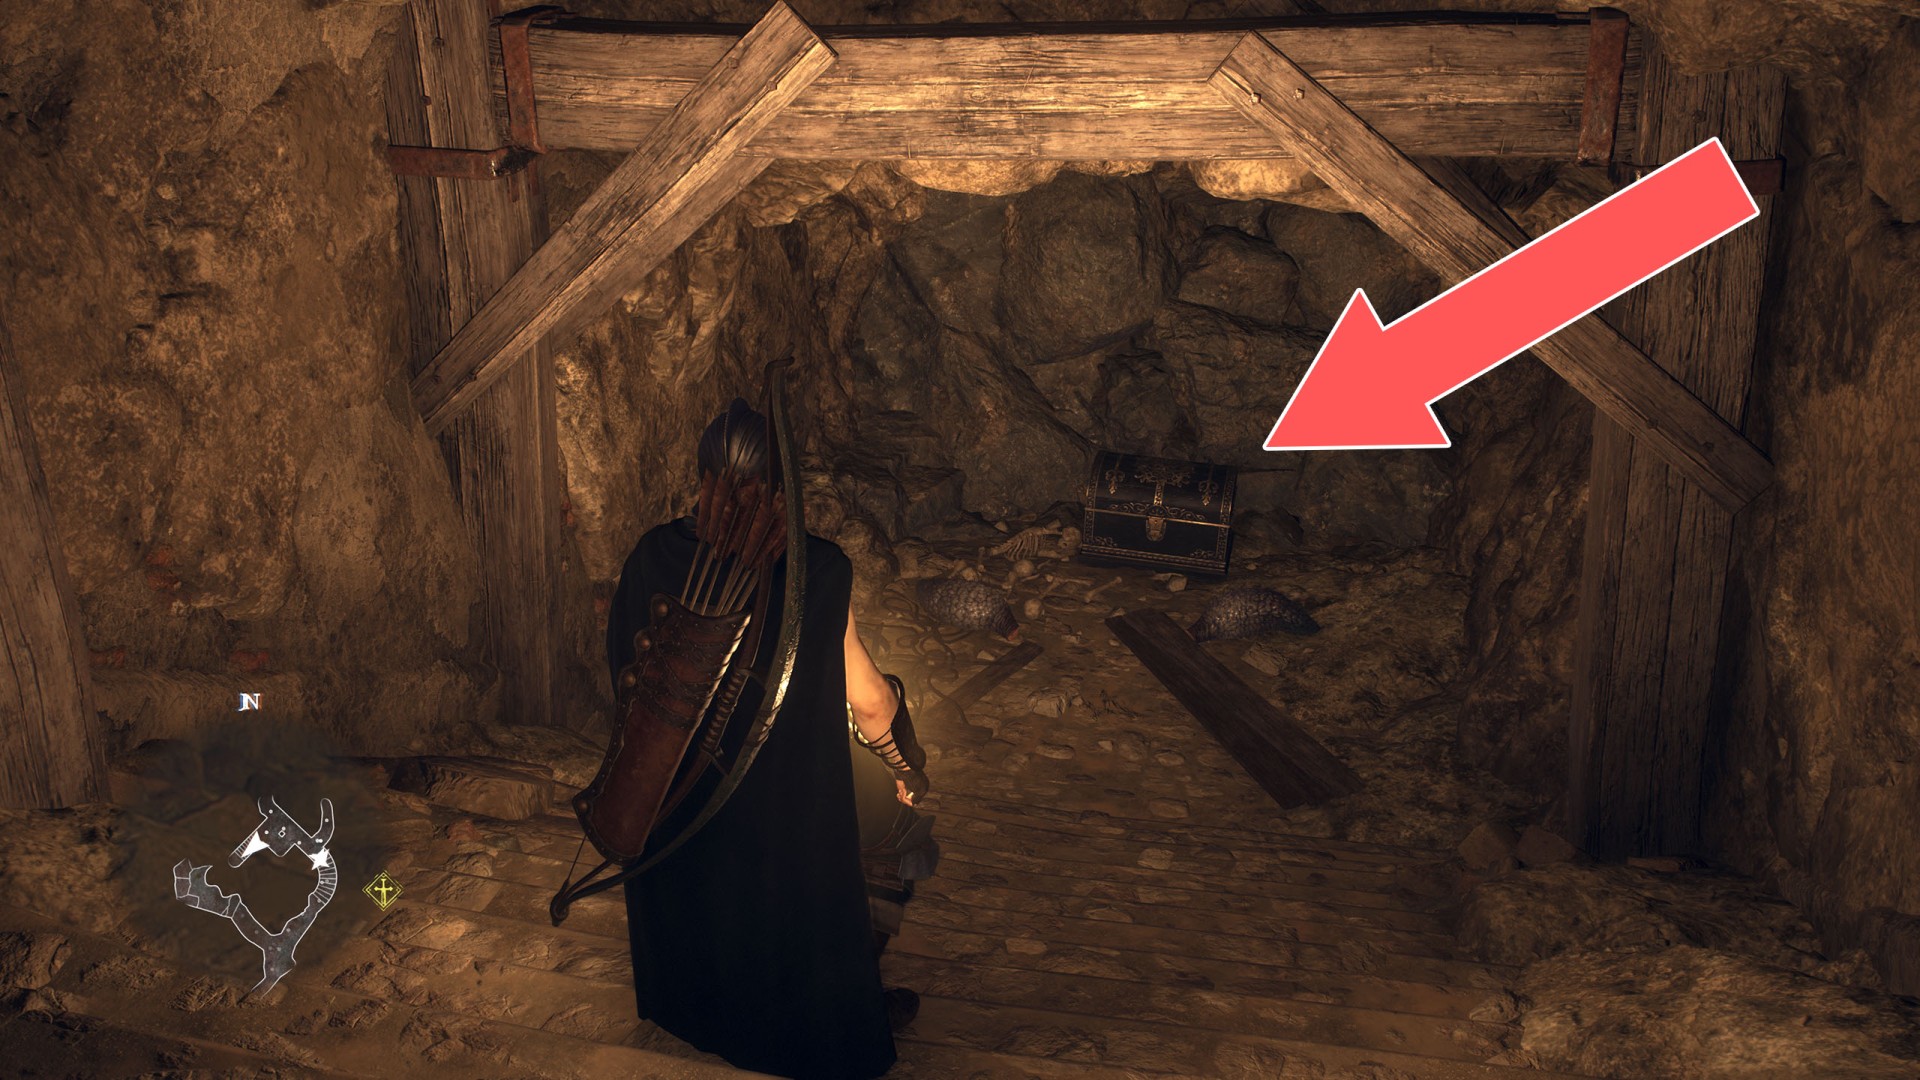
87Chest (3,600G)
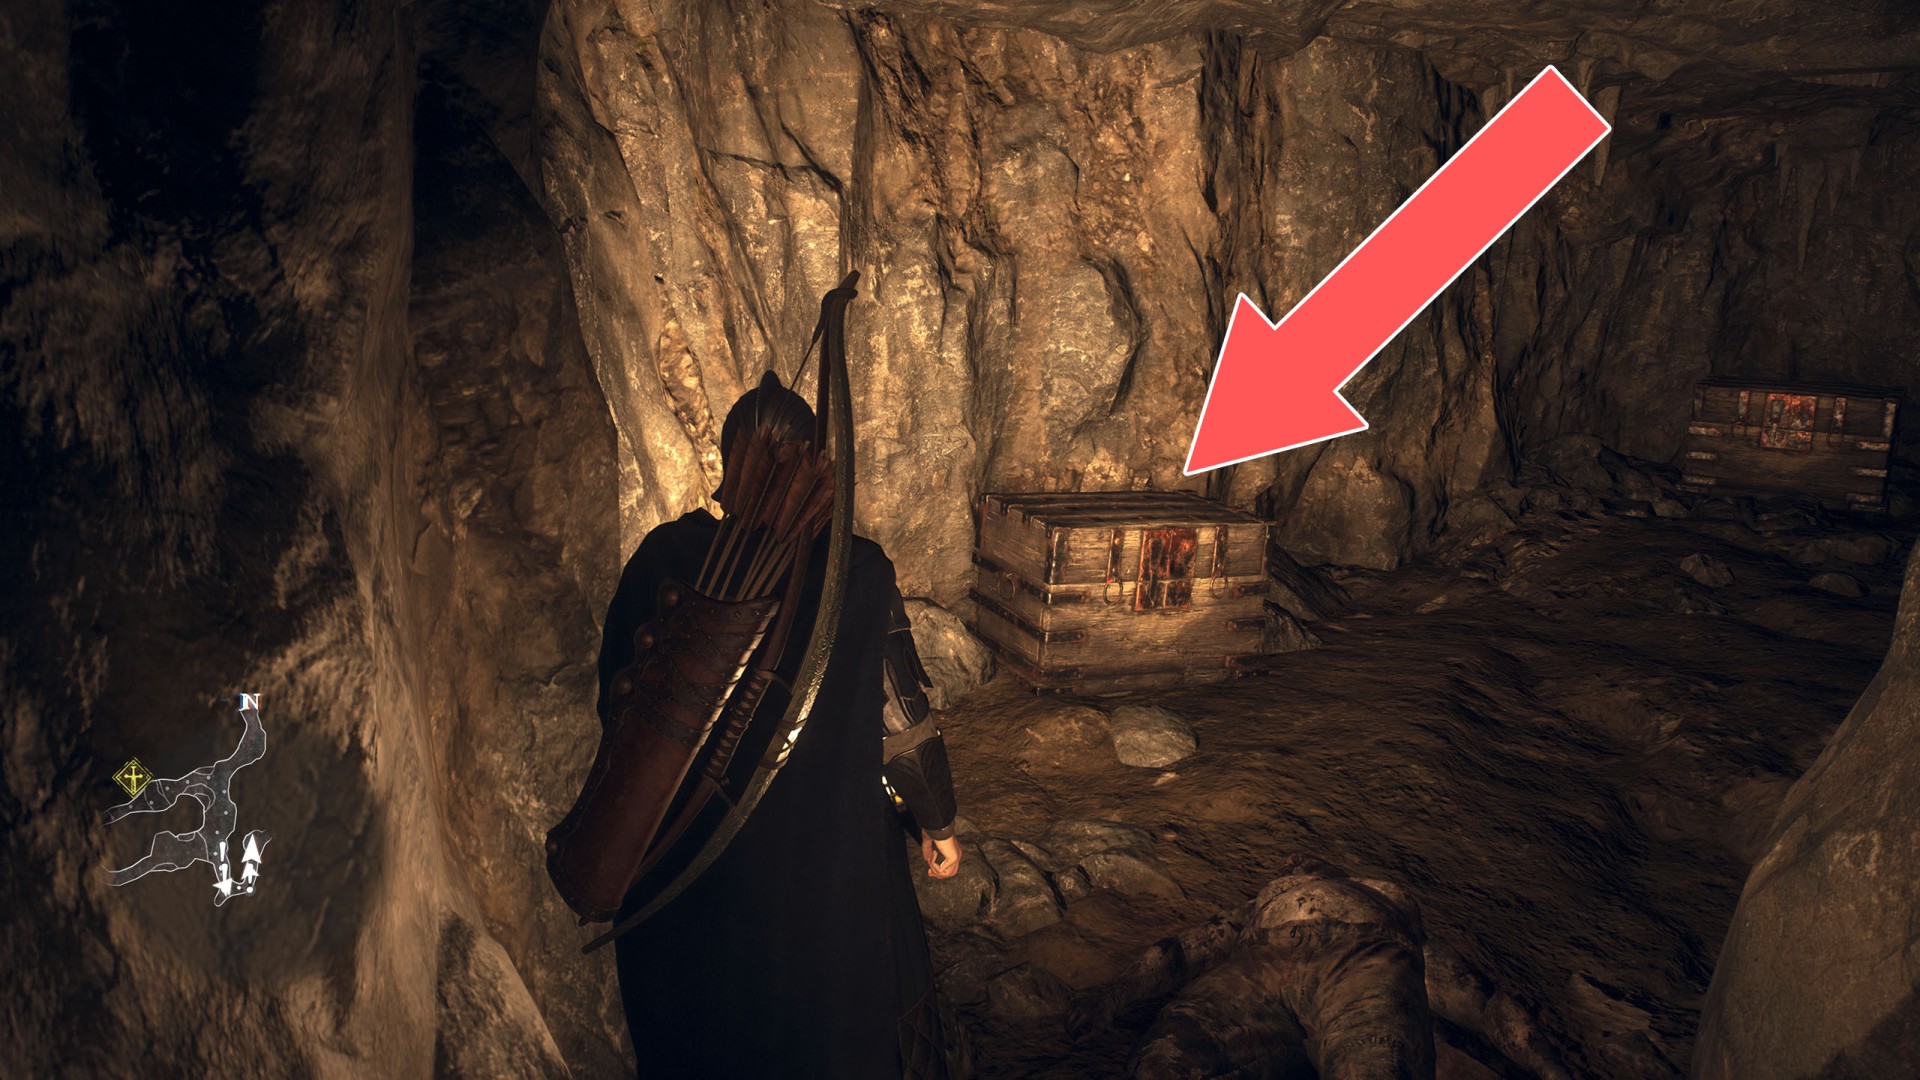
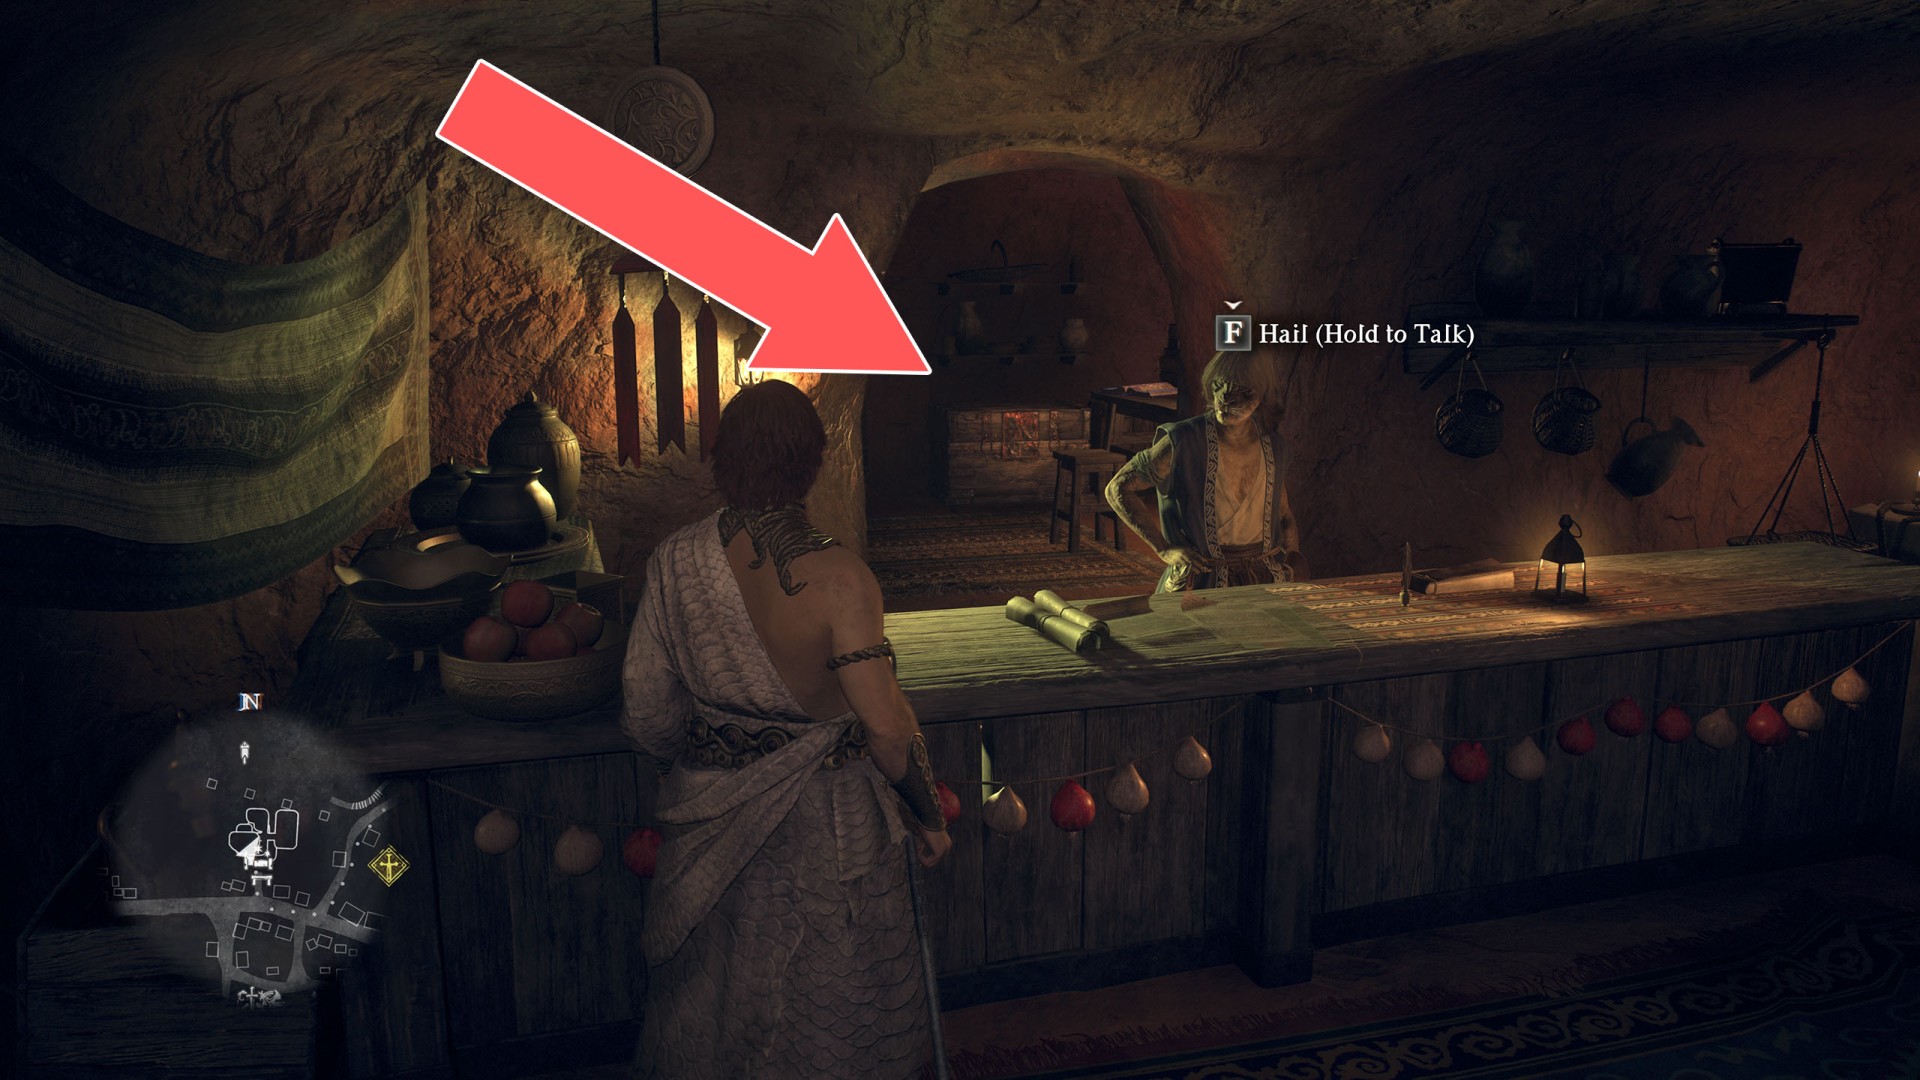
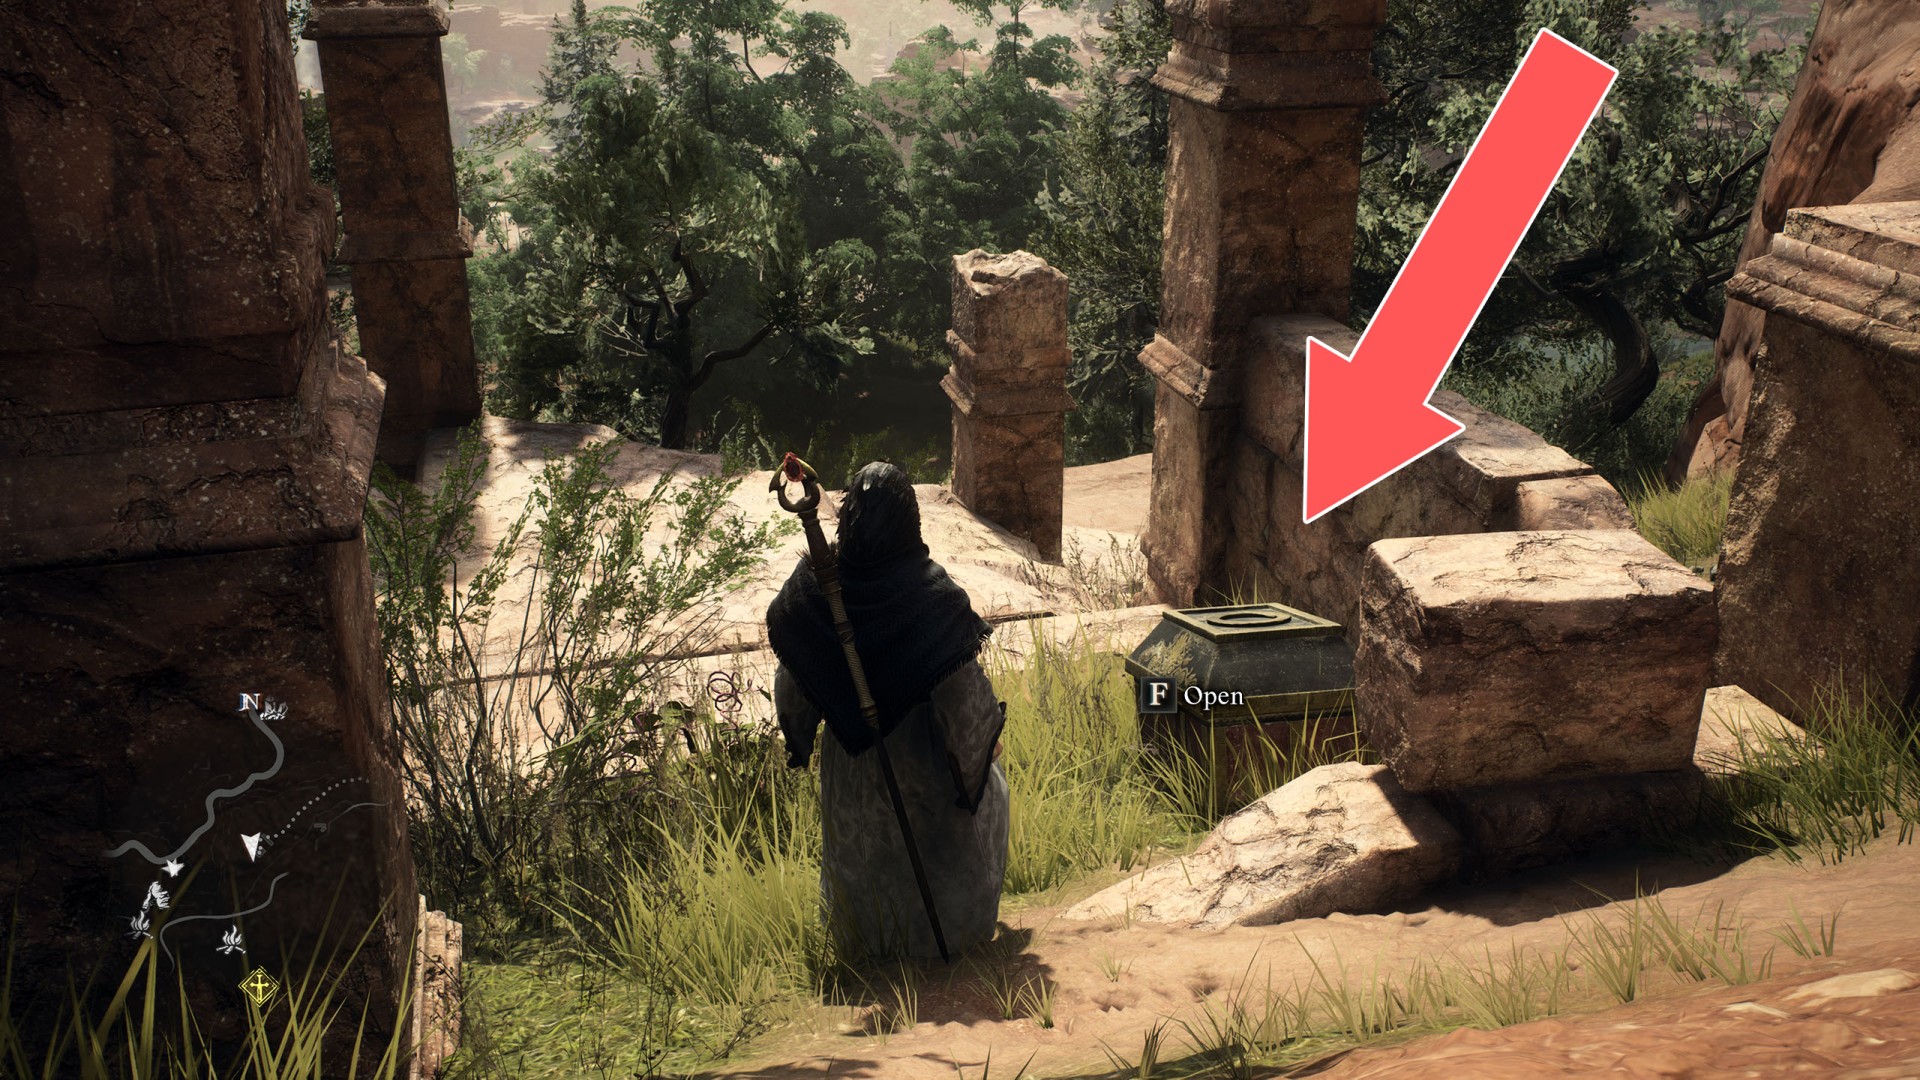
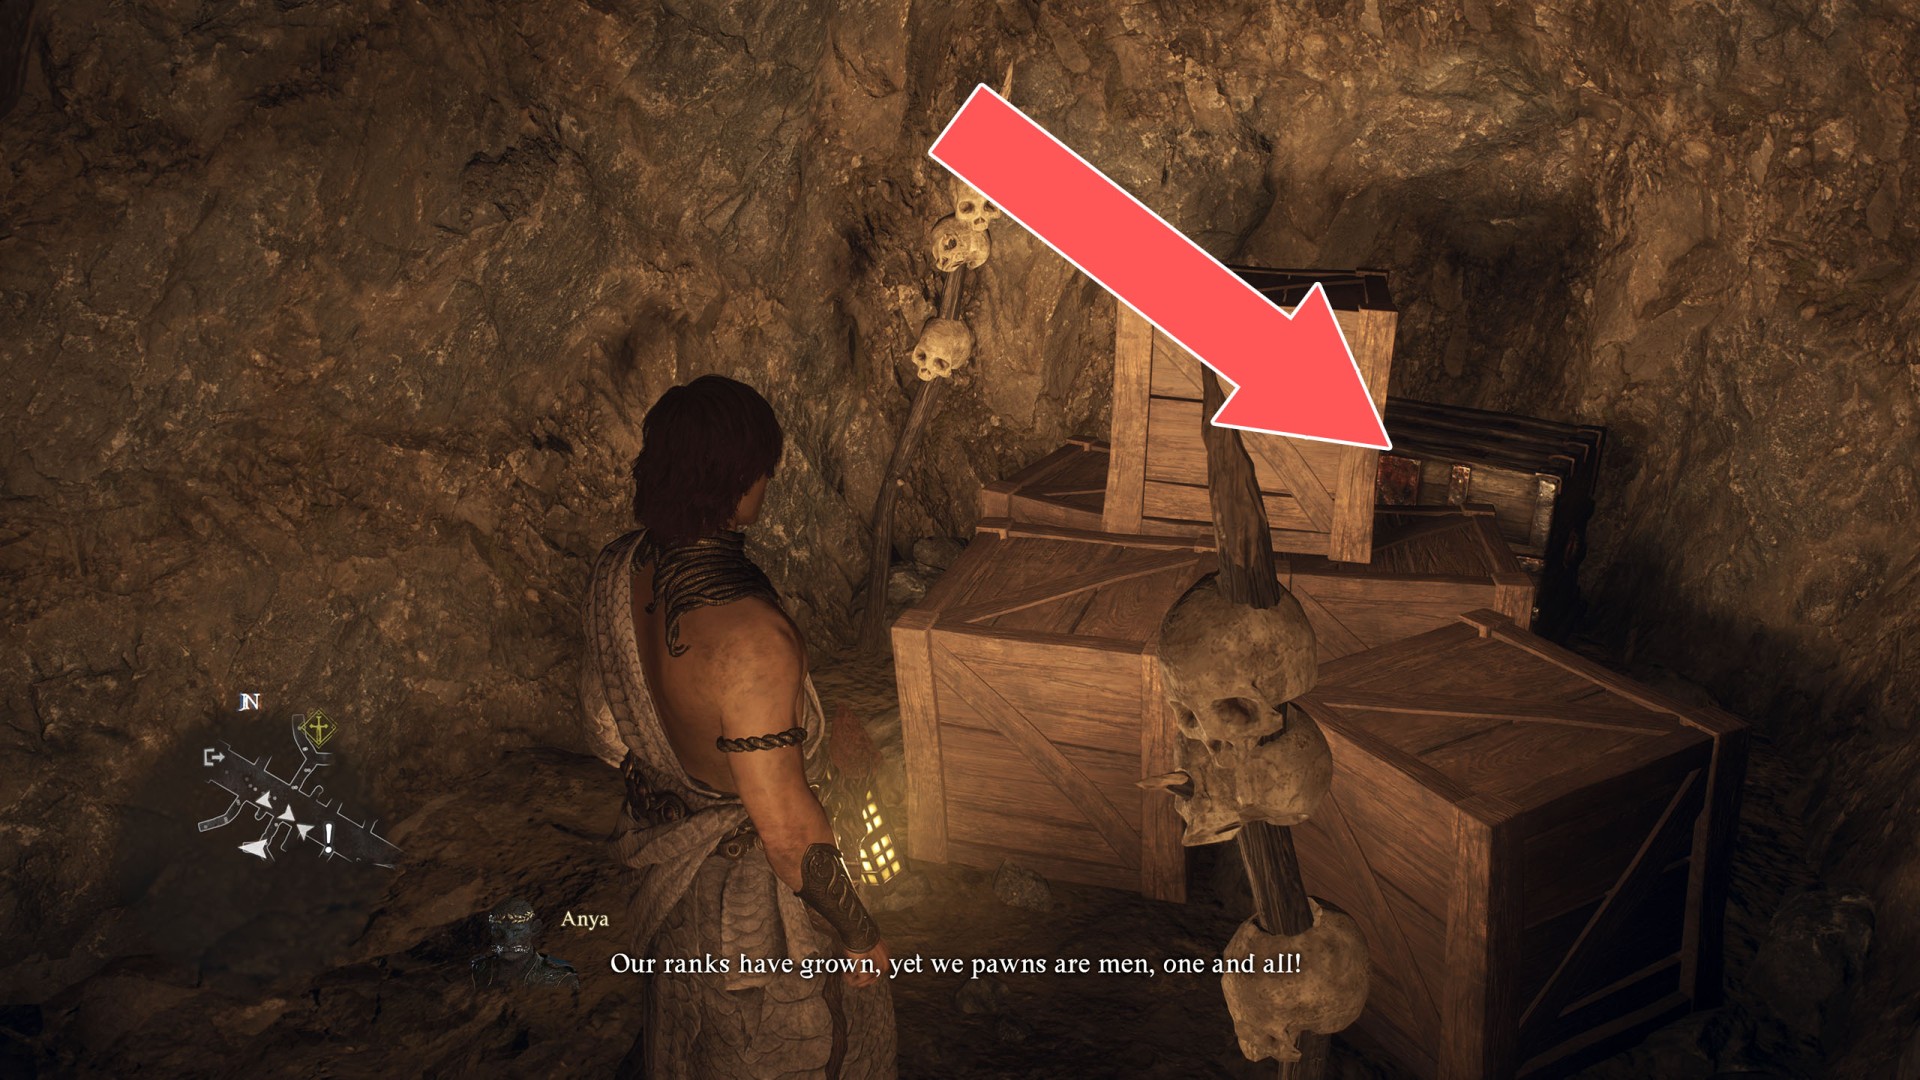
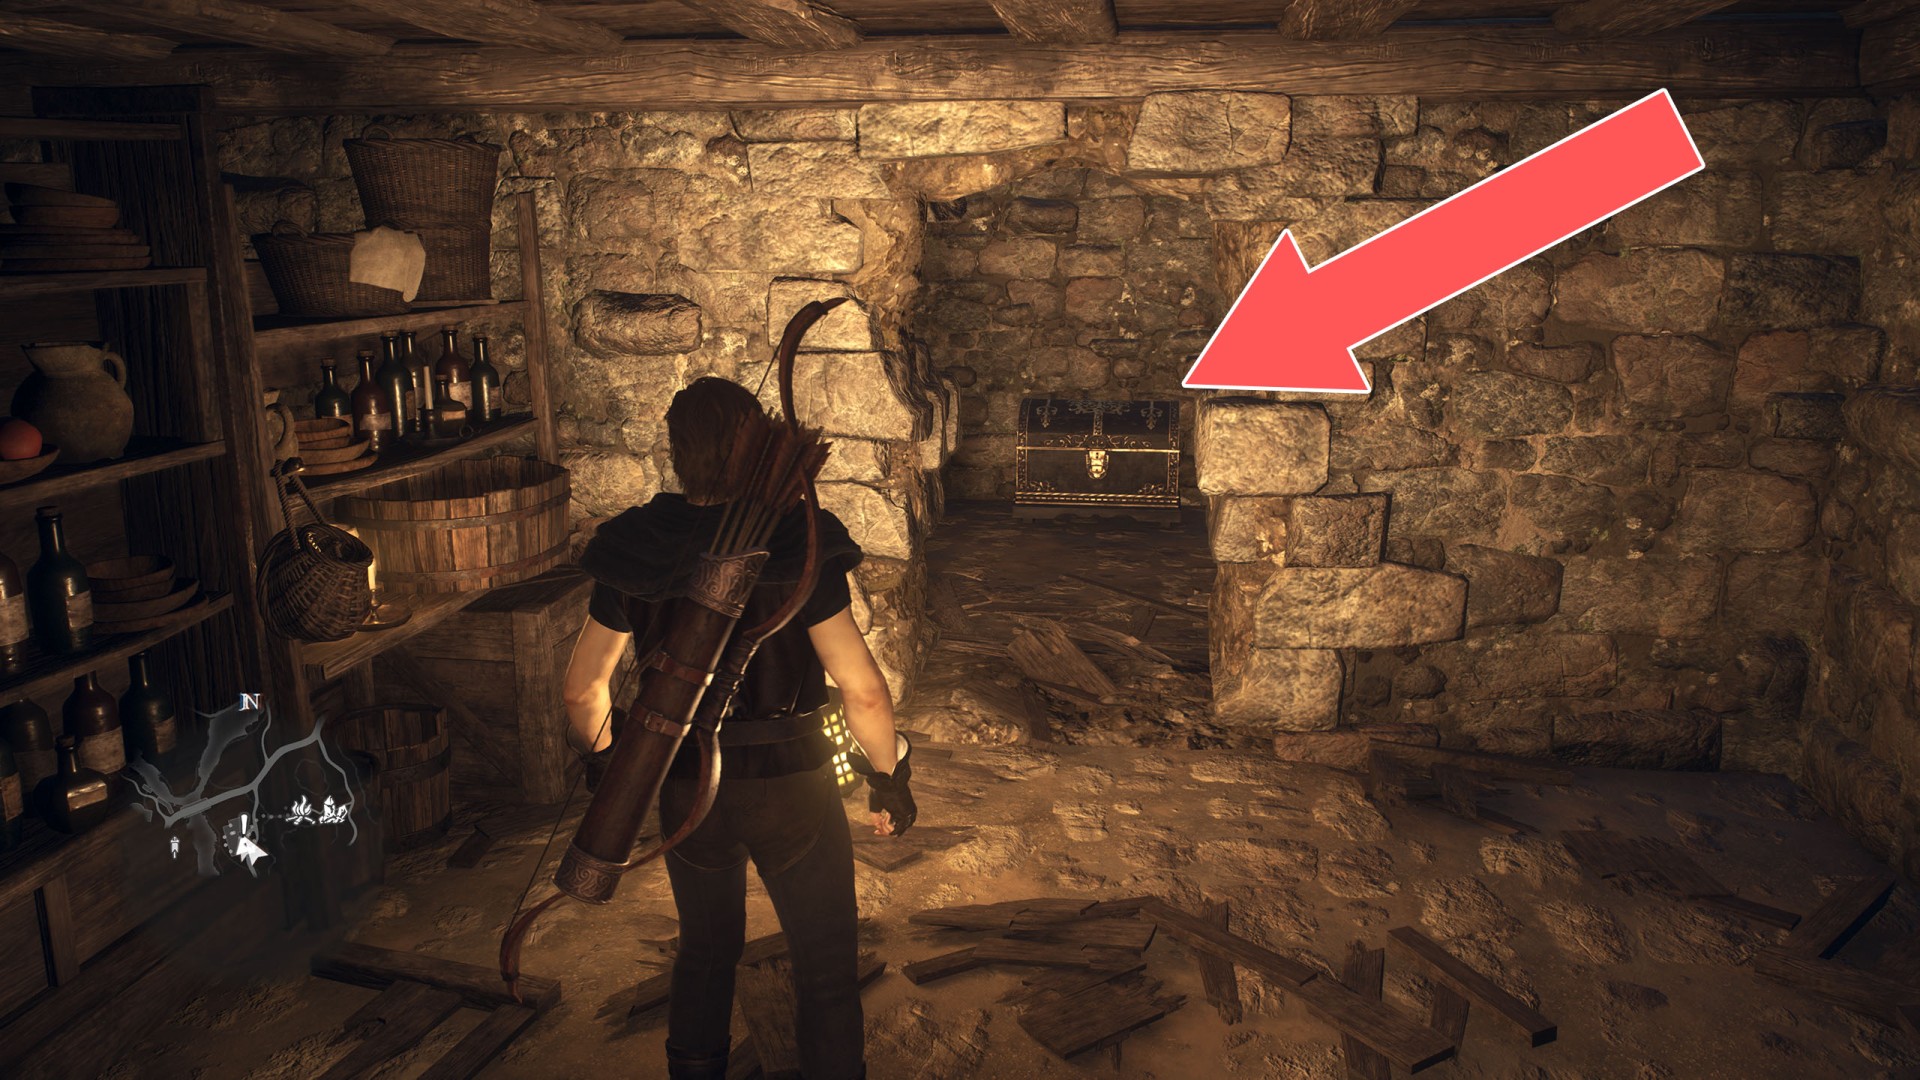
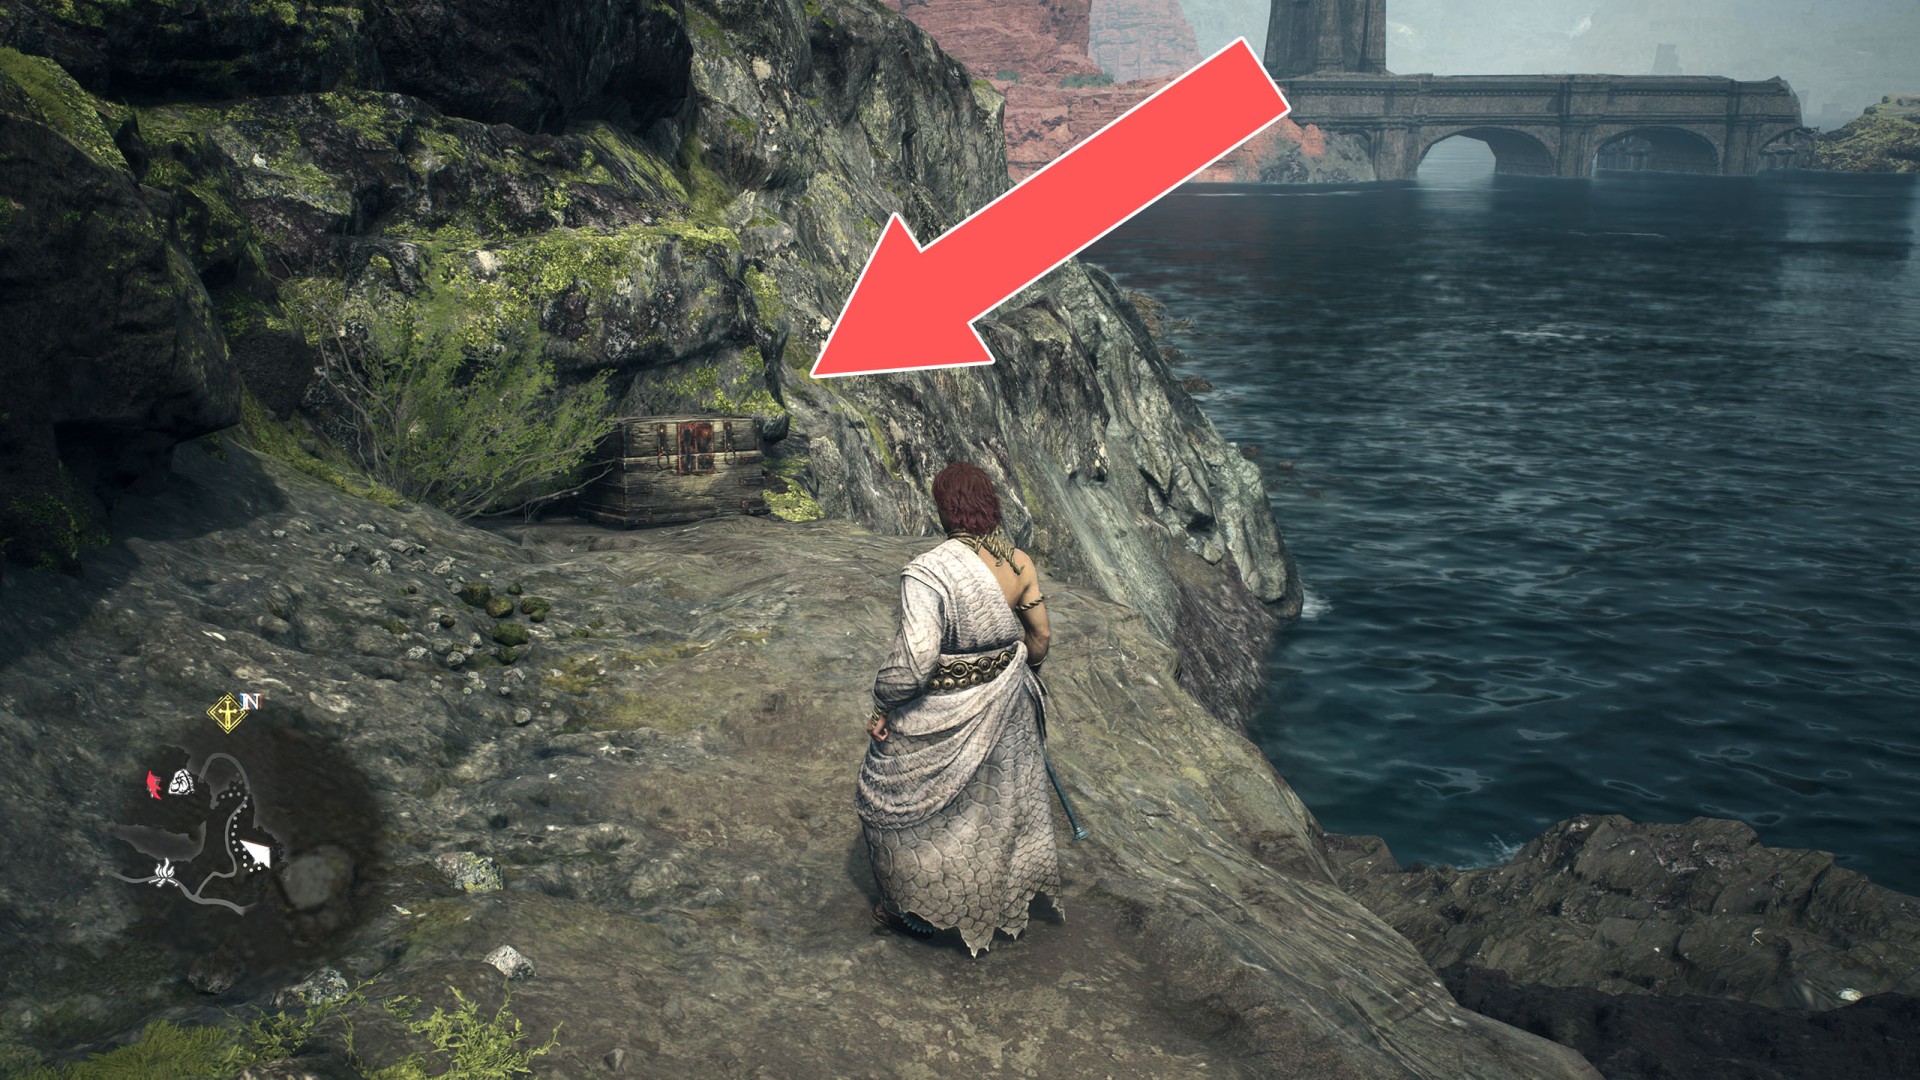
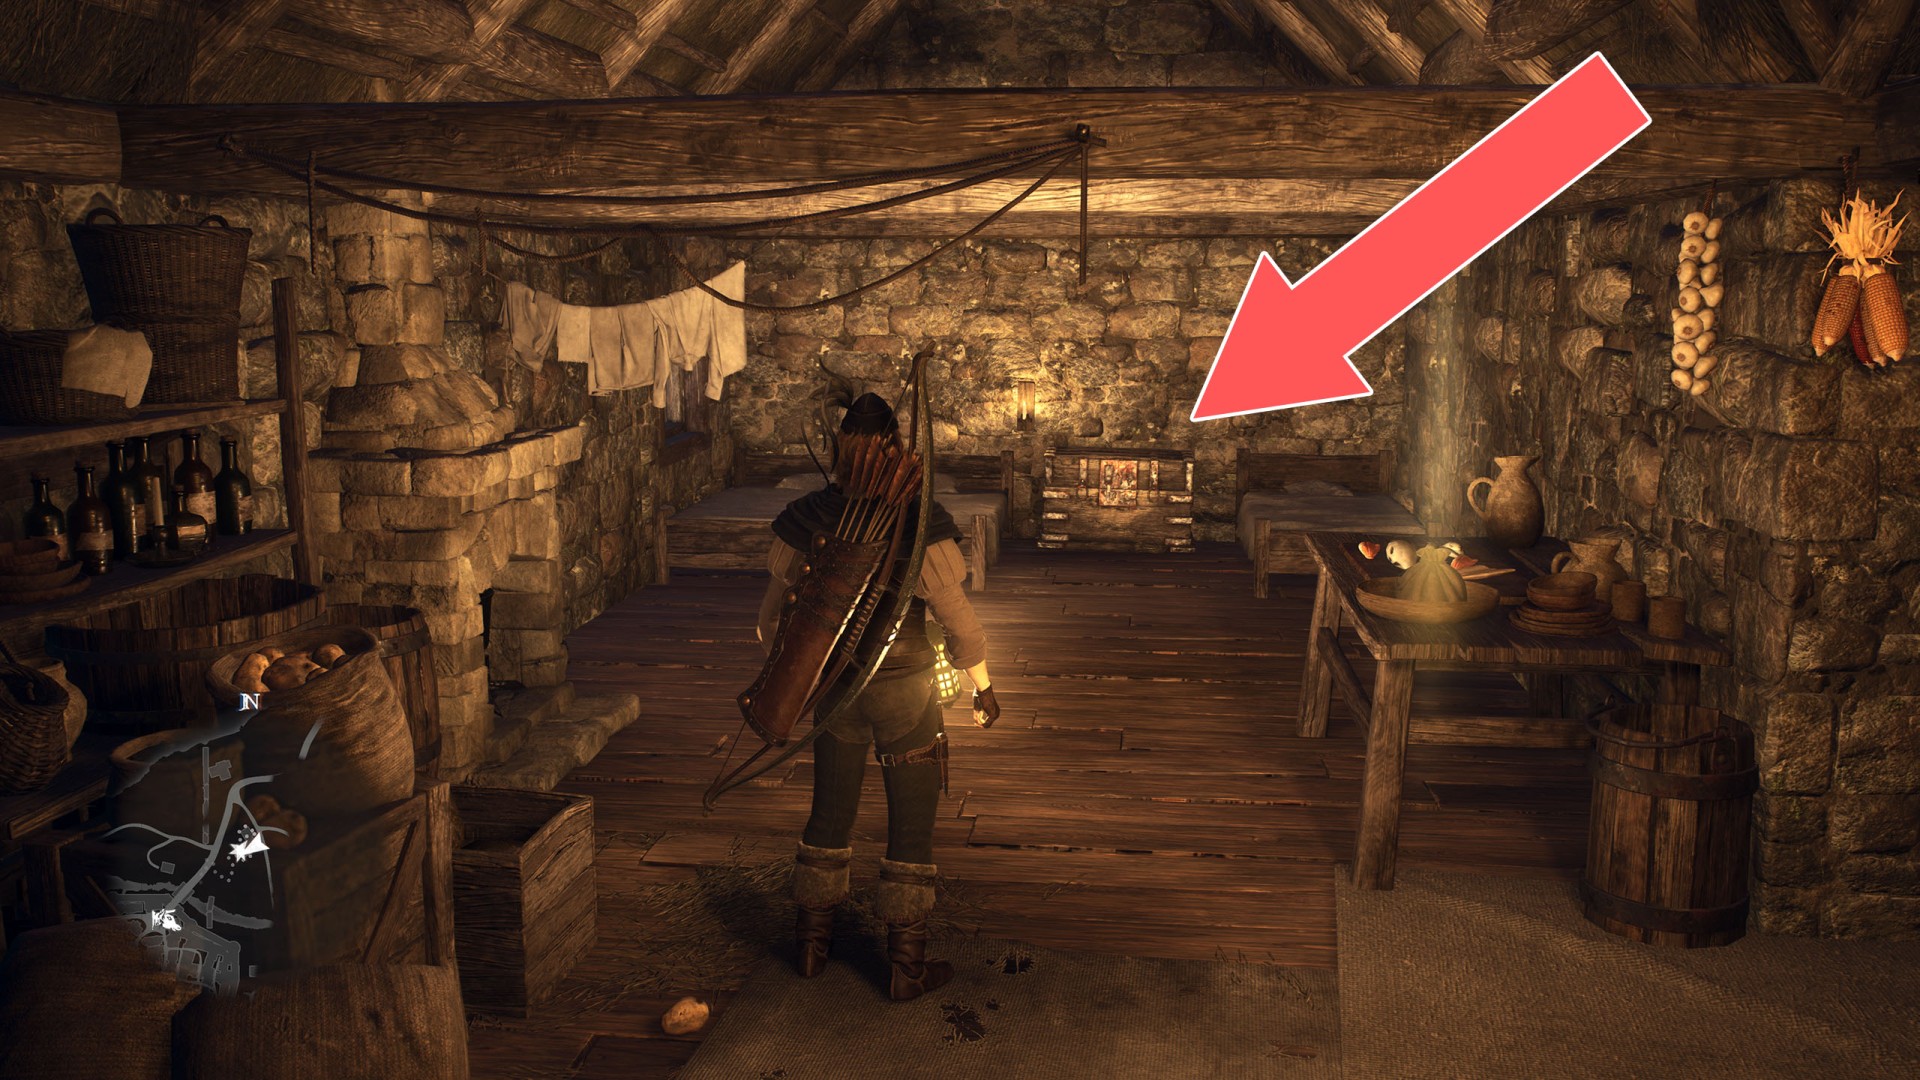
In the same basement as a Seeker's Token. The entrance is covered with crates.
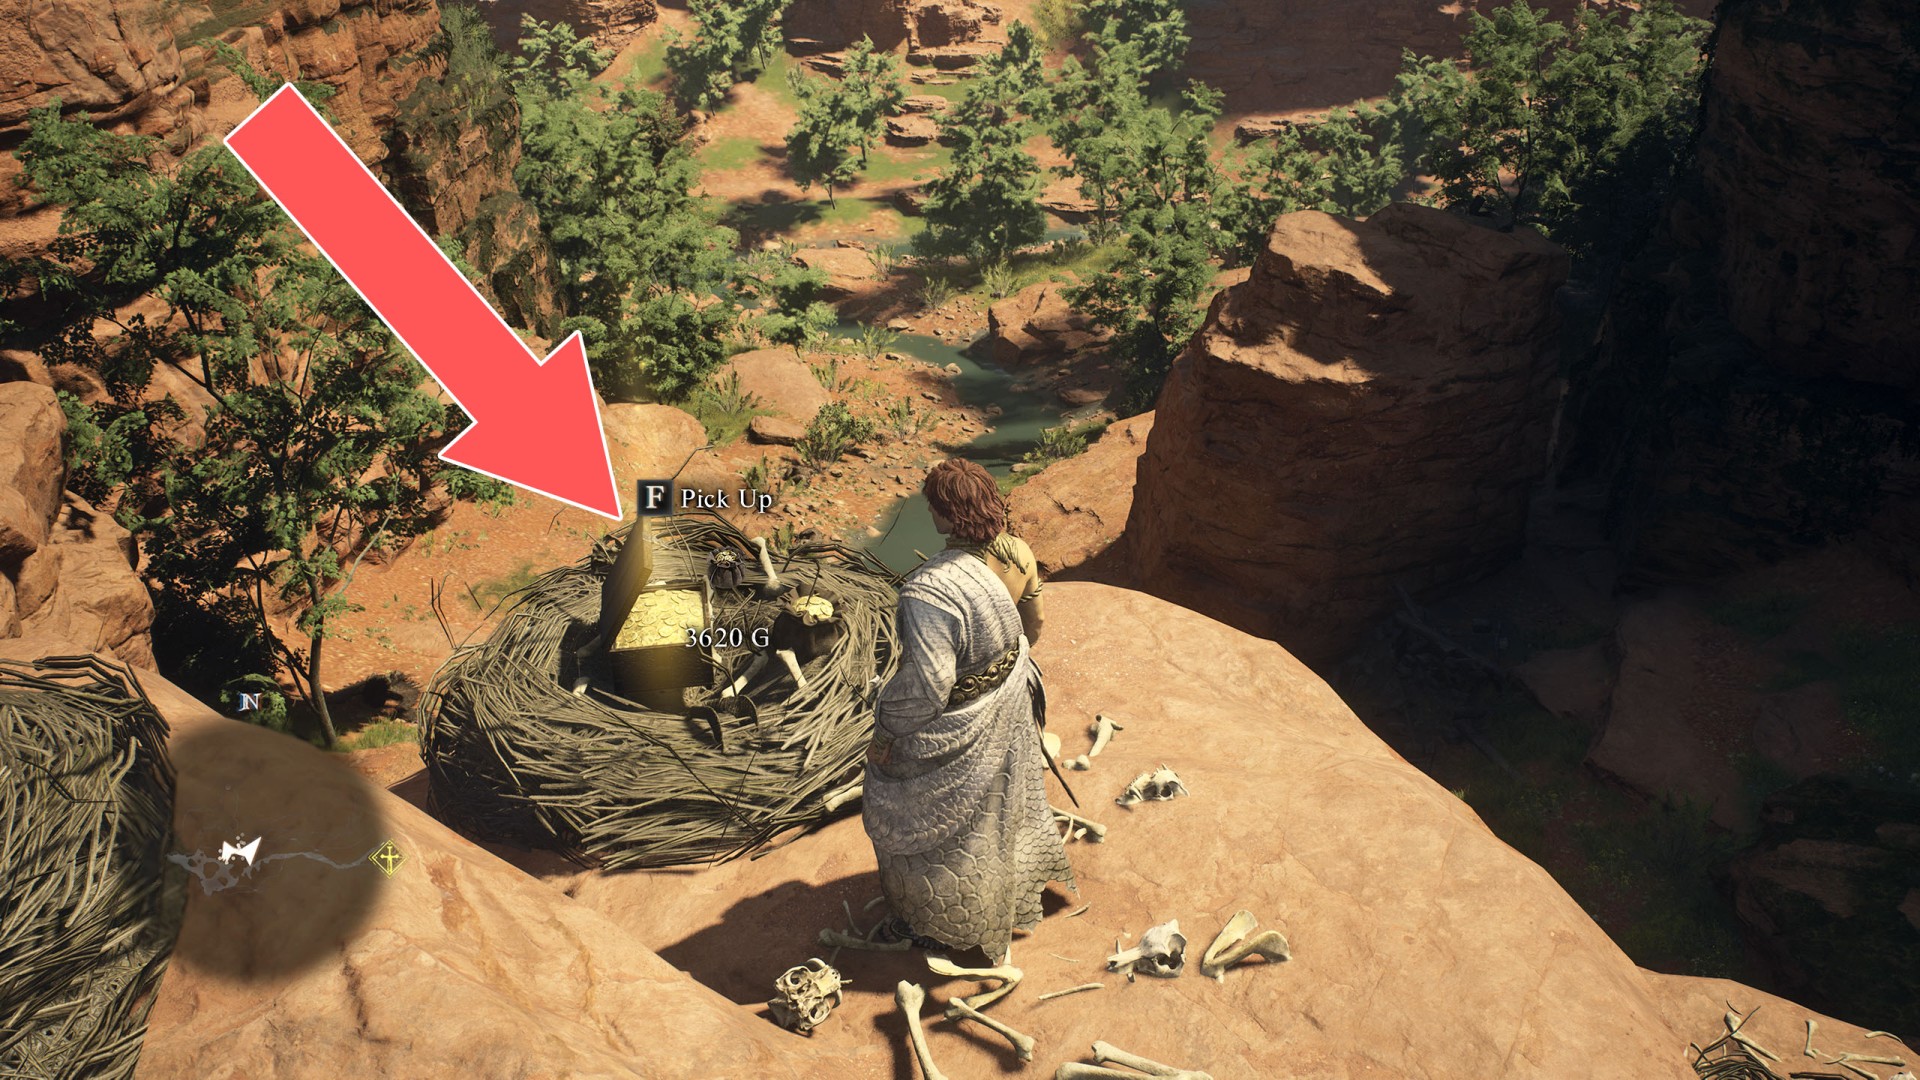
88Chest (3,620G)
89Chest (3,900G)
90Chest (4,100G)
91Chest (4,200G)
Show the map
92Chest (4,500G)
93Chest (4,510G)
94Chest (4,710G)
95Chest (4,710G)
96Chest (4,790G)
97Chest (4,790G)
98Chest (4,900G)
99Chest (4,930G)
100Chest (4,980G)
101Chest (400G)
102Chest (400G)
103Chest (420G)
104Chest (5,000G)
105Chest (5,020G)
106Chest (5,130G)
Show the map
107Chest (5,260G)
108Chest (5,520G)

109Chest (5,920G)
110Chest (500G)
111Chest (500G)
112Chest (500G)
113Chest (500G)
114Chest (540G)
115Chest (6,120G)
116Chest (6,140G)

117Chest (6,900G)
118Chest (7,360G)
119Chest (710G)
120Chest (750G)
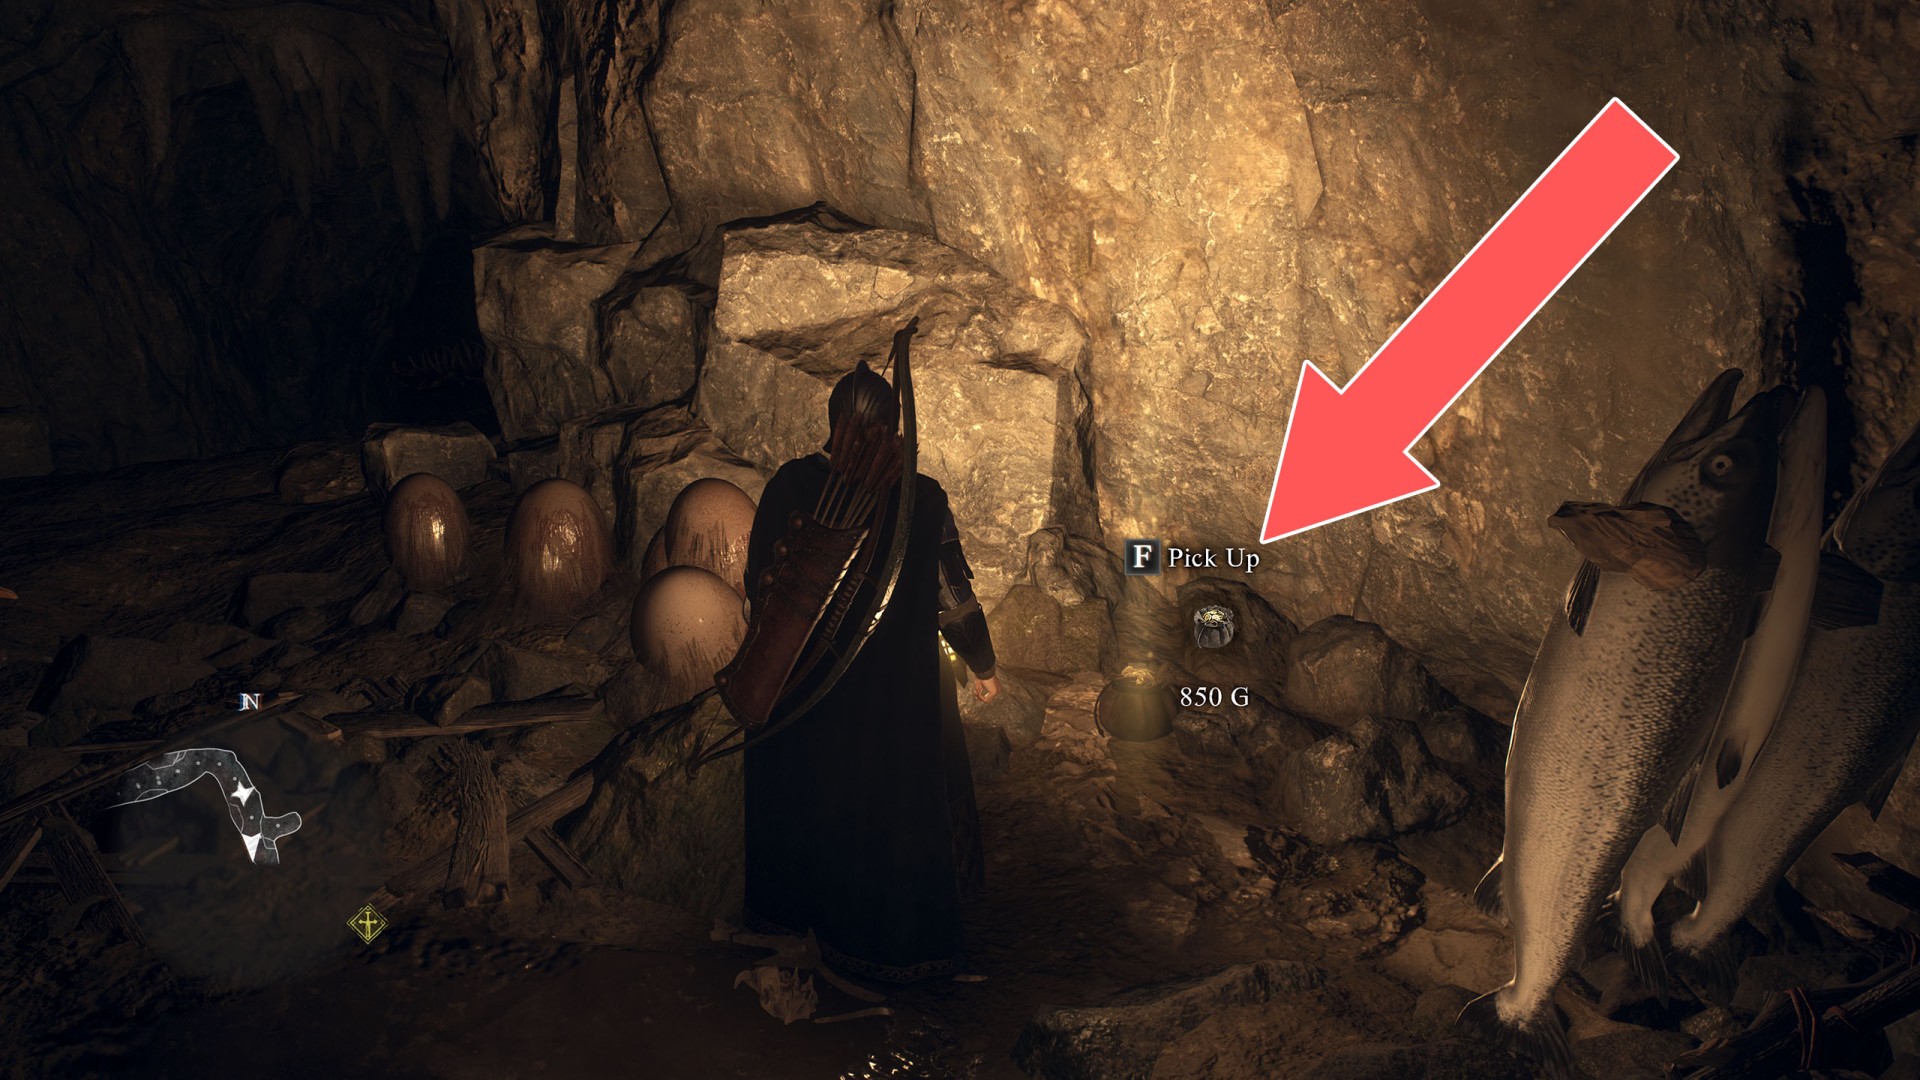
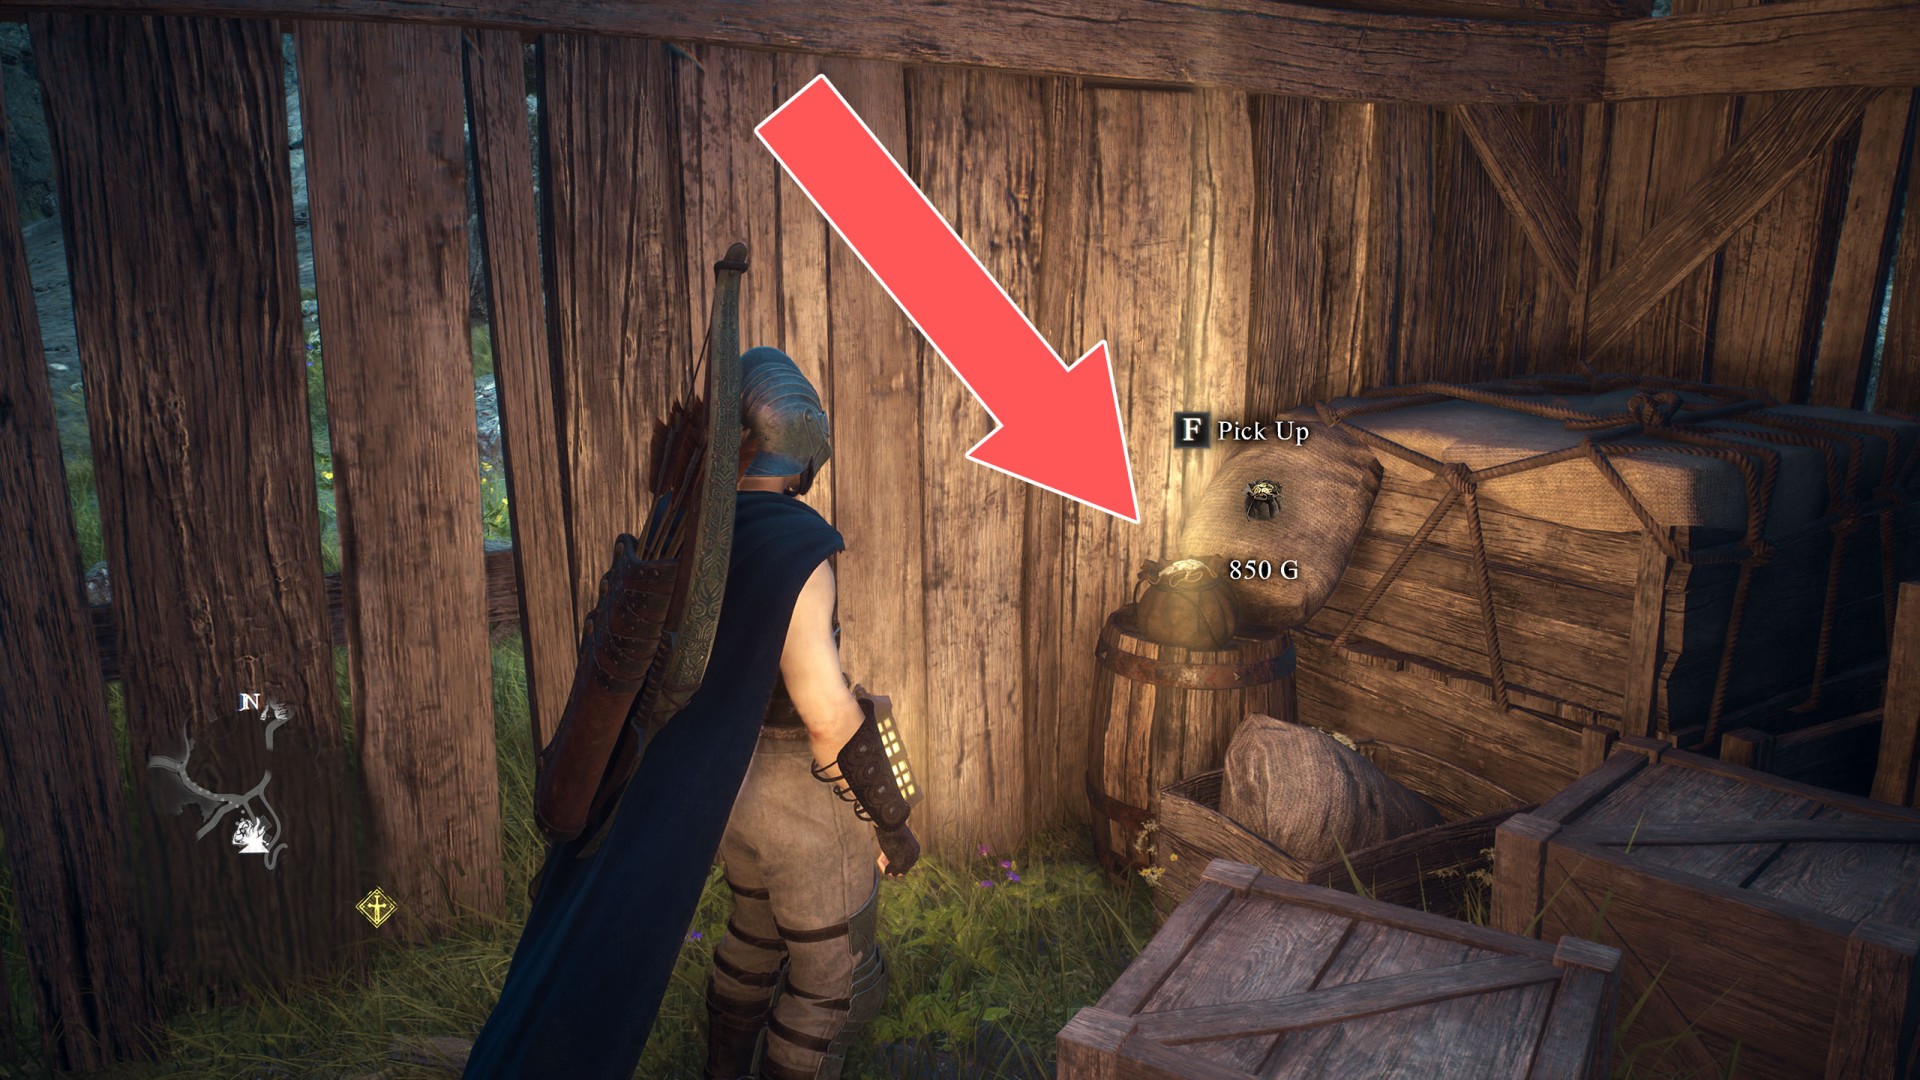
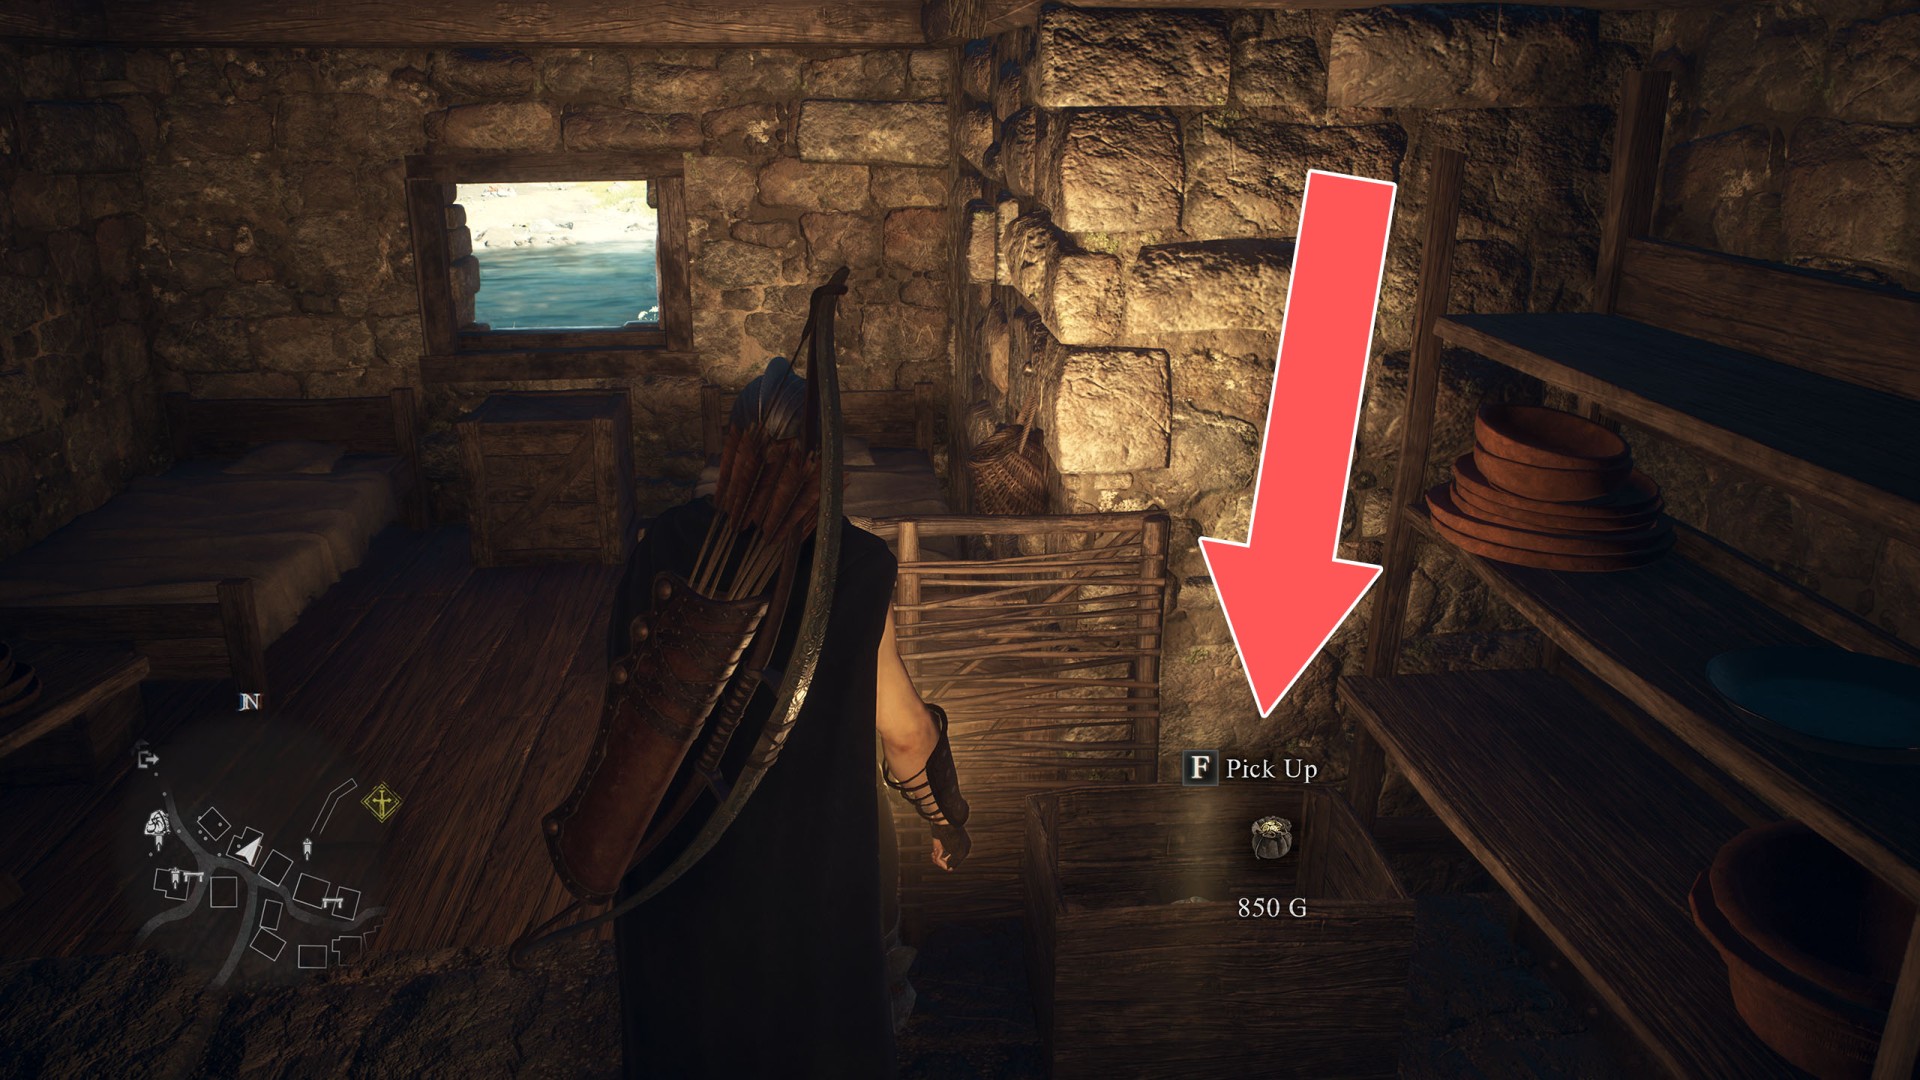
121Chest (850G)
122Chest (850G)
123Chest (900G)
124Chest (930G)

125Chest (950G)
126Chest (980G)
127Chest (990G)
128Pouch (1,060G)
Show the map
129Pouch (1,110G)
Show the map
130Pouch (1,130G)
Show the map
131Pouch (1,200G)
132Pouch (1,200G)
133Pouch (1,200G)
134Pouch (1,200G)
Show the map
135Pouch (1,300G)
Show the map
136Pouch (1,350G)
137Pouch (1,365G)
Show the map
138Pouch (1,400G)
139Pouch (1,500G)
140Pouch (1,500G)
141Pouch (1,500G)
Show the map
142Pouch (1,500G)
143Pouch (1,550G)
144Pouch (1,550G)
Show the map
145Pouch (1,700G)
146Pouch (1,720G)
Show the map
147Pouch (1,730G)
Show the map
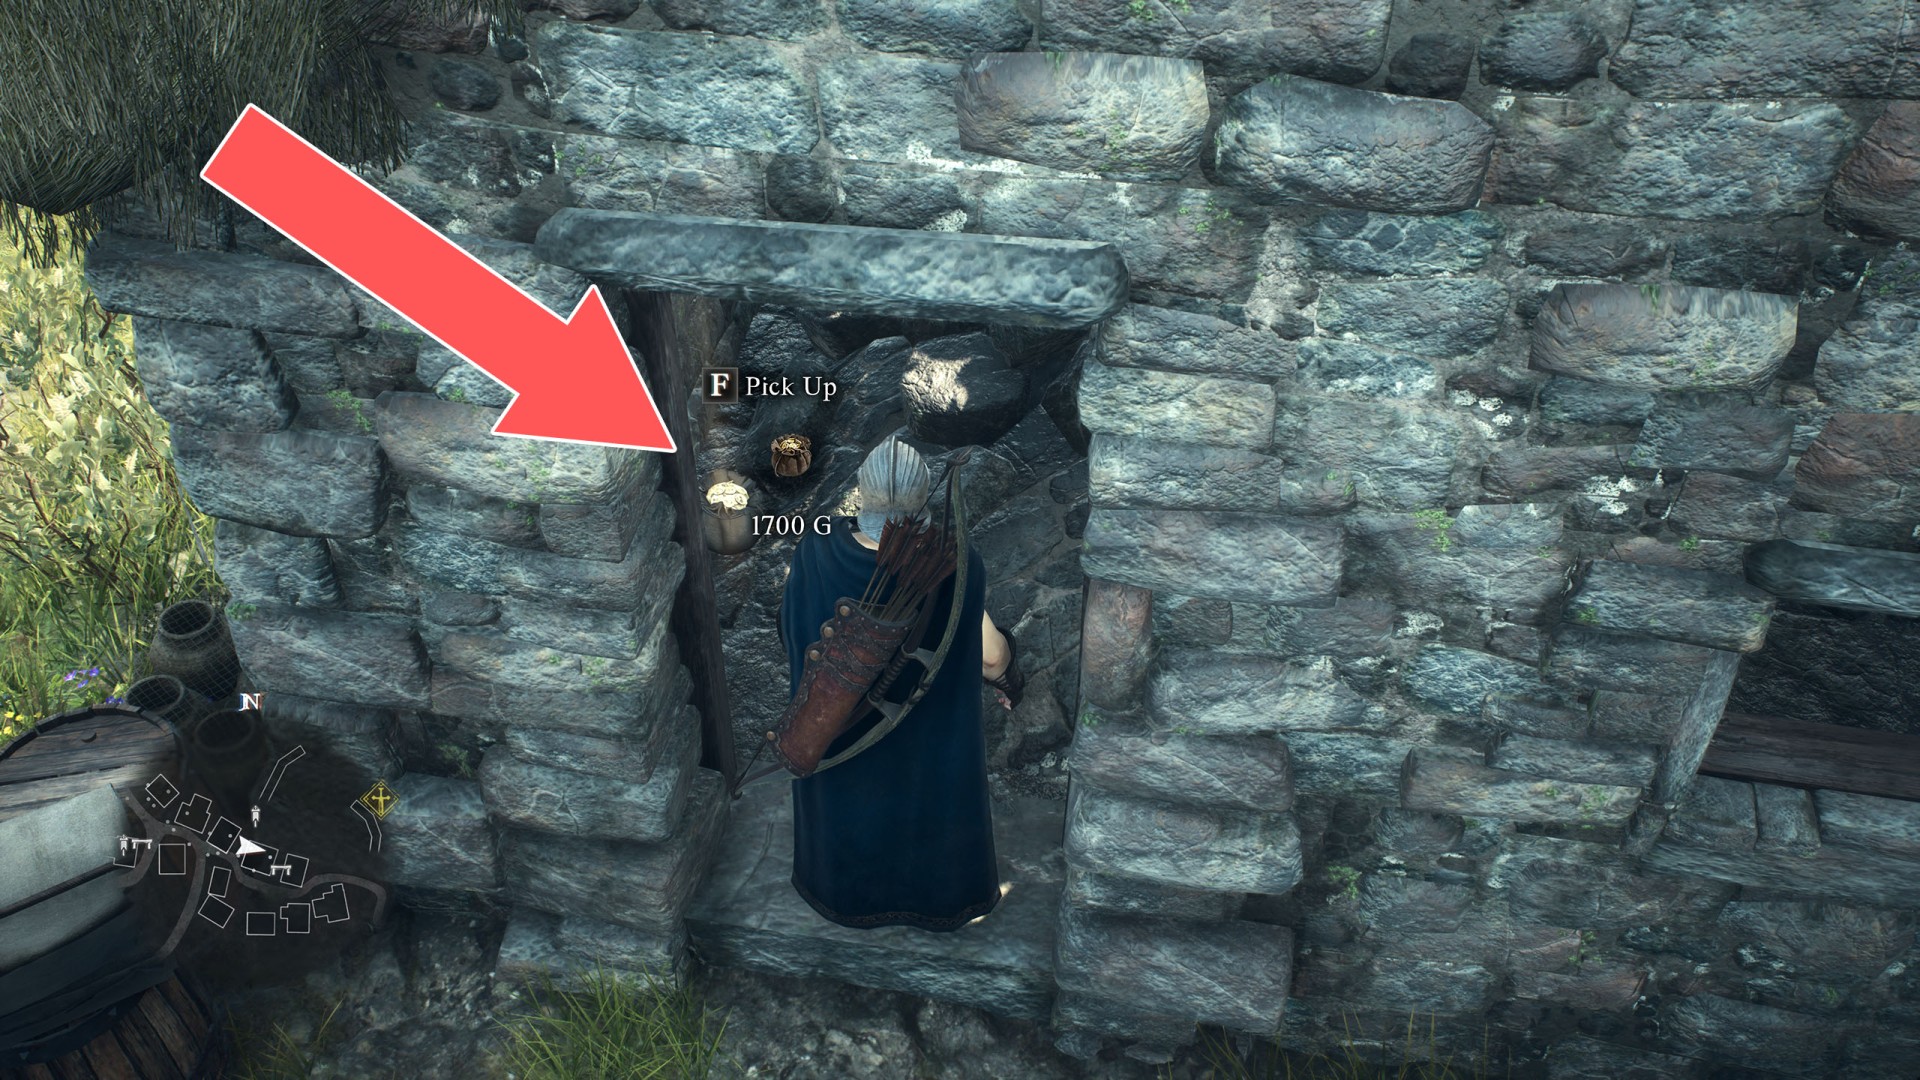
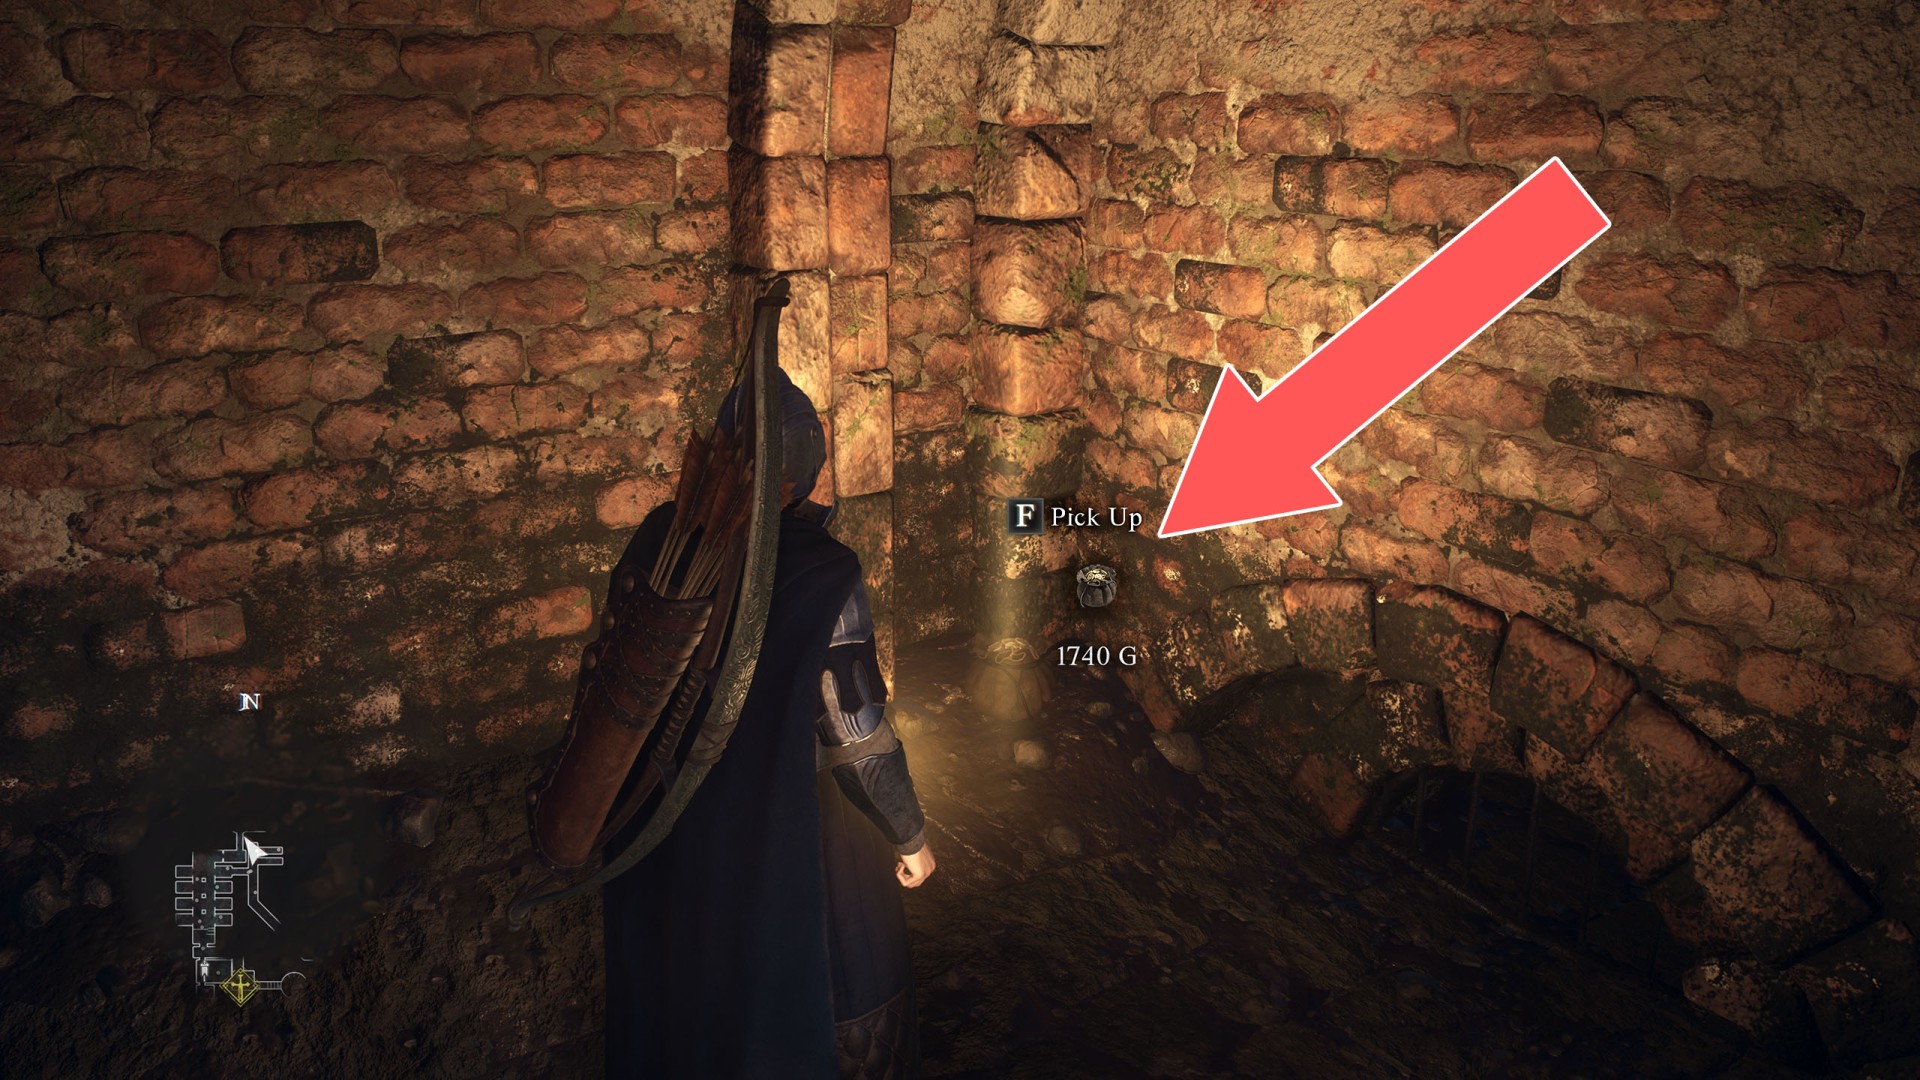
148Pouch (1,740G)
149Pouch (1,800G)
Show the map
150Pouch (2,000G)
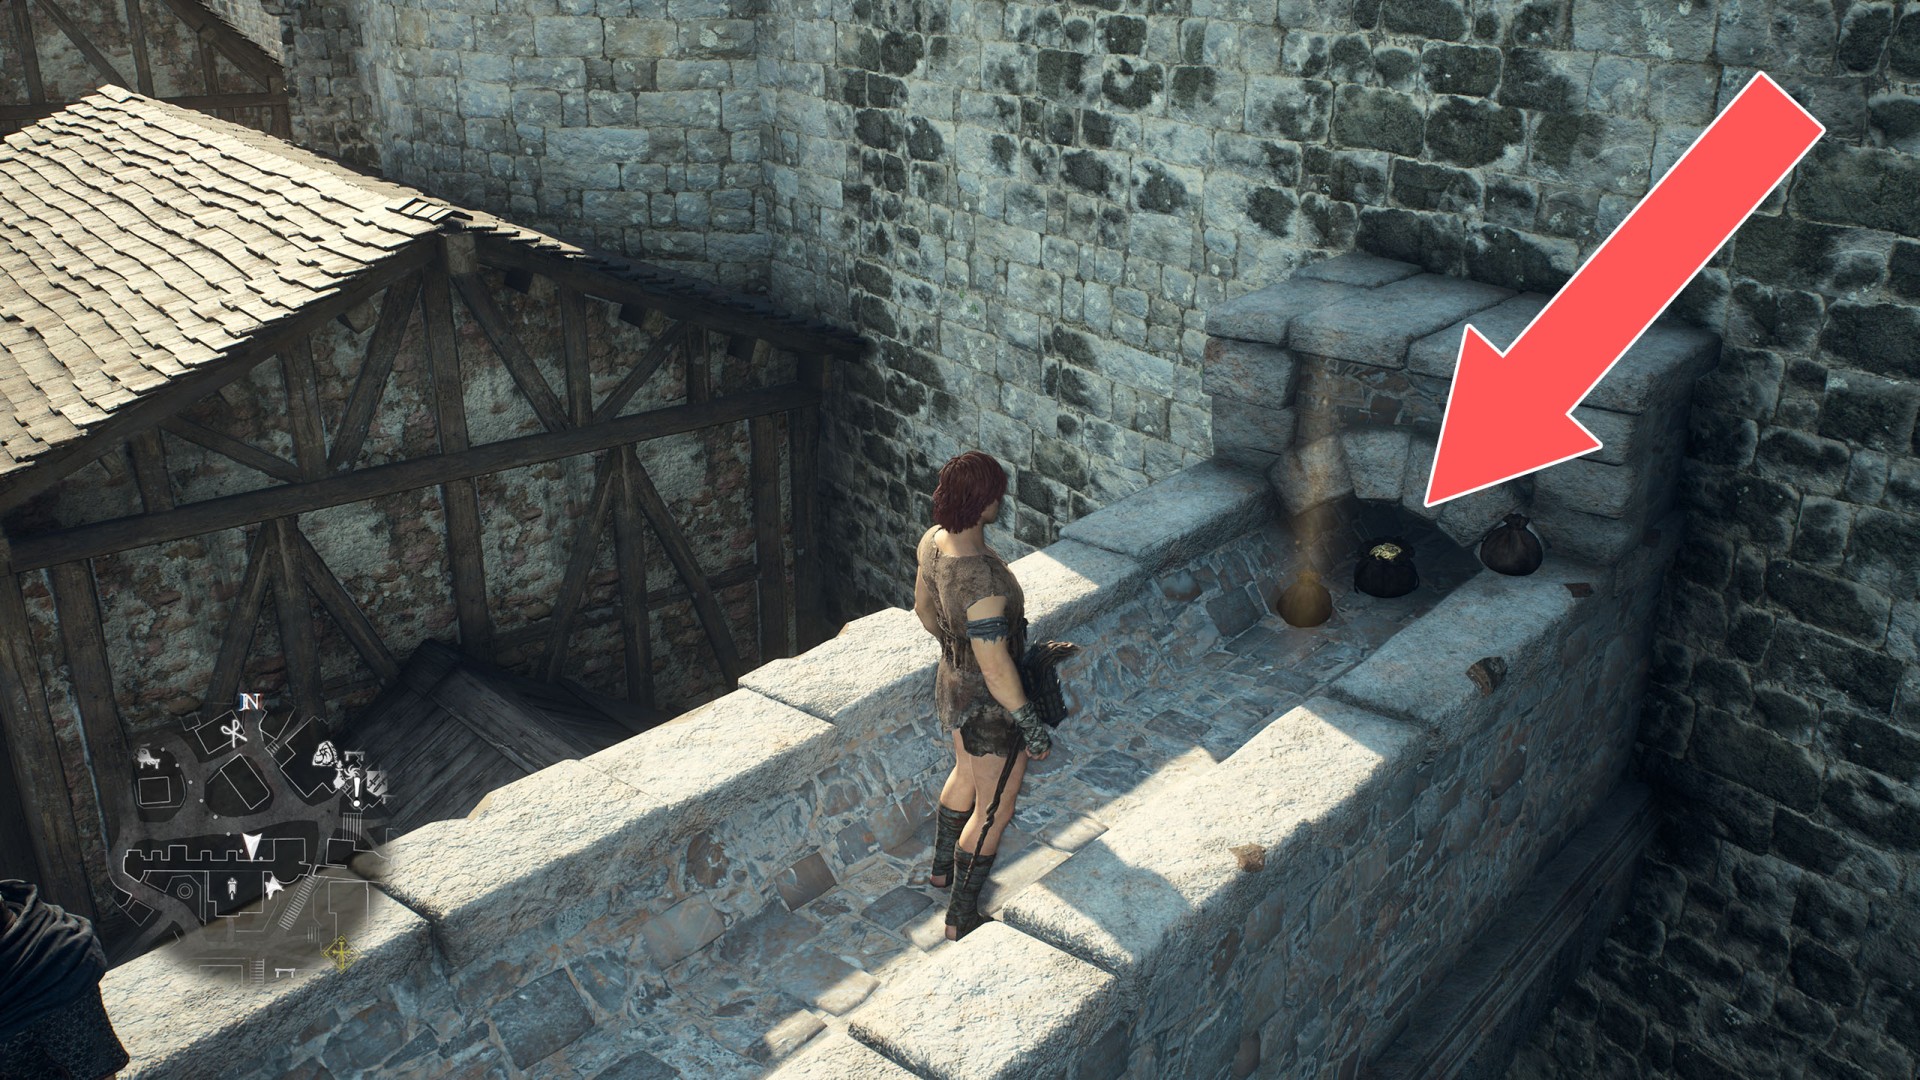
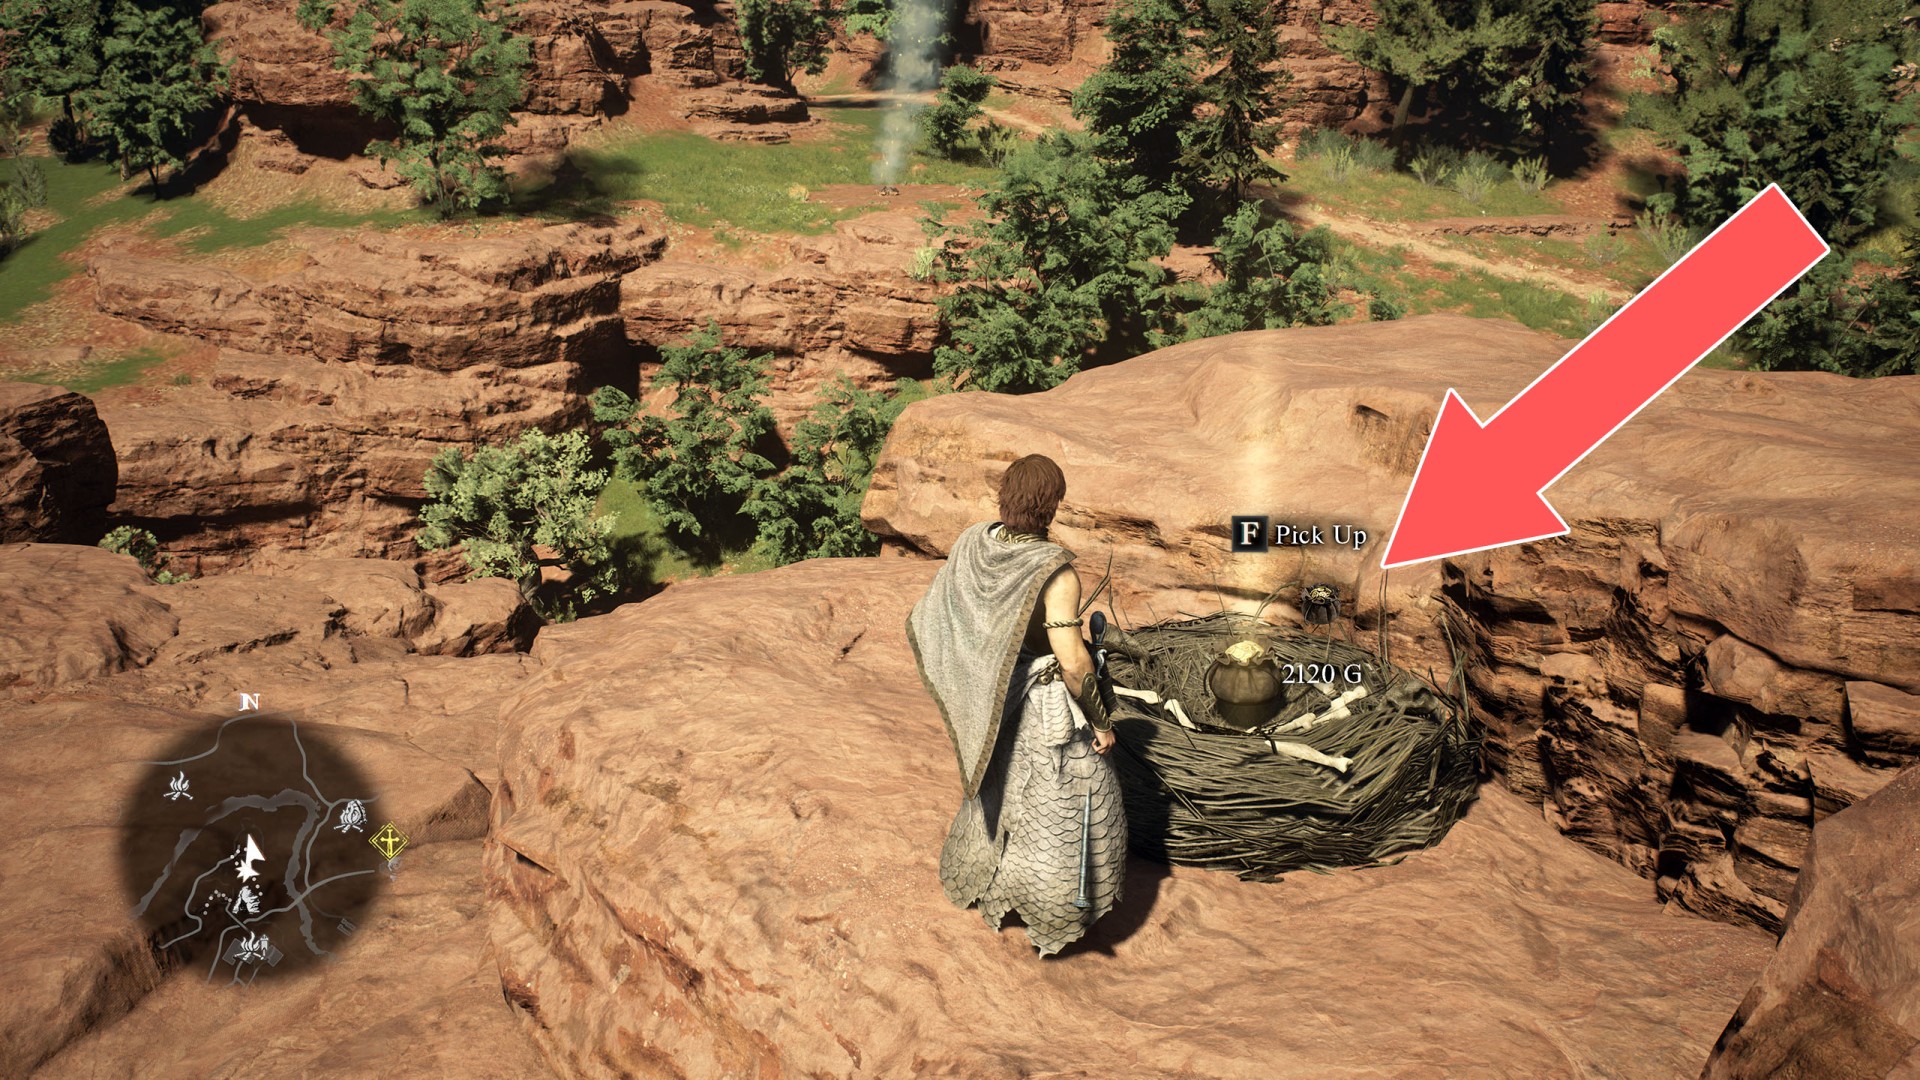
151Pouch (2,120G)
152Pouch (2,200G)
Show the map
153Pouch (2,400G)
154Pouch (2,500G)
Show the map
155Pouch (2,700G)
Show the map
156Pouch (2,950G)
Show the map
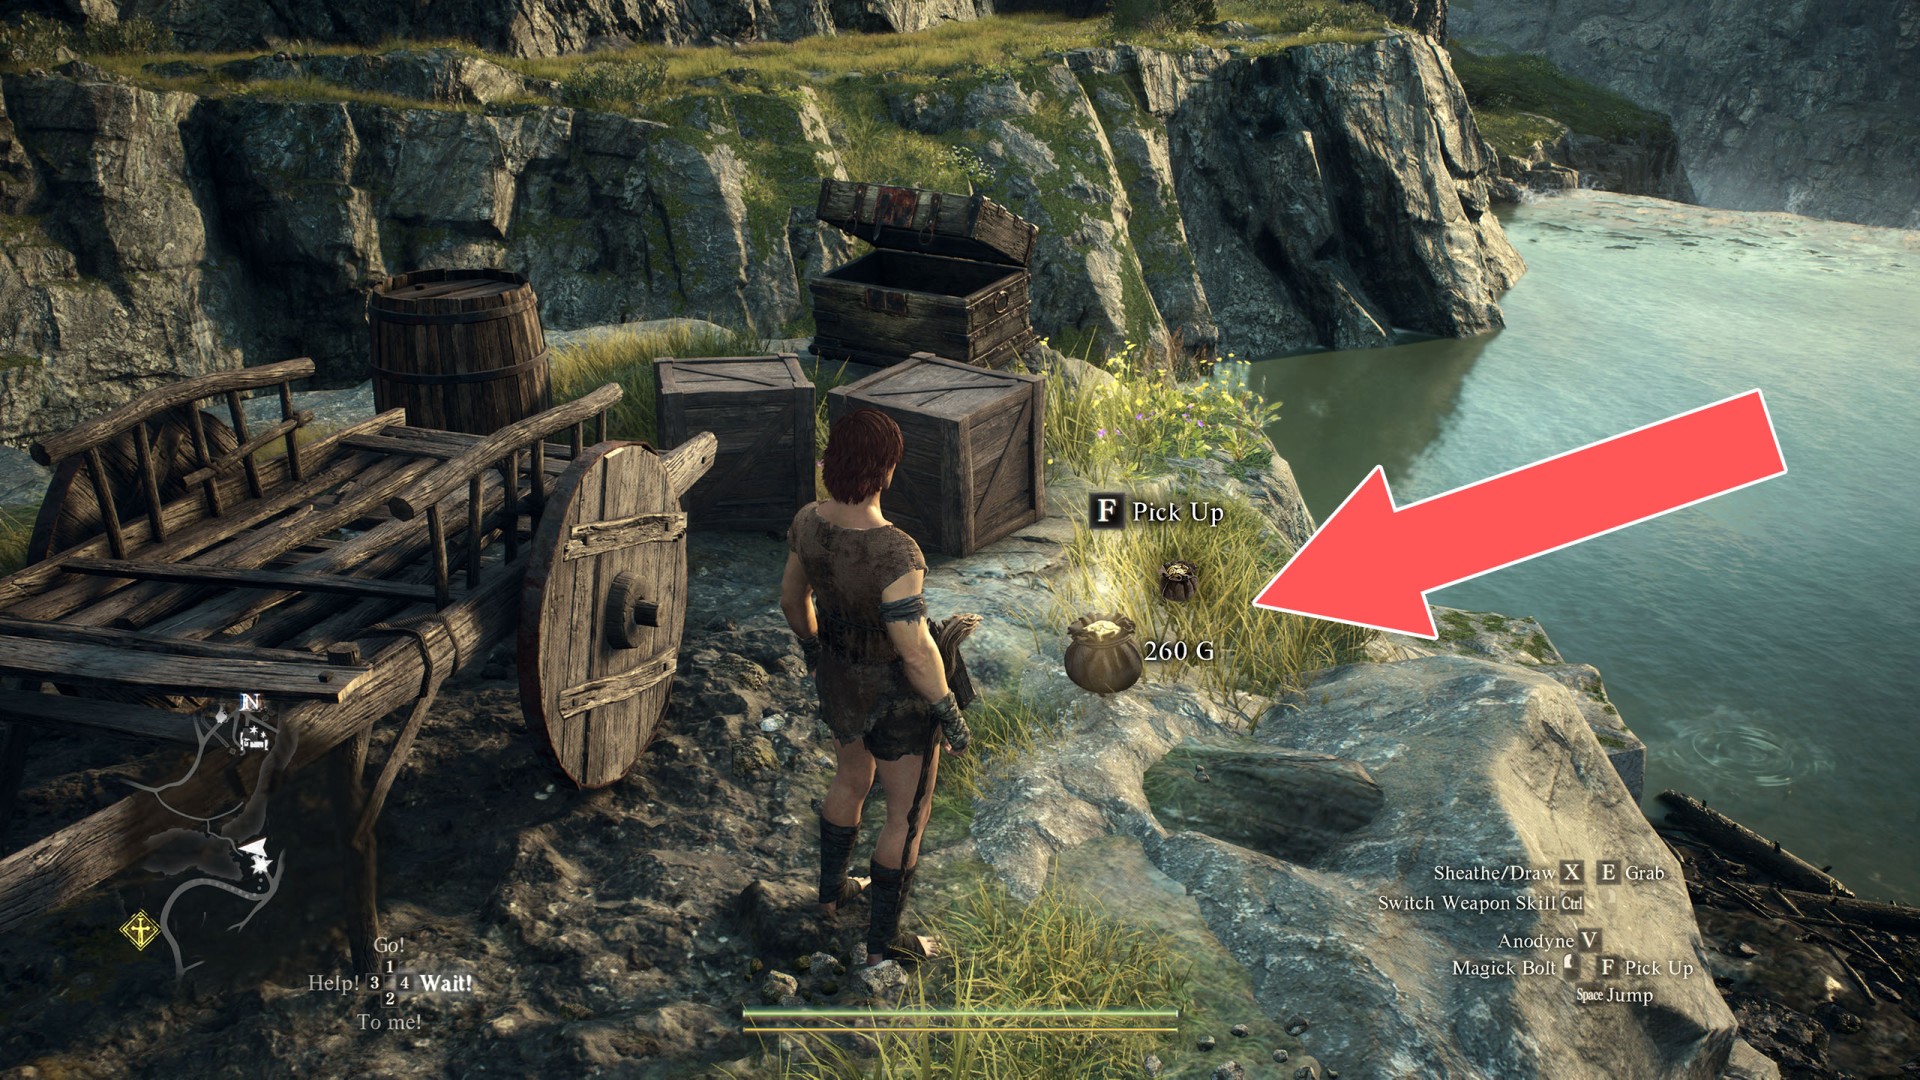
157Pouch (260G)
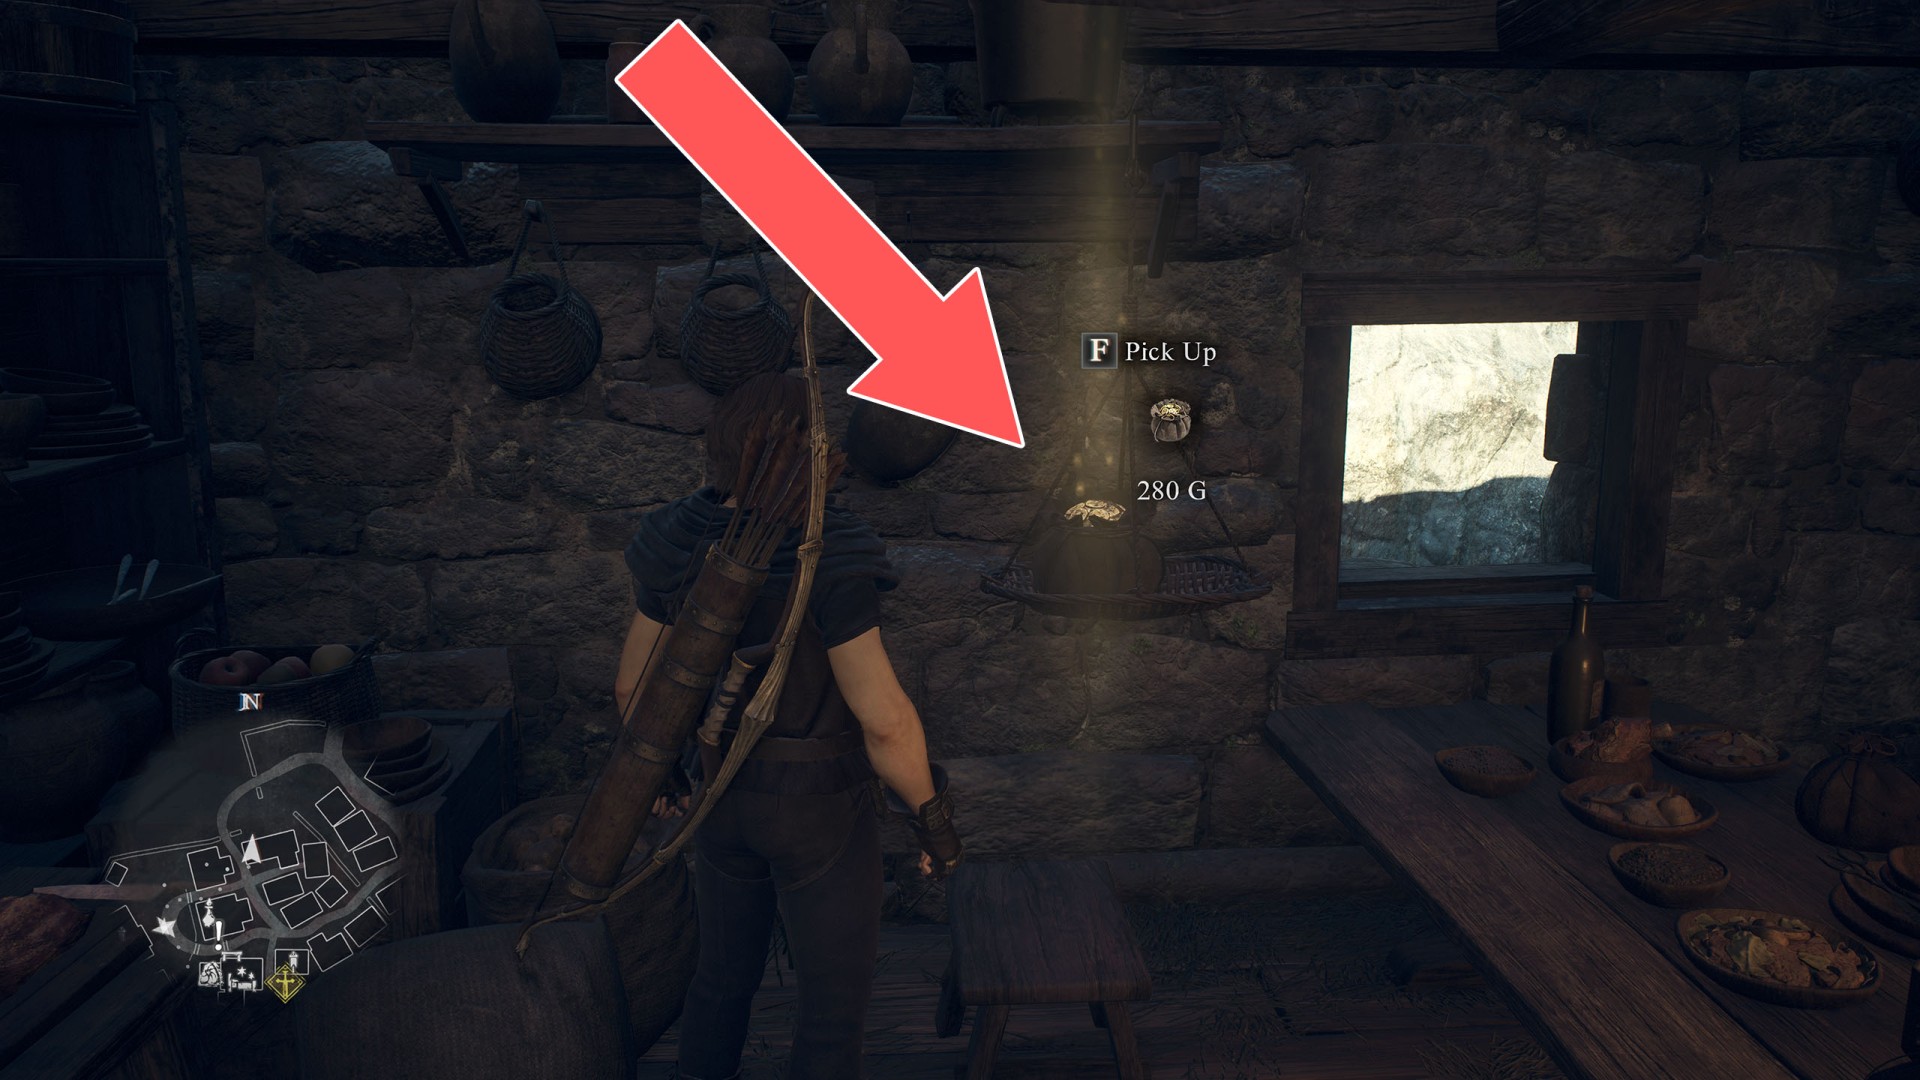
158Pouch (280G)
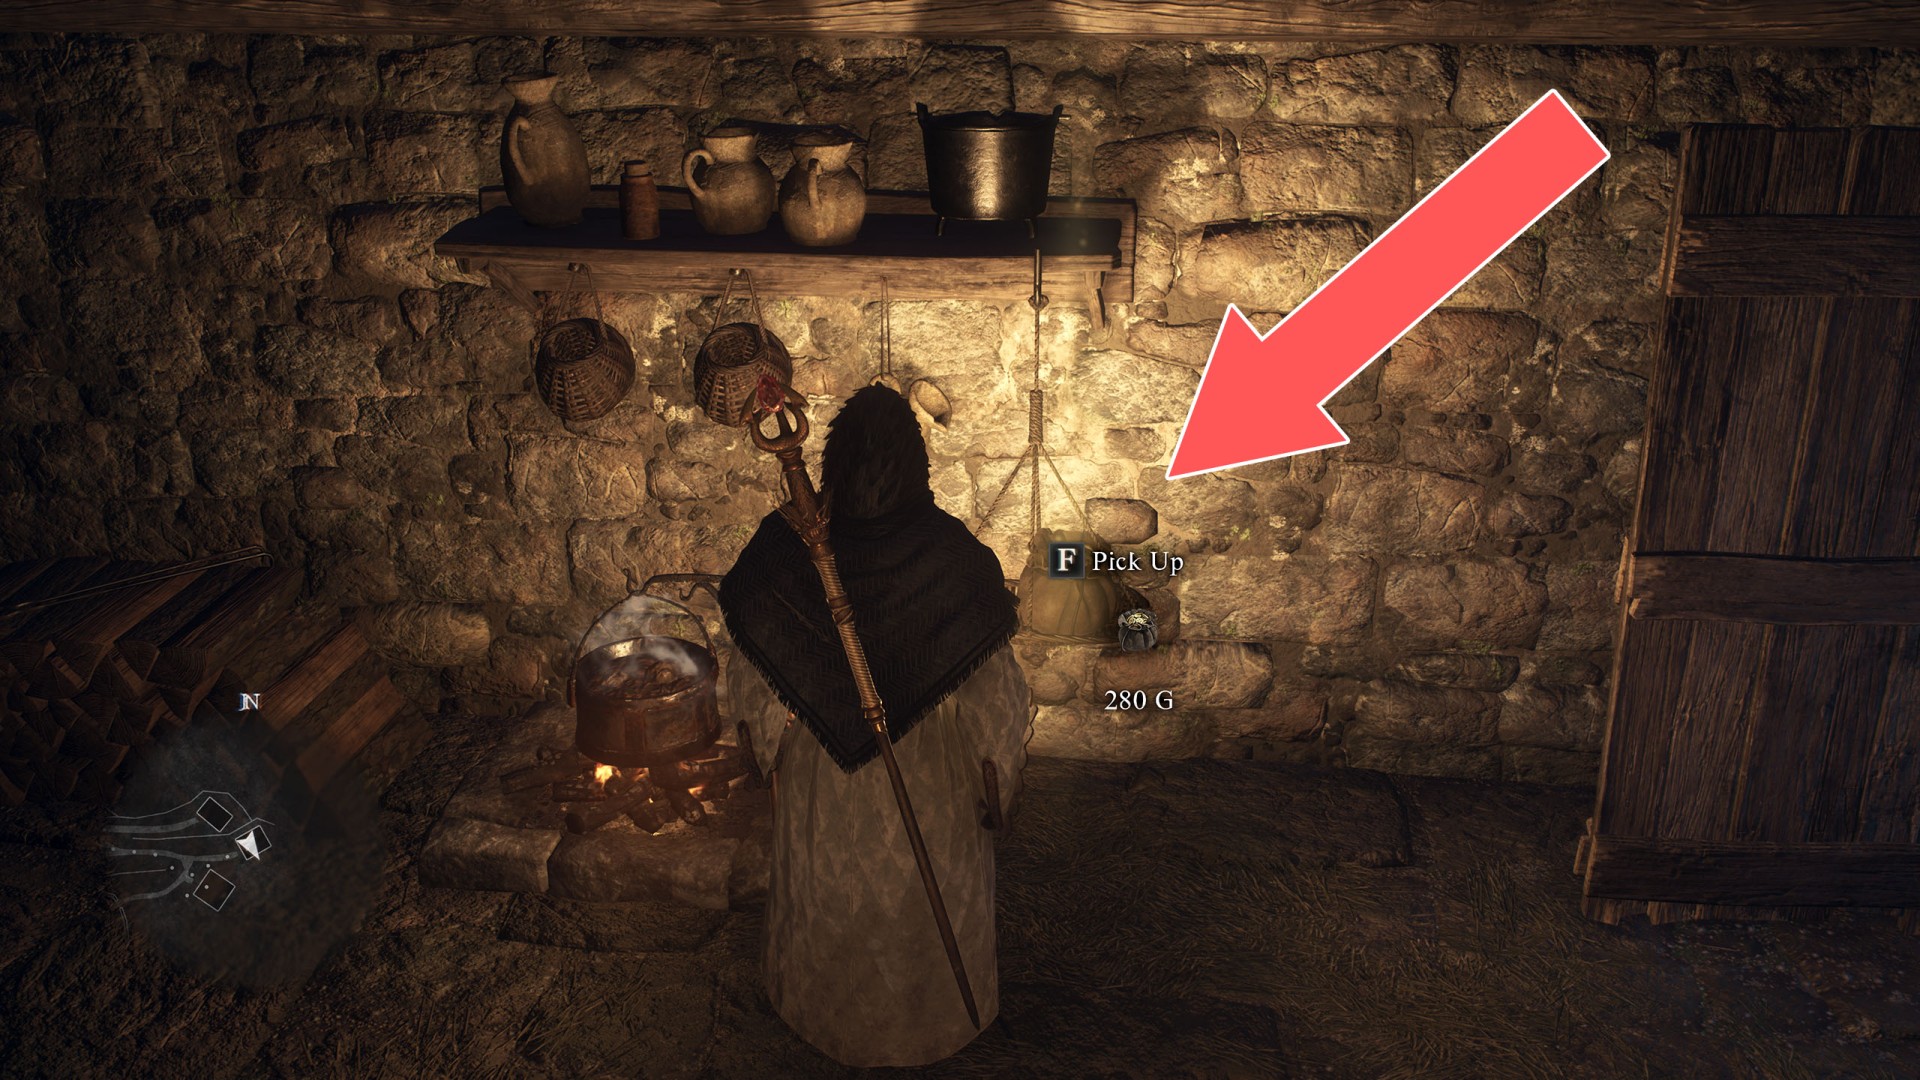
159Pouch (280G)
160Pouch (28G)
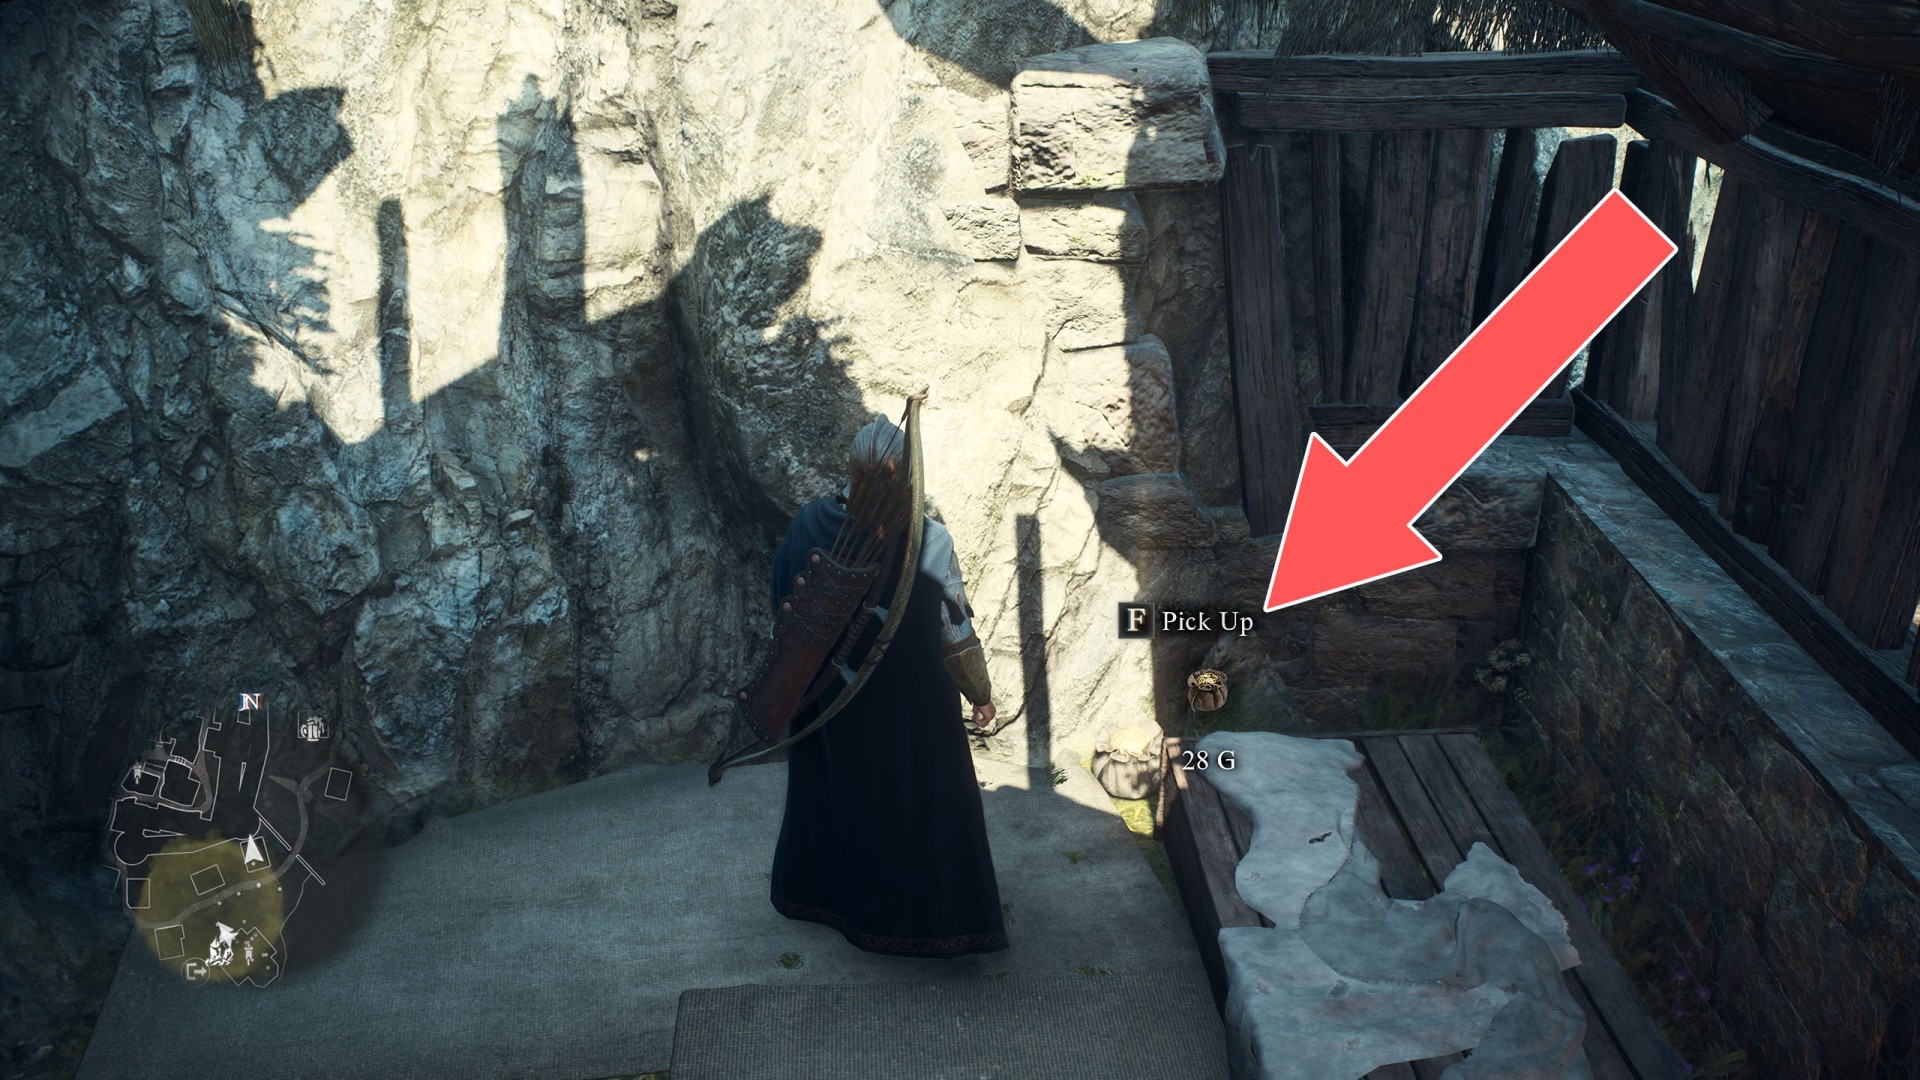
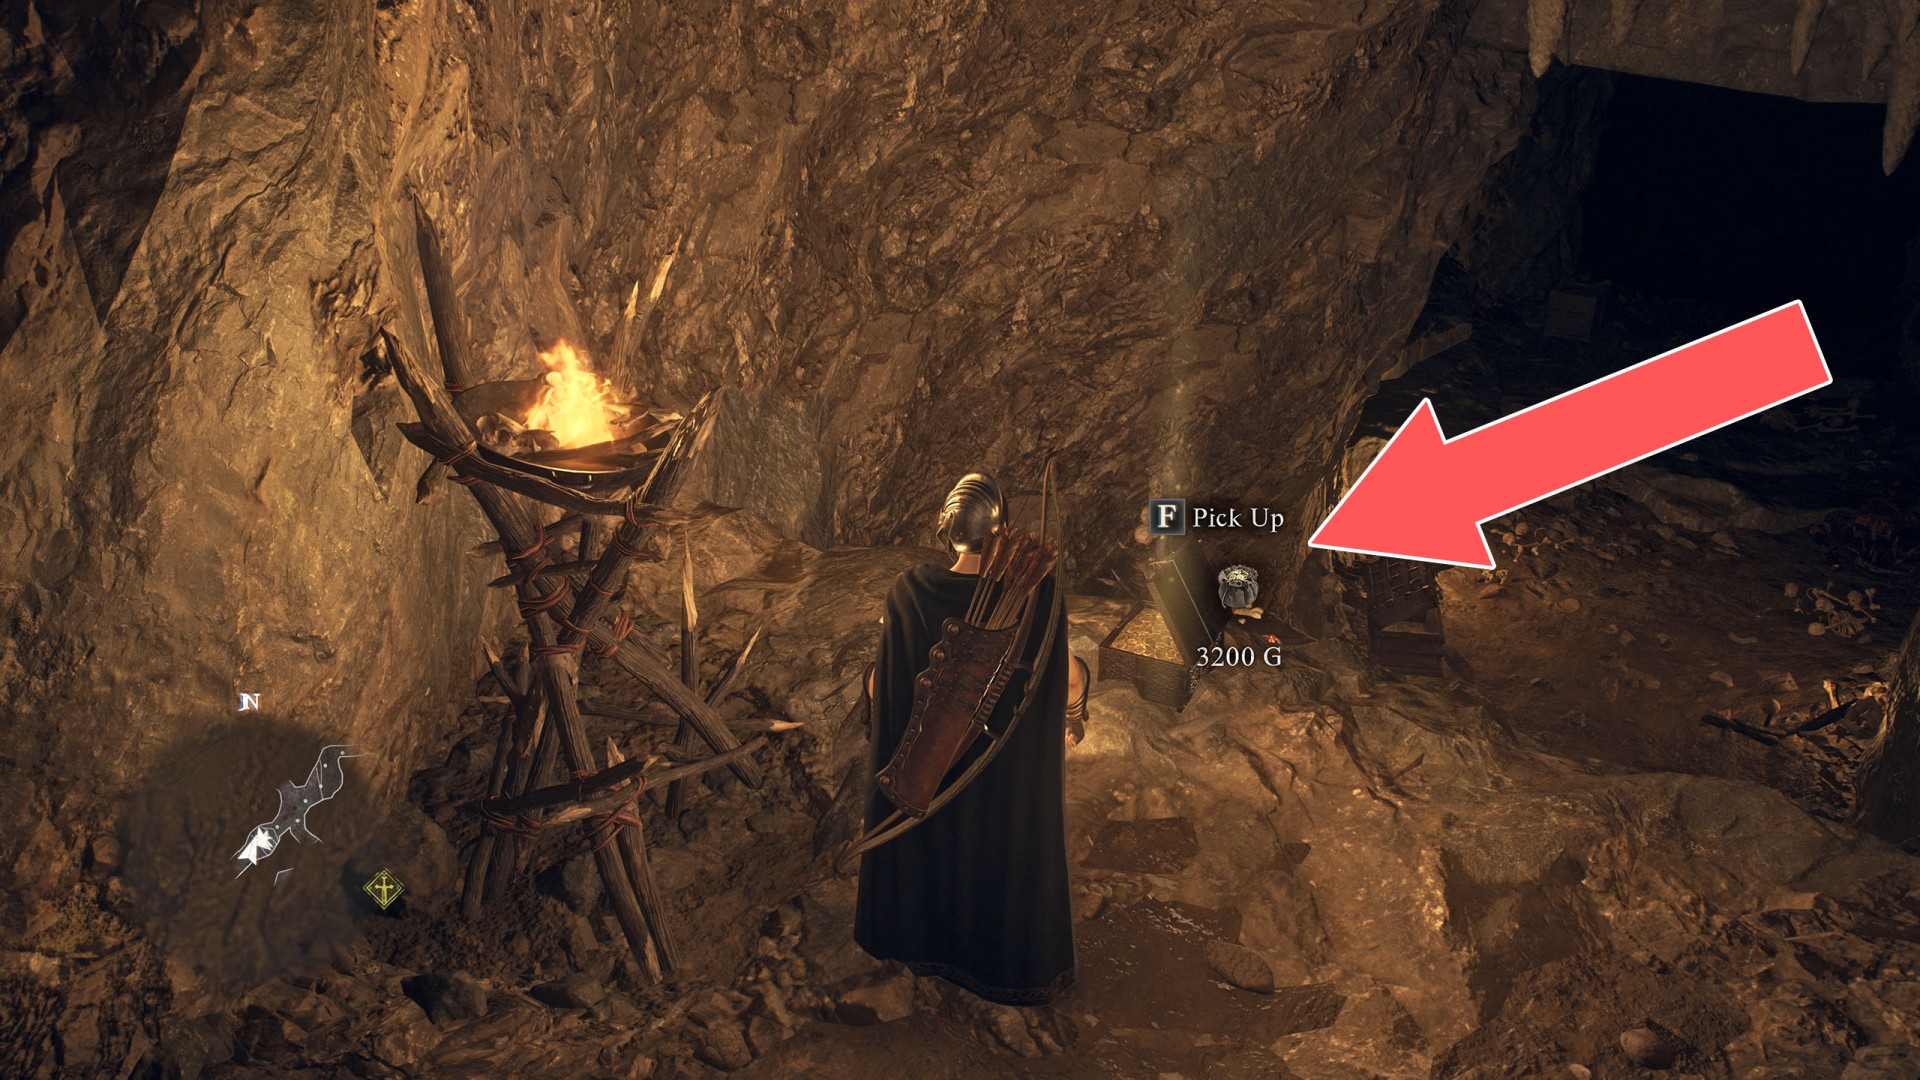
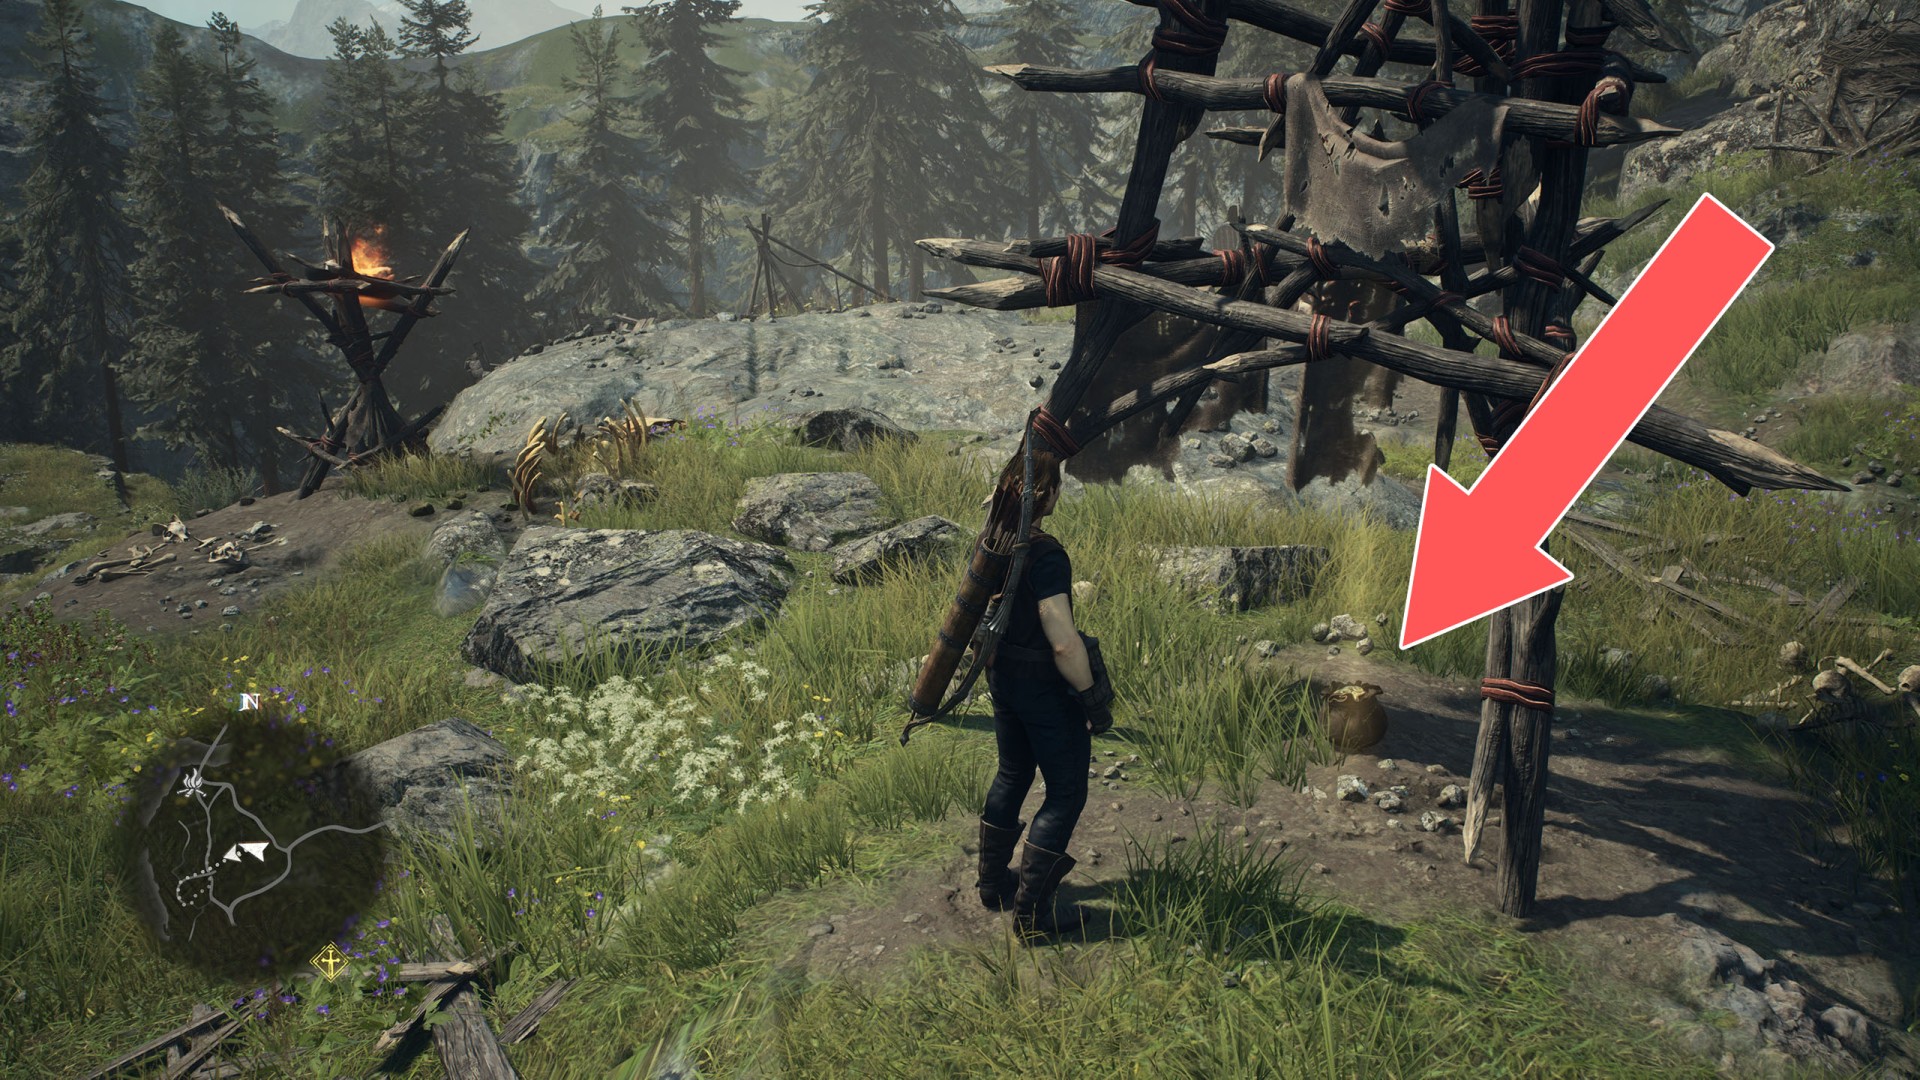
161Pouch (3,200G)
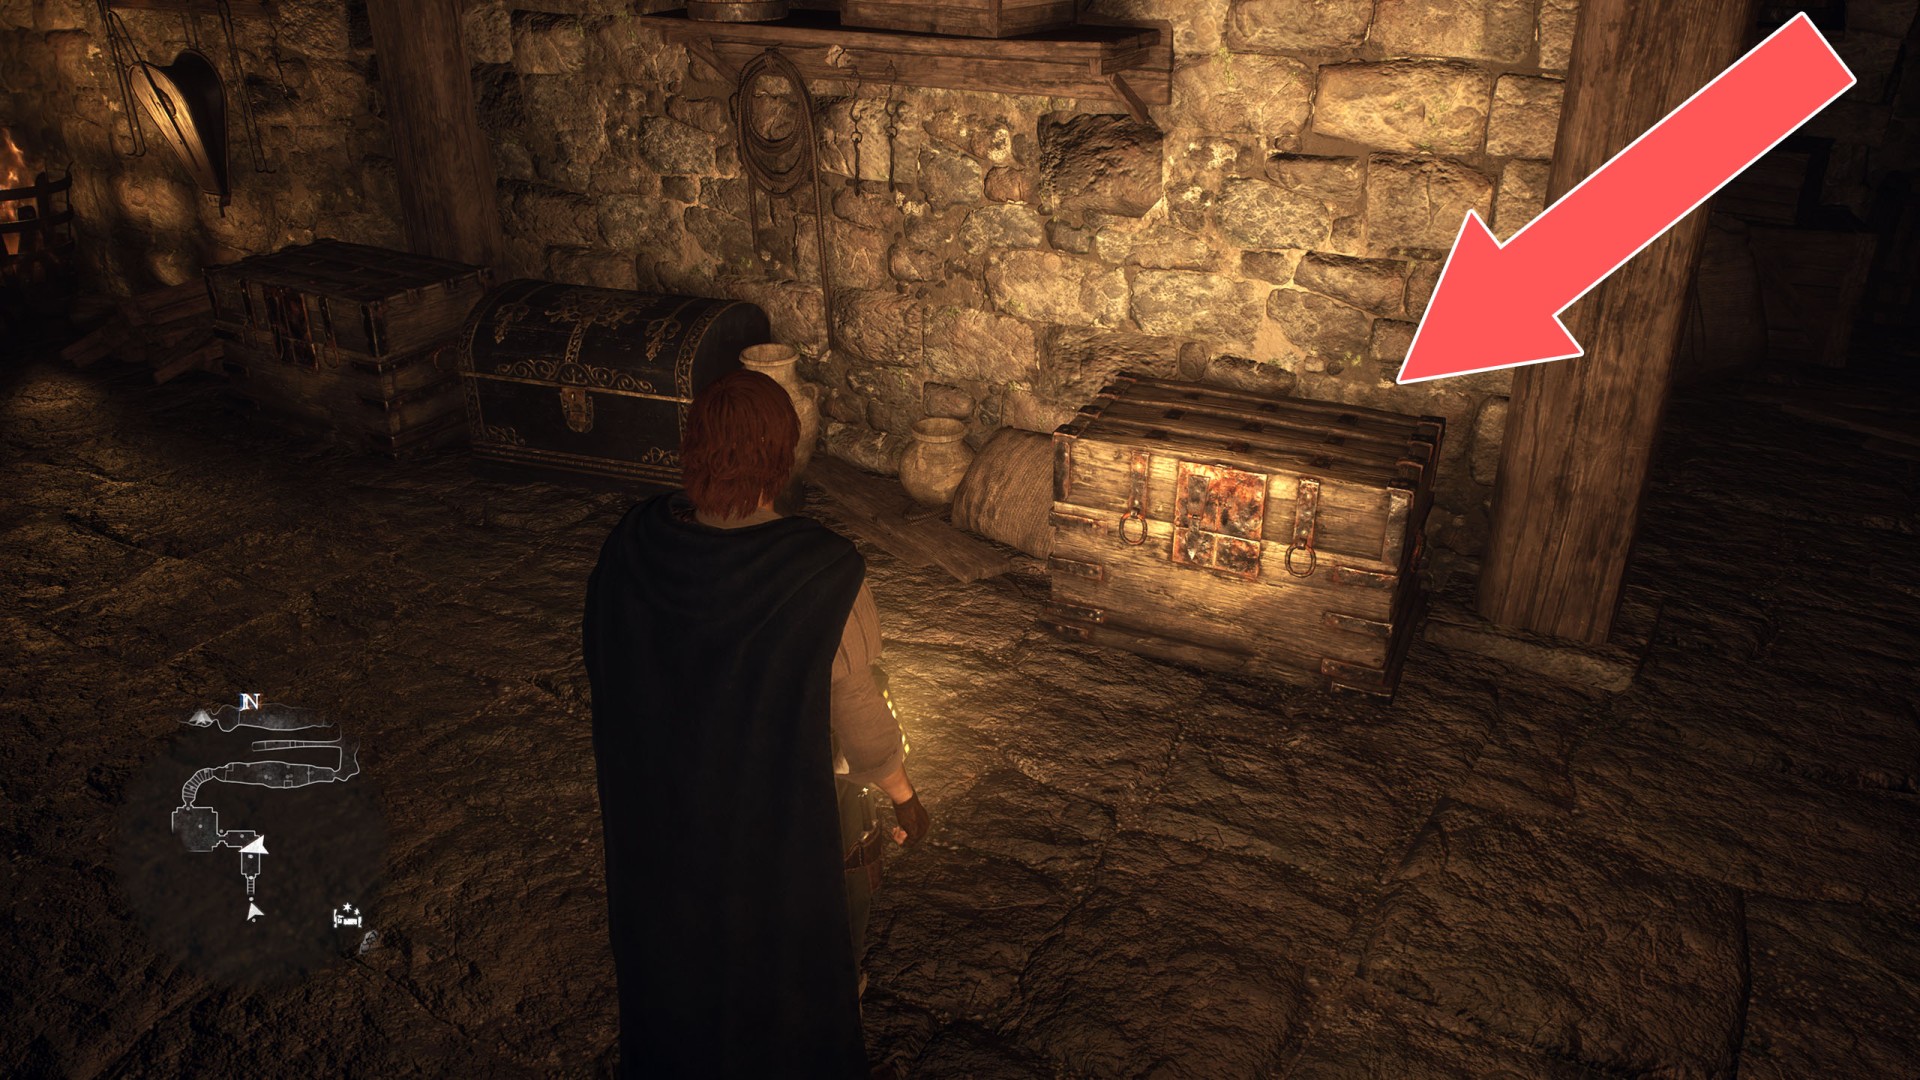
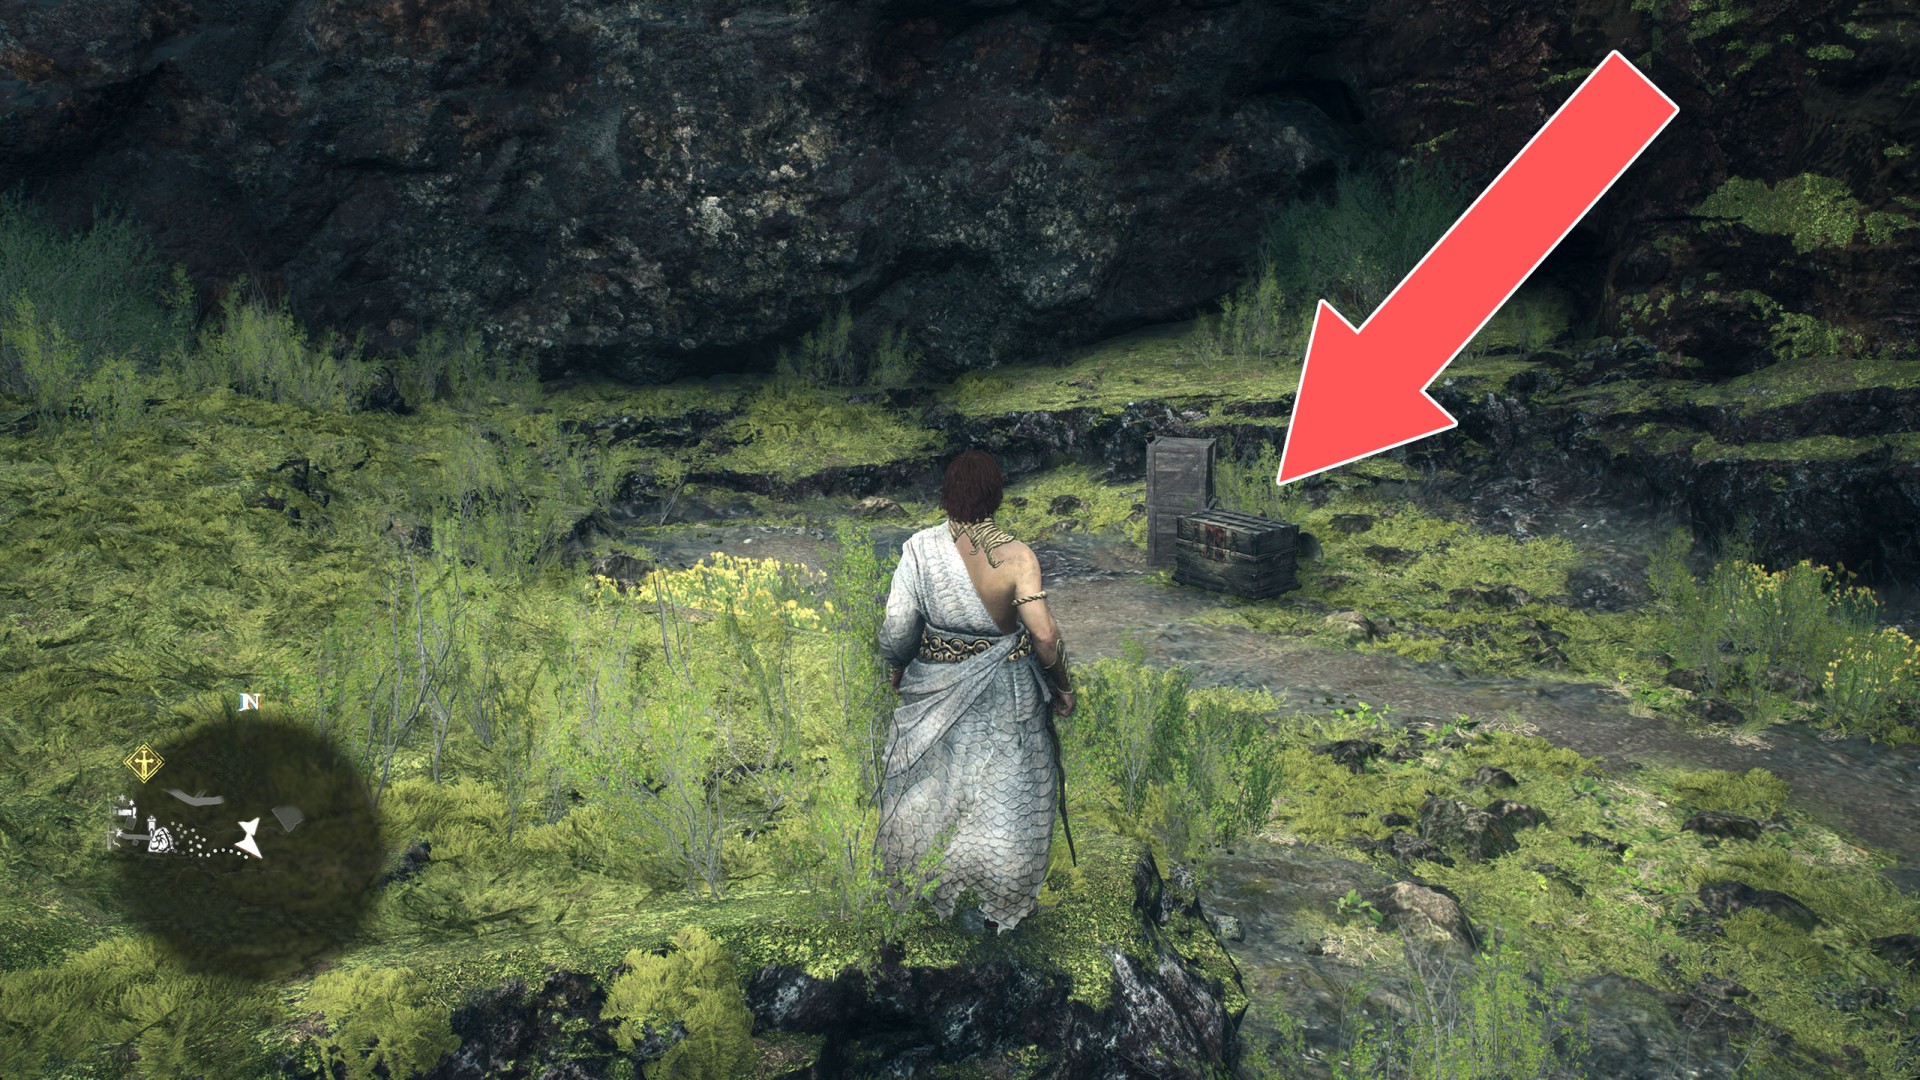
In the basement of the Northern Harve Ruins.
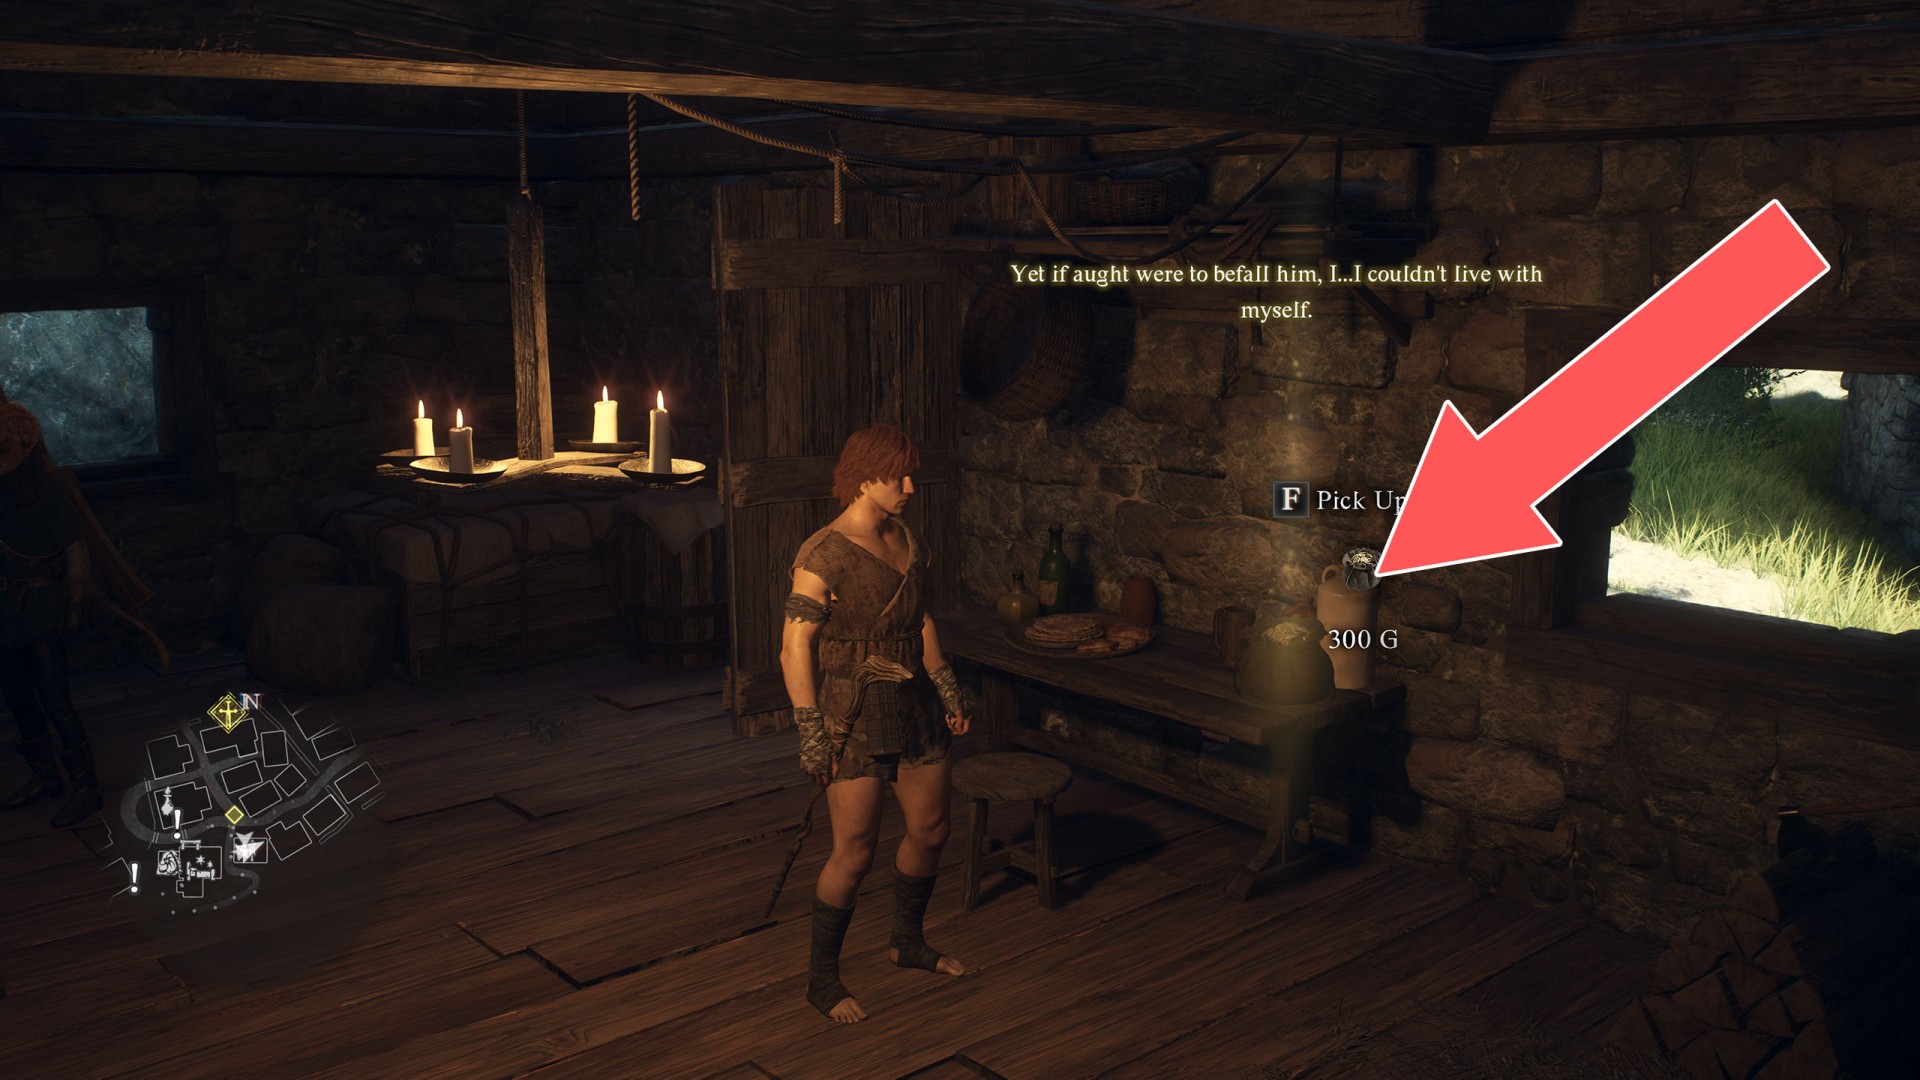
162Pouch (300G)
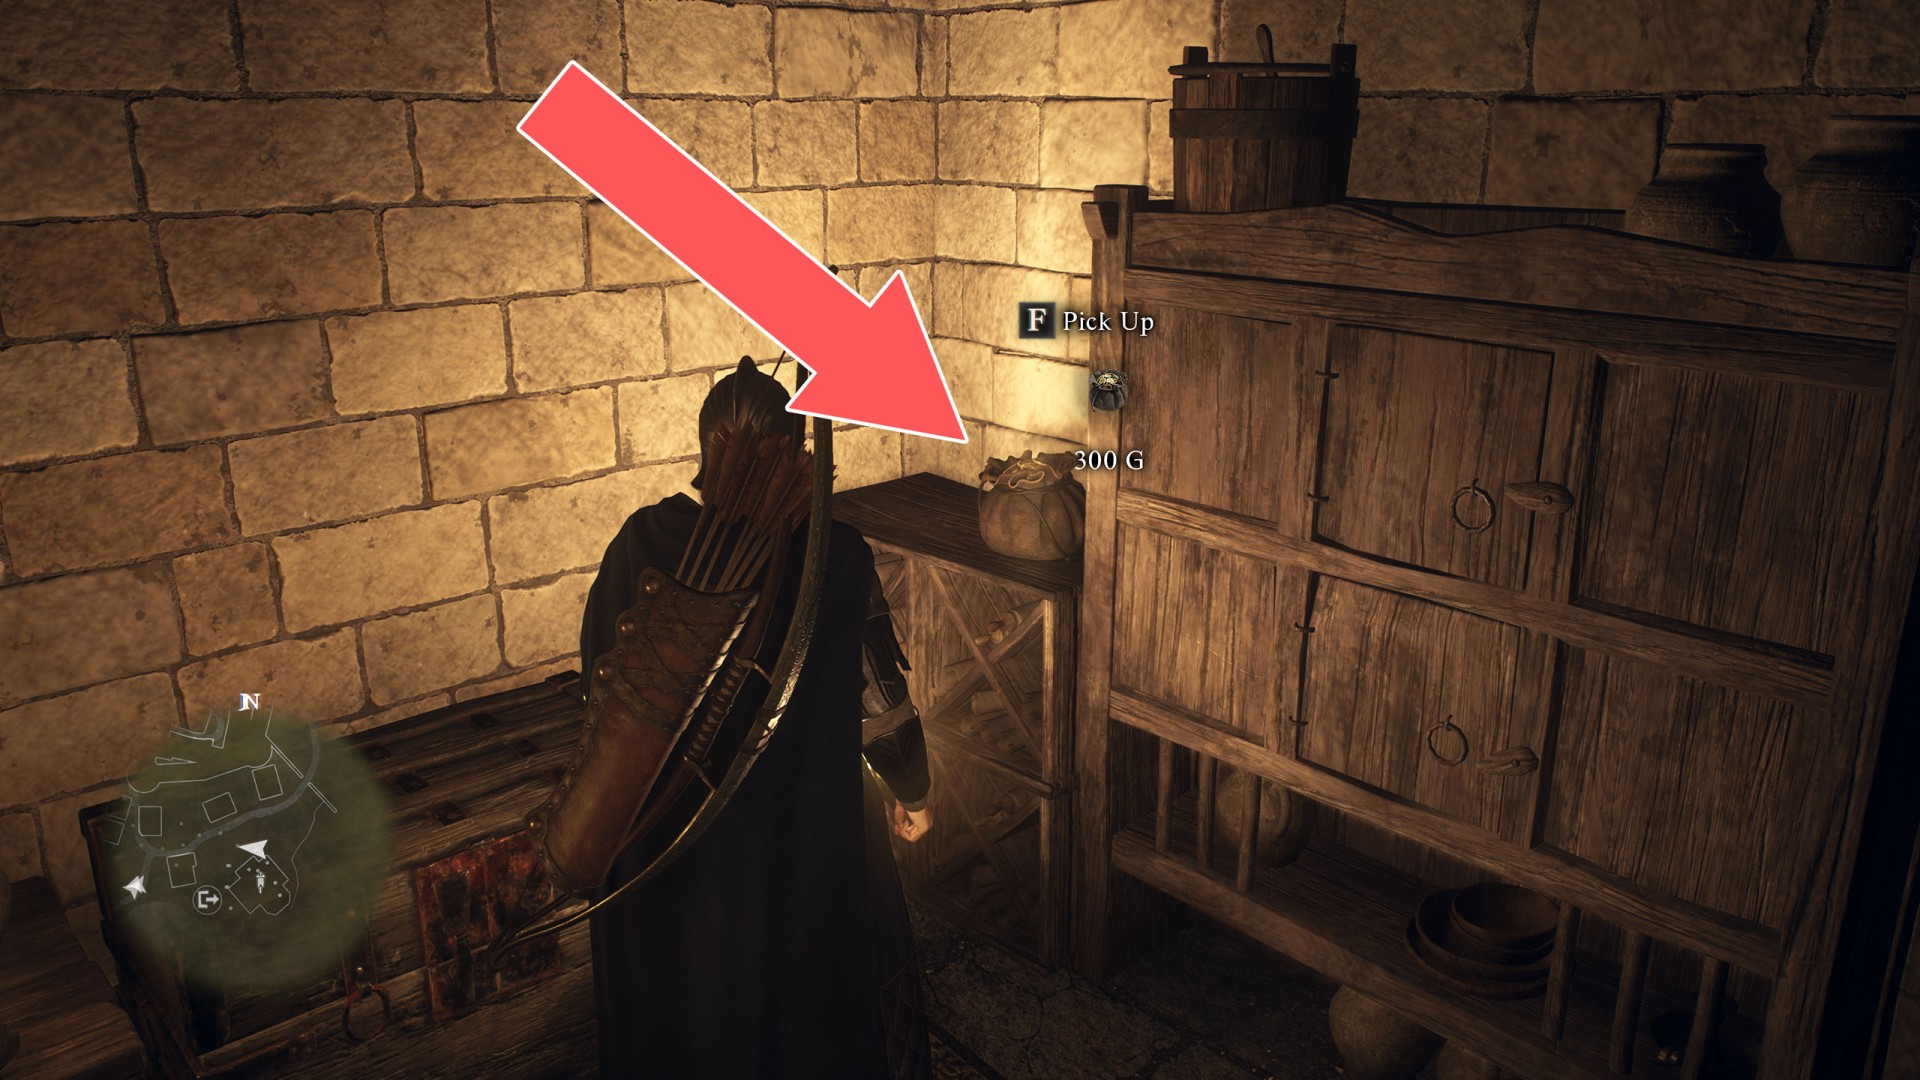
163Pouch (300G)
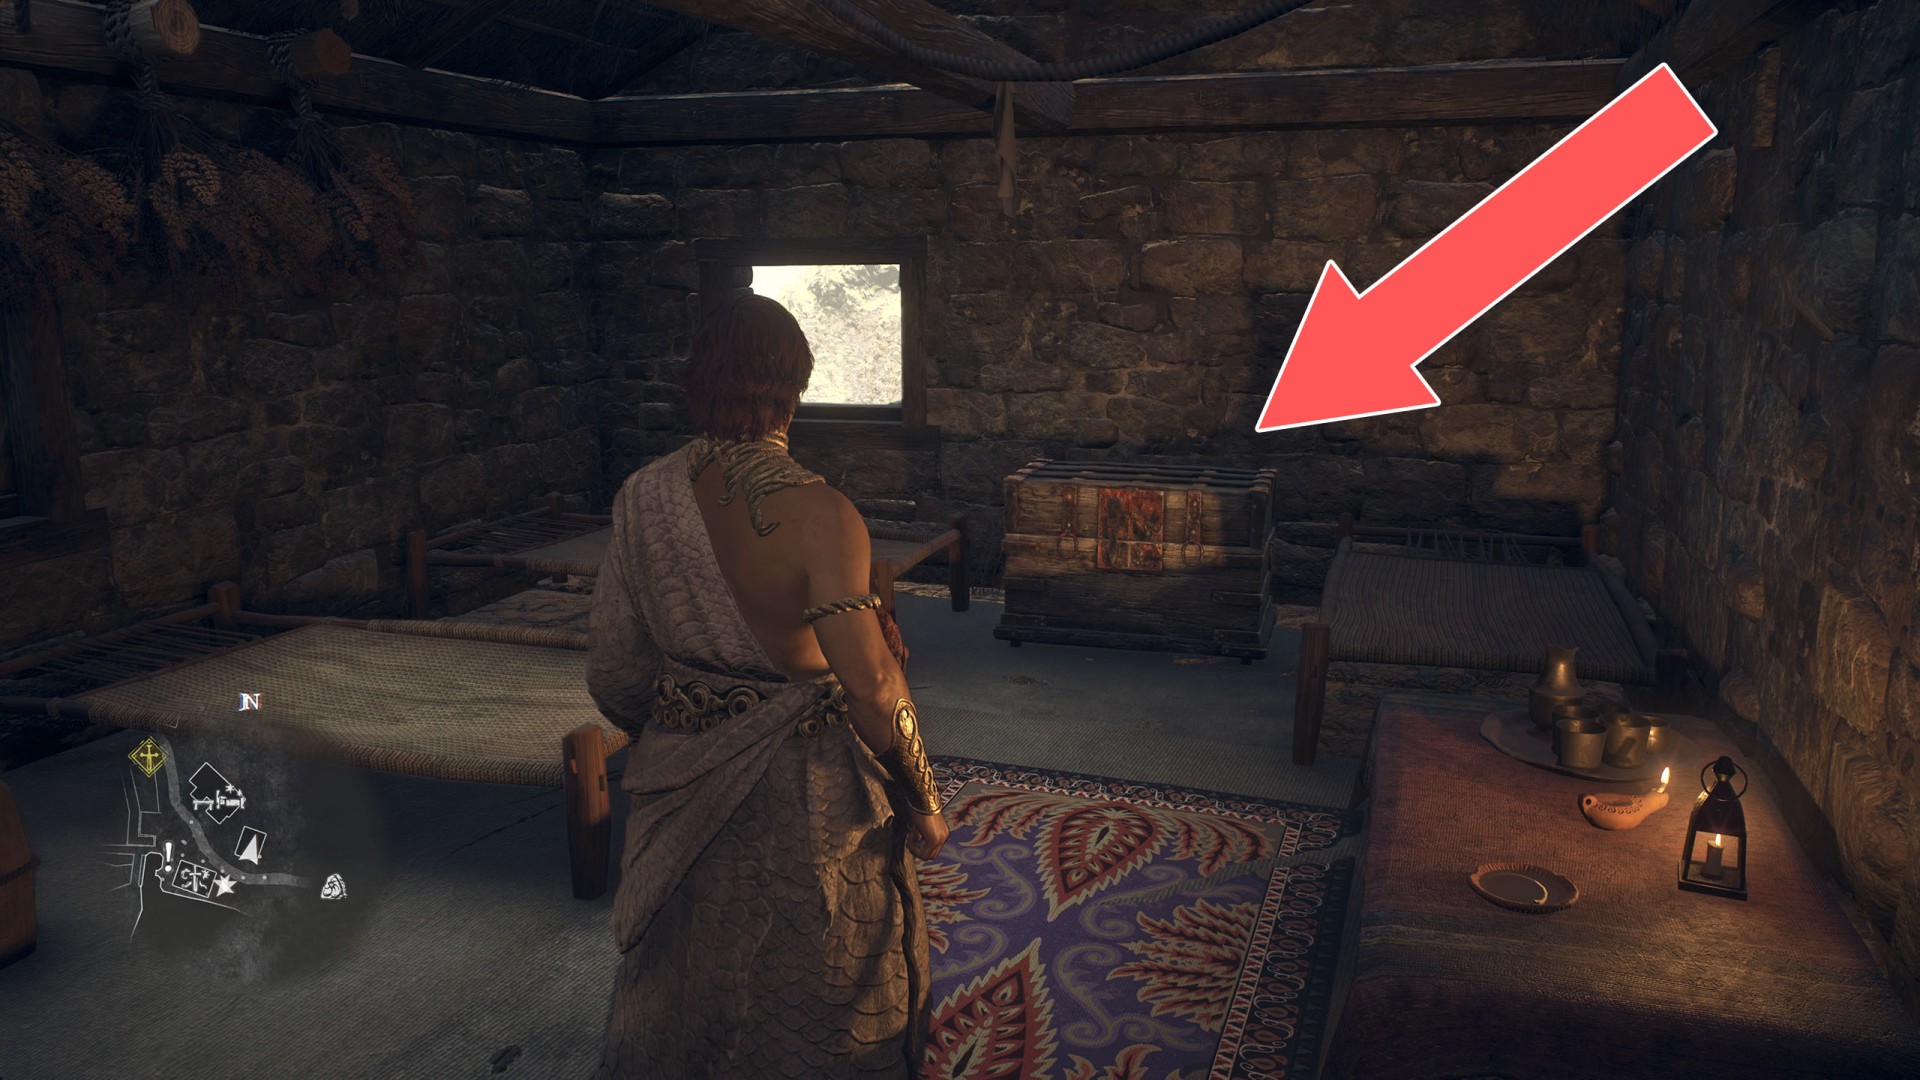
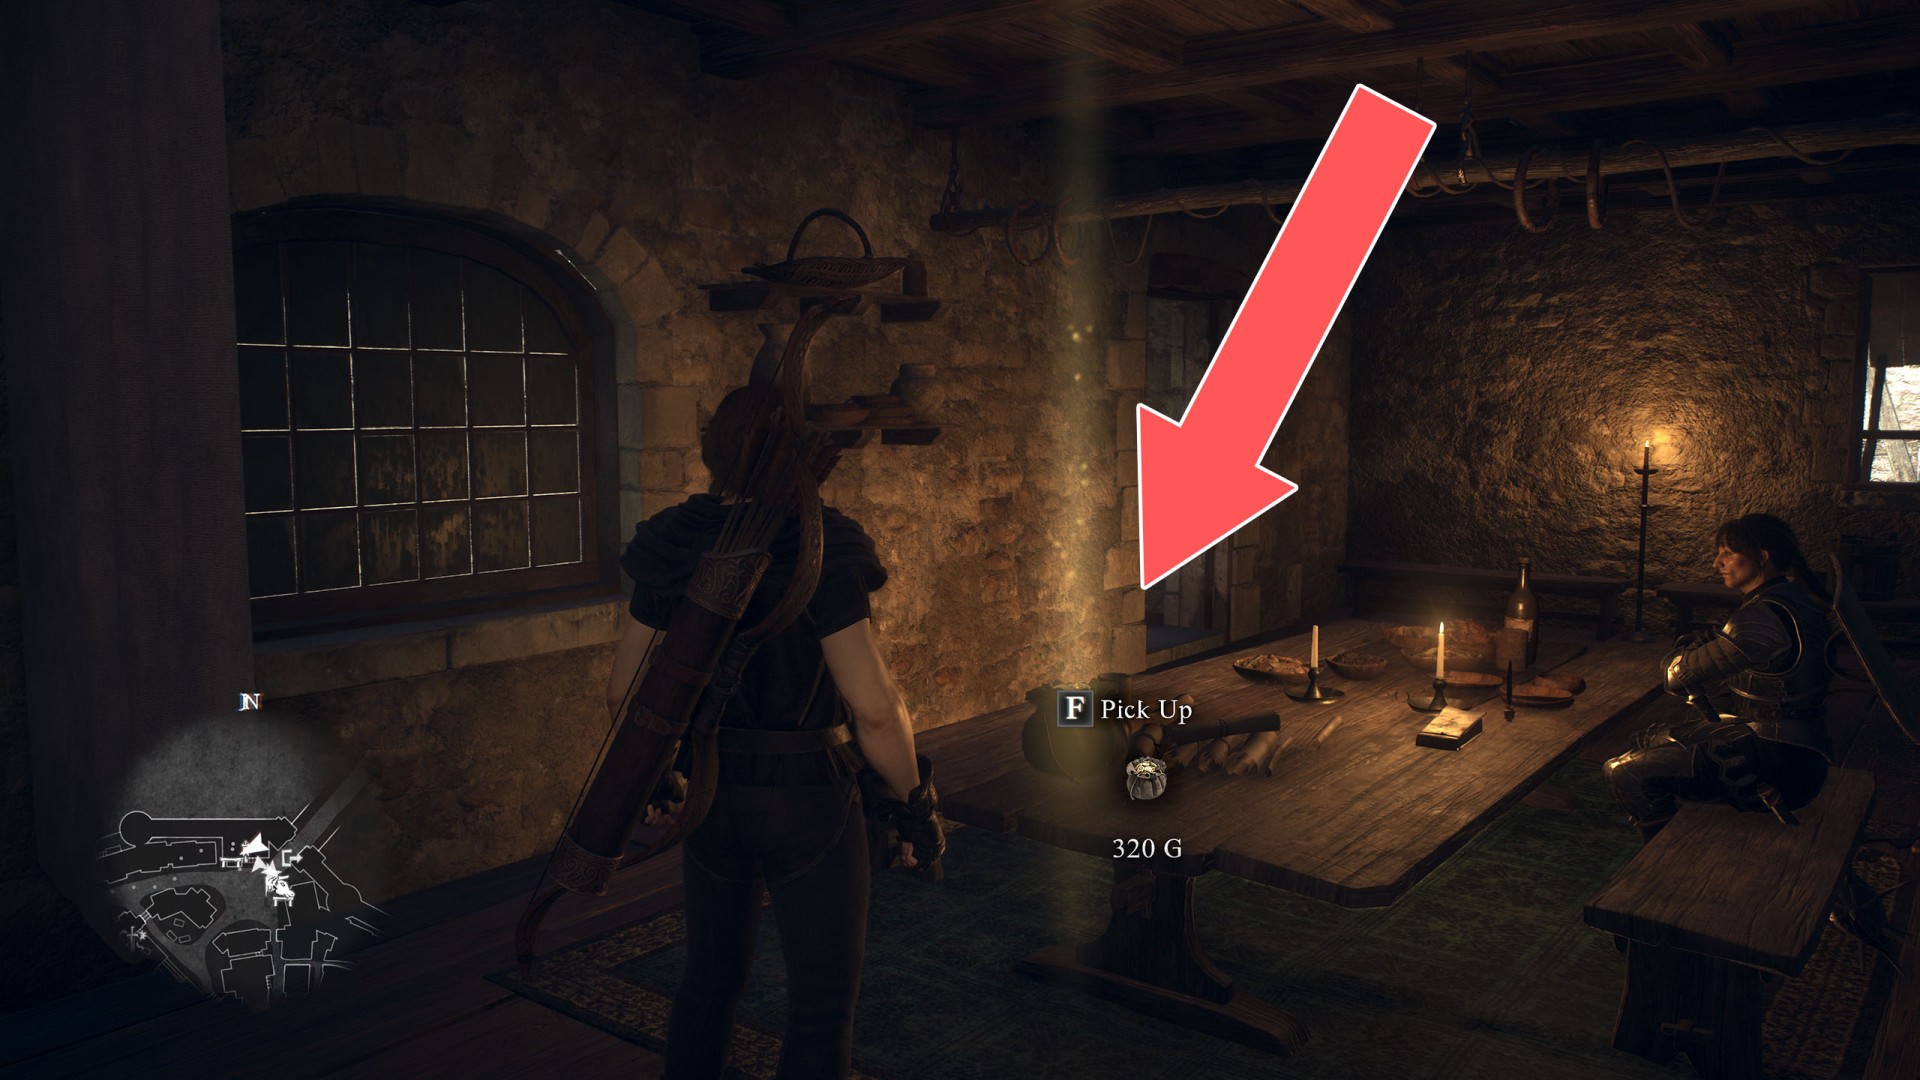
In the basement of The Gracious Hand.
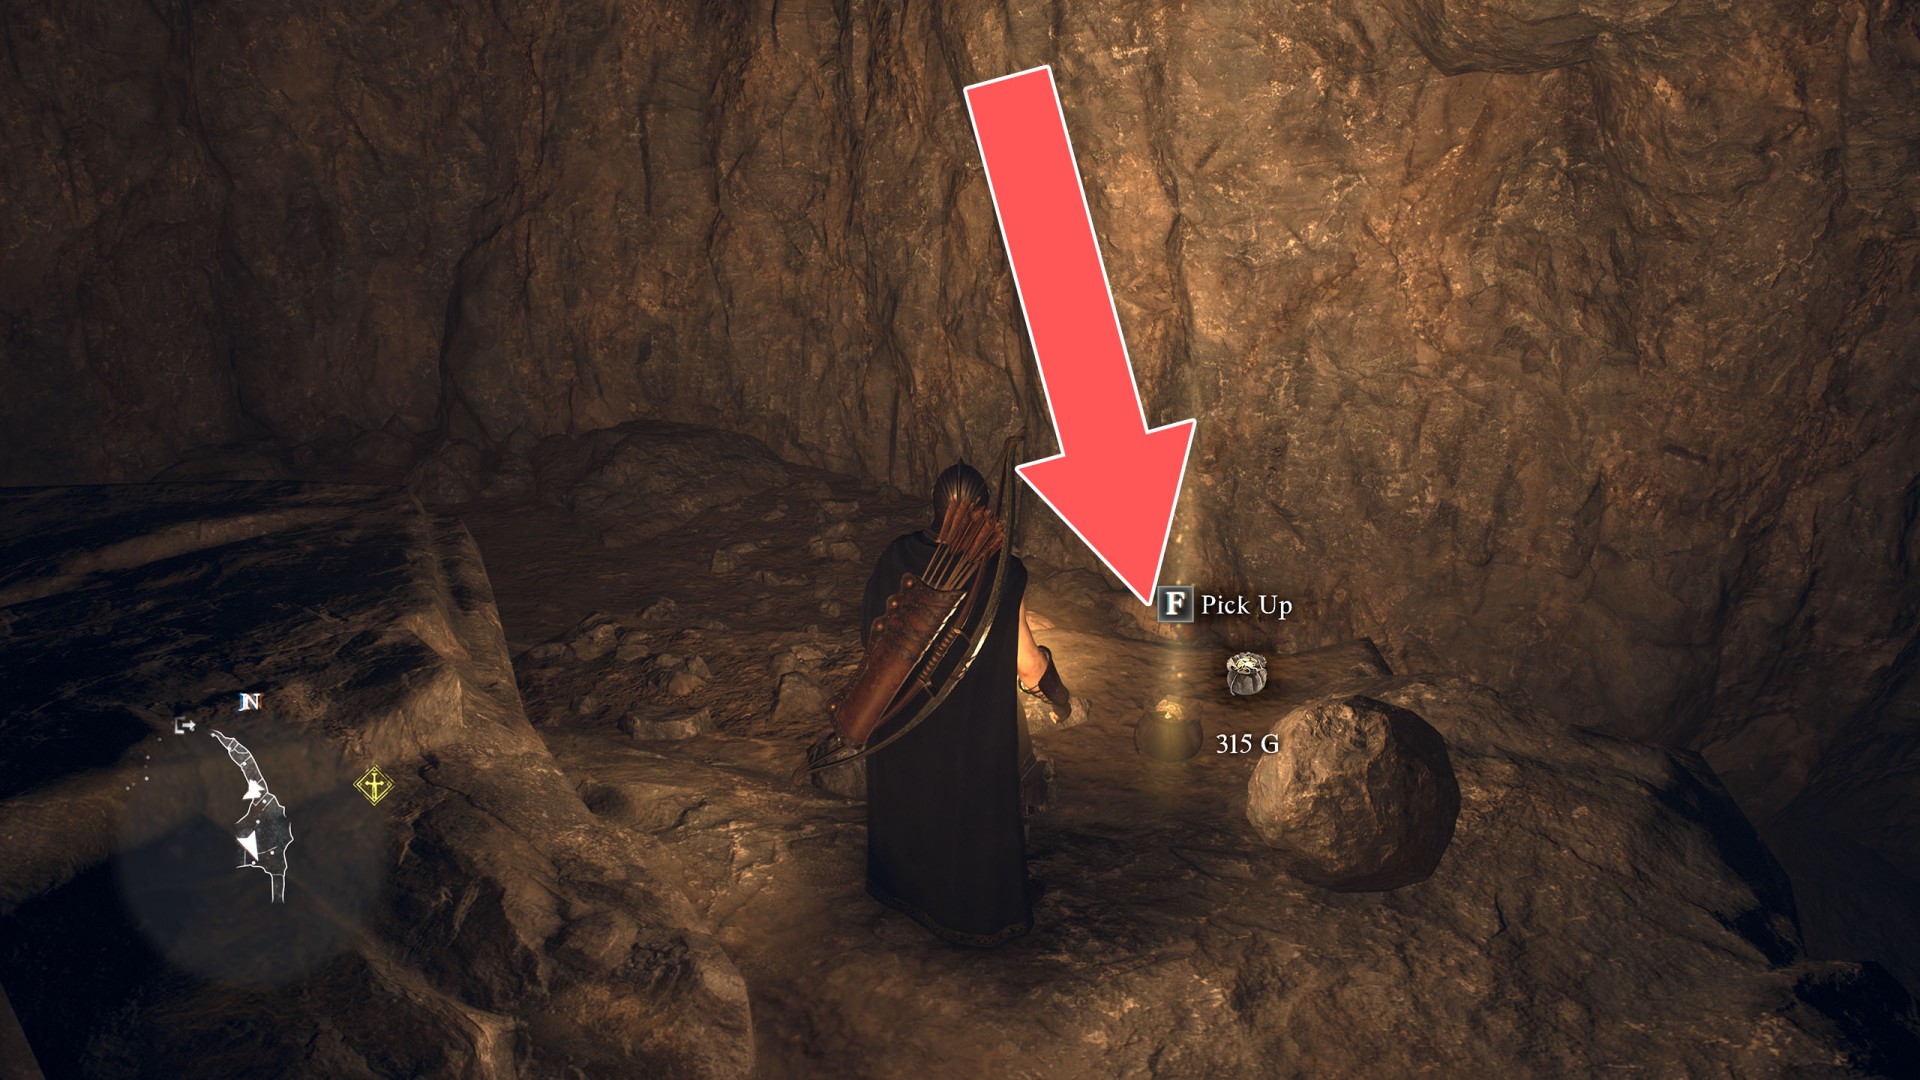
164Pouch (315G)
165Pouch (320G)
166Pouch (320G)

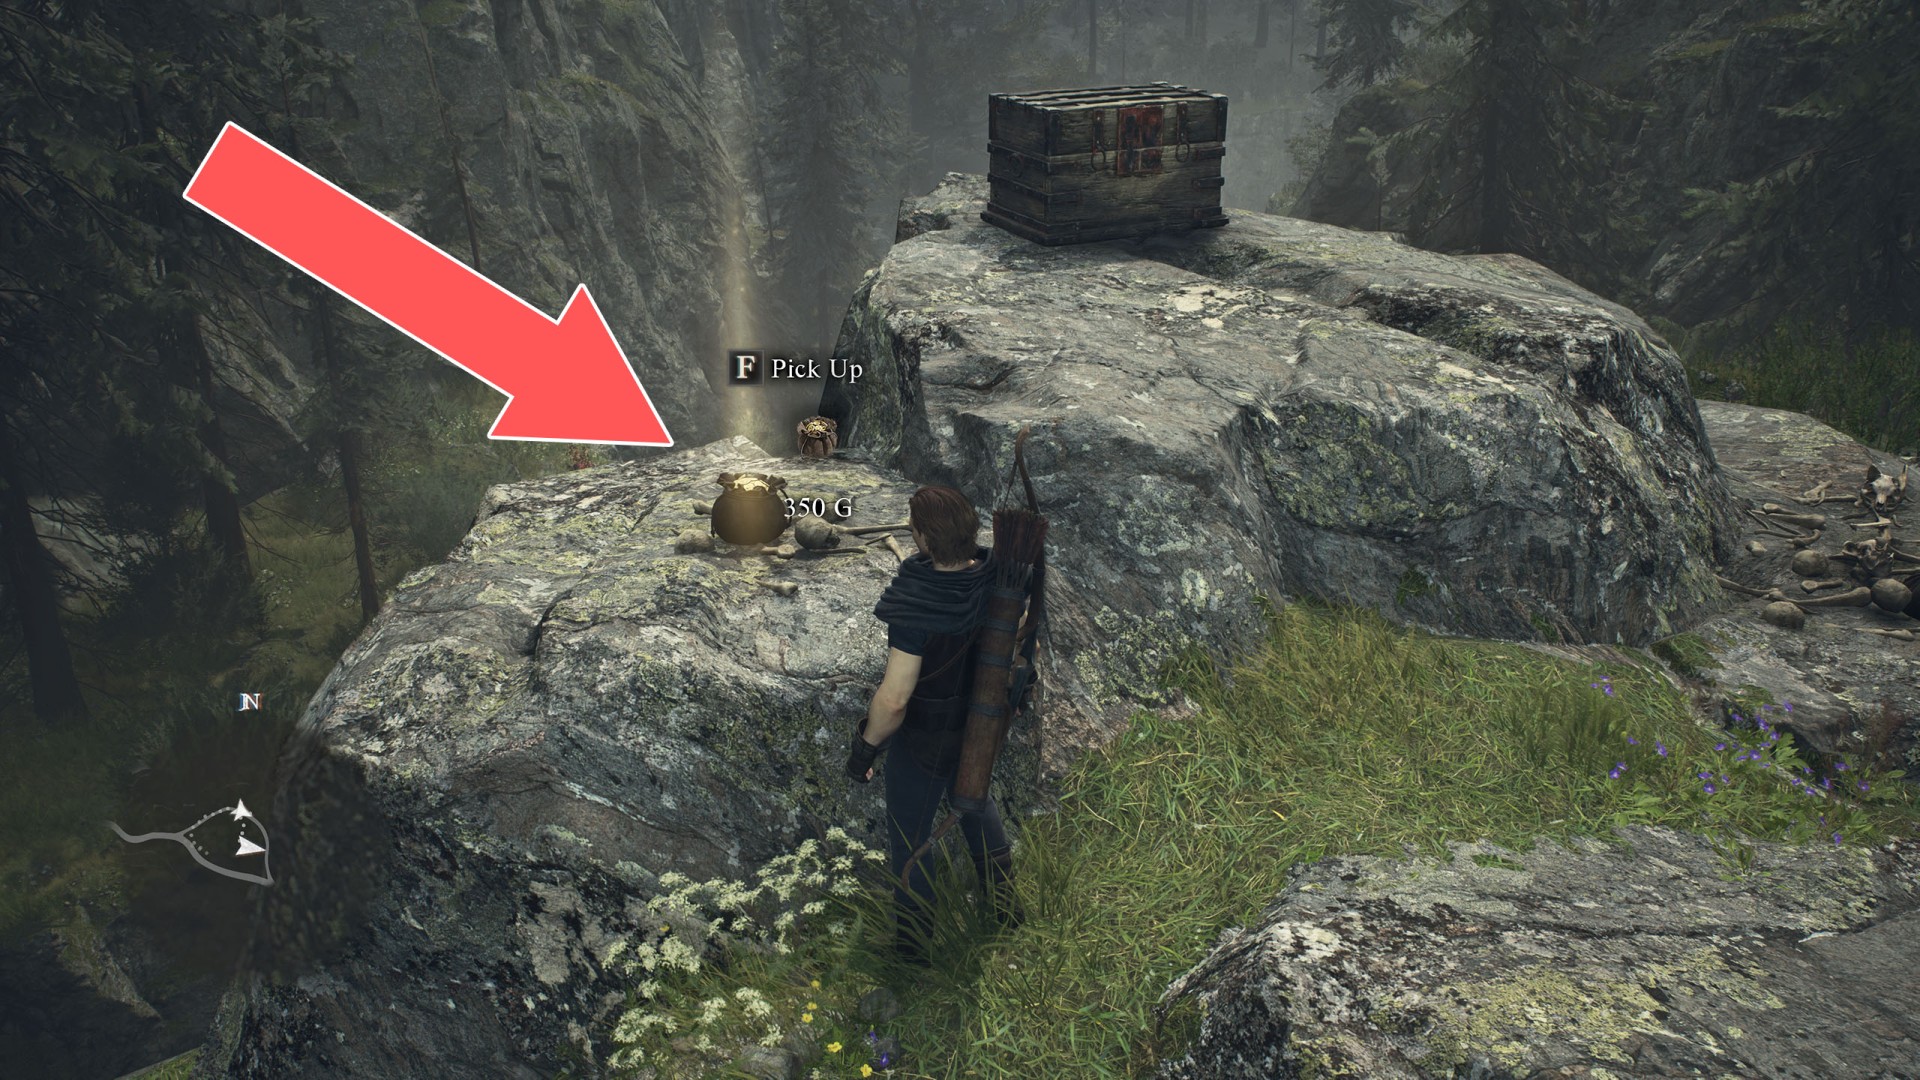
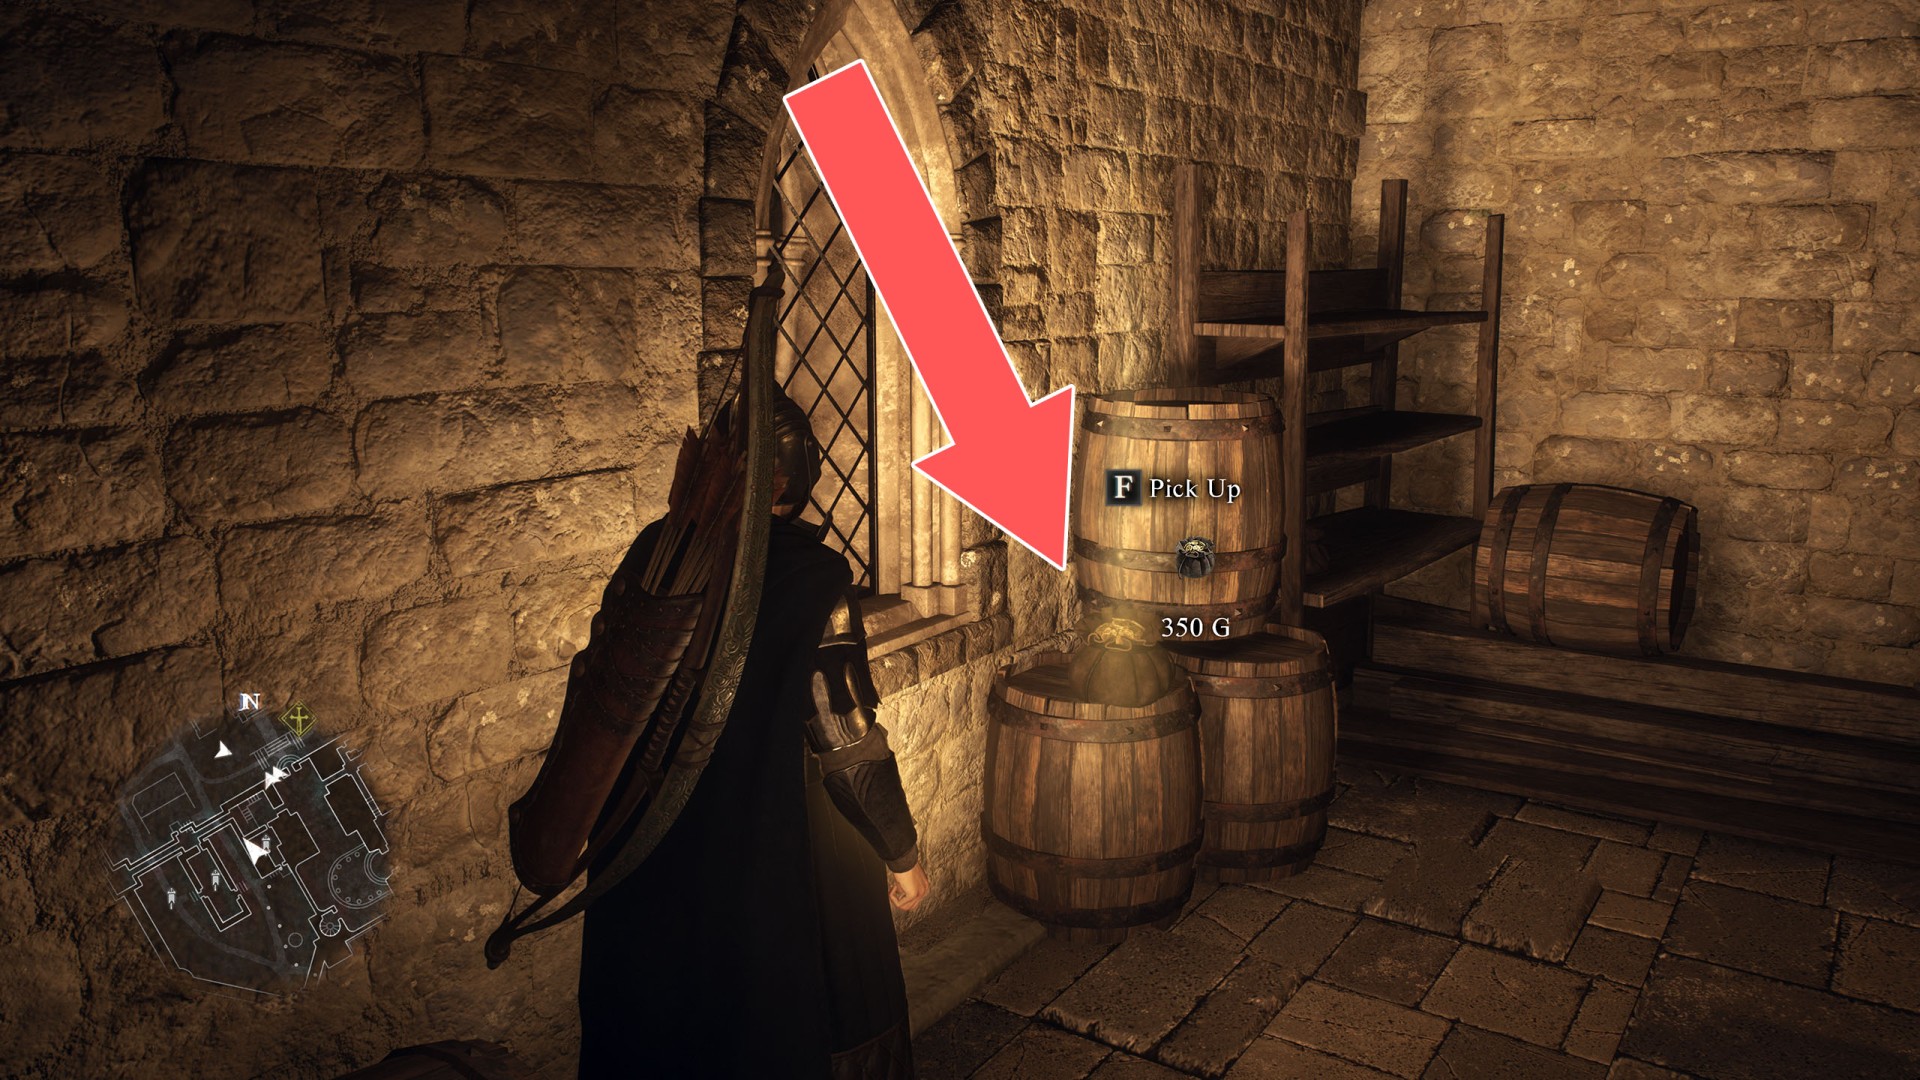
167Pouch (350G)
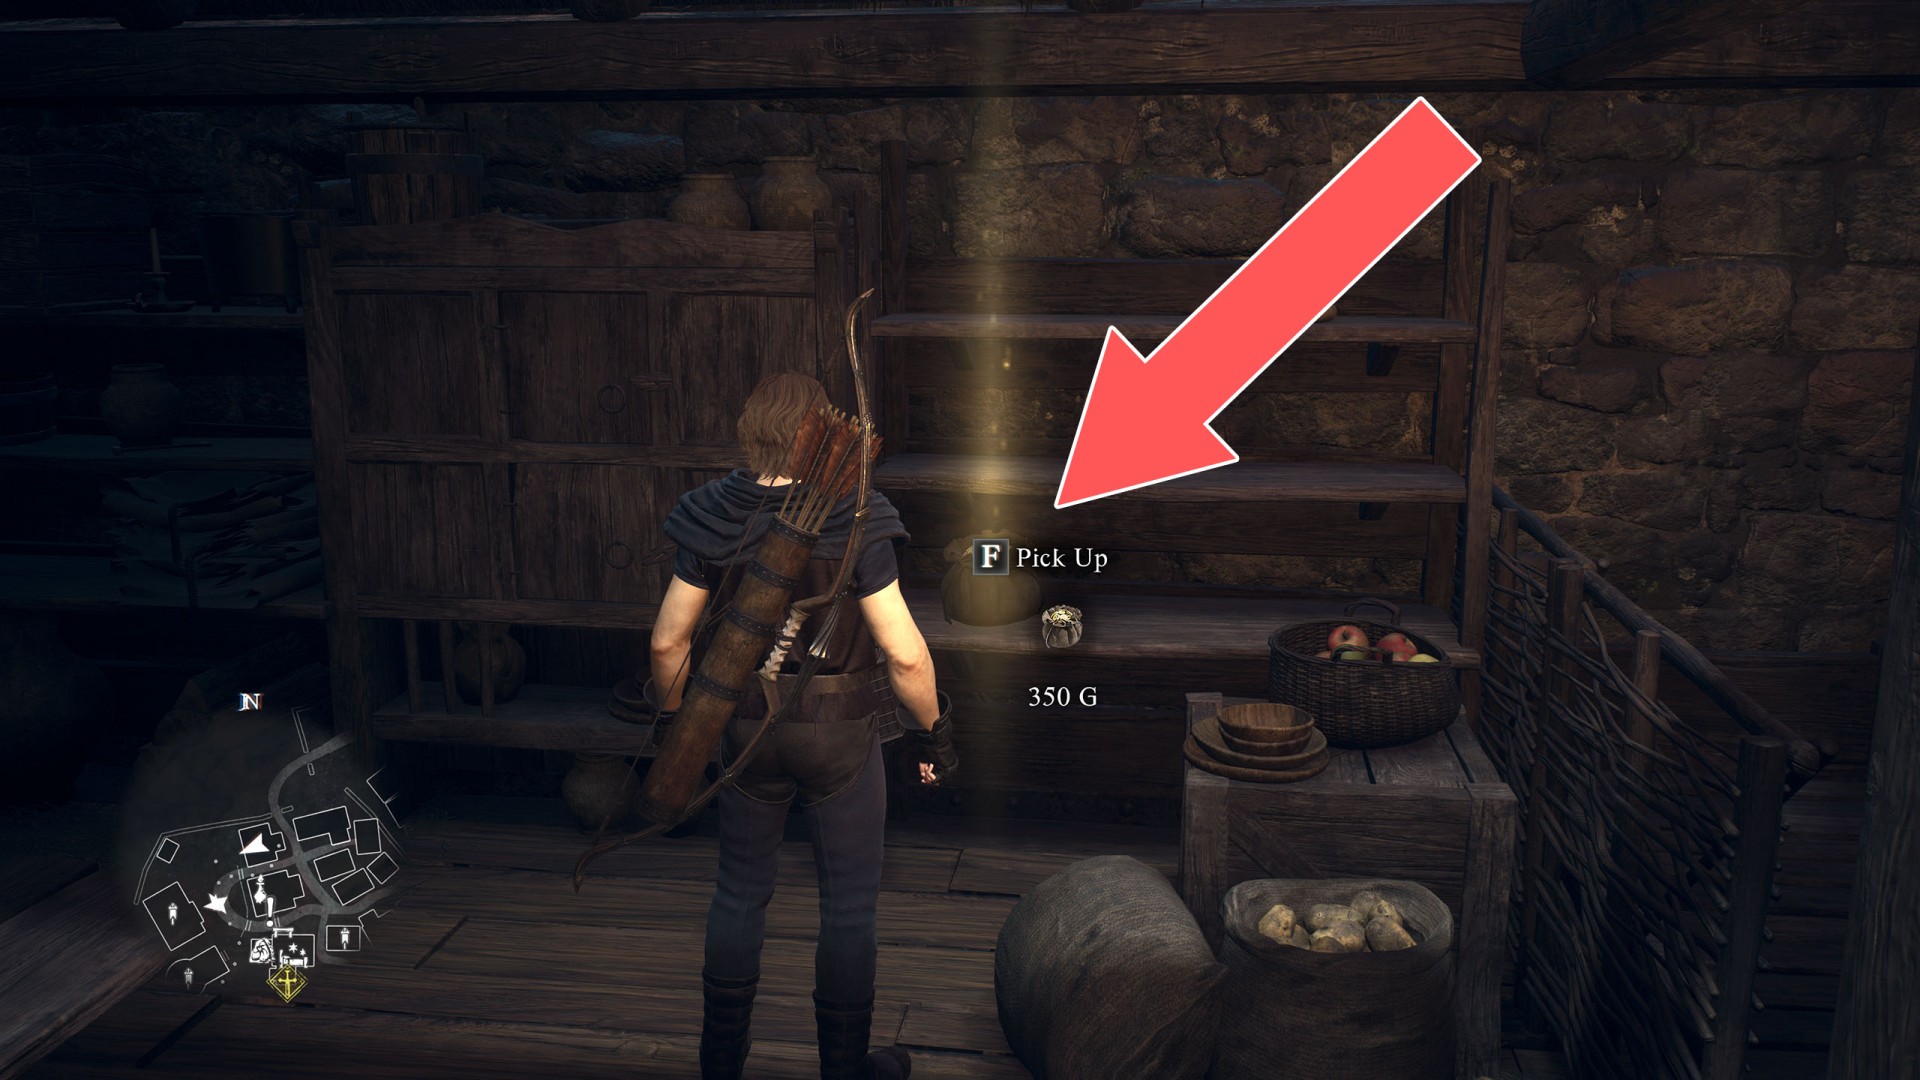
168Pouch (350G)
169Pouch (350G)
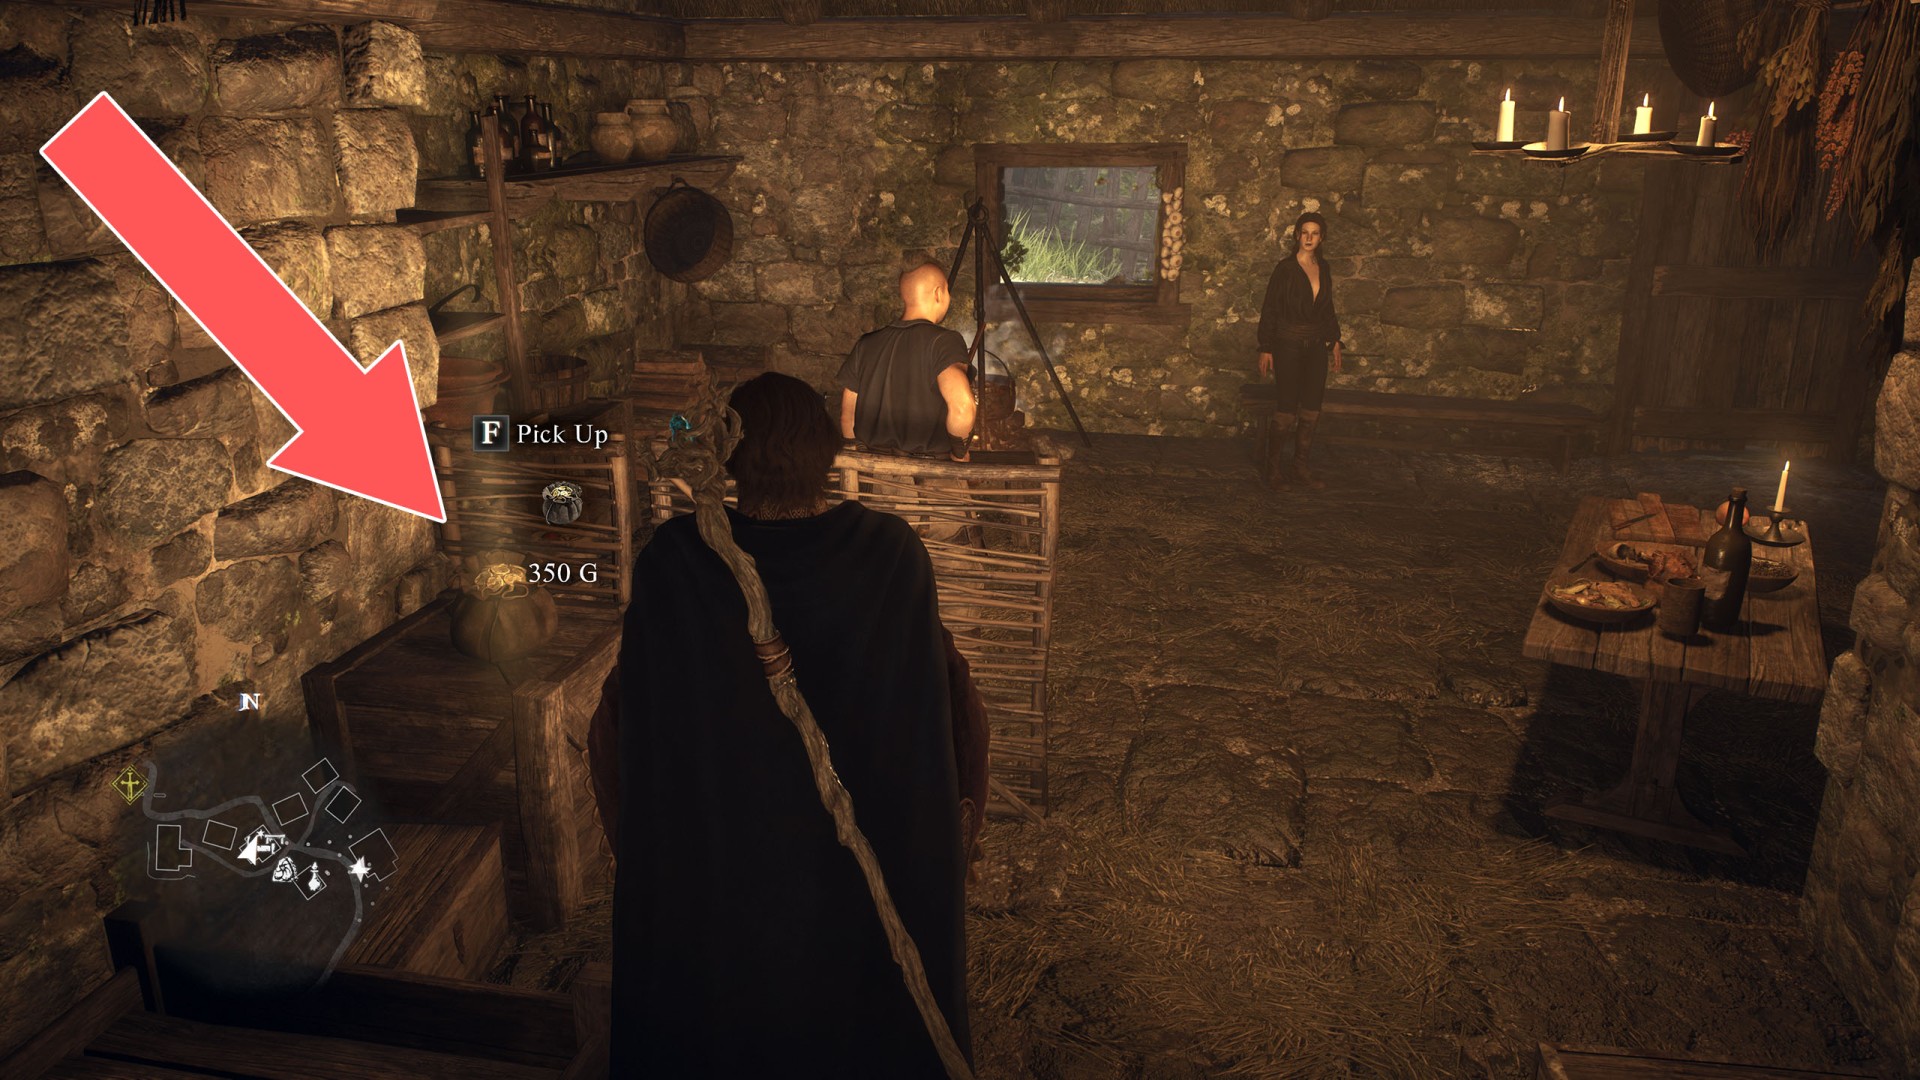
170Pouch (350G)
Show the map
171Pouch (350G)
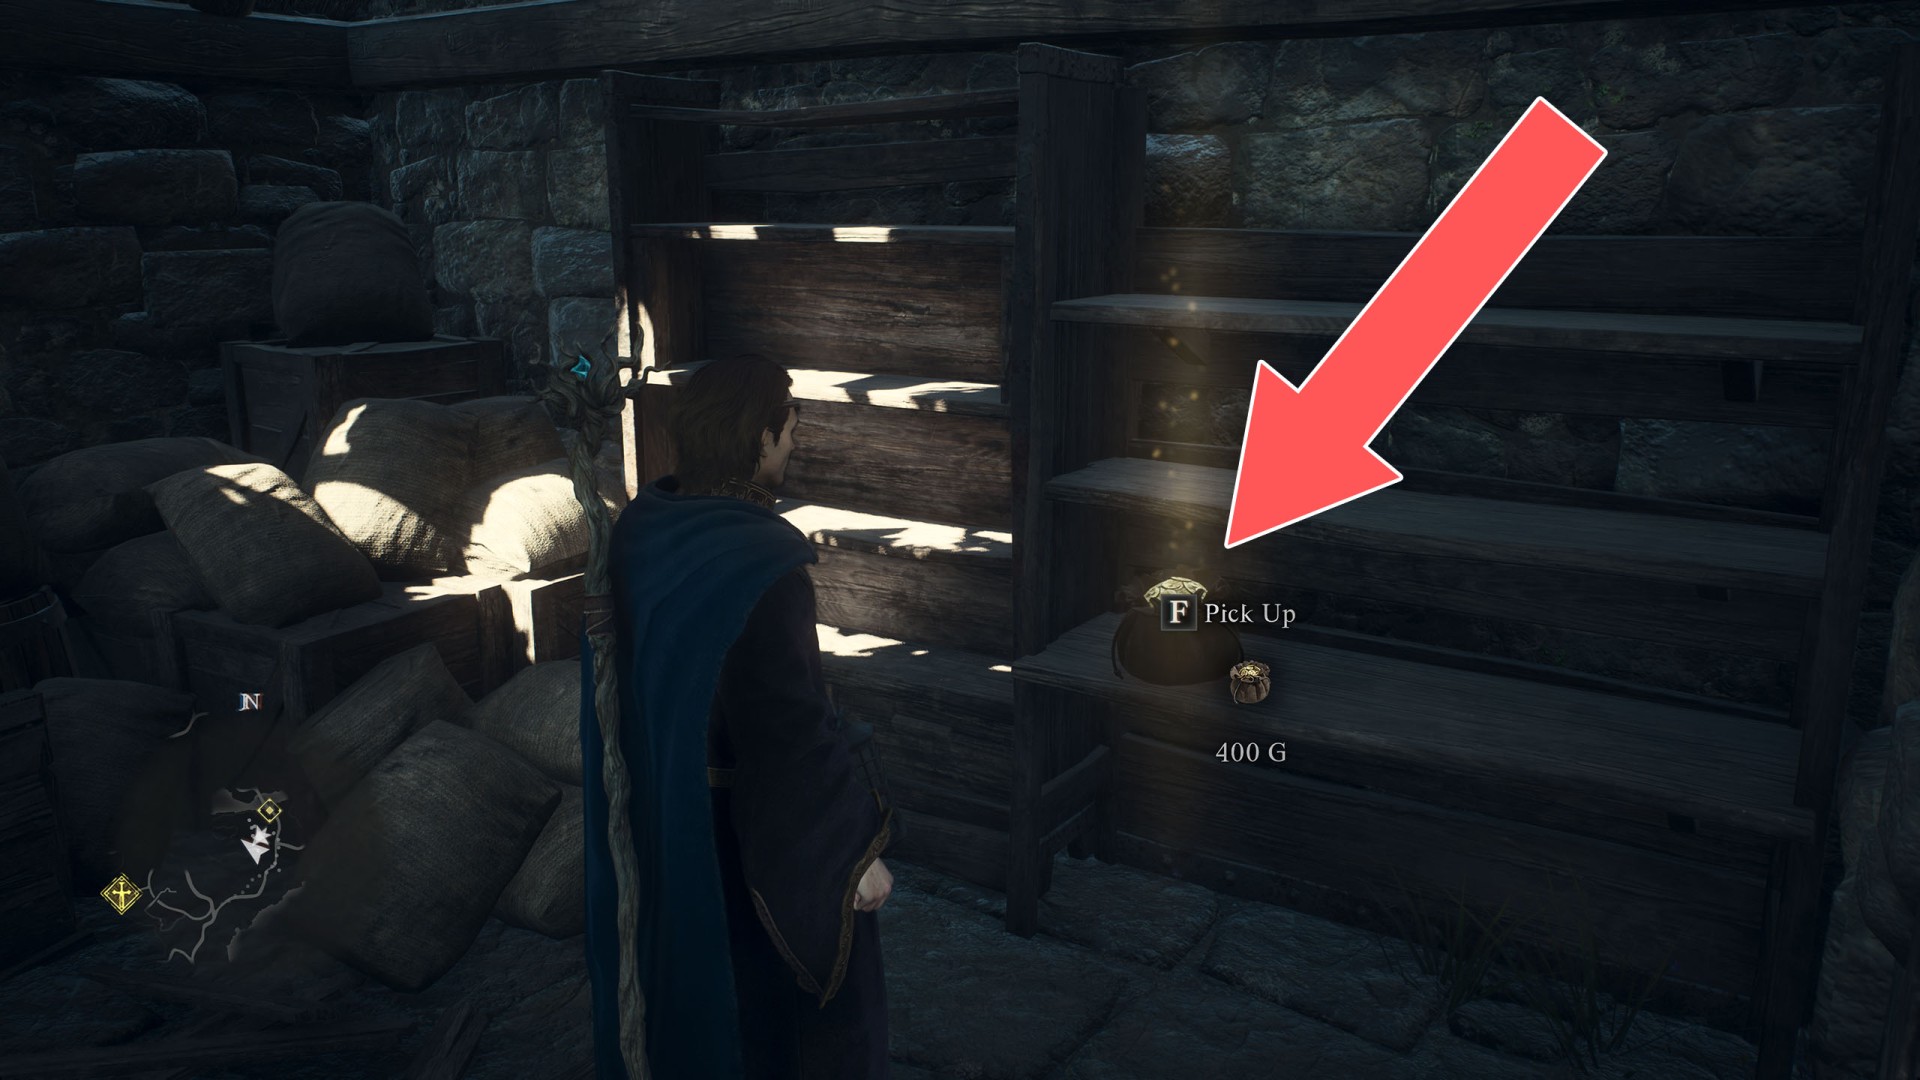
172Pouch (400G)
173Pouch (420G)
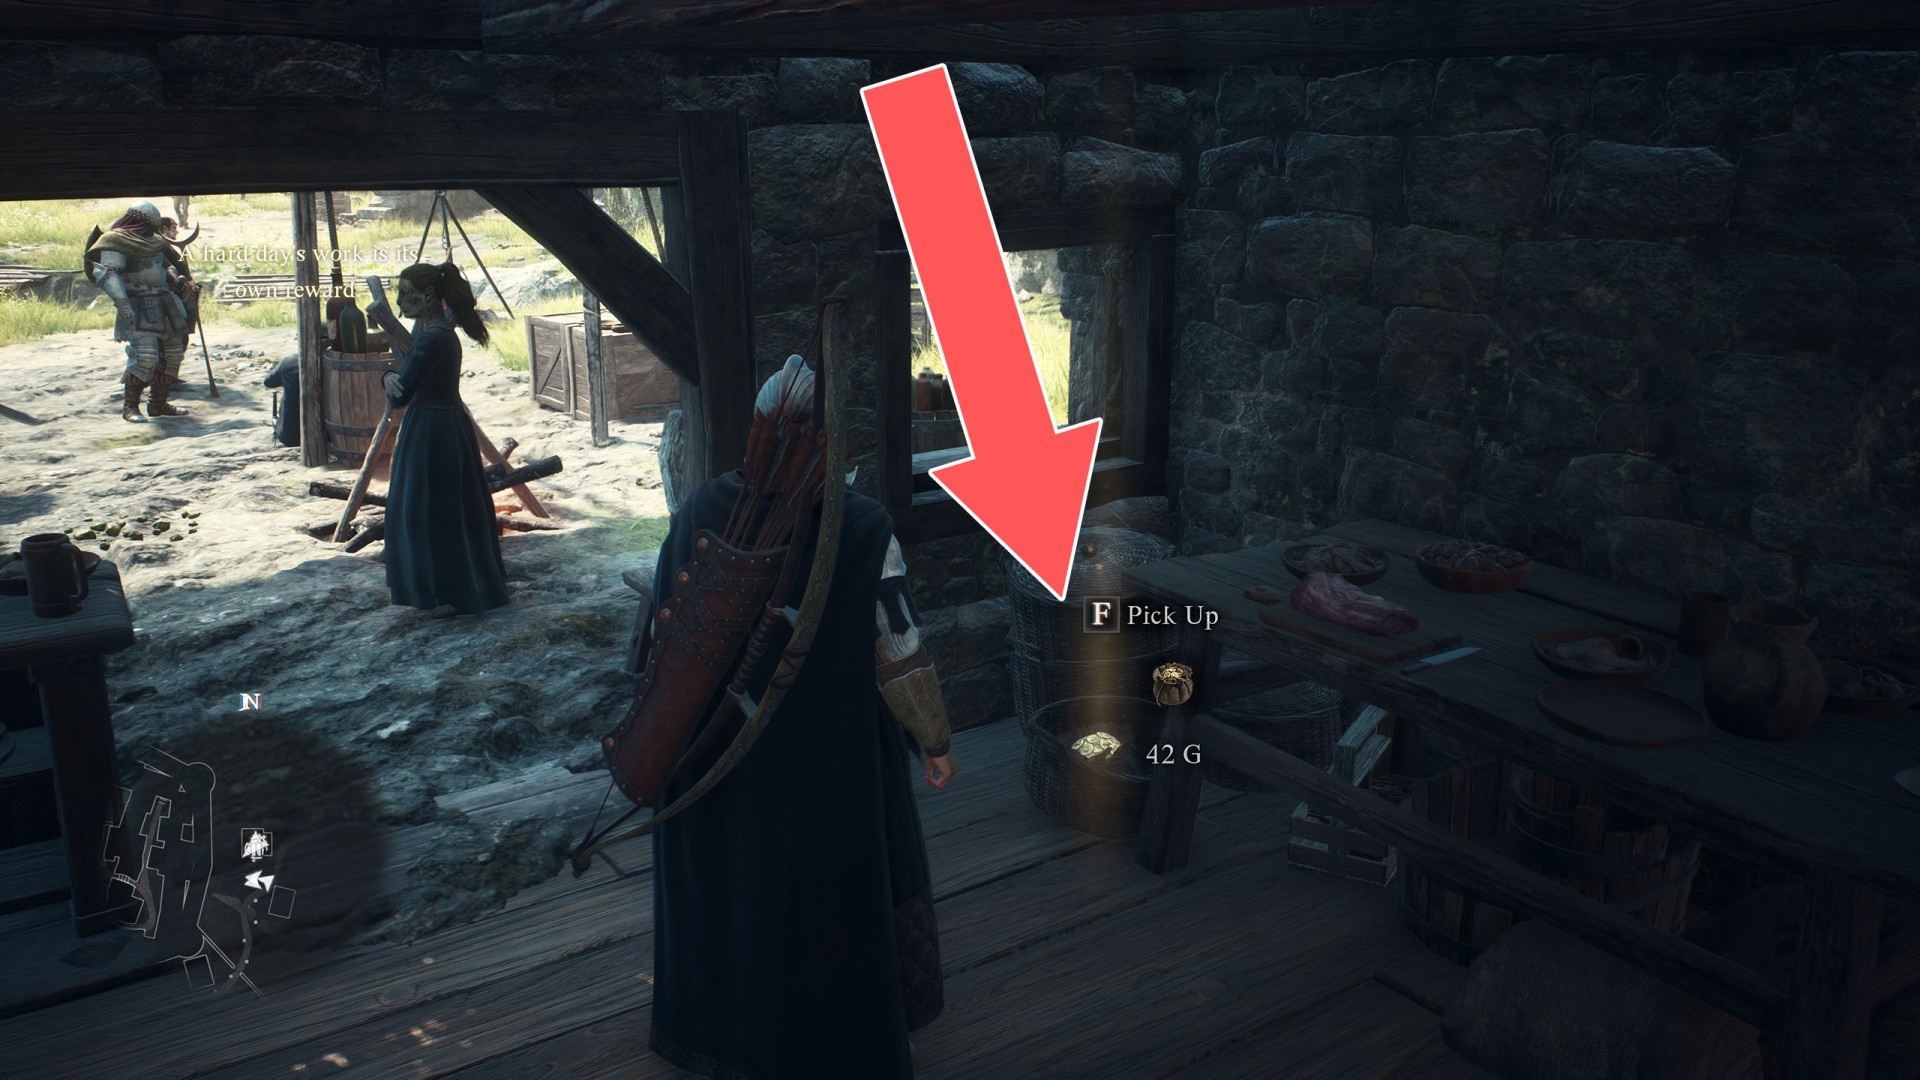
174Pouch (42G)
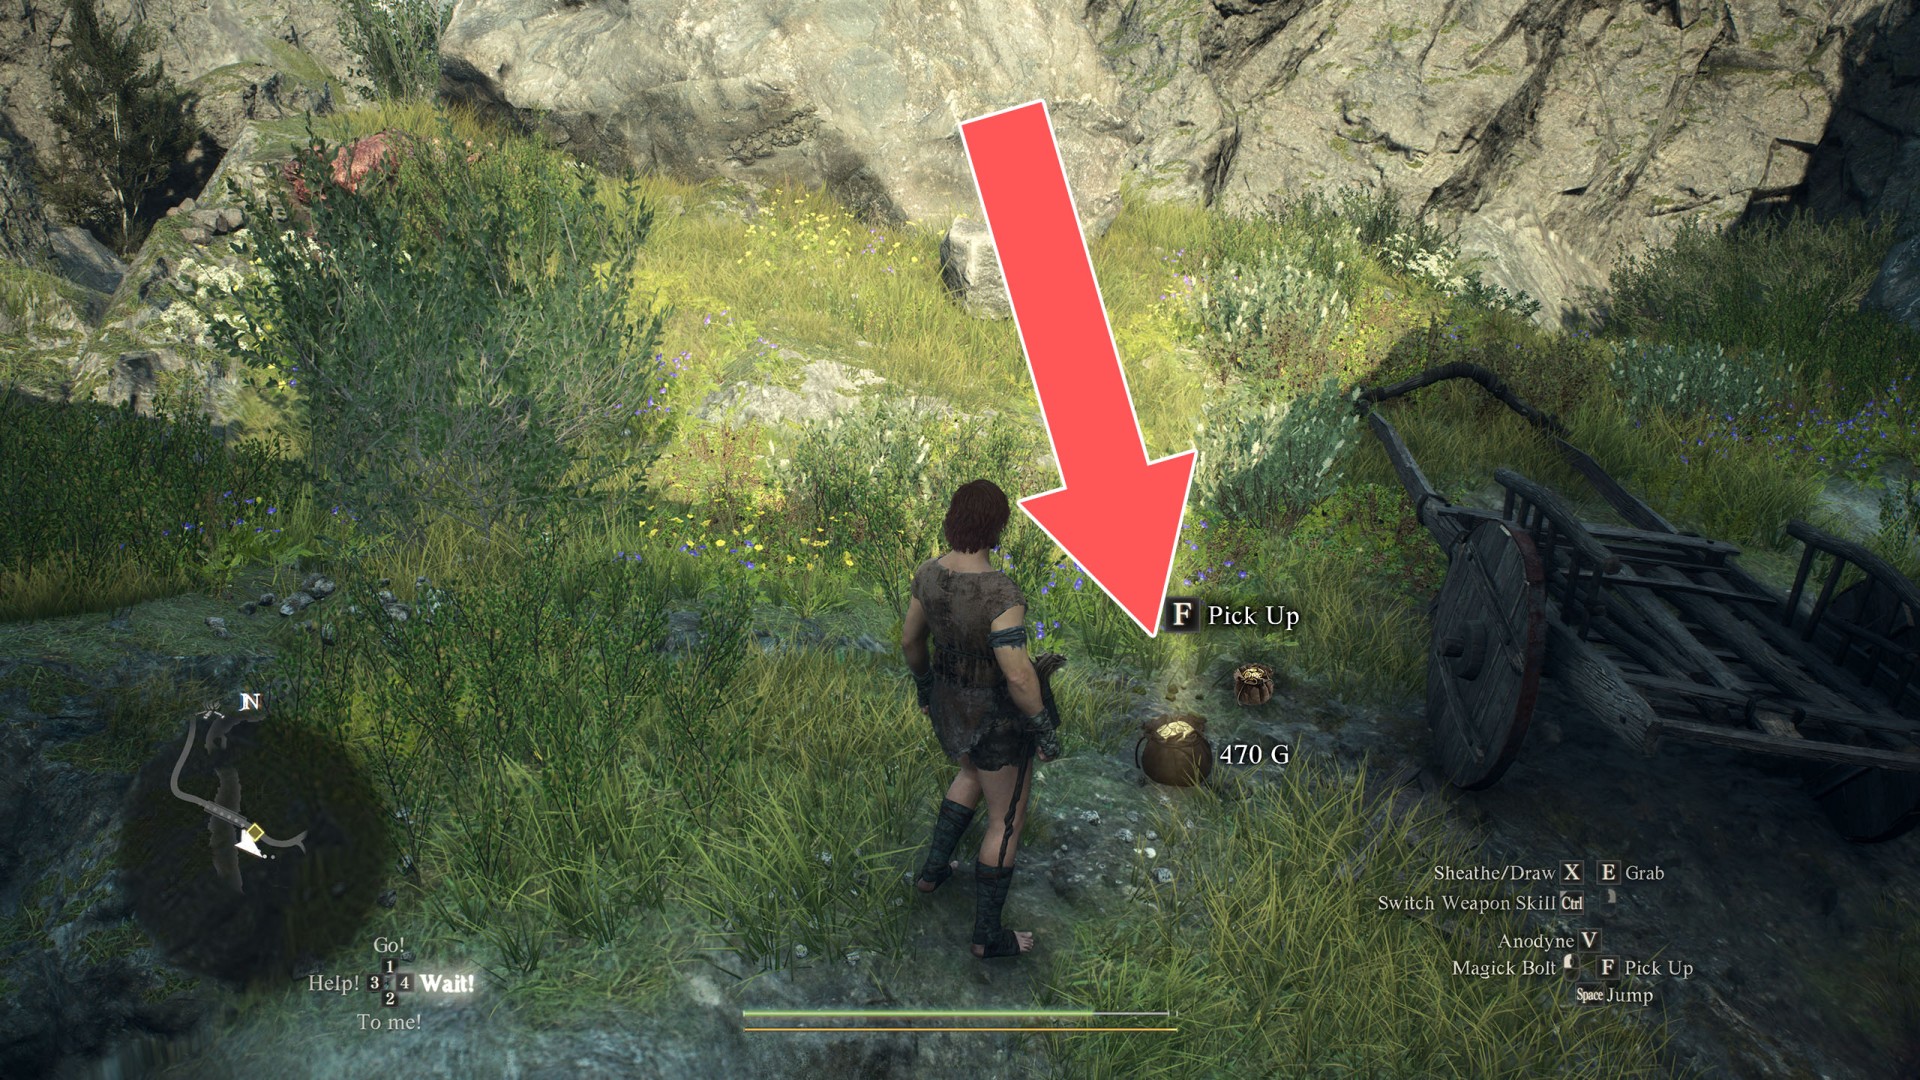
175Pouch (470G)
176Pouch (480G)
177Pouch (500G)
178Pouch (500G)
179Pouch (500G)

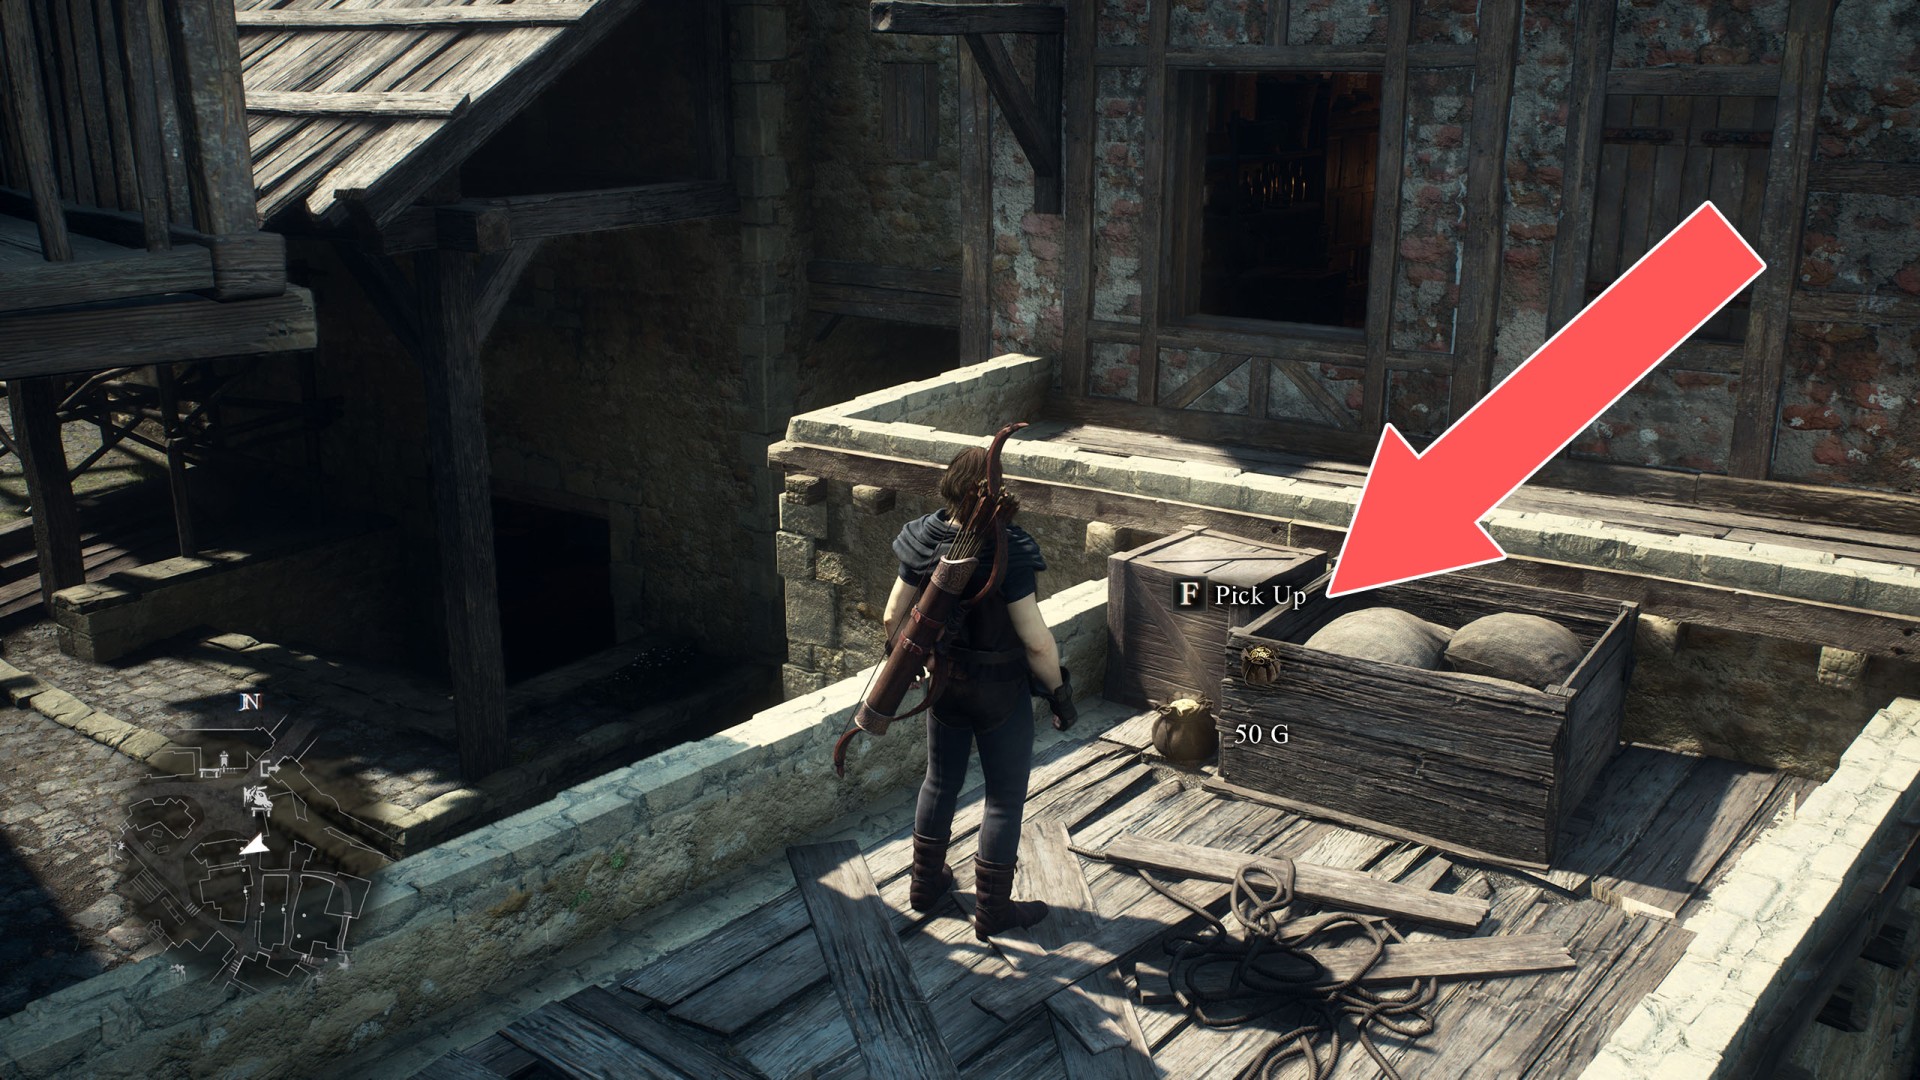
180Pouch (50G)
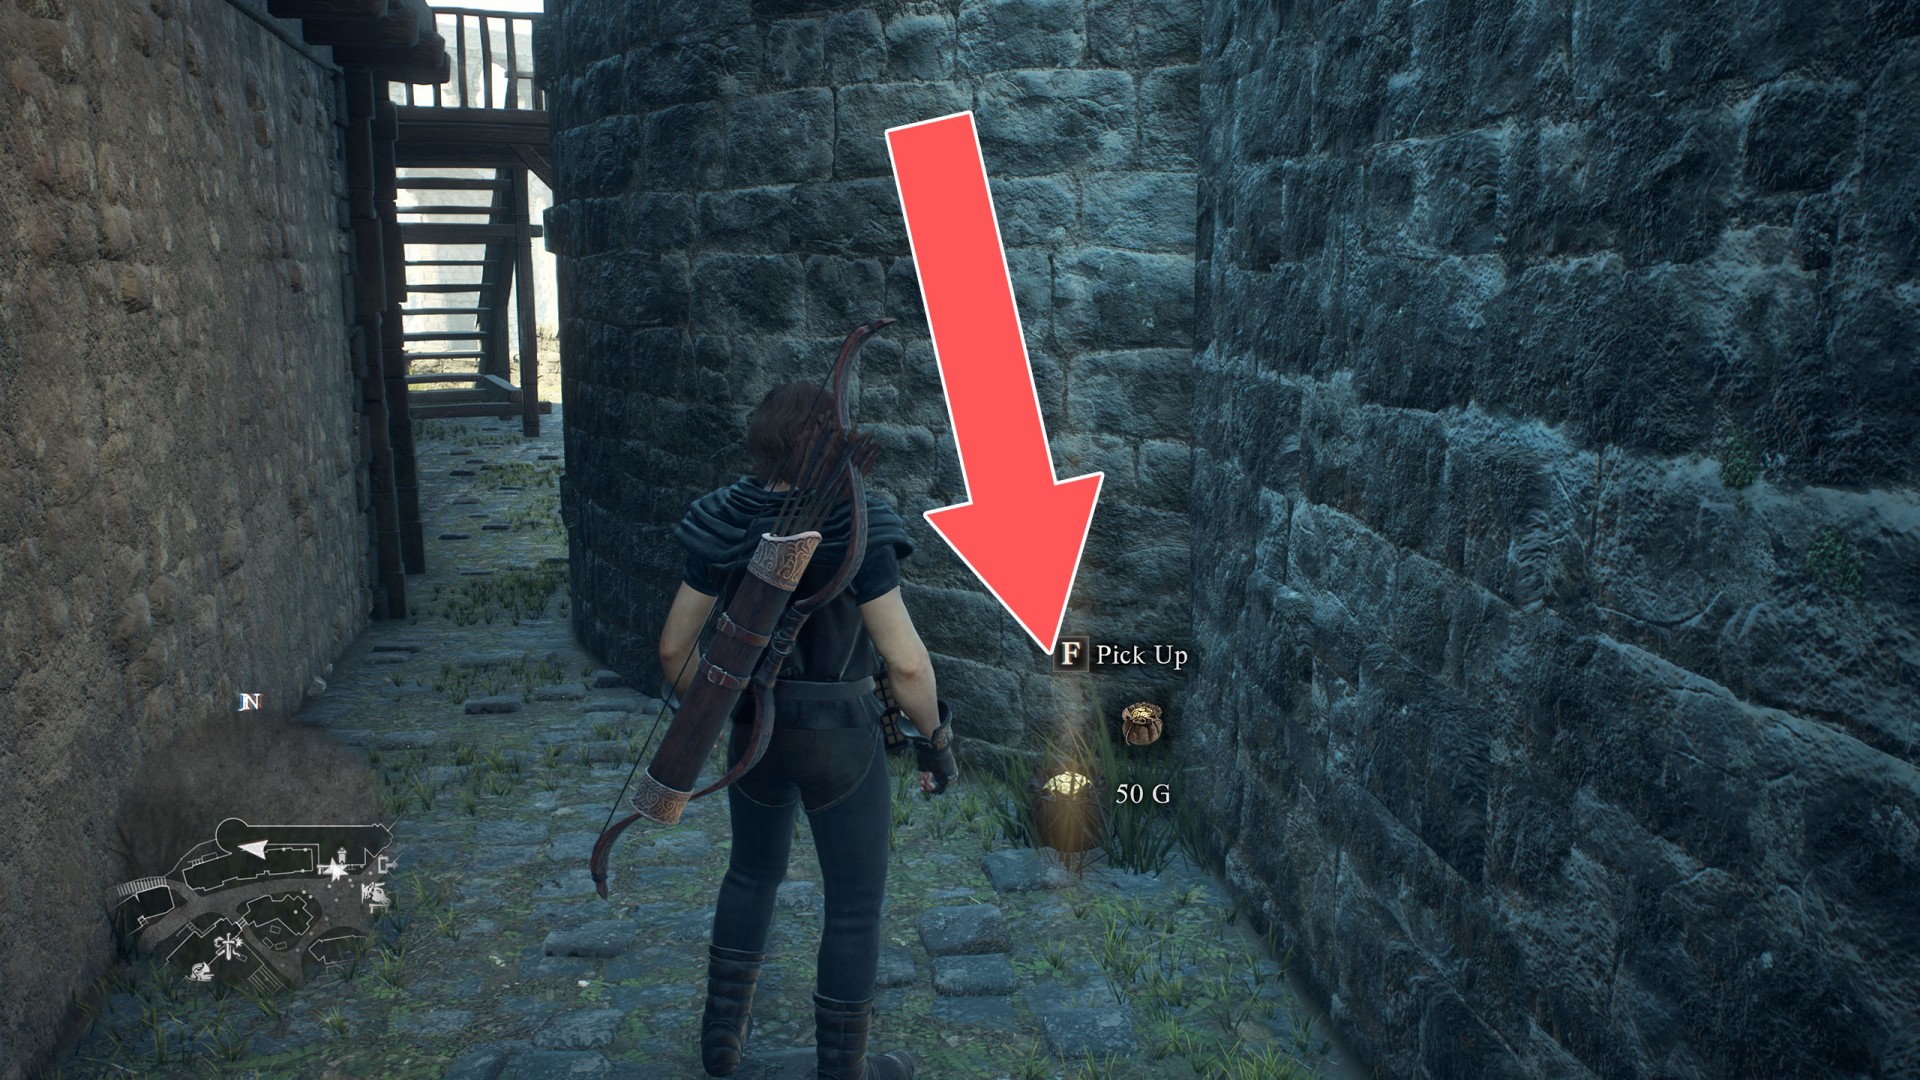
181Pouch (50G)
182Pouch (585G)
183Pouch (625G)
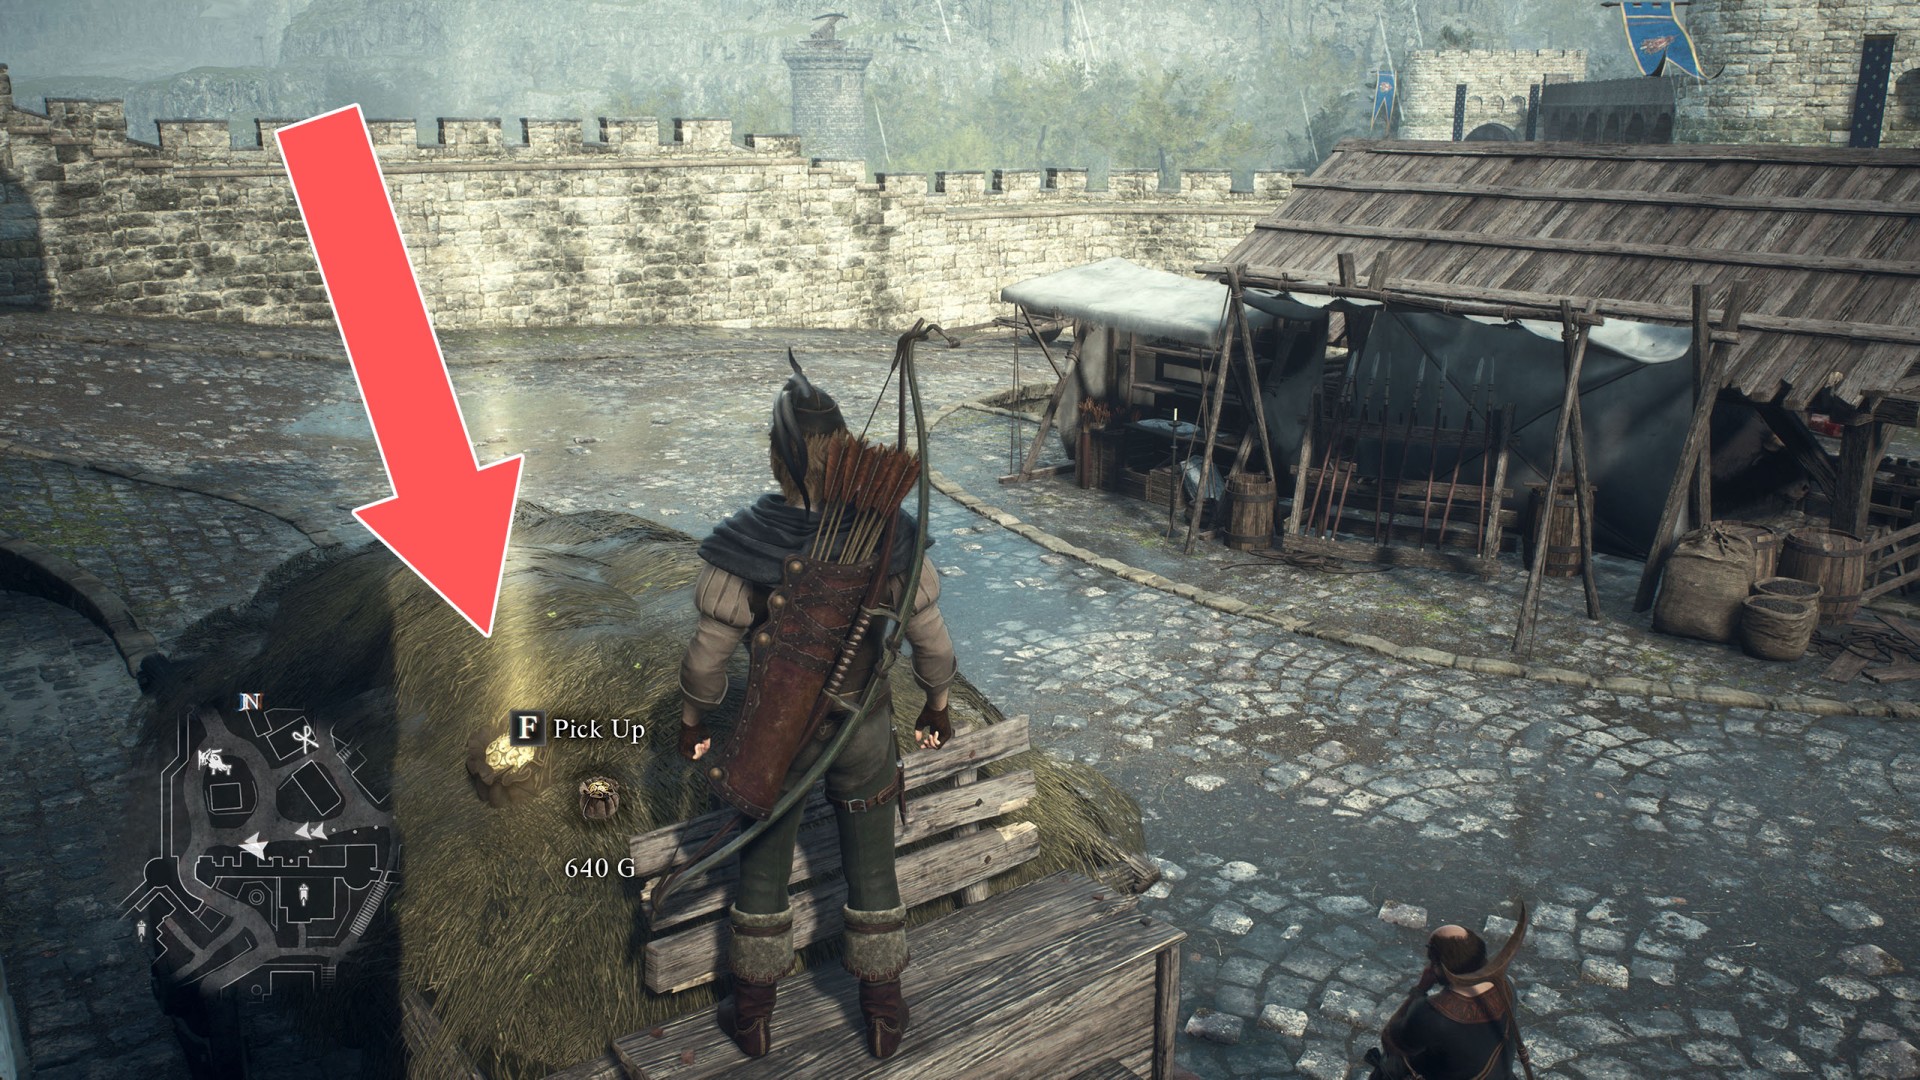
184Pouch (640G)
185Pouch (670G)
Show the map
186Pouch (820G)
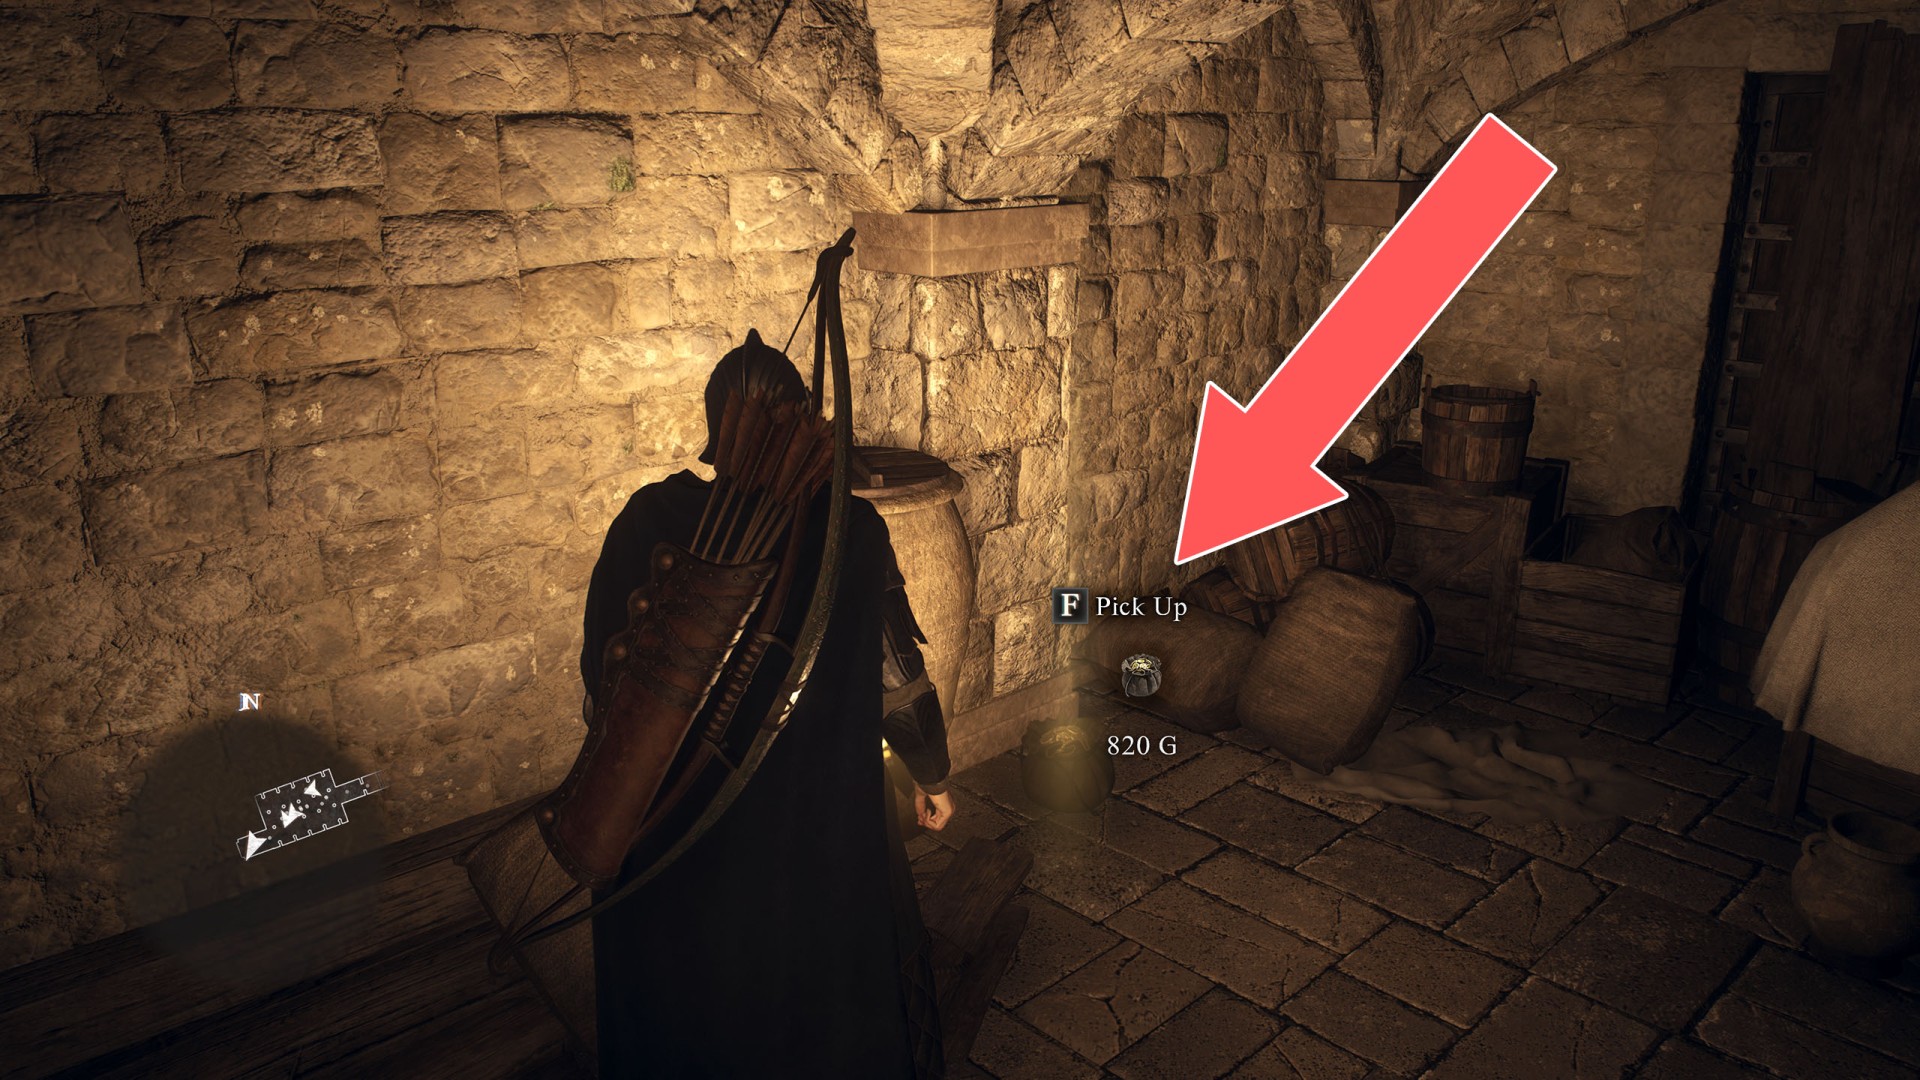
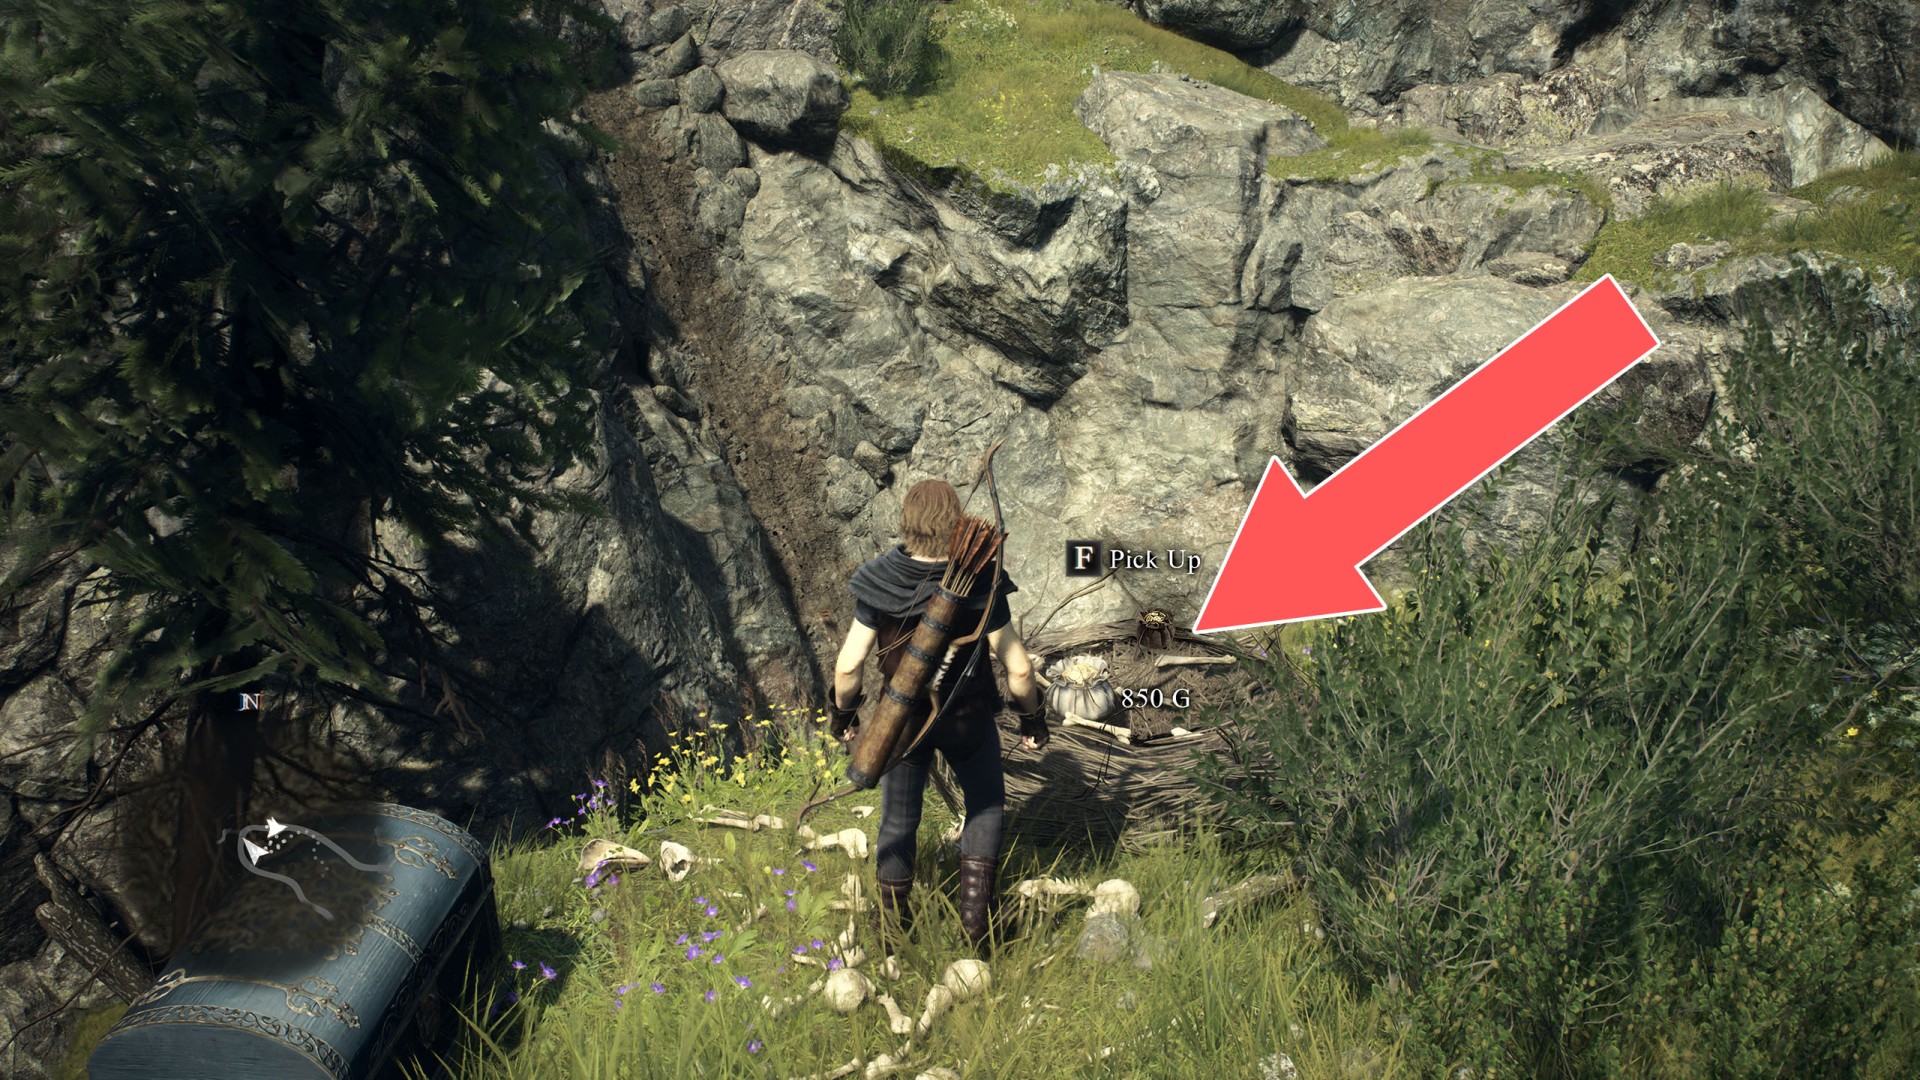
187Pouch (850G)
Show the map
188Pouch (850G)
189Pouch (850G)
190Pouch (850G)
191Pouch (850G)
192Pouch (900G)

193Pouch (970G)
194Pouch (990G)
Show the map
195Pouch x 2 (2,000G)