Gold Dragon's Dogma 2 Point of interest
Places where you can find chests, coin pouches or boxes containing a certain amount of gold, which is the basic currency in the game.
Index
- Box & Pouch (5,600G)
- Box & Pouch (6,490G)
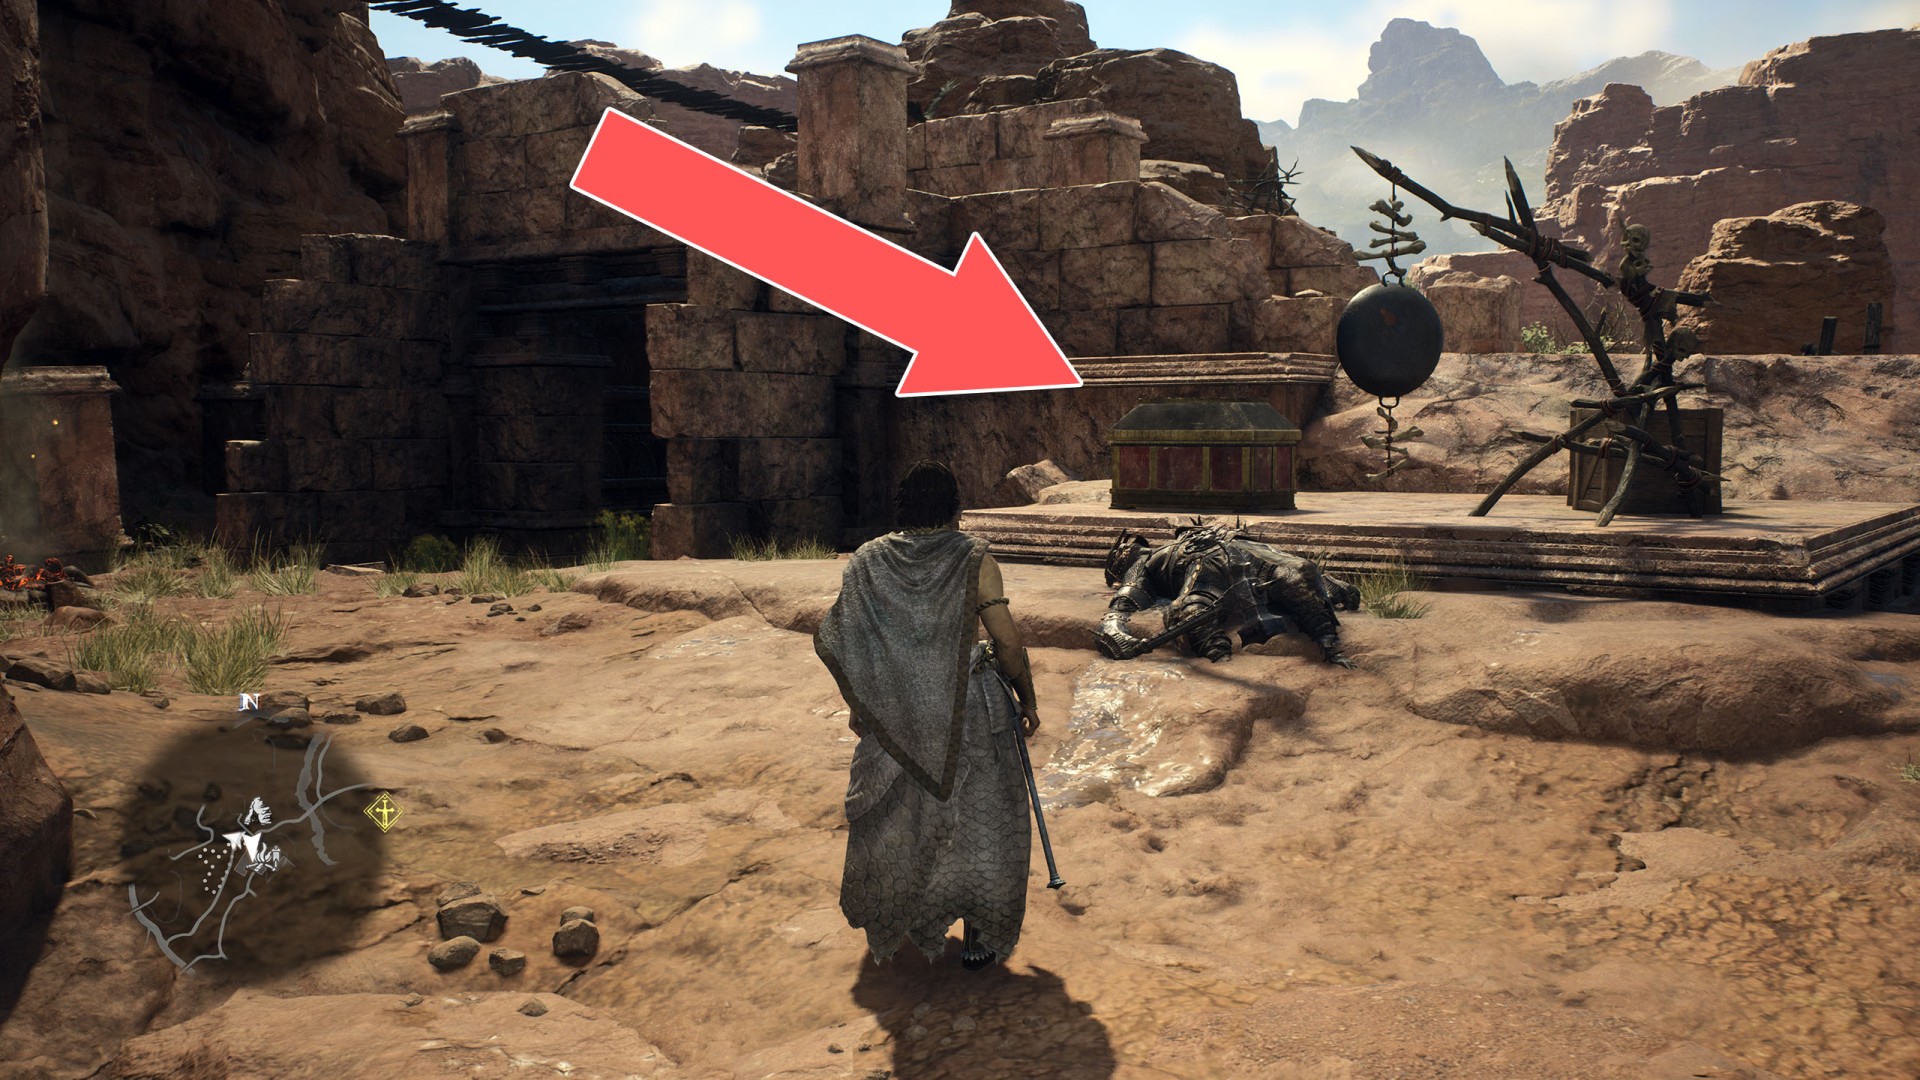
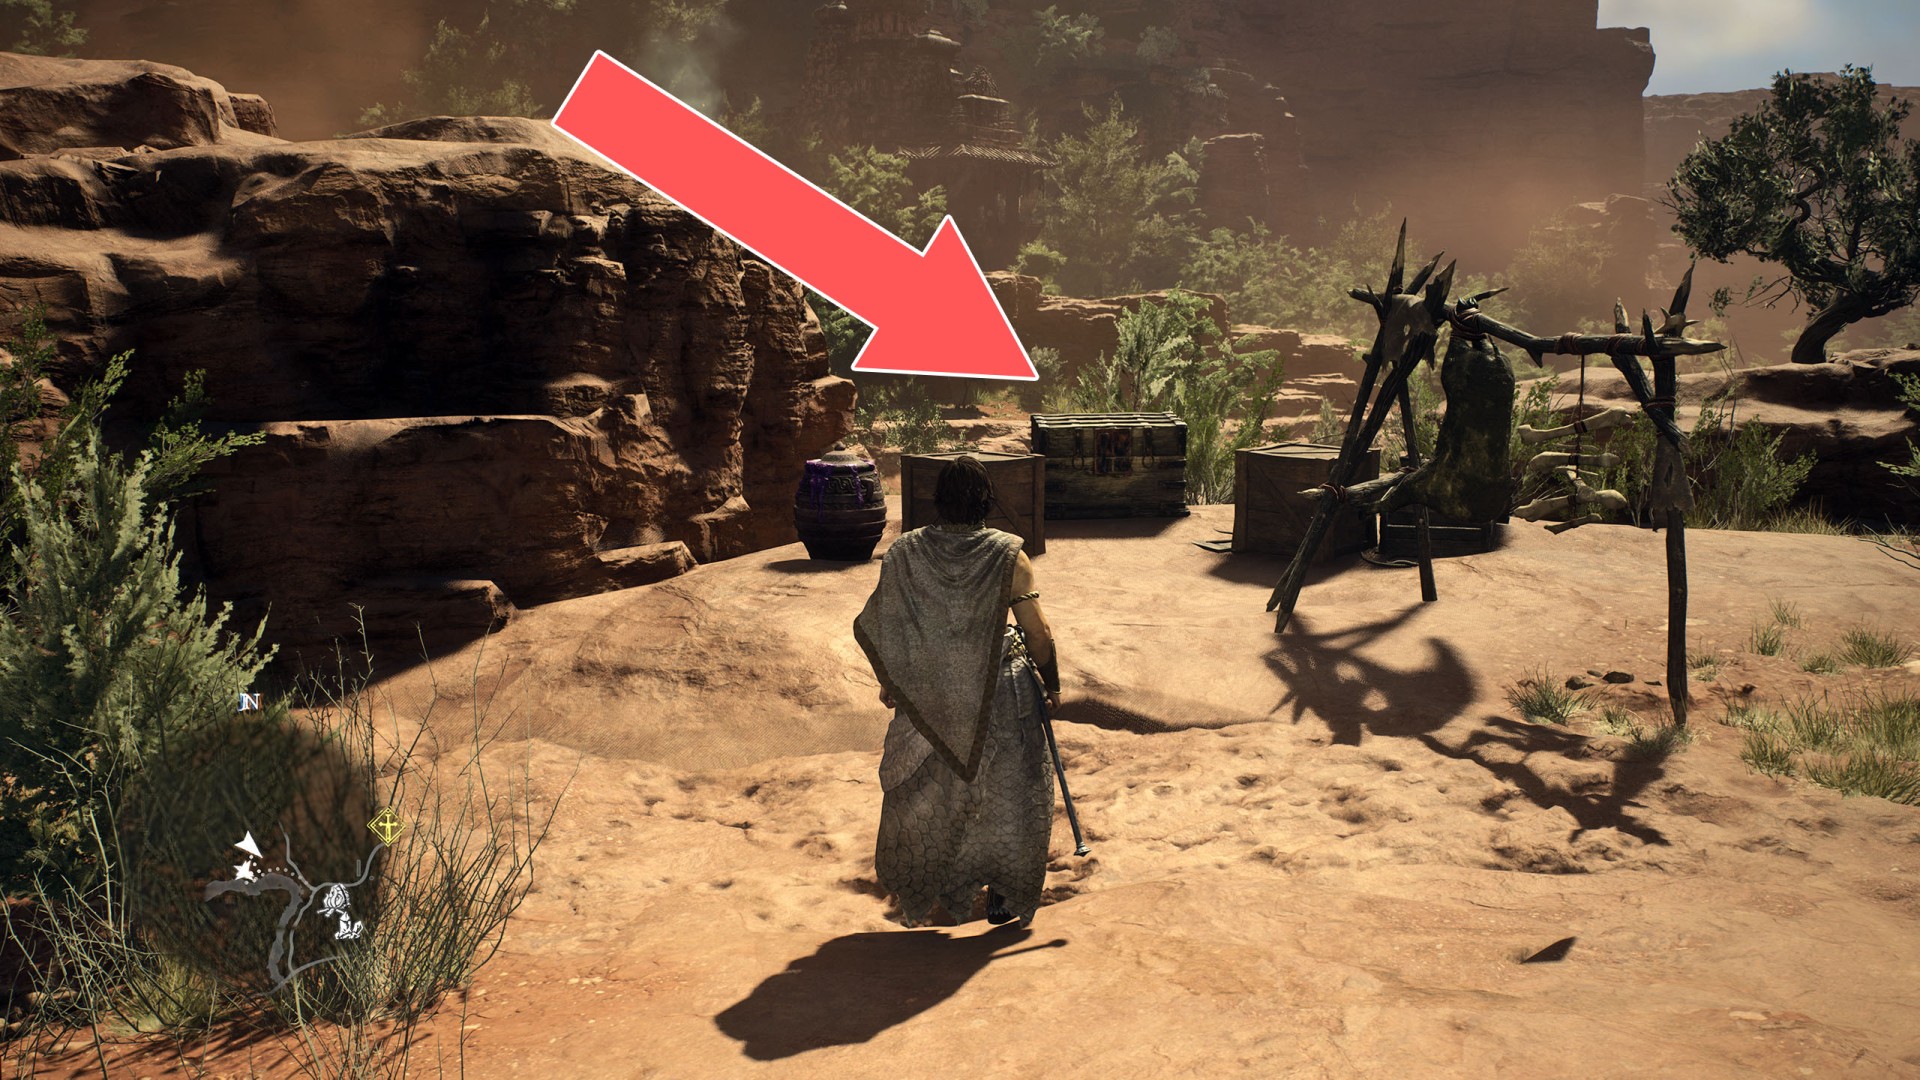
- Box (12,000G)
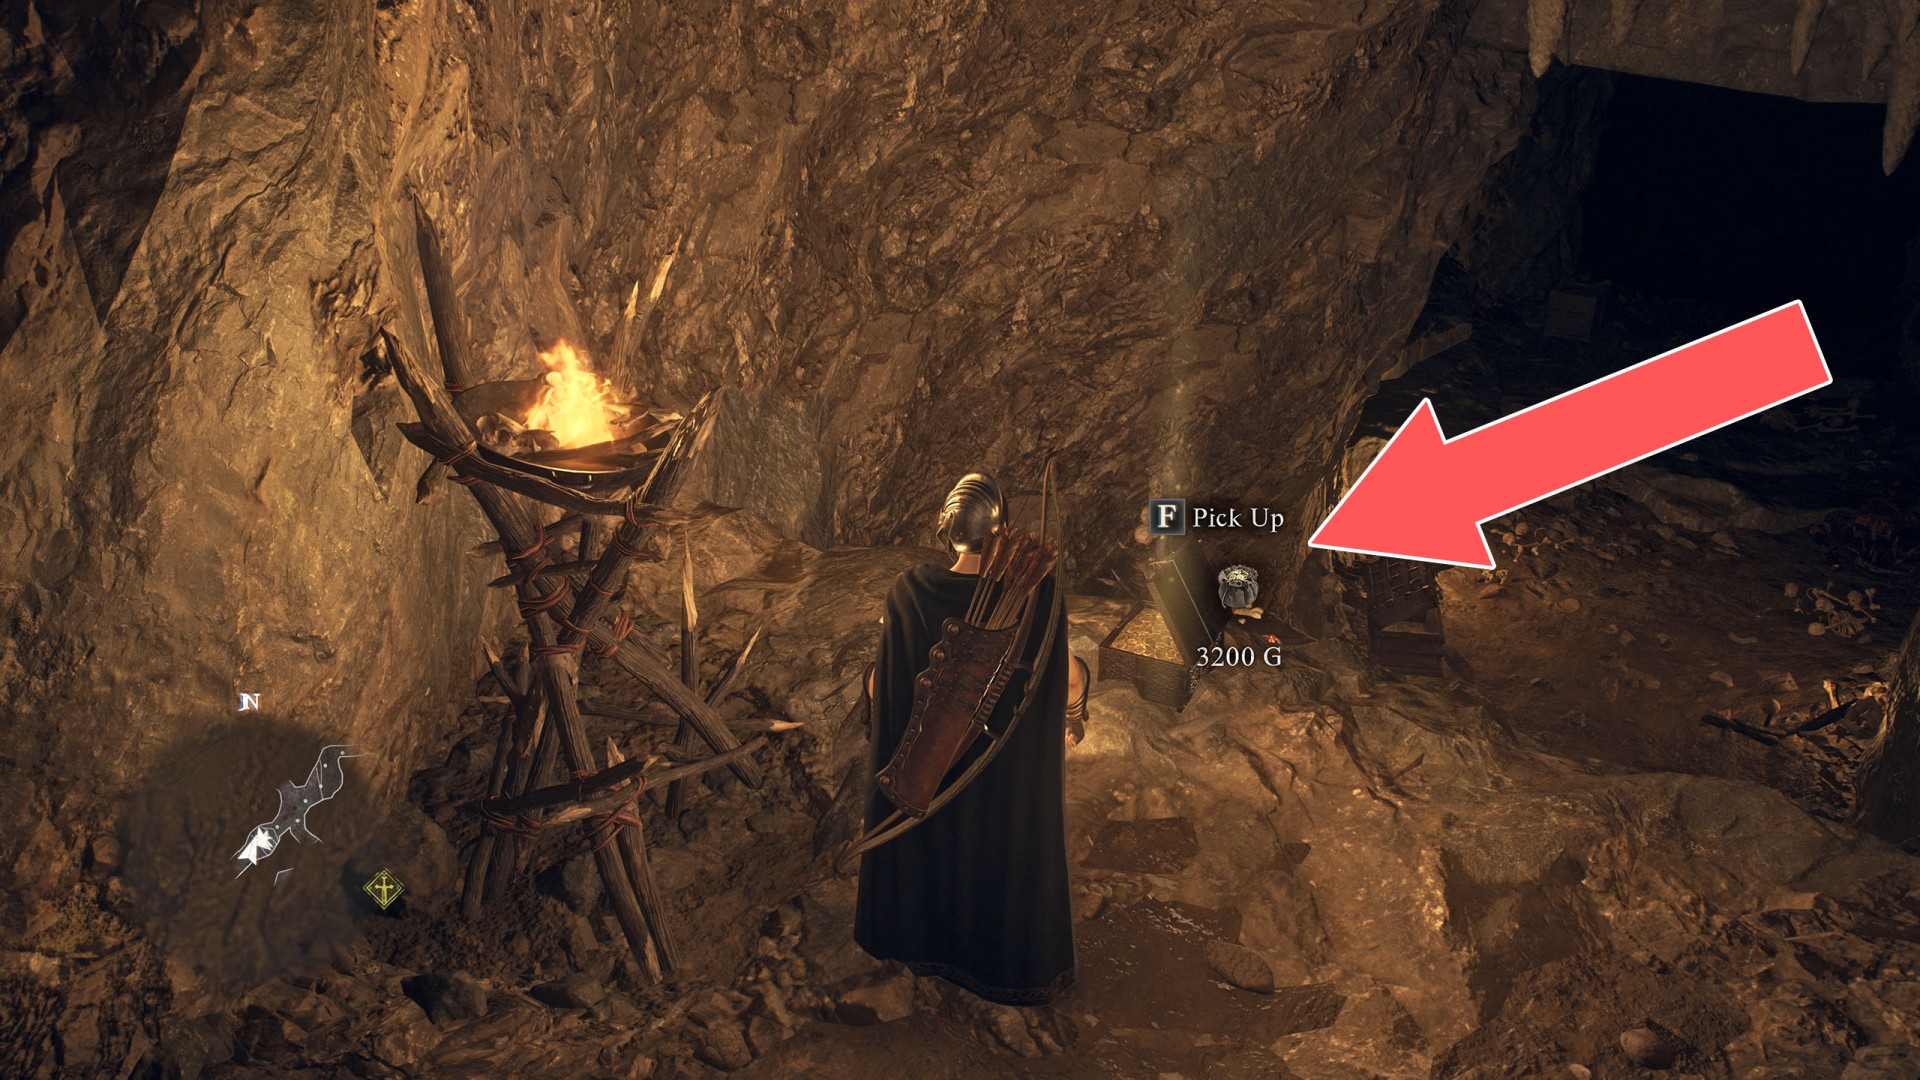
- Box (3,200G)
- Box (3,500G)
- Box (3,900G)
- Box (4,450G)
- Box + Pouch x 2 (5,350G)
- Chest (1,000G)
- Chest (1,015G)
- Chest (1,020G)
- Chest (1,030G)
- Chest (1,050G)
- Chest (1,080G)
- Chest (1,100G)
- Chest (1,100G)
- Chest (1,100G)
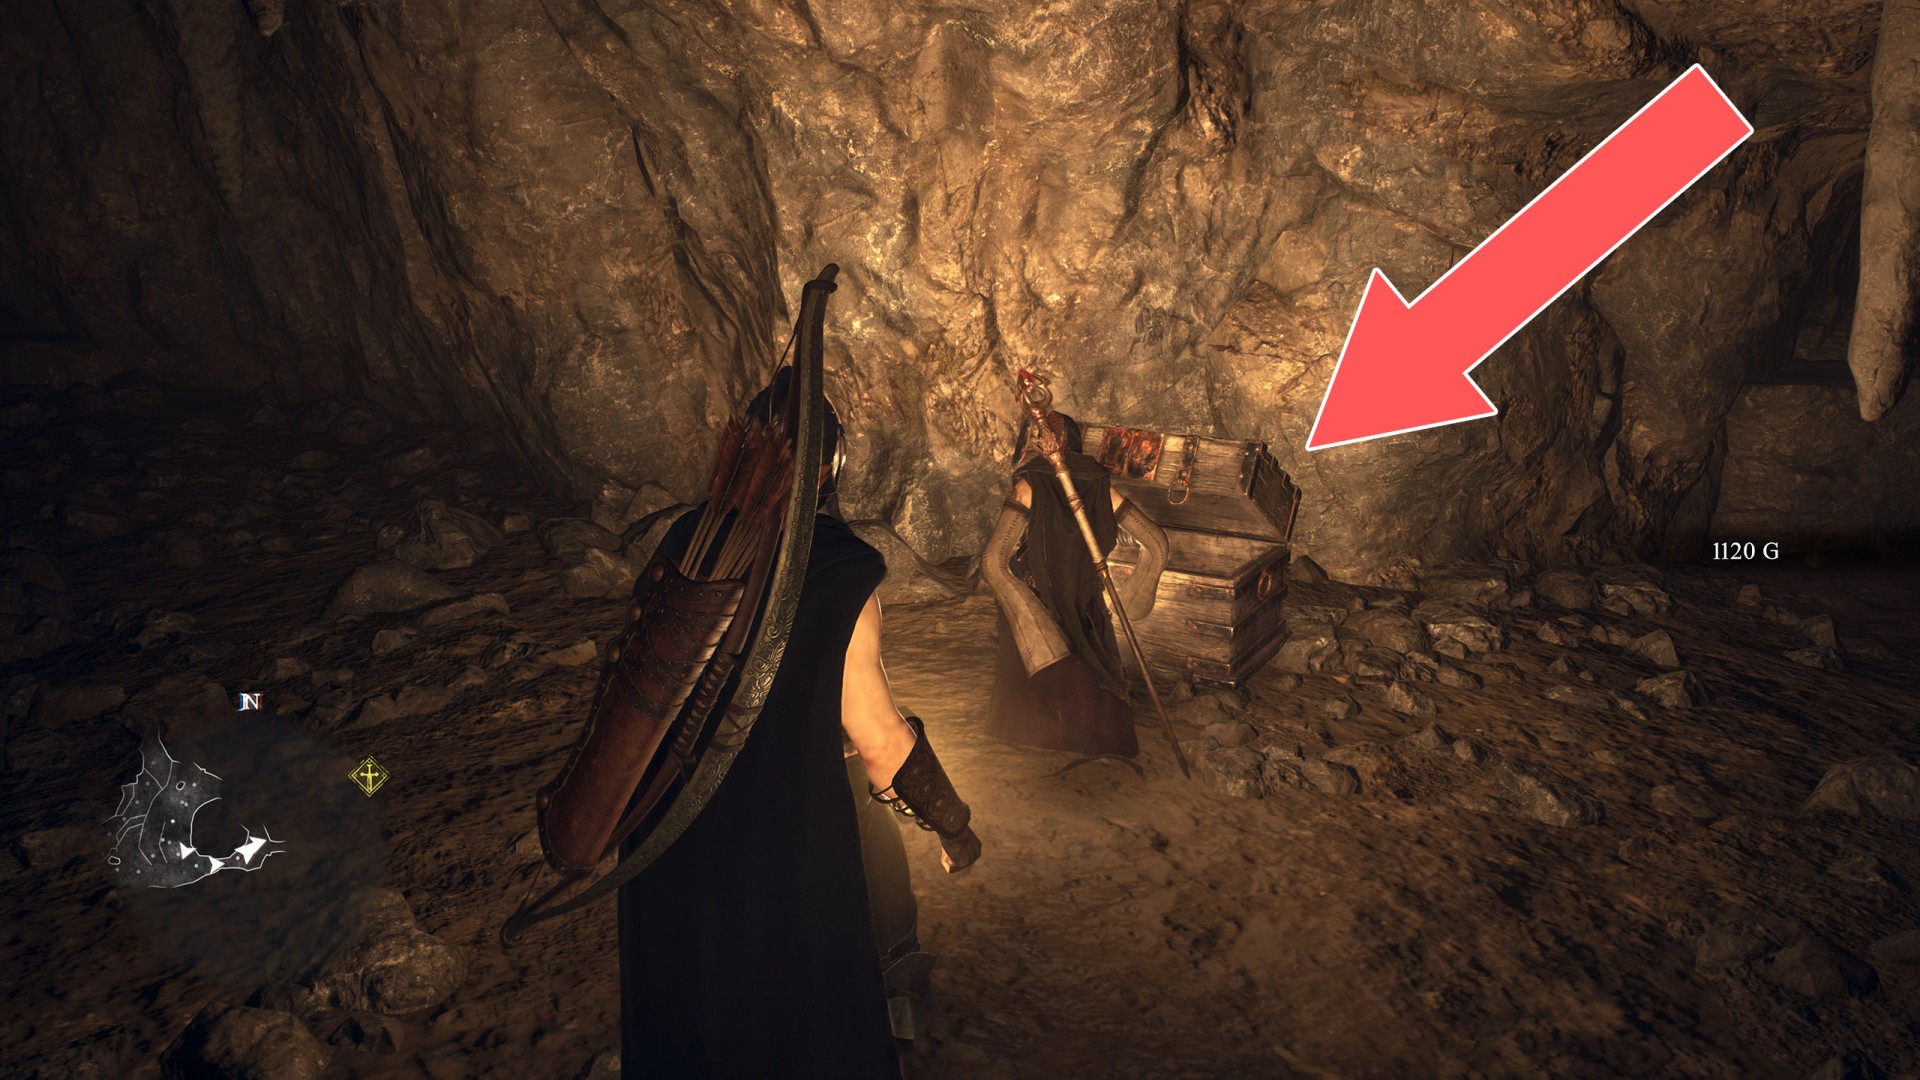
- Chest (1,120G)
- Chest (1,140G)
- Chest (1,150G)
- Chest (1,180G)
- Chest (1,190G)
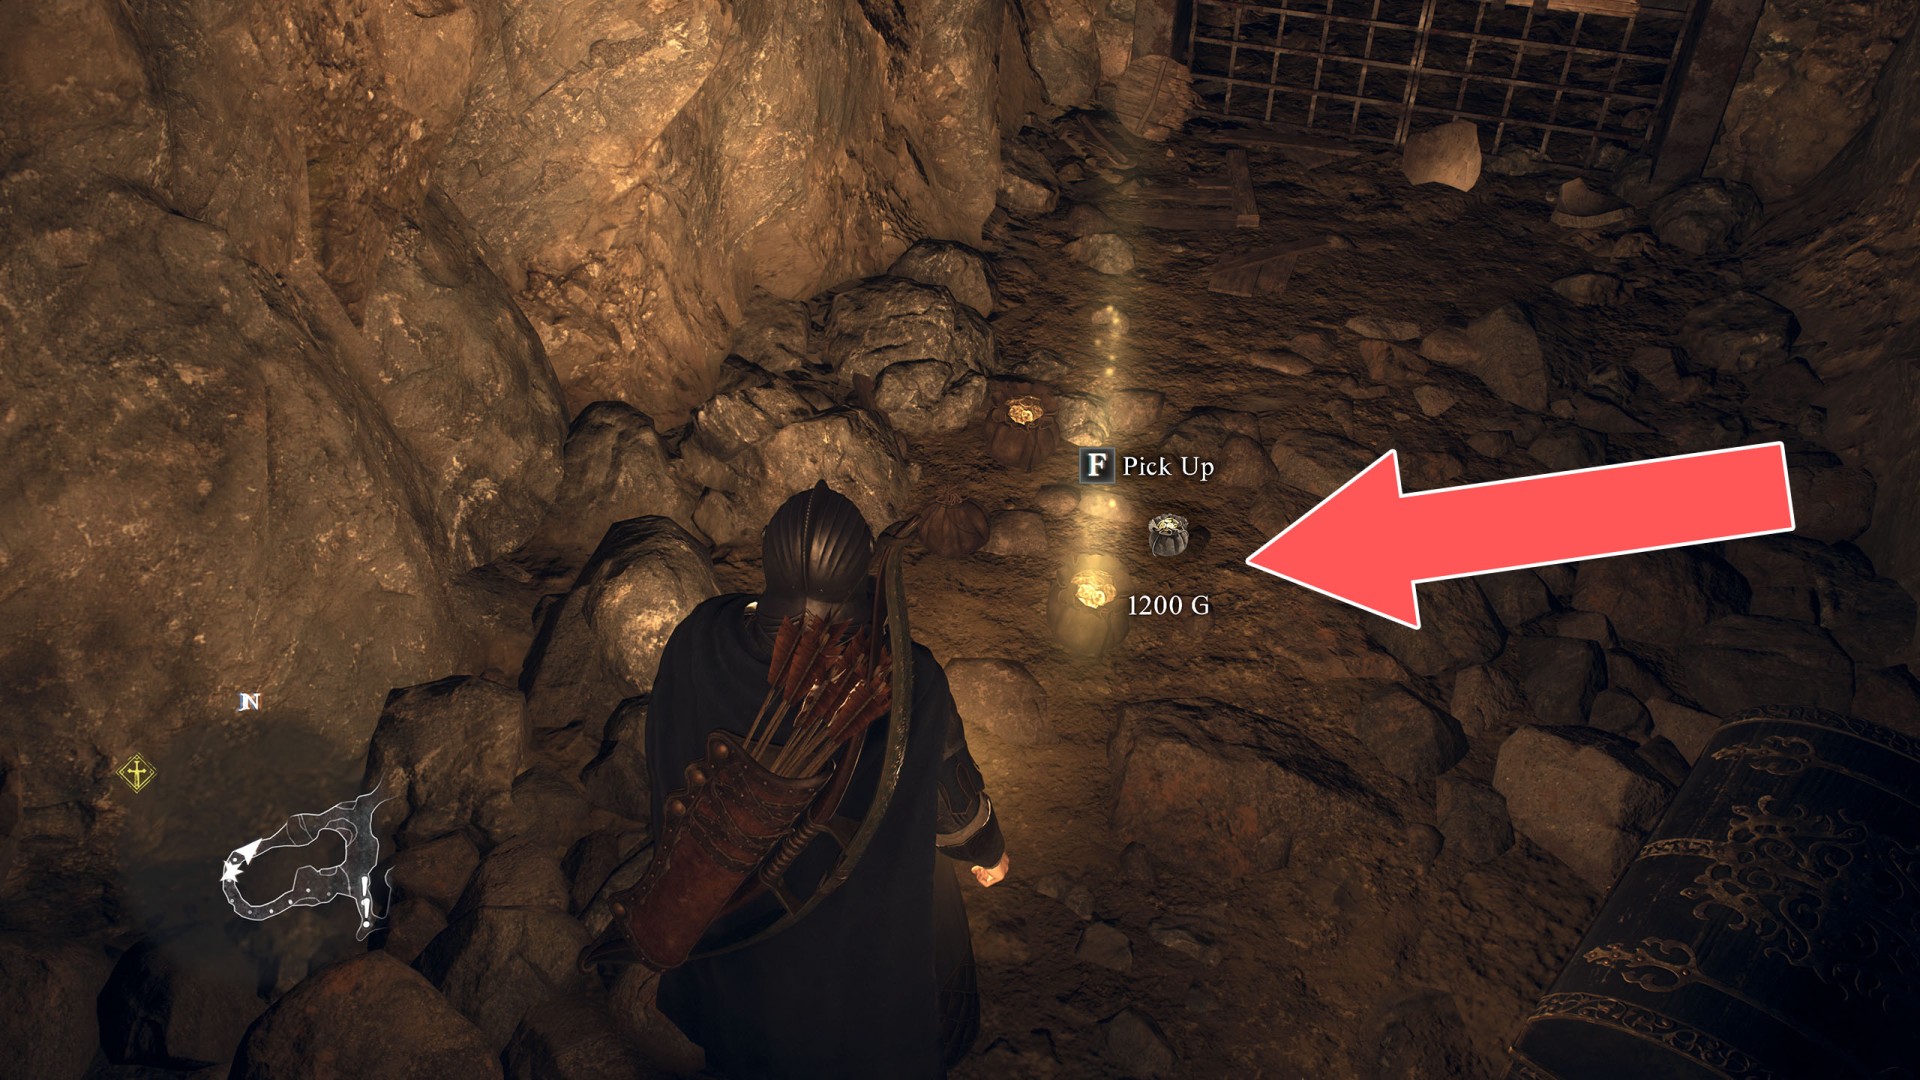
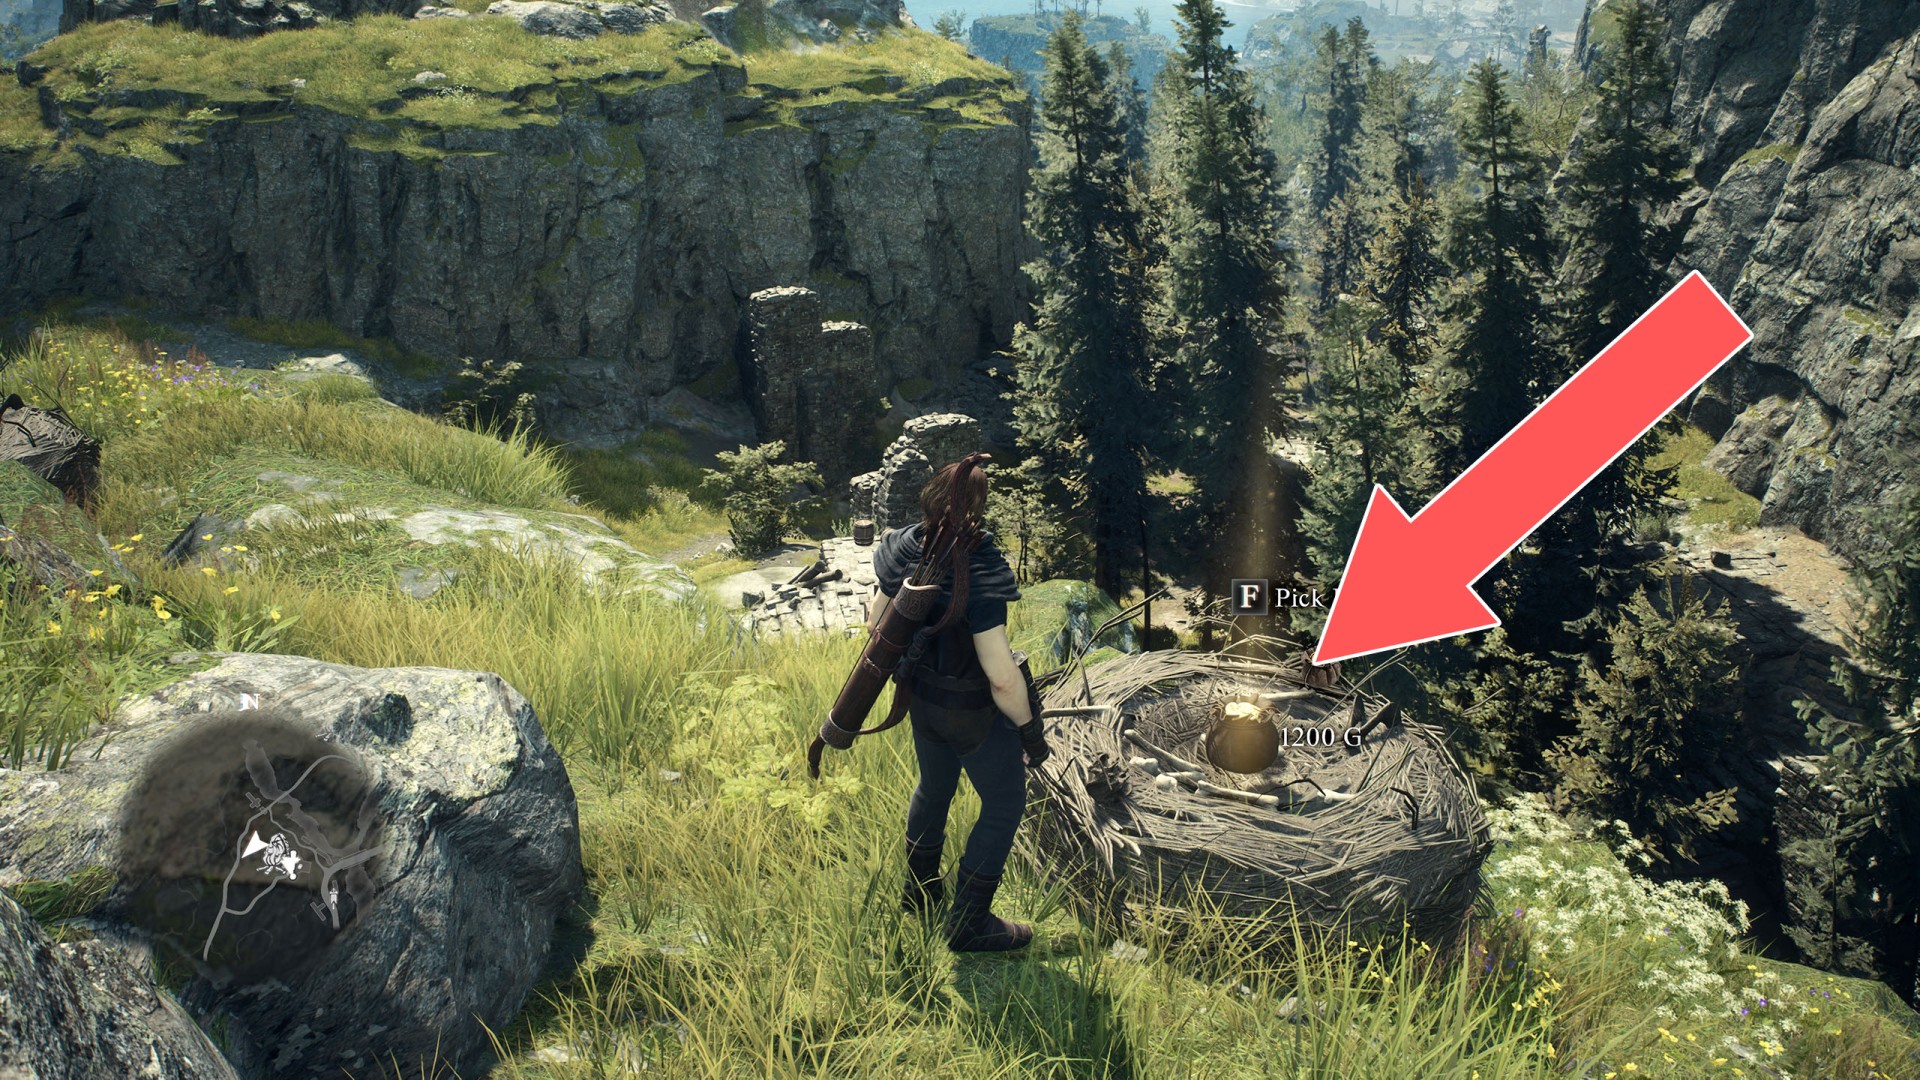
- Chest (1,200G)
- Chest (1,200G)
- Chest (1,200G)
- Chest (1,210G)
- Chest (1,210G)
- Chest (1,216G)
- Chest (1,300G)
- Chest (1,300G)
- Chest (1,300G)
- Chest (1,300G)
- Chest (1,340G)
- Chest (1,390G)
- Chest (1,400G)
- Chest (1,420G)
- Chest (1,500G)
- Chest (1,500G)
- Chest (1,500G)
- Chest (1,510G)
- Chest (1,730G)
- Chest (1,750G)
- Chest (1,800G)
- Chest (1,800G)
- Chest (1,800G)
- Chest (1,820G)
- Chest (1,830G)
- Chest (1,850G)
- Chest (1,900G)
- Chest (10,030G)
- Chest (10,090G)
- Chest (10,360G)
- Chest (130G)
- Chest (2,000G)
- Chest (2,070G)
- Chest (2,110G)
- Chest (2,130G)
- Chest (2,130G)
- Chest (2,200G)
- Chest (2,220G)
- Chest (2,250G)
- Chest (2,370G)
- Chest (2,370G)
- Chest (2,370G)
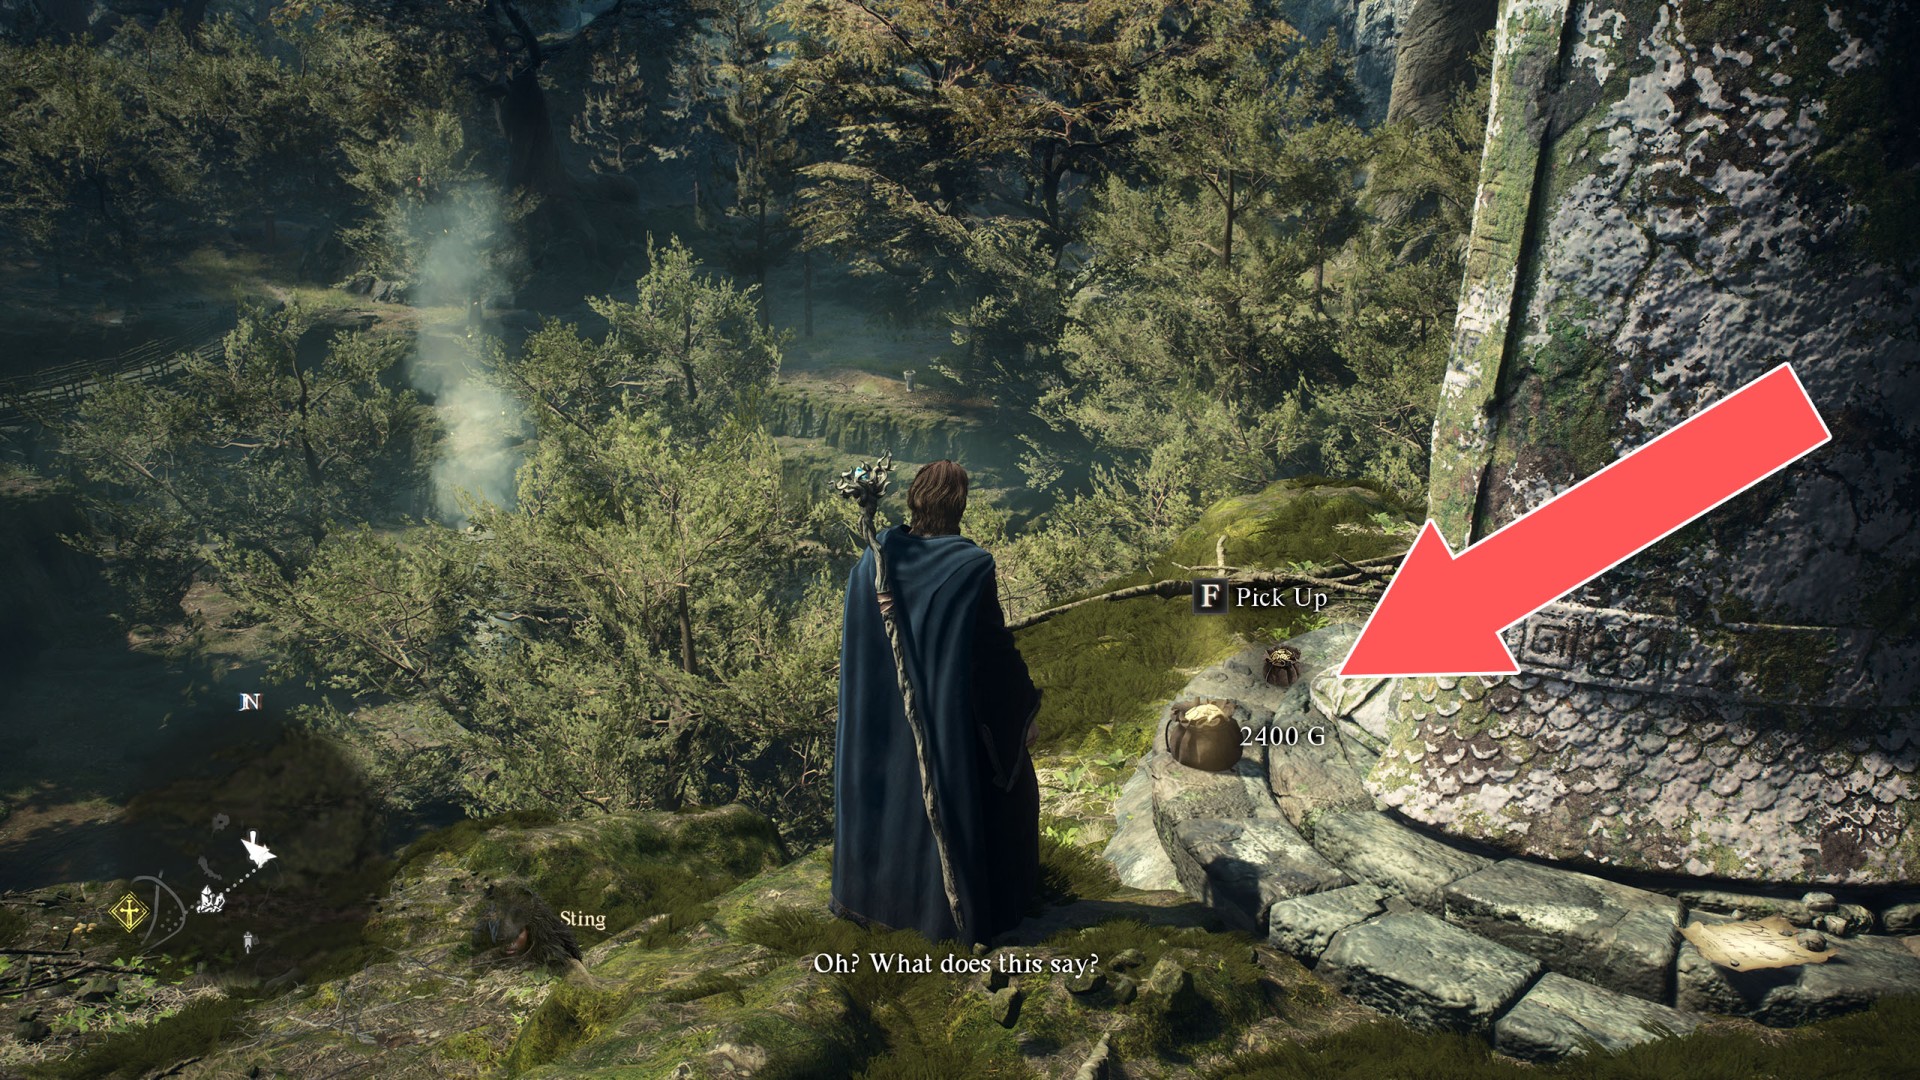
- Chest (2,400G)
- Chest (2,490G)
- Chest (2,500G)
- Chest (2,560G)
- Chest (2,570G)
- Chest (2,600G)
- Chest (2,650G)
- Chest (2,800G)
- Chest (2,800G)
- Chest (2,840G)
- Chest (2,920G)
- Chest (3,030G)
- Chest (3,080G)
- Chest (3,110G)
- Chest (3,120G)
- Chest (3,210G)
- Chest (3,260G)
- Chest (3,330G)
- Chest (3,450G)
- Chest (3,500G)
- Chest (3,520G)
- Chest (3,550G)
- Chest (3,600G)
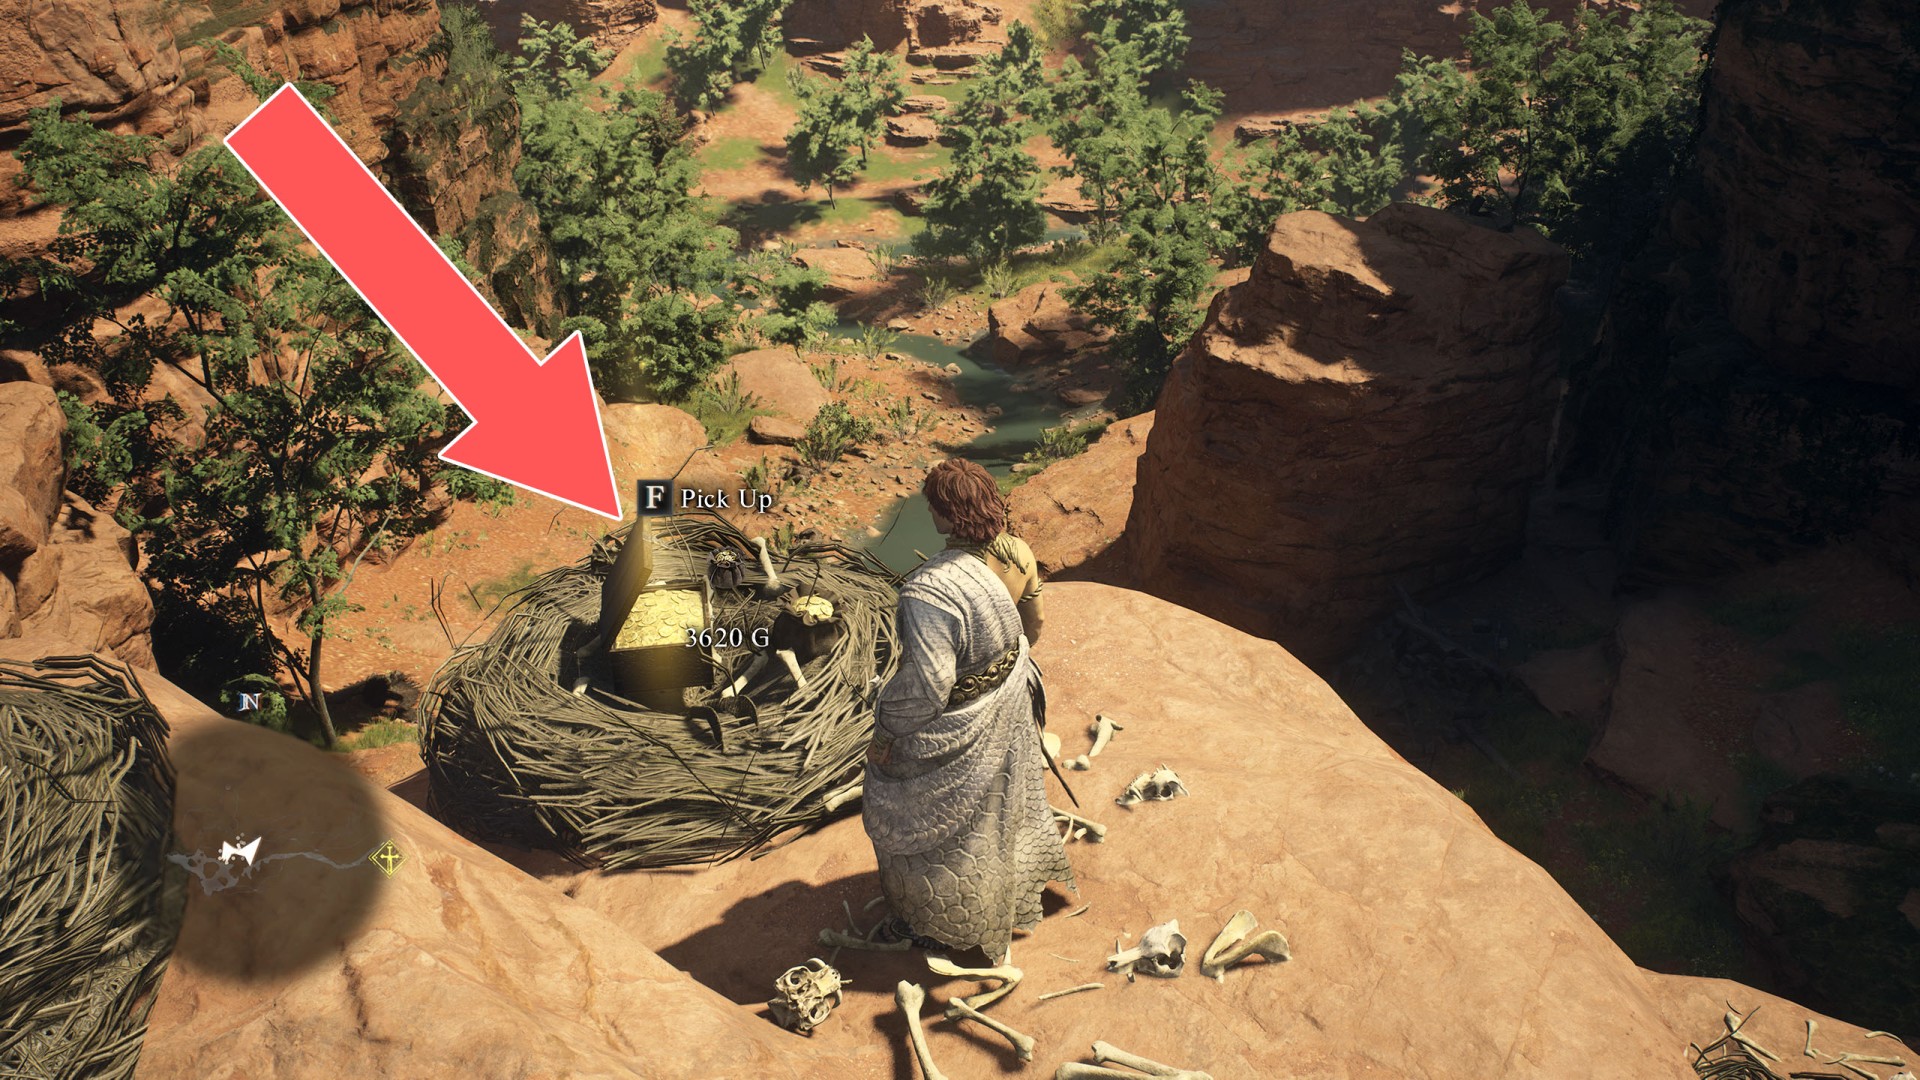
- Chest (3,620G)
- Chest (3,900G)
- Chest (4,100G)
- Chest (4,200G)
- Chest (4,500G)
- Chest (4,510G)
- Chest (4,710G)
- Chest (4,710G)
- Chest (4,790G)
- Chest (4,790G)
- Chest (4,900G)
- Chest (4,930G)
- Chest (4,980G)
- Chest (400G)
- Chest (400G)
- Chest (420G)
- Chest (5,000G)
- Chest (5,020G)
- Chest (5,130G)
- Chest (5,260G)
- Chest (5,520G)
- Chest (5,920G)
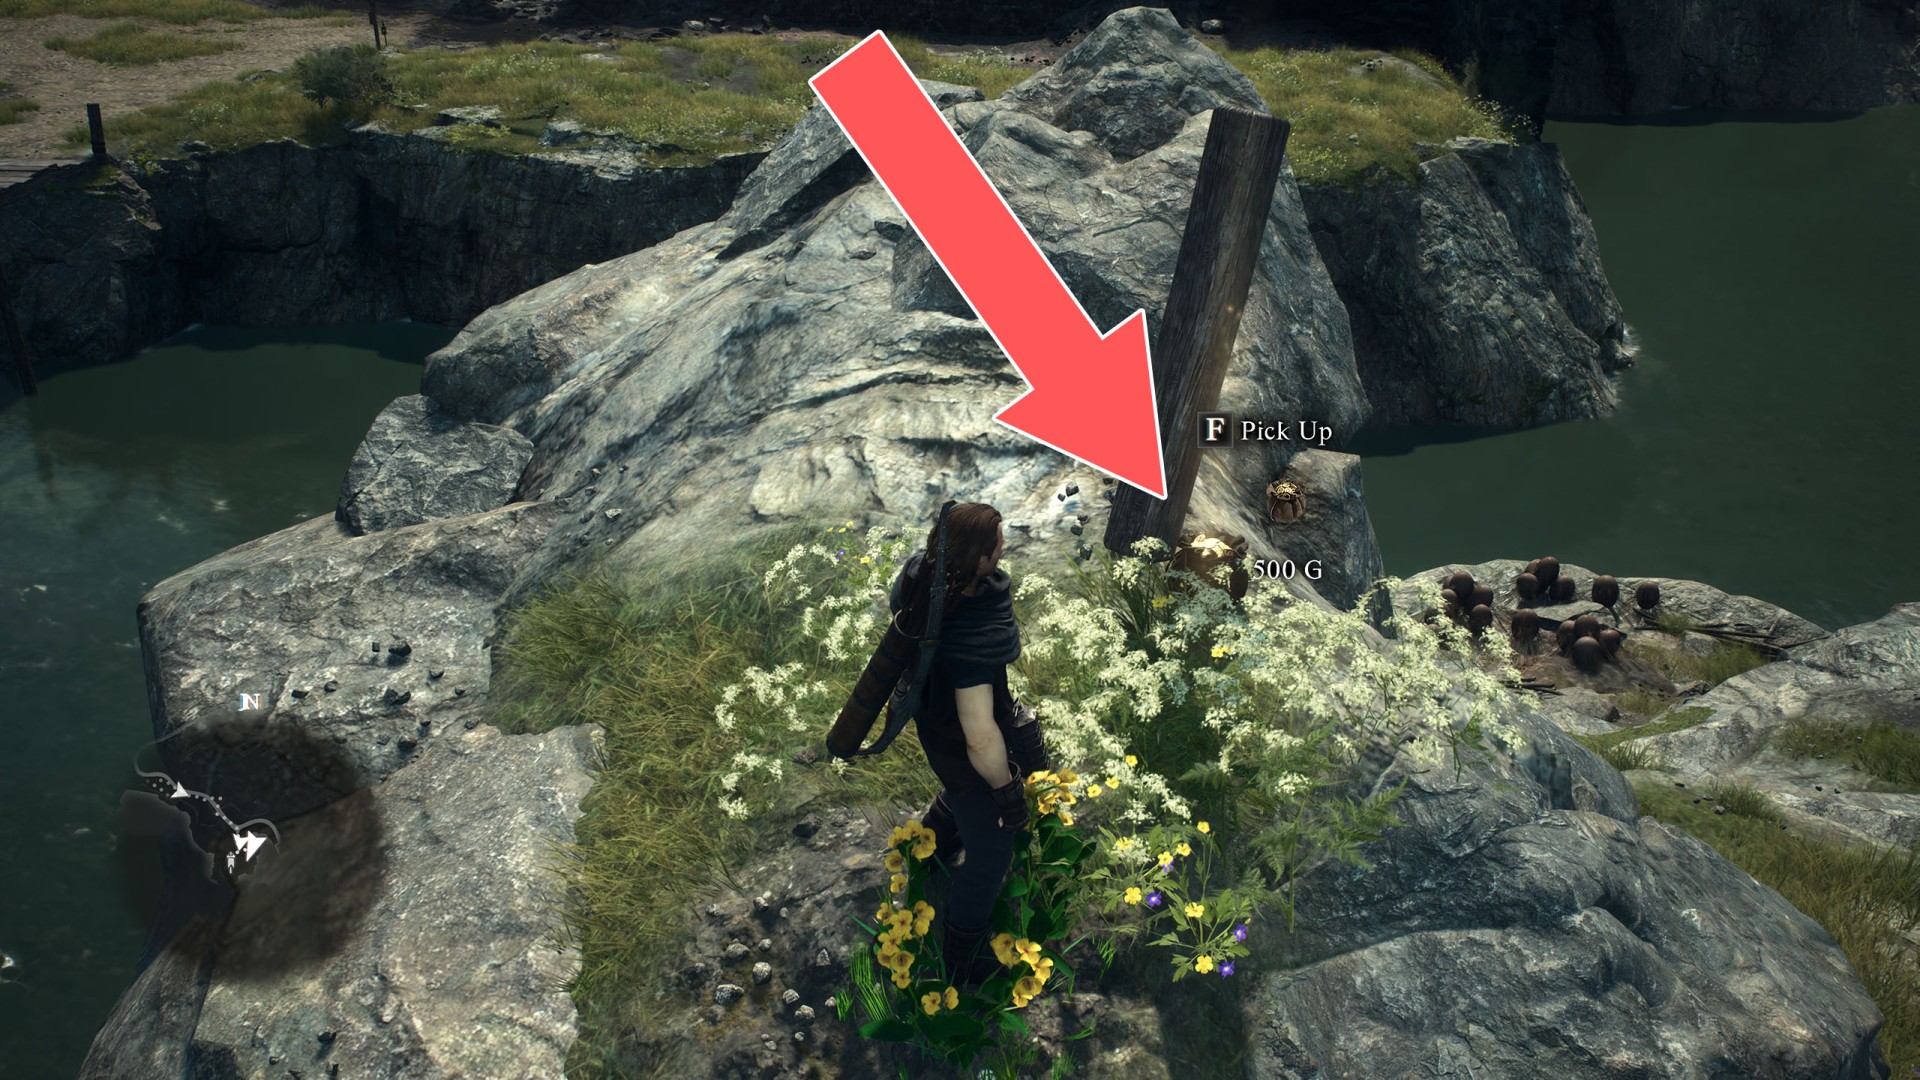
- Chest (500G)
- Chest (500G)
- Chest (500G)
- Chest (500G)
- Chest (540G)
- Chest (6,120G)
- Chest (6,140G)
- Chest (6,900G)
- Chest (7,360G)
- Chest (710G)
- Chest (750G)
- Chest (850G)
- Chest (850G)
- Chest (900G)
- Chest (930G)
- Chest (950G)
- Chest (980G)
- Chest (990G)
- Pouch (1,060G)
- Pouch (1,110G)
- Pouch (1,130G)
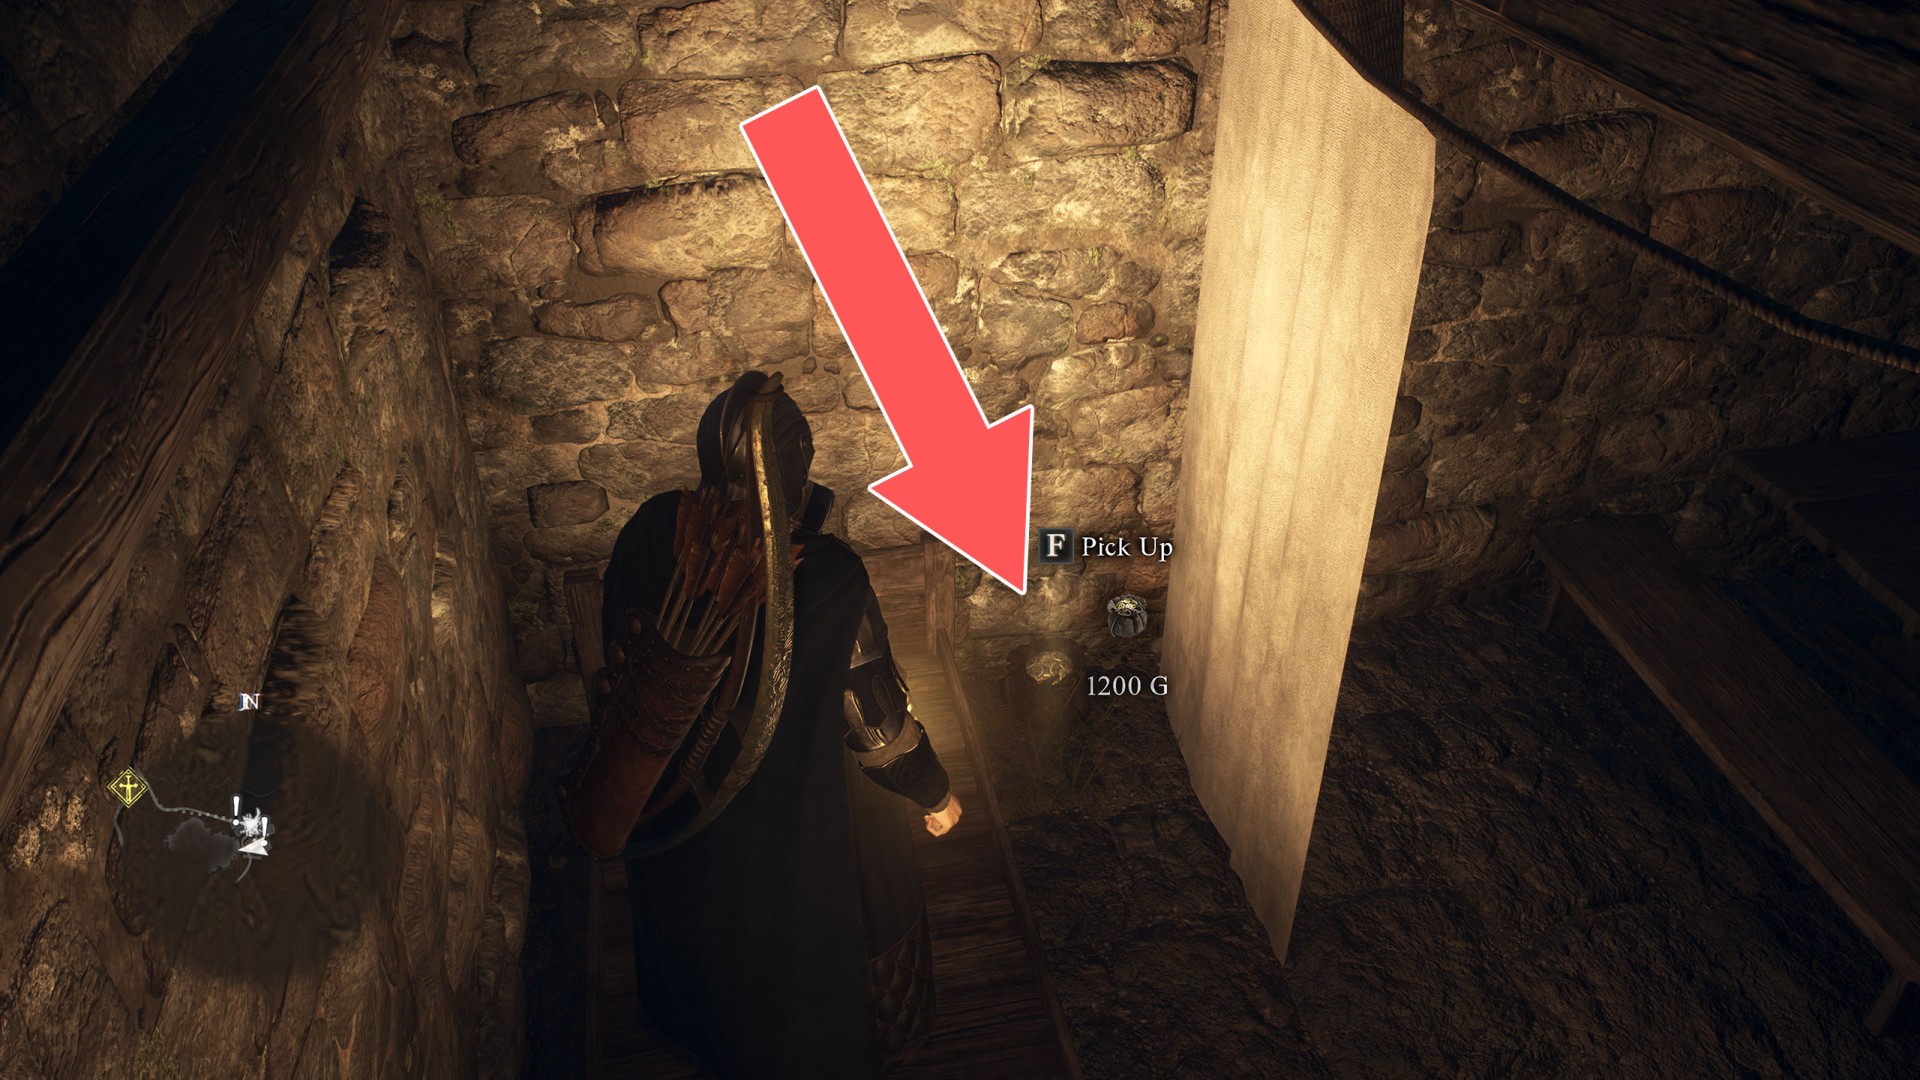
- Pouch (1,200G)
- Pouch (1,200G)
- Pouch (1,200G)
- Pouch (1,200G)
- Pouch (1,300G)
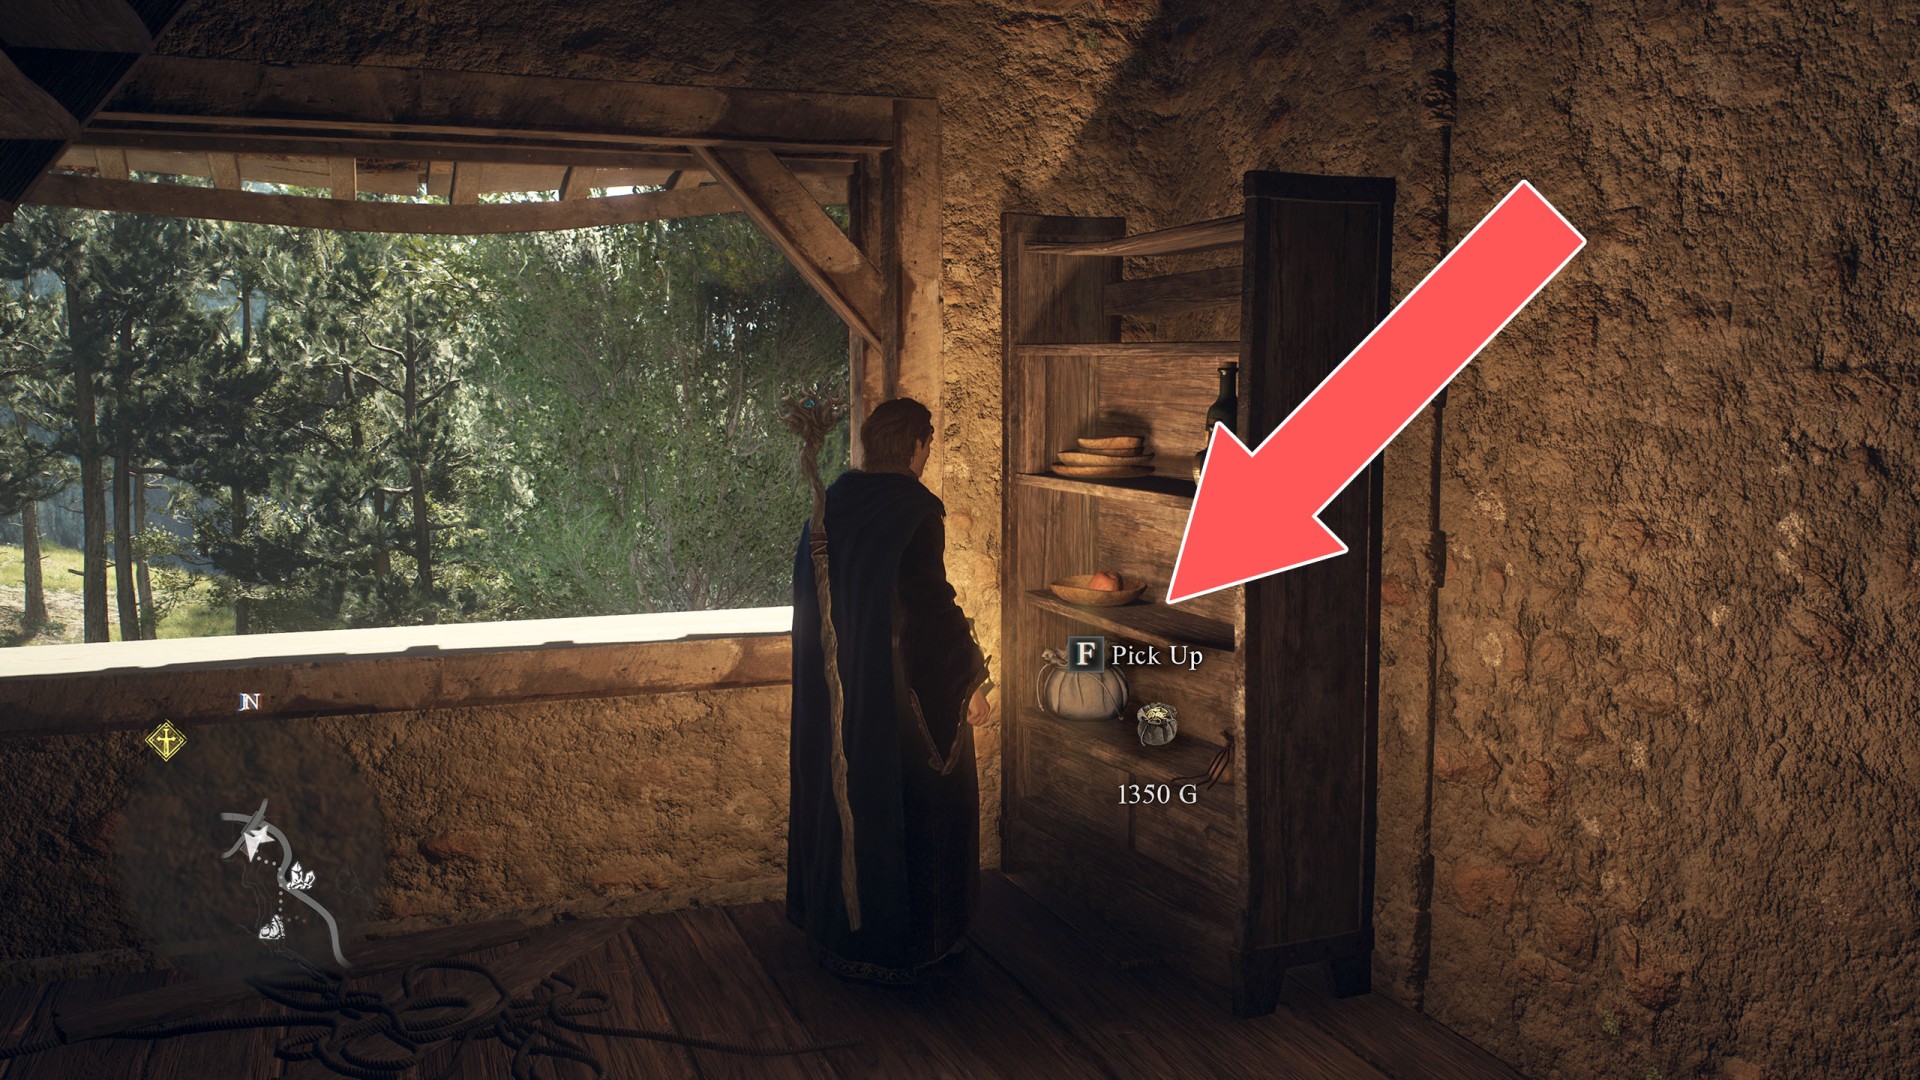
- Pouch (1,350G)
- Pouch (1,365G)
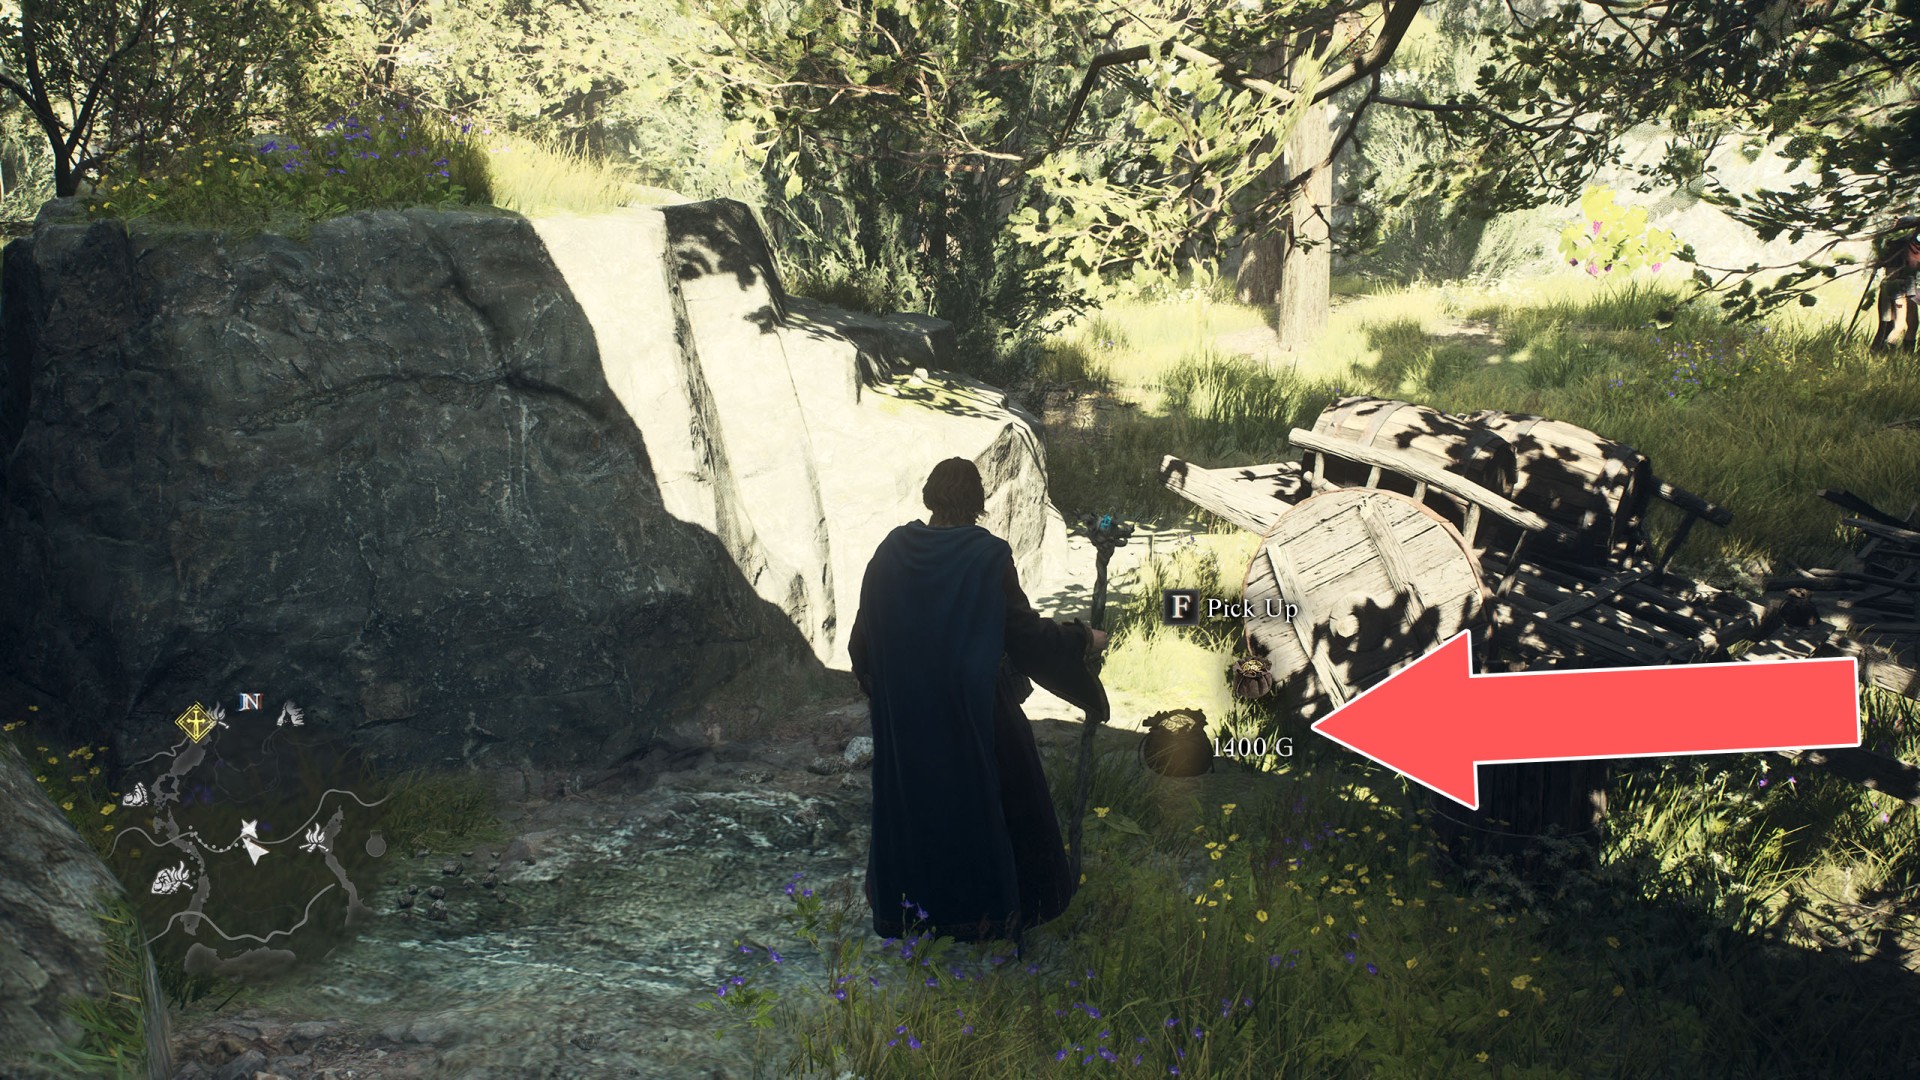
- Pouch (1,400G)
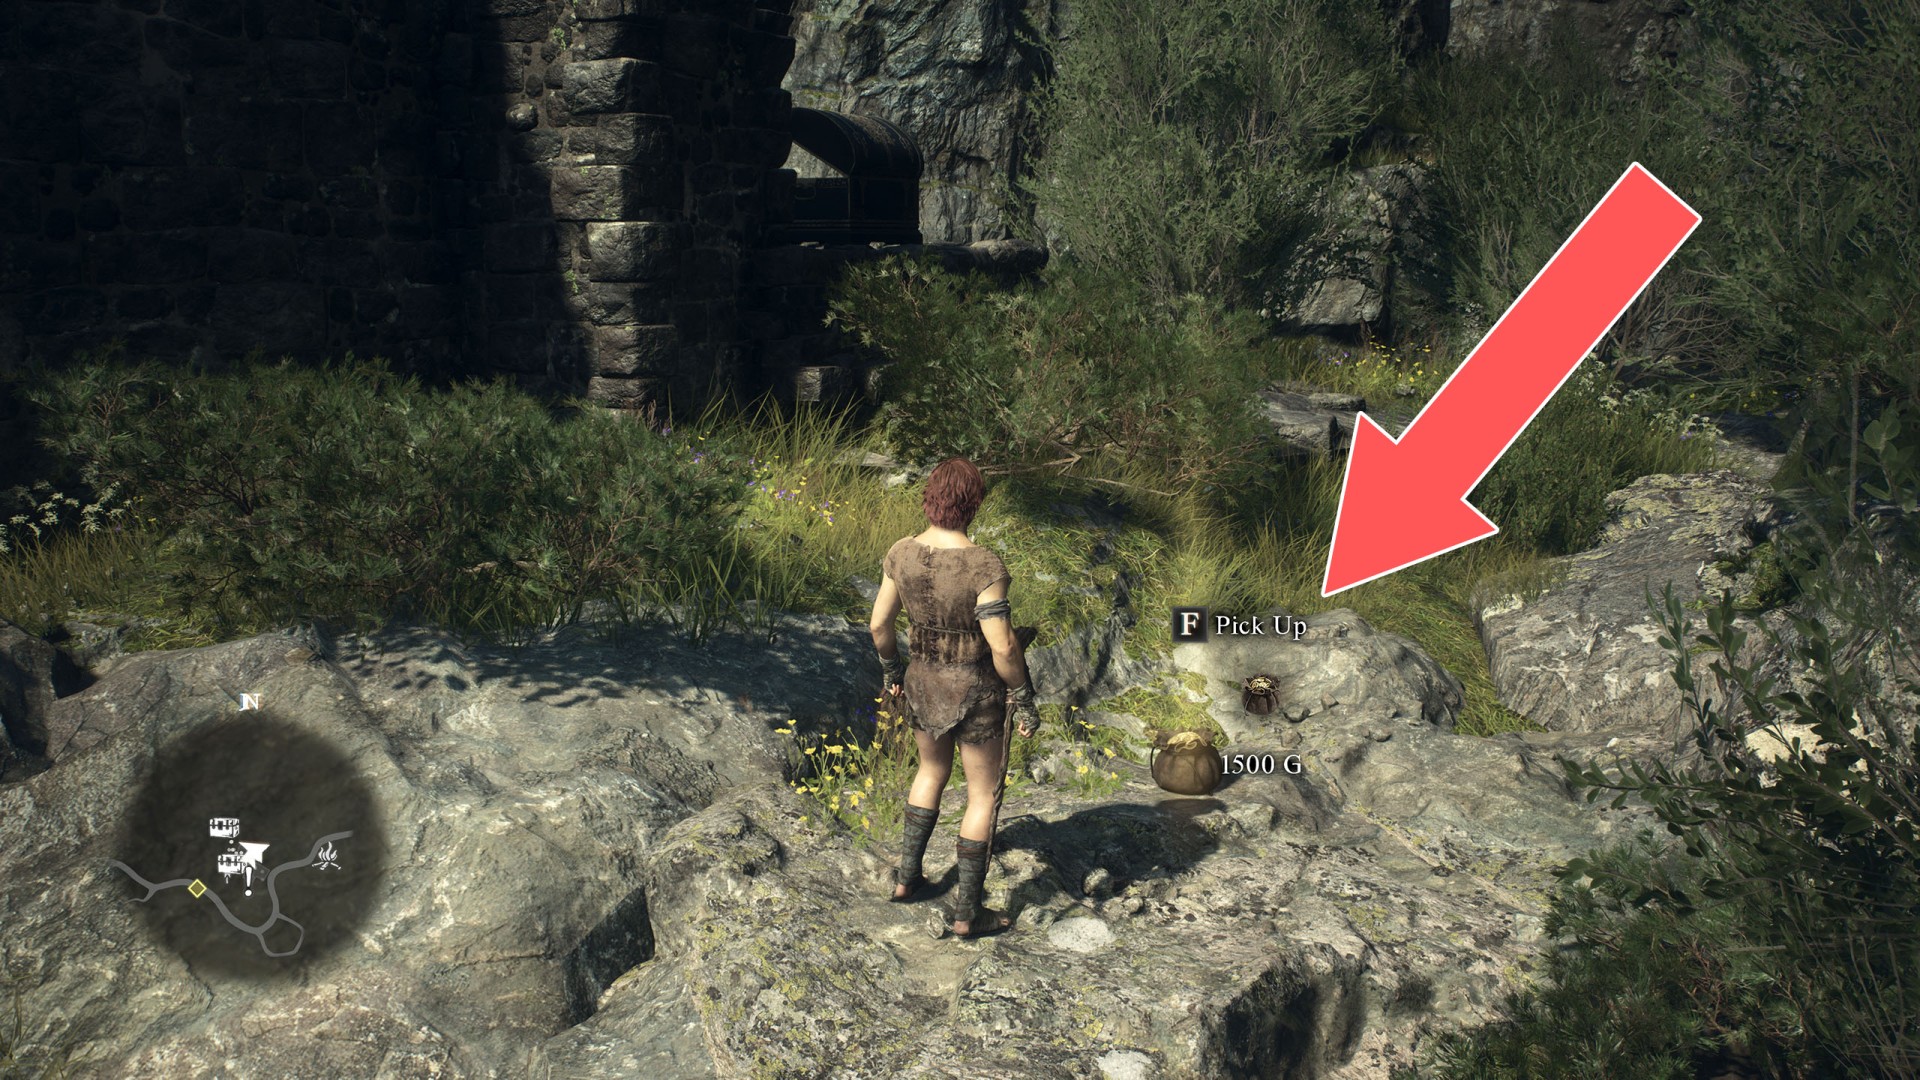
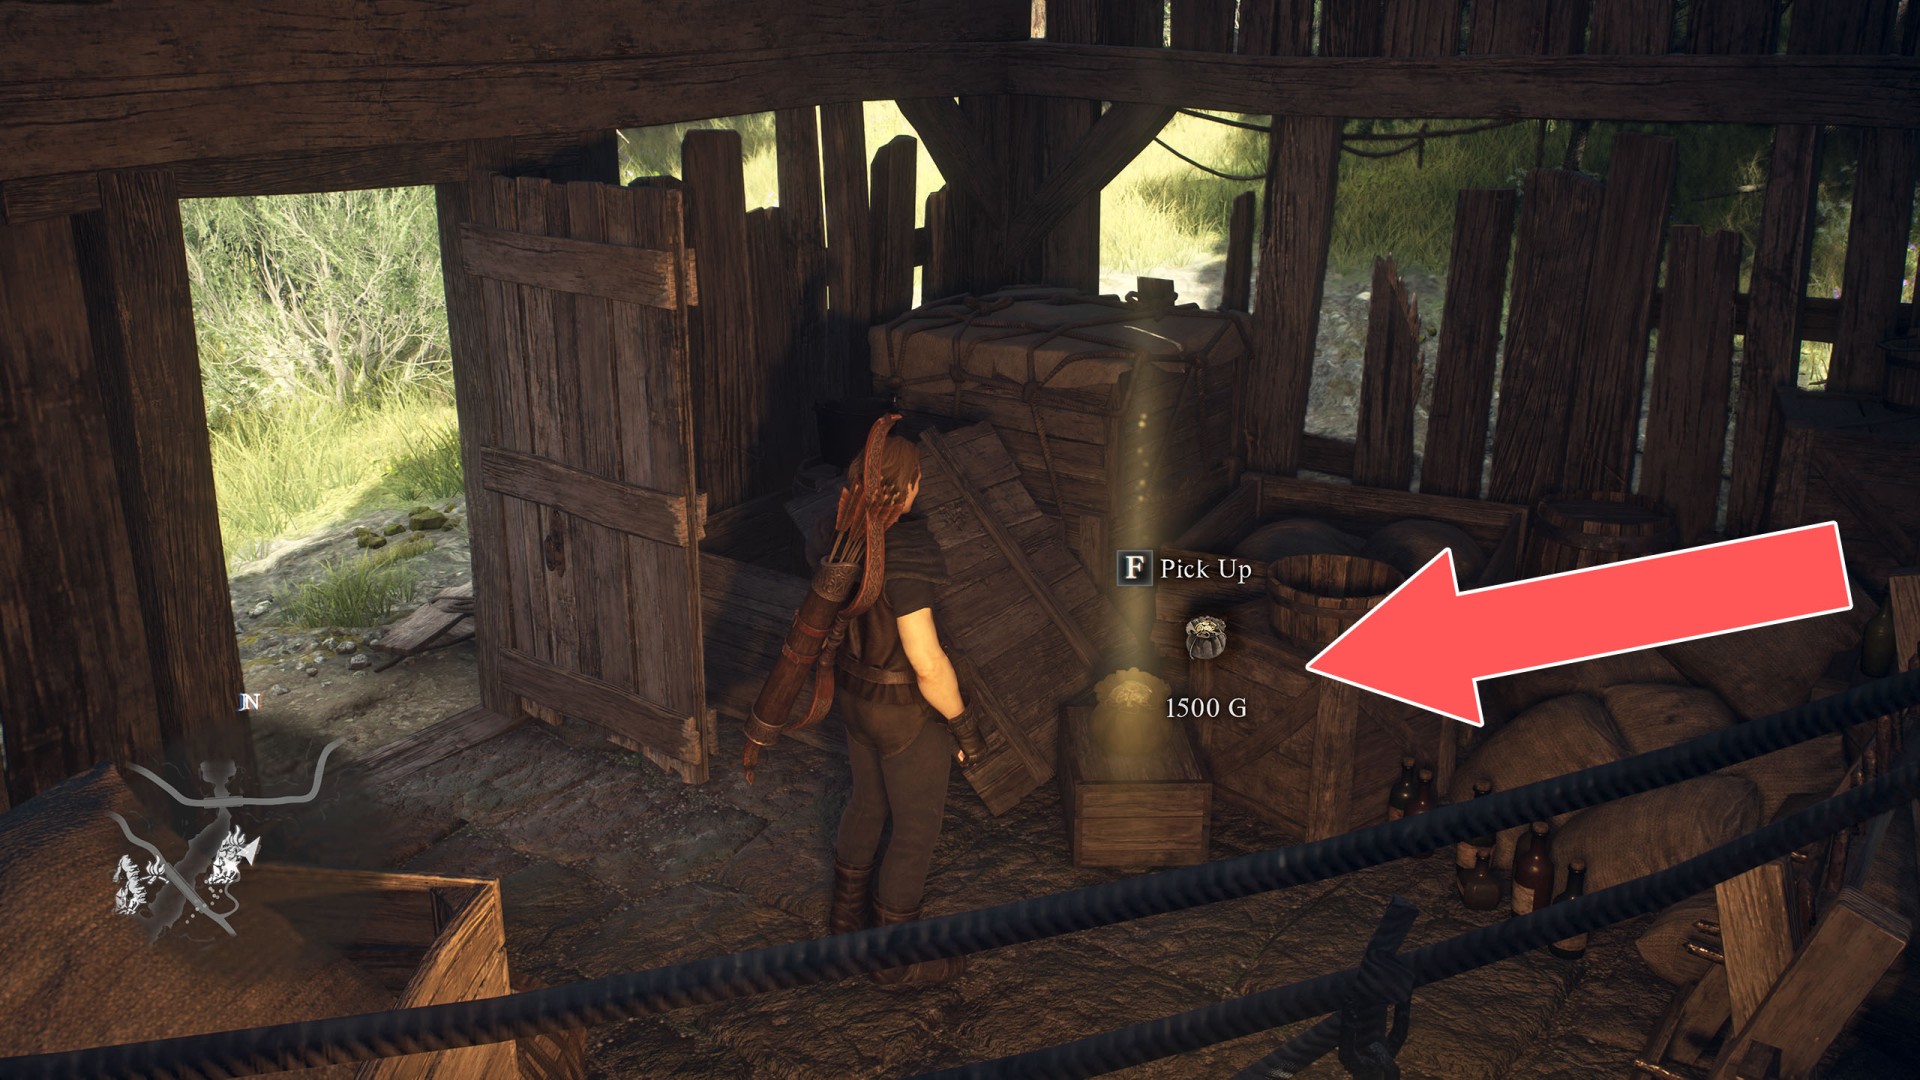
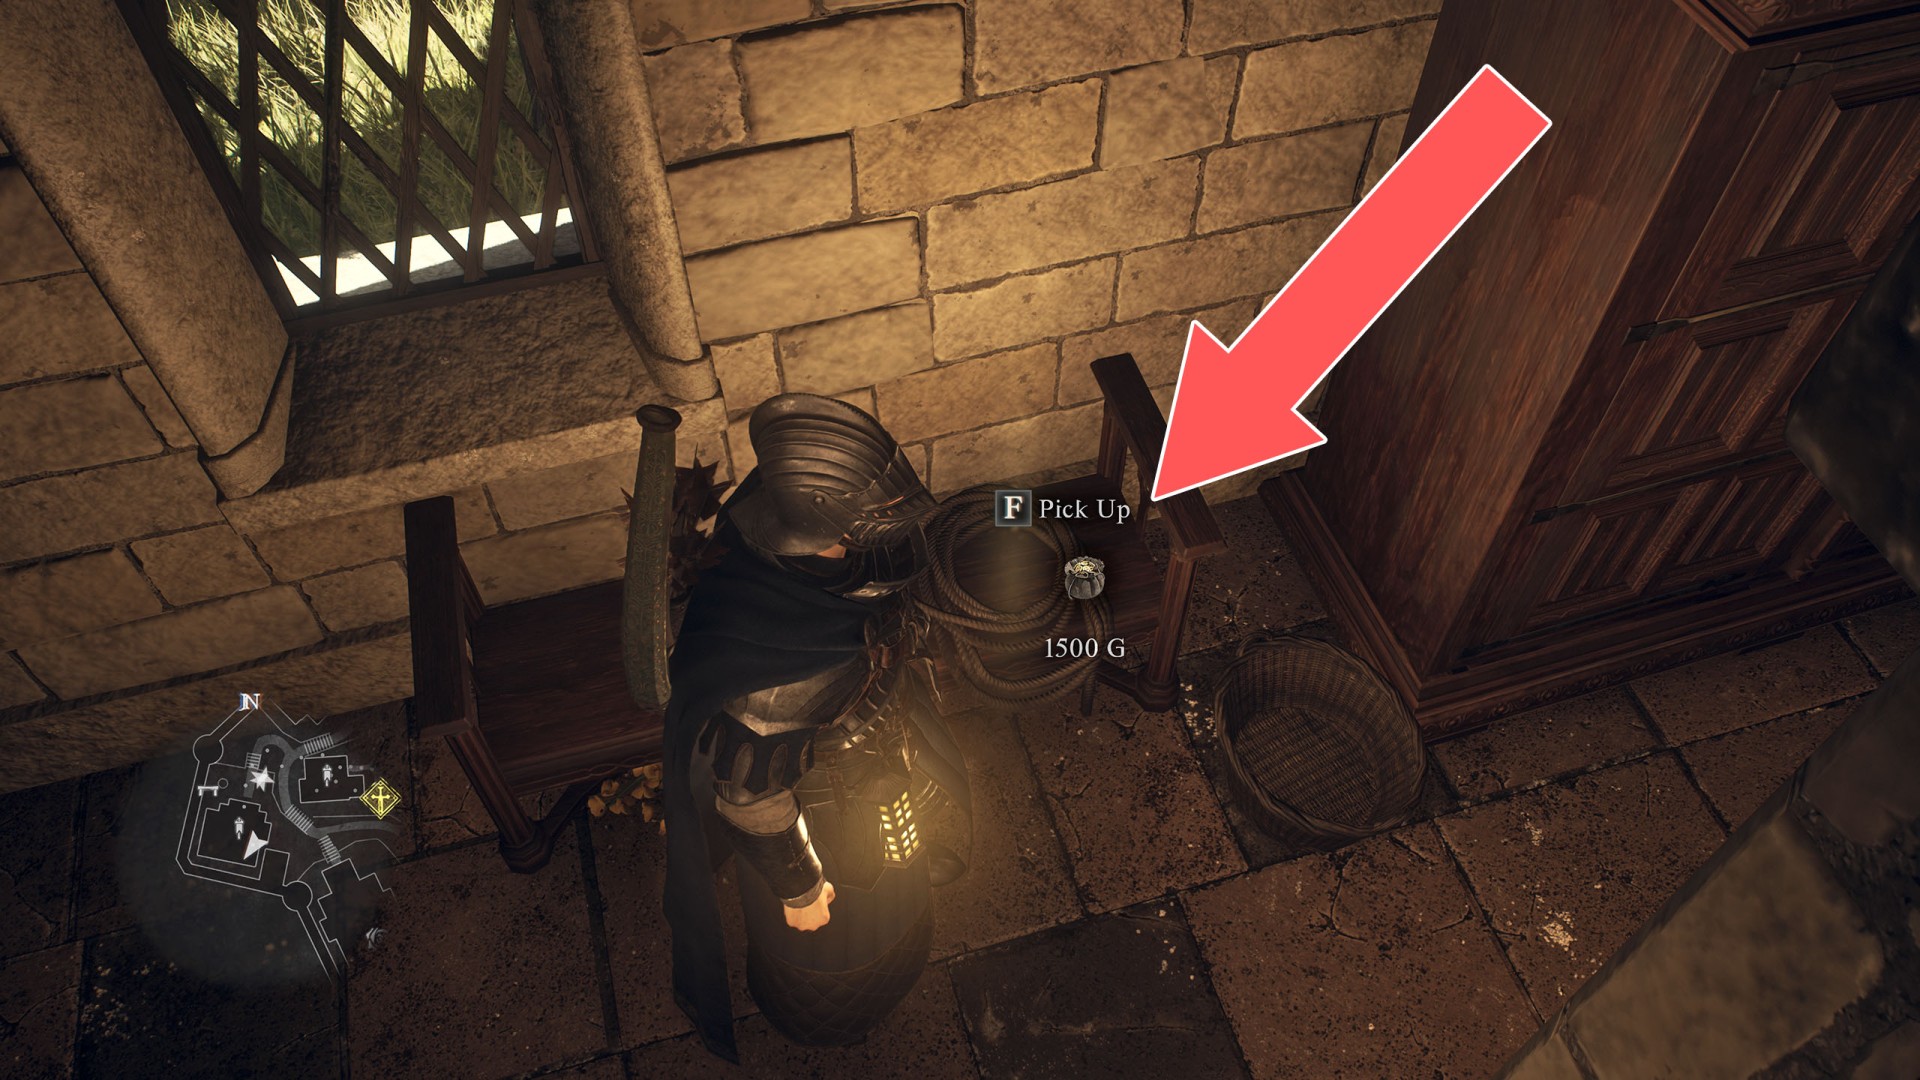
- Pouch (1,500G)
- Pouch (1,500G)
- Pouch (1,500G)
- Pouch (1,500G)
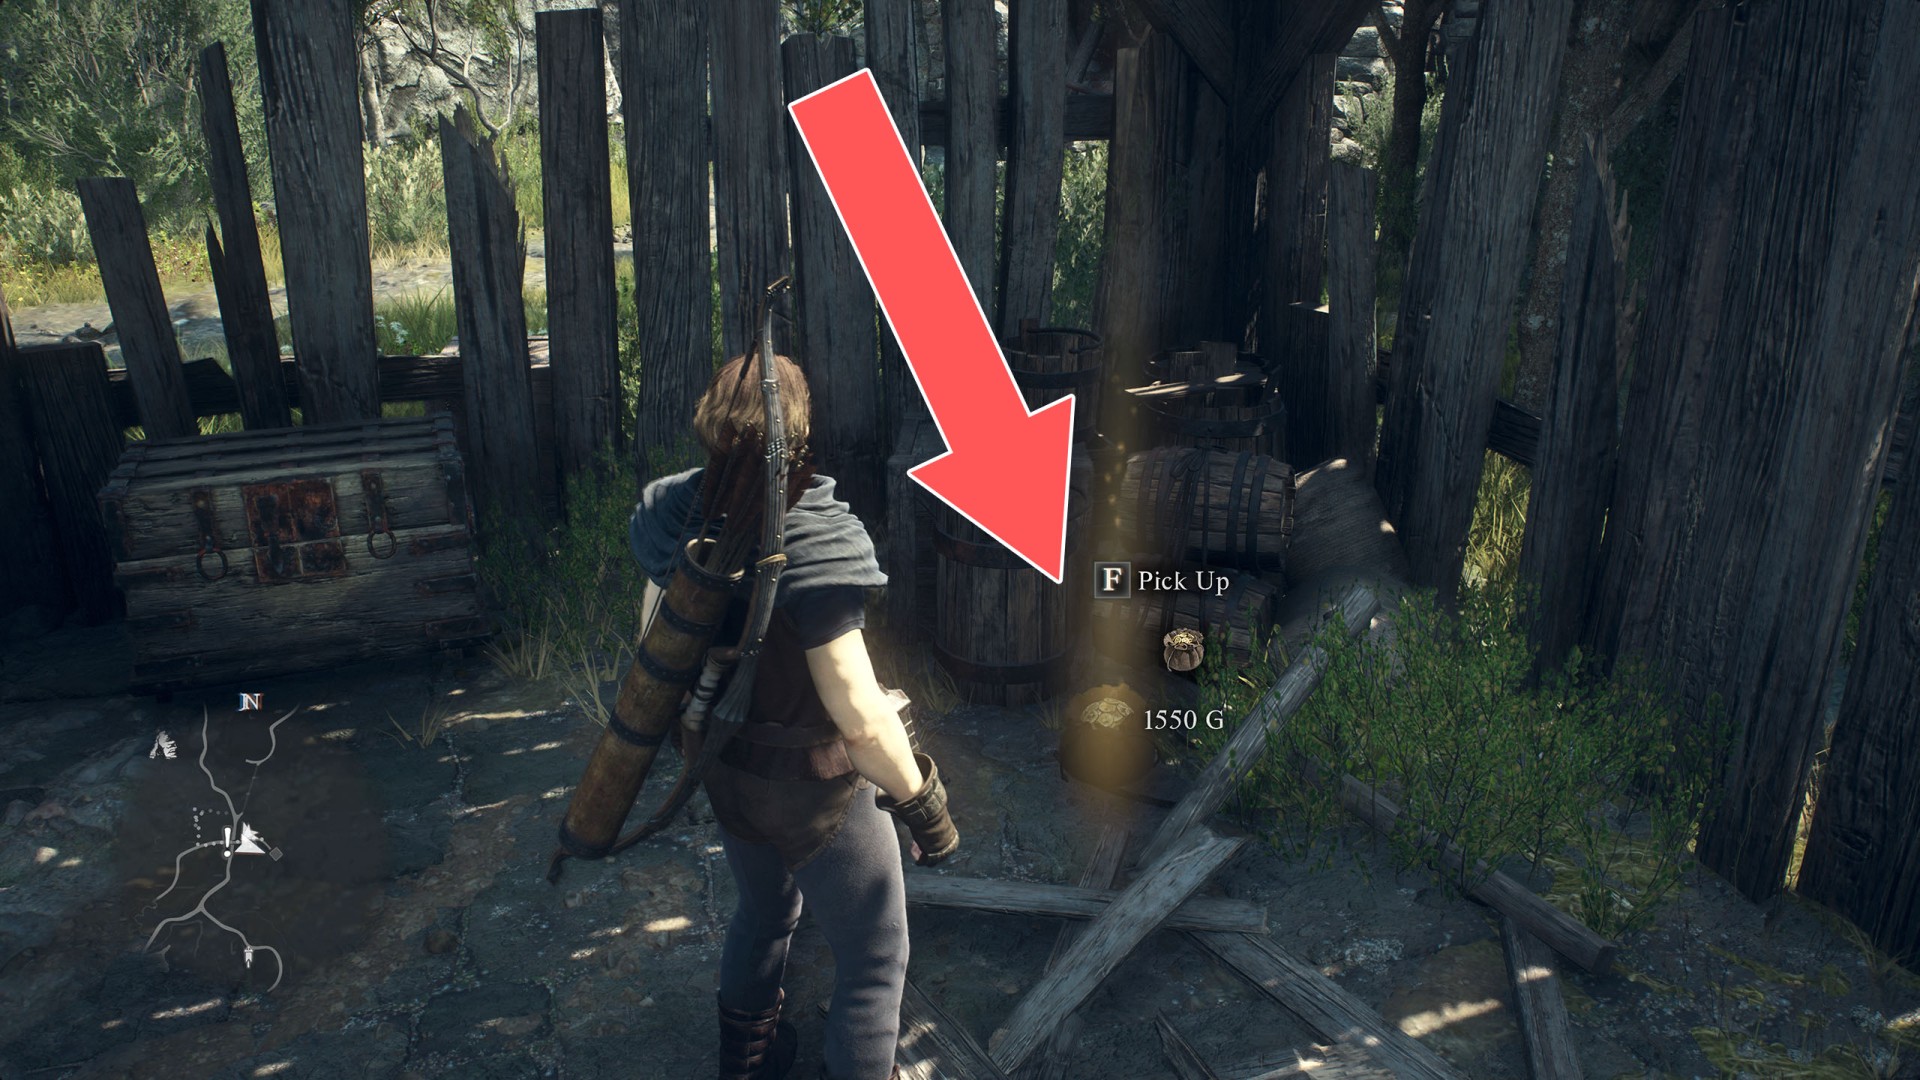
- Pouch (1,550G)
- Pouch (1,550G)
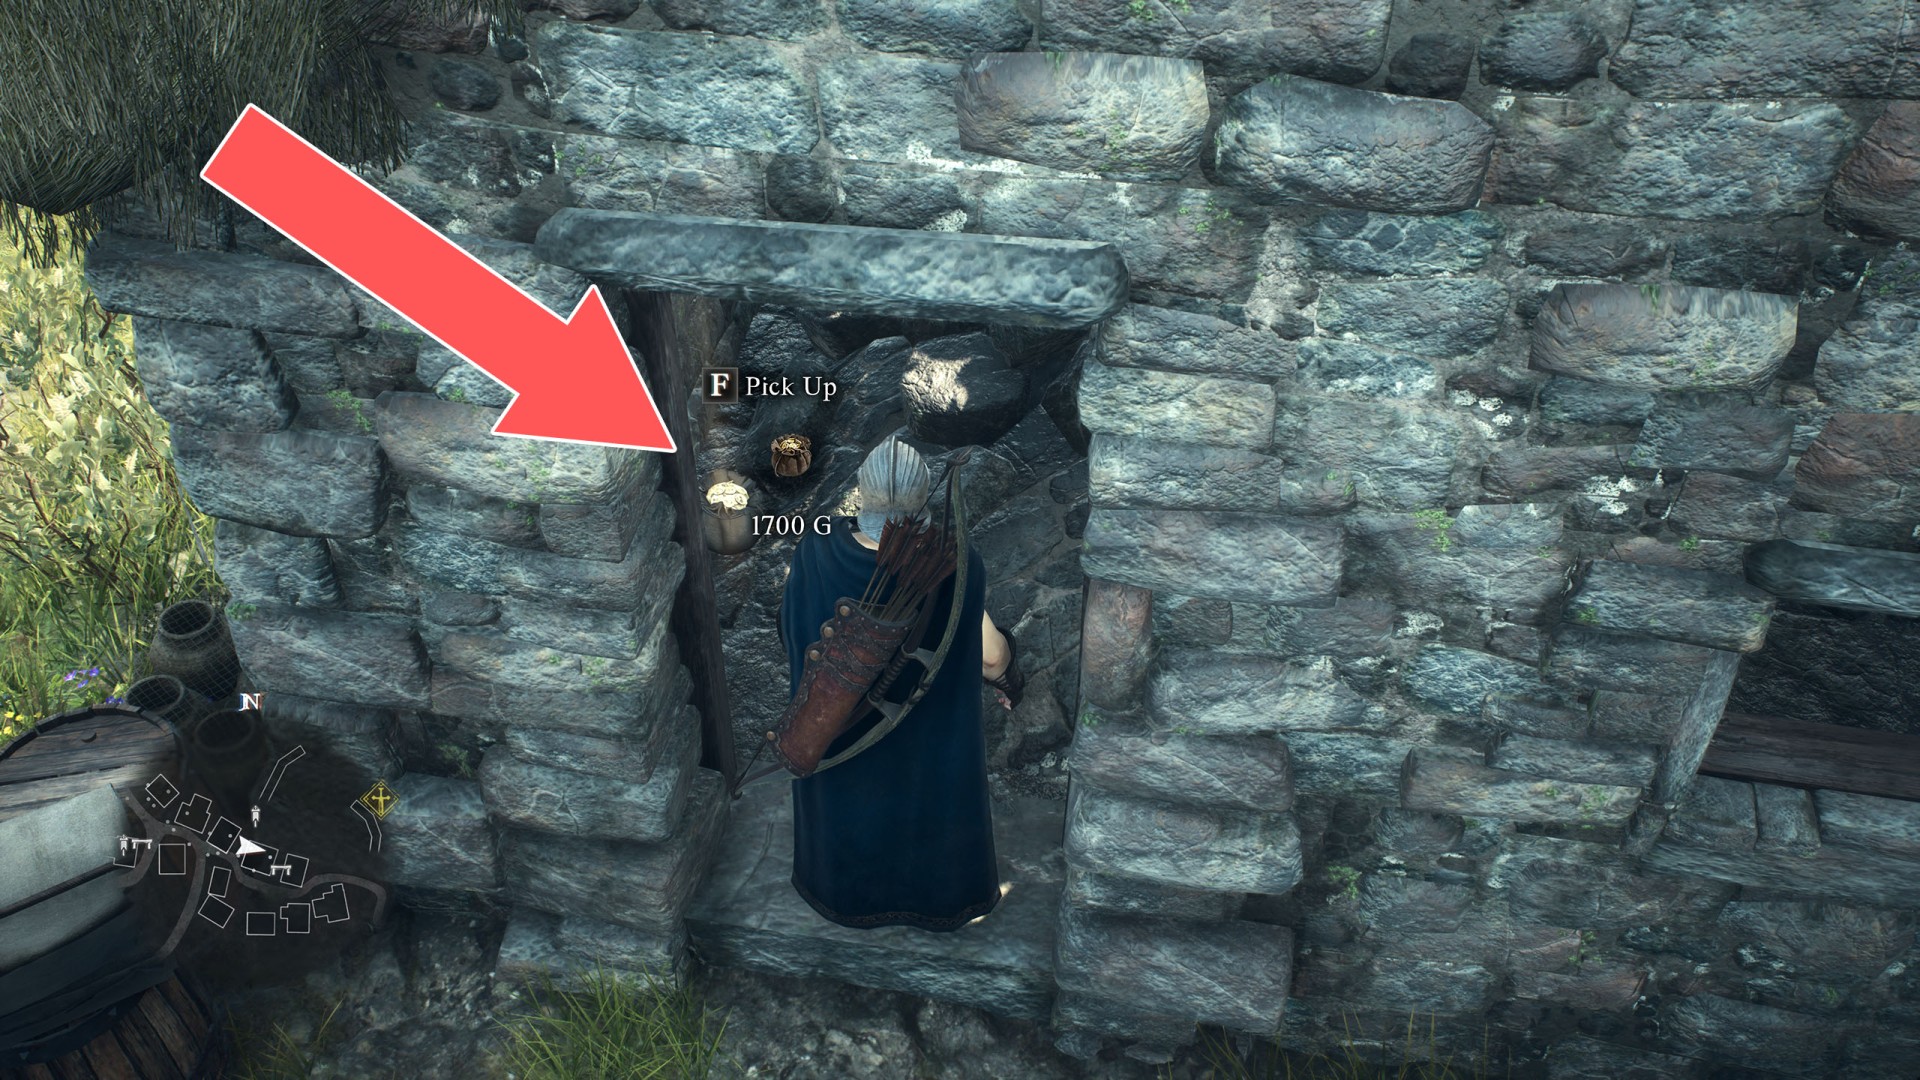
- Pouch (1,700G)
- Pouch (1,720G)
- Pouch (1,730G)
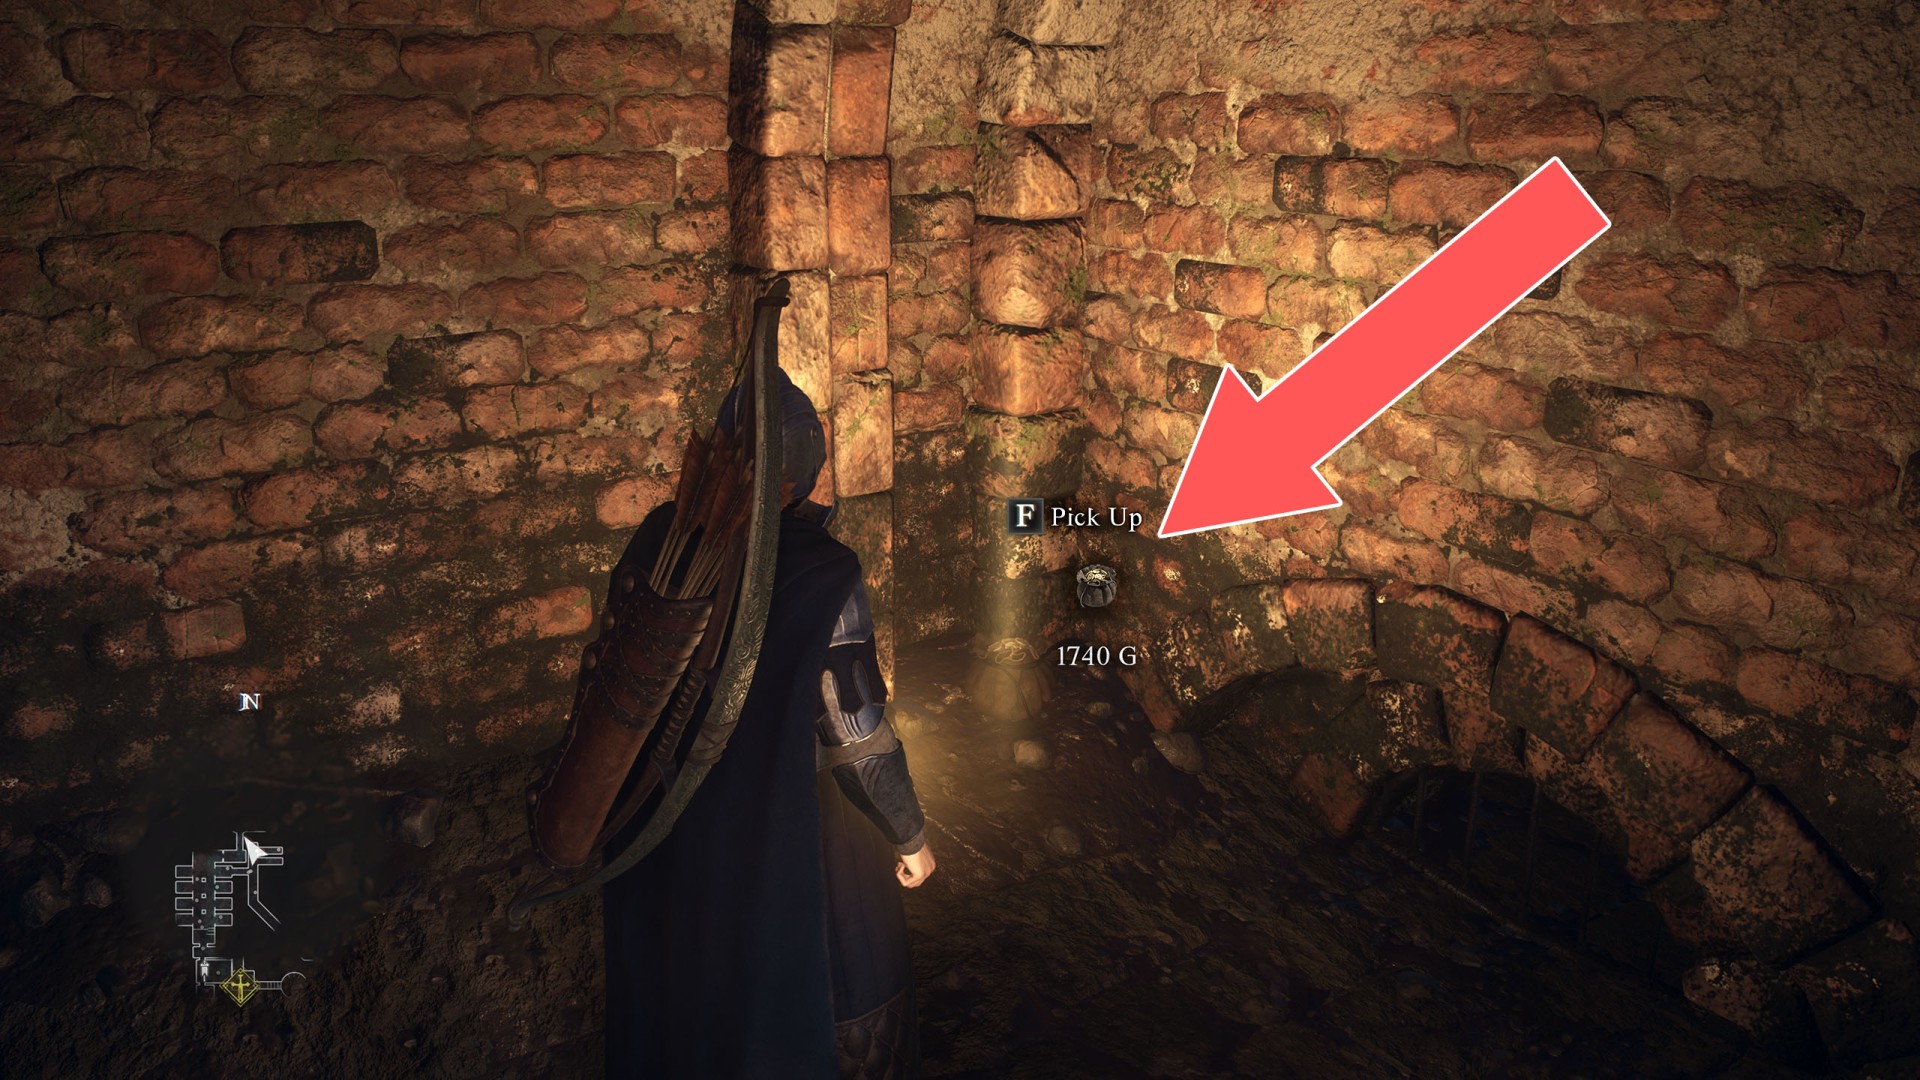
- Pouch (1,740G)
- Pouch (1,800G)
- Pouch (2,000G)
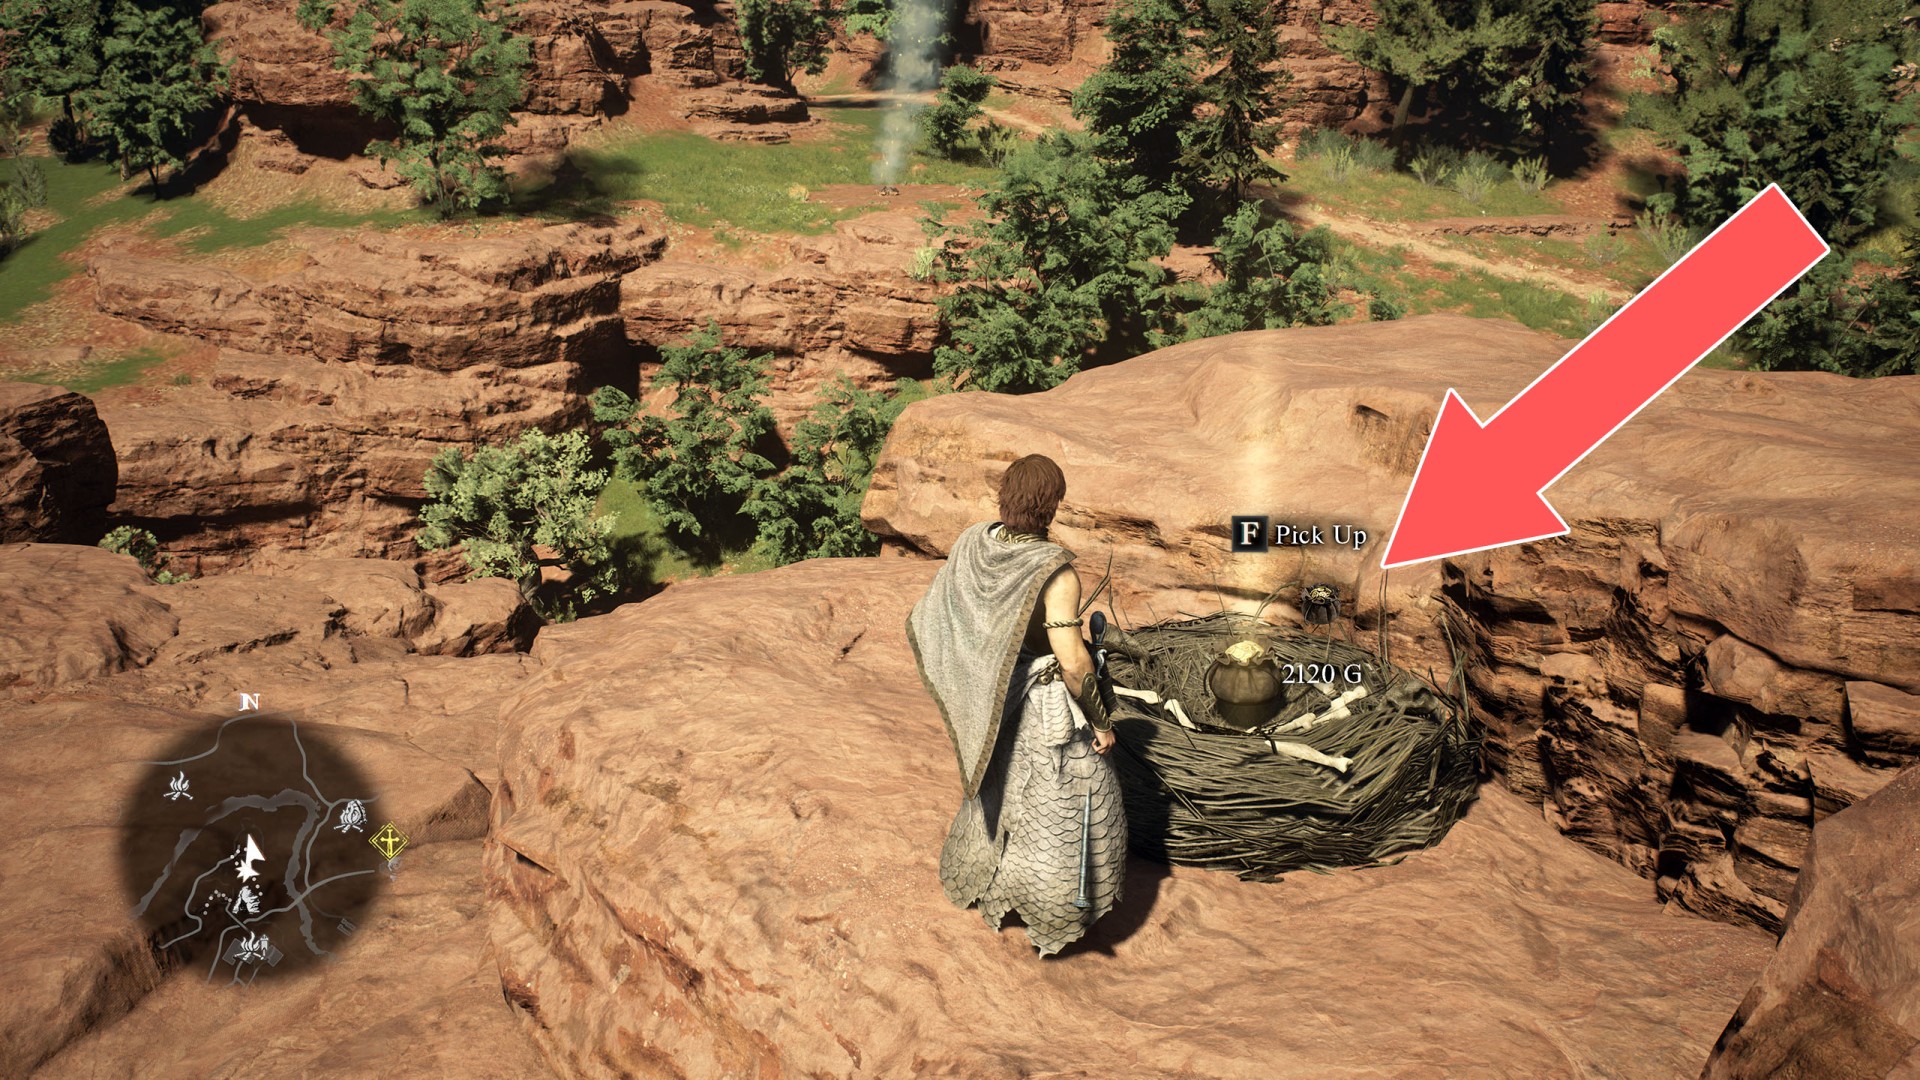
- Pouch (2,120G)
- Pouch (2,200G)
- Pouch (2,400G)
- Pouch (2,500G)
- Pouch (2,700G)
- Pouch (2,950G)
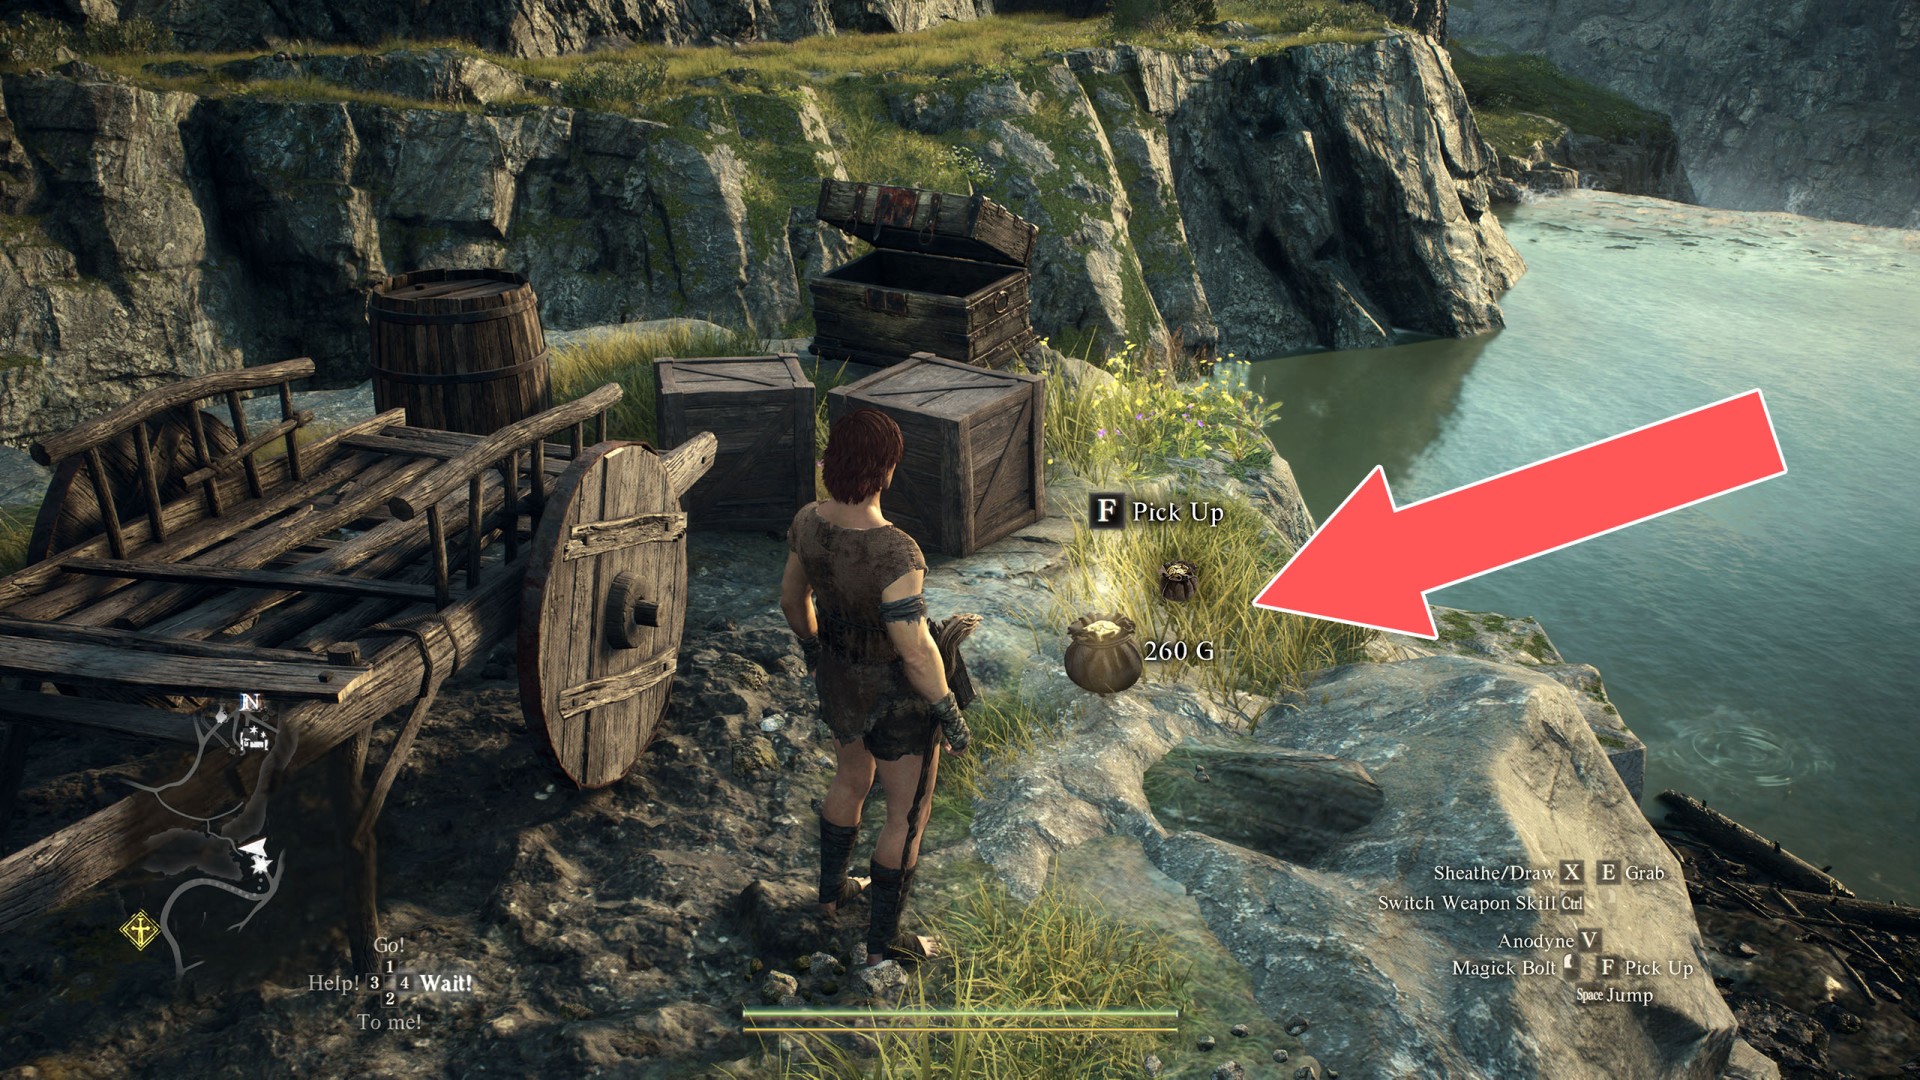
- Pouch (260G)
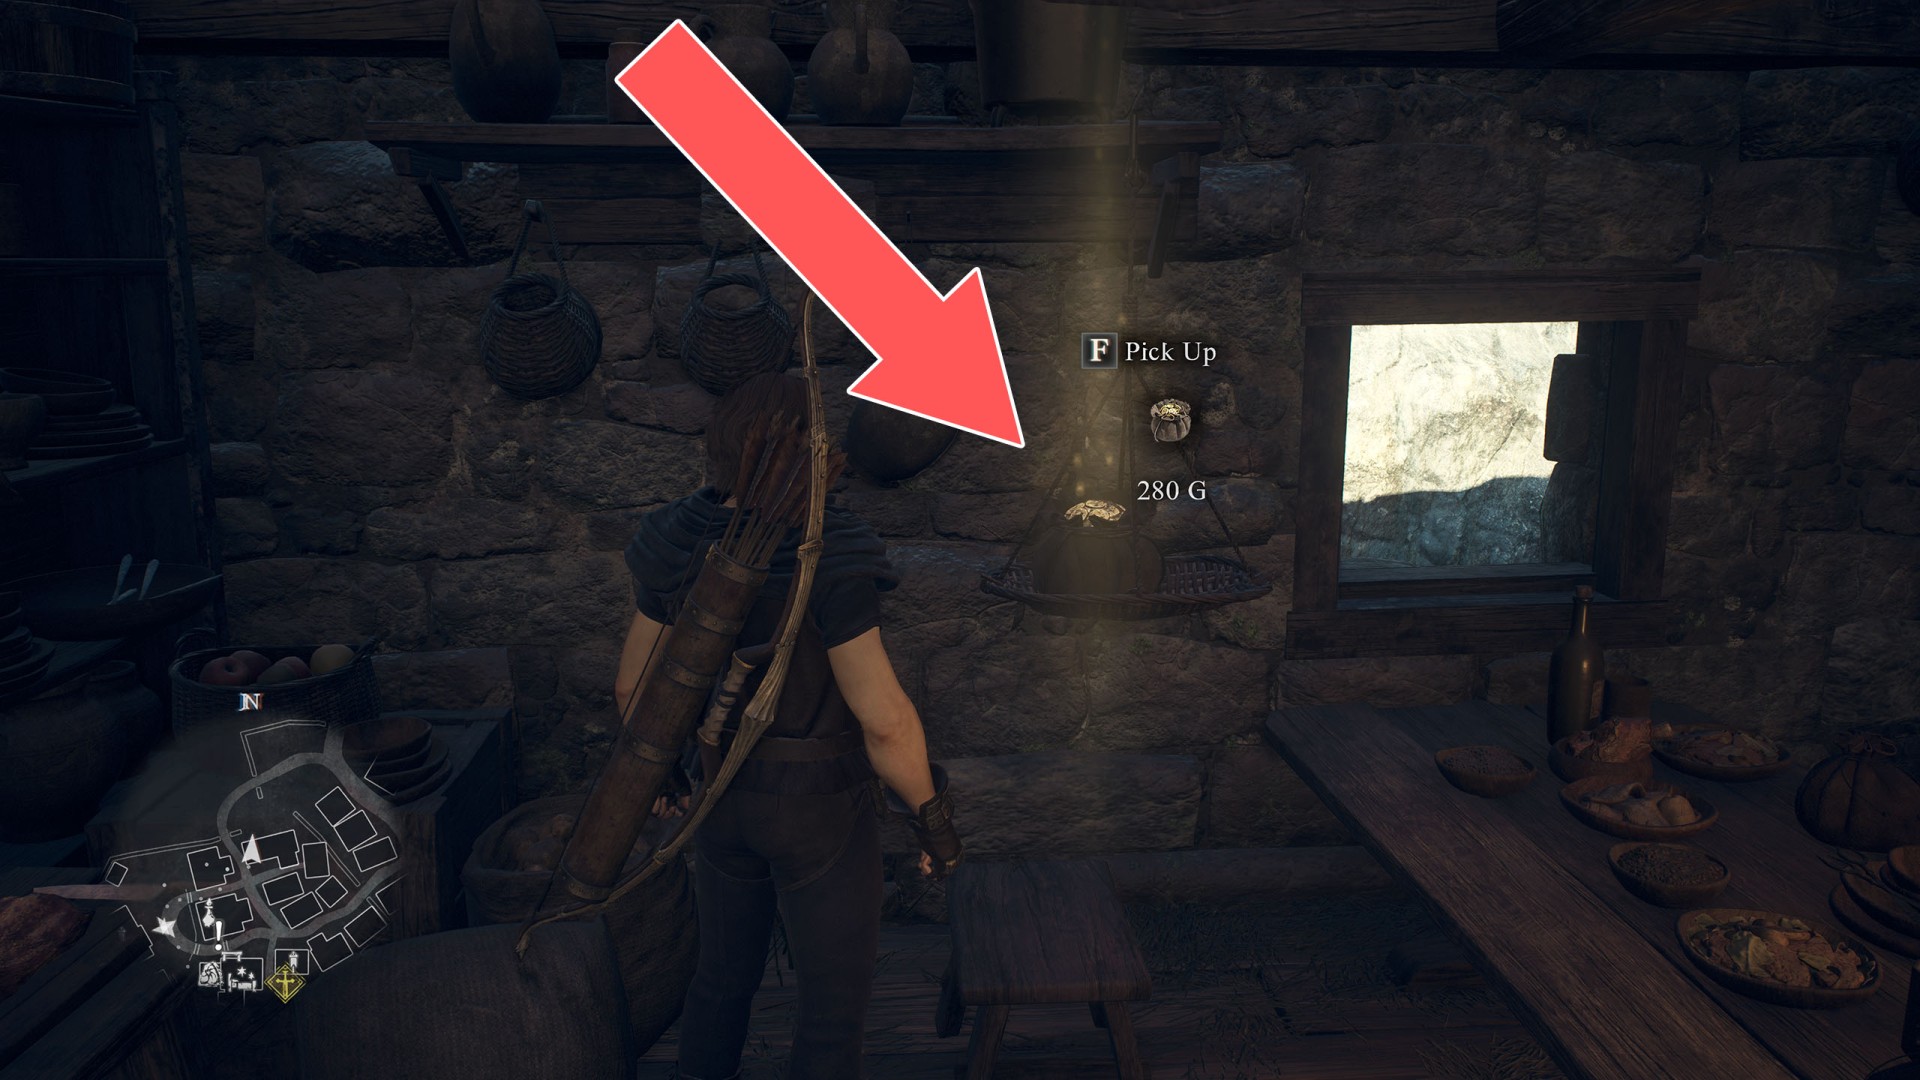
- Pouch (280G)
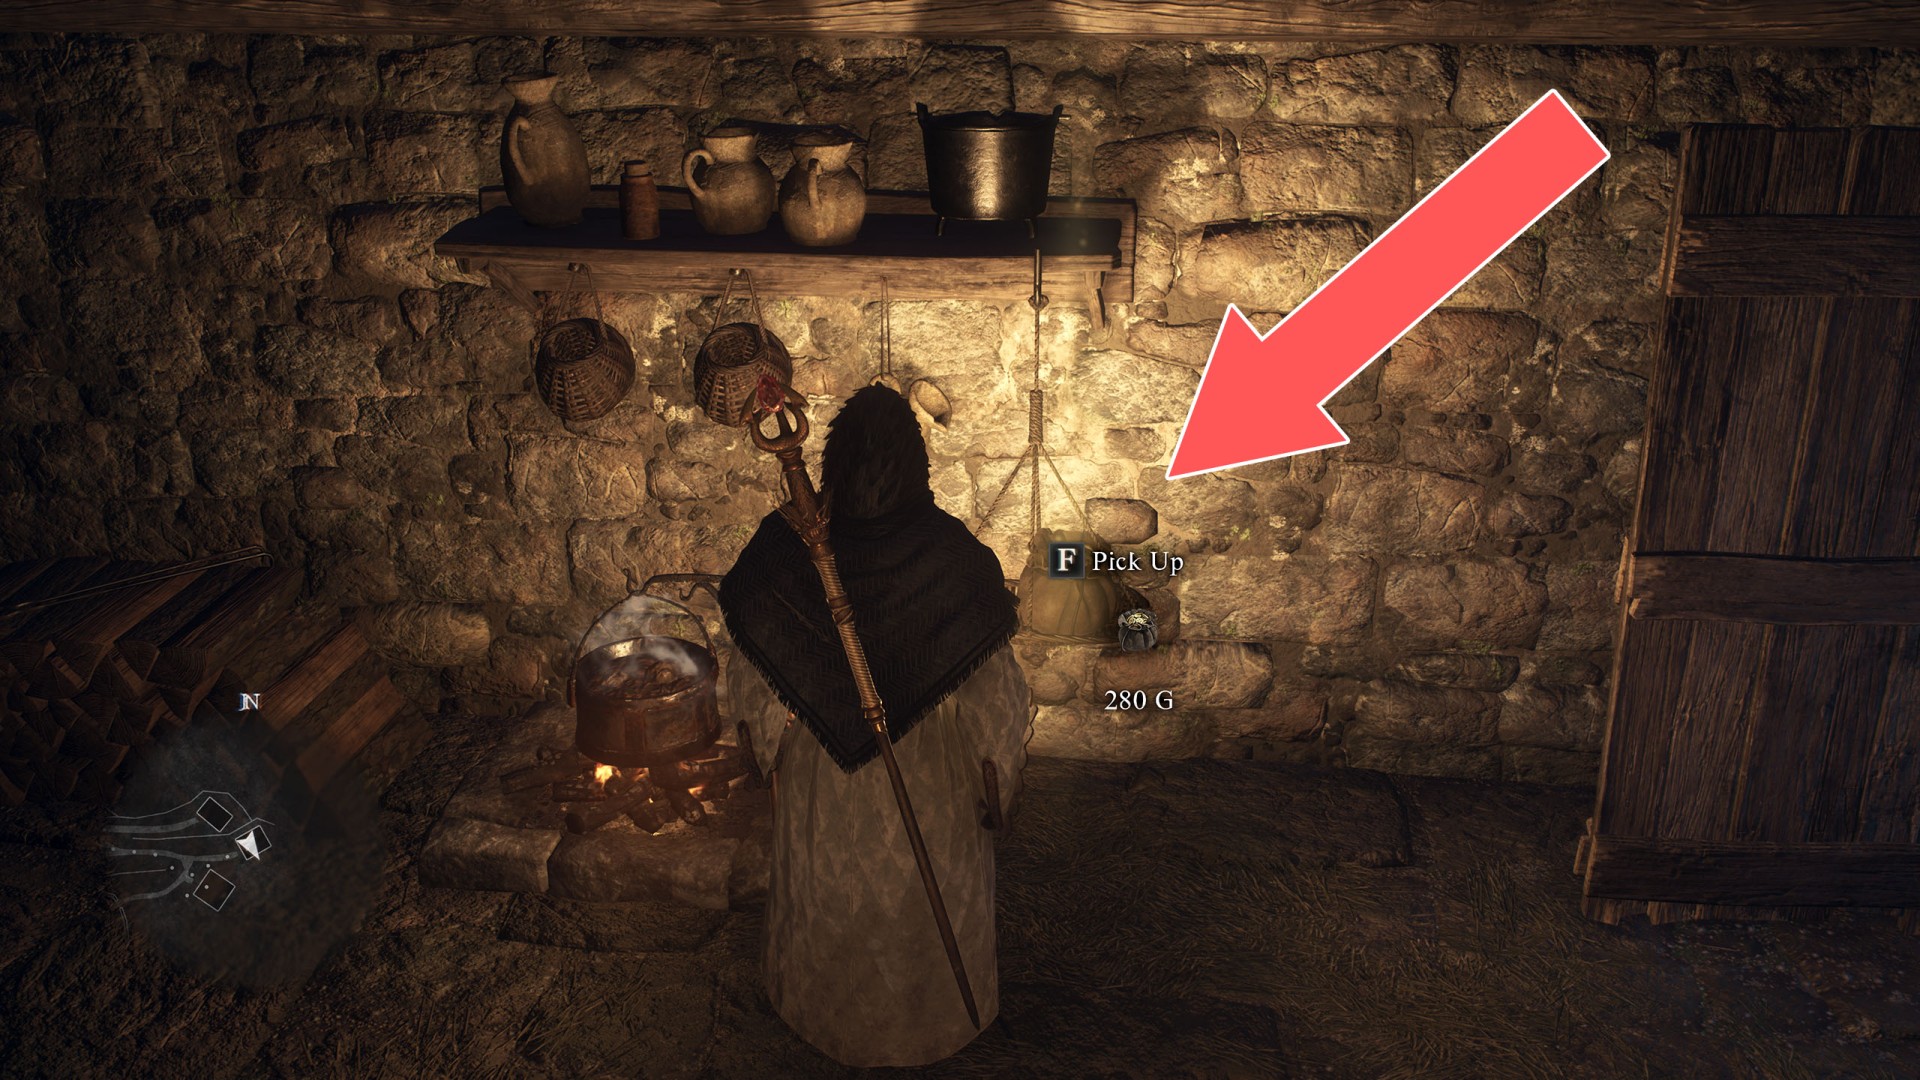
- Pouch (280G)
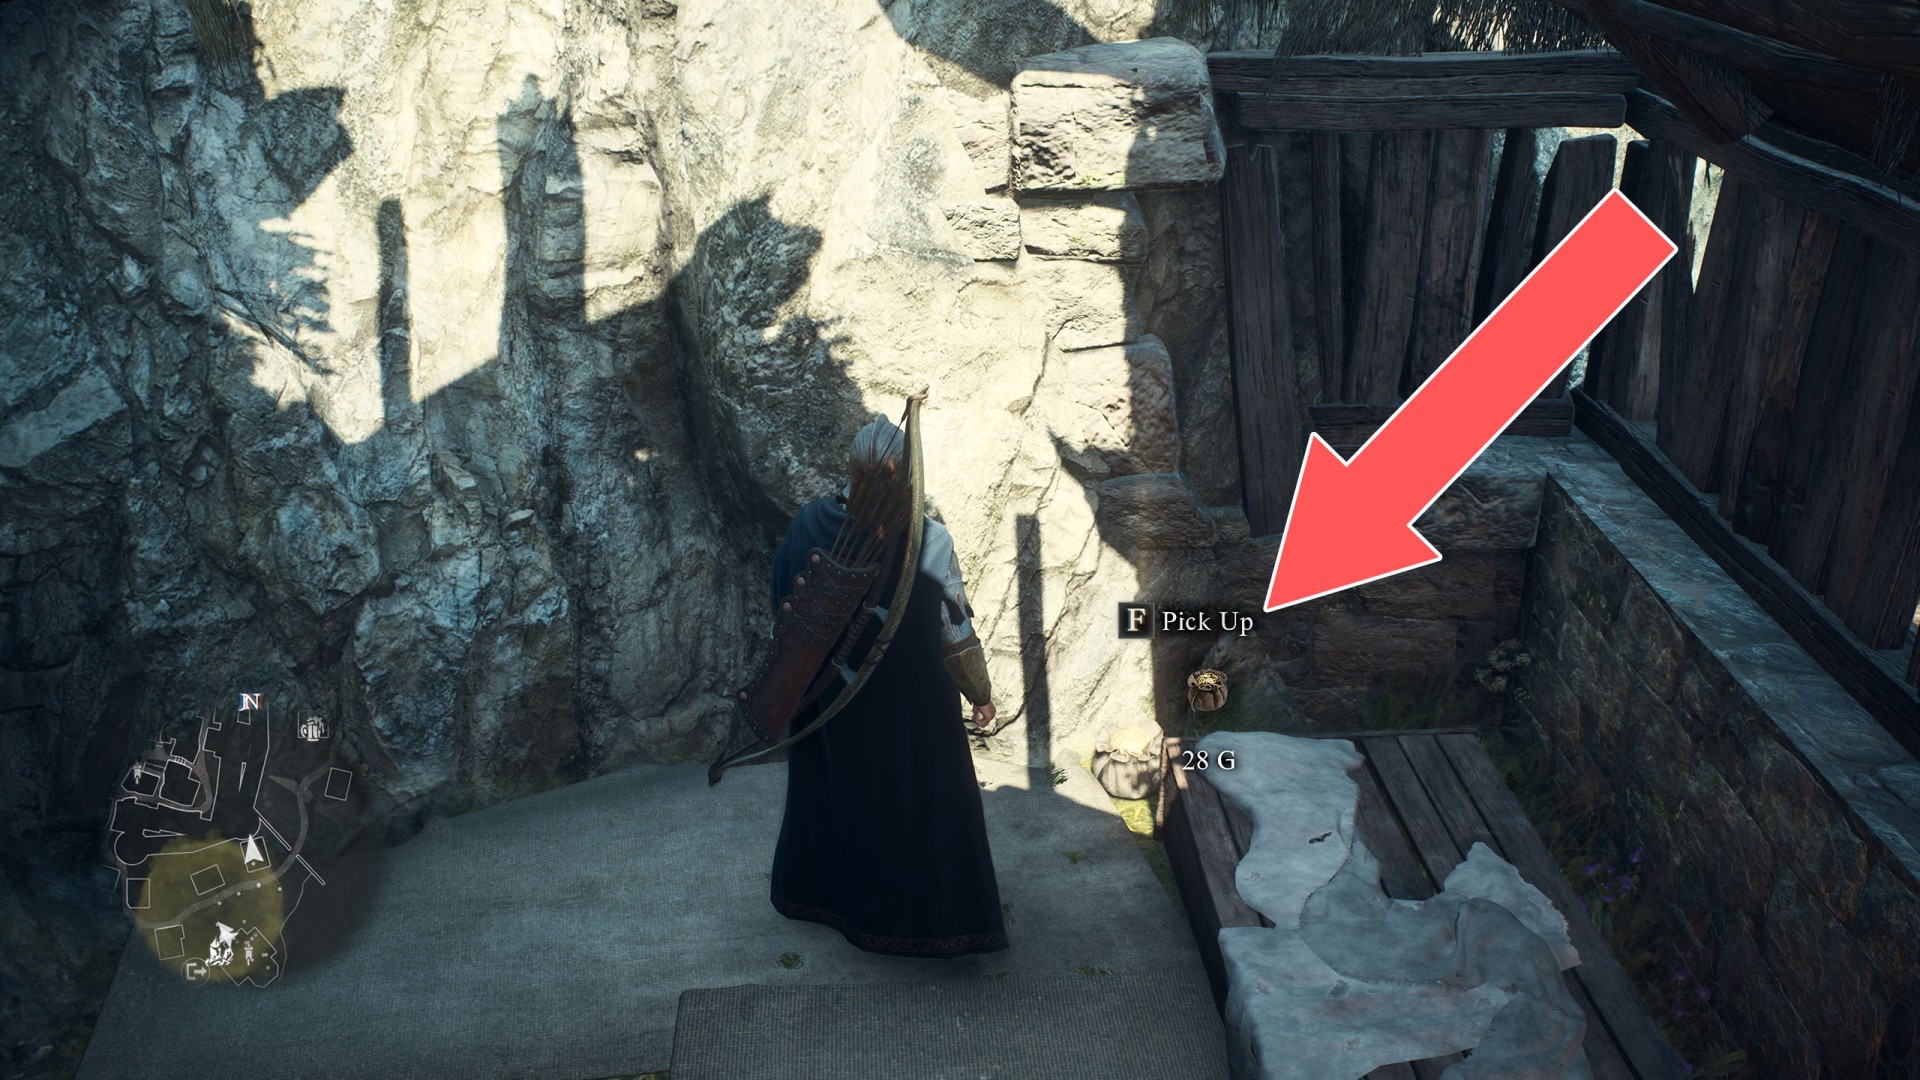
- Pouch (28G)
- Pouch (3,200G)
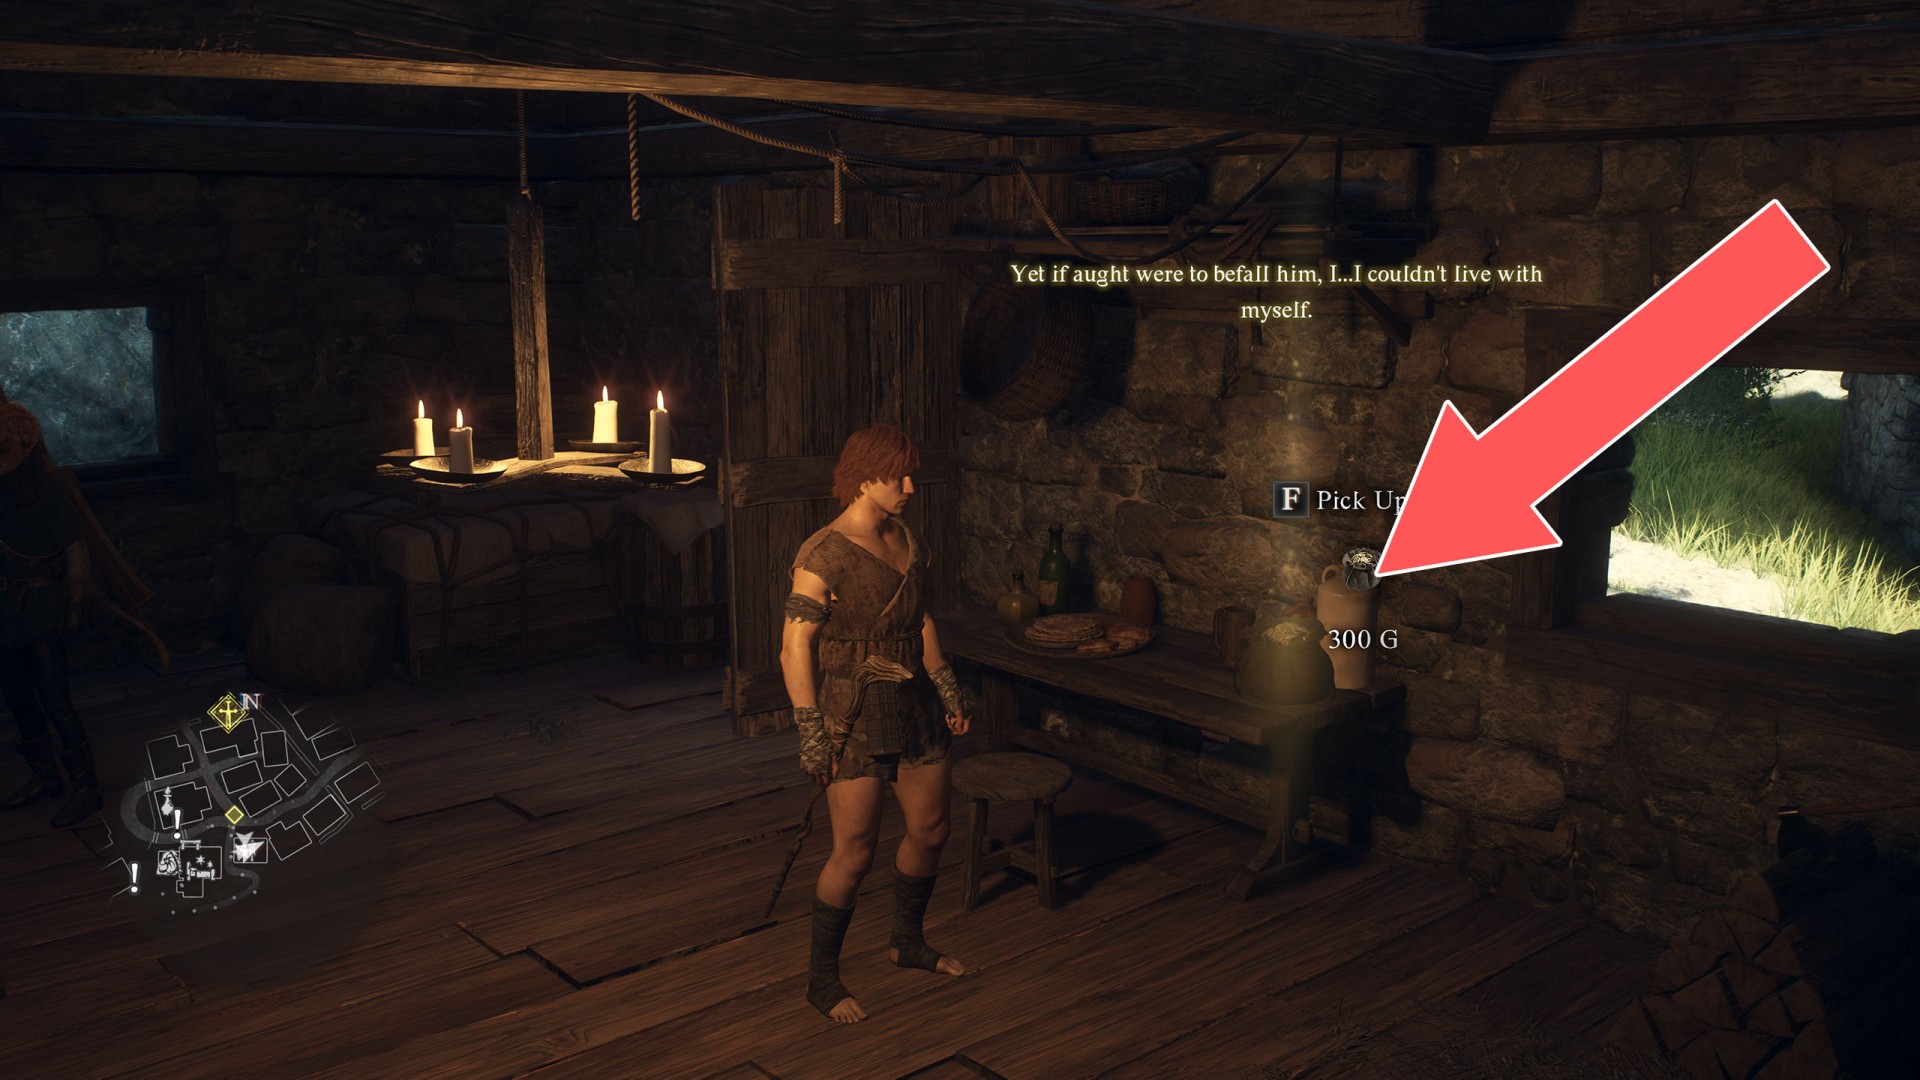
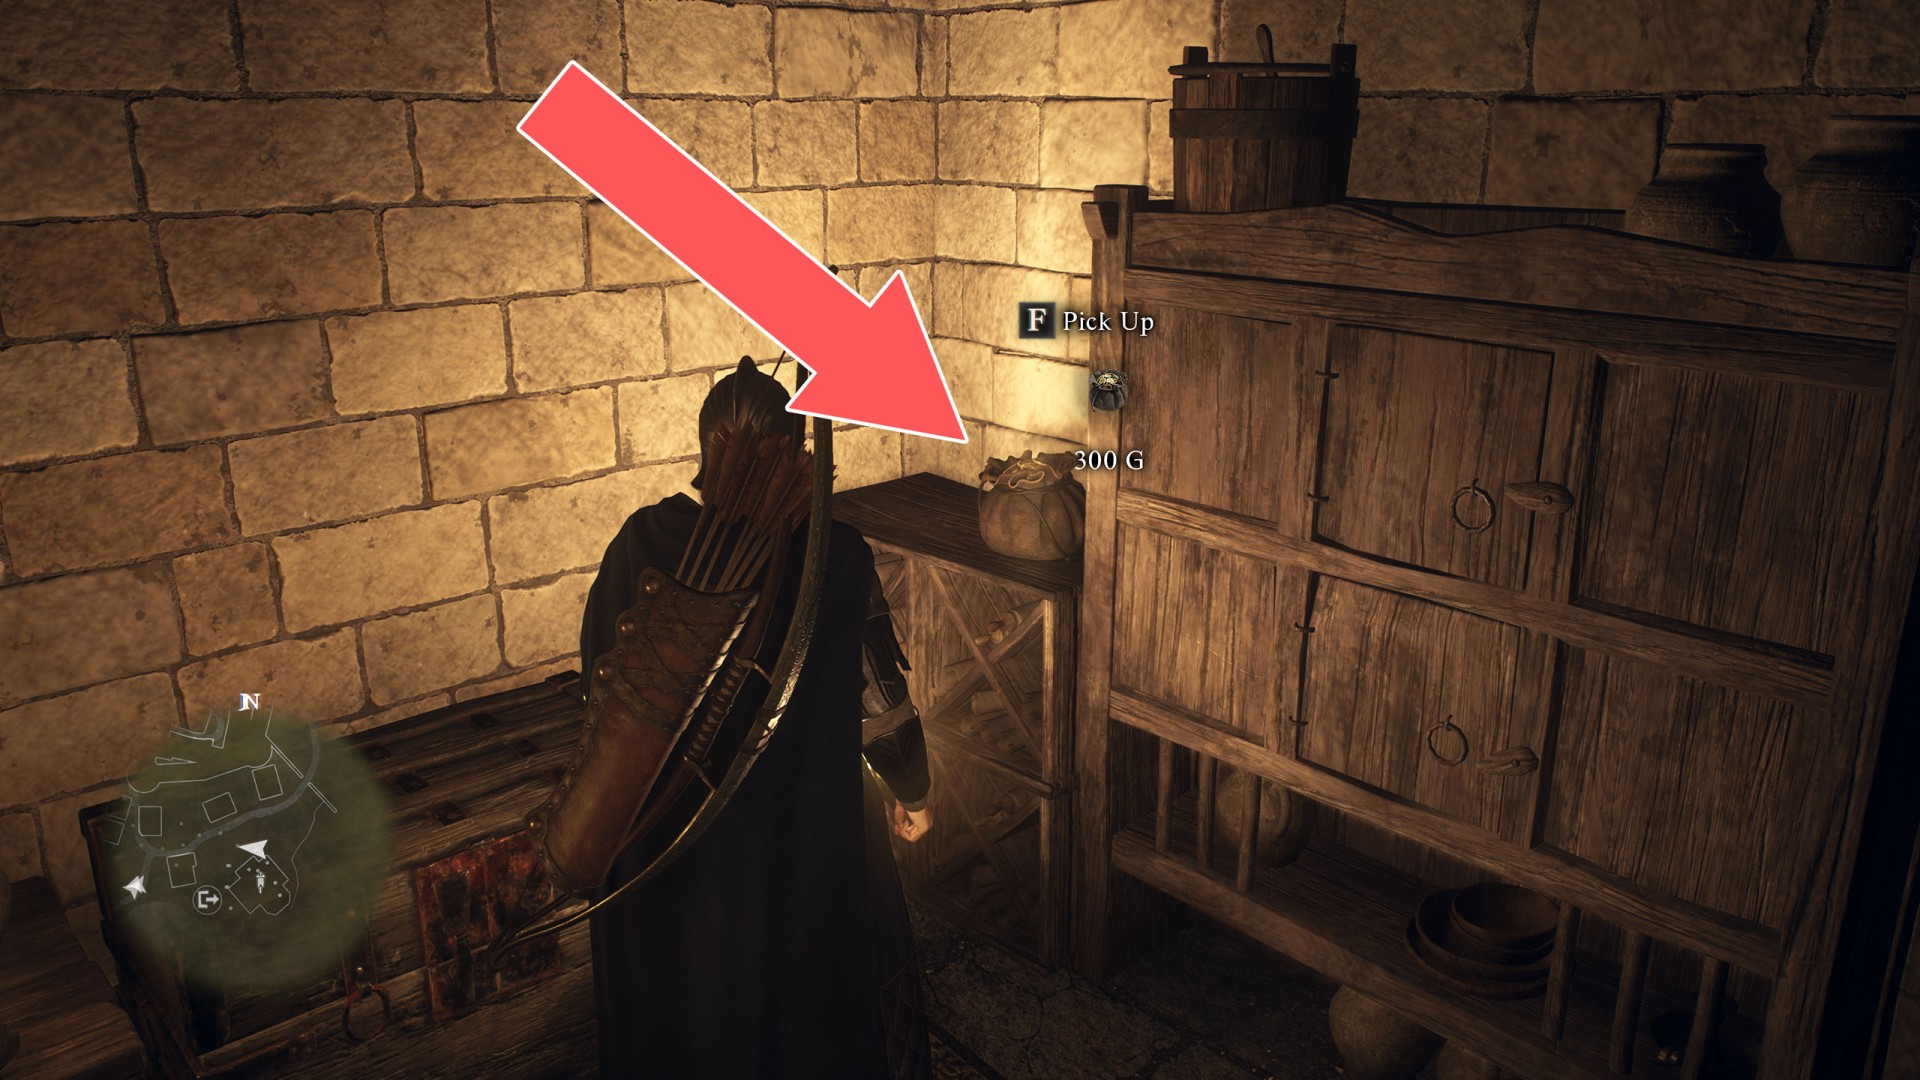
- Pouch (300G)
- Pouch (300G)
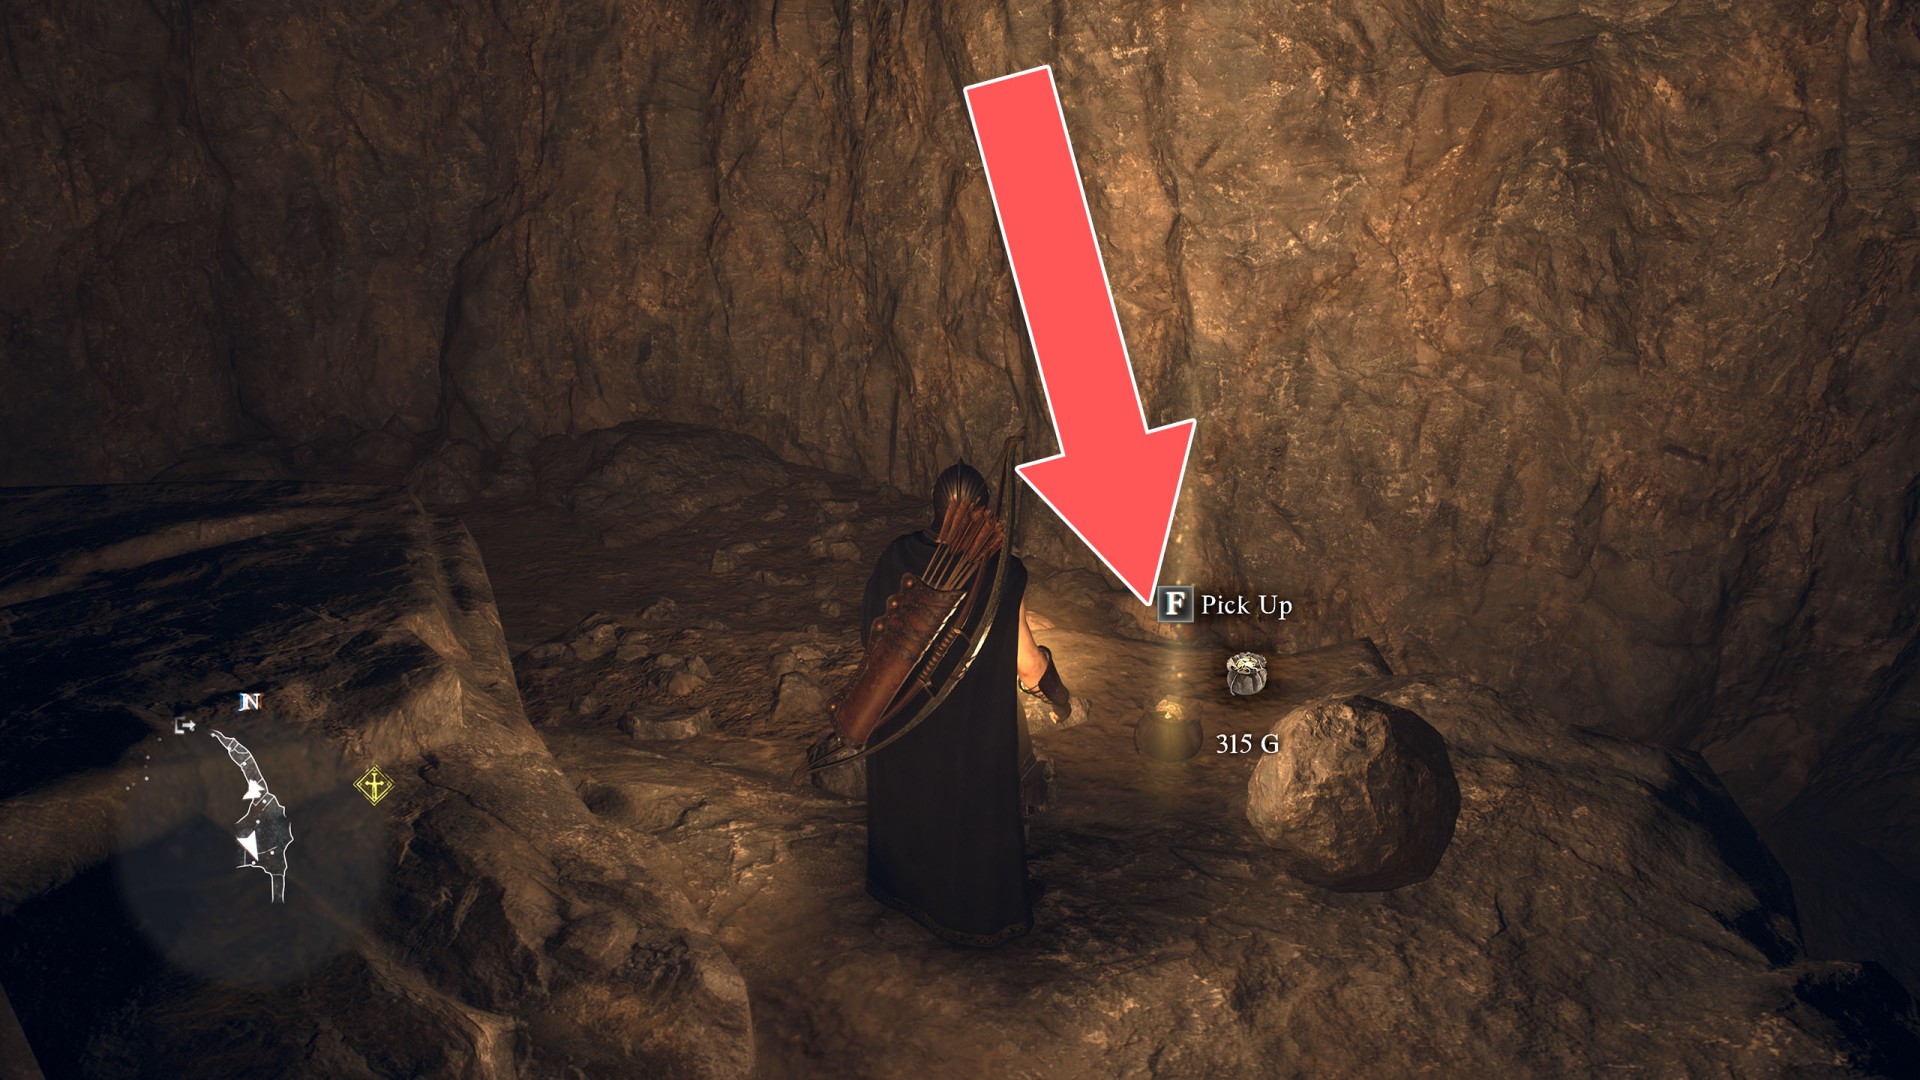
- Pouch (315G)
- Pouch (320G)
- Pouch (320G)
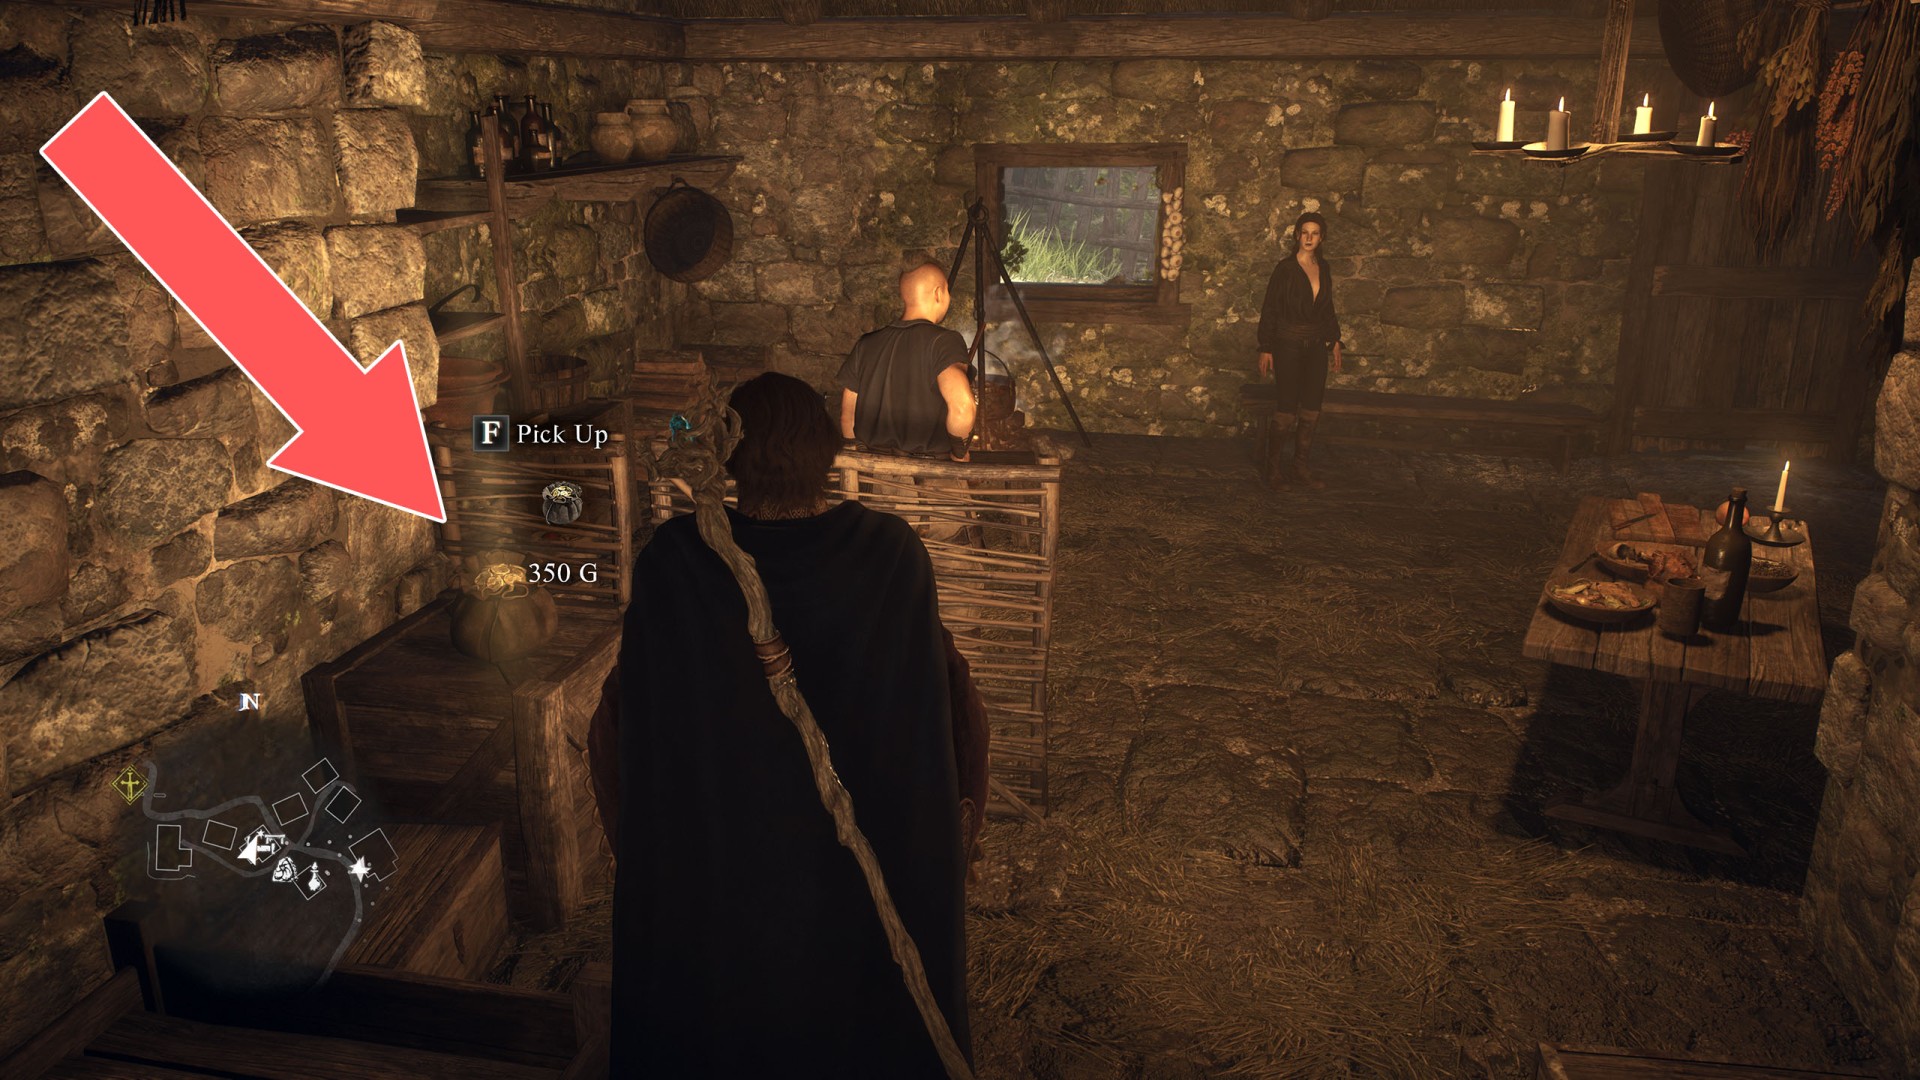
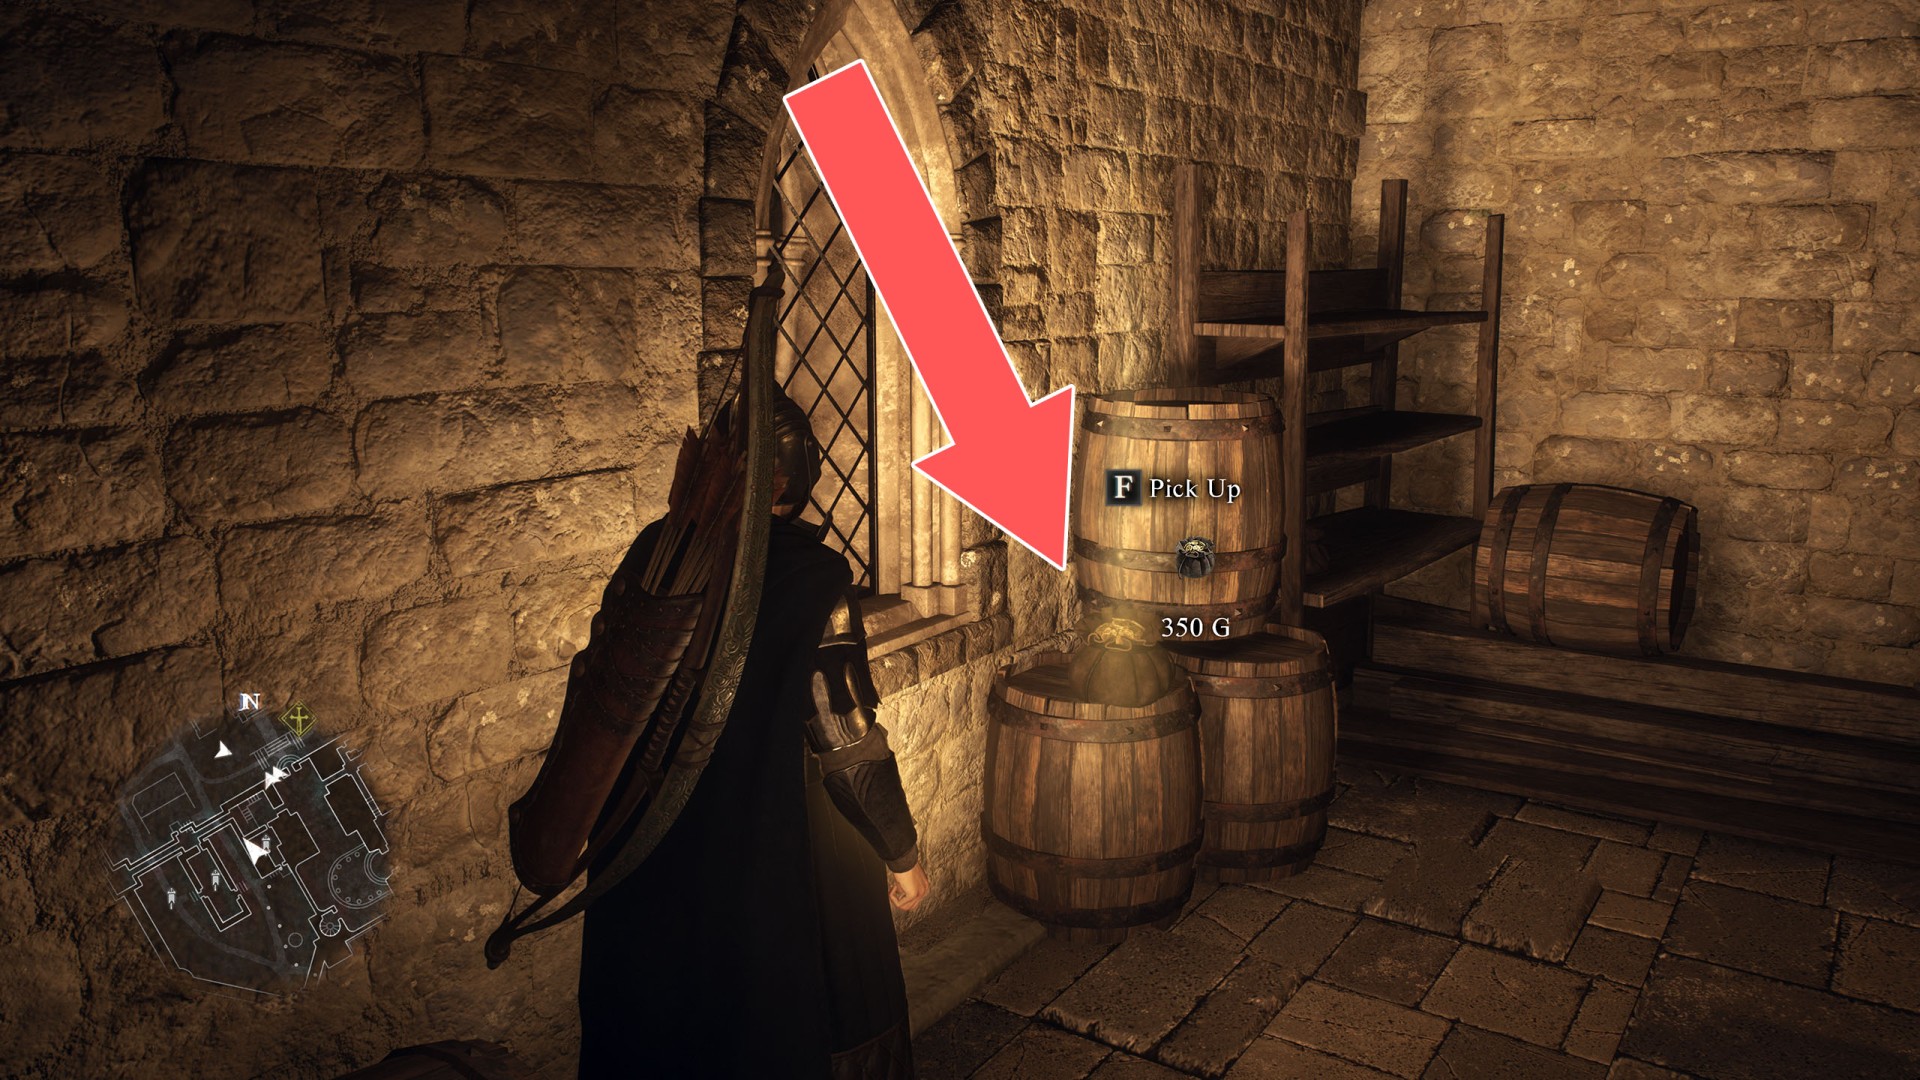
- Pouch (350G)
- Pouch (350G)
- Pouch (350G)
- Pouch (350G)
- Pouch (350G)
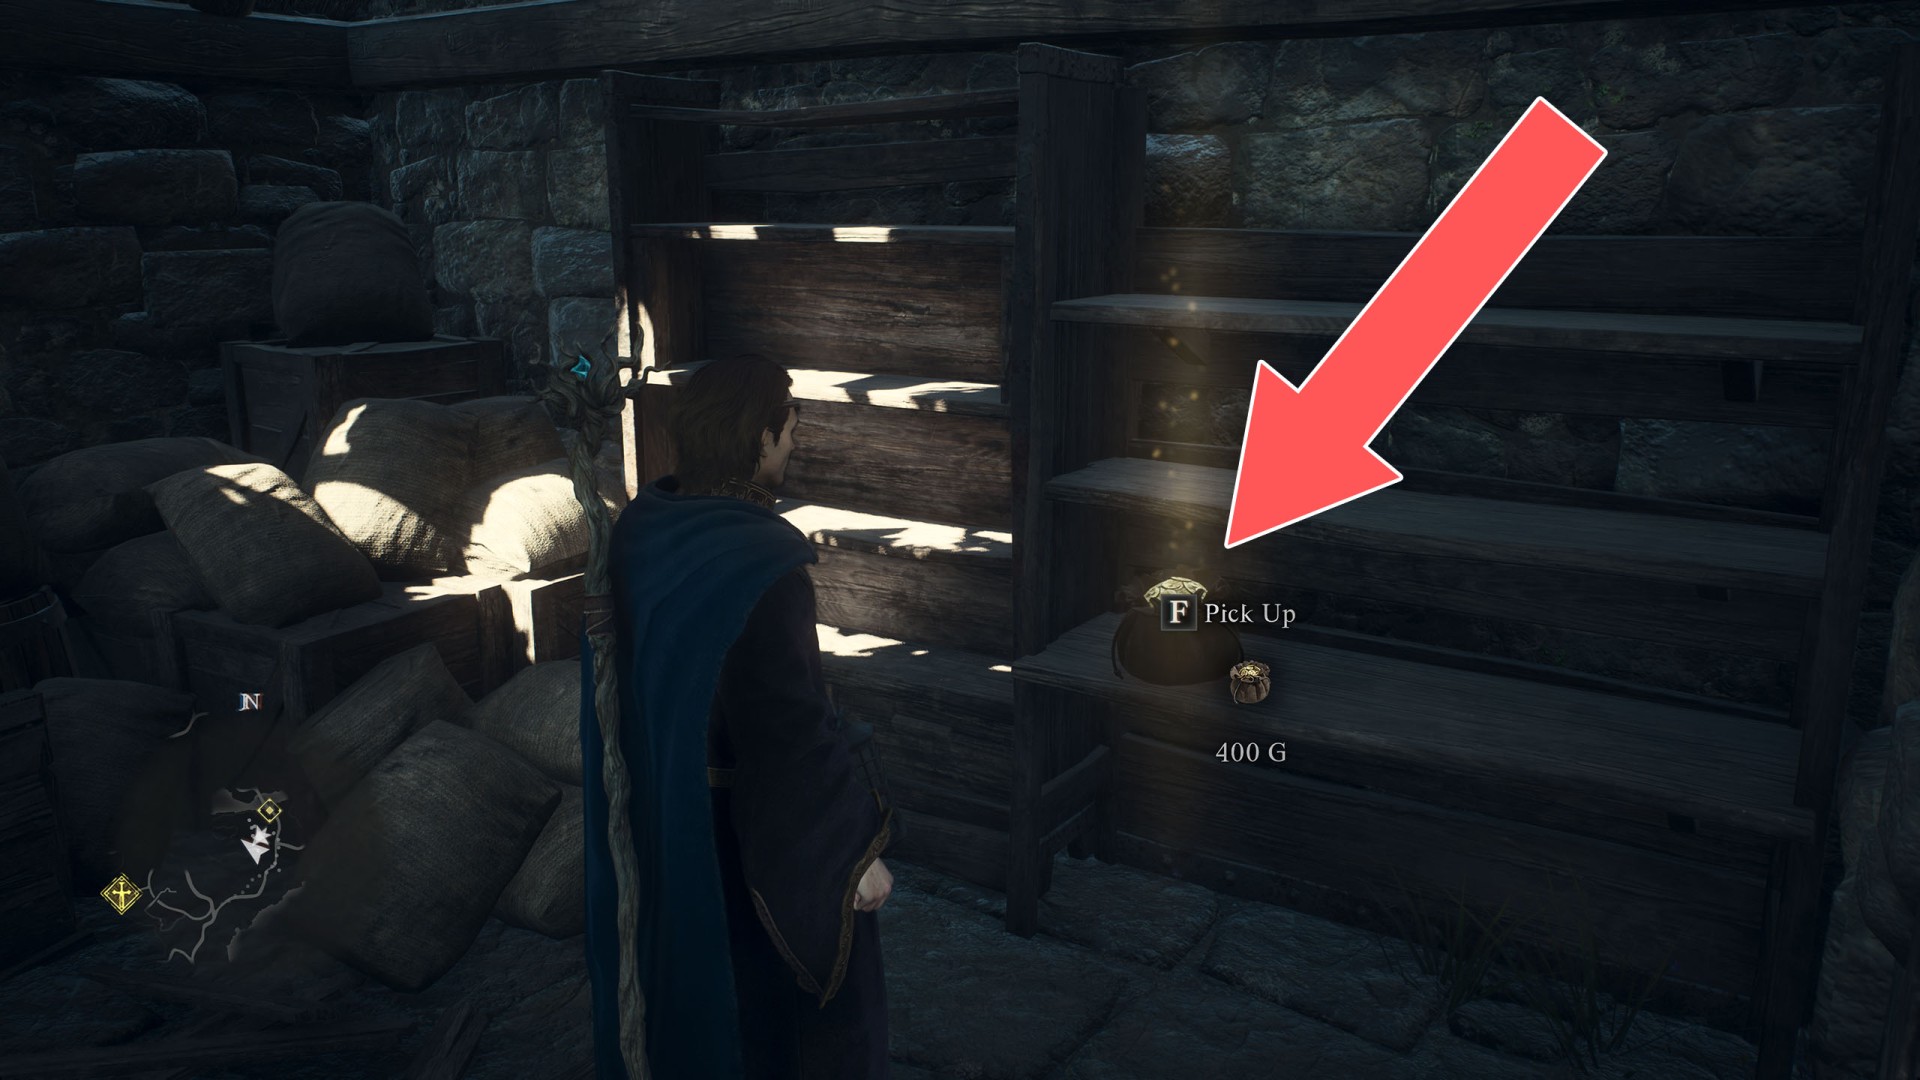
- Pouch (400G)
- Pouch (420G)
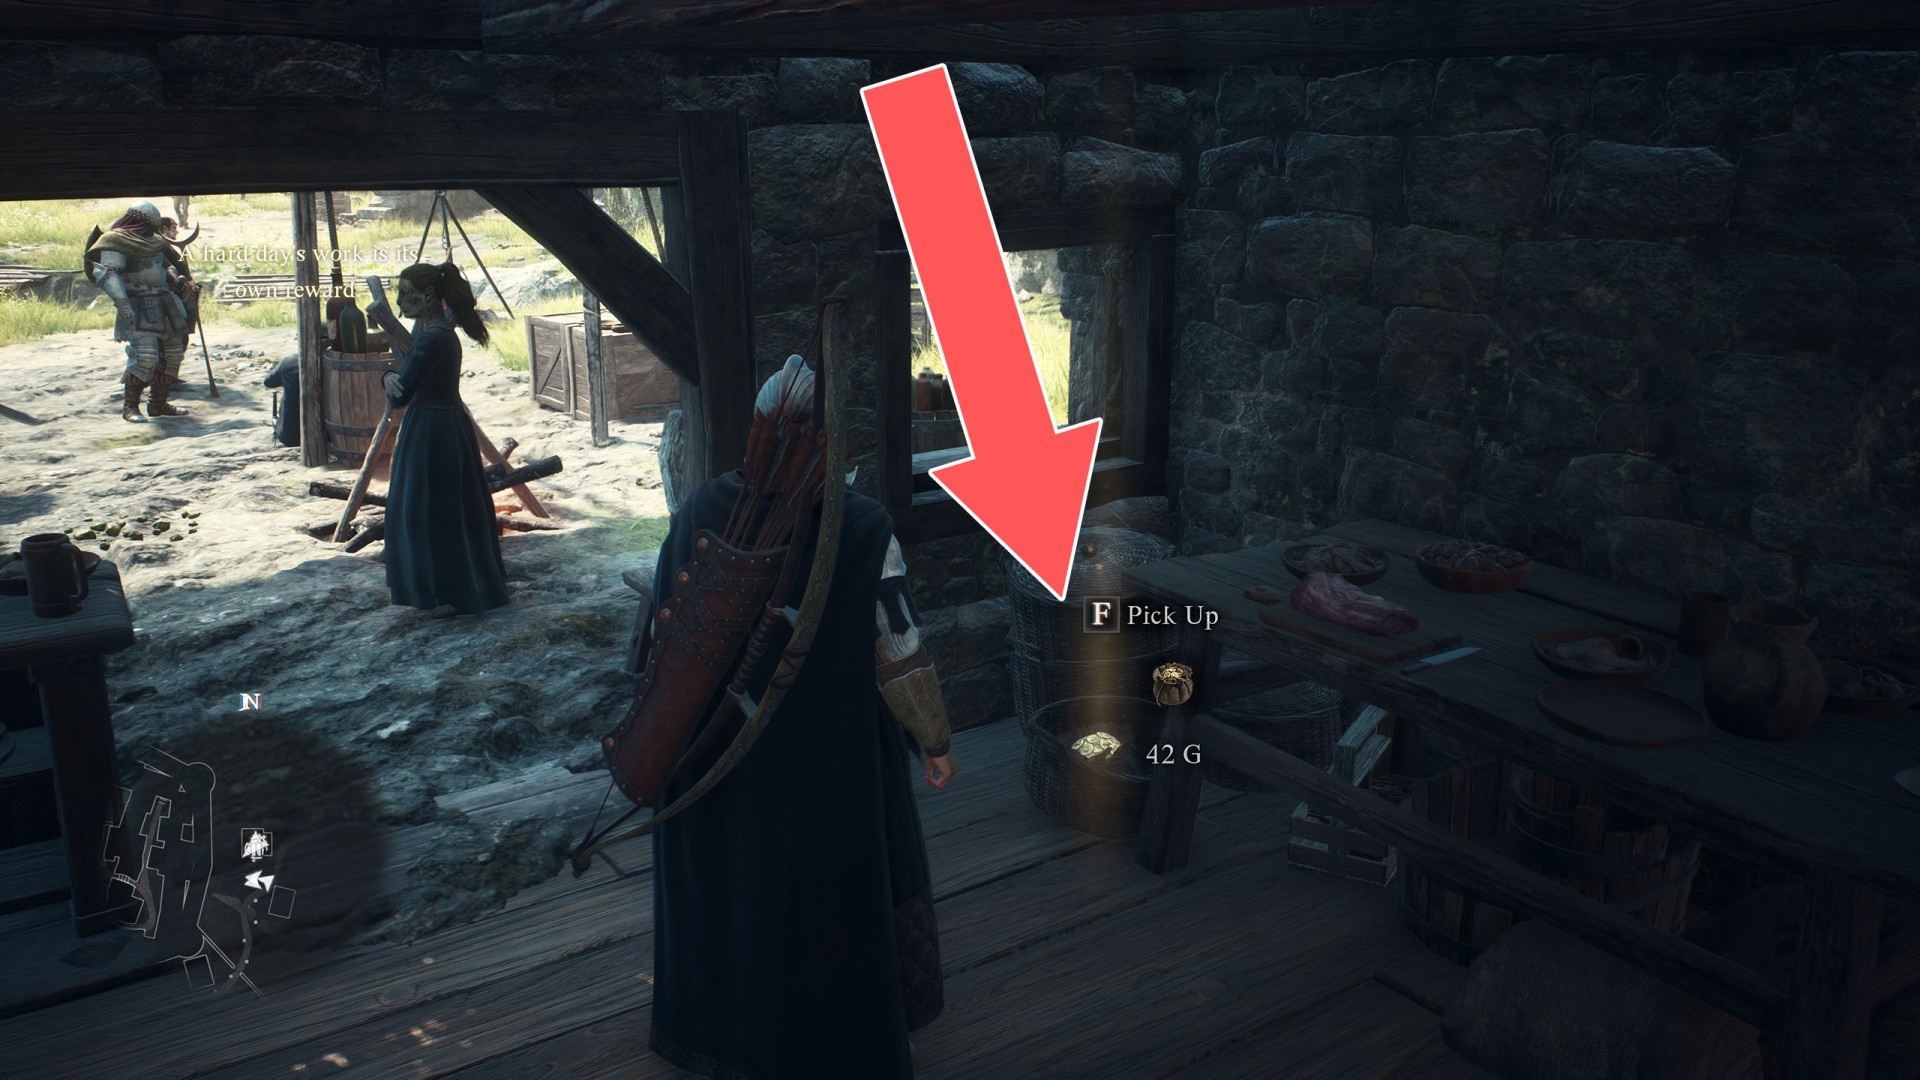
- Pouch (42G)
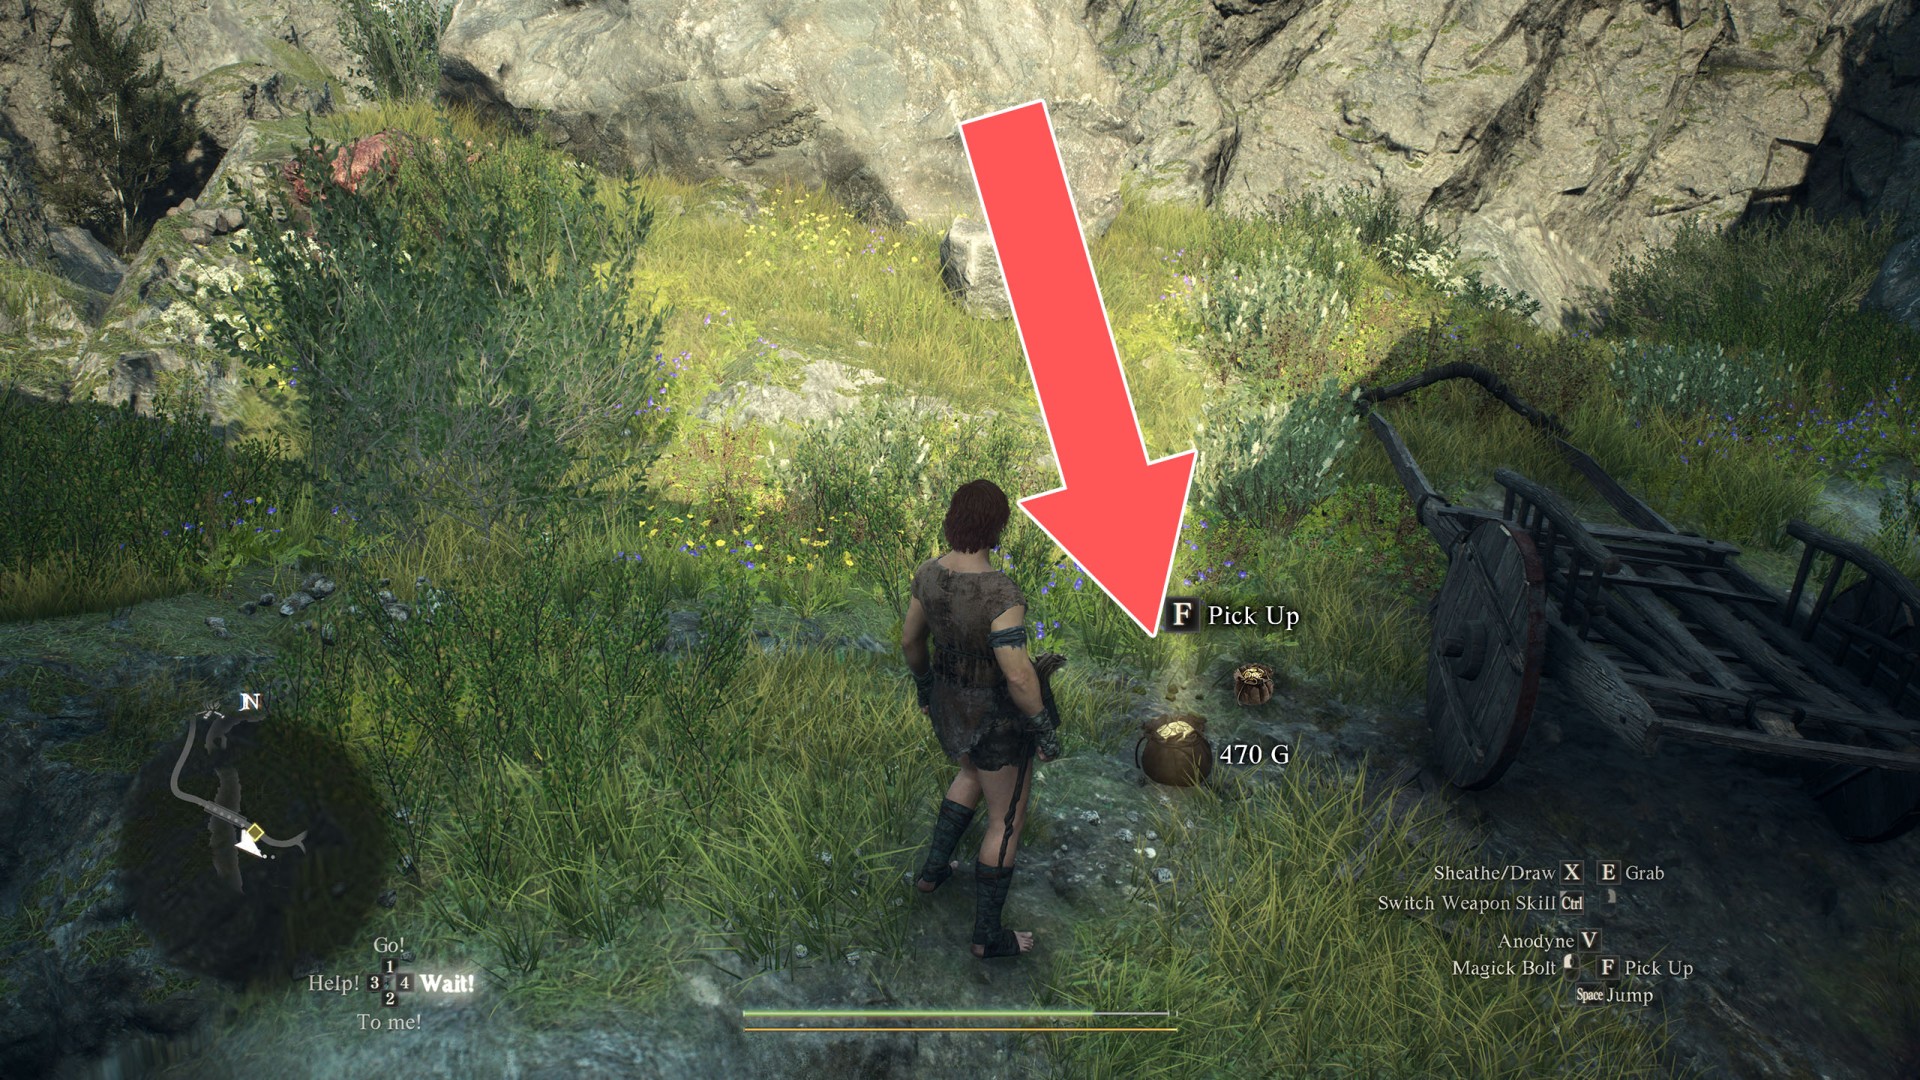
- Pouch (470G)
- Pouch (480G)
- Pouch (500G)
- Pouch (500G)
- Pouch (500G)
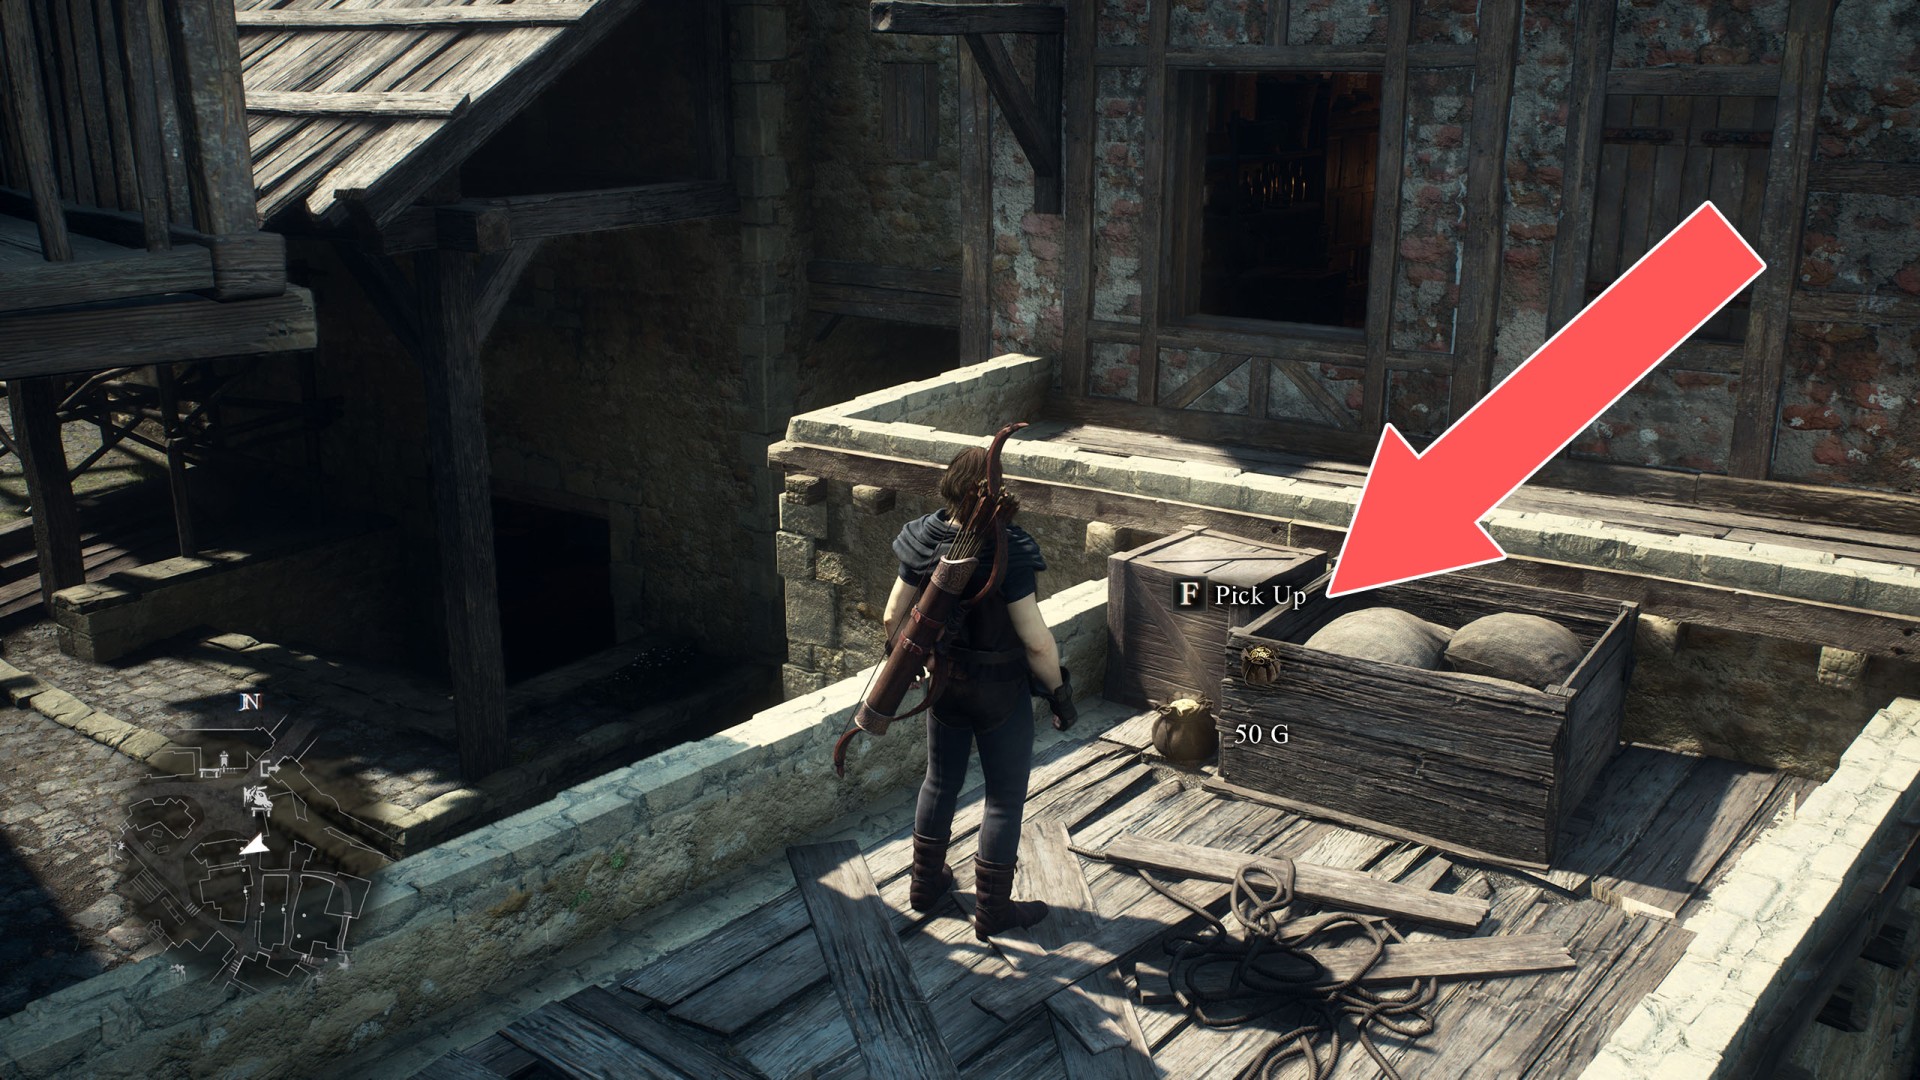
- Pouch (50G)
- Pouch (50G)
- Pouch (585G)
- Pouch (625G)
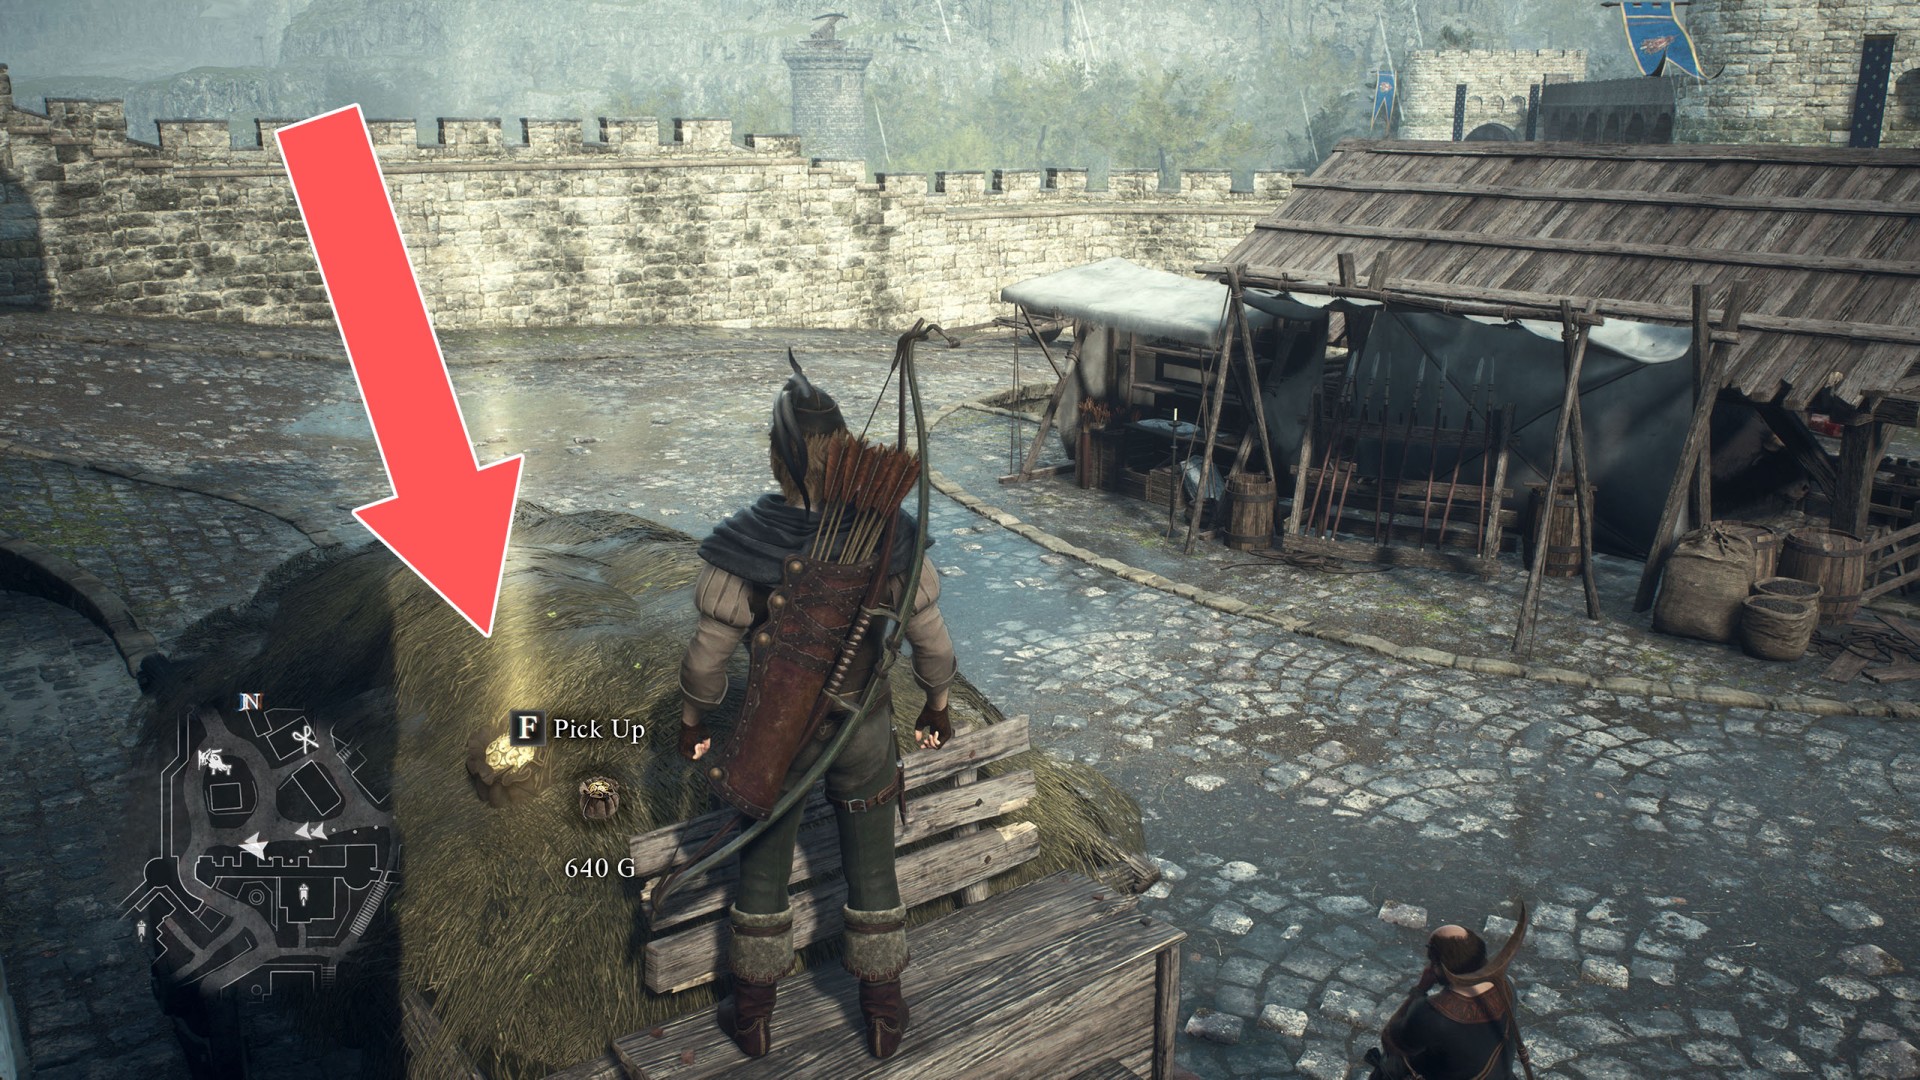
- Pouch (640G)
- Pouch (670G)
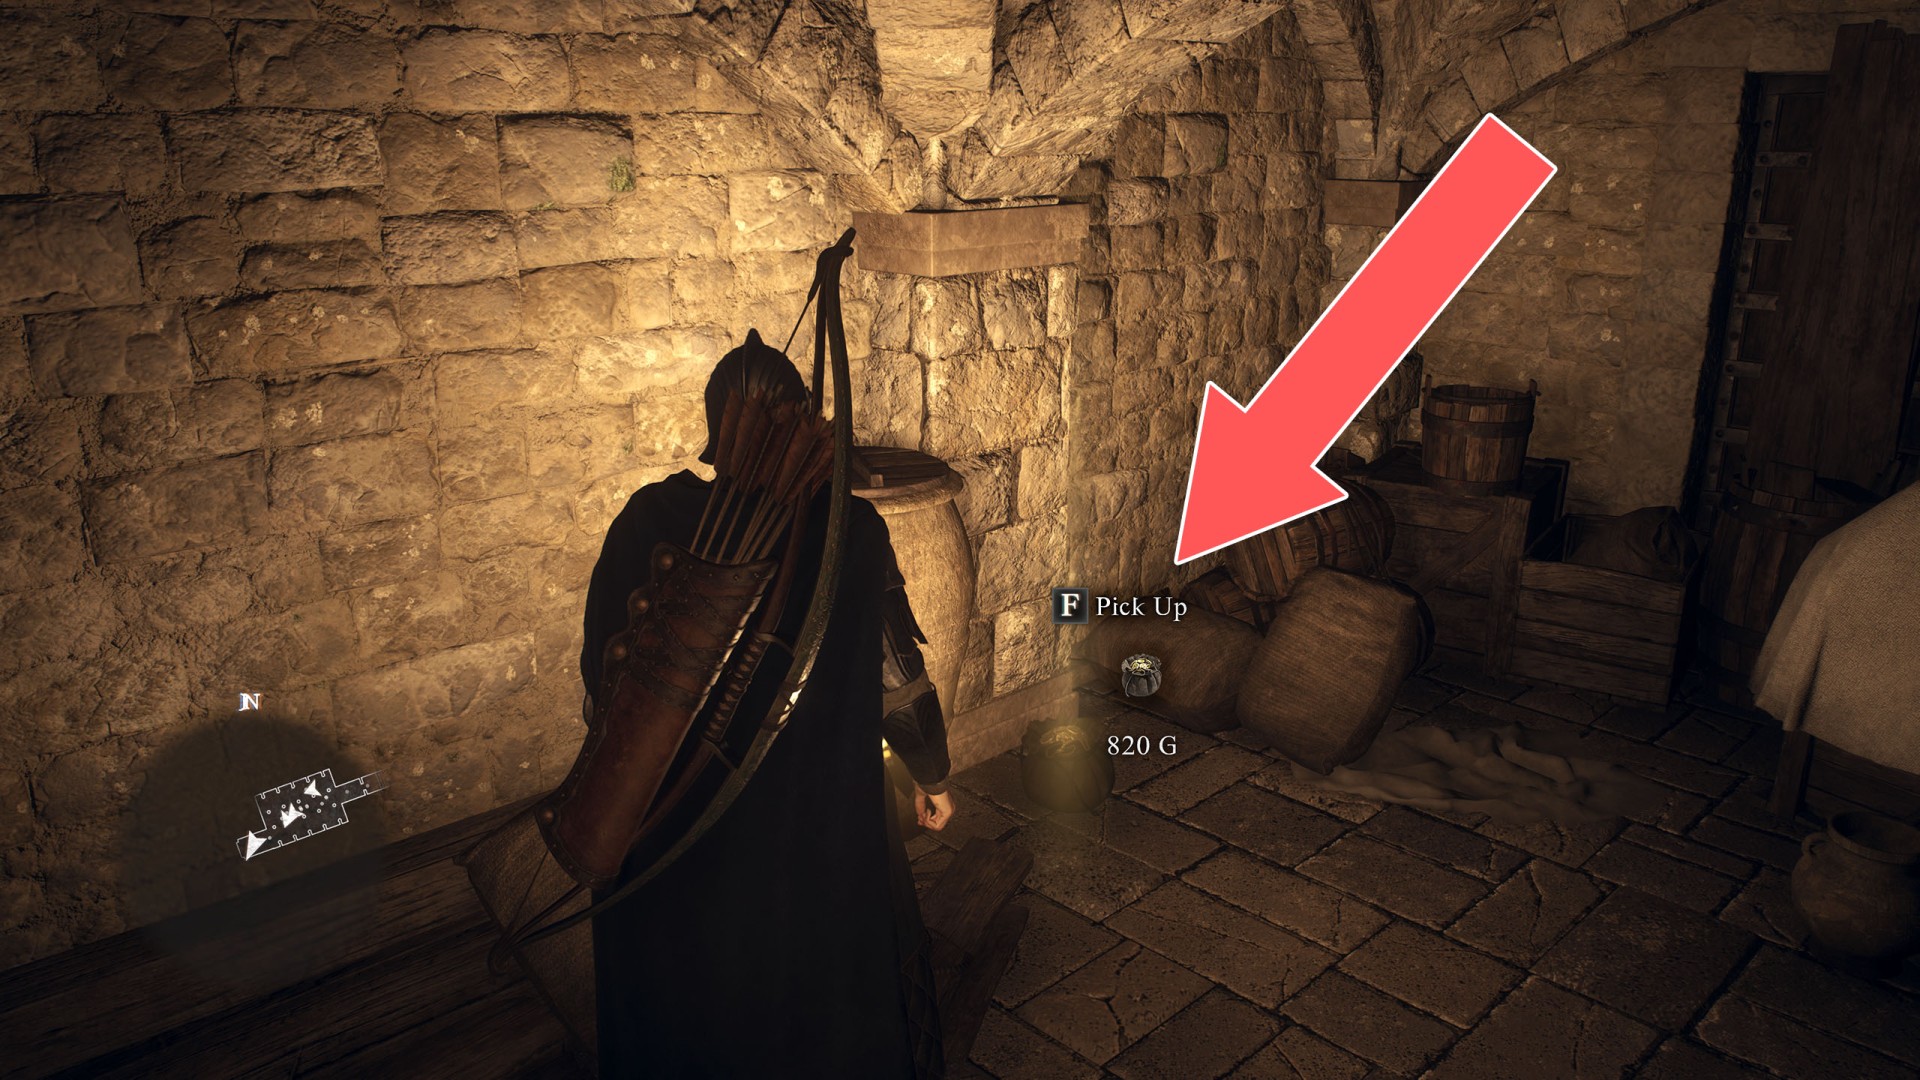
- Pouch (820G)
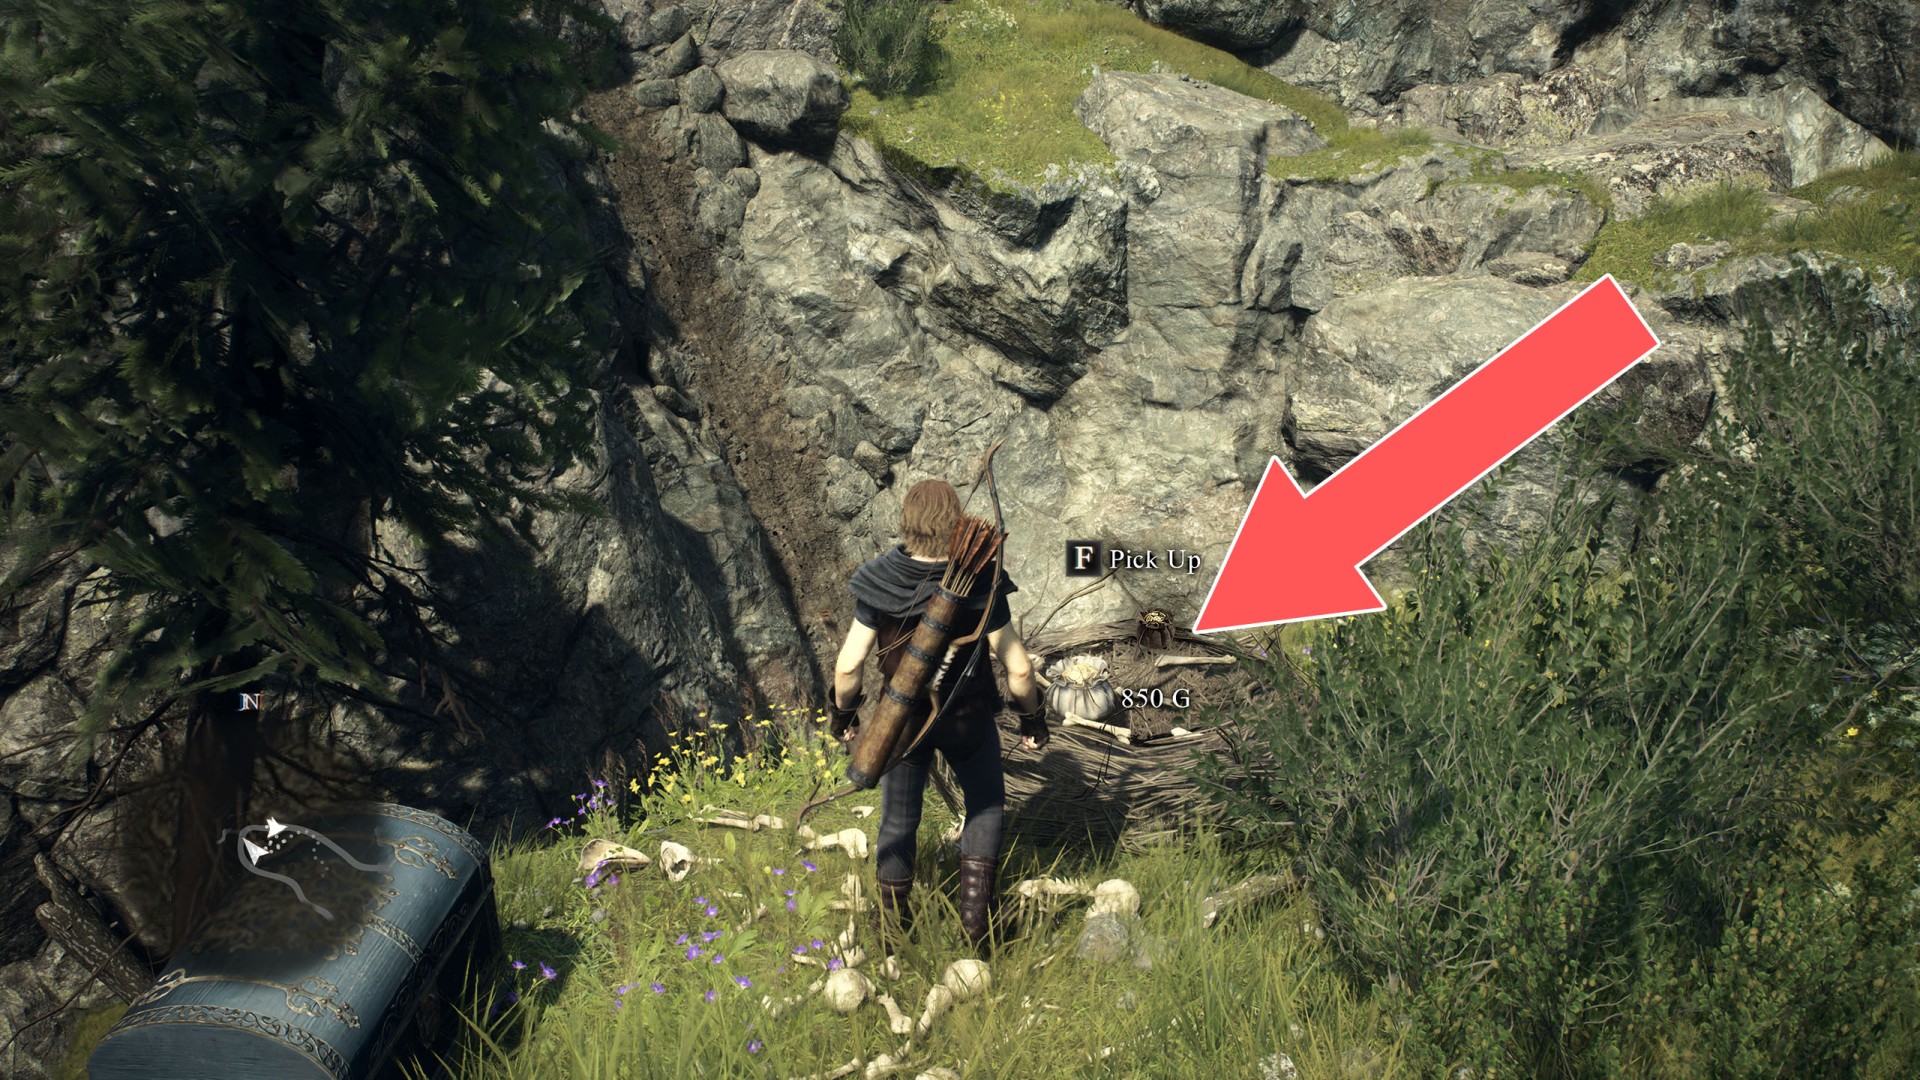
- Pouch (850G)
- Pouch (850G)
- Pouch (850G)
- Pouch (850G)
- Pouch (850G)
- Pouch (900G)
- Pouch (970G)
- Pouch (990G)
- Pouch x 2 (2,000G)
- Pouch x 3 (7,300G)
All known locations on the map World Map
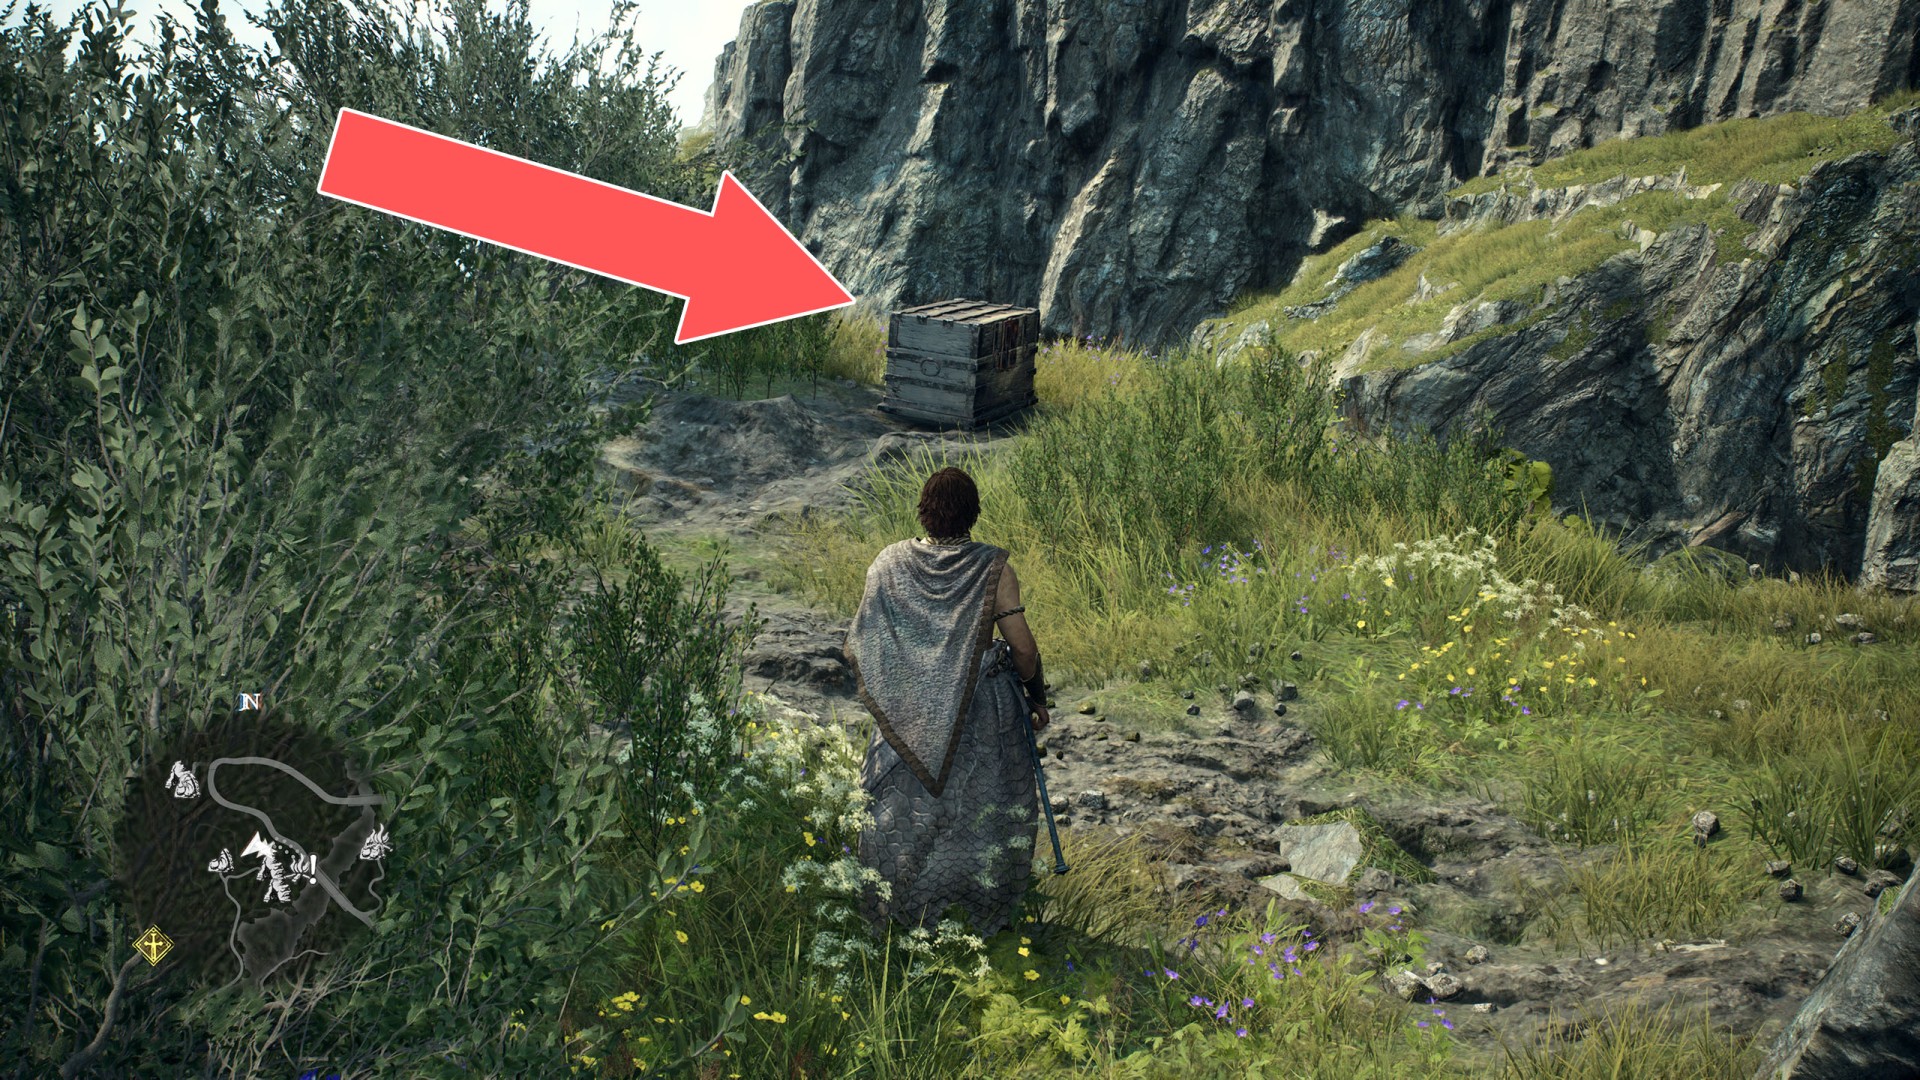
 Box & Pouch (5,600G)▶ show the map ◀
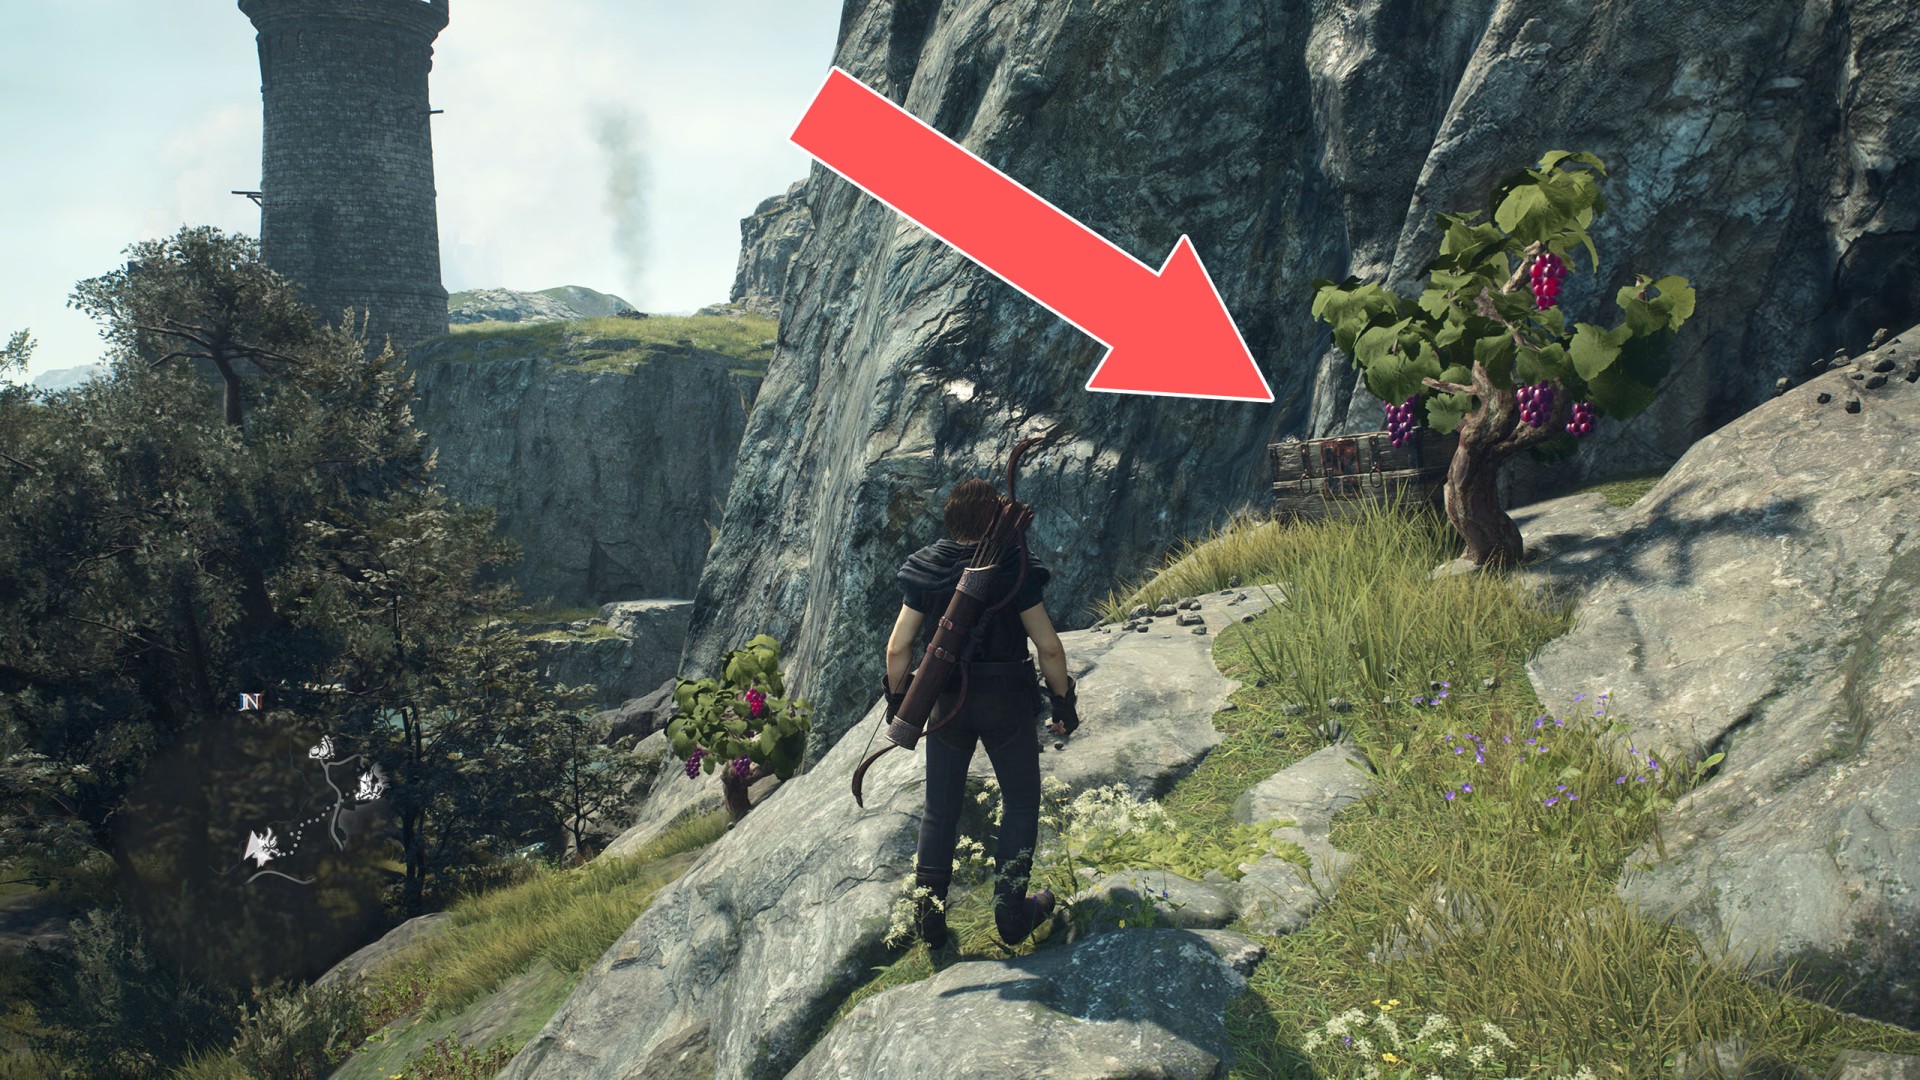
Box & Pouch (6,490G)▶ show the map ◀

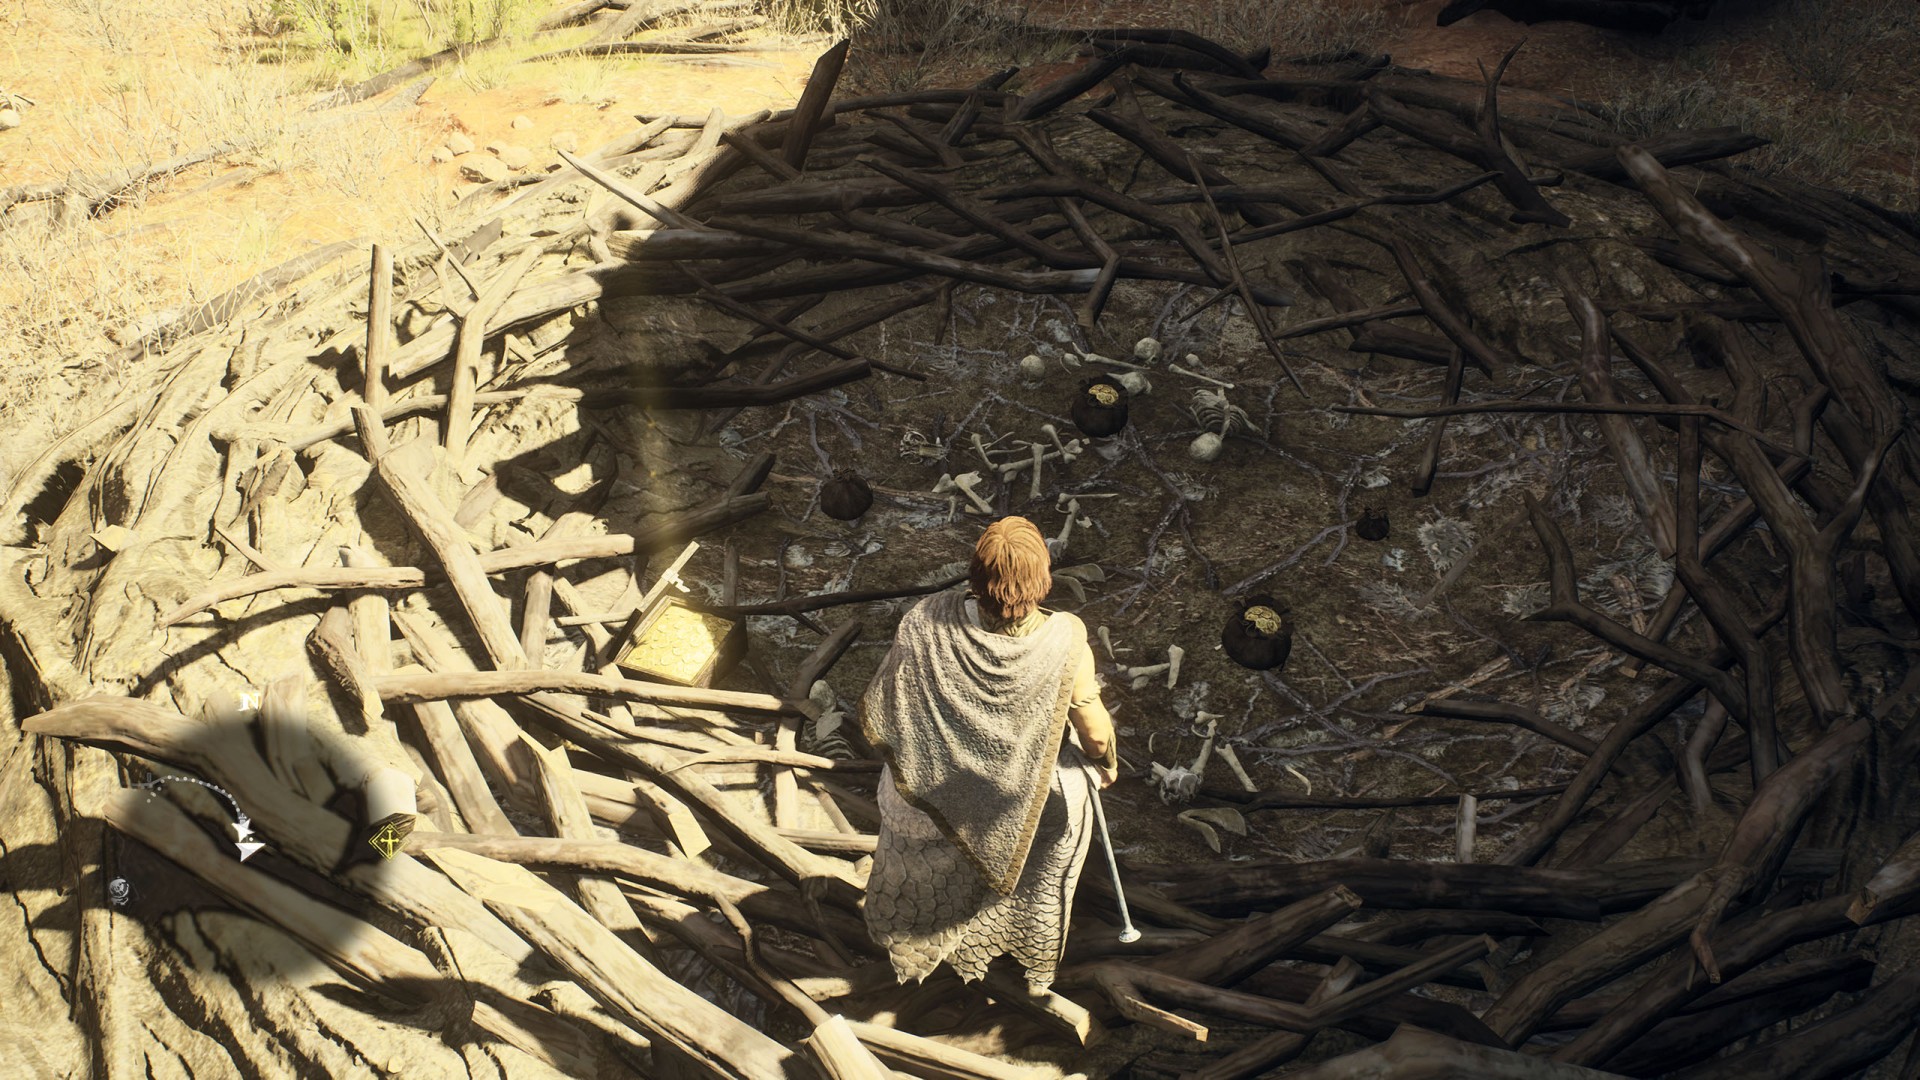
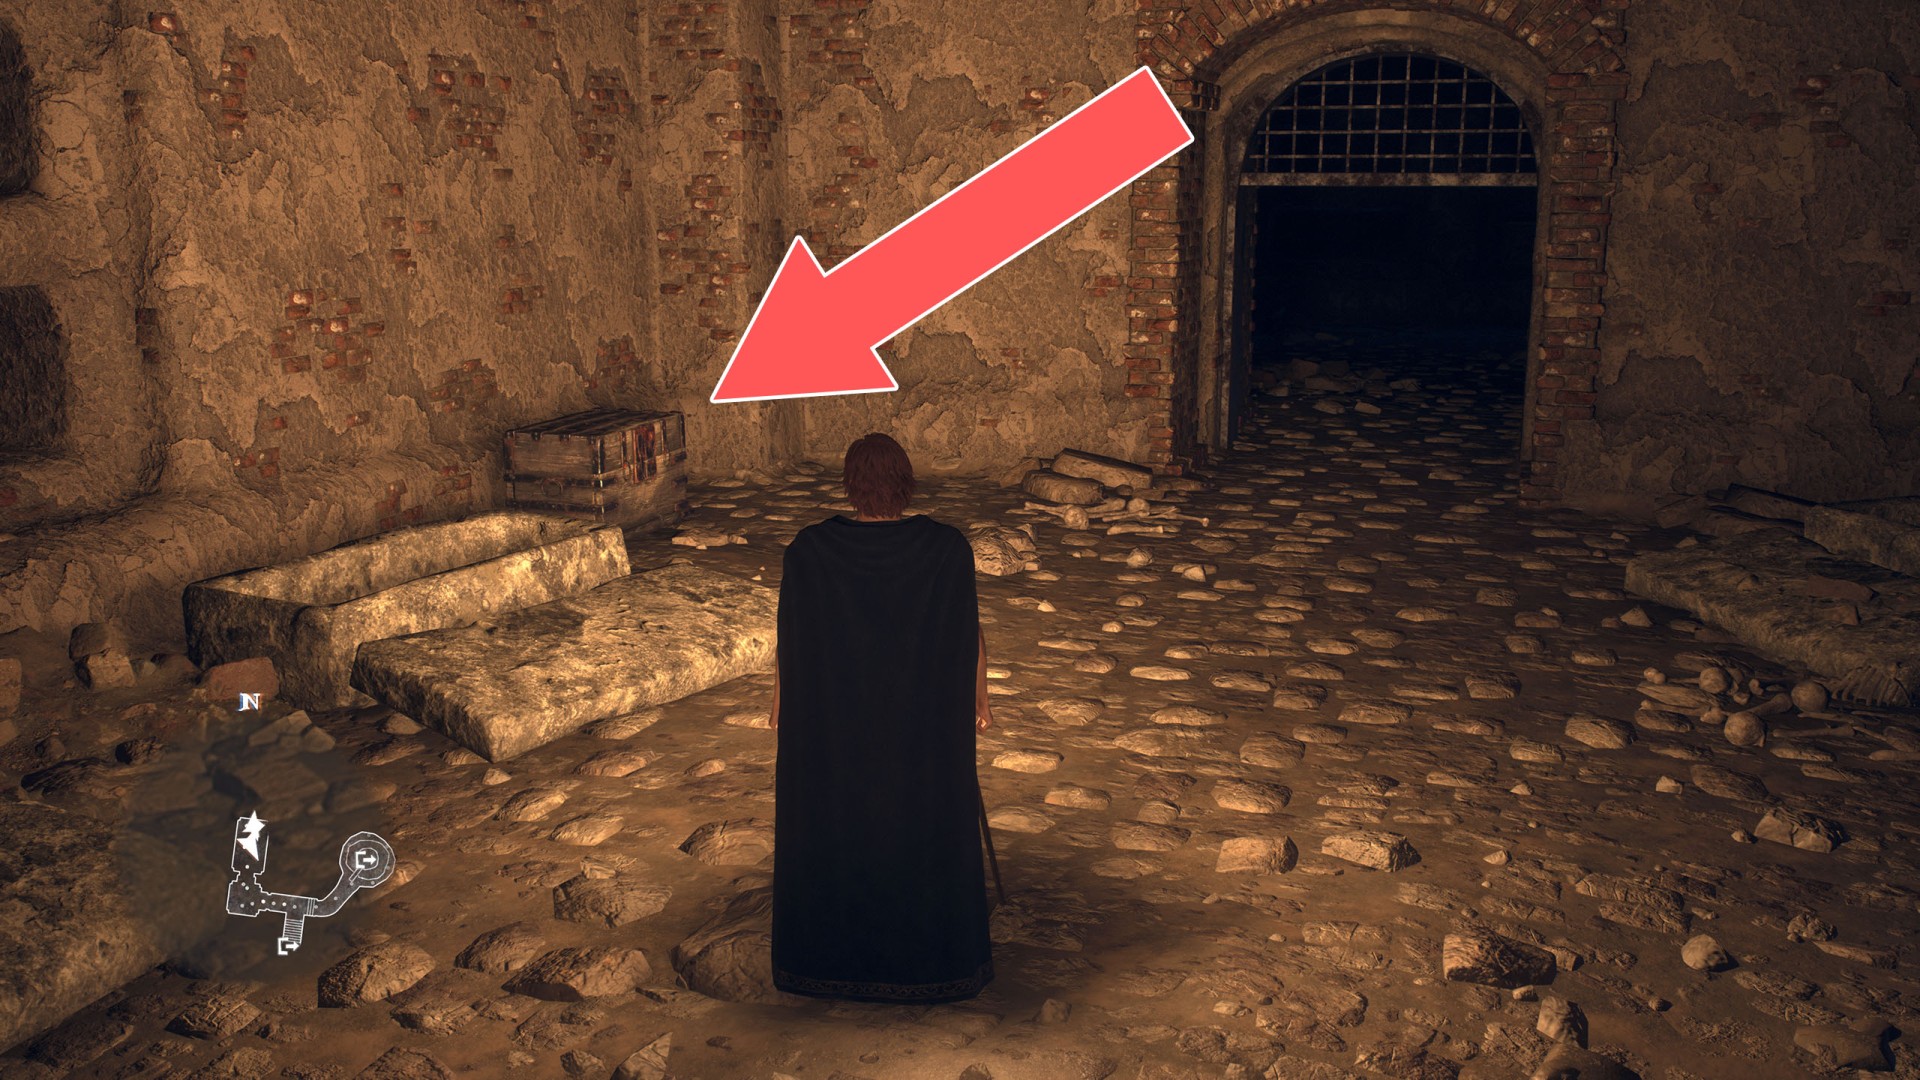
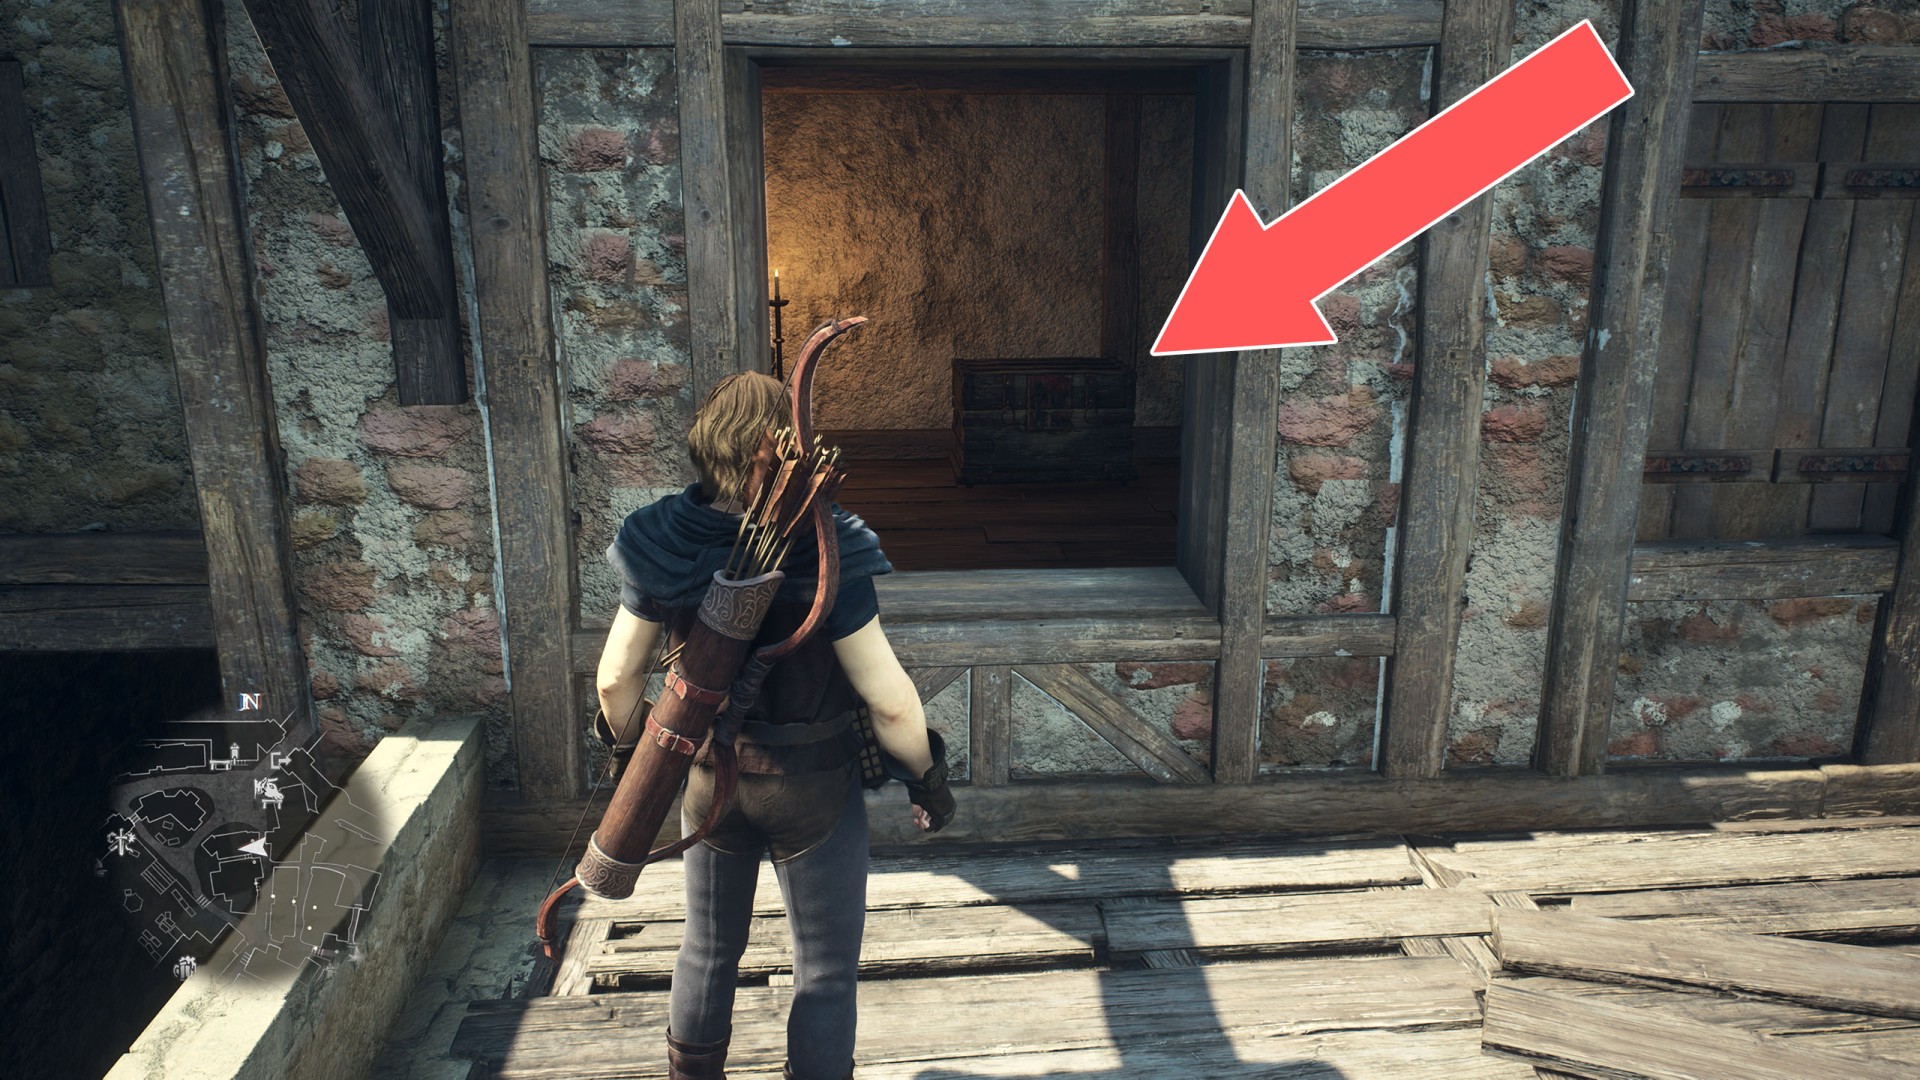
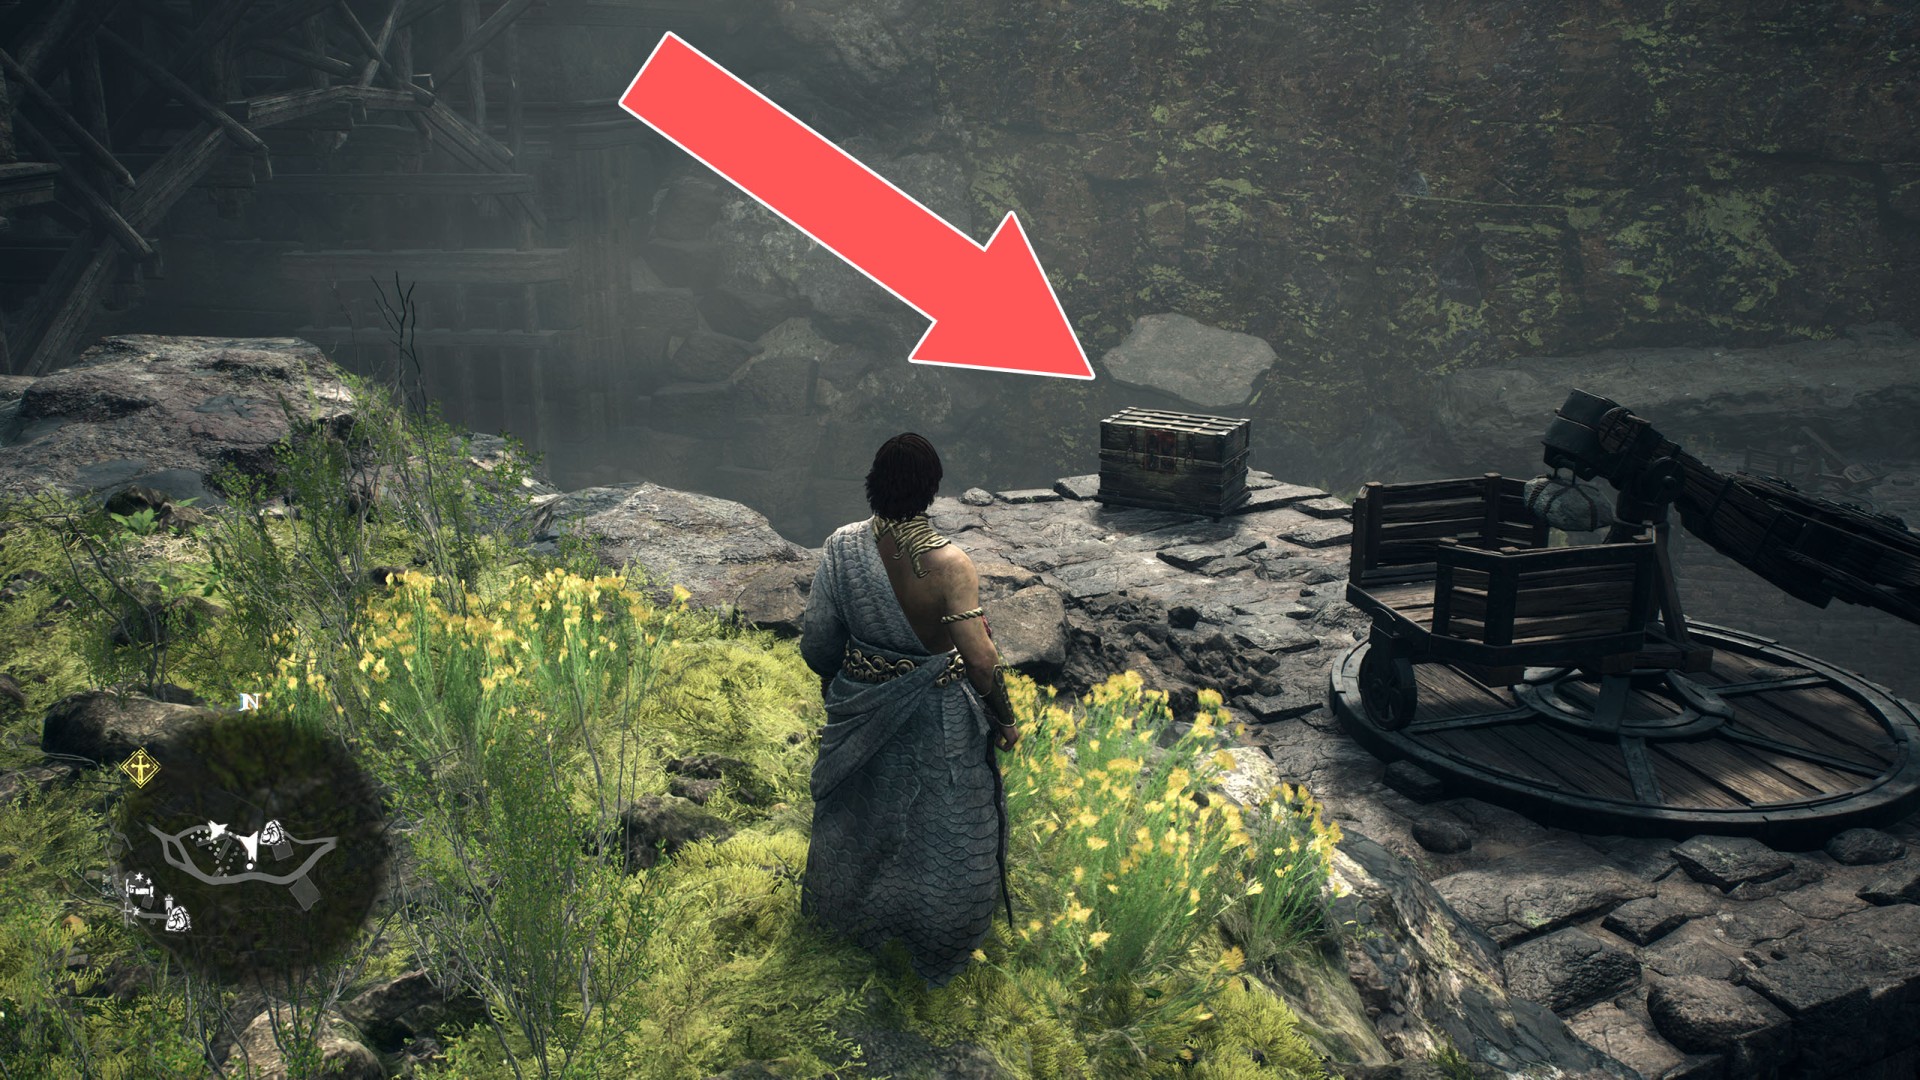
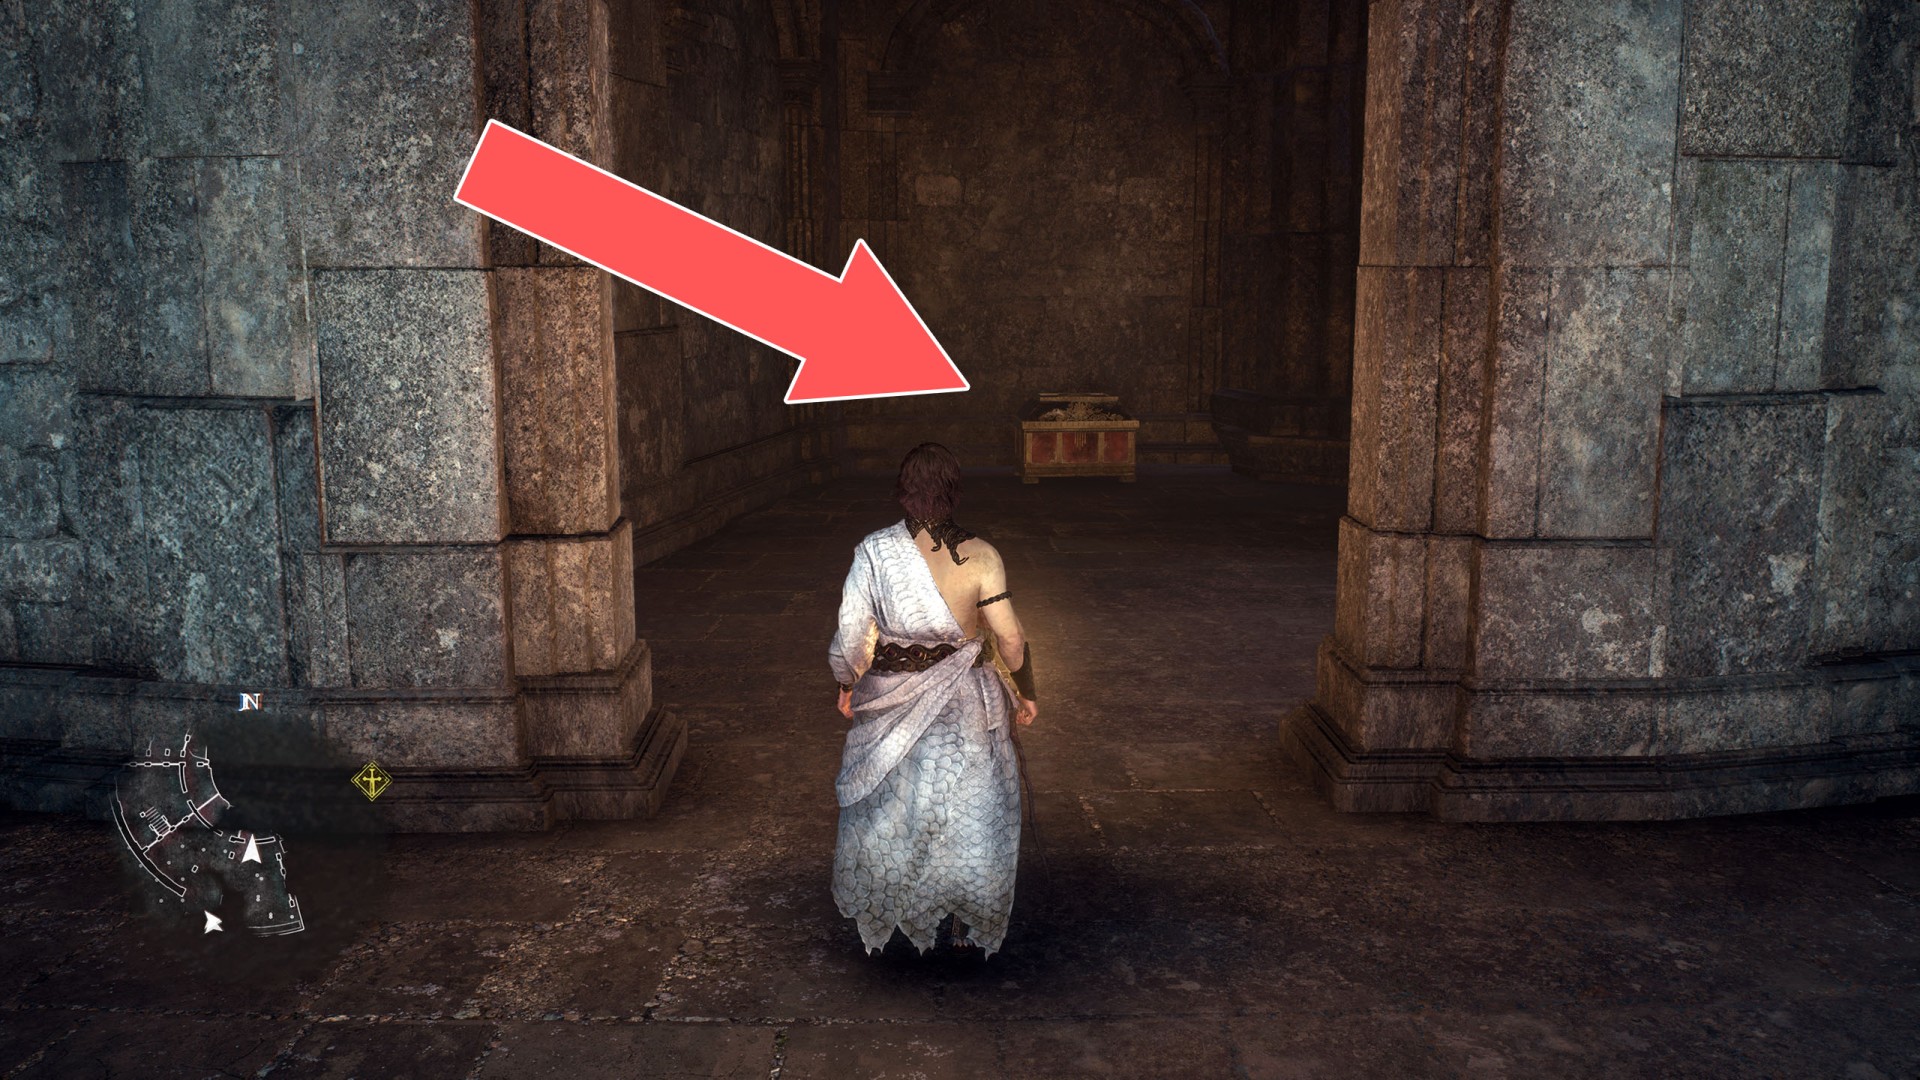
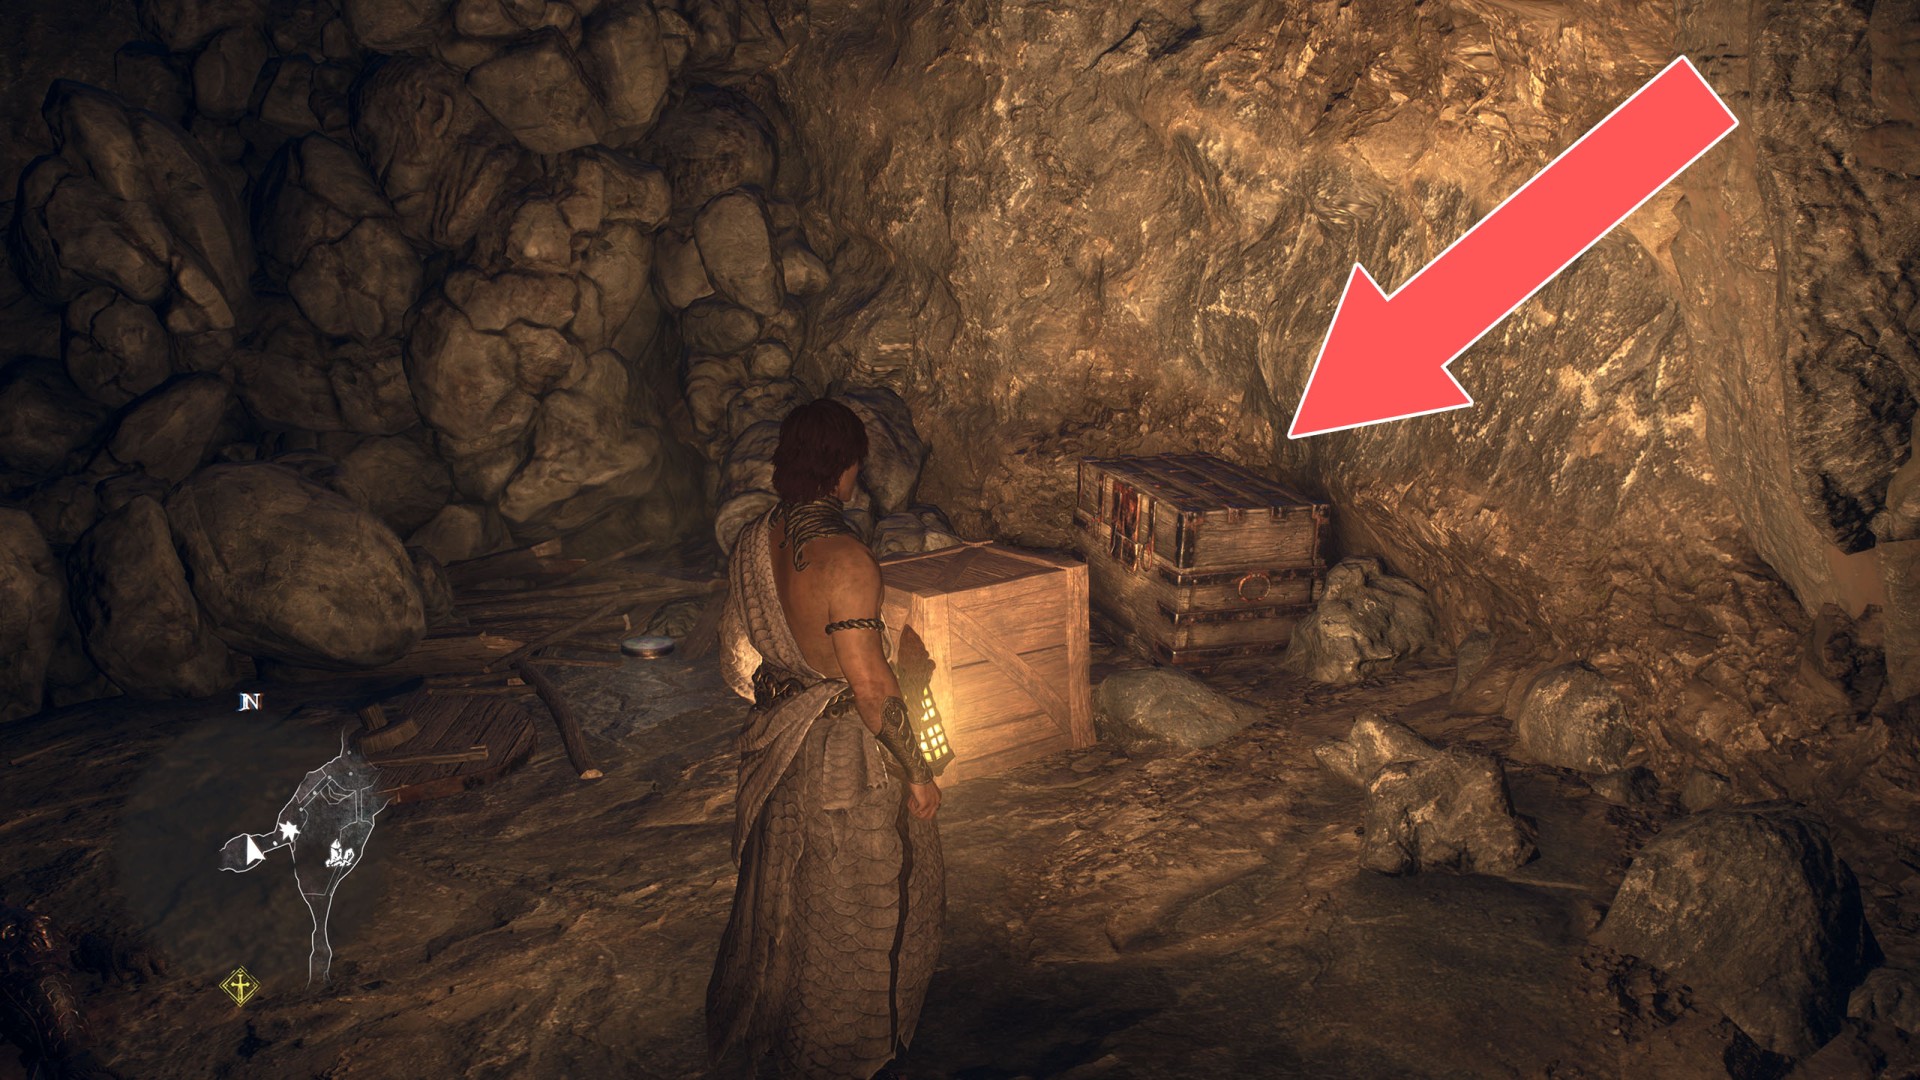
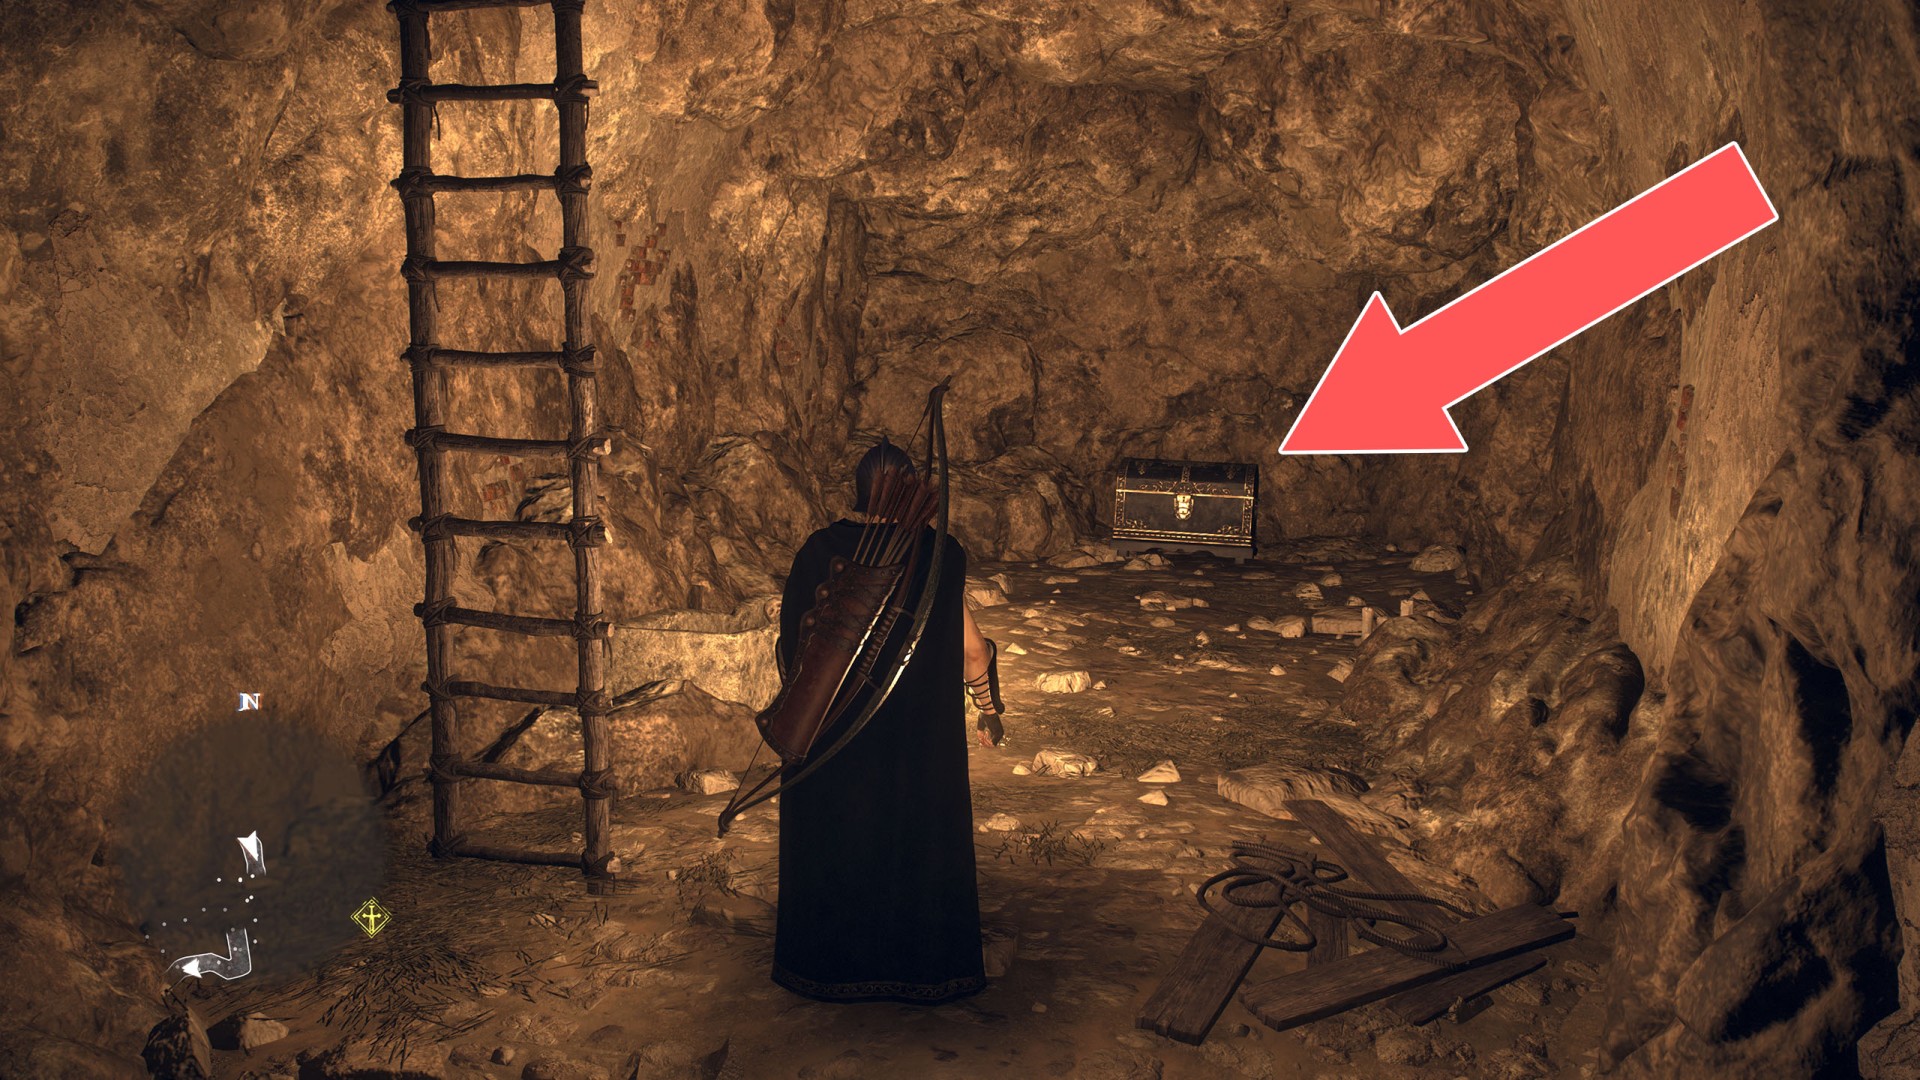
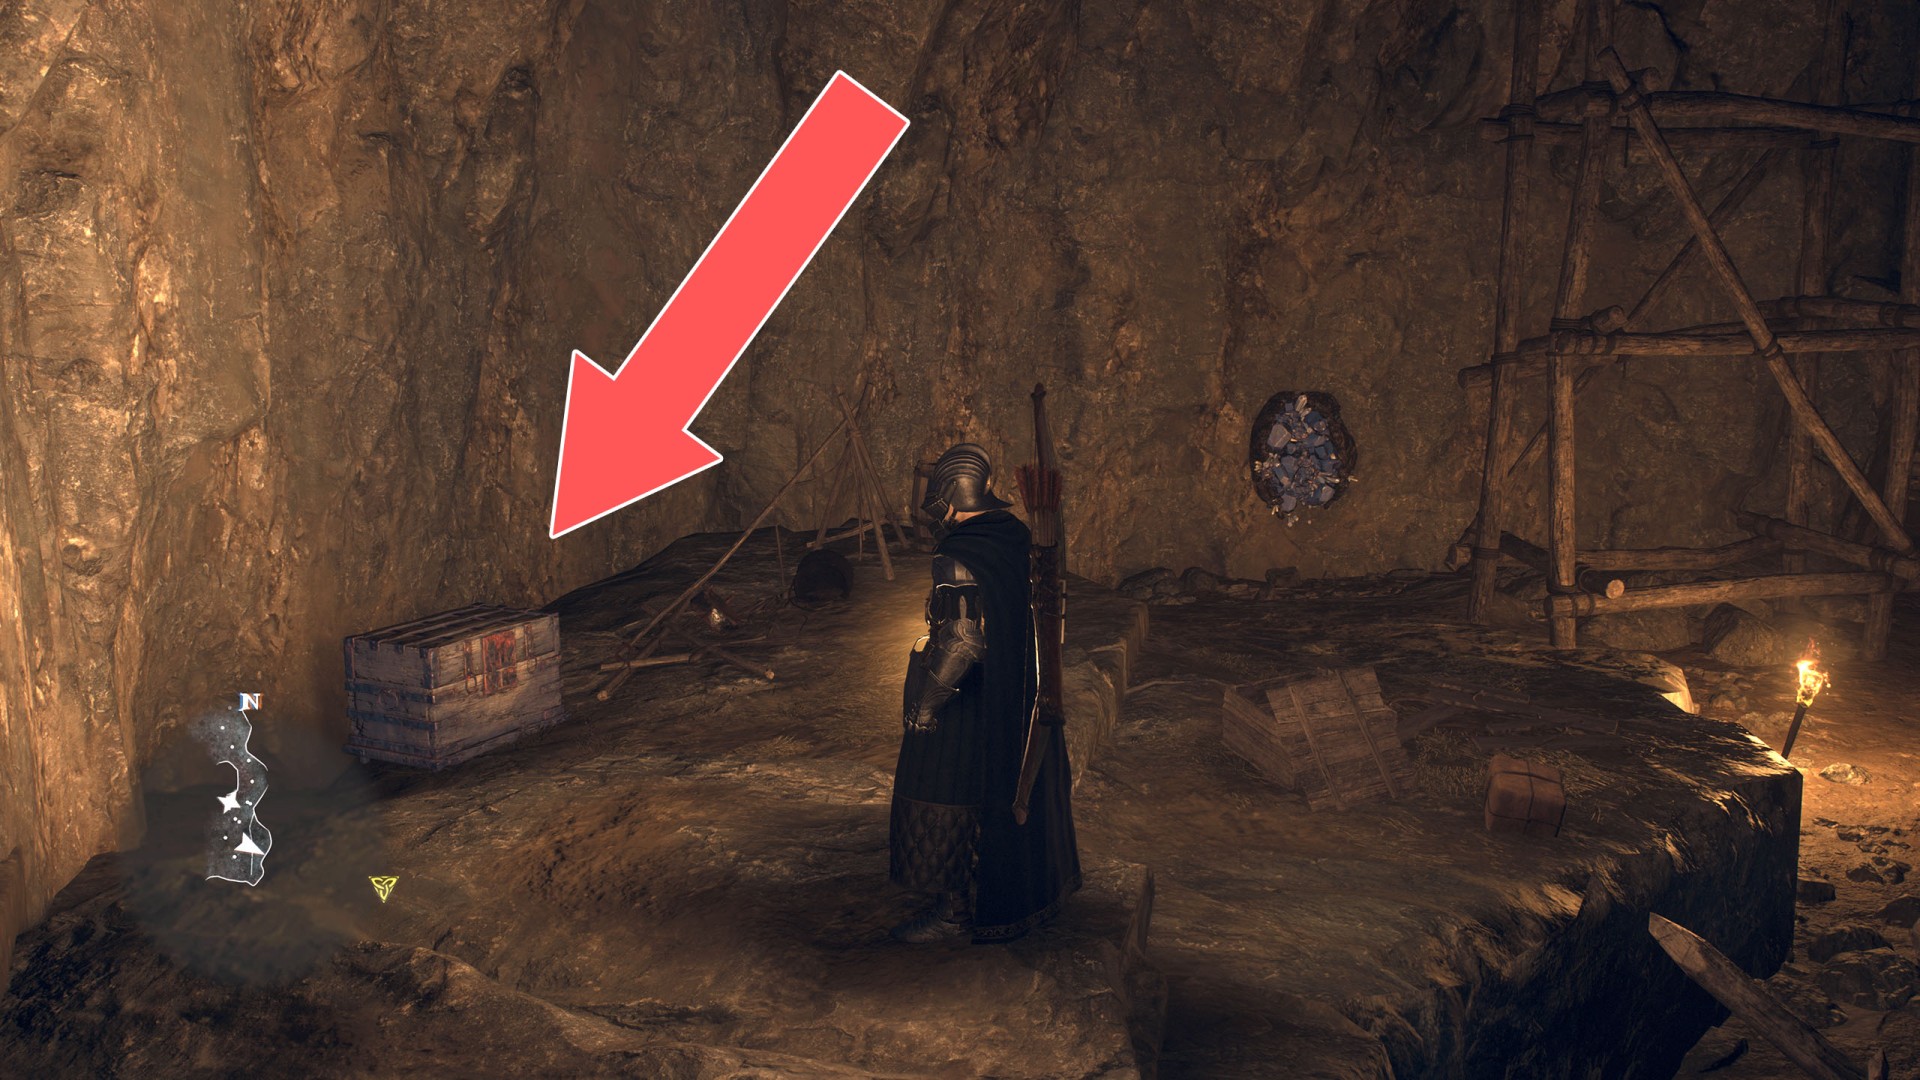
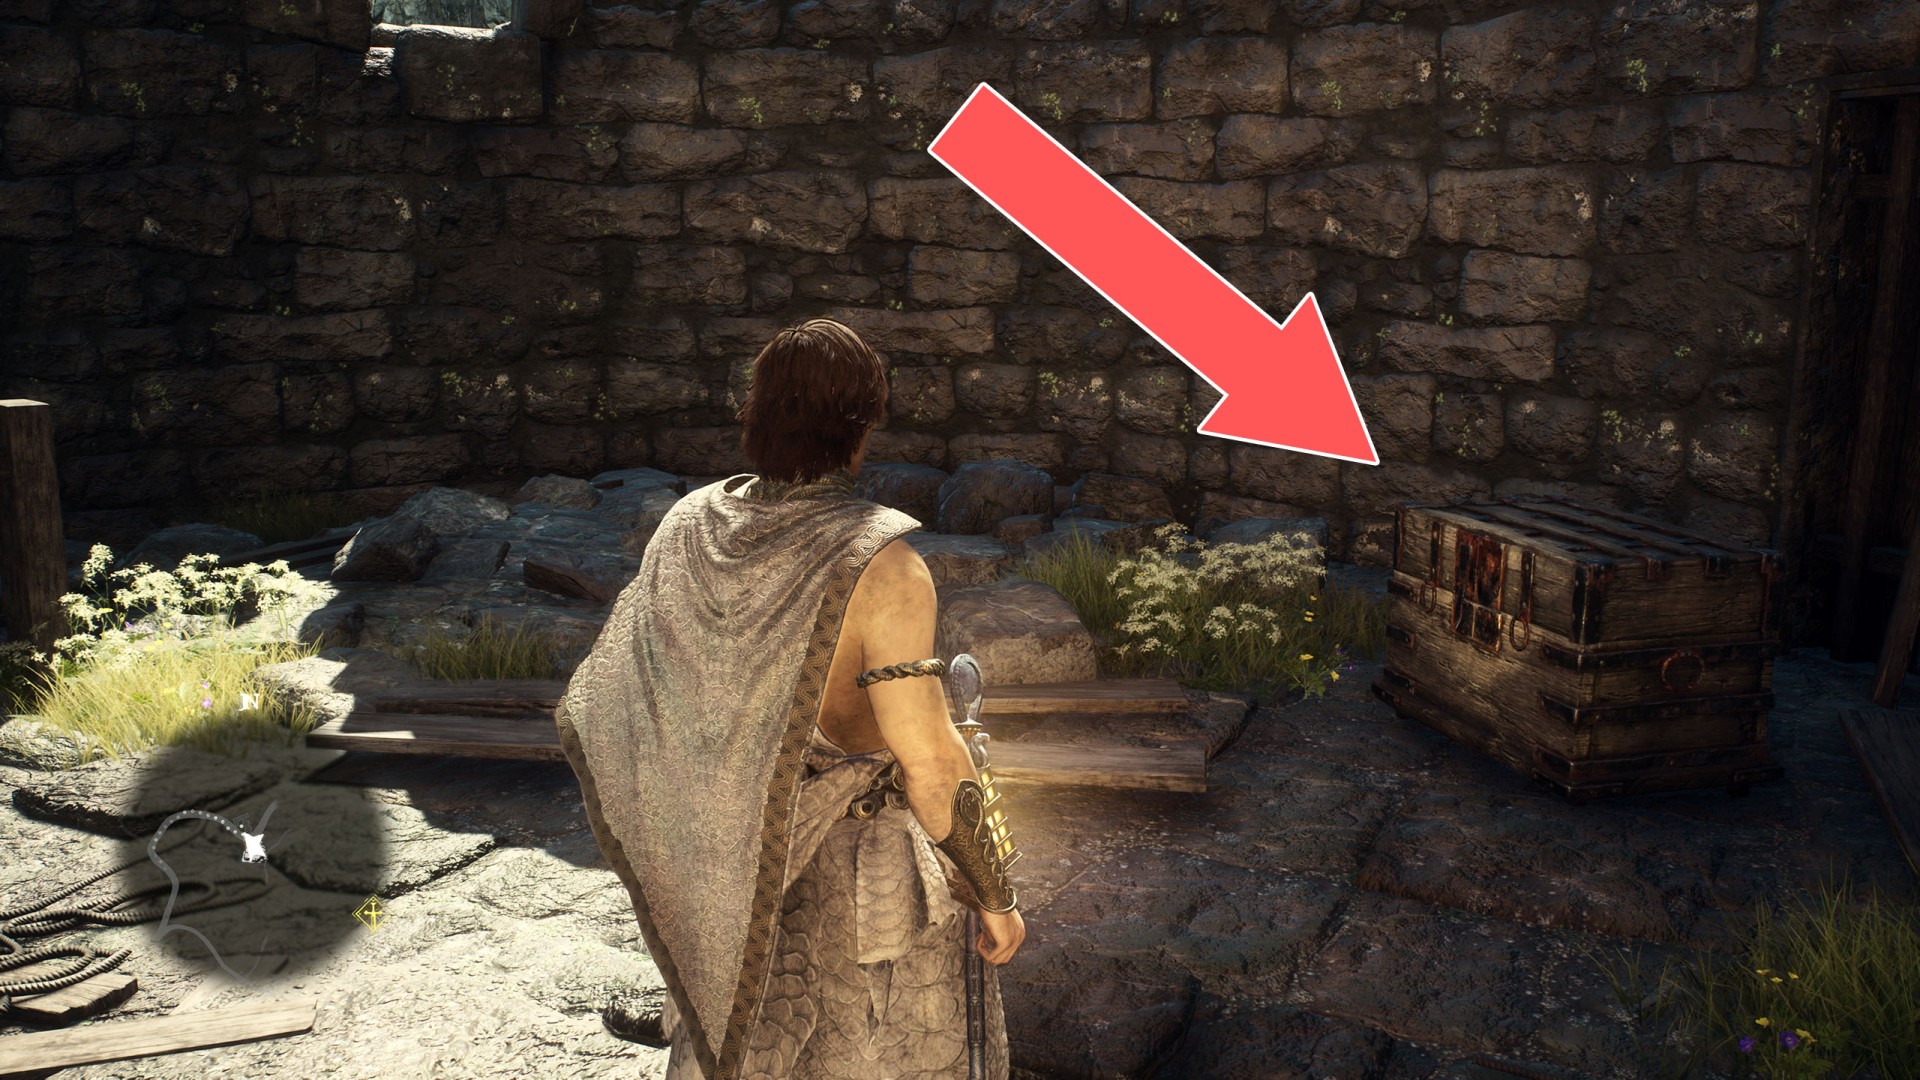
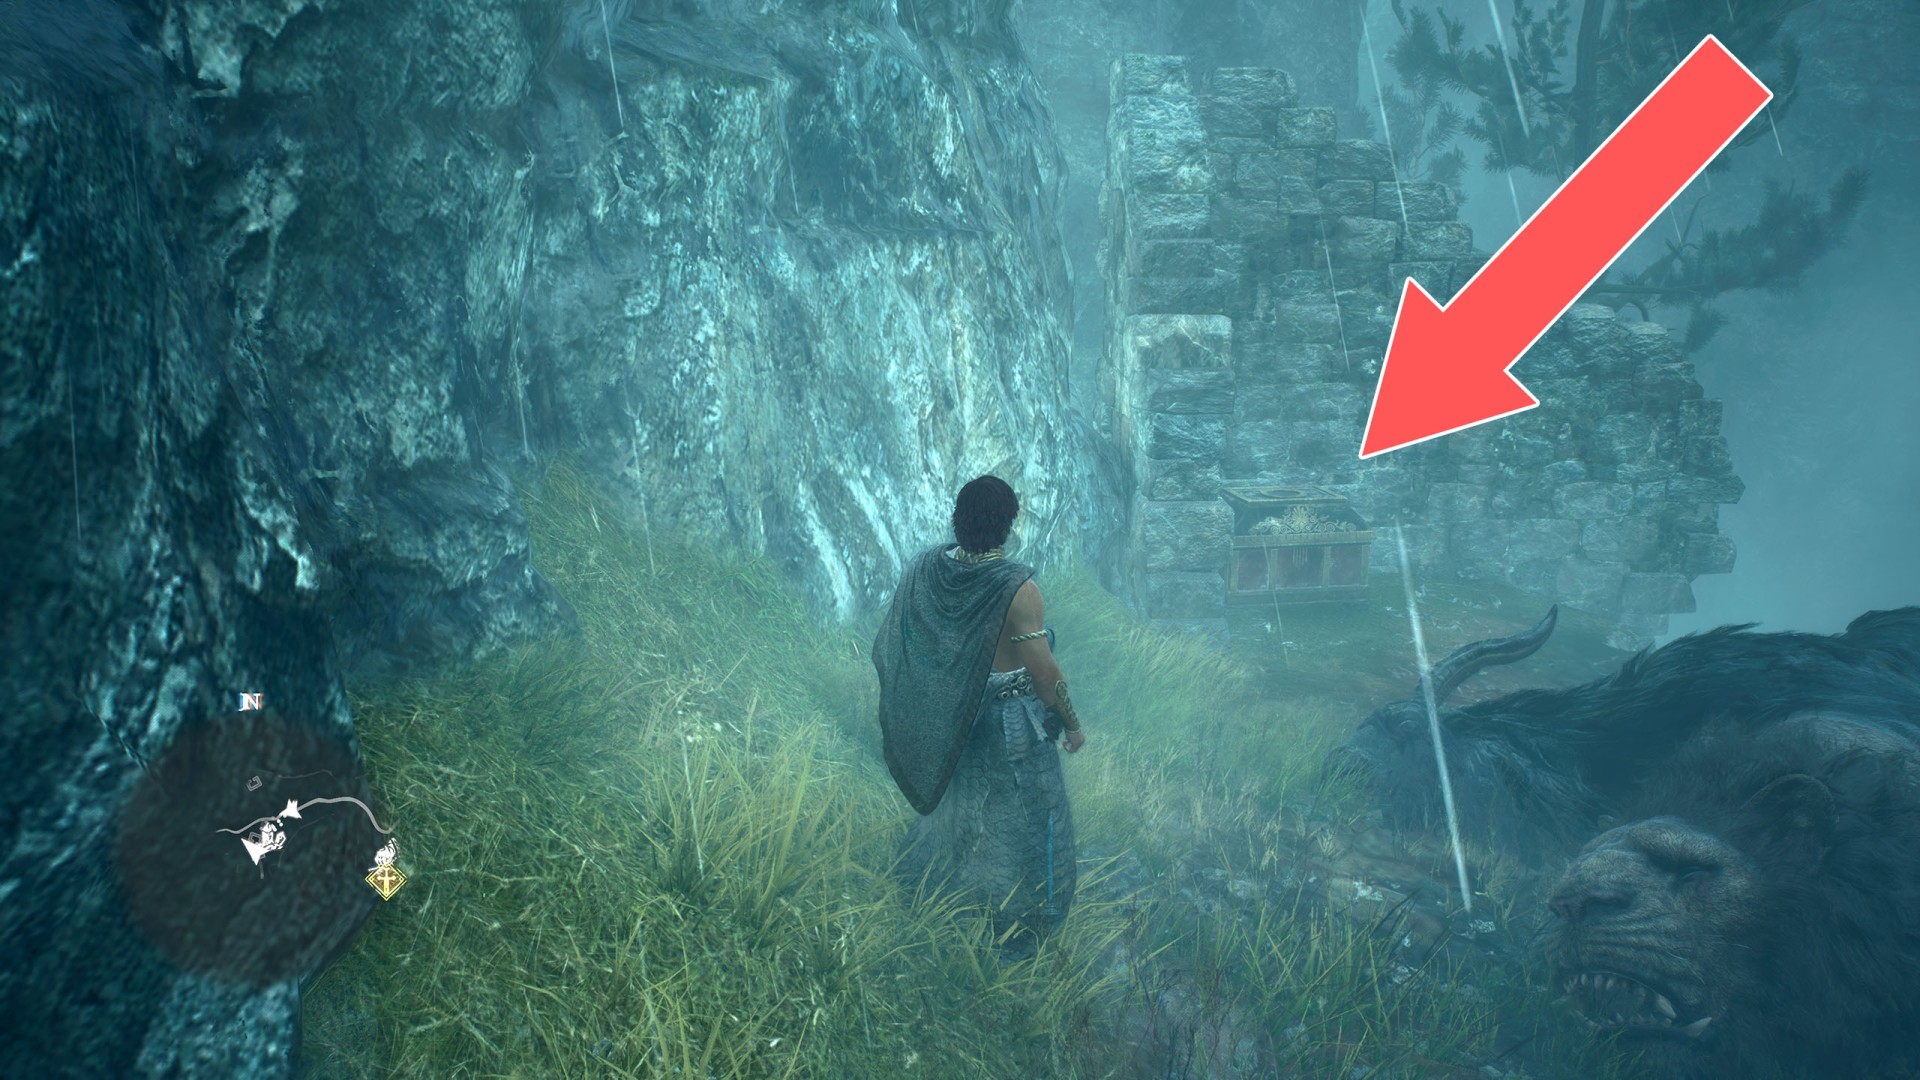
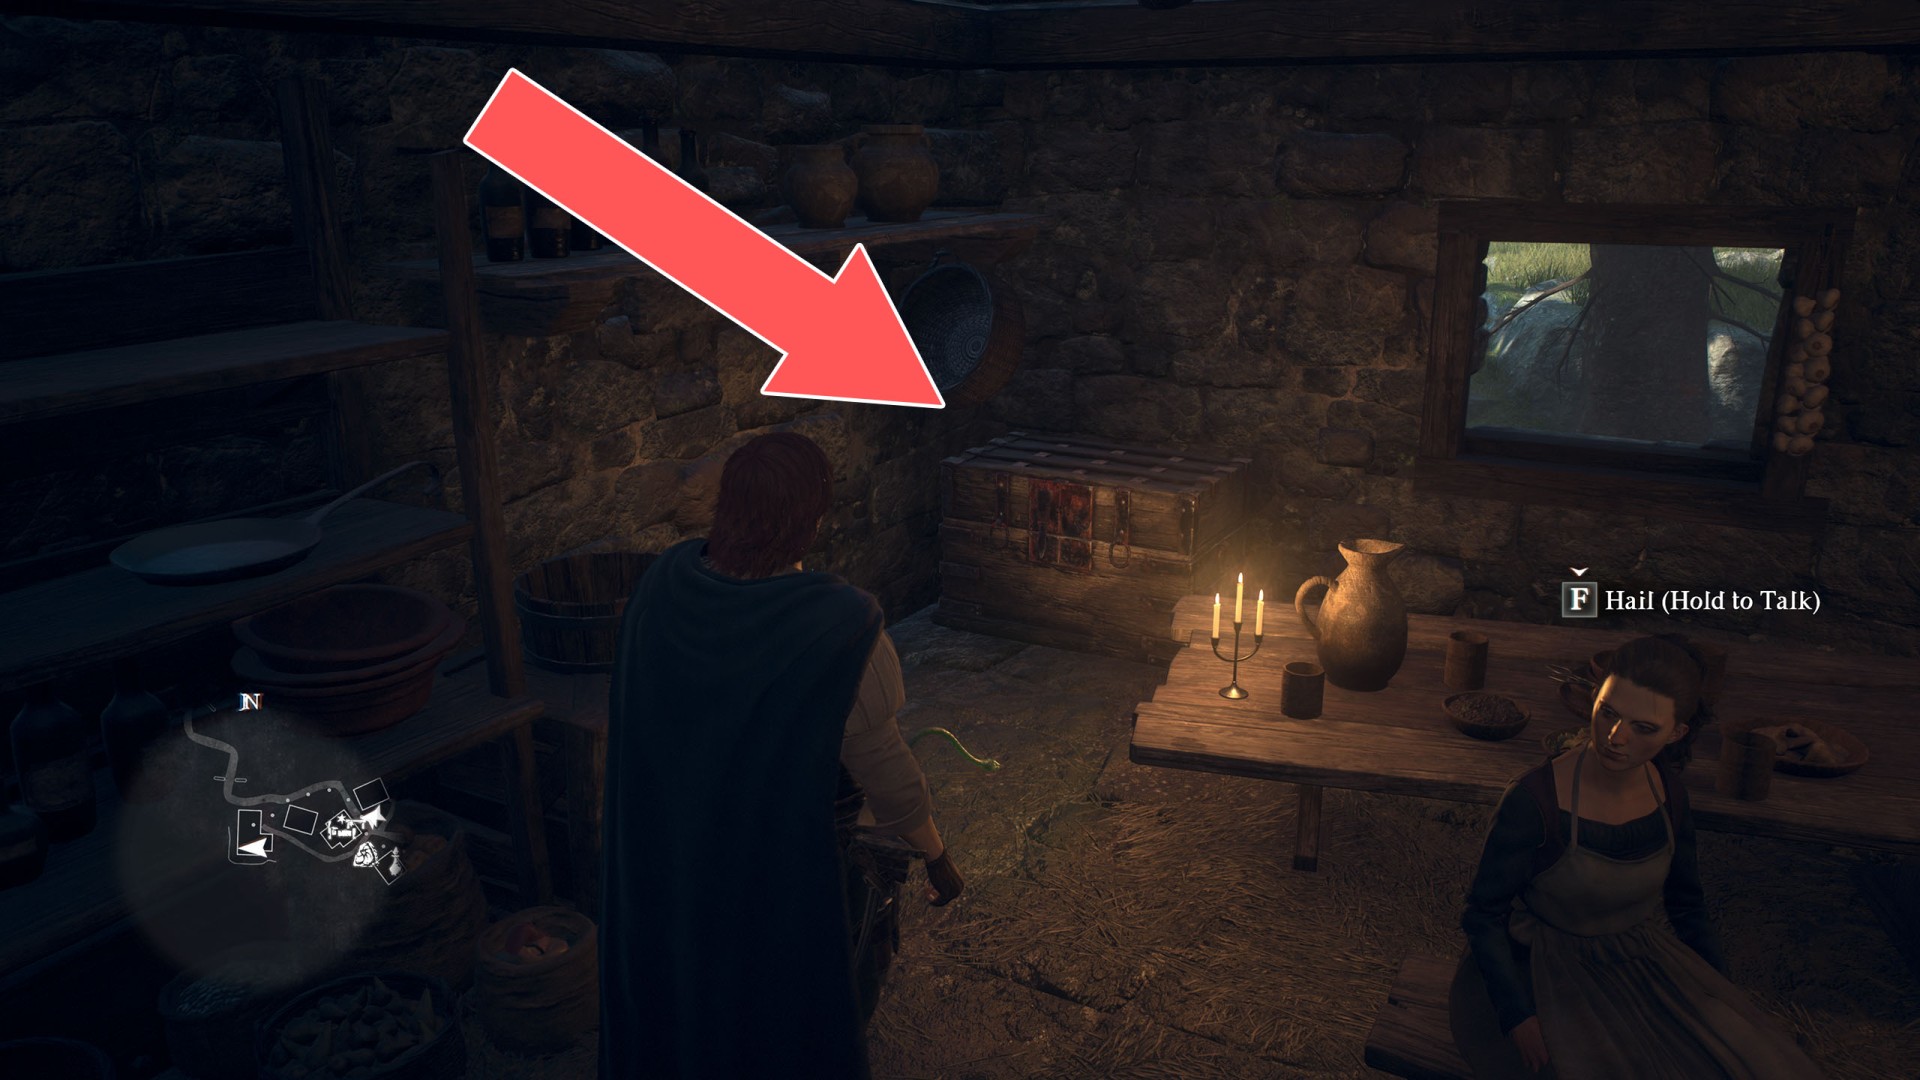
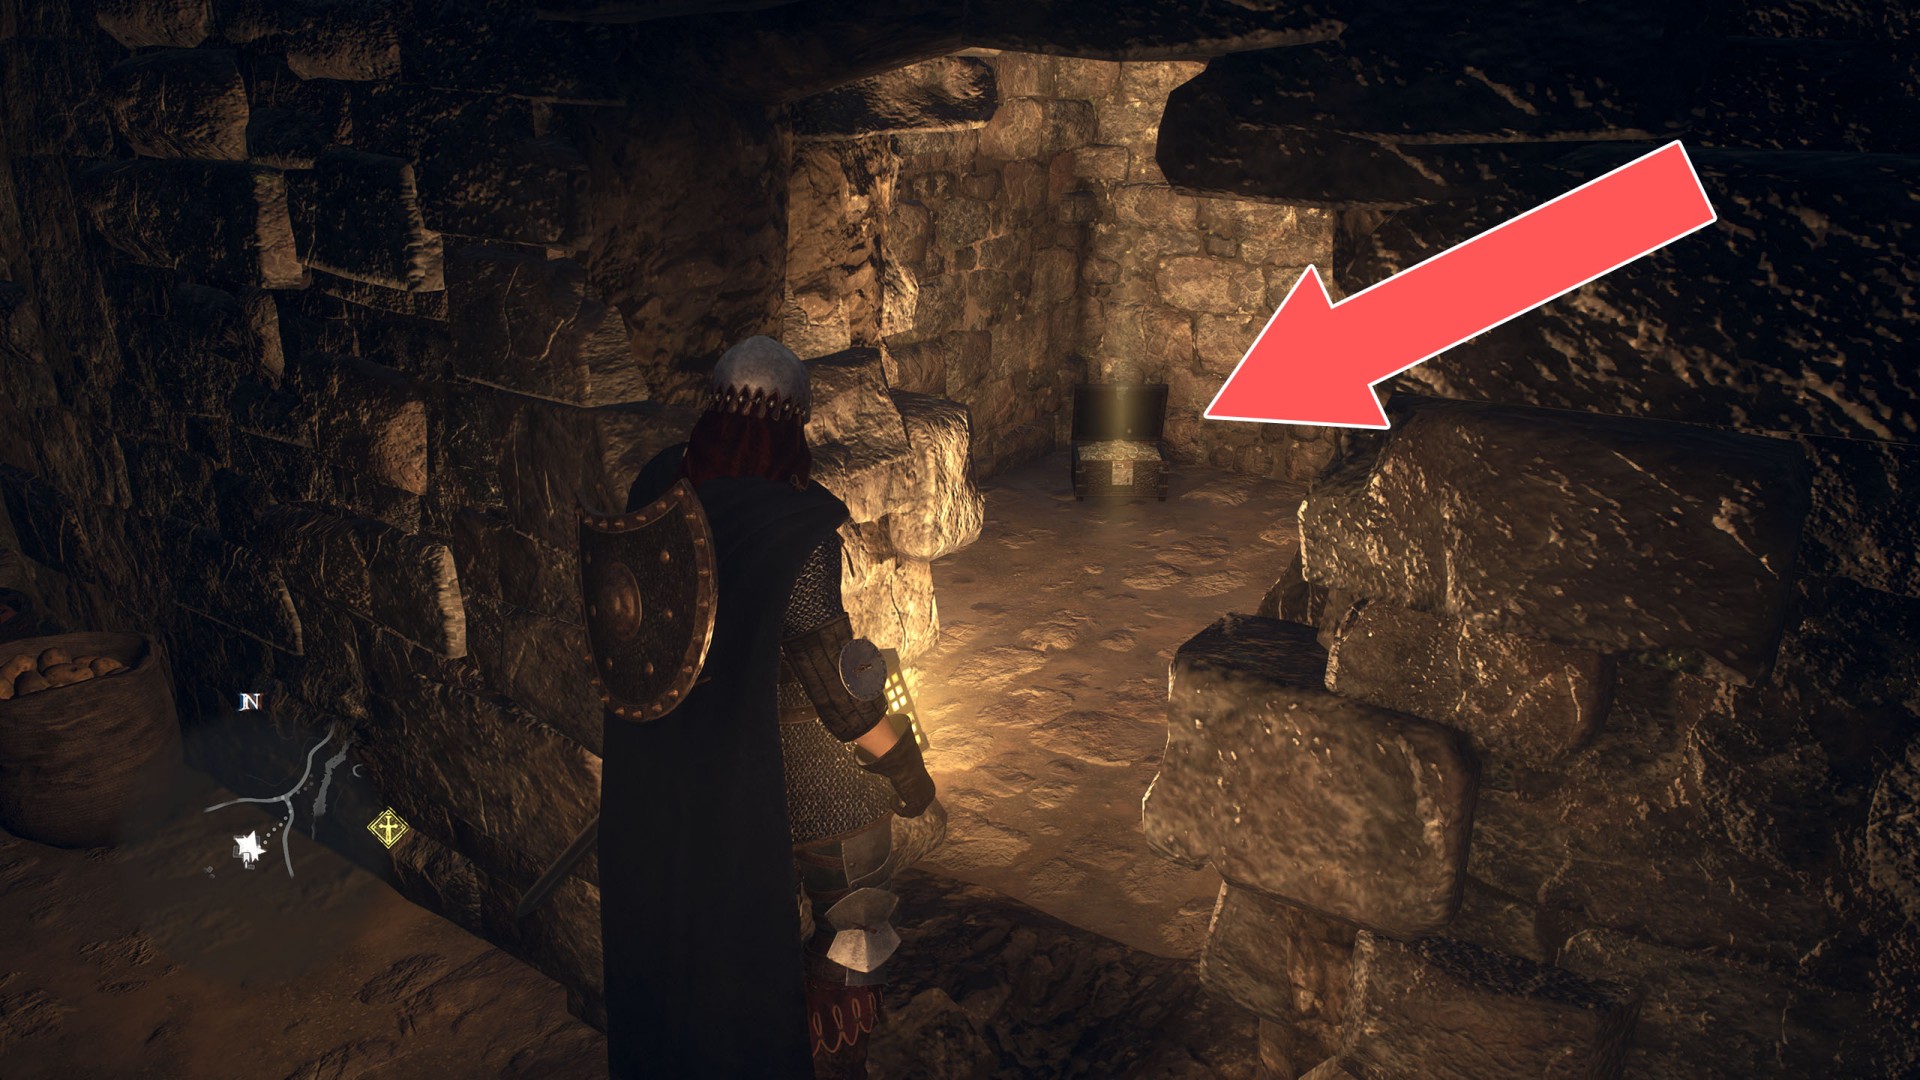
Box (12,000G)▶ show the map ◀
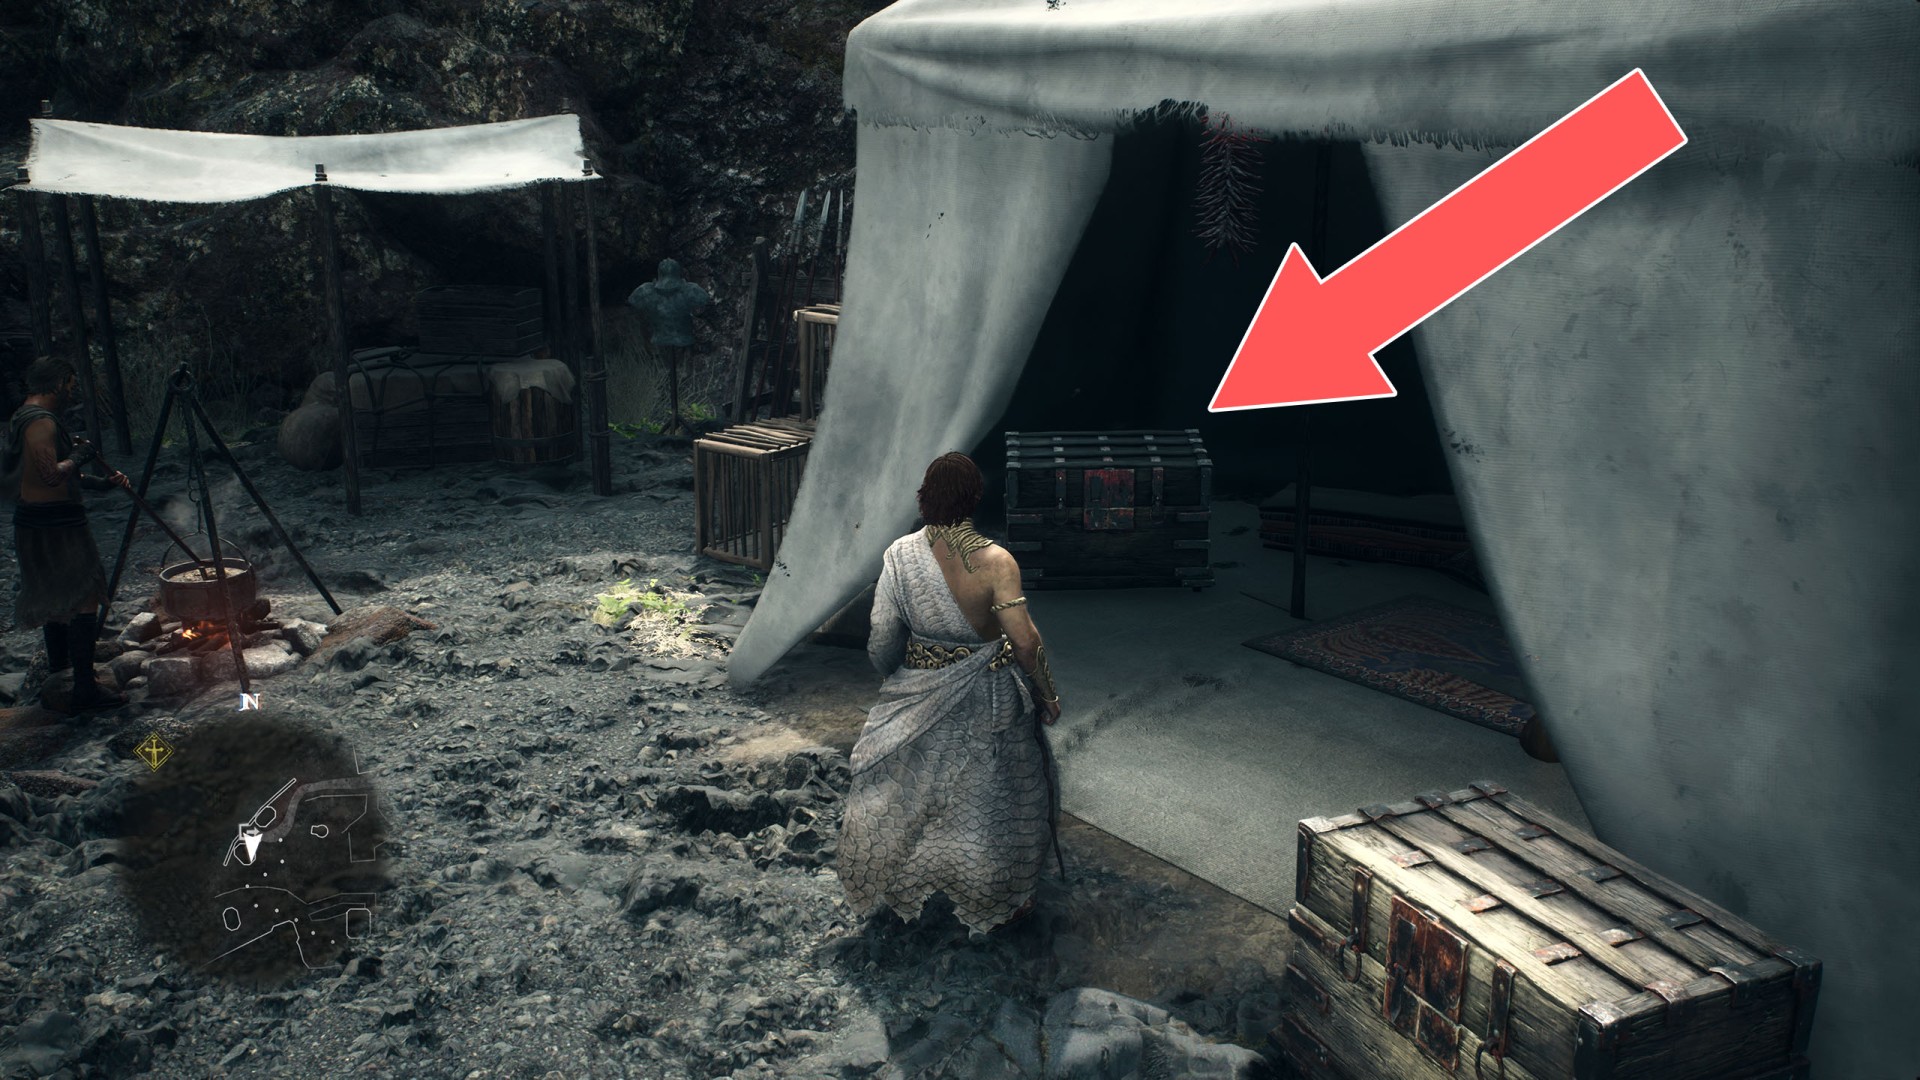
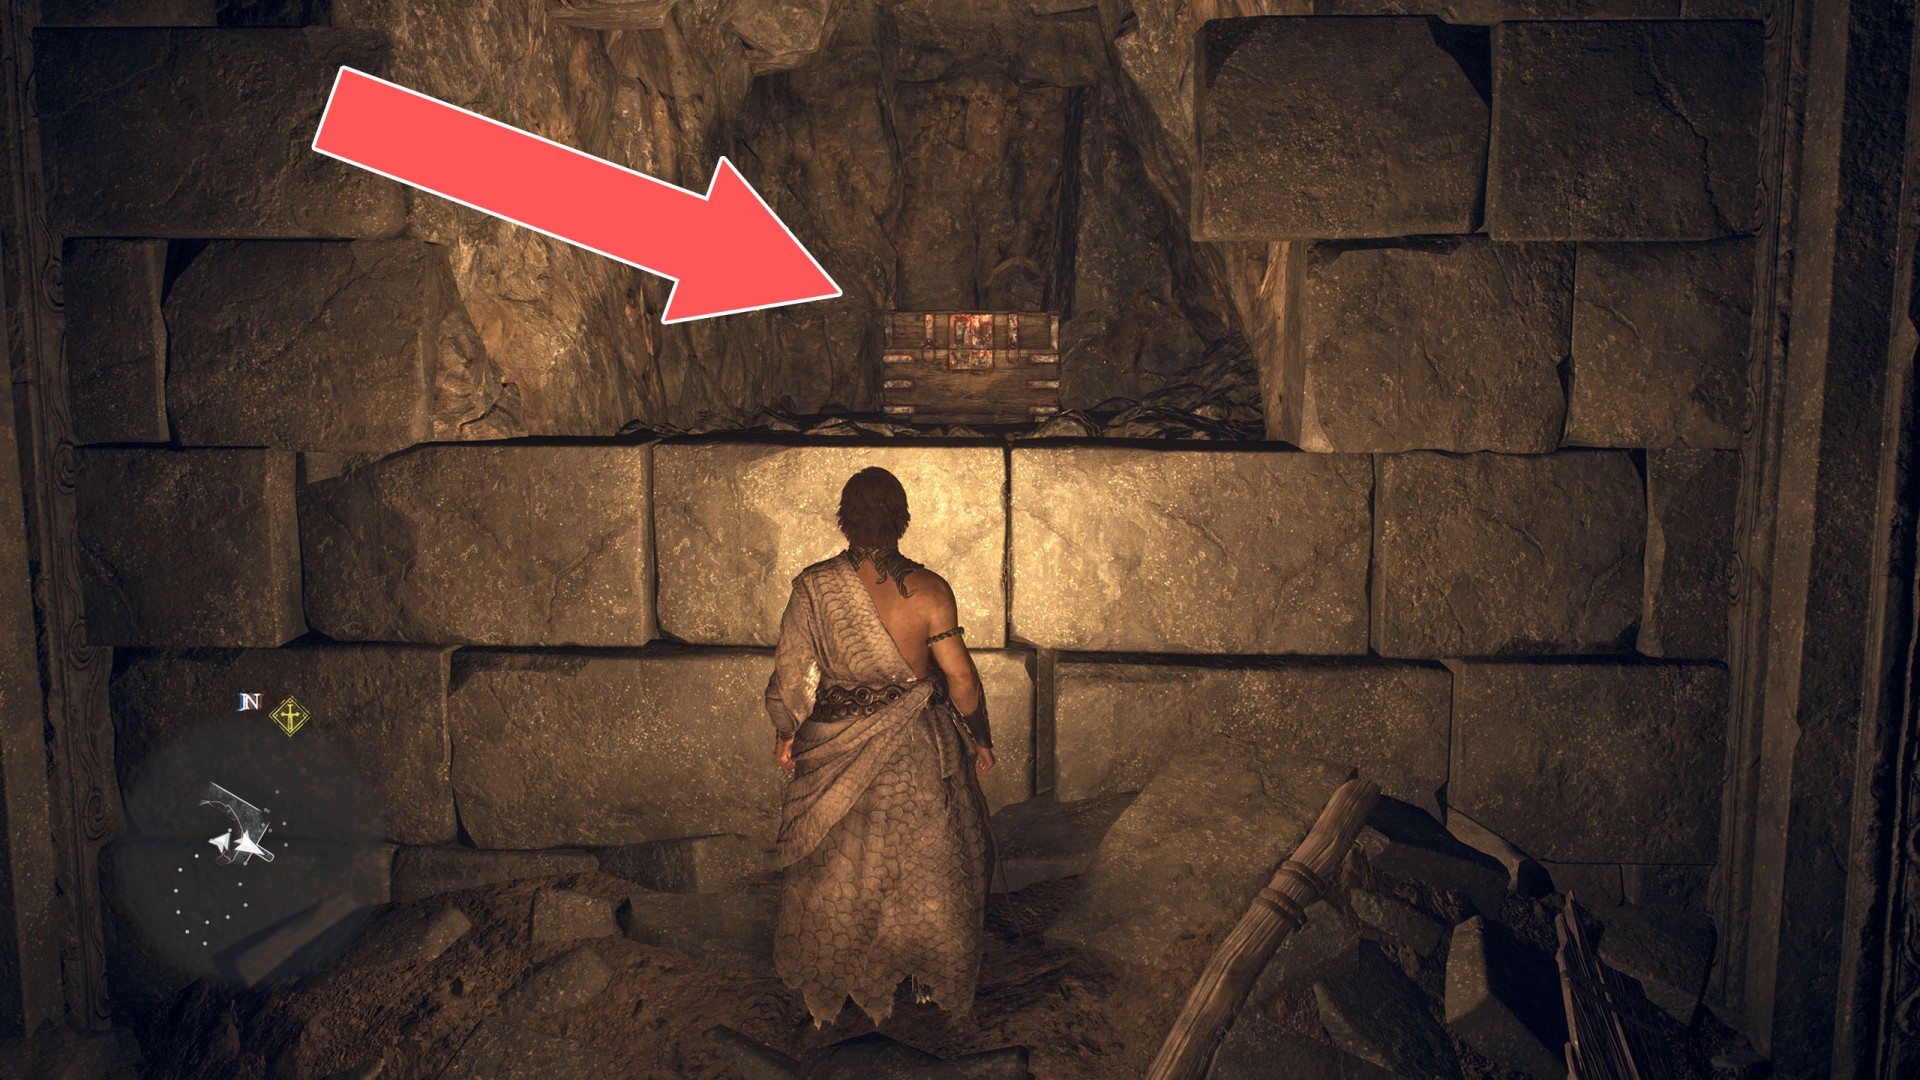
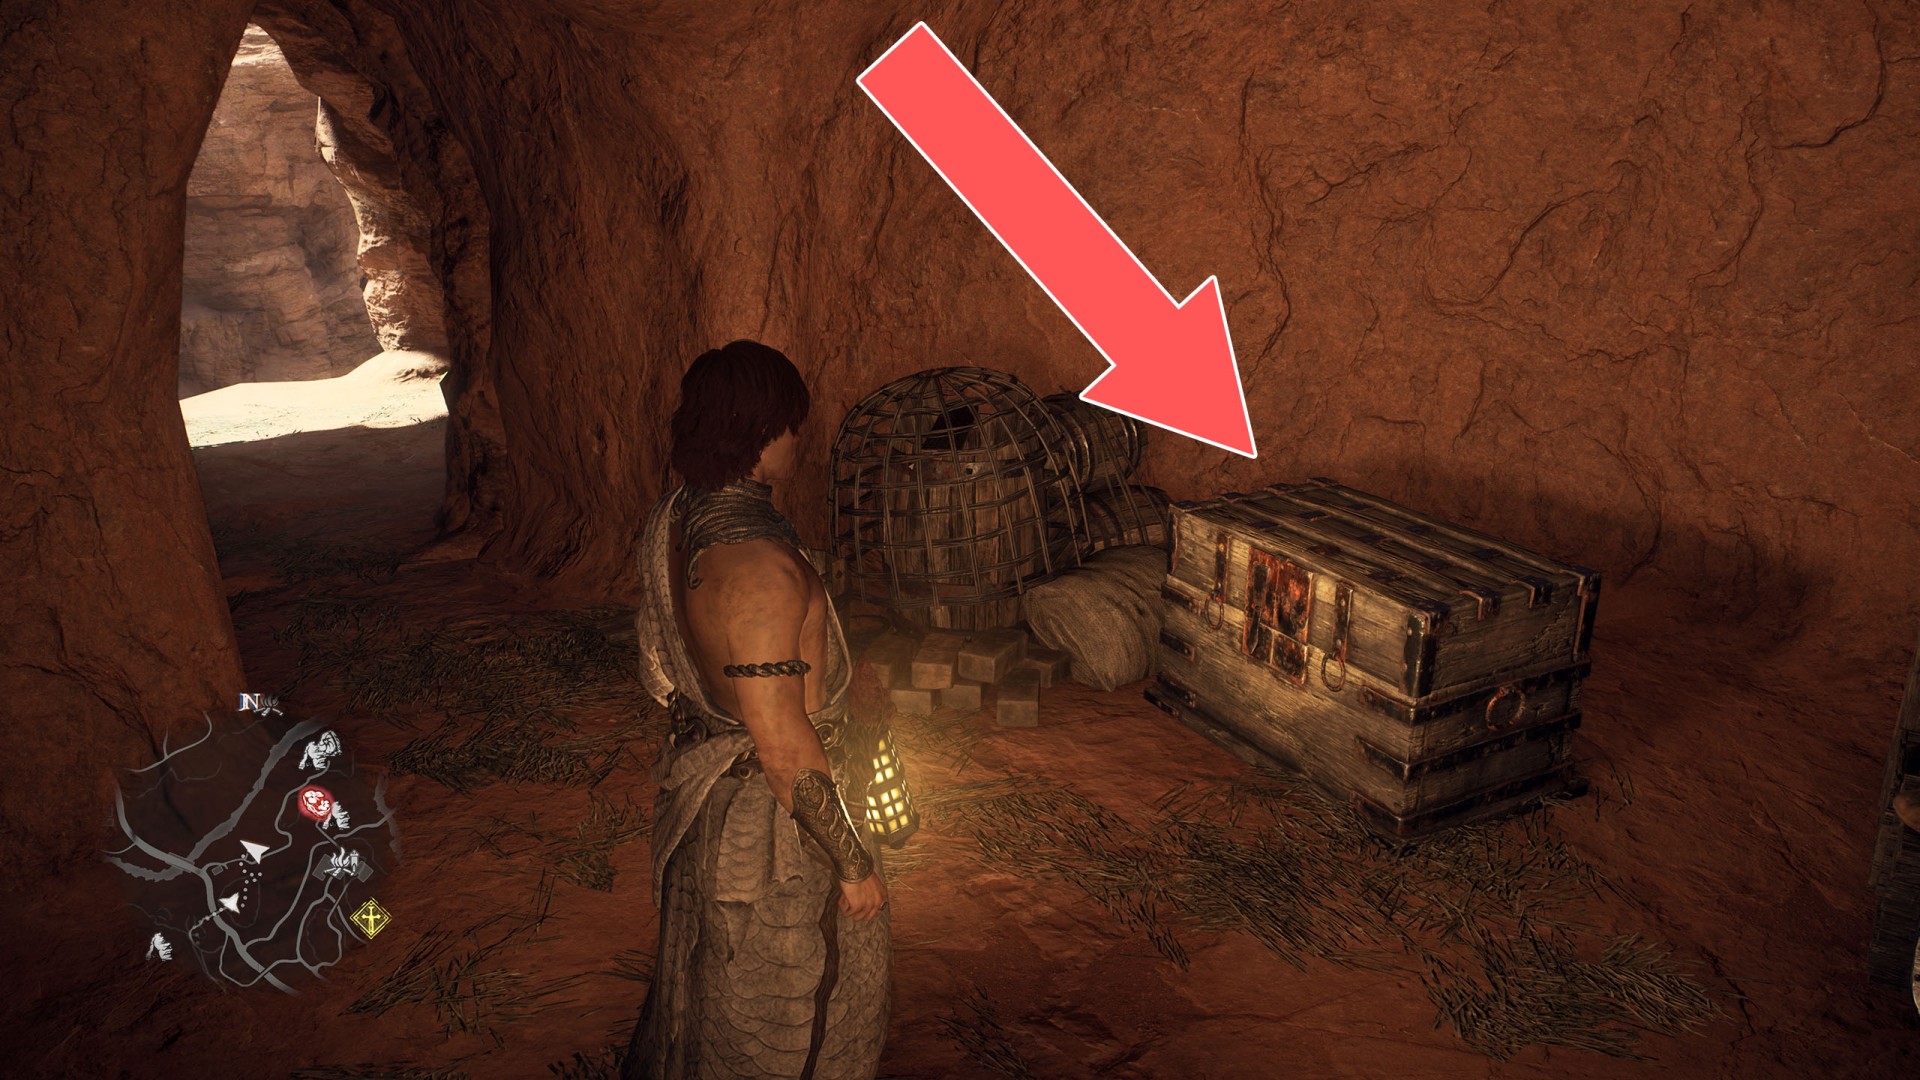
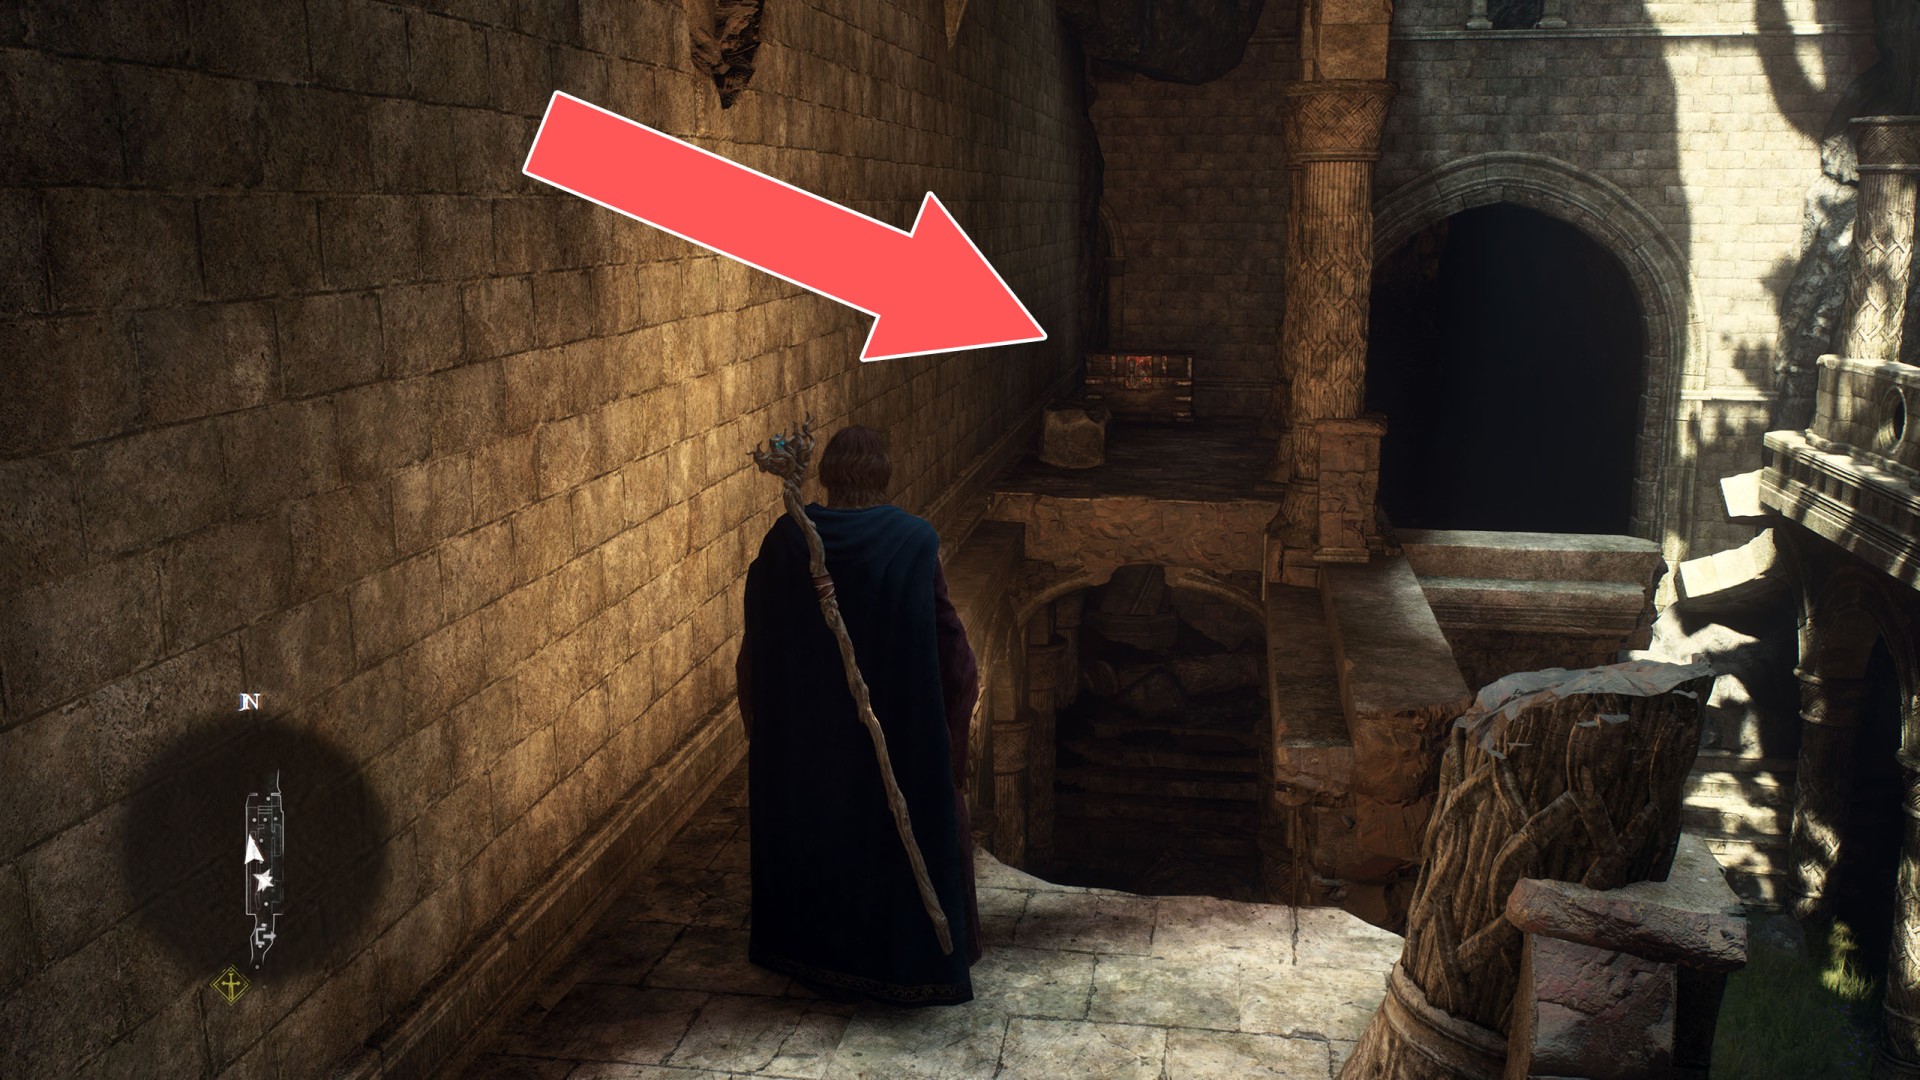
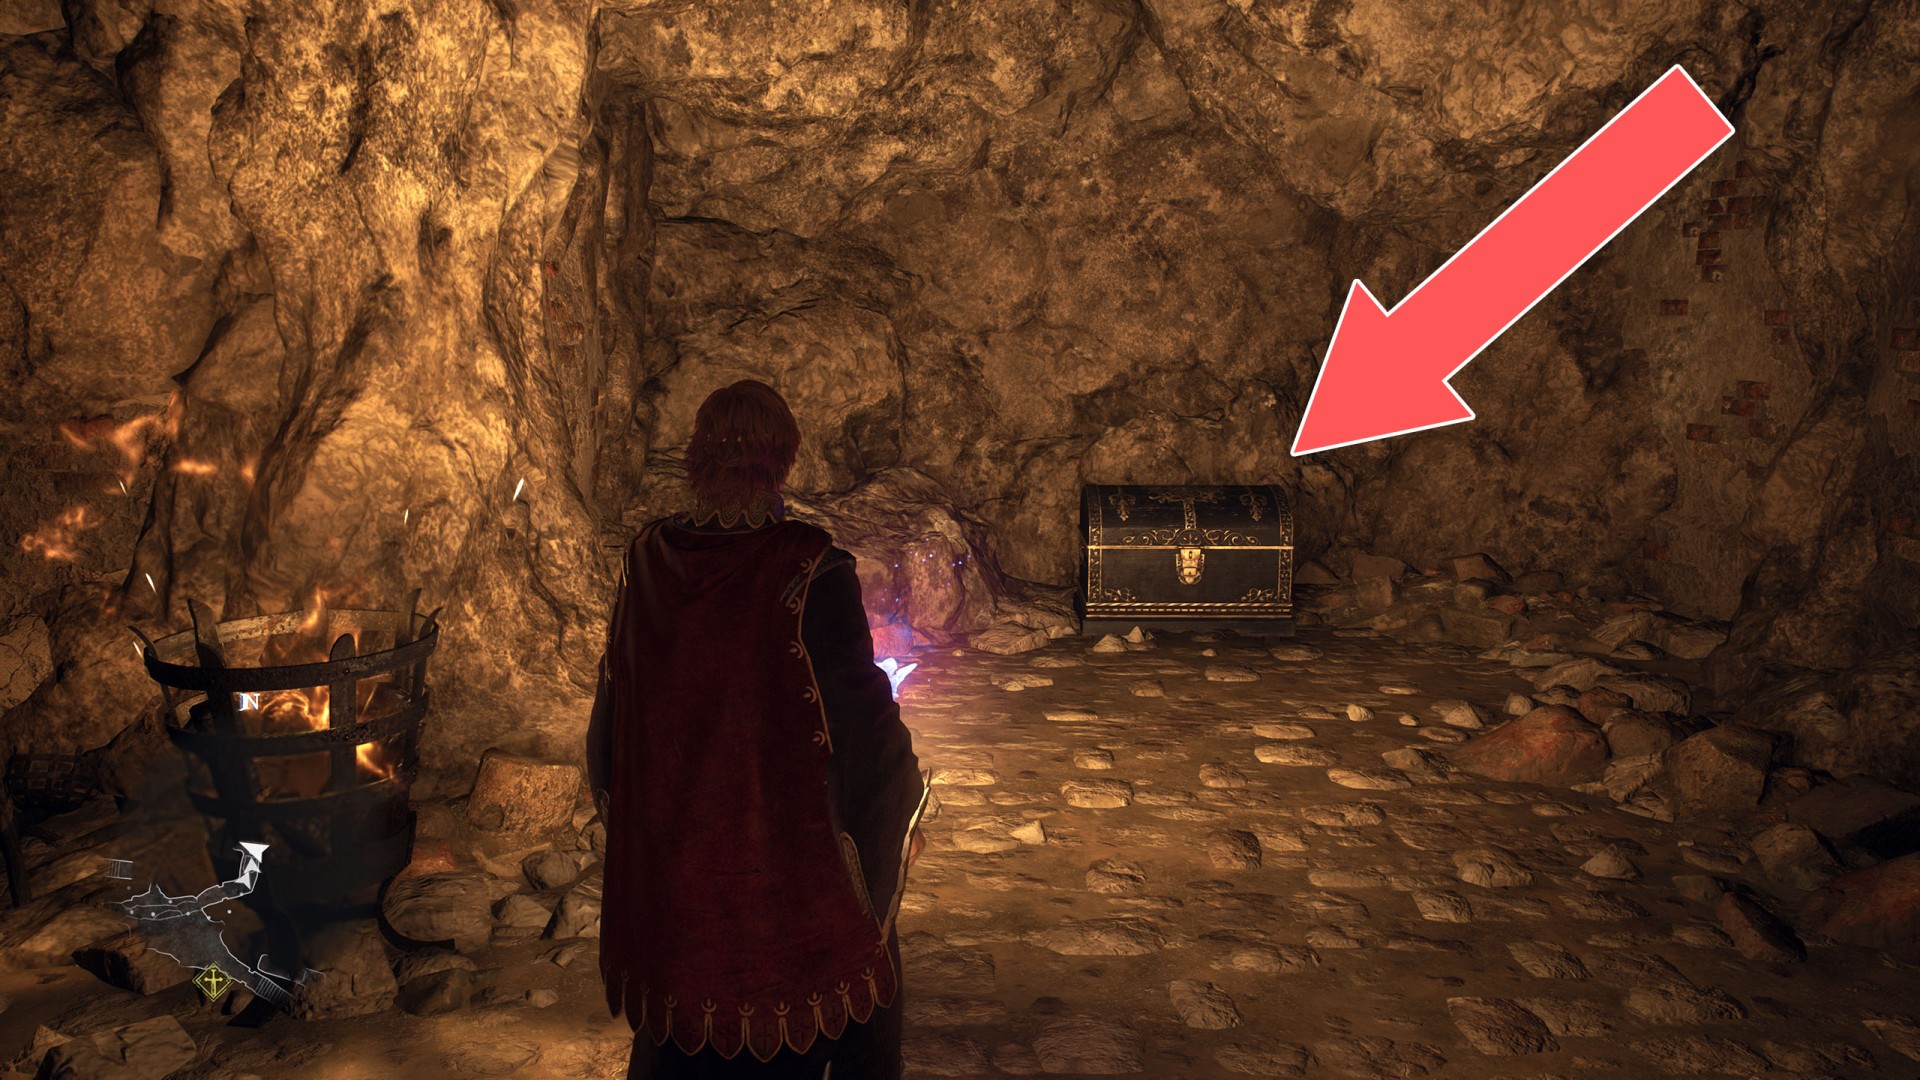
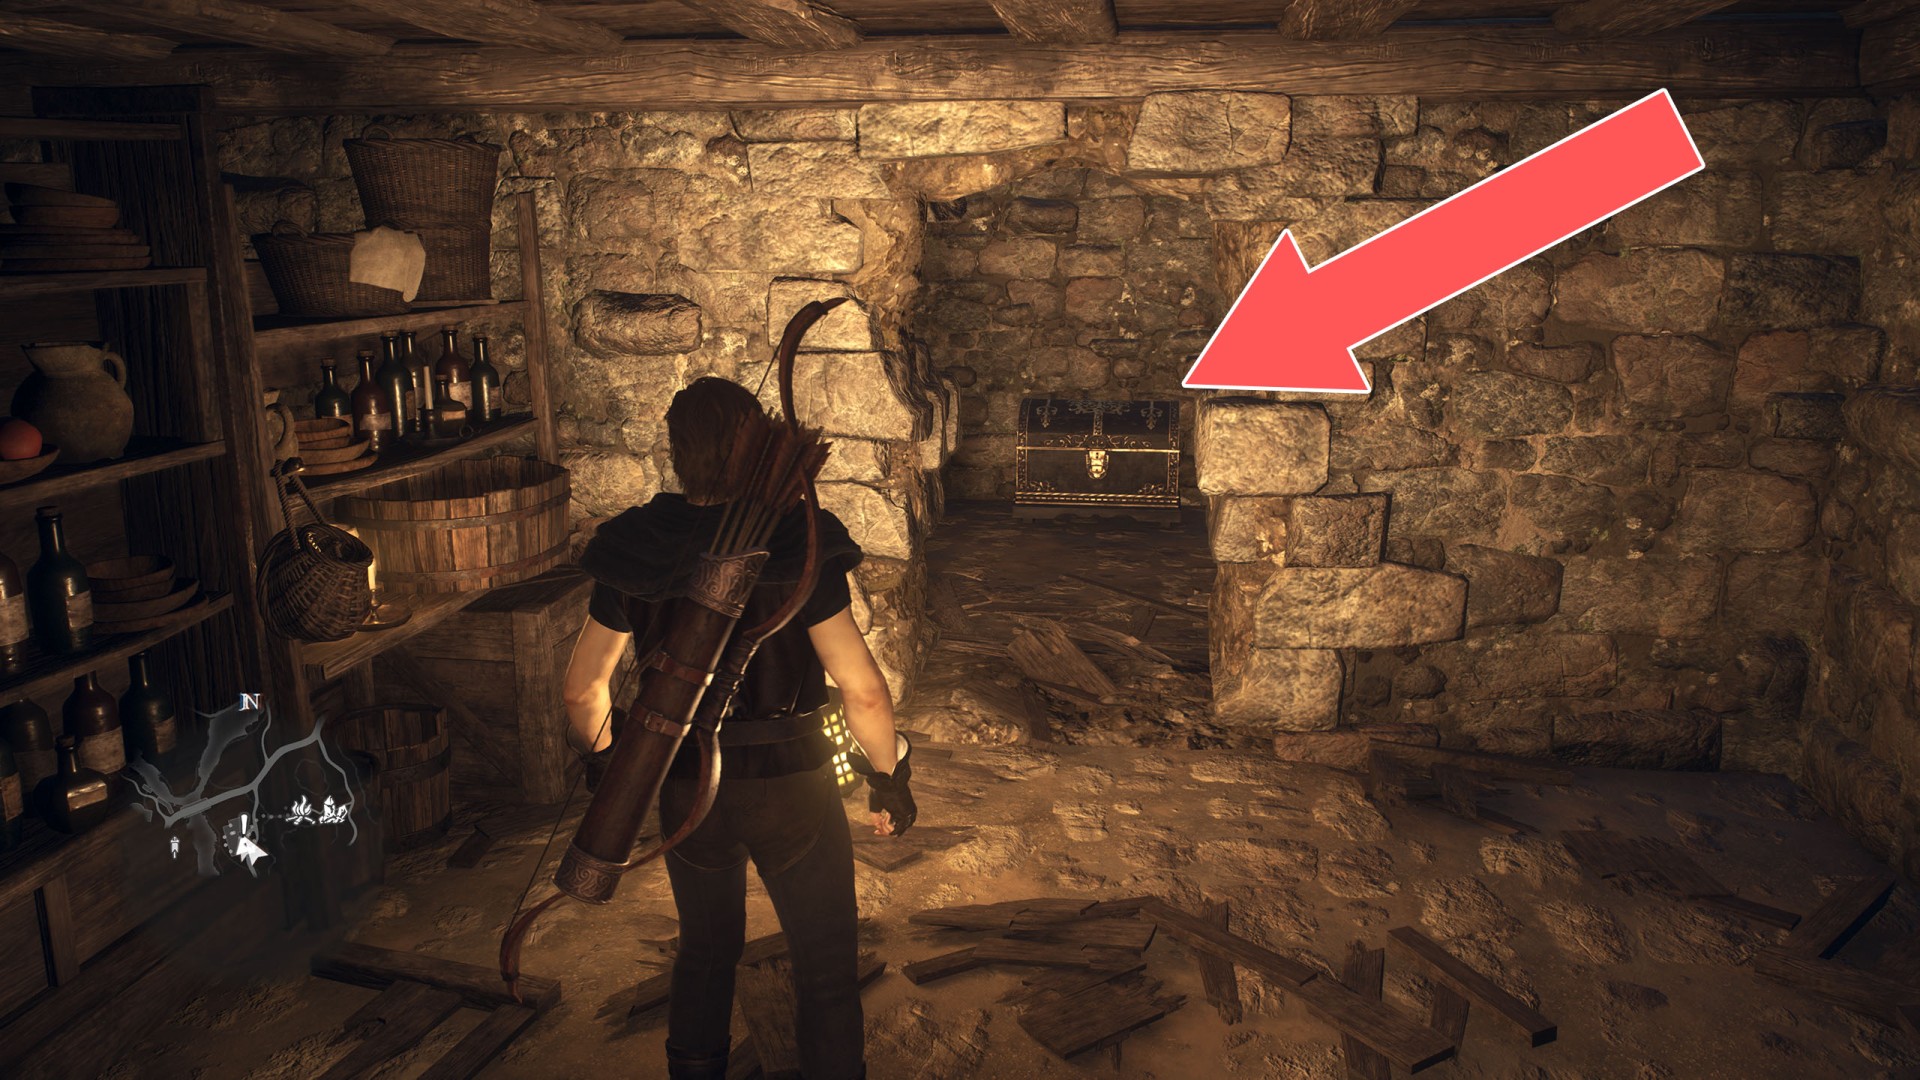
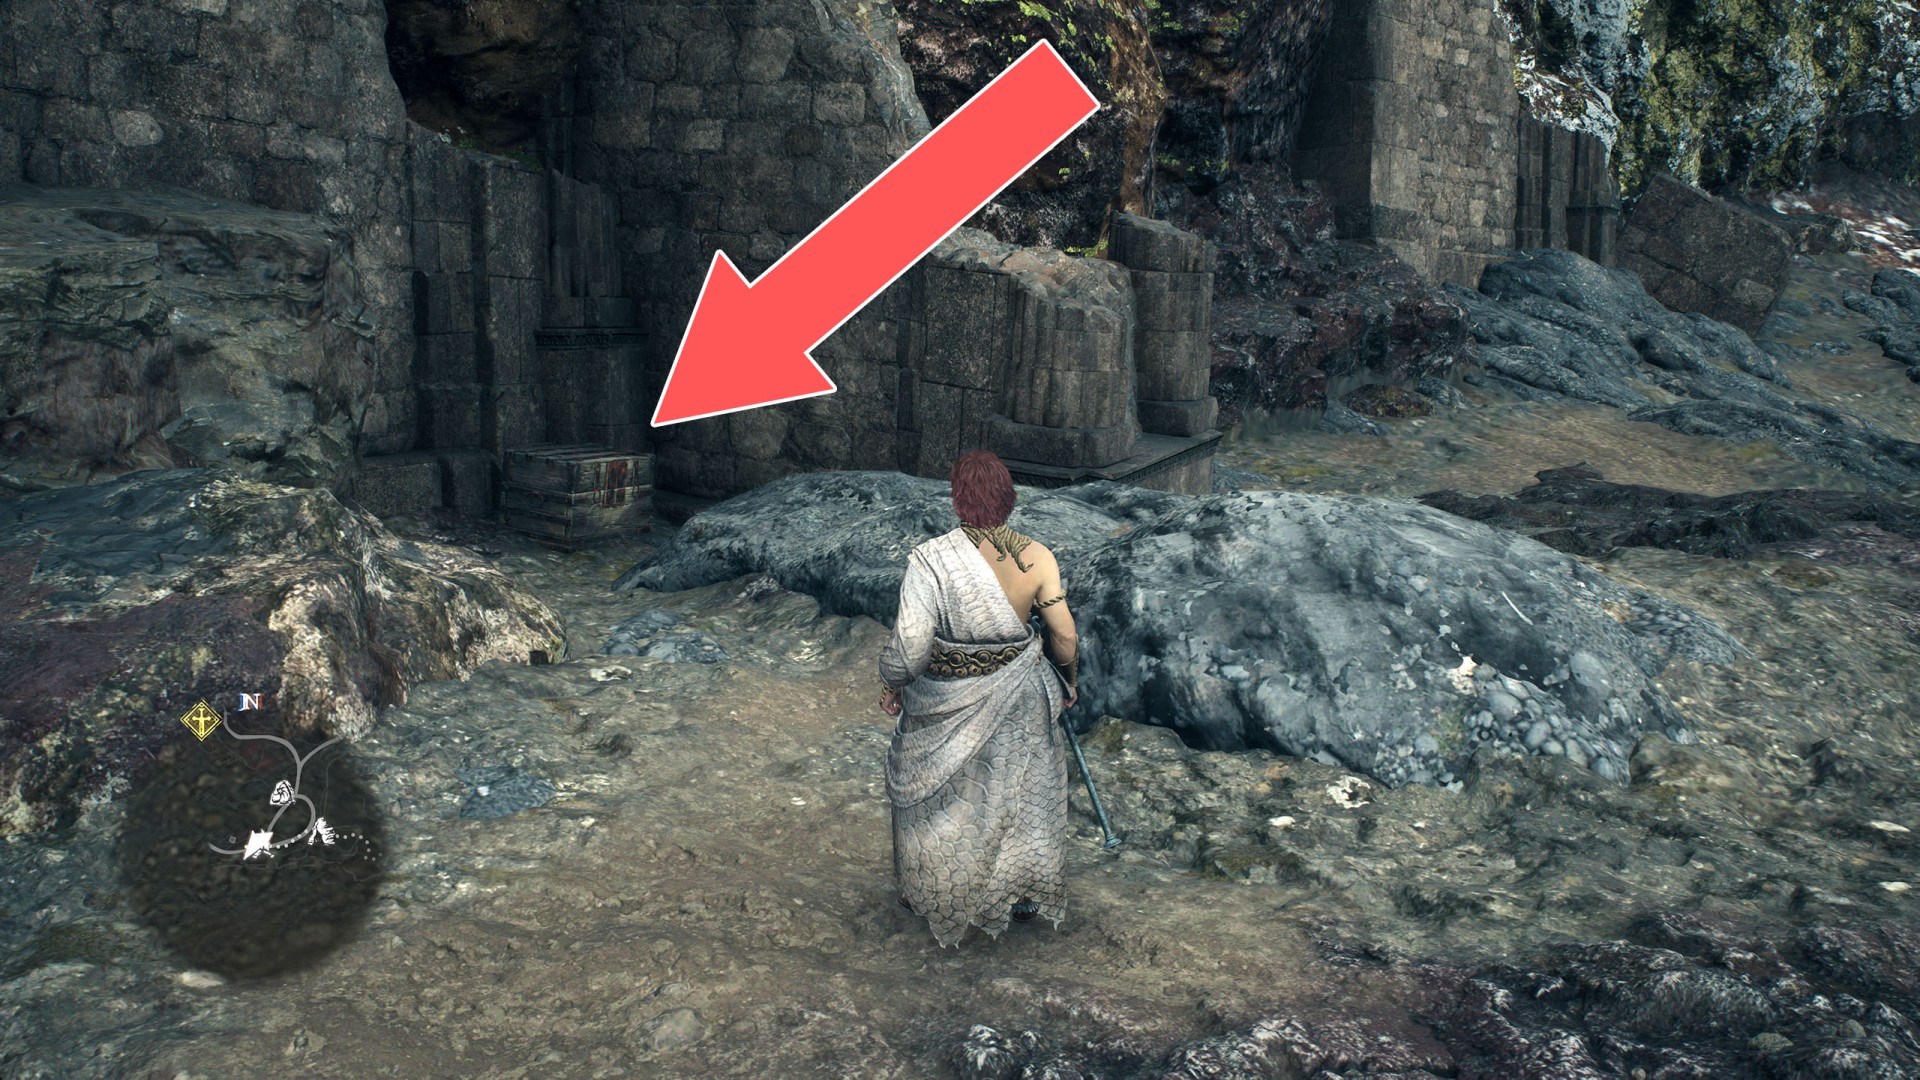
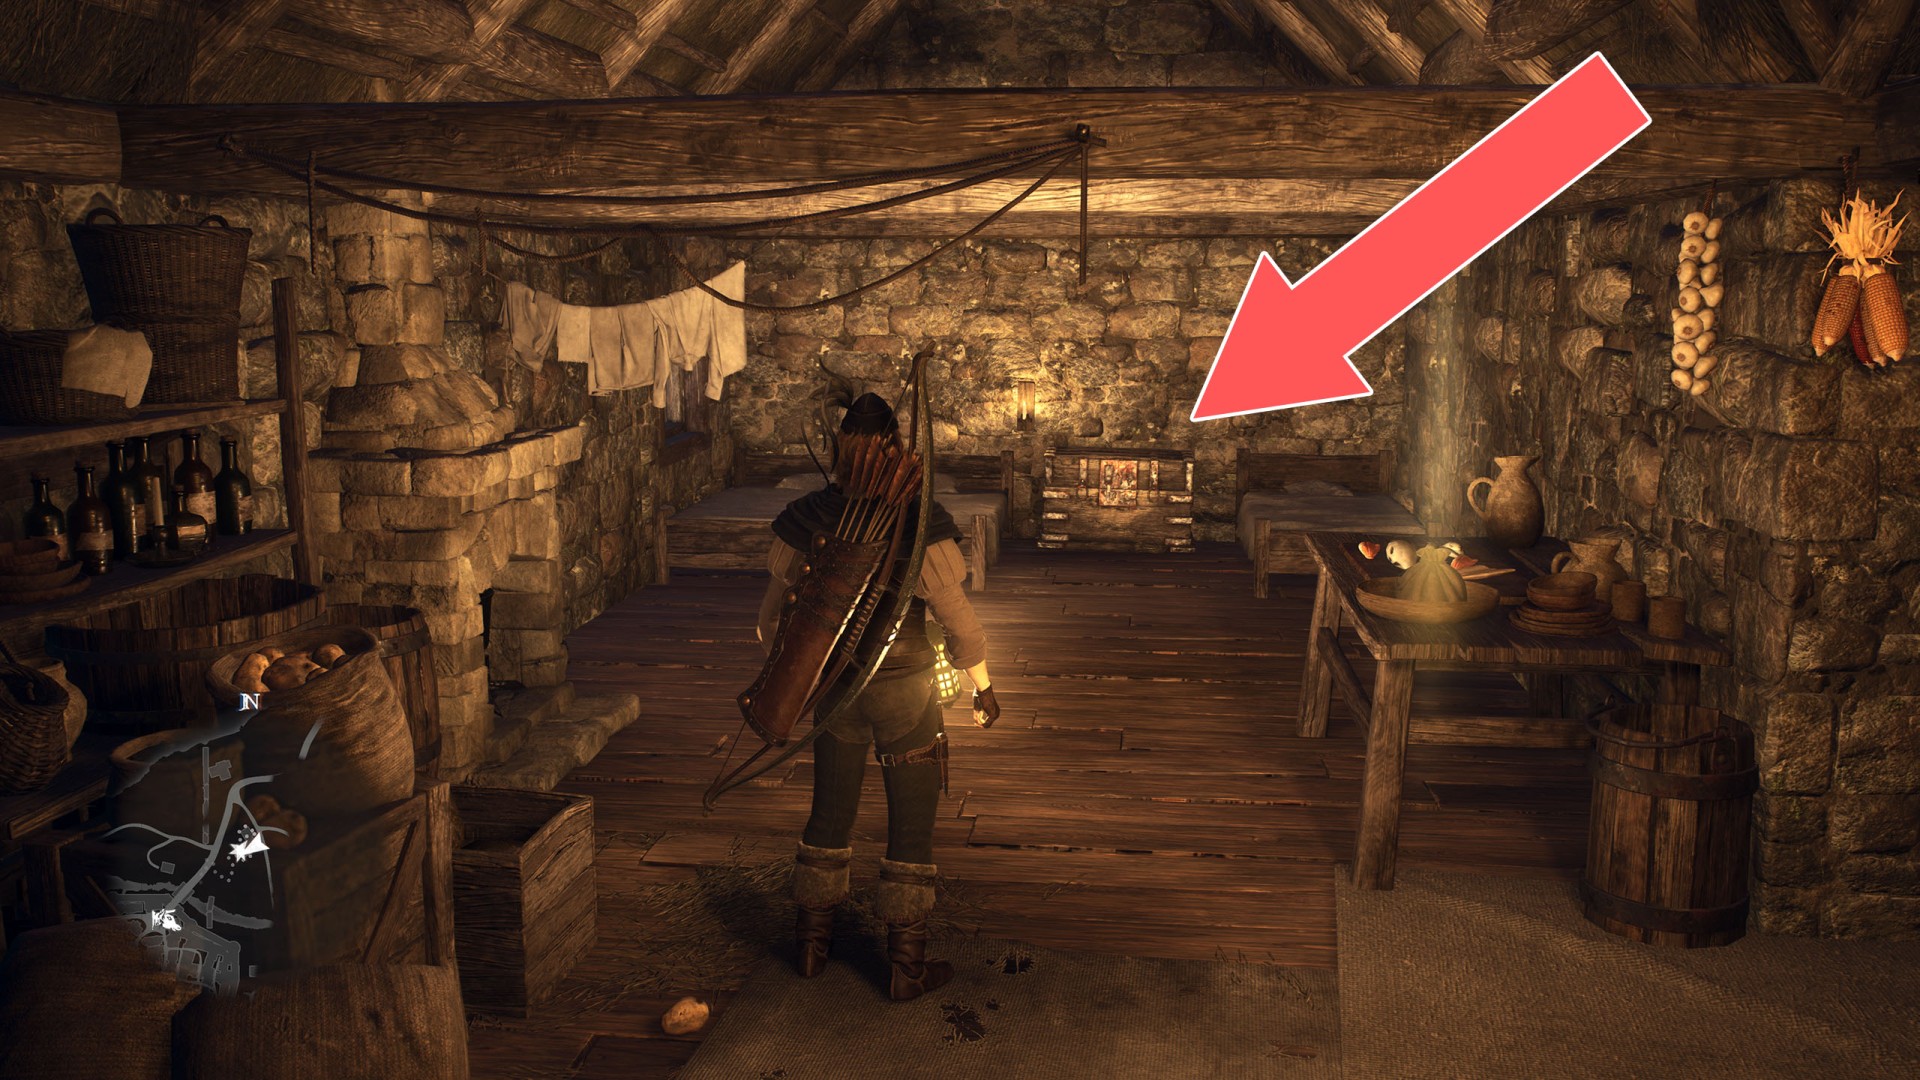
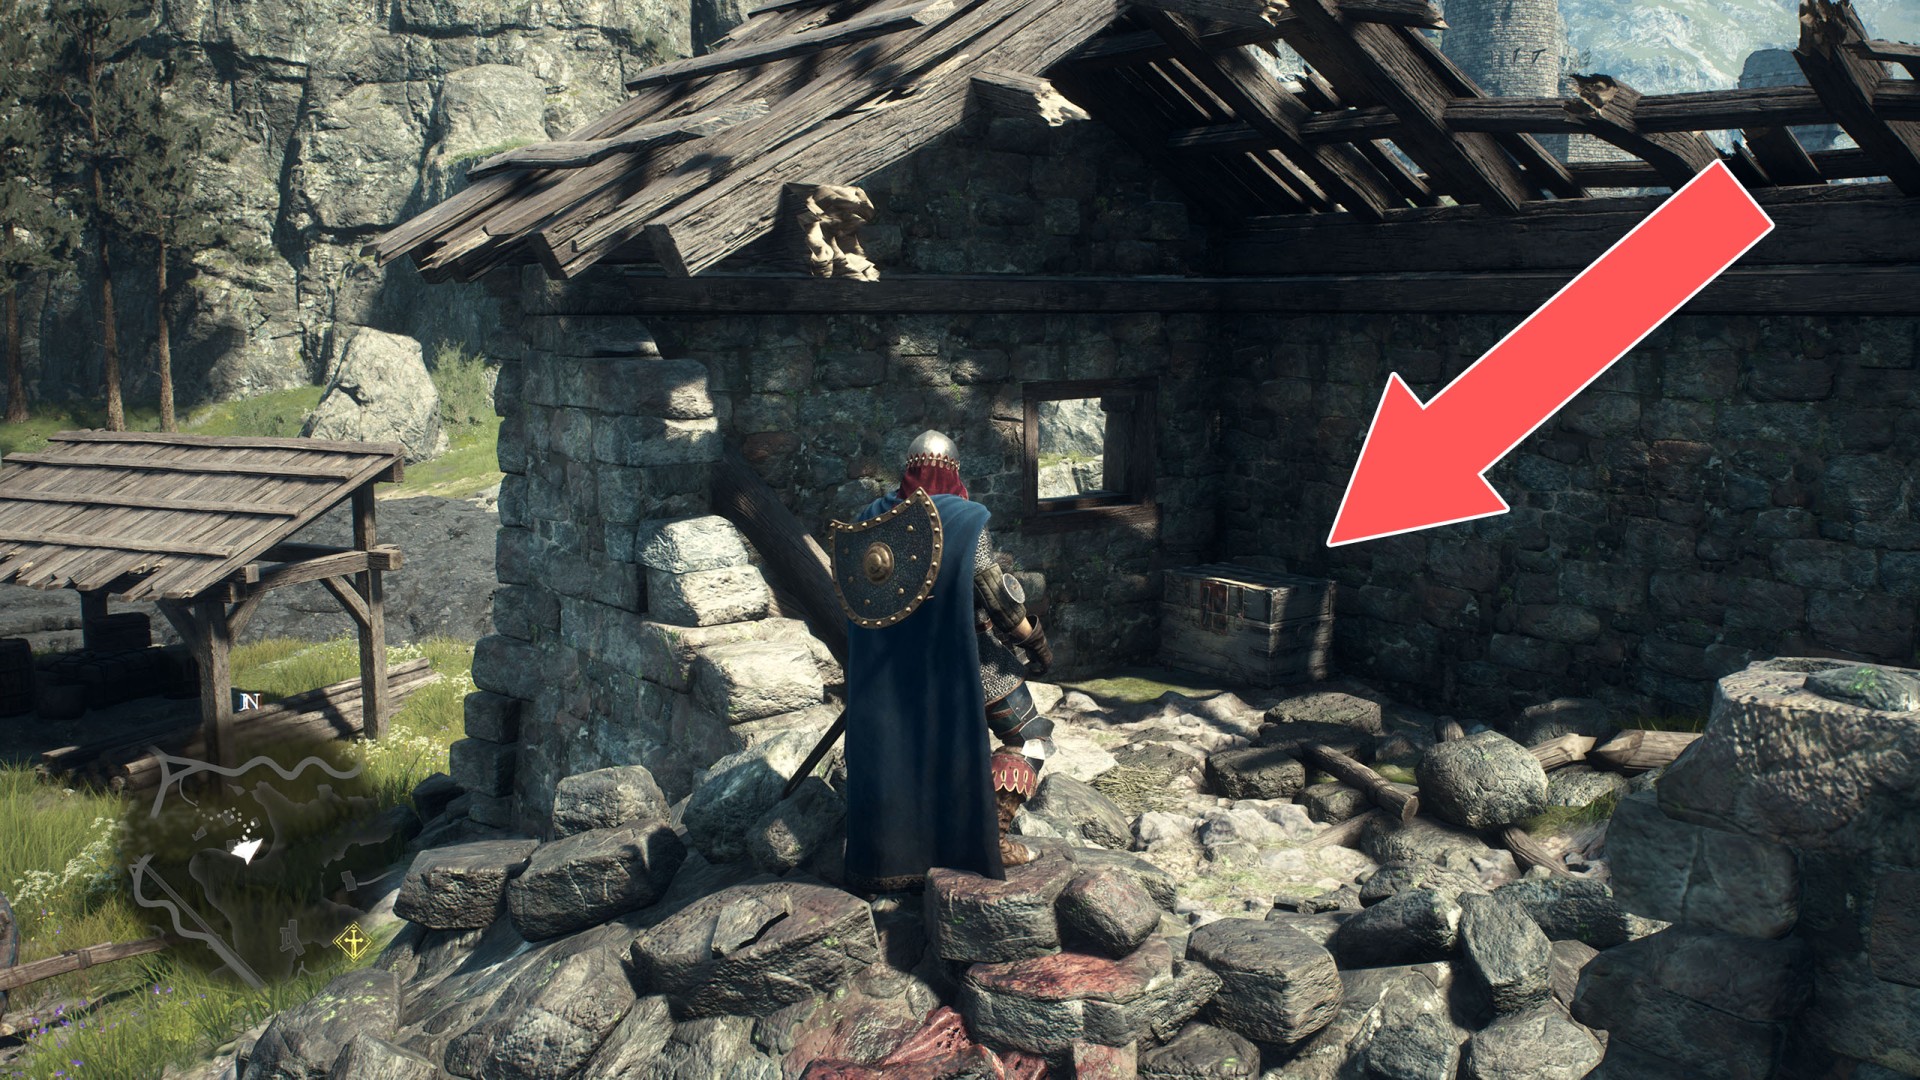
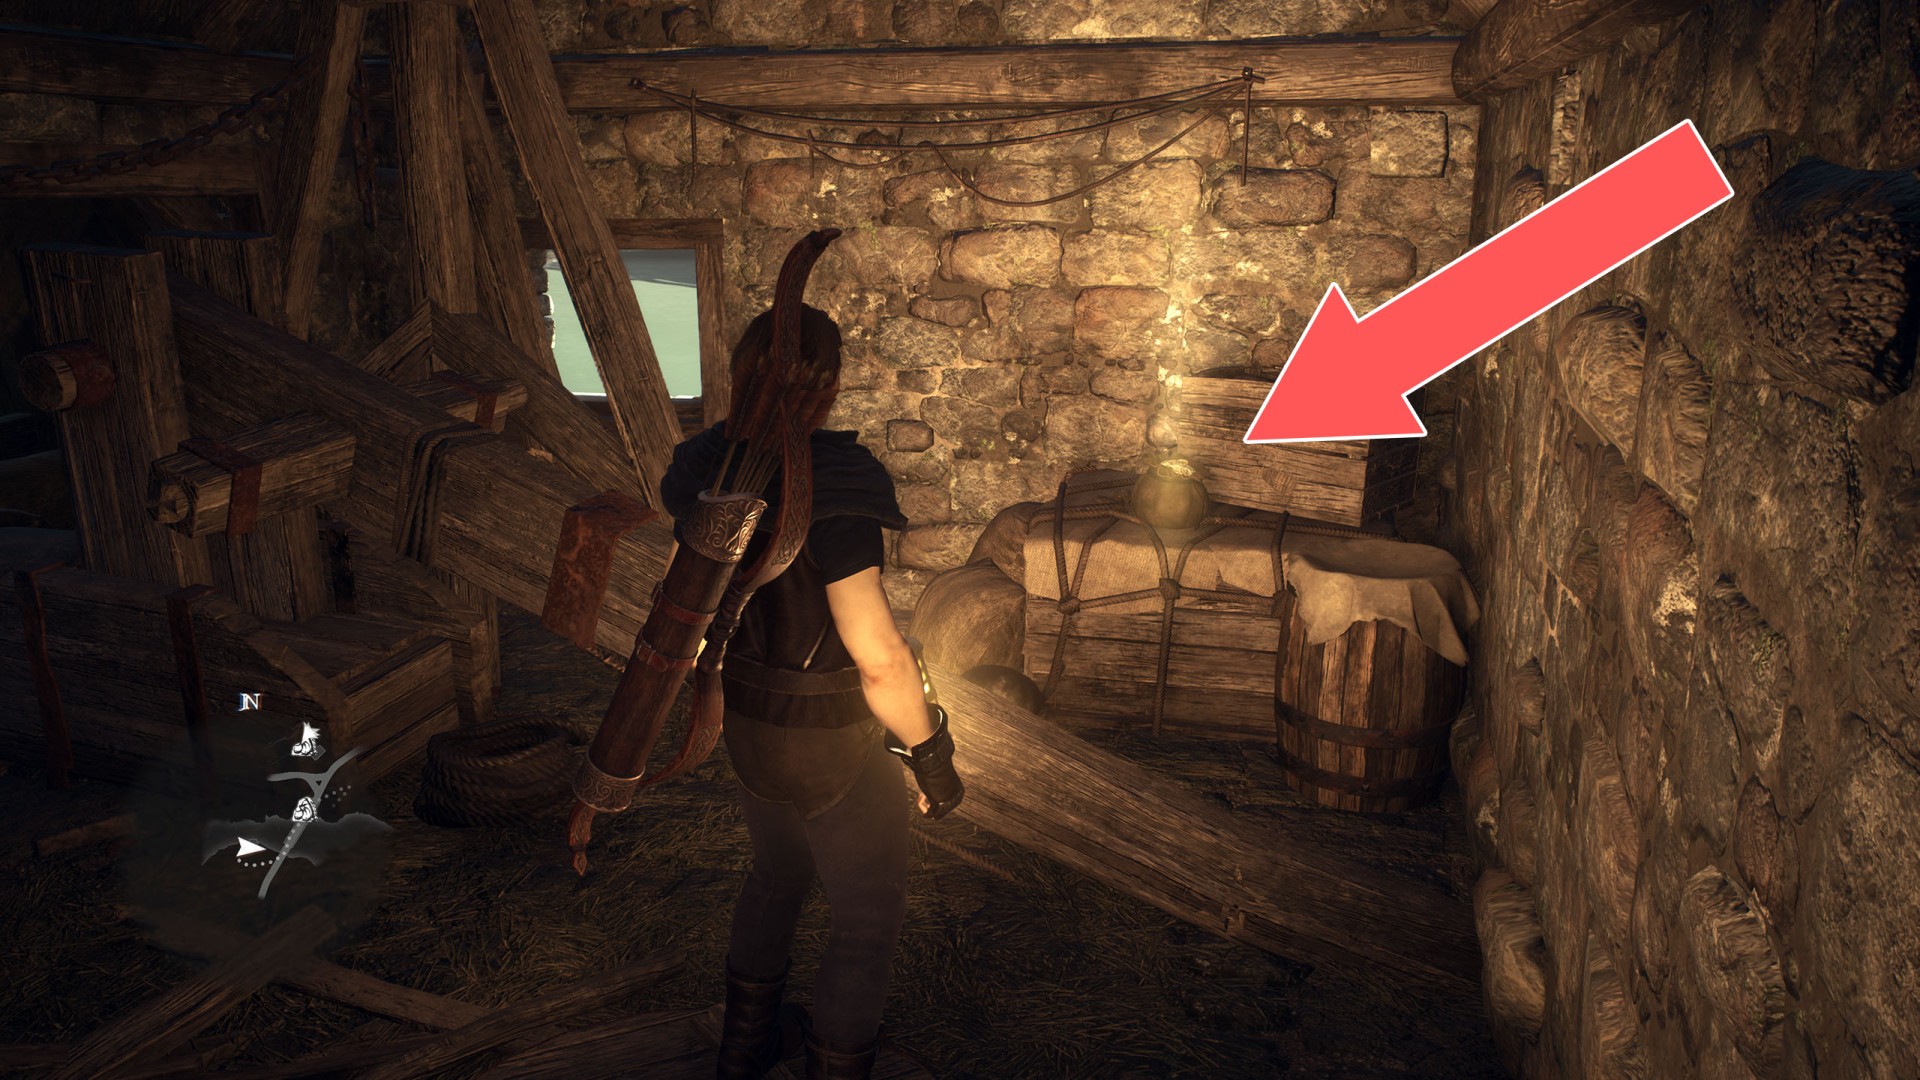
It's in the basement of the locked house. To enter this house, shoot the door lock through the window.

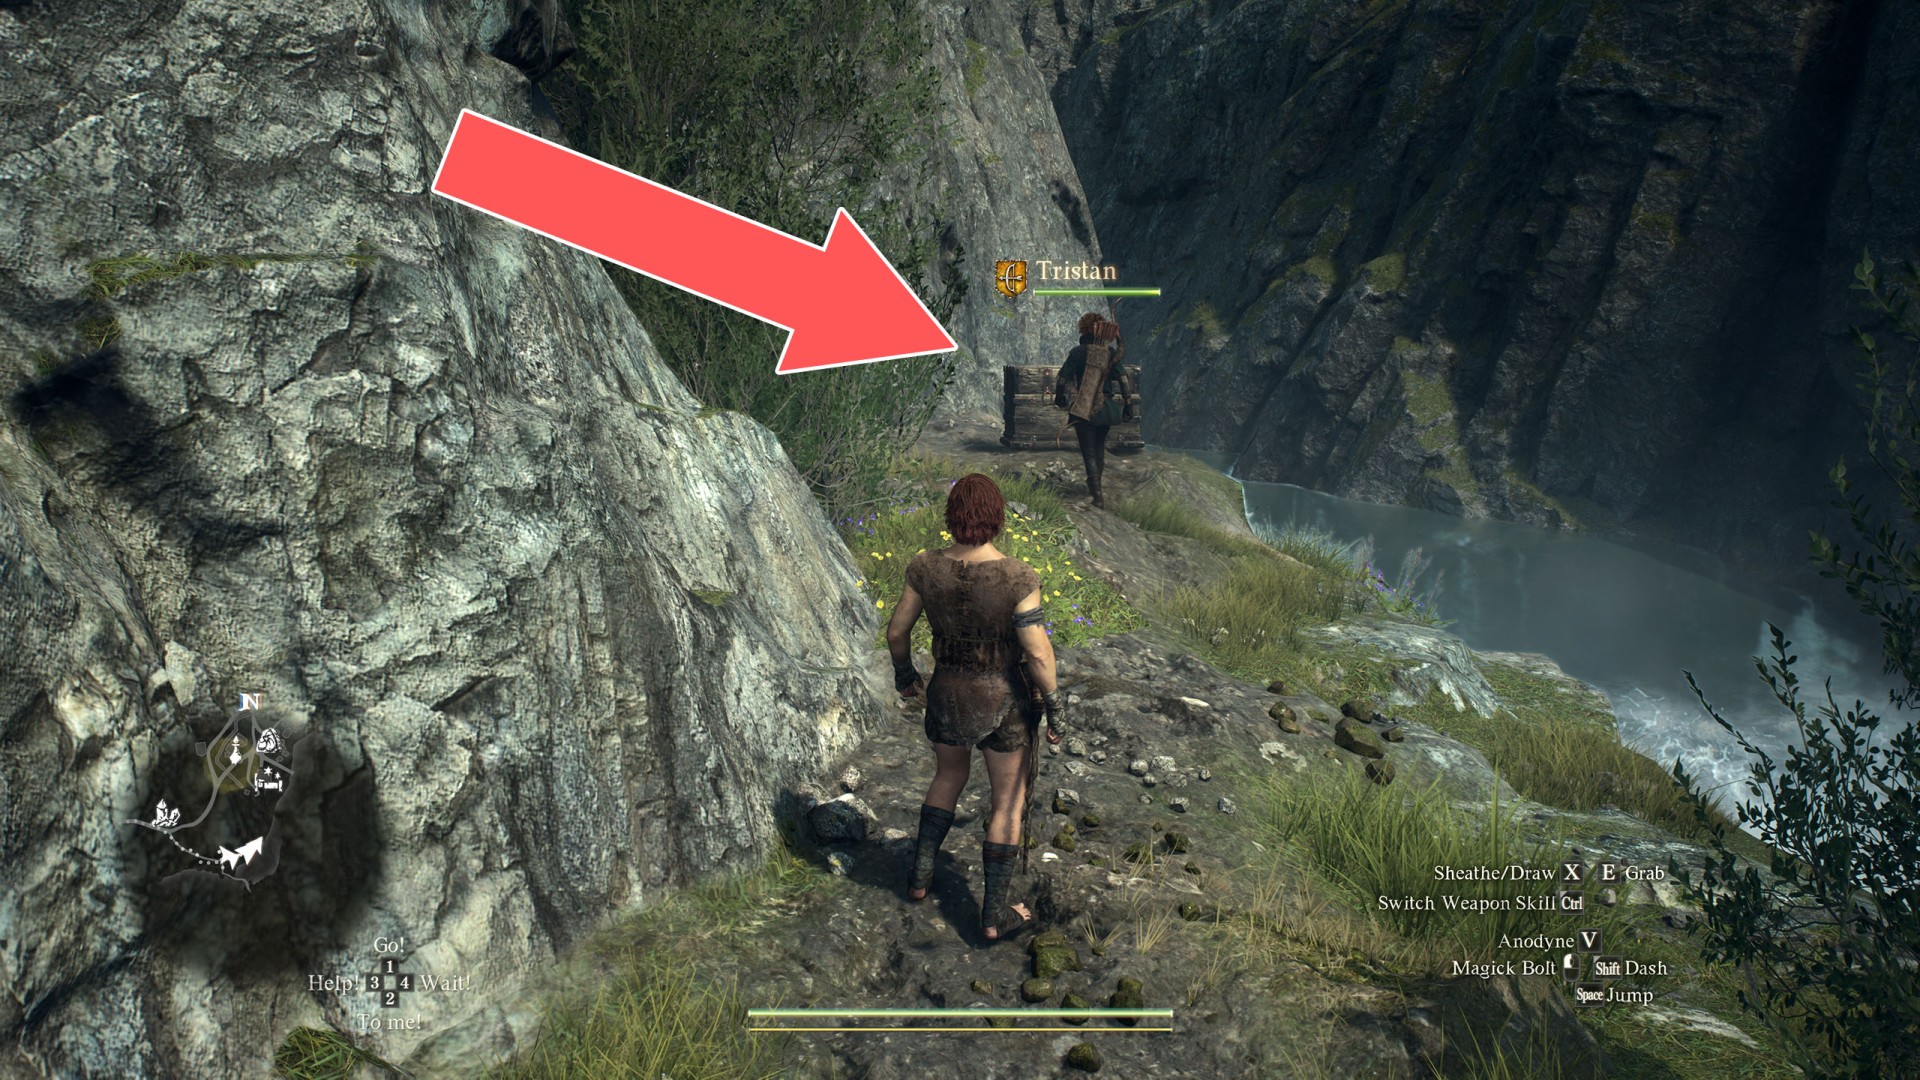
Box (3,200G)▶ show the map ◀
Box (3,500G)▶ show the map ◀

Box (3,900G)▶ show the map ◀

Box (4,450G)▶ show the map ◀
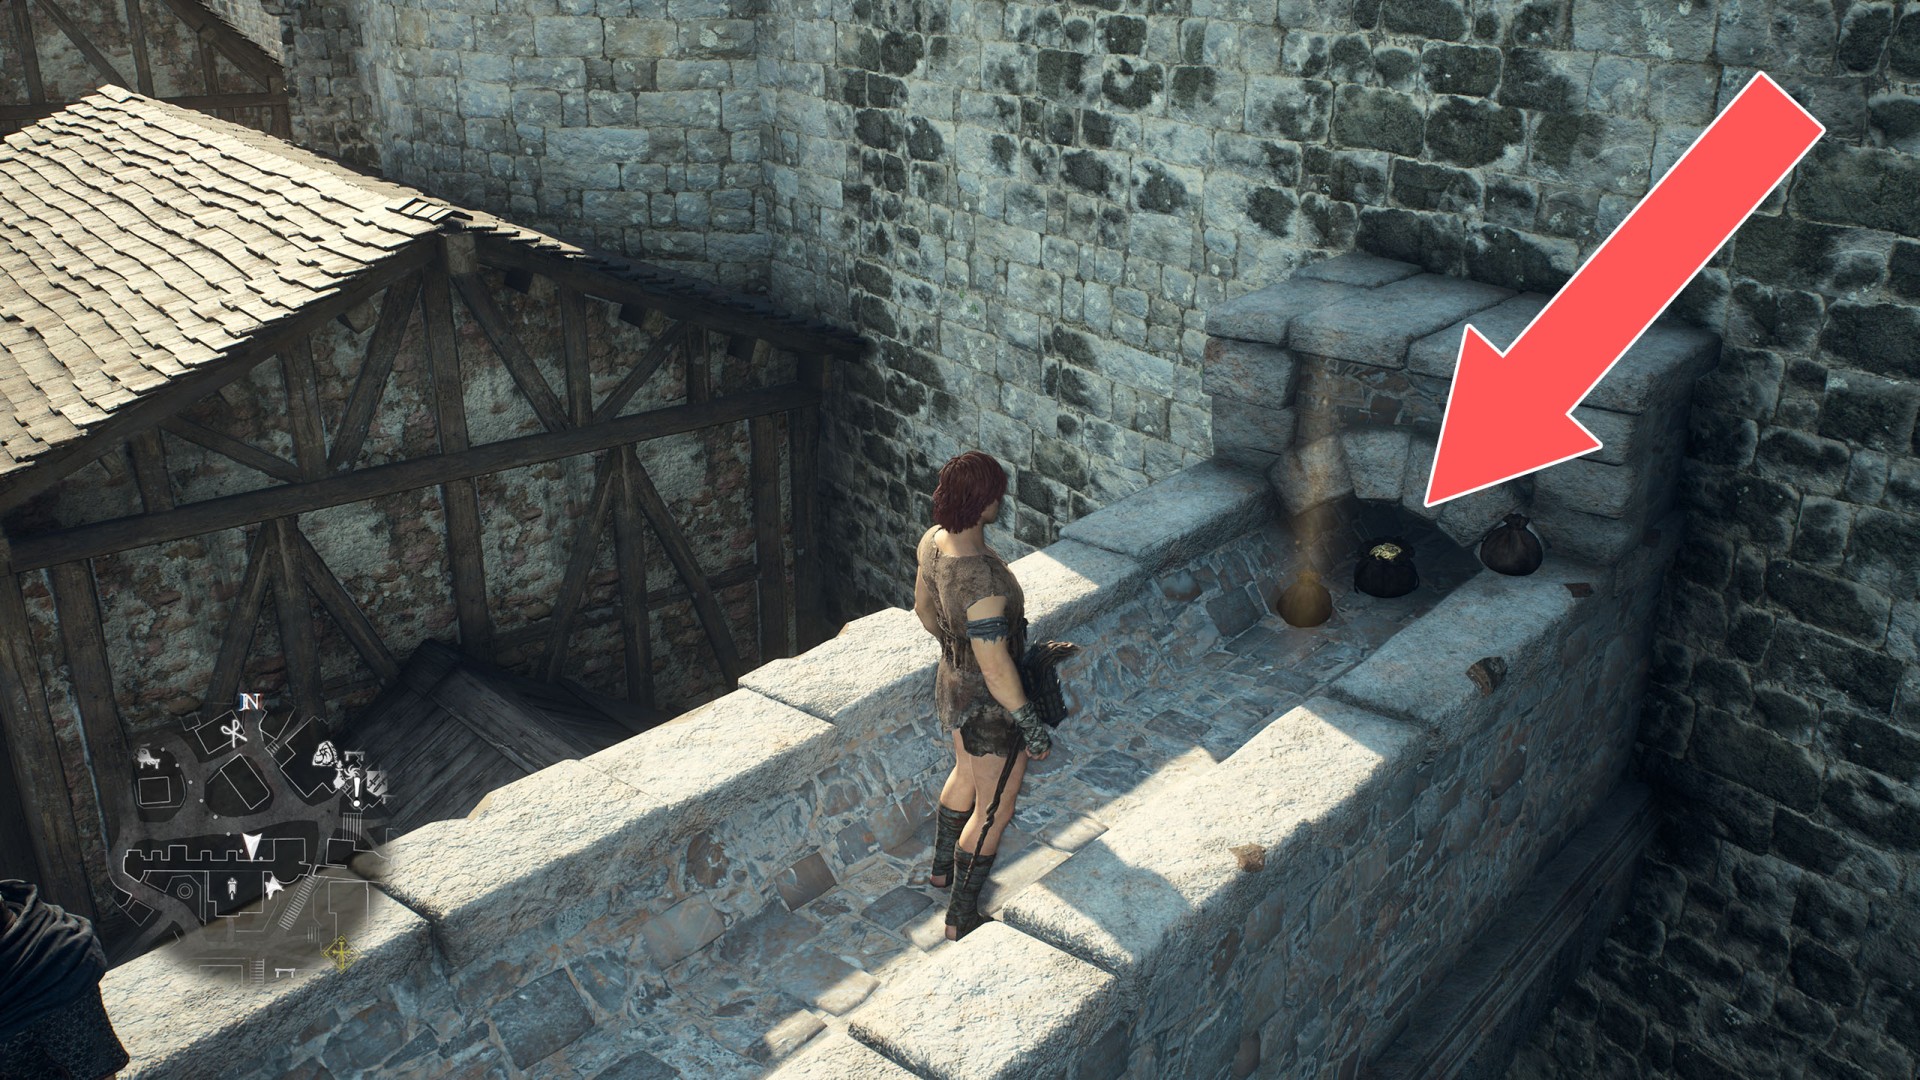
Box + Pouch x 2 (5,350G)▶ show the map ◀
Chest (1,000G)▶ show the map ◀
Chest (1,015G)▶ show the map ◀
Chest (1,020G)▶ show the map ◀
Chest (1,030G)▶ show the map ◀
Chest (1,050G)▶ show the map ◀
Chest (1,080G)▶ show the map ◀
Chest (1,100G)▶ show the map ◀

Chest (1,100G)▶ show the map ◀
Chest (1,100G)▶ show the map ◀
Chest (1,120G)▶ show the map ◀
Chest (1,140G)▶ show the map ◀
Chest (1,150G)▶ show the map ◀
Chest (1,180G)▶ show the map ◀
Chest (1,190G)▶ show the map ◀

Chest (1,200G)▶ show the map ◀
Chest (1,200G)▶ show the map ◀

Chest (1,210G)▶ show the map ◀
Chest (1,210G)▶ show the map ◀
Chest (1,216G)▶ show the map ◀
Chest (1,300G)▶ show the map ◀
Chest (1,300G)▶ show the map ◀
Chest (1,300G)▶ show the map ◀
Chest (1,300G)▶ show the map ◀

Chest (1,340G)▶ show the map ◀
Chest (1,390G)▶ show the map ◀
Chest (1,400G)▶ show the map ◀
Chest (1,420G)▶ show the map ◀
Chest (1,500G)▶ show the map ◀

Chest (1,500G)▶ show the map ◀
Chest (1,500G)▶ show the map ◀
Chest (1,730G)▶ show the map ◀
Chest (1,750G)▶ show the map ◀
Chest (1,800G)▶ show the map ◀
Chest (1,800G)▶ show the map ◀
Chest (1,800G)▶ show the map ◀
Chest (1,820G)▶ show the map ◀
Chest (1,830G)▶ show the map ◀
Chest (1,850G)▶ show the map ◀
Chest (1,900G)▶ show the map ◀
Chest (10,030G)▶ show the map ◀
Chest (10,090G)▶ show the map ◀
Chest (10,360G)▶ show the map ◀
Chest (130G)▶ show the map ◀
Chest (2,000G)▶ show the map ◀
Chest (2,070G)▶ show the map ◀
Chest (2,110G)▶ show the map ◀
Chest (2,130G)▶ show the map ◀
Chest (2,200G)▶ show the map ◀
Chest (2,220G)▶ show the map ◀
Chest (2,250G)▶ show the map ◀
Chest (2,370G)▶ show the map ◀
Chest (2,370G)▶ show the map ◀
Chest (2,370G)▶ show the map ◀
Chest (2,400G)▶ show the map ◀

Chest (2,490G)▶ show the map ◀
Chest (2,500G)▶ show the map ◀
Chest (2,560G)▶ show the map ◀
Chest (2,570G)▶ show the map ◀
Chest (2,600G)▶ show the map ◀
Chest (2,650G)▶ show the map ◀
Chest (2,800G)▶ show the map ◀
Chest (2,840G)▶ show the map ◀
Chest (2,920G)▶ show the map ◀
Chest (3,030G)▶ show the map ◀

Chest (3,080G)▶ show the map ◀
Chest (3,110G)▶ show the map ◀
Chest (3,120G)▶ show the map ◀
Chest (3,210G)▶ show the map ◀
Chest (3,260G)▶ show the map ◀
Chest (3,330G)▶ show the map ◀

Chest (3,450G)▶ show the map ◀
Chest (3,500G)▶ show the map ◀
Chest (3,520G)▶ show the map ◀
Chest (3,550G)▶ show the map ◀
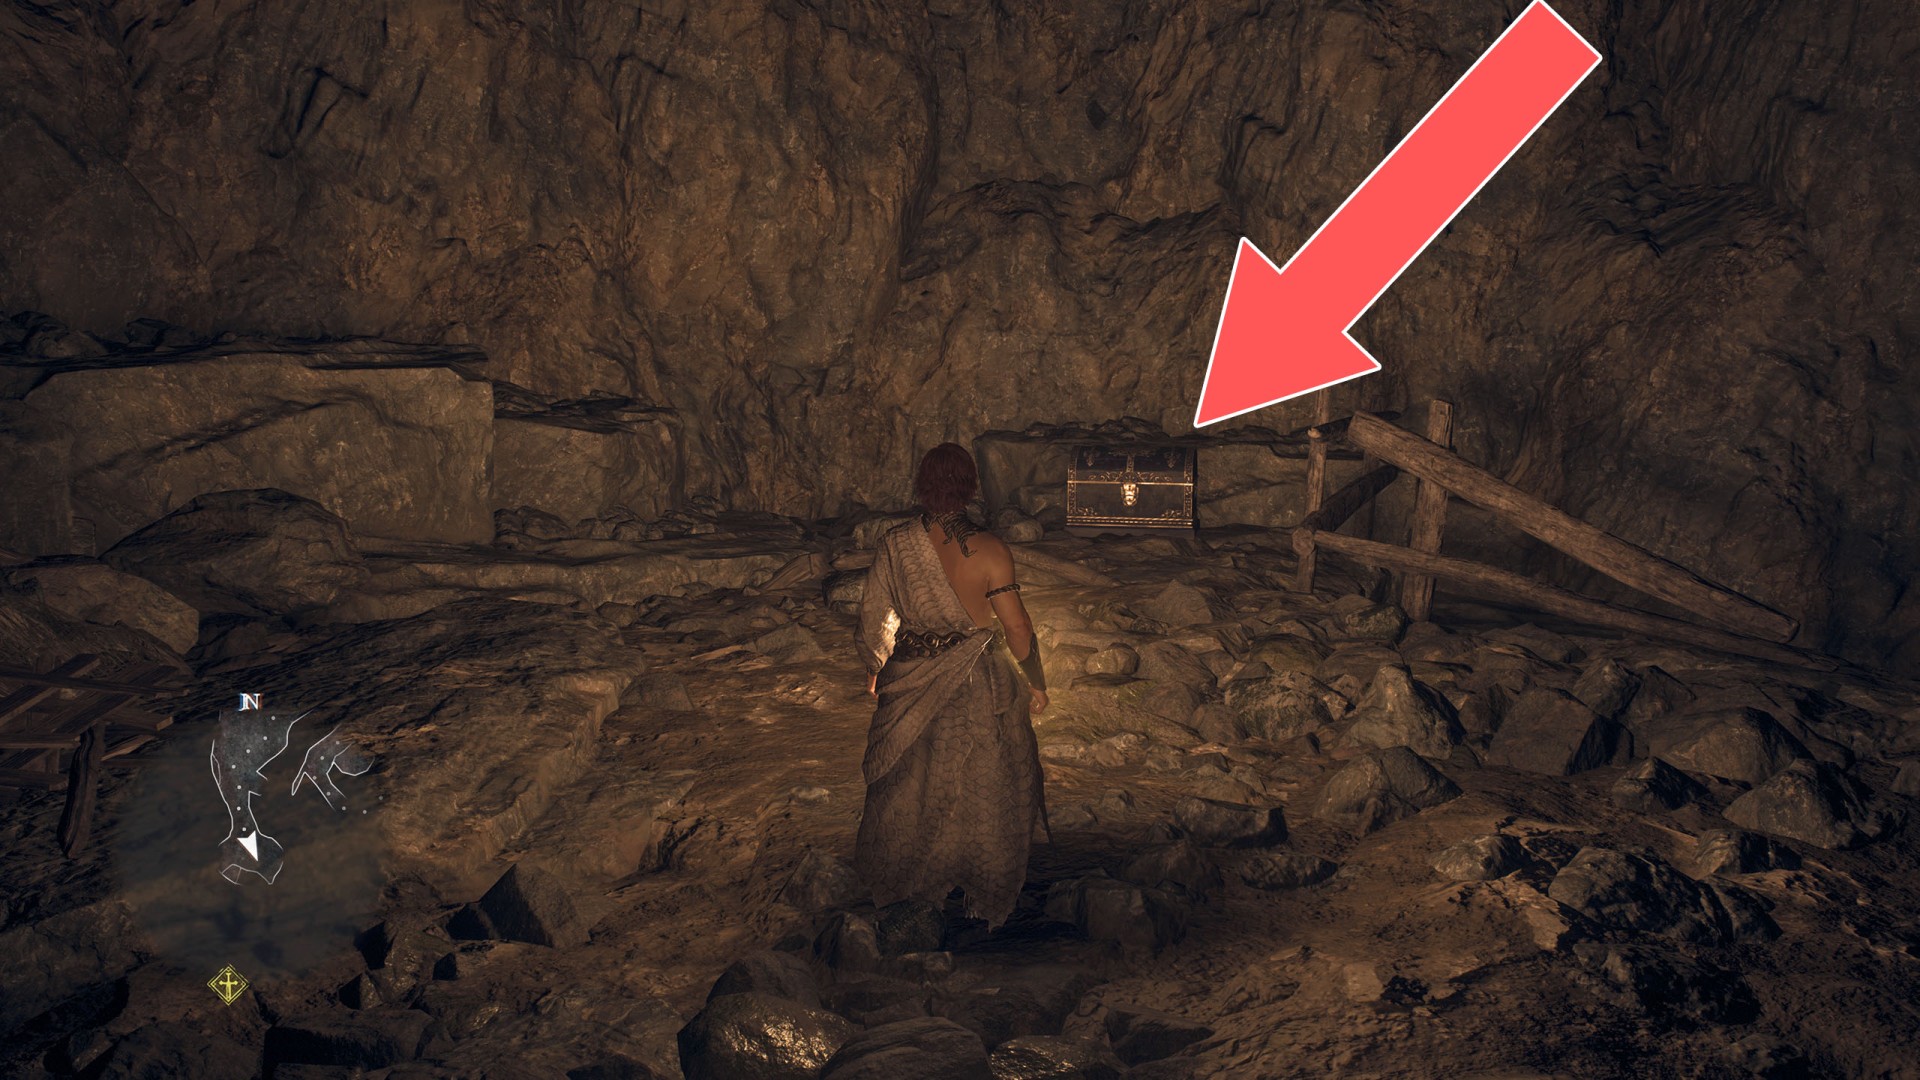
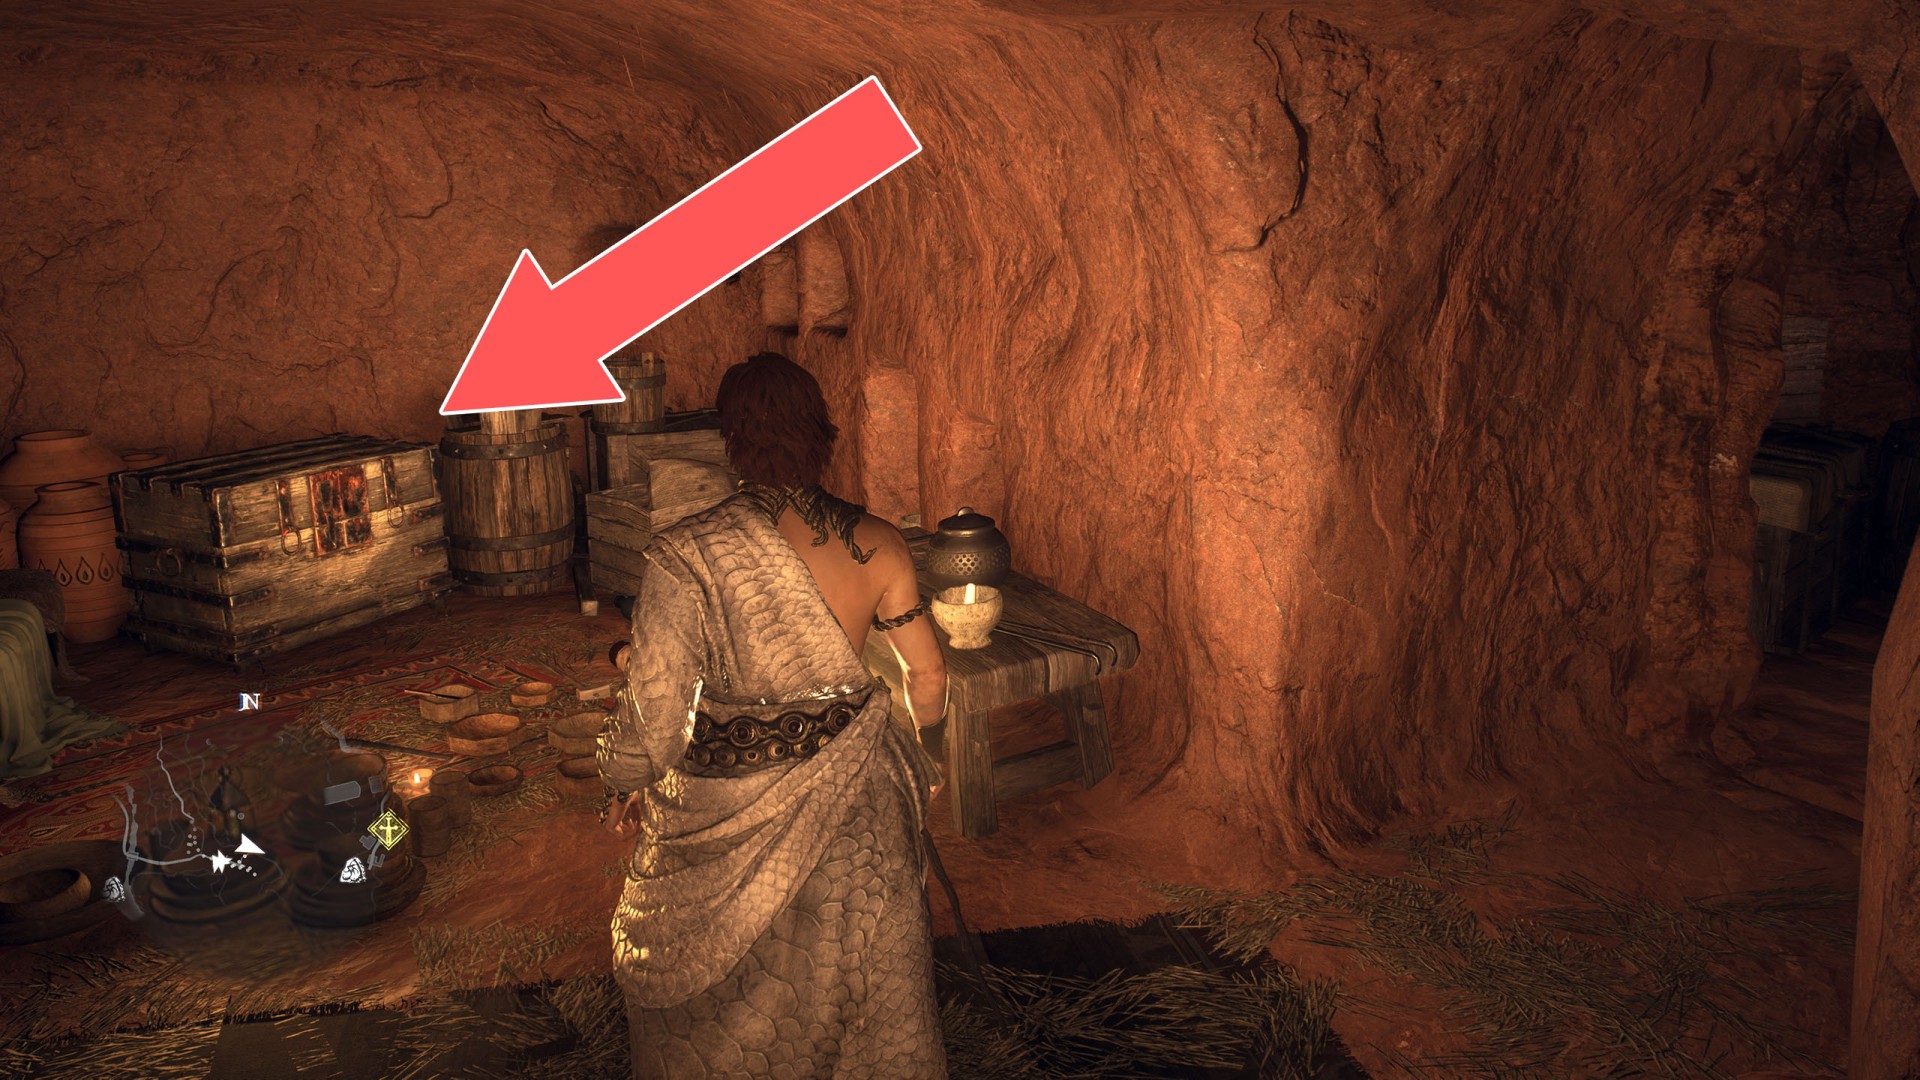
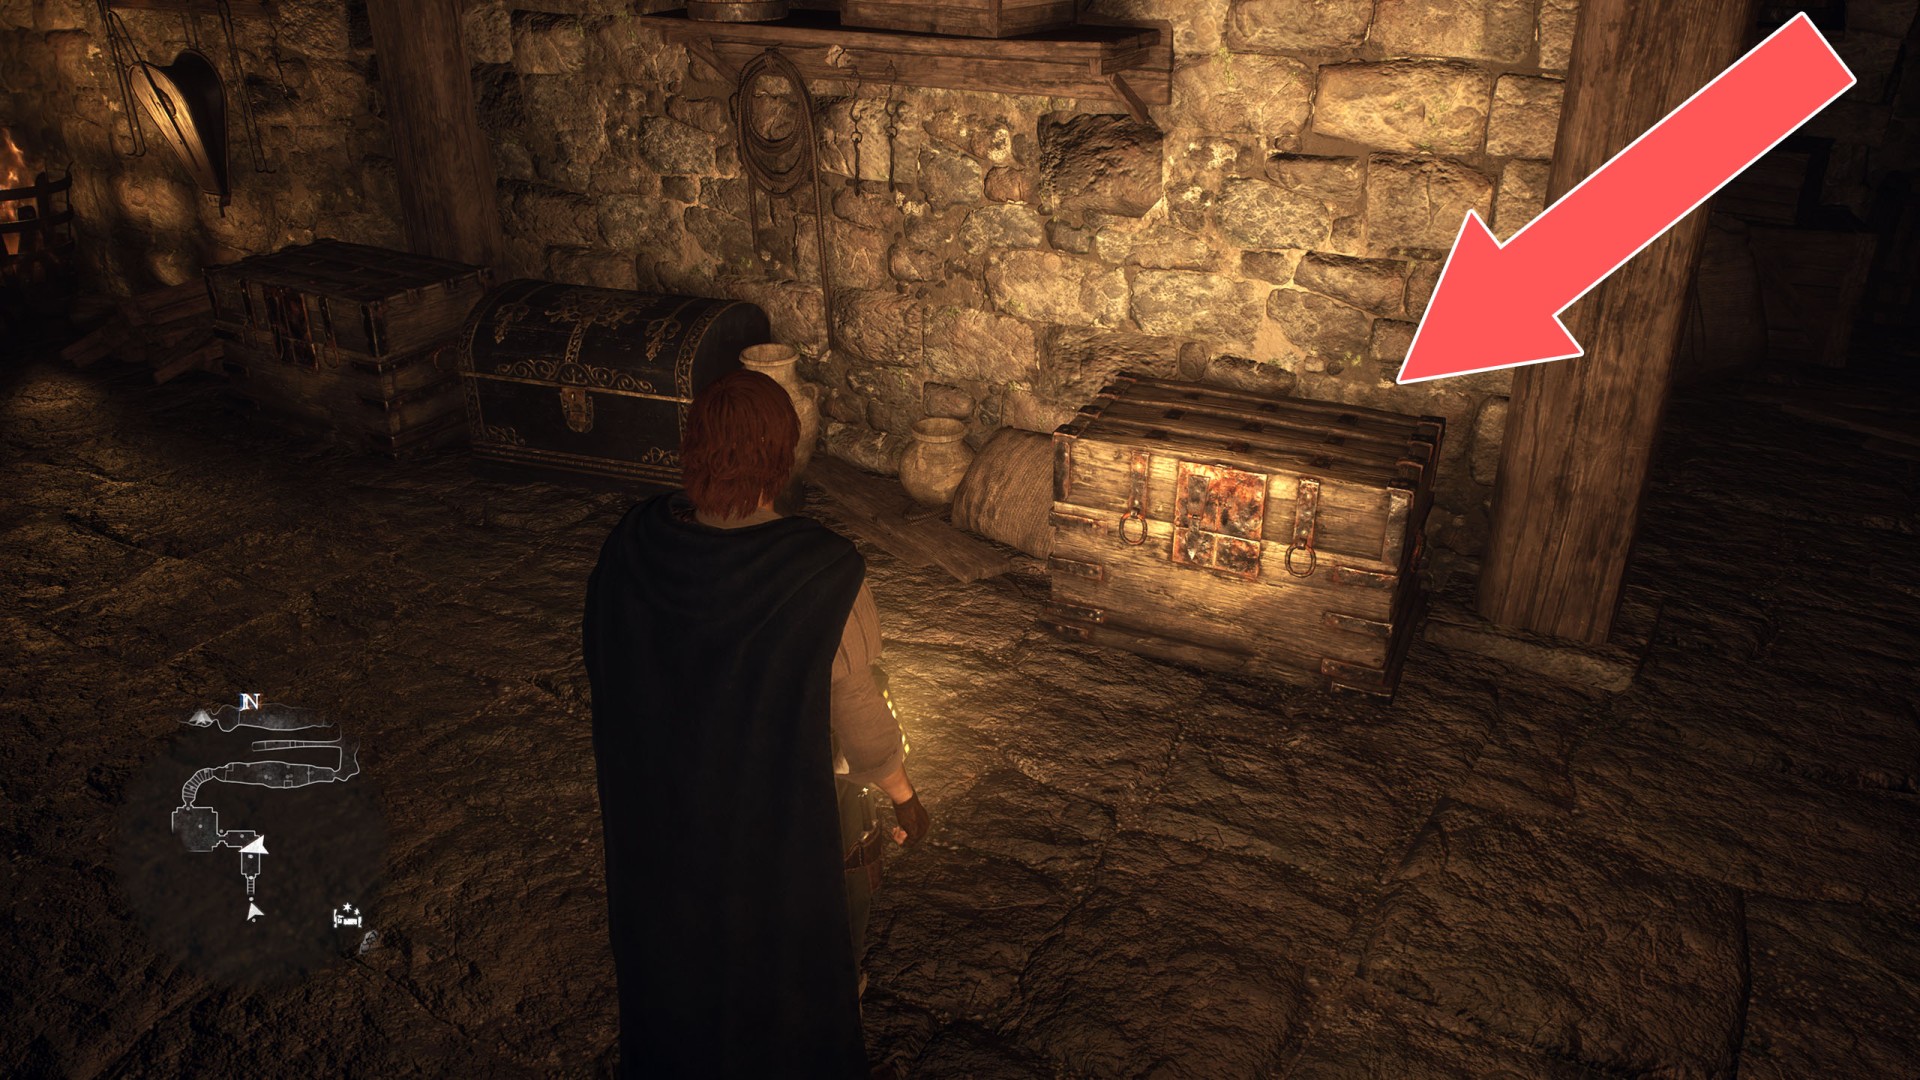
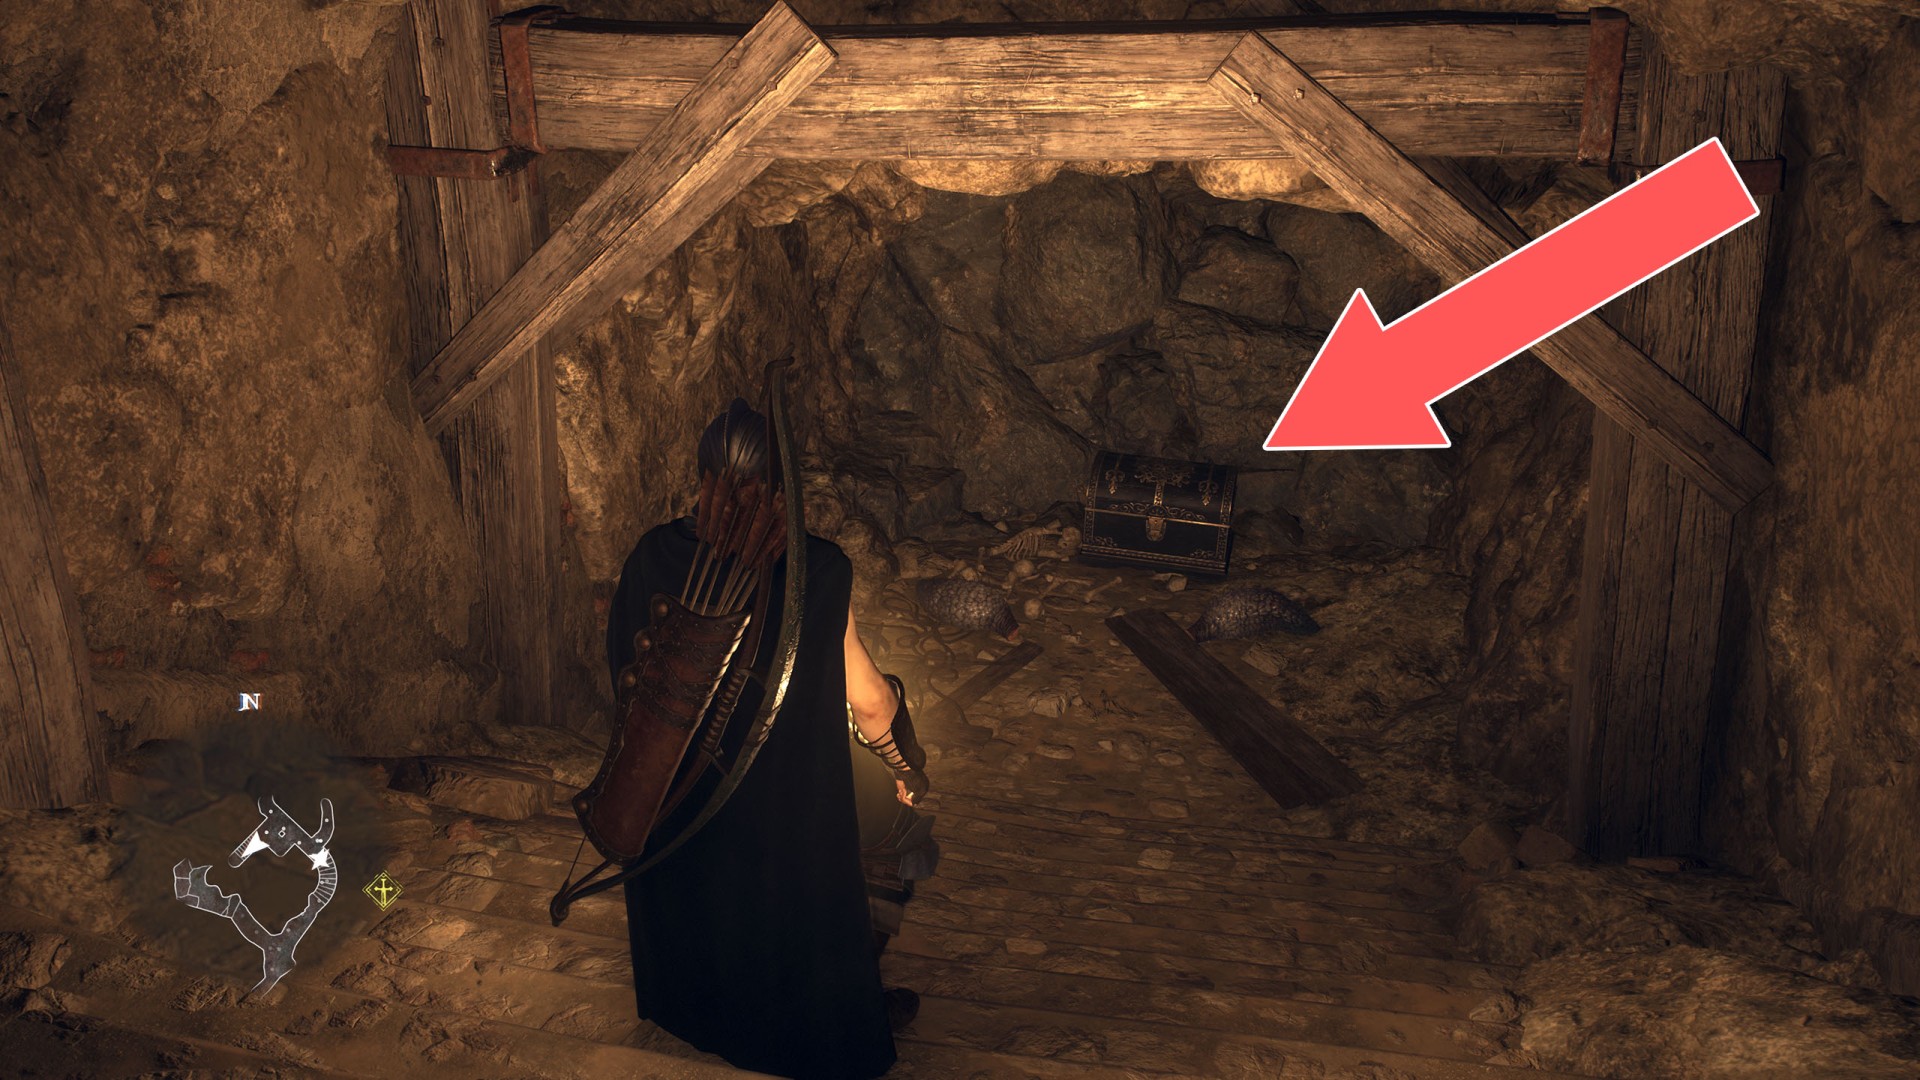
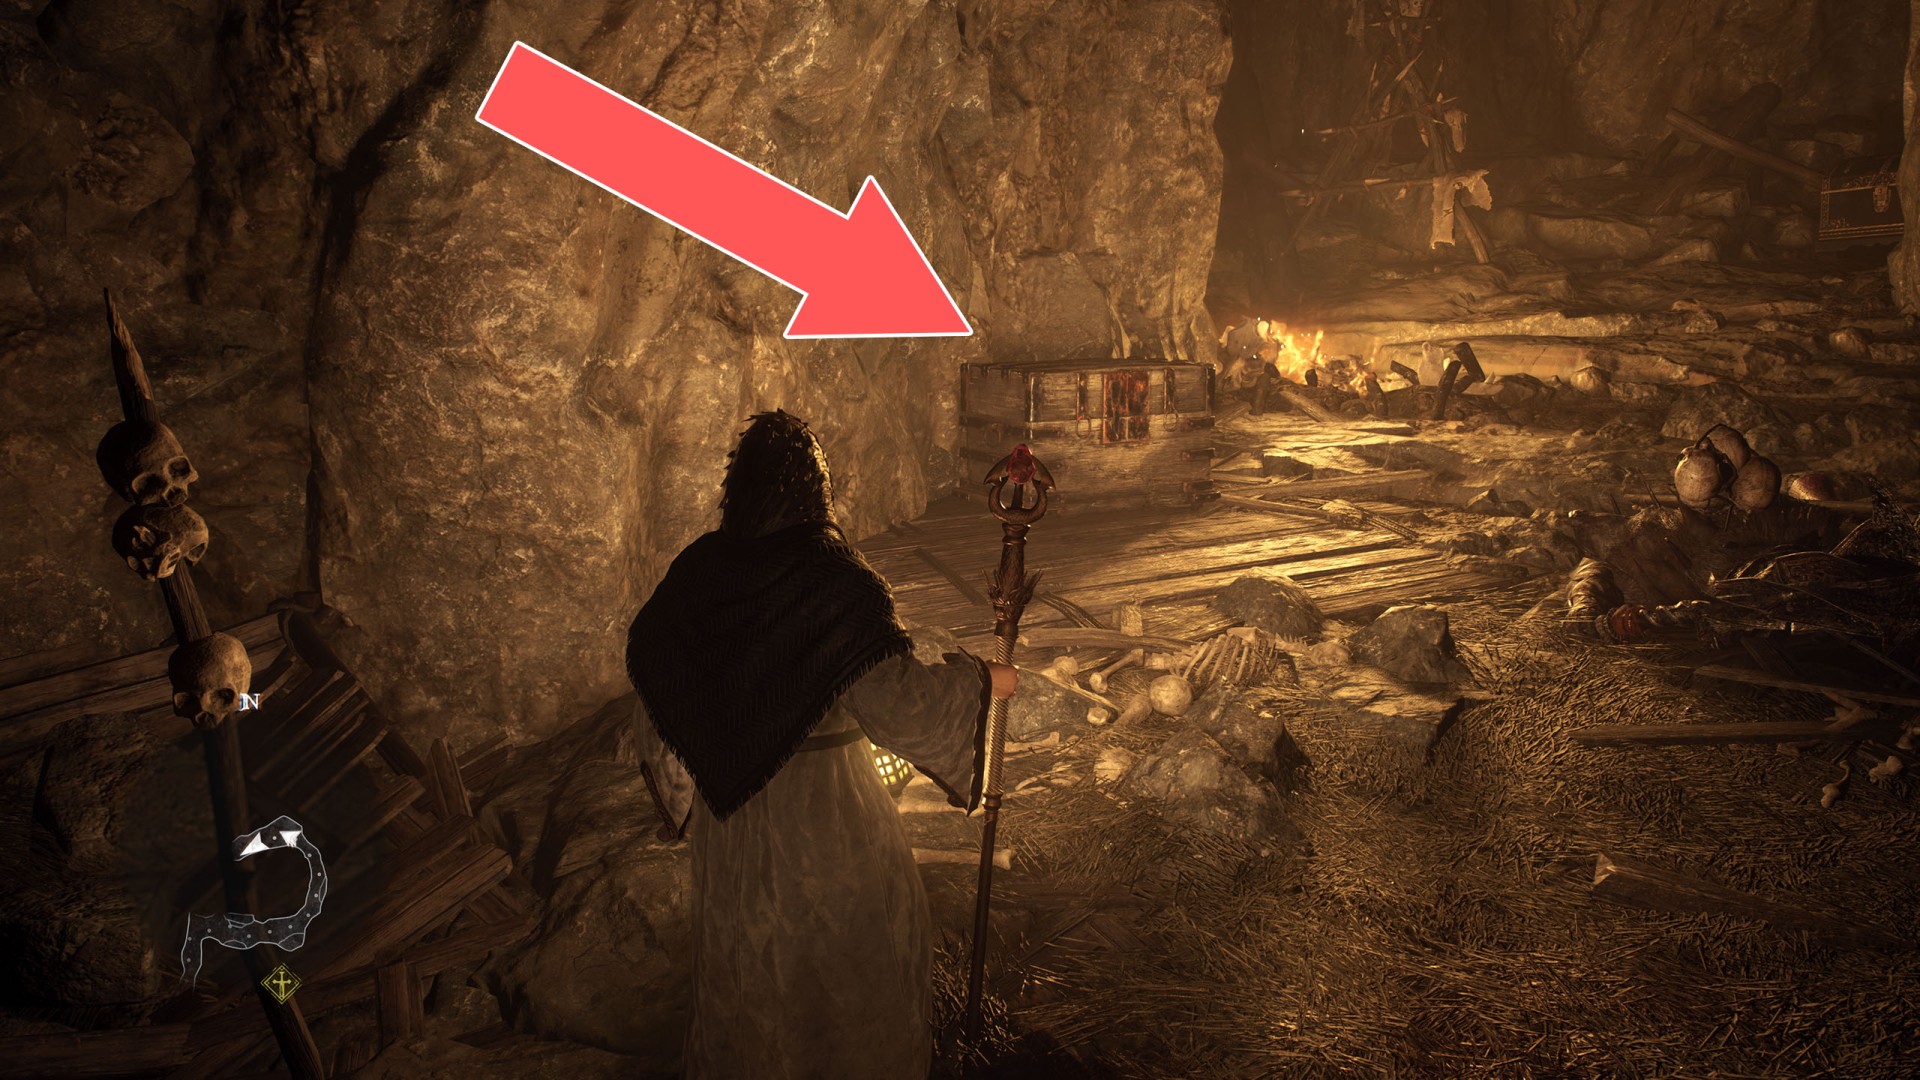
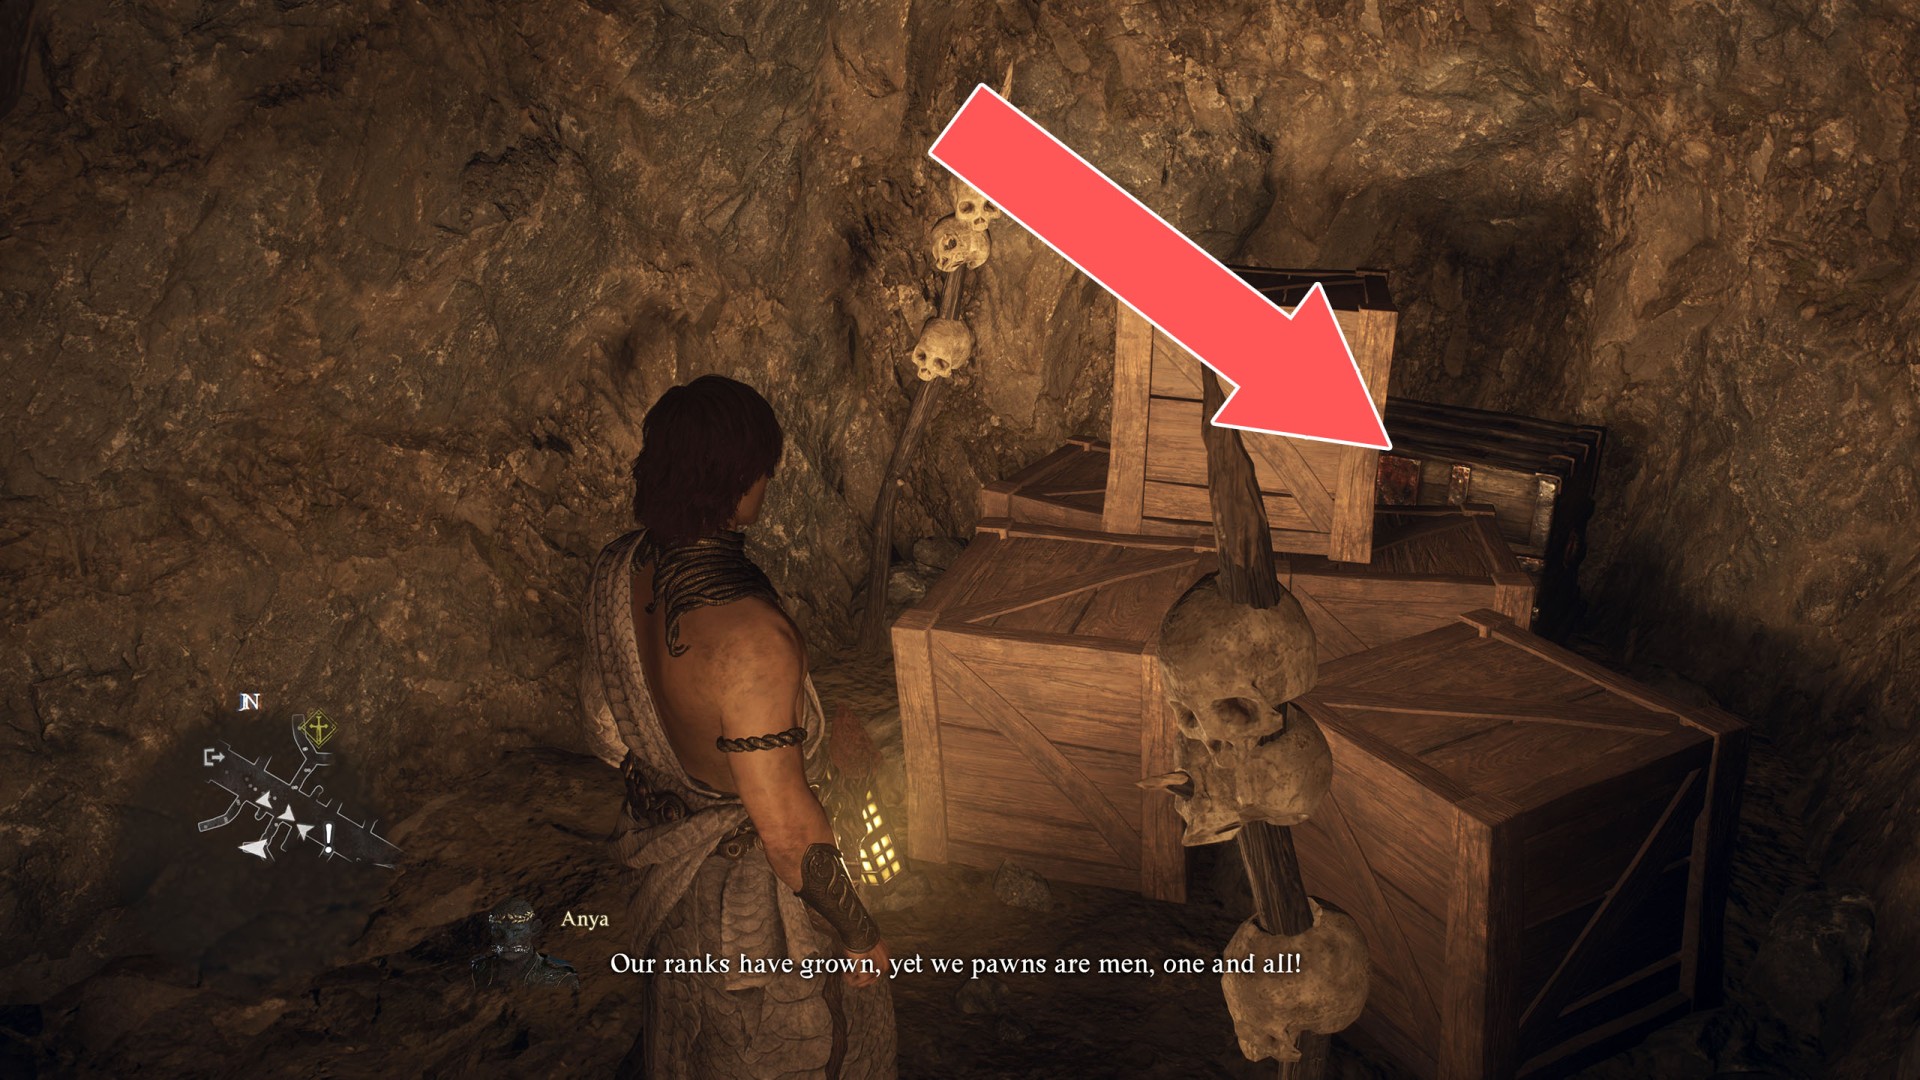
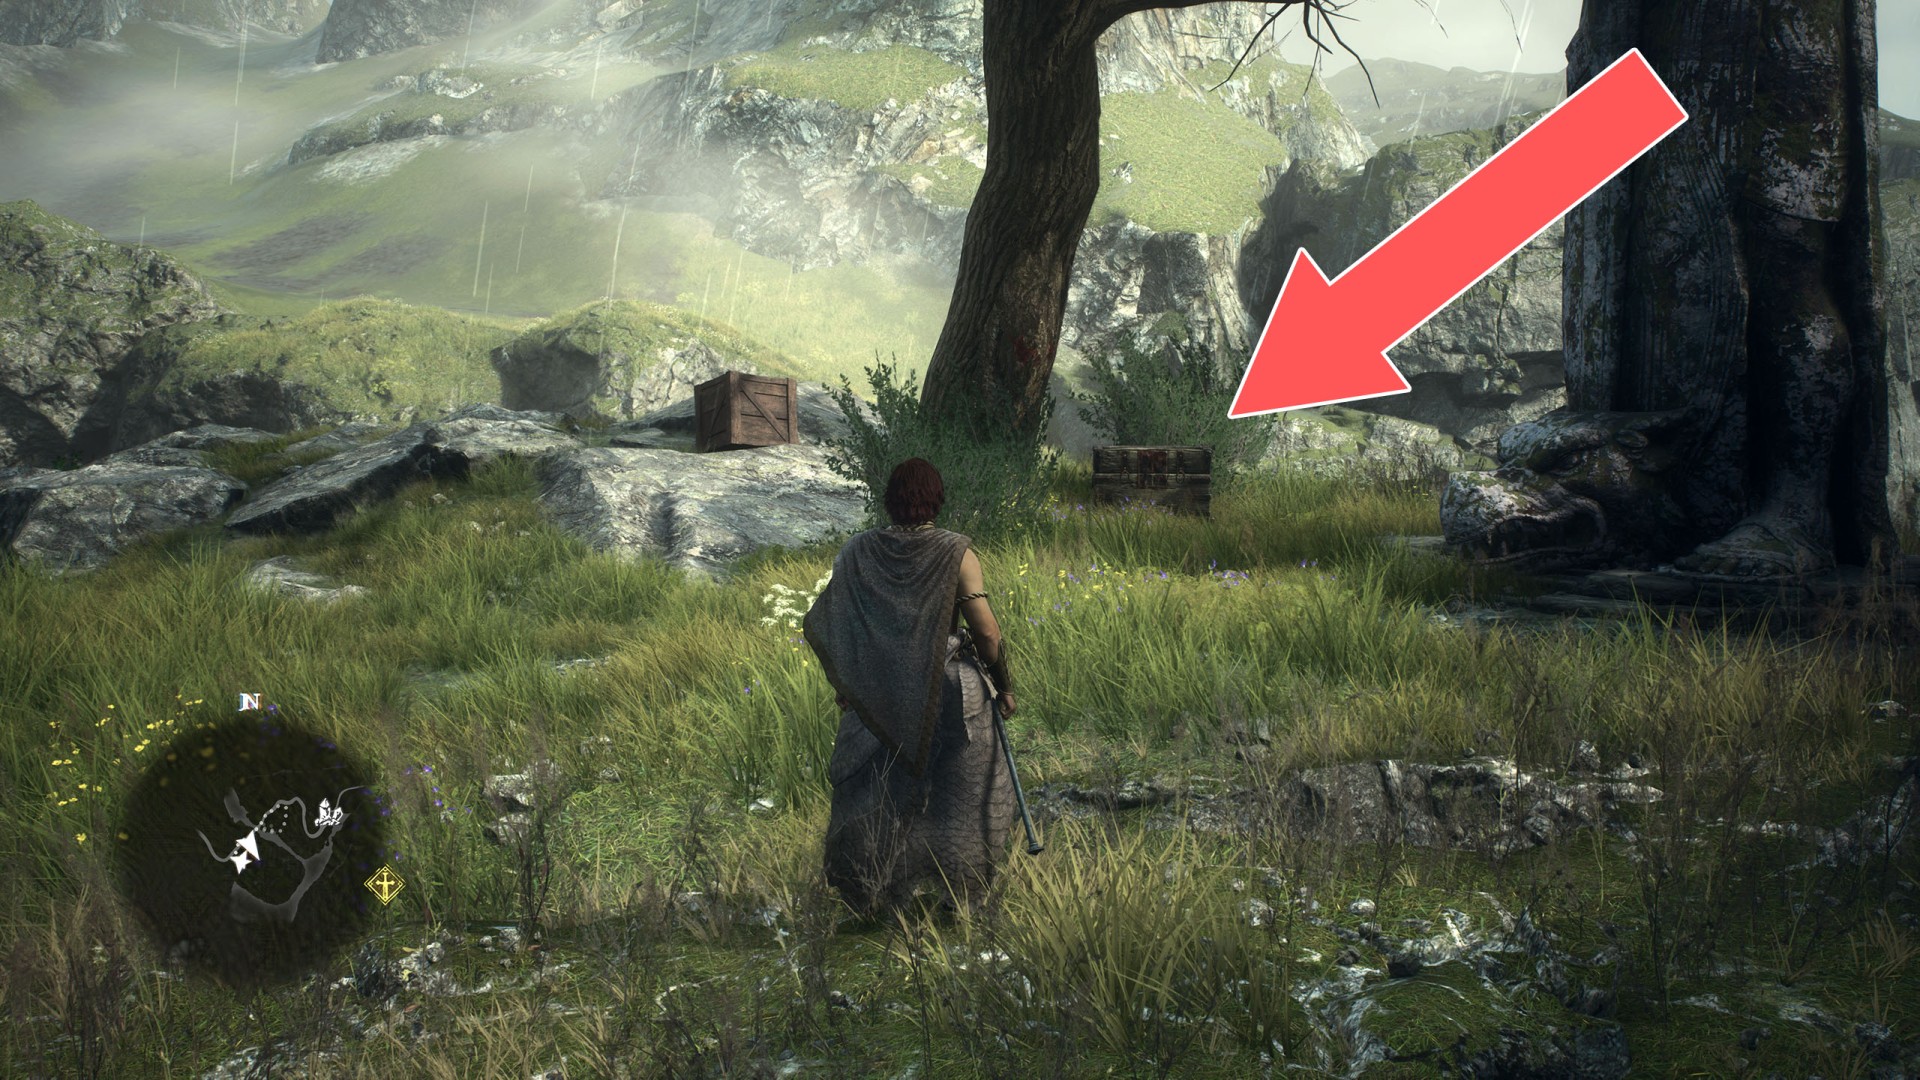
Chest (3,600G)▶ show the map ◀
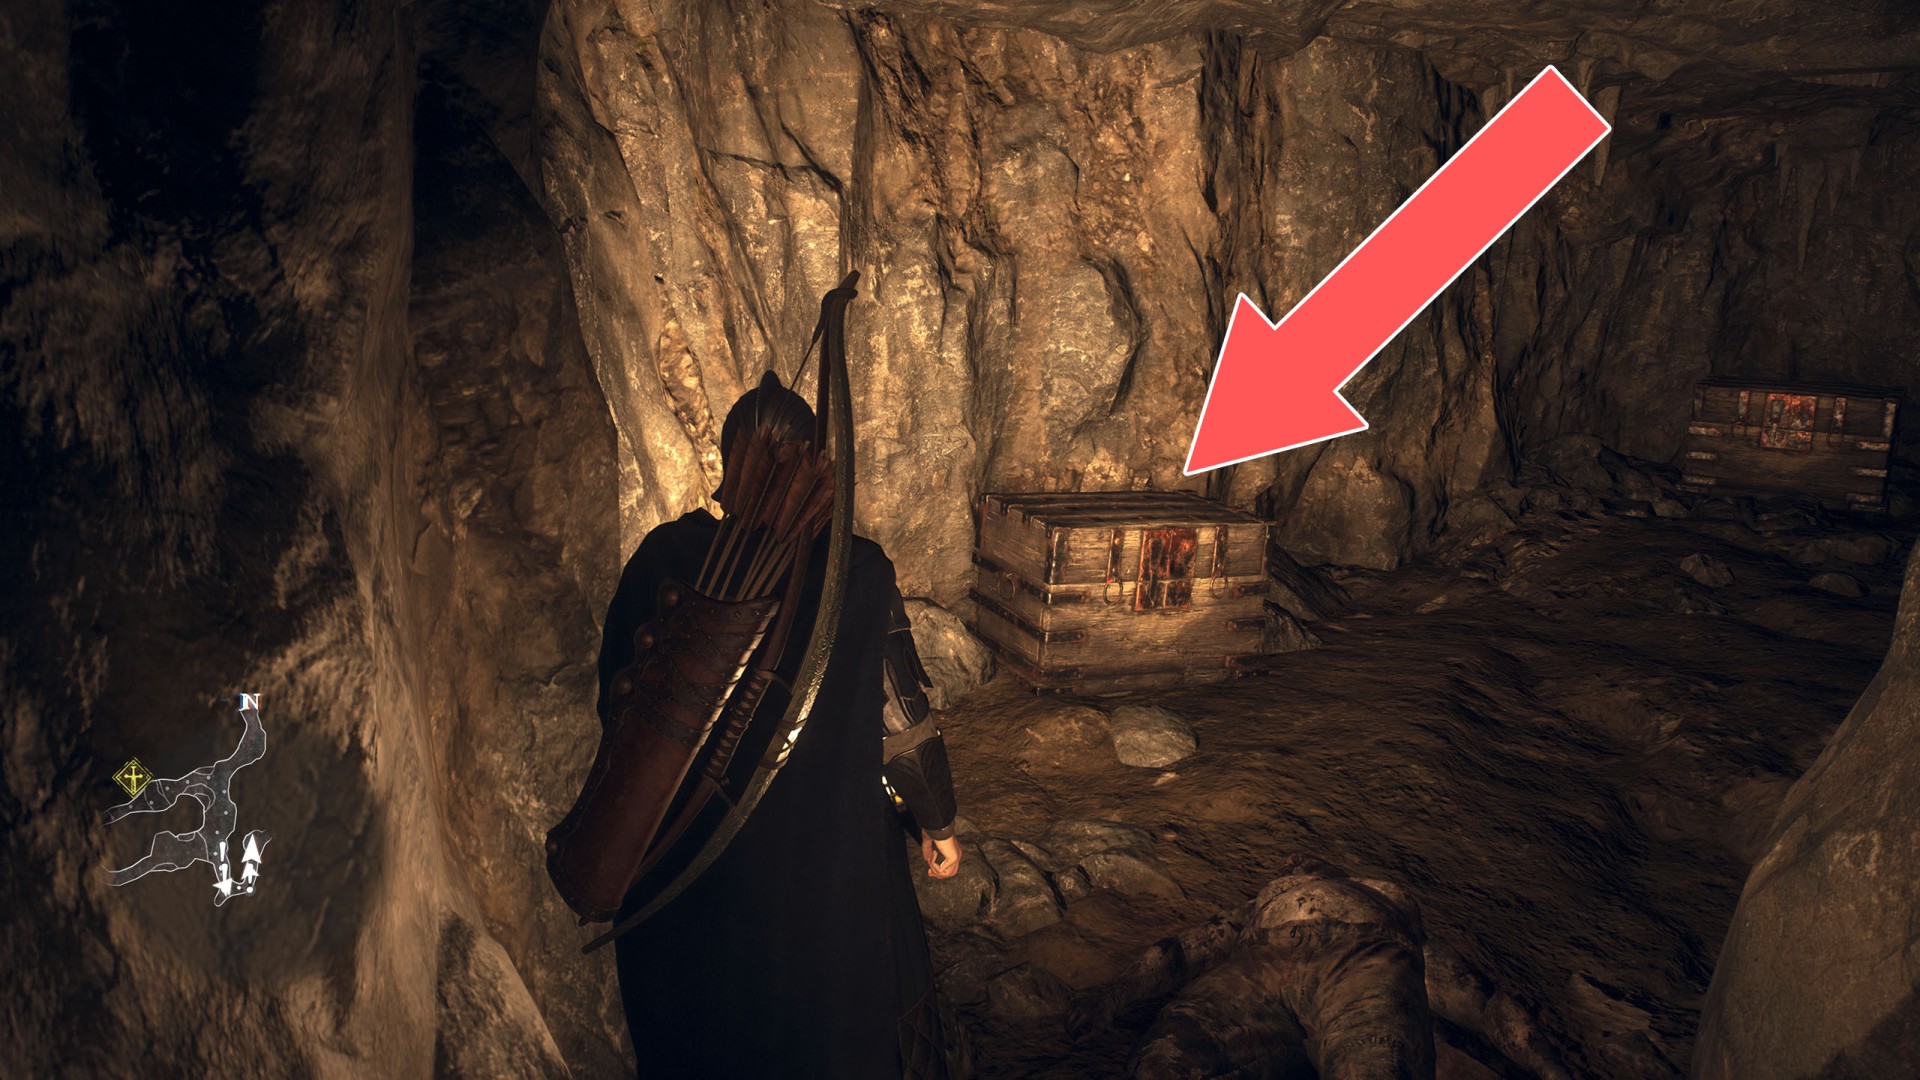
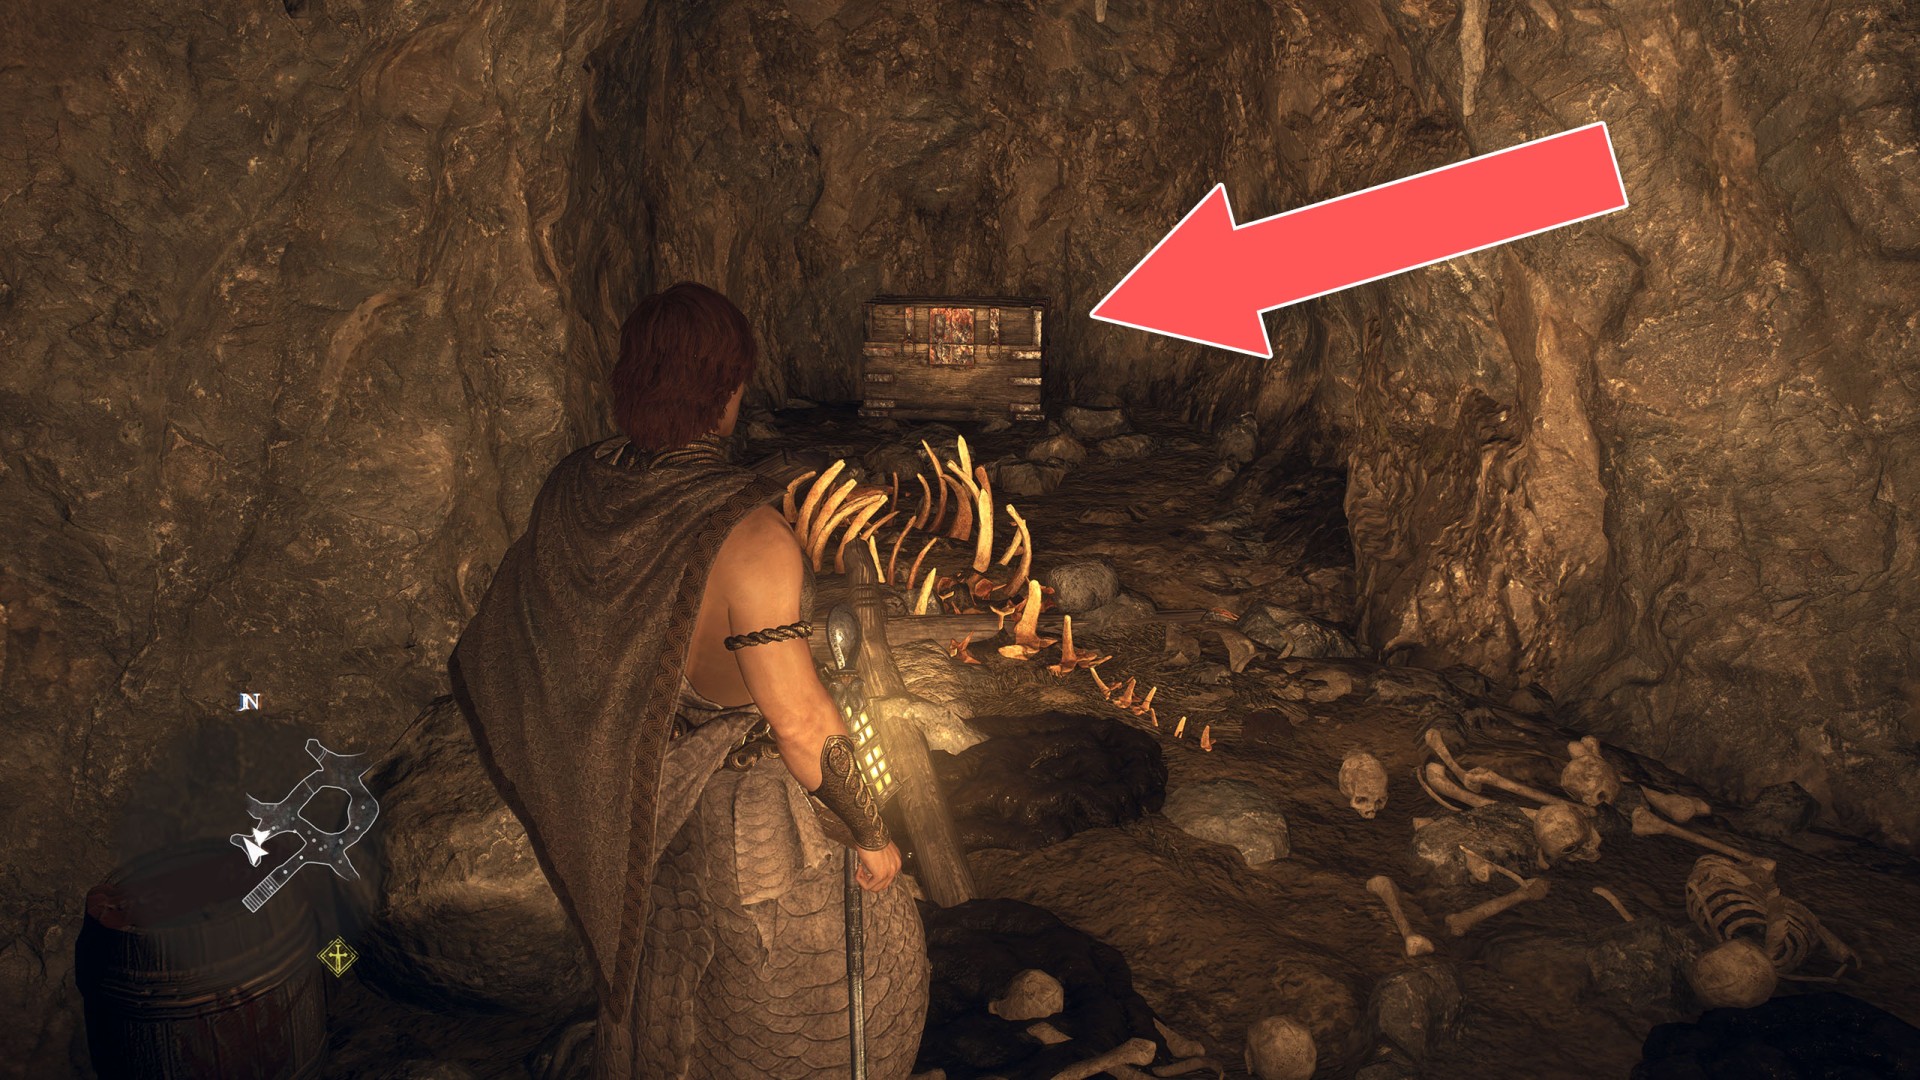
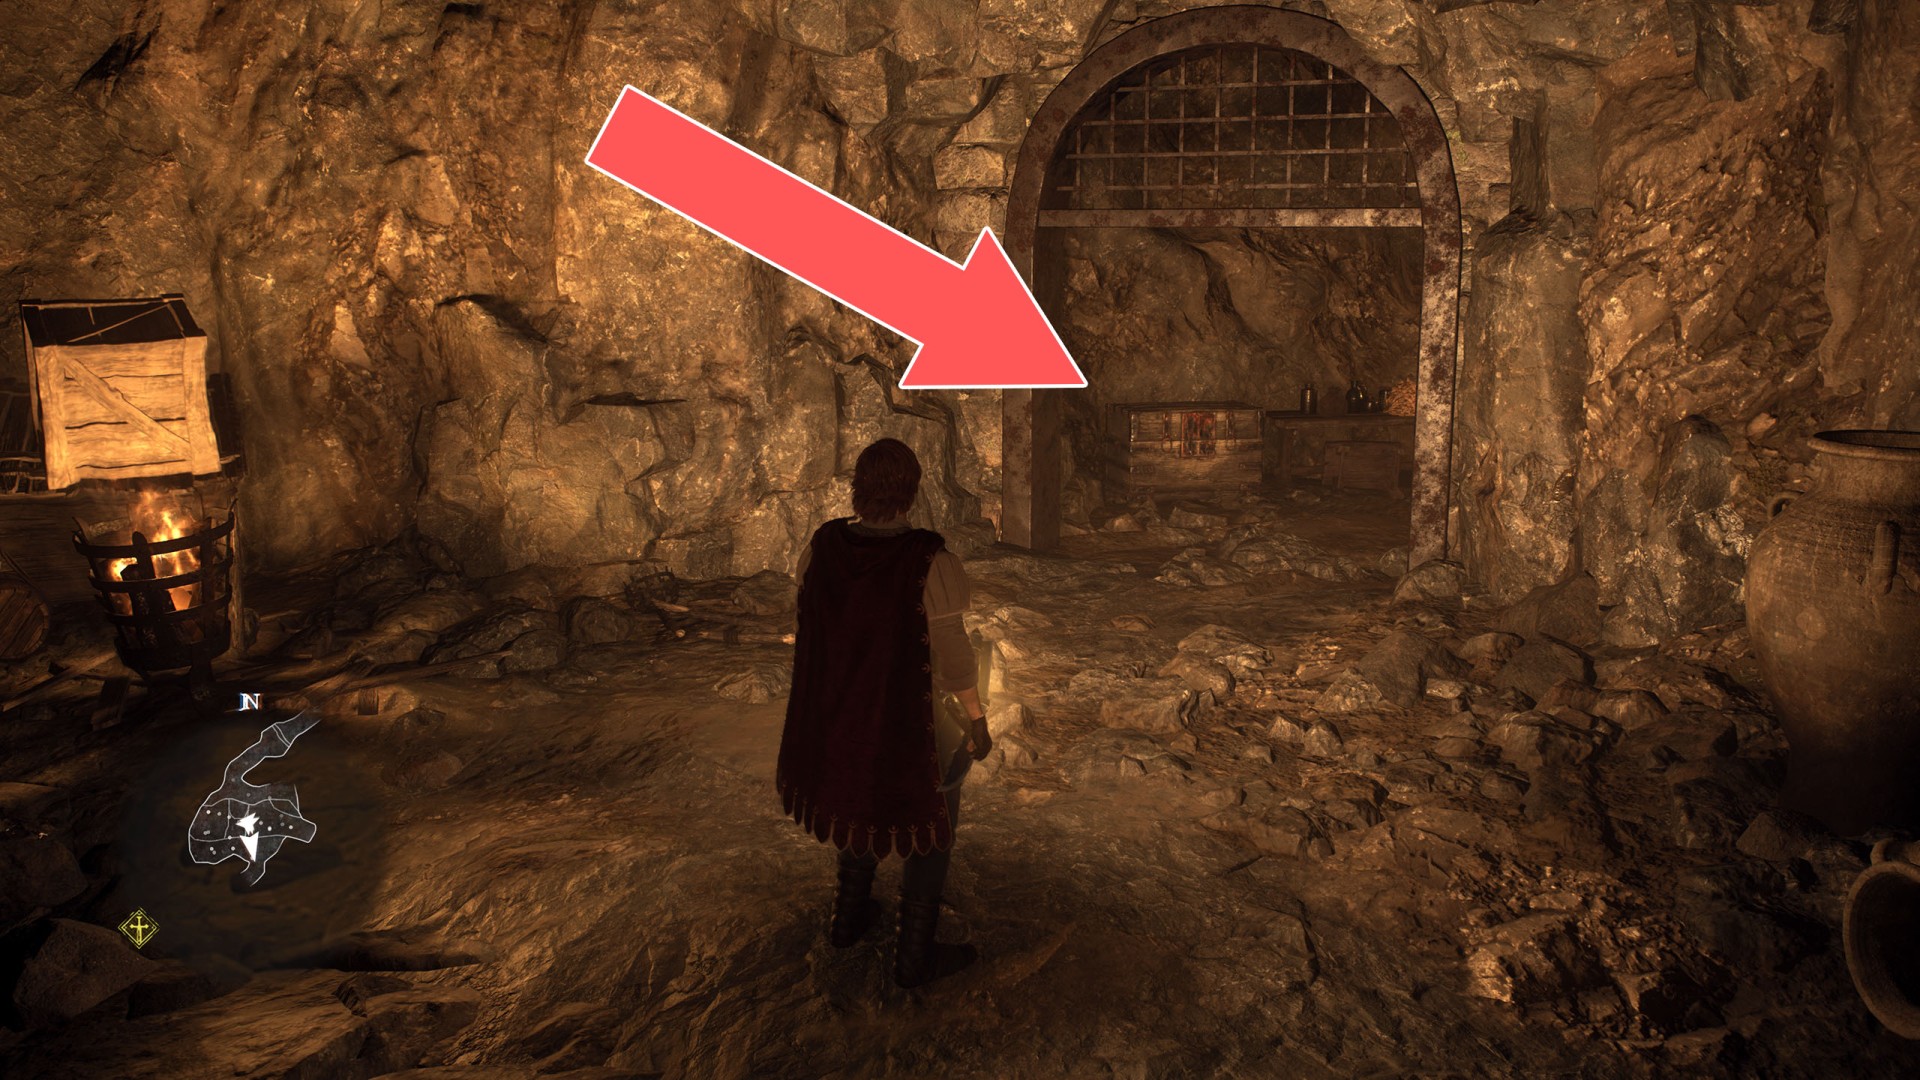
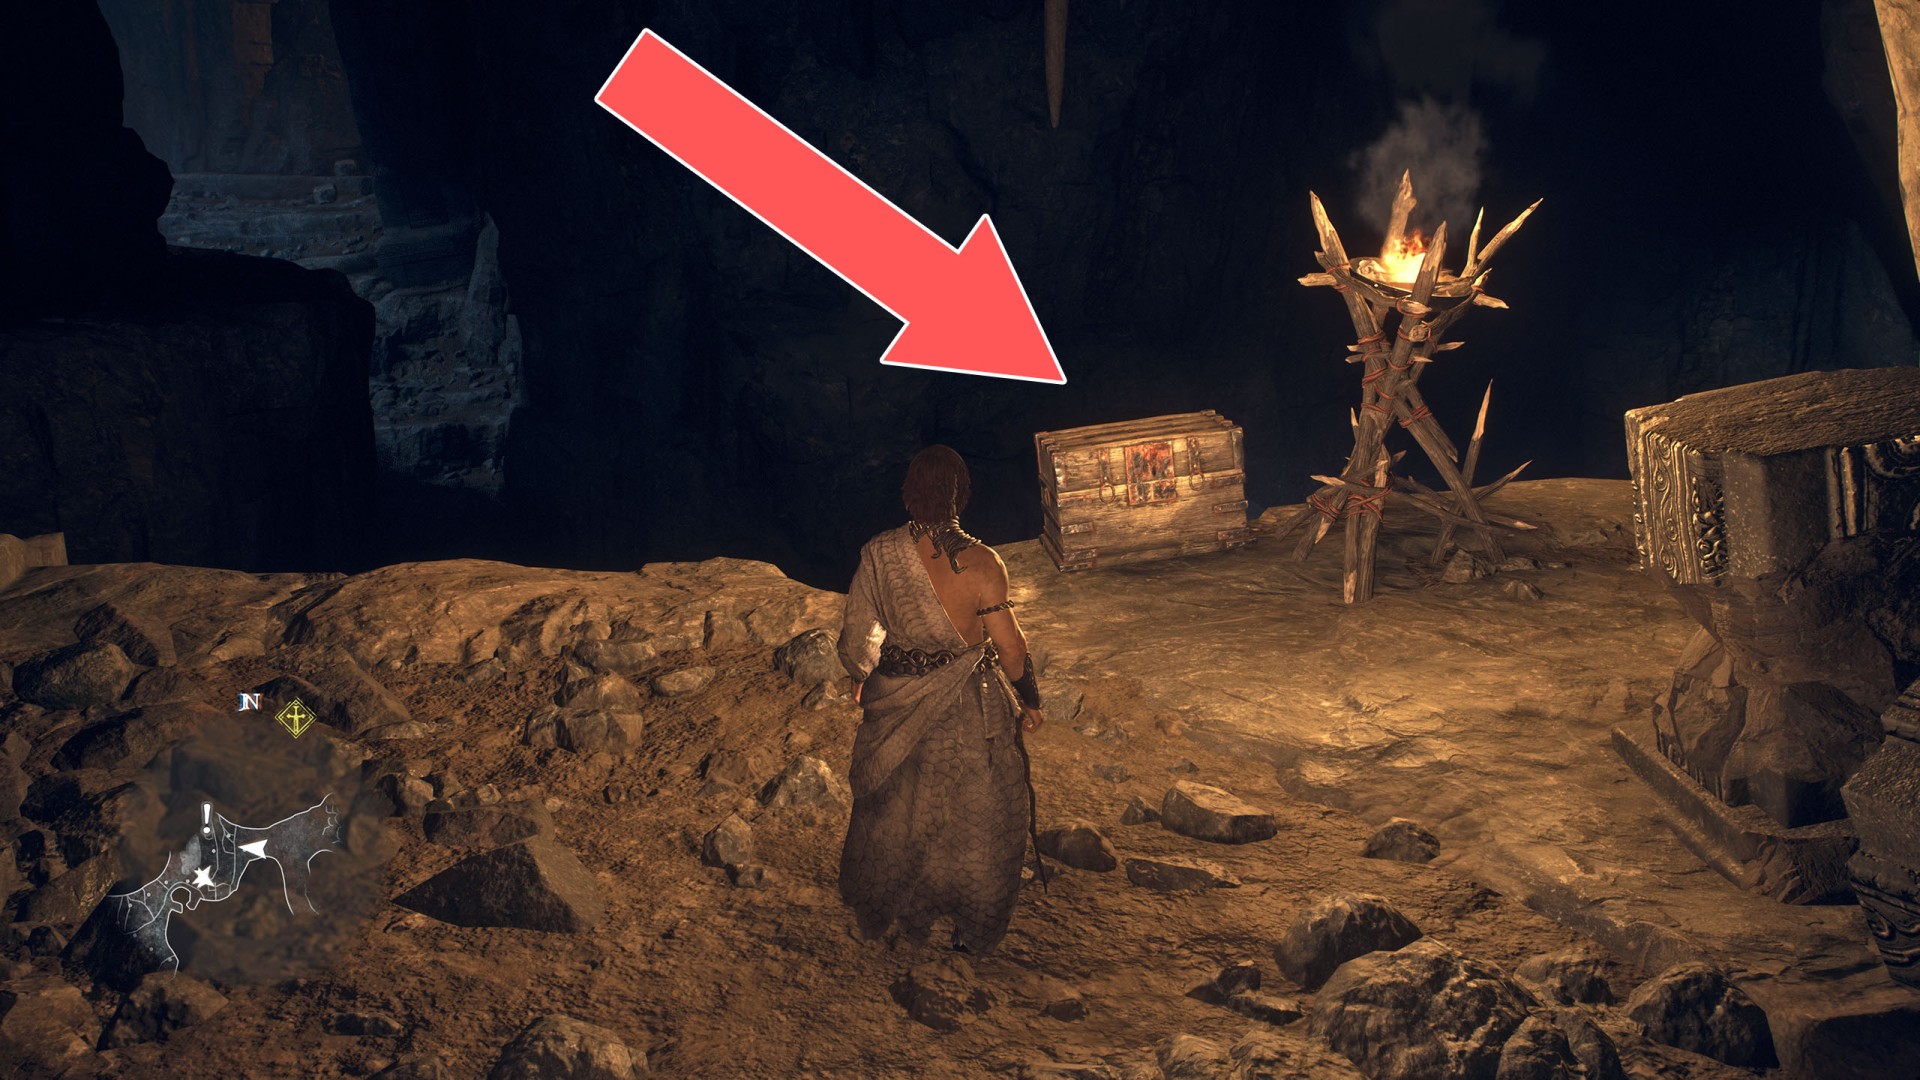
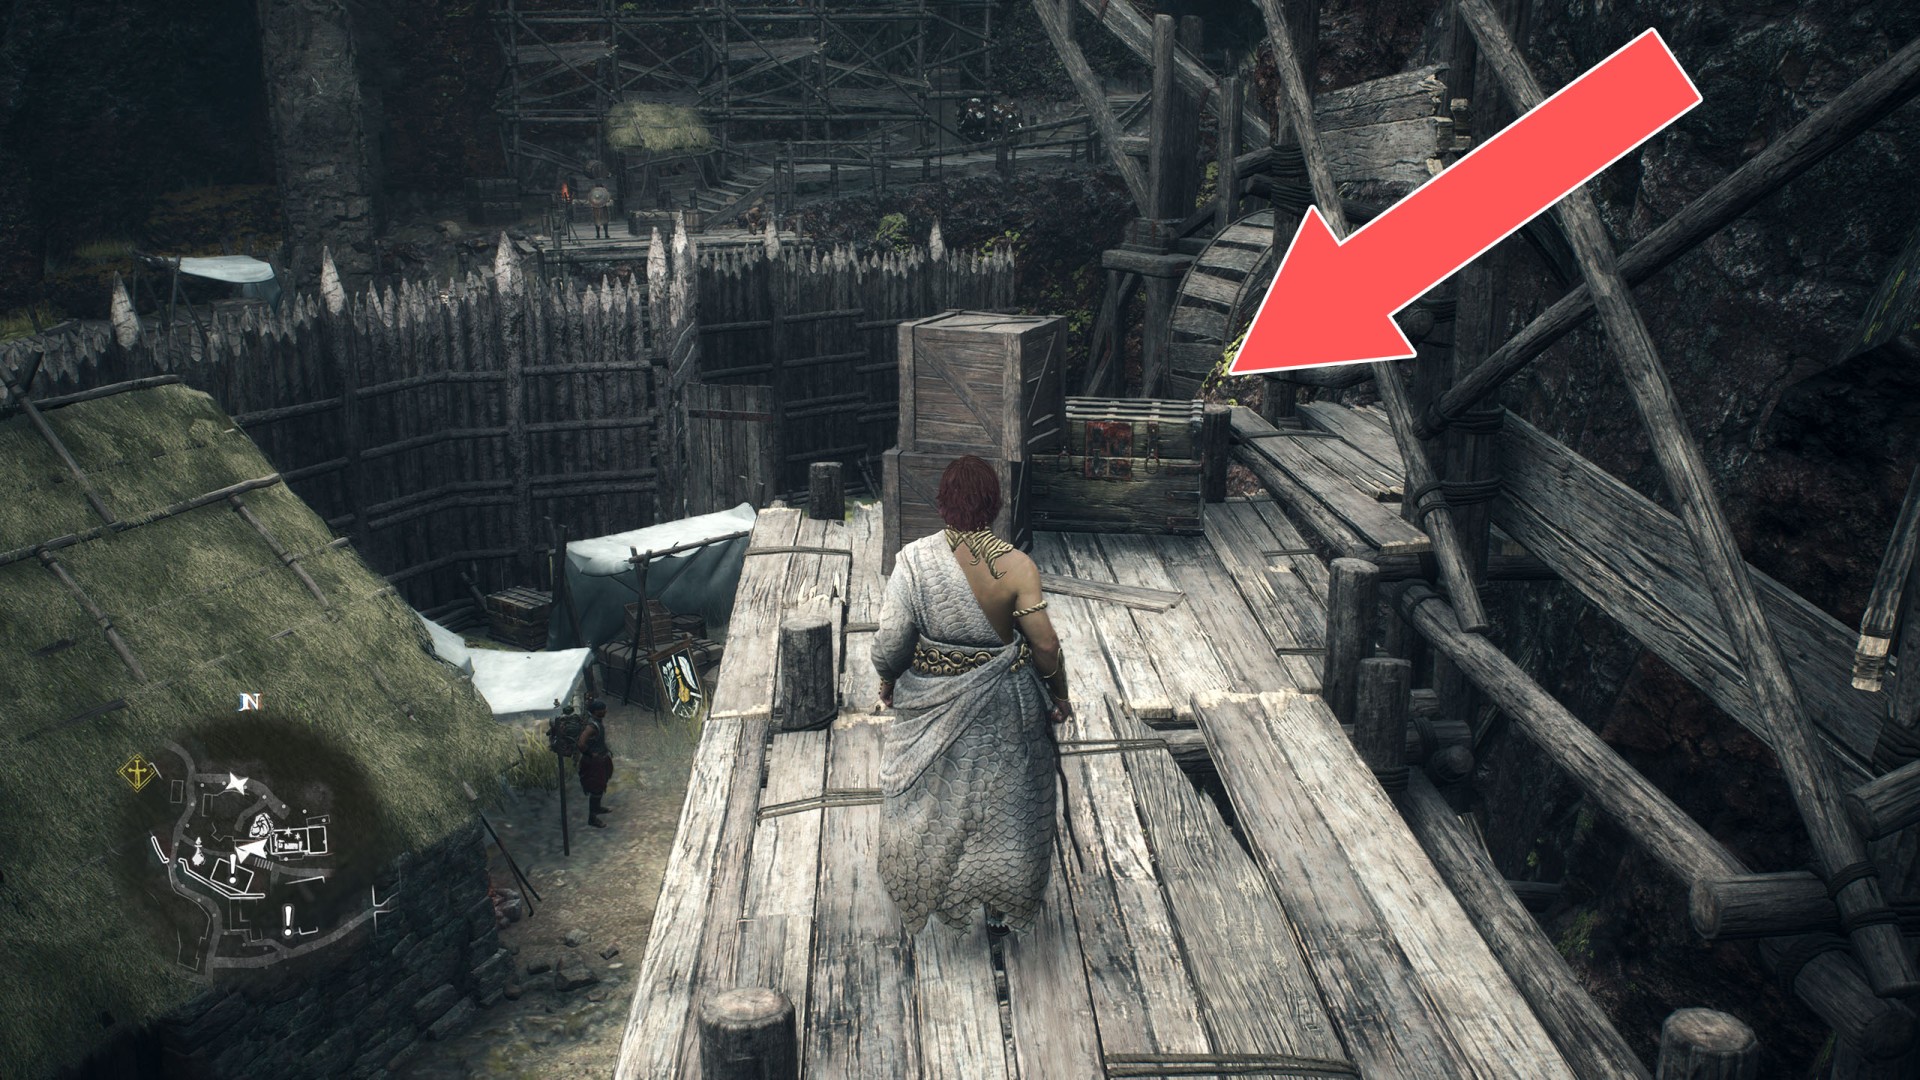
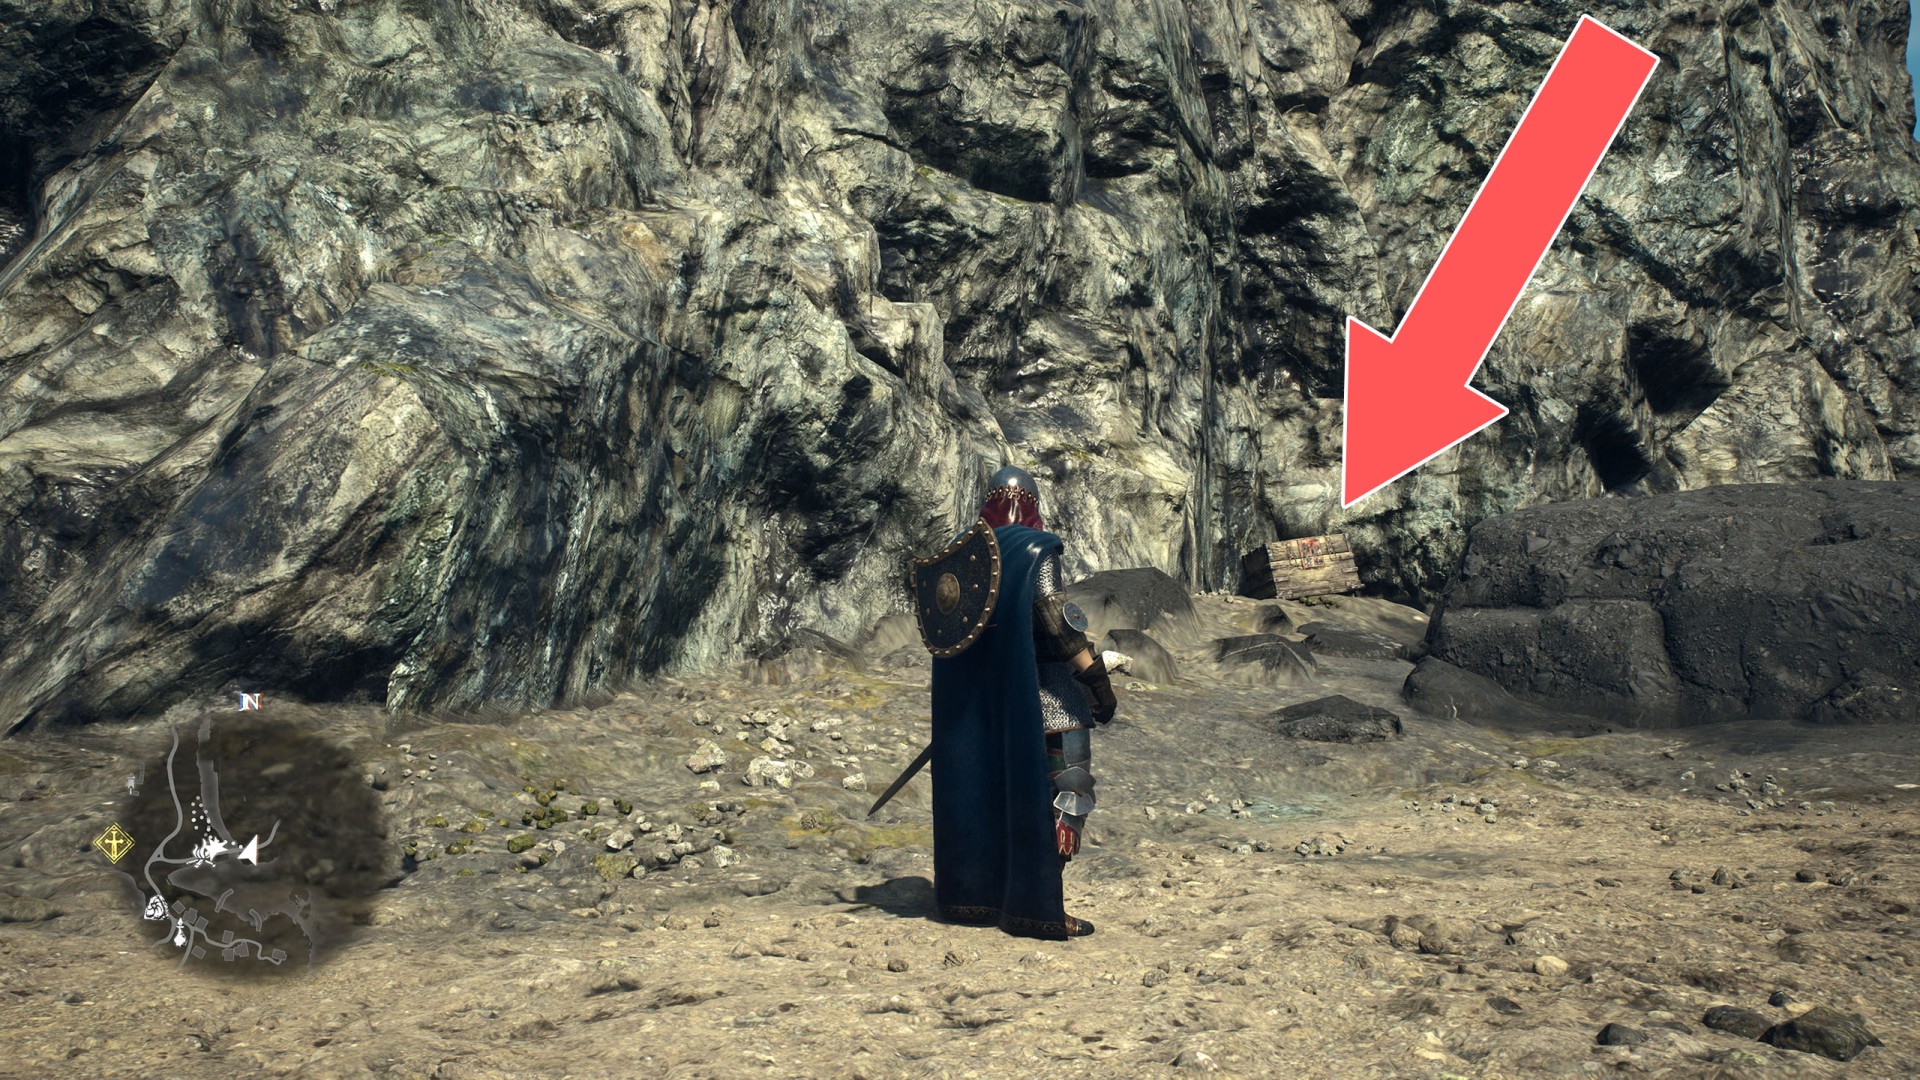
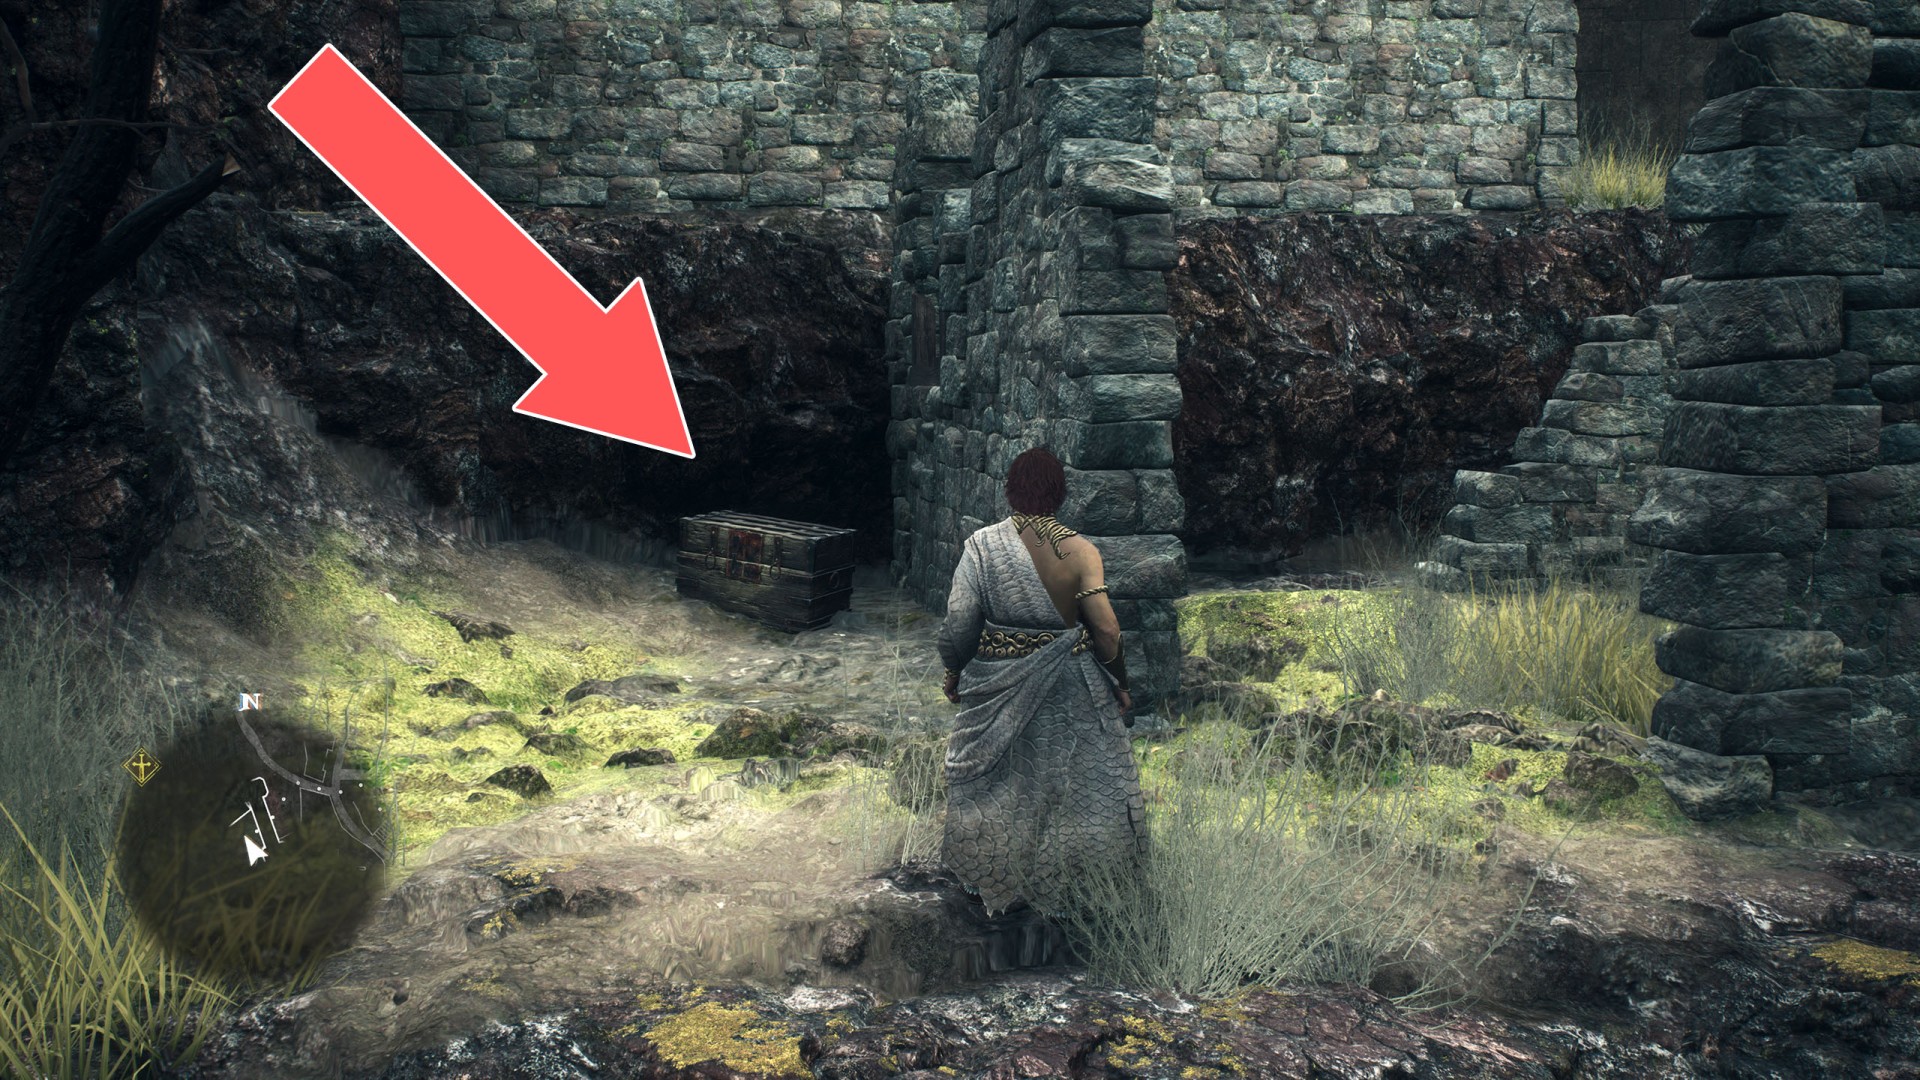
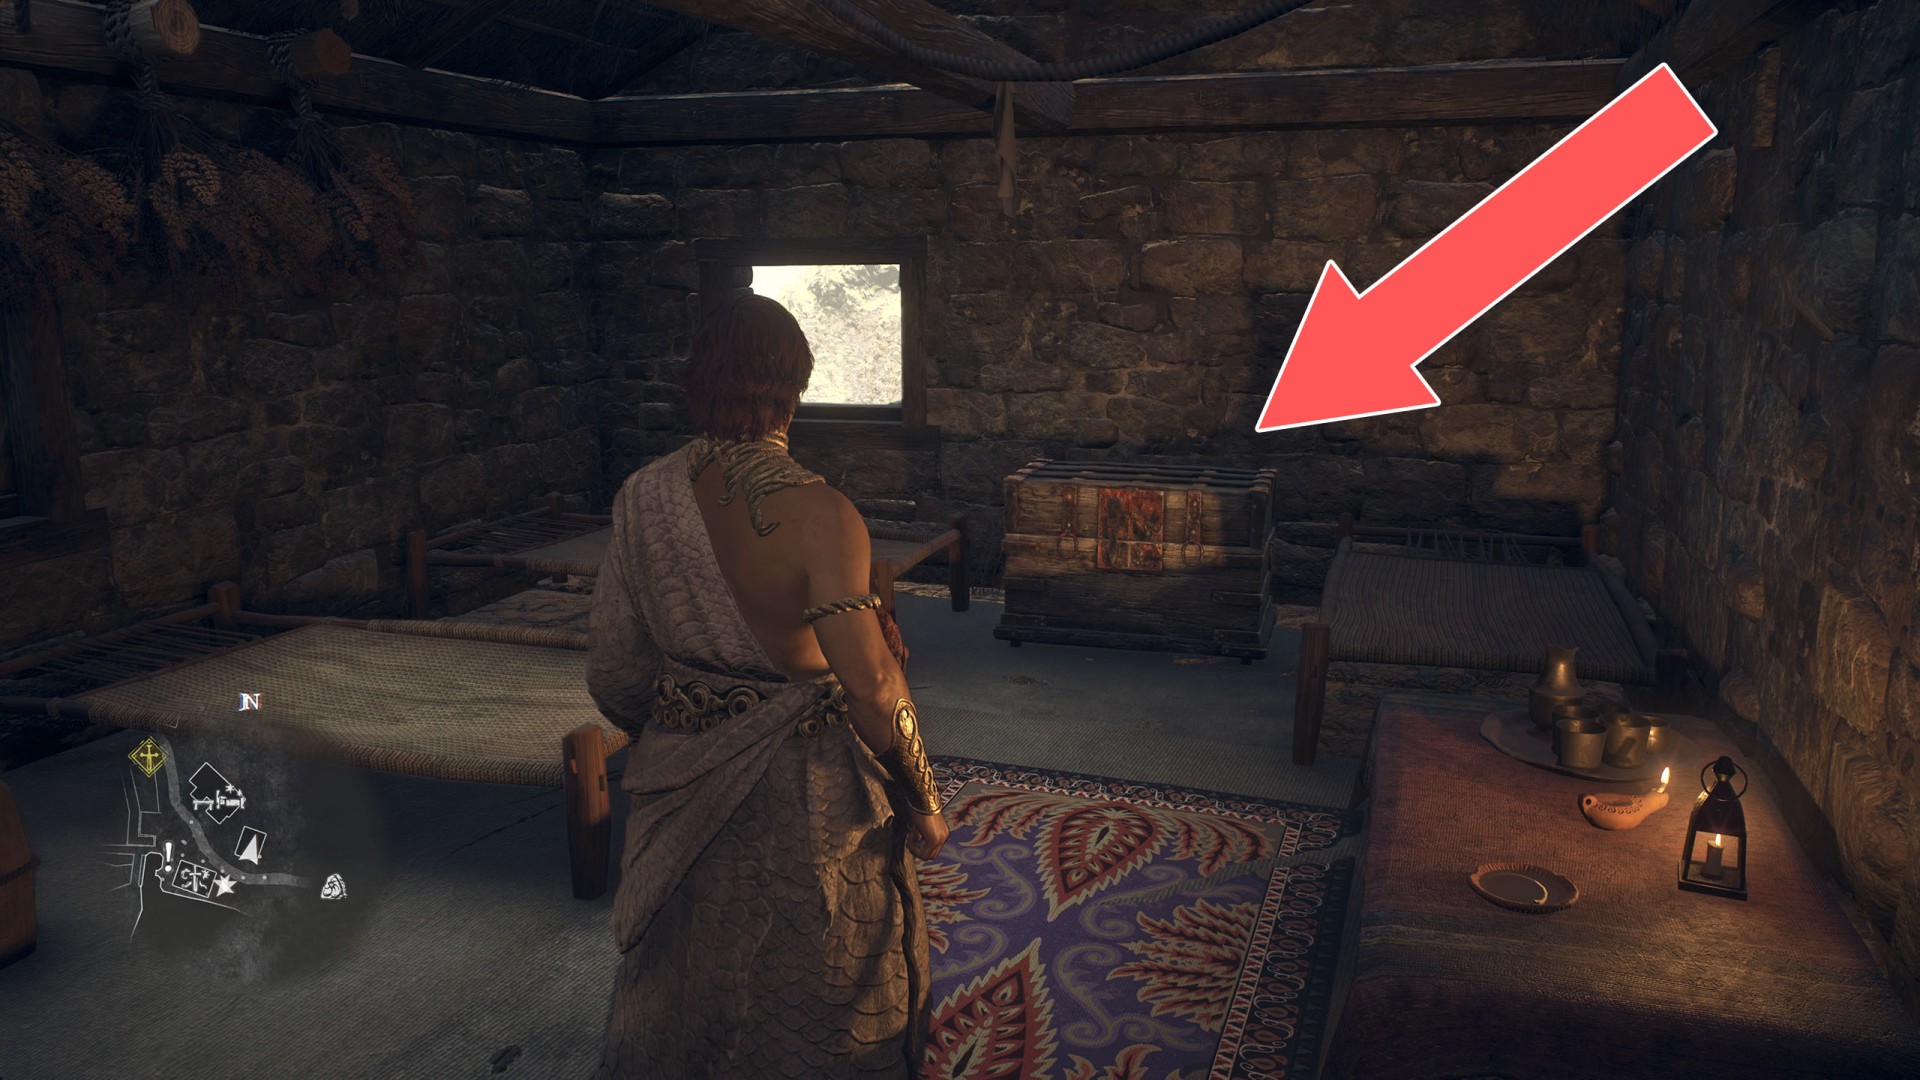
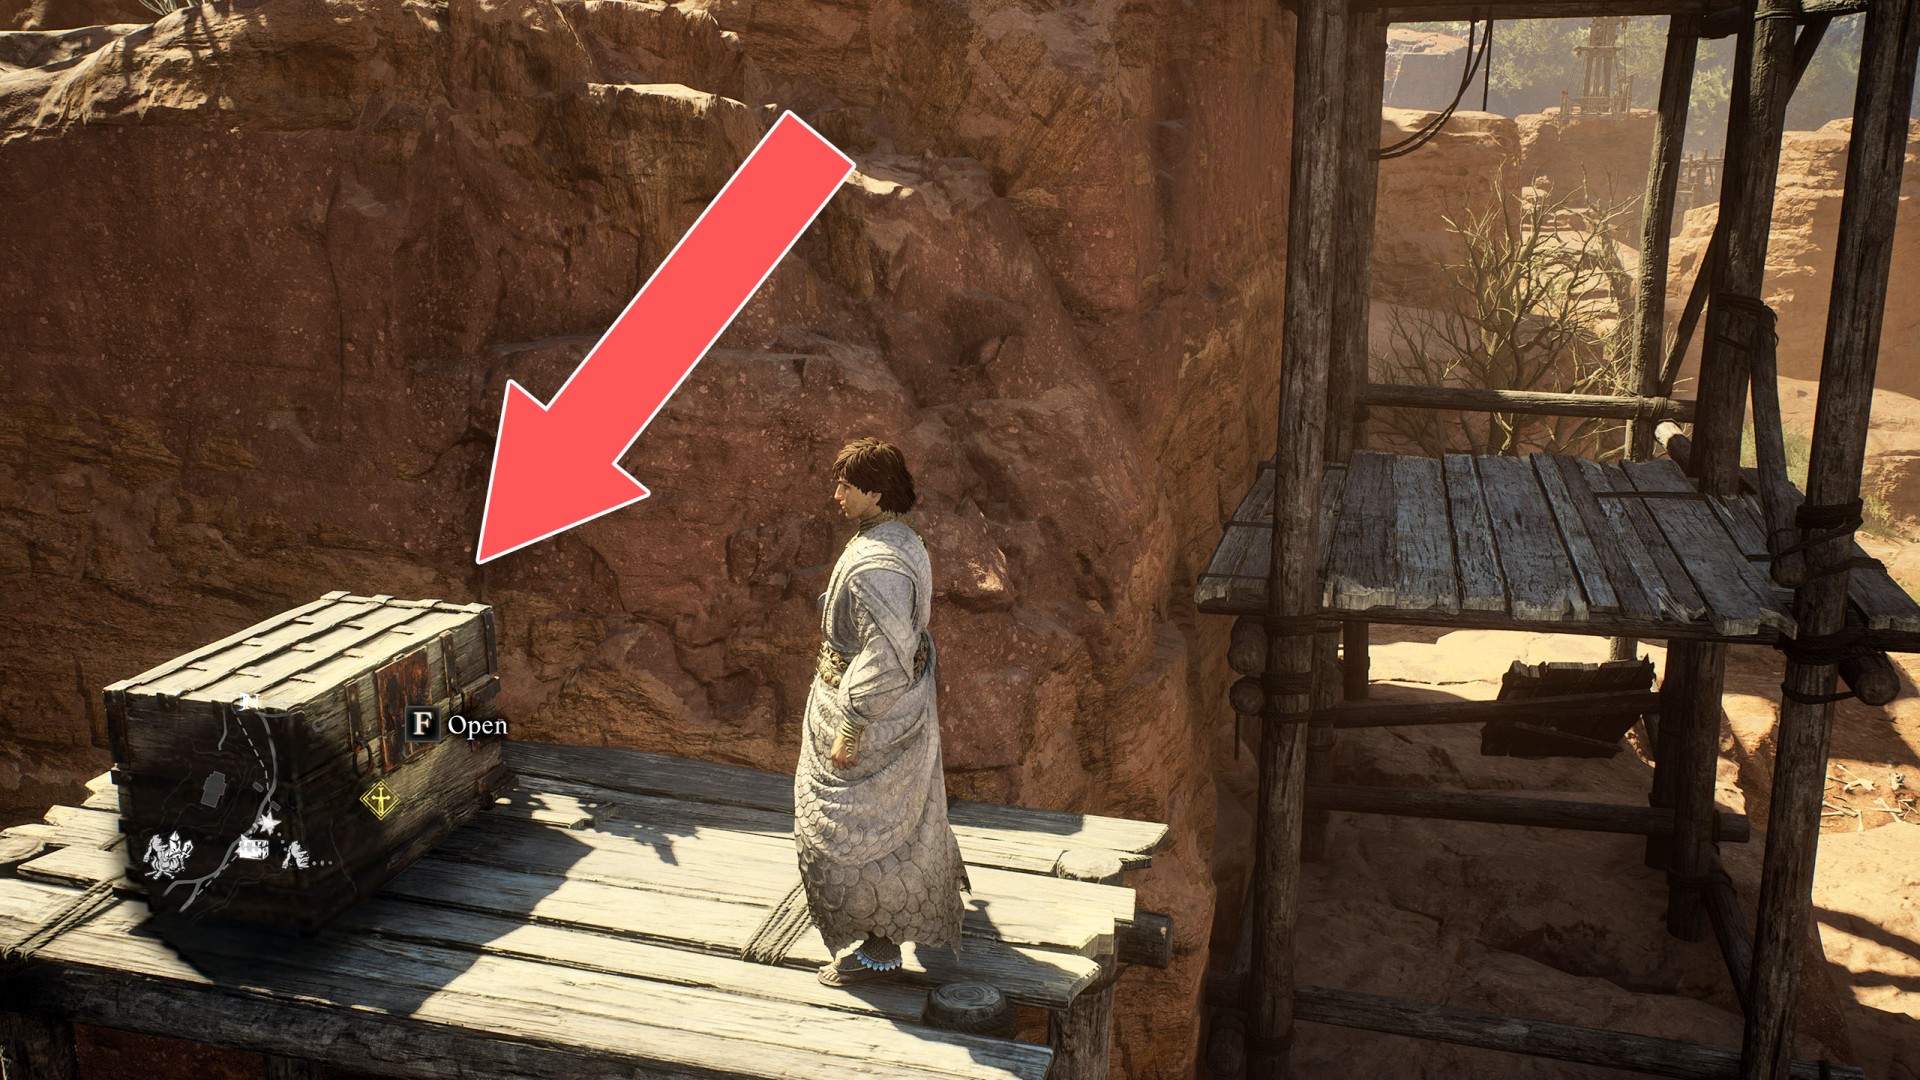
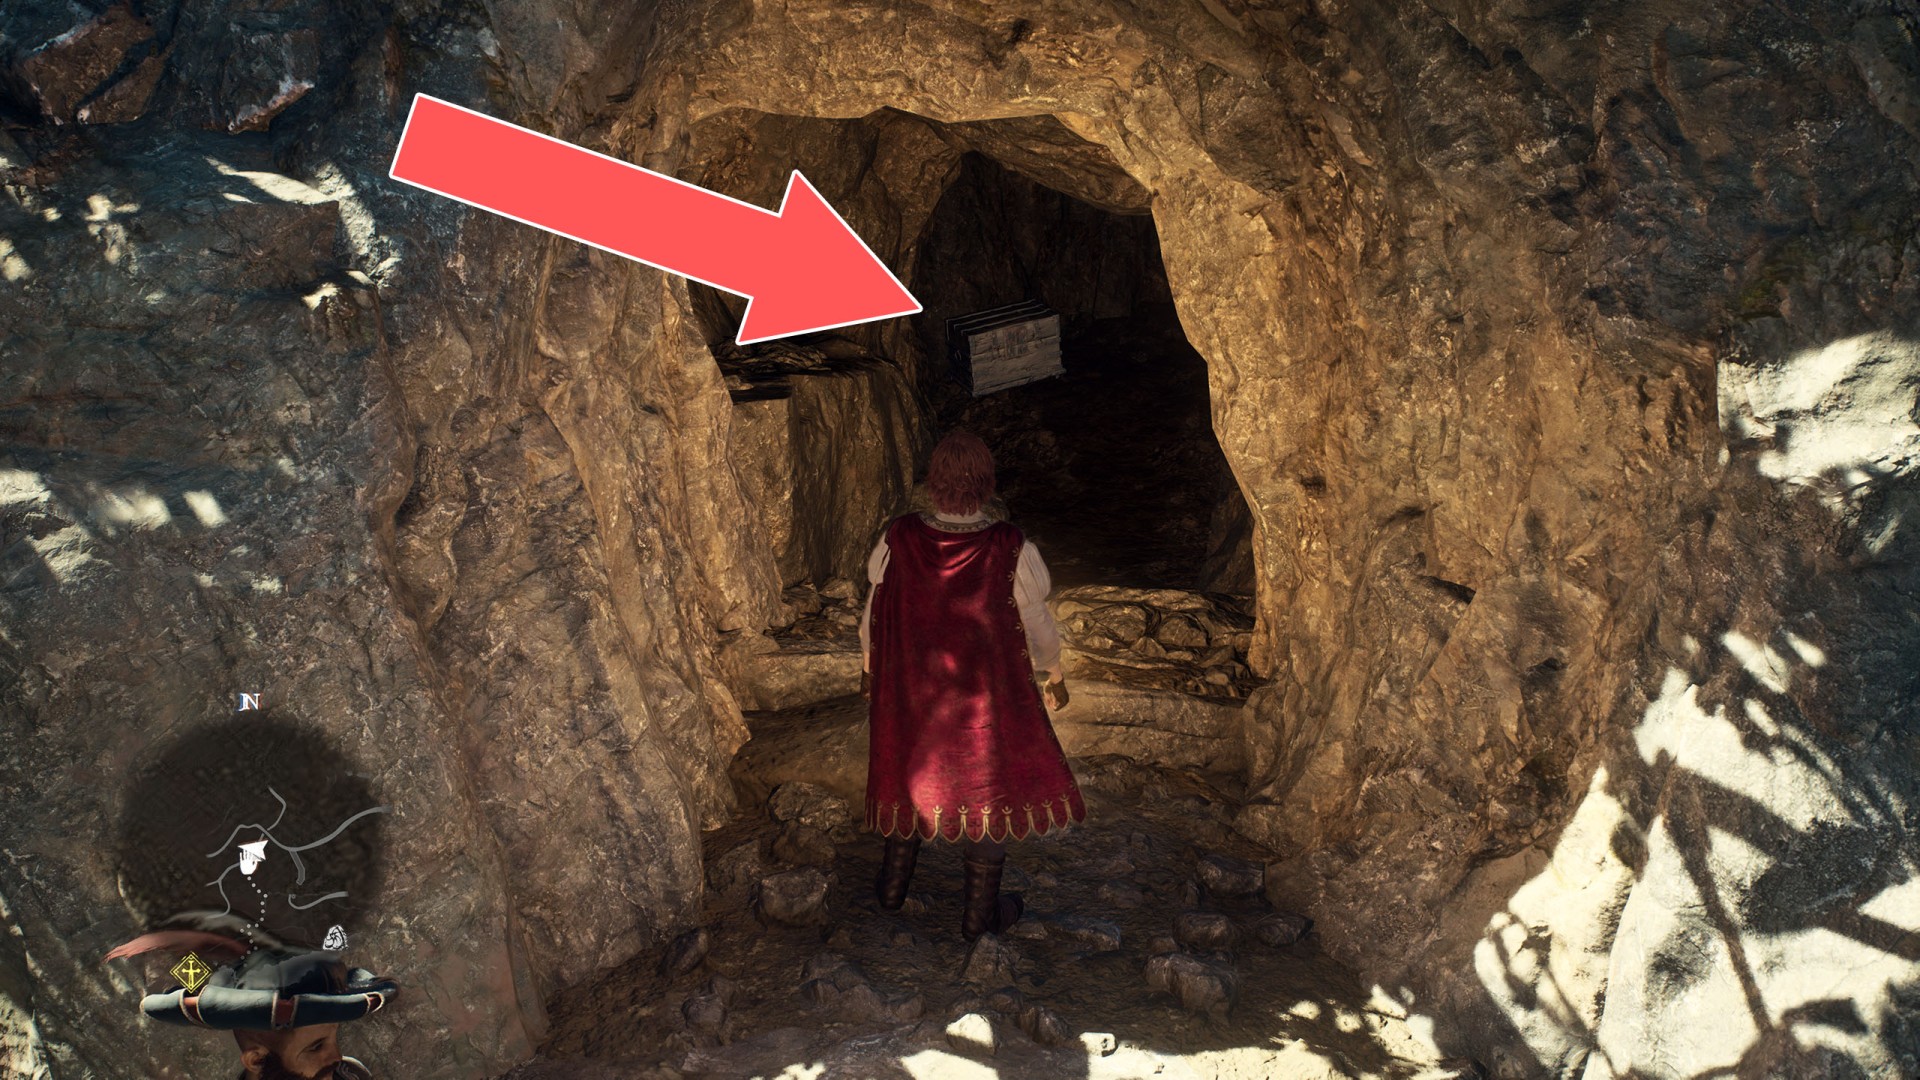
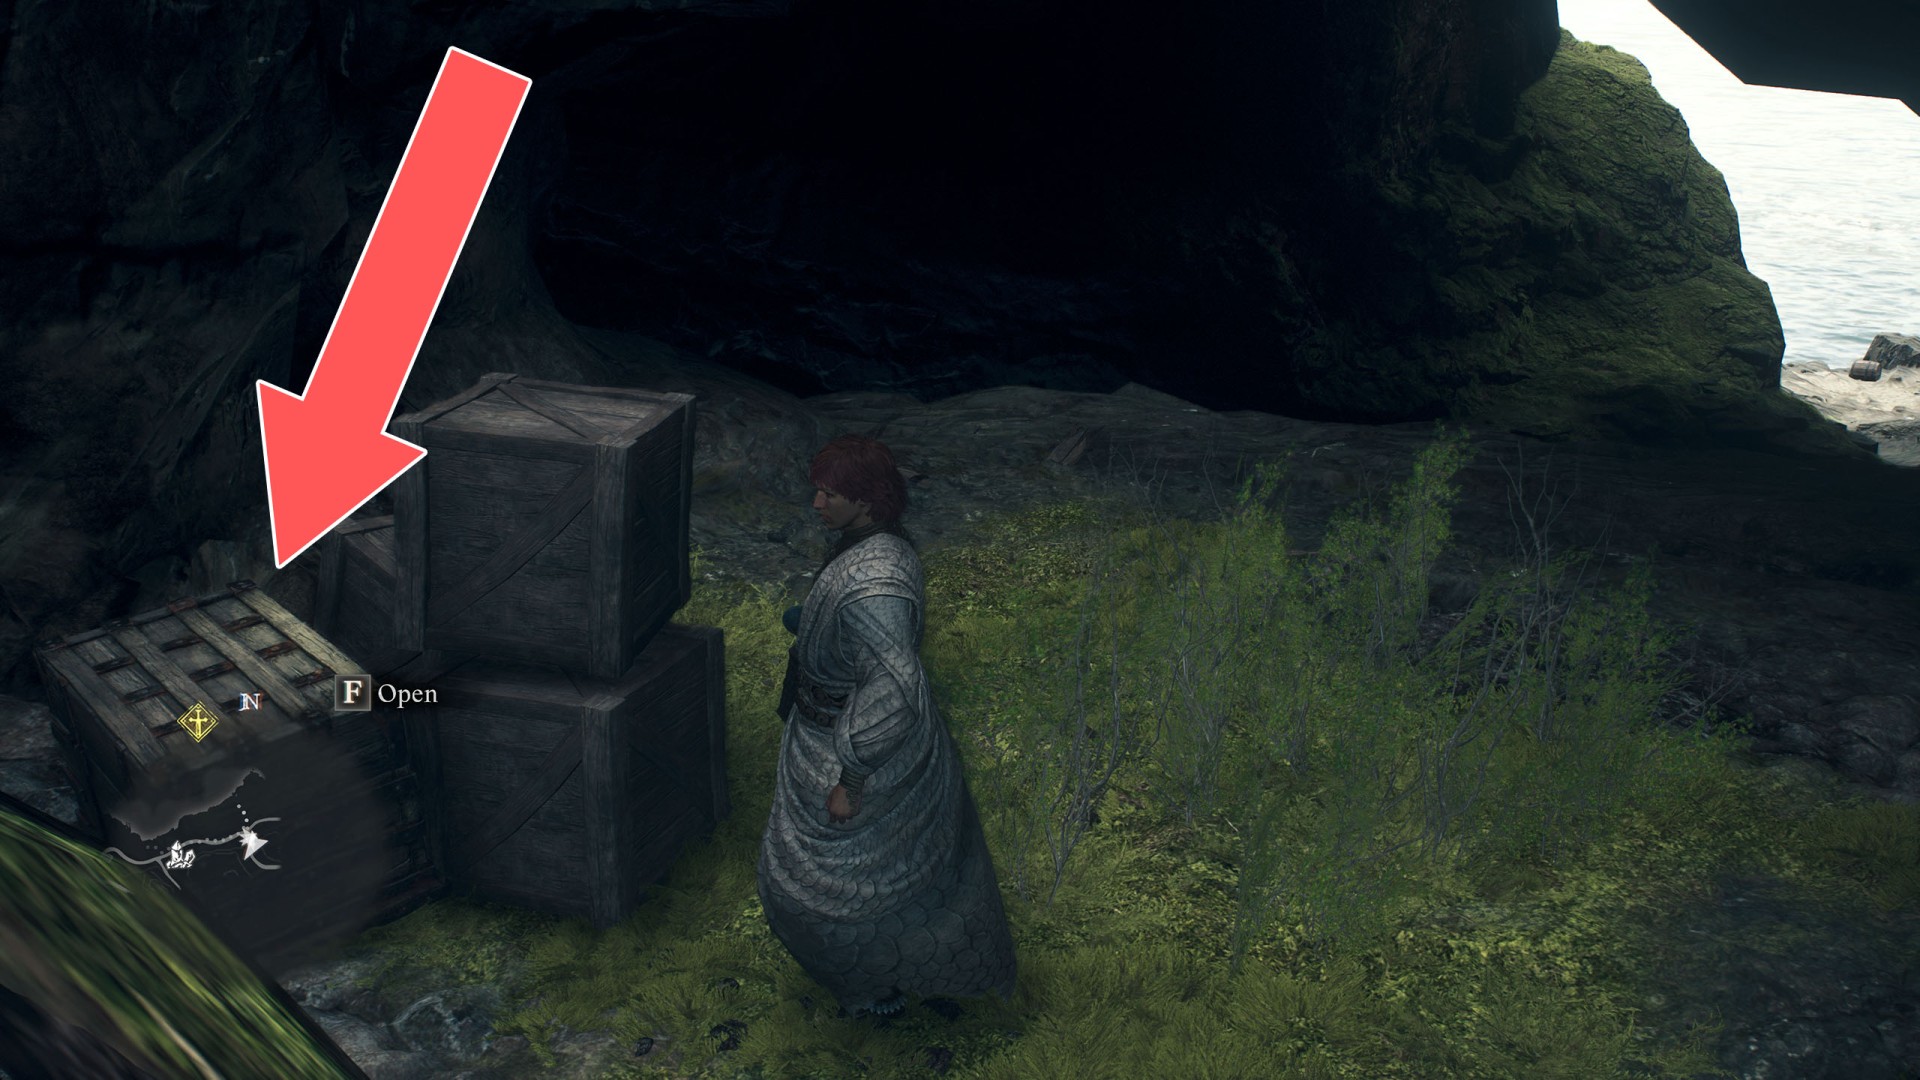
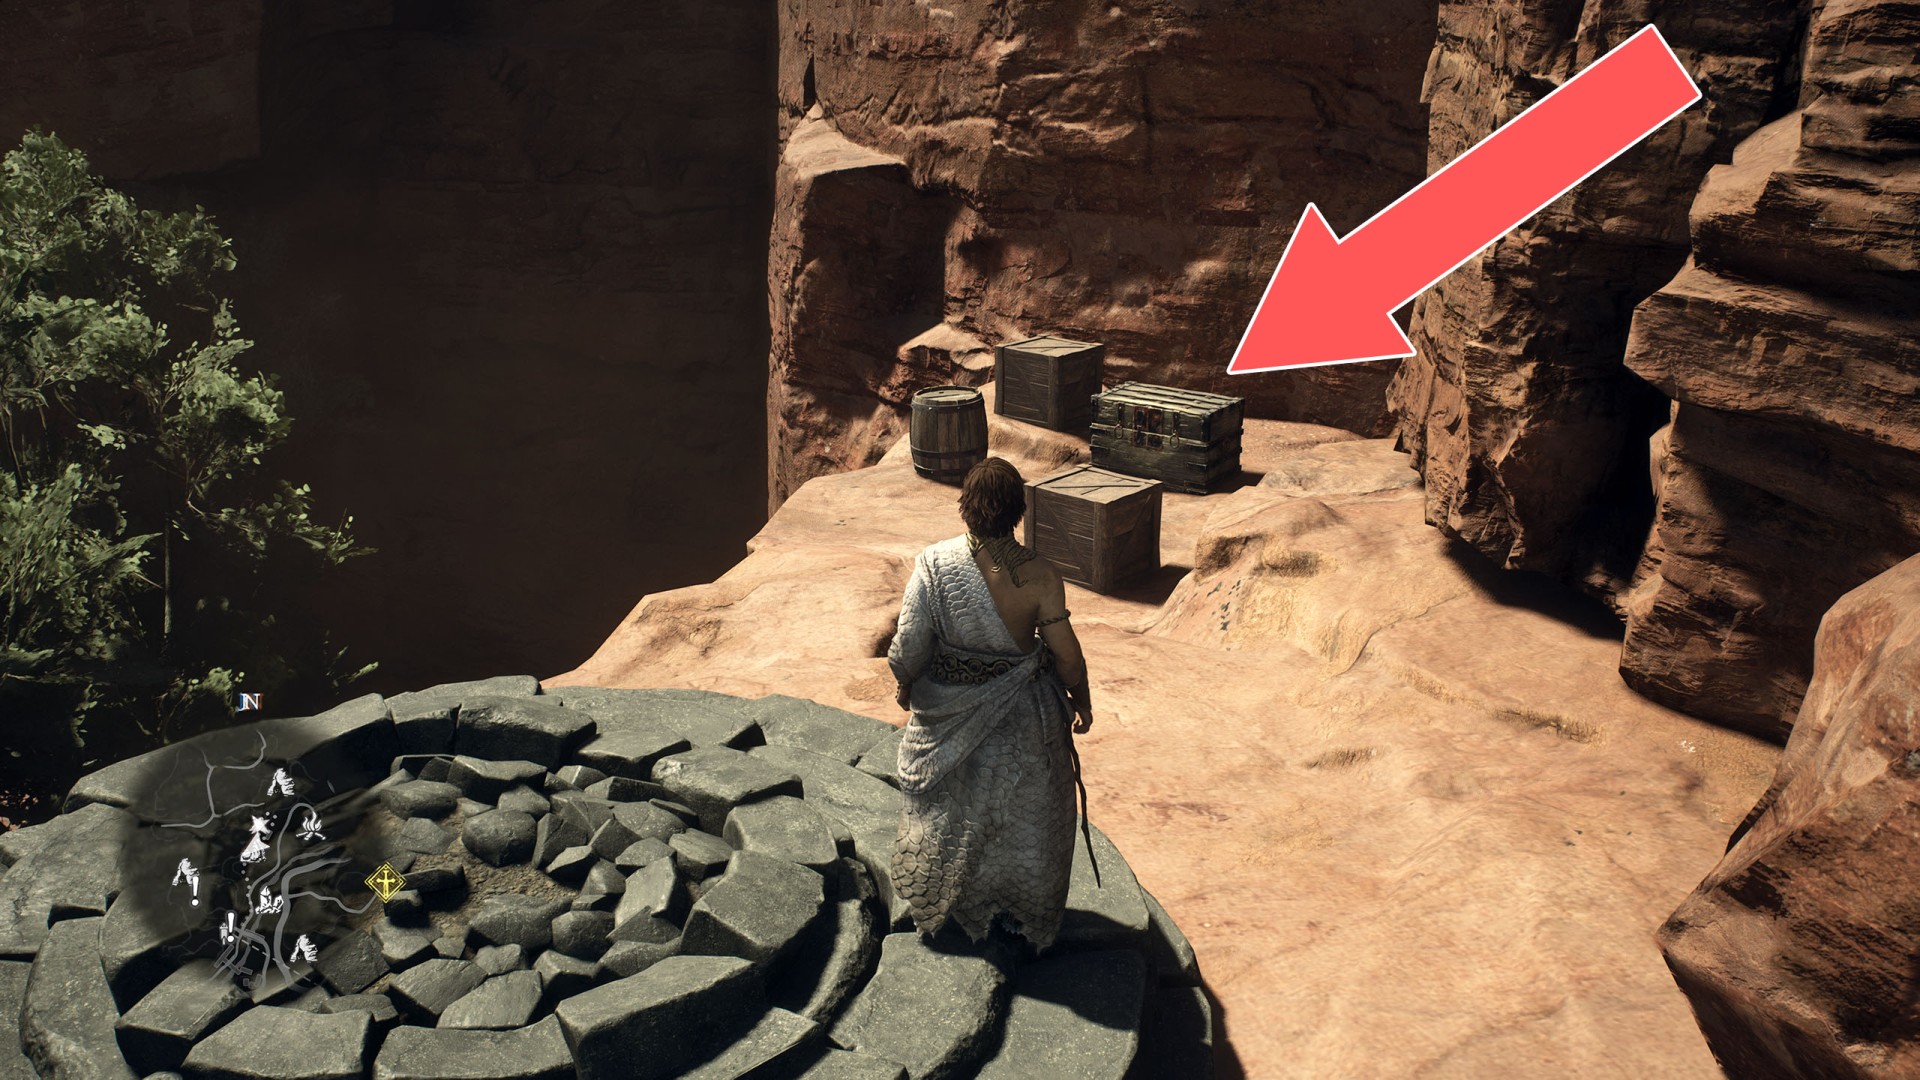
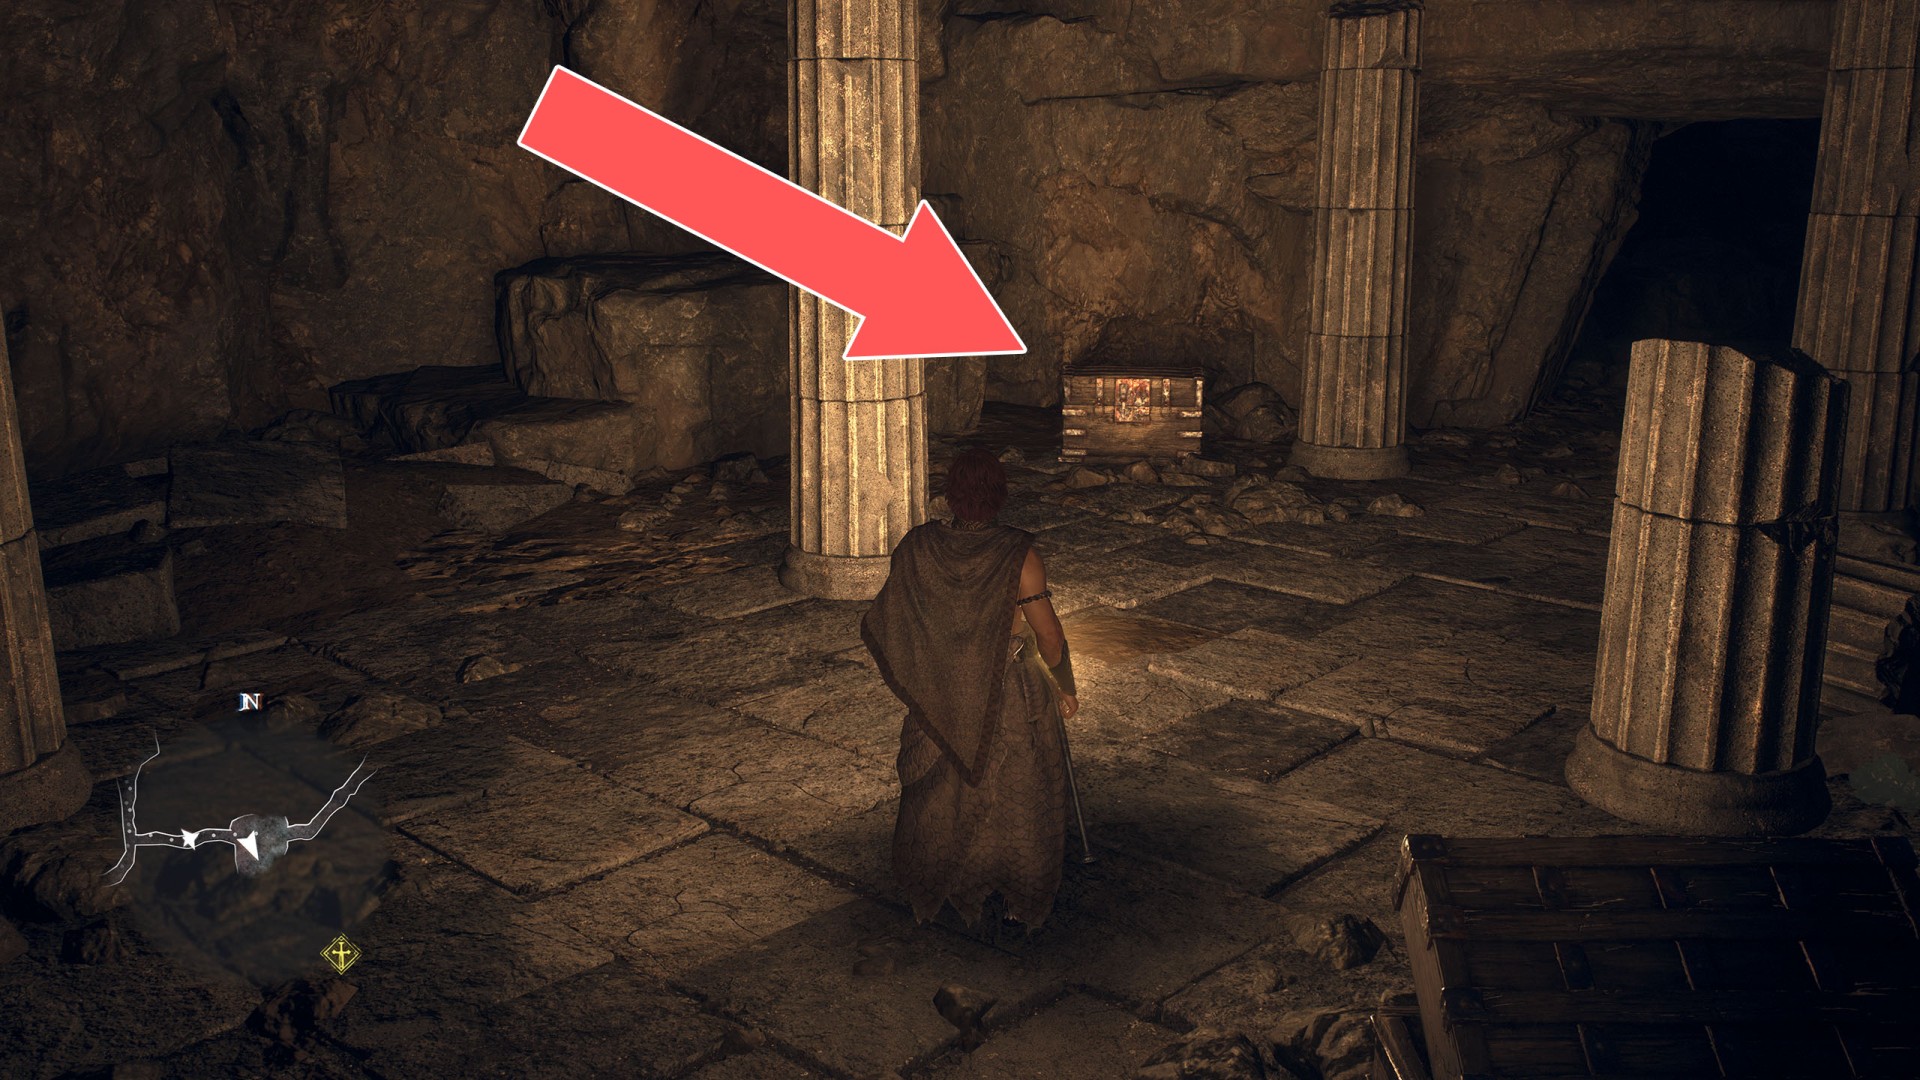
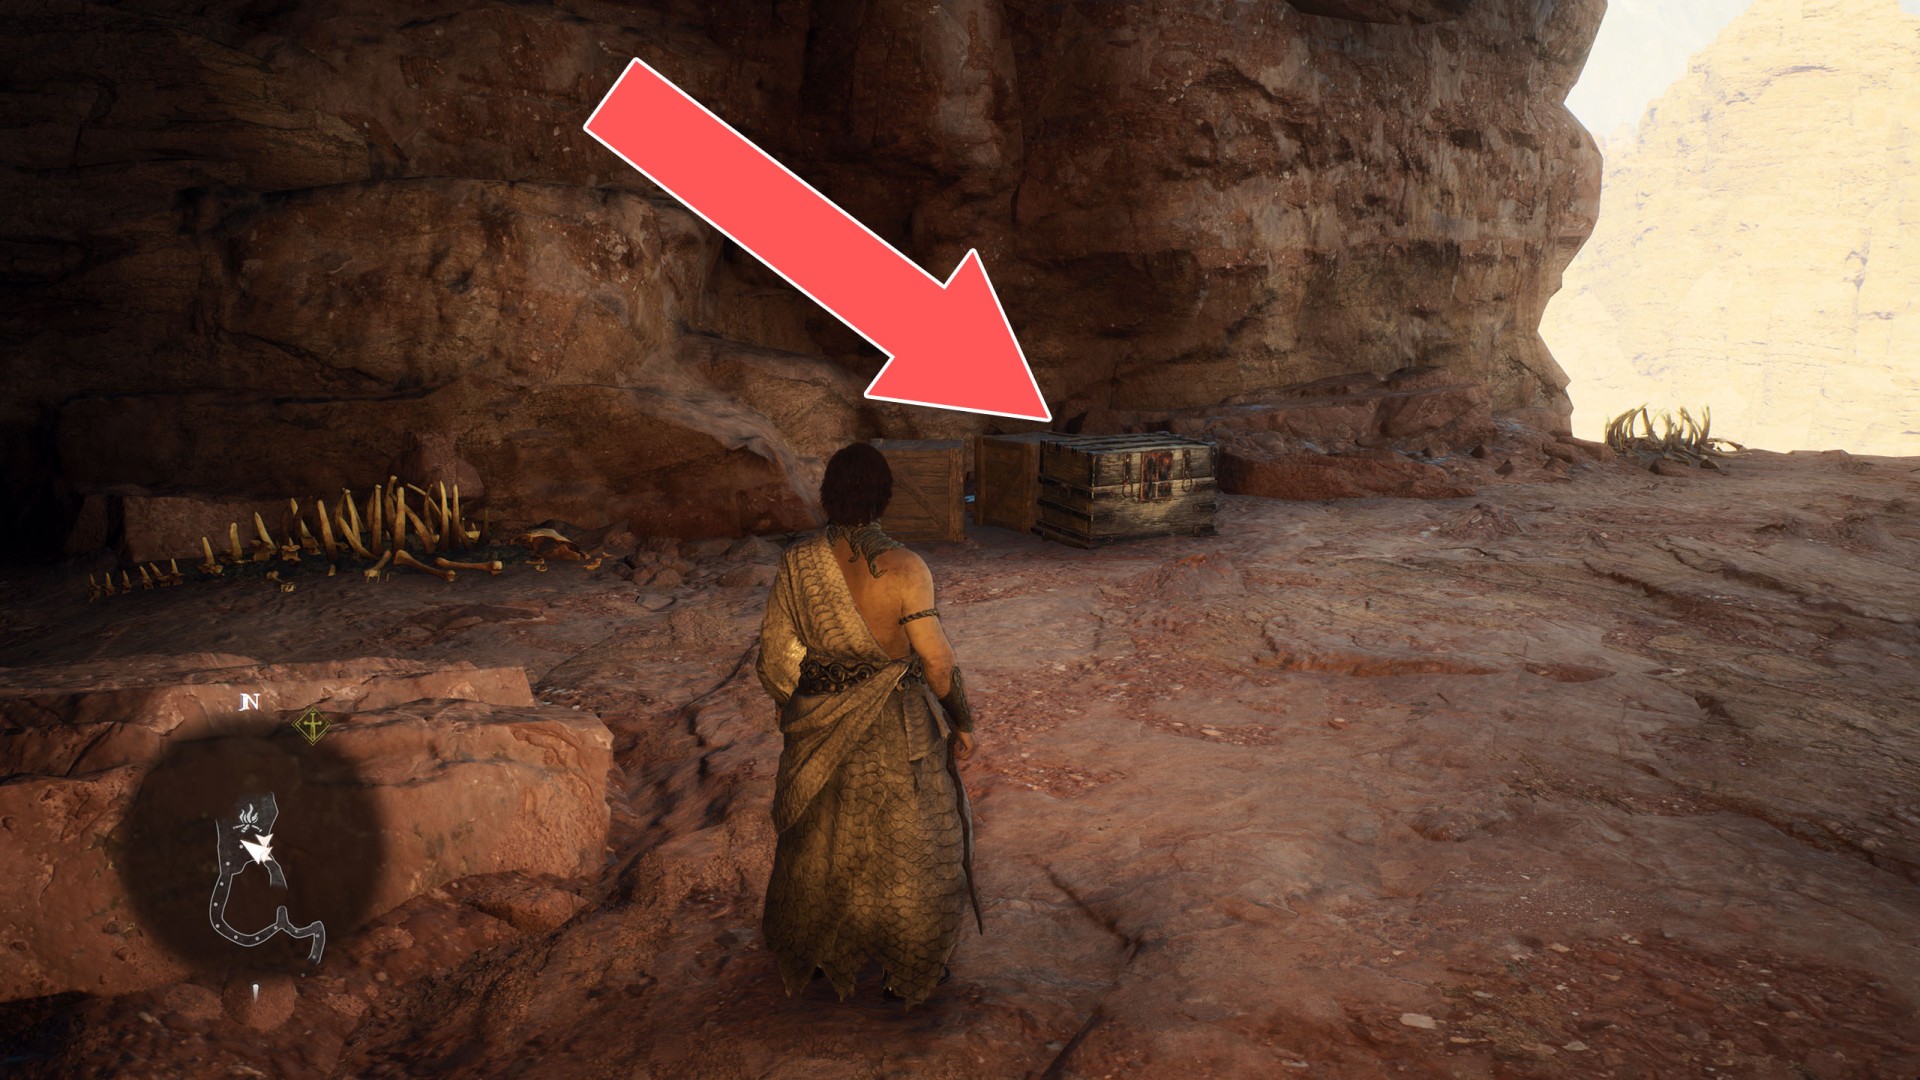
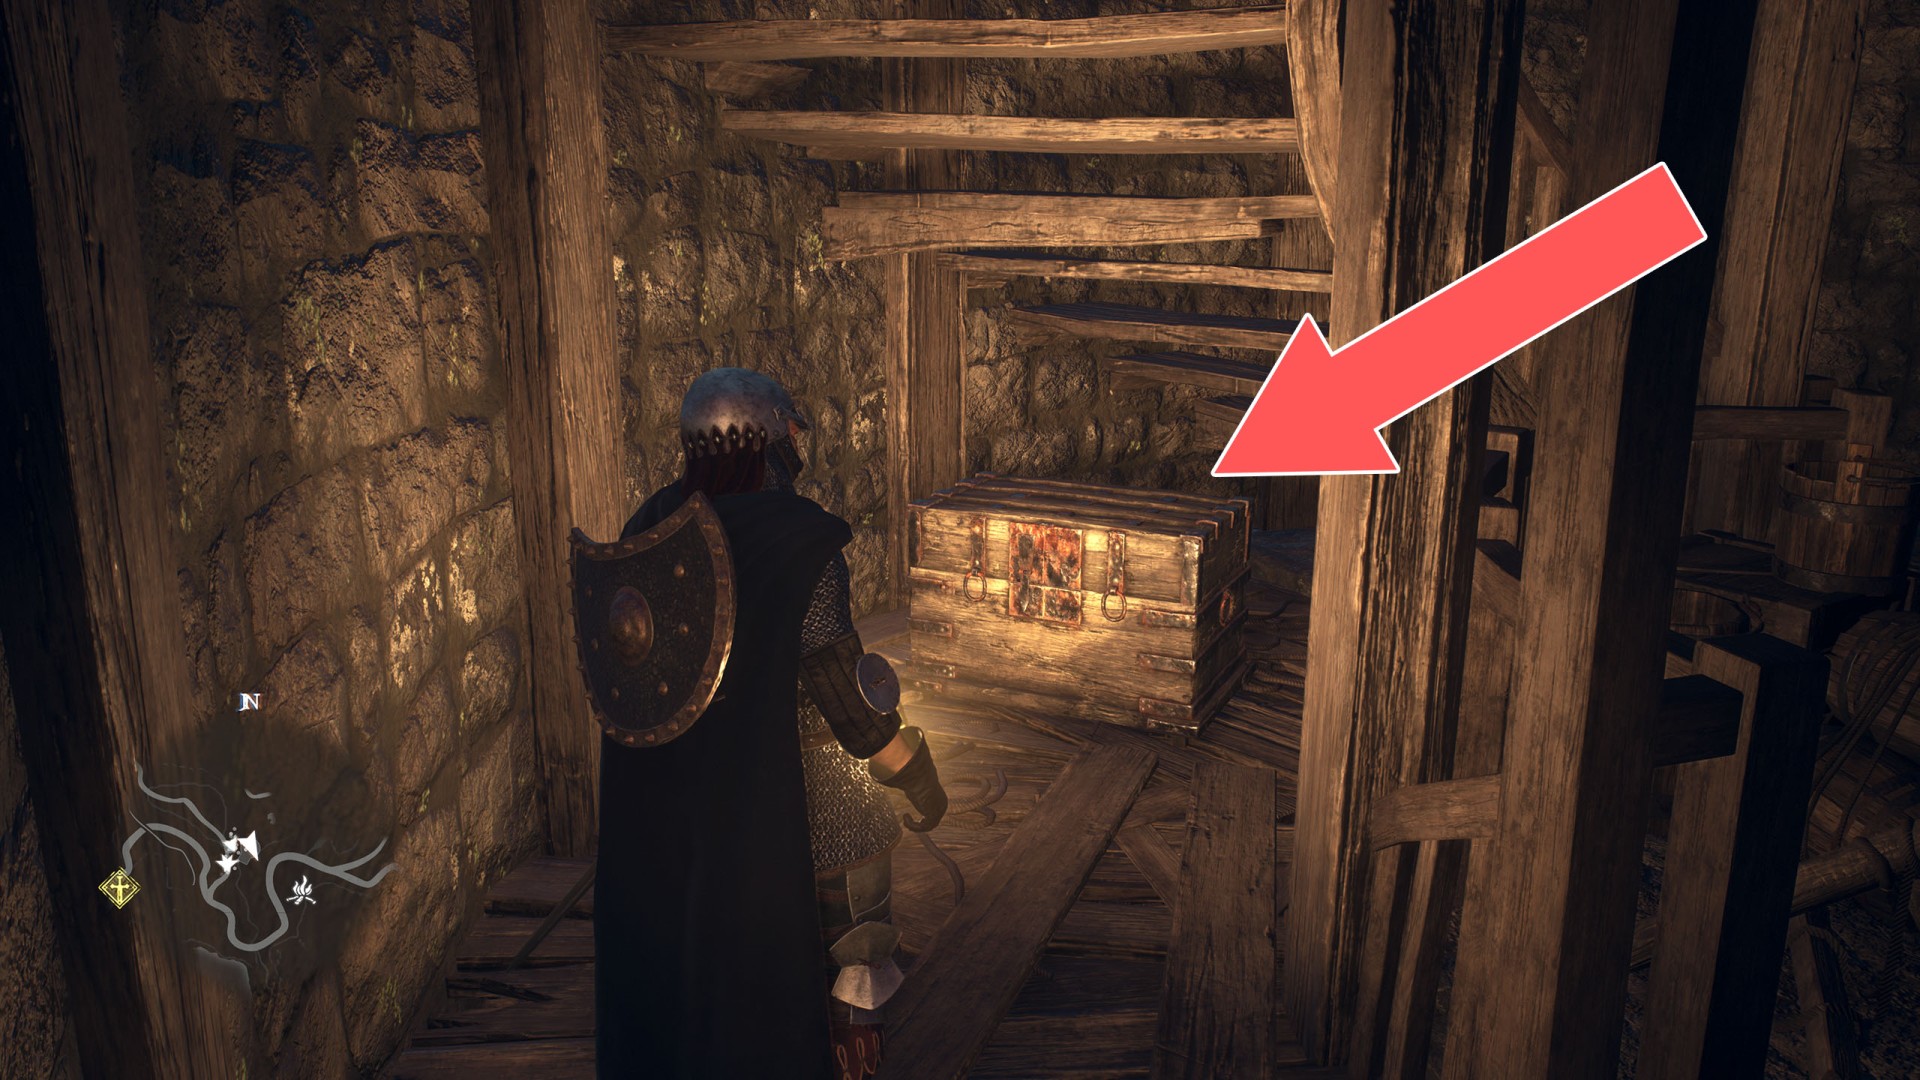
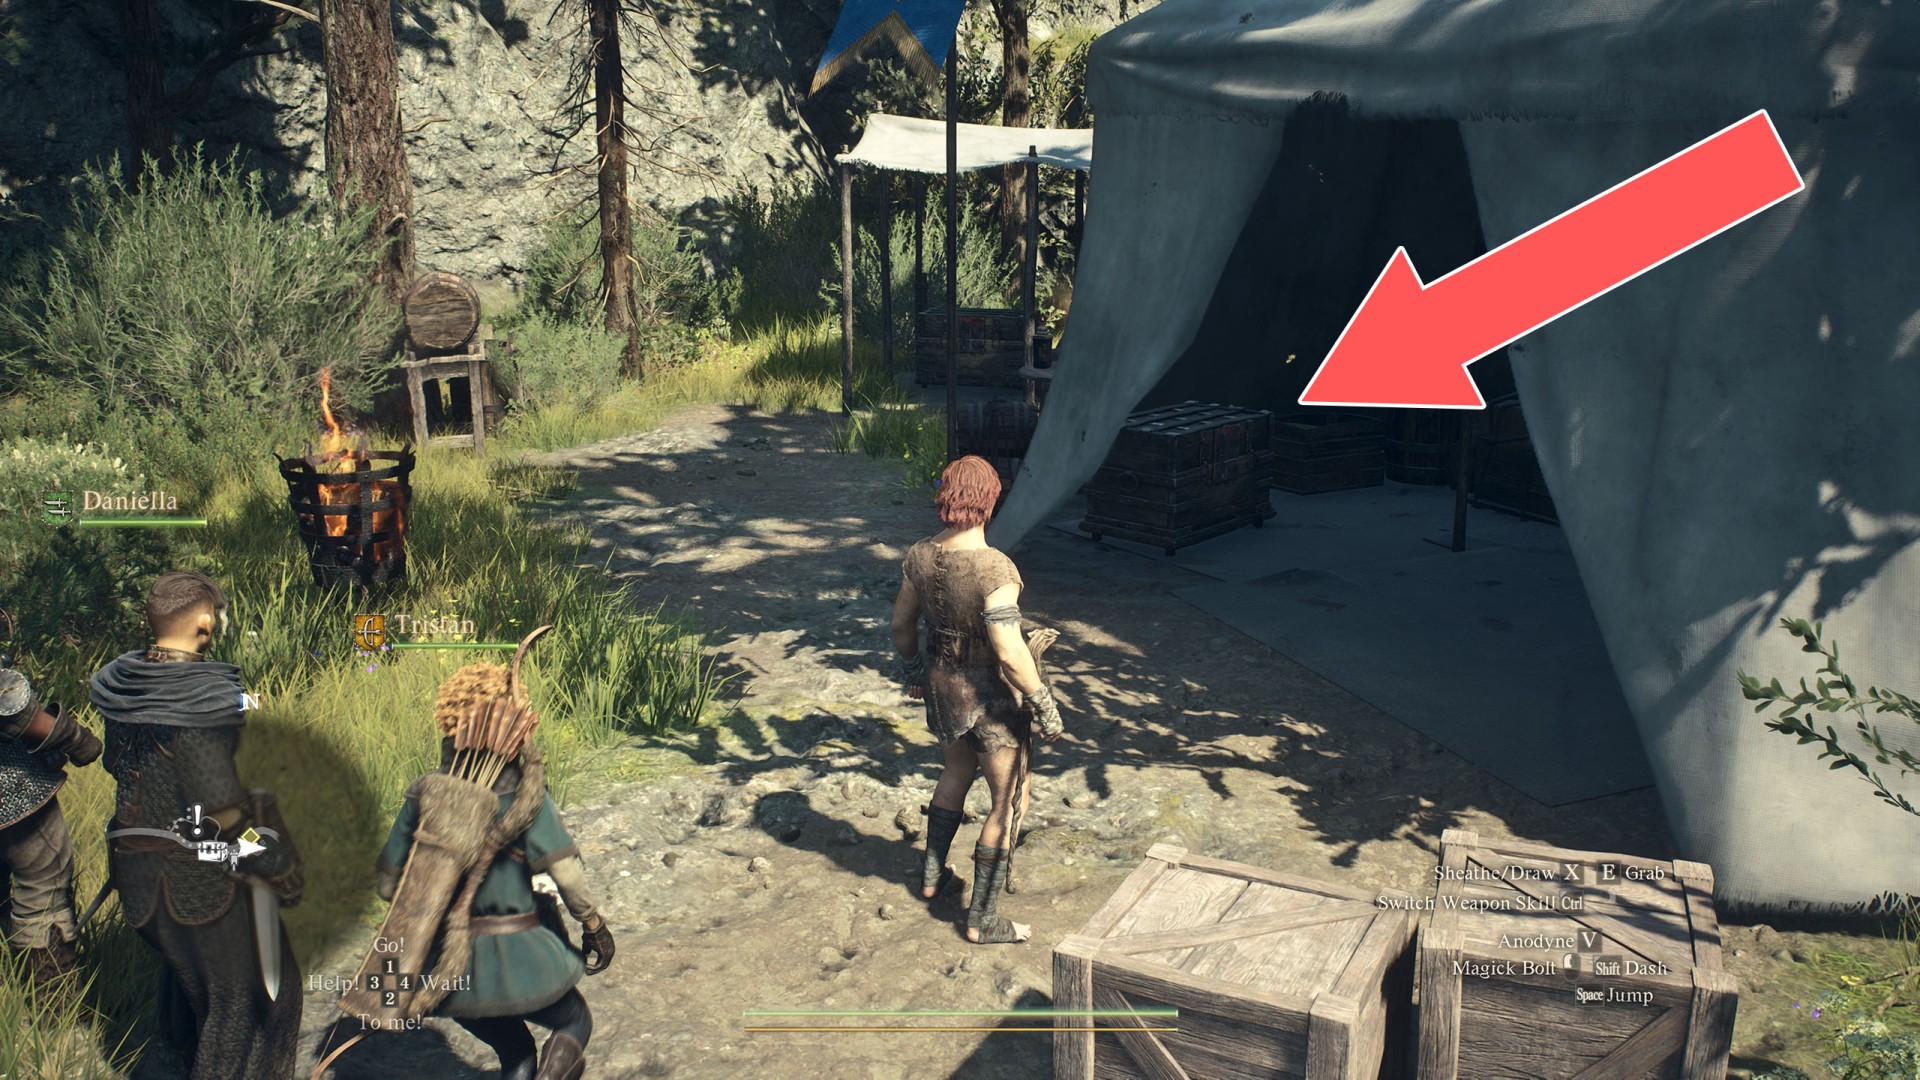
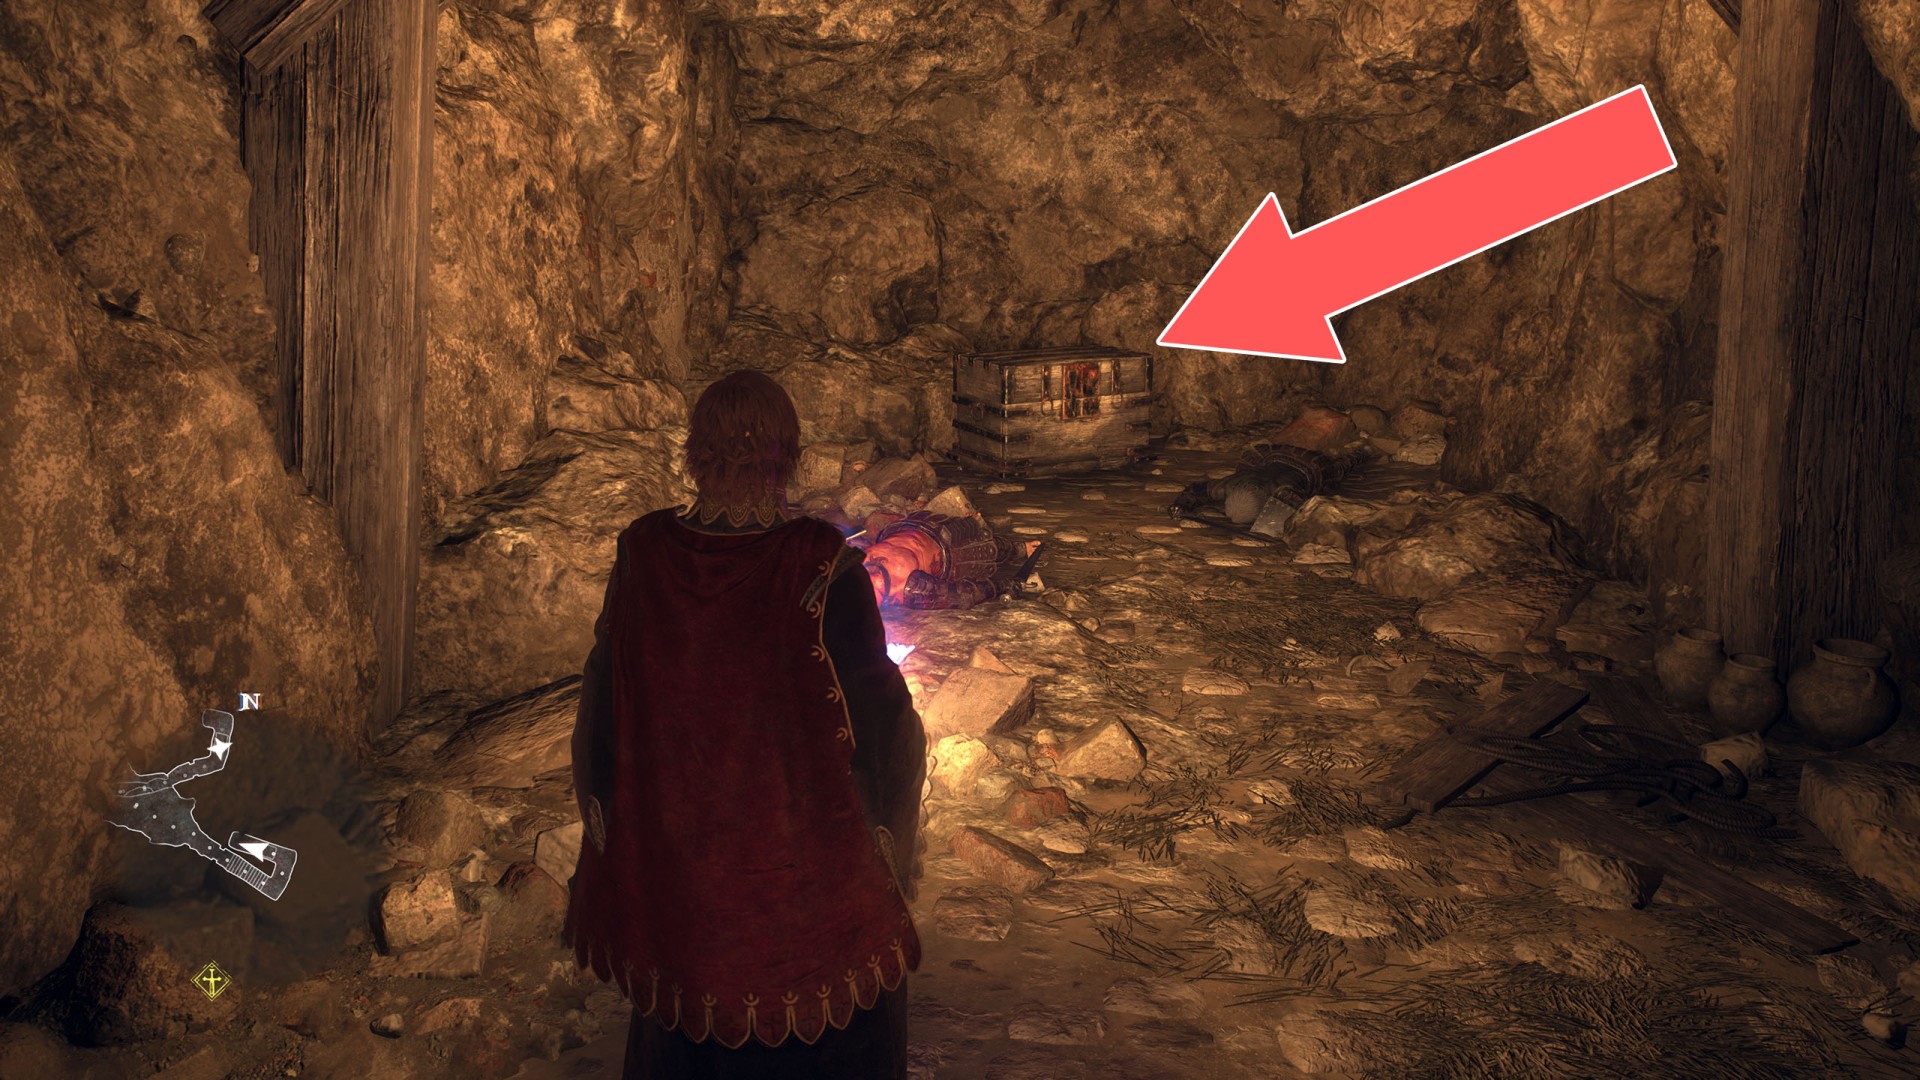
In the same basement as a Seeker's Token. The entrance is covered with crates.
Chest (3,620G)▶ show the map ◀
Chest (3,900G)▶ show the map ◀
Chest (4,100G)▶ show the map ◀
Chest (4,200G)▶ show the map ◀
Chest (4,500G)▶ show the map ◀
Chest (4,510G)▶ show the map ◀
Chest (4,710G)▶ show the map ◀
Chest (4,710G)▶ show the map ◀
Chest (4,790G)▶ show the map ◀
Chest (4,790G)▶ show the map ◀
Chest (4,900G)▶ show the map ◀
Chest (4,930G)▶ show the map ◀
Chest (4,980G)▶ show the map ◀
Chest (400G)▶ show the map ◀
Chest (400G)▶ show the map ◀
Chest (420G)▶ show the map ◀
Chest (5,000G)▶ show the map ◀
Chest (5,020G)▶ show the map ◀
Chest (5,130G)▶ show the map ◀
Chest (5,260G)▶ show the map ◀
Chest (5,520G)▶ show the map ◀

Chest (5,920G)▶ show the map ◀
Chest (500G)▶ show the map ◀
Chest (500G)▶ show the map ◀
Chest (500G)▶ show the map ◀
Chest (500G)▶ show the map ◀
Chest (540G)▶ show the map ◀
Chest (6,120G)▶ show the map ◀
Chest (6,140G)▶ show the map ◀

Chest (6,900G)▶ show the map ◀
Chest (7,360G)▶ show the map ◀
Chest (710G)▶ show the map ◀
Chest (750G)▶ show the map ◀
Chest (850G)▶ show the map ◀
Chest (850G)▶ show the map ◀
Chest (900G)▶ show the map ◀
Chest (930G)▶ show the map ◀

Chest (950G)▶ show the map ◀
Chest (980G)▶ show the map ◀
Chest (990G)▶ show the map ◀
Pouch (1,060G)▶ show the map ◀
Pouch (1,110G)▶ show the map ◀
Pouch (1,130G)▶ show the map ◀
Pouch (1,200G)▶ show the map ◀
Pouch (1,200G)▶ show the map ◀
Pouch (1,200G)▶ show the map ◀
Pouch (1,200G)▶ show the map ◀
Pouch (1,300G)▶ show the map ◀
Pouch (1,350G)▶ show the map ◀
Pouch (1,365G)▶ show the map ◀
Pouch (1,400G)▶ show the map ◀
Pouch (1,500G)▶ show the map ◀
Pouch (1,500G)▶ show the map ◀
Pouch (1,500G)▶ show the map ◀
Pouch (1,500G)▶ show the map ◀
Pouch (1,550G)▶ show the map ◀
Pouch (1,550G)▶ show the map ◀
Pouch (1,700G)▶ show the map ◀
Pouch (1,720G)▶ show the map ◀
Pouch (1,730G)▶ show the map ◀
Pouch (1,740G)▶ show the map ◀
Pouch (1,800G)▶ show the map ◀
Pouch (2,000G)▶ show the map ◀
Pouch (2,120G)▶ show the map ◀
Pouch (2,200G)▶ show the map ◀
Pouch (2,400G)▶ show the map ◀
Pouch (2,500G)▶ show the map ◀
Pouch (2,700G)▶ show the map ◀
Pouch (2,950G)▶ show the map ◀
Pouch (260G)▶ show the map ◀
Pouch (280G)▶ show the map ◀
Pouch (280G)▶ show the map ◀
Pouch (28G)▶ show the map ◀
Pouch (300G)▶ show the map ◀
Pouch (315G)▶ show the map ◀
Pouch (320G)▶ show the map ◀
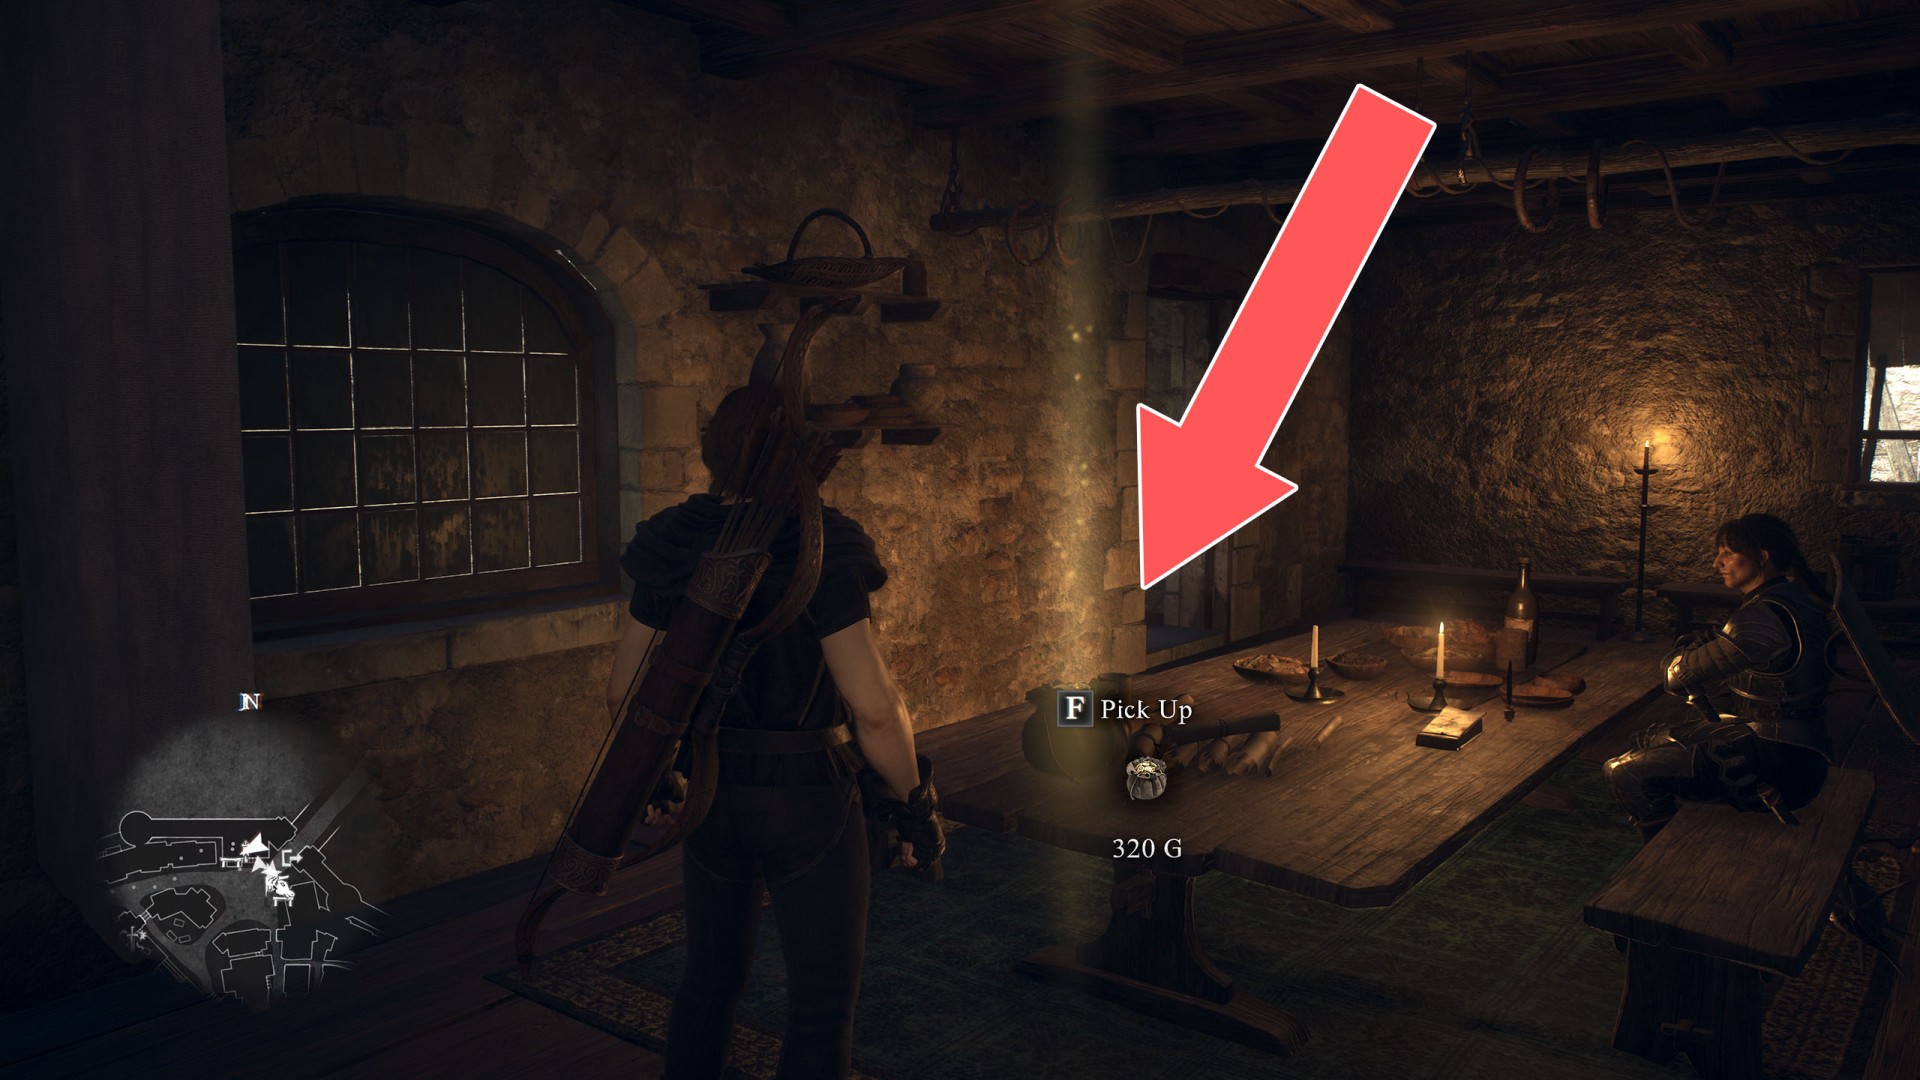
Pouch (320G)▶ show the map ◀

Pouch (350G)▶ show the map ◀
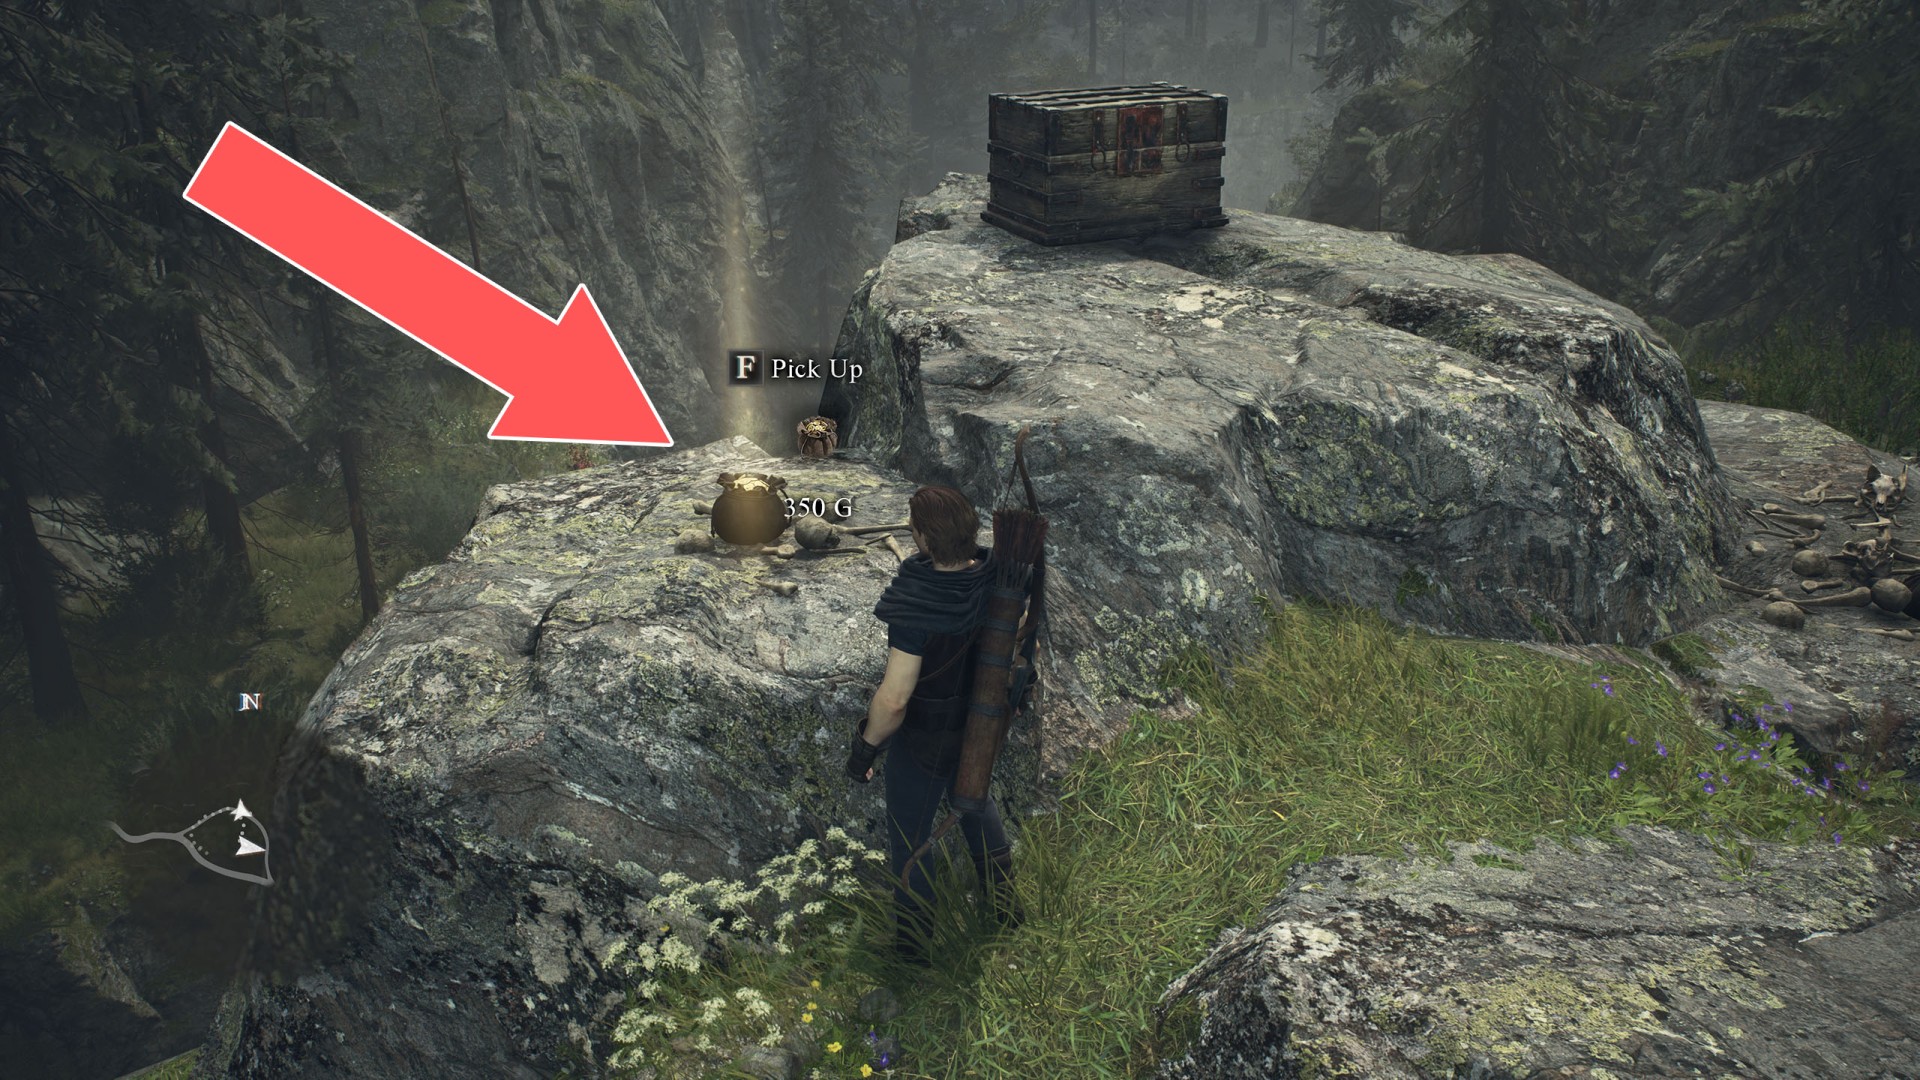
Pouch (350G)▶ show the map ◀
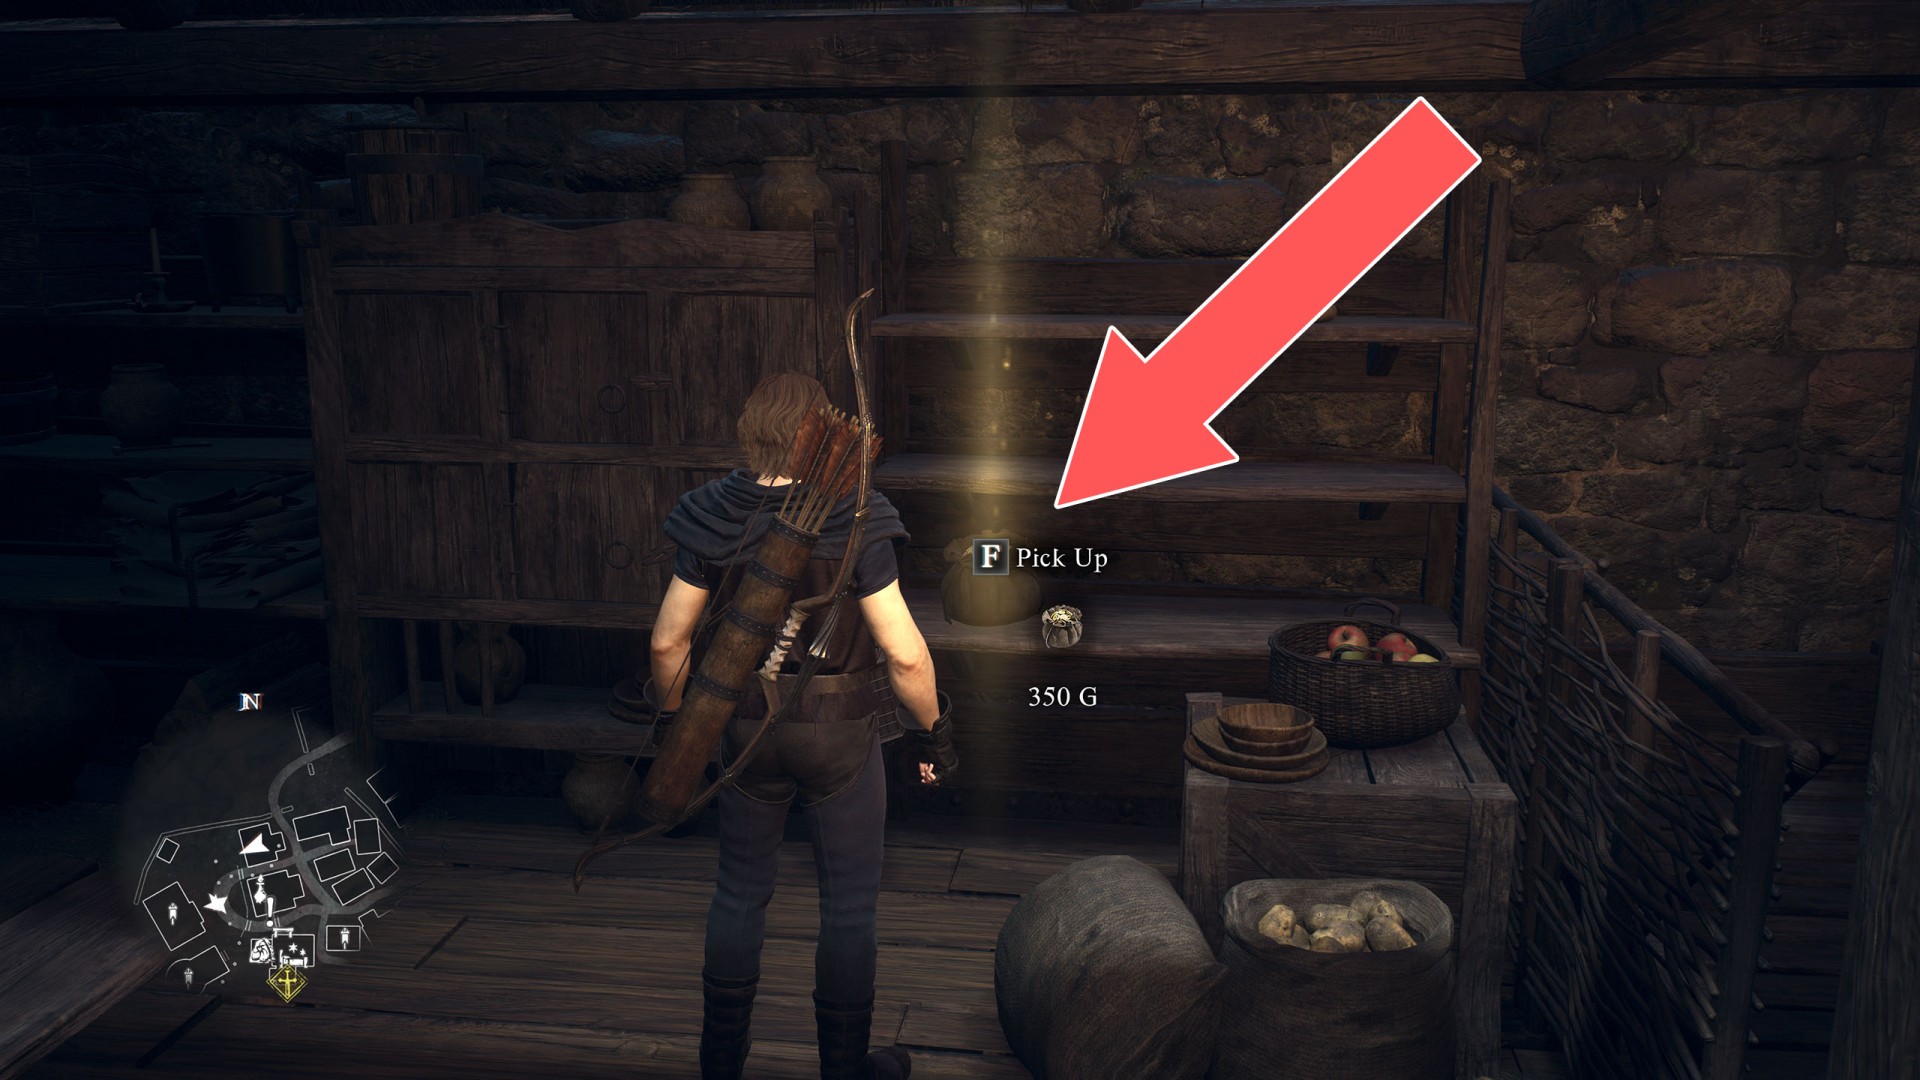
Pouch (350G)▶ show the map ◀
Pouch (350G)▶ show the map ◀
Pouch (350G)▶ show the map ◀
Pouch (400G)▶ show the map ◀
Pouch (420G)▶ show the map ◀
Pouch (42G)▶ show the map ◀
Pouch (470G)▶ show the map ◀
Pouch (480G)▶ show the map ◀
Pouch (500G)▶ show the map ◀
Pouch (500G)▶ show the map ◀
Pouch (500G)▶ show the map ◀

Pouch (50G)▶ show the map ◀
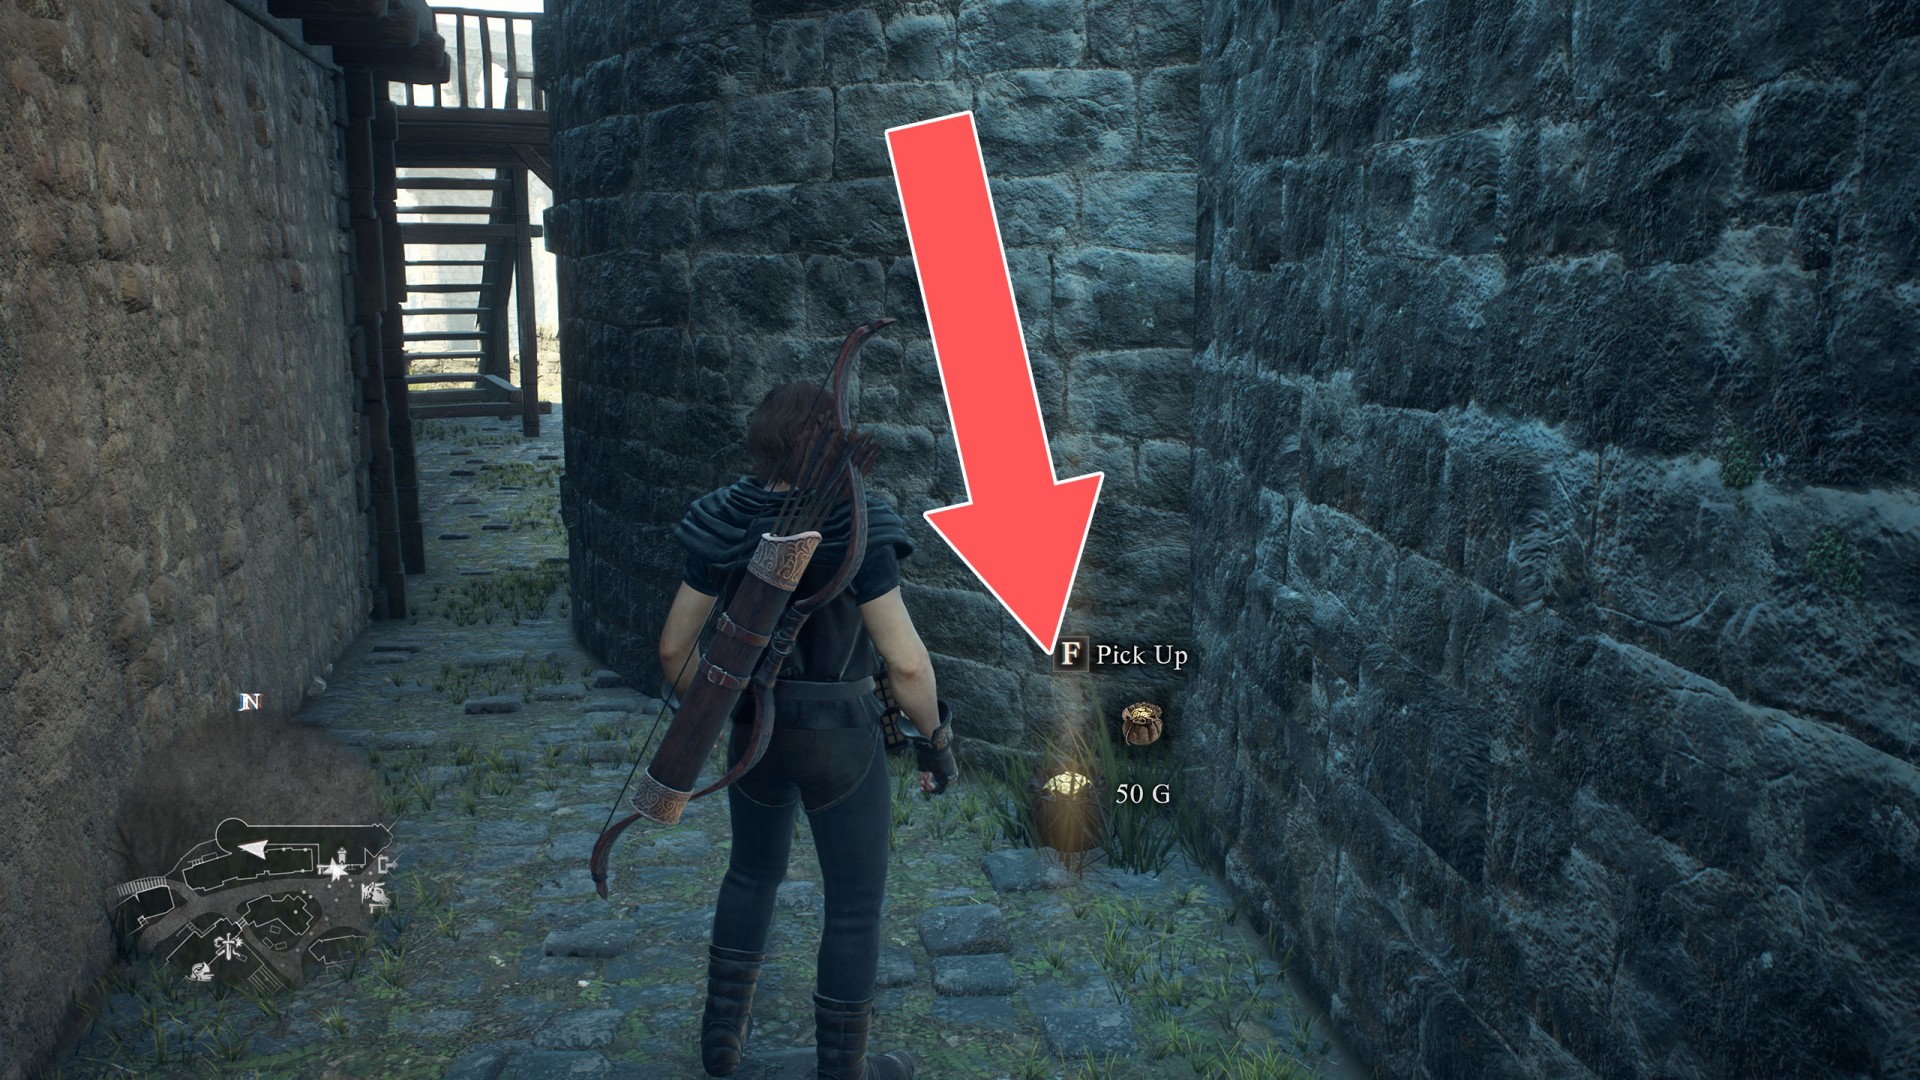
Pouch (50G)▶ show the map ◀
Pouch (585G)▶ show the map ◀
Pouch (625G)▶ show the map ◀
Pouch (640G)▶ show the map ◀
Pouch (670G)▶ show the map ◀
Pouch (820G)▶ show the map ◀
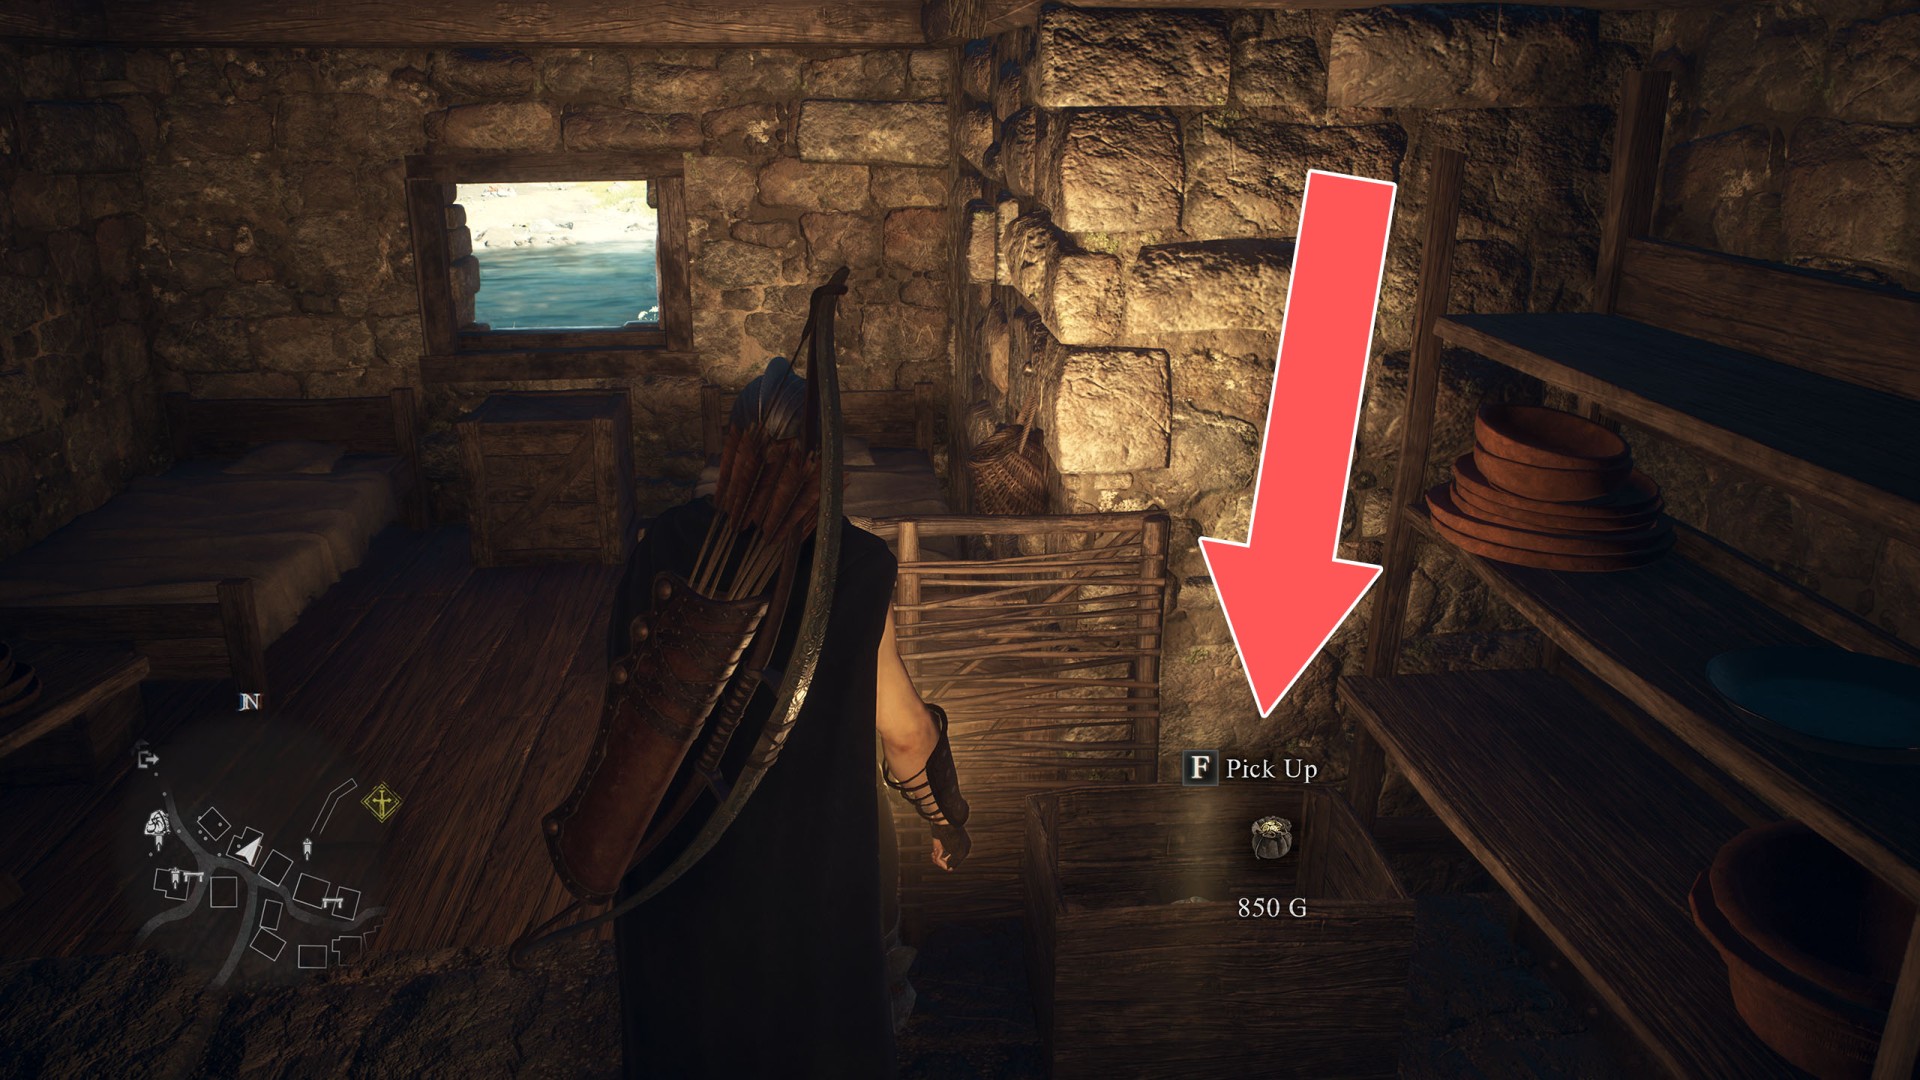
Pouch (850G)▶ show the map ◀
Pouch (850G)▶ show the map ◀
Pouch (850G)▶ show the map ◀
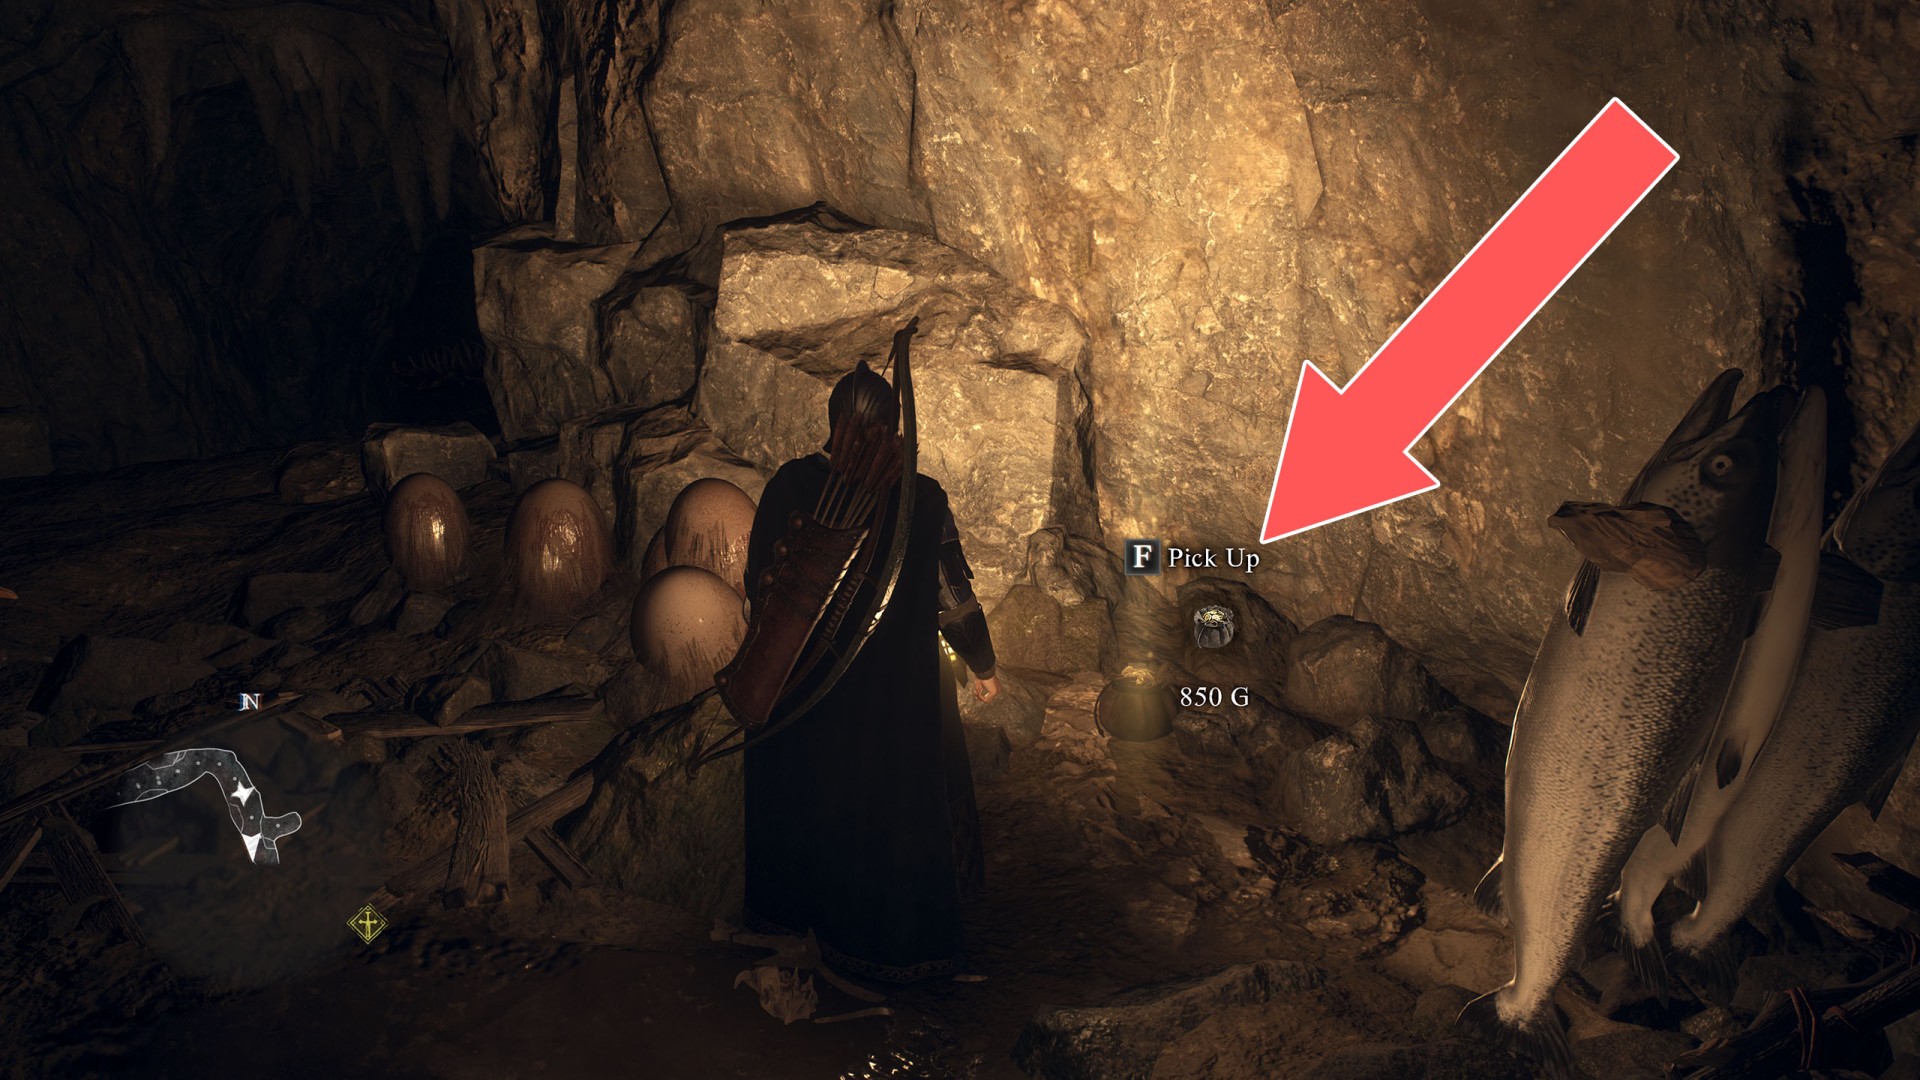
Pouch (850G)▶ show the map ◀
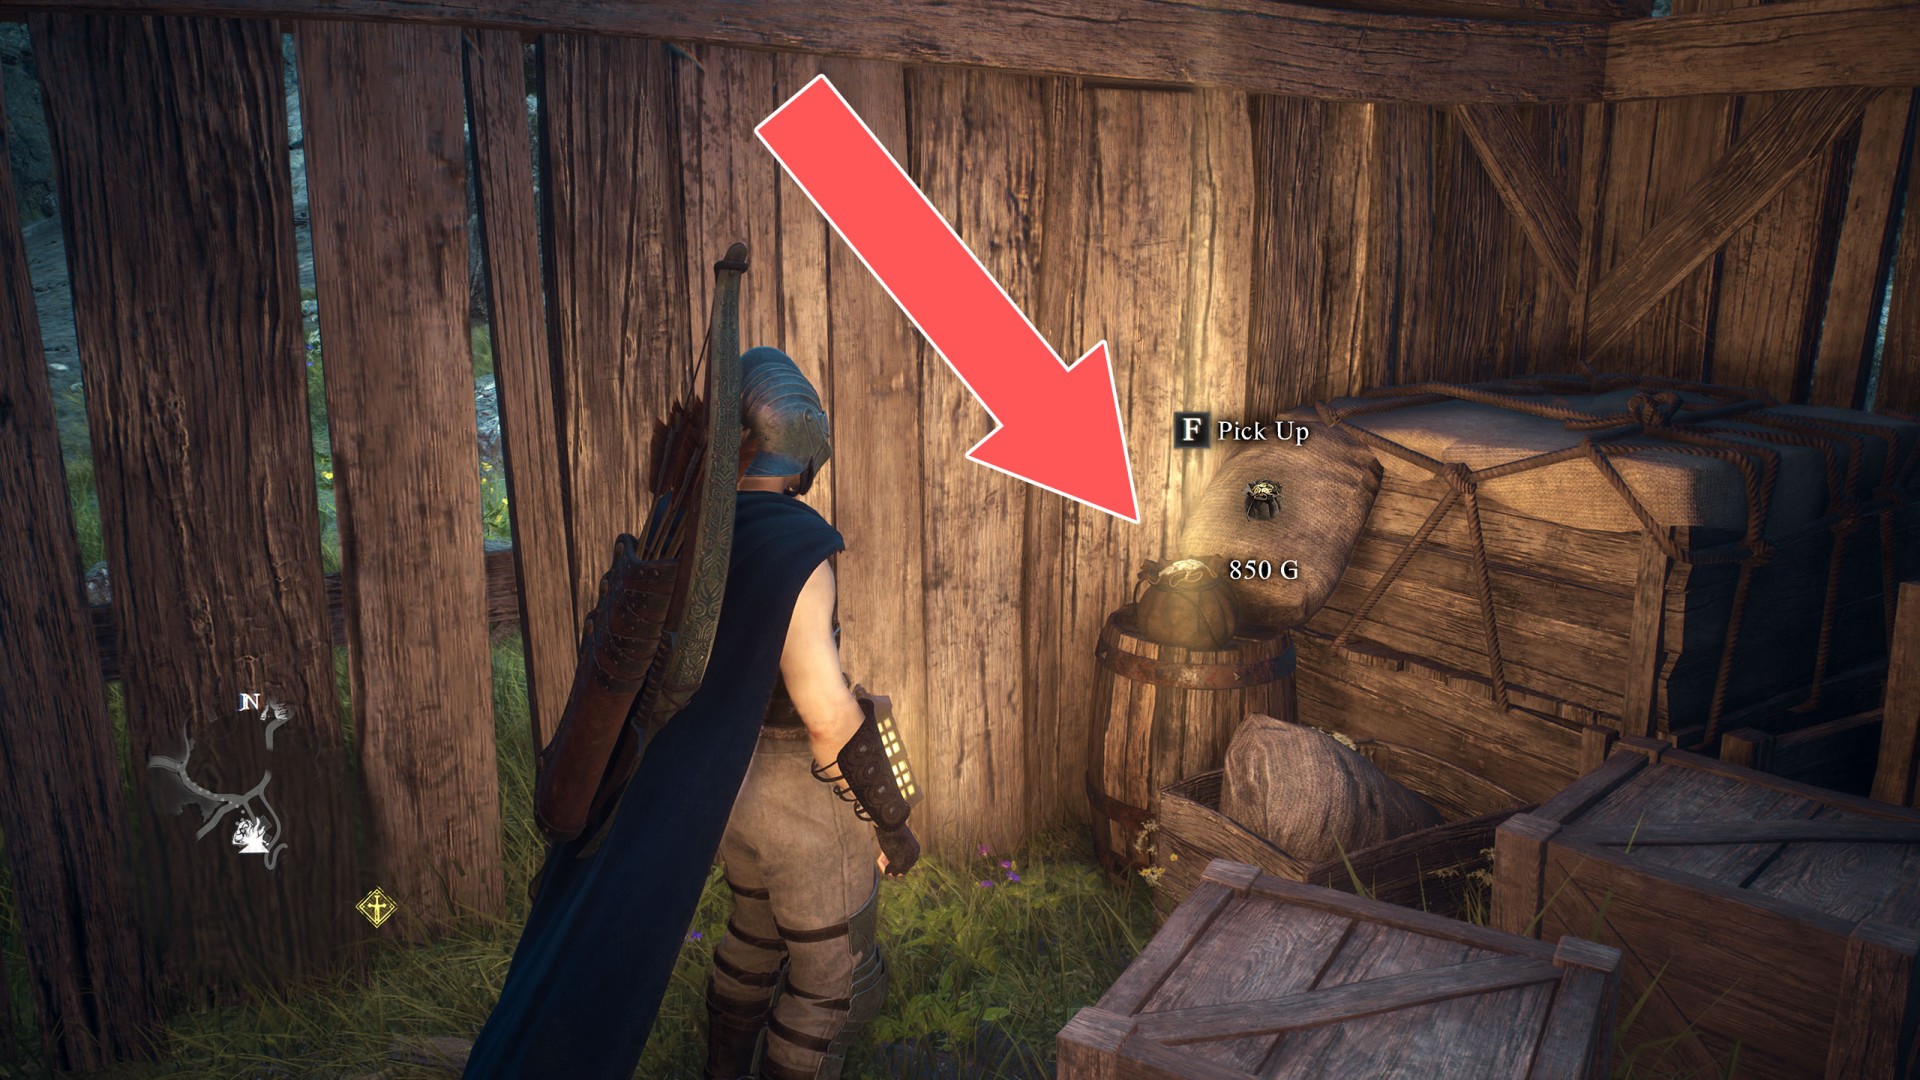
Pouch (850G)▶ show the map ◀
Pouch (900G)▶ show the map ◀

Pouch (970G)▶ show the map ◀
Pouch (990G)▶ show the map ◀
Pouch x 2 (2,000G)▶ show the map ◀