All known locations on the map - Sanctuary
How to start: Talk to Kato.
Desc: Help a woman square away a debt she owes, before her ship leaves Backwater.
I found a woman in Backwater who said she owes a debt to a man named Flinn. Her ship is getting ready to leave, and she is determined to clear her debt before departing. However, Flinn has recently gone missing. She says he was expected up the road north of Backwater, so we should begin our search there.
Objectives:
- Find Flinn.
- Slay Flinn.
- Speak with Kato. - We found Flinn alive, north of Backwater, but as with so many others in this area, he had been turned into a Drowned. To square Kato’s debt with Flinn, we mercy killed him. I should check in with her.
Show the map
How to start: It's a follow-up of "The Heretic" side quests. You will receive it automatically after completing the previous one.
Desc: A young girl with uncontrollable power has gone missing in the wilderness.
It's clear that Aneta has a powerful, if uncontrollable magic within her. As she fled, she begged me to tell her mother she was sorry. I don't know how her mother will take the news, but I owe it to Aneta to deliver it.
Objectives:
- Speak with Vera.
- Find the source of the hushed voice.
- Speak with Suzana. - A woman's voice whispered to me and told me to meet her nearby. It seems not everyone in Zarbinzet is afraid of Aneta. I should find this woman immediately.
- Search homes for the book of folk remedies. - The woman, Suzana, told me that Aneta may be searching for a local curative to calm her magic. The location of this cure should be in a book of herb lore somewhere in town. - Find the Wejinhani Dispensatory book.
- Travel to the Blind Burrows. - According to the book of folklore, the cure for 'tainted blood' comes from the spiders of the Blind Burrows. I only hope Aneta will be there.
- Speak with Aneta. - I've found Aneta outside the entrance to the Blind Burrows, exhausted from the magic erupting from her. I hope I can help the poor girl.
- Collect Spider Venom in the Blind Burrows x/8. - Aneta has asked me to bring her the venom from the spiders hiding within the Blind Burrows. She seems convinced this is the cure she needs to prevent any more magical outbursts.
- Return to Aneta.
- Pour the venom into the cauldron.
- Speak with Aneta.
- Speak with Gulyas. - Aneta attempted to cure herself by drinking the venom I brought her, but only succeeded in making herself violently ill. However, she was rescued by a strange blood-soaked woman!
The next quest: Poisoned Hearts.
Show the map
How to start: Talk to Elder Oranii.
Desc: Taissa's tower sits strangely empty.
Taissa has left her tower, but no one knows where she has gone or why. Perhaps there are some clues in her tower.
Objectives:
- Search Taissa's tower for clues.
- Find Taissa in the Hungering Swamp. - Taissa has returned to the Hungering Swamp, where we once helped Donan face his grief. What does Taissa hope to face, I wonder?
- Find Taissa.
- Slay the Shades of Grief.
- Check on Taissa.
- Slay the Shades of Grief.
- Destroy the Chains of Anguish.
- Speak with Taissa.
- Speak with Taissa outside. - Taissa is battling what she fears are the whispers of Andariel in her mind. Unfortunately, her ritual failed. I should see if there's any way I can help her.
Show the map
How to start: How to start: It's a follow-up of side quests "Past Regrets". You will receive it automatically after completing the previous one.
Desc: Taissa makes a desperate, final attempt to purge Andariel's whispers from her mind.
Reward: Mark of the Conclave - Rare Amulet.
Taissa needs my help to attempt her ritual. I should meet her at her tower.
Objectives:
- Speak with Taissa.
- Peer into the Ritual Flames. - Taissa's ritual will take us both into her memories... This will be a dangerous journey, but if it leads to Taissa being able to confront her grief, it is one I will gladly undertake.
- Accompany Taissa to Elias' Sanctum.
- Speak with Taissa.
- Slay the demonic manifestations.
- Peer into the Ritual Flames.
- Accompany Taissa to the Altar of Sacrifice.
- Speak with Taissa.
- Slay the demonic manifestations.
- Peer into the Ritual Flames.
- Accompany Taissa to center of the storm.
- Speak with Taissa.
- Slay the demonic manifestations.
- Defeat the Whisper of Andariel.
- Speak with Taissa. - We were almost overwhelmed by Andariel's whispers, but we were able to overcome them. I should make sure Taissa is alright.
Show the map
How to start: It's a follow-up of the "To Walk a Dark Path" side quests. You will receive it automatically after completing the previous one.
Desc: Track Elias' dark path through the marshes of Hawezar.
My heart sinks upon learning that Symon's traveling companion was Elias. If true, it is hard to imagine that Symon still lives. Still, if there is even the smallest chance he is alive, I will continue on. The pilgrims directed me towards a refuge in the marshes marked by giant tusks.
Objectives:
- Find the refuge marked by giant tusks.
- Enter the Strange Refuge. - Elias took Symon to the town of Backwater, on the eastern coast of Hawezar. What is his ultimate goal? What does he hope to find there? I suspect I will find more victims of the darkness Elias carries with him before long.
- Slay the wildlife.
- Investigate the campsite.
- Speak with the Groaning Corpse. - While exploring Symon and Elias' camp, I heard a strange groaning coming from one corner of the room. What could possibly still be alive down here?
- Collect the acolyte's head.
- Collect candles for the ritual. - The partially animated corpse of an acolyte of Rathma guides me to prepare for a ritual that will show me an echo of what transpired here. I hope this will help me follow Elias' trail.
- Place candles: x/3.
- Place the Acolyte's Head.
- Speak to the Acolyte's Head.
Show the map
How to start: Complete the "Necrotic Research" side quest then talk to Gulyas.
Desc: Test Gulyas' Nangari transformation potion.
Gulyas has made a potion that might turn a person into a Nangiri. She would like me to test it on both bandits and cultists.
Objectives:
- Take Gulyas' potion.
- Find the bandit camp.
- Add Gulyas' potion to the Cookpot.
- Hide near the Cookpot.
- Find the cultist camp. - I tested the potion on some nearby bandits. It failed to turn them into Nangiri. I should find some cultists and try it on them.
- Add Gulyas' potion to the Cookpot.
- Hide near the Cookpot.
- Speak with Gulyas. - The potion didn't work on either groups of test subjects. I should return to Gulyas and tell her the results.
Show the map
How to start: Complete the "Discretionary Spending" side quest then talk to Lyndon.
Desc: Lyndon has a foolproof plan to find the rat in Backwater.
Lyndon has another job for me. No doubt a wild plan to catch this supposed "rat." We should talk away from curious ears.
Objectives:
- Speak with Lyndon outside Backwater.
- Go to the first ambush location. - Lyndon has set up three ambushes to lure out the rat. Based on where we get ambushed, we'll know who the rat is. The first location is nearby.
- Enter the Secluded Clearing. - We've arrived at the first location. Aside from an infestation of Drowned, all seems quiet.
- Go to the first ambush location.
- Slay the drowned.
- Wait for the ambush.
- Go to the next ambush location. - The first location was a bust, but Lyndon is convinced the second location will be the winner. Rodney has been giving him trouble lately.
- Enter the Quiet Clearing.
- Go to the second ambush location.
- Wait for the ambush.
- Speak with Lyndon.
- Go to the last ambush location. - Lyndon believes there may not be a rat, and the ambush may have been a coincidence. The last location was told to Orton.
- Enter the Isolated Shack. - All is quiet for the time being. It's possible Lyndon was being paranoid, and the attack was merely a coincidence.
- Go to the last ambush location.
- Wait for the ambush.
- Slay the ambush.
- Speak with Lyndon.
Show the map
How to start: Talk to Lumir.
Desc: Help Lumir get back at Glin by making them sick with swamp mushrooms.
I should help Lumir get back at Glin by finding a nauseating red swamp mushroom.
Objectives:
- Collect a red mushroom for Lumir.
- Speak with Lumir. - I should return to Lumir with the mushrooms.
Show the map
How to start: How to start: How to start: It's a follow-up of the "Turbulent Waters" side quests. You will receive it automatically after completing the previous one.
Desc: Discover what Elias what sought in the ruins of Esret.
Reward: One-Eyed Swordsman's Blade - Rare Sword. This quest concludes the "To Walk a Dark Path" questline.
After a small bribe, Sev was willing to tell me about Elias's ultimate goal: the ruins of a town called Esret, forgotten in the southern wetlands. She showed me its location, and promised to meet me there, if only to face her fears of what occurred there.
Objectives:
- Meet Sev outside Esret.
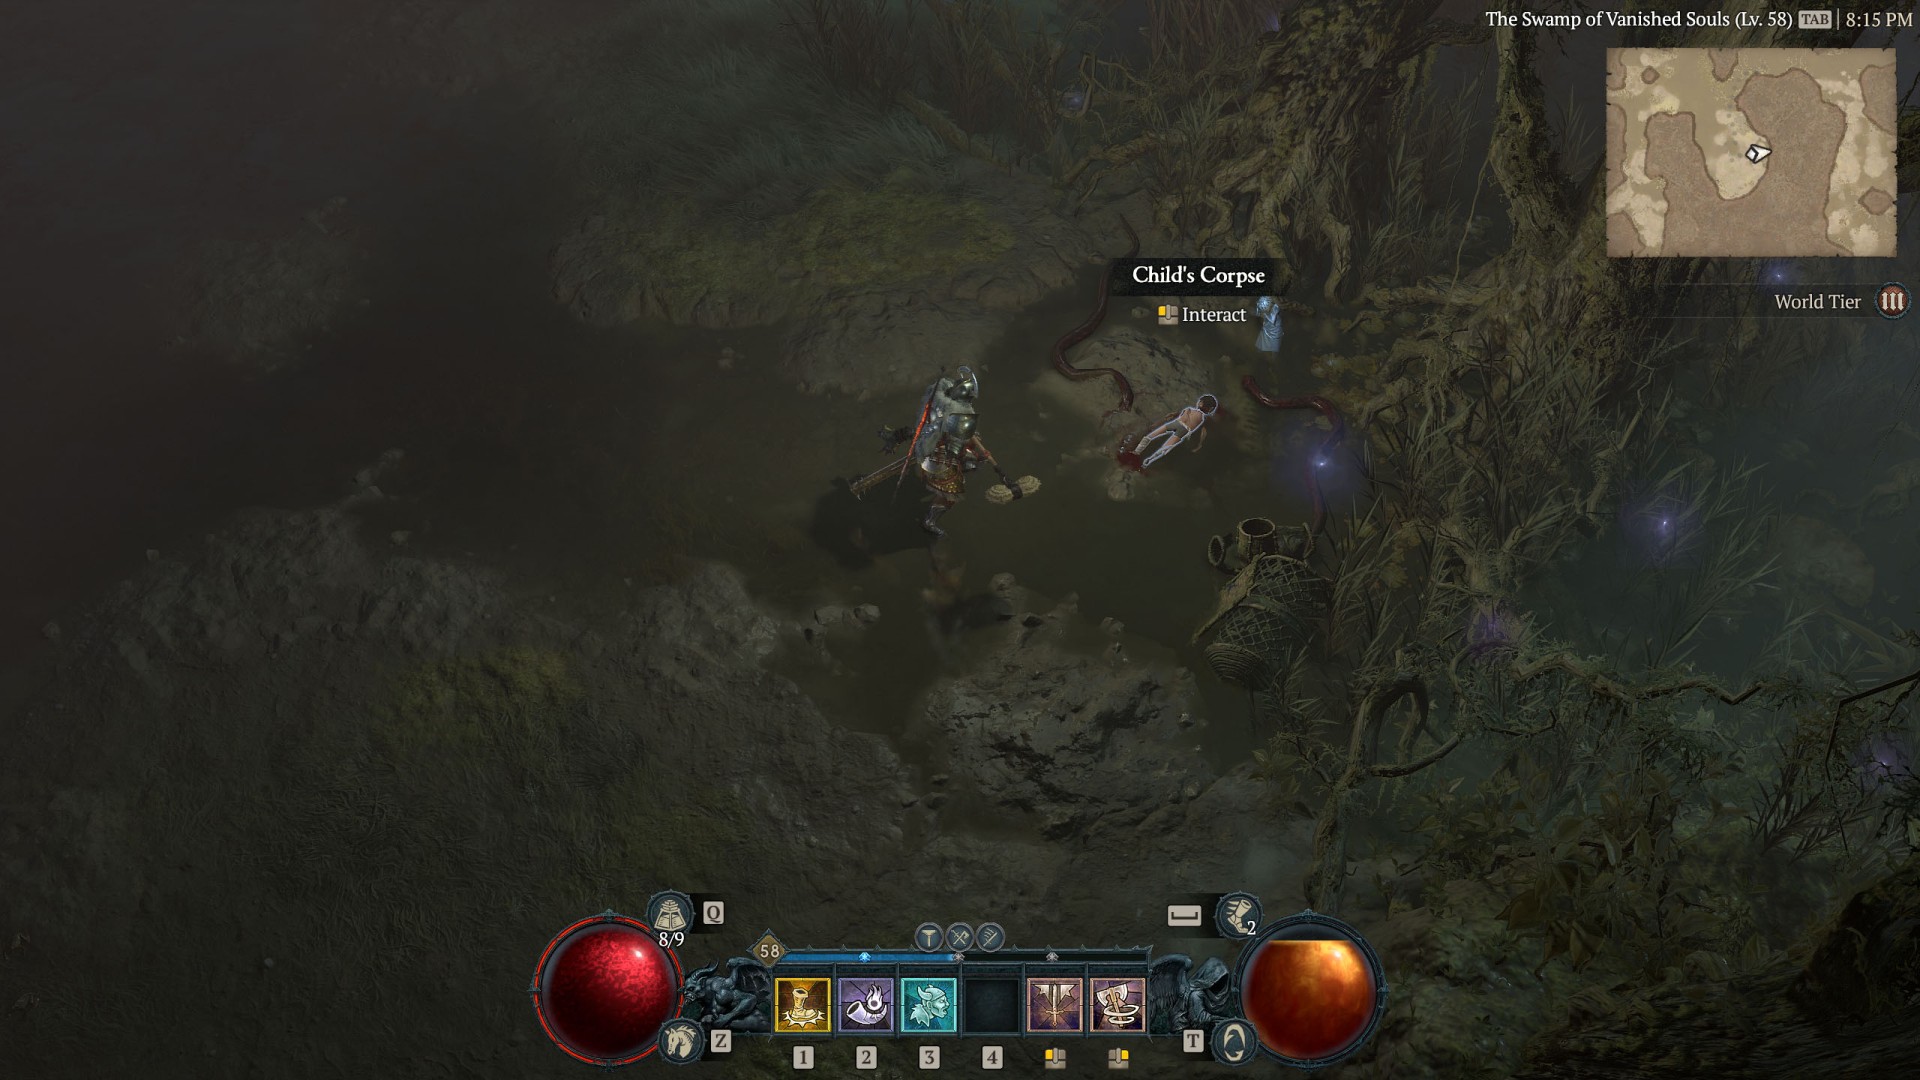
- Enter the Esret Chapel. - Sev has directed me towards the sagging chapel that sits amongst the ruins of the town of Esret. The closer I get to finding what Elias was searching for, the more uneasy I feel. What did Symon find himself wrapped up in?
- Enter the Halls of Dark Portent. - Elias and his party of mercenaries broke through the floor of the Esret chapel and descended into the dark depths inside. I must prepare myself to do the same.
- Search for traces of Elias.
- Break down the door. - I have found a stone door carved with ancient symbols. There seems to be no way to open it, so I must knock it down with brute force. The unease in my stomach grows, but I must see this to the end.
- Slay the ghouls.
- Break down the door.
- Slay the ghouls.
- Break down the door.
- Investigate the room beyond. - The unease in my stomach grows, but I must see this to the end. What is behind this door?
- Slay the Blood Echo. - This chamber is filled with blood petals... This is where Elias summoned Lilith back to this world. This is what he was after. I must survive the evil that still haunts it and find Symon.
- Inspect Symon's corpse. - This chamber is filled with blood petals... This is where Elias summoned Lilith back to this world. This is what he was after. I must find what happened to Symon.
- Collect Symon's Tattered Journal.
- Return to Father Dymus. - I should return Symon's things to Father Dymus. He will be heartbroken by the news, but he deserves to know the truth.
Show the map
How to start: Loot the Chained Zakarum Repository from the random corpse.
I must prove myself worthy of this repository by slaying the Fallen that gather here and banishing their essence.
Objectives:
- Harvest lingering essence.
Show the map
How to start: Complete the "Desperate Remedies" side quest (?) and talk to Elder Akos.
Desc: Elder Akos wants to piece together the dark history of Eriman's Pyre.
Elder Akos wants to find a record of the Zakarum inquisition that took place at Eriman's Pyre. He has asked me to bring him there to search for a ledger.
Objectives:
- Go to Eriman's Pyre with Elder Akos.
- Speak with Elder Akos. - Elder Akos appears unwilling to continue on into Eriman's Pyre. I should speak with him.
- Collect the ledger pages: x/4. - I need to look around Eriman's Pyre to find the pieces of the ledger that Elder Akos mentioned.
- Speak with Elder Akos. - I should deliver the remains of the ledger to Elder Akos in Wejinhani.
Show the map
How to start: Talk to Crusader Warwick.
Desc: A boisterous Crusader is looking for anyone who can hold a sword.
Crusader Warwick has asked me to help his faction take back an important location from snake cultists. I should report to Crusader Berolt as soon as possible.
Objectives:
- Speak with Crusader Berolt.
- Inspect Crusader Berolt's corpse. - Crusader Berolt was cruelly slain in front of me by one of these serpent cultists. I must determine what his orders were without him.
- Read Berolt's Orders.
Show the map
How to start: Talk to Tomaj.
Desc: A Backwater resident in need offers a glimpse into the harsh realities of daily life.
In Backwater, I met Tomaj, a resident facing potential exile for shirking his duties to the town. He has asked me to help him do what is needed to help ensure the town's survival.
Objectives:
- Help Tomaj burn Fresh Corpses: x/3.
- Collect Salvaged Resources: x/10.
- Slay the Drowned around the stranded man. - While helping Tomaj with his tasks, we came across a man stranded up on a broken ship's mast on the coast, south of Backwater. Clearing the Drowned surrounding him would allow him to descend safely.
- Speak with the stranded survivor. - While helping Tomaj with his tasks, we found and rescued a man stranded on a broken ship's mast along the shore. Now that he has been able to descend safely, I should ask how he got here.
- Bring Tomaj and Ervin to Backwater. - With Tomaj's tasks finished and the shipwrecked sailor, Ervin, rescued, we should return to the relative safety of Backwater.
- Speak with Tomaj. - With Tomaj's tasks finished and the shipwrecked sailor, Ervin, rescued, we have found Szilvia in Backwater, awaiting Tomaj's return. I should check in with Tomaj.
- Speak with Szilvia. - Szilvia wants me to verify Tomaj's claim that he carried out the work with which she tasked him, independently. Though in truth, I helped Tomaj with his tasks, I have learned along the way that Tomaj struggles with the losses he has faced while carrying out this grim work over the years. I now have to decide what to tell Szilvia.
Show the map
How to start: It's a follow-up of "Bait the Trap" side quests. You will receive it automatically after completing the previous one.
Desc: Orton's the rat.
Reward: Skeleton Key - Rare Amulet. This quest concludes the "Discretionary Spending" questline.
Lyndon has asked that I meet him in the storage cellar in Backwater. He's planning to confront Orton there.
Objectives:
- Return to Backwater Storage Cellar.
- Speak with Lyndon.
- Hide behind the crates. - Lyndon has invited Orton in hopes of handling this diplomatically. But in case things go south, he's asked that I hide.
- Slay Orton's ambush. - Orton wasn't keen on diplomacy; he came with his own ambush. Lyndon and I must kill Orton and his crew of traitors.
- Slay Orton.
- Speak with Lyndon in Backwater. - Lyndon doesn't seem to be taking this well. I should check on him.
Show the map
How to start: Talk to Elder Lau.
Desc: A strange outbreak in Wejinhani has left the Elders with more questions than answers.
Elder Lau wants me to question the other Elders of Wejinhani about this new untreatable sickness.
Objectives:
- Speak with the other Elders x/3.
- Report your findings to Elder Lau. - I have questioned the other Elders in Wejinhani about this new sickness. I should tell Elder Lau what I have learned.
- Search the Pyres for Brecht's corpse. - Elder Lau wants me to search the funeral pyres for Brecht's body.
- Speak with Elder Lau. - I should speak with Elder Lau about Brecht by the funeral pyre.
- Retrieve Aldara’s Amulet from Light’s Refuge. - I must go find Aldara and retrieve the cursed amulet that she carries in order to save the villagers that it has cursed.
- Speak with Elder Lau. - I need to bring Aldara's cursed amulet to Elder Lau so that it can be cleansed, removing its power over the sick villagers.
- Place the amulet on the altar. - I should place the amulet on the altar so that Elder Lau can attempt to cleanse its curse.
- Speak with Elder Lau. - I should speak with Elder Lau, who seems weak after the ritual to cleanse the cursed amulet.
Show the map
How to start: Complete two Backwater side quest then tak to Lyndon.
Desc: Lyndon needs some muscle to ensure a trade deal goes smoothly.
The head of Backwater, Lyndon, has another job for me. This one requiring more "discretion." I should meet Lyndon outside Backwater to learn more about the job I've accepted.
Objectives:
- Speak with Lyndon outside of Backwater.
- Retrieve Lyndon's stashed supplies. - We're paying off "law men" to keep Backwater out of scrutiny. But first we need to find Lyndon's stash.
- Speak with Lyndon.
- Search for Lyndon's supplies.
- CollectLyndon's Supplies. - We found Lyndon's stash near a Drowned bell. I should grab it so we can meet his "contacts."
- Meet Lyndon's contacts. - Supplies in hand, Lyndon and I are to meet with his "contacts" near the shipwrecks up north.
- Speak with Lyndon's contacts.
- Slay the Backwater Traitors. - Before the deal could complete, we were ambushed by some traitors from Backwater. They seemed to be angry with Lyndon.
- Speak with Lyndon.
Show the map
How to start: Loot the Kingsport Ale from the chest at the random location.
I should see if Lyndon is interested in sharing a drink with me, as Kingsport ale is finer than the usual swill found in Backwater.
Objectives:
- Bring the Kingsport Ale to Lyndon.
Show the map
How to start: Talk to Yonca.
Desc: Help Yonca discover what happened to her family.
I should accompany Yonca to her family's abandoned farmhouse.
Objectives:
- Bring Yonca into the farmhouse.
- Speak with Yonca.
- Search the farmhouse. - Yonca would like my help to search the abandoned farmhouse for anything that can tell her about what happened to her family.
- Speak with Yonca. - I should give the things that I found to Yonca.
- Search for Kaan's remains near the river. - Yonca wants to look for her father's remains near the river by the farmhouse.
- Search Kaan's corpse. - I should search Yonca's father's body to see what I can find.
- Give the windchime parts to Yonca. - I should give things I found to Yonca.
- Help Yonca fix the last windchime. - Yonca wants to fix the windchimes and put them back up around the perimeter of the farm, just like they were when she was a kid.
- Protect Yonca.
- Help Yonca fix the last windchime.
- Protect Yonca.
- Bring Yonca to the farmhouse. - Yonca heard her mother's voice in the distance, coming from the abandoned farmhouse. I should follow her to ensure that she will be okay.
- Speak with Yonca at the farmhouse.
Show the map
How to start: How to start: It's a follow-up of side quests "Gift of the Swamp". You will receive it automatically after completing the previous one.
Desc: Assist Yolonda in healing those afflicted with the gut rot.
I should speak with the healer Yolanda outside of Wejinhani. Aria's sickness might have spread.
Objectives:
- Speak with Yolanda.
- Enter Pilgrim's Cave. - Yolanda has asked that I travel to Pilgrim's Cave. The beasts there have a strange growth called Gano Fungus that will assist in curing gut rot.
- Collect Gano Fungus: x/10.
- Speak with Yolanda. - I should return to Yolanda now that I have obtained the Gano Fungus that she needs to treat gut rot.
- Add the Gano Fungus to the pot. - Yolanda has asked me to place the Gano Fungus in the mixture she made. I'll administer it to the sick once I'm done.
- Administer the medication to Thanak.
- Administer the medication to Jana.
- Give Yolanda the medicine.
Show the map
How to start: Talk to Marta.
Desc: Escort Marta to the healer in Wejinhani.
A sick woman named Marta has asked that I bring her to the healer Yolanda of Wejinhani.
Objectives:
- Bring Marta to Yolanda.
- Help Marta.
- Slay the diseased swarm. - Marta's sickness appears to have been terminal and I must now dispatch the swarm of vermin that burst from her body before she died.
Show the map
How to start: Loot the Gem-laden Geode which drops from random ore vein (bigger ones?) in the region.
I found a gem-laden geode in Hawezar. I should speak with Tungal the Jeweler in Ked Bardu to find out how to open it without breaking the gems inside.
Objectives:
- Speak with Tungal in Ked Bardu.
- Buy Acid Flux from Mislan in Zarbinzet. - Kratia told me to buy some acid flux from Mislan in Zarbinzet. Then I can open the geode by using it with his tools.
- Open the geode with Mislan's tools. - I've got the acid flux, now I need to use Mislan's crafting tools to break open the geode. I wonder what will be inside?
Show the map
How to start: Loot the Forgotten Crossbow that drops from a random corpse.
I should see if Lyndon is missing this crossbow. The carved name on it has his distinctively bad handwriting.
Objectives:
- Bring the Forgotten Crossbow to Lyndon.
Show the map
How to start: Complete the "Tangled Memories" side quest then talk to the Kres again.
Desc: Kres seeks to right a wrong from his past.
Kres wants to return an object he stole, but he is having trouble remembering who it belonged to. If we talk, maybe I can help him remember.
Objectives:
- Help Kres remember who "the woman" is.
- Deliver the Stolen Idol to Timue. - Kres remembered "the woman" he stole from was Timue. I should return the item to her.
- Collect Marsh Snake Venom from Nangari Spitters: x/10. - Having returned the item, Timue offered to create a salve to help Kres. I need to collect the venom of marsh snakes.
- Give Timue the Marsh Snake Venom.
- Acquire Timue's Salve.
- Give Kres Timue's salve. - With Timue's salve, I should return to Kres. He will want to know about Timue's reaction.
- Apply the salve to Kres. - Kres asked that I apply Timue's salve to him, given that he can't do it himself.
Show the map
How to start: How to start: It's a follow-up of side quests "Fungal Remedies". You will receive it automatically after completing the previous one.
Desc: As desperation grows, a more effective remedy for gut rot is needed.
I should speak to Yolanda about the next steps of how to treat gut rot. She seems to have gotten worse.
Objectives:
- Speak with Yolanda.
- Take the head from the Grotesque Trophy. - Yolanda has asked me to take the head of the most recent hunter trophy nailed to the gate of Wejinhani. It should make a suitable offering to Zurke, the witch.
- Find the clearing in the Corpsewail Deluge. - I must travel to the clearing in the Corpsewail Deluge where I hope to commune with the witch Zurke.
- Place the Grotesque Head in the Offering Bowl. - I must travel to the clearing in the Corpsewail Deluge where I hope to commune with the witch Zurke. I should place the offering and light the nearby torches.
- Light the Mossy Torches: x/2.
- Speak with Zurke. - I have made the offering and lit the torches. Now I must speak with the witch Zurke.
- Slay Nuroth the Vile Fang and claim his Oversized Snake Eyes. - Zurke has asked me to slay a snake known as Nuroth the Vile Fang. Once I kill him, I need to take his eye and return to Zurke.
- Return to Zurke.
- Place the Oversized. - Zurke has asked me to place the eye in the animal corpse he has provided. I should have a cure after the animal reacts.
- Take the Moldy Heart.
- Bring the Heart of Mold to Yolanda. - Zurke has given me a moldy heart and instructed me to return to Wejinhani to heal those suffering from gut rot. I hope Yolanda has enough time for the remedy to help.
Show the map
How to start: Loot the Rusted Dagger from the Child's Corpse.
I have the sorrowful task of finding someone in town who knew this boy and returning his dagger to them.
Objectives:
- Search for answers in Wejinhani.
- Speak with Damen.
Show the map
How to start: Loot Hungering Necrolyte's Cache from a random corpse in the region.
I found a cache sealed by powerful death magic. To open it, I must slay Nangari in this area and feed their death anima to its hungering lock.
Objectives:
- Harvest death anima from the Nangari.
Show the map
How to start: Talk to Zurke.
Desc: An unpaid debt needs collected.
Zurke is irritated a man indebted to him is nowhere to be found. He wants me to find this "Samil" before he turns his ire elsewhere. Zurke said to check the Sodden Graveyard for clues about Samil's whereabouts.
Objectives:
- Search for Samil in the Sodden Graveyard.
- Retrieve Samil's Corpse.
- Return to Zurke. - Samil has met an untimely end in the graveyard. I should bring his corpse back to Zurke as proof Samil didn’t intentionally break his promise. Hopefully, that knowledge will calm Zurke’s ire.
- Place Samil's Corpse.
Show the map
How to start: Talk to Mateen.
Desc: A young Crusader wants the remains of a friend found.
A young crusader lost his friend in a cultist infested cave nearby. He fears the worst has befallen them and asked me to bring back any remains.
Objectives:
- Find Derin's remains in the Shadowed Plunge.
- Give Derin a Healing Potion. - Against all odds, the crusader Derin is alive in the Shadowed Plunge. He’s been injured. I need to give him a potion before he bleeds out.
- Return to Mateen. - Giving a potion to Derin gave him the strength to escape the Shadowed Plunge. I should return to Mateen and tell him his friend survived.
Show the map
How to start: Talk to Erdener.
Desc: These cultists are making a mockery of the Zakarum faith.
The Crusader Erdener in Vyeresz has lost many men to cultists outside of the camp. While Erdener recovered the fallen, he noticed their prayer beads missing. The cultists who slew them wear them as a mockery of the Zakarum faith. I’ve been tasked with hunting down the thieves and retrieving the prayer amulets.
Objectives:
- Collect Zakarum Prayer Amulets from Cultists: x/10.
- Return to Erdener. - The Zakarum prayer amulets have been recovered from the cultists. Erdener will be happy to have them returned.
Show the map
How to start: Talk to Ksenia.
Desc: A Crusader seeks to rid the Zakarum Fortress of evil.
Reward: Carthas' Blessed Hammer - Rare Mace.
I met a Zakarum crusader named Ksenia. She believes that we can purify the Zakarum Fortress, returning it to its previous glory. I should meet her inside the fort.
Objectives:
- Speak with Ksenia inside the fort.
- Join Ksenia inside the Sealed Quarters. - Mephisto's influence has corrupted this once great fortress. Ksenia and I should continue forward to discover how to undo his corruption.
- Find the source of corruption within Sealed Quarters. - Ksenia believes we can purify the Zakarum Fortress, returning it to its previous glory. However, the halls are quiet, blanketed by a quiet darkness. We should search deeper into the Defiled Halls.
- Read the Urgent Letter.
- Find the source of corruption within Sealed Quarters. - A ominous note from the paladin Carthas warns us of the evils ahead. It seems the paladins guarding Sankekur's tomb fell to Mephisto's corruption.
- Inspect the paladin remains.
- Defeat Mathias, Corrupted Paladin.
- Speak with Ksenia.
- Collect Mathias' Betrayal.
- Collect Eleazar's Choice.
- Collect Alodia's Wrath.
- Search for the curse's root. - A great betrayal has cursed the paladins' spirits, but Ksenia believes she can purify the spirits allowing them to rest in peace. Cursed weapons in hand, the ritual must be preformed at the curse's root: where hatred is strongest.
- Place the cursed blades for Ksenia's ritual: x/3. - We have found the focal point of Mephisto's magic within the Sealed Chambers. I must place the cursed blades so Ksenia may begin the ritual.
- Speak with Ksenia to begin the ritual. - We have found the focal point of Mephisto's magic within the Sealed Chambers. I should speak with Ksenia when I am ready to begin the ritual.
- Defeat Carthas, Corrupted Paladin. - The ritual has begun. The wrathful spirit of Carthas attacked us. I must protect Ksenia so she may finish the ritual.
- Speak with Ksenia.
Show the map
How to start: complete the "Poisoned Hearts" side quest then talk to Gulyas.
Desc: Help Gulyas with her Nangari research.
Gulyas wants to see if there's any truth to the cultist's claims that they can turn into Nangari. To test this, she would like me to bring her some materials.
Objectives:
- Collect Necrotic Flesh x/1.
- Collect Snake Venom x/5.
- Return to Gulyas. - I've gathered all the materials and should return to Gulyas.
Show the map
How to start: Pick up Budding Crimson Thorn which can drop out when you harvest herbs.
I found a curious item that Timue might be able to tell me about.
Objectives:
- Bring the Budding Crimson Thorn to Timue.
Show the map
How to start: Buy the Thieves Guild Emblem from Mislan.
Lyndon is the biggest scoundrel I can think of nearby, he might know more about this emblem.
Objectives:
- Bring the Thieves Guild Emblem to Lyndon.
Show the map
How to start: How to start: It's a follow-up of side quests "A Question of Self". You will receive it automatically after completing the previous one.
Desc: Taissa must summon aid in her attempts to rid herself of the whispers of Andariel.
Taissa intends to ask the other witches of Hawezar for their advice, but before she can, she needs me to retrieve her amulet from Timue's house.
- Speak with Timue.
- Collect the Mark of the Conclave. - After speaking to Timue, I get the feeling things are cold between her and Taissa. Regardless, I must return Taissa's amulet to her.
- Meet Taissa at the Tree of Whispers.
- Collect Oracle Eyes from Nangari Oracles: x/4. - Taissa has forgotten she also needs several of the magical eyes wielded by the Nangari Oracle. We will collect some together.
- Bring the Oracle Eyes to Taissa. - I have collected everything Taissa needs for her task. She has gone on ahead, but asked me to meet her near the Tree of Whispers.
- Enter the Eldritch Conclave. - Taissa will soon begin her ritual to summon the other witches of Hawezar to her. I can only hope they can give her whatever advice she needs to defeat the whispers of Andariel.
- Speak with Taissa.
- Light the Braziers: x/4.
- Speak with Timue.
Show the map
How to start: How to start: It's a follow-up of side quests "Ire of the Witch". You will receive it automatically after completing the previous one.
Desc: A growing sickness threatens the swamp.
I brought back Samil’s corpse back to Zurke. He seems pleased, but I do not yet know Zurke’s intentions. I should speak with him and ask.
Objectives:
- Speak to Zurke.
- Find Zurke's experiments. - There is a new sickness in the swamp, thanks to Zurke’s experiments. He claims to be in control, but the Tree of Whispers wishes it to be cleansed. Zurke treated three corpses with possible curses. He needs me to collect a sample from the least corrupted source and bring it back.
- Collect the Uncorrupted Flesh.
- Return the sample to Zurke. - I have a piece of uncorrupted flesh collected from one of Zurke's experiments. I should return it to him.
Show the map
How to start: It's a follow-up of "A Price to Pay" side quests. You will receive it automatically after completing the previous one.
Desc: A young girl with burgeoning magic power is taken in by a swamp witch.
Reward: Aneta's Keepsake - Rare Amulet. This quest concludes the "The Heretic" questline.
Aneta's mother Vera has risked her health by coming so far out into the wilds. Why is she here? I doubt it is out of concern for her daughter's safety.
Objectives:
- Speak with Vera.
- Collect Aneta's Keepsake. - Aneta left her necklace behind when she left with Gulyas. I know how much it means to her. I should collect it and bring it to her.
- Find Aneta. - The witch Gulyas said her home was between the eastern shore and a river. I should find Aneta, return her necklace, and make sure she is all right.
- Extinguish the Strange Braziers: x/3. - Aneta seems to be in pain in the center of a ritual. I need to get her out of it.
- Speak with Aneta. - It appears that the ritual was part of Gulyas' attempt to calm Aneta's uncontrolled magic.
- Speak with Gulyas.
- Help Aneta gather rotten livers: x/4. - Gulyas needs Aneta to gather rotting livers for what she described as a "unique rite" to control Aneta's powers.
- Enter the Hidden Glade. - Aneta has gathered what she needs for this rite. We are to meet Gulyas in the Hidden Grove nearby.
- Follow Aneta.
- Speak with Gulyas.
- Fill the Blood Altar.
- Protect Aneta from the villagers.
- Follow Aneta. - Vera fled from the carnage inside the grove, and Aneta is following. I must catch up to them both before something terrible happens.
- Speak with Aneta. - Aneta's mother Vera succumbed to her illness rather than allow her daughter to heal her. A narrow minded and tragic decision.
- Return to Gulyas' Hovel. - Aneta is still clearly mourning her mother, but she told me "the voices are finally quiet" as she walked off. Could this be the change she needed?
- Read Aneta's Letter. - I was too late to see Aneta before she was summoned by the Tree of Whispers, but Gulyas says she left me a note...
Show the map
How to start: Talk to Tomyris.
Desc: A young Crusader apprentice wishes to carry on her master's legacy.
Tomyris needs a guide through the Hawezar Wetlands. She wishes to return to Maugan's Folly to retrieve her late master's armor. I should meet her by the bridge leading into the Wetlands.
Objectives:
- Speak with Tomyris.
- Find the broken bridge. - Tomyris told me of a shortcut over a broken bridge. It should lead us straight to Maugan's Folly.
- Cross the broken bridge.
- Enter Maugan's Folly. - After crossing the broken bridge, we need to find the road. Taking it south will lead to Maugan's Folly.
- Find the crusader's armor. - A desolate reminder of its former glory, we've reached Maugan's Folly. Tomyris' master should be nearby. Or rather, her corpse.
- Check on Tomyris.
- Enter Maugan's Work. - The armor was pilfered by the deserters and criminals that now make this place their home. We must search Maugan's Works for the armor.
- Search Maugan's Work for Johanna's armor.
- Speak with Tomyris. - At last! We've found the armor. I should speak with Tomyris.
- Speak with Johanna. - Donning her master's armor, Tomyris continues the name Johanna. Today, she is a true Crusader.
Show the map
How to start: How to start: It's a follow-up of side quests "Perceived Threat". You will receive it automatically after completing the previous one.
Desc: Zurke must kill the sweet sickness he has so lovingly cultivated.
Reward: Helm of Embalming - Rare Helm.
I have given Zurke the piece of uncorrupted flesh. He believes he now knows the cure for the swamp sickness. I should speak to him about the next steps.
Objectives:
- Speak with Zurke.
- Find the Blood Fungus Host. - Zurke is almost ready to cure the sickness he inflicted upon the swamp but he’s missing the last ingredient – blood fungus. He is growing the parasitic fungi on a corpsefiend. It should be roaming outside of the Ancient Reservoir in the Looming Edifice.
- Retrieve Blod Fungus.
- Find Zurke. - The Blood Fungus has been collected from the corpsefiend. Zurke told me to travel south to the sickness’ origin. He will be waiting for me there.
- Place the Blood Fungus on Samil’s corpse. - The mound of flesh and rot is unmistakably the swamp sickness’ origin. I found Zurke here who brought along Samil’s corpse. Zurke wishes me to place the Blood Fungus I collected unto the decayed body.
- Speak with Zurke. - The Blood Fungus was added to Samil’s corpse. I should speak to Zurke and ask him the next step in the cleansing.
- Protect Zurke as he completes the ritual. - In the heart of flesh mound, Zurke is to perform a cleansing ritual. He warned me this use of magic would awaken the swamp and attract peril. I need to protect Zurke while he concentrates.
- Speak with Zurke. - The ritual is completed and the swamp is quiet. Zurke wishes to speak with me at the flesh mound.
Show the map
How to start: Talk to Kres.
Desc: A mass of vines and viscera groans for help.
I met a mutilated corpse of a man deep within the Hawezar swamps. He asked that I find puffball reeds and deliver them to his daughter in Backwater.
Objectives:
- Find a puffball reed.
- Gather the Puffball Reed.
- Ask around Backwater for Katherina. - I've found the puffball reeds. Now, I just need to find Kres' daughter, Katharina. He said she lived in Backwater. I should ask some of the locals.
- Leave the flowers at Katherina's grave. - I've discovered Katherina has been dead for some time. Since I've come all this way, I should place the flowers on her grave.
- Speak with Kres. - Kres will want to know his daughter's fate. I should return to him.
Show the map
How to start: Complete the side quest "A Debt Repaid" and then talk to Lyndon.
Desc: Recover Backwater's stolen property from the bandits.
Bandits recently broke into Backwater's shared stockpiles and stole some supplies. Lyndon, Backwater's leader, has sent me off with his right-hand man to find the bandits and recover the goods.
Objectives:
- Find the stolen supplies with Orton.
- Slay the bandits.
- Speak with Orton. - We killed the ones that took the supplies, but one of them claimed Lyndon cheated them. I should speak to Orton about it.
- Gather Backwater's Missing Supplies. - Orton doesn't believe the claims but left me to recover the supplies and return them on my own.
- Bring the supplies back to Lyndon. - I have recovered the stolen supplies and should return to Lyndon in Backwater.
Show the map
How to start: Talk to Vass.
Desc: A spate of grisly deaths terrifies a group of villagers who fear a dark power is at work.
A man in Zarbinzet claimed someone is killing villagers with demonic magic. He asked me to search the ruins outside of town for survivors.
Objectives:
- Search for survivors at the Abandoned Ruins.
- Speak with the frightened girl. - I found a scene of fire and bloodshed in the ruins, just as the man described. I survived the demons, but a terrified girl emerged from her hiding place. I must make sure she is unharmed.
- Help Aneta gather flowers: x/3. - The young girl's name is Aneta, and once she learned I was not another demon, she begged me to help her finish her task to find flowers for her sick mother.
- Escort Aneta back to Zarbinzet. - Aneta and I have found all the flowers she needed. Hopefully I can get her home before her mother worries.
- Speak with Aneta. - Aneta is home safe, but her mother does not seem happy to see her...
- Find Aneta. - Aneta got nothing but a scolding for her kind gesture towards her mother. When angry townsfolk accused her of horrible crimes, her mother did nothing! I must find Aneta and protect her from the angry mob!
- Enter the Forgotten Cave.
- Save Aneta from the villagers.
- Slay the Demons.
- Speak with Aneta.
The next quest: A Price to Pay.
Show the map
How to start: Talk to Timue.
Desc: Help Timue check on other infected.
One of Timue's duties is to tend to the other infected that wander the swamp, but she is unable to do so this time. She wants me to take food and medicine to several infected in her stead.
Objectives:
- Get Timue's gifts for the infected.
- Find Baridan, Duraya, and Raldin.
- Speak with Duraya.
- Find Baridan and Raldin. - I found Duraya and delivered Timue's package. She told me that Baridan usually stays close to Timue's house.
- Speak with Baridan.
- Find Raldin. - I've found Baridan and Duraya and delivered Timue's packages to them. The third, Raldin, was last seen in the north-east area of the swamp near the border with the snakemen.
- Kill the bandits.
- Talk to Raldin. - I saved Raldin from a group of bandits who were trying to take him. I should talk to him about it.
- Find the bandit camp. - Raldin was looking for his brother when he was ambushed by the bandits. He overheard them talking of a camp where they were taking infected. I should go there and put a stop to the kidnappings.
- Kill the bandits.
- Return to Timue. - The bandits were kidnapping the infected and harvesting their growths to sell to alchemists. I destroyed their operation and should bring the news to Timue.
Show the map
How to start: Loot the Timeworn Timue Doll (Random Drop).
I found a doll that strongly resembles Timue. I should take it to her, just in case it is some form of witchcraft.
Objectives:
- Bring the Timeworn Timue Doll to Timue.
Show the map
How to start: Talk to Father Dymus.
Desc: Zarbinzet's only priest is concerned for his missing curate.
Father Dymus, the priest of Zarbinzet has asked me to look for signs of his curate Symon who left on a journey with a stranger several weeks past. Symon's journal page says they were headed to a ruined farmstead to the east.
Objectives:
- Find the Decaying Farmstead.
- Search for evidence of Symon.
- Open the Forgotten Lockbox.
- Read Symon's journal page.
- Travel to Tibault's Grasp. - A forgotten lockbox held another of Symon's journal pages. It seems his companion is a swordsman who has promised him great knowledge. Their next stop is the statue of Tibault, further east.
- Speak with the Frightened Pilgrim.
- Subdue the Frightened Pilgrims.
- Speak with the Frightened Pilgrim. - Upon arriving at the statue of Tibault, I was set upon by distraught pilgrims. Apparently this one-eyed swordsman caused them great distress. Perhaps they know where Symon went next.
- Question the pilgrims.
Show the map
How to start: Read the Hastily Scrawled Note.
Attempt the traveler's superstitious ritual.
I found a strange note with a traveler's superstitious ritual described on it, and the boon that she received. Could it work for me?
Objectives:
- Solve the note's riddle. - Use the "hello" emote in front of the statue.
- Investigate the hidden chest - I engaged in a superstitious ritual mentioned by a traveler at the site of many shipwrecks and a chest appeared. Maybe there's something good in there.
Show the map
How to start: How to start: It's a follow-up of the "At Any Cost" side quests. You will receive it automatically after completing the previous one.
Desc: Search for information about Symon and Elias in the port town of Backwater.
Elias took Symon to the town of Backwater, on the eastern coast of Hawezar. What is his ultimate goal? What does he hope to find there? I suspect I will find more victims of the darkness Elias carries with him before long.
Objectives:
- Travel to Backwater.
- Ask the locals about Elias.
- Buy the Cerrigar Mead. - I've learned that Elias and Symon came to the town in search of more hands to help them with their task. Only one returned: a sailor named Sev. I must find out what she knows.
- Find Sev south of Backwater.
- Give Sev the mead.
- Tell Sev you're ready to go. - After a small bribe, Sev was willing to tell me about Elias's ultimate goal: the ruins of a town called Esret, forgotten in the southern wetlands. She showed me its location, and promised to meet me there, if only to face her fears of what occurred there.
Show the map
How to start: Complete the "Growing Reminders" side quest then talk to Kres again.
Desc: Kres is pained with the memories of his past actions.
Kres told me that there is a shallow grave near a tunnel of gnarled trees. I should look there.
Objectives:
- Find the shallow grave.
- Acquire the Exsanguinated Remains. - I found the shallow grave. I must dig up the remains, so that I may burn them at the Backwater pyre.
- Burn the Exsanguinated Remains. - I should go to the pyre in Backwater. I can burn the remains there.
- Return to Kres. - I've burned the remains. I hope they're at peace now. I should return to Kres.
Show the map
How to start: Loot the Curious Venom.
I found some venom that has a curious look to it. Maybe Timue knows more about it.
Objectives:
- Bring the Curious Venom to Timue.
Show the map
How to start: Talk to Nevan.
Desc: Escort Nevan as he travels to Wejinhani in search of a cure.
I should escort Nevan while he finds herbs to trade to the Elders in Wejinhani for a cure.
Objectives:
- Escort Nevan while he finds herbs: x/3.
- Escort Nevan to Wejinhani. - I should help Nevan reach Wejinhani now that he has collected all the herbs he needs.
- Speak with Nevan. - I should speak with Nevan now that we've reached Wejinhani.
Show the map