The Village - Map Markers Summary
Goats of Warding x20, Treasure Chests x9, Breakable Windows x19, Puzzles x37, Weapons x37, Key Items x42, Keyed Passageways x22, Openable From One Side Passageways x21, Breakable Lock Passageways x17, Lockpicks x10, Boss Fights x12, Files x47, Duke / Shop x7, Wells x7, Outhouses x10, Typewriters x17, Misc Locations x13, Locked Containers x8, Poultry x7, Fish x6, Meat x8, Ammo x89, Crystal Fragments x33, Valuables x15, Herbs x16, Rusted Scraps x47, Chem Fluids x21, Gunpowder x34, Lei x8, Breakable Objects x145, First Aid Med x8, Passageways to Another Level x78, Ladders x17, No Passageway x4, Explosive Barrels x18, Misc x12
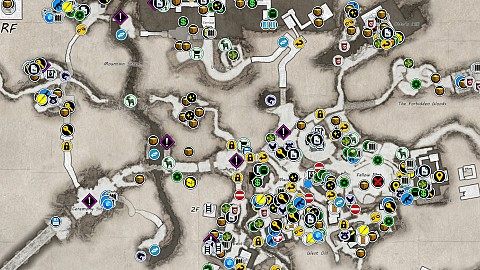
The following legend of The Village interactive game map defines the points of interest / markers displayed on the map. Each marker corresponds to a specific element to facilitate efficient navigation and interaction with the map.
Goats of Warding are small wooden goat figurines hidden in various places in the game that need to be destroyed. Some of them are very difficult to spot and some of them are in places where you can't return.
 Goat of Warding #1
It's in the shrine. You can destroy it as early as your first visit to the village.
Goat of Warding #1
It's in the shrine. You can destroy it as early as your first visit to the village.
Goat of Warding #2
It is located on top of the church roof. You can destroy it already on your first visit to the village.
Goat of Warding #3
It is located on top of the wall. You can destroy it already on your first visit to the village.
Goat of Warding #4
You can destroy this figure on the way to the castle. It is located on a rocky hillside next to a vineyard.
Goat of Warding #5
You will find this figurine on the first level of the castle basement (B1).
Goat of Warding #6
You will find this figurine on your way to the castle roof.
Goat of Warding #7
The figurine is located in a small room under a stone staircase. You will be able to visit this place after visiting the castle and getting out of it.
Goat of Warding #8
It is located behind the crypt. To visit this part of the cemetery you will need the Iron Insignia Key which you can get when visiting the castle.
Goat of Warding #9
On the canopy of a firewood storage. You will be able to get here during your next visit to the village after visiting the castle.
Goat of Warding #10
You can get to the area around House Beneviento after you visit the castle and then visit the village again to get the Four-Winged Key.
Goat of Warding #11
You'll find this figurine on your way to or from House Beneviento.
Goat of Warding #12
You will find this figure next to one of the windmills while trying to restore the power needed to open the sluice.
Goat of Warding #13
You will find this figure on top of a pole while trying to restore the energy needed to open the sluice.
Goat of Warding #14
You can access this figurine after draining the water from the reservoir and defeating Moreau.
Goat of Warding #15
You will find it in the shrine located under the Otto's Mill building. You can visit this area on your way to the Stronghold, which will be possible after killing Moreau and getting the Six-Winged Unborn Key.
Goat of Warding #16
You'll find it at the bottom of the spiral staircase located in the Stronghold, right next to the entrance to the further part of the basement (B1).
Goat of Warding #17
This figurine is standing on one of the elevator girders. You will be able to shoot at it when you reach the elevator entrance on level B3 of Heisenberg's Factory. Take a few steps back and look up.
Goat of Warding #18
You will find it in the ventilation duct at the B2 level of the factory. You will be able to get to it after destroying the ventilation fan.
Goat of Warding #19
You will find it in a small room which you can access from the cargo bay control room. It is located on level B1 of the factory.
Goat of Warding #20
You will find the last goat figurine during the endgame, after the cutscene where you throw an explosive charge at Megamycete. You will find it on the right side, at the base of the statue.
There are eight Treasure Chests in Resident Evil Village (RE8). Treasure chests contain either a weapon or a treasure item that can be sold to the Duke for a large amount of Lei.
 Beneviento's Treasure
It's inside the tomb. To open it you need Broken Slab. It is an item that can only be obtained after completing the Beneviento House and BEFORE you head to the Reservoir. When you return here with the broken slab a miniboss will appear that you must deal with. Kill it and then interact with the grave. Inside you will find Berengario's Chalice (Value: 18,000 Lei).
Beneviento's Treasure
It's inside the tomb. To open it you need Broken Slab. It is an item that can only be obtained after completing the Beneviento House and BEFORE you head to the Reservoir. When you return here with the broken slab a miniboss will appear that you must deal with. Kill it and then interact with the grave. Inside you will find Berengario's Chalice (Value: 18,000 Lei).
Cannibal's Plunder
It's Father Nichola's Angel (Value: 22,000 Lei) and it's inside the Otto's Mill. You can visit this place when you have to go to the Strongold, so you need Six-Winged Unborn Key. A Axe Giant will stand in your way.
Luiza's Heirloom
You can get this treasure when you return from Castle Dimetrescu. Return to Luiza's house and on the steps of the house you will find a chest containing Luiza's Necklace. Examine it twice to get Necklace Stone (Value: 8,000 Lei) and Luiza's Key. This key can be used to unlock Luiza's Heirloom (Bonus).
Luiza's Heirloom (Bonus)
It's a small box in a side room. It contains Cesare's Goblet (Value: 19,000 Lei). To open it you need Luiza's Key. To get this key you must open Luiza's Heirloom treasure chest and take Luiza's Necklace from it. Then you have to examine the necklace twice, and you will receive first the necklace stone and then you will recive the key.
Maestro's Collection
Code is 270917. It's birthday date from the card you can find in the kitchen. Inside you will find Steel Hræsvelgr (Value: 14,000 Lei) and F2 Rifle - High-Capacity Mag. To get into the house you need to get Luthier's Key. You will find it in the Gardener's House that you can visit on your way back from House Beneviento.
Moreau's Hidden Weapon
When you complete the reservoir then you will own the Crank. With it you will open the Mechanical Door and be able to visit the house where the chest is located. It's a weapon - M1851 Wolfsbane.
Riverbank Treasure House
Golden Lady Statue (Value: 20,000 Lei). The treasure is in a room under the castle and you will be able to get here after visiting the Reservoir since you need a Crank to lower the Drawbridge. Then you will be able to get into the Dock / Boat and head towards the castle where you will find the entrance.
Treasure Under the Stronghold
It's Guglielmo's Plate (Value: 25,000 Lei). You can collect this treasure when you are leaving the Stronghold through its basements (B1).
Waterwheel Weapon
To open the house where the chest is located, you need Iron Insignia Key which you will find in the castle. But you will be able to visit this area of the village again after you visit Beneviento's house and get the Four-Winged Unborn Key. The reward is a grenade launcher - GM 79.
There are a total of 19 Breakable Windows in Dimitrescu Castle. Successfully breaking all of them will grant you 8,000 Completion Points (CP).
 Castle Window
Castle Window
Castle Window
Castle Window
Castle Window
Castle Window
Castle Window
Castle Window
Castle Window
Castle Window
Castle Window
Castle Window
Castle Window
Castle Window
Castle Window
Castle Window
Castle Window
Castle Window
Castle Window
All sorts of Puzzles that you have to solve to open a passage, restore power, get some item, etc.
 Azure Eye
To get to the coffin you should first use the pipebomb to destroy the breakable wall and expose the lit brazier behind it. Then shoot twice at the hanging brazier on the left so that it goes towards the lit brazier and lights up too. Then swing the two hanging braziers to make them collide with each other. When both are lit, the metal bars around the coffin will go down. Value: 1,200 Lei.
Azure Eye
To get to the coffin you should first use the pipebomb to destroy the breakable wall and expose the lit brazier behind it. Then shoot twice at the hanging brazier on the left so that it goes towards the lit brazier and lights up too. Then swing the two hanging braziers to make them collide with each other. When both are lit, the metal bars around the coffin will go down. Value: 1,200 Lei.
Boat
To start the boat and drive it across the lake you will need the Boat Key.
Breaker Box
When you get the Breaker Box Key head down the corridors towards the elevator. A monster will block your path. Turn back, go through the medical room (before you saw the monster you couldn't go through here) and go through the hidden passage to the studio. Use the key to open the box and take the Relief of a Child.
Casting Machine
1. Find Relief Mold and use it here. You will receive the Relief of a Horse.
2. Find Cog Mold and use it here. You will receive the Large Cog.
3. Find Key Mold and use it here. You will receive the Heisenberg's Key.
4. Find Ball Mold and use it here. You will receive the Iron Horse Ball.
Combination Lock
You will learn the code to open the door when you examine the Wedding Ring while solving the Doll Woman puzzle. The code is 052911.
Dimitrescu's Portait / Five Bells Puzzle
You have to shoot five bells. When you hit it, fire will appear above the bell. When you hit all of them, the passage hidden behind the painting will be revealed.
Doll Woman
This is the most complex puzzle in the Beneviento house. You will solve it together with other puzzles available in the house.
Drawbridge
To lower this drawbridge you need the Crank, which you can get when you visit the Reservoir.
Film Projector
In order to solve this puzzle, you must have the Film you find in the Doll Woman's mouth. Arrange the filmstrips in the correct order. You will find a clue on the page lying on the table. The correct order is: Teddy Bear - Fairy Tale - Baby - Music Box - Wedding Ring. When you do this the entrance to a hidden passage will open. Go inside and you will find a scissors.
Generator Lever
You need the Large Cog created at Casting Machine. To be able to create it, you must first find the Cog Mold.
Giant Grinder
Shoot the four glowing elements. You can hit the first three by being on the lowest level.
Hall of Ablution Statues
Rotate the statues so that the two women on the right are facing each other and the three people are looking at the horseman. Then a secret passage will open.
Hall of War Braziers
Push the middle brazier so that both side braziers light up from it. Then the passage will open.
Hole in Wall
You need the Relief of a Horse created at Casting Machine. To be able to create it, you must first find the Relief Mold.
Incomplete Chalice
To solve this puzzle you need to find all four flasks: Dirty Flask (Head Flask), Legs Flask, Arms Flask, and Torso Flask. When you put all the flasks into their slots you will get the Giant's Chalice.
Labyrinth Puzzle
You will need "Flower Swords Ball" to solve this puzzle. Tilt the castle model and make the ball roll into the glowing slot. Watch out for the holes in the middle because when the ball falls into them, you'll have to start again. When you manage to do this you will receive the Crimson Skull (Value: 8,000 Lei).
Labyrinth Puzzle
You need Sun and Moon Ball to complete it. You will receive Onyx Skull (Value: 15,000 Lei).
Labyrinth Puzzle
You need Mermaid Ball for this puzzle. You will receive the Charteuse Skull (Value: 20,000 Lei).
Labyrinth Puzzle
You need the Iron Horse Ball created at Casting Machine. To be able to create it, you must first find the Ball Mold. Reward: Bister Skull (Value: 30,000 Lei).
Lever
Just pull it. When Alcina cuts off your hand then go around her and return to the lever. Take your hand and when the gate opens run through it.
Lever
Just pull it.
Lift Controls
In order to use it, you must restore power. To do this, you need to solve the Generator Lever puzzle.
Mechanical Door
You need the Crank to open it.
Mechanical Door
To open this door you need a Crank.
Mother's Door
To open this door you need the Relief of a Child. You will find it inside the Breaker Box. To open it you must first get the Breaker Box Key.
Music Box
To solve this puzzle you must have the Winding Key, which you will find in the left leg of the Doll Woman. Look at the scratches on the cylinders and rearrange them so that the scratches match. Play the melody and you will receive the Tweezers.
Outer Gate
The gate to the castle. It's locked. To unlock it you need Maiden Crest and Demon Crest. Insert both crests into the slots and position them as shown in the picture below.
Prioress Door
To unlock this door you need Maroon Eye which you get when you examine Maroon Eye Ring.
Reservoir Bridges
Using the colored levers you have to raise metal footbridges that you can walk over. They only come up for a short time and if you fall into the water you will die. Blue and orange platforms disappear very quickly, while the green one stays up much longer. You can pull the lever for a certain color again and extend the time for the walkways of that color to stay up.
Sealed Door
To open this door you will need the Brass Medalion, which you will get by solving the Doll Woman puzzle. You will also learn the correct symbols by examining the eye and one of the arms of the doll. Insert the medallion into the slot and set the correct symbols and the door will open.
Silver Flower Bottle Stand
Grab Sanguis Virginis and place it here. A hidden passage will open.
Sluice Gate Controls
First you need to restore power by solving the puzzle "Windmill Turntable" and then turn on the colored lights as shown in the picture below.
Stone Dais
In order to solve this puzzle you need the Giant's Chalice which you will receive after completing the puzzle "Incomplete Chalice". This will unlock access to the factory.
Switch
In order to use it, you must restore power. To do this, you need to solve the Generator Lever puzzle.
Windmill Turntable
To rotate this windmill and thus restore power, you need to get the Crank that you will find by the second windmill.
Places where you can find different types of Weapons and upgrades for them. Some weapons can be purchased from Duke later in the game or in subsequent playthroughs.
 F2 Rifle
F2 Rifle - High-Capacity Mag
GM 79
Knife
You will find a knife stuck in a table in one of the houses soon after you reach the village.
Lemi
Open the curtain behind which an old man is hiding. He will hand you this gun.
LEMI - Recoil Compensator
M1851 Wolfsbane
M1851 Wolfsbane - Long Barrel
M1897
M1911
It's inside the locked cabinet. The code to open the padlock is 070408. The code can be determined by looking out the window.
M1911 - High-Capacity Mag
When you drain the water.
Mine
Mine
Mine
Mine
Mine
It's in the cabinet.
Mine
Mine
Mine
Mine
It's in the cabinet.
Mine
It's in the cabinet.
Mine
Mine x 2
Mine x 2
Pipe Bomb
It's in a breakable crate.
Pipe Bomb
Pipe Bomb
Pipe Bomb
Pipe Bomb
Pipe Bomb
Pipe Bomb
Pipe Bomb x 2
Pipe Bomb x 2
Pipe Bomb x 2
Pipe Bomb x 3
In the well.
W870 TAC
You will be able to visit this place on your way back from House Beneviento.
W870 TAC - Foregrip
Key Items are miscellaneous items, including the regular keys, that you need to get in order to open locked passages, or that you will need when you want to solve some of the puzzles available in the game.
 Arms Flask
Ball Mold
Boat Key
Breaker Box Key
You will find the key at the bottom of the well.
Broken Slab
The crypt will open after completing House Beneviento, but it WILL CLOSE when you go to the Reservoir. So it is missable! You need this item to get Beneviento's Treasure.
Cog Mold
Crank
Demon Crest
You need this item to open the Outer Gate. To open the shrine you will need a screwdriver (you'll find it in the Truck Key ring case).
Dimitrescu's Key
With this key you can unlock some of the doors in the castle.
Dirty Flask
Head Flask. It is located in the basement where you will find yourself after defeating Alcina Dimitrescu. When you take it the exit to the outside will open.
Four-Winged Key
Four-Winged Unborn Key
After completeing all puzzles and defeating ...
Fuse
You need it to solve the "Breaker Box" puzzle and activate the elevator that will take you out of the basement.
Iron Insignia Key
The key is hidden in the piano. You must play a short melody to be able to take it. The melody is played one note at a time, so you can try again and again. This key opens a few doors, both in the castle and in the village.
Jack Handle
It's inside the locked cabinet. The code to open the padlock is 070408. The code can be determined by looking out the window.
Key Mold
Legs Flask
You can take it after the fight with Donna Beneviento. Take it to unlock the doors.
Maiden Crest
It lies on the altar in the church. You need this item to open the Outer Gate.
Maroon Eye Ring
Examine it and you will get Maroon Eye. You will need the eye to open the Prioress Door.
Mask of Pleasure
This is one of the four masks needed to solve the Four Angels' Busts puzzle. Once you remove the mask, the door to the room will be blocked. To unblock it getMounted Animal Skull, examine it to get Animal Skull and put the skull in place of the mask.
Mask of Sorrow
This is one of the four masks needed to solve the Four Angels' Busts puzzle. When you take the mask, the elevator will take you to the courtyard.
Mounted Animal Skull
Examine it and you will get the Animal Skull.
Photo of a Rare Animal
Photo of a Phantom Fish
Photo of a Strange Bird
In the outhouse.
Relief Mold
When you pick it up, the monster in the next room will activate.
Six-Winged Unborn Key
Torso Flask
Treasure Map
Truck Key
You'll find the keys in the drawer of the green cabinet by the sink. Inspect it to get the screwdriver.
Well Wheel
This item will let you use the Wells that are located in the village.
Winged Key
First this key will allow you to return to the village. You will be able to upgrade it later and thus gain access to new areas.
Mostly doors or gates that are locked and to open which you will need to get the right Key Items.
 Heisenberg's Quarters Door
You need Heisenberg's Key to unlock it. You have to find Key Mold and create the key at Casting Machine.
Heisenberg's Quarters Door
You need Heisenberg's Key to unlock it. You have to find Key Mold and create the key at Casting Machine.
Locked Door
Use the Family Photo to open this door.
Locked Door
Iron Insignia Key
Locked Door
You need Heisenberg's Key to unlock it. You have to find Key Mold and create the key at Casting Machine.
Locked Gate
Iron Insignia Key
Medicine Room Door
You need Silver Key.
Tractor
It will be here after you visit the castle. To lift it and make a passage underneath it you must use the Jack Handle.
Witch's Lair Gate
Use the Winged Key to unlock it.
Mostly doors or gates that are locked and you have to approach them from the right side to open them.
 Locked Crypt
You will exit through this crypt when leaving the Stronghold.
Locked Crypt
You will exit through this crypt when leaving the Stronghold.
Locked Door
It can be unlocked from the hall of joy side.
Locked Door
Locked Door
It can be opened from the corridor side.
Locked Door
Locked Door
It can be unlocked from the dining room side.
Locked Door
They can be opened from the main hall.
Locked Door
Locked Door
Locked from inside.
Locked Door
Locked form inside but there's a hole in the wall at the back of the house.
Locked Door
Locked Door
Locked Gate
You can get into the room through the hole in the ceiling.
Locked Gate
Can be unlocked from the Altar side. Shoot the padlock.
Locked Gate
Locked Gate
Locked Gate
It can only be unlocked from one side.
Locked Gate
Locked Gate
This is the way you will exit the reservoir after killing Moreau. To open the gate you need the Six-Winged Unborn Key.
Luiza's House Gate
It can be opened from the courtyard of the house.
Opera Hall Door
It can be unlocked from the opera hall side.
Mostly doors or gates that are locked and to open them you have to for example shoot the padlock, etc.
 Breakable Wall
Breakable Wall
Fence
Shoot the soldier lying on the table. He will wake up and destroy the fence.
Giant Rotor
Quickly shoot the central glowing part.
Hidden Passage
Push the cart to reveal a passageway.
Locked Door
Shoot three padlocks.
Locked Door
Shoot the padlock.
Locked Door
Destroy the glowing elements.
Locked Door
Destroy the glowing elements.
Locked Door
To open the door, destroy the glowing element.
Locked Door
Destroy the glowing elements.
Locked Door
Destroy the glowing elements.
Locked Gate
Shoot the padlock.
Locked Gate
Shoot the padlock.
Locked Gate
You have to shoot the padlock. You will be able to do this after visiting the castle.
Locked Gate
You need to shoot the padlock so you need a gun.
Slime Barrier
Can be destroyed.
The lockpicks with which you can unlock closed drawers or other containers.
 Lockpick
Lockpick
Lockpick
Lockpick
At the bottom of the well, near the ladder.
Lockpick
Lockpick
Lockpick
In the well. You need the Well Wheel to get it.
Lockpick
It's in the outhouse.
Lockpick
It's in the cabinet.
Lockpick
 Ancient Beast
It spawns after you visit the Reservoir. Drops Crystal Ancient Beast (Value: 80,000 Lei).
Ancient Beast
It spawns after you visit the Reservoir. Drops Crystal Ancient Beast (Value: 80,000 Lei).
Axe Giant
He drops the Giant Crystal Axe (Value: 30,000 Lei).
Axe Giant
When you return here to open the treasure chest. He drops the Giant Crystal Axe (Value: 30,000 Lei).
Donna Beneviento
When you manage to get out of the basement and want to leave the house. Fighting her will be a game of hide and seek. You must quickly find where the doll is. She drops Angie (Value: 28,000 Lei).
First Daughter
Destroy the second window to let in more cold air. She drops the Crystal Torso (Value: 5,000 Lei).
Hammer Giant
He drops the Crystal Hammer (Value: 35,000 Lei).
Heisenberg
Lady Alcina Dimitrescu
The fight begins here and you will move up the tower to finally fall to the very bottom of it. After the fight you will receive the Crystal Dimitrescu (Value: 25,000 Lei).
Moreau
He drops the Crystal Moreau (Value: 40,000 Lei).
Second Daughter
Use the lever on one of the columns to open the roof and let in cold air. You will have to do this several times during the fight. She drops the Crystal Torso (Value: 5,000 Lei).
Sturm
He will drop Complex Mechanical Heart (Value: 45,000 Lei).
Third Daughter
Move the rack and use the pipe bomb to smash the wall to let the cold air in. She drops the Crystal Torso (Value: 5,000 Lei).
There are a total of 47 Files hidden in Resident Evil Village, and you need to find all of them in order to earn the "Bookworm" achievement / trophy.
 "Goats of Warding" Placard
A Cook's Diary
A Maid's Diary
Alcina Dimitrescu's Diary
Analysis Results
Beneviento's Medical Report
Examine the book inside Miranda's Lab.
Changing the Cranks
Chris's Computer
Church Computer
After visiting the castle.
Craftsman's Note
Dangerous Creatures
It' s on an armchair in the first room of Luiza's House.
Development Note 1
Development Note 2
Dimitrescu's Medical Report
Examine the book inside Miranda's Lab.
Ernest's Diary
Ethan's Diary
During the prologue. The laptop in the room adjacent to the bedroom.
Eugen's Diary
Experiment Notes
Fridge Memo
During the prologue. It's on the refrigerator in Ethan's kitchen.
Further Observations
Examine it.
Gardener's Diary
Grand Chambermaid's Notice
Guest Book
Heisenberg's Diary
Heisenberg's Medical Report
Examine the book inside Miranda's Lab.
Insect Observation Journal
Examine it.
Leonardo's Message
Medical Checkup Report
During the prologue. In the drawer of the cabinet standing next to the desk on which the laptop is placed.
Miranda's Diary
During the endgame. Inside Miranda's Lab.
Mission Briefing
It's next to the soldier's corpse.
Moreau's Diary 1
In a drawer. When you drain the water.
Moreau's Diary 2
Moreau's Diary of Experiments
Moreau's Medical Report
Examine the book inside Miranda's Lab.
Note on the Luthier's House
Observation Report
The report lies on a table in one of the cells.
Officer's Diary
Old News Clipping
During the prologue. Upstairs, in the room at the end of the hallway.
Rumors of a Dagger
Scribbled Note
It' s on an armchair in the first room of Luiza's House.
Spencer's Letter
During the endgame. Inside Miranda's Lab.
Sturm
The Labyrinths
The Reservoir and Giant Fish
Treatment Candidates
The document lies on a hospital cart.
Vasile's Final Testament
Winemaking History
Places where Duke can be found. As you progress through the game, you will be able to buy new items from him.
 Duke
Duke
Duke
Duke
Duke
Duke
Duke
Duke
Generally, you will find the items inside the Wells. To be able to do this you must first get the Well Wheel.
 Well
Ladder to the bottom / Access to a hidden room.
Well
Ladder to the bottom / Access to a hidden room.
Well
Madalina (Head). It can be combined with Madalina (Body). Value of complete doll: 20,000 Lei.
Well
Wooden Animal (Head). It can be combined with the Wooden Animal (Body) to create the Wooden Goat (Value: 15,000 Lei).
Well
Pipe Bomb x 3
Well
Lockpick
Well
Flashbang x 3
There are a total of 10 Outhouses in the game. You need to open all 10 outhouses in a single playthrough to get the "When You Gotta Go..." achievement / trophy.
 Outhouse #1
Outhouse #2
Outhouse #3
Outhouse #4
Outhouse #5
It cannot be opened on your first visit to the village.
Outhouse #6
Outhouse #7
Outhouse #8
Outhouse #9
Outhouse #10
Typerwriters in Resident Evil Village are places where you can save your progress in the game.
 Altar
Altar
Ancient Bridge
Church
Craftsman's House
Doll Workshop (Beneviento House - B1)
Elevator (Factory - B1)
Elevator (Factory - B3)
Elevator (Factory - B4)
Gardener's House
Gatehouse (Reservoir)
Luiza's House
Merchant's Room (Castle - 1F)
Scrapheap (Factory - B5)
Stronghold - 1F
Stronghold - B1
Terrace (Castle - 2F)
Windmill Shack
 Breakable Wall
Use pipebomb to destroy it and uncover a lit brazier.
Breakable Wall
Use pipebomb to destroy it and uncover a lit brazier.
Castle Map (Annex)
Castle Map (Main)
Coffin
Open it and take the dagger to start the fight against Alcina Dimitrescu.
Elena and Leonardo
Elevator Controls
Factory Map (Lower Levels)
Factory Map (Upper Levels)
Heisenberg
A confrontation with Heisenberg. At the end he'll throw you into the pit.
Lift Controls
Use them to call the lift.
Medical Log
Story Gate
This gate will be opened or closed as you progress through the game.
 Drawer
Sniper Rifle Ammo
Drawer
Sniper Rifle Ammo
Drawer
Shotgun Ammo
Drawer
Wooden Angel Statue (Value: 3,000 Lei)
Drawer
Shotgun Ammo
Drawer
Shotgun Ammo
Drawer
Sniper Rifle Ammo
Drawer
Magnum Ammo
Locked Container
Yellow Quartz
 Blue Bird
Juicy Game. Blue bird sits on a tree branch.
Blue Bird
Juicy Game. Blue bird sits on a tree branch.
Chiken x 2
Chiken x 2
Chiken x 2
Chiken x 3
Chiken x 3
Poultry
It's on the shelf.
 Fish
It's on the table.
Fish
It's on the table.
Fish x 3
Fish x 3
Gold Fish + Fish x 2
Finest Fish + Fish x 2.
Large Fish x 2
Fish x 4
Large Fish x 2
Fish x 4
 Goat
Meat x 2
Goat
Meat x 2
Goat x 2
Meat x 4. After returning from the reservoir.
Meat
It's on the table.
Meat x 2
On the shelf.
Pig
Meat x 2
Pig
Meat x 2
Pig x 2
Meat x 4
White Pig
Quality Meat
Places where you can find ammunition for your firearm. Sometimes it will be directly accessible, for example lying on a shelf or a table, and sometimes you will have to first open a drawer, break the glass of a showcase, etc.
Crystals are small shiny crystals that are usually placed somewhere high up and to get them you have to shoot them and then they will fall down and you will be able to pick them up.
 Crystal Fragment
Crystal Fragment
Crystal Fragment
It's above the painting. Shoot it.
Crystal Fragment
Crystal Fragment
It's under the ceiling in the hallway.
Crystal Fragment
Crystal Fragment
Crystal Fragment
Look above and shoot it.
Crystal Fragment
Crystal Fragment
Above, shoot it.
Crystal Fragment
Crystal Fragment
Crystal Fragment
Crystal Fragment
In a box.
Crystal Fragment (Showcase)
Break the glass.
Crystal Fragment x 2 + Vivanite
Crystal Fragment x 2 + Yellow Quartz
Large Crystal
Large Crystal
It will appear after the Beneviento house is completed.
Large Crystal
Large Crystal
In the outhouse.
Large Crystal
Large Crystal
Large Crystal
Large Crystal x 2 + Vivanite + Yellow Quartz
Vivianite
Vivianite
It will appear after the Beneviento house is completed.
Vivianite
It's in the basement. Inside the oven.
Yellow Quartz
Yellow Quartz
You have to use the Zipline to get here.
Yellow Quartz
Yellow Quartz
Yellow Quartz
Valuable Items that can be found in various places and later sold to Duke. Some of them can be combined with other items, which will give you an item that you can sell for a much higher price.
 Angie
You can loot it after defeating Donna Beneviento. Value: 28,000 Lei.
Angie
You can loot it after defeating Donna Beneviento. Value: 28,000 Lei.
Antique Coin
Value: 8,000 Lei.
Cigar
Value: 3,000 Lei.
Crimson Glass
Value: 3,500 Lei.
Ingrid's Necklace
It drops from one of the monsters. Value: 2,000 Lei.
Lady's Lipstick
Return here later after meeting with Lady Dimitrescu then the door to the room will be open. Value: 6,000 Lei.
Large Pigeon Blood Ruby
It can be combined with the Necklace with Two Holes that you can find inside the Well and Pigeon Blood Ruby. You will create the Dimitrescu's Necklace (Value: 50,000 Lei).
Madalina (Body)
Value: 2,000 Lei. You can combine it with Madalina (Head) that you can find in the Well. A repaired doll value is 20,000 Lei.
Mechanical Part (Cylinder)
Value: 7,000 Lei. Can be combined with Mechanical Part (Shaft) to create Heisenberg's Hammer (Value: 45,000 Lei).
Mechanical Part (Shaft)
Value: 4,000 Lei. Can be combined with Mechanical Part (Cylinder) to create Heisenberg's Hammer (Value: 45,000 Lei).
Pigeon Blood Ruby
On the roof. To get here, open the nearby Mechanical Door, use the Ladder, walk along the cliff and jump onto the roof. Value: 3,000 Lei. It can be combined with the Necklace with Two Holes that you can find inside the Well and Large Pigeon Blood Ruby. You will create the Dimitrescu's Necklace (Value: 50,000 Lei).
Silver Angel Statue
It's in the chest. You can access this after draining the water from the reservoir and defeating Moreau. Value: 10,000 Lei.
Silver Ring (Drawer)
Value: 1,800 Lei
Teddy Bear
It's in the basement of the house. Value: 4,000 Lei.
Wooden Animal (Body)
Can be combined with the Wooden Animal (Head), that you can find inside the Well, to create the Wooden Goat (Value: 15,000 Lei)
Different types of Breakable Containers, for example chests, vases or barrels, that can be destroyed. When you do this, you will find for example ammunition, Lei, or components for crafting.
 First Aid Med
First Aid Med
First Aid Med
First Aid Med
First Aid Med
First Aid Med
Destroy the crate.
First Aid Med
First Aid Med
 Cabinet
You can hide here.
Cabinet
You can hide here.
Cabinet
You can hide here.
Cabinet
You can hide here.
Cabinet
You can hide from the baby monster here after taking the Fuse.
Doll (1st Position)
One of the places where the doll can hide.
Doll (2nd Position)
One of the places where the doll can hide.
Doll (3rd Position)
One of the places where the doll can hide.
Doll (4th Position)
One of the places where the doll can hide.
Gate
It will open on your second visit to the village.
Lever
Lever
Sink
Use Blood Covered Ring here to receive Wedding Ring. Examine the ring - 052911.