Welcome to guides4gamers.com

Flamingos, Need for Speed Heat Points of interest

This collection includes every marker from the Flamingos category of points of interest in Need for Speed Heat, all placed on interactive maps created specifically for the game.

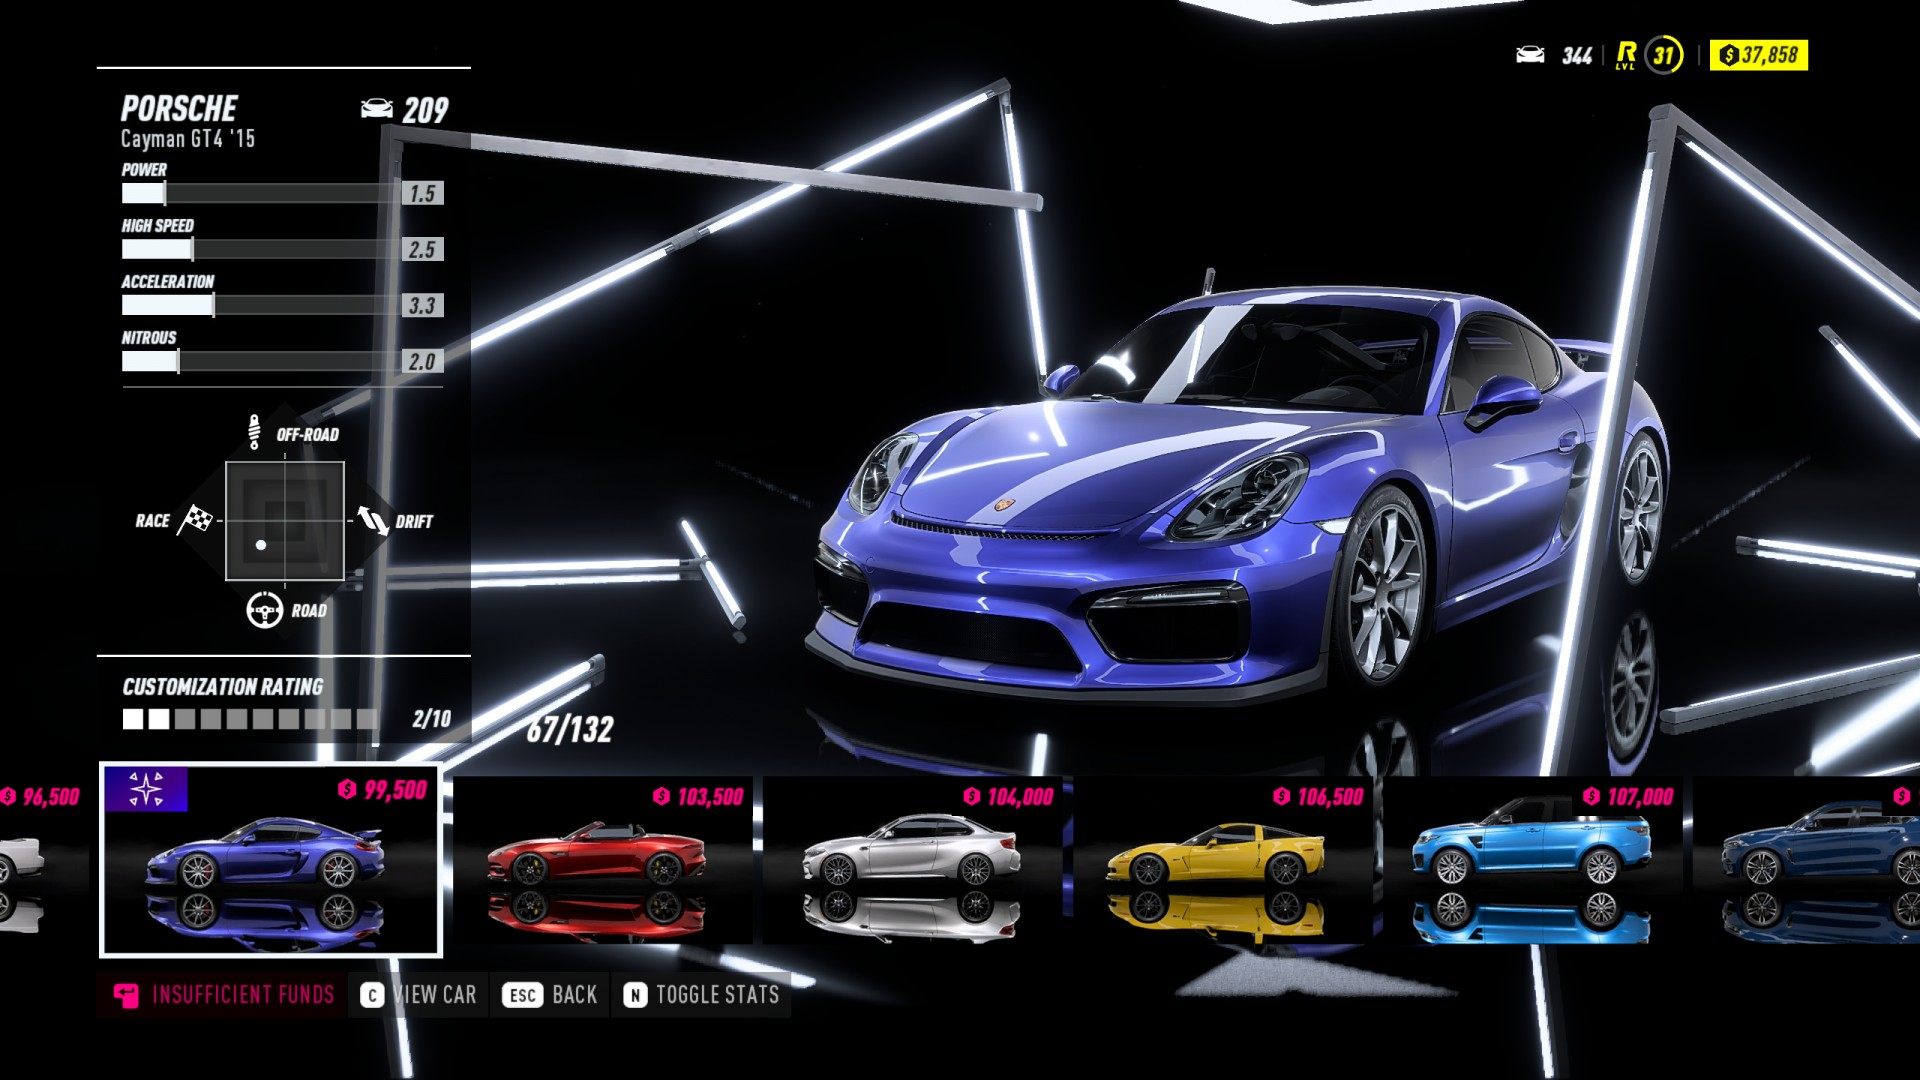
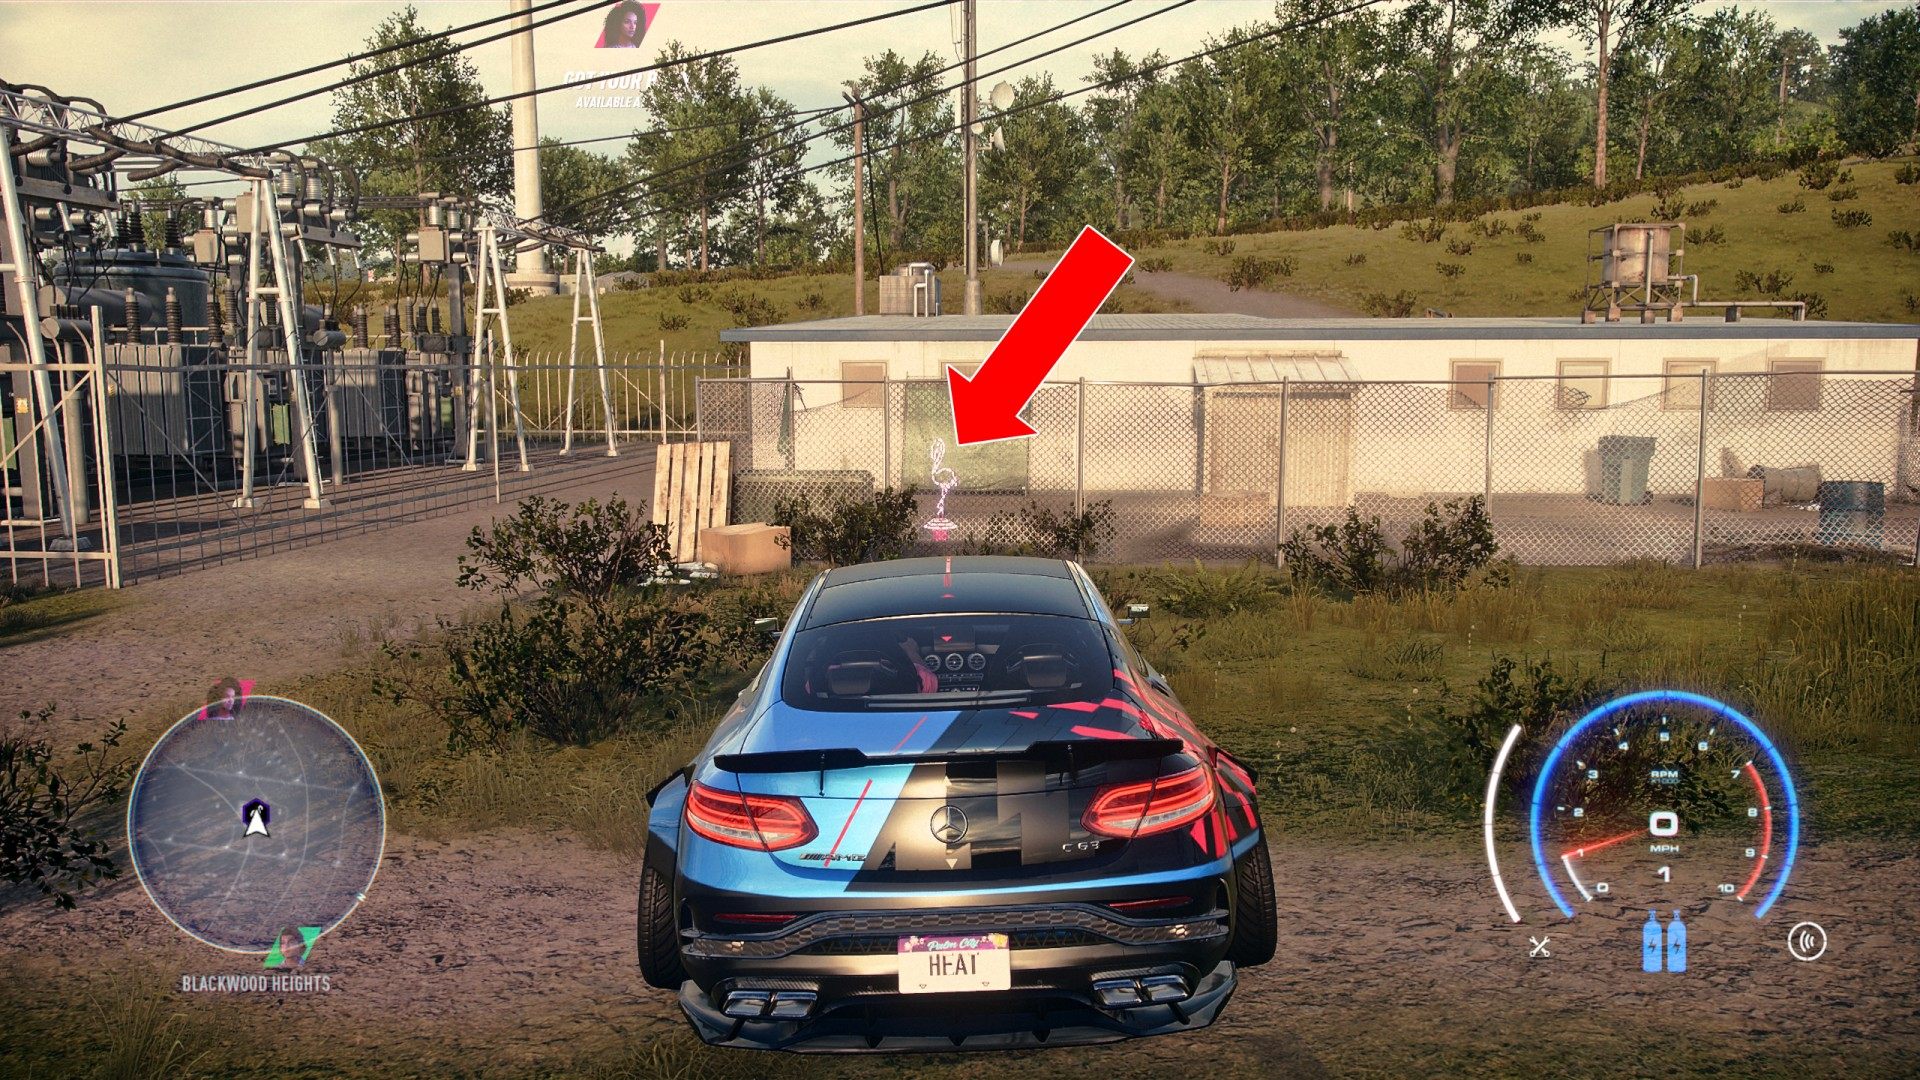
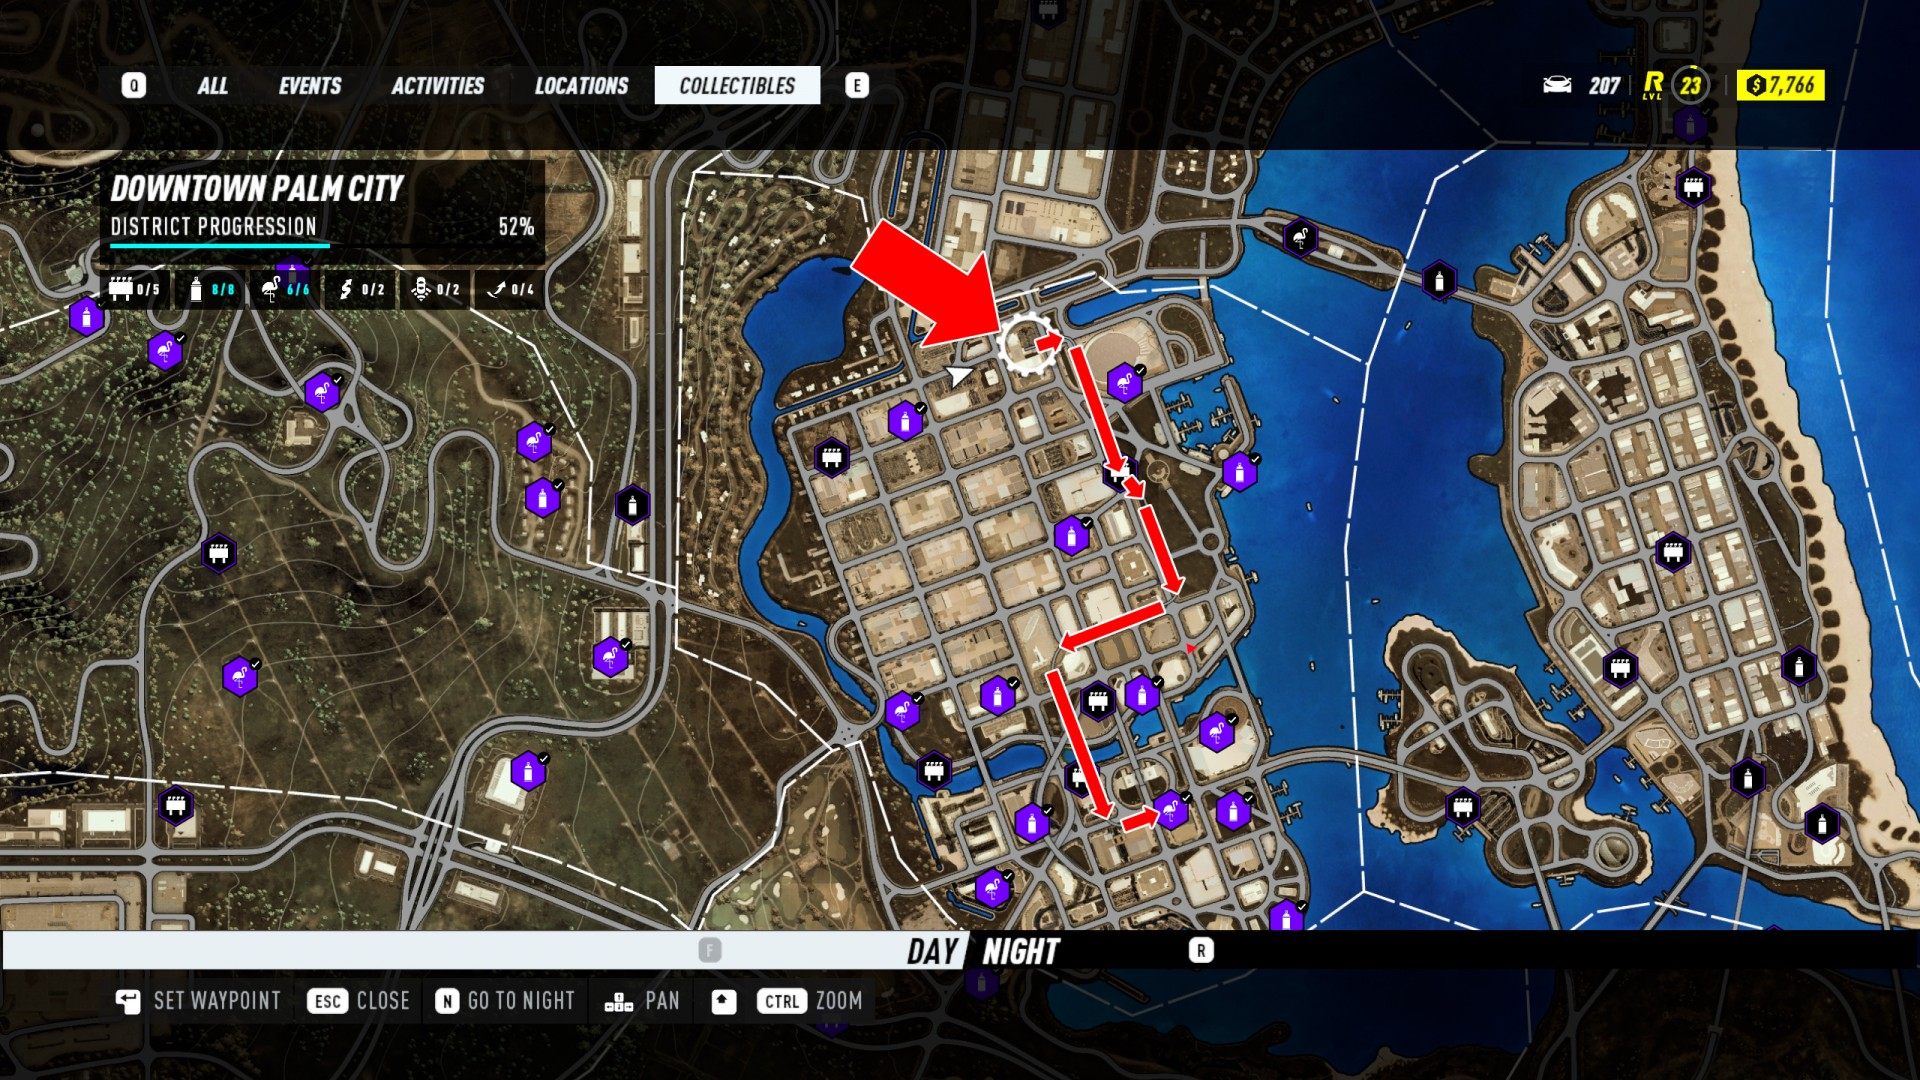
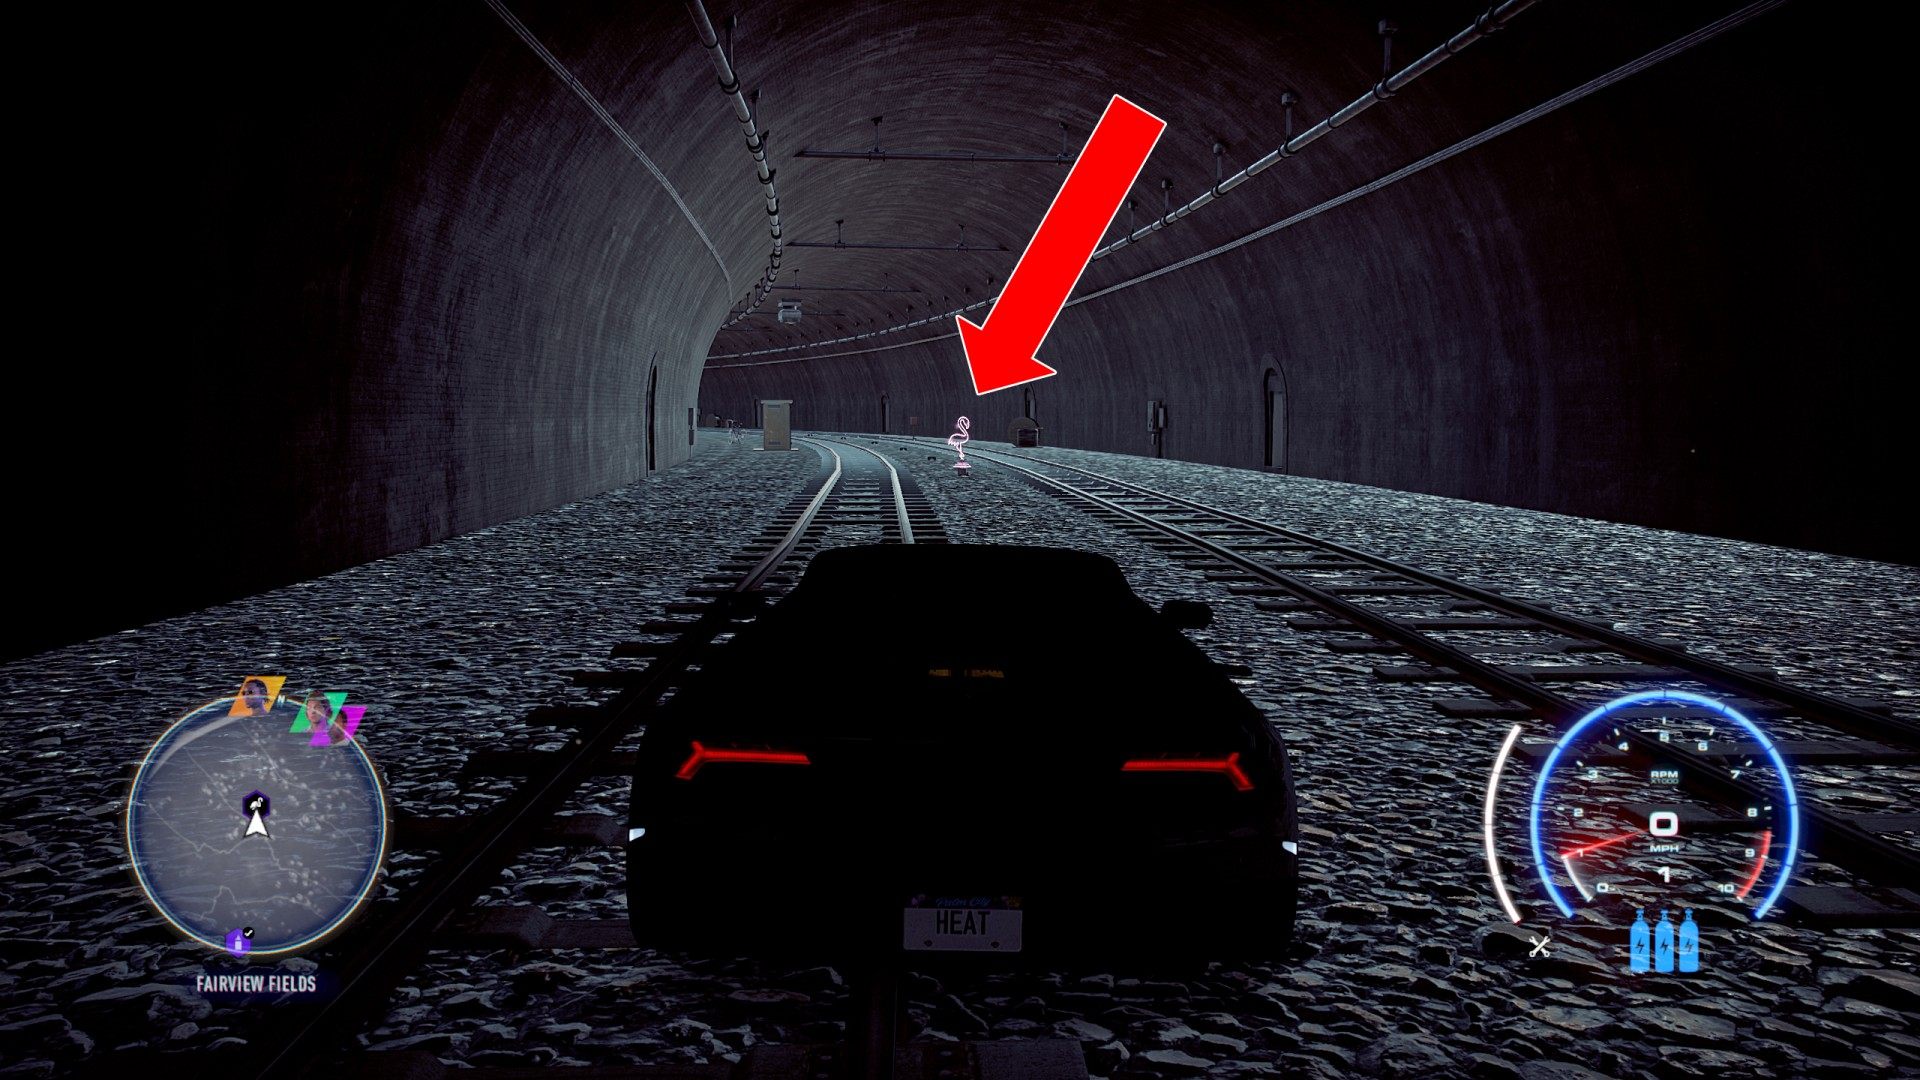
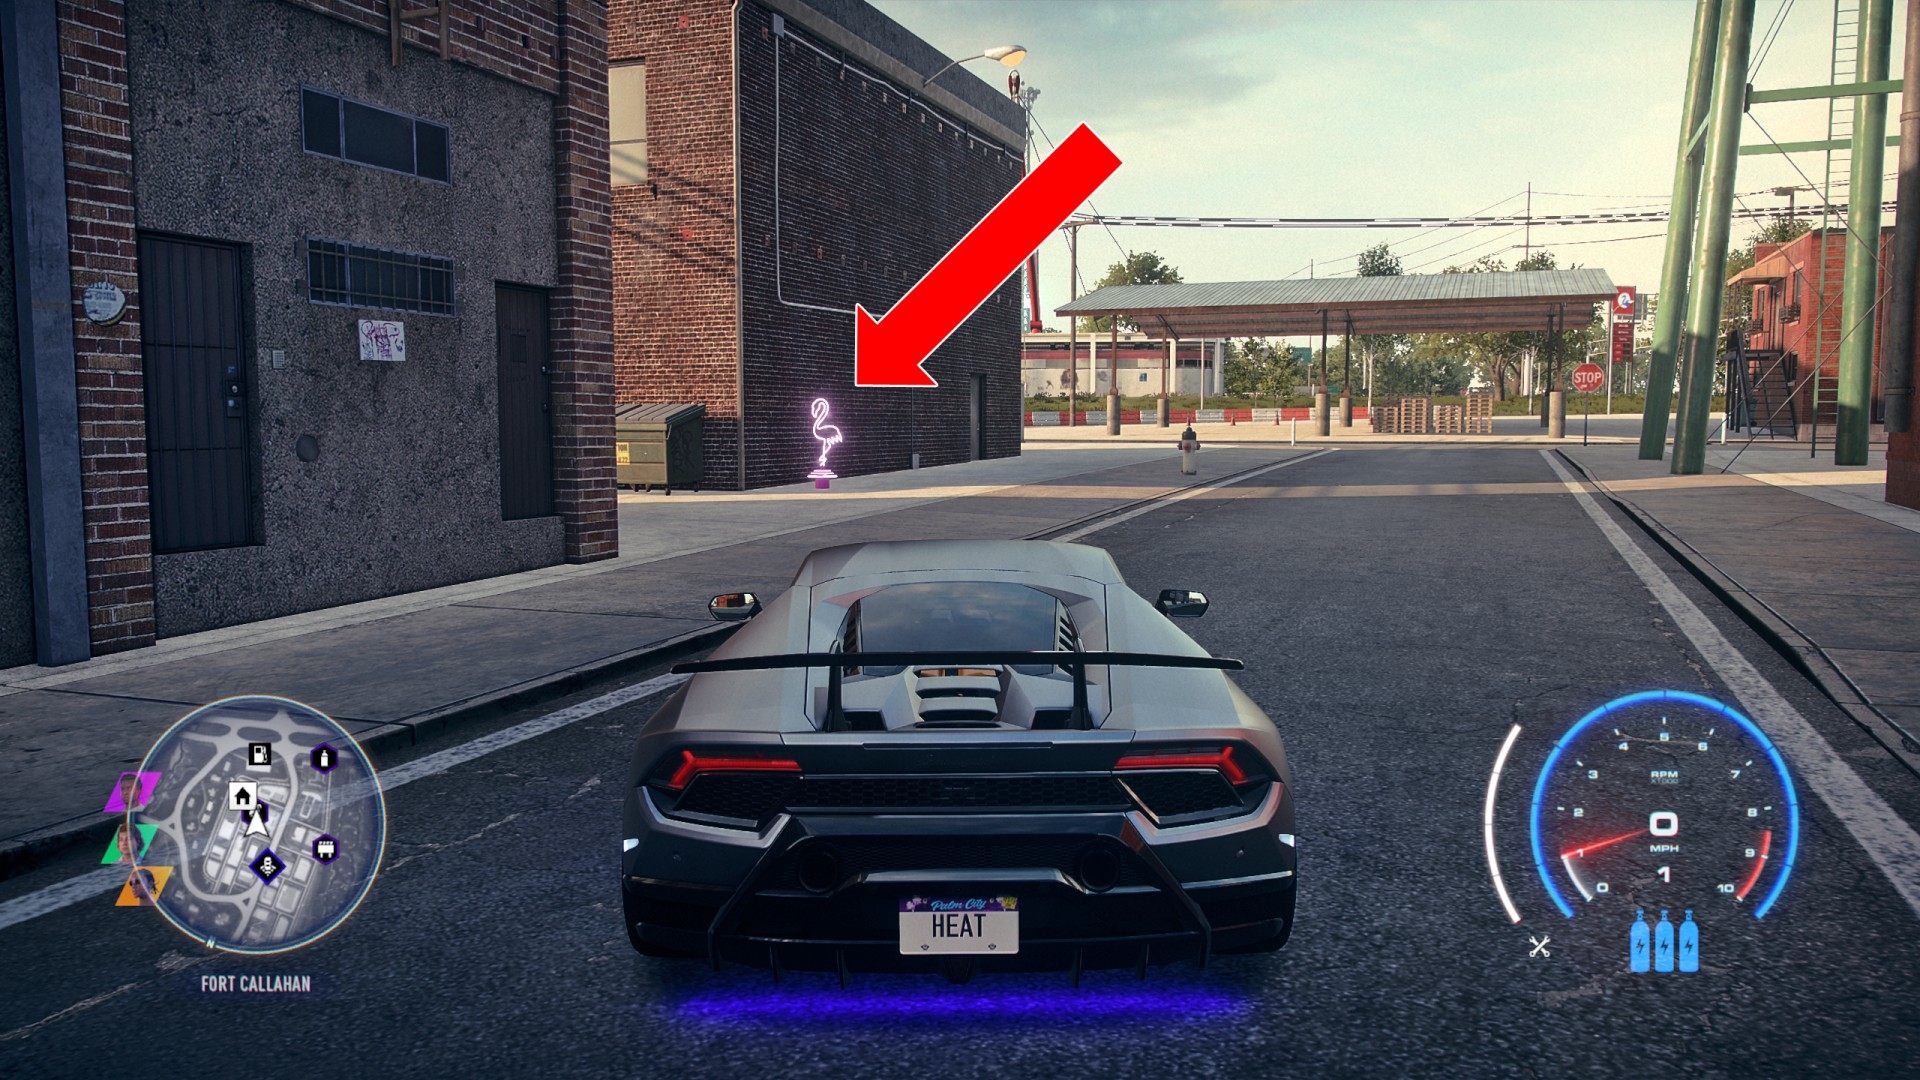
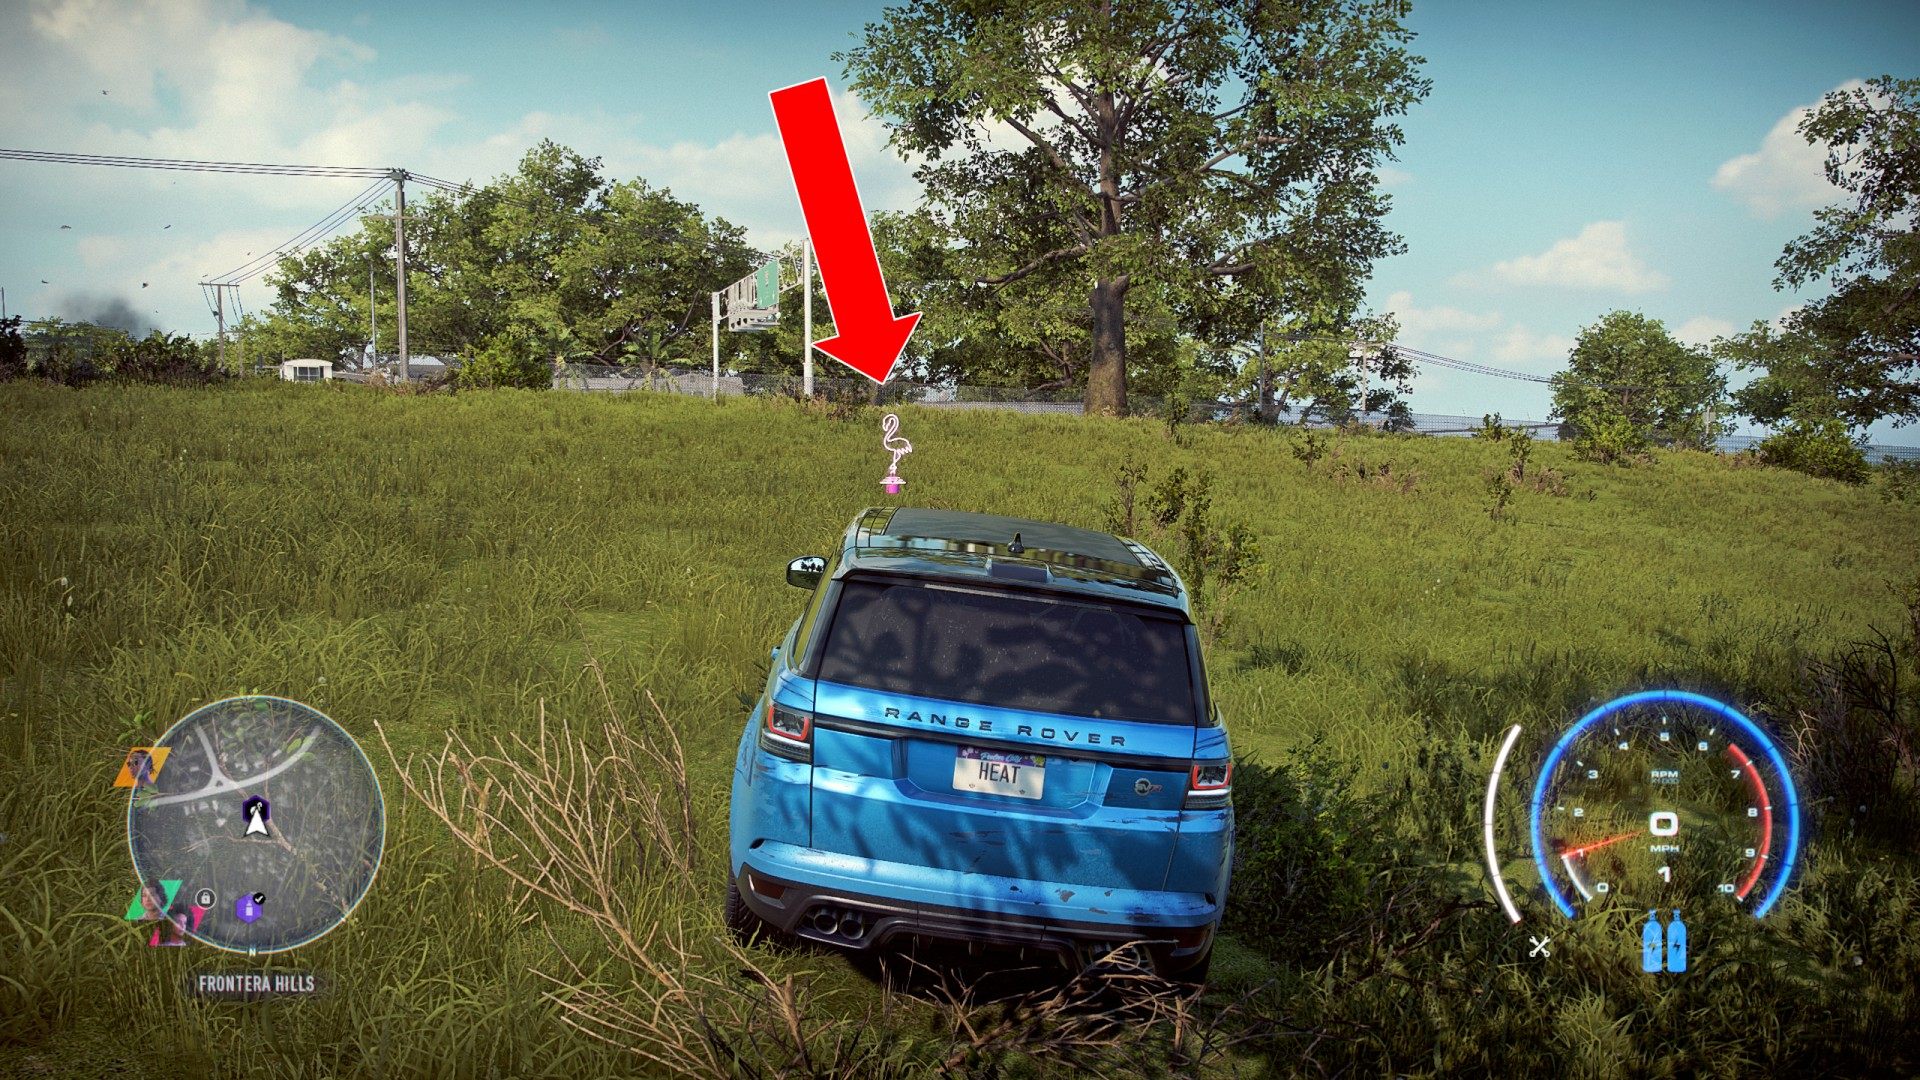
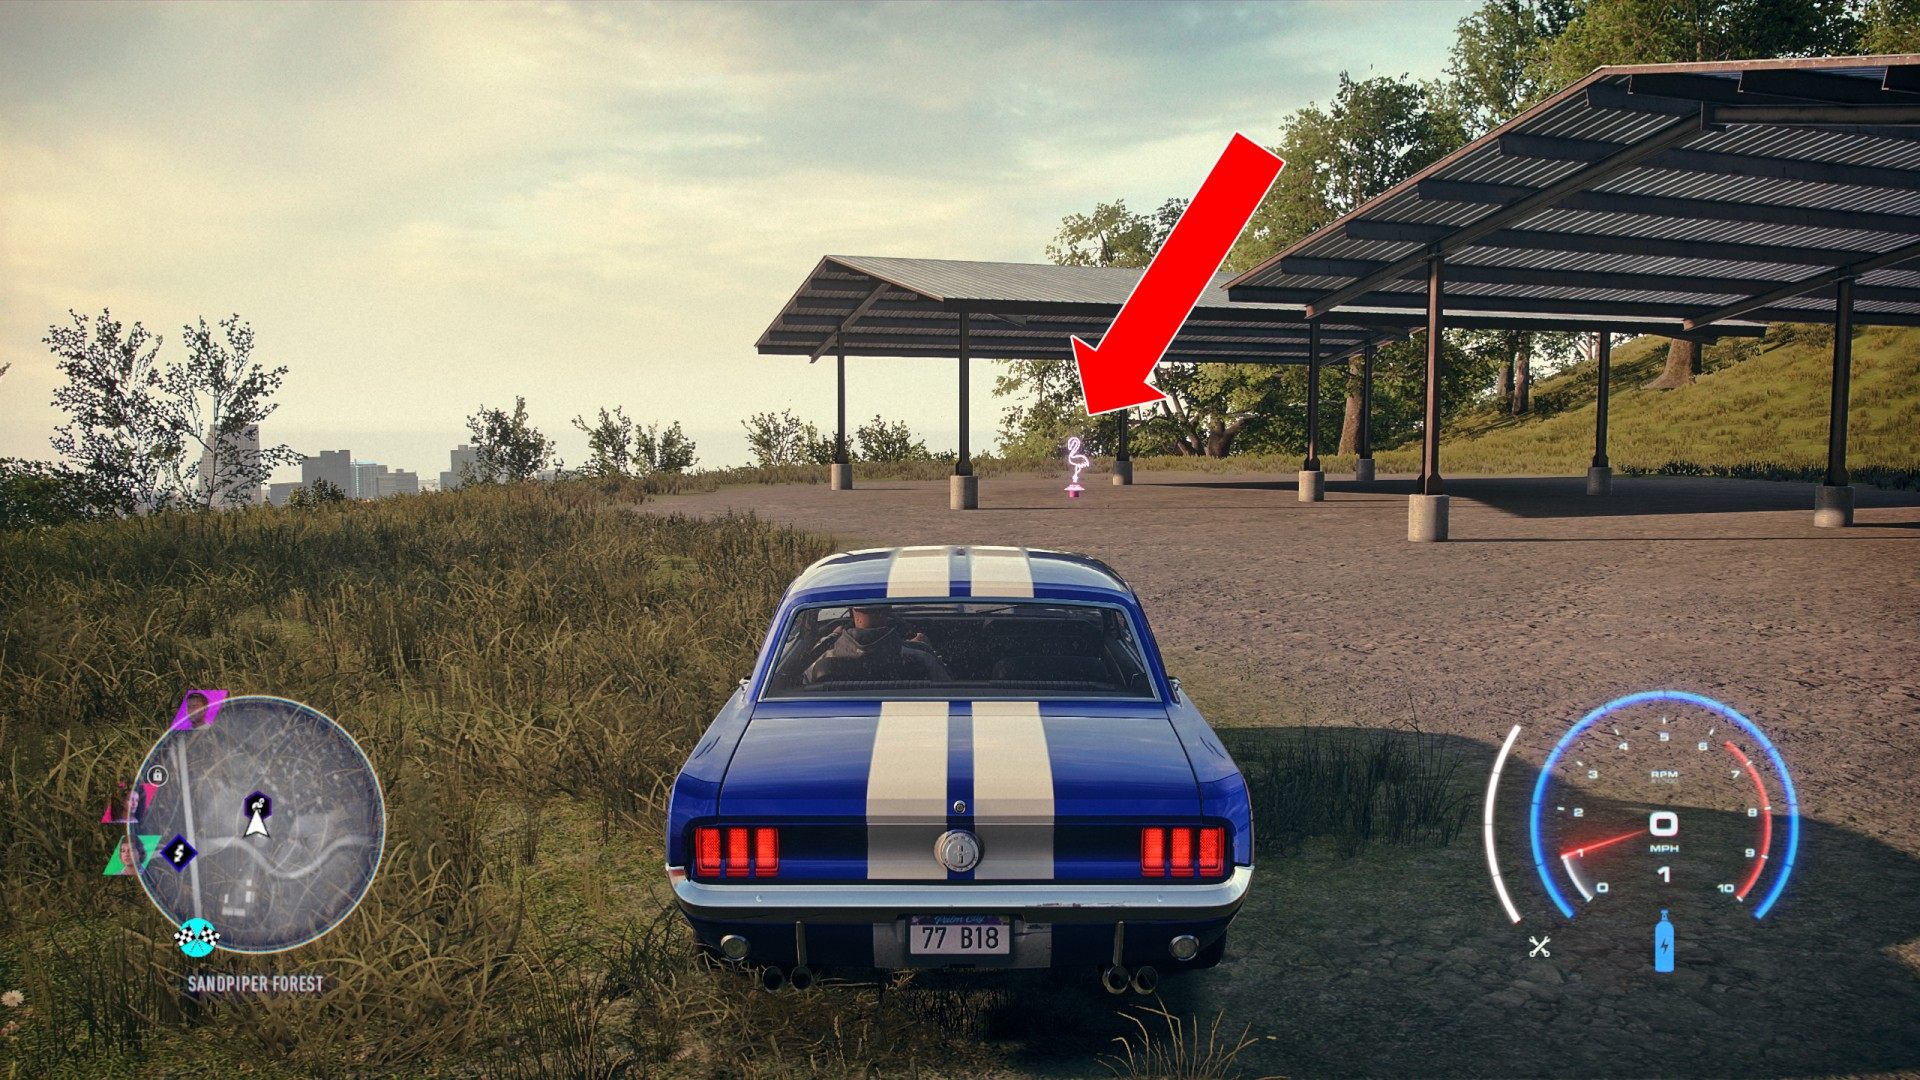
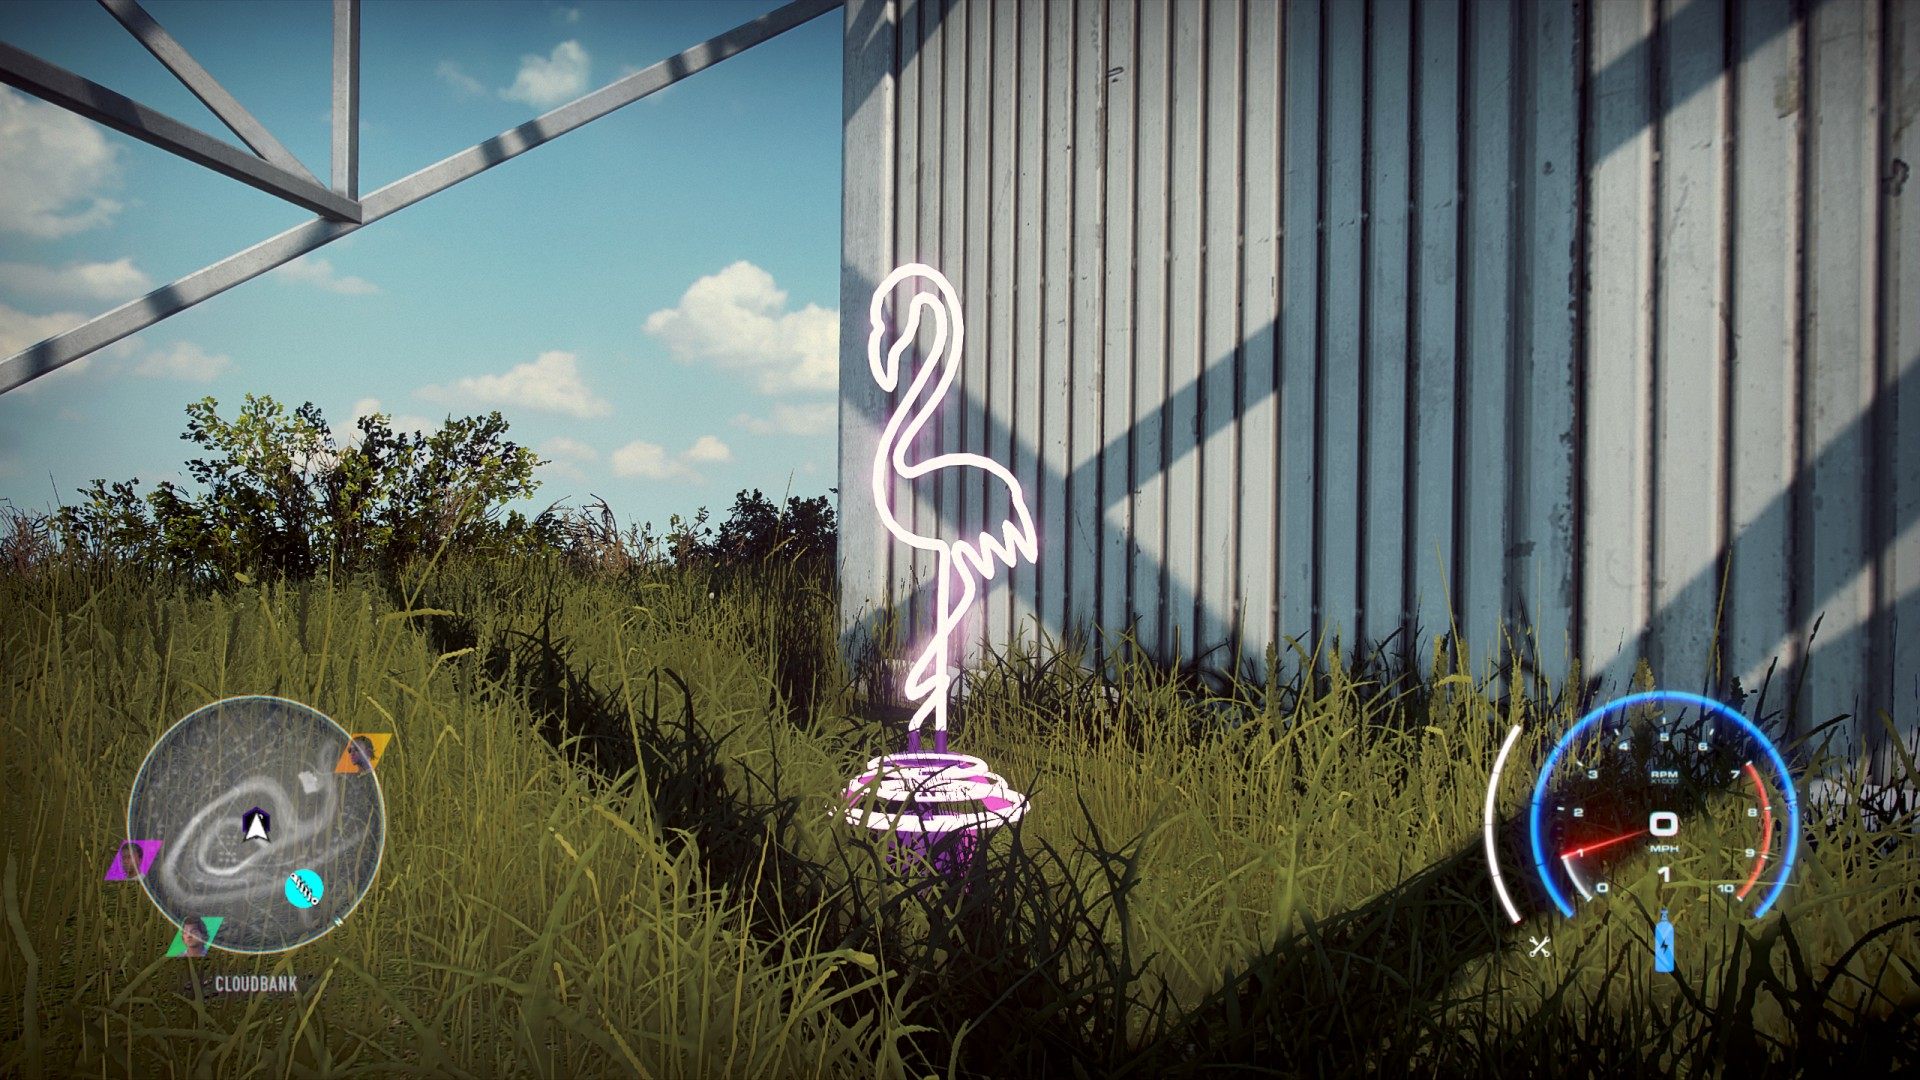
Flamingos can be collected when the 13th REP level is reached. Flamingos can be collected by driving into them. Once you collect all flamingos, you'll unlock a Porsche Cayman GT4 '15, as well as Candy Pink Tire Smoke and a Flamingo Decal.

Flamingos

Porsche Cayman GT4 '15

Flamingos

Index

The index below enables quick navigation to the desired marker / point of interest.

All known locations on the map - Palm City

FlamingoBayview Park #1

Bayview Park #1

Show the map

FlamingoBayview Park #2

Bayview Park #2

Show the map

FlamingoBayview Park #3

Bayview Park #3

Show the map

FlamingoBayview Park #4

Bayview Park #4

Show the map

FlamingoBayview Park #5

Bayview Park #5

Show the map

FlamingoBayview Park #6

Bayview Park #6

Show the map

FlamingoBlackwood Heights #1

Blackwood Heights #1

Show the map

FlamingoBlackwood Heights #2

Blackwood Heights #2

Show the map

FlamingoBlackwood Heights #3

Blackwood Heights #3

Show the map

FlamingoBlackwood Heights #4

Blackwood Heights #4

Show the map

FlamingoBlackwood Heights #5

Blackwood Heights #5

Show the map

FlamingoBlackwood Heights #6

Blackwood Heights #6

Show the map

FlamingoCape Castille #1

Cape Castille #1

Show the map

FlamingoCape Castille #2

Cape Castille #2

Show the map

FlamingoCape Castille #3

Cape Castille #3

Show the map

FlamingoCape Castille #4

Cape Castille #4

Show the map

FlamingoCape Castille #5

Cape Castille #5

Show the map

FlamingoCape Castille #6

Cape Castille #6

Show the map

FlamingoCloudbank #1

Cloudbank #1

Show the map

FlamingoCloudbank #2

Cloudbank #2

Show the map

FlamingoCloudbank #3

Cloudbank #3

Show the map

FlamingoCloudbank #4

Cloudbank #4

Show the map

FlamingoCloudbank #5

Cloudbank #5

Show the map

FlamingoDowntown Palm City #1

Downtown Palm City #1

Show the map

FlamingoDowntown Palm City #2

Downtown Palm City #2

Show the map

FlamingoDowntown Palm City #3

Downtown Palm City #3

Show the map

FlamingoDowntown Palm City #4

To get to this flamingo you have to jump on the overhead railway at its other end.

Downtown Palm City #4

Use this ramp.

Downtown Palm City #4

Then drive along the tracks to the other end.

Downtown Palm City #4

Show the map

FlamingoDowntown Palm City #5

Downtown Palm City #5

Show the map

FlamingoDowntown Palm City #6

Downtown Palm City #6

Show the map

FlamingoEden Shores #1

Eden Shores #1

Show the map

FlamingoEden Shores #2

Eden Shores #2

Show the map

FlamingoEden Shores #3

Eden Shores #3

Eden Shores #3

Show the map

FlamingoEden Shores #4

Eden Shores #4

Show the map

FlamingoEden Shores #5

Eden Shores #5

Show the map

FlamingoEden Shores #6

Eden Shores #6

Show the map

FlamingoEdgewood Valley #1

Edgewood Valley #1

Show the map

FlamingoEdgewood Valley #2

Edgewood Valley #2

Show the map

FlamingoEdgewood Valley #3

Edgewood Valley #3

Show the map

FlamingoEdgewood Valley #4

Edgewood Valley #4

Show the map

FlamingoEdgewood Valley #5

Edgewood Valley #5

Show the map

FlamingoFairview Fields #1

Fairview Fields #1

Show the map

FlamingoFairview Fields #2

Fairview Fields #2

Show the map

FlamingoFairview Fields #3

Fairview Fields #3

Show the map

FlamingoFairview Fields #4

Fairview Fields #4

Show the map

FlamingoFairview Fields #5

The nearest entrace to the tunnel is to the south, near the Fairview Fields #6 street art.

Fairview Fields #5

Show the map

FlamingoFairview Fields #6

Fairview Fields #6

Show the map

FlamingoFort Callahan #1

Fort Callahan #1

Show the map

FlamingoFort Callahan #2

Fort Callahan #2

Show the map

FlamingoFort Callahan #3

Fort Callahan #3

Show the map

FlamingoFort Callahan #4

Fort Callahan #4

Show the map

FlamingoFort Callahan #5

Fort Callahan #5

Show the map

FlamingoFrontera Hills #1

Frontera Hills #1

Show the map

FlamingoFrontera Hills #2

Update: If you don't find this flamingo outside, then you will find it in the underground tunnel. One of the entrances to the tunel is near the Frontera Hills #2 street art, and the other is south of the flamingo.

Frontera Hills #2

Show the map

FlamingoFrontera Hills #3

Frontera Hills #3

Show the map

FlamingoFrontera Hills #4

Frontera Hills #4

Show the map

FlamingoFrontera Hills #5

Frontera Hills #5

Show the map

FlamingoFrontera Hills #6

Frontera Hills #6

Show the map

FlamingoGrenada Wetlands #1

Grenada Wetlands #1

Show the map

FlamingoGrenada Wetlands #2

Grenada Wetlands #2

Show the map

FlamingoGrenada Wetlands #3

Grenada Wetlands #3

Show the map

FlamingoGrenada Wetlands #4

Grenada Wetlands #4

Show the map

FlamingoGrenada Wetlands #5

Grenada Wetlands #5

Show the map

FlamingoMendoza Keys #1

Mendoza Keys #1

Show the map

FlamingoMendoza Keys #2

Mendoza Keys #2

Show the map

FlamingoMendoza Keys #3

Mendoza Keys #3

Show the map

FlamingoMendoza Keys #4

Mendoza Keys #4

Show the map

FlamingoMendoza Keys #5

Mendoza Keys #5

Show the map

FlamingoMendoza Keys #6

Mendoza Keys #6

Show the map

FlamingoPalm City Raceway #1

Palm City Raceway #1

Show the map

FlamingoPalm City Raceway #2

Palm City Raceway #2

Show the map

FlamingoPalm City Raceway #3

Palm City Raceway #3

Show the map

FlamingoPalm City Raceway #4

Palm City Raceway #4

Show the map

FlamingoPalm City Raceway #5

Palm City Raceway #5

Show the map

FlamingoPort Murphy #1

Port Murphy #1

Show the map

FlamingoPort Murphy #2

Port Murphy #2

Show the map

FlamingoPort Murphy #3

Port Murphy #3

Show the map

FlamingoPort Murphy #4

Port Murphy #4

Show the map

FlamingoPort Murphy #5

Port Murphy #5

Show the map

FlamingoPort Murphy #6

Port Murphy #6

Show the map

FlamingoRockville #1

Rockville #1

Show the map

FlamingoRockville #2

Rockville #2

Show the map

FlamingoRockville #3

Rockville #3

Show the map

FlamingoRockville #4

Rockville #4

Show the map

FlamingoRockville #5

Rockville #5

Show the map

FlamingoRockville #6

Rockville #6

Show the map

FlamingoSandino Ranches #1

Sandino Ranches #1

Show the map

FlamingoSandino Ranches #2

Sandino Ranches #2

Show the map

FlamingoSandino Ranches #3

Sandino Ranches #3

Show the map

FlamingoSandino Ranches #4

Sandino Ranches #4

Show the map

FlamingoSandino Ranches #5

Sandino Ranches #5

Show the map

FlamingoSandpiper Forest #1

Sandpiper Forest #1

Show the map

FlamingoSandpiper Forest #2

Sandpiper Forest #2

Show the map

FlamingoSandpiper Forest #3

Sandpiper Forest #3

Show the map

FlamingoSandpiper Forest #4

Sandpiper Forest #4

Show the map

FlamingoSandpiper Forest #5

Sandpiper Forest #5

Show the map

FlamingoWestside #1

Westside #1

Show the map

FlamingoWestside #2

Westside #2

Show the map

FlamingoWestside #3

Westside #3

Show the map

FlamingoWestside #4

Westside #4

Show the map

FlamingoWestside #5

Westside #5

Show the map