Street Art Need for Speed Heat Point of interest
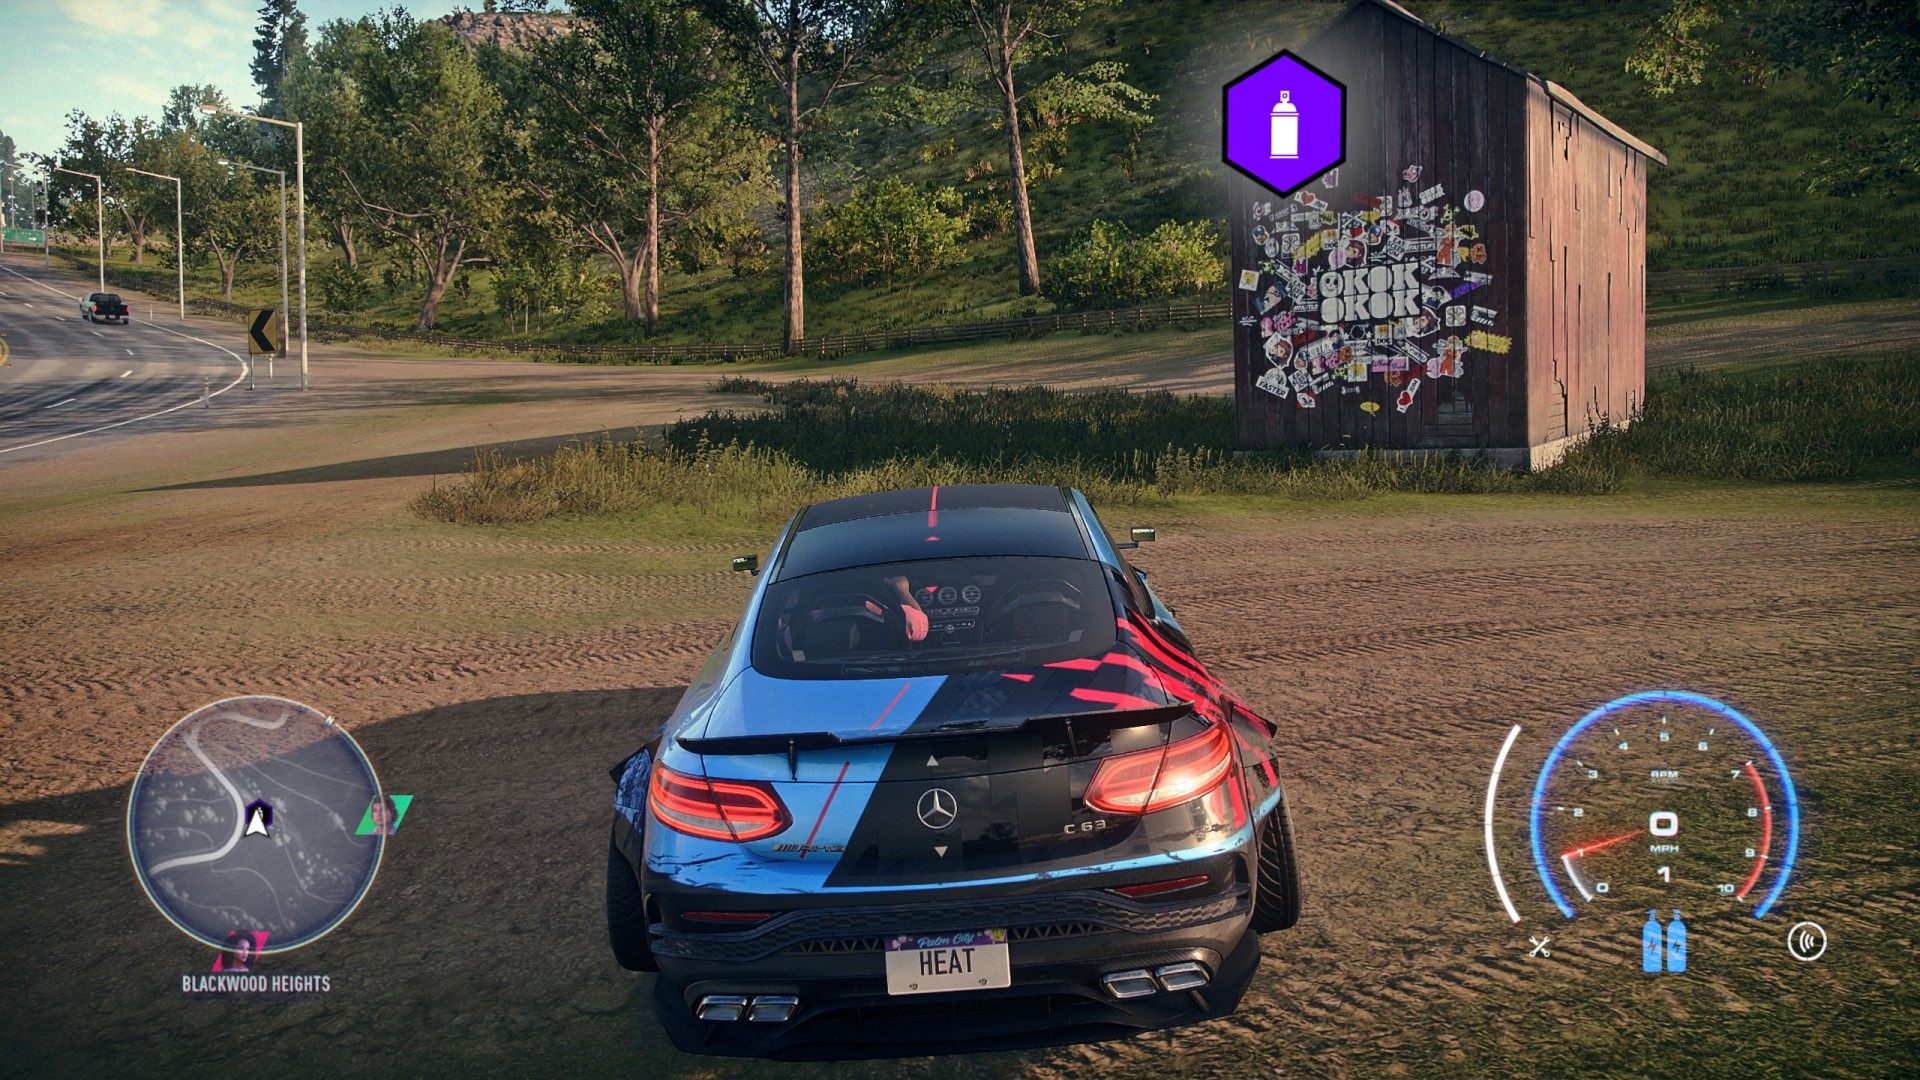
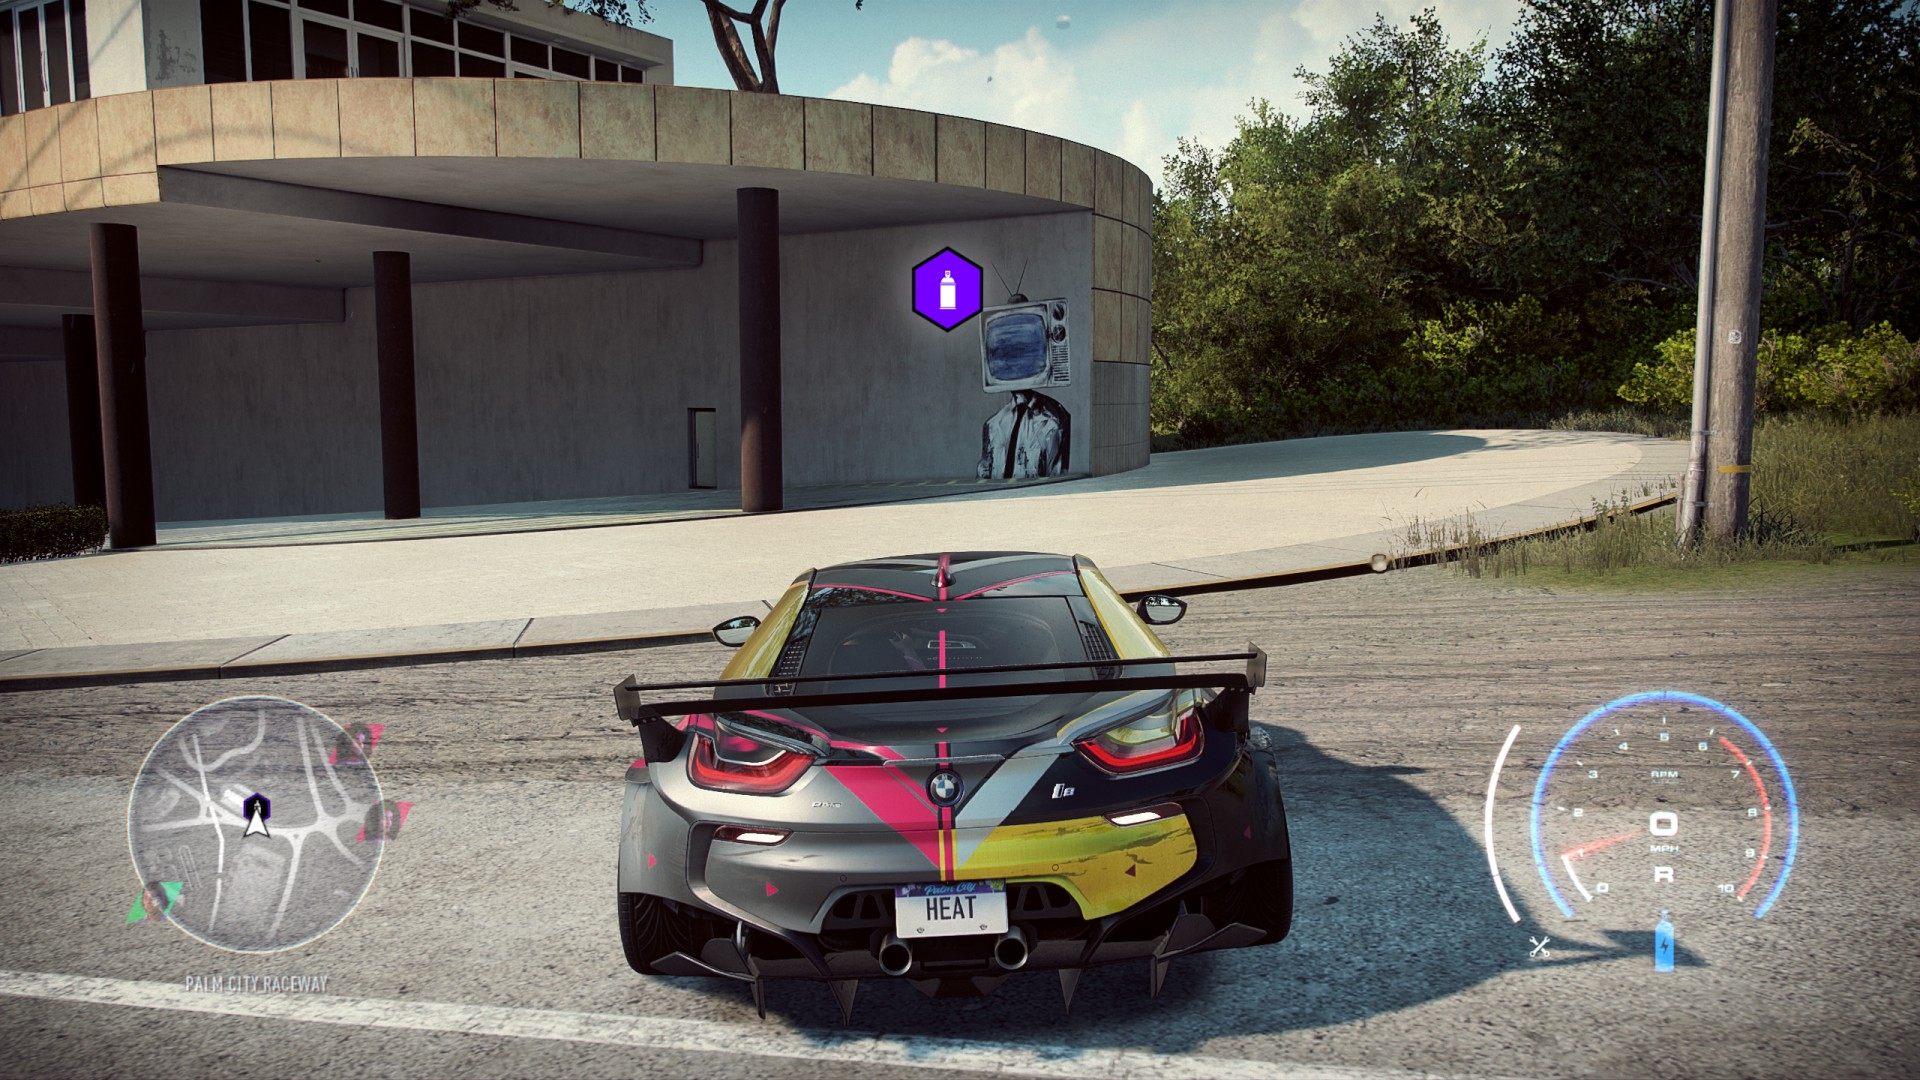
Street Art - stencil art, graffiti tags and stickers are located on the walls, etc., and they are collected by driving up near them and pressing a button prompt. You can start collecting street art when you reach the 6th REP level. Find them all to unlock a Nissan 370Z Nismo and Sticker Bomb Pattern Decal.
Nissan 370Z Nismo '15
Index
- Bayview Park #1
- Bayview Park #2
- Bayview Park #3
- Bayview Park #4
- Bayview Park #5
- Bayview Park #6
- Bayview Park #7
- Bayview Park #8
- Blackwood Heights #1
- Blackwood Heights #2
- Blackwood Heights #3
- Blackwood Heights #4
- Blackwood Heights #5
- Cape Castille #1
- Cape Castille #2
- Cape Castille #3
- Cape Castille #4
- Cape Castille #5
- Cape Castille #6
- Cape Castille #7
- Cloudbank #1
- Cloudbank #2
- Cloudbank #3
- Cloudbank #4
- Cloudbank #5
- Downtown Palm City #1
- Downtown Palm City #2
- Downtown Palm City #3
- Downtown Palm City #4
- Downtown Palm City #5
- Downtown Palm City #6
- Downtown Palm City #7
- Downtown Palm City #8
- Eden Shores #1
- Eden Shores #2
- Eden Shores #3
- Eden Shores #4
- Eden Shores #5
- Eden Shores #6
- Eden Shores #7
- Eden Shores #8
- Edgewood Valley #1
- Edgewood Valley #2
- Edgewood Valley #3
- Edgewood Valley #4
- Edgewood Valley #5
- Edgewood Valley #6
- Edgewood Valley #7
- Edgewood Valley #8
- Fairview Fields #1
- Fairview Fields #2
- Fairview Fields #3
- Fairview Fields #4
- Fairview Fields #5
- Fairview Fields #6
- Fairview Fields #7
- Fairview Fields #8
- Fort Callahan #1
- Fort Callahan #2
- Fort Callahan #3
- Fort Callahan #4
- Fort Callahan #5
- Frontera Hills #1
- Frontera Hills #2
- Frontera Hills #3
- Frontera Hills #4
- Frontera Hills #5
- Frontera Hills #6
- Frontera Hills #7
- Frontera Hills #8
- Grenada Wetlands #1
- Grenada Wetlands #2
- Grenada Wetlands #3
- Grenada Wetlands #4
- Grenada Wetlands #5
- Grenada Wetlands #6
- Grenada Wetlands #7
- Grenada Wetlands #8
- Mendoza Keys #1
- Mendoza Keys #2
- Mendoza Keys #3
- Mendoza Keys #4
- Mendoza Keys #5
- Mendoza Keys #6
- Mendoza Keys #7
- Mendoza Keys #8
- Mendoza Keys #9
- Palm City Raceway #1
- Palm City Raceway #2
- Palm City Raceway #3
- Palm City Raceway #4
- Palm City Raceway #5
- Palm City Raceway #6
- Palm City Raceway #7
- Palm City Raceway #8
- Port Murphy #1
- Port Murphy #2
- Port Murphy #3
- Port Murphy #4
- Port Murphy #5
- Port Murphy #6
- Port Murphy #7
- Port Murphy #8
- Rockville #1
- Rockville #2
- Rockville #3
- Rockville #4
- Rockville #5
- Rockville #6
- Sandino Ranches #1
- Sandino Ranches #2
- Sandino Ranches #3
- Sandino Ranches #4
- Sandino Ranches #5
- Sandino Ranches #6
- Sandino Ranches #7
- Sandino Ranches #8
- Sandpiper Forest #1
- Sandpiper Forest #2
- Sandpiper Forest #3
- Sandpiper Forest #4
- Sandpiper Forest #5
- Westside #1
- Westside #2
- Westside #3
- Westside #4
- Westside #5
- Westside #6
- Westside #7
- Westside #8
All known locations on the map Palm City
Bayview Park #1▶ show the map ◀
Bayview Park #2▶ show the map ◀
Bayview Park #3▶ show the map ◀
Bayview Park #4▶ show the map ◀
Bayview Park #5▶ show the map ◀
Bayview Park #6▶ show the map ◀
Bayview Park #7▶ show the map ◀
Bayview Park #8▶ show the map ◀
Blackwood Heights #1▶ show the map ◀
Blackwood Heights #2▶ show the map ◀
Blackwood Heights #3▶ show the map ◀
Blackwood Heights #4▶ show the map ◀
Blackwood Heights #5▶ show the map ◀
Cape Castille #1▶ show the map ◀
Cape Castille #2▶ show the map ◀
Cape Castille #3▶ show the map ◀
Cape Castille #4▶ show the map ◀
Cape Castille #5▶ show the map ◀
Cape Castille #6▶ show the map ◀
Cape Castille #7▶ show the map ◀
Cloudbank #2▶ show the map ◀
Cloudbank #3▶ show the map ◀
Cloudbank #4▶ show the map ◀
Cloudbank #5▶ show the map ◀
Downtown Palm City #1▶ show the map ◀
Downtown Palm City #2▶ show the map ◀
Downtown Palm City #3▶ show the map ◀
Downtown Palm City #4▶ show the map ◀
Downtown Palm City #5▶ show the map ◀
Downtown Palm City #6▶ show the map ◀
Downtown Palm City #7▶ show the map ◀
Downtown Palm City #8▶ show the map ◀
Eden Shores #1▶ show the map ◀
Eden Shores #2▶ show the map ◀
Eden Shores #3▶ show the map ◀
Eden Shores #4▶ show the map ◀
Eden Shores #5▶ show the map ◀
Eden Shores #6▶ show the map ◀
Eden Shores #7▶ show the map ◀
Eden Shores #8▶ show the map ◀
Edgewood Valley #1▶ show the map ◀
Edgewood Valley #2▶ show the map ◀
Edgewood Valley #3▶ show the map ◀
Edgewood Valley #4▶ show the map ◀
Edgewood Valley #5▶ show the map ◀
Edgewood Valley #6▶ show the map ◀
Edgewood Valley #7▶ show the map ◀
Edgewood Valley #8▶ show the map ◀
Fairview Fields #1▶ show the map ◀
Fairview Fields #2▶ show the map ◀
Fairview Fields #3▶ show the map ◀
Fairview Fields #4▶ show the map ◀
Fairview Fields #5▶ show the map ◀
Fairview Fields #6▶ show the map ◀
Fairview Fields #7▶ show the map ◀
Fairview Fields #8▶ show the map ◀
Fort Callahan #1▶ show the map ◀
Fort Callahan #2▶ show the map ◀
Fort Callahan #3▶ show the map ◀
Fort Callahan #4▶ show the map ◀
Fort Callahan #5▶ show the map ◀
Frontera Hills #1▶ show the map ◀
Frontera Hills #2▶ show the map ◀
Frontera Hills #3▶ show the map ◀
Frontera Hills #4▶ show the map ◀
Frontera Hills #5▶ show the map ◀
Frontera Hills #6▶ show the map ◀
Frontera Hills #7▶ show the map ◀
Frontera Hills #8▶ show the map ◀
Grenada Wetlands #1▶ show the map ◀
Grenada Wetlands #2▶ show the map ◀
Grenada Wetlands #3▶ show the map ◀
Grenada Wetlands #4▶ show the map ◀
Grenada Wetlands #5▶ show the map ◀
Grenada Wetlands #6▶ show the map ◀
Grenada Wetlands #7▶ show the map ◀
Grenada Wetlands #8▶ show the map ◀
Mendoza Keys #1▶ show the map ◀
Mendoza Keys #2▶ show the map ◀
Mendoza Keys #3▶ show the map ◀
Mendoza Keys #4▶ show the map ◀
Mendoza Keys #5▶ show the map ◀
Mendoza Keys #6▶ show the map ◀
Mendoza Keys #7▶ show the map ◀
Mendoza Keys #8▶ show the map ◀
Mendoza Keys #9▶ show the map ◀
Palm City Raceway #1▶ show the map ◀
Palm City Raceway #2▶ show the map ◀
Palm City Raceway #3▶ show the map ◀
Palm City Raceway #4▶ show the map ◀
Palm City Raceway #5▶ show the map ◀
Palm City Raceway #6▶ show the map ◀
Palm City Raceway #7▶ show the map ◀
Palm City Raceway #8▶ show the map ◀
Port Murphy #1▶ show the map ◀
Port Murphy #2▶ show the map ◀
Port Murphy #3▶ show the map ◀
Port Murphy #4▶ show the map ◀
Port Murphy #5▶ show the map ◀
Port Murphy #6▶ show the map ◀
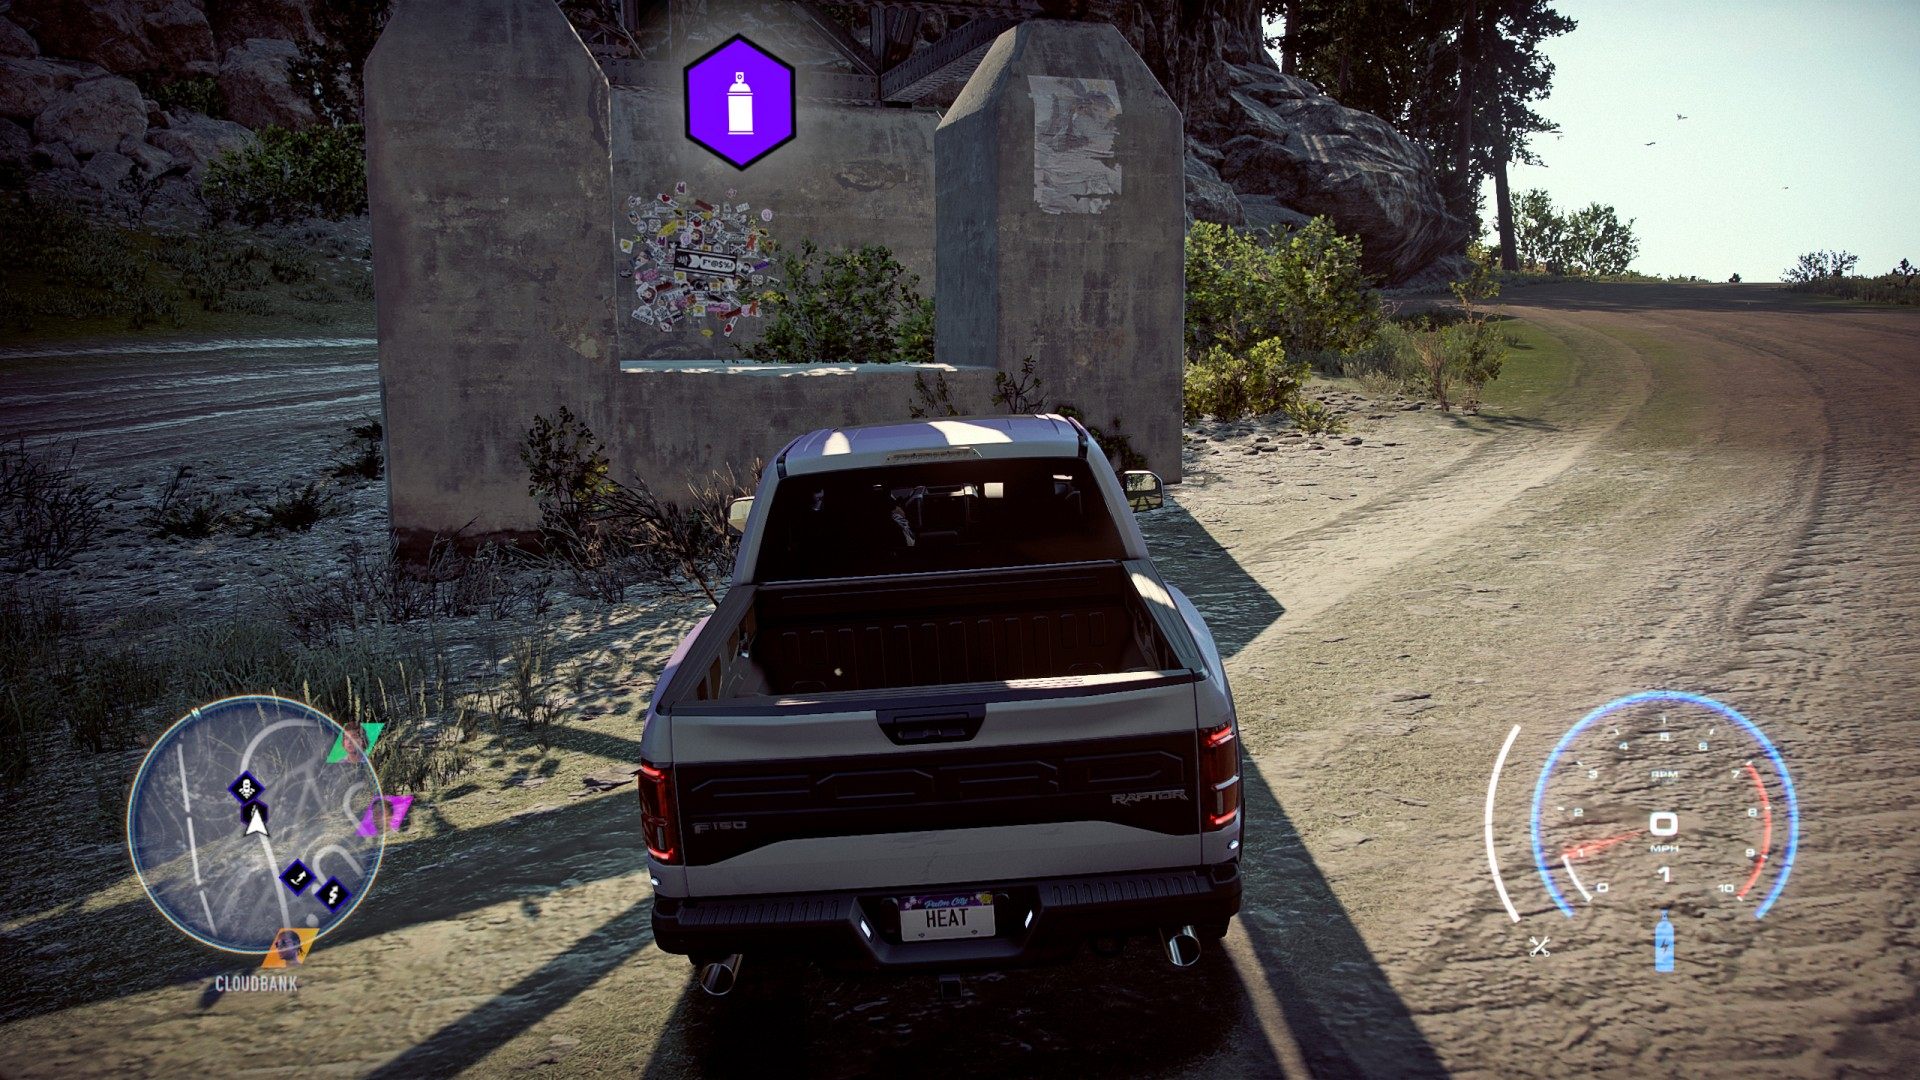
You have to jump to get to that graffiti.
Use the ramp and jump on the containers, drive over them, jump off them on the other side and quickly collect graffiti when you fly near it.
Port Murphy #7▶ show the map ◀
Port Murphy #8▶ show the map ◀
Rockville #1▶ show the map ◀
Rockville #2▶ show the map ◀
Rockville #3▶ show the map ◀
Rockville #4▶ show the map ◀
Rockville #5▶ show the map ◀
Rockville #6▶ show the map ◀
Sandino Ranches #1▶ show the map ◀
Sandino Ranches #2▶ show the map ◀
Sandino Ranches #3▶ show the map ◀
Sandino Ranches #4▶ show the map ◀
Sandino Ranches #5▶ show the map ◀
Sandino Ranches #6▶ show the map ◀
Sandino Ranches #7▶ show the map ◀
Sandino Ranches #8▶ show the map ◀
Sandpiper Forest #1▶ show the map ◀
Sandpiper Forest #2▶ show the map ◀
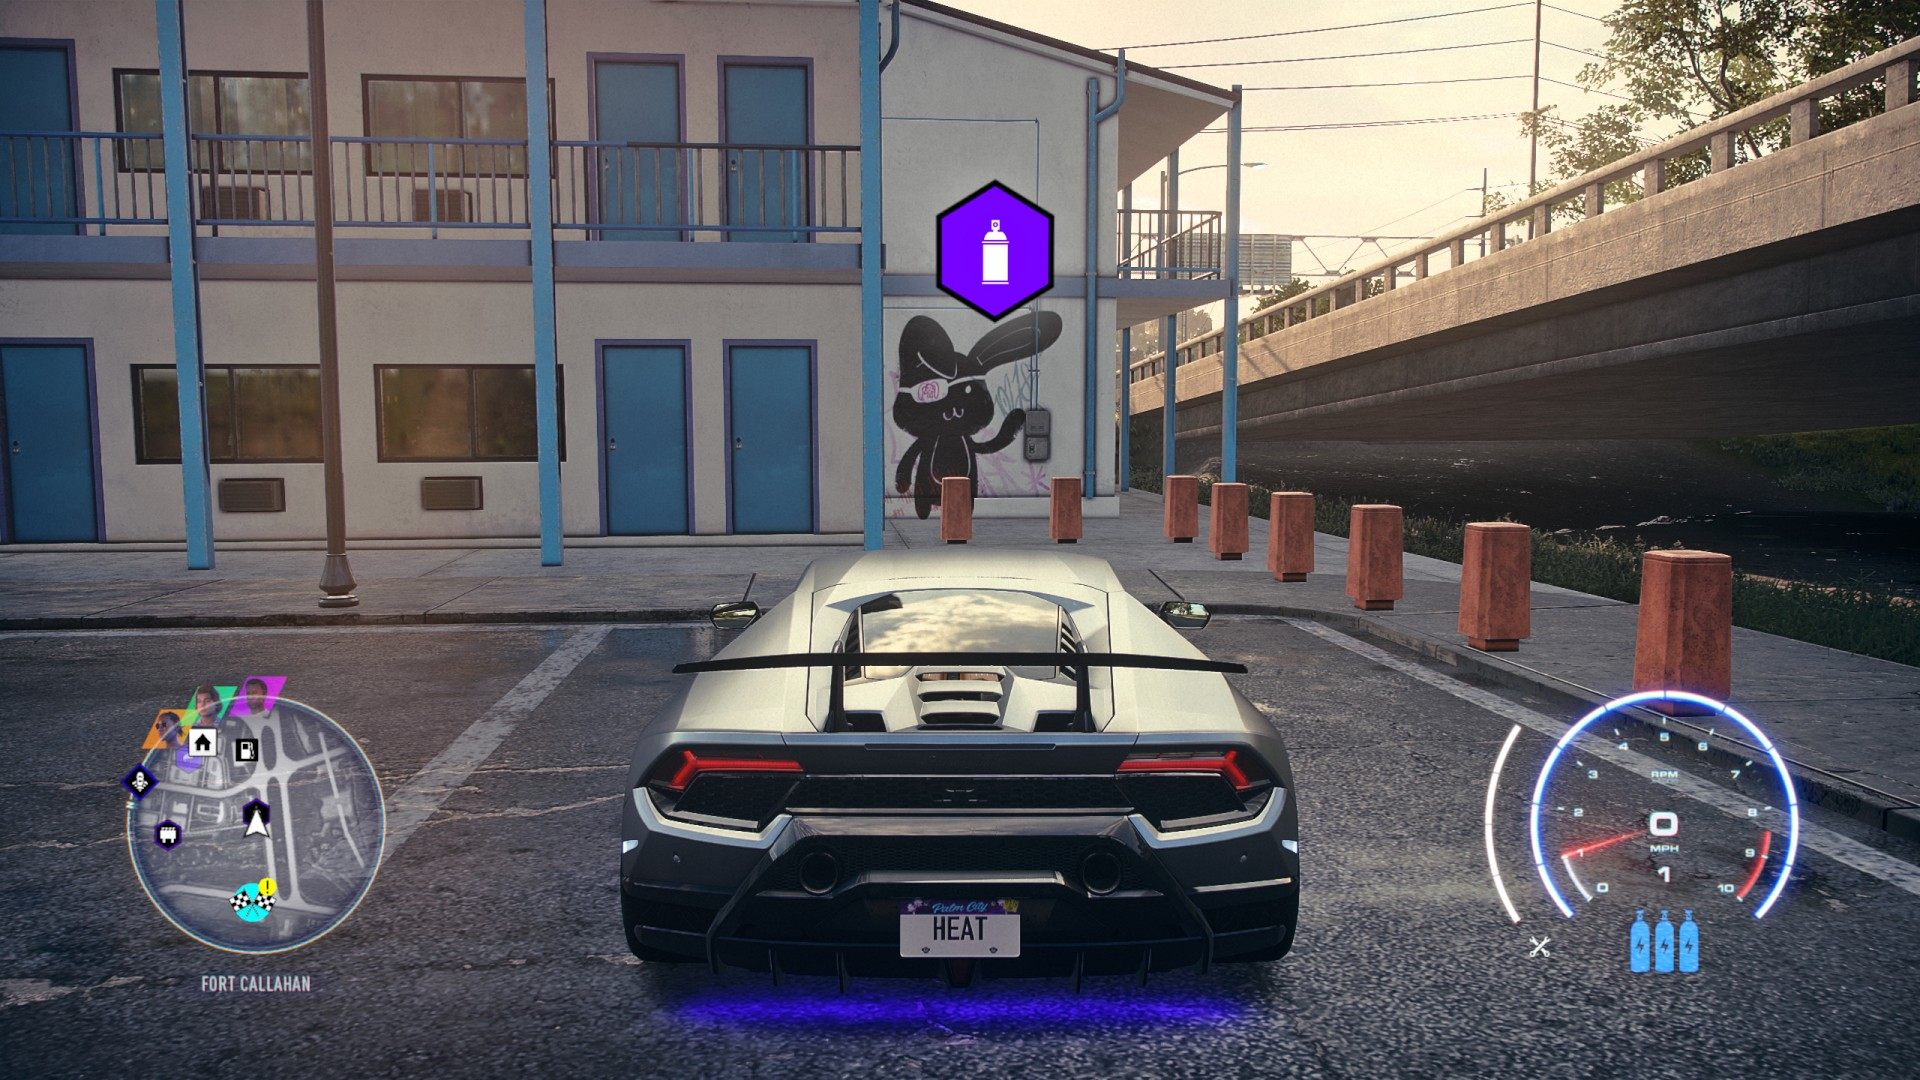
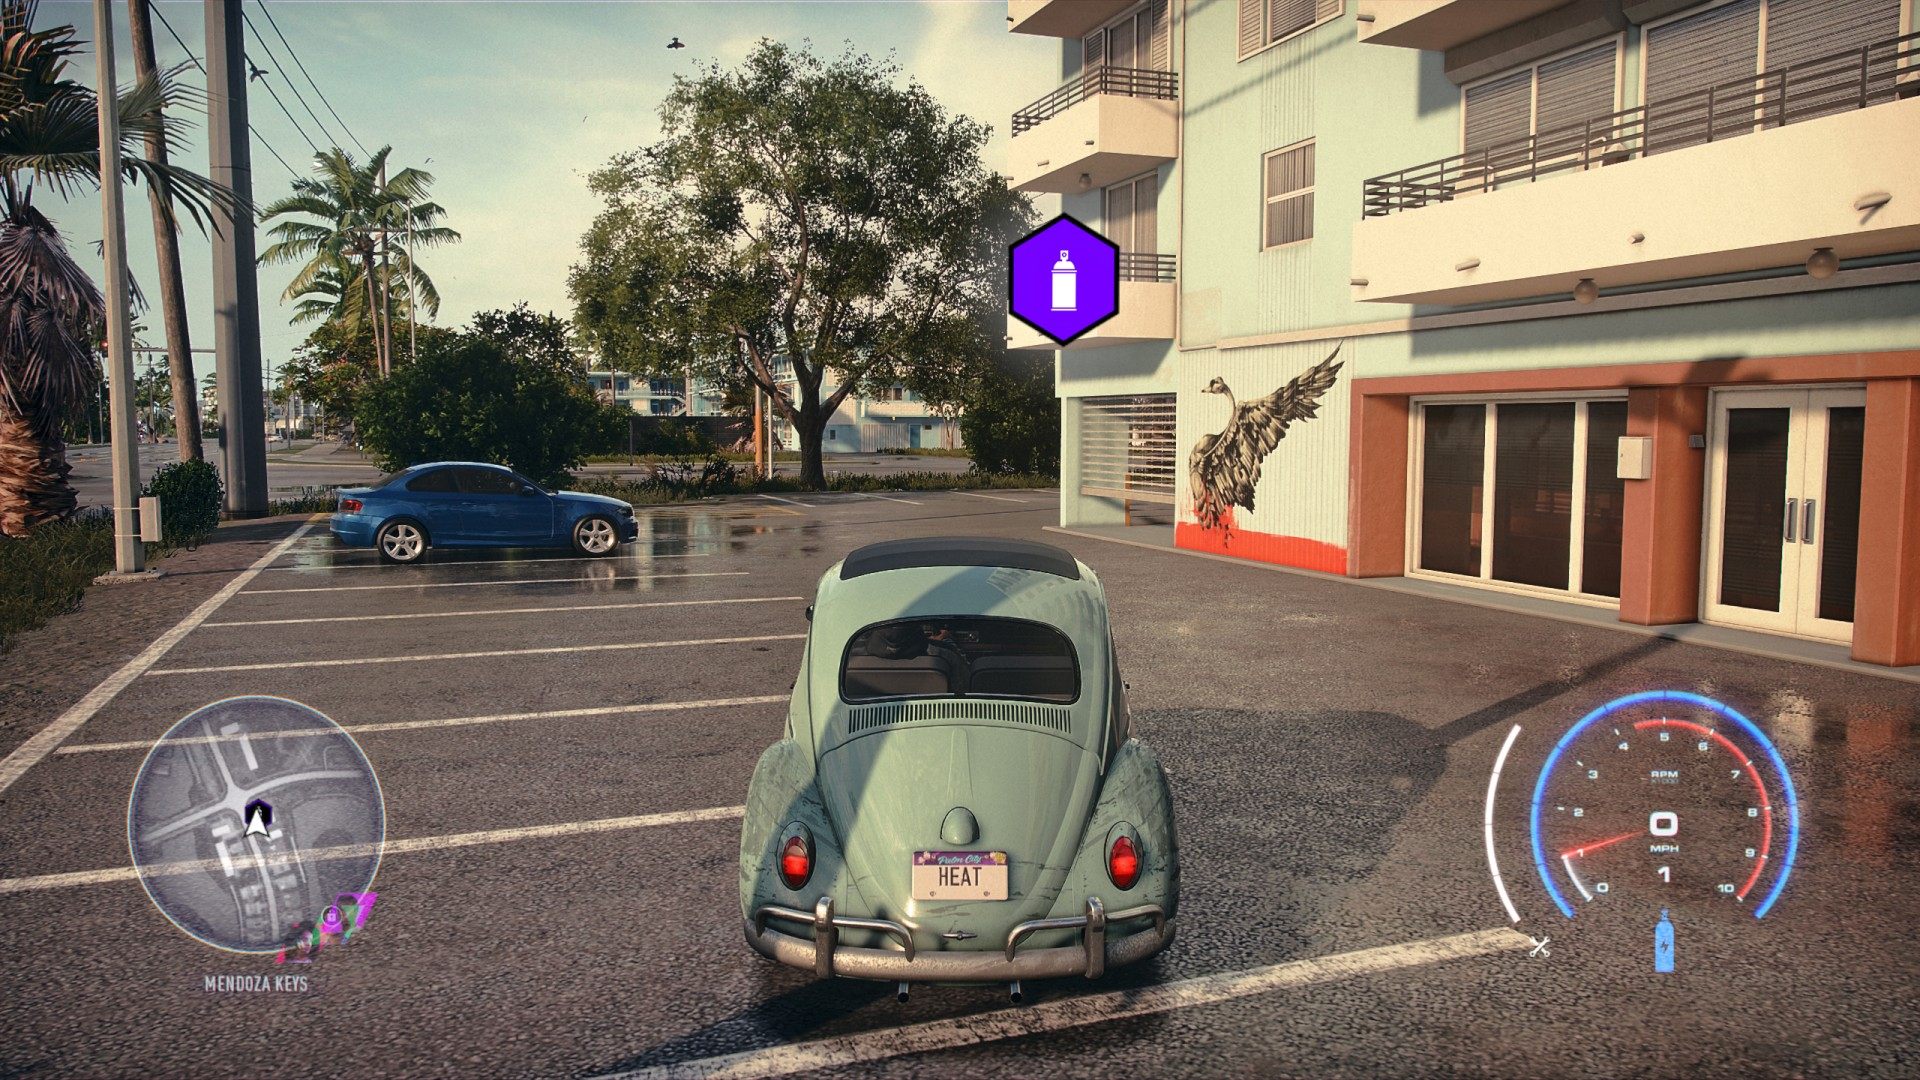
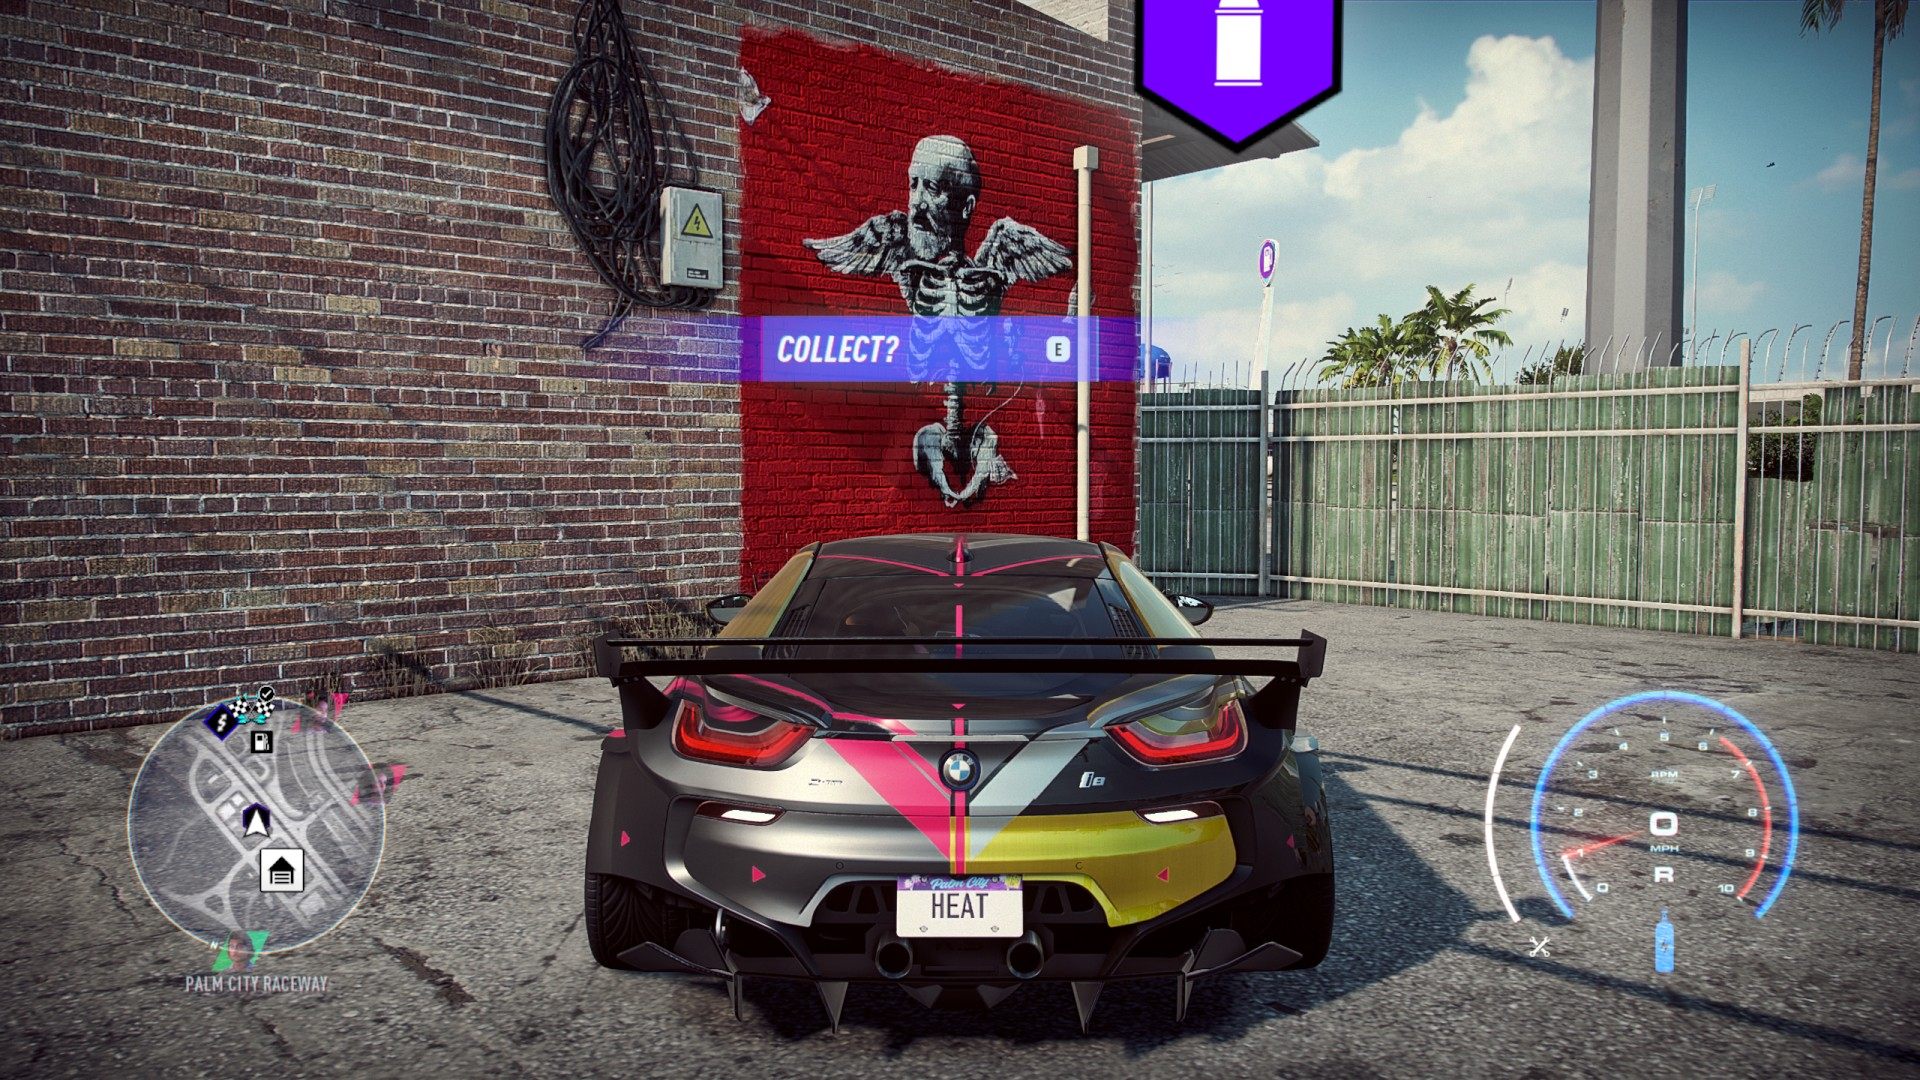
It can be collected from the ground level. Drive close to the wall of the building.