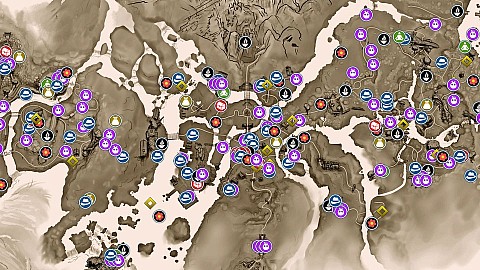
World Map - Map Markers Summary
Rot Hats x51, Spirit Mail x10, Meditation Spots x12, Cursed Chests x13, Flower Shrines x24, Forest Tears x30, Spirit Memories x9, Rot Minions x100, Owl Statues x9, Warp Shrines x27
The following legend of World Map interactive game map defines the points of interest / markers displayed on the map. Each marker corresponds to a specific element to facilitate efficient navigation and interaction with the map.
You can find 51 different Rot Hats in the game, which you can then equip your Rot with. When you find a particular hat, you can buy a certain amount of it and then put it on the heads of your Rots. You can do this by using one of the Rot Hat Carts.
 Acorn
It will be unlocked automatically after discovering the Rot Hat Cart located here.
Acorn
It will be unlocked automatically after discovering the Rot Hat Cart located here.
Adira's Mask
You will get it after Corrupted Woodsmith is defeated and Adira is freed.
Autumn
Baseball
Beetle
Bow
Chest is inside the house. Use Forest Tear to remove the corruption blocking the entrance to this house.
Butterfly
You need bow to get here. Grapple to the blue flower located on the other side of the canyon.
Cat
Clover
Crown
You can collect it after the Village Heart corruption is destroyed. It is located in the room below the platform where the corrupted heart was. You can swim there and the entrances are on both sides.
Deer
To get this hat, you must collect three owl statues that you find in the area and place them on pedestals.
Dinosaur
To get this hat, you must collect three owl statues that you find in the area and place them on pedestals.
Egg
To get this hat, you must collect three owl statues that you find in the area and place them on pedestals.
Feather
To get here you must first move one of the gears and shoot the crystal on the other. This will allow you to jump to the other side.
Flower
It moves around the area. Use the Pulse ability to stop him for a moment.
Fox
You will receive this hat automatically when you approach the Rot Hat Cart located here.
Halo
Upper level of the Forge. To get here grapple to the blue flower.
Hunter
You will receive it automatically after defeating the Hunter.
Mask
Mask Maker
You will receive it automatically after defeating Mask Maker.
Mushroom
It will be unlocked automatically after discovering the Rot Hat Cart located here.
Ox
Pancake
Pinecone
You will be passing by while leaving the Lantern Cave.
Pot
In the chest located next to the Rot Hat Cart.
Purple Mushroom
In a small cave hidden behind a waterfall.
Rusu's Mask
Complete all four shooting challenges.
Samurai
Sibling's Mask
To get here, stand on the large fallen tree trunk located to the NW side and grapple to the blue flower.
Squash
You need a bow. Shoot one of the targets above the small waterwheel. Move a drop of water to the flower to activate the tear. Using Rot, irrigate the field and then use Pulse to release Rot and the hat at the same time.
Stinky Fruit
Sun
It will be unlocked automatically after discovering the Rot Hat Cart located here.
Sunflower
Taro's Mask
Story related. It will be activated after defeating Corrupt Taro and cleansing this place.
Warrior
You will receive it automatically after defeating the Warrior.
Whirly Bird
You will receive this hat automatically when you approach the Rot Hat Cart located here.
Yellow Mushroom
Inside the house. To get here you must first find and deliver the Spirit Mail (Village #1) that will allow you to enter the area around the house and clear the corruption that has taken over it.
Zajuro's Mask
Spirit Mail are golden bags scattered around the game world which will allow you to access a certain area of the main village. When you find one of them, a point will be marked on the map indicating where you have to deliver it and thus gain access to a previously inaccessible area.
 Spirit Mail (Fields)
When you reach the forge, go down the stairs on the east side to the cave below it. Use the tear there to fill the cave with water, then swim left and go out onto the balcony where you will find a sack.
Spirit Mail (Fields)
When you reach the forge, go down the stairs on the east side to the cave below it. Use the tear there to fill the cave with water, then swim left and go out onto the balcony where you will find a sack.
Spirit Mail (Forgotten Forest #1)
See Rot (Forgotten Forest #3) description on how to get to the top and then grapple to the three flowers. The first one is shown in the picture below.
Spirit Mail (Forgotten Forest #2)
While climbing to the God Tree Shrine, you must use the blue flower and get to the tree where this bag is.
Spirit Mail (Rusu Mountain #1)
The bag is located in a small cave that you can get to by climbing up the rock protrusions to the right.
Spirit Mail (Storehouse)
In the house which you will pass by going to one of the crystals powering the door. First, you need to remove the corruption here.
Spirit Mail (Village #1)
To enter the house where the item is located, you need to move the barrel standing next to the building and enter through the opening in the roof.
Spirit Mail (Village #2)
In the room at the top of the tower.
Spirit Mail (Village #3)
Spirit Mail (Village Heart #1)
Spirit Mail (Village Heart #2)
Meditation Spots are places that allow you to meditate. Through meditation you will permanently increase your maximum health.
 Meditation Spot #1 (Rusu Mountain)
You will reach this place as you descend the mountain.
Meditation Spot #1 (Rusu Mountain)
You will reach this place as you descend the mountain.
Meditation Spot #2 (Forgotten Forest)
To get here walk along the river. Shoot the crystal and platforms will pop out of the water so you can go further.
Meditation Spot #3 (Forgotten Forest)
Meditation Spot #4 (Taro's Tree)
Story related. It will be activated after defeating Corrupt Taro and cleansing this place.
Meditation Spot #5 (Fields)
Meditation Spot #6 (Fields)
To get here, jump through the hole in the roof.
Meditation Spot #7 (Fields)
It becomes available after Corrupted Woodsmith is defeated and Adira is freed.
Meditation Spot #8 (Village Heart)
Meditation Spot #9 (Village)
It becomes available after the Hunter is defeated.
Meditation Spot #10 (Village)
It becomes available after Mask Maker is defeated.
Meditation Spot #11 (Village)
It becomes available after the Warrior is defeated.
Meditation Spot #12 (Mountain Shrine)
Story related - Endgame. It will be available after the final battle.
Cursed Chests are a special type of chest that will require you to perform a special combat challenge. Only when you complete it successfully you will gain access to what is inside them.
 Cursed Chest (Fields #1)
Enemies: 8. Defeat all enemies.
Cursed Chest (Fields #1)
Enemies: 8. Defeat all enemies.
Cursed Chest (Fields #2)
Enemies: 10. Defeat all enemies before time runs out.
Cursed Chest (Forgotten Forest #1)
Enemies: 7. Defeat all enemies before time runs out.
Cursed Chest (Forgotten Forest #2)
Enemies: 5. Defeat all enemies before time runs out.
Cursed Chest (Rusu Mountain)
Enemies: 4. Defeat all enemies without getting hit.
Cursed Chest (Village #1)
Enemies: 7. Defeat all enemies.
Cursed Chest (Village #2)
Enemies: 20. Defeat all enemies before time runs out. To get access to this area you need to find and deliver Spirit Mail (Forgotten Forest #2). Inside you will find a Rot.
Cursed Chest (Village #3)
Enemies: 18. Defeat all enemies before time runs out. To be able to open it you must first complete Cursed Chest (Village #2).
Cursed Chest (Village #4)
Enemies: 30. Defeat all enemies before time runs out. To be able to open it you must first complete two other cursed chests here. Inside you will find a new Rot Hat.
Cursed Chest (Village #5)
Enemies: 2. Defeat all enemies before time runs out.
Cursed Chest (Village #6)
Enemies: 5. Defeat all enemies without getting hit.
Cursed Chest (Village Heart #1)
Defeat 15 enemies before time runs out.
Cursed Chest (Village Heart #2)
Defeat the Wood Knight.
Flower Shrines are small altars scattered throughout the game which, when you first find them, will be covered in corruption. Your task will be to find a nearby Forest Tears and use it to remove the corruption. Once cleansed, the Flower Shrines will usually give you a handful of gems.
 Flower Shrine (Fields #1)
In a cave. You will pass by while going to to clear the corruption at the Ancient Well.
Flower Shrine (Fields #1)
In a cave. You will pass by while going to to clear the corruption at the Ancient Well.
Flower Shrine (Fields #2)
Flower Shrine (Fields #3)
Flower Shrine (Fields #4)
Flower Shrine (Fields #5)
Flower Shrine (Fields #6)
Flower Shrine (Fields #7)
Flower Shrine (Forgotten Forest #2)
Available after cleaning the God Tree Shrine. The elevator doesn't start right away after shooting the crystal, so stand on the elevator, shoot the crystal, quickly use the Forest Tear and get Rot onto the elevator so you will go down together.
Flower Shrine (Forgotten Forest #3)
Flower Shrine (Rusu Mountain #1)
Flower Shrine (Rusu Mountain #2)
In order to remove the corruption from the shrine, you must use your bow to shoot the crystal that is placed on the tree that grows on the hill. This will activate Forest Tear which you can use.
Flower Shrine (Rusu Mountain #3)
Shoot the crystal on the owl statue to activate Forest Tear. Use it to destroy the corruption blocking the cave entrance on the left and go through the cave to the shrine, destroying more vines along the way.
Flower Shrine (Taro's Forest #1)
Flower Shrine (Taro's Forest #2)
To activate the nearest Forest Tear, you must have a bow and shoot four crystals within a time timit.
Flower Shrine (Village #1)
Flower Shrine (Village #2)
Flower Shrine (Village #3)
Flower Shrine (Village #4)
Flower Shrine (Village #5)
To get to this area of the village you must have a bomb.
Flower Shrine (Village #6)
Flower Shrine (Village #7)
Flower Shrine (Village #8)
You will be able to swim here after defeating the Warrior.
Flower Shrine (Village Heart)
 Forest Tear
Story related.
Forest Tear
Story related.
Forest Tear
To activate this tear, use the bow ability and shoot the crystal on the tree trunk.
Forest Tear
Forest Tear
To activate this tear shoot one of the targets above the small waterwheel and then move a drop of water.
Forest Tear
To activate this tear shoot the crystal on the statue.
Forest Tear
To activate this teardrop, you must shoot a total of four crystals located on tree trunks with your bow within the time limit. The first crystal is located near the Flower Shrine (Taro's Forest #2).
Forest Tear
To activate this tear, shoot the crystals on tree trunks and then move a drop of water that falls from the third one.
Forest Tear
To activate this tear, shoot the crystal.
Forest Tear
It will activate after you remove the corruption.
Forest Tear
Shoot the crystal.
Forest Tear
To get to this area of the village you must have a bomb.
Forest Tear
To activate it, you must find and watch the Toshi #2 memory fragment.
Forest Tear
In a cave below the forge. Use it to fill the cave with water.
Forest Tear
In order to get the water needed to activate this tear, you must use the bomb to lift the nearby rocks and then shoot the crystal.
Forest Tear
Forest Tear
To activate this Forest Tear, use the water you find in the bucket placed near the waterfall.
Forest Tear
The water needed to activate this tear is in the house. To get inside you must go to the back of the house and grapple to the blue flower through the hole in the wall.
Forest Tear
It will activate after you remove the corruption.
Forest Tear
In order to activate this tear, you must cleanse the Water Shrine. To do this, you must place two stones in the right places, then stand on the platform and use the Pulse.
Forest Tear
Story related. You need it to clear the corruption at Watchtower.
Forest Tear
Story related. You need it to clear the corruption at Watchtower.
Forest Tear
To activate this tear defeat the monsters you encounter here.
Forest Tear
To activate this tear, you must have a bow and shoot the crystal located on the tree trunk.
Forest Tear
You can activate it after clearing the God Tree Shrine. The bucket of water needed to activate this tear is located on the level above.
Forest Tear
To release the water, shoot one of the targets above the small water wheel.
Forest Tear
To get access to this part of the village you need to find and deliver Spirit Mail (Fields).
Forest Tear
Story related. You will pass by while going to to clear the corruption at the Ancient Well. Shoot the drop of water above it.
Forest Tear
You can just swim here when you defeat the Warrior.
Forest Tear
To release the water needed for activation, shoot three crystals located on the trunks of nearby trees.
 Adira #1
"A view".
Adira #1
"A view".
Adira #2
A hammer in a small niche.
Adira #3
Broken roots and shattered rock.
Taro #2
A tiny pack.
Taro #3
Several worn fishing baskets.
Taro #4
Old camping gear marked with fox symbol.
Toshi #1
The markings.
Toshi #2
Zaju's tools.
Toshi #3
A sculpture.
The Rot are cute little forest creatures that you gather to help you during your adventure.
 Rot (Fields #1)
Rot (Fields #2)
In the room you descend to once you activate the spiral staircase.
Rot (Fields #3)
You will be passing through here as you leave the Ancient Well.
Rot (Fields #4)
Rot (Fields #5)
Rot (Fields #6)
Rot (Fields #7)
Rot (Fields #8)
Use a Forest Tear to irrigate the farm field and then open the pumpkin.
Rot (Fields #9)
Use the bomb to shatter the boulder.
Rot (Fields #10)
Available after removing the corruption at the Watchtower. You will have to shoot down 10 targets.
Rot (Fields #11)
To get inside the house you have to grapple to the blue flower through the hole in the roof. You can do this once you use the bomb and stones lying on the hill with the watchtower.
Rot (Fields #12)
You will receive it (3 in total) after you wake up Rufus and get the first relic.
Rot (Fields #13)
You will receive it (3 in total) after you wake up Rufus and get the first relic.
Rot (Fields #14)
You will receive it (3 in total) after you wake up Rufus and get the first relic.
Rot (Fields #15)
Rot (Fields #16)
Use the bomb to shatter the boulder.
Rot (Fields #17)
To get inside, destroy the corruption blocking the entrance with a nearby Forest Tear.
Rot (Fields #18)
Use the nearby Forest Tear to irrigate the field and then use the Pulse to release the Rot.
Rot (Fields #20)
You will pass this way going to the Forge. You must shoot down 7 targets.
Rot (Fields #21)
You will pass this way going to the Forge.
Rot (Fields #22)
You will pass this way going to the Forge.
Rot (Fields #23)
You will receive it (3 in total) automatically after defeating the Stone Guardian.
Rot (Fields #24)
You will receive it (3 in total) automatically after defeating the Stone Guardian.
Rot (Fields #25)
You will receive it (3 in total) automatically after defeating the Stone Guardian.
Rot (Forgotten Forest #1)
Use the Pulse then quickly shoot four targets.
Rot (Forgotten Forest #2)
Rot (Forgotten Forest #3)
To get here you must clear the nearby Water Shrine, use Forest Tear to clear the corruption behind which a large stone block is (next to the ruins to the south), and move it near the wall next to which the warp shrine is located.
Rot (Forgotten Forest #5)
Rot (Forgotten Forest #6)
After clearing the God Tree Shrine, look up a bit and grapple yourself to the blue flower there.
Rot (Forgotten Forest #7)
You will receive it after defeating the Sprout Captain and cleansing the Sacred Tree.
Rot (Forgotten Forest #8)
You will receive it after defeating the Sprout Captain and cleansing the Sacred Tree.
Rot (Forgotten Forest #9)
You will receive it after defeating the Sprout Captain and cleansing the Sacred Tree.
Rot (Forgotten Forest #10)
Rot (Forgotten Forest #11)
The Rot is located in a pile of leaves. Use the Forest Tear to remove them.
Rot (Forgotten Forest #12)
You will receive it (3 in total) after defeating the Shrine Guardian at the end of the Lantern Cave.
Rot (Forgotten Forest #13)
You will receive it (3 in total) after defeating the Shrine Guardian at the end of the Lantern Cave.
Rot (Forgotten Forest #14)
You will receive it (3 in total) after defeating the Shrine Guardian at the end of the Lantern Cave.
Rot (Ruins #1)
Use Pulse to reveal the Rot, then collect it.
Rot (Ruins #2)
Use Pulse to reveal the Rot, then collect it.
Rot (Ruins #3)
Use Pulse to reveal the Rot, then collect it.
Rot (Ruins #4)
Stand on the round plate and use Pulse. When you do this, stone posts will pop up after which you will be able to get into a cave hidden behind a waterfall. Use Pulse to reveal Rot, then collect it.
Rot (Ruins #5)
It is in a chest. Simply approach it and open it.
Rot (Ruins #6)
You will receive it (3 in total) automatically after defeating the Sprout and removing the corruption.
Rot (Ruins #7)
You will receive it (3 in total) automatically after defeating the Sprout and removing the corruption.
Rot (Ruins #8)
You will receive it (3 in total) automatically after defeating the Sprout and removing the corruption.
Rot (Rusu Mountain #1)
Rot (Rusu Mountain #2)
Climb to the very top and jump. While sliding down, jump on the rocks on the right.
Rot (Rusu Mountain #3)
Go down (you can even jump down) to the rock shelf below.
Rot (Rusu Mountain #4)
Rot (Rusu Mountain #5)
Rot (Rusu Mountain #6)
You will receive it (3 in total) automatically after defeating the Wood Knight and removing the corruption.
Rot (Rusu Mountain #7)
You will receive it (3 in total) automatically after defeating the Wood Knight and removing the corruption.
Rot (Rusu Mountain #8)
You will receive it (3 in total) automatically after defeating the Wood Knight and removing the corruption.
Rot (Rusu Mountain #9)
Rot (Rusu Mountain #10)
It moves around the area. Use the Pulse ability to stop him for a moment.
Rot (Rusu Mountain #11)
Use a nearby Forest Tear to irrigate the field, use a Pulse and pick up this Rot.
Rot (Rusu Mountain #12)
You need a bow to get here. Use it to grapple yourself to the flower on the island.
Rot (Rusu Mountain #13)
You can get here from the lake side. Enter the lake near the Gorge warp shrine.
Rot (Storehouse #1)
Use the bomb to lift the boulders under which the Rot is hidden.
Rot (Storehouse #2)
In the basement underneath the storehouse which you will pass through going to one of the crystals powering the door.
Rot (Storehouse #3)
Use the bomb to move the boulders blocking the passage, use Pulse and shoot 5 targets before they fall.
Rot (Taro's Tree #1)
Use the Forest Tear to remove the piles of leaves and then use the Rot to lift the trunk.
Rot (Taro's Tree #2)
Use the Forest Tear to remove the corruption blocking the entrance to the cave.
Rot (Taro's Tree #3)
Rot (Taro's Tree #4)
Walk up to the tree trunk and use the Pulse.
Rot (Taro's Tree #5)
Under one of the stones.
Rot (Taro's Tree #6)
Rot (Taro's Tree #7)
To get here you will need to get a bow first. Some rock climbing awaits you as well. The beginning of the path is to the northeast of this location. Look out for a flower that you can shoot at with your bow.
Rot (Village #1)
Rot (Village #2)
Under a stone lying on the ground.
Rot (Village #3)
In the back of the house. To get here you must first find and deliver the Spirit Mail (Village #1) that will allow you to enter the area around the house and clear the corruption that has taken over it.
Rot (Village #7)
Use Pulse near the lantern that glows purple and then Rot will jump out of it.
Rot (Village #8)
You need the Bomb ability to get access to this Rot.
Rot (Village #9)
To get access to this house you need to find and deliver Spirit Mail (Storehouse). Shoot the three crystals: middle - right - left.
Rot (Village #10)
To get access to this part of the village you need to find and deliver Spirit Mail (Fields). Shoot 5 targets.
Rot (Village #11)
Pull the lever and shoot down all targets three times (x3, x6, x6).
Rot (Village #12)
To get access to this house you need to find and deliver Spirit Mail (Village Heart #1). To clear the corruption you have to kill the boss (Kappa) in the basement.
Rot (Village #14)
You will receive it automatically after defeating the Hunter.
Rot (Village #15)
You will receive it automatically after defeating the Hunter.
Rot (Village #16)
You will receive it automatically after defeating the Hunter.
Rot (Village #17)
You will receive it automatically after defeating Mask Maker.
Rot (Village #18)
You will receive it automatically after defeating Mask Maker.
Rot (Village #19)
You will receive it automatically after defeating Mask Maker.
Rot (Village #21)
You will receive it automatically after defeating the Warrior.
Rot (Village #22)
You will receive it automatically after defeating the Warrior.
Rot (Village #23)
You will receive it automatically after defeating the Warrior.
Rot (Village Heart #1)
Grapple to a blue flower, then in mid-air shoot and grapple to another flower.
Rot (Village Heart #2)
You will find it after climbing to the top of a large cave in which you must climb over moving rocks.
Rot (Village Heart #3)
Story related. You automatically receive it after the Village Heart corruption is destroyed.
Rot (Village Heart #4)
Story related. You automatically receive it after the Village Heart corruption is destroyed.
Rot (Village Heart #5)
Story related. You automatically receive it after the Village Heart corruption is destroyed.
Rot (Village Heart #6)
You can collect it after the Village Heart corruption is destroyed. It is located in the room below the platform where the corrupted heart was. You can swim there and the entrances are on both sides.
 Owl Statue
Owl Statue
Owl Statue
Owl Statue
Owl Statue
Owl Statue
Owl Statue
Owl Statue
Owl Statue
Warp Shrines are stone shrines used for fast travel between them. In order to use a particular shrine, you must first discover it.
 Archery Range
Forest Path
Forge
Forge Path
Forgotten Forest
Gorge
Hunter Path
Lantern Cave
Mask Maker Path
Rufus' Barn
Ruins
Rusu's Backyard
Rusu's House
Rusu's Lookout
Sacred Tree
Storehouse
Taro's Tree
Tower Entrance
Village Center
Village Docks
Village Heart Caves
Village Heart Entrance
Village Heart Room
Village Leader Hall
Village Onsen
Warrior Path
Water Shrine