World Map - Map Markers Summary
Barn Finds x15, Beauty Spots x12, Player Houses x12, Danger Signs x18, Speed Zones x28, Speed Traps x28, Drift Zones x20, Fast Travel Boards x50, Influence Boards (5K) x25, Influence Boards (3K) x50, Influence Boards (1K) x75, Festival Sites x5, Showcases x5, Road Racing Series x25, Dirt Racing Series x20, Street Scenes x21, Cross Country Series x19, The Drag Strips x5, Stories and Businesses x11
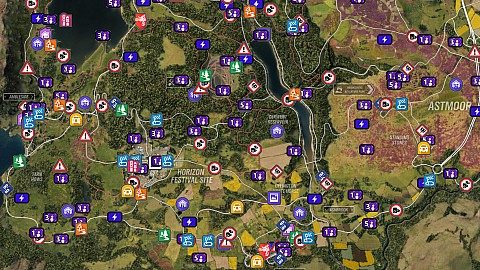
The following legend of World Map interactive game map defines the points of interest / markers displayed on the map. Each marker corresponds to a specific element to facilitate efficient navigation and interaction with the map.
The Barn Finds are hidden garages containing wrecked iconic cars that you can restore in your garage. Four barns are only available during specific seasons and one of them will be unlocked after purchasing an expensive property.
 1931 Bentley 4-1/2 Liter Supercharged
To unlock this barn, you must purchase Bamburgh Castle for 10,000,000 CR.
1931 Bentley 4-1/2 Liter Supercharged
To unlock this barn, you must purchase Bamburgh Castle for 10,000,000 CR.
1960 Aston Martin DB4 GT Zagato (Autumn Only)
1961 Jaguar E-Type S1
1962 Peel P50 (Summer Only)
1962 Triumph Spitfire
1964 Ford GT 40 MKI (Spring Only)
1965 Mini Cooper S
1966 MG MGB GT
1973 Range Rover Land Rover (Winter Only)
1983 Audi Sport Quattro
1986 Ford Escort RS Turbo
This is the first barn that can be found.
1993 Jaguar XJ220
1997 Lotus Elise GT1
1998 Subaru Impreza 22B STI
1998 TVR Cerbera Speed 12
There are 12 Beauty Spots in total across Britain. You have to visit them all for the "Taking the Grand Tour" achievement. You earn influence points after visiting each of the beauty spots.
 Ambleside Village
Arthur's Seat
Bamburgh Castle
Broadway Windmill
Derwent Reservoir
Derwentwater
Glenfinnan Viaduct
Moorhead Wind Farm
Mortimer Gardens
Scott Monument
Uffington White Horse
Whitewater Falls
There are 12 Player Houses in total across Britain. A few of them offer unique perks.
 Bamburgh Castle
Price: 10,000,000 CR
Bamburgh Castle
Price: 10,000,000 CR
Castleview Road
Price: 750,000 CR
Croftdale Farm
Price: 200,000 CR
Derwent Mansion
Price: 1,500,000 CR
Edinburgh Castle
Price: 15,000,000 CR
Fairlawn Manor
Price: 2,000,000 CR
Perk: Fast Travel Anywhere - Instantly travel to any road on the map!
Kingfisher Cottage
Price: 350,000 CR
Lake Lodge
Price: 5,000,000 CR
Perk: #FORZATHON Boost - You now earn double #FORZATHON Points!
Sunflower Meadows
Price: 200,000 CR
Perk: Horizon Promo - Photograph your car collection.
Thatch Corner
Price: 500,000 CR
The Gables
Price: This house is available as a gift for successfully qualifying for the introductory Horizon Autumn season.
Perk: Drone Mode - Great for exploring!
The Huntsman's Lodge
Price: 750,000 CR
Perk: Skill Song - DJs will now play Skill Songs!
Danger Signs in Forza Horizon 4 are special challenges in which you have to make a jump from a special ramp and fly as far as possible in the air.
 Level 1 - Ambleside Edge
250 FT / 450 FT / 650 FT
Level 1 - Ambleside Edge
250 FT / 450 FT / 650 FT
Level 2 - Open-Cast Cliff
500 FT / 725 FT / 950 FT
Level 3 - Reservoir Ridge
250 FT / 400 FT / 550 FT
Level 3 - The Great Ridge
350 FT / 675 FT / 900 FT
Level 3 - Whitewater Falls
300 FT / 400 FT / 500 FT
Level 4 - Rail Yard Ramp
300 FT / 500 FT / 700 FT
Level 4 - Rannoch Shelf
350 FT / 450 FT / 550 FT
Level 4 - Roman Ruins
200 FT / 375 FT / 550 FT
Level 5 - Arthur's Seat
250 FT / 425 FT / 600 FT
Level 5 - Bamburgh Castle
300 FT / 500 FT / 700 FT
Level 5 - Swan Dive
400 FT / 575 FT / 750 FT
Level 6 - Mam Tor
250 FT / 625 FT / 1,000 FT
Level 6 - Mudkickers' Showjump
200 FT / 475 FT / 700 FT
Level 6 - Northbound
250 FT / 475 FT / 700 FT
Level 7 - Broadway Windmill
250 FT / 725 FT / 1,200 FT
Level 7 - Hilltop Vista
350 FT / 475 FT / 600 FT
Level 7 - Leap of Faith
200 FT / 300 FT / 400 FT
Level 7 - Outcrop Crest
300 FT / 450 FT / 600 FT
Speed Zones are road sections where your average speed over the entire distance will be measured. Speed recording starts when you drive in the right direction through one of the two gates located on both sides of the designated road section.
 Level 1 - Broadway Commons
55 MPH / 105 MPH / 160 MPH
Level 1 - Broadway Commons
55 MPH / 105 MPH / 160 MPH
Level 2 - Lakeshore
55 MPH / 75 MPH / 95 MPH
Level 2 - Sudmoss
55 MPH / 100 MPH / 145 MPH
Level 3 - Coppice
40 MPH / 60 MPH / 85 MPH
Level 3 - Forest Green
65 MPH / 75 MPH / 90 MPH
Level 3 - Oldweir
60 MPH / 100 MPH / 145 MPH
Level 4 - Johnston Terrace
70 MPH / 105 MPH / 140 MPH
Level 4 - Pennine Way
45 MPH / 110 MPH / 180 MPH
Level 4 - Royal Botanic Gardens
65 MPH / 110 MPH / 155 MPH
Level 4 - Royal Terrace
60 MPH / 80 MPH / 100 MPH
Level 5 - Glen Rannoch
50 MPH / 70 MPH / 95 MPH
Level 5 - Hillside
30 MPH / 55 MPH / 85 MPH
Level 5 - Strathbridge
65 MPH / 100 MPH / 135 MPH
Level 6 - Ambleside Approach
40 MPH / 55 MPH / 70 MPH
Level 6 - The Bridge House
60 MPH / 80 MPH / 105 MPH
Level 6 - Toft
60 MPH / 95 MPH / 130 MPH
Level 7 - Brookside
65 MPH / 105 MPH / 145 MPH
Level 7 - Nether End
45 MPH / 60 MPH / 80 MPH
Level 7 - The Orchards
60 MPH / 75 MPH / 95 MPH
Level 8 - Camelbacks
65 MPH / 100 MPH / 135 MPH
Level 8 - Carden Creag
45 MPH / 65 MPH / 90 MPH
Level 8 - Foothills
65 MPH / 95 MPH / 130 MPH
Level 9 - Crescent
55 MPH / 80 MPH / 105 MPH
Level 9 - Queen's Drive
65 MPH / 90 MPH / 120 MPH
Level 9 - Rolling Fields
60 MPH / 80 MPH / 105 MPH
Level 10 - Bridlewood
60 MPH / 95 MPH / 130 MPH
Level 10 - Croft
55 MPH / 80 MPH / 105 MPH
Level 10 - Derwent Water
50 MPH / 70 MPH / 95 MPH
Speed Traps are places on the road where your current speed will be measured. The speed measurement takes place when you drive in any direction through a gate located at that location.
 Level 1 - Hythe House
80 MPH / 135 MPH / 175 MPH
Level 1 - Hythe House
80 MPH / 135 MPH / 175 MPH
Level 2 - Horizon Drag Strip
65 MPH / 110 MPH / 155 MPH
Level 2 - Slate Quarry
60 MPH / 95 MPH / 130 MPH
Level 3 - Astmoor
70 MPH / 125 MPH / 140 MPH
Level 3 - Derwent Reservoir
85 MPH / 130 MPH / 180 MPH
Level 3 - Moorhead Wind Farm
60 MPH / 150 MPH / 240 MPH
Level 4 - Aerodrome
75 MPH / 125 MPH / 180 MPH
Level 4 - Coombe
60 MPH / 125 MPH / 180 MPH
Level 4 - M68
95 MPH / 180 MPH / 265 MPH
Level 5 - Lower Fell
60 MPH / 130 MPH / 205 MPH
Level 5 - The Roman Mile
80 MPH / 150 MPH / 225 MPH
Level 5 - Wesloch
65 MPH / 100 MPH / 135 MPH
Level 6 - Calton Hill
65 MPH / 105 MPH / 145 MPH
Level 6 - Old Town
65 MPH / 135 MPH / 205 MPH
Level 6 - Princes Street
75 MPH / 150 MPH / 230 MPH
Level 7 - Deep Vale
55 MPH / 105 MPH / 160 MPH
Level 7 - Northbridge
75 MPH / 125 MPH / 175 MPH
Level 7 - Sylvan Hollow
70 MPH / 120 MPH / 170 MPH
Level 8 - Bamburgh Dunes
75 MPH / 145 MPH / 220 MPH
Level 8 - Greendale
75 MPH / 130 MPH / 190 MPH
Level 8 - Peak Moor
65 MPH / 115 MPH / 170 MPH
Level 9 - Cat Bells
75 MPH / 115 MPH / 150 MPH
Level 9 - Cops
80 MPH / 135 MPH / 180 MPH
Level 9 - Lakehurst
75 MPH / 130 MPH / 190 MPH
Level 10 - Cotswolds
45 MPH / 125 MPH / 210 MPH
Level 10 - High Street
75 MPH / 145 MPH / 220 MPH
Level 10 - Oakwood Crest
60 MPH / 125 MPH / 190 MPH
Level 10 - The Grange
65 MPH / 130 MPH / 195 MPH
Drift Zones are sections of road where your drifting skills will be rated. The evaluation starts when you drive onto the defined section of the road from either side.
 Level 1 - Back Lane
6,000 / 25,000 / 45,000
Level 1 - Back Lane
6,000 / 25,000 / 45,000
Level 2 - Ashbrook Lane
12,500 / 50,000 / 95,000
Level 2 - Thicket
7,000 / 30,000 / 55,000
Level 2 - Woodland Walk
12,500 / 50,000 / 90,000
Level 3 - Farmstead
7,000 / 25,000 / 50,000
Level 3 - Moorland Way
12,500 / 50,000 / 95,000
Level 3 - Otleydale
17,000 / 70,000 / 125,000
Level 3 - Switchbacks
9,000 / 35,000 / 65,000
Level 4 - Coast View
12,000 / 45,000 / 85,000
Level 4 - Holyrood Park
7,000 / 25,000 / 50,000
Level 4 - Kirk Loch
15,000 / 55,000 / 100,000
Level 5 - City Suburbs
17,500 / 70,000 / 125,000
Level 5 - Horseshoe Turn
10,000 / 40,000 / 75,000
Level 6 - Mortimer Gardens
6,000 / 25,000 / 45,000
Level 6 - Riverford
6,000 / 25,000 / 45,000
Level 6 - Shepherd's Crook
10,000 / 45,000 / 80,000
Level 7 - Horizon Doughnut
4,000 / 15,000 / 30,000
Level 7 - S-Bends
12,500 / 50,000 / 90,000
Level 7 - Sycamore Pastures
10,000 / 40,000 / 70,000
Level 7 - Tarn Hows
15,000 / 55,000 / 100,000
Fast Travel Boards are road signs located throughout the Forza Horizon 4 map which you can find and destroy. There are 50 of them. After destroying a fast travel board, the CR cost to use Fast Travel option will be reduced.
 Fast Travel Board #1
This board is on the railroad tracks. To get to it, you must get on the tracks on the other side of the bridge.
Fast Travel Board #1
This board is on the railroad tracks. To get to it, you must get on the tracks on the other side of the bridge.
Fast Travel Board #2
Fast Travel Board #3
Fast Travel Board #4
Fast Travel Board #5
Fast Travel Board #6
Fast Travel Board #7
Fast Travel Board #8
Fast Travel Board #9
Fast Travel Board #10
Fast Travel Board #11
Fast Travel Board #12
Fast Travel Board #13
Fast Travel Board #14
Fast Travel Board #15
Fast Travel Board #16
Fast Travel Board #17
Fast Travel Board #18
Fast Travel Board #19
Fast Travel Board #20
Fast Travel Board #21
Fast Travel Board #22
Fast Travel Board #23
Fast Travel Board #24
Fast Travel Board #25
Fast Travel Board #26
Fast Travel Board #27
Fast Travel Board #28
Fast Travel Board #29
Fast Travel Board #30
Fast Travel Board #31
Fast Travel Board #32
Fast Travel Board #33
Fast Travel Board #34
Fast Travel Board #35
Fast Travel Board #36
Fast Travel Board #37
Fast Travel Board #38
Fast Travel Board #39
Fast Travel Board #40
Fast Travel Board #41
Fast Travel Board #42
Fast Travel Board #43
Fast Travel Board #44
Fast Travel Board #45
Fast Travel Board #46
You must unlock the "Level 7 - Leap of Faith" danger sign to activate the ramp that will allow you to jump to the roof of the church.
Fast Travel Board #47
Fast Travel Board #48
This board is under the bridge.
Fast Travel Board #49
Fast Travel Board #50
Influence Boards are a type of collectibles with which you can gather some influence. Here are the boards that will grant you 5,000 influence.
 5,000 Points
You just need a little bit of speed to get here. Easy to get.
5,000 Points
You just need a little bit of speed to get here. Easy to get.
5,000 Points
This board is at the end of the railroad tracks. Easy to get.
5,000 Points
5,000 Points
5,000 Points
This board is inside the railroad tunnel. The entrances are north and south. Easy to get.
5,000 Points
Easy to get.
5,000 Points
Easy to get.
5,000 Points
5,000 Points
5,000 Points
This board is at the back of the house, between the silos. Easy to get.
5,000 Points
5,000 Points
5,000 Points
On the roof of a metal garage. You can easily jump there from a nearby hill.
5,000 Points
5,000 Points
5,000 Points
5,000 Points
5,000 Points
5,000 Points
This board is inside a small wooden house that you can demolish. Easy to get.
5,000 Points
Easy to get.
5,000 Points
5,000 Points
The board is located on the roof of the building. You need to accelerate and jump to the roof using a small pile of gravel right next to the building.
5,000 Points
This board is inside the greenhouse that you can demolish. Easy to get.
5,000 Points
Easy to get.
5,000 Points
Easy to get.
Influence Boards are a type of collectibles with which you can gather some influence. Here are the boards that will grant you 3,000 influence.
 3,000 Points
3,000 Points
This board is under the bridge.
3,000 Points
3,000 Points
3,000 Points
3,000 Points
3,000 Points
3,000 Points
3,000 Points
This board is in the railroad tunnel.
3,000 Points
This board is on the path about halfway up the hill. Follow the fence made of wooden stakes.
3,000 Points
This board is on top of the hill.
3,000 Points
3,000 Points
This board is on top of the hill.
3,000 Points
3,000 Points
This board is on the roof of the railcar. You must use the nearby ramp to jump up there.
3,000 Points
3,000 Points
3,000 Points
3,000 Points
3,000 Points
3,000 Points
3,000 Points
3,000 Points
3,000 Points
3,000 Points
3,000 Points
3,000 Points
3,000 Points
3,000 Points
3,000 Points
3,000 Points
3,000 Points
3,000 Points
3,000 Points
3,000 Points
3,000 Points
3,000 Points
3,000 Points
3,000 Points
3,000 Points
3,000 Points
This board is outside, above the tunnel.
3,000 Points
3,000 Points
3,000 Points
3,000 Points
3,000 Points
3,000 Points
3,000 Points
3,000 Points
3,000 Points
Influence Boards are a type of collectibles with which you can gather some influence. Here are the boards that will grant you 1,000 influence.
 1,000 Points
1,000 Points
1,000 Points
1,000 Points
1,000 Points
1,000 Points
1,000 Points
1,000 Points
1,000 Points
1,000 Points
1,000 Points
1,000 Points
the board is under the overpass.
1,000 Points
1,000 Points
This board is on the railroad bridge.
1,000 Points
This board is under the bridge.
1,000 Points
1,000 Points
1,000 Points
1,000 Points
1,000 Points
1,000 Points
This board is under the bridge.
1,000 Points
1,000 Points
1,000 Points
1,000 Points
1,000 Points
1,000 Points
1,000 Points
1,000 Points
1,000 Points
1,000 Points
1,000 Points
1,000 Points
1,000 Points
1,000 Points
1,000 Points
This board is under the bridge.
1,000 Points
1,000 Points
1,000 Points
1,000 Points
1,000 Points
1,000 Points
1,000 Points
1,000 Points
1,000 Points
1,000 Points
This board is at the base of the dam.
1,000 Points
1,000 Points
1,000 Points
This board is in the tunnel.
1,000 Points
1,000 Points
1,000 Points
1,000 Points
1,000 Points
1,000 Points
1,000 Points
1,000 Points
1,000 Points
This board is uder the bridge.
1,000 Points
1,000 Points
1,000 Points
1,000 Points
1,000 Points
1,000 Points
1,000 Points
1,000 Points
1,000 Points
1,000 Points
1,000 Points
1,000 Points
1,000 Points
1,000 Points
This board is uder the bridge.
1,000 Points
1,000 Points
1,000 Points
 Fortune Island
Travel to Fortune Island.
Fortune Island
Travel to Fortune Island.
Horizon Festival
LEGO Speed Champions
Travel to LEGO Valley.
The Eliminator
Battle to be the last one standing!
The Horizon Super 7
Take on Community Challenges in The Horizon Super 7
Showcases are special races where you face off against unusual opponents. These races will be unlocked progressively once you reach a certain rank. In each of these events you will drive a specific vehicle that will be provided to you.
 The Behemoth Showcase
Autumn Showcase.
The Behemoth Showcase
Autumn Showcase.
The Delta-Wing Showcase
The Flying Scotsman Showcase
Winter Showcase.
The Halo Experience Showcase
It unlocks when you reach level 20.
The Horizon Motocross Showcase
Spring Showcase.
A series of street races. As you progress and level up in the "Road Racing Series" more tracks will be unlocked. The final track "The Colossus" will be unlocked when you reach 10th tier.
 Tier 1 - Ambleside Sprint
Tier 1 - Horizon Festival Circuit
Tier 2 - Derwent Lakeside Sprint
Tier 3 - Ambleside Village Circuit
Tier 3 - Elmsdon on Sea Sprint
Tier 3 - Horizon Festival Sprint
Tier 4 - Greendale Club Circuit
Tier 4 - Lake District Sprint
Tier 4 - Moorhead Wind Farm Circuit
Tier 5 - Edinburgh City Sprint
Tier 5 - Holyrood Park Circuit
Tier 5 - Princes Street Gardens Circuit
Tier 6 - Broadway Village Circuit
Tier 6 - Lakehurst Copse Circuit
Tier 6 - Waterhead Sprint
Tier 7 - Edinburgh Station Circuit
Tier 7 - Greendale Super Sprint
Tier 7 - The Meadows Sprint
Tier 8 - Astmoor Heritage Circuit
Tier 8 - Bamburgh Coast Circuit
Tier 8 - Cotswolds Super Sprint
Tier 9 - Derwent Reservoir Sprint
Tier 9 - Glen Rannoch Hillside Sprint
Tier 9 - Lakehurst Forest Sprint
Tier 10 - The Colossus
A series of dirt races. As you progress and level up in the "Dirt Racing Series" more tracks will be unlocked. The final track "The Gauntlet" will be unlocked when you reach 8th tier.
 Tier 1 - Ambleside Scramble
Tier 1 - Tarn Hows Scramble
Tier 2 - Derwentwater Trail
Tier 3 - Cotswolds Road Rally Trail
Tier 3 - Lakehurst Forest Trail
Tier 3 - White Horse Hill Trail
Tier 4 - Astmoor Rally Trail
Tier 4 - Bamburgh Pinewood Trail
Tier 4 - Highland Farm Scramble
Tier 5 - Glen Rannoch Trail
Tier 5 - Greendale Foothills Scramble
Tier 5 - Mortimer Gardens Scramble
Tier 6 - Holyrood Park Trail
Tier 6 - Moorhead Rally Trail
Tier 6 - Mudkickers' 4x4 Scramble
Tier 7 - Ashbrook Loop Scramble
Tier 7 - Broadway Village Scramble
Tier 7 - Derwent Reservoir Trail
Tier 7 - Lakehurst Woodland Scramble
Tier 8 - The Gauntlet
A series of illegal street races. Races are generally held at dusk and during regular traffic. As you progress and level up in the "Street Scenes" more tracks will be unlocked. The final track "The Marathon" will be unlocked when you reach 9th tier.
 Tier 1 - Batham Gate
Tier 2 - Edinburgh Stockbridge
Tier 3 - Ambleside Ascent
Tier 3 - Derwent Valley Dash
Tier 3 - Reservoir Run
Tier 4 - Edinburgh New Town
Tier 4 - Edinburgh West End
Tier 4 - The Highland Charge
Tier 5 - Ashbrook Apex
Tier 5 - Broadway Crossfire
Tier 5 - Lakehurst Rush
Tier 6 - Glenfinnan Chase
Tier 6 - Mortimer's Pass
Tier 6 - Rail Yard Express
Tier 7 - Holyrood Run
Tier 7 - North Coast Rush
Tier 7 - The Monument Wynds
Tier 8 - Coastal Charge
Tier 8 - Otleydale Dash
Tier 8 - Wind Farm Rush
Tier 9 - The Marathon
A series of off-road races. As you progress and level up in the "Cross Country Series" more tracks will be unlocked. The final track "The Titan" will be unlocked when you reach 8th tier.
 Tier 1 - City Outskirts Cross Country
Tier 2 - Arthur's Seat Cross Country
Tier 2 - Beach View Cross Country
Tier 3 - Riverbank Cross Country Circuit
Tier 3 - Whitewater Falls Cross Country
Tier 3 - Windmill Cross Country
Tier 4 - Ambleside Loop Cross Country
Tier 4 - Ambleside Rush Cross Country
Tier 4 - Quarry Cross Country Circuit
Tier 5 - Aerodrome Cross Country Circuit
Tier 5 - Castle Cross Country Circuit
Tier 5 - The Ridge Cross Country Circuit
Tier 6 - Coastal Rush Cross Country
Tier 6 - North City Cross Country Circuit
Tier 6 - Rail Yard Cross Country Circuit
Tier 7 - Gardens Cross Country Circuit
Tier 7 - Glen Rannoch Cross Country
Tier 7 - Mountain Foot Cross Country
Tier 8 - The Titan
A series of drag races. As you progress and level up in "The Drag Strips" more tracks will be unlocked. Once you reach tier 5, a "bonus" track will be unlocked, but it will only be available during the winter season.
 Tier 1 - Horizon Festival Drag Strip
It unlocks when you reach level 20.
Tier 1 - Horizon Festival Drag Strip
It unlocks when you reach level 20.
Tier 2 - Greendale Aerodrome Drag Strip
Tier 3 - Bamburgh Beach Drag Strip
Tier 4 - The Juggernaut
Tier 5 - Ice Flats Drag Strip (Winter Only)
Forza Horizon 4 Stories are special missions that tell some unique narratives, combining different types of gameplay that are available in the game.
Forza Horizon 4 Businesses work similarly to stories, meaning they consist of chapters. Your progress in completing chapters will be rated with 1-3 stars. To own a business you must first purchase it. Once you purchase a business, you will receive profits from it regularly, every 24 hours.
 British Racing Green
This story is unlocked upon reaching level 50 and consists of 10 chapters. The reward (tier 10) is 1931 Bentley 8-Liter.
British Racing Green
This story is unlocked upon reaching level 50 and consists of 10 chapters. The reward (tier 10) is 1931 Bentley 8-Liter.
Drift Club
This story is unlocked upon reaching level 30 and consists of 10 chapters. The reward (tier 10) is 1969 Ford Mustang Boss 302.
Express Delivery
This business is unlocked upon reaching level 90, consists of 9 chapters, and can be purchased for 100,000 CR. The rewards are: (tier 4) 1983 GMC Vandura G-1500, (tier 6) 2011 Ford Transit SuperSportVan, (tier 8) 1965 Morris Mini-Traveller, (tier 10) Delivery Outfit.
Isha's Taxis
This business is unlocked upon reaching level 22, consists of 10 chapters, and can be purchased for 100,000 CR. The reward is 1964 Austin FX4 Taxi.
LaRacer @ Horizon
This story is unlocked upon reaching level 40 and consists of 10 chapters. The reward (tier 10) is 1988 Chevrolet Monte Carlo Super Sport.
Skill Streak
This story is unlocked upon reaching level 60 and consists of 10 chapters. The reward (tier 10) is 2016 Hoonigan Gymkhana 10 Ford Focus RS RX.
The Car Files
This business is unlocked upon reaching level 70, consists of 10 chapters, and can be purchased for 100,000 CR. The reward is the Crash Test Morph Suit.
The Stunt Driver
This story consists of 10 chapters. You will complete the first chapter during the "game's tutorial", the next nine will be unlocked shortly after when you qualify for the autumn season and complete the first race on Tarn Hows. The reward (tier 10) is 2018 Dodge Challenger SRT Demon.
The Top Gear Horizon Special
This story will be unlocked when you qualify for the autumn season and complete the first race on Tarn Hows. Is consists of 7 chapters. The rewards are: (tier 4) 2017 Mercedes-Benz E 350 D 4Matic All-Terrain "Project E-AT", (tier 5) 2018 Top Gear Track-Tor, (tier 6) The Stig Race Suit, (tier 7) 2014 Mercedes-Benz G 63 AMG 6x6.
Upgrade Heroes
This business is unlocked upon reaching level 80, consists of 10 chapters, and can be purchased for 100,000 CR. The rewards are: (tier 2) 1970 Datsun 510, (tier 3) 1983 Audi Sport quattro, (tier 4) 1970 Chevrolet El Camino Super Sport 454, (tier 5) 1997 Mazda RX-7, (tier 6) 1957 Chevrolet Bel Air, (tier 7) 1997 Land Rover Defender 90, (tier 8) 1984 Peugeot 205 T16, (tier 9) 1940 Ford De Luxe Coupe, (tier 10) 2013 Bentley Continental GT Speed, (tier 11) 2011 Koenigsegg Agera.
World's Fastest Cars
This business is unlocked upon reaching level 21, consists of 10 chapters, and can be purchased for 100,000 CR. The reward is 2016 Zenvo ST1.