All Soul Grabbers in Banishers: Ghosts of New Eden
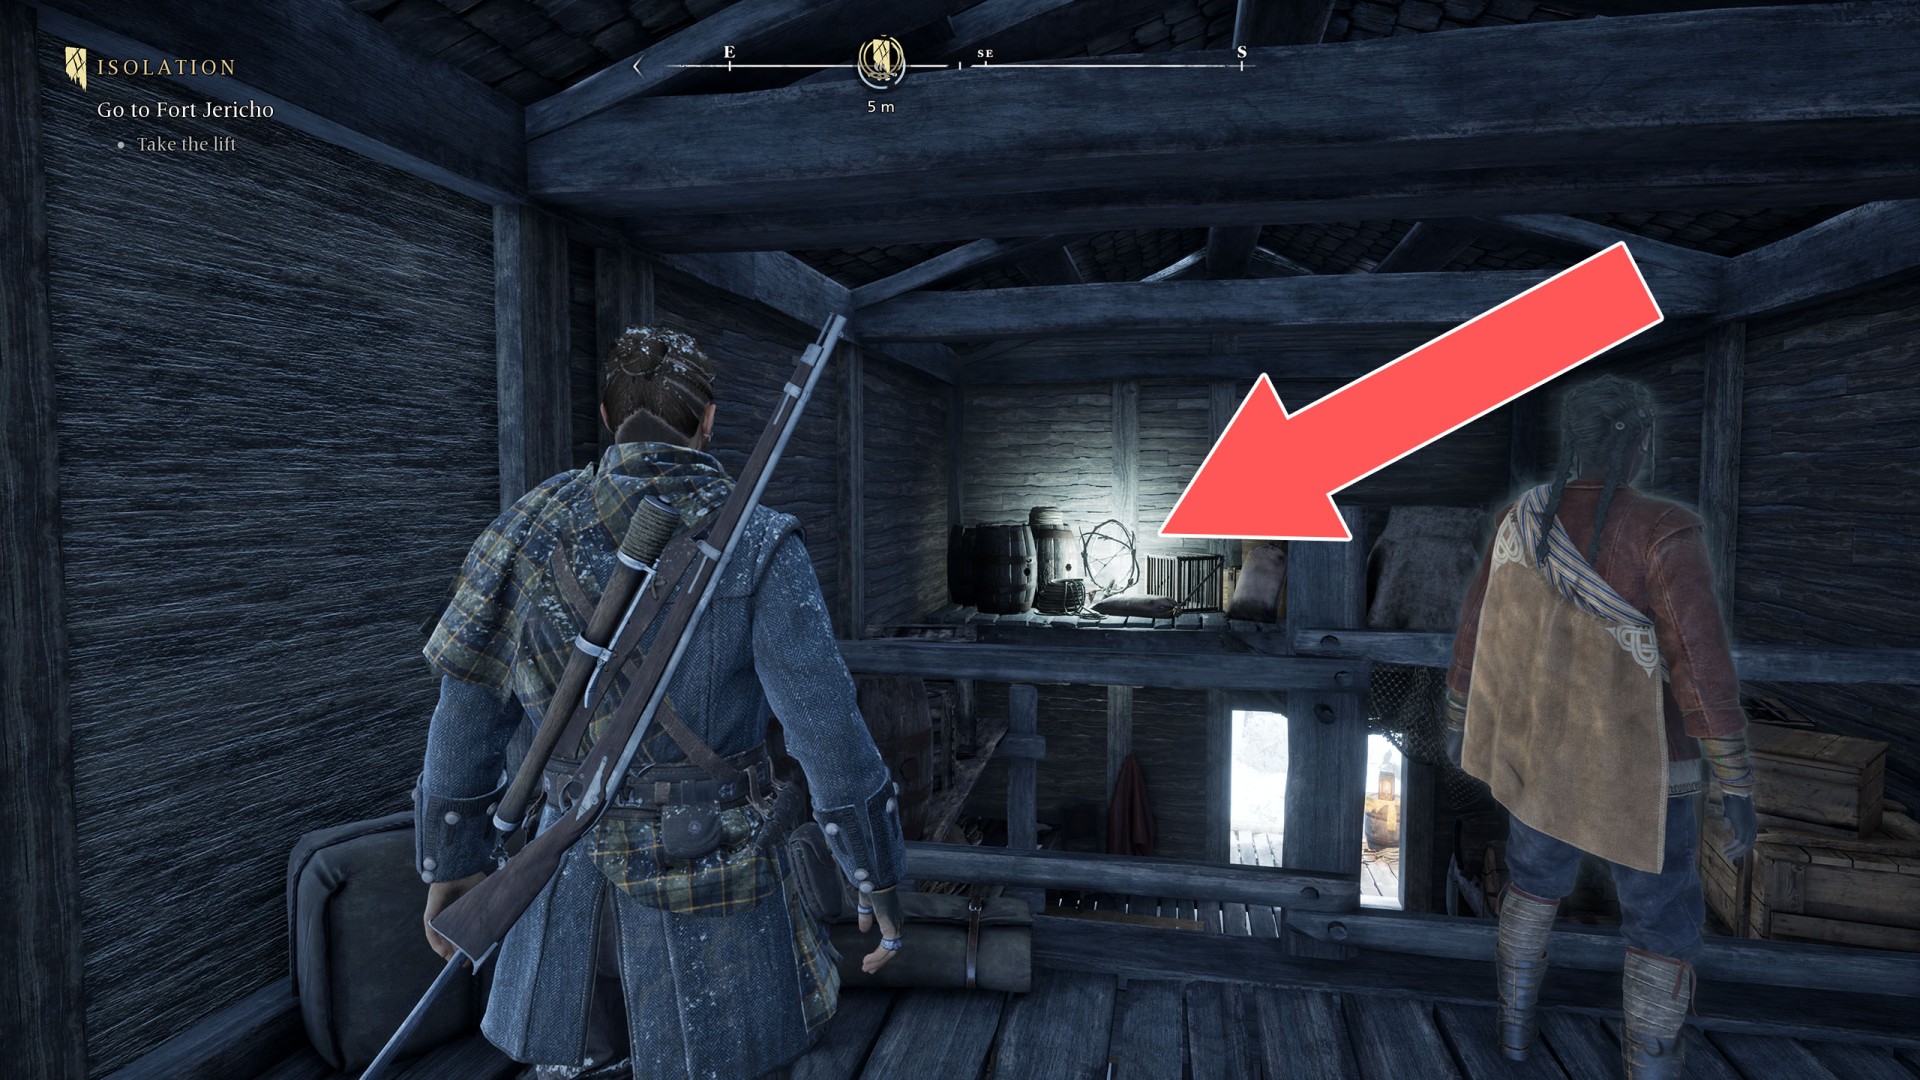
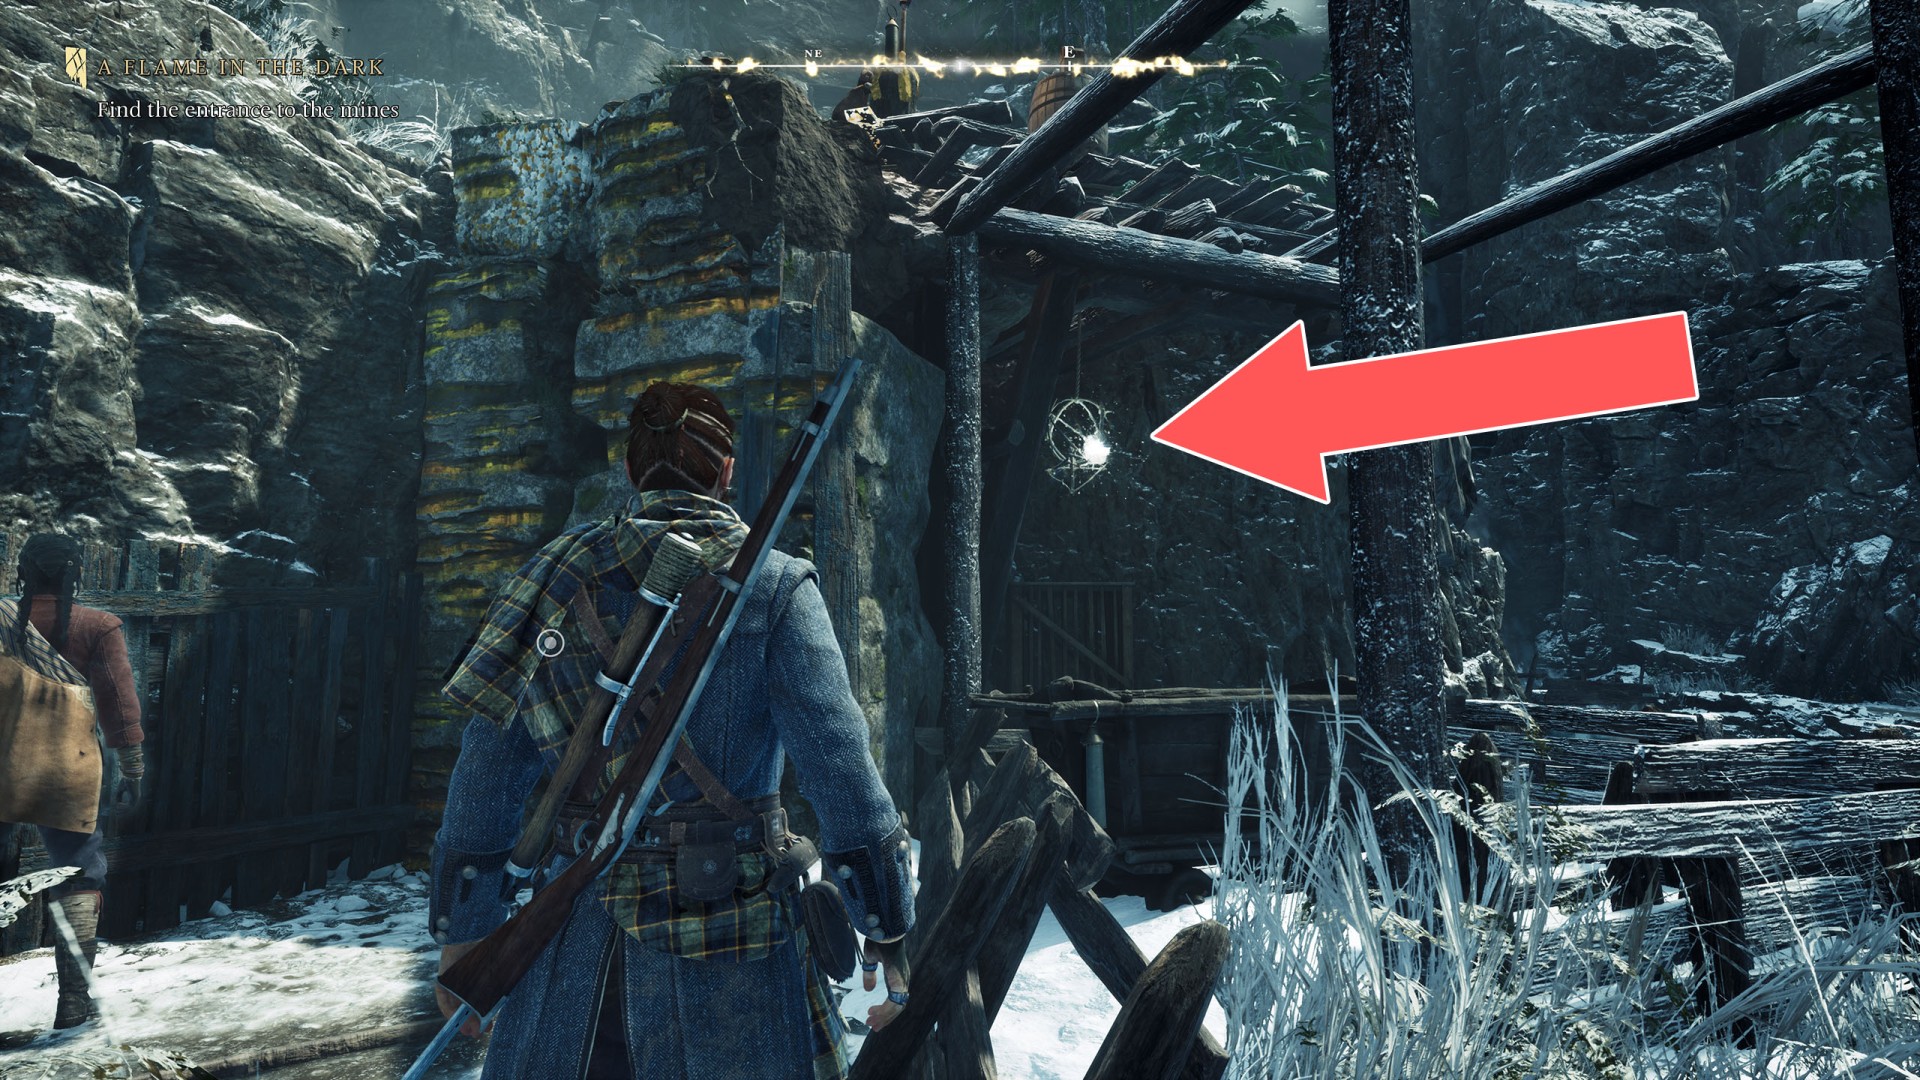
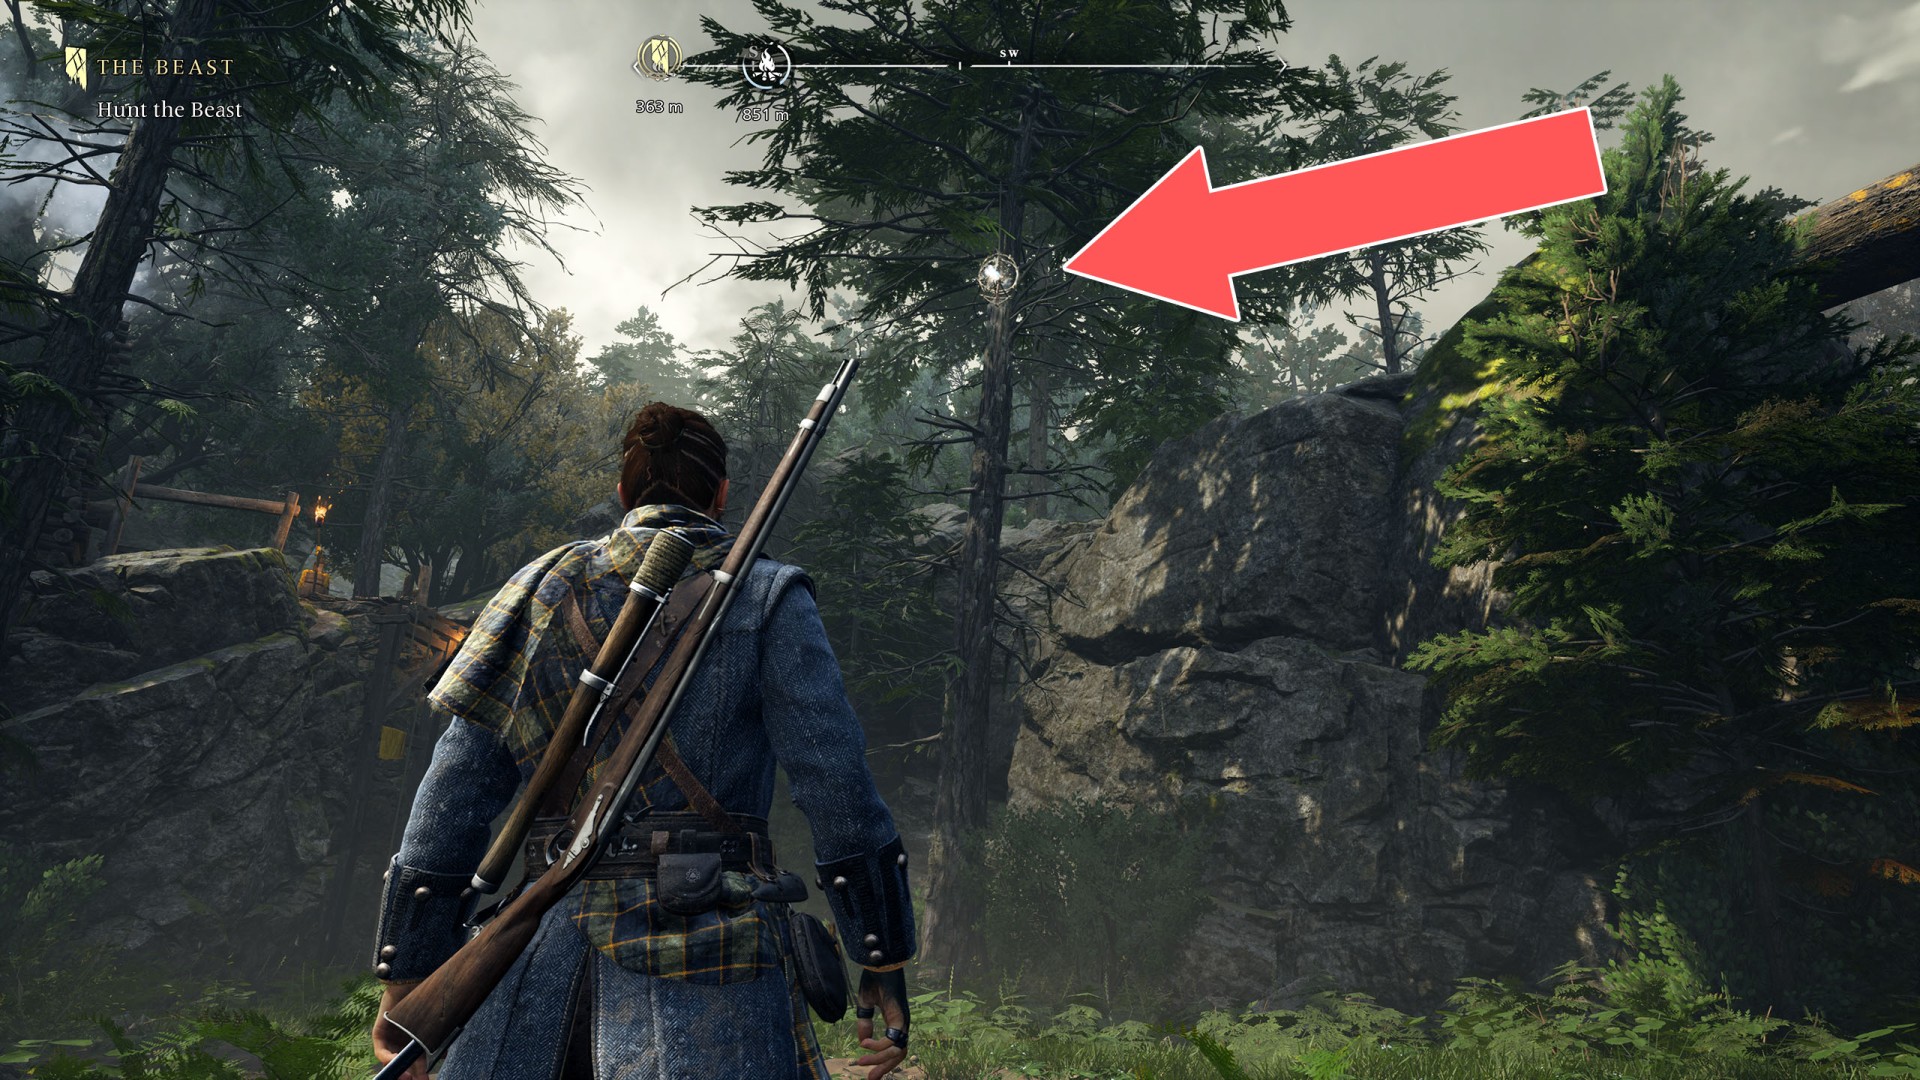
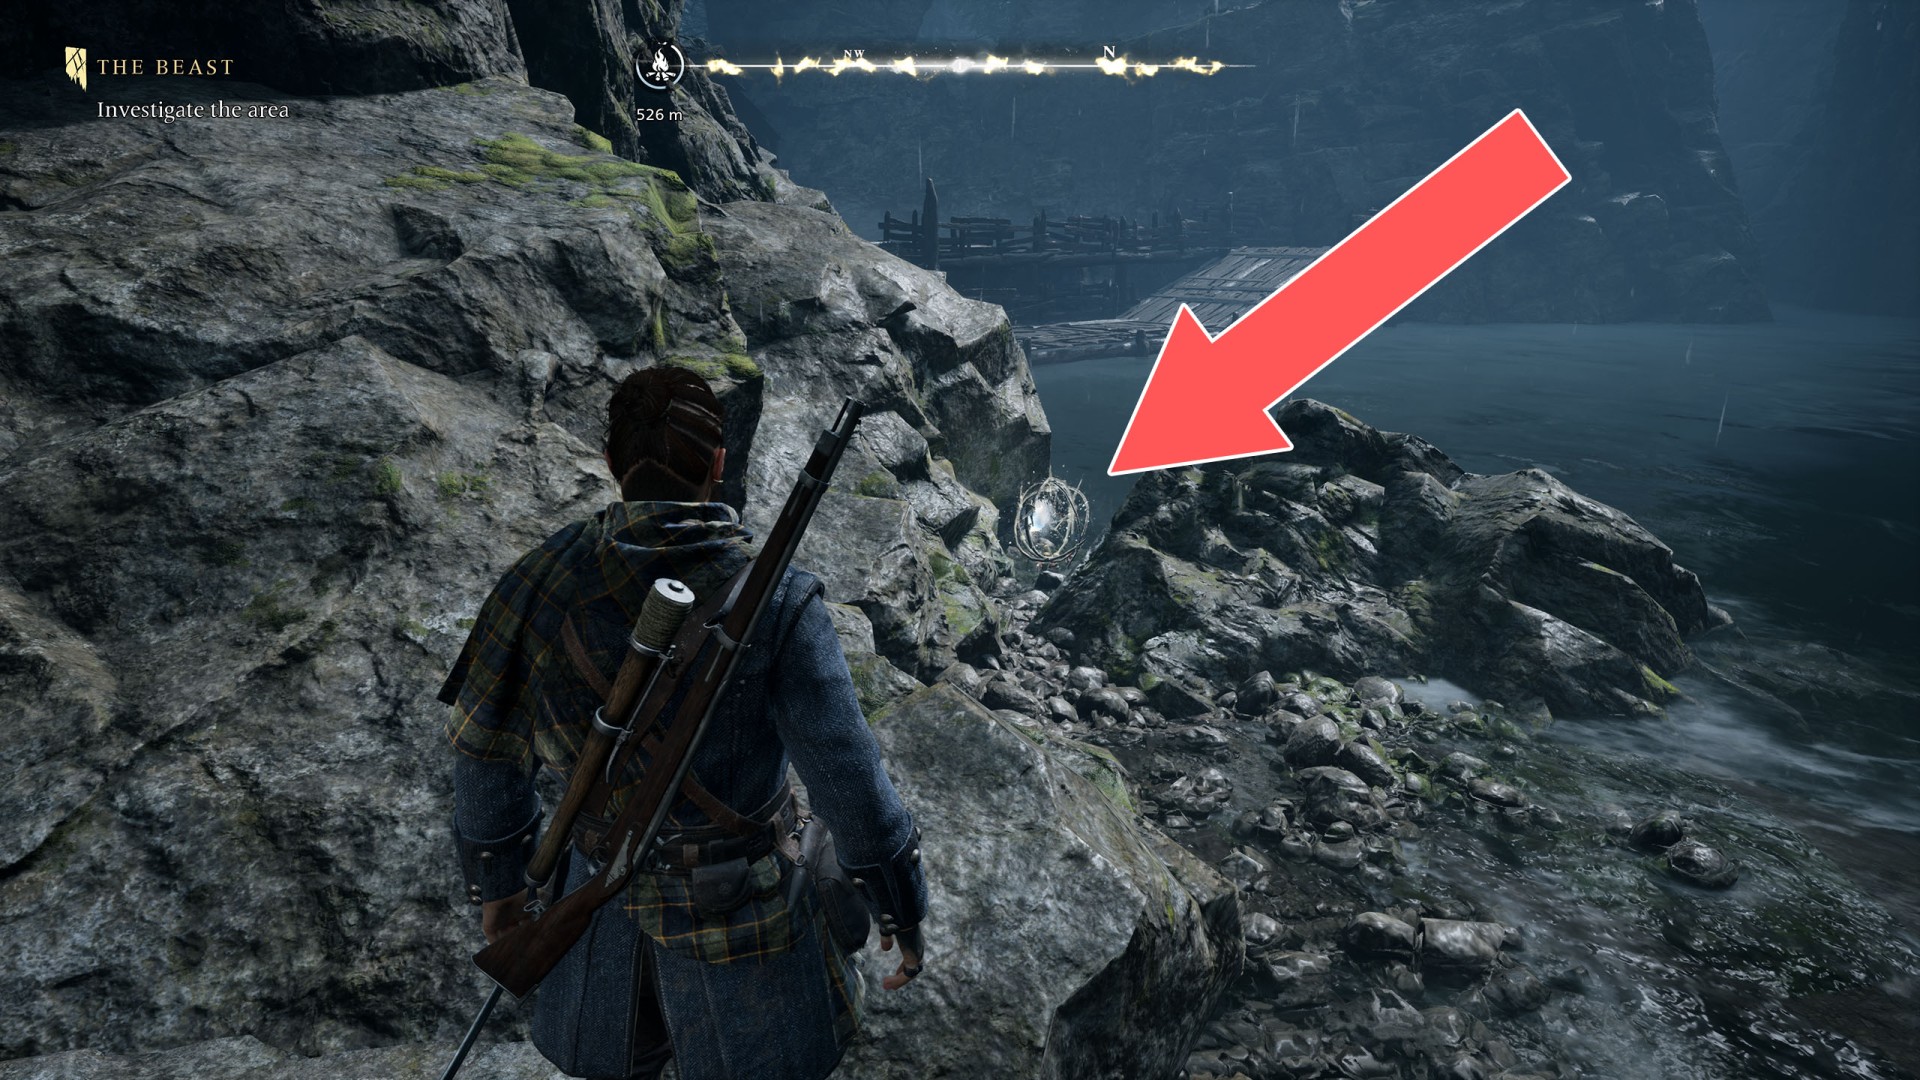
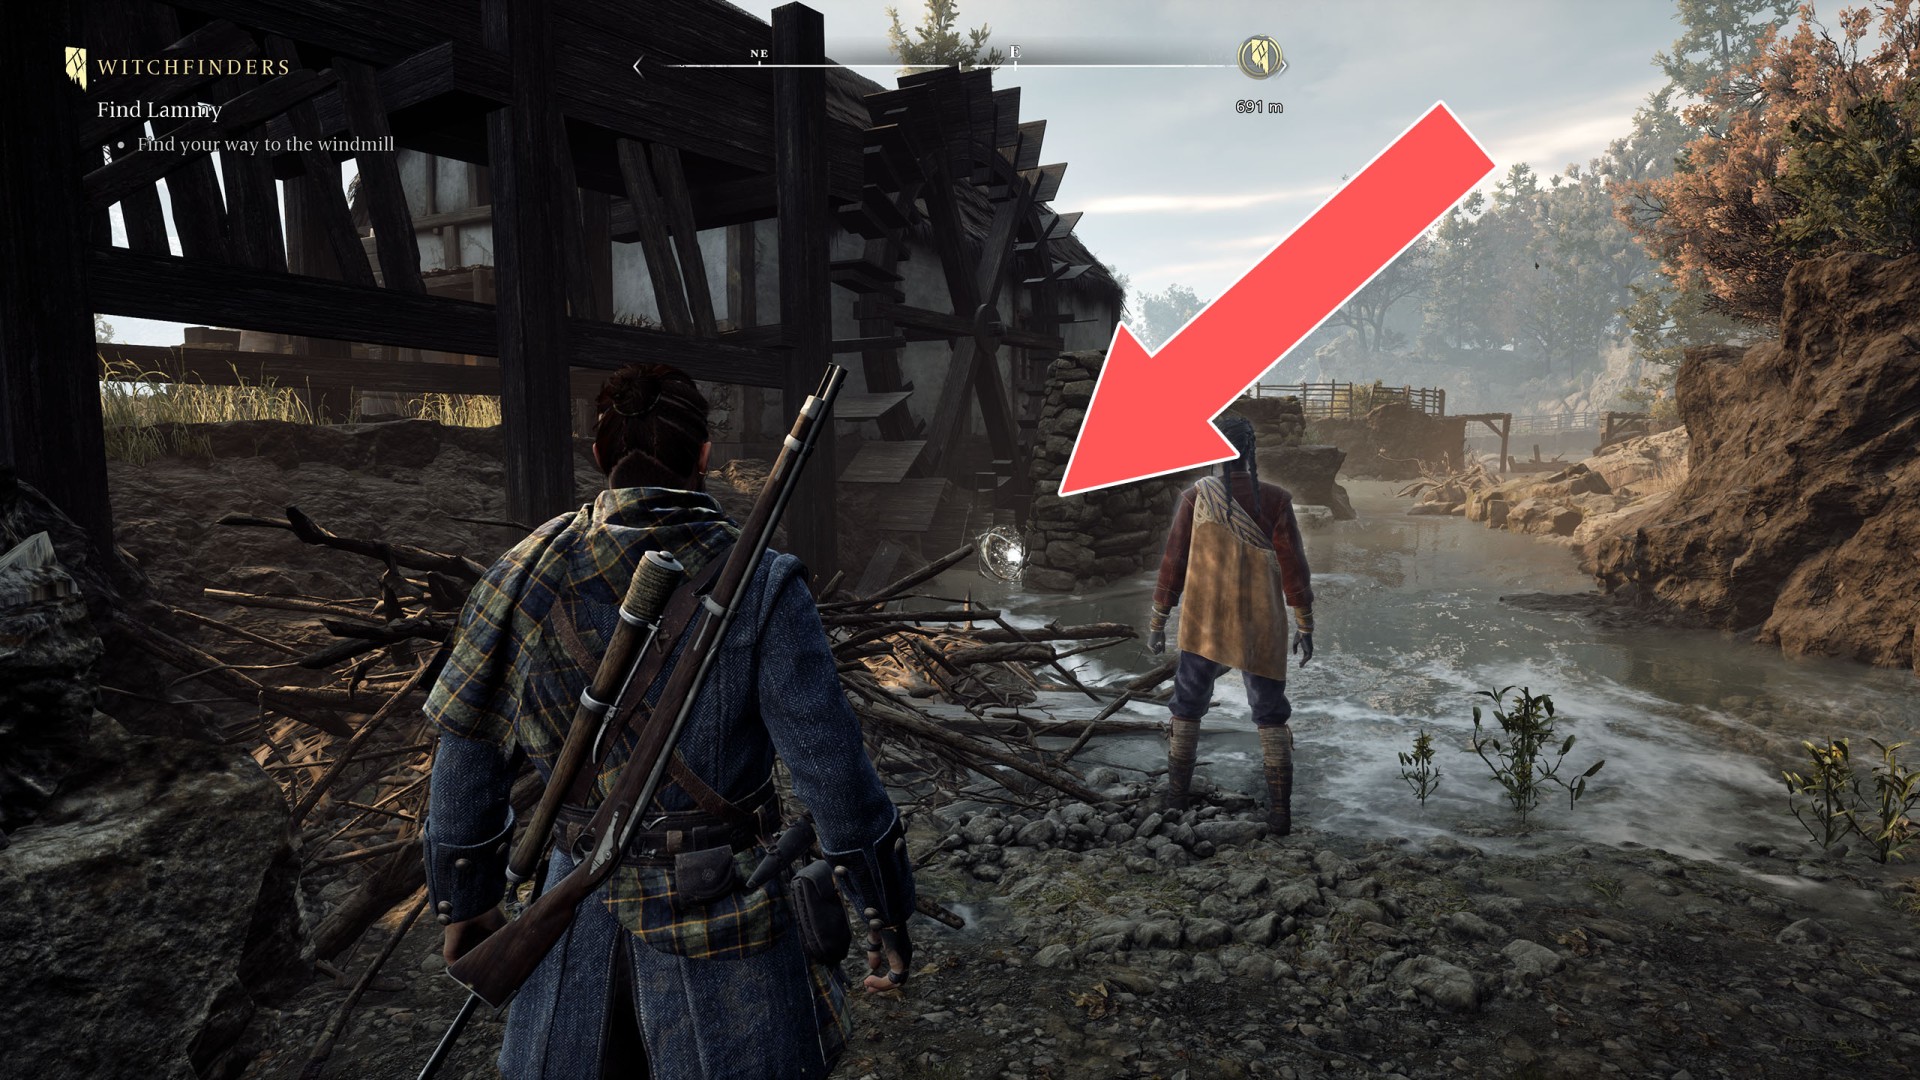
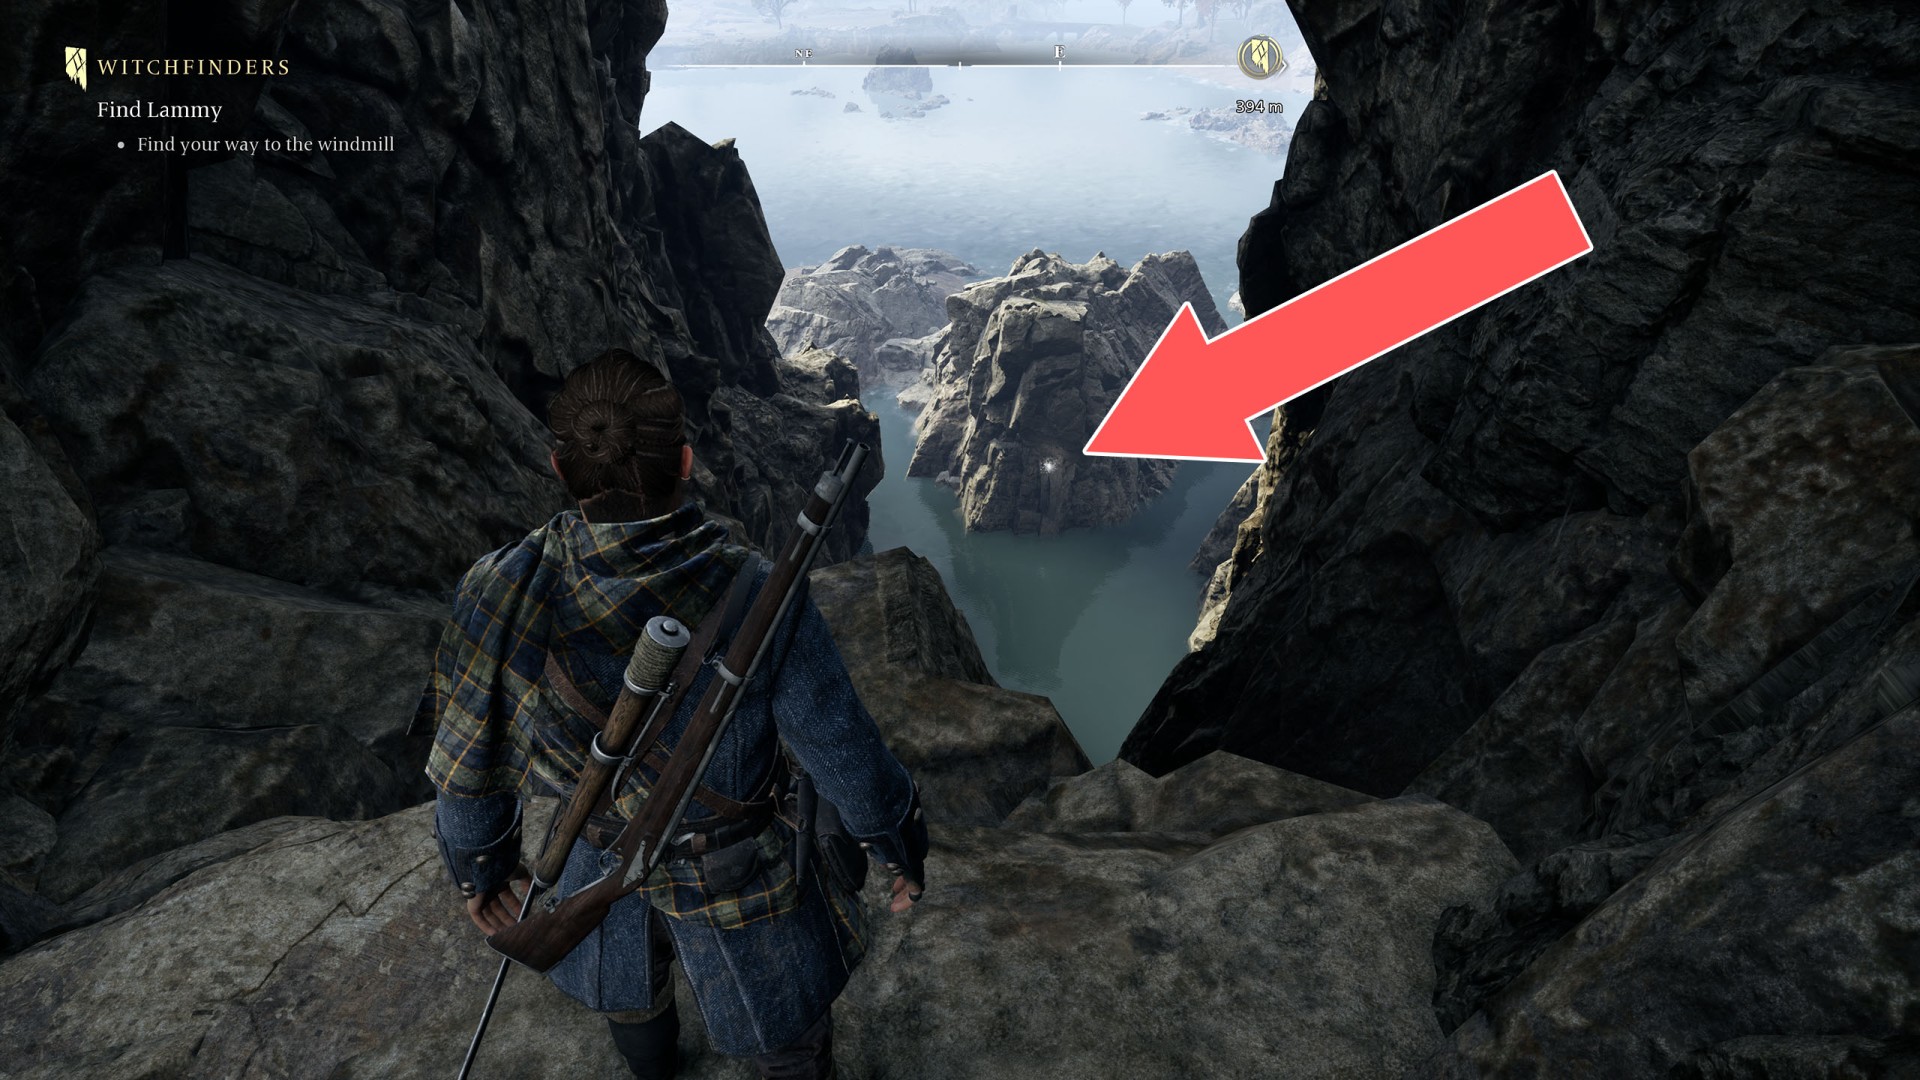
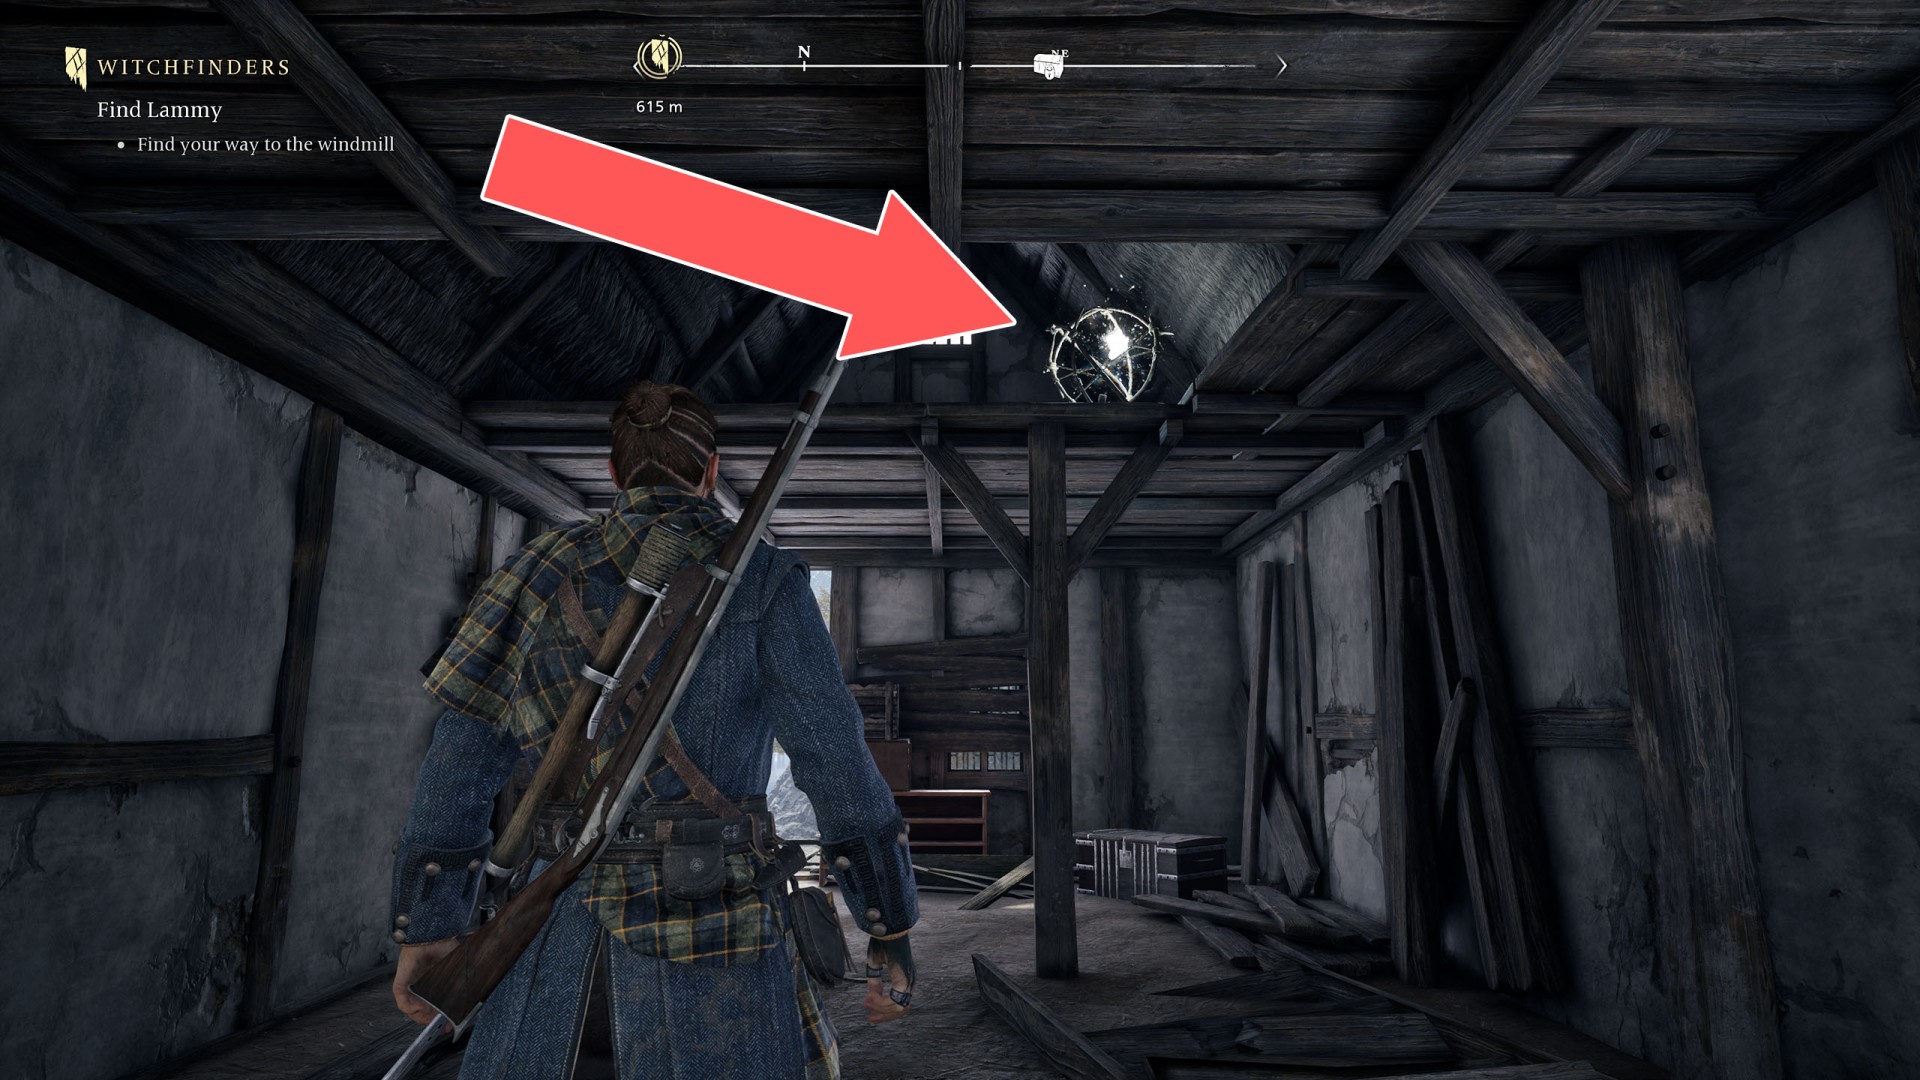
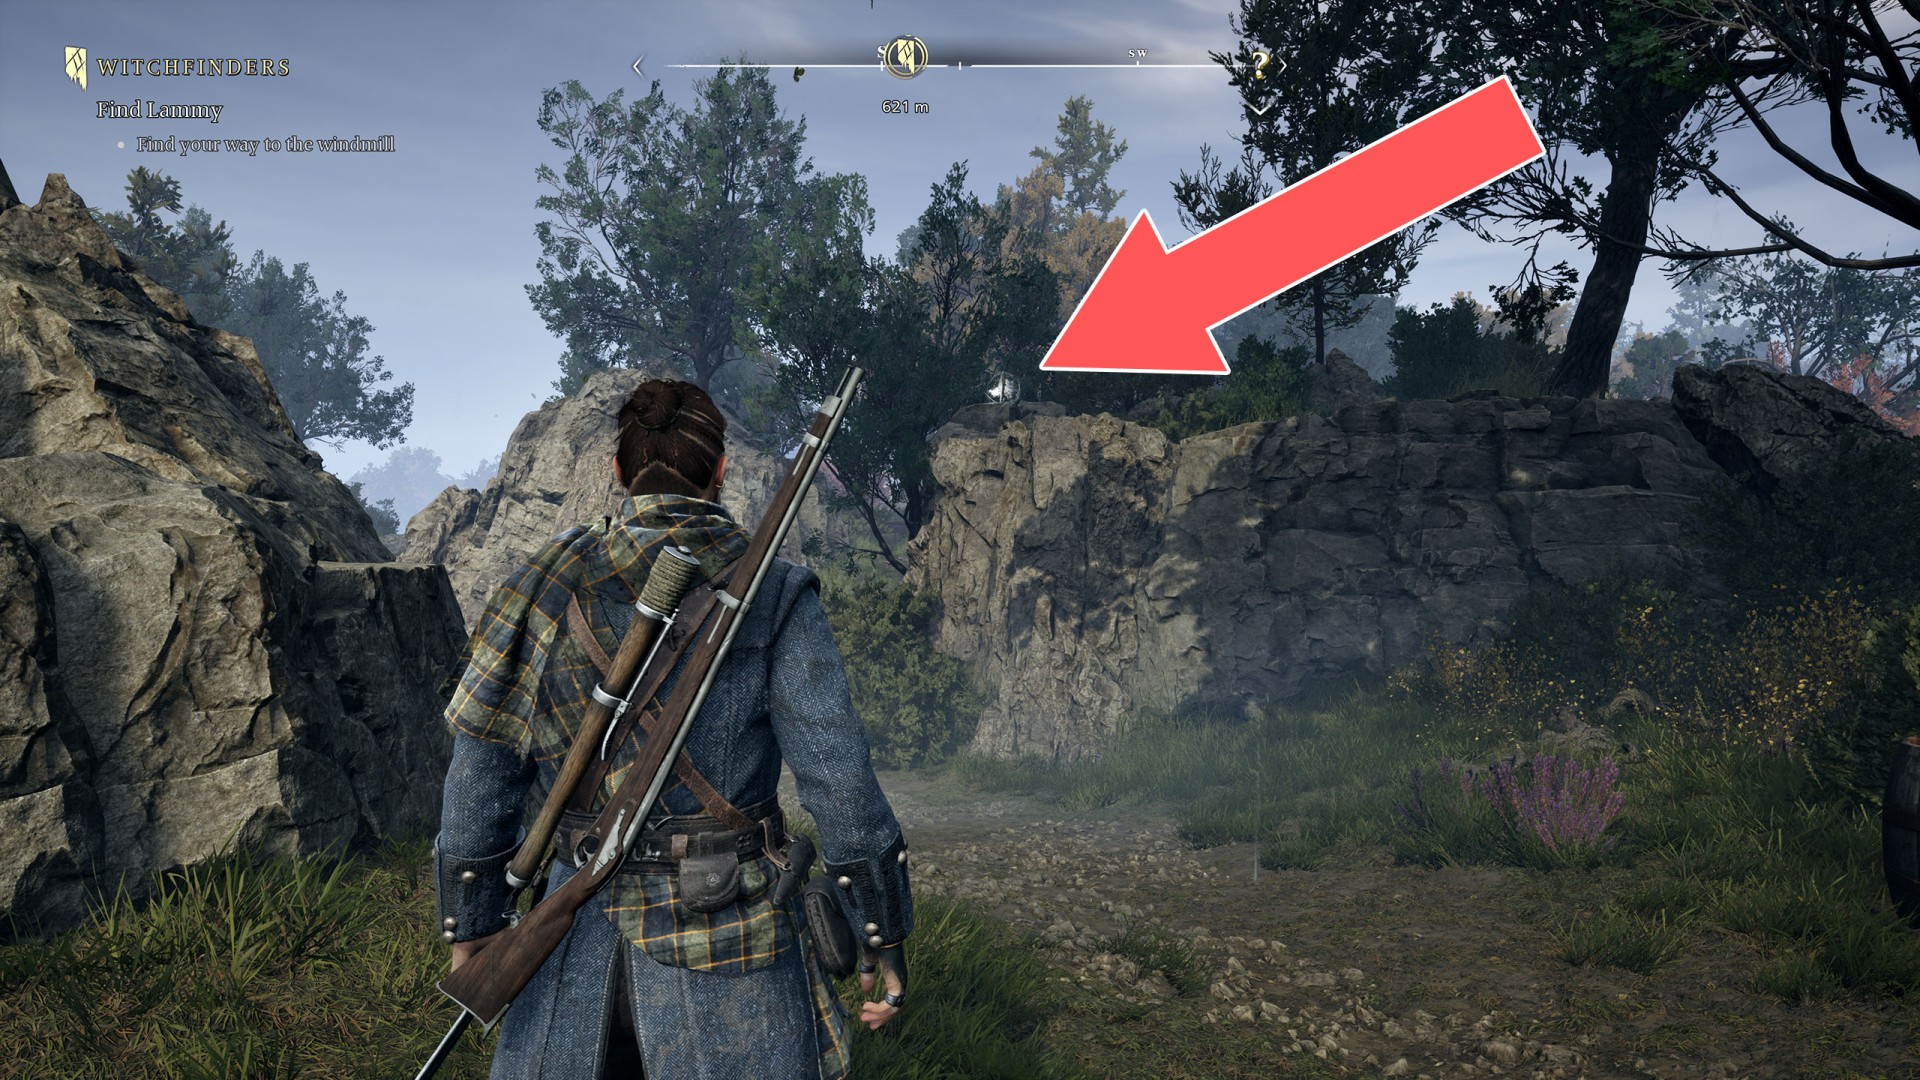
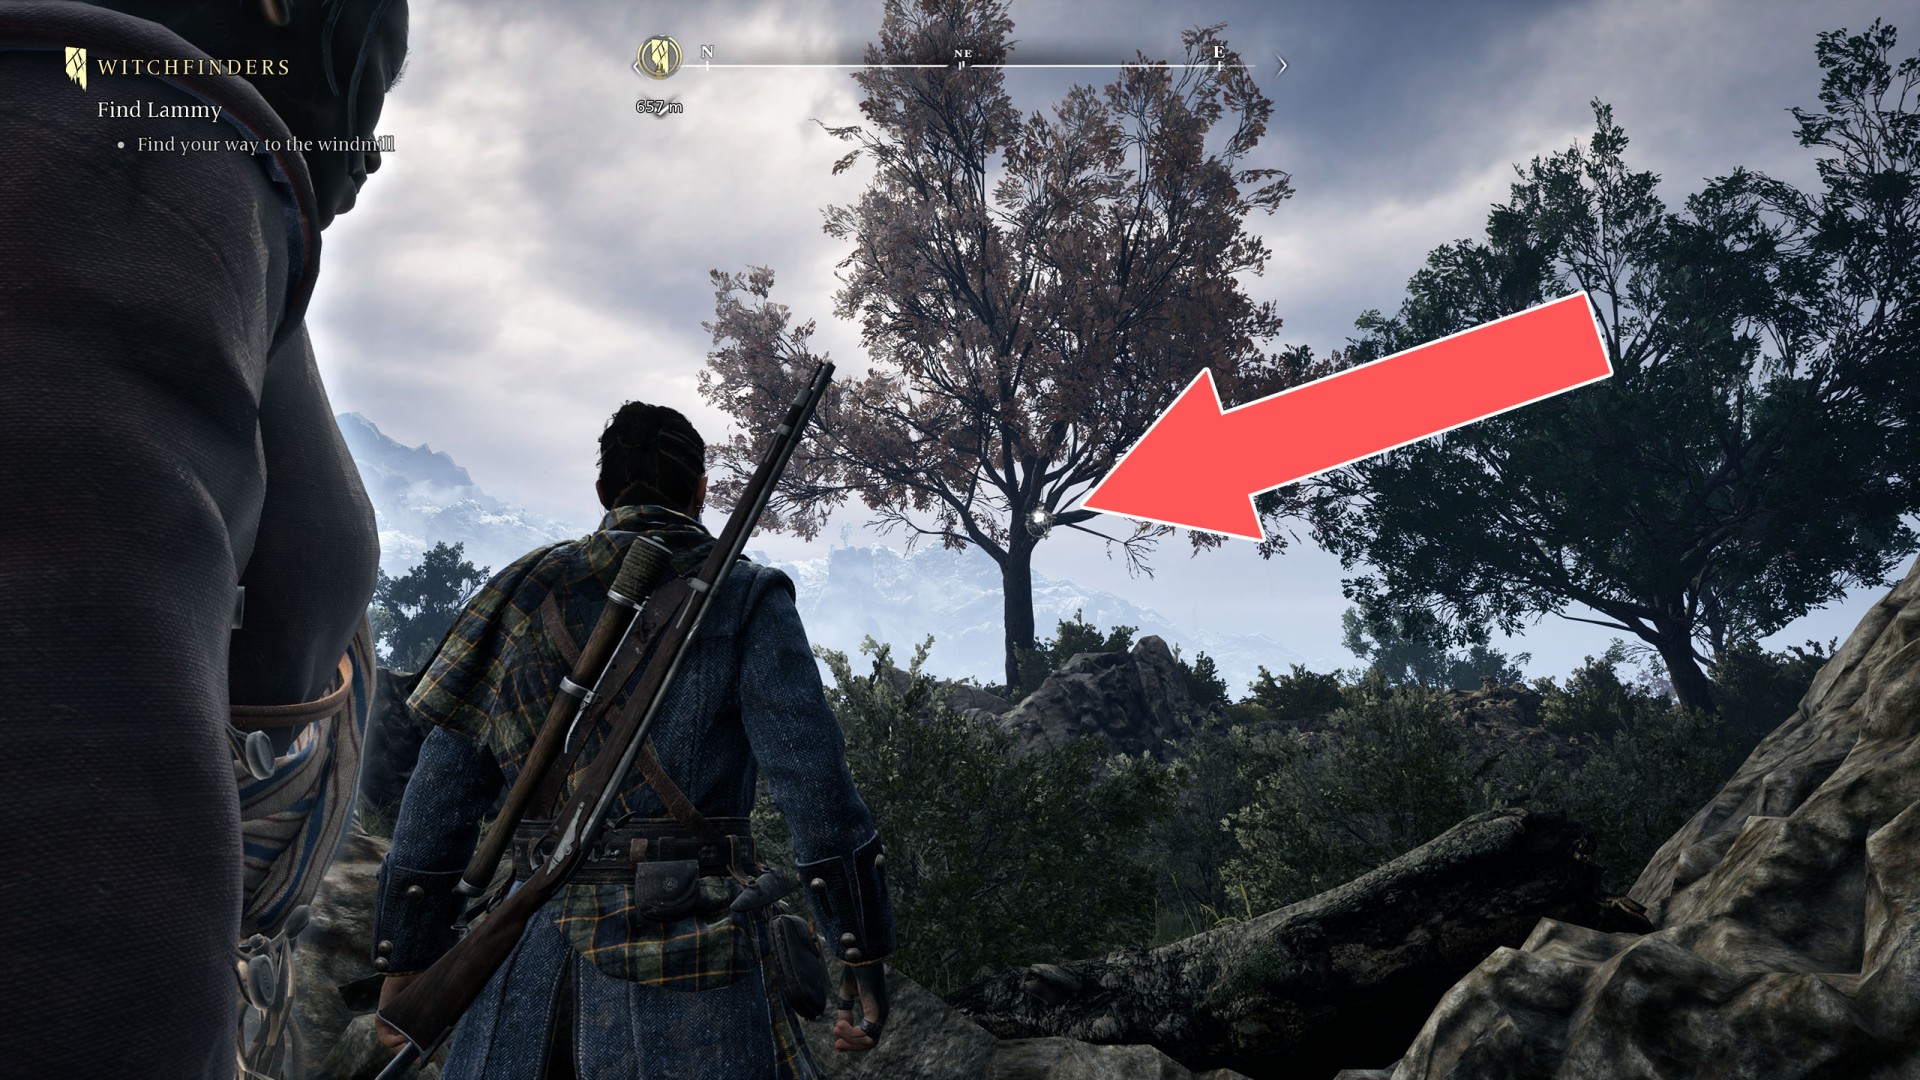
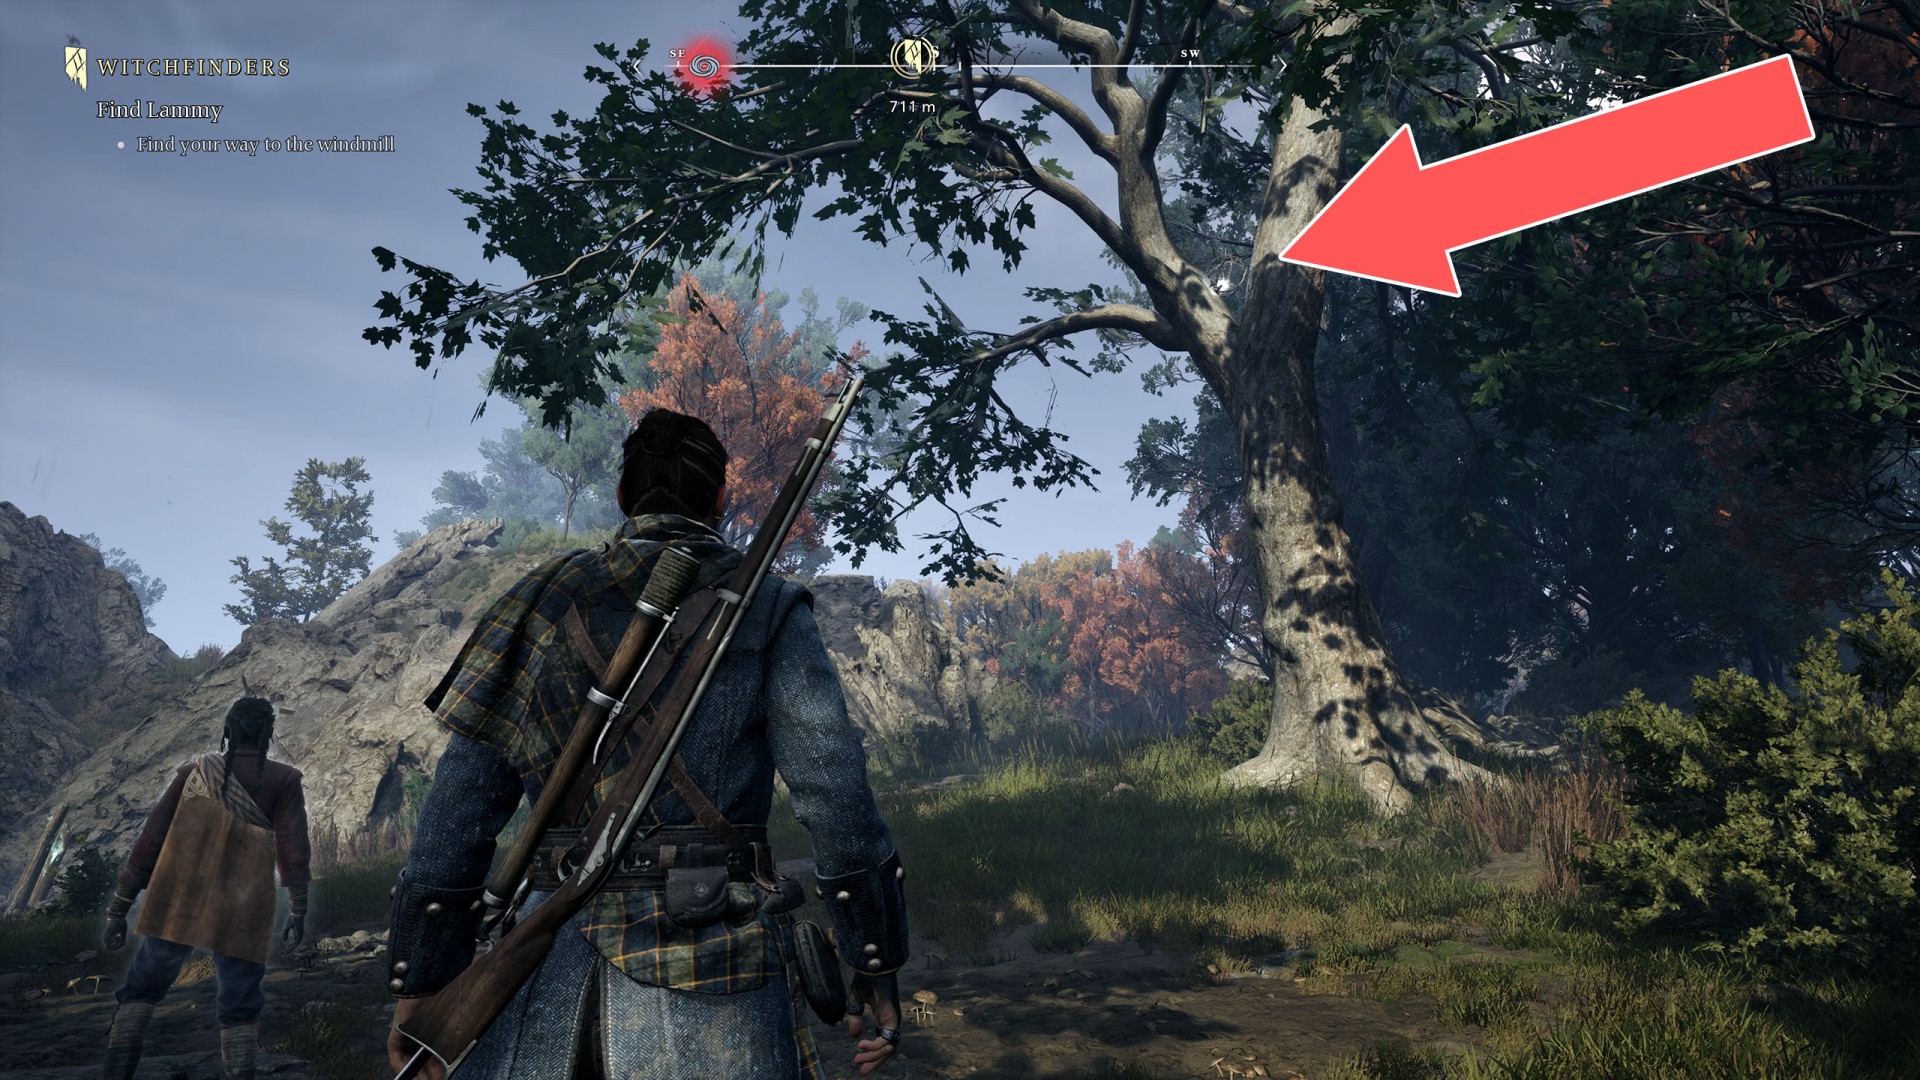
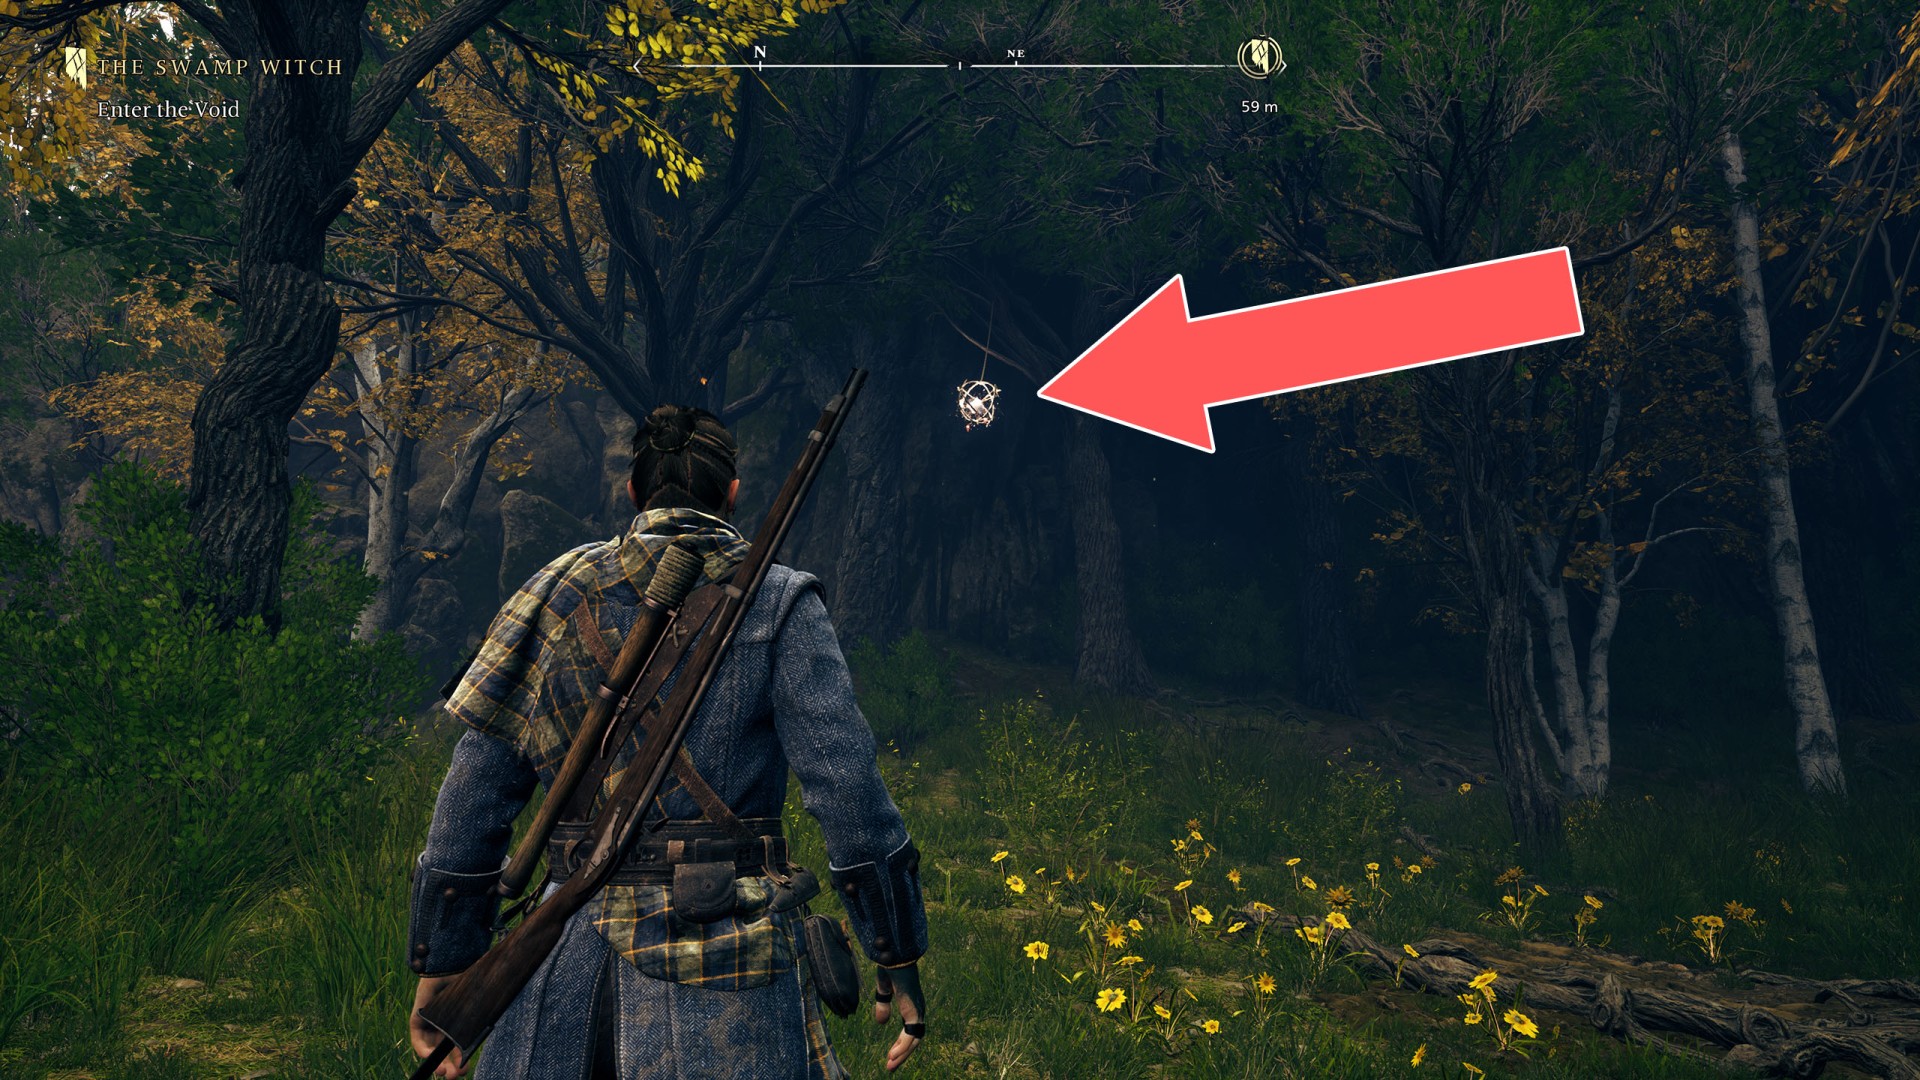
A total of 128 Soul Grabbers can be found in Banishers: Ghost of New Eden. Soul Grabbers are the source of Soul Shards. To be able to collect them you must get a rifle and just shoot them.
Once you find 50 Soul Grabbers you will unlock "The Good Hunter" achievement / trophy.
Index
- Mount Pleasant Soul Grabber (1/31)
- Mount Pleasant Soul Grabber (2/31)
- Mount Pleasant Soul Grabber (3/31)
- Mount Pleasant Soul Grabber (4/31)
- Mount Pleasant Soul Grabber (5/31)
- Mount Pleasant Soul Grabber (6/31)
- Mount Pleasant Soul Grabber (7/31)
- Mount Pleasant Soul Grabber (8/31)
- Mount Pleasant Soul Grabber (9/31)
- Mount Pleasant Soul Grabber (10/31)
- Mount Pleasant Soul Grabber (11/31)
- Mount Pleasant Soul Grabber (12/31)
- Mount Pleasant Soul Grabber (13/31)
- Mount Pleasant Soul Grabber (14/31)
- Mount Pleasant Soul Grabber (15/31)
- Mount Pleasant Soul Grabber (16/31)
- Mount Pleasant Soul Grabber (17/31)
- Mount Pleasant Soul Grabber (18/31)
- Mount Pleasant Soul Grabber (19/31)
- Mount Pleasant Soul Grabber (20/31)
- Mount Pleasant Soul Grabber (21/31)
- Mount Pleasant Soul Grabber (22/31)
- Mount Pleasant Soul Grabber (23/31)
- Mount Pleasant Soul Grabber (24/31)
- Mount Pleasant Soul Grabber (25/31)
- Mount Pleasant Soul Grabber (26/31)
- Mount Pleasant Soul Grabber (27/31)
- Mount Pleasant Soul Grabber (28/31)
- Mount Pleasant Soul Grabber (29/31)
- Mount Pleasant Soul Grabber (30/31)
- Mount Pleasant Soul Grabber (31/31)
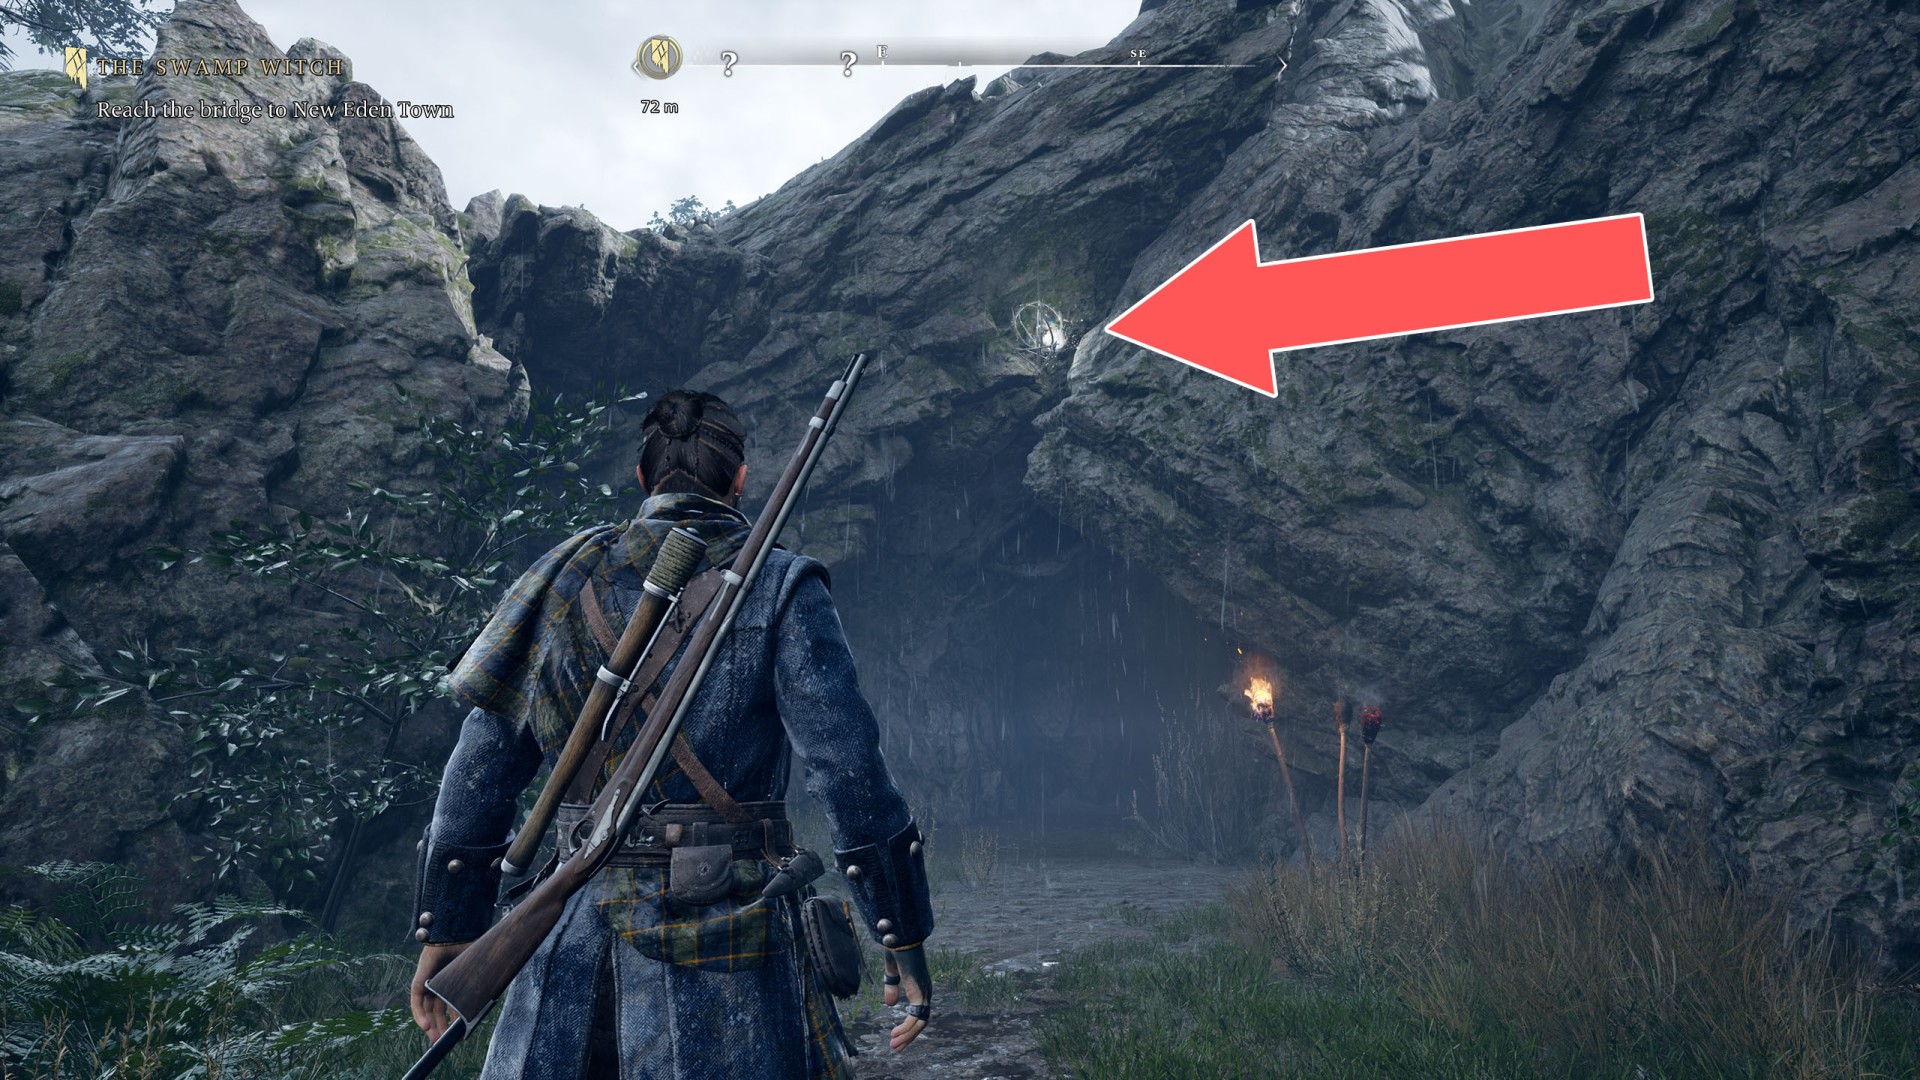
- The Dark Woods Soul Grabber (1/38)
- The Dark Woods Soul Grabber (2/38)
- The Dark Woods Soul Grabber (3/38)
- The Dark Woods Soul Grabber (4/38)
- The Dark Woods Soul Grabber (5/38)
- The Dark Woods Soul Grabber (6/38)
- The Dark Woods Soul Grabber (7/38)
- The Dark Woods Soul Grabber (8/38)
- The Dark Woods Soul Grabber (9/38)
- The Dark Woods Soul Grabber (10/38)
- The Dark Woods Soul Grabber (11/38)
- The Dark Woods Soul Grabber (12/38)
- The Dark Woods Soul Grabber (13/38)
- The Dark Woods Soul Grabber (14/38)
- The Dark Woods Soul Grabber (15/38)
- The Dark Woods Soul Grabber (16/38)
- The Dark Woods Soul Grabber (17/38)
- The Dark Woods Soul Grabber (18/38)
- The Dark Woods Soul Grabber (19/38)
- The Dark Woods Soul Grabber (20/38)
- The Dark Woods Soul Grabber (21/38)
- The Dark Woods Soul Grabber (22/38)
- The Dark Woods Soul Grabber (23/38)
- The Dark Woods Soul Grabber (24/38)
- The Dark Woods Soul Grabber (25/38)
- The Dark Woods Soul Grabber (26/38)
- The Dark Woods Soul Grabber (27/38)
- The Dark Woods Soul Grabber (28/38)
- The Dark Woods Soul Grabber (29/38)
- The Dark Woods Soul Grabber (30/38)
- The Dark Woods Soul Grabber (31/38)
- The Dark Woods Soul Grabber (32/38)
- The Dark Woods Soul Grabber (33/38)
- The Dark Woods Soul Grabber (34/38)
- The Dark Woods Soul Grabber (35/38)
- The Dark Woods Soul Grabber (36/38)
- The Dark Woods Soul Grabber (37/38)
- The Dark Woods Soul Grabber (38/38)
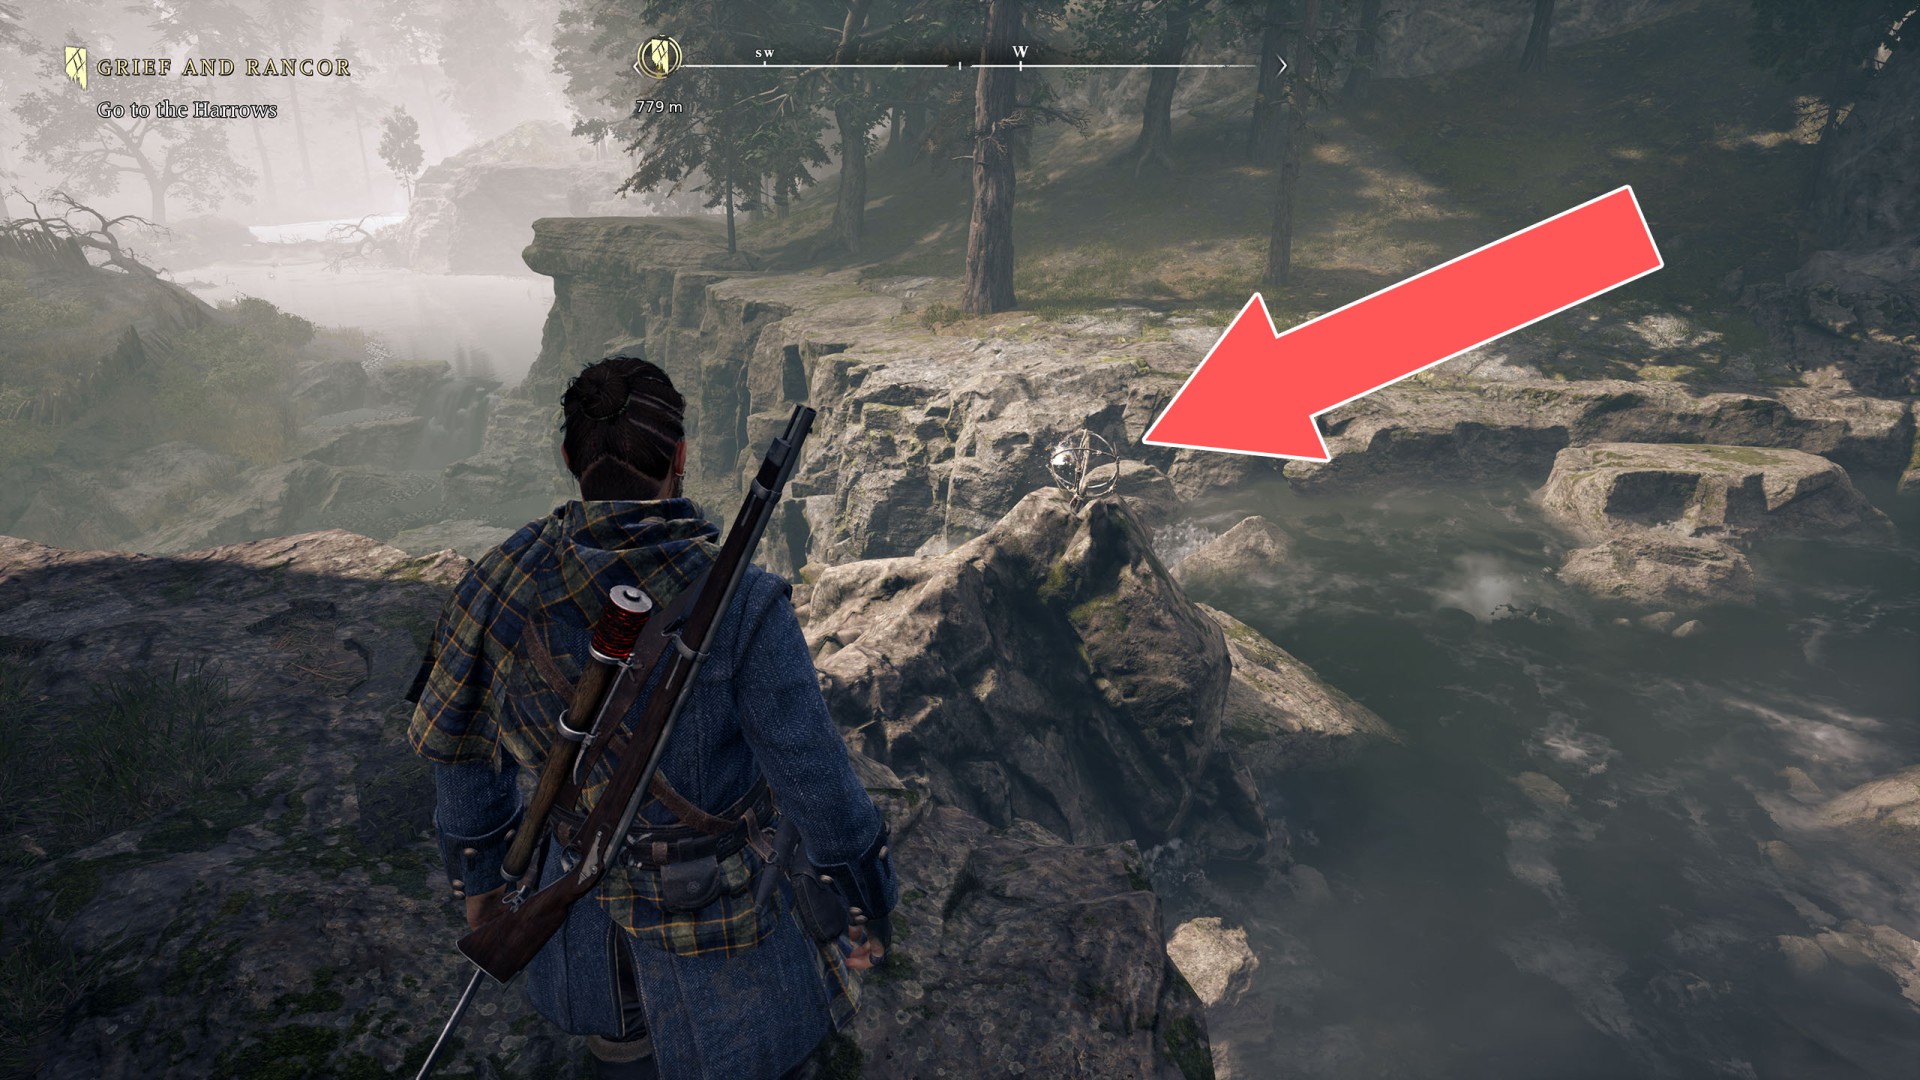
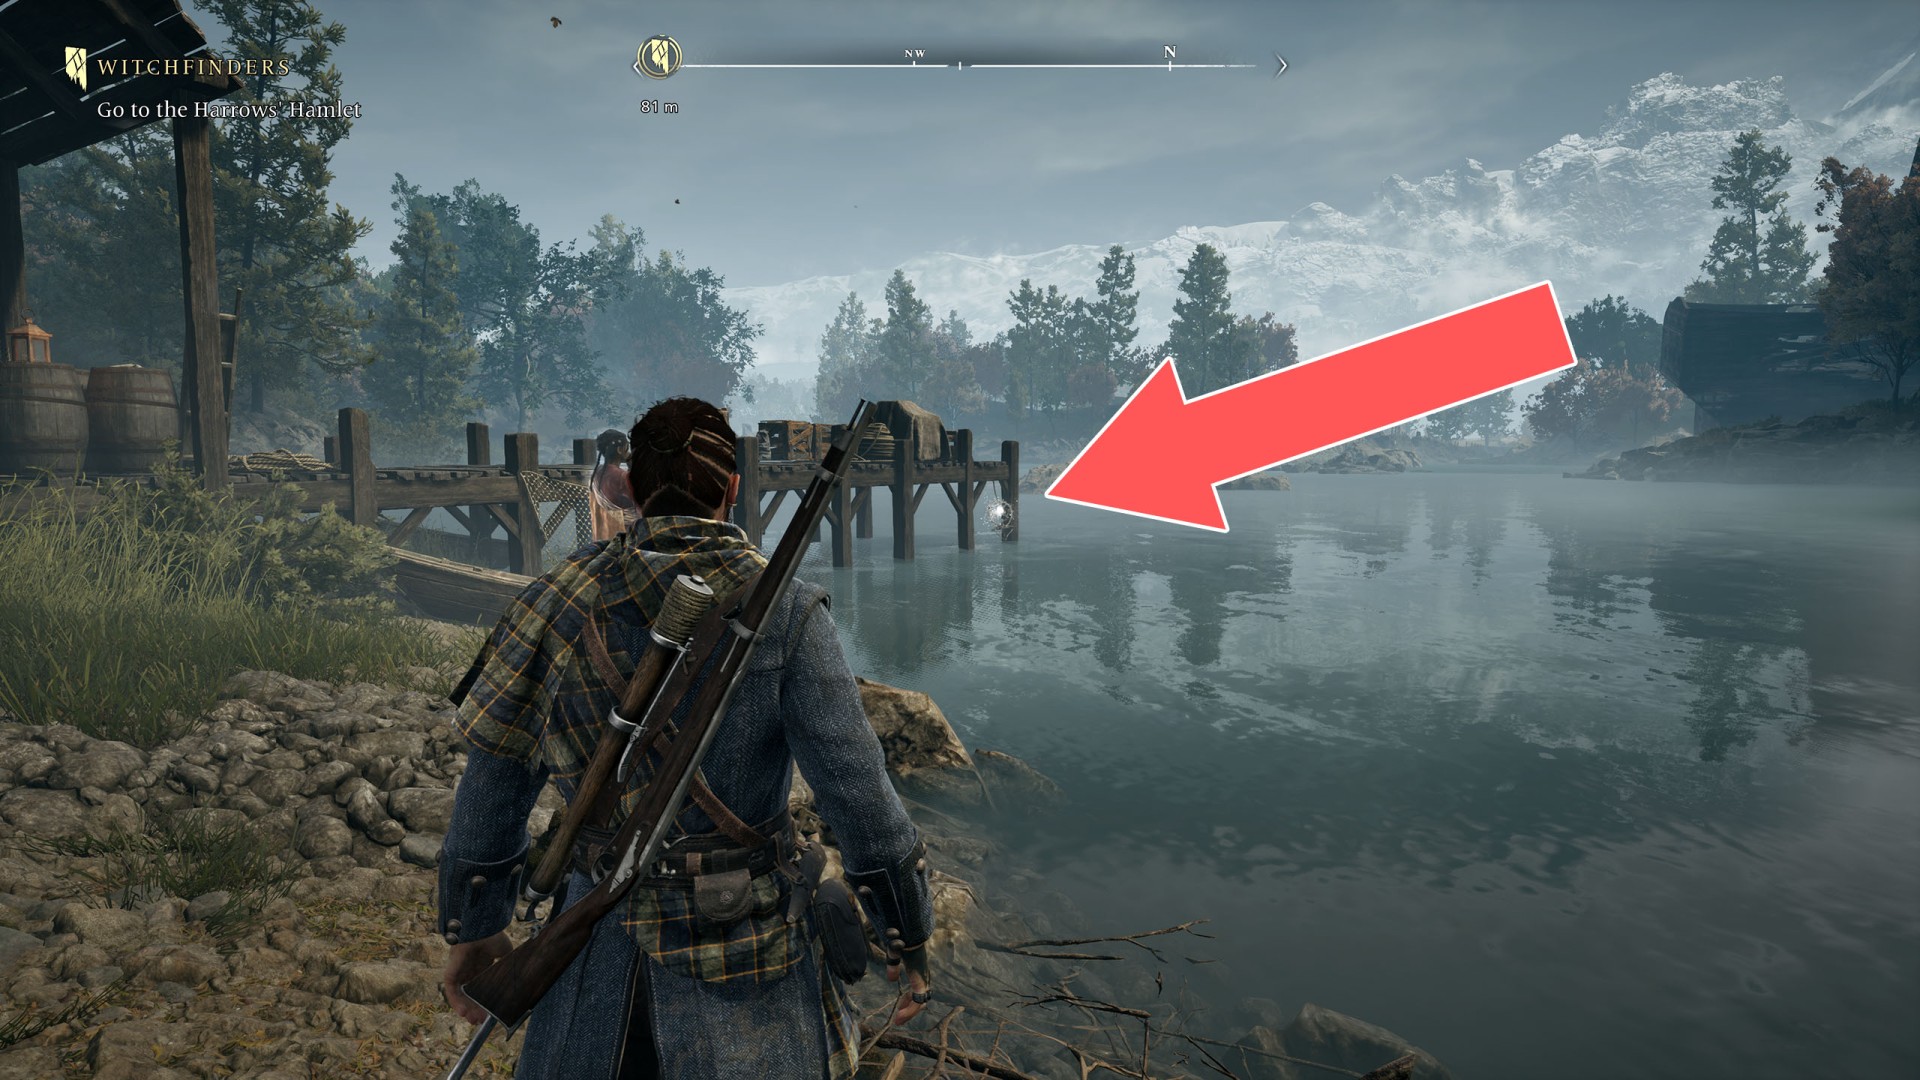
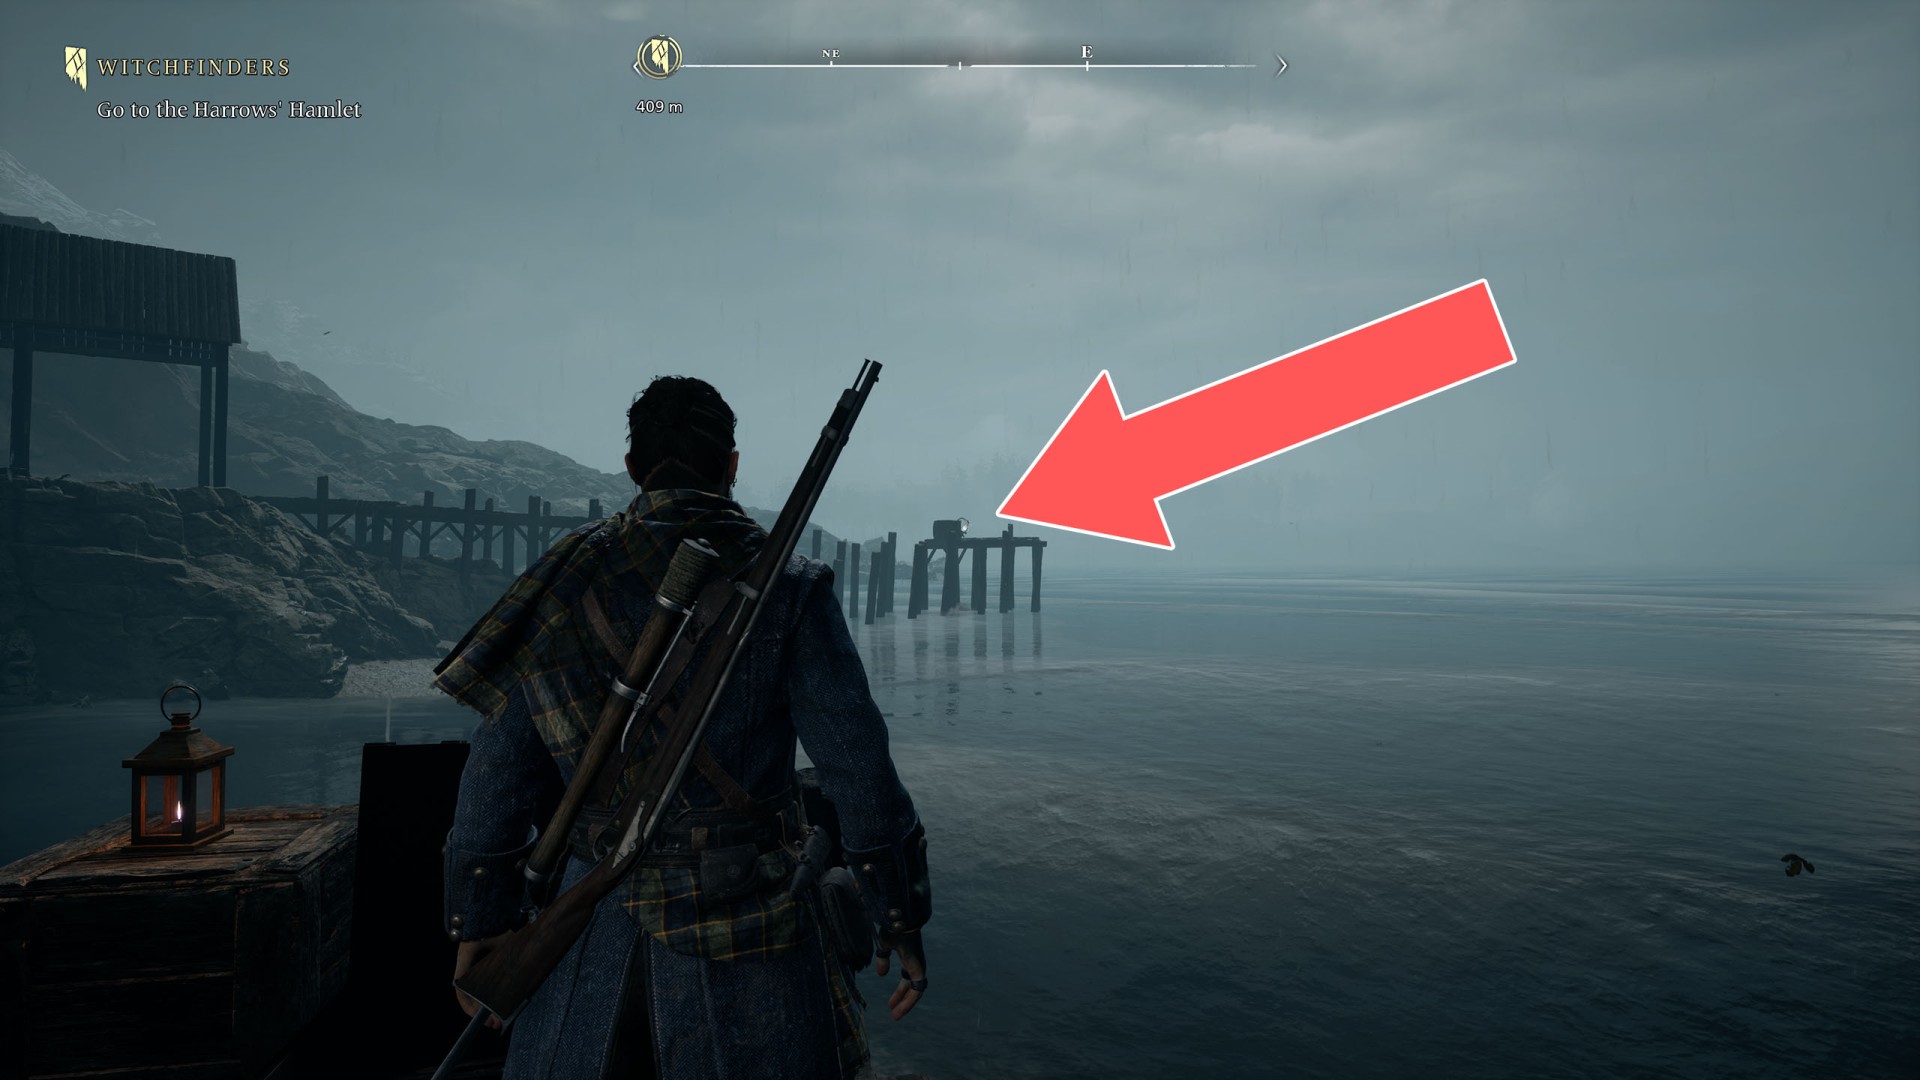
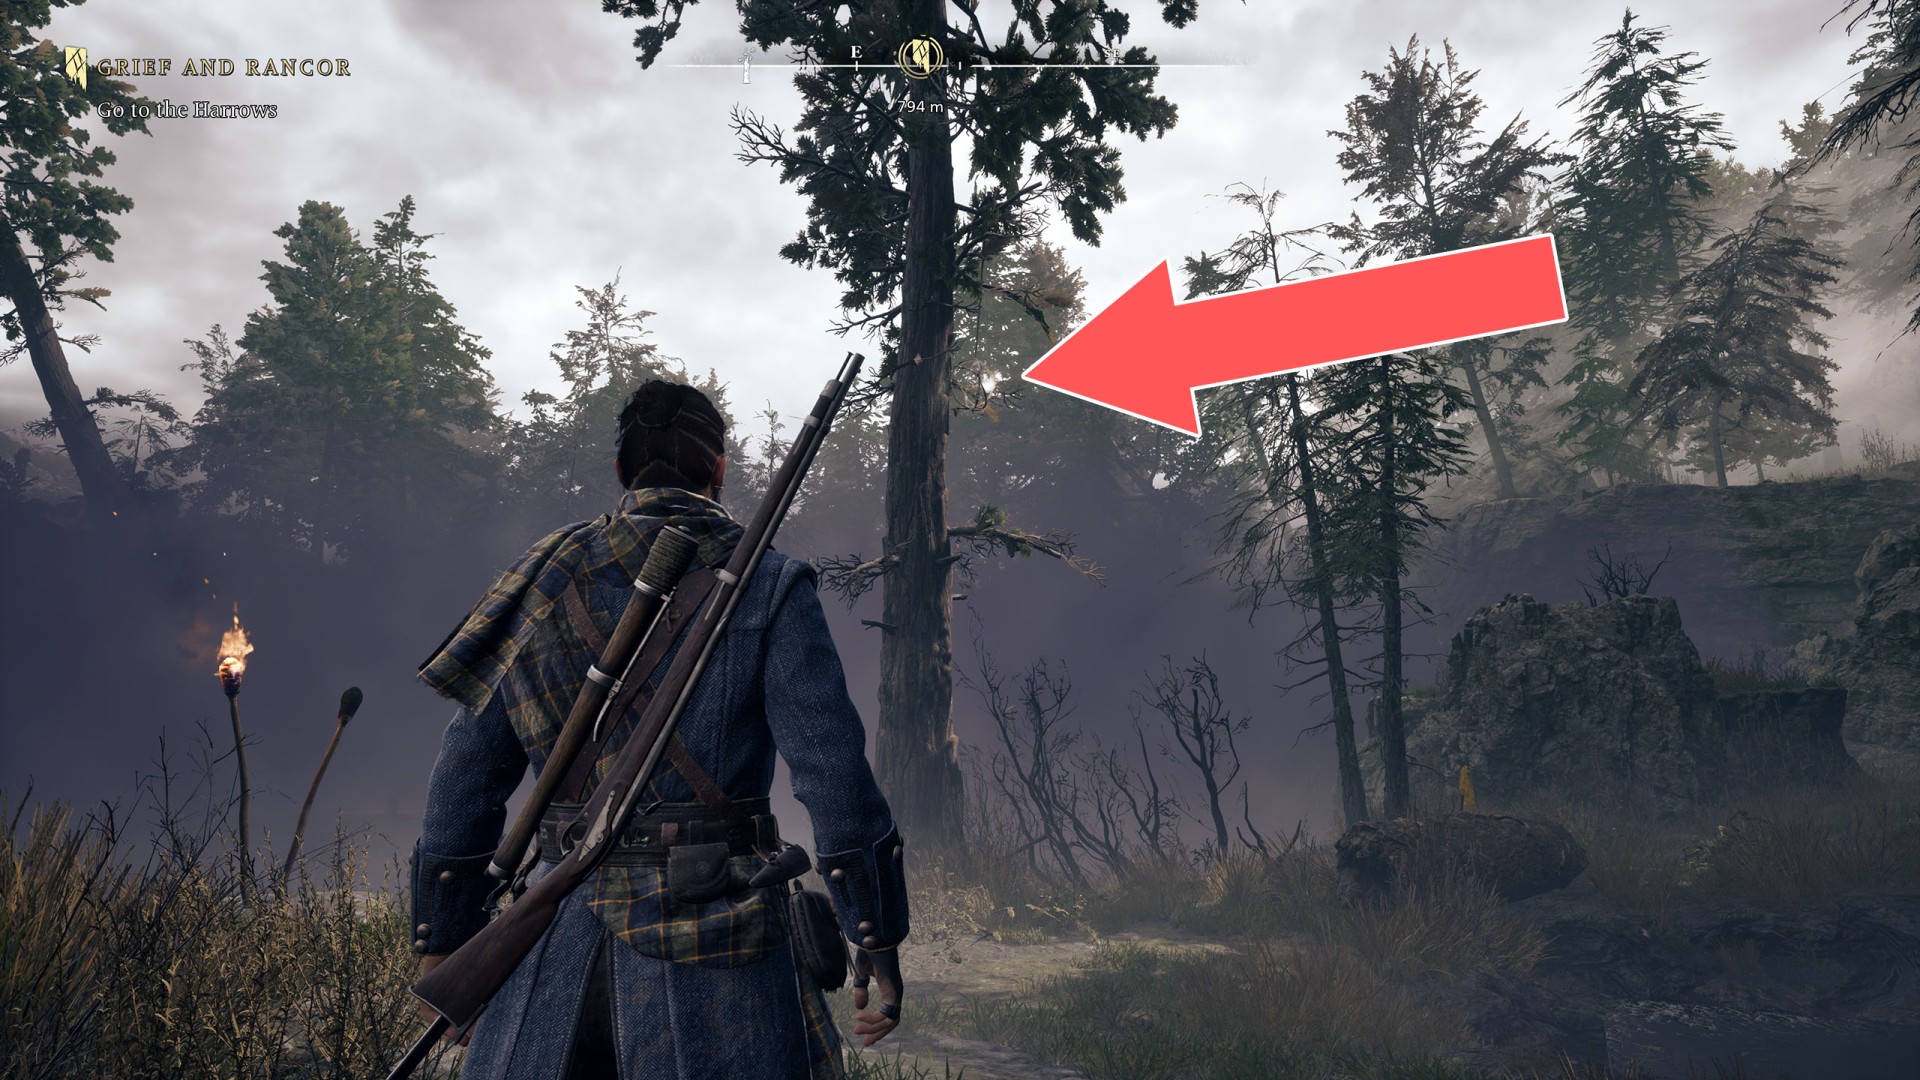
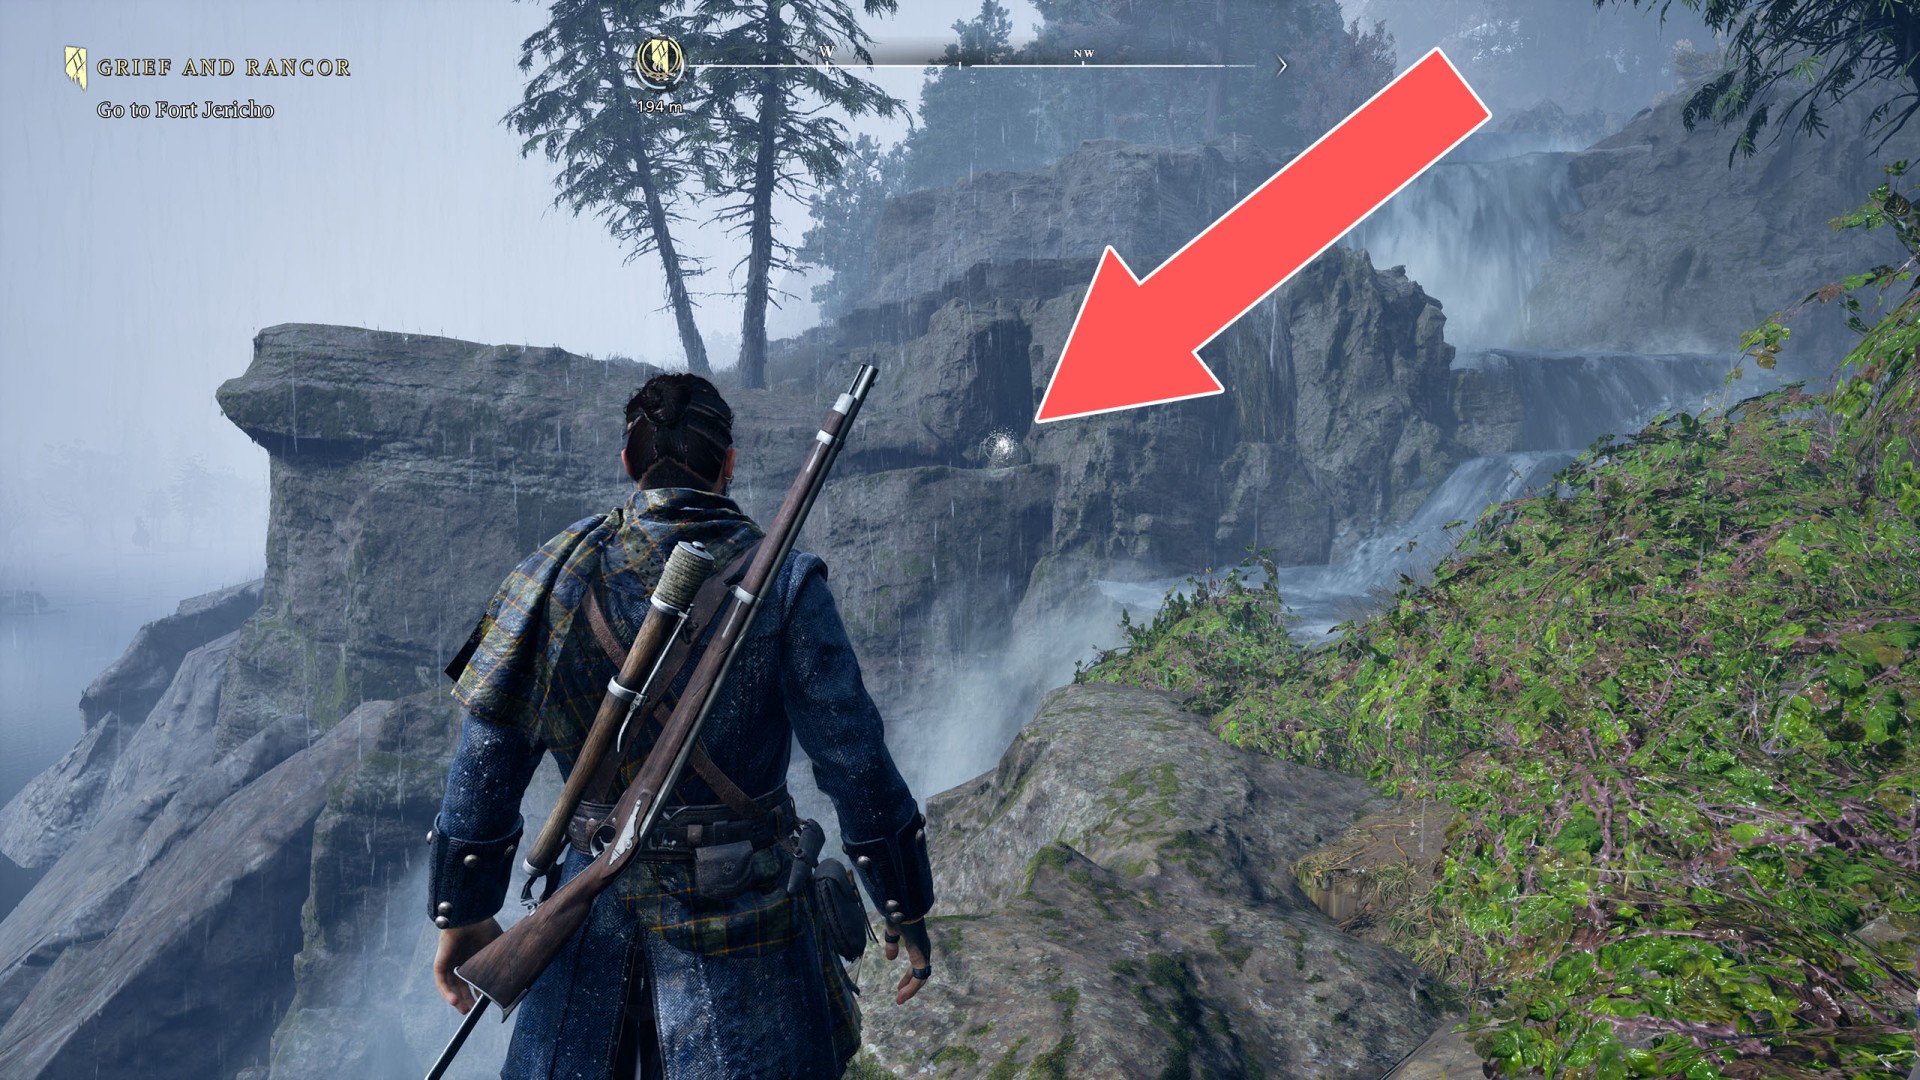
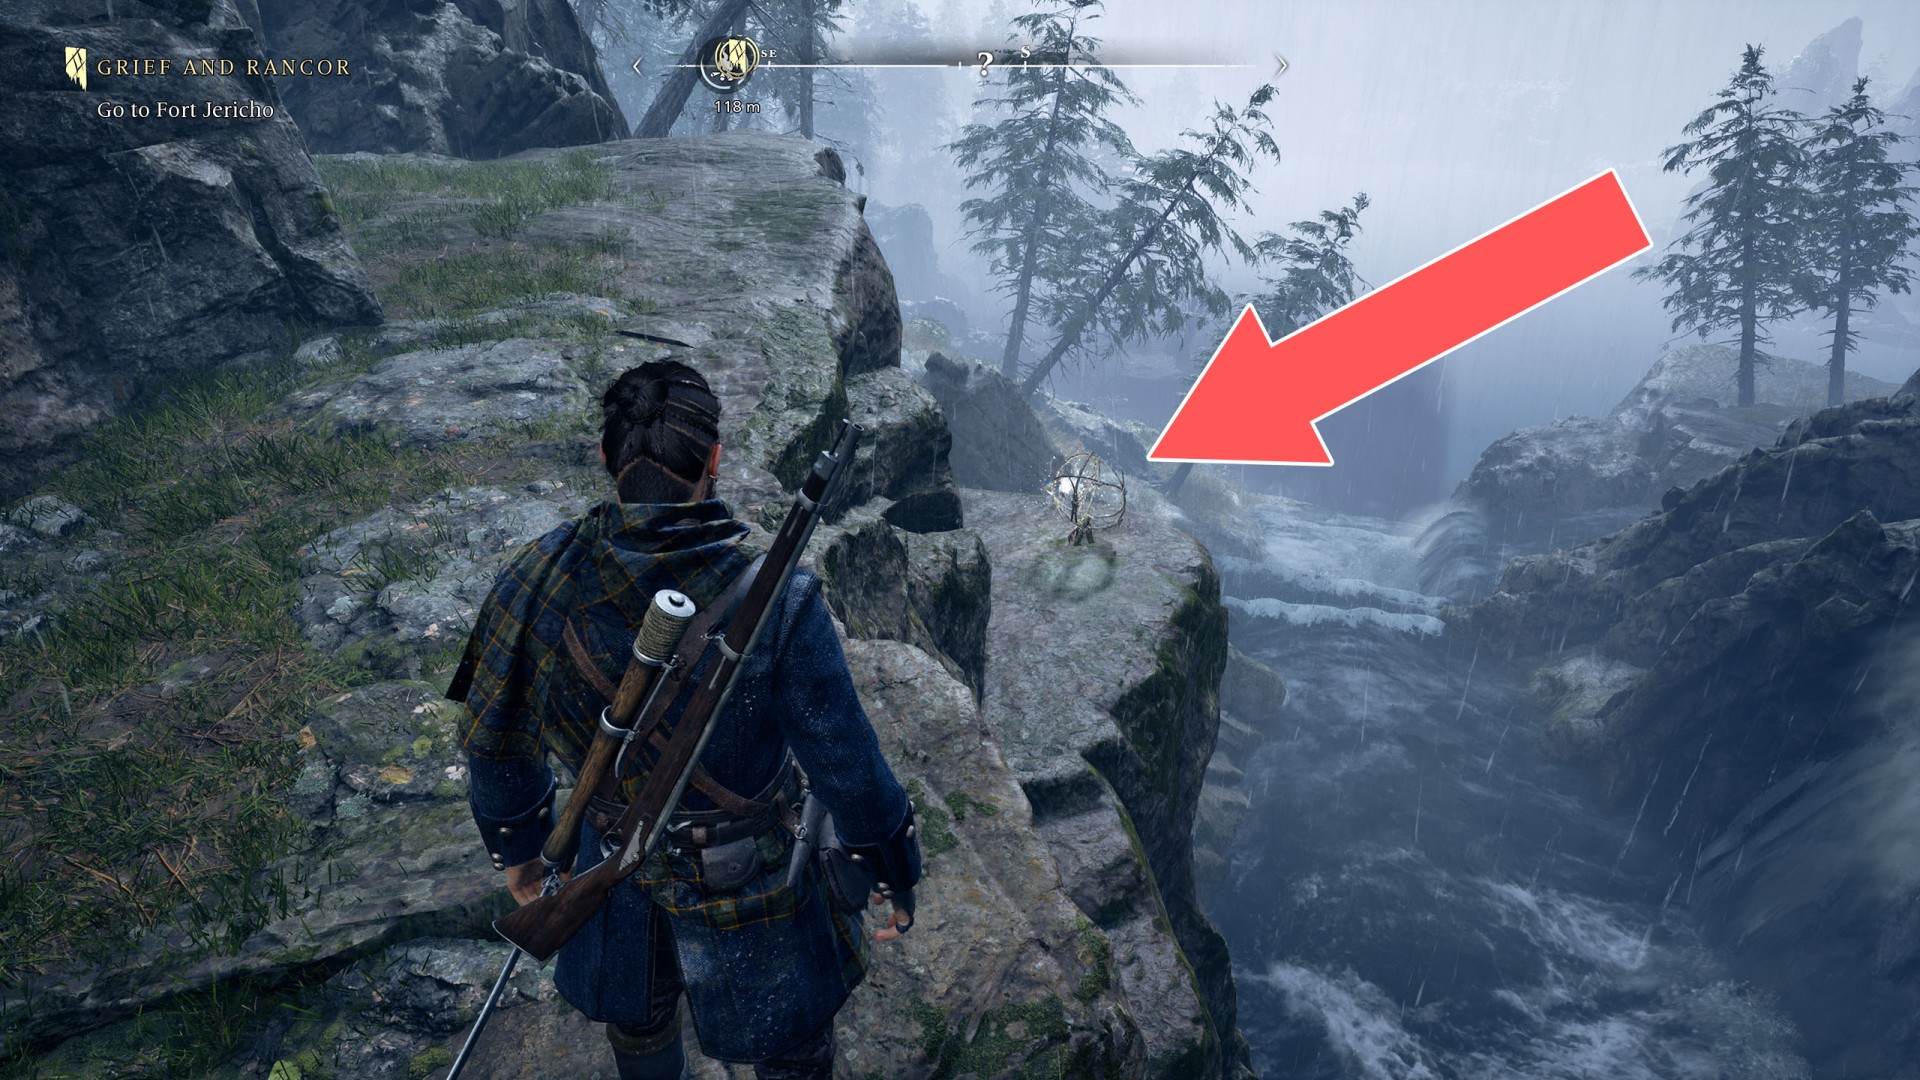
- The Harrows Soul Grabber (1/42)
- The Harrows Soul Grabber (2/42)
- The Harrows Soul Grabber (3/42)
- The Harrows Soul Grabber (4/42)
- The Harrows Soul Grabber (5/42)
- The Harrows Soul Grabber (6/42)
- The Harrows Soul Grabber (7/42)
- The Harrows Soul Grabber (8/42)
- The Harrows Soul Grabber (9/42)
- The Harrows Soul Grabber (10/42)
- The Harrows Soul Grabber (11/42)
- The Harrows Soul Grabber (12/42)
- The Harrows Soul Grabber (13/42)
- The Harrows Soul Grabber (14/42)
- The Harrows Soul Grabber (15/42)
- The Harrows Soul Grabber (16/42)
- The Harrows Soul Grabber (17/42)
- The Harrows Soul Grabber (18/42)
- The Harrows Soul Grabber (19/42)
- The Harrows Soul Grabber (20/42)
- The Harrows Soul Grabber (21/42)
- The Harrows Soul Grabber (22/42)
- The Harrows Soul Grabber (23/42)
- The Harrows Soul Grabber (24/42)
- The Harrows Soul Grabber (25/42)
- The Harrows Soul Grabber (26/42)
- The Harrows Soul Grabber (27/42)
- The Harrows Soul Grabber (28/42)
- The Harrows Soul Grabber (29/42)
- The Harrows Soul Grabber (30/42)
- The Harrows Soul Grabber (31/42)
- The Harrows Soul Grabber (32/42)
- The Harrows Soul Grabber (33/42)
- The Harrows Soul Grabber (34/42)
- The Harrows Soul Grabber (35/42)
- The Harrows Soul Grabber (36/42)
- The Harrows Soul Grabber (37/42)
- The Harrows Soul Grabber (38/42)
- The Harrows Soul Grabber (39/42)
- The Harrows Soul Grabber (40/42)
- The Harrows Soul Grabber (41/42)
- The Harrows Soul Grabber (42/42)
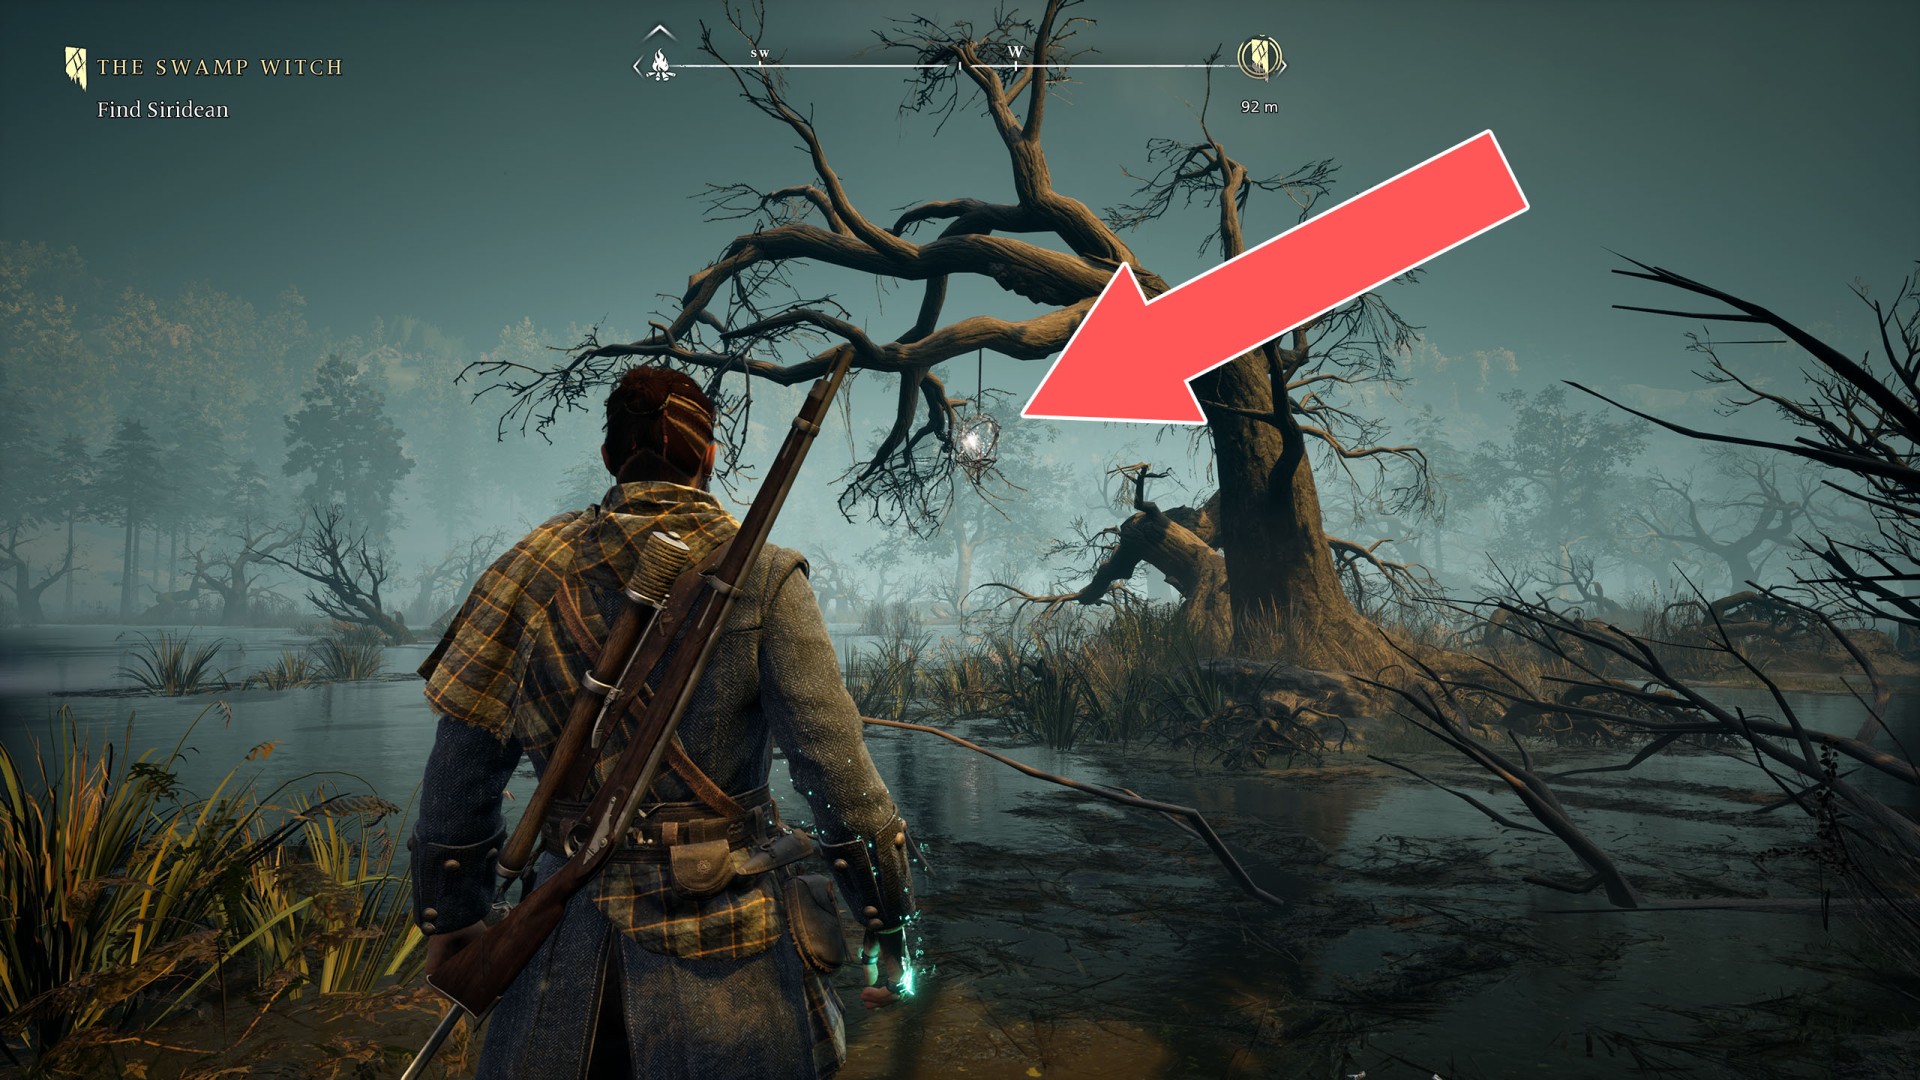
- The Mire Marshes Soul Grabber (1/17)
- The Mire Marshes Soul Grabber (2/17)
- The Mire Marshes Soul Grabber (3/17)
- The Mire Marshes Soul Grabber (4/17)
- The Mire Marshes Soul Grabber (5/17)
- The Mire Marshes Soul Grabber (6/17)
- The Mire Marshes Soul Grabber (7/17)
- The Mire Marshes Soul Grabber (8/17)
- The Mire Marshes Soul Grabber (9/17)
- The Mire Marshes Soul Grabber (10/17)
- The Mire Marshes Soul Grabber (11/17)
- The Mire Marshes Soul Grabber (12/17)
- The Mire Marshes Soul Grabber (13/17)
- The Mire Marshes Soul Grabber (14/17)
- The Mire Marshes Soul Grabber (15/17)
- The Mire Marshes Soul Grabber (16/17)
- The Mire Marshes Soul Grabber (17/17)
All known locations on the map New Eden
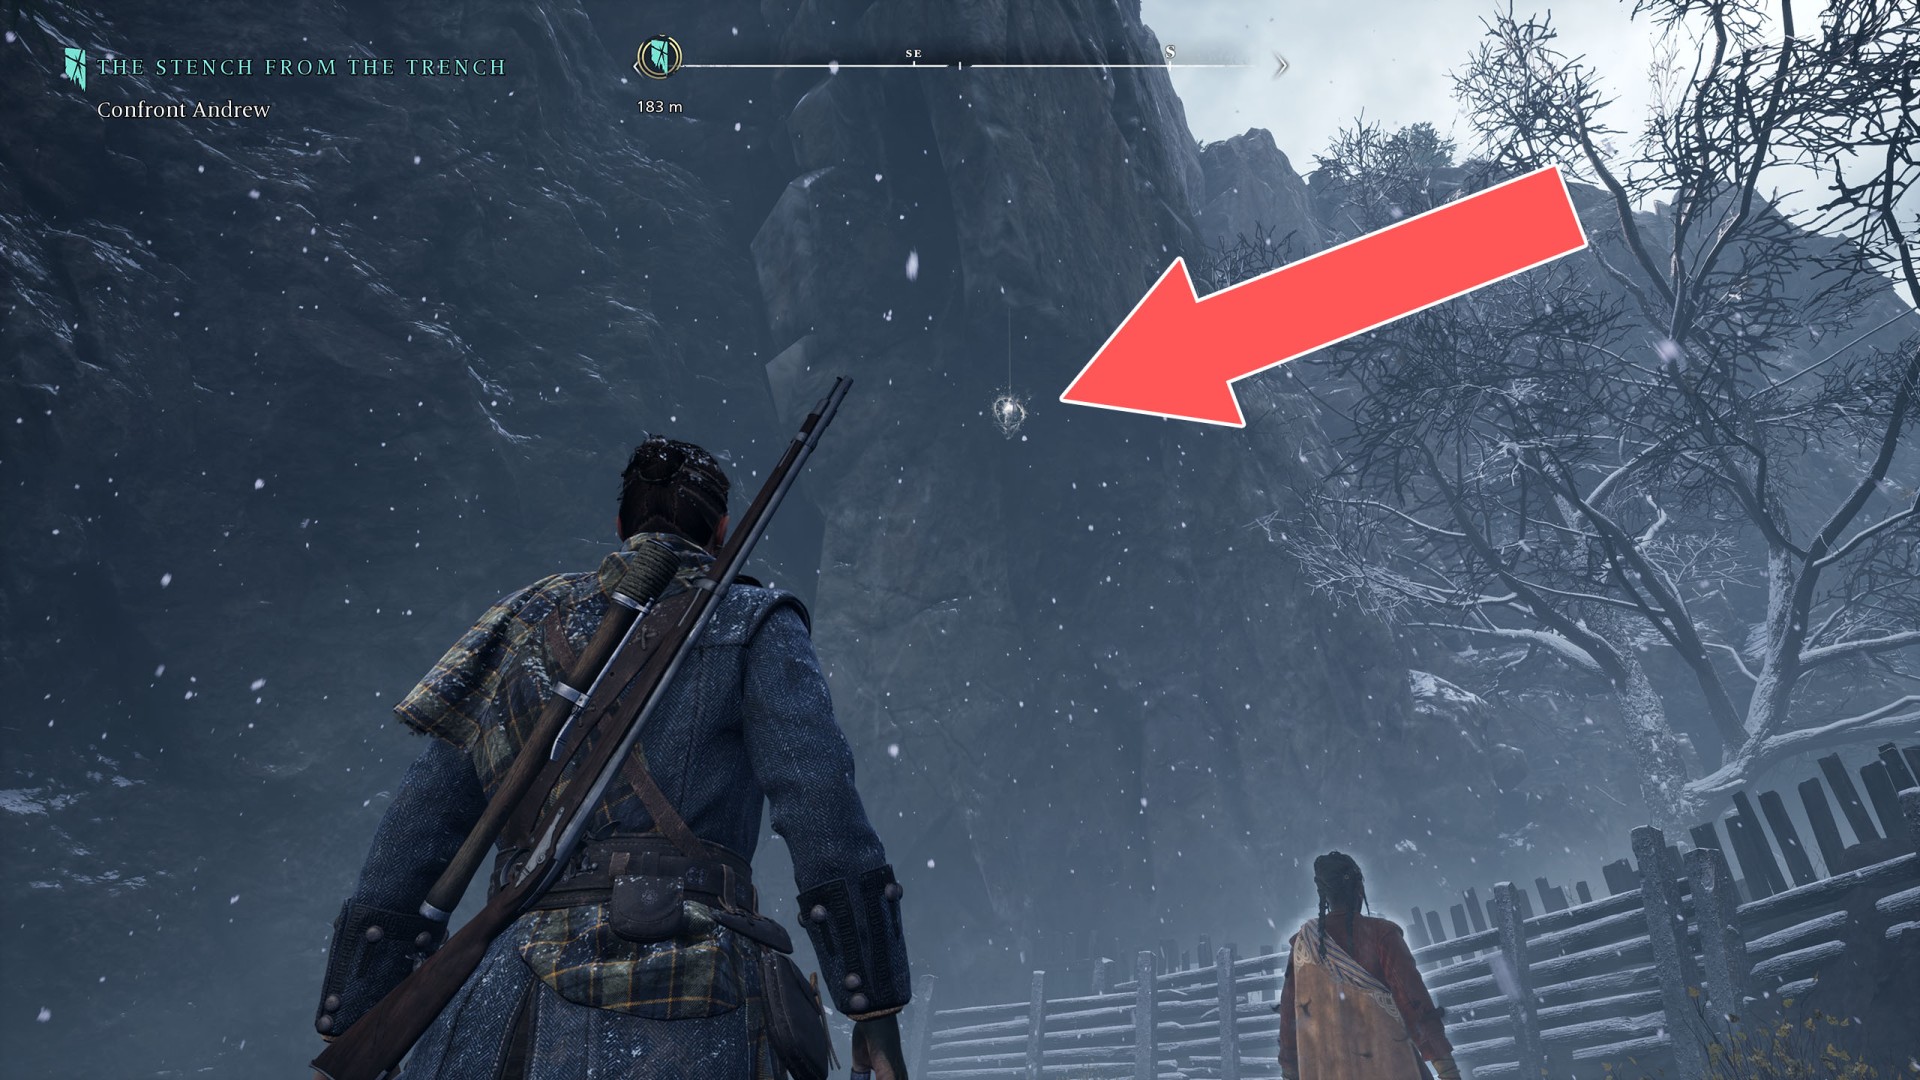
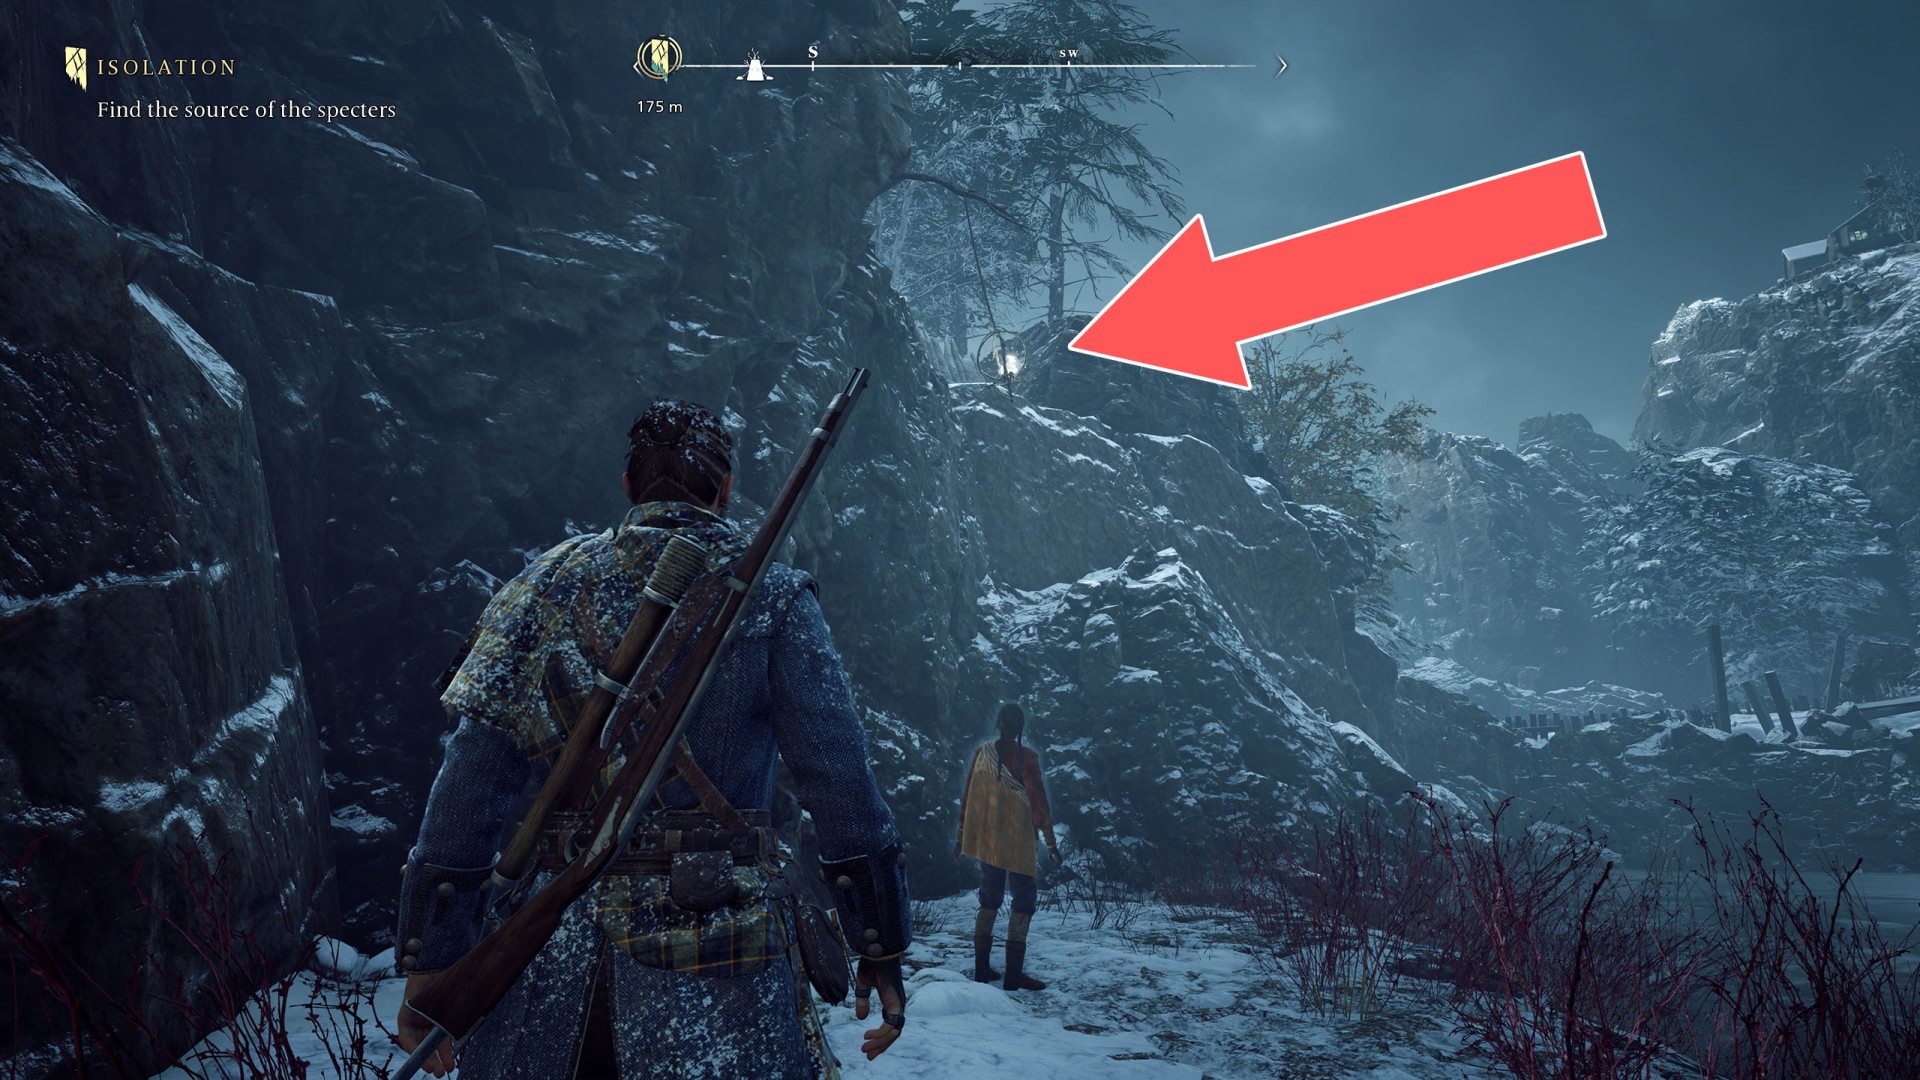
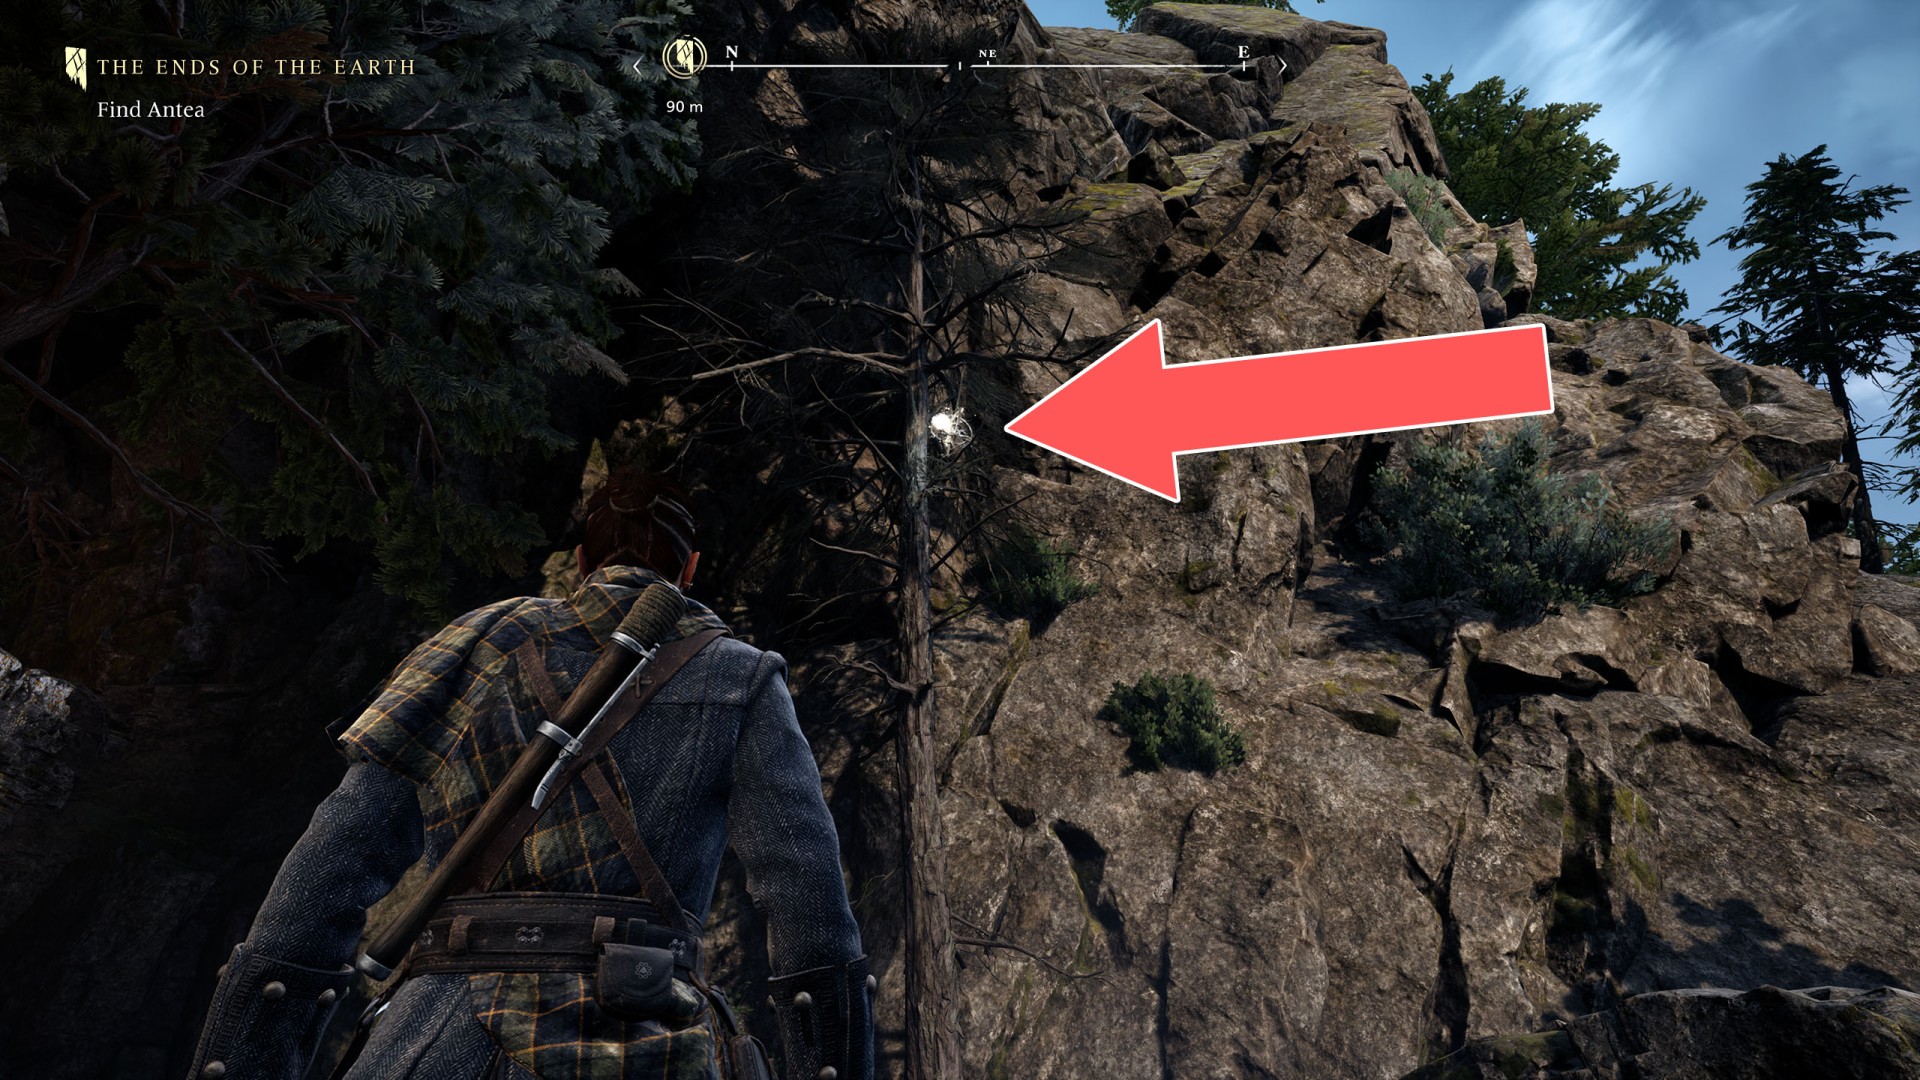
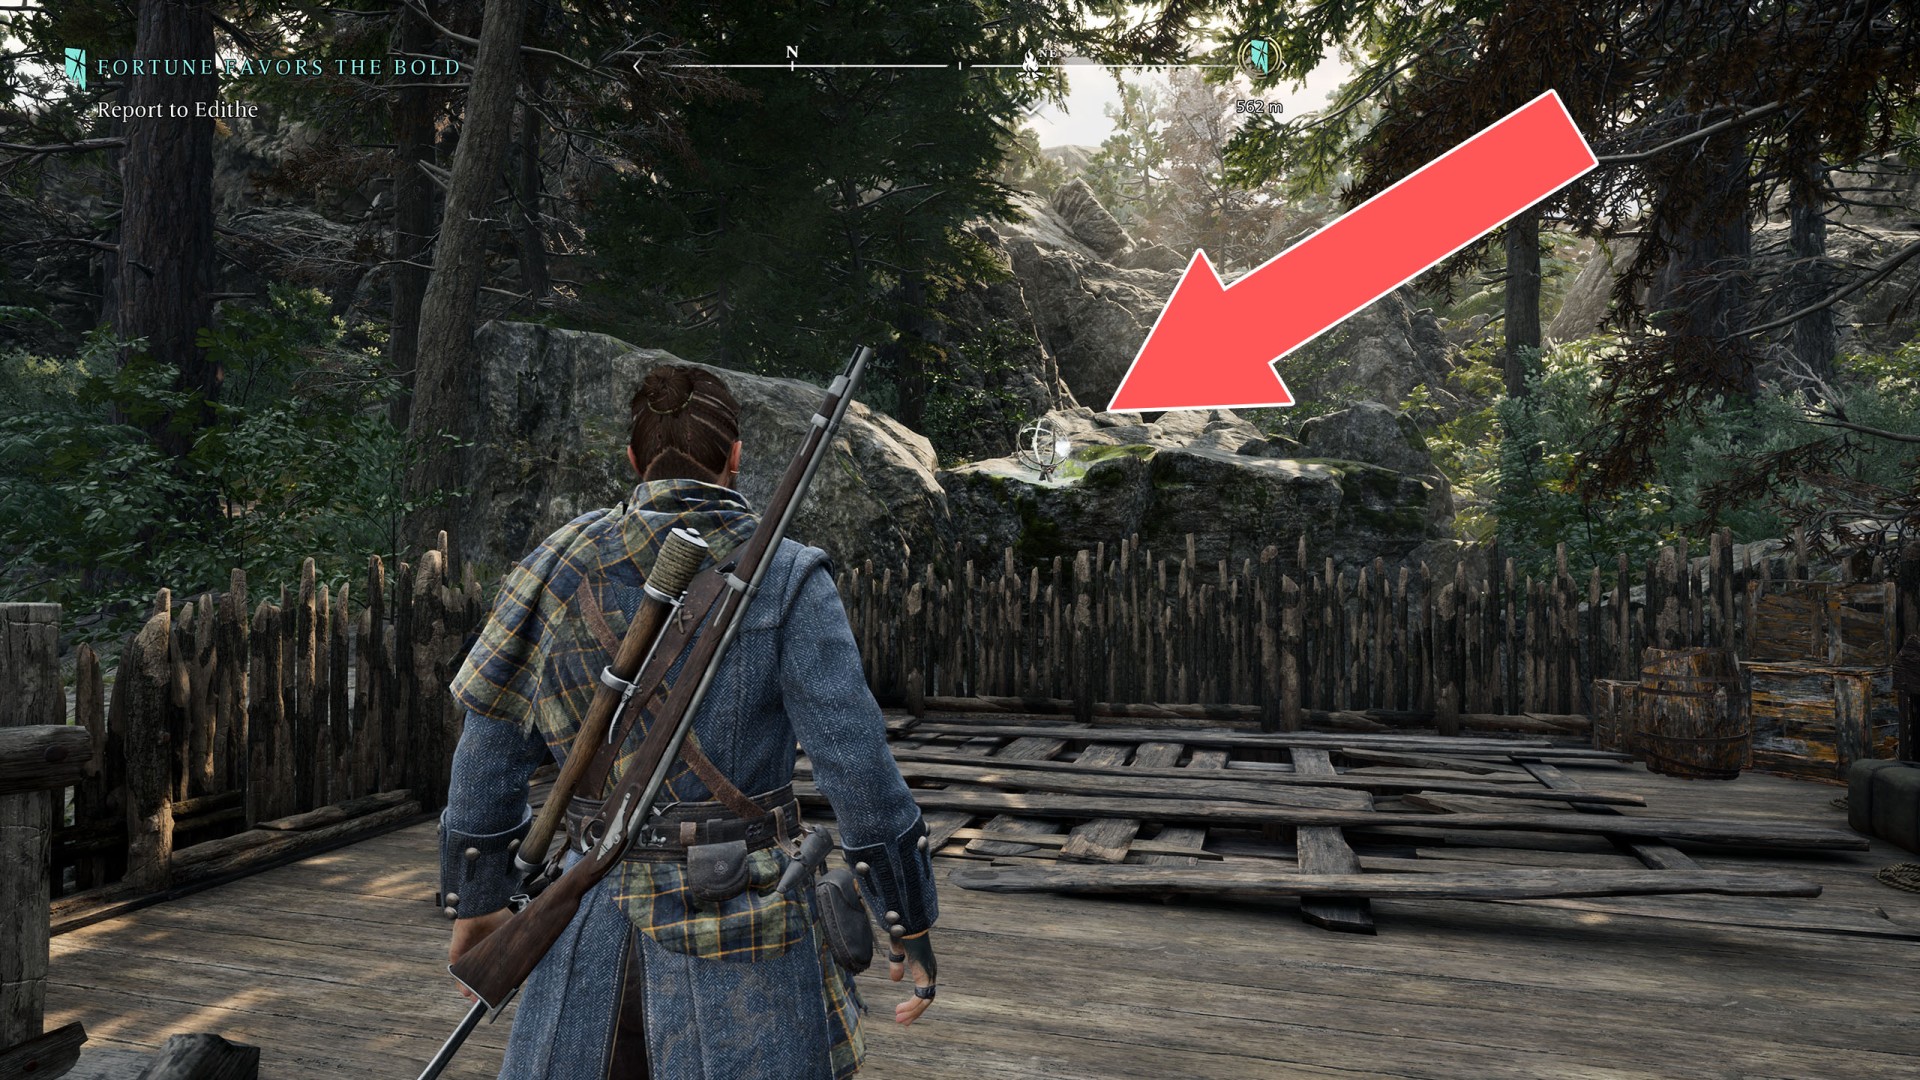
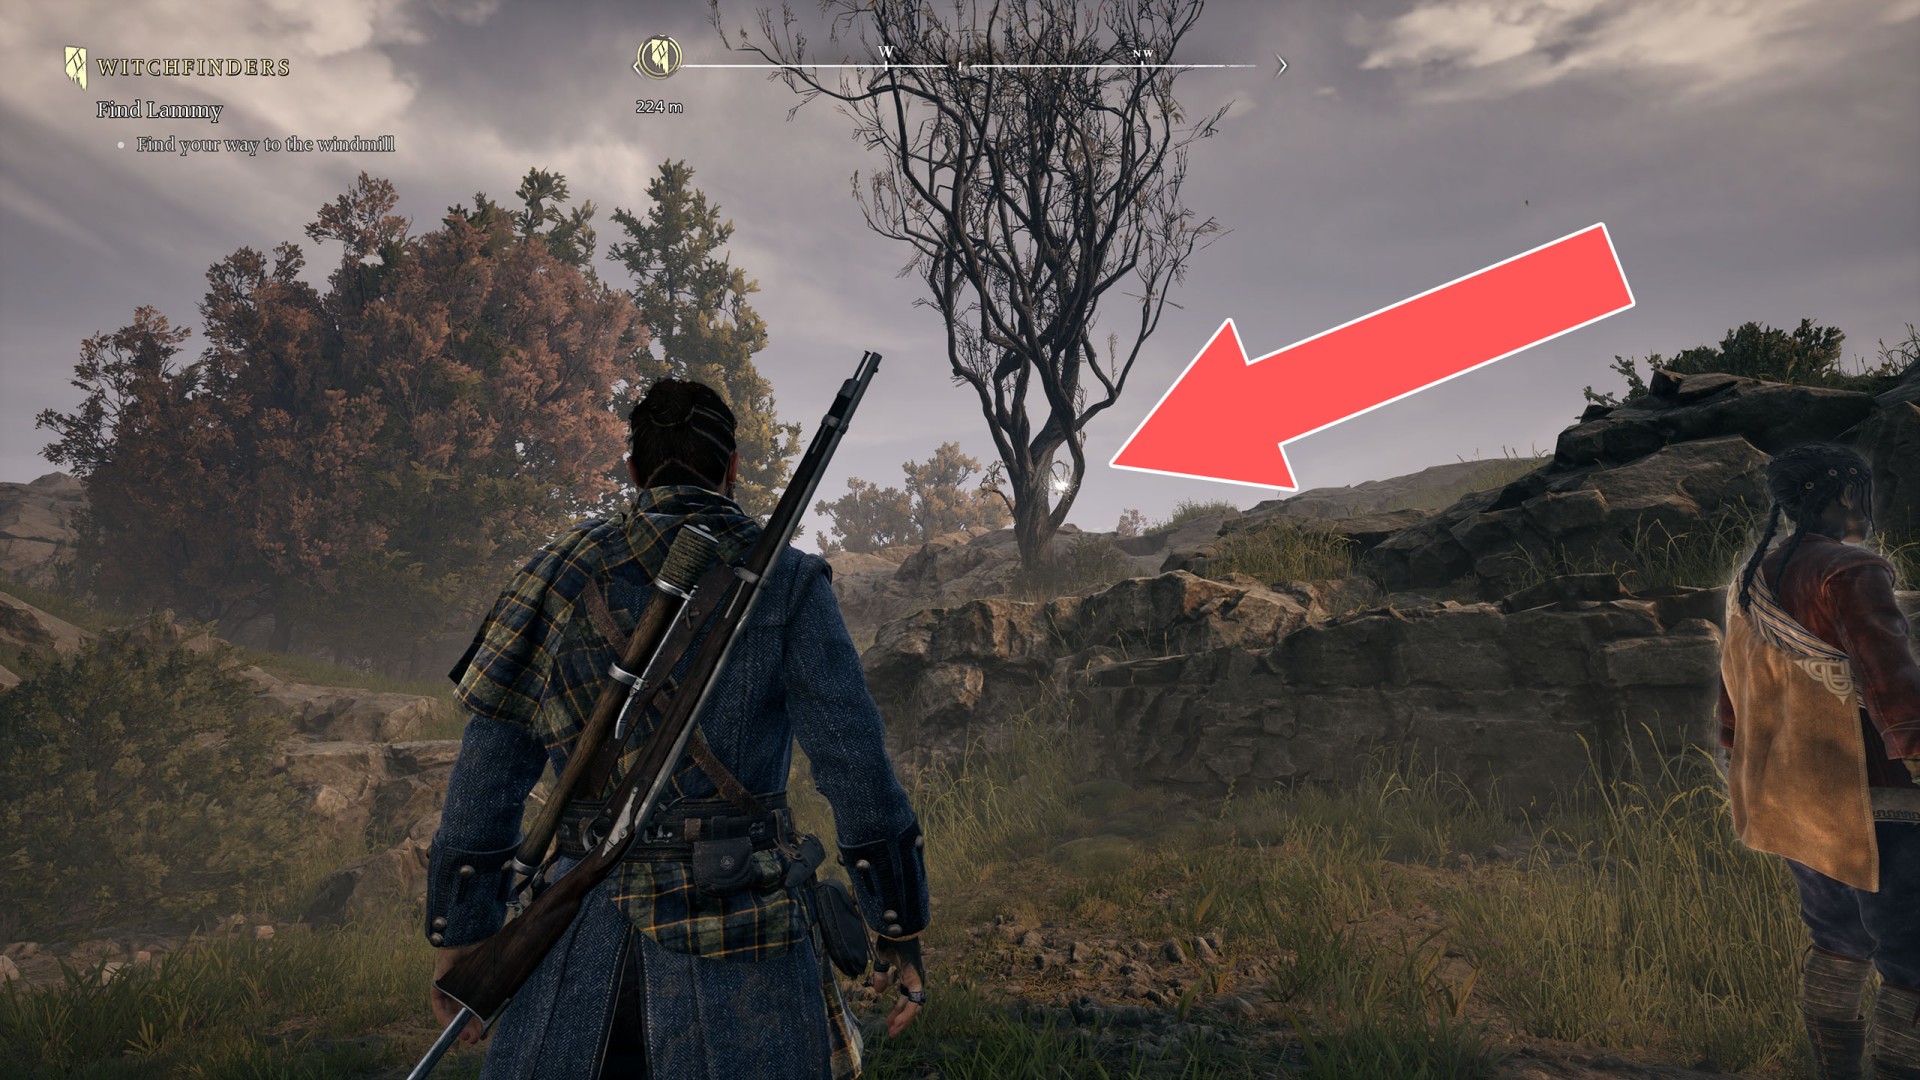
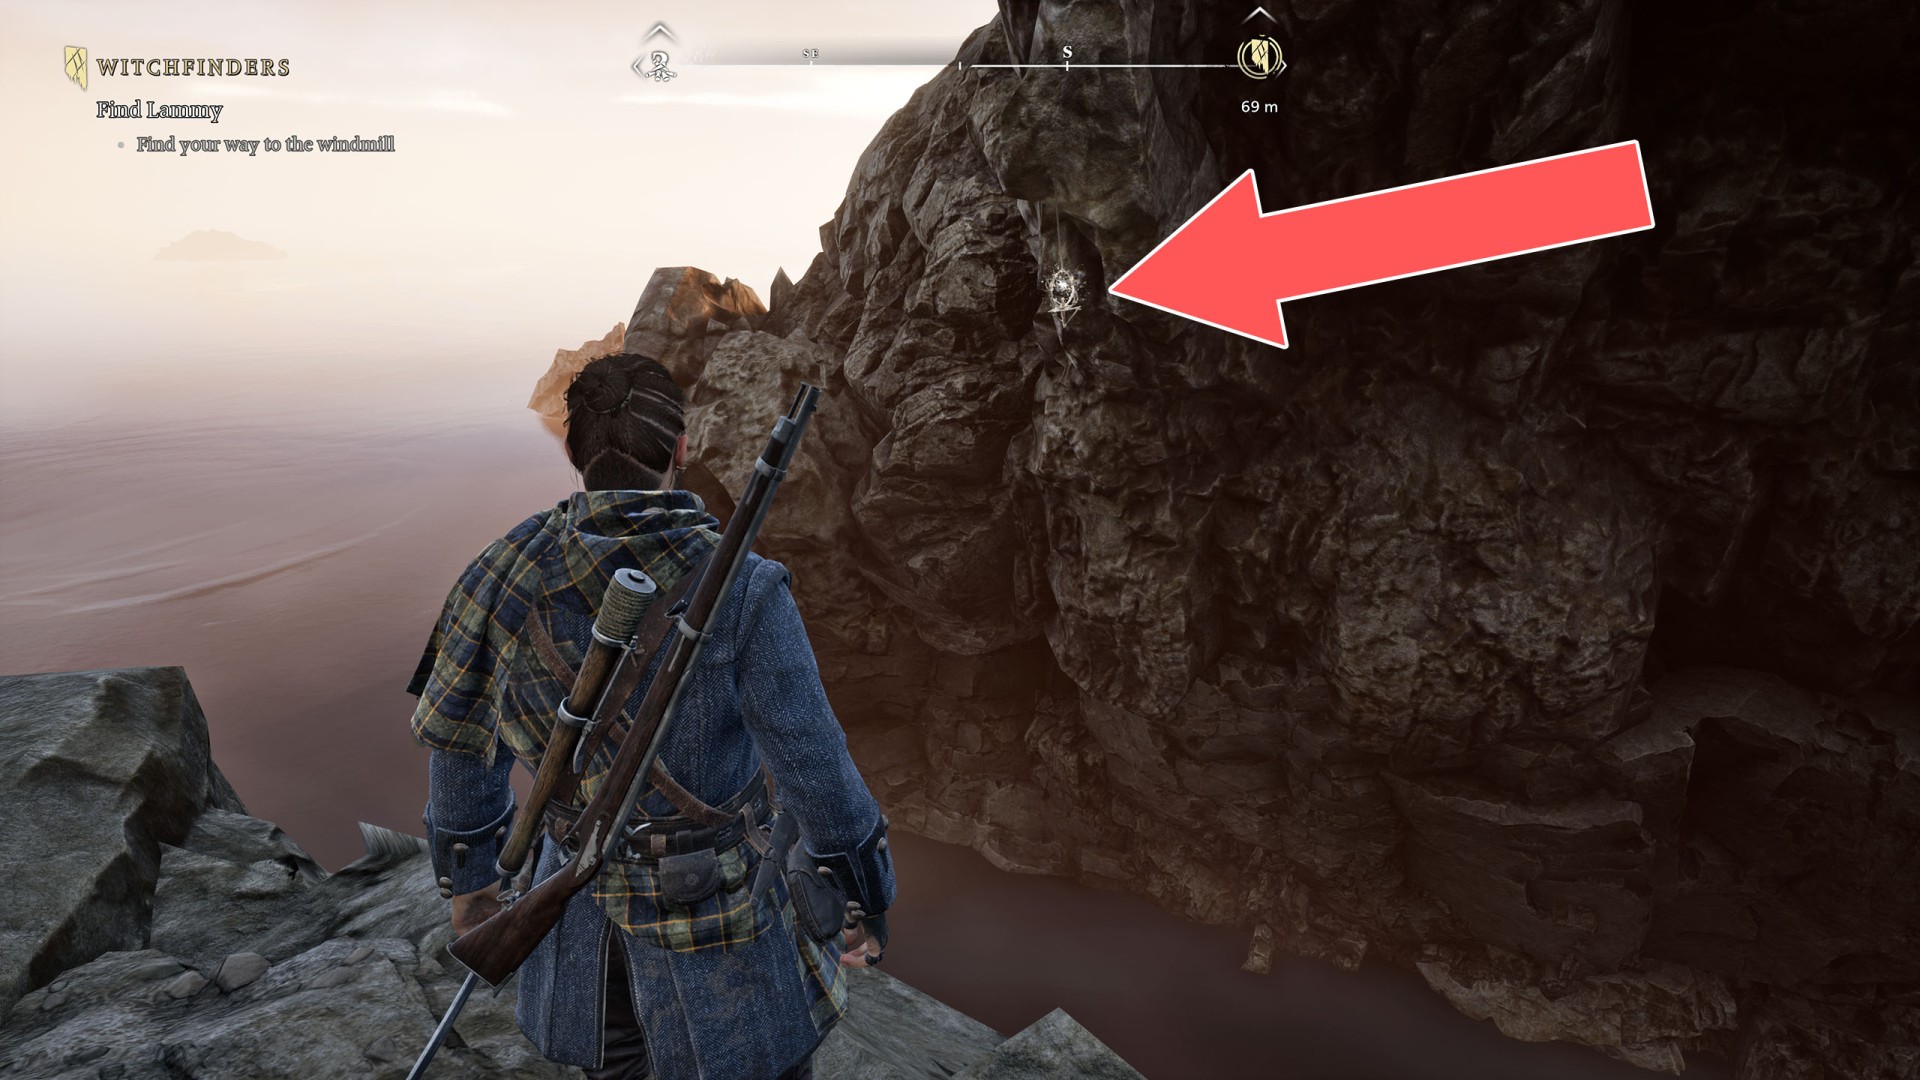
 Mount Pleasant Soul Grabber (1/31)▶ show the map ◀
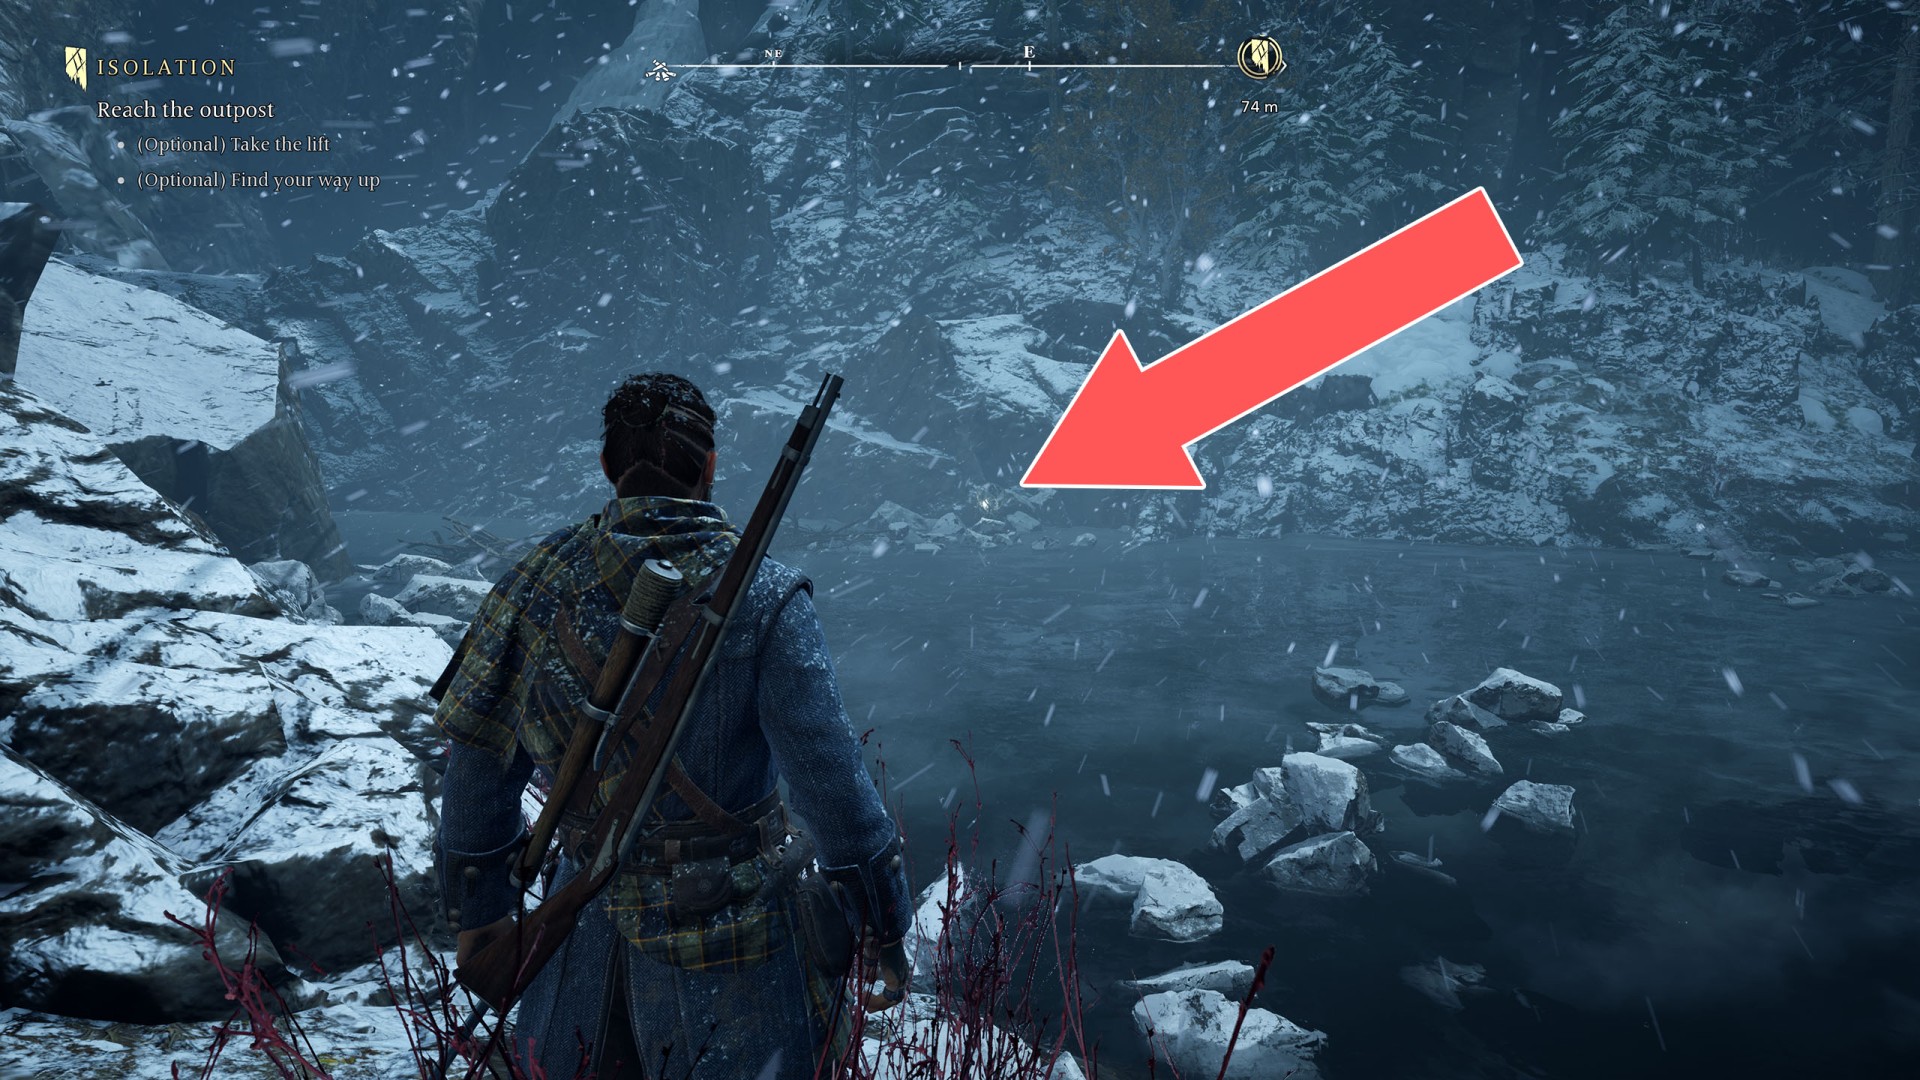
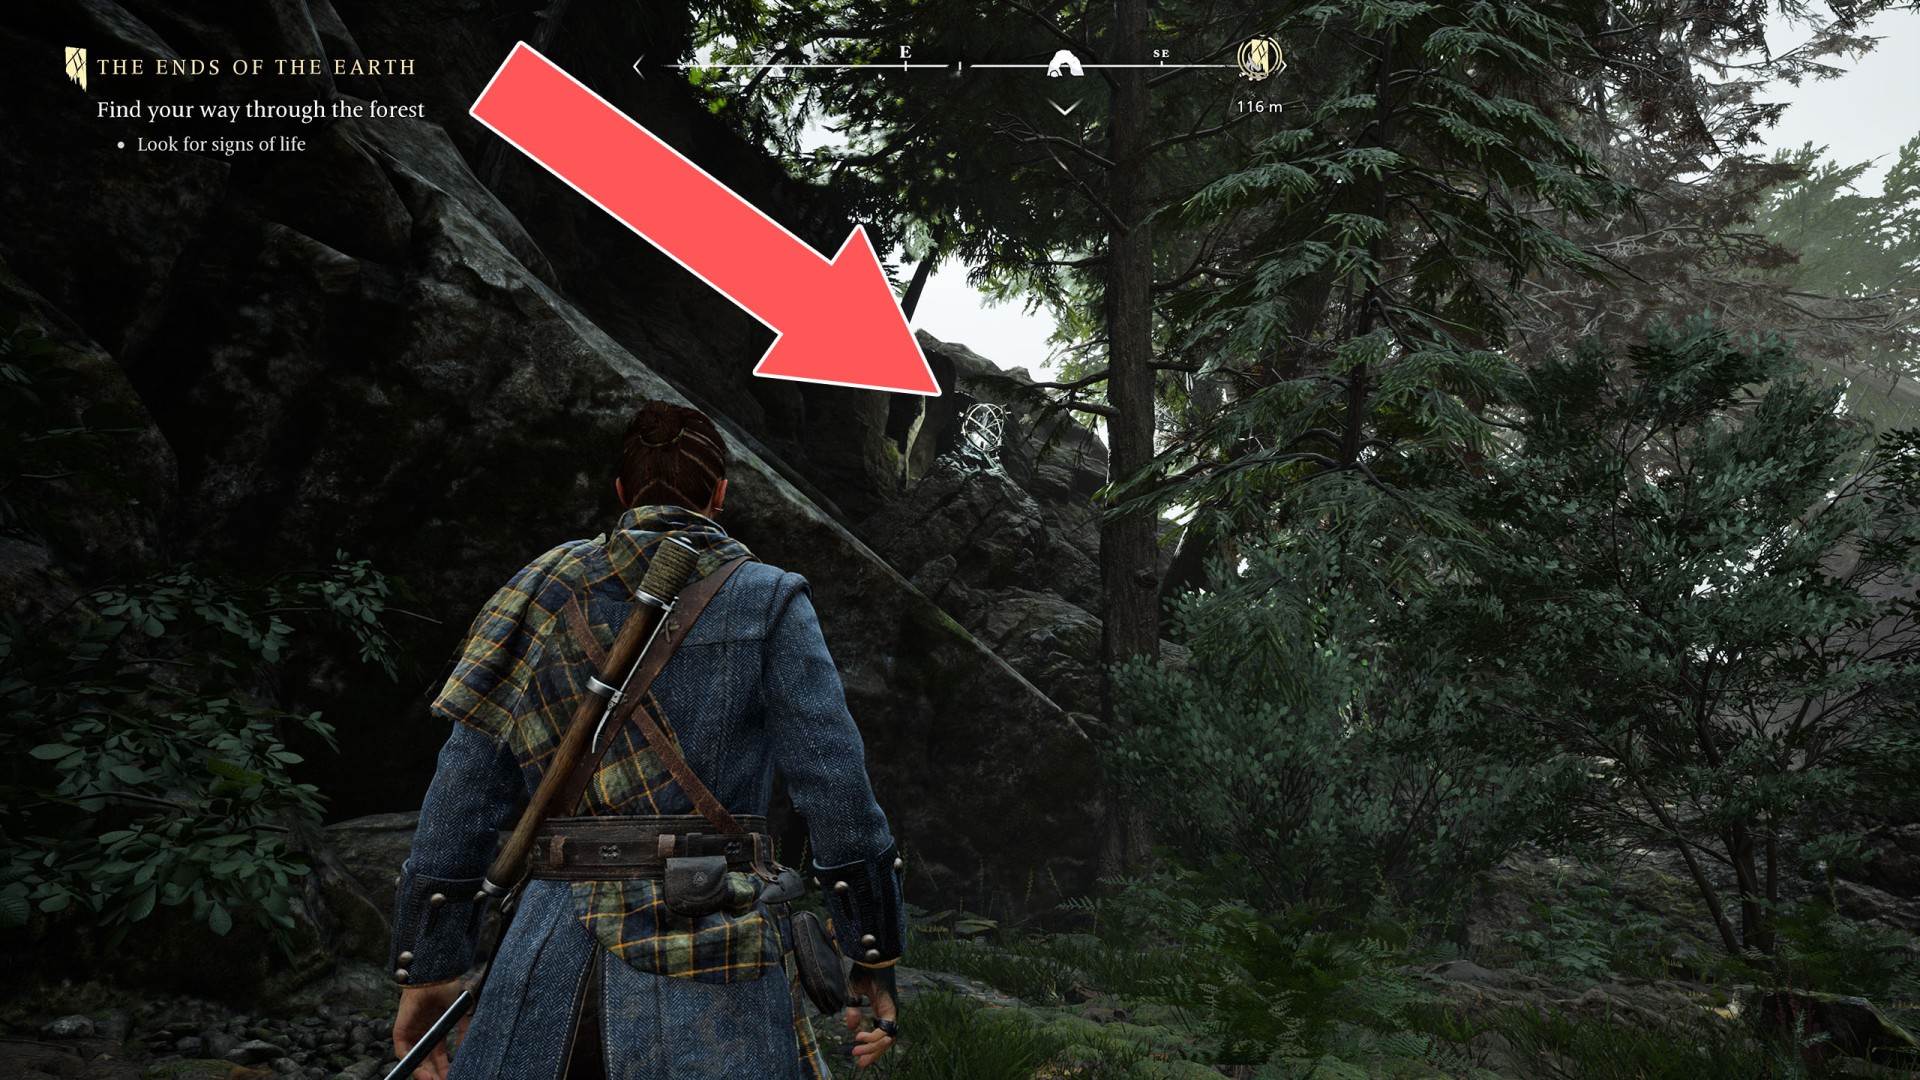
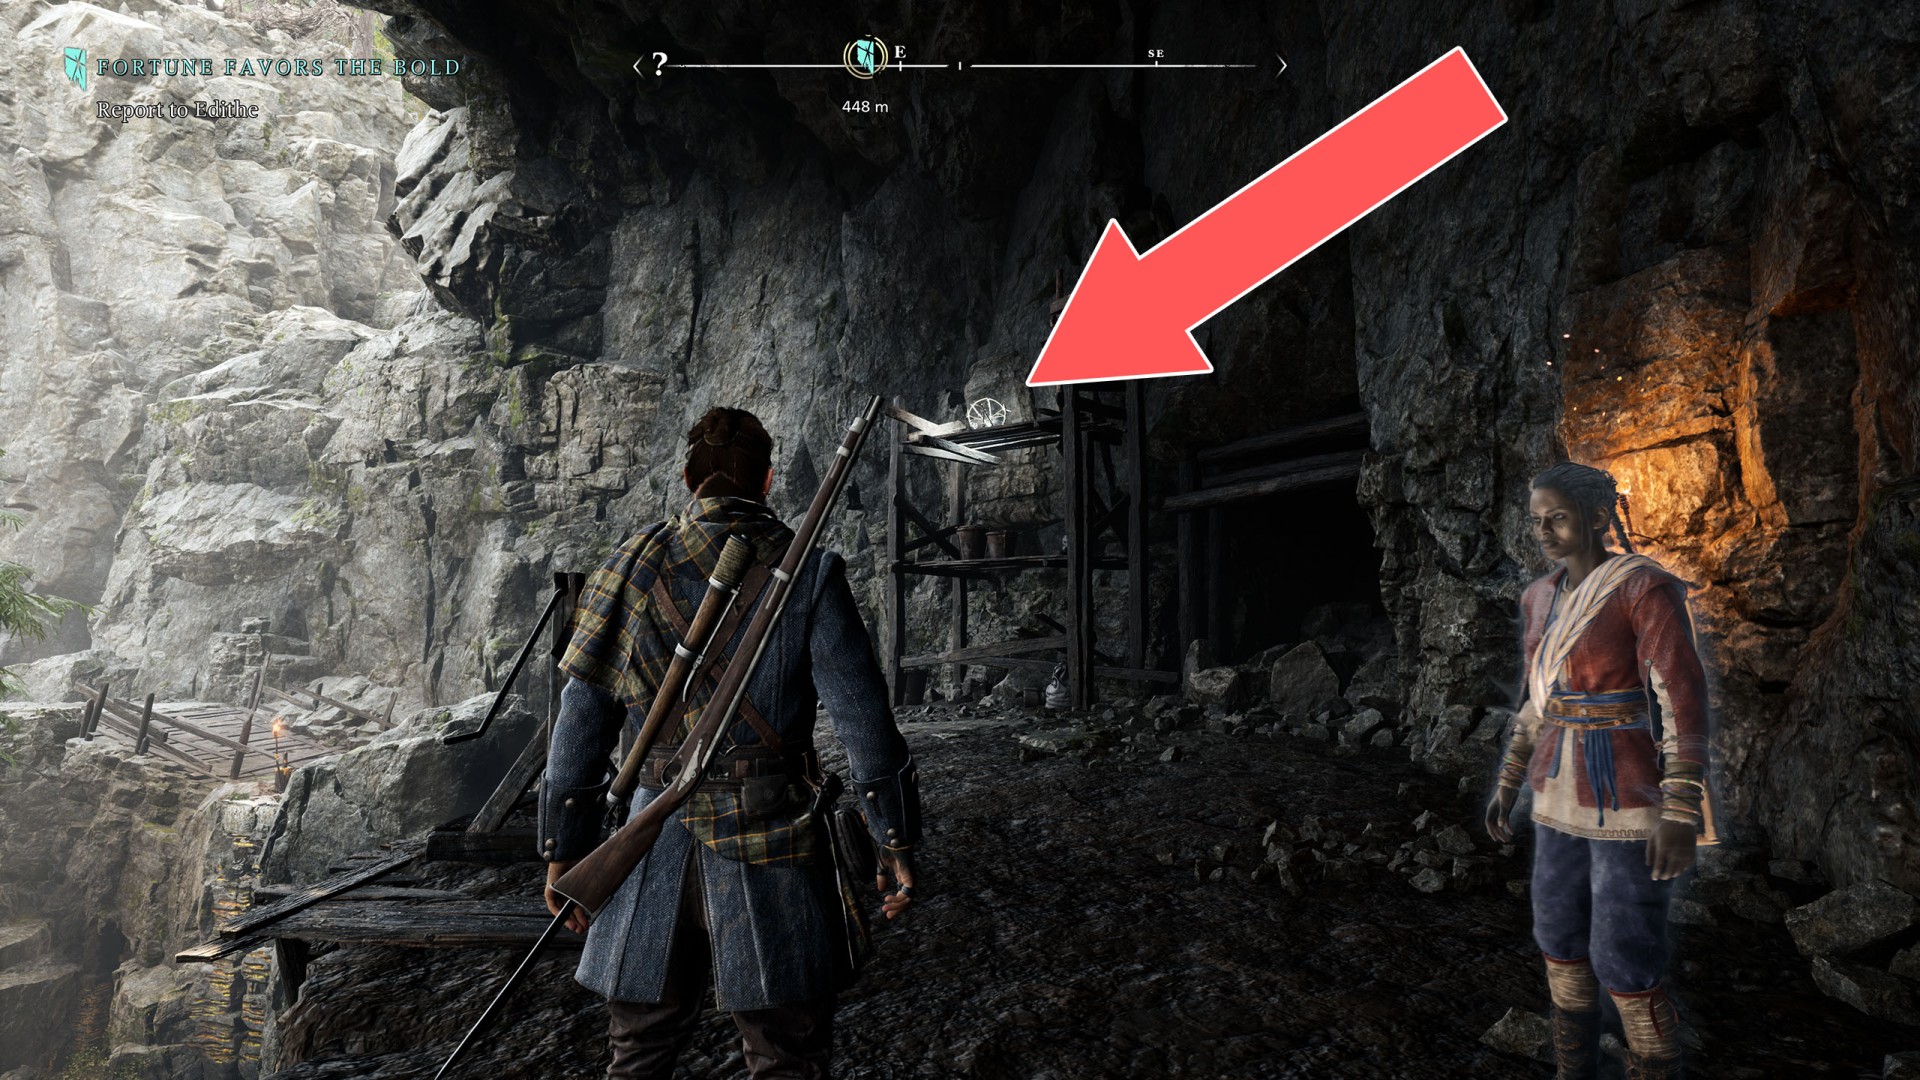
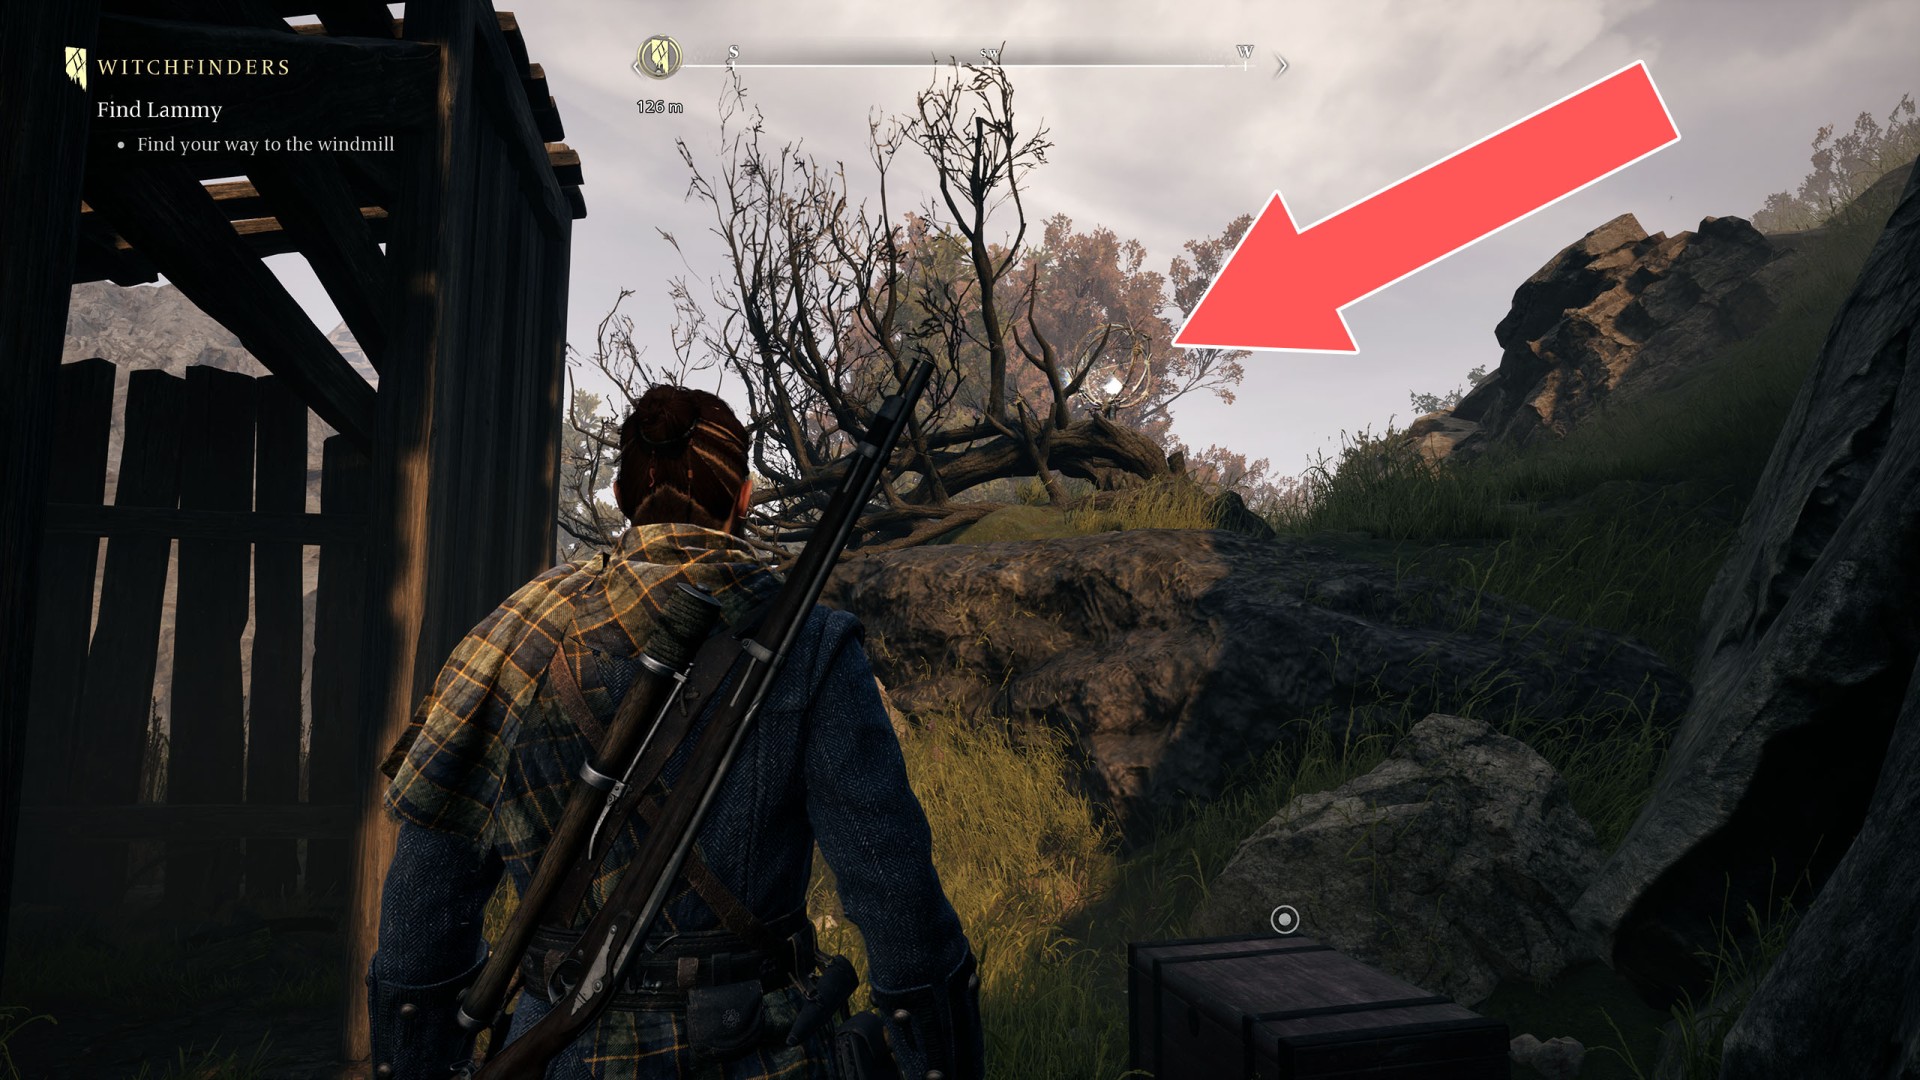
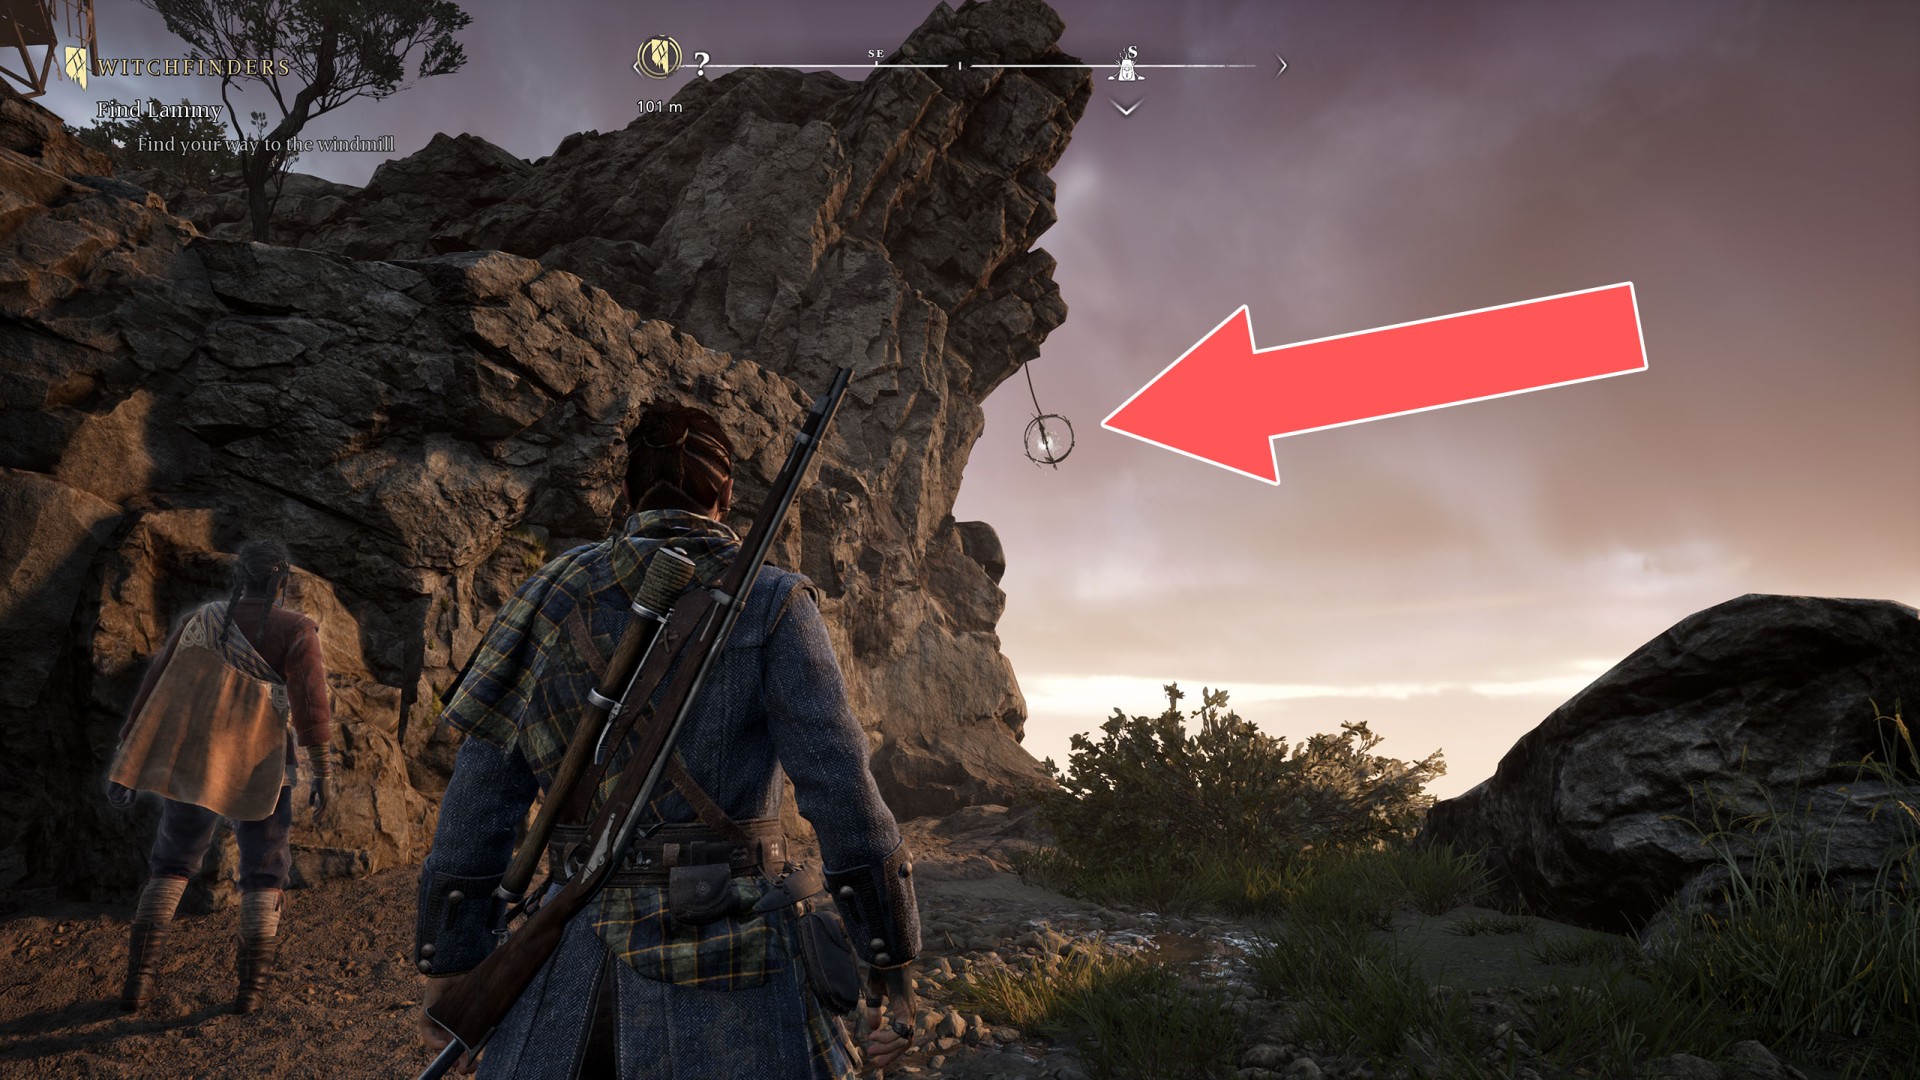
Mount Pleasant Soul Grabber (2/31)▶ show the map ◀
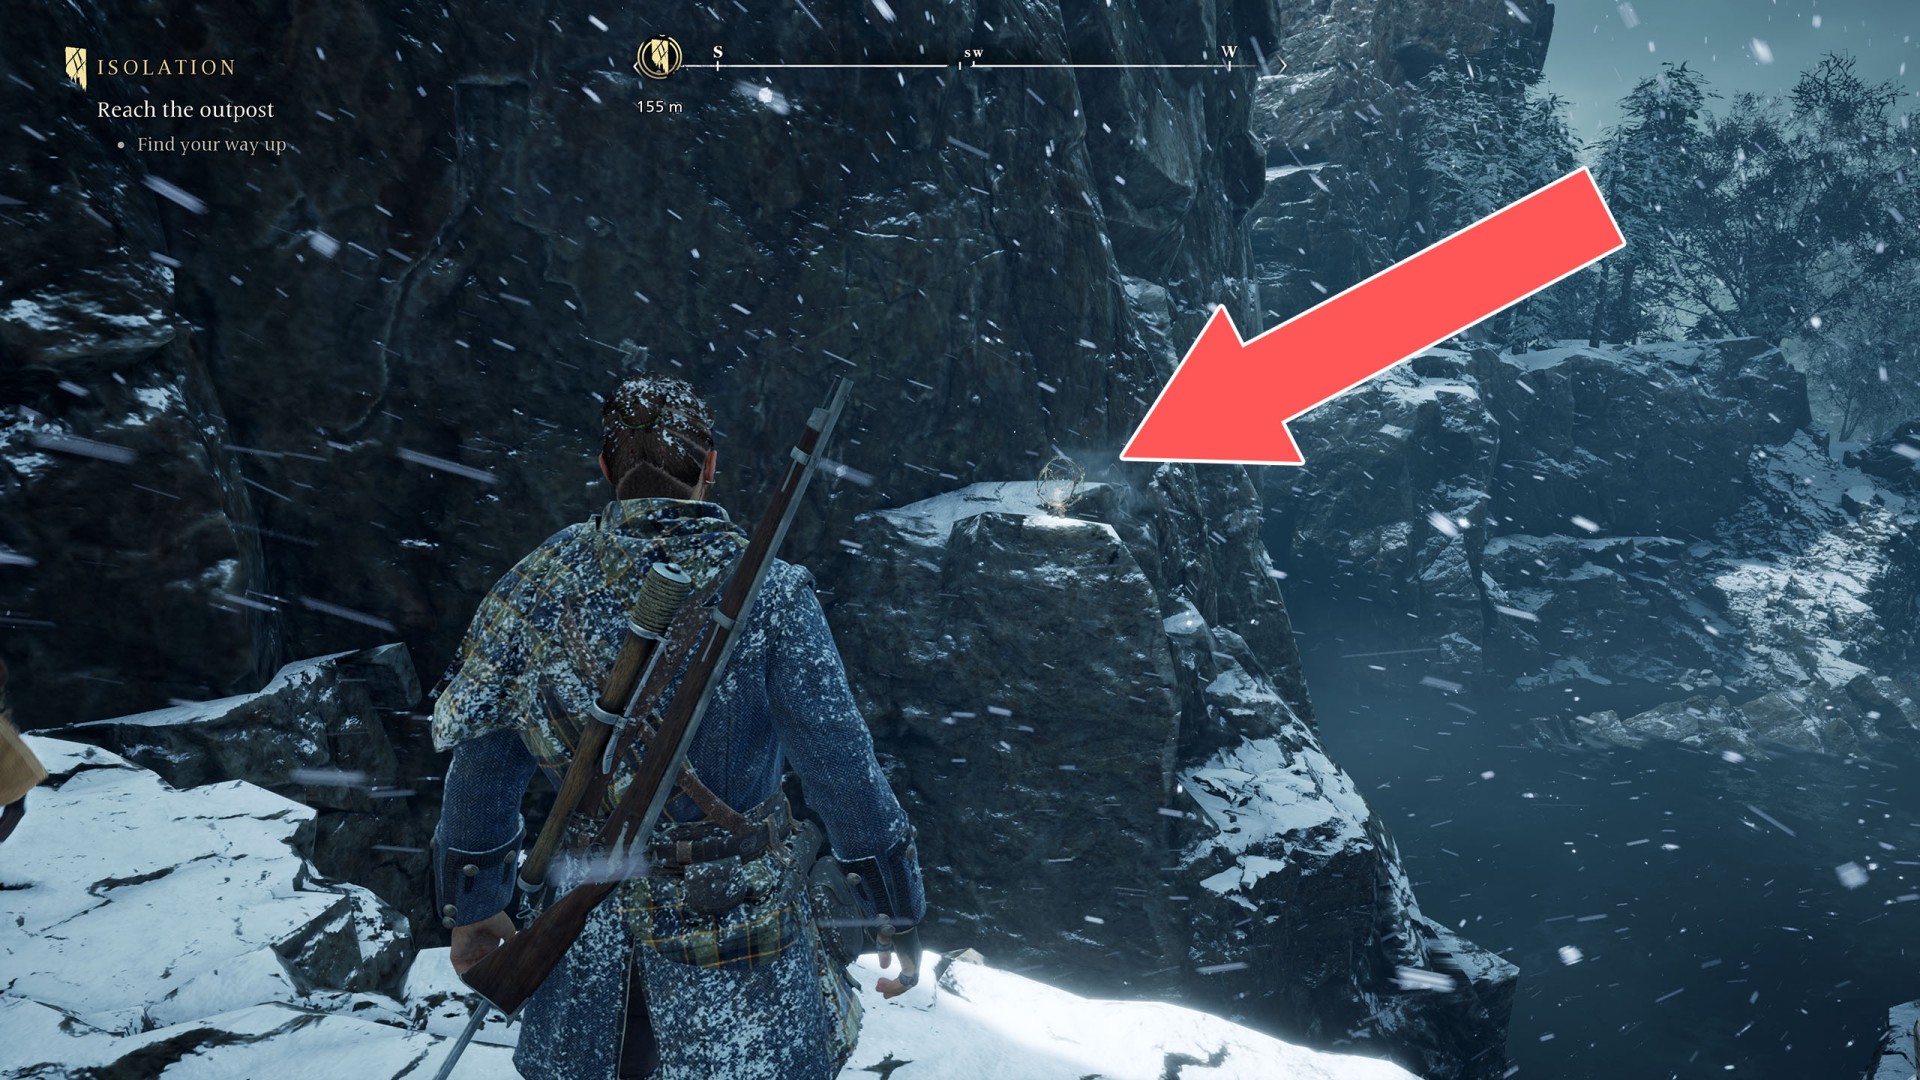
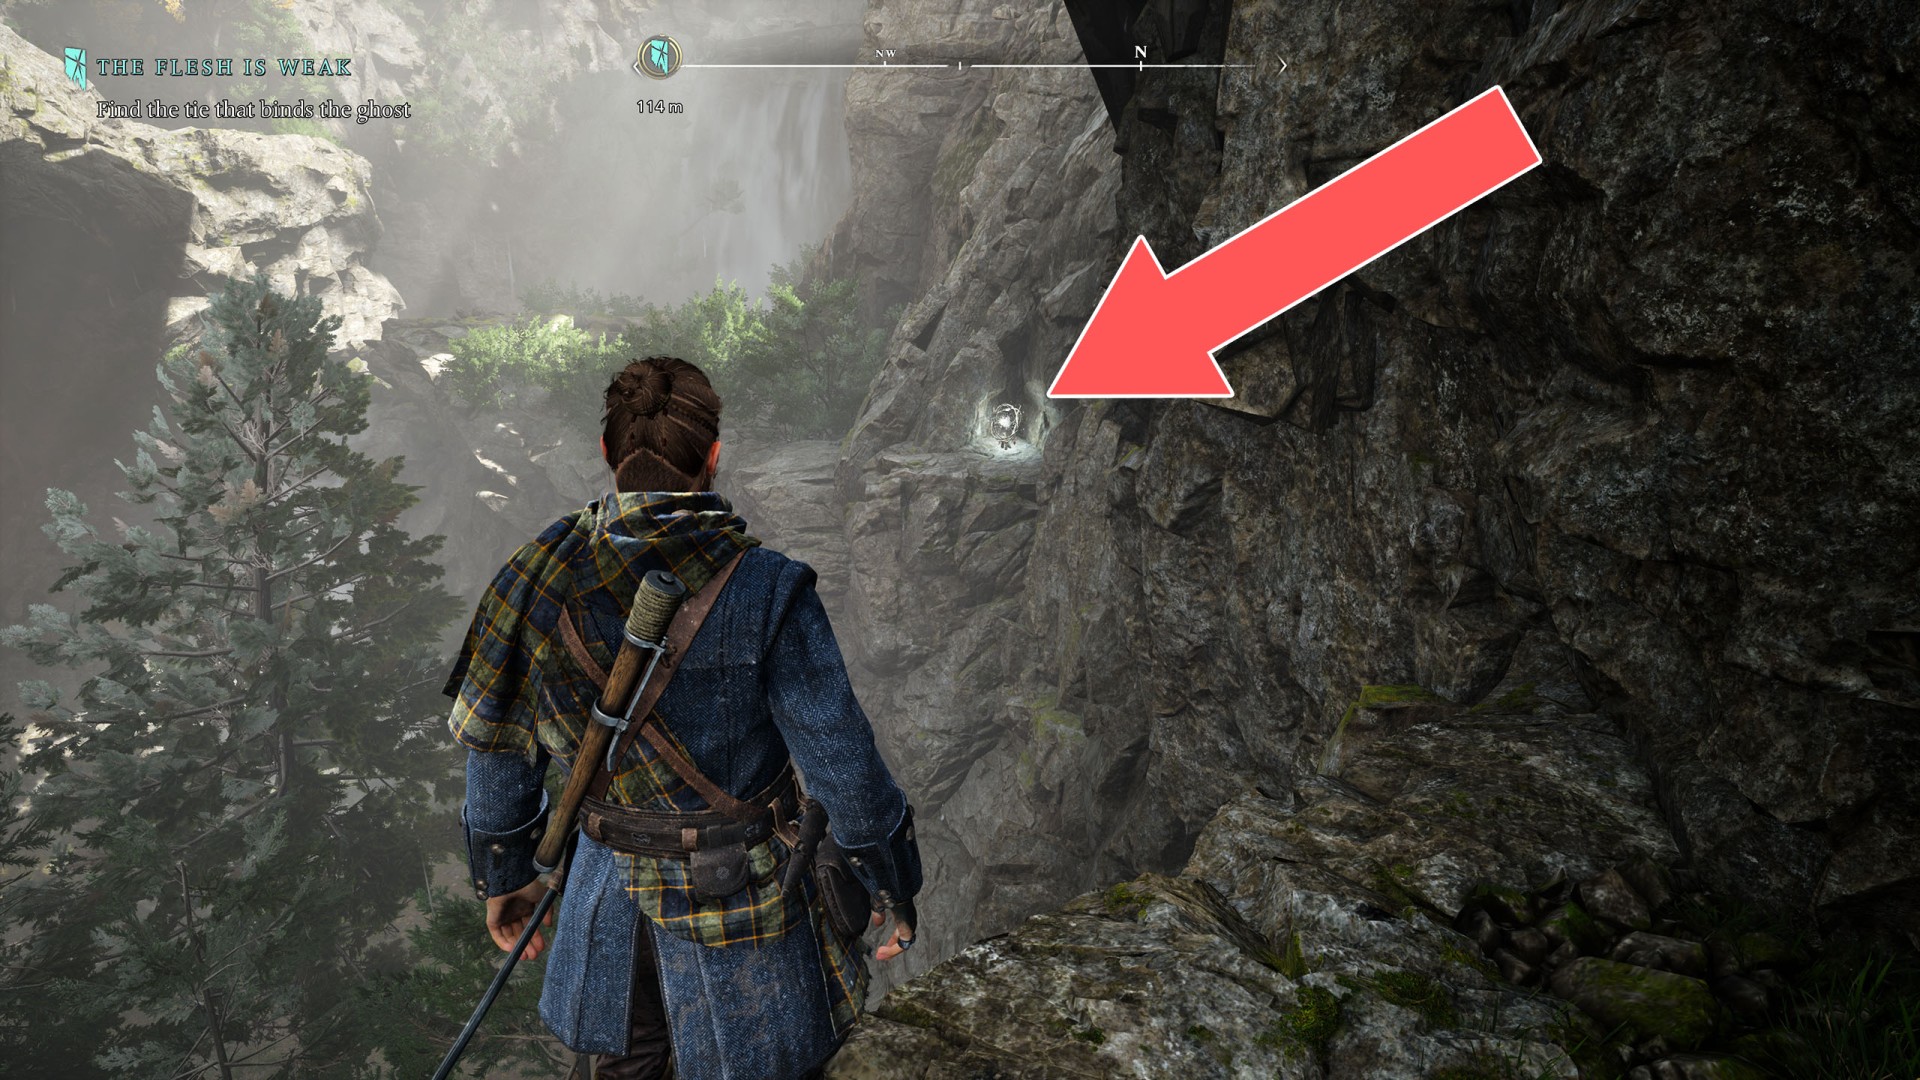
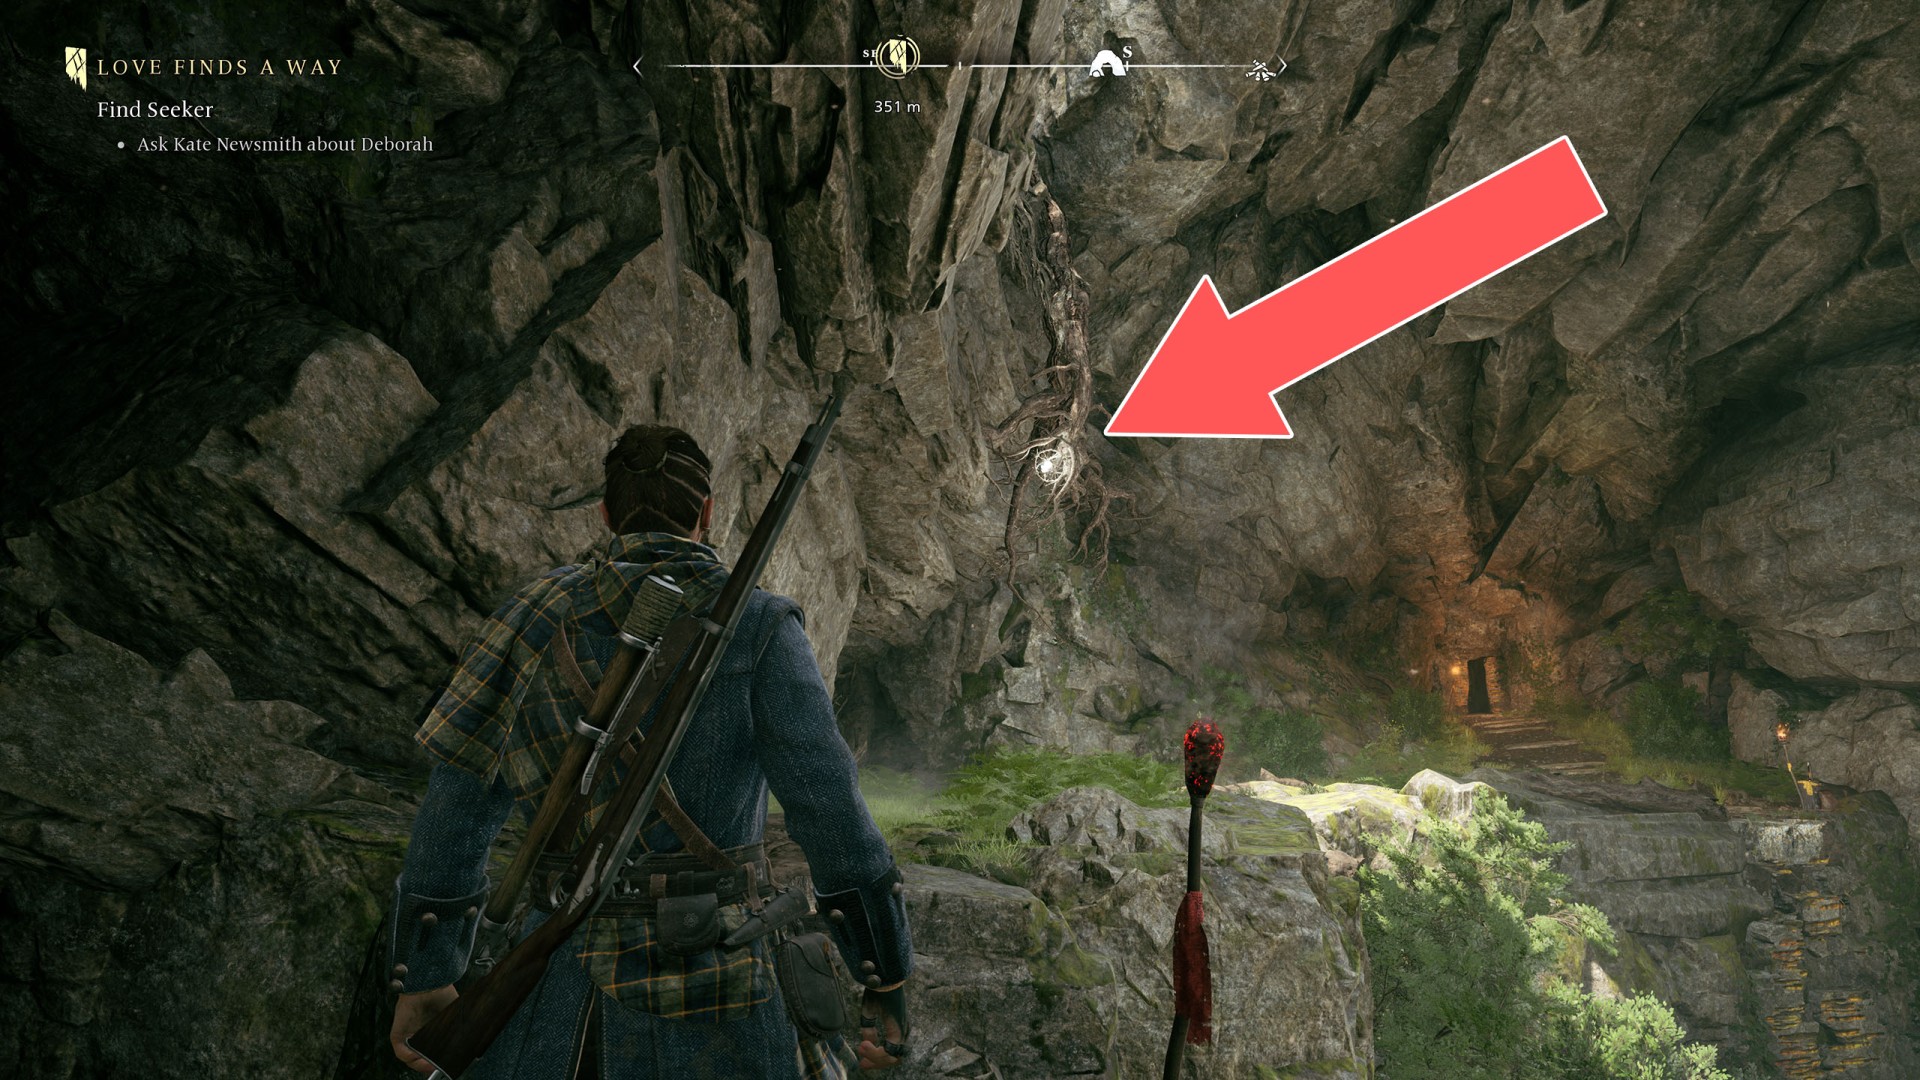
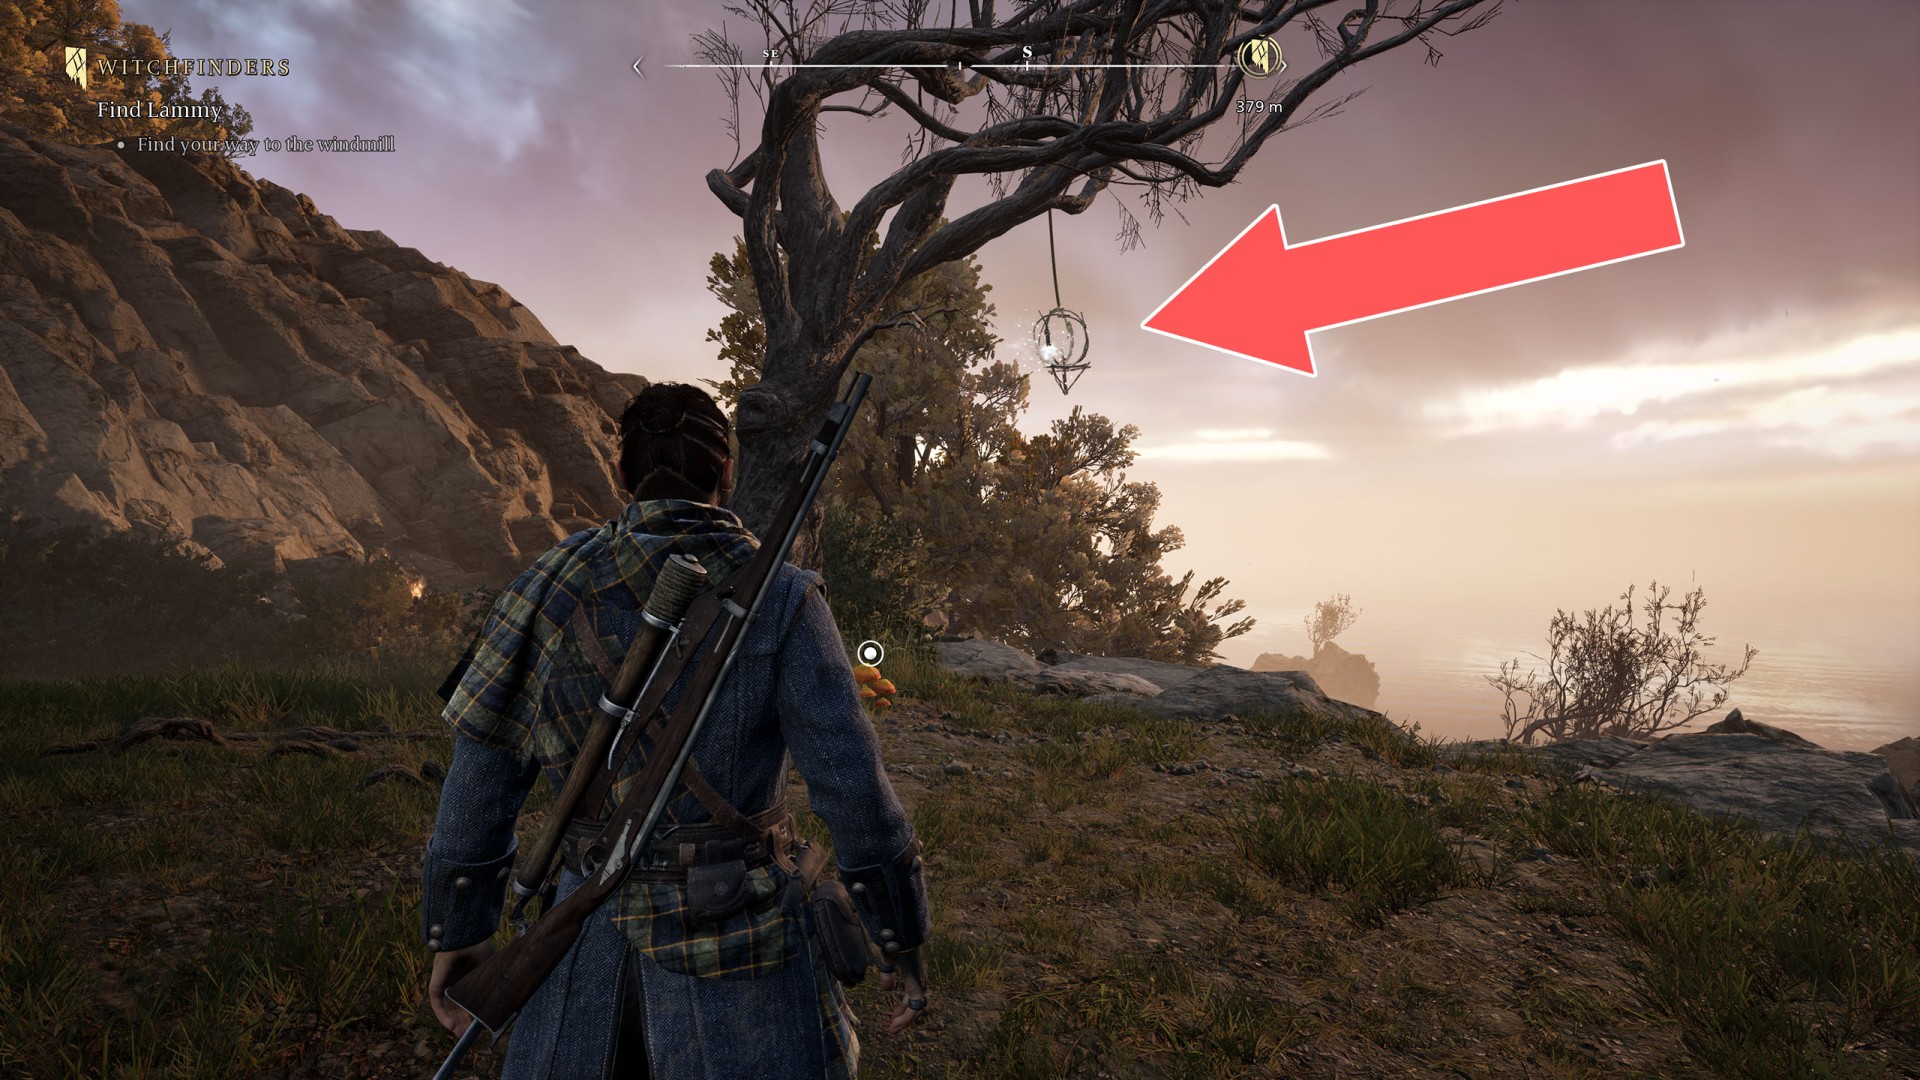
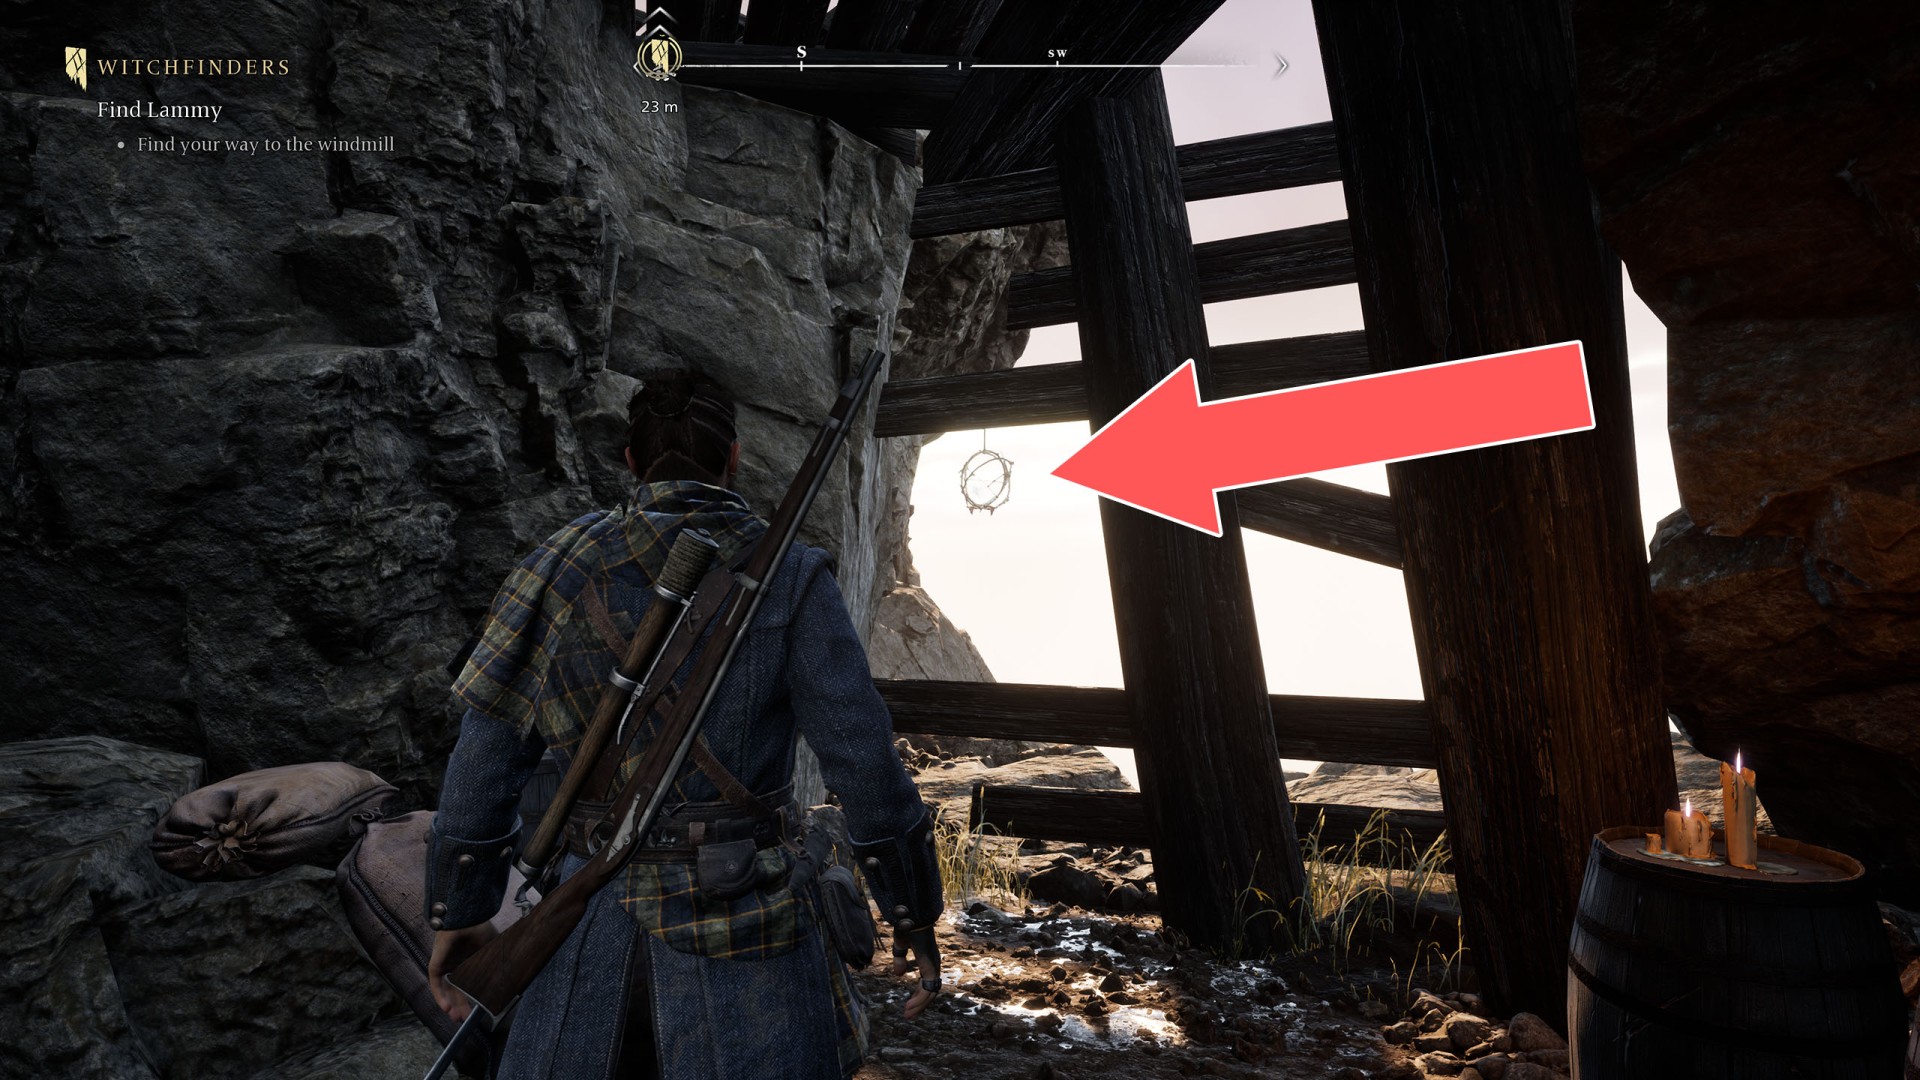
Mount Pleasant Soul Grabber (3/31)▶ show the map ◀
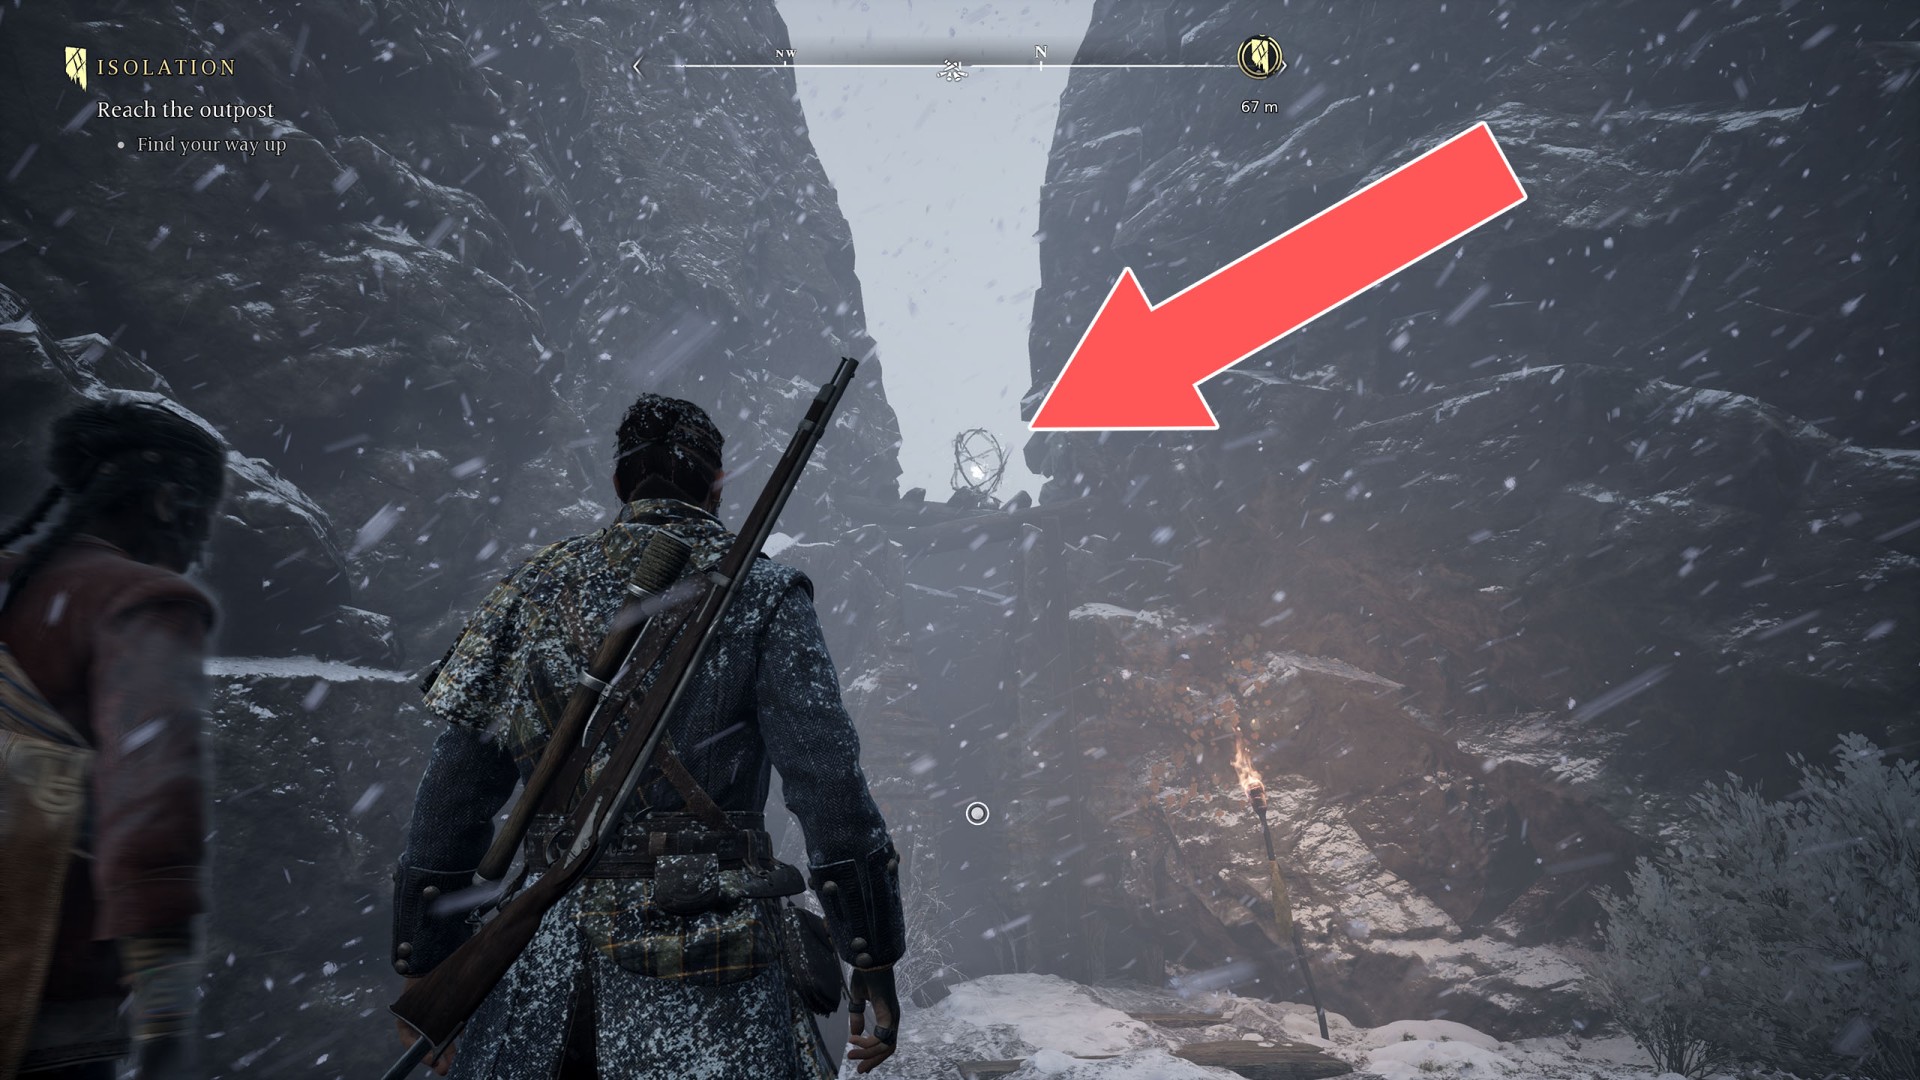
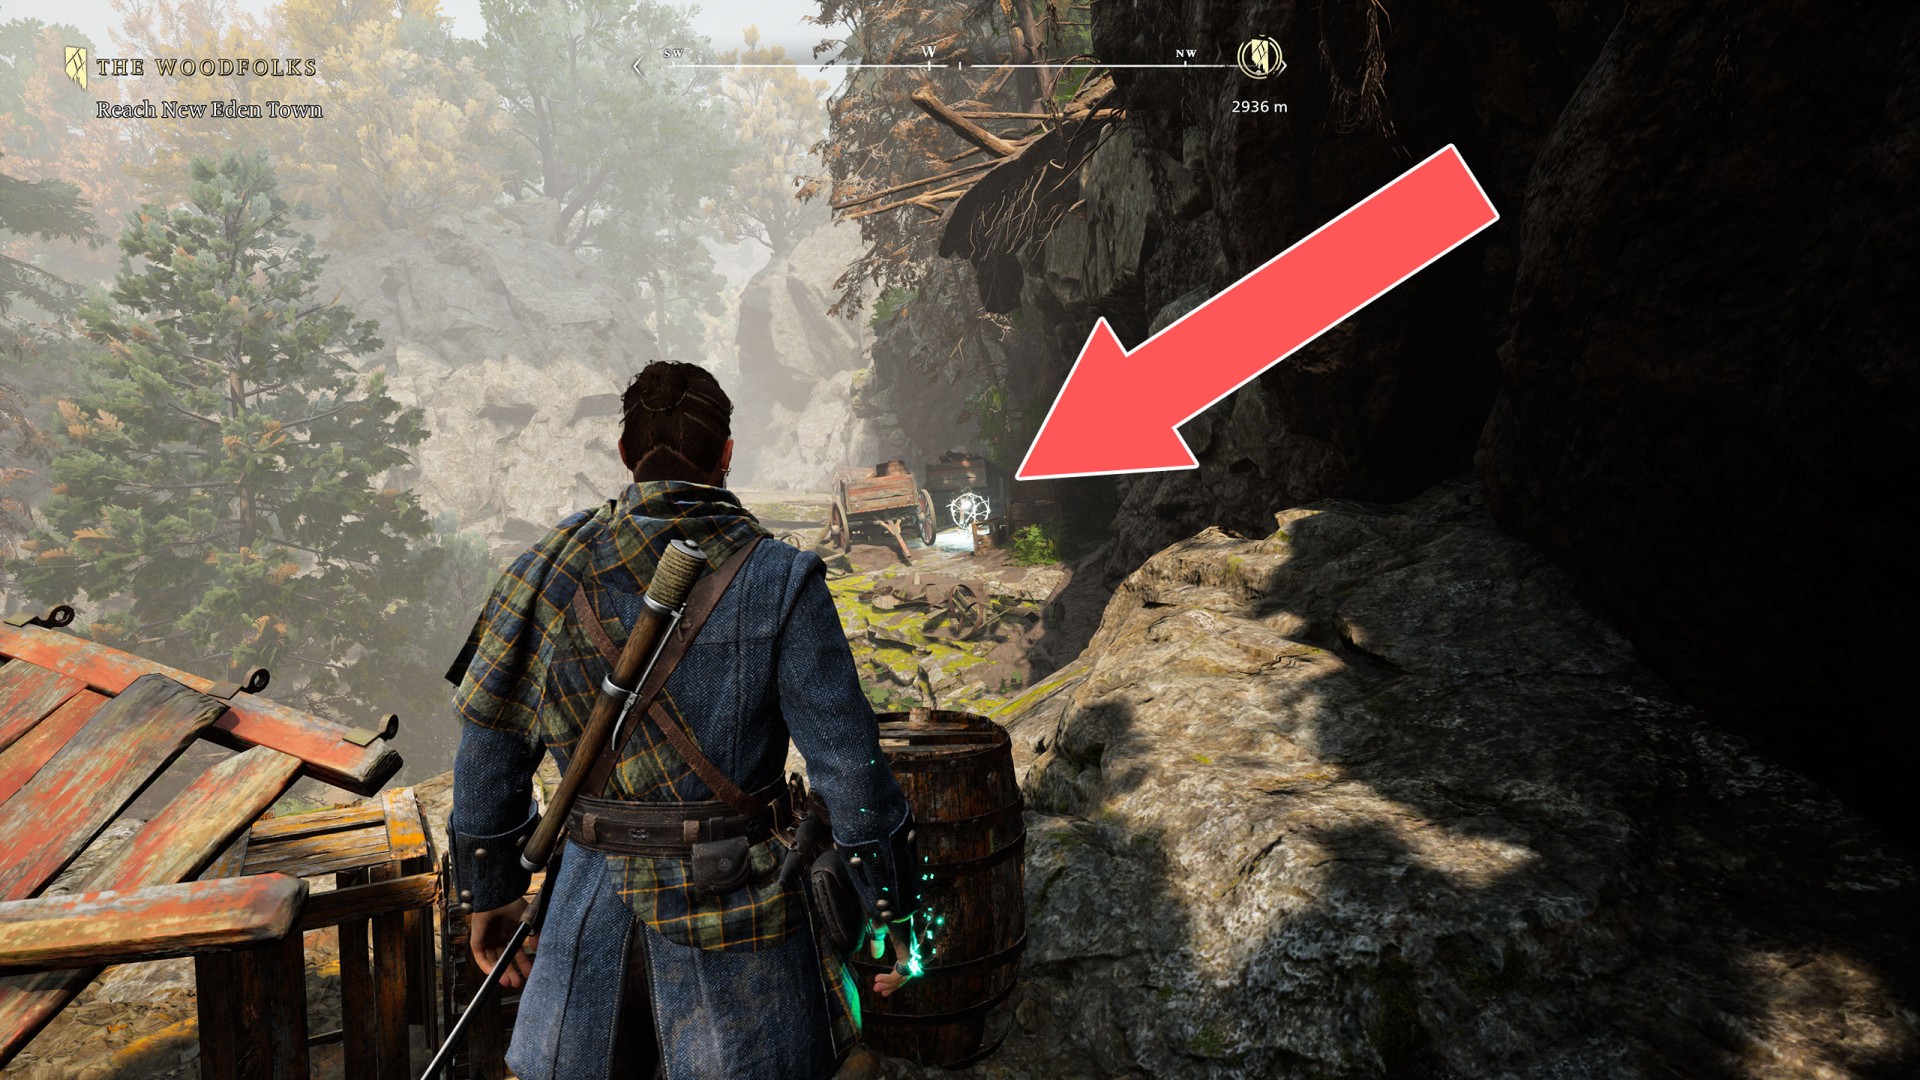
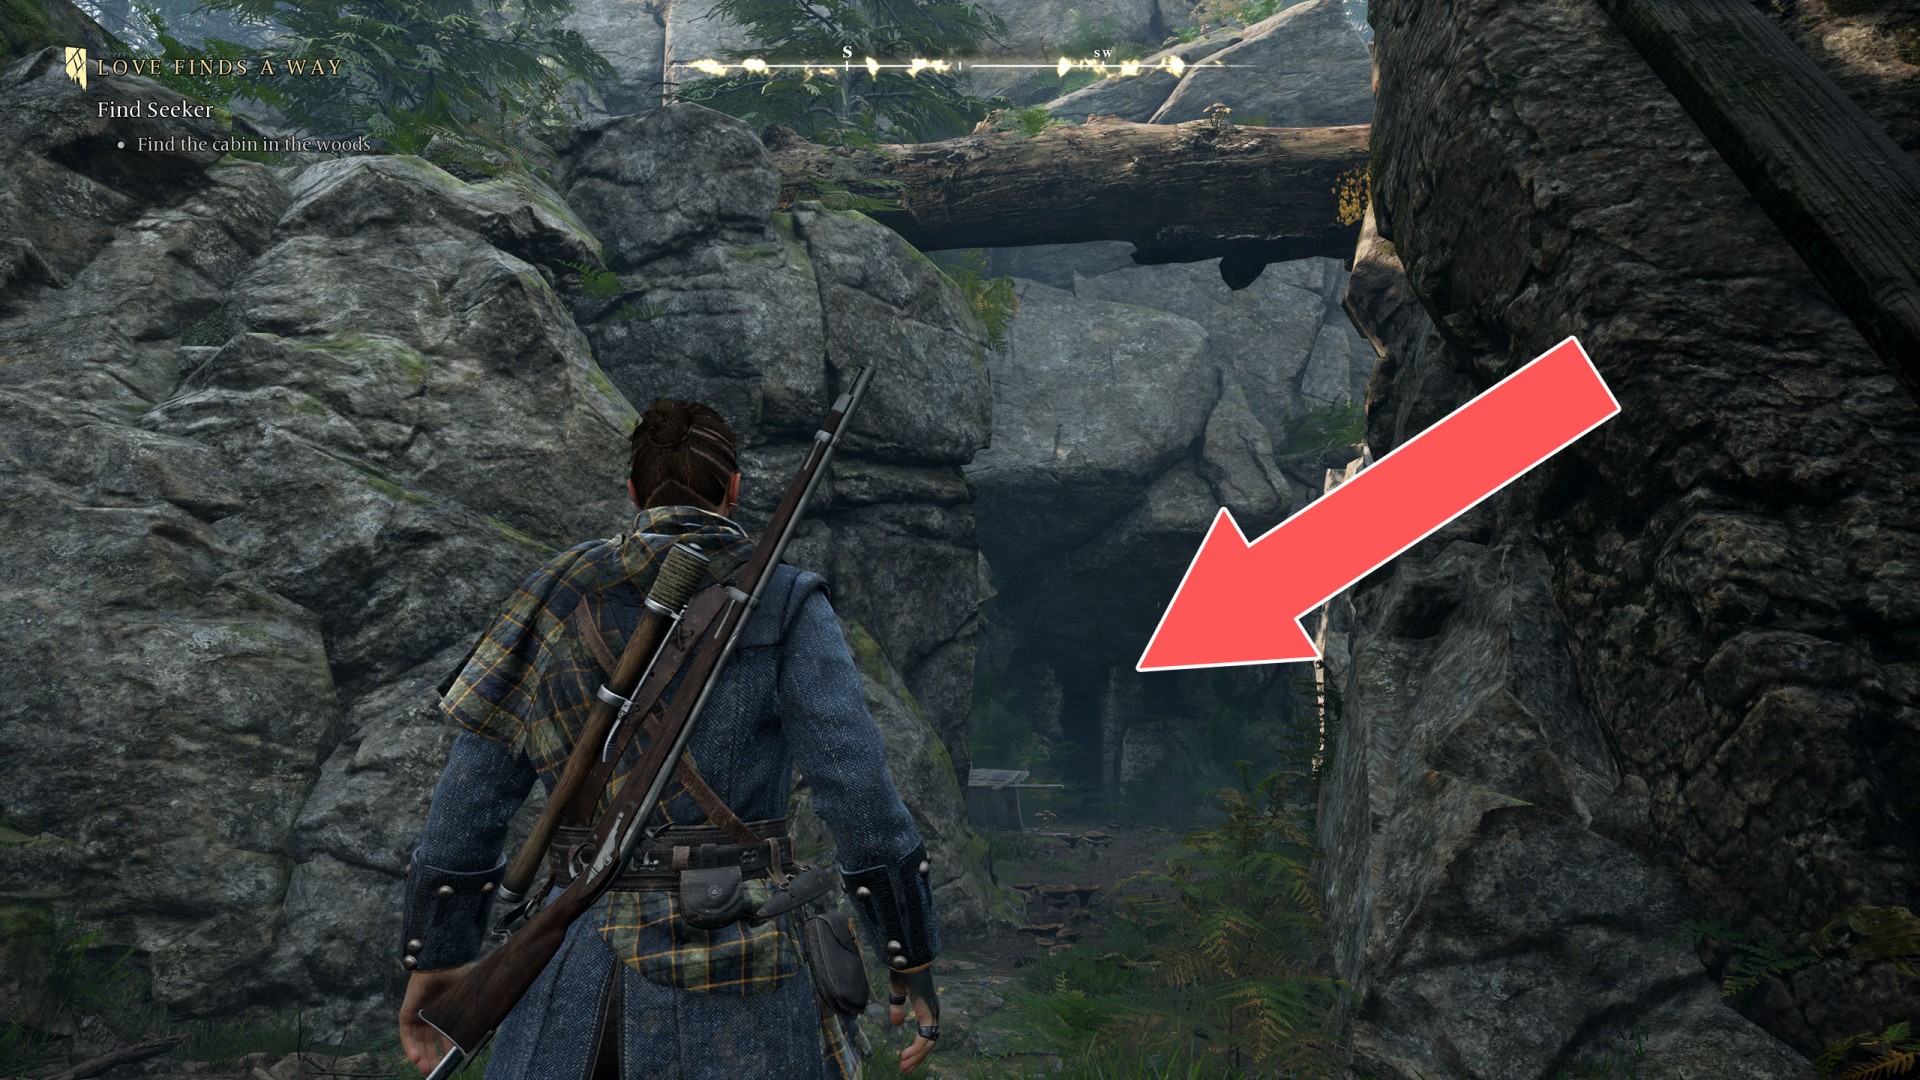
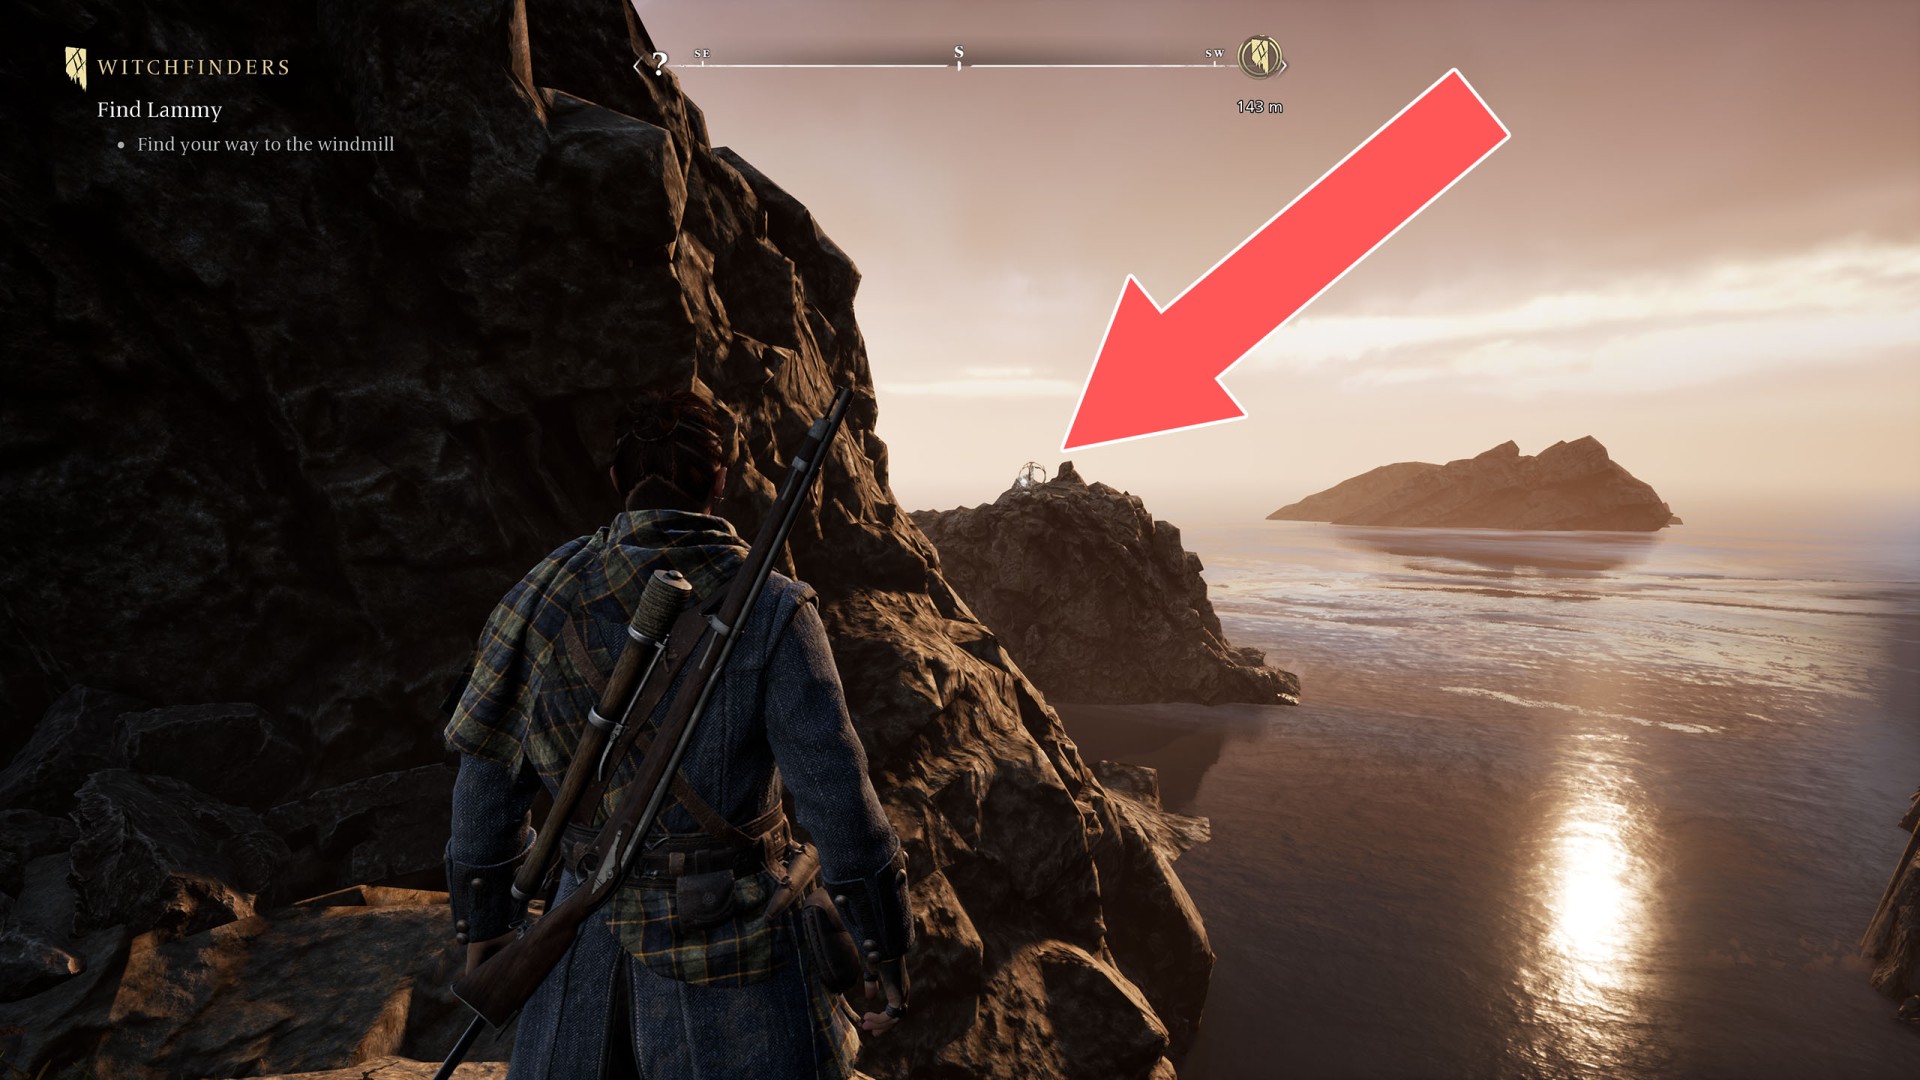
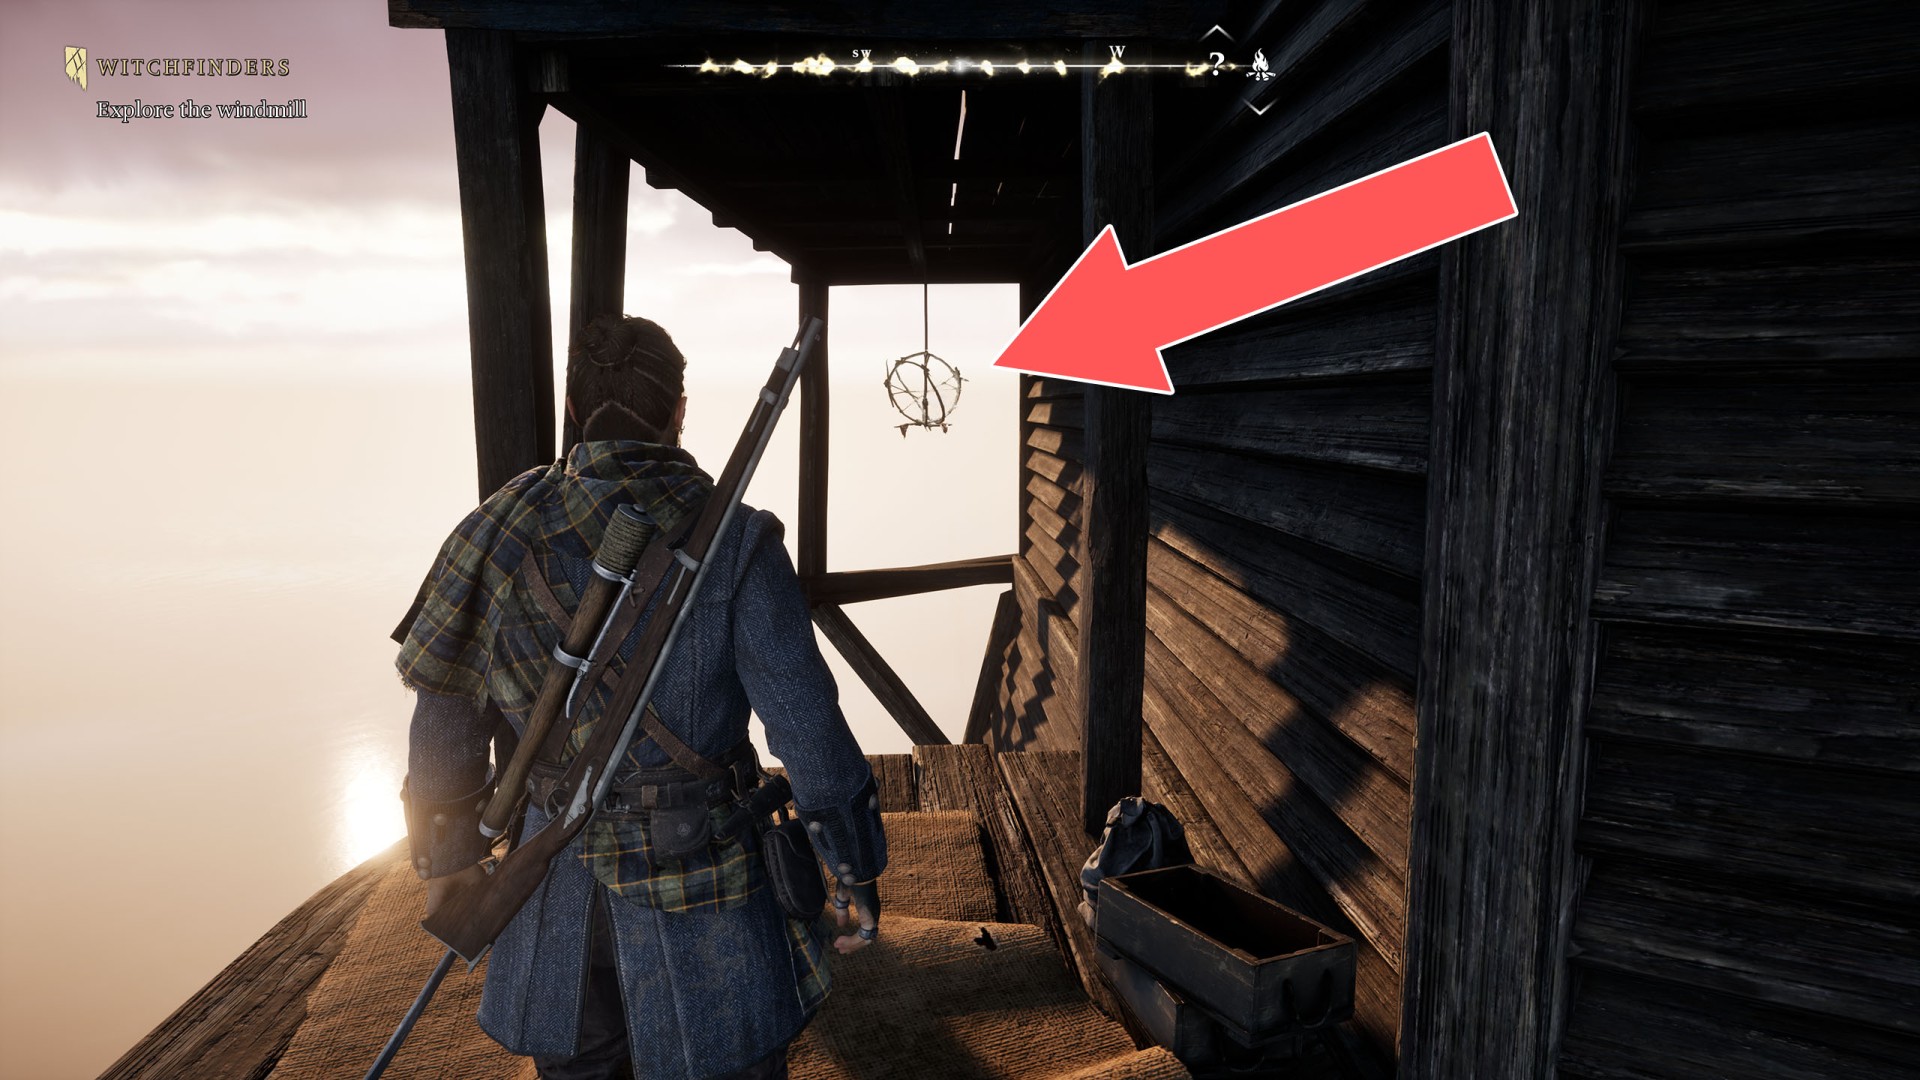
Mount Pleasant Soul Grabber (4/31)▶ show the map ◀
Mount Pleasant Soul Grabber (5/31)▶ show the map ◀
Mount Pleasant Soul Grabber (6/31)▶ show the map ◀

Mount Pleasant Soul Grabber (7/31)▶ show the map ◀
Mount Pleasant Soul Grabber (8/31)▶ show the map ◀
Mount Pleasant Soul Grabber (9/31)▶ show the map ◀
Mount Pleasant Soul Grabber (10/31)▶ show the map ◀
Mount Pleasant Soul Grabber (11/31)▶ show the map ◀
Mount Pleasant Soul Grabber (12/31)▶ show the map ◀
Mount Pleasant Soul Grabber (13/31)▶ show the map ◀
Mount Pleasant Soul Grabber (14/31)▶ show the map ◀
Mount Pleasant Soul Grabber (15/31)▶ show the map ◀
Mount Pleasant Soul Grabber (16/31)▶ show the map ◀
Mount Pleasant Soul Grabber (17/31)▶ show the map ◀
Mount Pleasant Soul Grabber (19/31)▶ show the map ◀
Mount Pleasant Soul Grabber (20/31)▶ show the map ◀
Mount Pleasant Soul Grabber (21/31)▶ show the map ◀
Mount Pleasant Soul Grabber (22/31)▶ show the map ◀
Mount Pleasant Soul Grabber (23/31)▶ show the map ◀
Mount Pleasant Soul Grabber (24/31)▶ show the map ◀
Mount Pleasant Soul Grabber (25/31)▶ show the map ◀
Mount Pleasant Soul Grabber (26/31)▶ show the map ◀
Mount Pleasant Soul Grabber (27/31)▶ show the map ◀
Mount Pleasant Soul Grabber (28/31)▶ show the map ◀
Mount Pleasant Soul Grabber (29/31)▶ show the map ◀
Mount Pleasant Soul Grabber (30/31)▶ show the map ◀
Mount Pleasant Soul Grabber (31/31)▶ show the map ◀
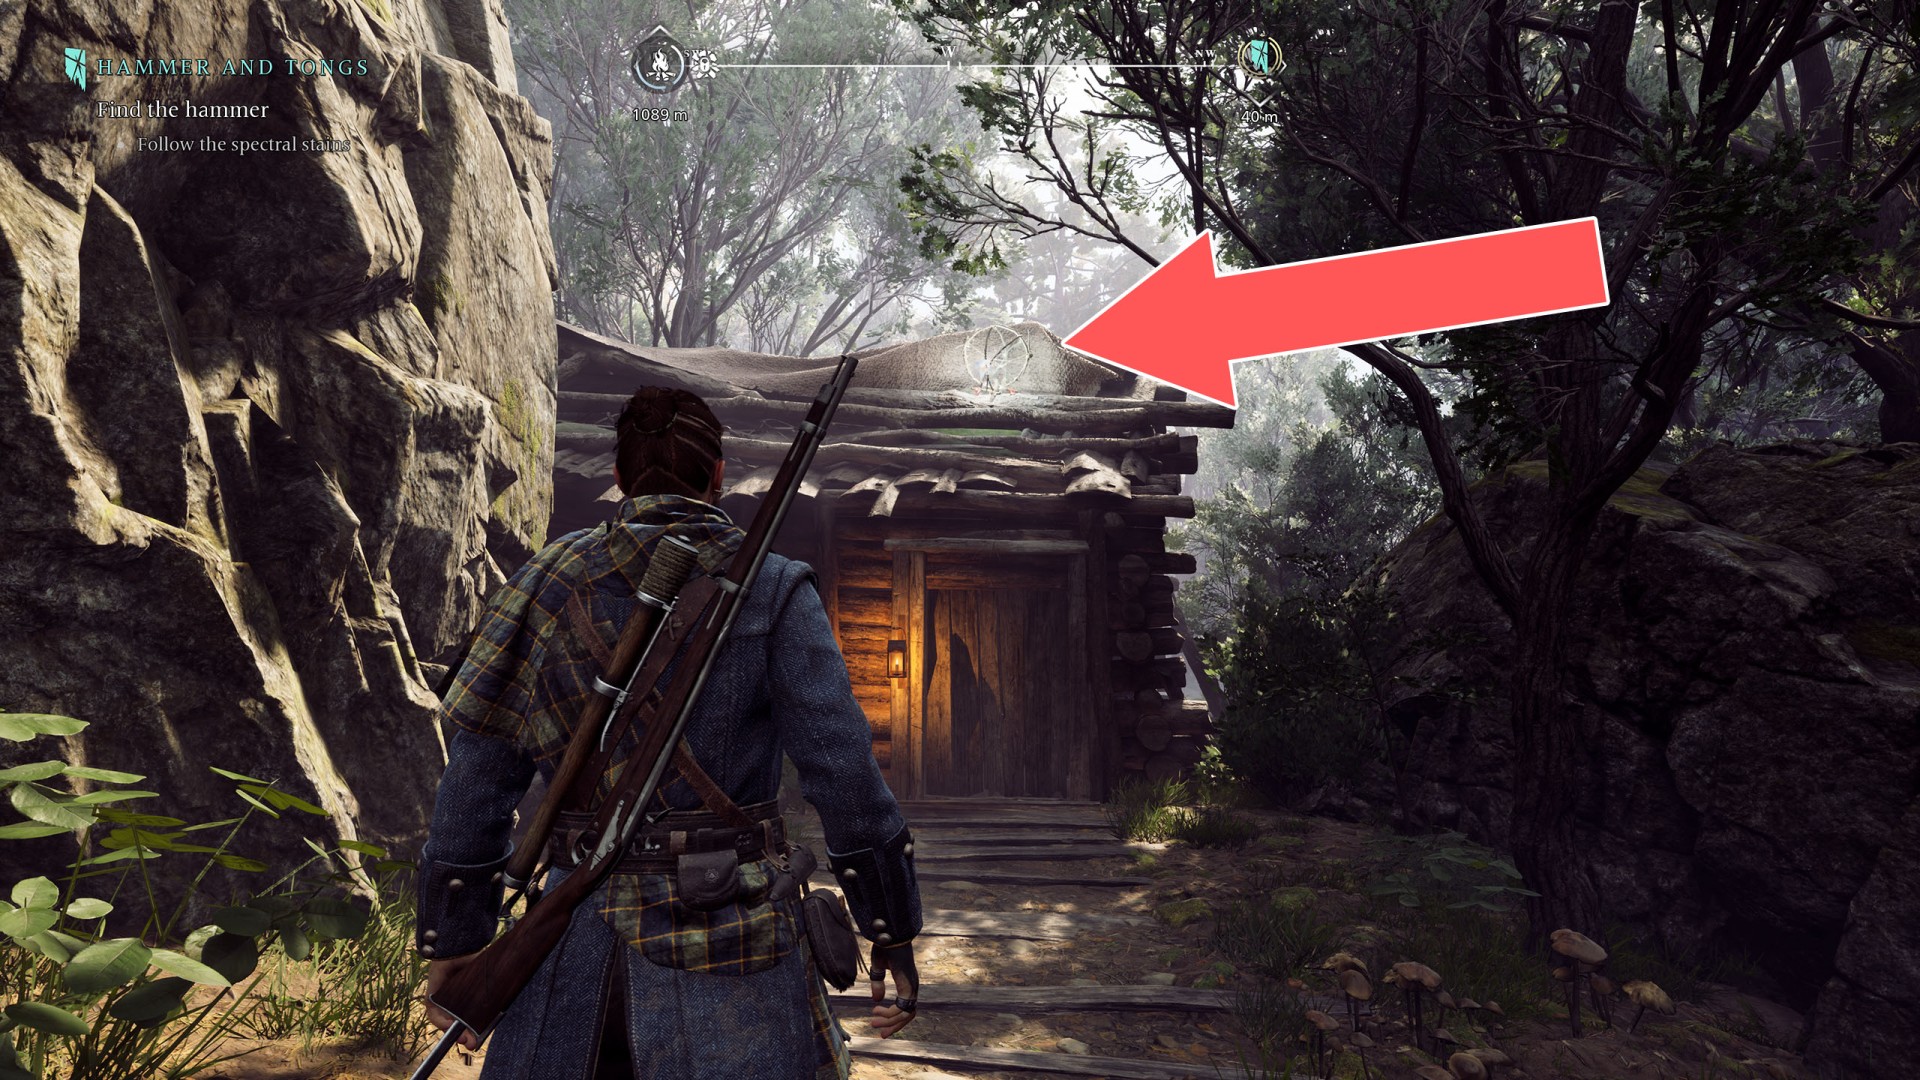
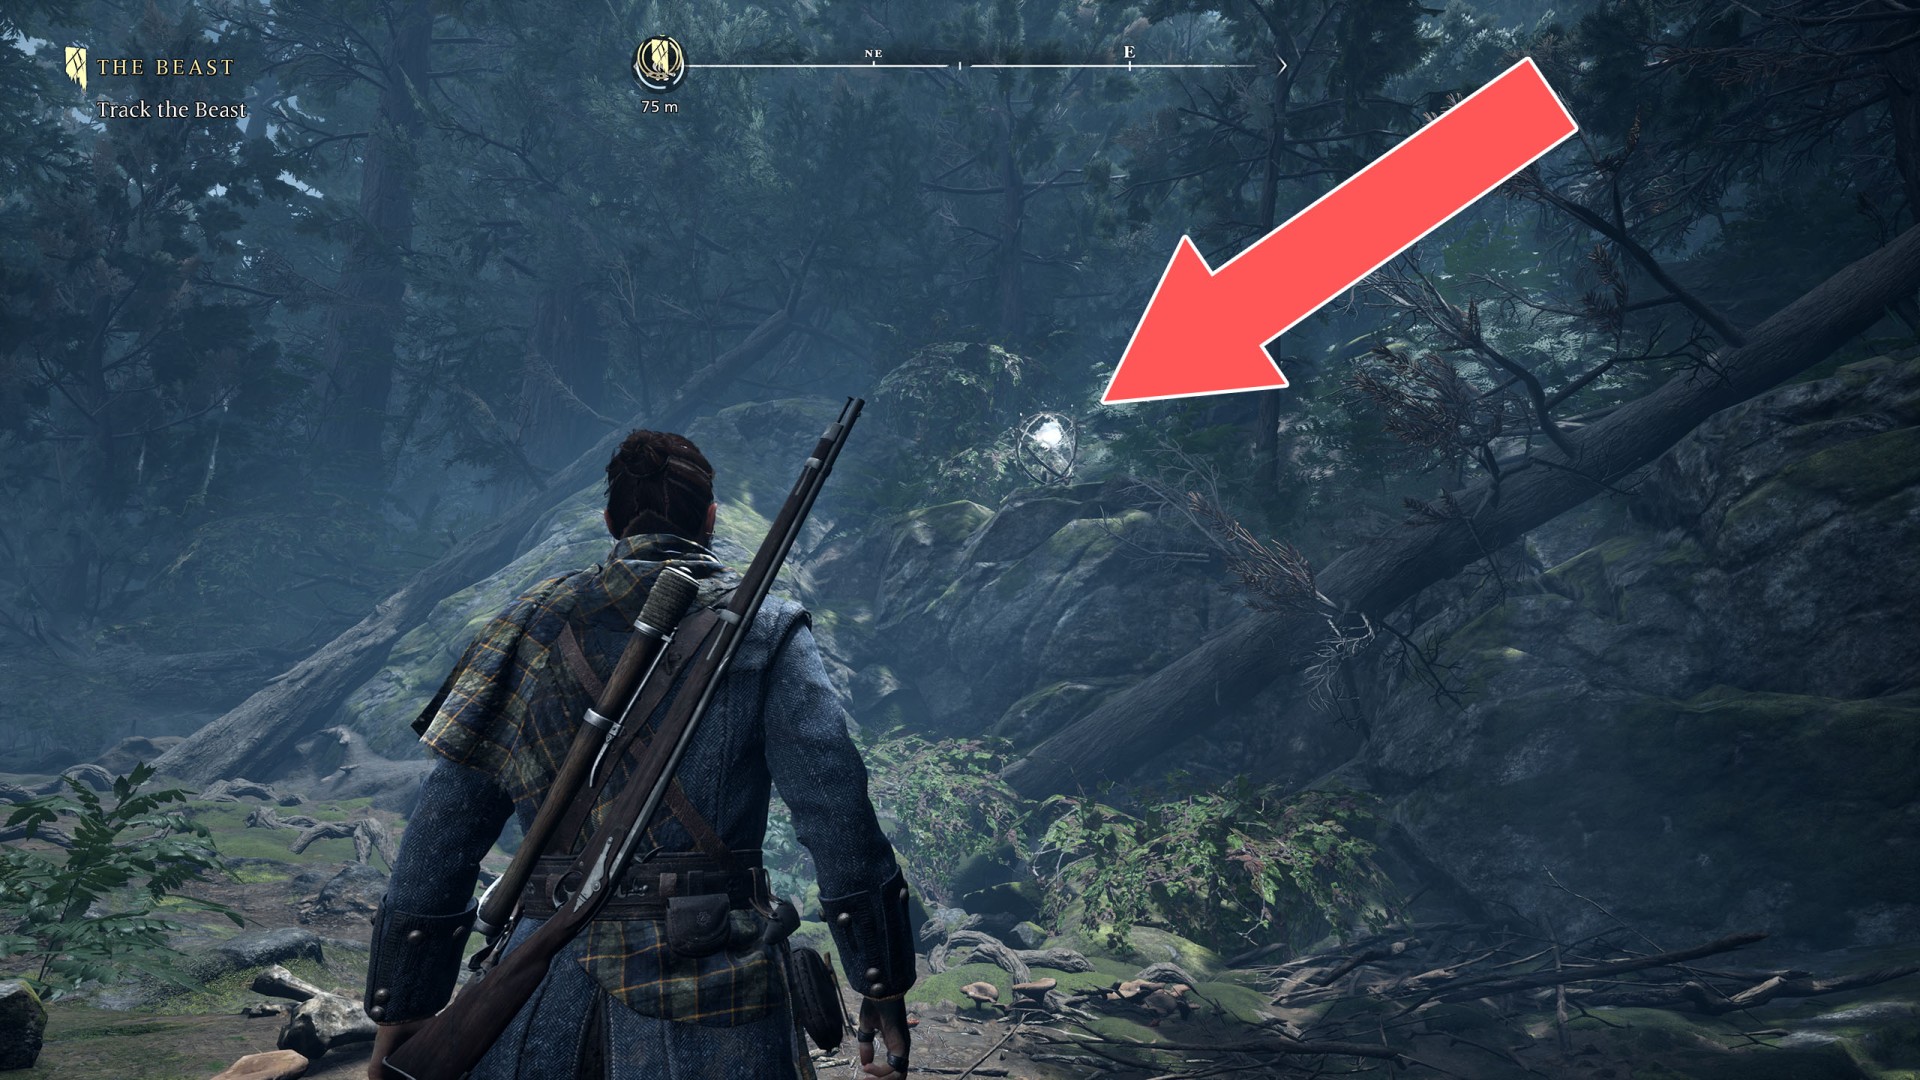
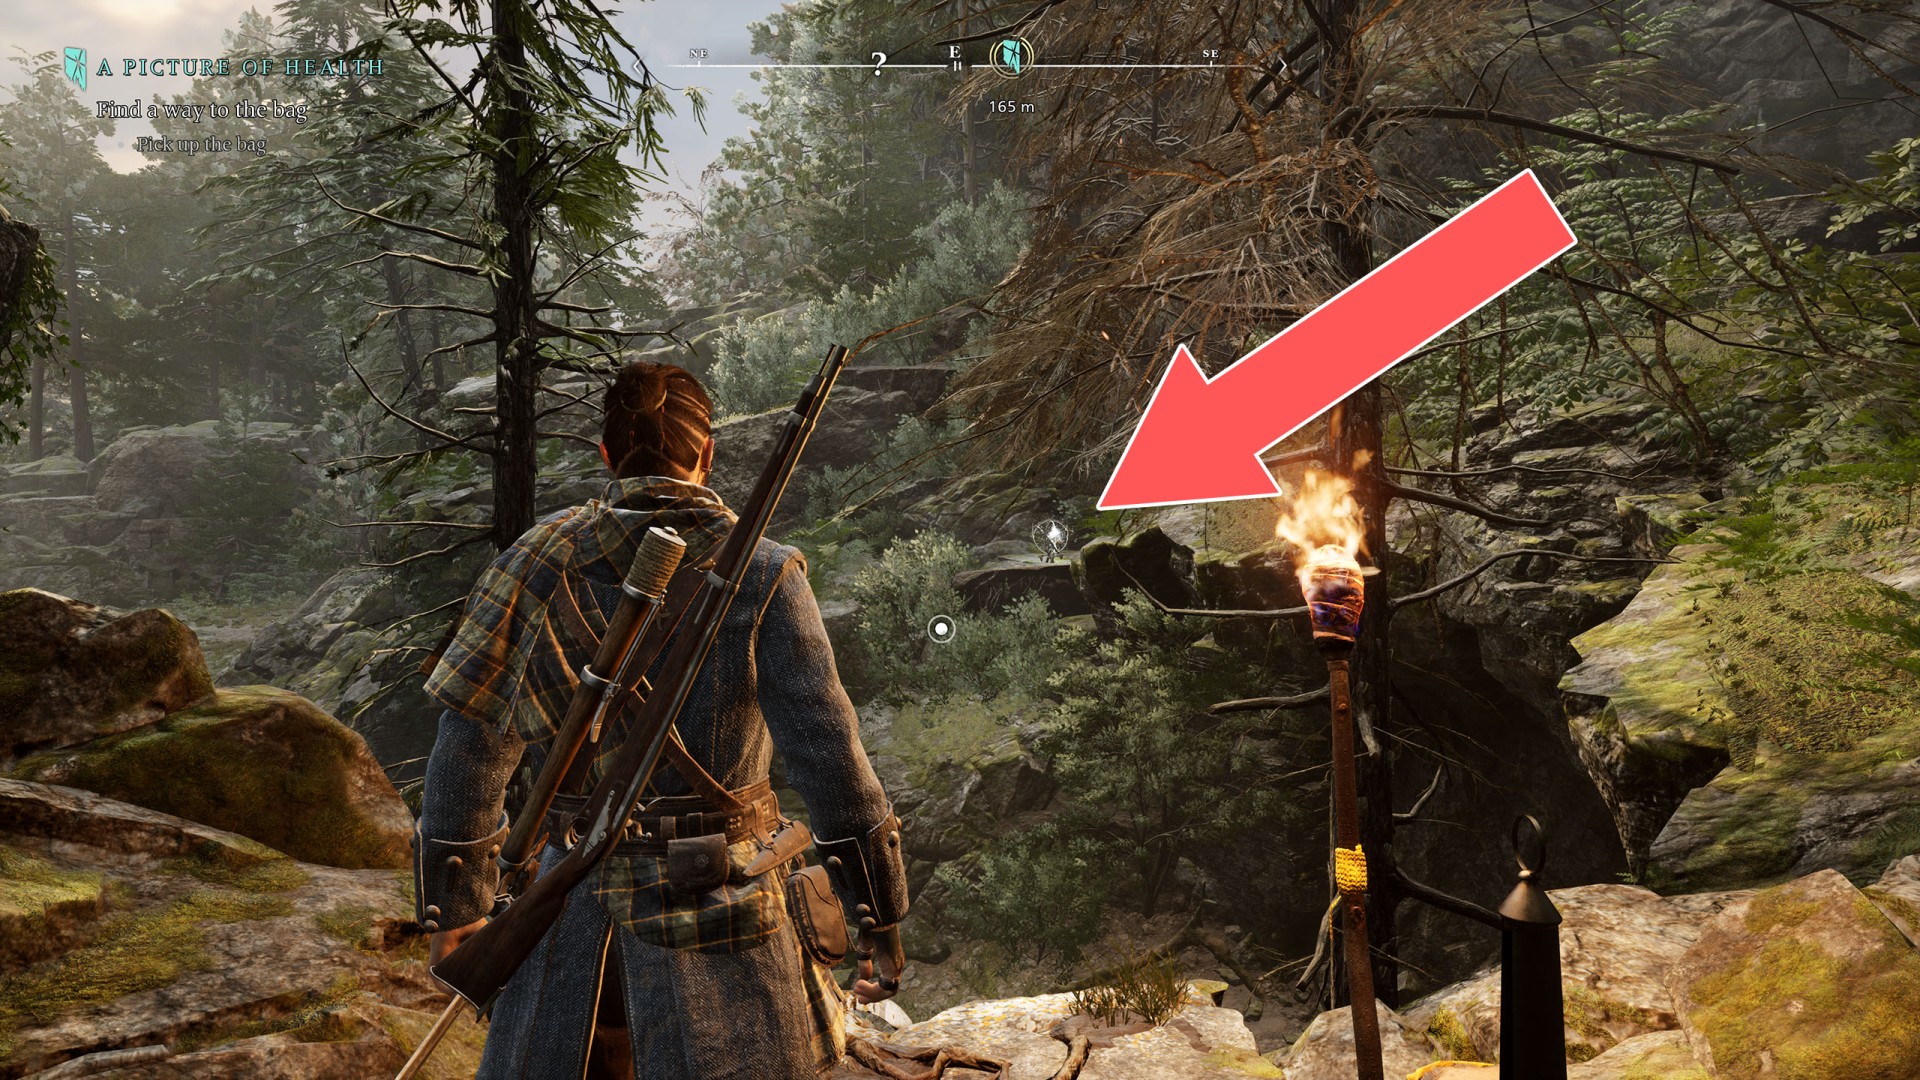
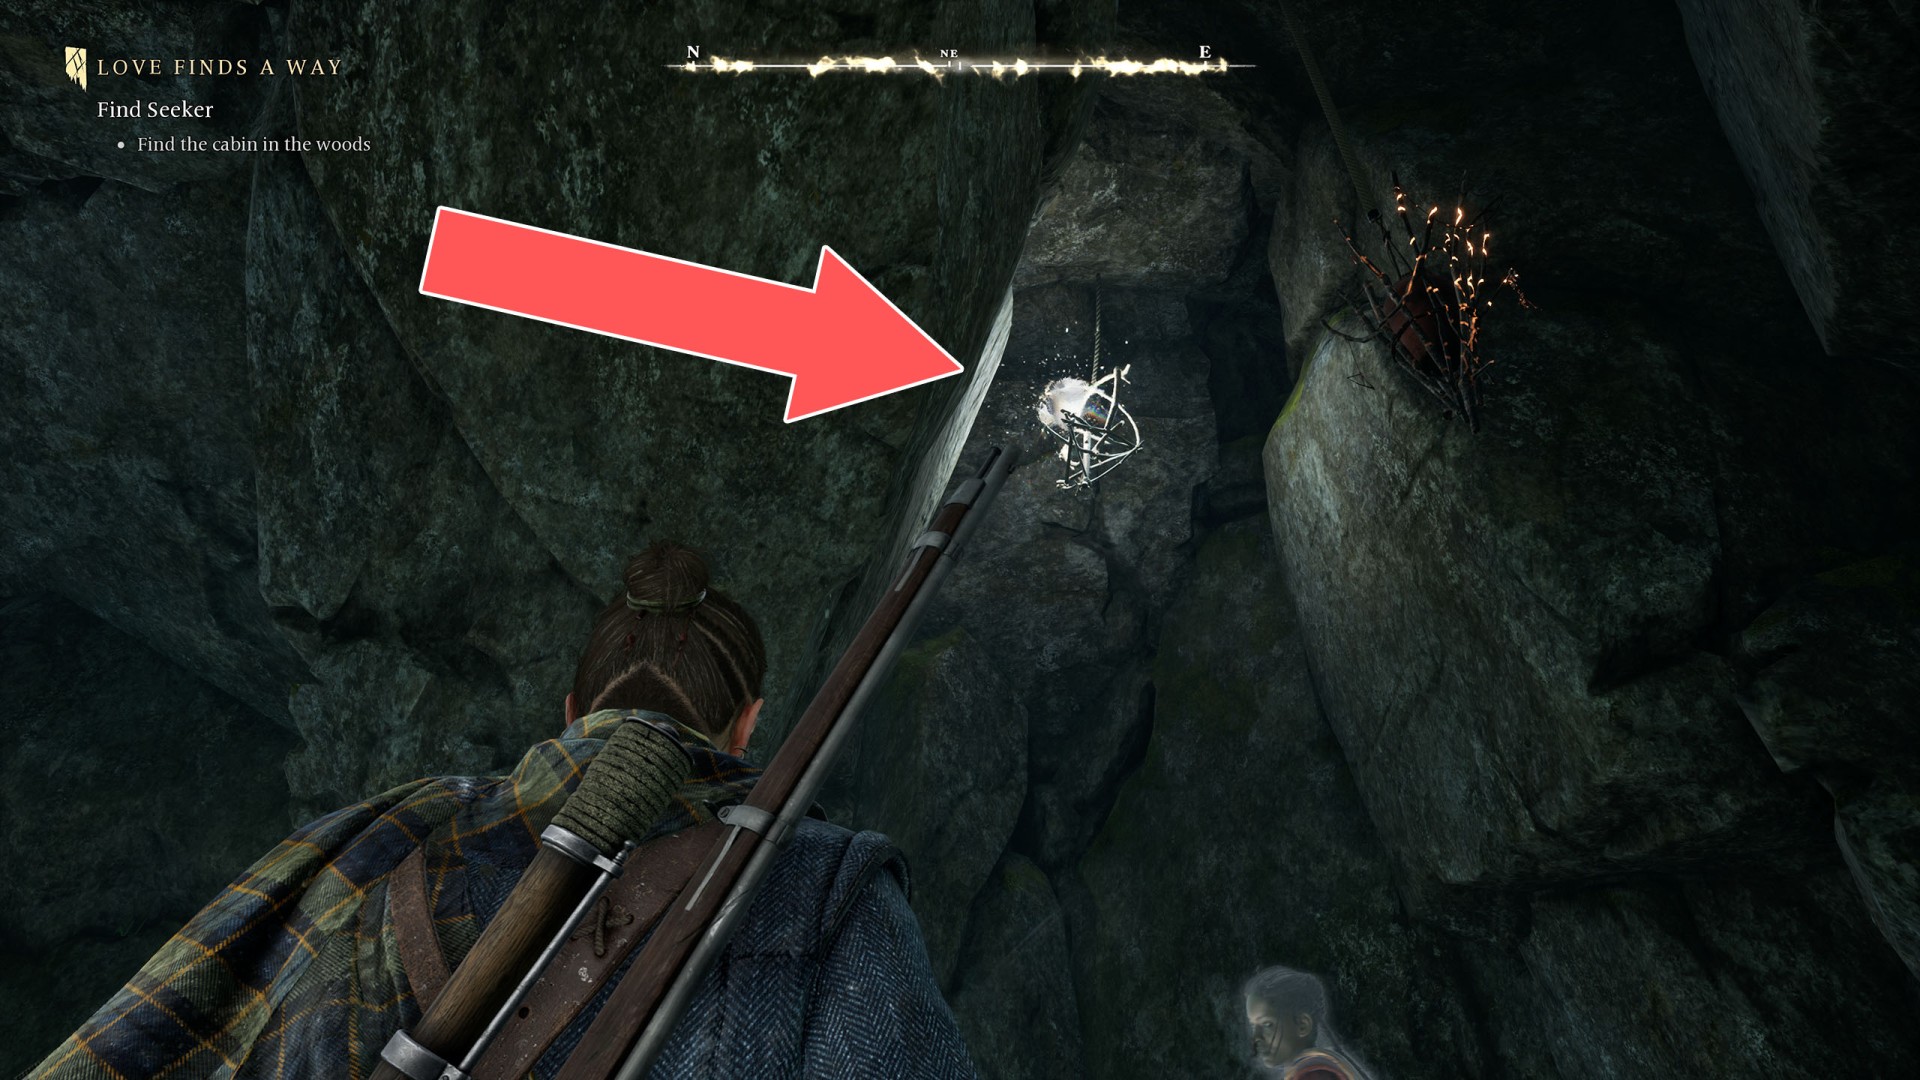
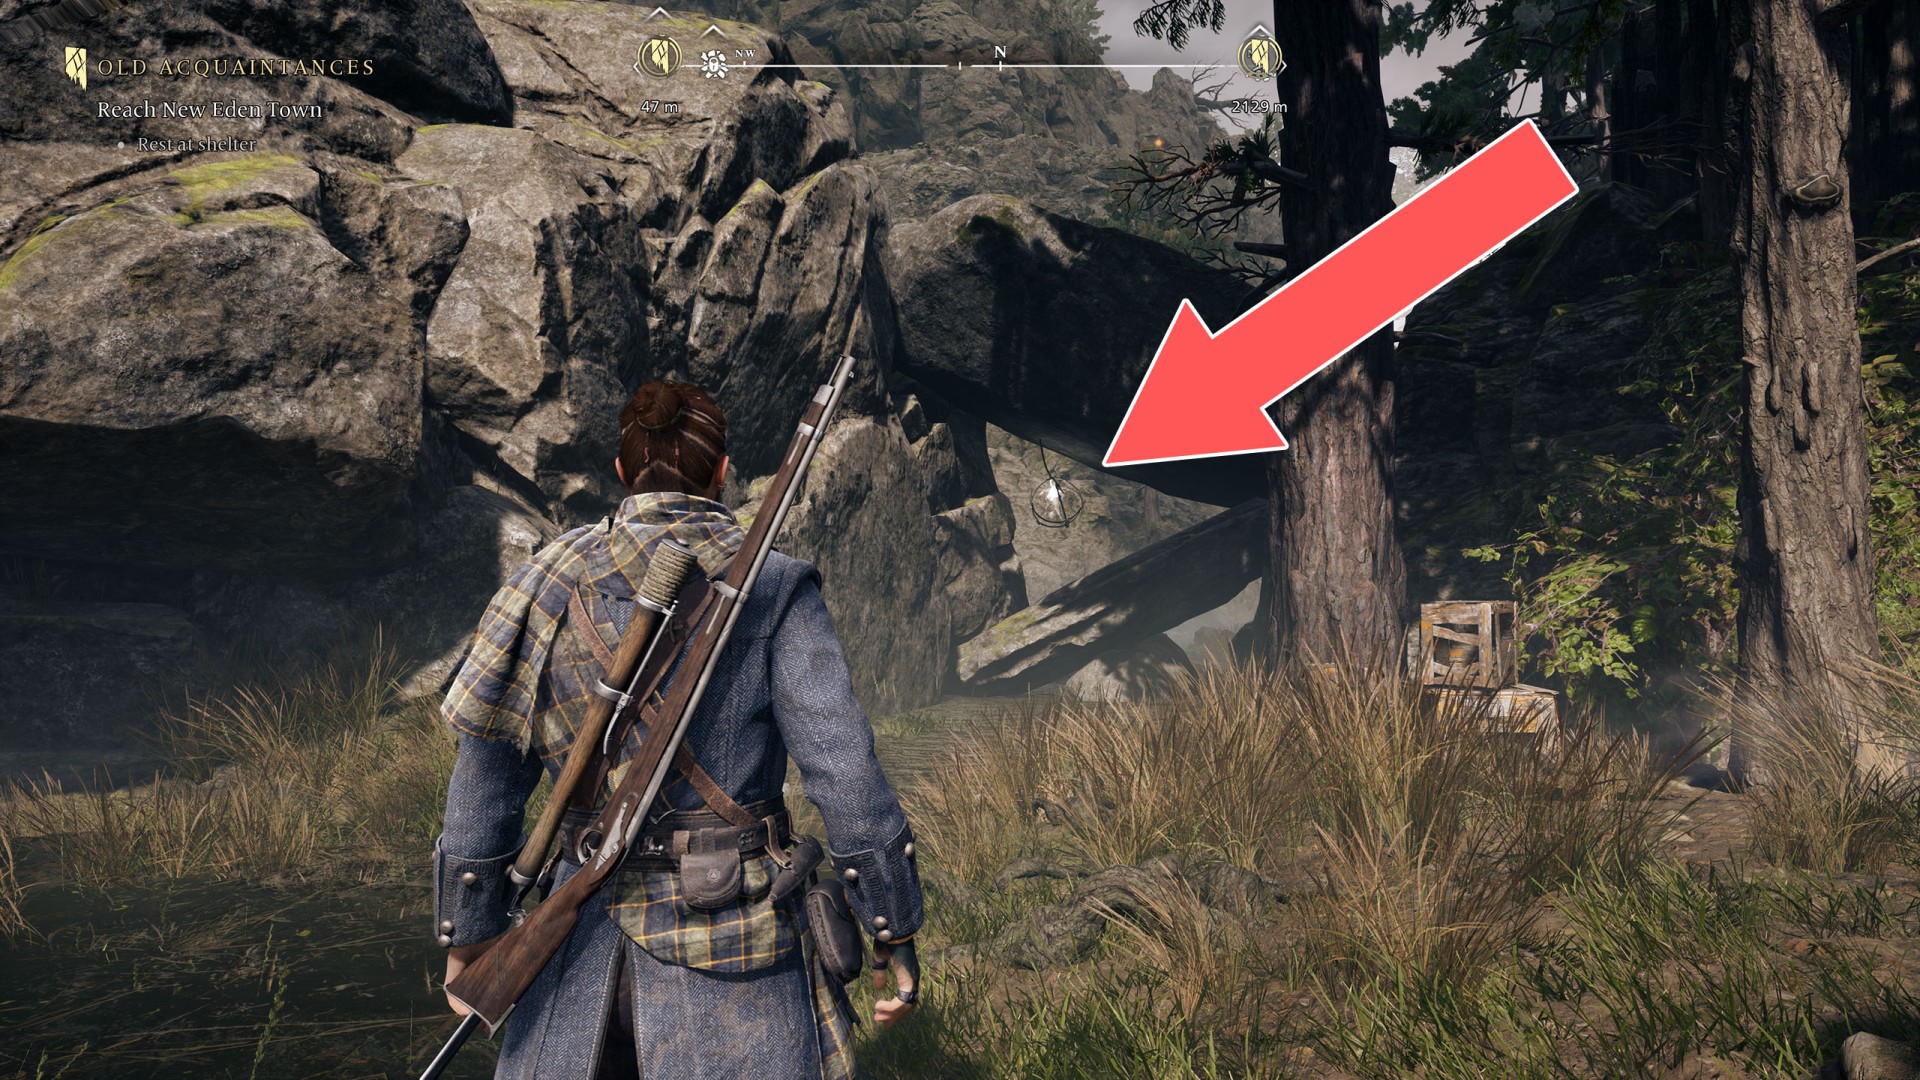
The Dark Woods Soul Grabber (1/38)▶ show the map ◀
When you pass this way for the first time you will not yet have a rifle so you will have to come back here later.
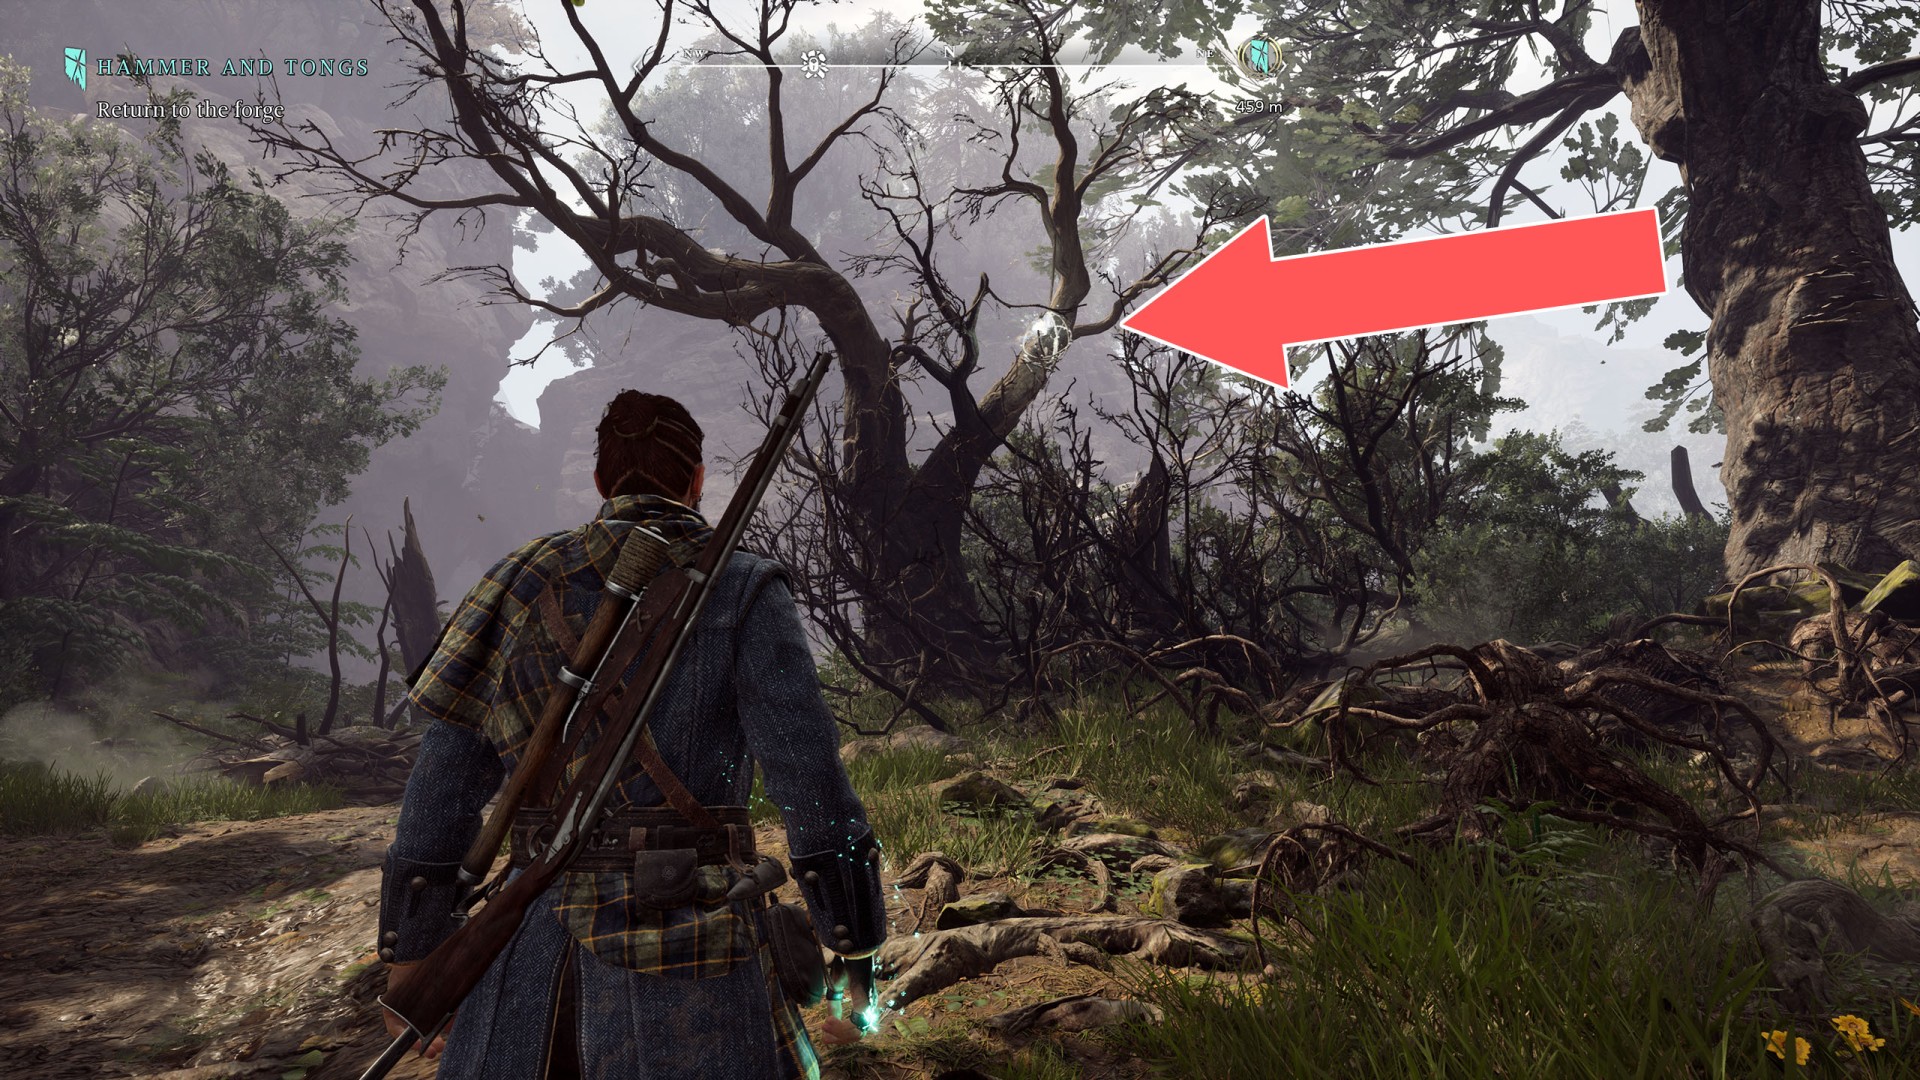
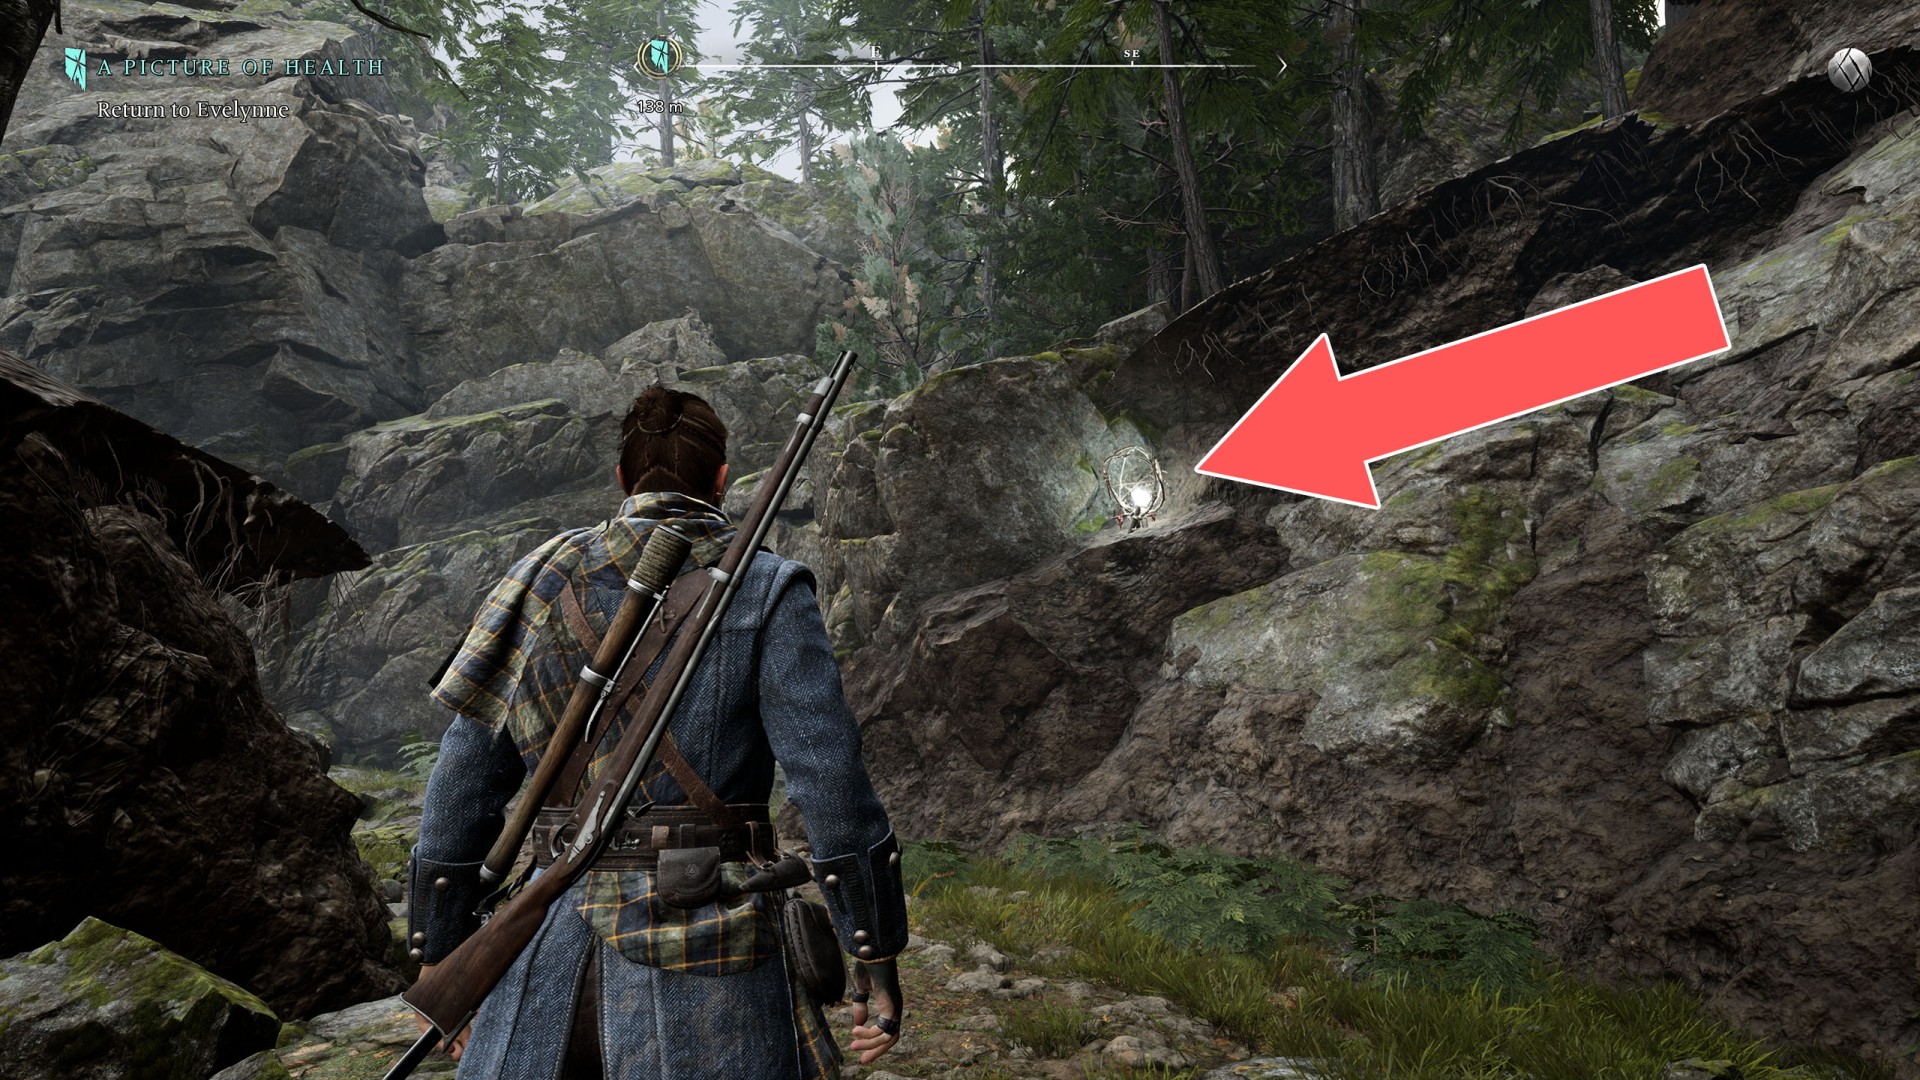
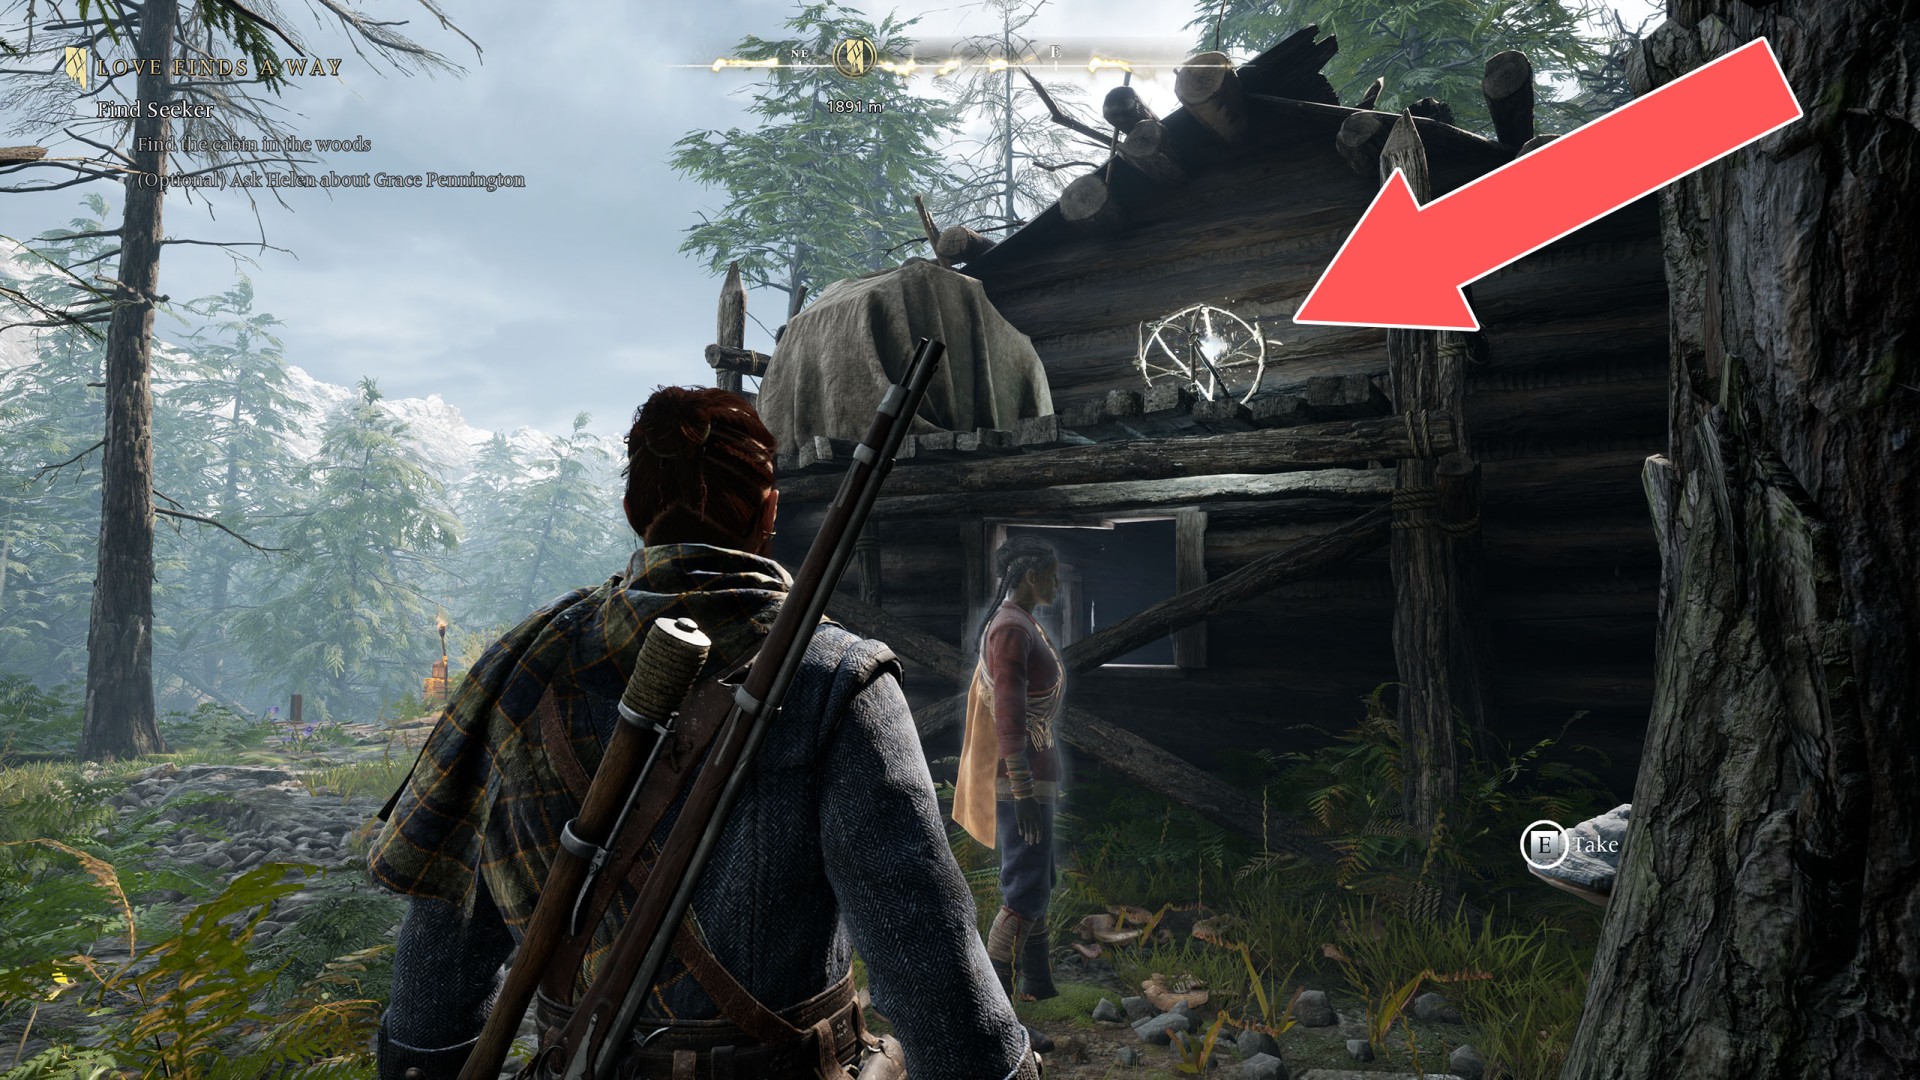
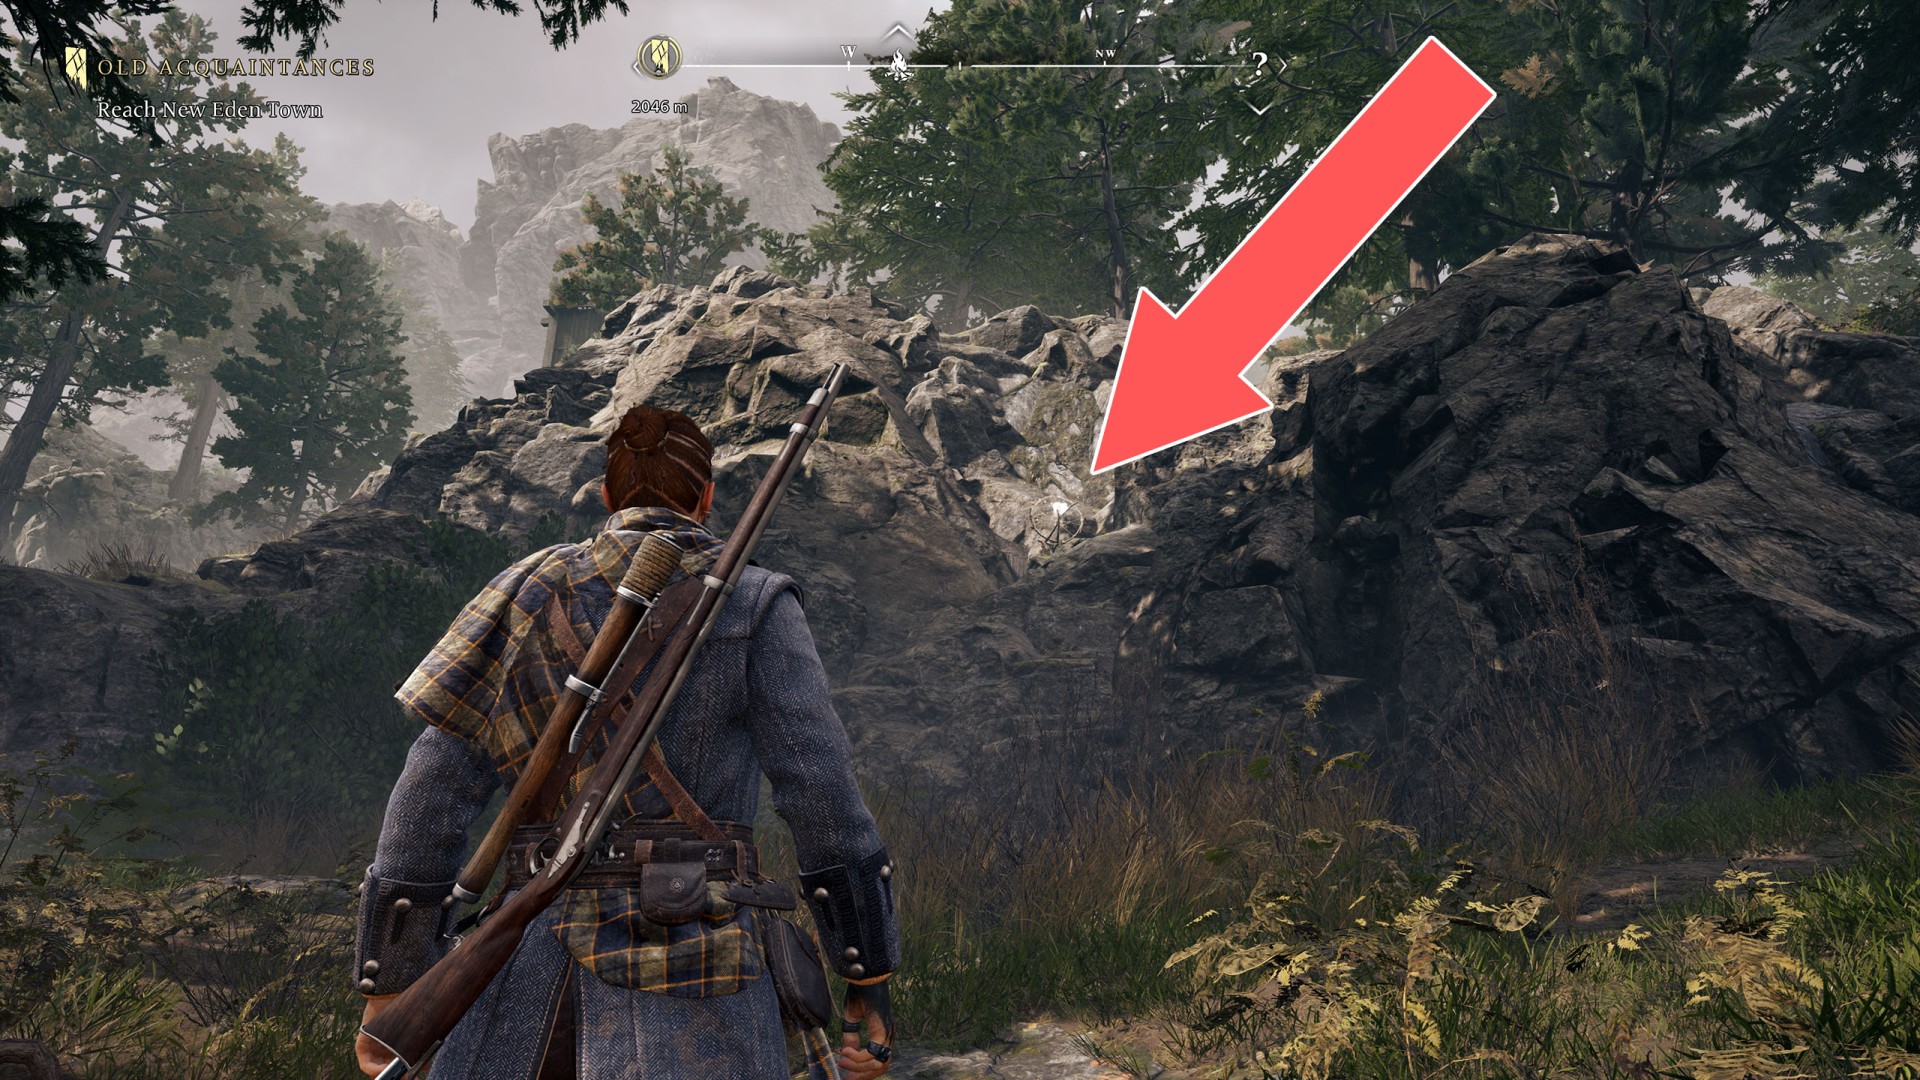
The Dark Woods Soul Grabber (2/38)▶ show the map ◀
When you pass this way for the first time you will not yet have a rifle so you will have to come back here later.
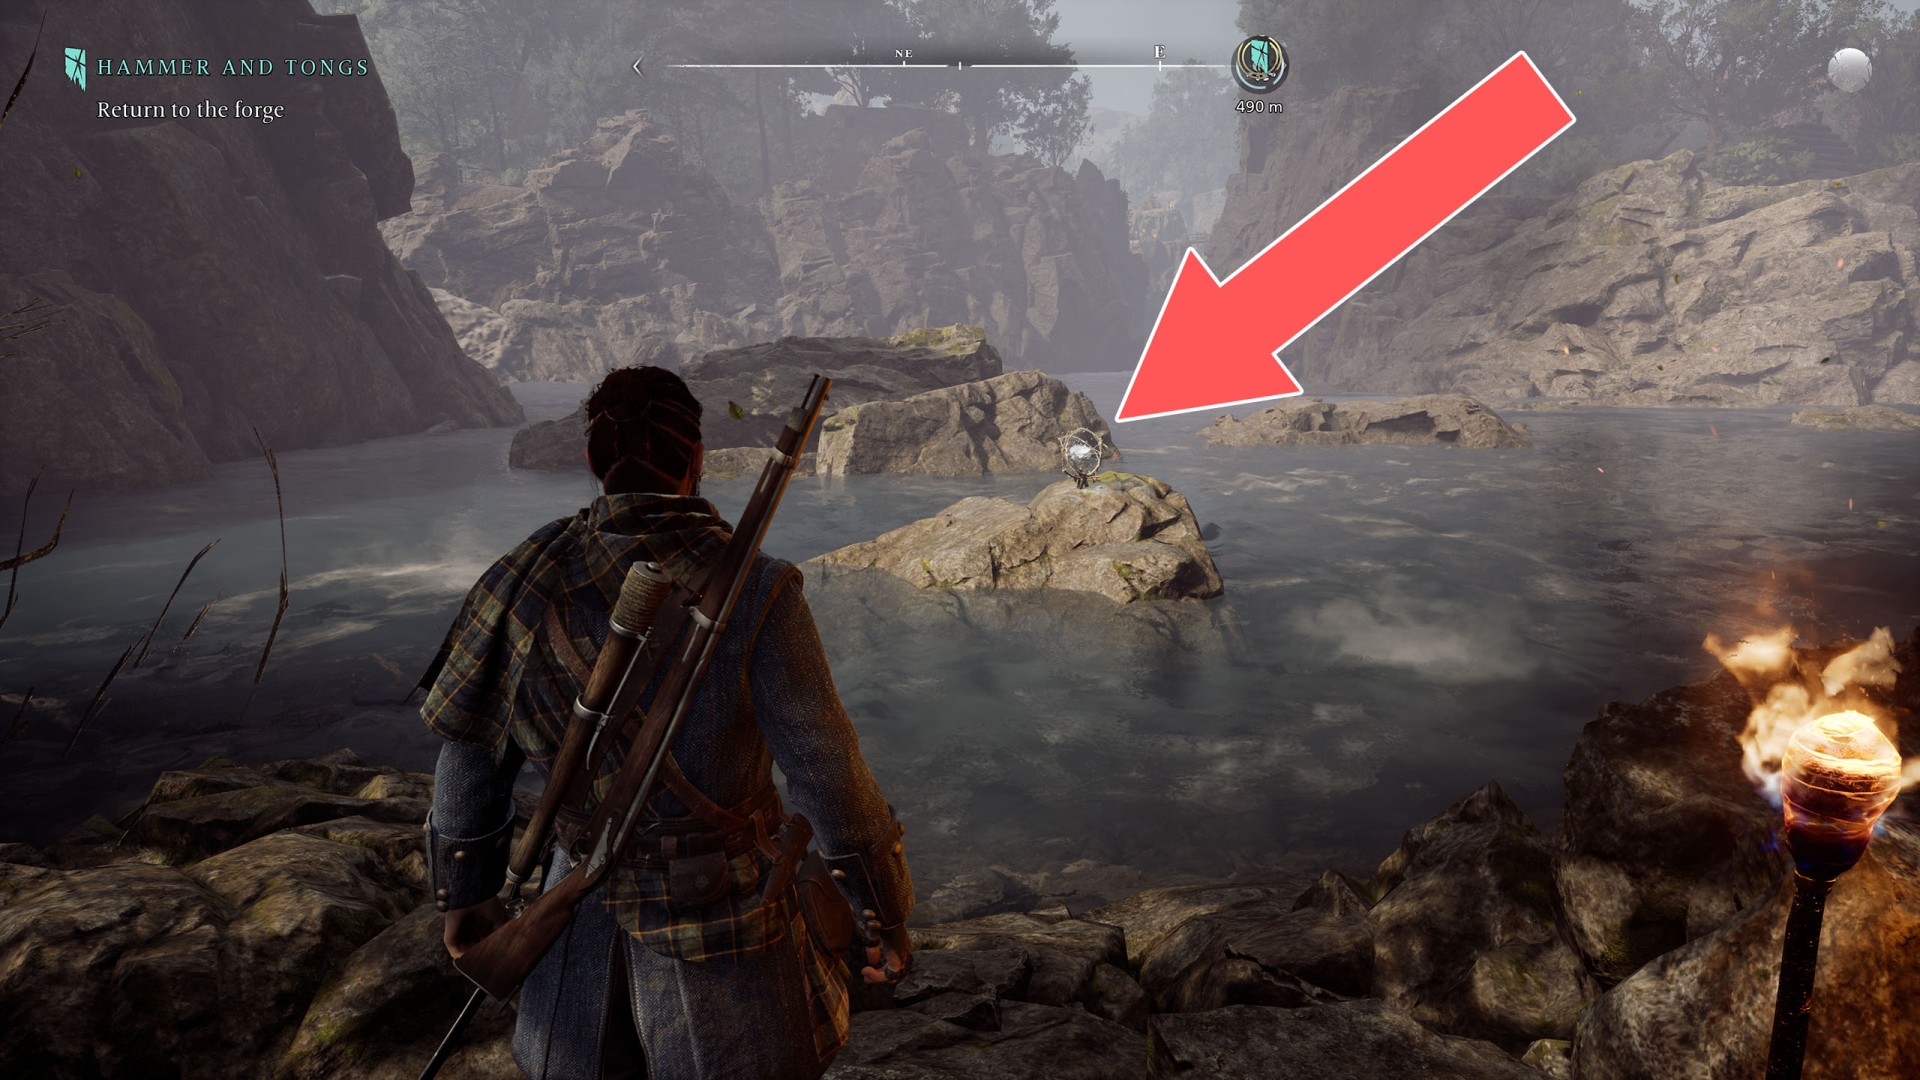
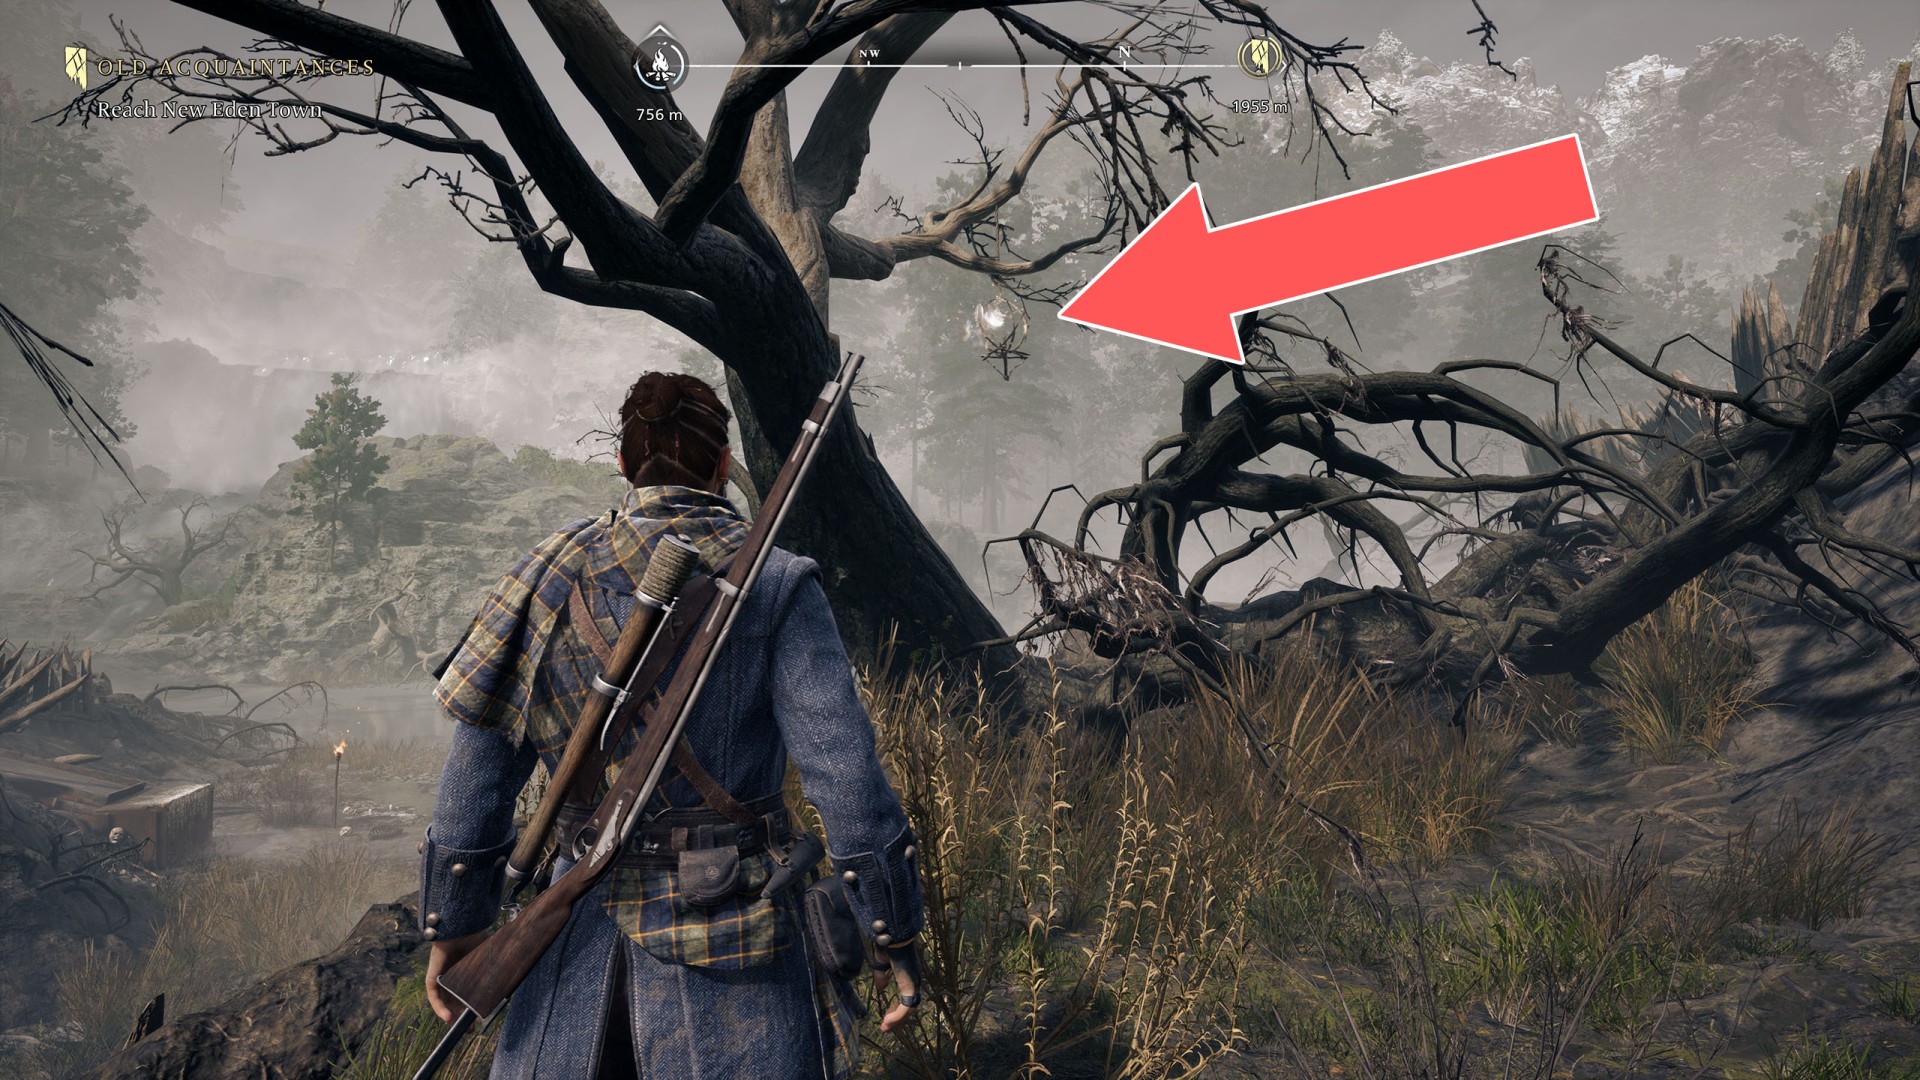
The Dark Woods Soul Grabber (3/38)▶ show the map ◀
When you pass this way for the first time you will not yet have a rifle so you will have to come back here later.
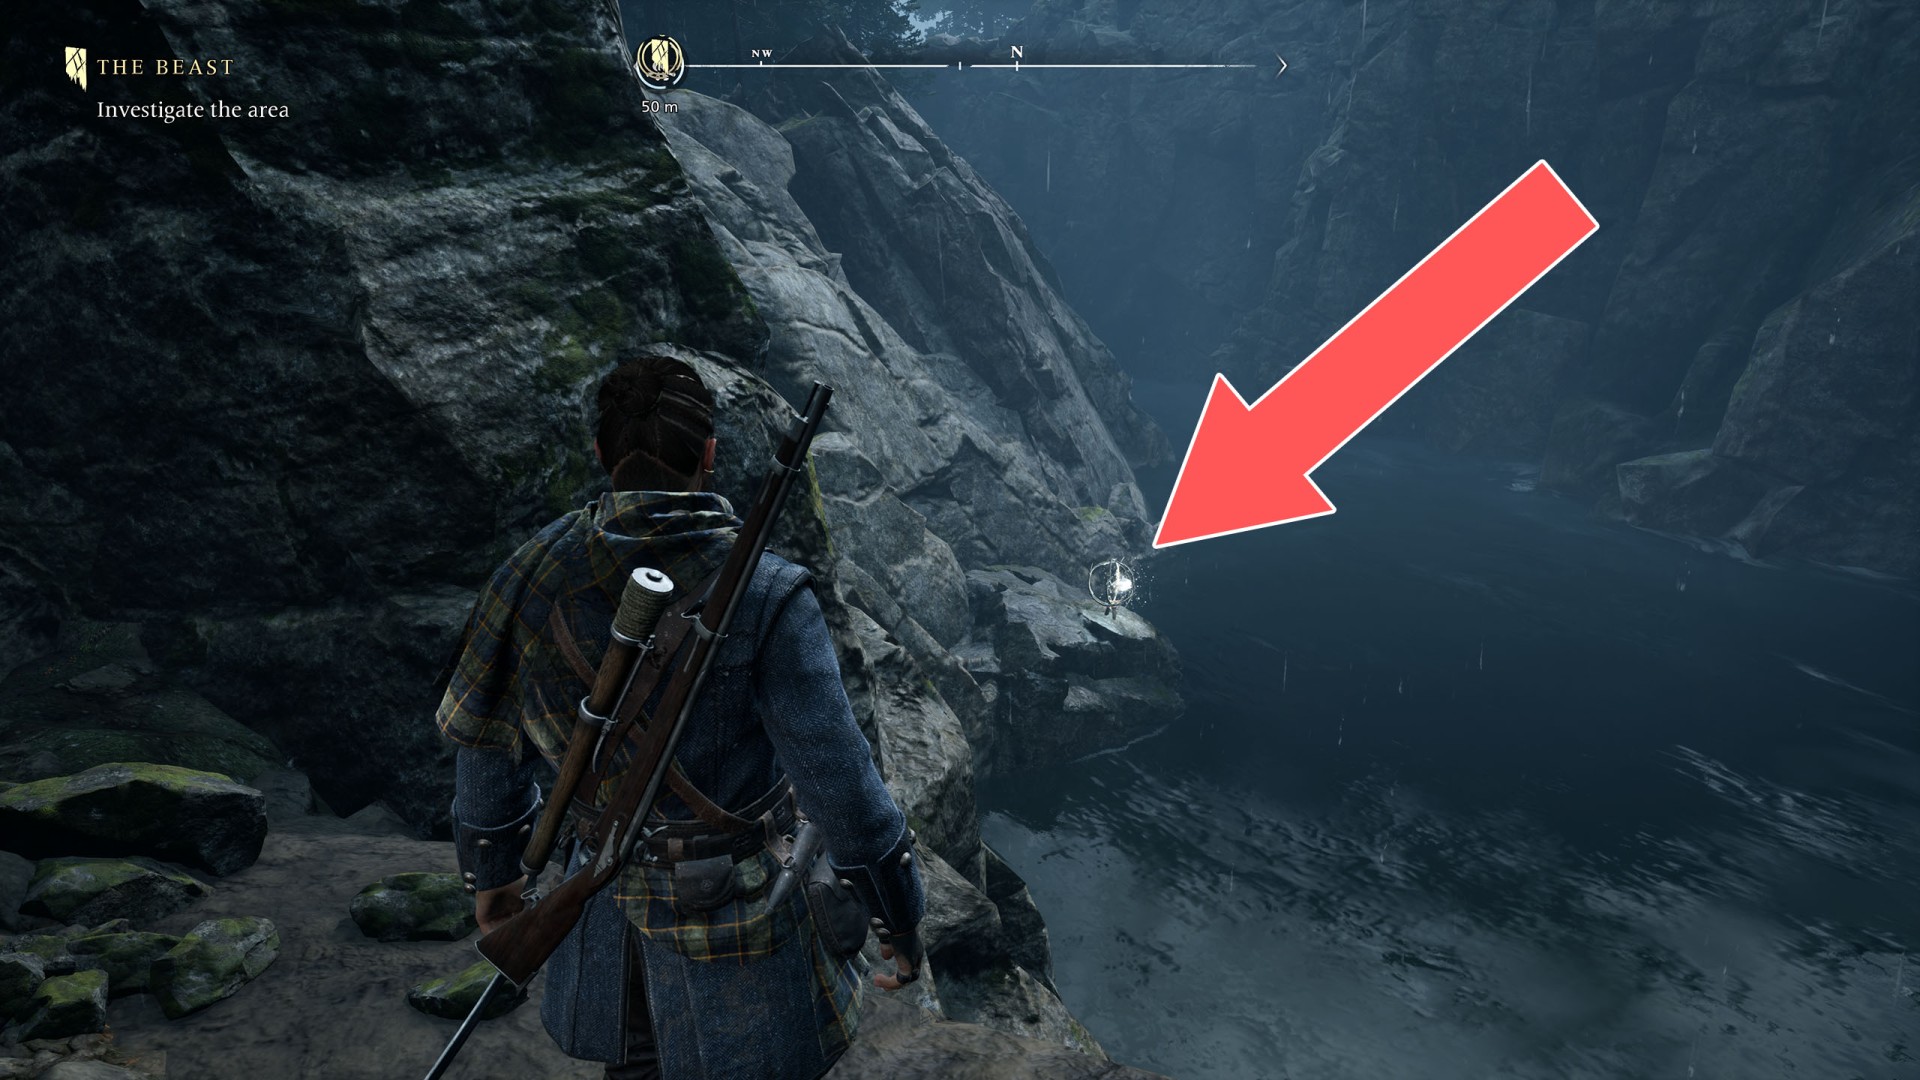
The Dark Woods Soul Grabber (4/38)▶ show the map ◀
When you pass this way for the first time you will not yet have a rifle so you will have to come back here later.
The Dark Woods Soul Grabber (5/38)▶ show the map ◀
When you pass this way for the first time you will not yet have a rifle so you will have to come back here later.
The Dark Woods Soul Grabber (6/38)▶ show the map ◀
The Dark Woods Soul Grabber (7/38)▶ show the map ◀
The Dark Woods Soul Grabber (8/38)▶ show the map ◀

The Dark Woods Soul Grabber (9/38)▶ show the map ◀
The Dark Woods Soul Grabber (10/38)▶ show the map ◀
The Dark Woods Soul Grabber (11/38)▶ show the map ◀
The Dark Woods Soul Grabber (12/38)▶ show the map ◀
The Dark Woods Soul Grabber (13/38)▶ show the map ◀
The Dark Woods Soul Grabber (14/38)▶ show the map ◀
The Dark Woods Soul Grabber (15/38)▶ show the map ◀
The Dark Woods Soul Grabber (16/38)▶ show the map ◀
The Dark Woods Soul Grabber (17/38)▶ show the map ◀
The Dark Woods Soul Grabber (18/38)▶ show the map ◀
The Dark Woods Soul Grabber (19/38)▶ show the map ◀
The Dark Woods Soul Grabber (20/38)▶ show the map ◀

The Dark Woods Soul Grabber (21/38)▶ show the map ◀
The Dark Woods Soul Grabber (22/38)▶ show the map ◀
The Dark Woods Soul Grabber (23/38)▶ show the map ◀

The Dark Woods Soul Grabber (24/38)▶ show the map ◀
To get here you need to travel through the "The Dark Woods Void Breach (1/2)".
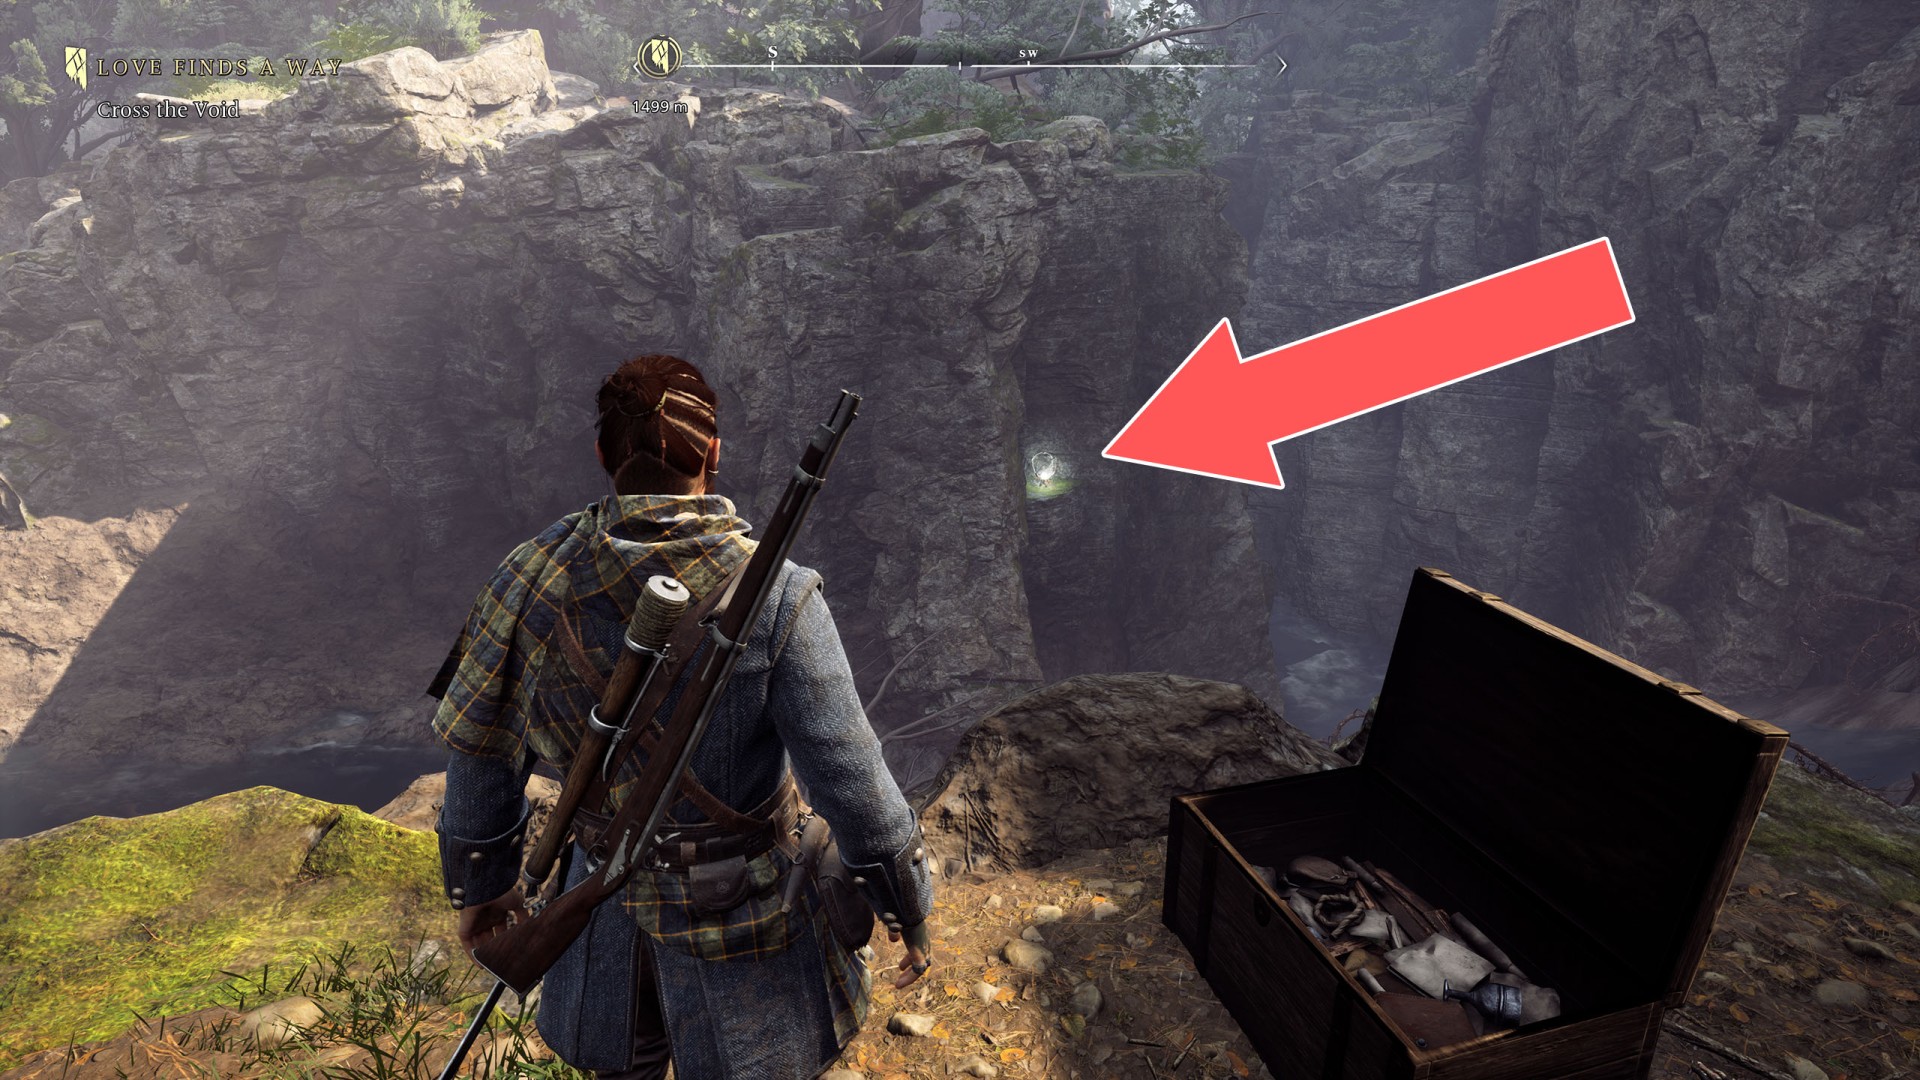
The Dark Woods Soul Grabber (25/38)▶ show the map ◀

The Dark Woods Soul Grabber (26/38)▶ show the map ◀
The Dark Woods Soul Grabber (27/38)▶ show the map ◀
The Dark Woods Soul Grabber (28/38)▶ show the map ◀
The Dark Woods Soul Grabber (29/38)▶ show the map ◀
The Dark Woods Soul Grabber (30/38)▶ show the map ◀
The Dark Woods Soul Grabber (31/38)▶ show the map ◀
The Dark Woods Soul Grabber (32/38)▶ show the map ◀
The Dark Woods Soul Grabber (33/38)▶ show the map ◀
The Dark Woods Soul Grabber (34/38)▶ show the map ◀
The Dark Woods Soul Grabber (35/38)▶ show the map ◀
The Dark Woods Soul Grabber (36/38)▶ show the map ◀
The Dark Woods Soul Grabber (38/38)▶ show the map ◀
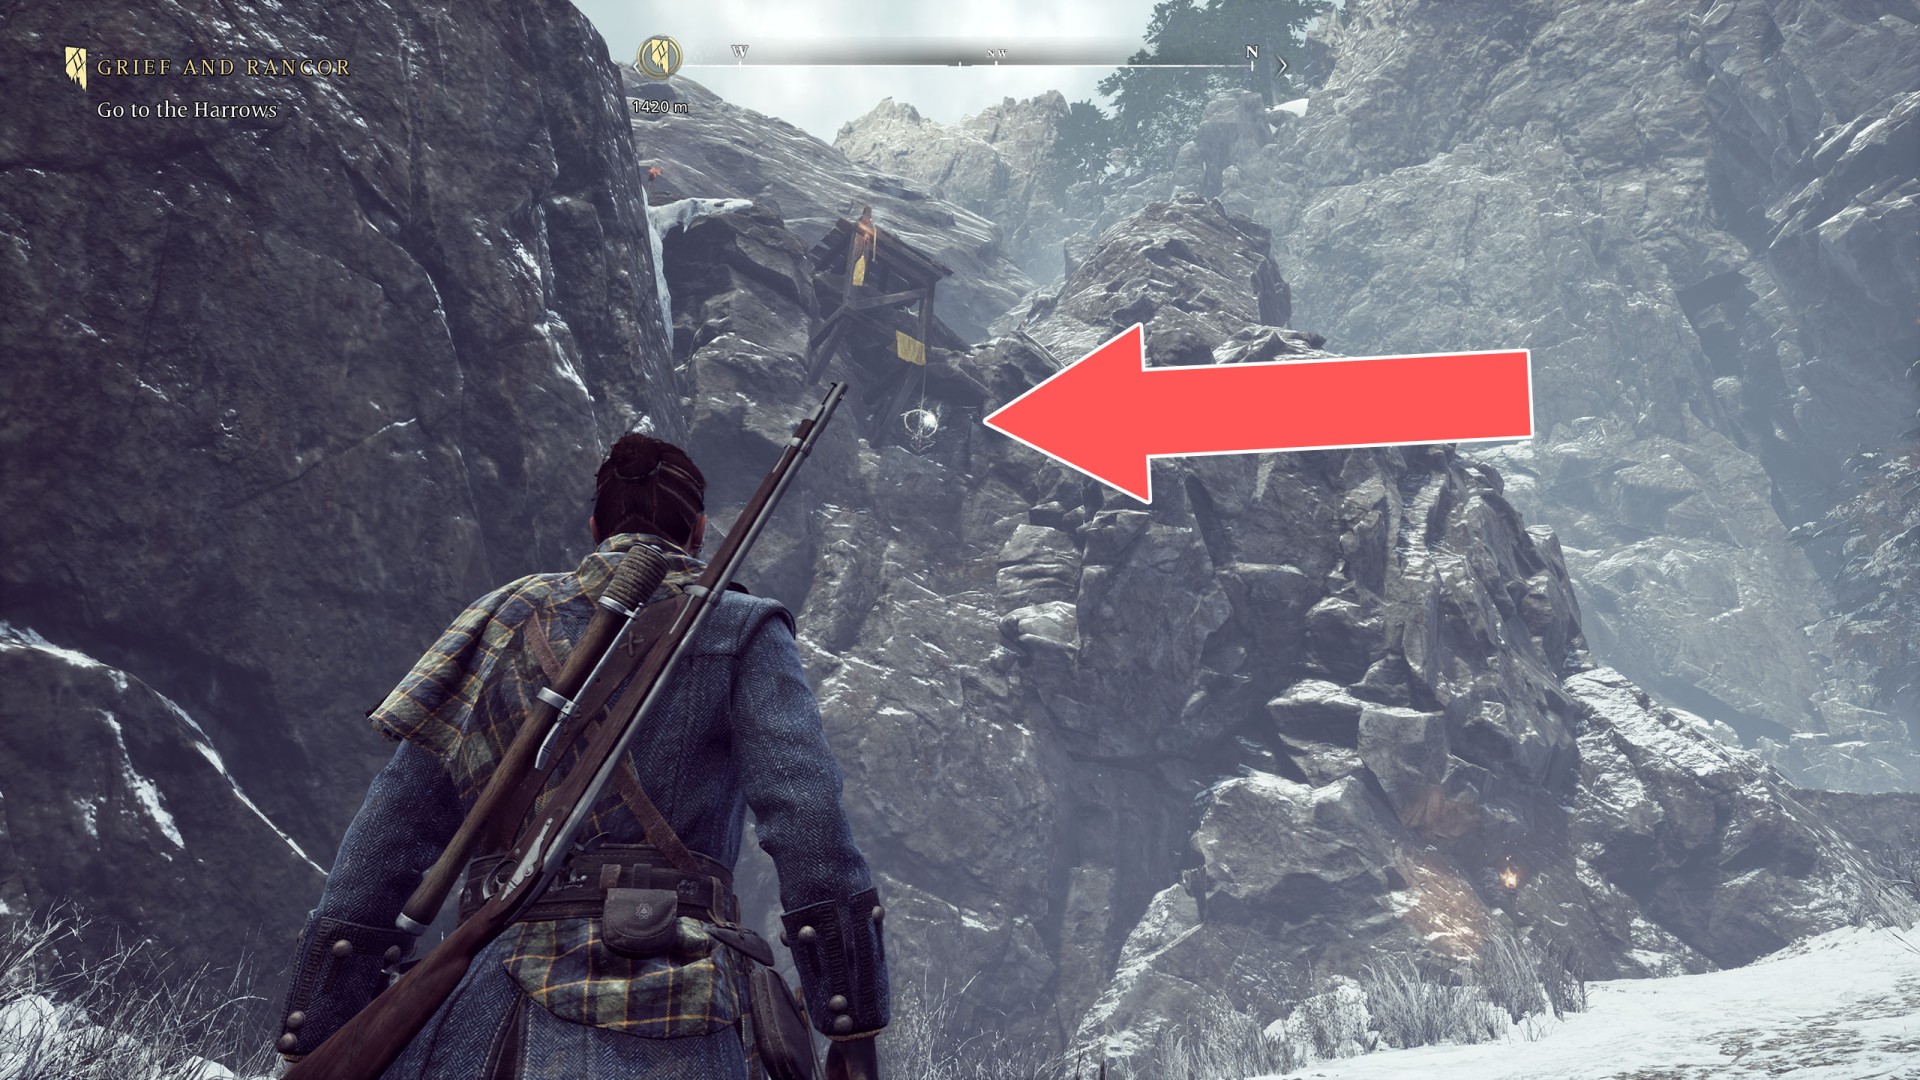
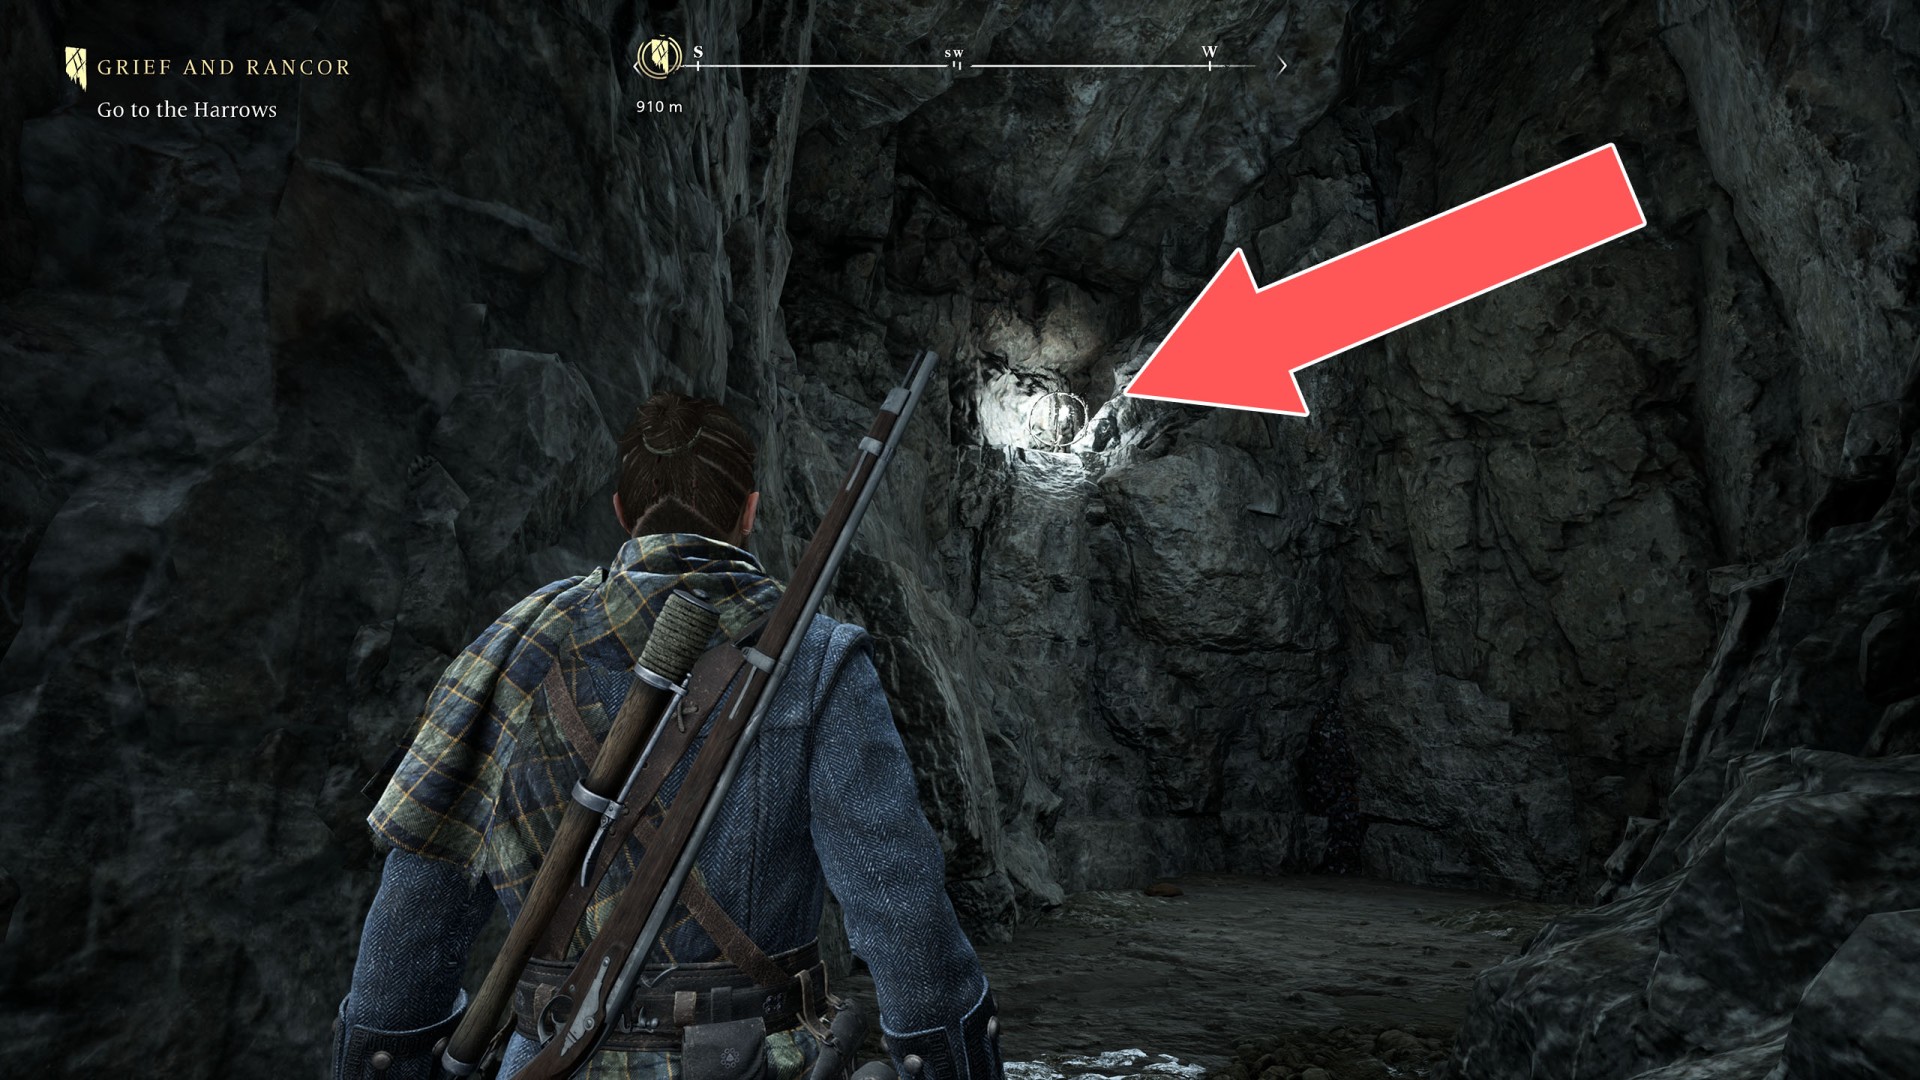
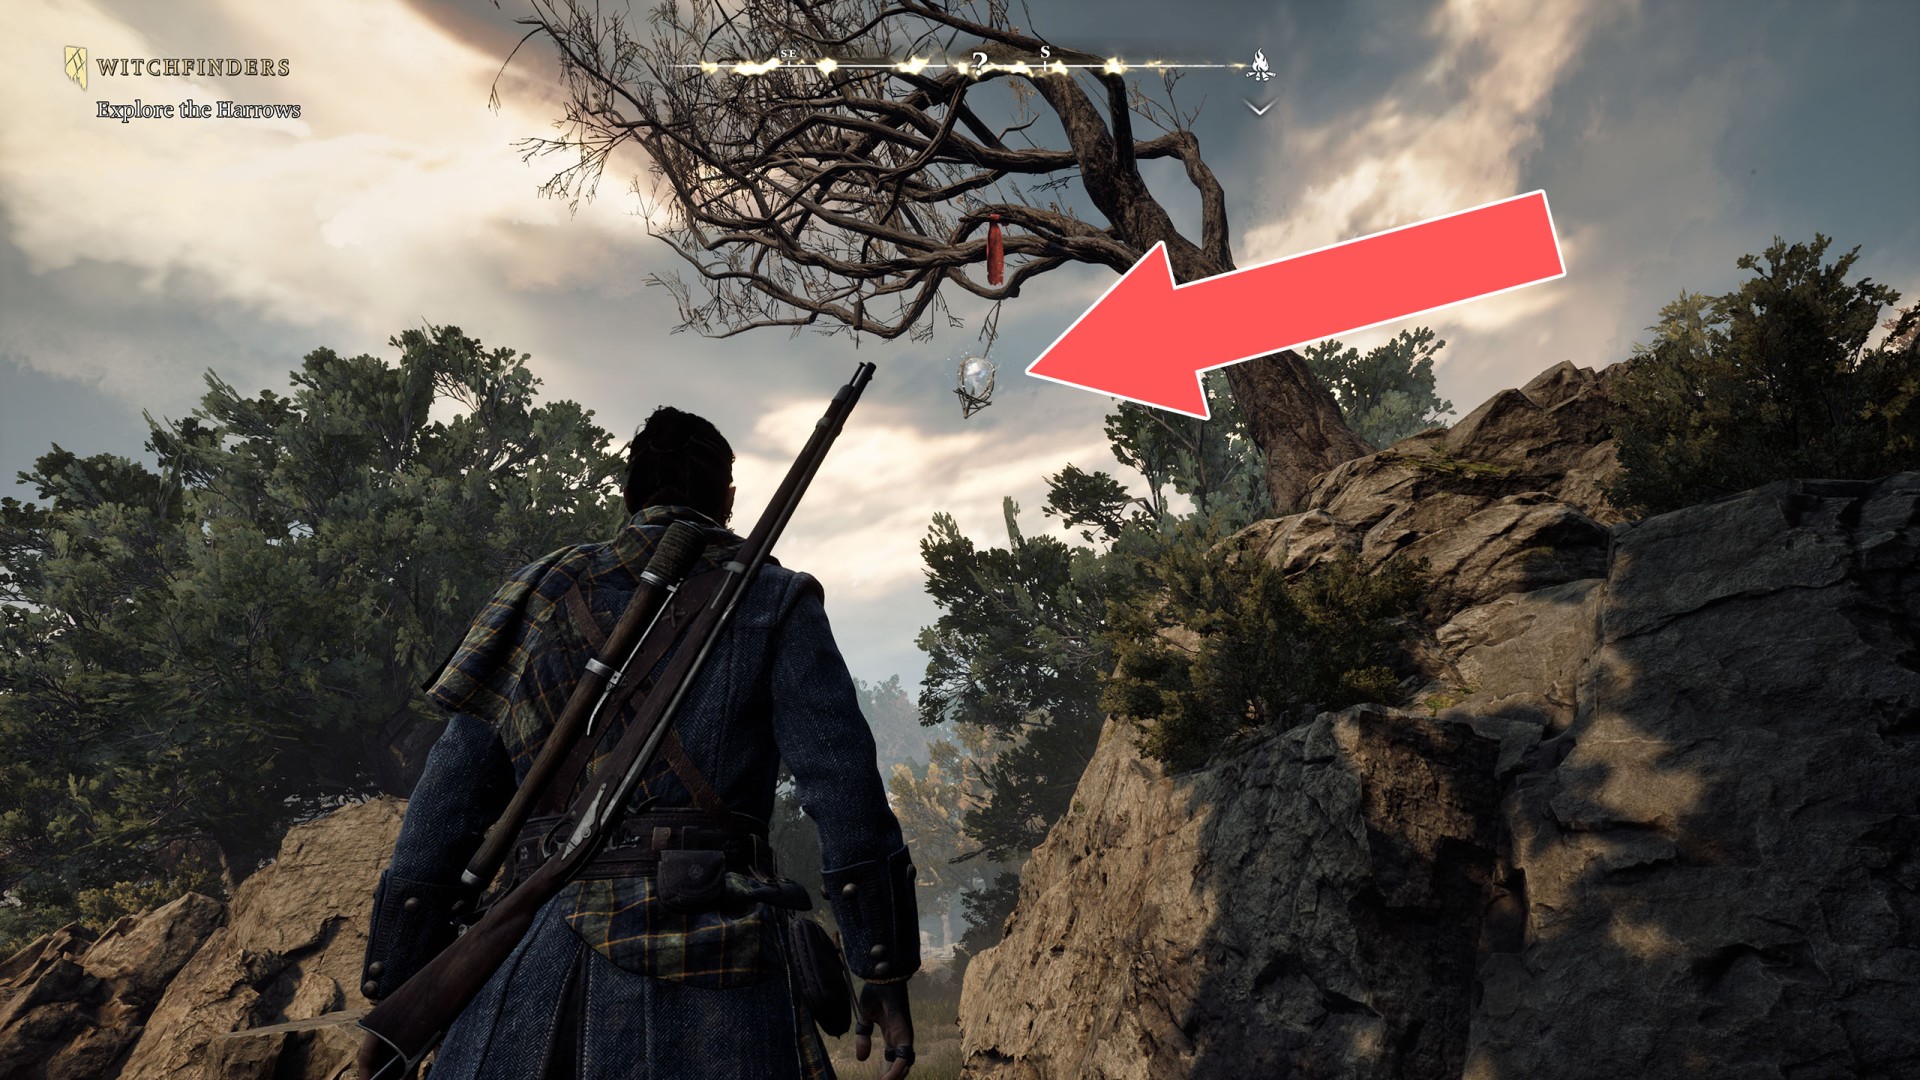
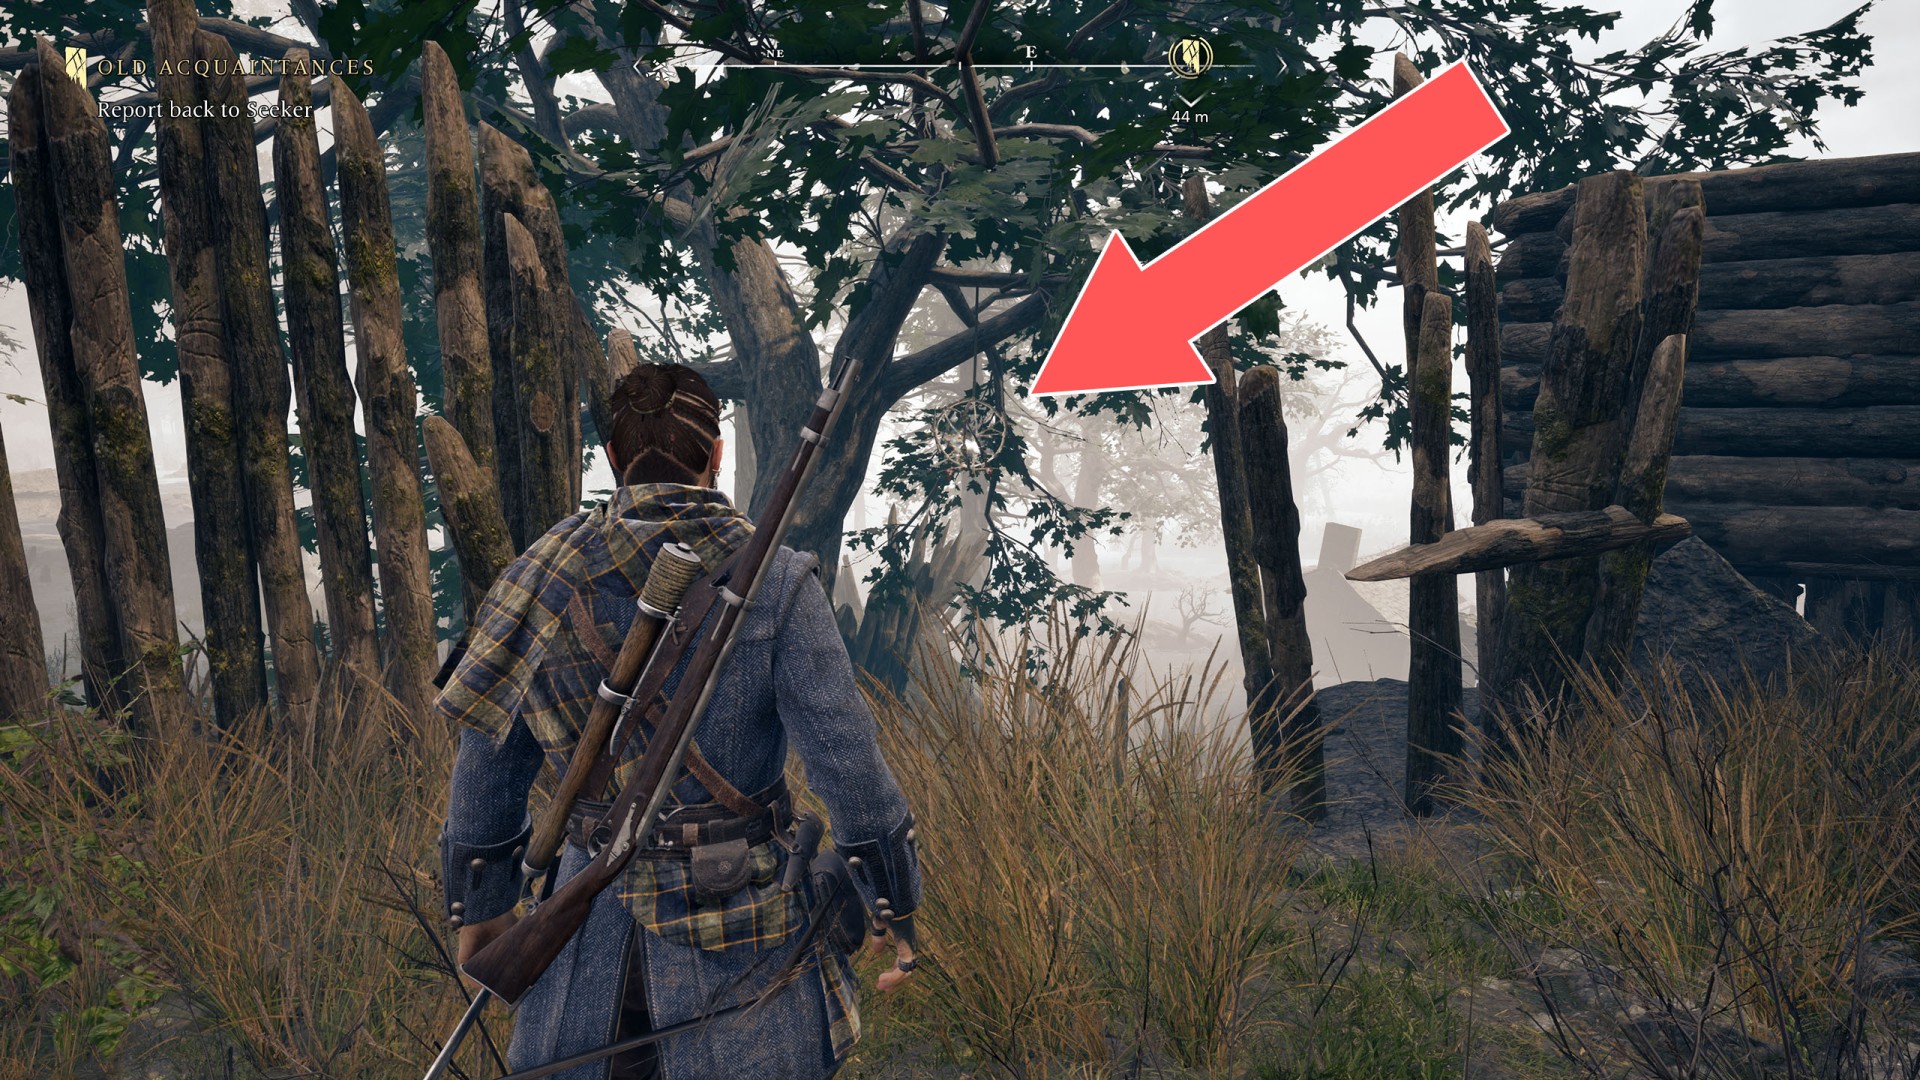
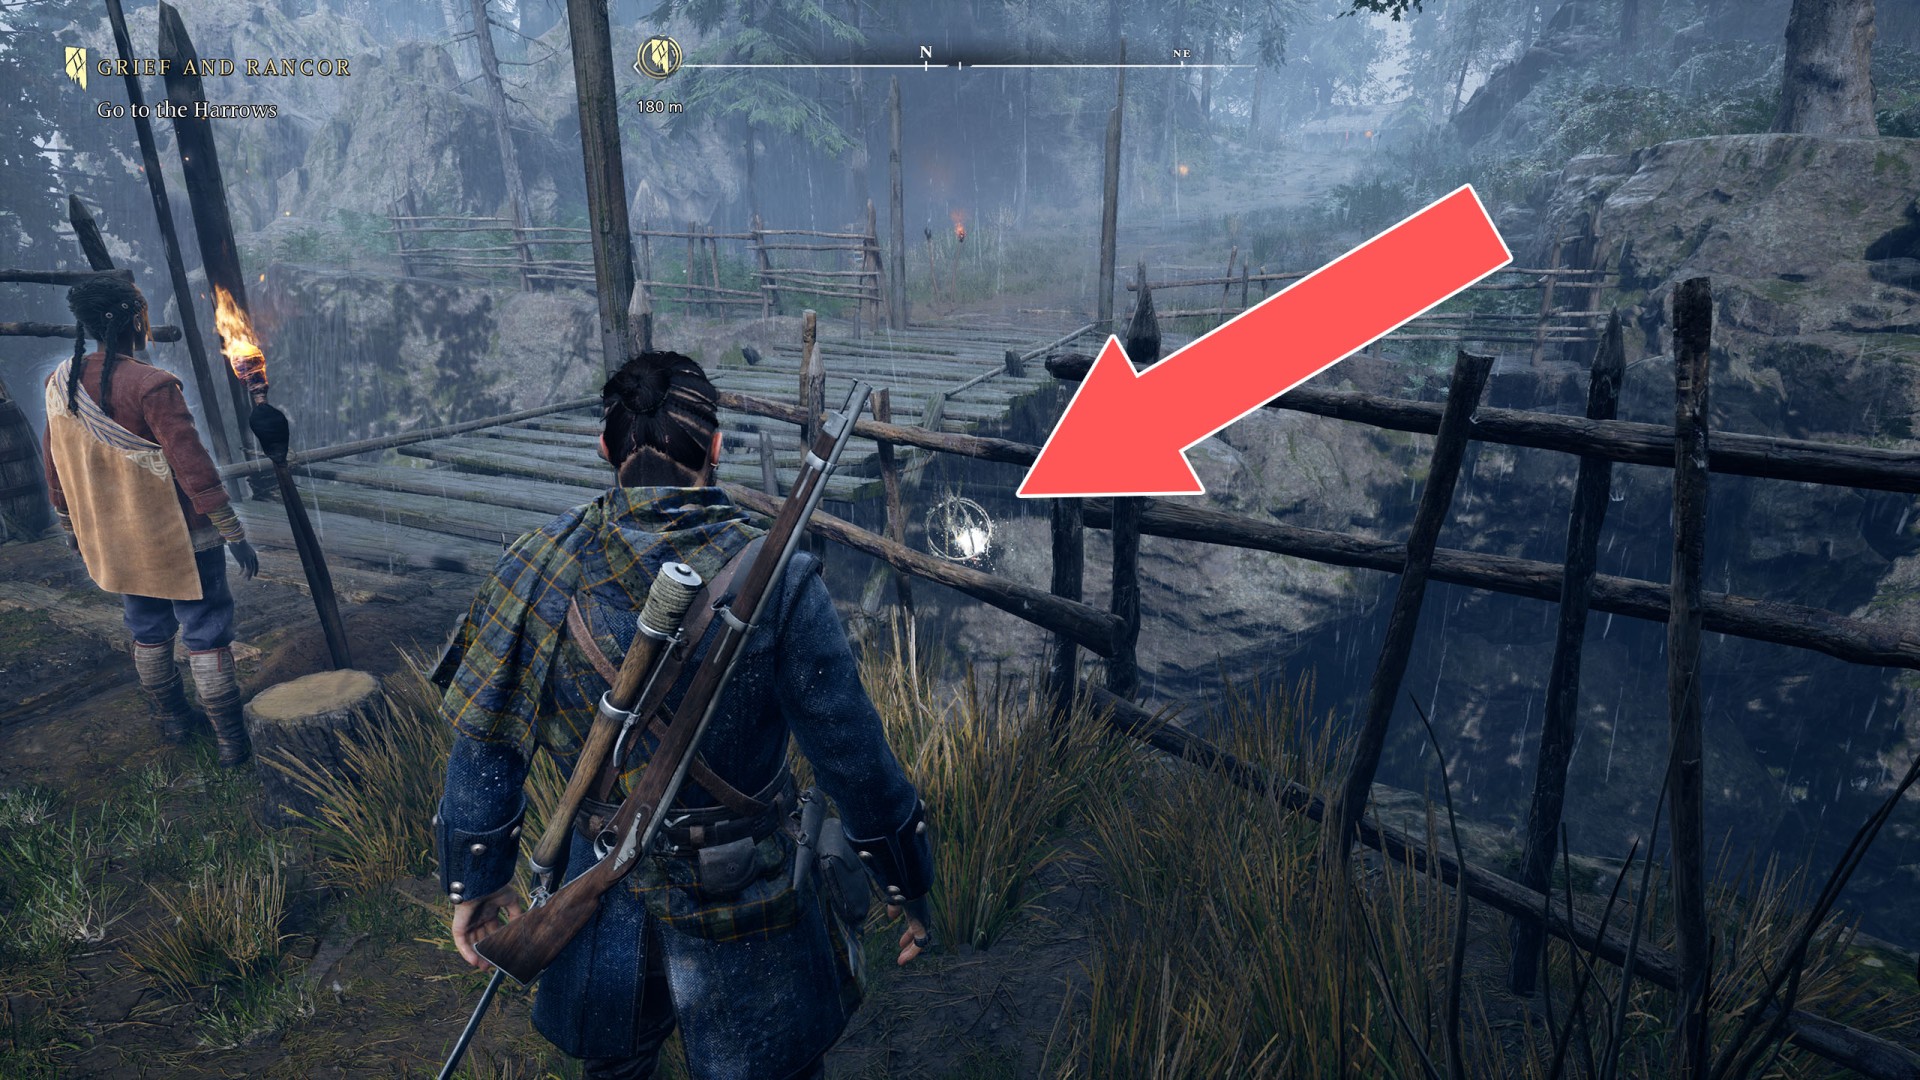
The Harrows Soul Grabber (1/42)▶ show the map ◀
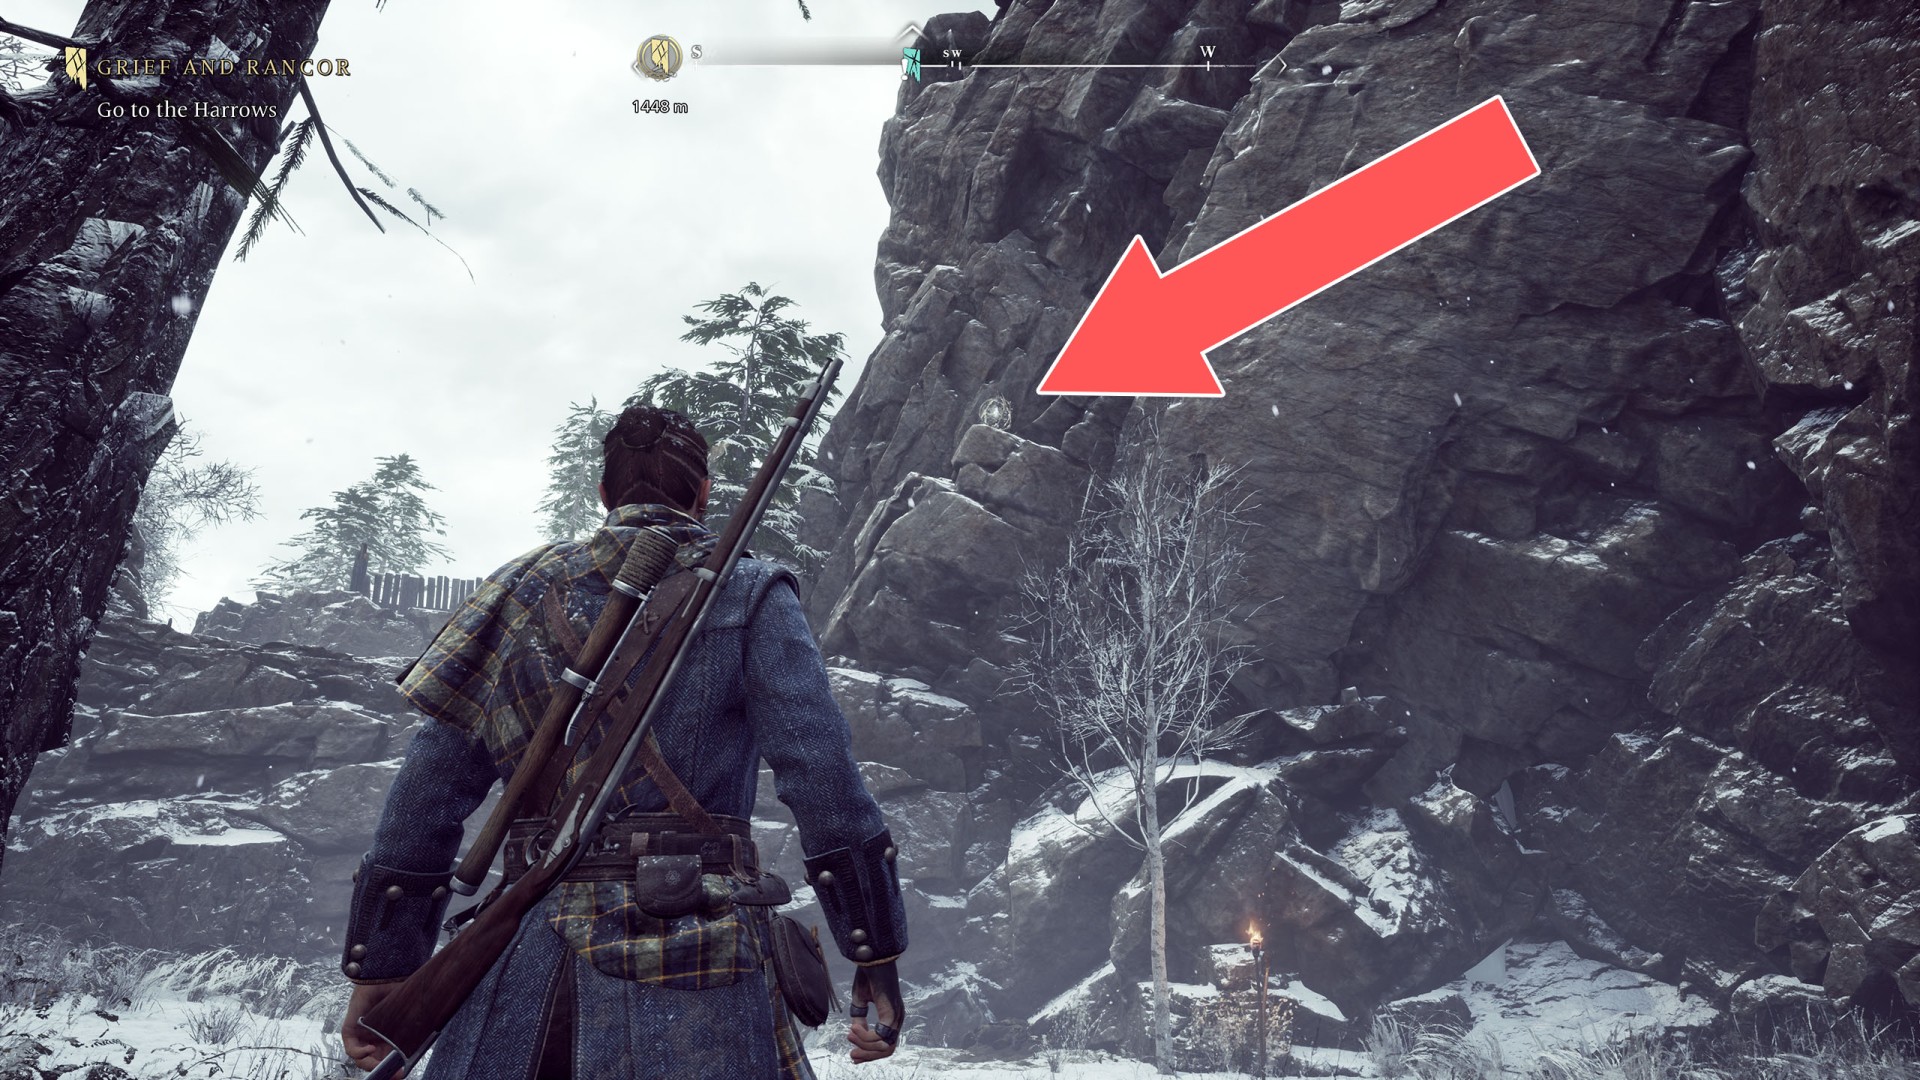
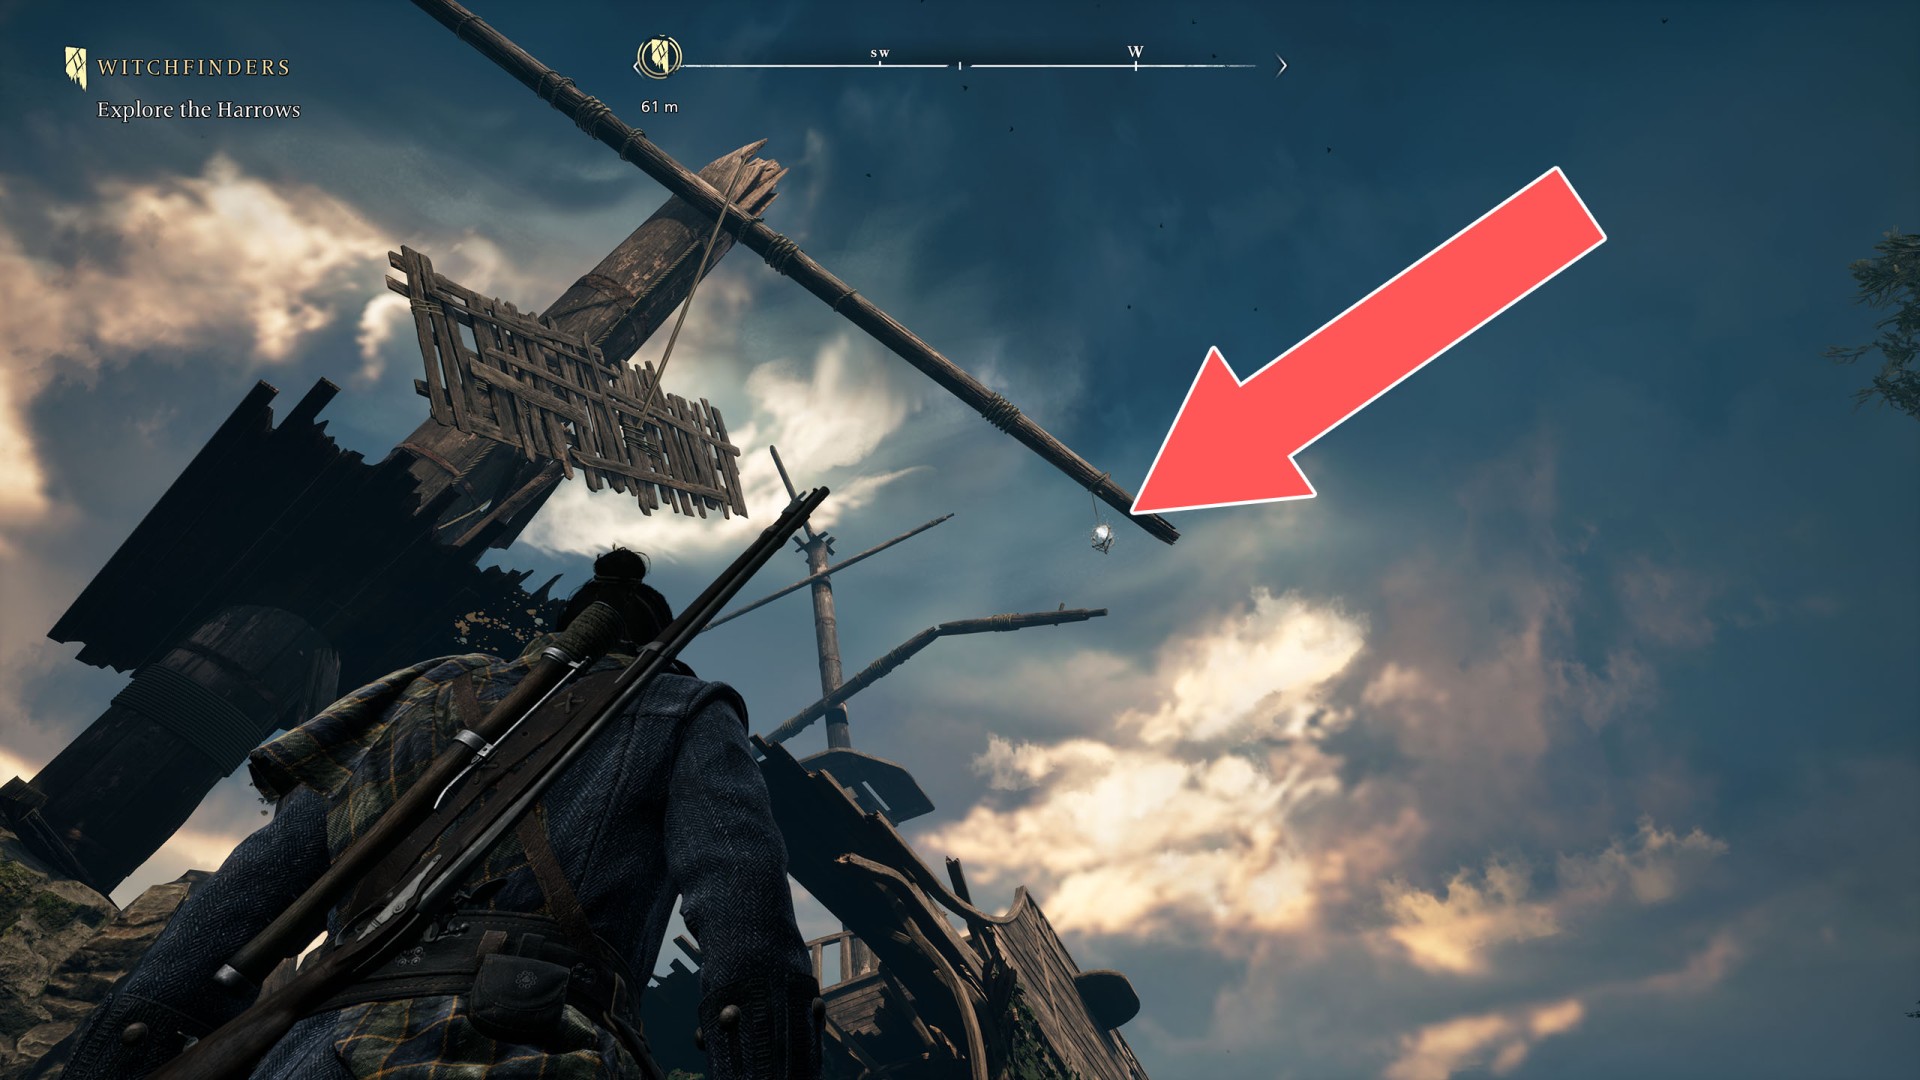
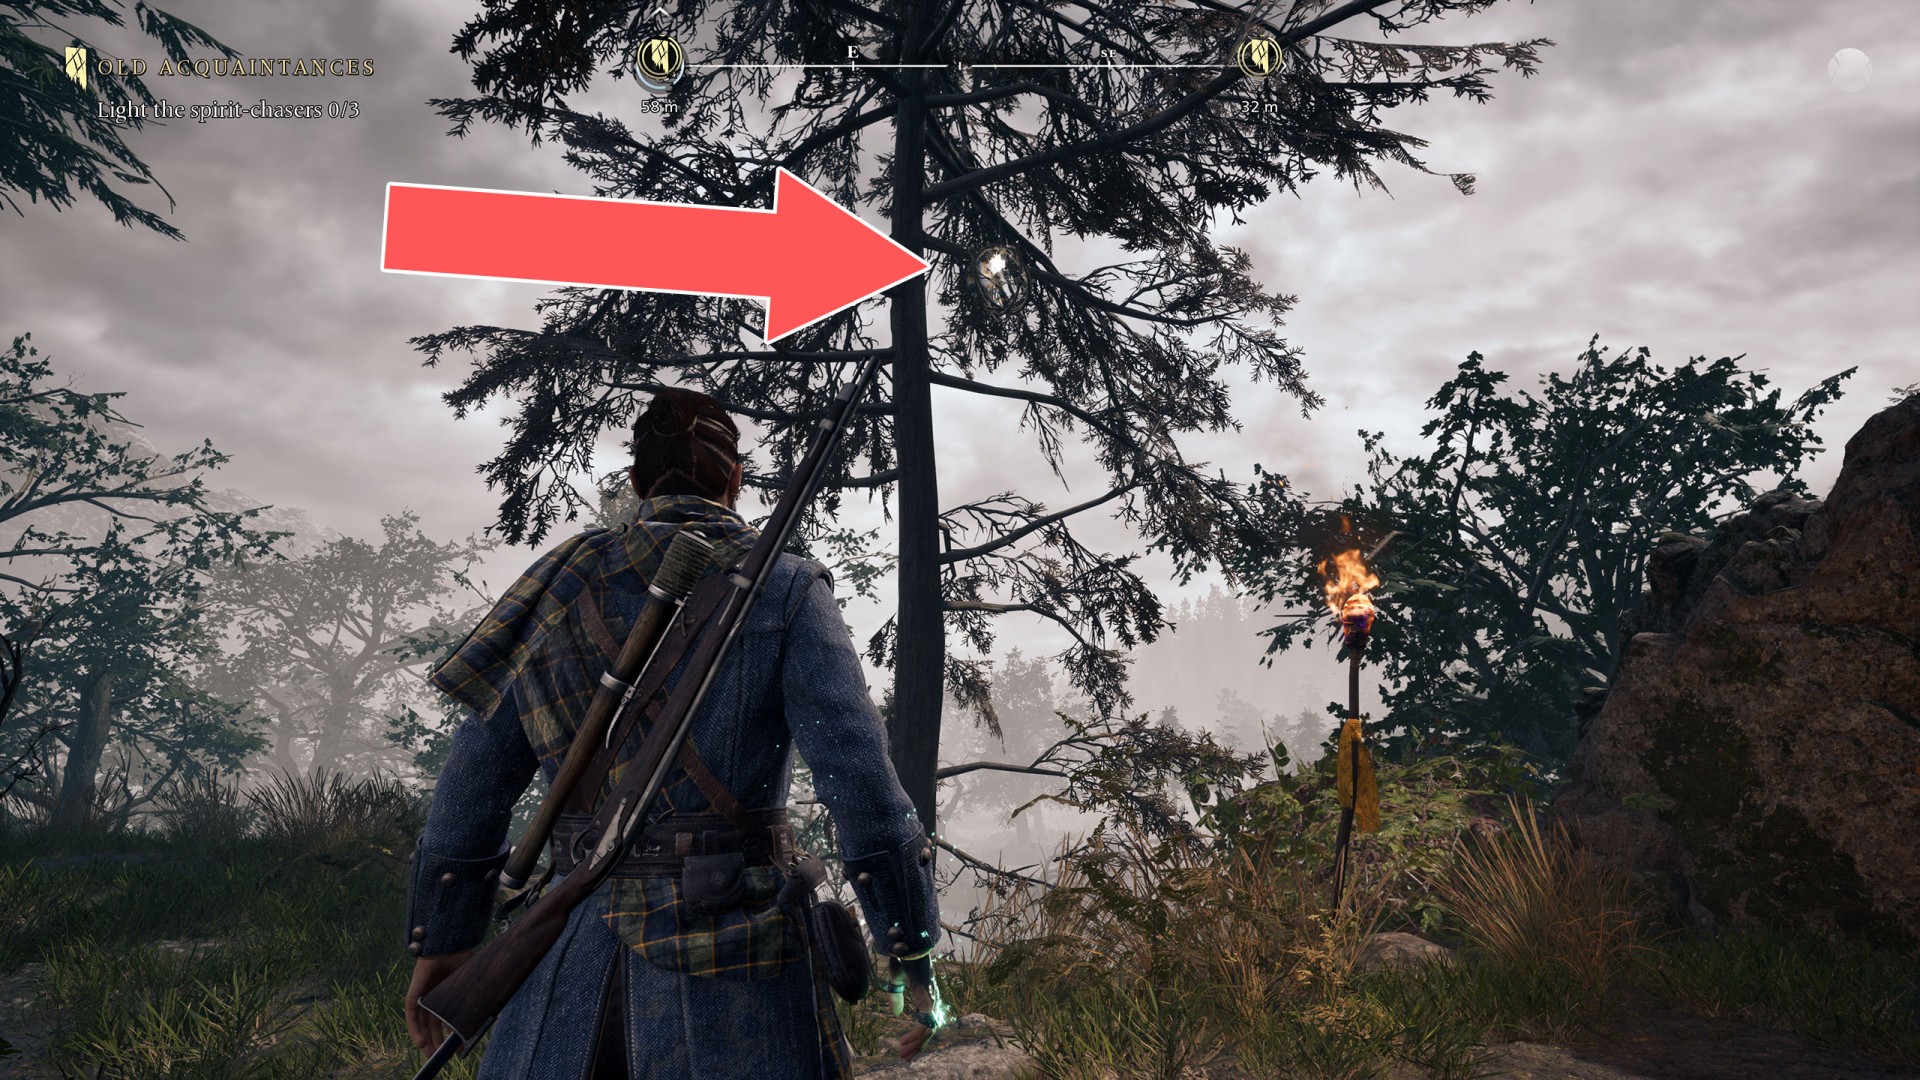
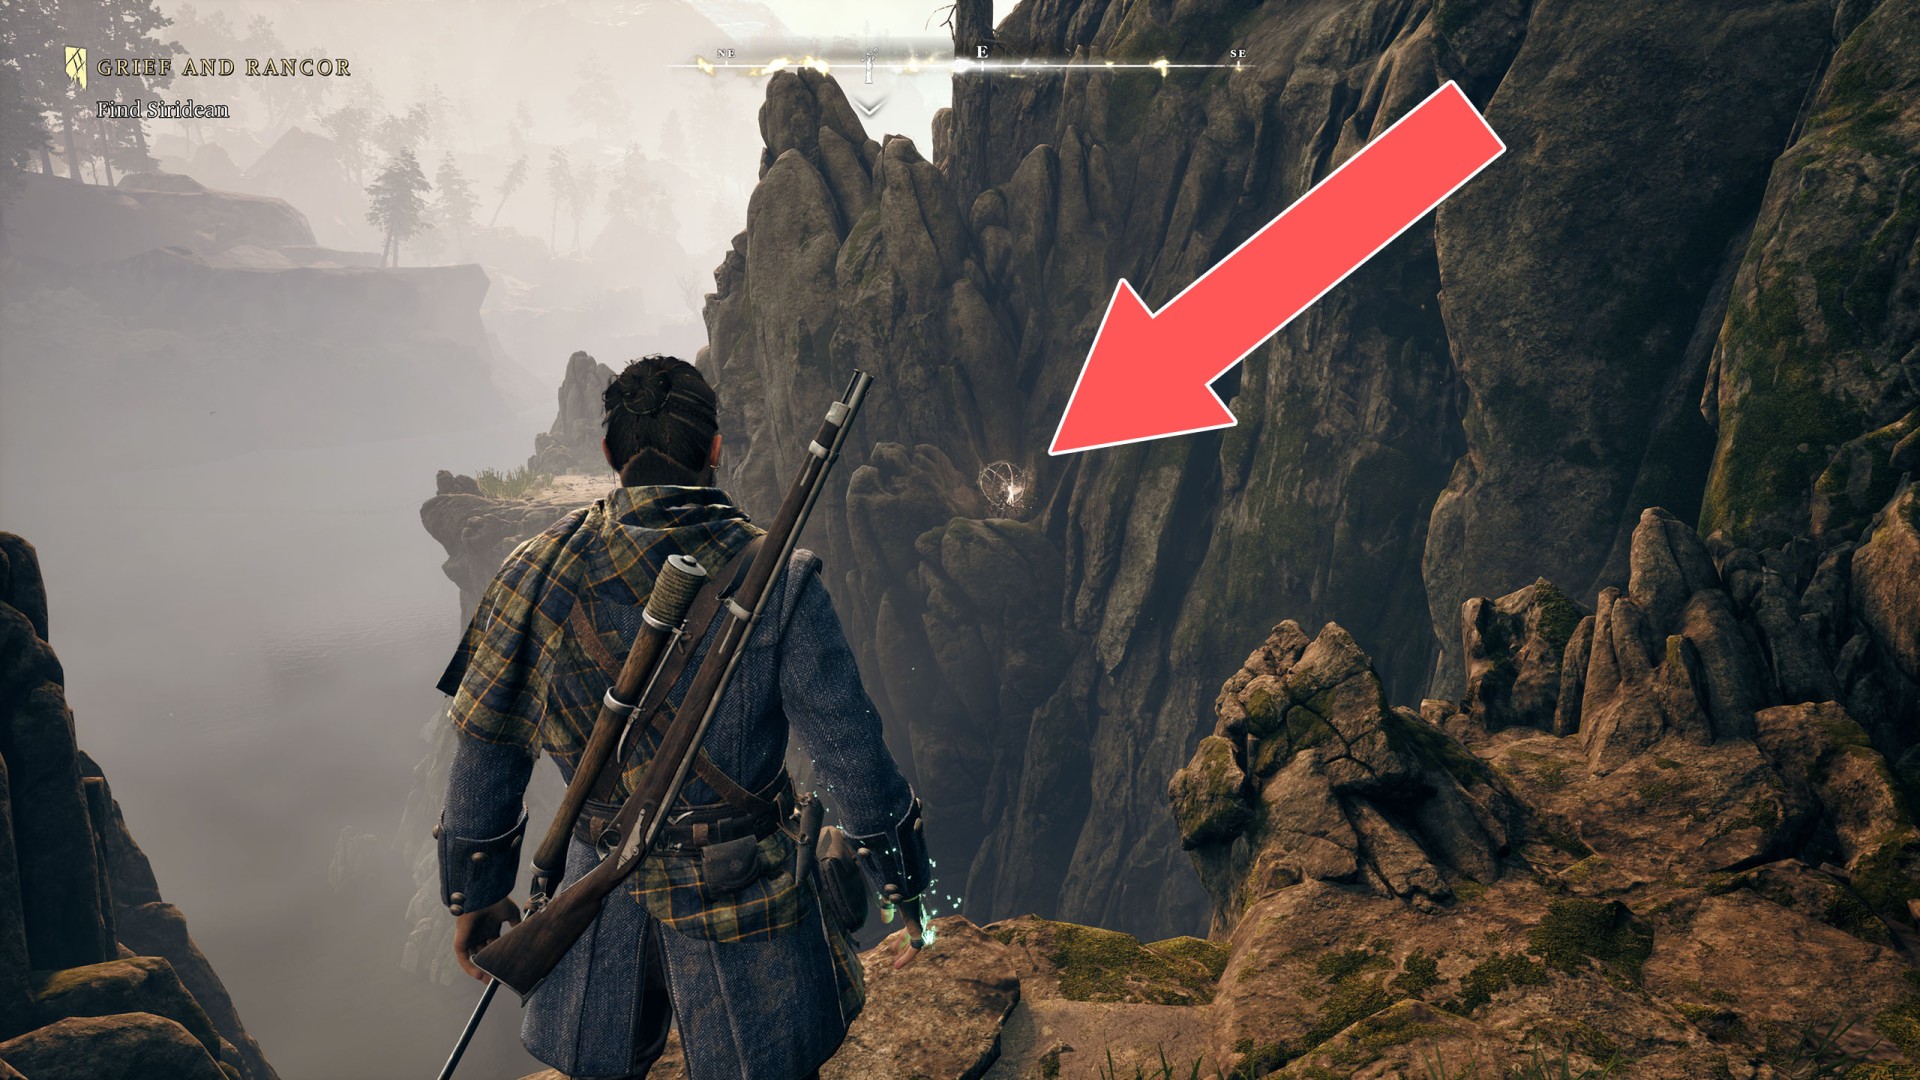
The Harrows Soul Grabber (2/42)▶ show the map ◀
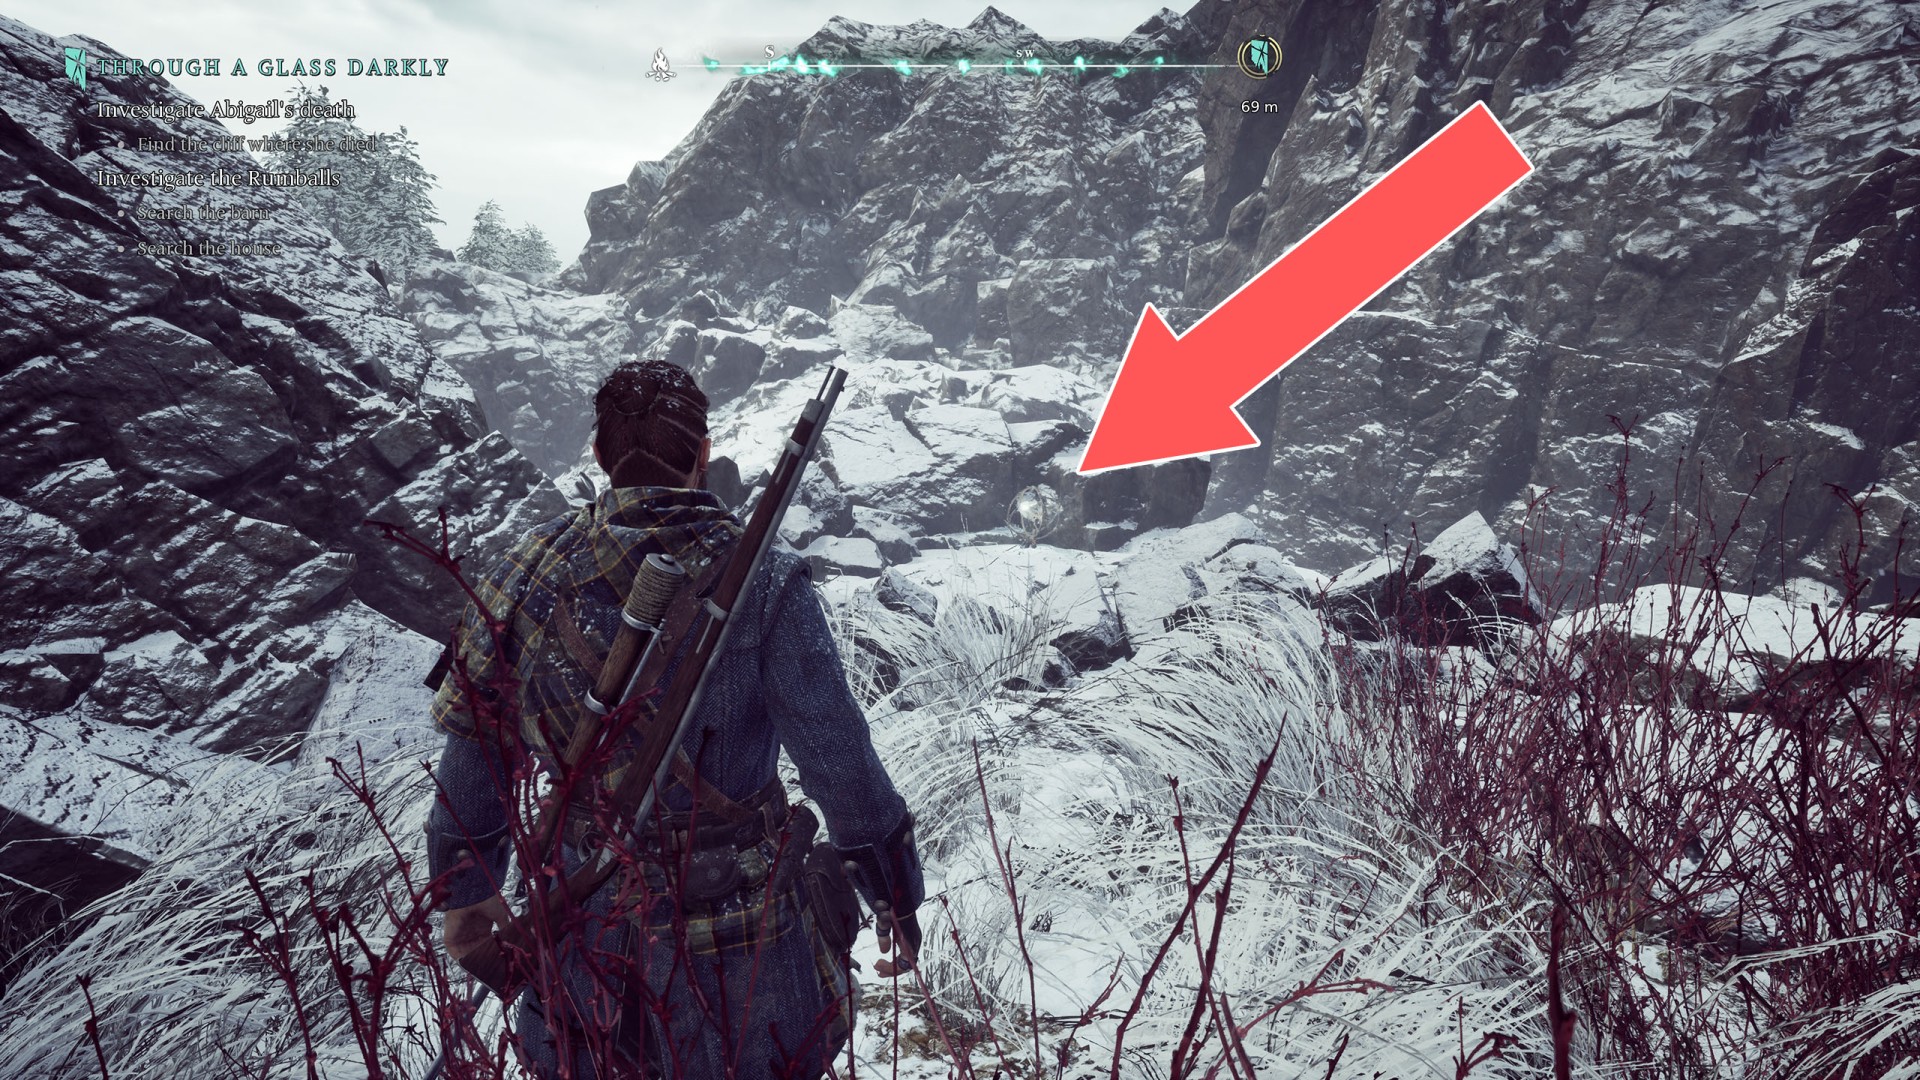
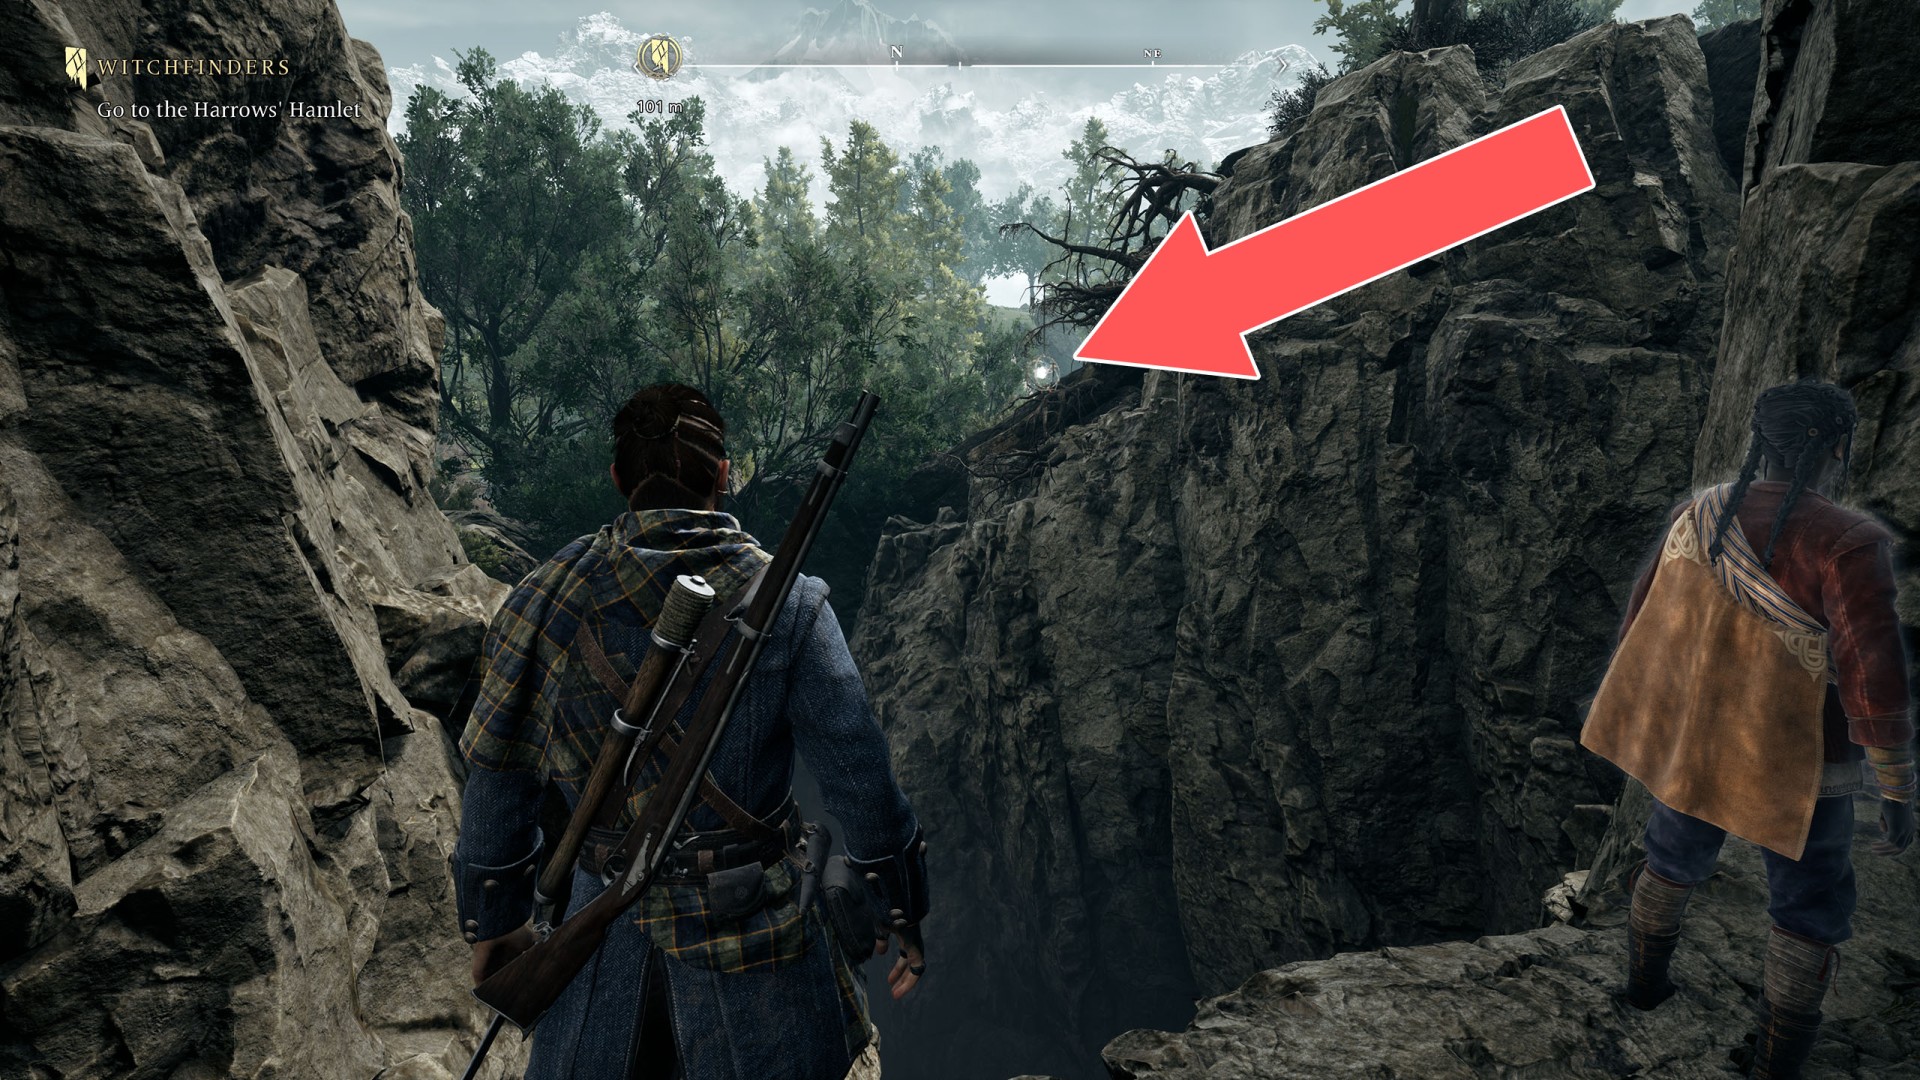
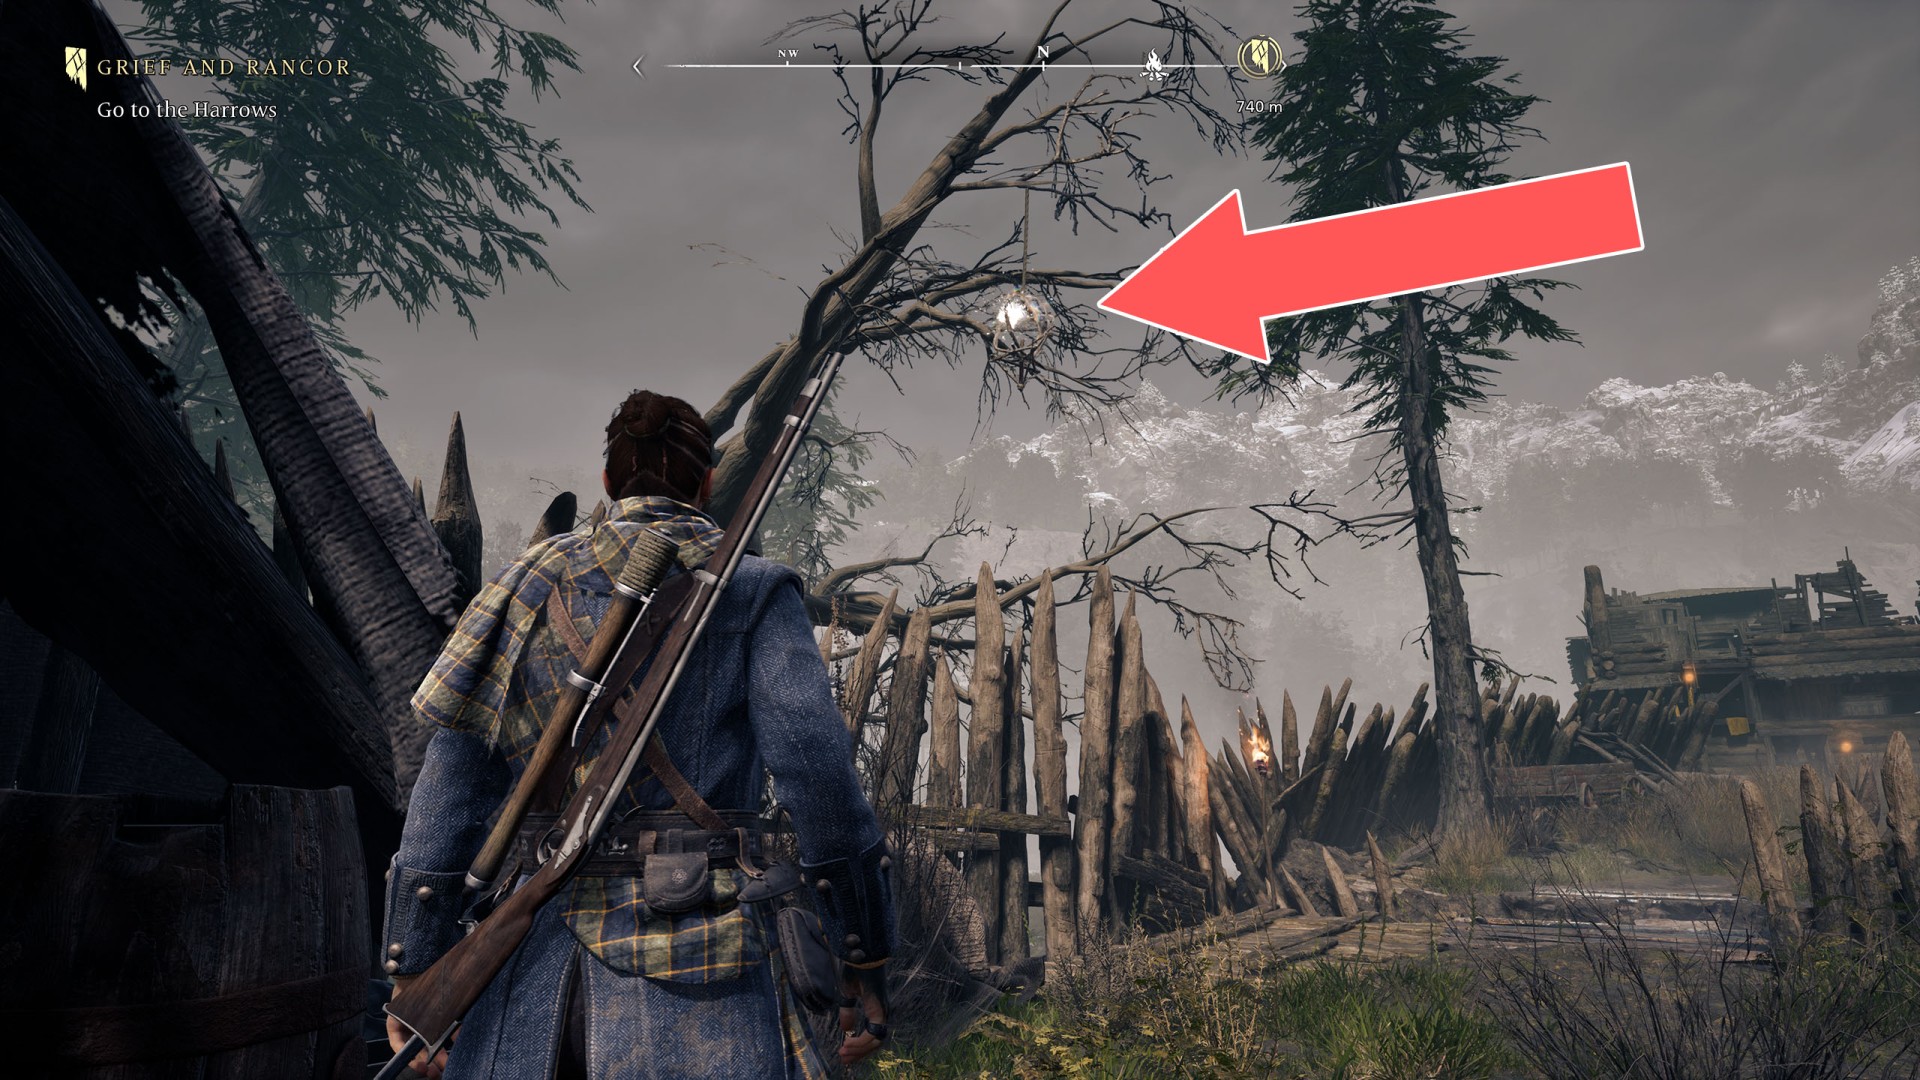
The Harrows Soul Grabber (3/42)▶ show the map ◀
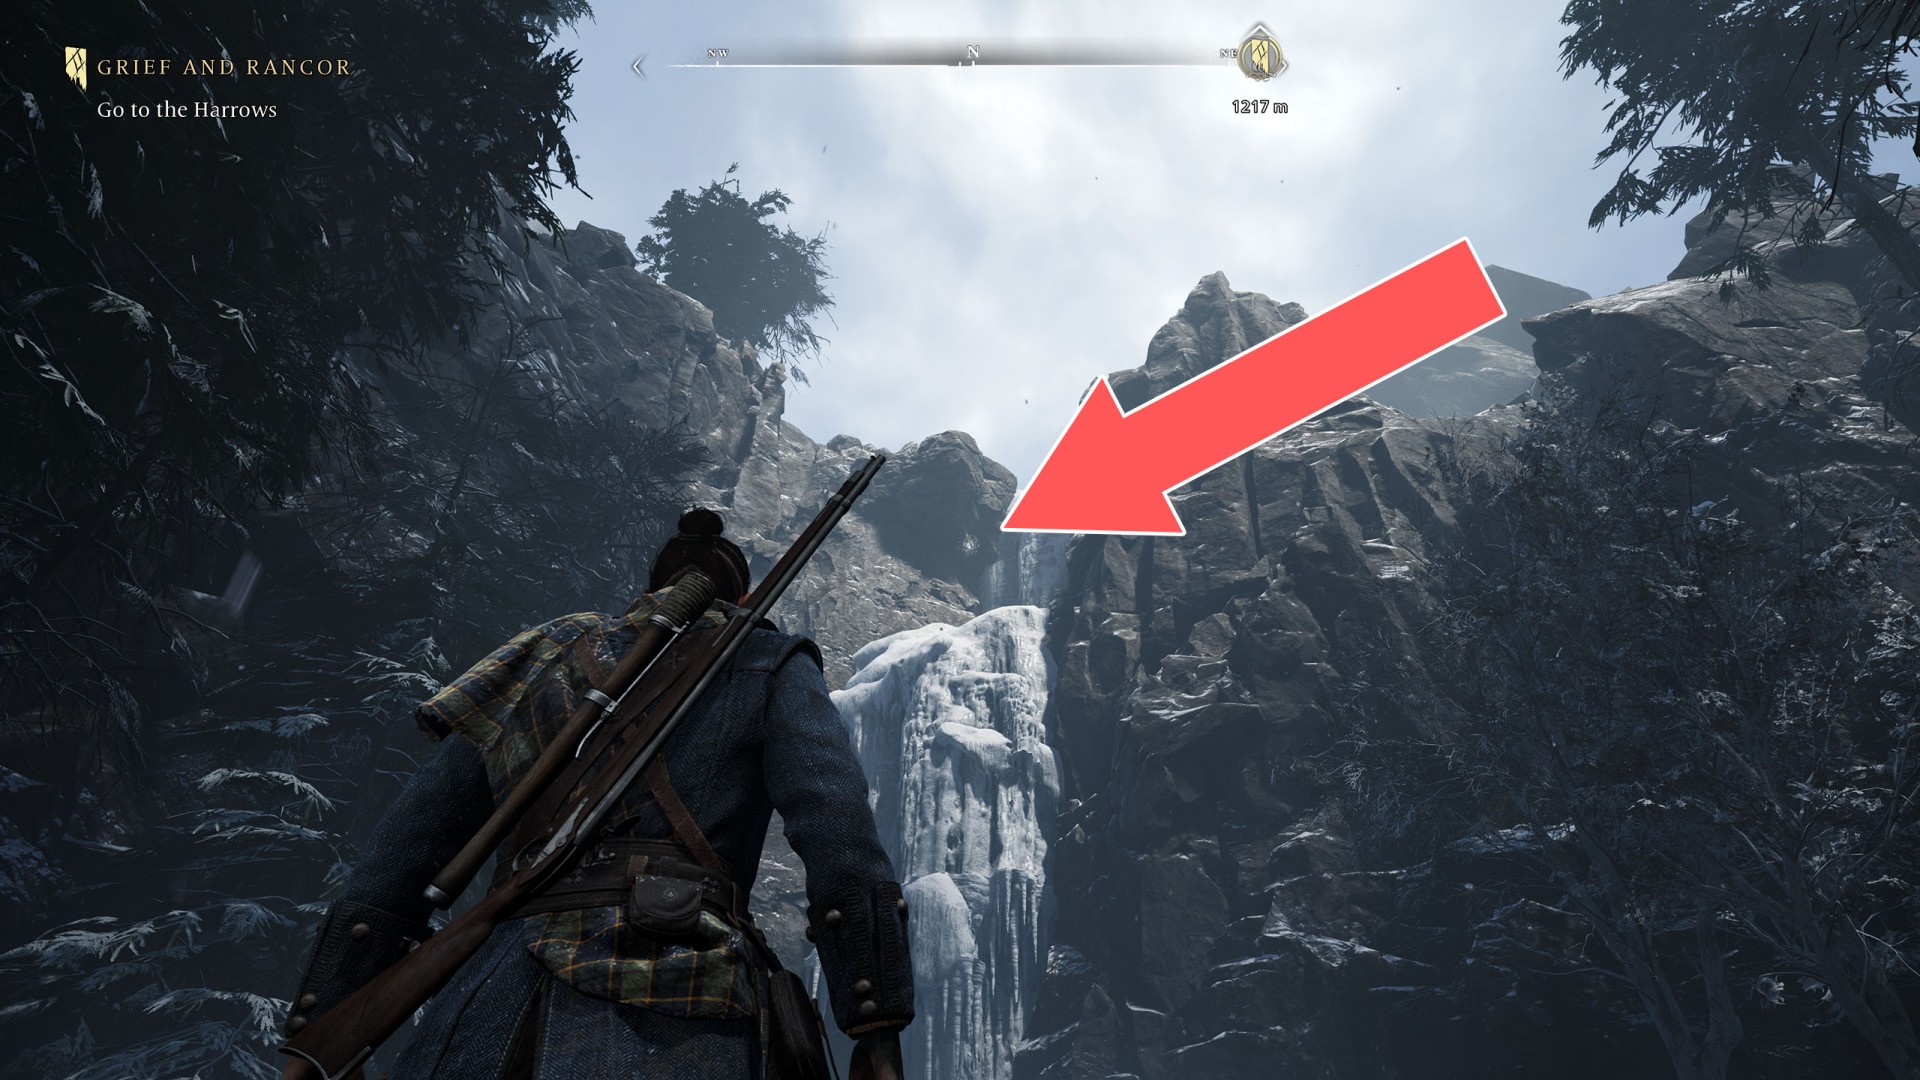
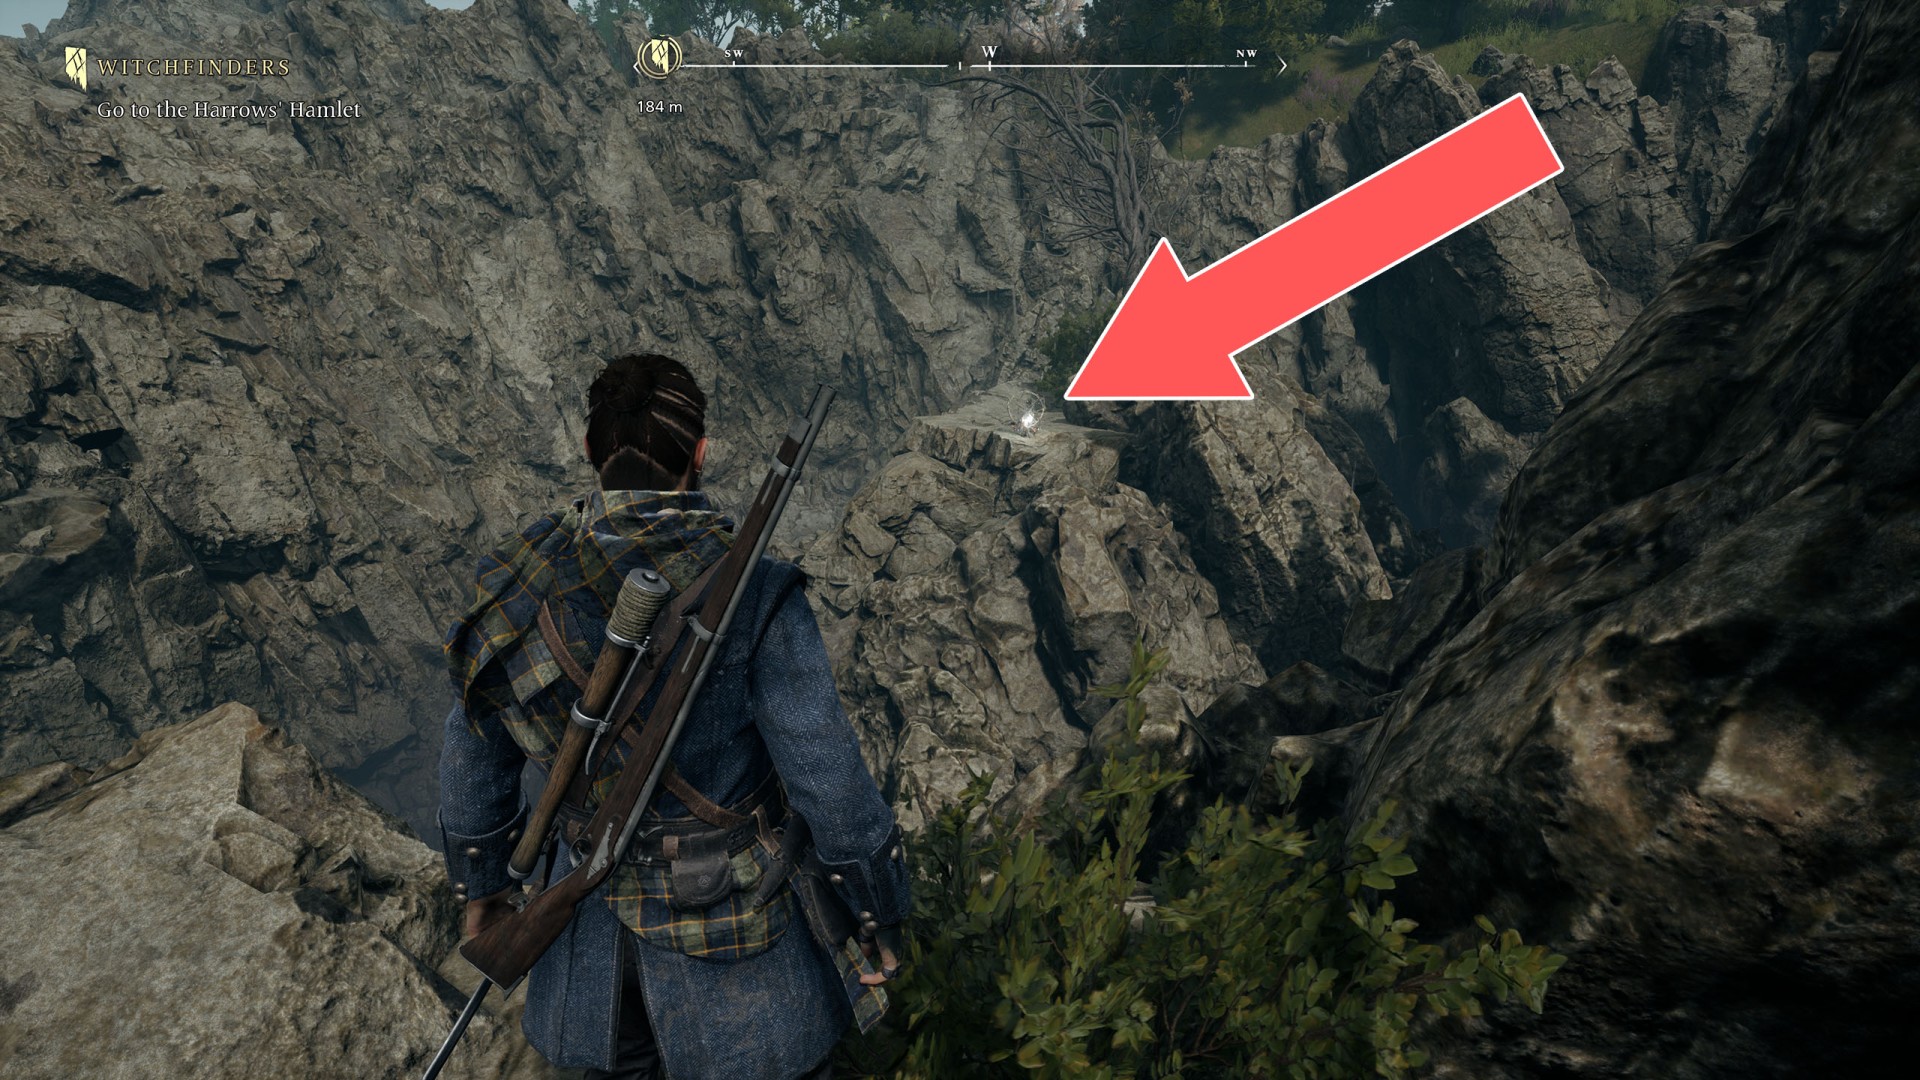
The Harrows Soul Grabber (4/42)▶ show the map ◀
The Harrows Soul Grabber (5/42)▶ show the map ◀
The Harrows Soul Grabber (6/42)▶ show the map ◀
The Harrows Soul Grabber (7/42)▶ show the map ◀
The Harrows Soul Grabber (8/42)▶ show the map ◀
The Harrows Soul Grabber (9/42)▶ show the map ◀
The Harrows Soul Grabber (10/42)▶ show the map ◀

The Harrows Soul Grabber (11/42)▶ show the map ◀
The Harrows Soul Grabber (12/42)▶ show the map ◀
The Harrows Soul Grabber (13/42)▶ show the map ◀
The Harrows Soul Grabber (14/42)▶ show the map ◀
The Harrows Soul Grabber (15/42)▶ show the map ◀
The Harrows Soul Grabber (16/42)▶ show the map ◀
The Harrows Soul Grabber (17/42)▶ show the map ◀
The Harrows Soul Grabber (18/42)▶ show the map ◀
The Harrows Soul Grabber (19/42)▶ show the map ◀
The Harrows Soul Grabber (20/42)▶ show the map ◀
The Harrows Soul Grabber (21/42)▶ show the map ◀
The Harrows Soul Grabber (22/42)▶ show the map ◀
The Harrows Soul Grabber (24/42)▶ show the map ◀
The Harrows Soul Grabber (25/42)▶ show the map ◀
The Harrows Soul Grabber (26/42)▶ show the map ◀
The Harrows Soul Grabber (27/42)▶ show the map ◀
The Harrows Soul Grabber (28/42)▶ show the map ◀
The Harrows Soul Grabber (29/42)▶ show the map ◀
The Harrows Soul Grabber (30/42)▶ show the map ◀
The Harrows Soul Grabber (31/42)▶ show the map ◀
The Harrows Soul Grabber (32/42)▶ show the map ◀
The Harrows Soul Grabber (33/42)▶ show the map ◀

The Harrows Soul Grabber (34/42)▶ show the map ◀
The Harrows Soul Grabber (35/42)▶ show the map ◀
The Harrows Soul Grabber (36/42)▶ show the map ◀
The Harrows Soul Grabber (37/42)▶ show the map ◀
The Harrows Soul Grabber (38/42)▶ show the map ◀
The Harrows Soul Grabber (39/42)▶ show the map ◀
The Harrows Soul Grabber (40/42)▶ show the map ◀
The Harrows Soul Grabber (41/42)▶ show the map ◀
The Harrows Soul Grabber (42/42)▶ show the map ◀

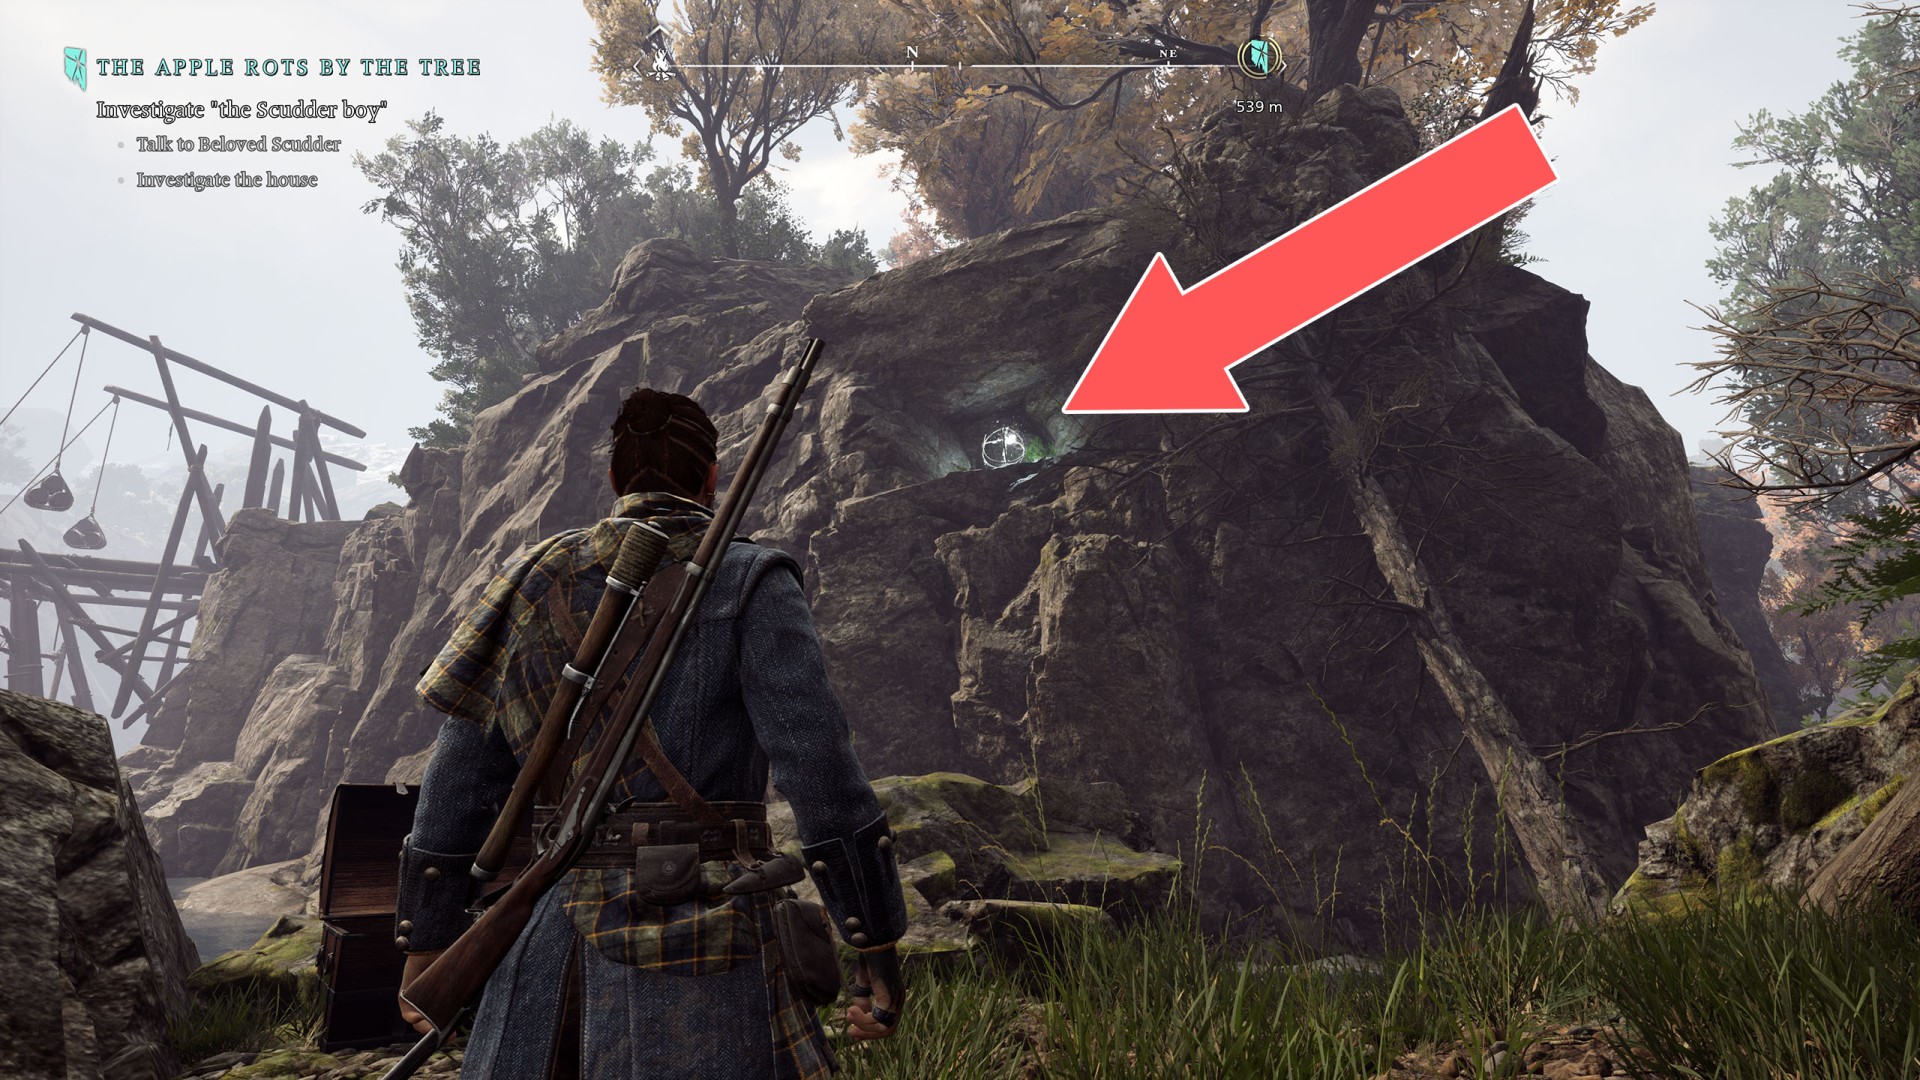
The Mire Marshes Soul Grabber (1/17)▶ show the map ◀
The Mire Marshes Soul Grabber (2/17)▶ show the map ◀
The Mire Marshes Soul Grabber (3/17)▶ show the map ◀
The Mire Marshes Soul Grabber (4/17)▶ show the map ◀
The Mire Marshes Soul Grabber (5/17)▶ show the map ◀
The Mire Marshes Soul Grabber (6/17)▶ show the map ◀
The Mire Marshes Soul Grabber (7/17)▶ show the map ◀
The Mire Marshes Soul Grabber (8/17)▶ show the map ◀
The Mire Marshes Soul Grabber (9/17)▶ show the map ◀
You will get here after your first, main story-related, crossing of the Void.
The Mire Marshes Soul Grabber (10/17)▶ show the map ◀
The Mire Marshes Soul Grabber (11/17)▶ show the map ◀
The Mire Marshes Soul Grabber (12/17)▶ show the map ◀
The Mire Marshes Soul Grabber (13/17)▶ show the map ◀

The Mire Marshes Soul Grabber (14/17)▶ show the map ◀

The Mire Marshes Soul Grabber (15/17)▶ show the map ◀
The Mire Marshes Soul Grabber (16/17)▶ show the map ◀
The Mire Marshes Soul Grabber (17/17)▶ show the map ◀