Treasures, The Castle Resident Evil 4 Remake Points of interest
List of all the treasures that can be found in the Castle (RE4 Remake) and which are needed to unlock the achievement / trophy "Burglar" - Obtain all treasures indicated on the castle treasure map in a single playthrough. In the castle you can find 41 of the 104 treasures available throughout the whole game.
Note: For each of the treasures I have included information about the first chapter in which you can reach it and collect it. It is best to do it as soon as possible, because later it may no longer be possible (blocked passages, etc.)
Index
- Alexandrite #1
- Alexandrite #2
- Brass Pocked Watch
- Butterfly Lamp
- CQBR Assault Rifle
- Depraved Idol
- Elegant Bangle
- Elegant Chessboard
- Elegant Crown
- Elegant Perfume Bottle #1
- Elegant Perfume Bottle #2
- Emerald #1
- Emerald #2
- Extravagant Clock #1
- Extravagant Clock #2
- Flagon
- Gold Bangle
- Gold Bar #1
- Gold Bar #2
- Gold Bar (L)
- Gold Chicken Egg
- Golden Hourglass #1
- Golden Hourglass #2
- Golden Lynx
- Justitia Statue
- Mirror with Pearls & Rubies #1
- Mirror with Pearls & Rubies #2
- Ornate Beetle #1
- Ornate Beetle #2
- Ornate Necklace
- Red Beryl
- Ruby #1
- Ruby #2
- Ruby #3
- Sapphire #1
- Sapphire #2
- Spinel
- Vintage Compass
- Yellow Diamond #1
- Yellow Diamond #2
- Yellow Diamond #3
All known locations on the map The Castle

 Brass Pocked Watch▶ show the map ◀
Chapter 8. It's in a locked drawer. you should use the Small Key (Chapter 8) to unlock this drawer.

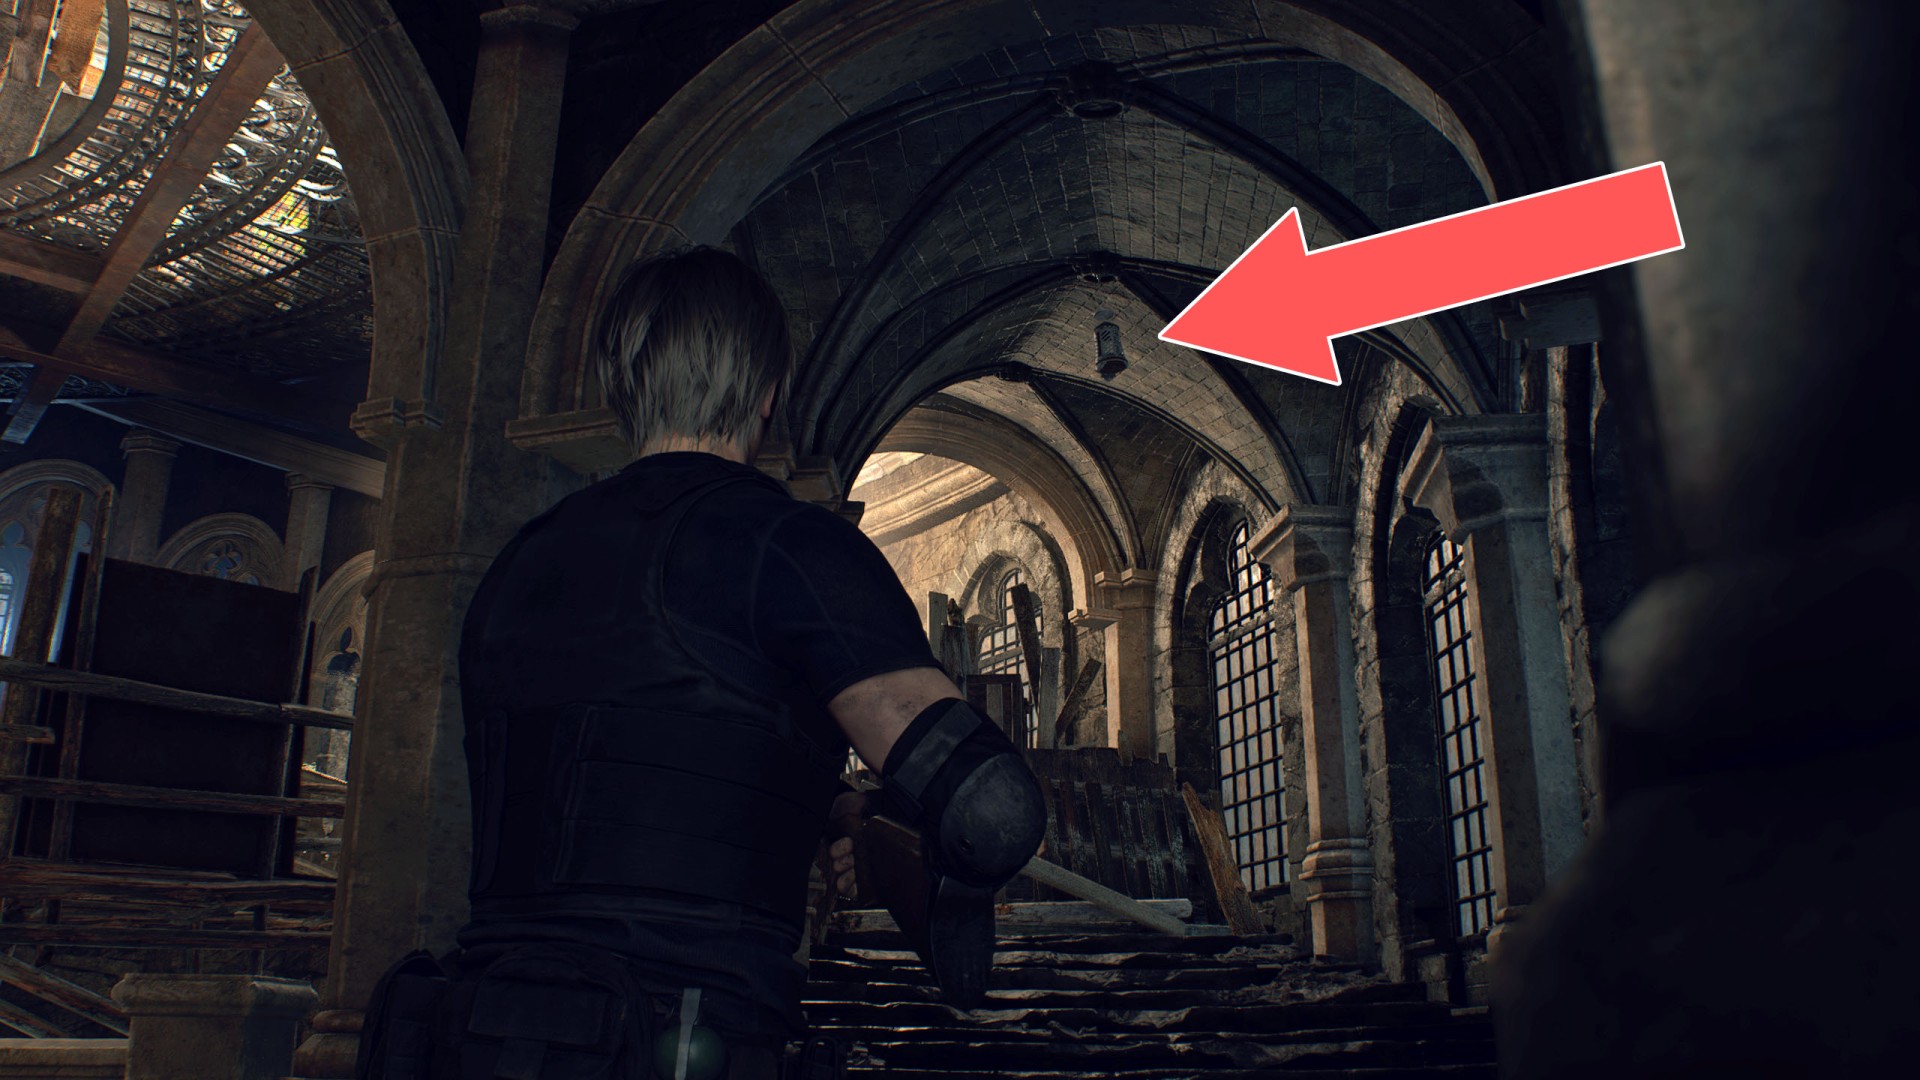
Butterfly Lamp▶ show the map ◀
Chapter 9. To get to this treasure you first need to get the Cubic Device. You need to rotate the cube properly.


CQBR Assault Rifle▶ show the map ◀
Chapter 10. To get to this treasure you first need to get the Cubic Device. You need to rotate the cube properly.


Depraved Idol▶ show the map ◀
Chapter 9. You can enter this room at some stage in Chapter 9, when Ashely rejoins you and the Courtyard Gate opens.


Elegant Perfume Bottle #1▶ show the map ◀
Chapter 7. You can get here once Ashley has opened for you the Locked Gate (Audience Chamber).

Elegant Perfume Bottle #2▶ show the map ◀
Chapter 9. You need the Bunch of Keys to be able to open this chest. Use the second key from the left to unlock it.


Emerald #1▶ show the map ◀
Chapter 8. To get to the top of this tower you must first reach the top of the tower located to the east.

Emerald #2▶ show the map ◀
Chapter 9. You need the Bunch of Keys to be able to open this chest. Use the first key from the left to unlock it.


Gold Bar #1▶ show the map ◀
Chapter 9. It's in a locked drawer so you need on of the Small Keys to get access to it.


Gold Chicken Egg▶ show the map ◀
Chapter 12. To get to this treasure you first need to get the Cubic Device. You need to rotate the cube properly.


Golden Hourglass #1▶ show the map ◀
Chapter 7. You can get here from the upper gallery by jumping in through a hole in the floor/ceiling.


Golden Lynx▶ show the map ◀
Chapter 10. Square Lock Box. To get to this treasure you first need to get the Cubic Device. You need to rotate the cube properly.


Justitia Statue▶ show the map ◀
Chapter 9. Square Lock Box. To get to this treasure you first need to get the Cubic Device. You need to rotate the cube properly.


Ornate Beetle #2▶ show the map ◀
Chapter 12. At the lowest level. Locked drawer. You should come back here during chapter 12 when you get the Small Key (Chapter 12).


Sapphire #1▶ show the map ◀
Chapter 9. You need the Bunch of Keys to be able to open this chest. Use the fourth key from the left to unlock it.


